100
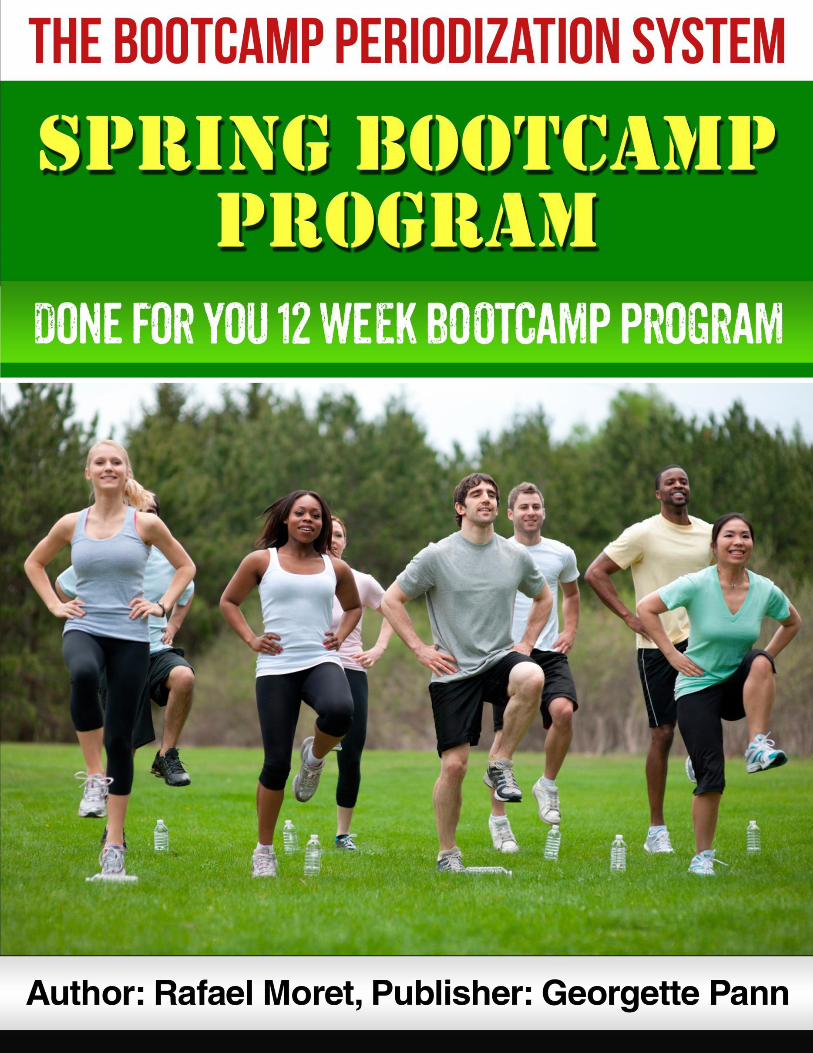
The Bootcamp Periodization System
SPRING BootCamp
Program
Done for you 12 week Bootcamp program
2
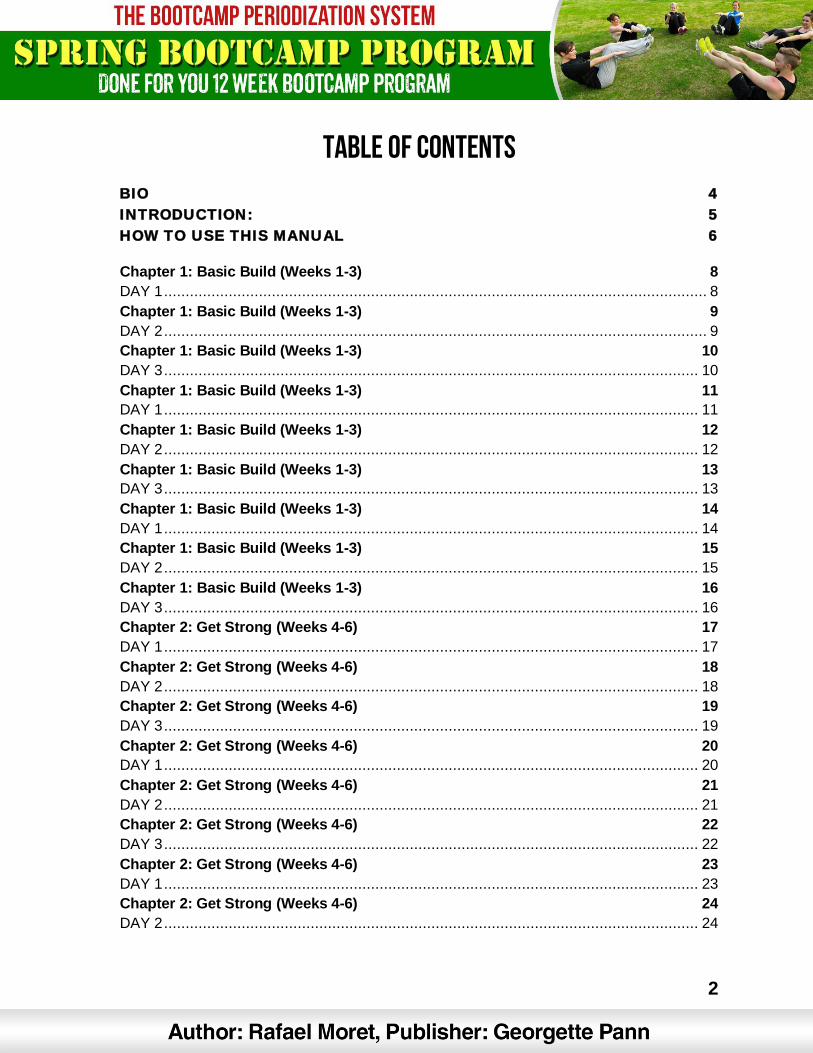
TABLE OF CONTENTS
BIO 4
INTRODUCTION: 5
HOW TO USE THIS MANUAL 6
Chapter 1: Basic Build (Weeks 1-3) 8
DAY 1 .............................................................................................................................. 8
Chapter 1: Basic Build (Weeks 1-3) 9
DAY 2 .............................................................................................................................. 9
Chapter 1: Basic Build (Weeks 1-3) 10
DAY 3 ............................................................................................................................ 10
Chapter 1: Basic Build (Weeks 1-3) 11
DAY 1 ............................................................................................................................ 11
Chapter 1: Basic Build (Weeks 1-3) 12
DAY 2 ............................................................................................................................ 12
Chapter 1: Basic Build (Weeks 1-3) 13
DAY 3 ............................................................................................................................ 13
Chapter 1: Basic Build (Weeks 1-3) 14
DAY 1 ............................................................................................................................ 14
Chapter 1: Basic Build (Weeks 1-3) 15
DAY 2 ............................................................................................................................ 15
Chapter 1: Basic Build (Weeks 1-3) 16
DAY 3 ............................................................................................................................ 16
Chapter 2: Get Strong (Weeks 4-6) 17
DAY 1 ............................................................................................................................ 17
Chapter 2: Get Strong (Weeks 4-6) 18
DAY 2 ............................................................................................................................ 18
Chapter 2: Get Strong (Weeks 4-6) 19
DAY 3 ............................................................................................................................ 19
Chapter 2: Get Strong (Weeks 4-6) 20
DAY 1 ............................................................................................................................ 20
Chapter 2: Get Strong (Weeks 4-6) 21
DAY 2 ............................................................................................................................ 21
Chapter 2: Get Strong (Weeks 4-6) 22
DAY 3 ............................................................................................................................ 22
Chapter 2: Get Strong (Weeks 4-6) 23
DAY 1 ............................................................................................................................ 23
Chapter 2: Get Strong (Weeks 4-6) 24
DAY 2 ............................................................................................................................ 24
3
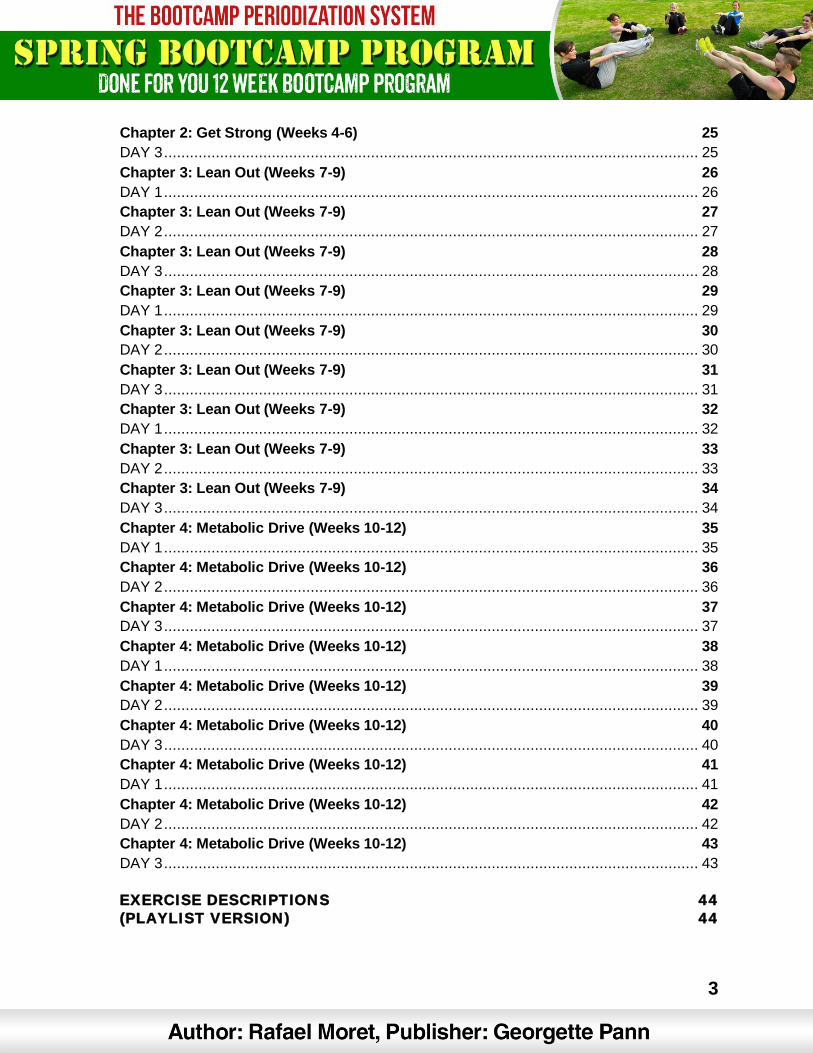
Chapter 2: Get Strong (Weeks 4-6) 25
DAY 3 ............................................................................................................................ 25
Chapter 3: Lean Out (Weeks 7-9) 26
DAY 1 ............................................................................................................................ 26
Chapter 3: Lean Out (Weeks 7-9) 27
DAY 2 ............................................................................................................................ 27
Chapter 3: Lean Out (Weeks 7-9) 28
DAY 3 ............................................................................................................................ 28
Chapter 3: Lean Out (Weeks 7-9) 29
DAY 1 ............................................................................................................................ 29
Chapter 3: Lean Out (Weeks 7-9) 30
DAY 2 ............................................................................................................................ 30
Chapter 3: Lean Out (Weeks 7-9) 31
DAY 3 ............................................................................................................................ 31
Chapter 3: Lean Out (Weeks 7-9) 32
DAY 1 ............................................................................................................................ 32
Chapter 3: Lean Out (Weeks 7-9) 33
DAY 2 ............................................................................................................................ 33
Chapter 3: Lean Out (Weeks 7-9) 34
DAY 3 ............................................................................................................................ 34
Chapter 4: Metabolic Drive (Weeks 10-12) 35
DAY 1 ............................................................................................................................ 35
Chapter 4: Metabolic Drive (Weeks 10-12) 36
DAY 2 ............................................................................................................................ 36
Chapter 4: Metabolic Drive (Weeks 10-12) 37
DAY 3 ............................................................................................................................ 37
Chapter 4: Metabolic Drive (Weeks 10-12) 38
DAY 1 ............................................................................................................................ 38
Chapter 4: Metabolic Drive (Weeks 10-12) 39
DAY 2 ............................................................................................................................ 39
Chapter 4: Metabolic Drive (Weeks 10-12) 40
DAY 3 ............................................................................................................................ 40
Chapter 4: Metabolic Drive (Weeks 10-12) 41
DAY 1 ............................................................................................................................ 41
Chapter 4: Metabolic Drive (Weeks 10-12) 42
DAY 2 ............................................................................................................................ 42
Chapter 4: Metabolic Drive (Weeks 10-12) 43
DAY 3 ............................................................................................................................ 43
EXERCISE DESCRIPTIONS 44
(PLAYLIST VERSION) 44
4
BIO
been training people since 1995 and has incorporated a variety of training
methods over the years. He h
From the stay at home mom to athletes, bodybuilders, figure models, and fitness
enthusiasts of all ages and from all walks of life.
He was the director of strength and conditioning for Gold's Gym in Bellville NJ,
World Gym in Paramus NJ, World Gym in Orlando and Lake Mary Florida.. and
finally all the World Gyms in Palm Beach county until finally opening the first of
many Bootcamps in South Florida. He contributes to a few blogs, and other
internet based mediums and gives personal seminars on a limited basis.
Rafael got his first Personal Training certification in 1995 and followed it with a
degree in Exercise Science from Rutgers along with Personal Training and
Nutrition degree from PCDI in 1999, certifications from ISSA, NASM, NSCA and
Apex Nutrition followed. He has continued education over the last 20 years by
attending a variety of on hand lectures, workshops and seminars. Bootcamps
and/or Group Personal Training are his main focus now and his workouts are
now shorter and faster, producing greater results in strength, power, muscular
development, and maximum caloric expenditure.
A native of Puerto Rico, after more than 10 years in New Jersey he currently lives
in Broward County in South Florida.
All of these workouts have been tested in real time at South Florida Fitness
Bootcamp by real people.
5
Introduction:
The goal of a fitness boot camp is to provide a whole-body workout that builds strength
and endurance. Boot camp workouts also attract many people because they:
● Offer a more challenging and varied workout
● Require little or no special equipment
● Create a sense of camaraderie among the participants
Boot camp workouts can vary but generally include a fairly intense mix of strength
training and aerobic elements. One boot camp workout might stress calisthenics while
another stresses military-style drills.
setting. Developing a structured program that is going to deliver RESULTS is always the
#1 goal.
Fitness Bootcamps are a great alternative to one on one private fitness coaching, not
just for the clients but for the coaches as well.
Disclaimer: See your physician before starting any exercise or nutrition program.
You must have a complete physical examination if you are sedentary, if you have high
cholesterol, high blood pressure, or diabetes, if you are overweight, or if you are over 30
years old. Please discuss all nutritional changes with your physician or a registered
dietician.
Perform this program for 3 weeks then switch to the next BPS workout.
Train hard 3 days per week.
Do each exercise at a controlled pace.
Finish each workout with stretching for the tight muscle groups only if desired.
Start every strength workout with the warm-up circuit and specific warm-up sets.
For one thing, they are awesome. Also, they are inexpensive for what you get.
Check them out at www.gymboss.com. Or you can use any interval timer application on your smartphone.

6
HOW TO USE THIS MANUAL
This manual is a DONE for YOU, Plug and Play system...You can pick to start at the
corresponding season or any season and start right away. All the workouts are planned,
times have been counted, warm ups designed, finishers chosen, and all designed to be
used in a group setting. It does not matter if you have 2 people or 20, you can use these
workouts. Workouts are all 30 minutes and are based on a 3 time per week progression.
We will be providing you with tips relating to the upcoming workouts... How to execute
certain workouts, and how to decipher the exercise names. I recommend reading
thro
make sure you read all the notes as they will most likely answer questions that will
come up.
The first thing to cover, is the meaning of certain exercises, and how we will write the
exercises. There are some descriptors on each page, but eventually they will phase out.
For starters:
DB = Dumbbell
KB = Kettlebell
TGU = Turkish Get-Up
BB = Barbell
DL = Deadlift
RDL= Romanian Deadlift
Exercise: sets x reps Currently they look like:
In the Super Sets and Giant Sets the pace is written as :20/:20, :50/:15, :25/:15, etc. What
this means is that you will perform the exercise for :20 and then rest for :20, or work for
:50 and then rest for :15. These will eventually be written as :20/:20 x 5, or 1:00/:15 x 3.
7
In the warm-up, the lifts are super-setted and done straight through without resting
until each super set is completed. In the workout, rest will be defined.
I suggest you review the workout beforehand so that you have an understanding before
you start it.
The Progression will be on the load or resistance used.
Example: On the Dumbbell Shoulder Press (15-20 Reps) if client is using 10lbs DB in
week 1, Client should use 12.5 or 15lbs in week 2 and 15lbs or 20lbs in Week 3
Any other questions you may have along the way that I may not have covered, go ahead
and reach out.
Workouts all start out using a push, pull and lower body rotation. As you get later into
the programs, the workouts become more complex and intertwined in fitness concepts.
The goal of the entire program is to develop new lean muscle tissue, help build
cardiovascular endurance and create a metabolic effect large enough to burn fat.
8
Chapter 1: Basic Build (Weeks 1-3)
WEEK 1
DAY 1
WARM UP FOR WEEK 1 Jumping Jack
Push ups
Plank to Pushup
30 seconds of each back to back
30 second break at the end
repeat for 3 rounds
Chest Back and Shoulders
Perform 30 seconds of each move and allow 20 seconds to “ROTATE” in between
stations or moves for 2 Rounds
Break for 90 seconds
Repeat 2 More Rounds
Chest Flyes with Bands
Chest Press with Dumbbells
HIGH BAND ROWS
DB Rows
DB Shoulder Press
DB Side Laterals
Finisher
20 Diamond Push ups EMOM for 4 minute
The key to success is to expand as a person and take the necessary action to make
the lives of those
9
Chapter 1: Basic Build (Weeks 1-3)
WEEK 1
DAY 2
WARM UP FOR WEEK 1 Jumping Jack
Push ups
Plank to Pushup
30 seconds of each back to back
30 second break at the end
repeat for 3 rounds
Biceps, Triceps and Core
Perform 30 seconds of each move and allow 20 seconds to “ROTATE” in between
stations or moves for 2 Rounds
Break for 90 seconds
Repeat 2 More Rounds
Curls with DB’s
Bench DIPS
Band Curls
Reverse Grip Triceps Ext
Leg Raises
Bicycle Crunches
Finisher
20 Reverse Crunches EMOM for 4 minute

10
Chapter 1: Basic Build (Weeks 1-3)
WEEK 1
DAY 3
WARM UP FOR WEEK 1 Jumping Jack
Push ups
Plank to Pushup
30 seconds of each back to back
30 second break at the end
repeat for 3 rounds
LEGS
WORKOUT
Perform 30 seconds of each move and allow 20 seconds to”ROTATE” in between
stations or moves for 2 Rounds
Break for 90 seconds
Repeat 2 More Rounds Forward Lunges with DB’s
DB Sumo Squats
Step Ups
DB Narrow Squats
DB Single Leg Stiff Leg Deadlift Right
DB Single Leg Stiff Leg Deadlift Left
Finisher 20 Squat Jumps EMOM for 4 minute
11
Chapter 1: Basic Build (Weeks 1-3)
WEEK 2
DAY 1
WARM UP FOR WEEK 2 Jumping Jacks
Inch worm
Push Up
Cross Body (X-Body) Mountain Climber
Squats
30 seconds each for 2 Rounds
Chest Back and Shoulders
Perform 30 seconds of each move and allow 20 seconds to “ROTATE” in between
stations or moves for 2 Rounds
Break for 90 seconds
Repeat 2 More Rounds
Chest Flyes with Bands
Chest Press with Dumbbells
HIGH BAND ROWS
DB Rows
DB Shoulder Press
DB Side Laterals
Finisher 20 Diamond Push ups EMOM for 4 minute
12
Chapter 1: Basic Build (Weeks 1-3)
WEEK 2
DAY 2
WARM UP FOR WEEK 2 Jumping Jacks
Inch worm
Push Up
Cross Body (X-Body) Mountain Climber
Squats
30 seconds each for 2 Rounds
Biceps, Triceps and Core
Perform 30 seconds of each move and allow 20 seconds to “ROTATE” in between
stations or moves for 2 Rounds
Break for 90 seconds
Repeat 2 More Rounds
Curls with DB’s
Bench DIPS
Band Curls
Reverse Grip Triceps Ext
Leg Raises
Bicycle Crunches
Finisher 20 Reverse Crunches EMOM for 4 minute
13
Chapter 1: Basic Build (Weeks 1-3)
WEEK 2
DAY 3
WARM UP FOR WEEK 2 Jumping Jacks
Inch worm
Push Up
Cross Body (X-Body) Mountain Climber
Squats
30 seconds each for 2 Rounds
LEGS
WORKOUT
Perform 30 seconds of each move and allow 20 seconds to”ROTATE” in between
stations or moves for 2 Rounds
Break for 90 seconds
Repeat 2 More Rounds Forward Lunges with DB’s
DB Sumo Squats
Step Ups
DB Narrow Squats
DB Single Leg Stiff Leg Deadlift Right
DB Single Leg Stiff Leg Deadlift Left
Finisher 20 Squat Jumps EMOM for 4 minute
14
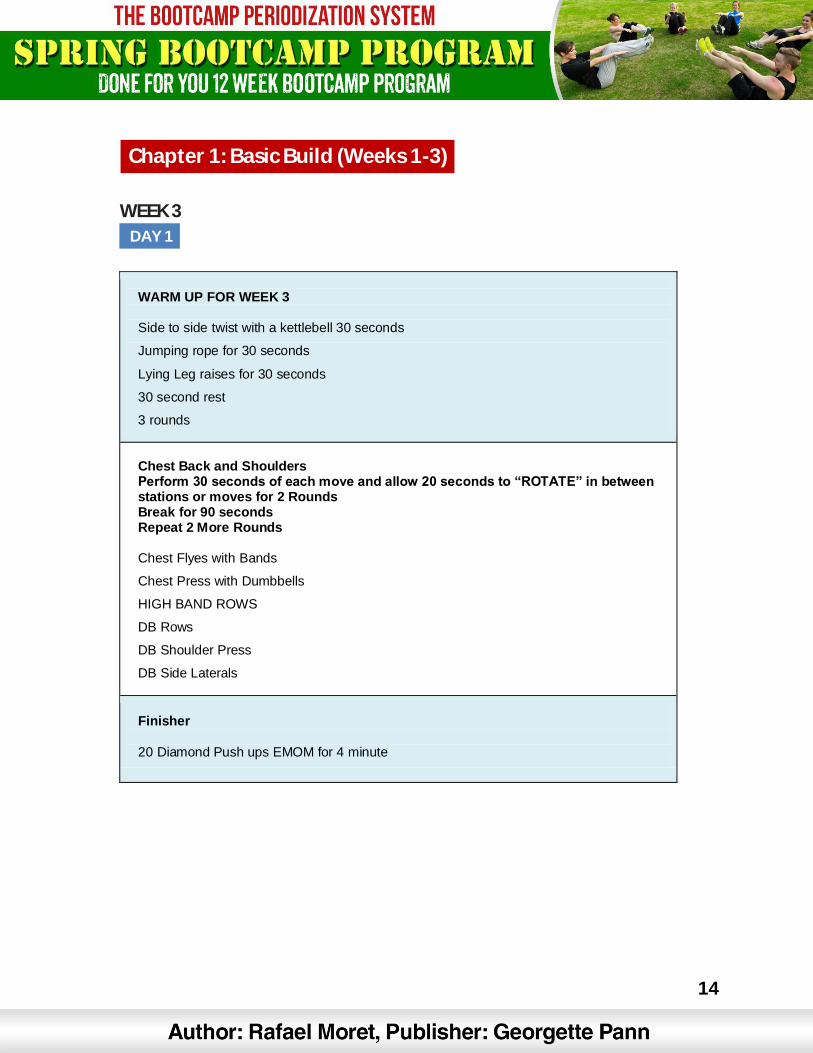
Chapter 1: Basic Build (Weeks 1-3)
WEEK 3
DAY 1
WARM UP FOR WEEK 3 Side to side twist with a kettlebell 30 seconds
Jumping rope for 30 seconds
Lying Leg raises for 30 seconds
30 second rest
3 rounds
Chest Back and Shoulders Perform 30 seconds of each move and allow 20 seconds to “ROTATE” in between stations or moves for 2 Rounds Break for 90 seconds Repeat 2 More Rounds Chest Flyes with Bands
Chest Press with Dumbbells
HIGH BAND ROWS
DB Rows
DB Shoulder Press
DB Side Laterals
Finisher
20 Diamond Push ups EMOM for 4 minute
15
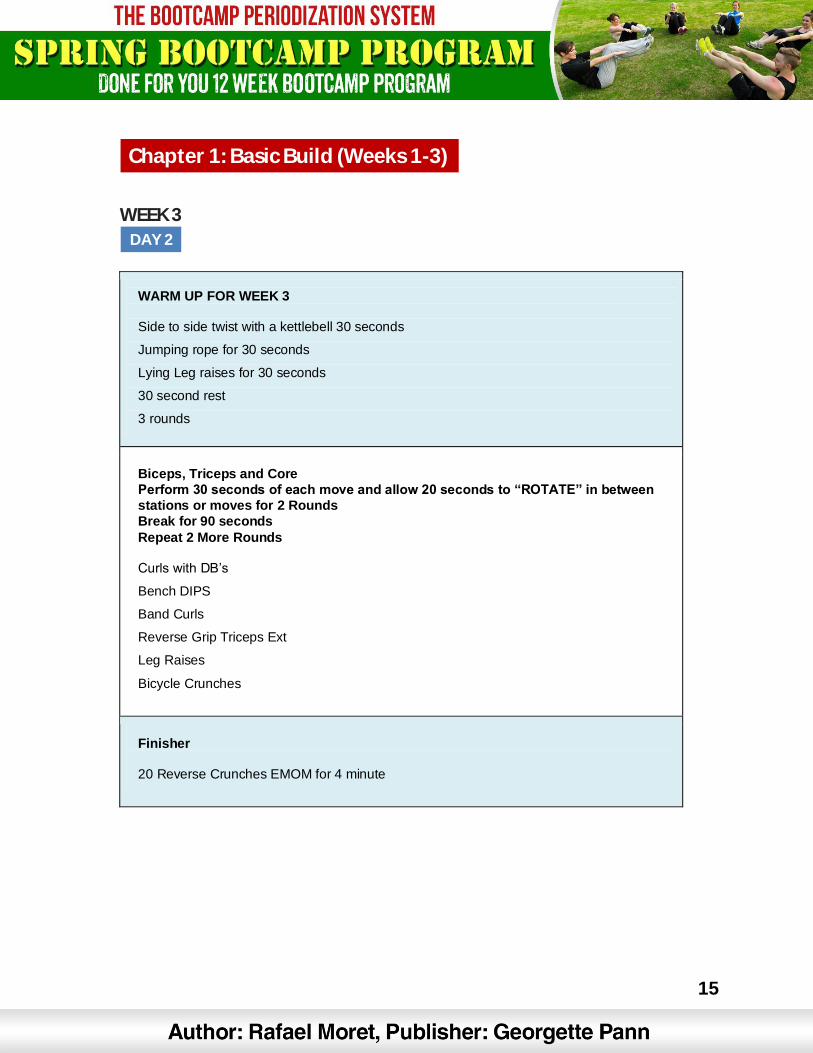
Chapter 1: Basic Build (Weeks 1-3)
WEEK 3
DAY 2
WARM UP FOR WEEK 3 Side to side twist with a kettlebell 30 seconds
Jumping rope for 30 seconds
Lying Leg raises for 30 seconds
30 second rest
3 rounds
Biceps, Triceps and Core
Perform 30 seconds of each move and allow 20 seconds to “ROTATE” in between
stations or moves for 2 Rounds
Break for 90 seconds
Repeat 2 More Rounds Curls with DB’s
Bench DIPS
Band Curls
Reverse Grip Triceps Ext
Leg Raises
Bicycle Crunches
Finisher 20 Reverse Crunches EMOM for 4 minute
16
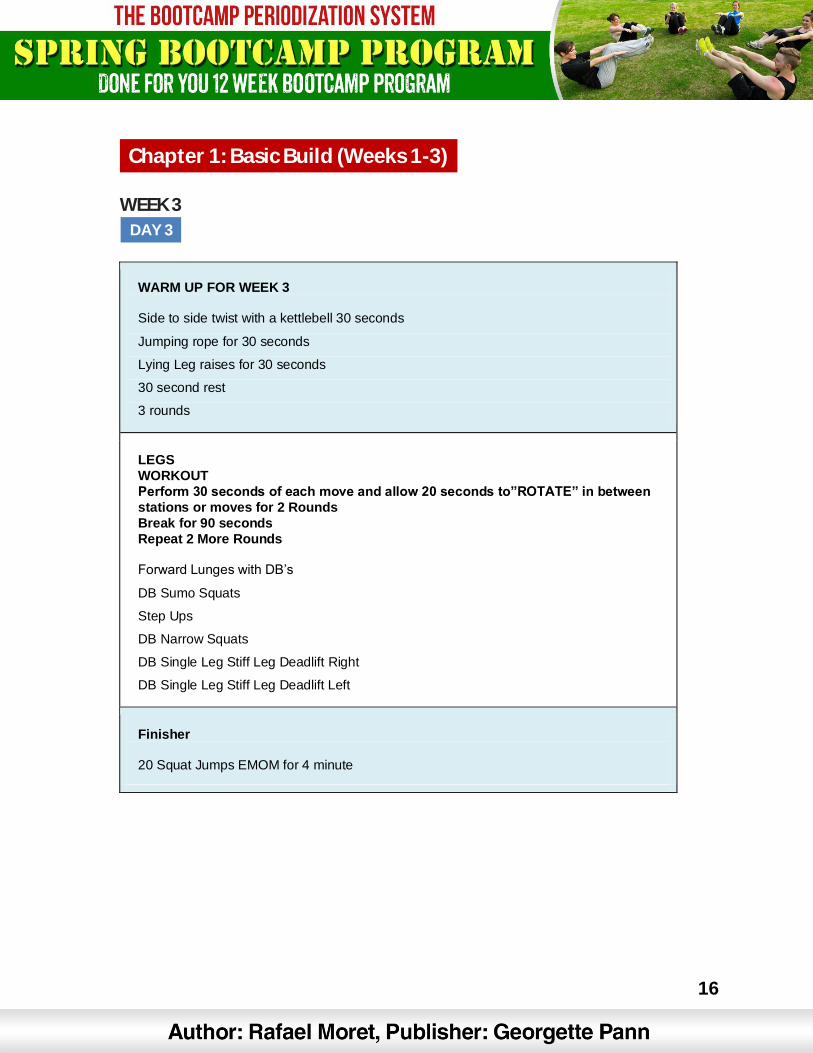
Chapter 1: Basic Build (Weeks 1-3)
WEEK 3
DAY 3
WARM UP FOR WEEK 3 Side to side twist with a kettlebell 30 seconds
Jumping rope for 30 seconds
Lying Leg raises for 30 seconds
30 second rest
3 rounds
LEGS
WORKOUT
Perform 30 seconds of each move and allow 20 seconds to”ROTATE” in between
stations or moves for 2 Rounds
Break for 90 seconds
Repeat 2 More Rounds Forward Lunges with DB’s
DB Sumo Squats
Step Ups
DB Narrow Squats
DB Single Leg Stiff Leg Deadlift Right
DB Single Leg Stiff Leg Deadlift Left
Finisher 20 Squat Jumps EMOM for 4 minute
17
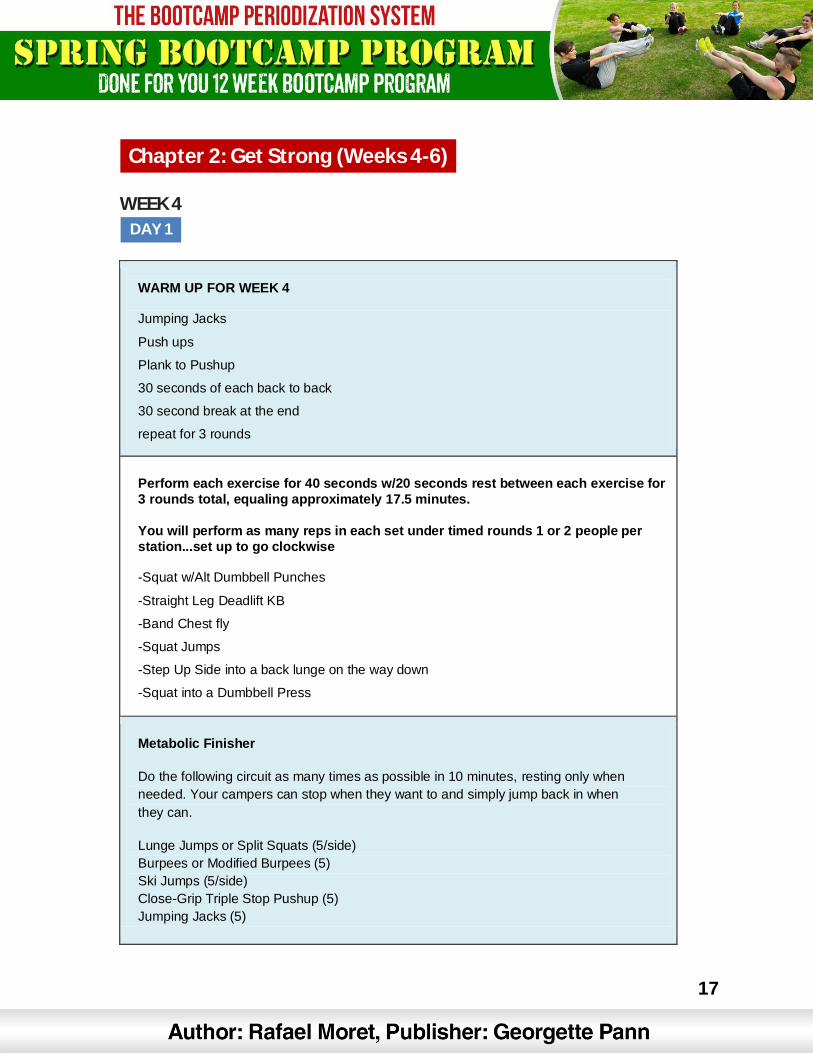
Chapter 2: Get Strong (Weeks 4-6)
WEEK 4
DAY 1
WARM UP FOR WEEK 4 Jumping Jacks
Push ups
Plank to Pushup
30 seconds of each back to back
30 second break at the end
repeat for 3 rounds
Perform each exercise for 40 seconds w/20 seconds rest between each exercise for
3 rounds total, equaling approximately 17.5 minutes.
You will perform as many reps in each set under timed rounds 1 or 2 people per
station...set up to go clockwise -Squat w/Alt Dumbbell Punches
-Straight Leg Deadlift KB
-Band Chest fly
-Squat Jumps
-Step Up Side into a back lunge on the way down
-Squat into a Dumbbell Press
Metabolic Finisher
Do the following circuit as many times as possible in 10 minutes, resting only when
needed. Your campers can stop when they want to and simply jump back in when
they can.
Lunge Jumps or Split Squats (5/side)
Burpees or Modified Burpees (5)
Ski Jumps (5/side)
Close-Grip Triple Stop Pushup (5)
Jumping Jacks (5)
18
Chapter 2: Get Strong (Weeks 4-6)
WEEK 4
DAY 2
WARM UP FOR WEEK 4
Jumping Jacks
Push ups
Plank to Pushup
30 seconds of each back to back
30 second break at the end
repeat for 3 rounds
Perform each exercise for 40 seconds w/20 seconds rest between each exercise for
3 rounds total, equaling approximately 17.5 minutes.
You will perform as many reps in each set under timed rounds 1 or 2 people per
station...set up to go clockwise -Alt Lunge w/Dumbbell Lateral Raise
-KB Swing
-Band Alt Punches
-Squat Jumps
-Back Lunge Into Squat Combo Alt Legs
-Dumbbell Shoulder Press
Metabolic Finisher Do the following circuit as many times as possible in 10 minutes, resting only when needed. Your campers can stop when they want to and simply jump back in when they can.
Exploding Push Ups(5) Seal Jacks (5) Squat Thrust (5) Toe Taps (5/Side) Rocking Planks (5)
19
Chapter 2: Get Strong (Weeks 4-6)
WEEK 4
DAY 3
WARM UP FOR WEEK 4 Jumping Jacks
Push ups
Plank to Pushup
30 seconds of each back to back
30 second break at the end
repeat for 3 rounds
Perform each exercise for 40 seconds w/20 seconds rest between each exercise for
3 rounds total, equaling approximately 17.5 minutes.
You will perform as many reps in each set under timed rounds 1 or 2 people per
station...set up to go clockwise -Farmers Walk
-KB Squat into Upright Row
-Band Rows
-Band Curls
-Single Leg Rocking Bridge Right
-Single Leg Rocking Bridge Left
Metabolic Finisher
Do the following circuit as many times as possible in 10 minutes, resting only when
needed. Your campers can stop when they want to and simply jump back in when
they can.
Renegade Rows (5/side)
High Knees (5/side)
Spider man Mountain Climber (5/side)
Sit Throughs (5/side)
Plank to Tricep Ext (5)
20
Chapter 2: Get Strong (Weeks 4-6)
WEEK 5
DAY 1
WEEK 5 Warm Up Jumpin Jacks
Inch worm
Push Up
Cross Body (X-Body) Mountain Climber
Squats
30 seconds each for 2 Rounds
Perform each exercise for 40 seconds w/20 seconds rest between each exercise for
3 rounds total, equaling approximately 17.5 minutes.
You will perform as many reps in each set under timed rounds 1 or 2 people per
station...set up to go clockwise -Squat w/Alt Dumbbell Punches
-Straight Leg Deadlift KB
-Band Chest fly
-Squat Jumps
-Step Up Side into a back lunge on the way down
-Squat into a Dumbbell Press
Metabolic Finisher
Do the following circuit as many times as possible in 10 minutes, resting only when needed. Your campers can stop when they want to and simply jump back in when they can.
Lunge Jumps or Split Squats (5/side) Burpees or Modified Burpees (5)
Ski Jumps (5/side) Close-Grip Triple Stop Pushup (5) Jumping Jacks (5)
21
Chapter 2: Get Strong (Weeks 4-6)
WEEK 5
DAY 2
WEEK 5 Warm Up
Jumpin Jacks
Inch worm
Push Up
Cross Body (X-Body) Mountain Climber
Squats
30 seconds each for 2 Rounds
Perform each exercise for 40 seconds w/20 seconds rest between each exercise for
3 rounds total, equaling approximately 17.5 minutes.
You will perform as many reps in each set under timed rounds 1 or 2 people per
station...set up to go clockwise -Alt Lunge w/Dumbbell Lateral Raise
-KB Swing
-Band Alt Punches
-Squat Jumps
-Back Lunge Into Squat Combo Alt Legs
-Dumbbell Shoulder Press
Metabolic Finisher Do the following circuit as many times as possible in 10 minutes, resting only when
needed. Your campers can stop when they want to and simply jump back in when they can. Exploding Push Ups(5) Seal Jacks (5) Squat Thrust (5) Toe Taps (5/Side) Rocking Planks (5)

22
Chapter 2: Get Strong (Weeks 4-6)
WEEK 5
DAY 3
WEEK 5 Warm Up Jumpin Jacks
Inch worm
Push Up
Cross Body (X-Body) Mountain Climber
Squats
30 seconds each for 2 Rounds
Perform each exercise for 40 seconds w/20 seconds rest between each exercise for
3 rounds total, equaling approximately 17.5 minutes.
You will perform as many reps in each set under timed rounds 1 or 2 people per
station...set up to go clockwise -Farmers Walk
-KB Squat into Upright Row
-Band Rows
-Band Curls
-Single Leg Rocking Bridge Right
-Single Leg Rocking Bridge Left
Metabolic Finisher Do the following circuit as many times as possible in 10 minutes, resting only when
needed. Your campers can stop when they want to and simply jump back in when
they can.
Renegade Rows (5/side)
High Knees (5/side)
Spider man Mountain Climber (5/side)
Sit Throughs (5/side)
Plank to Tricep Ext (5)
23
Chapter 2: Get Strong (Weeks 4-6)
WEEK 6
DAY 1
WARM UP FOR WEEK 6 Side to side twist with a kettlebell 30 seconds
Jumping rope for 30 seconds
Lying Leg raises for 30 seconds
30 second rest
3 rounds
Perform each exercise for 40 seconds w/20 seconds rest between each exercise for
3 rounds total, equaling approximately 17.5 minutes.
You will perform as many reps in each set under timed rounds 1 or 2 people per
station...set up to go clockwise -Squat w/Alt Dumbbell Punches
-Straight Leg Deadlift KB
-Band Chest fly
-Squat Jumps
-Step Up Side into a back lunge on the way down
-Squat into a Dumbbell Press
Metabolic Finisher Do the following circuit as many times as possible in 10 minutes, resting only when needed. Your campers can stop when they want to and simply jump back in when they can. Lunge Jumps or Split Squats (5/side)
Burpees or Modified Burpees (5)
Ski Jumps (5/side)
Close-Grip Triple Stop Pushup (5)
Jumping Jacks (5)
24
Chapter 2: Get Strong (Weeks 4-6)
WEEK 6
DAY 2
WARM UP FOR WEEK 6 Side to side twist with a kettlebell 30 seconds
Jumping rope for 30 seconds
Lying Leg raises for 30 seconds
30 second rest
3 rounds
Perform each exercise for 40 seconds w/20 seconds rest between each exercise for
3 rounds total, equaling approximately 17.5 minutes.
You will perform as many reps in each set under timed rounds 1 or 2 people per
station...set up to go clockwise
-Alt Lunge w/Dumbbell Lateral Raise
-KB Swing
-Band Alt Punches
-Squat Jumps
-Back Lunge Into Squat Combo Alt Legs
-Dumbbell Shoulder Press
Metabolic Finisher
Do the following circuit as many times as possible in 10 minutes, resting only when needed. Your campers can stop when they want to and simply jump back in when they can. Exploding Push Ups(5) Seal Jacks (5) Squat Thrust (5) Toe Taps (5/Side)
Rocking Planks (5)
25
Chapter 2: Get Strong (Weeks 4-6)
WEEK 6
DAY 3
WARM UP FOR WEEK 6 Side to side twist with a kettlebell 30 seconds
Jumping rope for 30 seconds
Lying Leg raises for 30 seconds
30 second rest
3 rounds
Perform each exercise for 40 seconds w/20 seconds rest between each exercise for
3 rounds total, equaling approximately 17.5 minutes.
You will perform as many reps in each set under timed rounds 1 or 2 people per
station...set up to go clockwise
-Farmers Walk
-KB Squat into Upright Row
-Band Rows
-Band Curls
-Single Leg Rocking Bridge Right
-Single Leg Rocking Bridge Left
Metabolic Finisher
Do the following circuit as many times as possible in 10 minutes, resting only when needed. Your campers can stop when they want to and simply jump back in when they can.
Renegade Rows (5/side) High Knees (5/side) Spider man Mountain Climber (5/side) Sit Throughs (5/side) Plank to Tricep Ext (5)
26
Chapter 3: Lean Out (Weeks 7-9)
WEEK 7
DAY 1
Warm Up for Week 7
Mr Bootcamp’s 12
12 reps of each move
Contra lateral crunches left to right
Contra lateral crunches right to left
Cross leg reverse crunch right leg over left knee
Cross leg reverse crunch left leg over right knee
Reverse Crunch
Leg raises
Crunches
Scissors
Rocking Plank
Side to Side rocking Plank
Bicycle Crunch
Russian twist
-144 Reps
All moves will consist of 50 reps, Coach will keep timer going from the beginning
to keep accurate time. Allow group 8-10 minutes to finish and have campers yell
time as they finish, give them their time as a response. Goal is to complete 3
rounds and finish faster every round
Dumbbell Shoulder Press
Dumbbell Squats
Bodyweight Lunges
Band Curls
Toe Taps
Bench Dips
8-10 Minute Time Limit
300 Total Reps per Round
Have Campers Yell Out Time As They Finish
Repeat 1 More Time with 8-10 Minute time limit but goal being to finish faster
Finisher
REPEAT FOR THE FASTEST TIME!
27
Chapter 3: Lean Out (Weeks 7-9)
WEEK 7
DAY 2
Warm Up for Week 7
Mr Bootcamp’s 12
12 reps of each move
Contra lateral crunches left to right
Contra lateral crunches right to left
Cross leg reverse crunch right leg over left knee
Cross leg reverse crunch left leg over right knee
Reverse Crunch
Leg raises
Crunches
Scissors
Rocking Plank
Side to Side rocking Plank
Bicycle Crunch
Russian twist
-144 Reps
All moves will consist of 50 reps, Coach will keep timer going from the beginning
to keep accurate time. Allow group 8-10 minutes to finish and have campers yell
time as they finish, give them their time as a response. Goal is to complete 3
rounds and finish faster every round
Dumbbell Chest
Squat Jumps
Kettle Bell Swings
Dumbbell Rows
Single Leg Bridge Right
Single Leg Bridge Left
8-10 Minute Time Limit
300 Total Reps per Round
Have Campers Yell Out Time As They Finish
Repeat 1 More Time with 8-10 Minute time limit but goal being to finish faster
Finisher
REPEAT FOR THE FASTEST TIME!
28
Chapter 3: Lean Out (Weeks 7-9)
WEEK 7
DAY 3
Warm Up for Week 7
Mr Bootcamp’s 12
12 reps of each move
Contra lateral crunches left to right
Contra lateral crunches right to left
Cross leg reverse crunch right leg over left knee
Cross leg reverse crunch left leg over right knee
Reverse Crunch
Leg raises
Crunches
Scissors
Rocking Plank
Side to Side rocking Plank
Bicycle Crunch
Russian twist
-144 Reps
All moves will consist of 50 reps, Coach will keep timer going from the beginning
to keep accurate time. Allow group 8-10 minutes to finish and have campers yell
time as they finish, give them their time as a response. Goal is to complete 3
rounds and finish faster every round
Push Ups
Bodyweight Squats
Kettle Bell Swings
Band Rows
Heel Raises
Jumping Jacks
8-10 Minute Time Limit
300 Total Reps per Round
Have Campers Yell Out Time As They Finish
Repeat 1 More Time with 8-10 Minute time limit but goal being to finish faster
FINSIHER REPEAT FOR THE FASTEST TIME!

29
Chapter 3: Lean Out (Weeks 7-9)
WEEK 8
DAY 1
Warm up for Week 8
10 Side to Side KB twist (both sides =1)
10 Single Leg KB Straight Deadlift R
10 Single Leg KB Straight Deadlift L
10 Alt Arm KB Swings (Every arm counts)
10 Over Head KB Tricep Ext
All moves will consist of 50 reps, Coach will keep timer going from the beginning
to keep accurate time. Allow group 8-10 minutes to finish and have campers yell
time as they finish, give them their time as a response. Goal is to complete 3
rounds and finish faster every round
Dumbbell Shoulder Press
Dumbbell Squats
Bodyweight Lunges
Band Curls
Toe Taps
Bench Dips
8-10 Minute Time Limit
300 Total Reps per Round
Have Campers Yell Out Time As They Finish
Repeat 1 More Time with 8-10 Minute time limit but goal being to finish faster
FINISHER REPEAT FOR THE FASTEST TIME!
30
Chapter 3: Lean Out (Weeks 7-9)
WEEK 8
DAY 2
Warm Up for Week 8 10 Side to Side KB twist (both sides =1)
10 Single Leg KB Straight Deadlift R
10 Single Leg KB Straight Deadlift L
10 Alt Arm KB Swings (Every arm counts)
10 Over Head KB Tricep Ext
All moves will consist of 50 reps, Coach will keep timer going from the beginning
to keep accurate time. Allow group 8-10 minutes to finish and have campers yell
time as they finish, give them their time as a response. Goal is to complete 3
rounds and finish faster every round
Dumbbell Shoulder Press Dumbbell Squats Bodyweight Lunges Band Curls Toe Taps Bench Dips 8-10 Minute Time Limit
300 Total Reps per Round Have Campers Yell Out Time As They Finish Repeat 1 More Time with 8-10 Minute time limit but goal being to finish faster
FINISHER REPEAT FOR THE FASTEST TIME!
31
Chapter 3: Lean Out (Weeks 7-9)
WEEK 8
DAY 3
Warm up for Week 8
10 Side to Side KB twist (both sides =1)
10 Single Leg KB Straight Deadlift R
10 Single Leg KB Straight Deadlift L
10 Alt Arm KB Swings (Every arm counts)
10 OH KB Tricep Ext
All moves will consist of 50 reps, Coach will keep timer going from the beginning
to keep accurate time. Allow group 8-10 minutes to finish and have campers yell
time as they finish, give them their time as a response. Goal is to complete 3
rounds and finish faster every round
Dumbbell Chest Squat Jumps Kettle Bell Swings Dumbbell Rows Single Leg Bridge Right
Single Leg Bridge Left 8-10 Minute Time Limit 300 Total Reps per Round Have Campers Yell Out Time As They Finish Repeat 1 More Time with 8-10 Minute time limit but goal being to finish faster
FINISHER REPEAT FOR THE FASTEST TIME!
32
Chapter 3: Lean Out (Weeks 7-9)
WEEK 9
DAY 1
Warm Up Week 9
GOOD MORNINGS SQUATS PUSH UPS 20 seconds of each 3 times
All moves will consist of 50 reps, Coach will keep timer going from the beginning
to keep accurate time. Allow group 8-10 minutes to finish and have campers yell
time as they finish, give them their time as a response. Goal is to complete 3
rounds and finish faster every round
Dumbbell Shoulder Press Dumbbell Squats Bodyweight Lunges Band Curls Toe Taps Bench Dips
8-10 Minute Time Limit 300 Total Reps per Round Have Campers Yell Out Time As They Finish Repeat 1 More Time with 8-10 Minute time limit but goal being to finish faster
FINISHER REPEAT FOR THE FASTEST TIME!
33
Chapter 3: Lean Out (Weeks 7-9)
WEEK 9
DAY 2
Warm Up Week 9
GOOD MORNINGS SQUATS PUSH UPS 20 seconds of each 3 times
All moves will consist of 50 reps, Coach will keep timer going from the beginning to
keep accurate time. Allow group 8-10 minutes to finish and have campers yell time
as they finish, give them their time as a response. Goal is to complete 3 rounds and
finish faster every round
Dumbbell Shoulder Press Dumbbell Squats Bodyweight Lunges Band Curls
Toe Taps Bench Dips 8-10 Minute Time Limit 300 Total Reps per Round Have Campers Yell Out Time As They Finish Repeat 1 More Time with 8-10 Minute time limit but goal being to finish faster
FINISHER REPEAT FOR THE FASTEST TIME!
34
Chapter 3: Lean Out (Weeks 7-9)
WEEK 9
DAY 3
Warm Up Week 9
GOOD MORNINGS SQUATS PUSH UPS
20 seconds of each 3 times
All moves will consist of 50 reps, Coach will keep timer going from the beginning
to keep accurate time. Allow group 8-10 minutes to finish and have campers yell
time as they finish, give them their time as a response. Goal is to complete 3
rounds and finish faster every round
Push Ups Bodyweight Squats Kettle Bell Swings Band Rows Heel Raises
Jumping Jacks 8-10 Minute Time Limit 300 Total Reps per Round Have Campers Yell Out Time As They Finish Repeat 1 More Time with 8-10 Minute time limit but goal being to finish faster
FINISHER REPEAT FOR THE FASTEST TIME!
35
Chapter 4: Metabolic Drive (Weeks 10-12)
WEEK 10
DAY 1
WARM UP FOR WEEK 10
Jumping Jacks
Push ups
Plank to Pushup
30 seconds of each back to back
30 second break at the end
repeat for 3 rounds
WORKOUT
Repeat 50 seconds of work and 10 seconds to ROTATE
Break for 90 seconds
Repeat 1 More Round
Chest Flyes with DB’s
Decline Chest Press with Bands
Push Ups
DIPS
Bar Pull Up/Rows
Band Pull Aparts
HIGH BAND ROWS
DB Rows
DB Shoulder Press on Ball
DB Side Laterals
Finisher 10 Burpees EMOM for 4 minute
36
Chapter 4: Metabolic Drive (Weeks 10-12)
WEEK 10
DAY 2
WARM UP FOR WEEK 10
Jumping Jacks
Push ups
Plank to Pushup
30 seconds of each back to back
30 second break at the end
repeat for 3 rounds
WORKOUT
Repeat 50 seconds of work and 10 seconds to ROTATE
Break for 90 seconds
Repeat 1 More Round
Curls with DB’s
Plank
Push Ups
Bench DIPS
Band Curls
Band Hammer Curls
Reverse Grip Triceps Ext
Pikes
DB Kickbacks
Bicycle Crunches
Finisher
10 Inchworms EMOM for 4 minute
37
Chapter 4: Metabolic Drive (Weeks 10-12)
WEEK 10
DAY 3
WARM UP FOR WEEK 10
Jumping Jacks
Push ups
Plank to Pushup
30 seconds of each back to back
30 second break at the end
repeat for 3 rounds
WORKOUT
Repeat 50 seconds of work and 10 seconds to ROTATE
Break for 90 seconds
Repeat 1 More Round
Forward Lunges with DB’s
DB Stiff Leg Deadlift
Step Ups
Squats with DB or KB
Bar Pull Up/Rows
Alt Leg Side Lunges
Stability Ball Leg Curls
DB Narrow Squats
DB Single Leg Stiff Leg Deadlift Right
DB Single Leg Stiff Leg Deadlift Left
Finisher 10 Frog Jumps EMOM for 4 minute
38
Chapter 4: Metabolic Drive (Weeks 10-12)
WEEK 11
DAY 1
WARM UP FOR WEEK 11
Side to side twist with a kettlebell 30 seconds
Jumping rope for 30 seconds
Lying Leg raises for 30 seconds
30 second rest
3 rounds
WORKOUT
Repeat 50 seconds of work and 10 seconds to ROTATE
Break for 90 seconds
Repeat 1 More Round
Chest Flyes with DB’s
Decline Chest Press with Bands
Push Ups
DIPS
Bar Pull Up/Rows
Band Pull Aparts
HIGH BAND ROWS
DB Rows
DB Shoulder Press on Ball
DB Side Laterals
Finisher
10 Burpees EMOM for 4 minute
39
Chapter 4: Metabolic Drive (Weeks 10-12)
WEEK 11
DAY 2
WARM UP FOR WEEK 11
Side to side twist with a kettlebell 30 seconds
Jumping rope for 30 seconds
Lying Leg raises for 30 seconds
30 second rest
3 rounds
WORKOUT
Repeat 50 seconds of work and 10 seconds to ROTATE
Break for 90 seconds
Repeat 1 More Round
Curls with DB’s
Plank
Push Ups
Bench DIPS
Band Curls
Band Hammer Curls
Reverse Grip Triceps Ext
Pikes
DB Kickbacks
Bicycle Crunches
Finisher 10 Inchworms EMOM for 4 minute
40
Chapter 4: Metabolic Drive (Weeks 10-12)
WEEK 11
DAY 3
WARM UP FOR WEEK 11
Side to side twist with a kettlebell 30 seconds
Jumping rope for 30 seconds
Lying Leg raises for 30 seconds
30 second rest
3 rounds
WORKOUT
Repeat 50 seconds of work and 10 seconds to ROTATE
Break for 90 seconds
Repeat 1 More Round
Forward Lunges with DB’s
DB Stiff Leg Deadlift
Step Ups
Squats with DB or KB
Bar Pull Up/Rows
Alt Leg Side Lunges
Stability Ball Leg Curls
DB Narrow Squats
DB Single Leg Stiff Leg Deadlift Right
DB Single Leg Stiff Leg Deadlift Left
Finisher 10 Frog Jumps EMOM for 4 minute
41
Chapter 4: Metabolic Drive (Weeks 10-12)
WEEK 12
DAY 1
WARM UP FOR WEEK 12
GOOD MORNINGS
SQUATS
PUSH UPS
30 second rest
3 rounds
WORKOUT
Repeat 50 seconds of work and 10 seconds to ROTATE
Break for 90 seconds
Repeat 1 More Round
Chest Flyes with DB’s
Decline Chest Press with Bands
Push Ups
DIPS
Bar Pull Up/Rows
Band Pull Aparts
HIGH BAND ROWS
DB Rows
DB Shoulder Press on Ball
DB Side Laterals
Finisher
10 Burpees EMOM for 4 minute
42
Chapter 4: Metabolic Drive (Weeks 10-12)
WEEK 12
DAY 2
WARM UP FOR WEEK 12
GOOD MORNINGS
SQUATS
PUSH UPS
30 second rest
3 rounds
WORKOUT
Repeat 50 seconds of work and 10 seconds to ROTATE
Break for 90 seconds
Repeat 1 More Round
Curls with DB’s
Plank
Push Ups
Bench DIPS
Band Curls
Band Hammer Curls
Reverse Grip Triceps Ext
Pikes
DB Kickbacks
Bicycle Crunches
Finisher 10 Inchworms EMOM for 4 minute
43
Chapter 4: Metabolic Drive (Weeks 10-12)
WEEK 12
DAY 3
WARM UP FOR WEEK 12
GOOD MORNINGS
SQUATS
PUSH UPS
30 second rest
3 rounds
WORKOUT
Repeat 50 seconds of work and 10 seconds to ROTATE
Break for 90 seconds
Repeat 1 More Round
Forward Lunges with DB’s
DB Stiff Leg Deadlift
Step Ups
Squats with DB or KB
Bar Pull Up/Rows
Alt Leg Side Lunges
Stability Ball Leg Curls
DB Narrow Squats
DB Single Leg Stiff Leg Deadlift Right
DB Single Leg Stiff Leg Deadlift Left
Finisher
10 Frog Jumps EMOM for 4 minute
44
EXERCISE DESCRIPTIONS
(PLAYLIST VERSION)
HOW TO DO A JUMPING JACK
1. Stand with your feet together and your hands down by your side.
2. In one motion jump your feet out to the side and raise your arms above your
head.
3. Immediately reverse that motion by jumping back to the starting position.
4. https://youtu.be/dmYwZH_BNd0
How to Do a Perfect Push Up
1. Get on the floor on all fours, positioning your hands slightly wider than your
shoulders.
2. Extend your legs back so that you are balanced on your hands and toes. Keep
your body in a straight line from head to toe without sagging in the middle or
arching your back. You can position you feet to be close together or a bit wider
depending upon what is most comfortable for you.
3. Before you begin any movement, contract your abs and tighten your core by
pulling your belly button toward your spine. Keep a tight core throughout the
entire push up.
4. Inhale as you slowly bend your elbows and lower yourself until your elbows
are at a 90 degree angle.
5. Exhale as you begin contracting your chest muscles and pushing back up
through your hands to the start position. Don't lock out the elbows; keep them
slightly bent.
6. https://youtu.be/BfCXehLp8qM
45
HOW TO DO A PLANK TO PUSHUP
1. Start in a plank position on your forearms with your feet shoulder width apart
and your lower back flat.
2. Press your body up to a push-up position and then lower yourself back down
into the plank.
3. Do all the reps on one side or alternate sides for the recommended number
of reps.
4. https://youtu.be/uco2g3YexwA
HOW TO DO A CHEST FLY WITH BAND
● Attach the centre of the band to a stationary object behind you at chest height.
● Hold an end in each hand and start with your arms out to the side, just below
shoulder height.
● Keep a small bend in the elbows as you bring your arms forwards so that your
hands meet in front of your chest.
● Slowly return to the starting position.
● https://youtu.be/W8k5T1F-W9c
HOW TO DO A CHEST PRESS WITH DUMBBELLS
1. Lie on the bench with a dumbbell in each hand and your feet flat on the floor.
2.
3. Push the dumbbells up so that your arms are directly over your shoulders
and your palms are up.
4. Pull your abdominals in, and tilt your chin toward your chest.
5. Lower the dumbbells down and a little to the side until your elbows are
slightly below your shoulders.
6.
and accentuating your chest.
7. Push the weights back up, taking care not to lock your elbows or allow your
shoulder blades to rise off the bench.
8. https://youtu.be/VmB1G1K7v94
46
HOW TO DO A HIGH BAND ROW
Pull your elbows back until your they are even with your shoulders. Return to the
starting position (controlling the resistance). Repeat https://youtu.be/czJAcZ7zpFs
HOW TO DO DB ROW
1. With a dumbbell in each hand (palms facing your torso), bend your knees
slightly and bring your torso forward by bending at the waist; as you bend
make sure to keep your back straight until it is almost parallel to the floor.
Tip: Make sure that you keep the head up. The weights should hang directly in
front of you as your arms hang perpendicular to the floor and your torso. This
is your starting position.
2. While keeping the torso stationary, lift the dumbbells to your side (as you
breathe out), keeping the elbows close to the body (do not exert any force with
the forearm other than holding the weights). On the top contracted position,
squeeze the back muscles and hold for a second.
https://youtu.be/pTT_MCK0L90
HOW TO DO DB SHOULDER PRESS
Make sure to rotate your wrists so that the palms of your hands are facing forward.
This is your starting position. Now, exhale and push the dumbbells upward until they
touch at the top. Then, after a brief pause at the top contracted position, slowly
lower the weights back down to the starting position while inhaling.
https://youtu.be/qEwKCR5JCog
HOW TO DO DB SIDE LATERAL
1. Pick a couple of dumbbells and stand with a straight torso and the dumbbells
by your side at arms length with the palms of the hand facing you. This will be
your starting position.
47
2. While maintaining the torso in a stationary position (no swinging), lift the
dumbbells to your side with a slight bend on the elbow and the hands slightly
tilted forward as if pouring water in a glass. Continue to go up until you arms
are parallel to the floor. Exhale as you execute this movement and pause for a
second at the top.
3. Lower the dumbbells back down slowly to the starting position as you inhale.
4. https://youtu.be/3VcKaXpzqRo
HOW TO DO A KETTLEBELL SWING
1. Stand over the kettlebell with feet hip-width apart, chest up, shoulders back
kettlebell that allows you to swing with perfect technique while still
2. Squatting down, grip the kettlebell with palms facing you and thumbs
wrapped loosely around the handle.
3. Stand tall, still gripping the 'bell. Keep your arms long and loose while
retracting your shoulders blades and engaging your core. Soften the knees,
shift your bodyweight into your heels and lower your rear end back and down
toward the wall behind you. At this point you should be ready to spring er,
swing into action.
5.
weight swinging upward from your qu
the arms extended. Achieving this finish position requires you to snap your
hips through, contracting your core while squeezing your cheeks. (Yes, those
cheeks!)
6. As the kettlebell begins to descend, let the weight do the work as you ready
your body for the next rep.
48
Shift your weight back into your heels while hinging at the hips and loading
both the hamstrings and glutes. Receive the weight allowing the kettlebell to
ride back between your legs.
7. As it makes the transition from backward to forward, drive through the heel
and hips to keep this party going.
8. https://youtu.be/OopKTfLiz48
BENCH DIPS
1. For this exercise you will need to place a bench behind your back. With the
bench perpendicular to your body, and while looking away from it, hold on to
the bench on its edge with the hands fully extended, separated at shoulder
width. The legs will be extended forward, bent at the waist and perpendicular
to your torso. This will be your starting position.
2. Slowly lower your body as you inhale by bending at the elbows until you lower
yourself far enough to where there is an angle slightly smaller than 90
degrees between the upper arm and the forearm. Tip: Keep the elbows as
close as possible throughout the movement. Forearms should always be
pointing down.
3. Using your triceps to bring your torso up again, lift yourself back to the
starting position.
4. Repeat for the recommended amount of repetitions.
5. https://youtu.be/c3ZGl4pAwZ4
BAND CURLS
1. Stand this Bicep Exercise with the middle of the band under your feet and an
end in each hand.
2. Start with the arms straight by your sides and the band held taught.
49
3. Bend the arms at the elbows to lift the hands towards the shoulders.
4. Slowly return to the starting position.
5. https://youtu.be/bcE0DAPbqLU
BAND PULL APARTS
1. Begin with your arms extended straight out in front of you, holding the band
with both hands.
2. Initiate the movement by performing a reverse fly motion, moving your hands
out laterally to your sides.
3. Keep your elbows extended as you perform the movement, bringing the band
to your chest. Ensure that you keep your shoulders back during the exercise.
4. Pause as you complete the movement, returning to the starting position
under control.
5. https://youtu.be/1lQdu_U4AAI
FRONT DUMBELL RAISES
1. Pick a couple of dumbbells and stand with a straight torso and the dumbbells
on front of your thighs at arms length with the palms of the hand facing your
thighs. This will be your starting position.
2. While maintaining the torso stationary (no swinging), lift the left dumbbell to
the front with a slight bend on the elbow and the palms of the hands always
facing down. Continue to go up until you arm is slightly above parallel to the
floor. Exhale as you execute this portion of the movement and pause for a
second at the top. Inhale after the second pause.
3. Now lower the dumbbell back down slowly to the starting position as you
simultaneously lift the right dumbbell.
4. Continue alternating in this fashion until all of the recommended amount of
repetitions have been performed for each arm.
5. https://youtu.be/-t7fuZ0KhDA
50
ARM CROSSES
1. Arm crosses help to loosen up the chest and rear shoulders. Stand with your
feet about shoulder width apart and your arms out to your sides with your
palms down. 2.Extend your arms behind you and then cross them in front of
your body.
2. https://youtu.be/MkWAmC3TQXg
SHOULDER CIRCLES
1. With shoulders relaxed and arms resting loosely at your sides (or in your lap
if you're seated), gently roll your shoulders forward, up, back, and down.
2. Reverse direction. You can do this exercise alternating shoulders or both at
the same time.
3. https://youtu.be/Wko_UA8jUGs
PULL UPS
1. Grab the pull-up bar with the palms facing forward using the prescribed grip.
Note on grips: For a wide grip, your hands need to be spaced out at a distance
wider than your shoulder width. For a medium grip, your hands need to be
spaced out at a distance equal to your shoulder width and for a close grip at a
distance smaller than your shoulder width.
2. As you have both arms extended in front of you holding the bar at the chosen
grip width, bring your torso back around 30 degrees or so while creating a
curvature on your lower back and sticking your chest out. This is your starting
position.
3. Pull your torso up until the bar touches your upper chest by drawing the
shoulders and the upper arms down and back. Exhale as you perform this
portion of the movement. Tip: Concentrate on squeezing the back muscles
once you reach the full contracted position.
51
The upper torso should remain stationary as it moves through space and only
the arms should move. The forearms should do no other work other than hold
the bar.
5. After a second on the contracted position, start to inhale and slowly lower
your torso back to the starting position when your arms are fully extended and
the lats are fully stretched.
6. Repeat this motion for the prescribed amount of repetitions.
7. https://youtu.be/eGo4IYlbE5g
SUSPENDED ROWS
1. Suspend your straps at around chest height. Take a handle in each hand and
lean back. Keep your body erect and your head and chest up. Your arms
should be fully extended. This will be your starting position.
2. Begin by flexing the elbow to initiate the movement. Protract your shoulder
blades as you do so.
4. At the completion of the motion pause, and then return to the starting
position.
5. https://youtu.be/TKrTvPSIi0w
BENT OVER DB ROWS
1. With a dumbbell in each hand (palms facing your torso), bend your knees
slightly and bring your torso forward by bending at the waist; as you bend
make sure to keep your back straight until it is almost parallel to the floor.
Tip: Make sure that you keep the head up. The weights should hang directly in
front of you as your arms hang perpendicular to the floor and your torso. This
is your starting position.
52
2. While keeping the torso stationary, lift the dumbbells to your side (as you
breathe out), keeping the elbows close to the body (do not exert any force with
the forearm other than holding the weights). On the top contracted position,
squeeze the back muscles and hold for a second.
3. Slowly lower the weight again to the starting position as you inhale.
4. Repeat for the recommended amount of repetitions.
5. https://youtu.be/LktGPg-AkvY
DB BICEP CURLS
1. Stand up straight with a dumbbell in each hand at arm's length. Keep your
elbows close to your torso and rotate the palms of your hands until they are
facing forward. This will be your starting position.
2. Now, keeping the upper arms stationary, exhale and curl the weights while
contracting your biceps. Continue to raise the weights until your biceps are
fully contracted and the dumbbells are at shoulder level. Hold the contracted
position for a brief pause as you squeeze your biceps.
3. Then, inhale and slowly begin to lower the dumbbells back to the starting
position.
4. Repeat for the recommended amount of repetitions.
5. https://youtu.be/ykJmrZ5v0Oo
KB UPRIGHT ROW
1. Grasp a kettlebell with an overhand grip that is slightly less than shoulder
width. The kettlebell should be resting on the top of your thighs with your
arms extended and a slight bend in your elbows. Your back should also be
straight. This will be your starting position.
2. Now exhale and use the sides of your shoulders to lift the kettlebell, raising
your elbows up and to the side.
53
Keep the kettlebell close to your body as you raise it. Continue to lift the
kettlebell until it nearly touches your chin. Tip: Your elbows should drive the
motion, and should always be higher than your forearms. Remember to keep
your torso stationary and pause for a second at the top of the movement.
3. Lower the kettlebell back down slowly to the starting position. Inhale as you
perform this portion of the movement.
4. Repeat for the recommended amount of repetitions.
5. https://youtu.be/5E5r0KhIoUQ
CHIN UP
1. Grab the pull-up bar with the palms facing your torso and a grip closer than
the shoulder width. As you have both arms extended in front of you holding
the bar at the chosen grip width, keep your torso as straight as possible while
creating a curvature on your lower back and sticking your chest out. This is
your starting position. Tip: Keeping the torso as straight as possible
maximizes biceps stimulation while minimizing back involvement.
2. As you breathe out, pull your torso up until your head is around the level of
the pull-up bar. Concentrate on using the biceps muscles in order to perform
the movement. Keep the elbows close to your body.Tip: The upper torso
should remain stationary as it moves through space and only the arms should
move. The forearms should do no other work other than hold the bar.
3. After a second of squeezing the biceps in the contracted position, slowly
lower your torso back to the starting position; when your arms are fully
extended. Breathe in as you perform this portion of the movement.
4. Repeat this motion for the prescribed amount of repetitions.
5. https://youtu.be/_71FpEaq-fQ
54
PLYO PUSH UPS
1. Move into a prone position on the floor, supporting your weight on your hands
and toes.
2. Your arms should be fully extended with the hands around shoulder width.
Keep your body straight throughout the movement. This will be your starting
position.
3. Descend by flexing at the elbow, lowering your chest towards the ground.
4. At the bottom, reverse the motion by pushing yourself up through elbow
extension as quickly as possible. Attempt to push your upper body up until
your hands leave the ground.
5. Return to the starting position and repeat the exercise.
6. https://youtu.be/FRo3b_Pfw3M
FLOOR CHEST PRESS
1. Lower the dumbbell towards the bottom of your chest or upper stomach,
squeezing the dumbbell and attempting to pull it apart as you do so. Ensure
that you tuck your elbows throughout the movement. Lower the dumbbell
until your upper arm contacts the ground and pause, preventing any
slamming or bouncing of the weight.
2. Press the dumbbell back up as fast as you can, keeping the dumbbell, your
wrists, and elbows in line as you do so.
3. https://youtu.be/uUGDRwge4F8
OH DB SHOULDER PRESS
1. While holding a dumbbell in each hand, sit on a military press bench or utility
bench that has back support. Place the dumbbells upright on top of your
thighs.
55
2. Now raise the dumbbells to shoulder height one at a time using your thighs to
help propel them up into position.
3. Make sure to rotate your wrists so that the palms of your hands are facing
forward. This is your starting position.
4. Now, exhale and push the dumbbells upward until they touch at the top.
5. Then, after a brief pause at the top contracted position, slowly lower the
weights back down to the starting position while inhaling.
6. Repeat for the recommended amount of repetitions.
7. https://youtu.be/qEwKCR5JCog
BAND ROWS
Find a fixed object where you can wrap the exercise band around. It can be a
doorknob, pole or a tree, just choose whatever stationary and stable object
that you can use. Attach the band around it, then move back to create tension
in the band. Stand with your feet apart, shoulder width, and then bend your
knees a little. Pull the band towards you as if you are rowing a boat while
keeping your shoulders back (do not hunch over) and place all of the tension
on your back muscles. Keep your elbows close to your sides as you row and
pull the handles back to your body. Contract and flex your back muscles at
the peak position and then return to starting position slowly. Repeat for the
recommended number of reps.
https://youtu.be/b8xlsUOIJVc
DIAMOND PUSHUPS
1. Get in the modified push-up position on your knees but with your hands
together and back flat. Spread your fingers so that your index fingers and
thumbs form a diamond, and extend your arms. This is your start position.
56
2. Allow your elbows to break, lowering your chest toward the floor while
keeping your back flat.
3. Press back up to full arm extension, repeating for the required number of
reps.
4. To make the movement more difficult, stay up on your toes rather than on
your knees.
5. https://youtu.be/J0DnG1_S92I
DB TRICEP KICKBACK
1. Start with a dumbbell in each hand and your palms facing your torso. Keep
your back straight with a slight bend in the knees and bend forward at the
waist. Your torso should be almost parallel to the floor. Make sure to keep
your head up. Your upper arms should be close to your torso and parallel to
the floor. Your forearms should be pointed towards the floor as you hold the
weights. There should be a 90-degree angle formed between your forearm
and upper arm. This is your starting position.
2. Now, while keeping your upper arms stationary, exhale and use your triceps
to lift the weights until the arm is fully extended. Focus on moving the
forearm.
3. After a brief pause at the top contraction, inhale and slowly lower the
dumbbells back down to the starting position.
4. Repeat the movement for the prescribed amount of repetitions.
5. https://youtu.be/6SS6K3lAwZ8
DB OVERHEAD EXTENSION
1. To begin, stand up with a dumbbell held by both hands. Your feet should be
about shoulder width apart from each other. Slowly use both hands to grab
the dumbbell and lift it over your head until both arms are fully extended.
57
2. The resistance should be resting in the palms of your hands with your thumbs
around it. The palm of the hands should be facing up towards the ceiling. This
will be your starting position.
3. Keeping your upper arms close to your head with elbows in and
perpendicular to the floor, lower the resistance in a semicircular motion
behind your head until your forearms touch your biceps. Tip: The upper arms
should remain stationary and only the forearms should move. Breathe in as
you perform this step.
4. Go back to the starting position by using the triceps to raise the dumbbell.
Breathe out as you perform this step.
5. Repeat for the recommended amount of repetitions.
6. https://youtu.be/YbX7Wd8jQ-Q
KB SINGLE ARM ROW
1. Place a kettlebell in front of your feet. Bend your knees slightly and then push
your butt out as much as possible as you bend over to get in the starting
position. Grab the kettlebell and pull it to your stomach, retracting your
shoulder blade and flexing the elbow. Keep your back straight. Lower and
repeat.
2. https://youtu.be/J3zfFc1UfHo
KB SNATCH
1. Place a kettlebell between your feet. Bend your knees and push your butt
back to get in the proper starting position.
2. Look straight ahead and swing the kettlebell back between your legs.
3. Immediately reverse the direction and drive through with your hips and
knees, accelerating the kettlebell upward.
58
As the kettlebell rises to your shoulder rotate your hand and punch straight
up, using momentum to receive the weight locked out overhead.
4. https://youtu.be/6l2Iu26oWW8
FROG JUMPS
1. Stand with your hands behind your head, and squat down keeping your torso
upright and your head up. This will be your starting position.
2. Jump forward several feet, avoiding jumping unnecessarily high. As your feet
contact the ground, absorb the impact through your legs, and jump again.
3. https://youtu.be/GvTeWVyJKNE
DB OVERHEAD SQUATS
1. From a standing position, press a pair of dumbbells overhead by extending
the elbows and flexing the shoulders. You should be looking directly forward,
with your chest up, knees and hips slightly bent, and your back straight. This
will be your starting position.
2. Descend into a squat by flexing your hips and knees. As you squat, keep your
weight on your heels and push your knees out. Maintain proper curvature of
your entire spine, from the lower back all the way up through your cervical
spine.
3. Descend as far as your flexibility allows or until you have reached a full squat
position. Avoid excessive forward lean, rounding your lumbar or thoracic
spine, and keep the dumbbell in place throughout the exercise.
4. After a brief pause, return to the starting position by extending through the
hips and knees. Repeat for the desired number of repetitions.
5. https://youtu.be/VC7abo785c0
59
SKATER JUMPS
1. Stand on your left leg with your hips and knees slightly bent
2. Extend your left hip, knee and ankle to jump forward and to the right at a 45-
degree angle
3. Land on the ball of your right foot with your hips and knees slightly bent to
absorb the impact
4. Immediately jump off your right leg in the opposite direction
5. Continue bounding in this pattern for the specified distance
6. https://youtu.be/qlIcZK3c3g4
LATERAL SIDE-TO-SIDE HOPS
1. Stand to the side of a cone or hurdle. To get into the start position, stand on
one leg with your knee slightly bent.
2. To begin, execute a counterjump to hop sideways over the cone.
3. Land on your jumping leg, and immediately rebound out of it by jumping back
to the start position.
4. Continue hopping back and forth.
5. https://youtu.be/1MNy6YuN07s
WALL SQUATS
1. Begin with your back against the wall and your feet 18-24 inches out in front
of you. Have your feet in a shoulder-width stance, toes pointed slightly
outward and knees slightly out. This will be your starting position.
2. and maintain a
flat back against the wall.
60
3. Continue down until the upper legs are at or just below parallel to the floor.
Maintain this position for the recommended amount of time. Focus on
breathing continuously throughout.
4. Push through your heels to return upwards to the starting position.
5. Repeat for the recommended amount of repetitions.
6. https://youtu.be/ARDeqd6J1sg
KB SUMO SQUAT
1. Use 1 or 2 hands to pick up the kettlebell, pulling it up to your chest. Hold the
kettlebell at chest level with both hands, making sure to keep your arms
close to your body and elbows tucked in. Your feet should be slightly wider
than shoulder-width apart, with your toes pointing slightly outward. Keep
your back straight and abdominals tight. This will be your starting position.
2. Pushing your hips back, slowly bend the knees and lower your legs until your
thighs are just below parallel to the floor. Make sure to inhale during this
portion of the exercise.
3. Press through the heel of the foot and push your hips through to return to the
starting position.
4. Breathe out during this phase of the exercise.
5. Repeat for recommended number of repetitions before bending your knees to
lower the kettle bell back to the ground.
6. https://youtu.be/5uEOHCPWQTE
WALKING LUNGES
Begin standing with your feet shoulder width apart and your hands on your hips. Step
forward with one leg, flexing the knees to drop your hips. Descend until your rear knee
nearly touches the ground. Your posture should remain upright, and your front knee
should stay above the front foot. https://youtu.be/YYWhkctnP2o
61
SQUAT JUMP WITH DOUBLE PUMP
1. Stand with your feet shoulder with apart
2. Squat down a ¼ of your normal range
3. Stand back up
4. Squat down a ¼ of your normal range
5. Jump up as high as you can
6. Land safely
7. Repeat
8. https://youtu.be/CNL3W1X_trg
ALTERNATING PRISONER LUNGE
1. Stand with your feet shoulder-width apart and clasp your hands behind your
head.
2. Keep your elbows pulled back and your shoulder blades should be pulled
together to work the upper back.
3. Step forward with your left leg, taking a slightly larger than normal step.
4. Be sure to keep your right toe on the ground and use it to help keep your
balance, and also bend your right knee.
5. Continue to lower your body until your front thigh is parallel to the ground
6. Keep your upper body upright throughout the entire movement.
7. Push with your front (left) leg to return to the starting position and swap legs.
8. https://youtu.be/1DwNnlzXy58
62
LEG SWINGS
Support yourself on a wall or a post with one hand, and face straight ahead.
Swing one leg forward and back like a pendulum, keeping your posture tall and
your core engaged. Try not to swing your leg aggressively at first; instead, lightly
start to swing it and gradually increase your range of motion. As you get blood
flow to the muscles, you will feel yourself loosen up. Relax your hip joint as much
as possible.
https://youtu.be/hxKfZlW1rys
LUNGE JUMPS
1. Assume a lunge stance position with one foot forward with the knee bent, and
the rear knee nearly touching the ground.
2. Ensure that the front knee is over the midline of the foot. Extending through
both legs, jump as high as possible, swinging your arms to gain lift.
4. As you jump as high as you can, switch the position of your legs, moving your
front leg to the back and the rear leg to the front.
5. As you land, absorb the impact through the legs by adopting the lunge
position, and repeat.
5. https://youtu.be/cdFyA89Kp0Y
DUMBBELL FRONT SQUAT
1. Stand with your feet slightly wider than hip-width apart, holding a pair of light
dumbbells down by your sides. Clean the dumbbells up to your shoulders so
that one end of each dumbbell rests on top of each shoulder. Balance the
dumbbells on your shoulder by holding on to dumbbells with elbows facing
forward. This will be your starting position.
2. Keeping your head facing forward, your back straight, and your chest high,
squat down by bending your hips back while allowing knees to come forward
slightly,
63
keeping your back straight and knees pointed in the same direction as your
feet. Descend until your thighs are at parallel, or just past parallel to floor.
3. To return to the starting position, extend your knees and hips until your legs
are straight. Repeat for the recommended number of reps.
4. https://youtu.be/MJao9o7ROs0
LONG FROG JUMPS
https://youtu.be/GvTeWVyJKNE
STIFF LEG DEADLIFT
1. Grasp a bar using an overhand grip (palms facing down). You may need some
wrist wraps if using a significant amount of weight.
2. Stand with your torso straight and your legs spaced using a shoulder width or
narrower stance. The knees should be slightly bent. This is your starting
position.
3. Keeping the knees stationary, lower the barbell to over the top of your feet by
bending at the waist while keeping your back straight. Keep moving forward
as if you were going to pick something from the floor until you feel a stretch
on the hamstrings. Inhale as you perform this movement.
4. Start bringing your torso up straight again by extending your hips until you
are back at the starting position. Exhale as you perform this movement.
5. Repeat for the recommended amount of repetitions.
6. https://youtu.be/1uDiW5--rAE
SQUAT JUMPS
1. Cross your arms over your chest.
2. With your head up and your back straight, position your feet at shoulder
width.
64
3. Keeping your back straight and chest up, squat down as you inhale until your
upper thighs are parallel, or lower, to the floor.
4. Now pressing mainly with the ball of your feet, jump straight up in the air as
high as possible, using the thighs like springs. Exhale during this portion of
the movement.
5. When you touch the floor again, immediately squat down and jump again.
6. Repeat for the recommended amount of repetitions.
7. https://youtu.be/U4s4mEQ5VqU
SQUAT
The setup for the squat is incredibly simple. Stand with your feet slightly
wider than your hips. Your toes should be pointed slightly outward about 5
to 20 degrees outward.
Look stra
look at this spot the entire time you squat, not looking down at the floor or up
at the ceiling.
https://youtu.be/UXJrBgI2RxA
NARROW GOBLET SQUAT
● Hold a weight against the chest. If you have a kettlebell, grab it by the horns;
with a dumbbell, hold one of the heads up vertically between your palms.
● Position your feet so your stance is a smidge outside shoulder-width, with
your toes pointed slightly out. If you're taller, you may need to widen the
stance a little more.
● Drop it like it's hot. That is, sit back and down between the knees, keeping
your chest up the whole time. Make sure you're not falling forward or
rounding your back.
● Go down as low as you can while keeping your feet flat on the floor. If your
heels come up, your stance is still too narrow.
65
● At the bottom, brush your elbows down the inside of your legs and push your
knees out. This is what makes the goblet squat so special, so let me say that
again: knees out, knees out, knees out.
● Shoot back up and stand tall at the top.
● https://youtu.be/1taJKUUT_HA
SUMO SQUAT
1. Stand with feet wider than shoulder-width apart and your toes slightly turned
out. Hold a dumbbell in each hand in front of your hips.
2. Push your hips back and squat down, keeping your chest up and knees out.
Bring the weights down to the floor in between your legs. Then stand back up
to starting position.
3. https://youtu.be/9ZuXKqRbT9k
LUNGES
● Keep your upper body straight, with your shoulders back and relaxed and
chin up (pick a point to stare at in front of you so you don't keep looking
down). Always engage your core.
● Step forward with one leg, lowering your hips until both knees are bent at
about a 90-degree angle. Make sure your front knee is directly above your
ankle, not pushed out too far, and make sure your other knee doesn't touch
the floor. Keep the weight in your heels as you push back up to the starting
position.
● https://youtu.be/QF0BQS2W80k
DB SQUAT IN TO PRESS
1. Begin in a standing position with a dumbbell in each hand. Clean the
dumbbells to shoulder height utilizing a jumping motion and shoulder
rotation.

66
Your palms should be facing each other and the elbows pointed forward. Look
directly forward, keep your chest up, and place your feet about shoulder-
width apart. This will be your starting position.
2. Initiate the movement with a squat, flexing the knees and hips to lower your
body. Descend as far as flexibility allows, maintaining good posture in the
spine, hips, and knees.
3. Pause for a brief moment at the bottom of the squat before returning to a
standing position by extending the hips and knees.
4. After fully rising to a standing position, press the weights overhead by
extending the elbows and flexing at the shoulder.
5. Return the weights to the shoulder before repeating the entire movement for
additional repetitions.
6. https://youtu.be/LtXAqfzwFD0
KB WIDE SQUAT
https://youtu.be/9ZuXKqRbT9k
KB SINGLE LEG DEADLIFT
1. Hold a kettlebell by the handle in one hand. Stand on one leg, on the same
side that you hold the kettlebell.
2. Keeping that knee slightly bent, perform a stiff legged deadlift by bending at
the hip, extending your free leg behind you for balance.
3. Continue lowering the kettlebell until you are parallel to the ground, and then
return to the upright position.
4. https://youtu.be/054ea9tBEIA
67
RENEGADE ROWS
5. Place two kettlebells on the floor about shoulder width apart. Position
yourself on your toes and your hands as though you were doing a pushup,
with the body straight and extended. Use the handles of the kettlebells to
support your upper body. You may need to position your feet wide for support.
6. Push one kettlebell into the floor and row the other kettlebell, retracting the
shoulder blade of the working side as you flex the elbow, pulling it to your
side.
7. Then lower the kettlebell to the floor and begin the kettlebell in the opposite
hand. Repeat for several reps.
8. https://youtu.be/YHN0SGa-68Q
DB JACKS
https://youtu.be/nSd2ebFATi8
WINDMILL
1. Place a kettlebell in front of your lead foot and clean and press it overhead
with your opposite arm. Clean the kettlebell to your shoulder by extending
through the legs and hips as you pull the kettlebell towards your shoulders.
Rotate your wrist as you do so, so that the palm faces forward. Press it
overhead by extending the elbow.
2. Keeping the kettlebell locked out at all times, push your butt out in the
direction of the locked out kettlebell. Turn your feet out at a forty-five degree
angle from the arm with the locked out kettlebell. Bending at the hip to one
side, sticking your butt out, slowly lean until you can touch the floor with your
free hand. Keep your eyes on the kettlebell that you hold over your head at all
times.
3. Pause for a second after reaching the ground and reverse the motion back to
the starting position.
4. https://youtu.be/ITSmgn_BQgY
68
ALTERNATING ARM KB SWINGS
Step 1: Place a kettlebell in front of you about a foot distance away
Step 2: Maintaining a long spine and wide, proud chest, hinge and grab and pull
the kettlebell back to create momentum with one hand
Step 3: Once you reach the peak behind you snap your hips forward launching the
kettlebell forward
Step 4: Right before you reach the peak of the kettlebell in front of you (about chest
height) quickly change hands and finish the movement
Step 5: As you downswing maintain that long spine to avoid rounding.
Step 6: Snap your hips forward launching the kettlebell in front your repeating the
motion switching back to the first hand.
https://youtu.be/f9vEYM_CnZo
PUSH PRESS
Beginning Position:
● Use the floor-to-shoulder lifting technique described in the Power Clean
exercise to move the bar from the floor to the shoulders.
Upward Movement Phase:
● Slightly flex the hips and knees, keeping torso erect.
● Immediately follow with an explosive push upward by extending the knees.
● Keep torso erect and tensed.
● At maximum hip and knee extension, shift body weight to balls of feet and
extend ankle joints.
● At maximum plantar flexion, push bar from the shoulders.
● Push the bar with the arms to a fully extended elbow position overhead.
69
Downward Movement Phase:
● Lower bar to shoulders.
● Flex hips and knees slightly as bar touches shoulders.
● Straighten the hips and knees before the upward movement phase begins
again.
Breathing:
● Exhale through the sticking point of the upward movement phase.
● Inhale during the downward movement phase.
https://youtu.be/6XgsJGTrts0
BICEP CURLS
https://youtu.be/uO_CNYidOw0
REAR DELT BAND FLYES
1. Run a band around a stationary post like that of a squat rack.
2. Grab the band by the handles and stand back so that the tension in the band
rises.
3. Extend and lift the arms straight in front of you. Tip: Your arms should be
straight and parallel to the floor while perpendicular to your torso. Your feet
should be firmly planted on the floor spread at shoulder width. This will be
your starting position.
4. As you exhale, move your arms to the sides and back. Keep your arms
extended and parallel to the floor. Continue the movement until the arms are
extended to your sides.
5. After a pause, go back to the original position as you inhale.
6. Repeat for the recommended amount of repetitions.
7. https://youtu.be/lqAFdfcVP_Y
70
WIDE SQUAT INTO HEEL RAISE
https://youtu.be/KB4_IsdkskA
SINGLE ARM BICEP CURL
1. Start out by grabbing single handle next to the low pulley machine. Make sure
you are far enough from the machine so that your arm is supporting the
weight.
2. Make sure that your upper arm is stationary, perpendicular to the floor with
elbows in and palms facing forward. Your non lifting arm should be grabbing
your waist. This will allow you to keep your balance.
3. Slowly begin to curl the single handle upwards while keeping the upper arm
stationary until your forearm touches your bicep while exhaling. Tip: Only the
forearm should move.
4. Hold the contraction position as you squeeze the bicep and then lower the
single handle back down to the starting position as you inhale.
5. Repeat for the recommended amount of repetitions.
6. Switch arms while performing this exercise.
7. https://youtu.be/7jBWfTQJDNE
LOW ROW
1. For this exercise you will need access to a low pulley row machine with a V-
bar. Note: The V-bar will enable you to have a neutral grip where the palms of
your hands face each other. To get into the starting position, first sit down on
the machine and place your feet on the front platform or crossbar provided
making sure that your knees are slightly bent and not locked.
2. Lean over as you keep the natural alignment of your back and grab the V-bar
handles.
71
3. With your arms extended pull back until your torso is at a 90-degree angle
from your legs. Your back should be slightly arched and your chest should be
sticking out. You should be feeling a nice stretch on your lats as you hold the
bar in front of you. This is the starting position of the exercise.
4. Keeping the torso stationary, pull the handles back towards your torso while
keeping the arms close to it until you touch the abdominals. Breathe out as
you perform that movement. At that point you should be squeezing your back
muscles hard. Hold that contraction for a second and slowly go back to the
original position while breathing in.
5. Repeat for the recommended amount of repetitions.
6. https://youtu.be/GZbfZ033f74
BAND SWIMMER
https://youtu.be/vaqArj6M9zo
DB SKIERS
athletic base, feet hip-to-shoulder-width apart with a slight bend in your knees.
Next, swing the dumbbells behind you while pushing your hips and hamstrings
back as far as you can. Do this until your trunk is parallel with the floor while
keeping your knees soft and a slight natural arch in your back. (You should feel a
stretch in the backs of your thighs.)
Explosively thrust your hips forward and come to a full stand, squeezing your
glutes at the top of the movement. At the same time, swing your arms forward
https://youtu.be/u70sdRc8XjU
72
DB PUNCHES
Hold a pair of 3- to 5-pound dumbbells at shoulder height with arms bent, palms
facing in. In a slow, controlled motion, punch your right hand diagonally across your
body to the left, keeping it at shoulder level. Allow your torso to rotate slightly as you
punch, but keep your lower body still throughout the move. If you feel the move in
your shoulder rather than your chest and back, slow down; you should feel your
chest and upper back muscles flex and contract. Return to start, and alternate
https://youtu.be/C3RvgN6ZW_Y
BAND FORWARD TRICEP EXTENSION
Grip a handle with each hand and stand about 3 feet from the door, with your back to
the door. Stagger your legs, with one leg in front. Start with your upper arms up at
parallel with the floor, with your hands close to your head at eye level, and palms
facing forward.Push the handles forward and straighten your arms.Keep your upper
arms parallel with the floor throughout the movement.
https://youtu.be/RHetGoBj2SI
ROPE SLAMS
To start, stand with feet hip-width apart and grasp the ends of the rope in each
hand. Bring both arms up overhead, and then forcefully slam the ropes down into
the ground, lowering into a high squat as you do. Straighten up to return to
standing and repeat.
https://youtu.be/3PE6FKlT54Q
CHEST PRESS ON SUSPENSION STRAP
1. Lengthen the straps of the suspension trainer and grab the handles, facing
away from your anchor point. Arms should be straight with a firm, neutral
grip and handles extended at shoulder height.
2. Lower your chest toward (but not beyond) your hands, similar to a standard
push-up. Maintain elbows at shoulder height.
73
3. At the bottom of the exercise, pause for a second and squeeze the arms back
together in a controlled movement to return to the start position. Repeat.
4. https://youtu.be/lDhbs4lkcAw
ALTERNATING BATTLE ROPE SLAMS
1. For this exercise you will need a heavy rope anchored at its center 15-20 feet
away. Standing in front of the rope, take an end in each hand with your arms
extended at your side. This will be your starting position.
2. Initiate the movement by rapidly raising one arm to shoulder level as quickly
as you can.
3. As you let that arm drop to the starting position, raise the opposite side.
4. Continue alternating your left and right arms, whipping the ropes up and
down as fast as you can.
5. https://youtu.be/AyTJ7GQqg2A
ALTERNATING LEGS SIDE LUNGES
1. Assume an athletic standing position, with the knees and hips slightly bent,
feet shoulder-width apart, and the head and chest up. This will be your
starting position.
2. Staying low, take a slow, lateral step to the right. Keep your toes pointed
forward and stay low. Extend the left knee, driving your weight to the right,
flexing the knee and hip into a side lunge. Maintain good posture through the
entire spine, keeping your head and chest up.
3. Pause at the bottom of the motion, and then extend through the working leg
to return to a standing position, transitioning into a lunge to the opposite side.
4. https://youtu.be/2eCQjGiovsY
74
ALTERNATING OVERHEAD PRESS
1. Stand with a dumbbell in each hand. Raise the dumbbells to your shoulders
with your palms facing forward and your elbows pointed out. This will be your
starting position.
2. Extend one arm to press the dumbbell straight up, keeping your off hand in
place. Do not lean or jerk the weight during the movement.
3. After a brief pause, return the weight to the starting position.
4. Repeat for the opposite side, continuing to alternate between arms.
5. https://youtu.be/C7tFlxDYozg
HEEL RAISES
Stand with your feet a few inches apart, with your hands lightly resting on a
counter or chair in front of you. Slowly raise your heelsoff the floor while keeping
your knees straight. Hold for about 6 seconds, then slowly lower your heels to
the floor.
https://youtu.be/DJ63rzIPcGA
GOBLET SQUAT
1. Stand holding a light kettlebell by the horns close to your chest. This will be
your starting position.
2. Squat down between your legs until your hamstrings are on your calves. Keep
your chest and head up and your back straight.
3. At the bottom position, pause and use your elbows to push your knees out.
Return to the starting position, and repeat for 10-20 repetitions.
4. https://youtu.be/MeIiIdhvXT4
75
NARROW STANCE SQUAT
This exercise is best performed inside a squat rack for safety purposes. To begin,
first set the bar on a rack that best matches your height. Once the correct height is
chosen and the bar is loaded, step under the bar and place the back of your
shoulders (slightly below the neck) across it.
1. Hold on to the bar using both arms at each side and lift it off the rack by first
pushing with your legs and at the same time straightening your torso.
2. Step away from the rack and position your legs using a less-than-shoulder-
width narrow stance with the toes slightly pointed out. Feet should be around
3-6 inches apart. Keep your head up at all times (looking down will get you off
balance) and maintain a straight back. This will be your starting position.
(Note: For the purposes of this discussion we will use the medium stance
described above which targets overall development; however you can choose
any of the three stances discussed in the foot stances section).
3. Begin to slowly lower the bar by bending the knees as you maintain a straight
posture with the head up. Continue down until the angle between the upper
leg and the calves becomes slightly less than 90-degrees (which is the point
in which the upper legs are below parallel to the floor). Inhale as you perform
this portion of the movement. Tip: If you performed the exercise correctly, the
front of the knees should make an imaginary straight line with the toes that is
perpendicular to the front. If your knees are past that imaginary line (if they
are past your toes) then you are placing undue stress on the knee and the
exercise has been performed incorrectly.
4. Begin to raise the bar as you exhale by pushing the floor with the heel of your
foot mainly as you straighten the legs again and go back to the starting
position.
5. Repeat for the recommended amount of repetitions.
6. https://youtu.be/SauQgvbztRE

76
PULSING SQUAT
All you have to do is start with your feet hip-width apart and arms stretched out in
front of you. Perform a squat as you normally would, dropping down towards the
ground with your butt pushed back and knees never over your toes. Pretend like you
are sitting in an imaginary chair. Rather than coming back to the starting position
right away, hold that seated squat position at the bottom as you pulse a few inches
up and down for the entire exercise. You can do as many pulses as you can, then rise
up for a mini break and return down for more pulses.
https://youtu.be/ysLT25DHurY
MARCHING BRIDGE
● Begin on your back with feet about 12 inches from your bum and hands by
your sides with palms up. Press your heels into the ground and lift your pelvis
up until your knees, pelvis, and shoulders form a straight line.
● Hold your bridge while you lift your right knee toward your chest, until your
hip is at 90 degrees. Return the heel to the floor and lift the left knee. Do not
let your pelvis sag or your back overarch while lifting and lowering your
knees. This completes one rep.
● https://youtu.be/rXAbcneAr3I
JUMPING JACKS IN SQUAT POSITION
1. Standing with your feet close together and your hands clasped behind you
head, push your hips back to get into a half-squat position.
2. Jump your feet out to the sides, maintaining the squat position. Quickly jump
your feet back to the starting position.
3. https://youtu.be/LK3jSsdQ7M4
77
DOUBLE KETTLEBELL FORWARD LUNGES
Step 1: Double Clean a pair of kettlebells to the rack position
Step 2: Step forward with your right leg until your left thigh is perpendicular to the
ground.
Step 3: Drive through both feet until standing fully in the starting position
Step 4: Lower yourself back down with your left leg until your right thigh is
perpendicular to the ground and gently touch the ground with your knee.
Repeat
https://youtu.be/fFr33RA5nKw
BOX STEP UPS
● To start, place your entire right foot onto the box. Press through your right
heel as you step onto the bench, bringing your left foot to meet your left so
you are standing on the bench.
● Return to the starting position by stepping down with the right foot, then the
left so both feet are on the floor.
● https://youtu.be/l4AA5d5mInQ
SINGLE LEG GLUTE BRIDGE
1. Lay on the floor with your feet flat and knees bent.
2. Raise one leg off of the ground, pulling the knee to your chest. This will be
your starting position.
3. Execute the movement by driving through the heel, extending your hip upward
and raising your glutes off of the ground.
4. Extend as far as possible, pause and then return to the starting position.
5. https://youtu.be/3NXv0Nany-Q
78
SIDE SHUFFLE
Extend one leg to the side of your body and shuffle the other leg toward it. Keep your
chest up and your feet straight as you continue shuffling for several seconds. Repeat
the exercise in the opposite direction.
https://youtu.be/rr-dch4oFRM
SQUAT WITH ALT DB PUNCHES
https://youtu.be/TdwE8ipXur4
ALT LUNGE WITH DB LATERAL RAISE
https://youtu.be/vcg1o-YOfsk
TOE TAPS
To perform a toe tap, start by standing with your toes pointing towards your
plyometric box or aerobic stair. With a small jump, hop with your right foot onto the
box, with your left foot landing on the ground. Take another small jump and switch
feet so that your right foot stabilizes your body on the ground and your left foot is on
top of the box. Continue jumping and alternating your feet to complete the set.
https://youtu.be/6nnEkntir7Y
FARMERS WALK
1. There are various implements that can be used for the farmers walk. These
can also be performed with heavy dumbbells or short bars if these
implements aren't available. Begin by standing between the implements.
2. After gripping the handles, lift them up by driving through your heels, keeping
your back straight and your head up.
3. Walk taking short, quick steps, and don't forget to breathe.
4. https://youtu.be/Fkzk_RqlYig
79
KB SQUAT INTO UPRIGHT ROW
Stand tall with your feet shoulder-width apart, holding a kettlebell by the handle
in front of your thighs. Sit your butt down and back into a squat. As your legs
extend from the squat position, pull the handle of the kettlebell up to your
collarbone. Slowly lower the kettlebell back down into the starting position and
smoothly transition into the next repetition.
https://youtu.be/EyadTadLhsI
SINGLE LEG ROCKING BRIDGE
https://youtu.be/Ult_TNLVebA
HIGH KNEES
1. Stand straight with the feet hip width apart, looking straight ahead and arms
hanging down by your side.
2. Jump from one foot to the other at the same time lifting your knees as high as
possible, hip height is advisable.
3. The arms should be following the motion.
4. Touch the ground with the balls of your feet.
5. https://youtu.be/ZZZoCNMU48U
LYING LEG RAISES
1. Lie with your back flat on a bench and your legs extended in front of you off
the end.
2. Place your hands either under your glutes with your palms down or by the
sides holding on to the bench. This will be your starting position.
3. As you keep your legs extended, straight as possible with your knees slightly
bent but locked raise your legs until they make a 90-degree angle with the
floor. Exhale as you perform this portion of the movement and hold the
contraction at the top for a second.
80
4. Now, as you inhale, slowly lower your legs back down to the starting position.
5. https://youtu.be/Wp4BlxcFTkE
CROSS BODY MOUNTAIN CLIMBERS
Start at the top of the pushup position, with your body forming a straight line from
head to heels. Keeping your abs braced, pick up your right foot and slowly bring your
right knee toward your left shoulder. Then return to start.
https://youtu.be/9p-8sXwh-7k
PLANK JACKS
1. Start in the plank position but with the elbows bent and the weight resting on
the forearms
2. The body should form a straight line from the shoulders to the ankles
3. Engage the core by contracting your abs
4. Jump the feet out to the sides as if you were performing a jumping jack but
keep the upper body still
5. Return the feet to the starting position and that is 1 rep
6. https://youtu.be/Jo0LKx6c7XM
MOUNTAIN CLIMBERS
1. Begin in a pushup position, with your weight supported by your hands and
toes. Flexing the knee and hip, bring one leg until the knee is approximately
under the hip. This will be your starting position.
2. Explosively reverse the positions of your legs, extending the bent leg until the
leg is straight and supported by the toe, and bringing the other foot up with
the hip and knee flexed.
3. https://youtu.be/nmwgirgXLYM
81
SQUAT THRUST
1. Stand tall with your feet shoulder-width apart and arms hanging at your
sides.
2. Bend down and place your hands on the ground before hopping your legs
back into pushup position.
4. Quickly spring your legs forward to the bottom of a squat and jump back to
the starting position.
5. https://youtu.be/RJx7A7rN_4I
REVERSE CRUNCHES
1. Lie down on the floor with your legs fully extended and arms to the side of
your torso with the palms on the floor. Your arms should be stationary for the
entire exercise.
2. Move your legs up so that your thighs are perpendicular to the floor and feet
are together and parallel to the floor. This is the starting position.
3. While inhaling, move your legs towards the torso as you roll your pelvis
backwards and you raise your hips off the floor. At the end of this movement
your knees will be touching your chest.
4. Hold the contraction for a second and move your legs back to the starting
position while exhaling.
5. Repeat for the recommended amount of repetitions.
6. https://youtu.be/gAyTBB4lm3I
PLANK
1. Start by getting into a press up position.
2. Bend your elbows and rest your weight on your forearms and not on your
hands.
82
3. Your body should form a straight line from shoulders to ankles.
4. Engage your core by sucking your belly button into your spine.
5. Hold this position for the prescribed time.
6. https://youtu.be/pSHjTRCQxIw
LEG RAISES
1. Lie flat on the floor (on a mat) place your arms out to the side on the floor
with your palms facing down.
2. Make sure that your head, legs and bottom are all in contact with the floor.
3. Engage your stomach muscles and grasp the sides.
4. Slowly lift your legs to a 90-degree angle, keeping your legs straight and not
bending at the knees.
5. Pause for a second then slowly lower the legs back down.
6. https://youtu.be/JB2oyawG9KI
CROSS LEG REVERSE CRUNCH
1. Stand with your feet shoulder width apart. This will be your starting position.
2. Perform a rear lunge by stepping back with one foot and flexing the hips and
front knee. As you do so, rotate your torso across the front leg.
3. After a brief pause, return to the starting position and repeat on the other
side, continuing in an alternating fashion.
4. https://youtu.be/FOhdK5C6i0k
TABLETOP
https://youtu.be/3WhZjq4jYvg
83
SIDE PLANK
Start on your side with your feet together and one forearm directly below your
shoulder. Contract your core and raise your hips until your body is in a straight
line from head to feet. Hold the position without letting your hips drop for the
allotted time for each set, then repeat on the other side.
https://youtu.be/6cRAFji80CQ
PIKE
(A) Get in high plank position, with your hands under your shoulders and your
body straight from head to heels.
(B) Lift your hips and shift your body back into a pike shape by pressing your
hands into the floor. Return to the starting position and repeat.
Return to the starting position and repeat. Make it easier: Lower your knees to
the floor in plank position (then lift them when you lift your hips).
https://youtu.be/iP2fjvG0g3w
CRUNCH
1. Lie on your back with your knees bent and feet flat on the floor, hip-width
apart.
2. Place your hands behind your head so your thumbs are behind your ears.
3. fingers together.
4. Hold your elbows out to the sides but rounded slightly in.
5. Tilt your chin slightly, leaving a few inches of space between your chin and
your chest.
6. Gently pull your abdominals inward.
7. Curl up and forward so that your head, neck, and shoulder blades lift off the
floor.
84
8. Hold for a moment at the top of the movement and then lower slowly back
down.
9. https://youtu.be/Xyd_fa5zoEU
SIDE TO SIDE KB TWIST
To get into position, start with your feet flat on the floor, and then raise your legs
up so your shins are parallel to the ground. With both hands hold the kettlebell
close to your chest, either at the handle or base, and lean back to a 45-degree
angle. Your core should be engaged the whole time to keep you steady. Twist at
the waist left and right not the hips! using core control to slowly move the
kettlebell side to side.
https://youtu.be/l0feQvBzxdo
ROCKING PLANKS
1. Assume a plank position on your elbows and feet. This is your starting
position (Figure 1).
2. While maintaining a straight back, flex at your elbows and bring your body
forwards (Figure 2).
3. Return to the starting position by flexing at your shoulders.
4. Repeat.
5. https://youtu.be/FZzmmzqSuR4
STANDING BICYCLE CRUNCHES
Get in a starting position. Stand tall with your feet shoulder-width and your toes
pointing forward. Place your fingertips behind the neck with your elbows pointing out
to your sides in line with your shoulders. Inhale and contract your core muscles.
To begin the exercise raise your right knee up across the body as high as you can to
your chest.
85
Simultaneously twist your torso to the right and draw your left elbow towards the
lifted knee so that you can feel the crunch. Exhale during the movement.
Then return in a starting position and repeat the same movement on the other side.
Keep alternating sides until you reach a desired number of repetitions or time limit.
You can also finish all reps on one side and then switch to the other side.
https://youtu.be/1BT7az9xvIU
BICYCLE CRUNCHES
● Lie flat on the floor with your lower back pressed to the ground (pull your
navel in to also target your deep abs).
● Put your hands behind your head, then bring your knees in towards your chest
and lift your shoulder blades off the ground, but be sure not to pull on your
neck.
● Straighten your right leg out to about a 45-degree angle to the ground while
turning your upper body to the left, bringing your right elbow towards the left
knee. Make sure your rib cage is moving and not just your elbows.
● Now switch sides and do the same motion on the other side to complete one
rep.
● https://youtu.be/Iwyvozckjak
PIKES ON SUSPENSION STRAPS
Adjust the TRX straps to mid-calf length. Begin in a suspended plank position with
your feet in the TRX loops, toes facing down and wrists directly underneath your
shoulders. Your body should be in a straight line from head to toe (a). Pressing down
through your palms, lift your hips up towards the ceiling by drawing your legs
towards your chest until you look like an upside-down V, or as high as you can go (b).
Slowly lower your legs and return to the starting position (c). Repeat.
https://youtu.be/xAH6WmupNZA
86
LYING SCISSOR KICKS
1. To begin, lie down with your back pressed against the floor or on an exercise
mat (optional). Your arms should be fully extended to the sides with your
palms facing down. Note: The arms should be stationary the entire time.
2. With a slight bend at the knees, lift your legs up so that your heels are about 6
inches off the ground. This is the starting position.
3. Now lift your left leg up to about a 45 degree angle while your right leg is
lowered until the heel is about 2-3 inches from the ground.
4. Switch movements by raising your right leg up and lowering your left leg.
Remember to breathe while performing this exercise.
5. Repeat for the recommended amount of repetitions.
6. https://youtu.be/WoNCIBVLbgY
POWER PLANK
1. Start by getting into a press up position.
2. Bend your elbows and rest your weight ono your forearms and not on your
hands.
3. Your body should form a straight line from shoulders to ankles.
4. Engage your core by sucking your belly button into your spine.
5. Hold this position for the prescribed time.
6. https://youtu.be/FZzmmzqSuR4
PLANK TO TRICEP
Start in a forearm plank position on the floor. Then, pop up onto your palms by
lifting your elbows. Slowly let the elbows drop back down, and don't let them bow
out to the side.
https://youtu.be/-nfTC718a1I
87
CONTRALATERAL CRUNCHES
https://youtu.be/IOtEROrWJ68
CROSS LEG REVERSE CRUNCH
1. Lie flat on your back with the knees bent, the feet flat on the floor. Cross
one ankle over the top of your other knee. Bring your arms overhead and
hold onto a sturdy object like a bench.
2. Curl your pelvis towards your chest and lift your legs as close to your chest
as possible while maintaining the cross-legged posture. Pause, return to
the starting position.
3. https://youtu.be/FOhdK5C6i0k
BURPEES
1. Stand with your feet shoulder-width apart, weight in your heels, and your
arms at your sides.
2. Push your hips back, bend your knees, and lower your body into a squat.
3. Place your hands on the floor directly in front of, and just inside, your feet.
Shift your weight onto them.
4. Jump your feet back to softly land on the balls of your feet in a plank position.
Your body should form a straight line from your head to heels. Be careful not
to let your back sag or you butt stick up in the air, as both can keep you from
effectively working your core.
5. Jump your feet back so that they land just outside of your hands.
6. Reach your arms over head and explosively jump up into the air.
7. Land and immediately lower back into a squat for your next rep.
8. https://youtu.be/Pf7wZvraWV0
88
BEAR CRAWL
1. get down on all fours.
2. try to keep your hands underneath shoulders.
3. try to keep your knees underneath hips.
4. lift knees off the ground.
5. allow the posture of your body to be natural.
6. https://youtu.be/WMXbyYpZ9oY
CRAB WALK
In order to do a Crab Walk correctly, sit on the ground with your legs extended out in
front of you. Place your hands by your side with your fingers pointed toward your
feet. Lift your body up into the air. Arch your back up as far as you can making sure
your glutes are tight. Now in this position, begin to step forward one hand after the
https://youtu.be/4RNX7_M76FU
GOOD MORNING
1. Begin with a bar on a rack at shoulder height. Rack the bar across the rear of
your shoulders as you would a power squat, not on top of your shoulders.
Keep your back tight, shoulder blades pinched together, and your knees
slightly bent. Step back from the rack.
2. Begin by bending at the hips, moving them back as you bend over to near
parallel. Keep your back arched and your cervical spine in proper alignment.
3. Reverse the motion by extending through the hips with your glutes and
hamstrings. Continue until you have returned to the starting position.
4. https://youtu.be/5Xj6XUa77qc
89
SINGLE LEG LYING HIP EXT
Perform the bridging movement with one leg off the floor so that the remaining
leg has to produce the hip extension. This makes the exercise a lot tougher and
the core and hips have to work hard to stabilise the torso throughout the
movement.
https://youtu.be/ynLvGO09y_s
SEAL JACKS
1. Stand straight with the arms down by the side.
2. In one movement jump just high enough to spread the feet apart and clap the
hands out in front of the chest.
3. Quickly return back to the starting position and that is 1 rep.
4. https://youtu.be/cEg40wwTkC0
SPIDERMAN MOUNTAIN CLIMBERS
Start out this exercise in a regular push-up position with your hands placed flat on
the ground at about shoulder width. Begin by raising your right leg up and outward
so your right knee ends up a few inches outside of your right elbow. Really try to
crunch your abs in this position in order to put maximum tension on the core
muscles of your midsection. From the top position, slowly lower your right leg back
down to the starting position and repeat with the opposite leg. Raising and lowering
your hands firmly on the ground to provide the balance and support your body needs
during the entire range of motion.
https://youtu.be/oGG3On4DxWQ
90
BRIDGE
1. Lie on your back with your knees bent and your feet flat on the floor.
2. Raise your hips of the floor so that your body forms a straight line from your
shoulders to your knees.
3. Pause at the top then slowly lower your body back to the floor.
4. https://youtu.be/WowARnE-p0s
INCHWORMS
1. Stand with your feet close together. Keeping your legs straight, stretch down
and put your hands on the floor directly in front of you. This will be your
starting position.
2. Begin by walking your hands forward slowly, alternating your left and your
right. As you do so, bend only at the hip, keeping your legs straight.
3. Keep going until your body is parallel to the ground in a pushup position.
4. Now, keep your hands in place and slowly take short steps with your feet,
moving only a few inches at a time.
5. Continue walking until your feet are by hour hands, keeping your legs straight
as you do so.
6. https://youtu.be/VSp0z7Mp5IU
MOUNTAIN CLIMBERS ON A BOSU
Flip the ball over onto its dome. Grip the sides of the platform and come into a
plank position. Run in place, quickly bringing each knee to your chest.
https://youtu.be/SISteum1-YU

91
SIT THROUGHS
Start on your hands and knees, toes tucked. Lift your knees about 3 inches off the
floor. Leaving your right hand and left foot on the floor, lift your right foot and
sweep it underneath you to the left side of the room as you rotate your body in
the same direction. Your left hand should lift up as you sweep your right foot.
Return back to all fours with knees still off the floor and repeat, alternating
sides.
https://youtu.be/DKNER4Fn6KI
MARCHING BRIDGE
● Begin on your back with feet about 12 inches from your bum and hands by
your sides with palms up. Press your heels into the ground and lift your pelvis
up until your knees, pelvis, and shoulders form a straight line.
● Hold your bridge while you lift your right knee toward your chest, until your
hip is at 90 degrees. Return the heel to the floor and lift the left knee. Do not
let your pelvis sag or your back overarch while lifting and lowering your
knees. This completes one rep.
● https://youtu.be/DGeXCDWRqjU
SUICIDES
Set up your markers if you are running drills at an area that does not have
marked lines. Place three to six markers about 6 yards apart, with an additional
marker serving as your start/finish line. Use anything that is available as
markers, such as towels, Frisbees or tennis ball cans.
Warm up by jogging at a moderate pace for five to 10 minutes; running sprints
with cold muscles can lead to an injury.
92
Begin at the starting line and sprint to the first line or marker. Touch the marker
with your hand and then sprint back to the starting line. Sprint to the second line
or marker immediately; touch the second marker and sprint back to the starting
line. Continue the pattern until you have run to all of the lines. That is one set.
https://youtu.be/MPL487ToJt8
NECK ROLLS
1. Begin the Neck Roll with Your Head Facing Straight 2. Roll Your Head to One Side 3. Roll Your Head Back 4. Roll Your Head to the Other Side 5. Roll to the Front 6. Return Your Head to the Start Position
https://youtu.be/yMJcEukHtnA
BIRD DOG
To work your six-pack area and back, remain on all fours and tighten your
abdominal muscles, keeping your spine and neck in a neutral position; you should be
looking at the floor. Slowly extend your left leg behind you while reaching your right
arm forward. Keep your hips and shoulders square and make sure your lower back
return to the starting position and do the
move on the opposite side.
https://youtu.be/wiFNA3sqjCA
LEG LYING HIP EXT.
https://youtu.be/ynLvGO09y_s
SCREECH
https://youtu.be/ZCDlcoL4WYA
93
BODYWEIGHT 1 LEG ROMANIAN DEADLIFT
● Stand with your feet shoulder-width apart and knees slightly bent.
● Raise one leg off the floor.
● https://youtu.be/ZyV3rwv62AE
SIDE TO SIDE ROCKING PLANK
1. Lie down on the floor placing your feet either under something that will not
move or by having a partner hold them. Your legs should be bent at the knees.
2. Elevate your upper body so that it creates an imaginary V-shape with your
thighs. Your arms should be fully extended in front of you perpendicular to
your torso and with the hands clasped. This is the starting position.
3. Twist your torso to the right side until your arms are parallel with the floor
while breathing out.
4. Hold the contraction for a second and move back to the starting position while
breathing out. Now move to the opposite side performing the same
techniques you applied to the right side.
5. Repeat for the recommended amount of repetitions.
6. https://youtu.be/utpdRn3SaDU
CLEAN
1. With a barbell on the floor close to the shins, take an overhand (or hook) grip
just outside the legs. Lower your hips with the weight focused on the heels,
back straight, head facing forward, chest up, with your shoulders just in front
of the bar. This will be your starting position.
2. Begin the first pull by driving through the heels, extending your knees. Your
back angle should stay the same, and your arms should remain straight.
Move the weight with control as you continue to above the knees.
94
3. Next comes the second pull, the main source of acceleration for the clean. As
the bar approaches the mid-thigh position, begin extending through the hips.
In a jumping motion, accelerate by extending the hips, knees, and ankles,
using speed to move the bar upward. There should be no need to actively pull
through the arms to accelerate the weight; at the end of the second pull, the
body should be fully extended, leaning slightly back, with the arms still
extended.
4. As full extension is achieved, transition into the third pull by aggressively
shrugging and flexing the arms with the elbows up and out. At peak
extension, aggressively pull yourself down, rotating your elbows under the
bar as you do so. Receive the bar in a front squat position, the depth of which
is dependent upon the height of the bar at the end of the third pull. The bar
should be racked onto the protracted shoulders, lightly touching the throat
with the hands relaxed. Continue to descend to the bottom squat position,
which will help in the recovery.
5. Immediately recover by driving through the heels, keeping the torso upright
and elbows up. Continue until you have risen to a standing position.
6. https://youtu.be/KjGvwQl8tis
CLOSE GRIP PUSH UP
Lie on the floor face down and place your hands closer than shoulder width for a
close hand position. Make sure that you are holding your torso up at arms' length.
1. Lower yourself until your chest almost touches the floor as you inhale.
2. Using your triceps and some of your pectoral muscles, press your upper body
back up to the starting position and squeeze your chest. Breathe out as you
perform this step.
3. After a second pause at the contracted position, repeat the movement for the
prescribed amount of repetitions.
4. https://youtu.be/G2mlaEfpEIM
95
REVERSE GRIP TRICEP EXTENSION
1. Start by setting a bar attachment (straight or e-z) on a high pulley machine.
2. Facing the bar attachment, grab it with the palms facing up (supinated grip) at
shoulder width. Lower the bar by using your lats until your arms are fully
extended by your sides. Tip: Elbows should be in by your sides and your feet
should be shoulder width apart from each other. This is the starting position.
3. Slowly elevate the bar attachment up as you inhale so it is aligned with your
chest. Only the forearms should move and the elbows/upper arms should be
stationary by your side at all times.
4. Then begin to lower the cable bar back down to the original staring position
while exhaling and contracting the triceps hard.
5. Repeat for the recommended amount of repetitions
6. https://youtu.be/o8jBN-gWAsg
EXPLODING PUSH UPS
1. Assume a pushup position with hands slightly wider than shoulder-width
apart. Your body should form a straight line from your ankles to your head.
This is your starting position.
2. Bend elbows and lower body until your chest nearly touches the floor.
3. Explosively press yourself up so that your hands leave the floor. Land with
your arms extended and reset your body back to starting position.
4. https://youtu.be/cI3LFiBIeuY
96
CLOSE GRIP TRIPLE STOP PUSH UP
1. Get in the standard pushup position with your hands slightly wider than
shoulder-width apart and arms fully extended.
2. Keeping your core tight, slowly lower your body to the ground, as though to
perform a regular pushup. Instead of lowering all the way to the ground in
one motion, pause briefly halfway to the ground.
3. Continue the pushup, pausing briefly again at the bottom of the movement. As
you return to start, pause again halfway to the top.
4. https://youtu.be/G2mlaEfpEIM
DB SHOULDER PRESS ON BALL
Step 1: Sit on the stability ball with a neutral spine and hold the dumbbells up
beside your head with your arms at a 90 degree angle.
Step 2: Press the dumbbells upward and slightly in almost touching them together
at the full extension of your arms.
Step 3: Lower the dumbbells back to the starting position and repeat the action.
https://youtu.be/ECxfa7yxuX4
BAND HAMMER CURLS
Stand on the band(s) hips width apart and stand up straight. Keep your back straight,
head straight, chest up and stomach tight. Start with your your arms straight down,
elbows tight to your sides, and palms facing in. Pull the ankle straps or handles up,
and bend your arms until your hands are at chest height.
https://youtu.be/KIqRZEF_Aqg
97
BAND OR DB BILATERAL ROWS
https://youtu.be/qRzjrpM9BsI
NARROW GRIP PUSH UPS
1. Lie on the floor face down and place your hands closer than shoulder width
for a close hand position. Make sure that you are holding your torso up at
arms' length.
2. Lower yourself until your chest almost touches the floor as you inhale.
3. Using your triceps and some of your pectoral muscles, press your upper body
back up to the starting position and squeeze your chest. Breathe out as you
perform this step.
4. After a second pause at the contracted position, repeat the movement for the
prescribed amount of repetitions.
5. https://youtu.be/G2mlaEfpEIM
TRX OR SUSPENSION STRAP CHEST PRESS
● Step 1: Hook up the TRX cables so that the handles hang about waist height.
● Step 2: Grab the handles with your hands and take a step forward.
● Step 3: Keep your body in a straight line, arms both straight, and lean
forward until your body is at about 40 degree angle.
● Step 4: Bend at the elbows and lower your body down until your chest
reaches the handles.
● Step 5: Now push yourself back up. This completes one repetition.
● https://youtu.be/lDhbs4lkcAw
98
BILATERAL WIDE DB ROWS
1. Stand erect while holding a barbell with a supinated grip (palms facing up).
2. Bend your knees slightly and bring your torso forward, by bending at the
waist, while keeping the back straight until it is almost parallel to the floor.
Tip: Make sure that you keep the head up. The barbell should hang directly in
front of you as your arms hang perpendicular to the floor and your torso. This
is your starting position.
3. While keeping the torso stationary, lift the barbell as you breathe out, keeping
the elbows close to the body and not doing any force with the forearm other
than holding the weights. On the top contracted position, squeeze the back
muscles and hold for a second.
4. Slowly lower the weight again to the starting position as you inhale.
5. Repeat for the recommended amount of repetitions.
6. https://youtu.be/qwMqmcwU1Ig
SKI JUMPS
● Stand with your feet together.
● Jump from side to side, landing with your knees bent.
● The wider you jump and the lower you squat, the harder you'll work.
● https://youtu.be/yk7yXdzabxY
STABILITY BALL LEG CURLS
1. Begin on the floor laying on your back with your feet on top of the ball.
2. Position the ball so that when your legs are extended your ankles are on top
of the ball. This will be your starting position.
99
3. Raise your hips off of the ground, keeping your weight on the shoulder blades
and your feet.
4. Flex the knees, pulling the ball as close to you as you can, contracting the
hamstrings.
5. After a brief pause, return to the starting position.
6. https://youtu.be/Kk8dpH4ZPos
BULGARIAN SPLIT SQUAT
1. Position yourself into a staggered stance with the rear foot elevated and front
foot forward.
2. Hold a dumbbell in each hand, letting them hang at the sides. This will be
your starting position.
3. Begin by descending, flexing your knee and hip to lower your body down.
Maintain good posture througout the movement. Keep the front knee in line
with the foot as you perform the exercise.
4. At the bottom of the movement, drive through the heel to extend the knee and
hip to return to the starting position.
5. https://youtu.be/2C-uNgKwPLE
BULGARIAN SQUAT
https://youtu.be/JUi9PjVYQgo
SKATER HOPS
https://youtu.be/4RuxhVJ4-pg


