1 The Discus The Discus USATF Level 2 School -Youth Specialization Sacramento, 1-5 August, 2010 Big Circles & Little Circles • Wind up. • Turn (Big Circle). • Non-support phase. • Wheel (Little Circle). • Delivery (Big & Little Circles). The Grip • First joints of the fingers curl over the rim facilitating a comfortable feeling • Fingers slightly spread with the first two fingers close together • Thumb along side the fingers a forty to fifty degrees • Thumb along side the fingers a forty to fifty degrees Importance of the Beginning Movements All movements through release are effected by the beginning The Importance of Rhythm • Successful throwers are masters of rhythm • We focus primarily on mechanics but mechanics are dead without rhythm Starting Position • The feet positioned slightly wider than shoulder width apart •Options for initial foot placement – Left and right equal distance from centerline – Left foot can be lined up on or near centerline
Transcript
1
The DiscusThe Discus
USATF Level 2 School -Youth SpecializationSacramento, 1-5 August, 2010
Big Circles & Little Circles• Wind up.• Turn (Big Circle).• Non-support phase.• Wheel (Little Circle).• Delivery (Big & Little
Circles).
The Grip• First joints of the fingers curl over the rim facilitating a
comfortable feeling• Fingers slightly spread with the first two fingers close
together• Thumb along side the fingers a forty to fifty degrees• Thumb along side the fingers a forty to fifty degrees
Importance of the Beginning Movements
All movements through release are effected by the beginning
The Importance of Rhythm
• Successful throwers are masters of rhythm
• We focus primarily on mechanics but mechanics are dead without rhythm
Starting Position
• The feet positioned slightly wider than shoulder width apart
• Options for initial foot pplacement– Left and right equal
distance from centerline
– Left foot can be lined up on or near centerline
2
Preliminary Swings• Rhythmic movement
(key) to begin the throw• For a beginner, a
moderate knee bend with an erect back isan erect back is recommended
• Many coaches advocate only one swing
Wind Up
• Wind up.– Right foot flat.– Discus high, big
stretchstretch.– Head and eyes
in line with mid point of the body.
1 1
1 1
Wilkins Powell
Fazekas Kruger
Foot Work Turn - Big Circle
• Turn (Big Circle).– Weight onto the left
leg (70%).– Left arm long, arm
pit over the left 2 2pknee.
– Initiate the turn by turning the left foot.
– Left foot, knee, shoulder and arm “on the line.
– Right leg is led by the inside of the thigh or instep.
2 2
1
Wilkins Powell
Riedel Riedel3
Three Major Initial Force Producing Moves
• The unseating (as discussed earlier) (linear-extremely important)
• Left leg push-off during the final stages of the unseating (linear important)
• Sweeping right leg (rotary important)
Non-support Phase
• Non-support phase.– Drive right knee,
get off the left leg (knees together)(knees together).
– Left arm wrapped.
– Keep the discus back.
– Let the make ground contact with the foot.
4
5 5
5Fazekas Kruger
Wilkins Riedel
3
Back of the Ring Mechanics Linear Sprint-Drive to the Center of Circle
• Body weight is balanced on pivoting and driving left leg
• Left leg bends significantly, lowering g g y gthe COG=balance and force potential
• Inside of right thigh leads right leg and body to center of circle
Jump Turn
• Left leg push off should result in subtle jump (non-support)
• Posture of upper ppbody as the thrower drives is relatively erect
Jump Turn
Discus Orbit (Path)
• At conclusion of last preliminary swing the discus is high
• Discus path from high to low around back of circleof circle
• As thrower drives to center of circle discus rises
• High point to the right of the center line
Power Position - Right-Left Foot Relationship
• Left foot of center line approximately on li ith thline with the instep of the right foot
4
Wheel - Little Circle• Wheel (Little Circle).
– Weight on right leg.– On the ball of the
right foot (heel up), keep it turning.
– Left foot down– Left foot down early.
– Keep the left arm wrapped and the discus back.
– Maximum separation between hip and shoulder axis.
– No head movement!
6 6
6 7
Wilkins Riedel
Kruger Fazekas
Delivery - Big & Little Circle
• Delivery - Big & Little Circle.– Head Back!– Long arm (keep
f
P5
P6
P7
P8
discus away from body).
– Accelerate the right hip (knee in).
– Block (left side) & Chase (right side).
P7
8
Kruger Powell-Top 5-8
Riedel Wilkins7
Power Position• Foot placement -Heel to
toe relationship, shoulder width apart.
• Solid core, long left side.• Weight “loaded” on the• Weight loaded on the
right side (70-30).• Discus back for a long
pull.• Left arm long and
wrapped. Kruger
Discus Orbit-During the Delivery Phase
• High Point at approximately 1:00
• Low point at approximately 6:00pp y
• Release at approximately 11:30
Delivery Mechanics• Head back.• Accelerate the right side.• Block with the left side.
– Transfer energy.P t f l– Prevents fouls.
• Flight.– Angle of release.– Plane of the discus.
Mate
Recovery Phase
• Upward leg usually results in a reversing of the feetthe feet
• Athlete lands on right leg - facing approximately 9 o’clock
5
The Discus
Teaching Progression
Choose an Appropriate Discus
• A good discus can cost anywhere from $80 to $225
• Rim Weight is the most important factorfactor
• High Rim Weight Discus is for the more advanced thrower
• Lower Rim Weight Discus is easier to control
Getting Started• Grip.
– Index finger along the axis of the discus.
– Index and middle finger together or g gspread apart.
– Joint of the first knuckle on the outside edge of the discus.
– Should be able to hold the discus at your side.
The Grip
Swinging the Arm with Discus for “Feel”
• Swing discus around to feel forces & necessary control
• Should feel that centrifugal• Should feel that centrifugal force will keep the discus in the hand (confidence)
Teaching the Proper Release
• Bowl the discus along the ground• Modify the bowling action by having the
thrower flip the discus in the airTh t f f f th b d• The transfer of energy from the body (hand) to the discus is crucial
6
Discus Bowling Release Drills
• Drop Drill.– Let the discus fall out of the front of the hand.
• Bowling.• Vertical tosses.• Skimming.
Hip Drill Stand Throw Progression & Drills
• Hip drill• No Reverse stand
throw• Step out (chase)
t d thstand throw• Stand throw with
Reverse• Throws with cones,
bars, ballsRiedel
Standing Throw
• Establish a base about shoulder width• The relationship of the feet approximates
left toe on line with right instepS th di l k i d• Sweep the discus clockwise, down, around the body and back up to an 11 o’clock position
Standing Throw (con’t)• The right hip is driven up
and around pulling the torso with it. The shoulder and arms are thereby brought in to the throwing actionTh l ft id bl k• The left side blocks as asthe hand releases the discus in the direction of the intended throw
• The left arm generally moves through opposite positions from the right arm
7
Stand Throw
• Stay back!• Head back.• Turning right foot,
accelerate the rightaccelerate the right side.
• Long arm.• Block and chase.
Riedel
Position Drill into Stand
Line Drills
• Teaching the Half Turn.• Turn Drills.• Modified South African.
Half Turn Drill
• Right foot in the center, left foot in the back (Looks like power position in wrong direction).
• Wind the discus.• Pivot on the right.• Step through with the left foot (knees tight)
to power position.• Throw.
Half Turn Drill Performing the Wheel
• In the wheel drill the athlete places the right foot in the middle of the ring with the left arm facing the direction of the throw and the right arm behind the right hip
• The athlete then pivots on the right leg grounding the left leg and assuming the power position
• The athlete repeat this drill in both directions
8
Wheel and Throw Teaching the Turn
• The thrower must assume a good starting position (stance)
• Relate this position to the weight room
Learning To Turn
• Stance – Athletic Position (relaxed).
• Wind up – reach back.
• Load the left.• Initiate the turn by
turning the left foot.• Lead with the inside
of the right thigh.
Turning Drills
• Step around turns (from the middle and in the back).
• 90, 180, 360 degree turns (from the middle and in the back)and in the back).
• 270 degree turn (Plant the right foot in the middle).
• Line drills (with and without a med ball).
Turning Drills The 1/4 Turn• Once the athlete is able to make a proper
weight shift we teach the turn• The athlete is taught to shift the weight to the
left foot, pick up the right foot and perform 1/4 turn while keeping the shoulders and hips level
• It may be helpful to tell the athlete to assume that have a book on their head
• These 1/4 turn movements are continued around the clock
9
The 1/2 Turn
• Once the athlete has mastered the 1/4 turn movement, 1/2 turn movement is learned
• In this drill it is important to maintain• In this drill it is important to maintain shoulder width spacing between the legs as the athlete makes a 180 degree turn
The Full Turn
• The athlete is challenged to make a full 360 degree turn while keeping on balance
• In all of these drills athletes are encouraged to keep their right legencouraged to keep their right leg sweeping through a wide arc
360 Degree Turn 1/4 Turn, 1/2 Turn, Wheel• The first drill is the 1/4 turn• From the 1/4 turn position the 1/2 turn drill
is added• This will put the athlete in the middle of the
i i iti t f th h lring in position to perform the wheel • The final drill is the wheel which will get
the athlete into the power position• Repeat 1/4, 1/2, wheel until the athlete is
comfortable
Teaching the Sweep The Giant Step, Wheel
• After the athlete has mastered this combination the 1/4 turn and 1/2 turn is replaced by the “giant step”
• In the giant step the sweeping movement• In the giant step the sweeping movement of the start and stops in the middle of the ring
• This combination is Giant Step, Wheel
10
Full Turn Specific Strength
Specific Strength Practice Makes Perfect
• Imitation drills• 10,000 throws• Throws with and
without a reversewithout a reverse
Riedel
1
The Glide Shot PutThe Glide Shot Put
USATF Level 2 School -Youth SpecializationSacramento, 1-5 August, 2010
The Glide Shot Put
GLIDE SHOT PUT(Basic Technique)
• The Grip• Starting Position• The Glide• Power Position• Power Position• Delivery• Recovery
The Grip
• The shot should rest on the base of the fingers
• Four fingers on the gball
• Thumb balances shot on fingers
Position on the Neck Starting Position(Crouch)
• Right foot at six o’clock
• Free arm closed pointing to the rearp g
• Shoulders parallel• Eyes on a spot three
to six feet in back of the ring
2
The Glide• The movement is a rhythmic whole• The coach must keep the rhythmic nature in mind when
teaching these movements
Glide TechniqueThe glide is the result of the summation of
three distinct movements:• Unseating• Left leg actionLeft leg action• Right leg action
Left Leg Action• The left leg is lifted for a rhythmic
beginning• The left knee is bent and the left leg is
brought in toward the rightbrought in toward the right• As the left knee approaches the right knee
the athlete begins unseating
UnseatingThis is felt as sitting back or a controlled fall toward
the toeboard.• The COG must pass behind the right heel• Thrower moves the line of gravity beyond theThrower moves the line of gravity beyond the
base of support
Right Leg Action• As the left knee approaches the right knee
the right leg pushes off• The right leg is fully extended with final
contact coming from the heelcontact coming from the heel• Following full extension the right leg is
quickly pulled under the COG
Sequence
3
Landing• Weight should be on the ball of the right
foot• The right foot should land approximately in
the center of the ringthe center of the ring• The right foot should be turned between
forty five to ninety degrees• The majority of the body weight is back on
the right leg
Landing (continued)• The shoulders are
closed• The eyes remain
focused on the original focal point behind the ring
• The left leg should land approximately one inch from the toe board
Power Position• From this position the
delivery phase is initiated
• A good consistent gpower position is the key to effective throwing
• This position must be rehearsed
Delivery Phase• There is a violent lifting action with the legs and hips• The shot stays in line with the elbow• The key is a long application of force• The throw is finished by a meaningful snap of the wrist• The fingers should follow through in an outward motion
(thumb down)
Delivery RecoveryThis is termed as the follow
through or reverse
4
Recovery Action• This is a natural movement that results
from the throwers technique• In the reverse the right leg can shift to
the frontthe front• The right foot can brace against the
toeboard• The thrower should not watch the shot
in the recovery
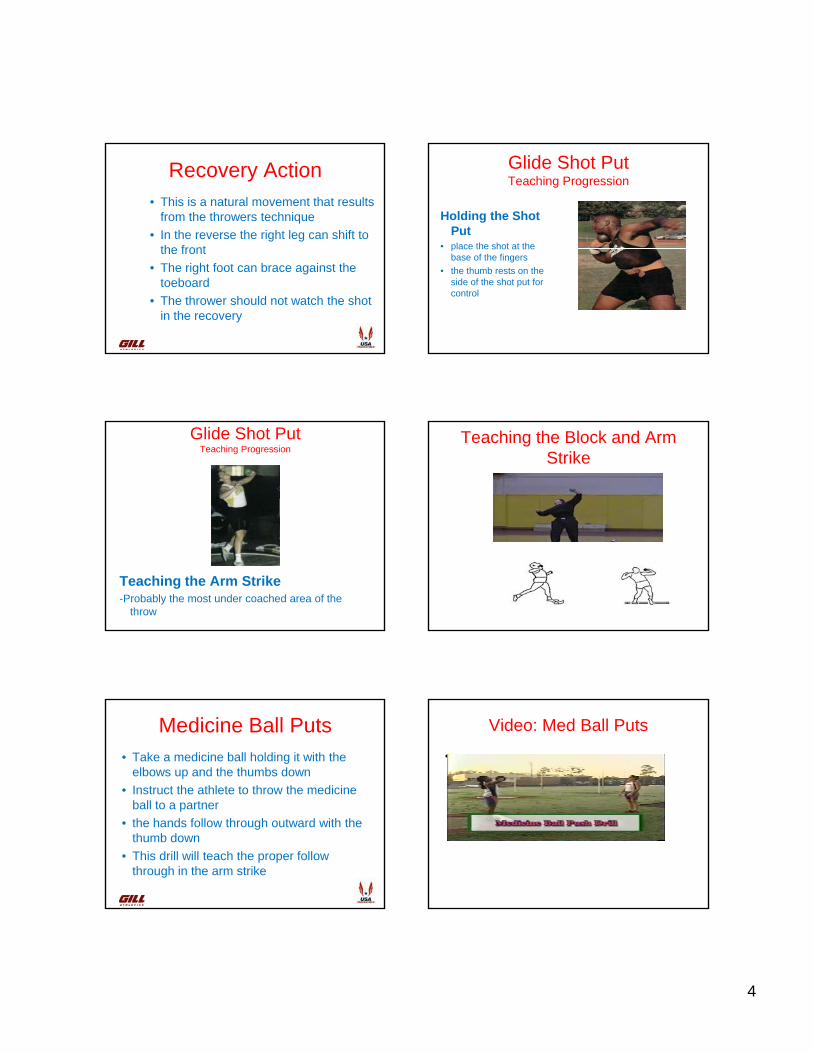
Glide Shot PutTeaching Progression
Holding the Shot Put
• place the shot at theplace the shot at the base of the fingers
• the thumb rests on the side of the shot put for control
Glide Shot PutTeaching Progression
Teaching the Arm Strike-Probably the most under coached area of the
throw
Teaching the Block and Arm Strike
Medicine Ball Puts• Take a medicine ball holding it with the
elbows up and the thumbs down• Instruct the athlete to throw the medicine
ball to a partnerball to a partner• the hands follow through outward with the
thumb down• This drill will teach the proper follow
through in the arm strike
Video: Med Ball Puts
•
5
Partner “High Fives”• Have the athlete face a partner
with the throwing hand off of the shoulder
• The left arm is flexed at the midline of the body
• The partner will hold his hand in the air creating a target for thethe air creating a target for the partner
• The athlete strikes the partners hand with their throwing hand
• It is important to stress the proper alignment of the arm with thumb down and elbow up
Partner High Fives
Video:Partner High Fives Throws on the Knees
• This series of Drills is designed to get the athlete comfortable with the arm strike
Throws on the Knees (Action)• The shot is off The neck just above the right shoulder• The left arm is flexed in front of the athlete as they
face the landing area• The athlete puts the shot as described in previous
drillsdrills
Throws on the Knees (Action)• When this is
mastered add the block by pulling the arm into the body
6
Throws on the Knees (Action)
• With the block have the athlete turn clockwise to add torque to the movement
Teaching the Power PositionThe Stance
• Right toe - left instep relationship feet shoulderrelationship feet shoulder width apart
• Be fairly upright at first• Keep the head up and
the midsection firm• Most of the weight will be
on the back leg (right Leg)
Teaching the Lower Body Action
Hip Pop Drill• Assume the power
position• Turn the knee in on the
drive leg toward the direction of the throw
• Keep the shoulders closed and the weight back on the right
• Partner can hold the free arm to help the athlete stay back
Hip Pop Drill
Hip Pop Drill Glide to Hip Pop
7
Executing the Standing Throw (Lower Body Action)
• Assume the power position• Throw is started by the right knee turning in the
direction of the throw• Turning of the hip and knee ultimately causesTurning of the hip and knee ultimately causes
the turning of the foot• Hips are driven around and up• Body weight is driven from the right leg over the
left leg
video
Video Teaching the Movement Across the Ring
The Step Back Drill• Start in the same position as in the glide• Perform a short step with the right
Th t ith th l ft i t th iti• Then step with the left into the power position • This is a rhythmic movement
The “A” Drill• Athlete assumes the glide start and unseats• Majority of weight is on the right heel• Left Leg extends toward the toeboard• This extension will create a body position
similar to the letter ‘A”.
8
The Med Ball Push Drill• Assume the glide start position• Medicine ball is placed behind left leg• Left leg is extended back toward the toeboard• Left leg strikes the medicine ball• This helps the athlete feel the left leg action
The “Mini-glide” Drill• Perform a short glide of about 6 inches• Drill is designed to feel the feet hitting at the same
time• The shortened version is great for ‘weak’ athletes• As the shortened version feels comfortable,
lengthen the glide
Partner Glide• Assume the glide start position• Partner holds left arm• As the glide begins the partner walks with the athlete• Partner holding the free arm helps the athlete keep the
The right handed athlete grips the handle with the left hand at mid-finger.The palm of the right hand is placed over the left with the fingers closed over the left.A leather glove with open fingers is worn on the left hand to protect the fingers.
GripHammer Throw Coaching
Geometric Reference Points
Feet are shoulder width apart with slight knee bend.Hammer is placed behind near right foot. Turn the right shoulder with the arms straight and grip the hammer.The vertical and horizontal lines mark the fixed turning
Starting Position Stance
access of the throw.
The winds are designed to set the hammer in motion and setup the rhythm of the throw.
The Winds
Two winds are commonly performed in the hammer.
In teaching the winds it is best to use a medicine ball on a rope.
3
The WindsSweep-Curl-Form the Window-Twist.Sweep hammer across front, looking slightly right of the ball. Do not let hands pass the midline of body.
As ball passes in front of body, curl left arm and form a window in front of the body.
L f i l i id d i i d ith b d i htLegs are fairly rigid during winds with body weight shifting opposite the ball.
As hammer sweeps across, up and around the left, legs and hips must not sway to right or drop.
Do not try to reach back overhead. Arms form a window in front of the body.
As hammer sweeps around to the back, hands clear top center of head by a few inches.
Twist right shoulder and torso to catch the implement behind.
As right elbow draws back, left upper arm brushes in close to face and chest
Winds continued
In wind 2 sweep hammer through its low point with both arms fully extended before hammer reaches 0 degrees.
Plane of hammer must reach well to the left as hammer orbits around left foot.
Winds continued
As hands clear the top of head, they must now be to the left of the top of thrower’s head, extending the sweeping radius and pull of the hammer.
Setting up the Low Point
• Hammer trajectory during the winds
• Low point first wind• Low point secondLow point second
wind• Low point entry
This is how the hammer thrower travels across the ring and creates acceleration of the hammer.
The thrower, the hammer and its rising orbit move in relaxed rhythm as
The Turns
rising orbit move in relaxed rhythm as a unified system.
The action of the left foot is heel-side-toe while the right pushes off of the ball of the foot.
The left leg remains bent throughout the turns. Most advanced throwers perform a 3 or 4 turn throw.
Turning Action - Video
4
On entry into turn 1, Stroke the hammer faster from the high point of wind 2 with the shoulders turned less to the right than on wind 1 in order to assure that the low point hits 0 degrees
Entry into the Turns
low point hits 0 degrees.
Drop from an erect to a bent knee position as hammer drops from 180 degrees.
Relax the shoulders and arms in this smooth, sweeping motion.
The Turns Single Support Phase
Stroke hammer well out and around rotating left foot. Counter pull of hammer with hips. Relax arms and shoulders. Right foot pushes off at about 90 degrees.
Let hammer feel as if it’s leading the system of thrower and hammer around to 180180.
Keep both feet rotating in unison, knees bent. Keep chin raised and line of vision in line with and above hammer. Drive right foot up over left ankle, keep knees closely together.
Rotating speed of left foot and quickness of right foot landing reduce throw’s single support phase and give hip axis a slight lead over shoulder axis for stroking hammer in power phase.
Turns continued
Double Support Work PhaseAs right foot lands, drop to bent left knee for the catch. Feel torque between hip and shoulder axis.
On landing, right foot should be facing 270 degrees. Immediately rotate both feet. Keep line of vision bisecting triangle formed by two straight arms.
This is where the hammer is mostThis is where the hammer is most accelerated.
Counter the pull of ball by shifting left and back against it.
As gravity accelerates ball downward to 0 degrees, the rotating action of feet, hips, arms and torso in the work phase adds to acceleration of ball out and around body.
At 0 degrees sit back against opposite pull of hammer with relaxed arms.
The hammer is worked with the lower body and torso with arms long and relaxed.
The work phase occurs between 270 and just past 0 degrees.
Counter with torso and back of head against hammer's opposite pull Line of
Turns continued single support 2
against hammer s opposite pull. Line of a vision remains in the triangle above the ball. Do not pull away from hammer with left shoulder or head.
As hammer passes 90 degrees, drive right foot up over left ankle, keeping knees closely together.
Maintain line of vision above the hammer bisecting the triangle.
Turns continued (work phase 2)
As right foot lands, counter back to bent left leg and to the right of the center point of the hammer's orbit (Note the vertical line in image). The line of vision remains above and ideally slightly behind the hammer.
The orbit of the hammer steepens throughout the throw.
The low point of the orbit should occur at 0 degrees. Keep the line of vision bisecting the triangle of the arms without looking down at the hammer.
g y
Work Phase• This is where the hammer is
accelerated.• The work phase occurs
between 270 degrees and 90 degrees.
• The hammer is worked with• The hammer is worked with the lower body and torso.
• The action of the work phase is to accelerate the ball out and around the body.
• The athlete will increase the counter during each successive turn
5
The Counter Orbits
• This represents the trajectory of the hammer.
• The orbit begins relatively flat in the winds and steepens throughout the throwand steepens throughout the throw.
• The low point of the orbit should occur in front of the athlete or at 0 degrees.
• The highpoint of the orbit should occur behind the athlete or at 180 degrees.
OrbitThe release is the culmination of an accelerating orbit, resulting from 3 technically the same, though faster, work phases with both legs driving up and a blocking action at the end.
Release
At moment of release face 90 degrees blocking on left leg, head and shoulders way back, line a vision straight up.
Release continues with both feet rotating into follow-through around another quarter turn with head way back and hands high.
Release follow-through
Arms and hands finish high. Regain balance in the center of the throw
The Release
6
The Full Technique Teaching Progression for the Hammer Throw
• This is how the hammer thrower creates force and travels across the ring.
• The action of the left foot is heel-side-toe while the right pushes off of the ball of the g pfoot.
• The left leg remains bent throughout the turns.
• Most advanced throwers perform a 3 or 4 turn throw.
Turning Action - Video
Using a stick, an aluminum bat, or a broom, the coach
demonstrates slowly, in segmented moves, a series of 3 or
more technically correct, complete 360 degree turns on the
heel of the left foot and ball of the right foot with knees tightly
Teaching the Turns
together and the right foot lifting over the left ankle to touch
down at the completion of each turn.
Then the thrower will learn one turn in segments until he
masters the positions to be able to complete one correct
heel-toe turn, followed by a series of heel-toe turns.
Draw with chalk a bisecting line from 0 to 180 degrees and a series of linesabout 6” apart on an angular arc behind the thrower.
Grip a bat or bar like a golf club and stand straddling the line with back to throwing area.
Teaching the Turn in Segments
Keep head erect and learn to turn without looking down at feet or the ground. The bat should be extended from straight arms out to the right side a little below knee height.
Turning on left heel and ball of right foot, push the bat around past 0 degrees to 90 degrees at about shoulder level.
7
As bat is pushed to 90 degrees, step with right foot to a spot three inches in front of turned left foot.
Completing this step will bring body-weight from left heel down on the ball of left foot. In a progression of identical 6-inch longer right foot steps, complete a full 360 degree heel toe turn.
Teaching the Turn continued
In completing each of these stepping segments of a full turn, keep knees bent and closely together.
In the steps from 180 degrees to completion of the turn, step over left ankle, and stay balanced primarily on rotating left foot and bent left leg.
One Complete TurnFrom preliminary stance, turning on heel of left foot and ball of right foot, push the broom past 0 degrees until facing 90 degrees.
At this point lift right leg and continue to turn on the side of left foot, letting the broom lead the system as it risesthe broom lead the system as it rises to 180 degrees at head height.
The right leg is kept close to left with knees almost touching.
The left leg continues to turn on the ball of the foot with the right leg stepping over the left ankle for a touch down on the ball of the right foot facing 270 degrees.
The Position DrillsTeaching the Turn Progression
• The turn can be taught in three parts• Position 1-Turn to 90 degreesg• Position 2-Step to 270 degrees• Position 3-Pivot back to 0 degrees
Starting Position• Base slightly wider
than shoulder width• Assume a quarter
squat positionF t i l i f t• Form triangle in front of the body with weight evenly distributed
• Eyes to the horizon and the chin is up
Teaching the Turns (Step One)
• Have the thrower assume a quarter squat position with both arms out.
• Have the thrower put his weight on the left heel and the ball of the right footheel and the ball of the right foot.– Turn on the left heel until the athlete is facing
180 degrees.• Have the athlete pick up the right and turn
and walk a couple of steps.
Teaching the Turns (Step Two)
• Assuming the preliminary stance, again turn on the left heel until the athlete is facing 90 degrees. This is position 1.
• At this point in the throw the athlete lifts• At this point in the throw the athlete lifts the right leg and continues to turn on the side of the left foot.
• The right leg is kept close to the left with the knees almost touching.
8
Position 1• Right handed thrower
makes a quarter turn to the left
• Pivot on the ball of the right foot and the heel of th d i fl d l ft f tthe dorsi-flexed left foot
• The majority of the weight is on the right leg
• Arms form a 90 degree angle from the body
• The eyes are to the horizon
Position 2• The left leg will rotate on
the side of foot to the ball of the foot
• The right leg will step over the left with tight shins and knees
• The right leg will step 2-4 inches behind the left foot
• The majority of the body weight is on the left leg
• The hips will be facing 270 degrees and the upper body should be facing 225 degrees
Position 3• The athlete will pivot on
the ball of the feet until the weight is back on the left heel
• The hips will moveThe hips will move forward and the shoulders and chin will move away from the ball
• The weight will be evenly distributed and the core will be firm
Full Position Drill Video
On cement slab, grip hammer as at start of winds.
With knees slightly bent, shoulders relaxed, and both arms straight, begin to walk in place in a circle on balls of close together feet.
The walk-around drill with turns and release:
g
The hammer, trailing behind, rolls over the surface inscribing a circle.
By completion of one revolution, the hammer will take off the ground like a rising airplane.
With long straight relaxed arms, erect head, and line of vision over top of the hammer, increase walking speed on balls of feet, rotating torso in place in circles, keeping flight of hammer low and flat.
Hips, shoulders and head should be li d ith h N d i
The walk-around drill continued:
aligned with hammer. No dragging hammer behind.
Turning faster, feel increasing pull of hammer. Turn as a total system,
Counter against pull by straightening back and bending knees.
Beginning with 3 or 4 walk-arounds add series of heel-toe turns and correct release.
9
Teaching the Winds Teaching the Winds
• Sweep-Curl-Form the Window-Twist.– The thrower sweeps the ball in front of him,
curls the left arm when the ball passes in front of the body; and then twists the right shoulder y; gand torso to catch the implement behind him.
– The arms form a window in front of the body.– The thrower should look slightly right of the
ball.
The Winds (Continued)
– The legs are fairly rigid during the winds with the body weight shifting opposite the ball.
– The shoulders and arms are relaxed in this smooth , sweeping motion.p g
– In teaching the winds it is best to use a medicine ball on a rope.
– The thrower should not let the hands pass the midline of the body and should not try to reach back overhead.
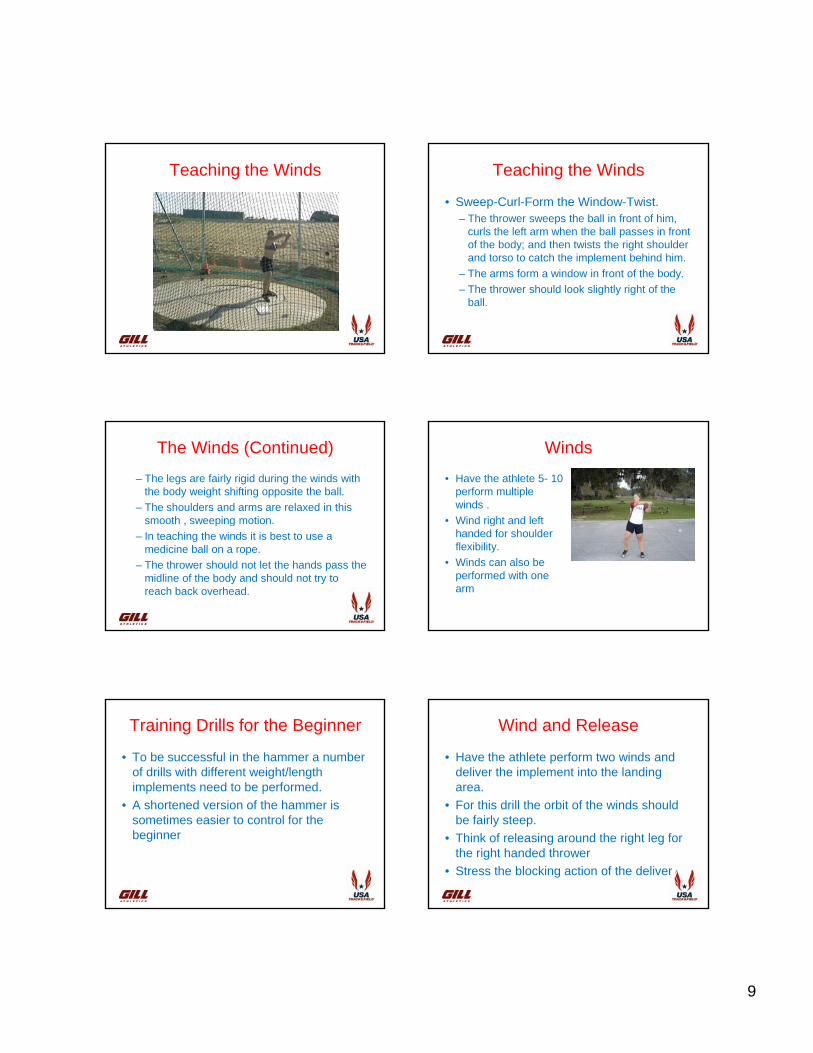
Winds
• Have the athlete 5- 10 perform multiple winds .
• Wind right and left ghanded for shoulder flexibility.
• Winds can also be performed with one arm
Training Drills for the Beginner
• To be successful in the hammer a number of drills with different weight/length implements need to be performed.
• A shortened version of the hammer is• A shortened version of the hammer is sometimes easier to control for the beginner
Wind and Release
• Have the athlete perform two winds and deliver the implement into the landing area.
• For this drill the orbit of the winds should• For this drill the orbit of the winds should be fairly steep.
• Think of releasing around the right leg for the right handed thrower
• Stress the blocking action of the delivery.
10
1 Wind 1 Turn Drill
• Have the athlete perform a wind followed by a turn followed by another wind and a turn.
• This warm up drill is great for balance• This warm-up drill is great for balance, core strength and working on the entry into the turn.
• 3-5 sets are an ideal warm-up.
1 Wind 2 Turn Drill
• Have the athlete perform a wind followed by a two turns followed by another wind and a two turns.
• This warm up drill is great for balance• This warm-up drill is great for balance, core strength and working on the entry into the turn.
• 3-5 sets are an ideal warm-up.
2 Winds-1-Turn and Release
• Have the athlete perform two winds, a turn and deliver the implement into the landing area.
• This drill helps the athlete perfect the p prelease with the turn providing a little momentum.
• Remember to wind a little steeper in this drill.
• Think of releasing around the right leg
2 Winds-2-Turns and Release
• Have the athlete perform two winds, two turns and deliver the implement into the landing area.
• This drill is actually an excellent way for• This drill is actually an excellent way for the beginner to throw in competition.
1
The Javelin ThrowThe Javelin Throw
USATF Level 2 School -Youth SpecializationSacramento, 1-5 August, 2010
• The grip is relaxed to lessen the tension in the arm and the shoulders
Finnish Grip• The most popular grip• Javelin is held horizontally across the palm
of the hand• Index finger is rolled around the javelin
b th bi diabove the binding• Second finger is wrapped behind the
binding of the javelin• Other fingers are wrapped around the
binding
Finnish Grip Finnish Grip
2
Fork Grip
• Javelin is held horizontally across the palm of the hand
• Javelin rests between the index finger gand the second finger
• The other fingers are wrapped around the binding
Fork Grip
Fork Grip American Grip
• Javelin is held horizontally across the palm of the hand
• Index finger is wrapped around behind the binding of the javelin
• The other fingers are wrapped around the binding
American Grip American Grip
3
Basic Technique Video: Javelin
Carry
• Javelin is held horizontally with the palm up in an over the shoulder position above the phead
• Point of the javelin is usually level but this can vary
Carry
Approach Run• Athlete is in an erect position at a check
mark on the runway taking initial steps similar to the approach of a jumper
• Athlete builds acceleration while running t d h k k thto a second check mark on the runway
• Approach run can vary from 6 to 12 strides
• Beginner starts with fewer strides
Approach Run
4
Approach Run Withdrawal
• As the thrower hits his check mark with the left foot the thrower takes the javelin backward
• Extend the throwing arm backwards keeping theExtend the throwing arm backwards keeping the palm up and keeping the implement aligned with the shoulder
• Run away from the implement• This is referred to as the transition phase• Point of the javelin is near the head
Withdrawal Pre-Throwing Stride (Cross Steps)
• Following the withdrawal the thrower will begin the step pattern of the javelin
• As the thrower completes the withdrawal, they will be on the right legy g g
• The hip position is variable based on the flexibility of the athlete– For orientation in feeling torque we will say the hips
will face the right side and the javelin will face the throwing direction
Cross Steps Performing the Pre-throwing Stride
• In a rhythmic manner, the legs move out ahead of the hips with the right leg stepping in front of the left leg
• There is a tilted axis• The right leg is picked up high similar
to a triple jump bound
5
Performing the Pre-throwing Stride (con’t)
• Upon touching the ground the right leg will bend, as in a ‘soft step’ to allow the COG to continue moving
• The left leg should swing through prior to• The left leg should swing through prior to the right leg touchdown
• Starting with the left count each step: 1--2--3--4-5– the space between the final two steps is
smaller as this is the plant
Cross Steps
Cross Steps Video The Plant
Power Position
• The power position of the javelin differs slightly from the shot put and discus
• The right leg faces the throwing direction at 45 degreesat 45 degrees
• The left leg is extended landing heel first with a slight flex
Power Position
6
“C” Position Bow Tension
Throwing Action
• Initiating the throw
• The arm action
• The release
Initiating the Throw
• As the COG passes over the right foot there is push/rotation with the right footright foot
• The right leg drive precedes a firm planting of the left leg
Initiating the Throw Arm Action
• The palm is up as the elbow comes through high over the shoulder line
• The throwing shoulder is like a whip g phandle
• The release occurs near the front, as high as possible
7
Arm Action Release
• The release angle is approximately 27-35 degrees
• The throwing hand rotates right after the release achieving a thumb down position
• Avoid the ‘baseball follow through’
Release Release
Full Technique Teaching Progressions for the Javelin Throw
• Grip• Arm Action• Power Position• 3 and 5 Step Throws• Walk-in Throws• Full Approach
8
Teaching Progressions for the Javelin Throw
• Grip• Arm Action
P P iti• Power Position• 3 and 5 Step Throws• Walk-in Throws• Full Approach
Teaching the Grip
• The javelin should rest across the palm • The javelin should be held like a wet bar of
soapE i t ith th diff t i b• Experiment with the different grips by walking the field
• Remember the Finnish grip is preferred
Teaching the Grip Teaching the Arm Action
• Have the athlete take the implement overhead and throw into the ground about 3 to 5 feet in front of the athlete
• Keep the throws short emphasizing pulling through the point of the implement
Teaching the Arm Action (con’t)
• As the athlete progresses draw the javelin back and perform short throws of 10 to 15 feet into the ground
• Stress keeping the elbow high and following through over the head
Stabs
9
Video: Short throws Teaching the Power Position
• Assume the power position with the right leg at 45 degrees facing the direction of the throw
• The javelin is drawn back with the palm up, the head facing the front and the hips and shoulders to the side
The Standing Throw
• Keeping the weight on the right, initiate the action by slightly lifting the left leg
• Drive the right leg by pivoting on the ball of the foot and then block the left foot
• The hips will rotate to the front with the shoulder, arm and hand to follow
Standing Throw
Three Step Throws
• Start with the right leg crossed over the left, with the javelin drawn back and with most of the weight on the left f tfoot
• Starting with the left, the foot pattern is left-right-left
• This short approach throw helps emphasize the plant and the power position
Video: 3 Step
10
Five Step Throws
• Start with right leg crossed over the left, with the javelin drawn back and with most of the weight on the left foot
• Starting with the left the foot pattern• Starting with the left, the foot pattern is left-right-left-right-left or 1--2--3--4-5
• This is the best way to teach pre-throwing strides
Video: 5 Step
Walk-in Throws
• With the implement drawn back the athlete performs walking cross over steps to a check pointp p
• At the check point the athlete accelerates into a five step throw
Walk-in Throws
Full Throws Training Drills
• The javelin thrower is like a baseball pitcher - REST is essential
• Training drills are the dominant part of the training program
• Athletes should only throw 2 to 3 times per week
11
Medicine Balls (General)
• These drills are designed to increase shoulder and torso flexibility and strength
• Examples:
• overhead throws• seated side throws• v-up throw• fish out of water
Medicine Ball
Medicine Balls (Specific)• These drills are preformed with the
medicine ball held in both hands overhead and can be done against a wall or net