1 A Human Gait Institute Publication The Dynamic Bracing Solutions (DBS) Handbook Information and Tips for Wearers from First Steps to Mastery By Marny Eulberg, M.D. And Margaret C. Hinman, Ed.S. Copyright Human Gait Institute 2013 Revised January 2013
Transcript
1
A Human Gait Institute Publication
The Dynamic Bracing Solutions (DBS) Handbook
Information and Tips for Wearers
from First Steps to Mastery
By
Marny Eulberg, M.D. And
Margaret C. Hinman, Ed.S.
Copyright Human Gait Institute 2013 Revised January 2013
The Dynamic Bracing Solutions (DBS) System ..............................................................8 Definitions – It sounded good at the time, but what the heck did that orthotist mean when saying? (Plain English, please!) ..........................................10 Some Benefits of the DBS Brace .....................................................................................11 Factors to Consider When Making the Decision to Get a DBS Brace ........................12 Expectations and Reality .................................................................................................14 About Learning ................................................................................................................15 Trust ..................................................................................................................................16
Pre–Preparation for the DBS Brace ...............................................................................19 Selecting a Physical Therapist ........................................................................................20 Some Helpful Practice Hints ...........................................................................................21 Permission to Follow Rules . . . and Not Follow Rules .................................................22 Aches and Pains ...............................................................................................................23 Skin Issues ........................................................................................................................25 Fitting and Refitting ........................................................................................................25
Repairs ..............................................................................................................................35 The Care and Feeding of a DBS Brace ..........................................................................35 Supplemental Equipment for Training Success ............................................................36 Driving with a Right Leg DBS ........................................................................................38 Navigating Transportation Safety Administration (TSA) and Other Security Checkpoints ...............................................................................................39 Carrying Stuff ..................................................................................................................40 Going Up and Down Hills and/or Stairs ……………………………………………...?U
Beyond Basics to Mastery ...............................................................................................41 Networking (You don’t need to do this alone!) .............................................................41
General Insurance Information ......................................................................................42 Theft and Loss ..................................................................................................................43
Insurance Reimbursement for your DBS Brace…………………………………….. 44
Notes on Filing a Medicare Claim ..................................................................................46 !
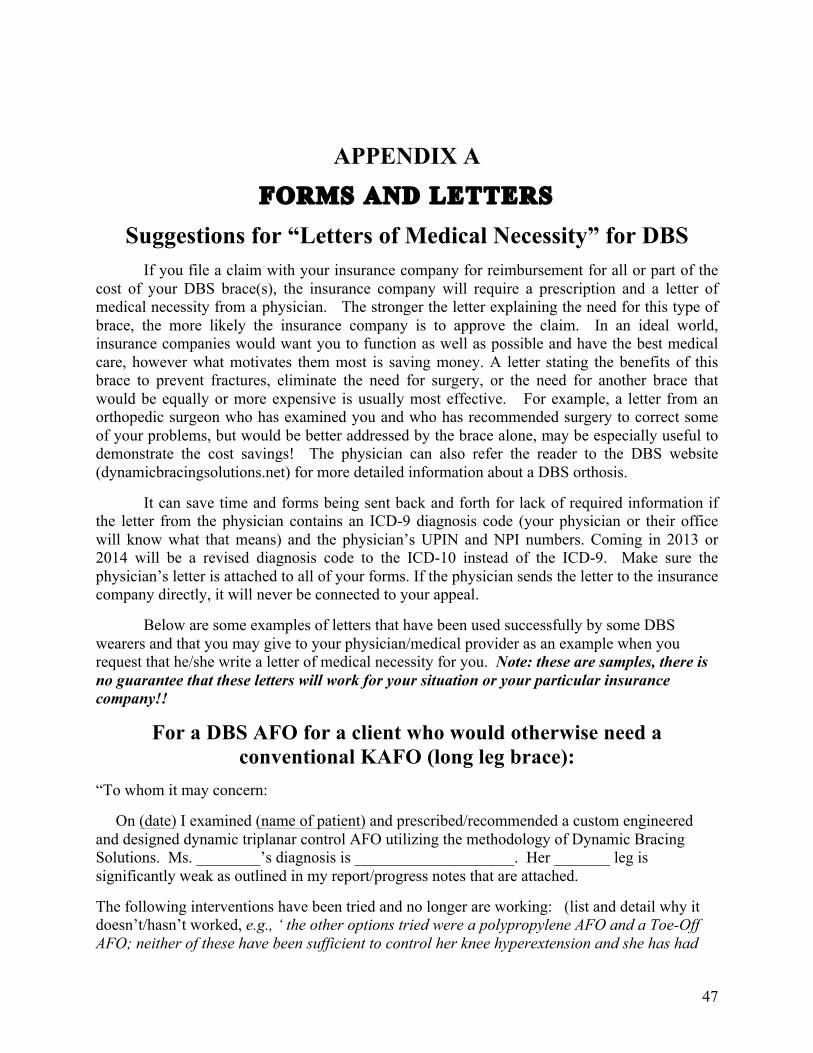
Suggestions for “Letters of Medical Necessity” for DBS .............................................47 For a DBS AFO for a client who would otherwise need a conventional KAFO (long leg brace) .......................................................................................47
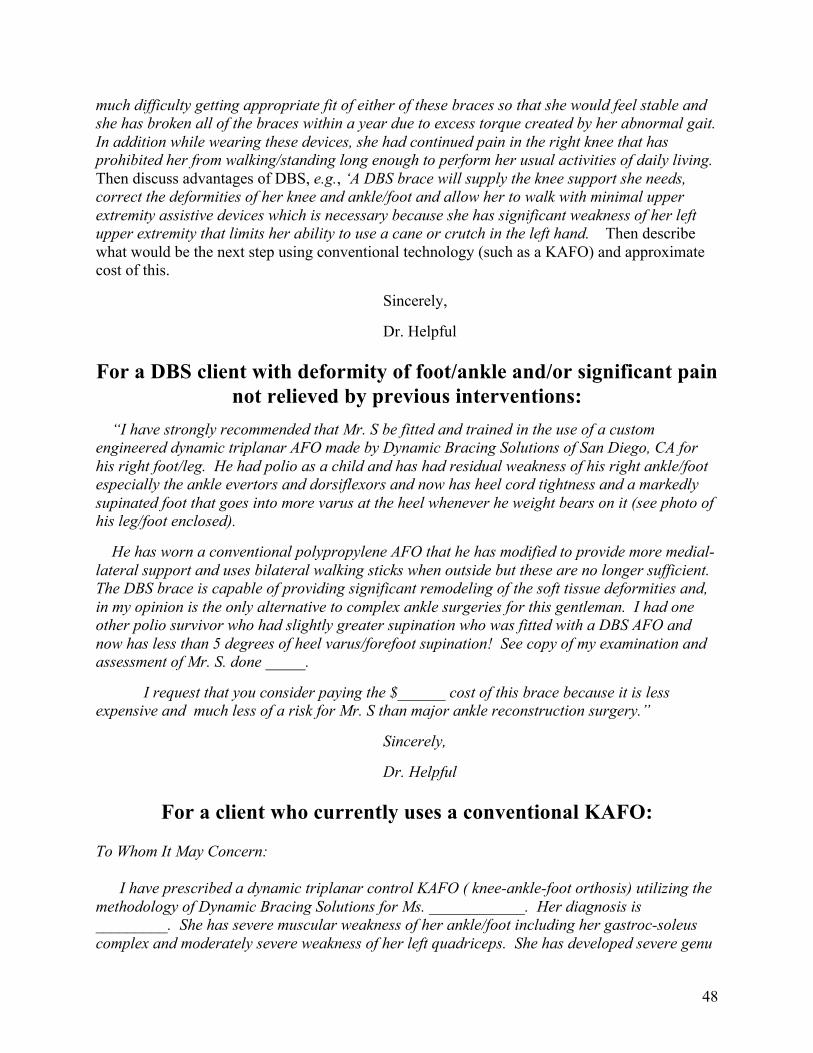
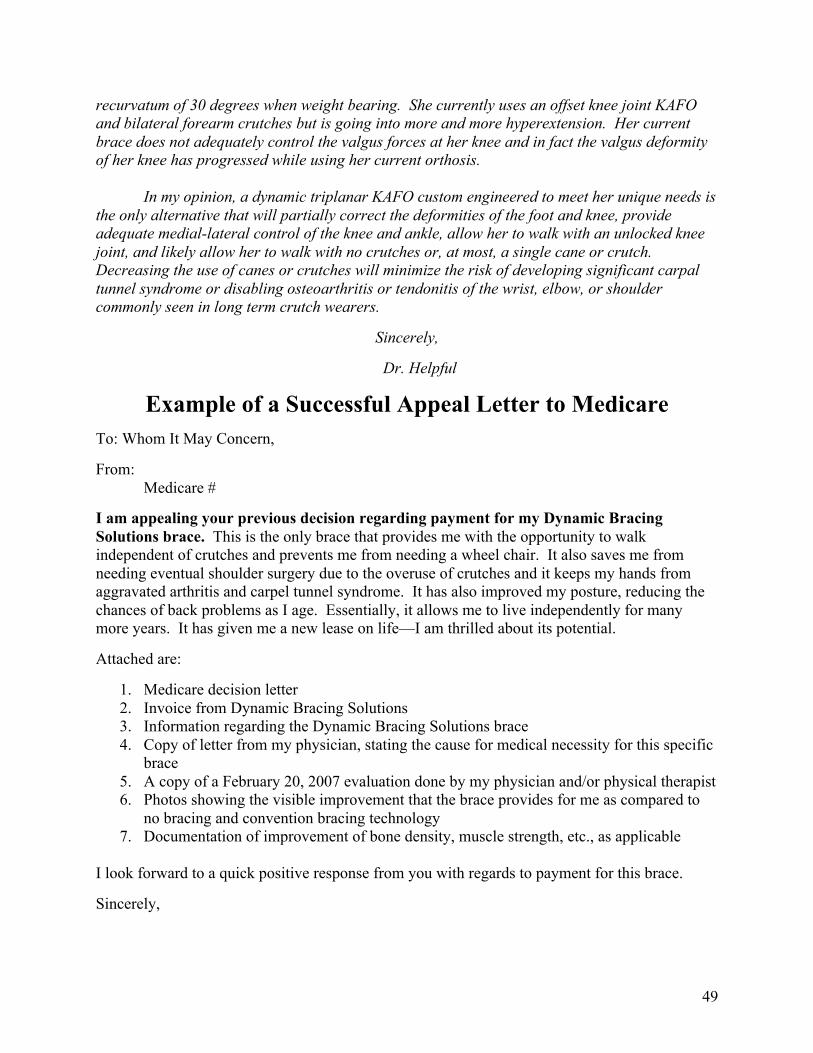
For a DBS client with deformity of foot/ankle and/or significant pain not relieved by previous interventions .............................................................48 For a client who currently uses a conventional KAFO ........................................48 Example of an Appeal Letter to Medicare ....................................................................49 Invoices and Reimbursement Codes…………………………………………………. 50
Goals for DBS Wearers and Physical Therapists .........................................................51 Suggested Pre-DBS assessment and training …………………………………………51 The Learning Processes in Physical Therapy………………………………………... 51 Considerations for Physical Therapists………………………………………………. 52 APPENDIX C – Shoes and SACH Heel Measurements ....................................................53
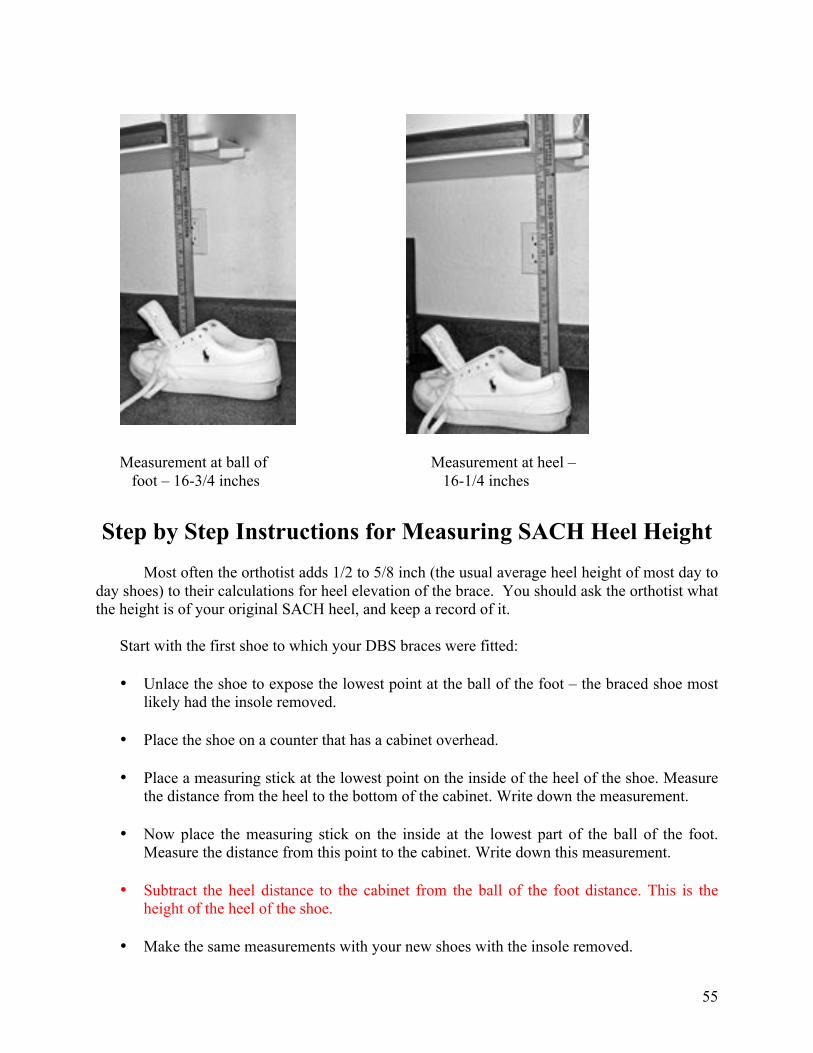
Guidelines for Choosing Shoes for DBS Braces ...........................................................53 Measuring for the Appropriate Height of the SACH Heel .........................................54 Step by Step Instructions for Measuring for SACH Heel Height ..............................55 A Word about Density of SACH Heels .........................................................................56
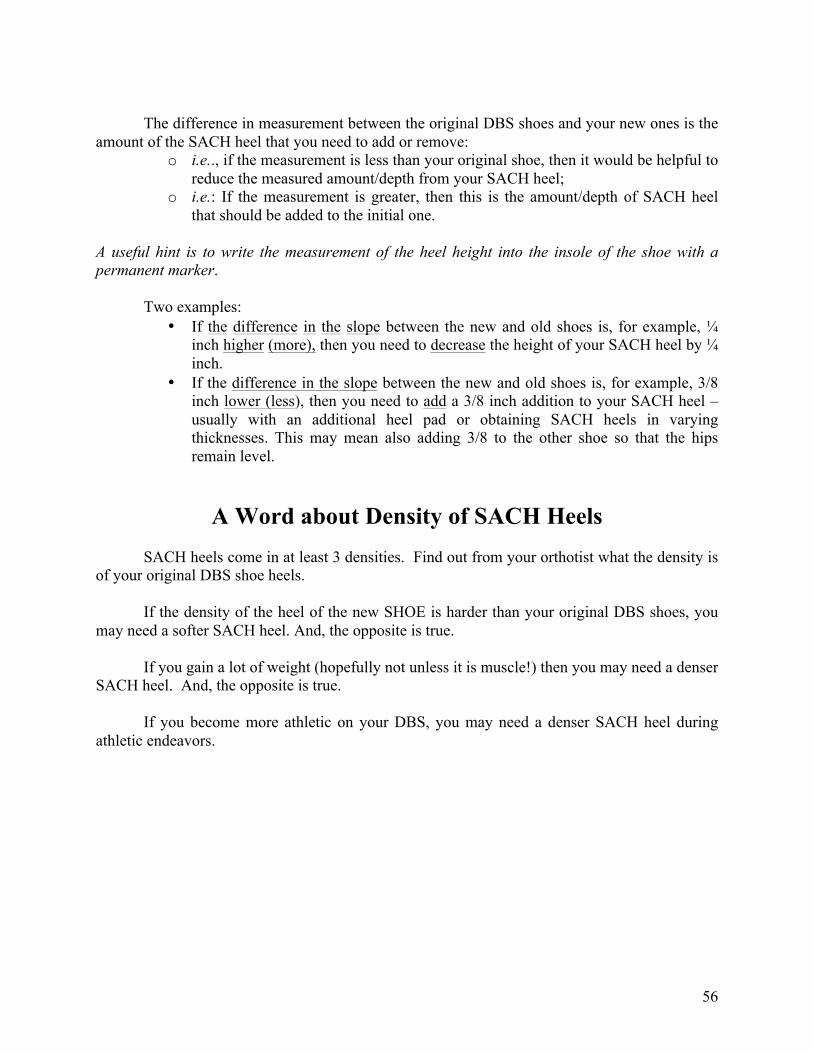
Hallway railings and parallel bars .................................................................................57 !!!!!!!!!!!!!!!!Installing bars in a hallway .....................................................................................57
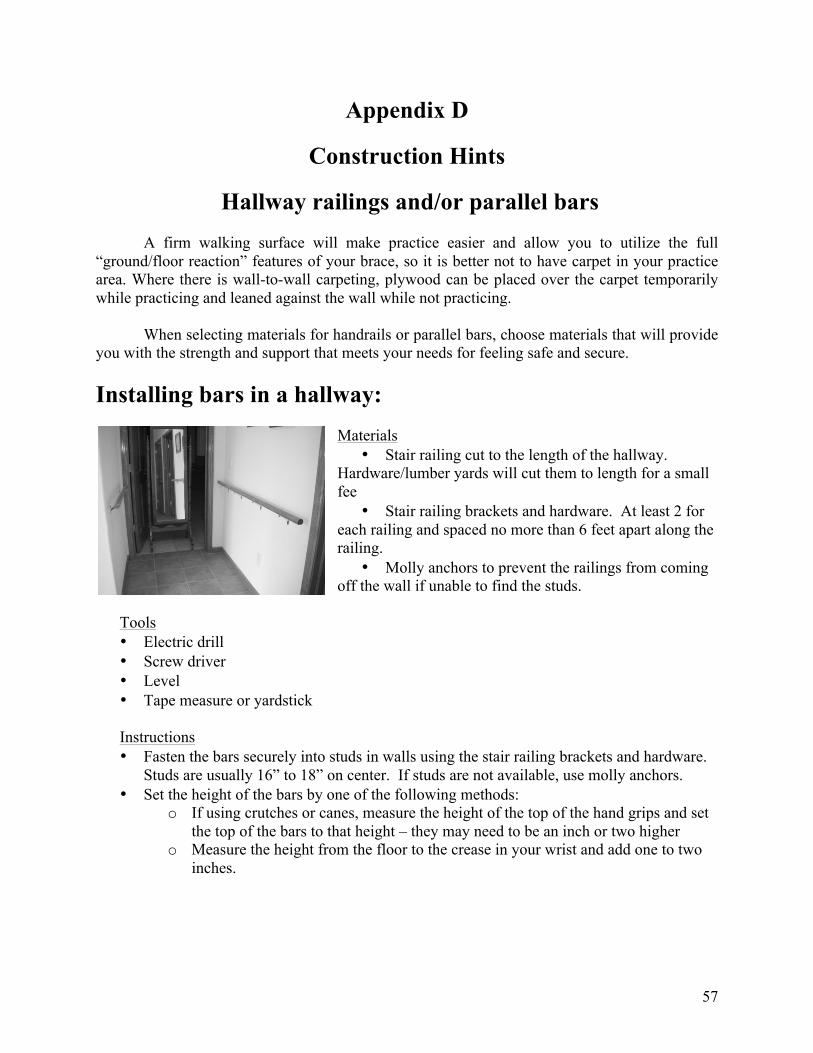
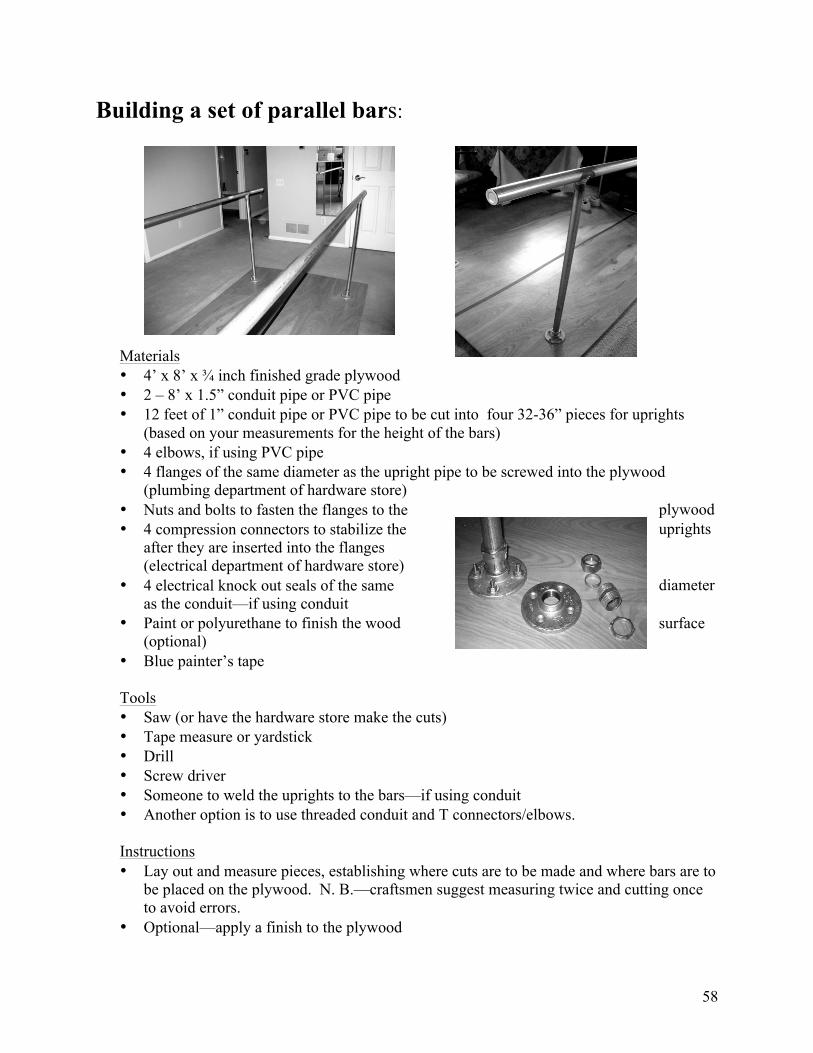
Building a set of parallel bars .................................................................................58 Hints for making a custom carrying bag .......................................................................59
Also, incorporated into the design is a dynamic component that allows the wearer to more efficiently use body motion, and ground force resistance to improve gait and balance while walking, and to increase endurance and balance while standing. The mechanical principles that govern this design make it so effective that even some traditional KAFO (knee/ankle/foot orthotic or long leg brace) wearers, as well as those who use AFOs (ankle/foot orthotic or short leg brace), may be able to be fitted with an AFO, thus reducing the need for the long leg brace.
8
Marmaduke Loke, CPO, and Jean-Paul Neilsen, CP, developed this system in the 1990s and have custom designed and custom engineered bracing for persons with polio/post-polio problems, spinal cord injuries, and other neuromuscular disorders. Contact information: Marmaduke Loke, CPO – Dynamic Bracing Solutions — 6092 Innovation Way, Carlsbad, CA 92009-1741; Mailing address: P.O. Box 235267, Encinitas, CA 92023; Telephone: 760-814-8475 — E-mail: [email protected] -- www.dynamicbracingsolutions.net
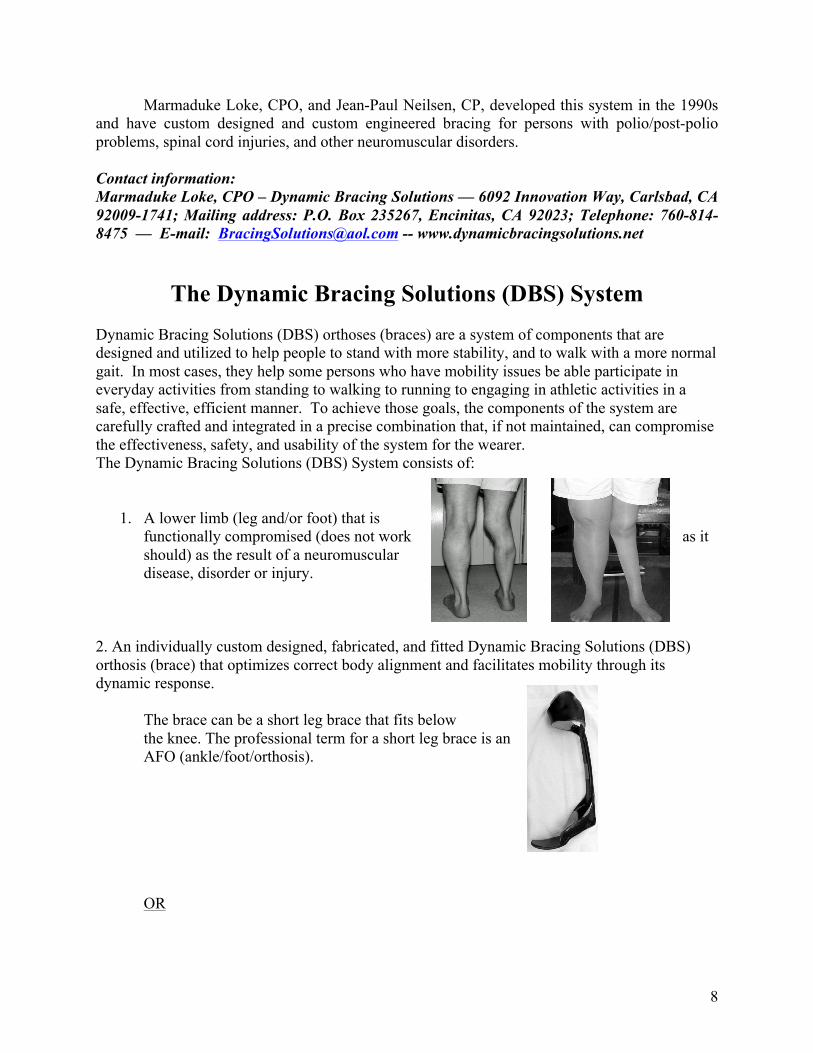
The Dynamic Bracing Solutions (DBS) System Dynamic Bracing Solutions (DBS) orthoses (braces) are a system of components that are designed and utilized to help people to stand with more stability, and to walk with a more normal gait. In most cases, they help some persons who have mobility issues be able participate in everyday activities from standing to walking to running to engaging in athletic activities in a safe, effective, efficient manner. To achieve those goals, the components of the system are carefully crafted and integrated in a precise combination that, if not maintained, can compromise the effectiveness, safety, and usability of the system for the wearer. The Dynamic Bracing Solutions (DBS) System consists of:
1. A lower limb (leg and/or foot) that is functionally compromised (does not work as it should) as the result of a neuromuscular disease, disorder or injury.
2. An individually custom designed, fabricated, and fitted Dynamic Bracing Solutions (DBS) orthosis (brace) that optimizes correct body alignment and facilitates mobility through its dynamic response.
The brace can be a short leg brace that fits below the knee. The professional term for a short leg brace is an AFO (ankle/foot/orthosis).
OR
9
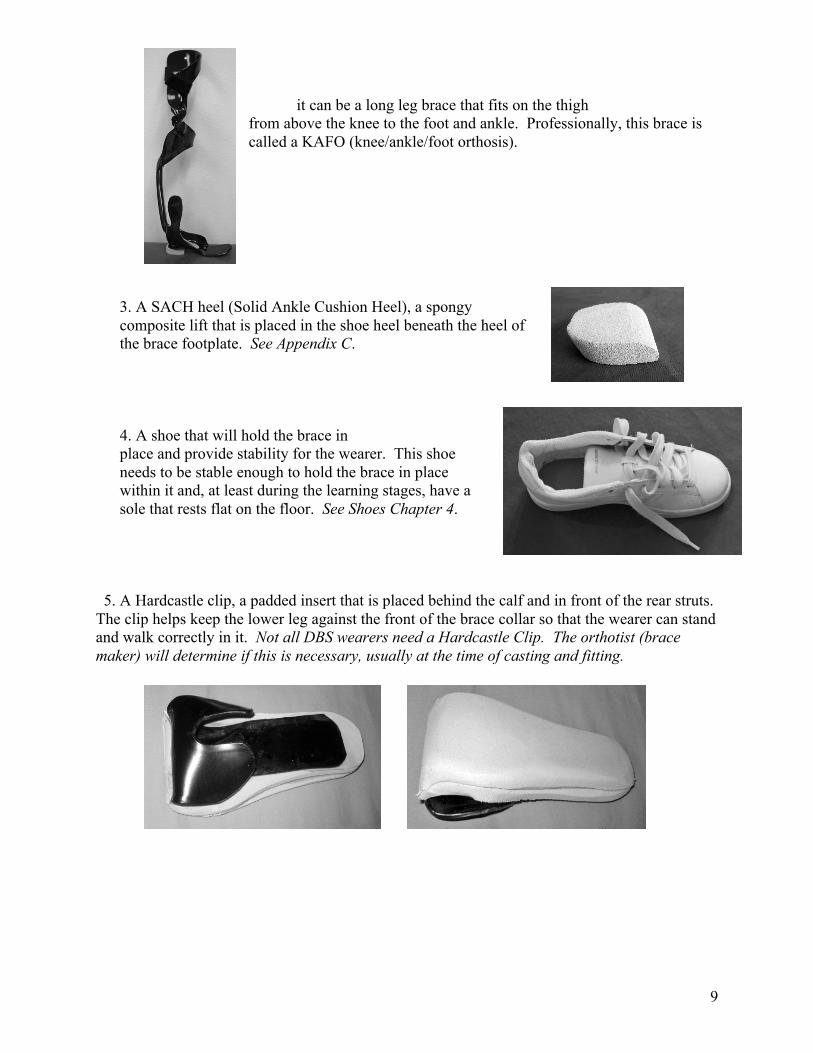
it can be a long leg brace that fits on the thigh from above the knee to the foot and ankle. Professionally, this brace is called a KAFO (knee/ankle/foot orthosis).
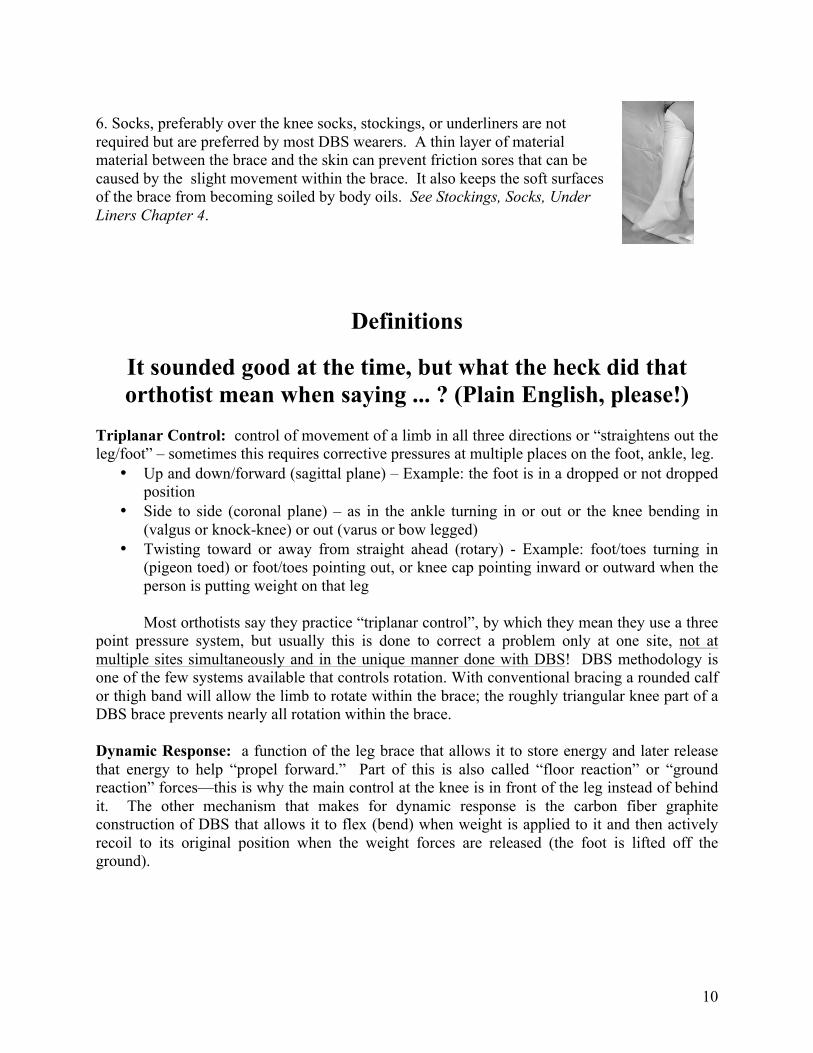
3. A SACH heel (Solid Ankle Cushion Heel), a spongy composite lift that is placed in the shoe heel beneath the heel of the brace footplate. See Appendix C.
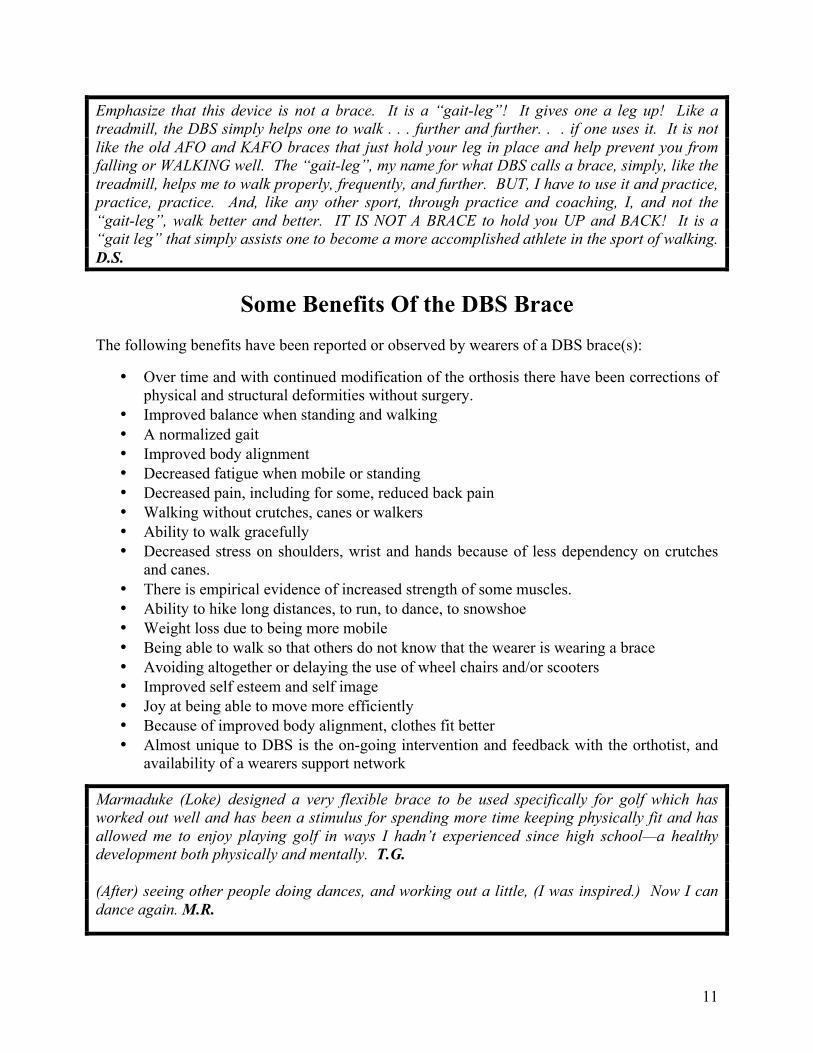
4. A shoe that will hold the brace in place and provide stability for the wearer. This shoe needs to be stable enough to hold the brace in place within it and, at least during the learning stages, have a sole that rests flat on the floor. See Shoes Chapter 4.
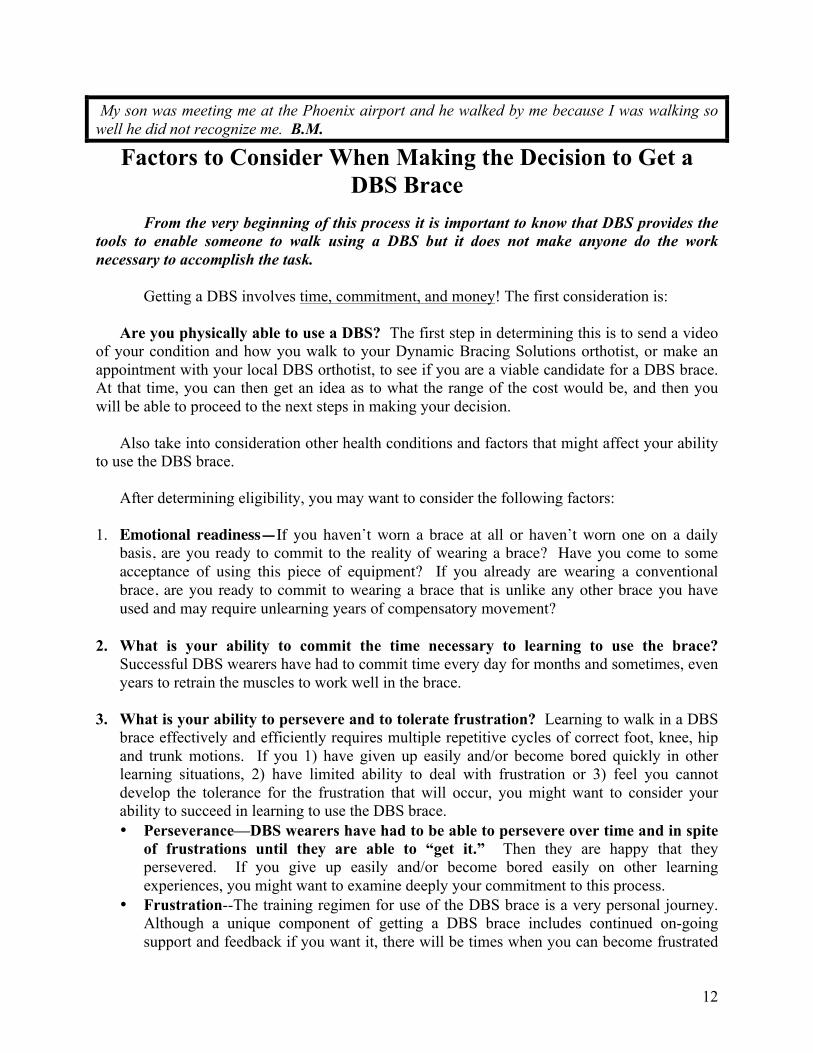
5. A Hardcastle clip, a padded insert that is placed behind the calf and in front of the rear struts. The clip helps keep the lower leg against the front of the brace collar so that the wearer can stand and walk correctly in it. Not all DBS wearers need a Hardcastle Clip. The orthotist (brace maker) will determine if this is necessary, usually at the time of casting and fitting.
10
6. Socks, preferably over the knee socks, stockings, or underliners are not required but are preferred by most DBS wearers. A thin layer of material material between the brace and the skin can prevent friction sores that can be caused by the slight movement within the brace. It also keeps the soft surfaces of the brace from becoming soiled by body oils. See Stockings, Socks, Under Liners Chapter 4.
Definitions
It sounded good at the time, but what the heck did that orthotist mean when saying ... ? (Plain English, please!)
Triplanar Control: control of movement of a limb in all three directions or “straightens out the leg/foot” – sometimes this requires corrective pressures at multiple places on the foot, ankle, leg.
• Up and down/forward (sagittal plane) – Example: the foot is in a dropped or not dropped position
• Side to side (coronal plane) – as in the ankle turning in or out or the knee bending in (valgus or knock-knee) or out (varus or bow legged)
• Twisting toward or away from straight ahead (rotary) - Example: foot/toes turning in (pigeon toed) or foot/toes pointing out, or knee cap pointing inward or outward when the person is putting weight on that leg
Most orthotists say they practice “triplanar control”, by which they mean they use a three point pressure system, but usually this is done to correct a problem only at one site, not at multiple sites simultaneously and in the unique manner done with DBS! DBS methodology is one of the few systems available that controls rotation. With conventional bracing a rounded calf or thigh band will allow the limb to rotate within the brace; the roughly triangular knee part of a DBS brace prevents nearly all rotation within the brace. Dynamic Response: a function of the leg brace that allows it to store energy and later release that energy to help “propel forward.” Part of this is also called “floor reaction” or “ground reaction” forces—this is why the main control at the knee is in front of the leg instead of behind it. The other mechanism that makes for dynamic response is the carbon fiber graphite construction of DBS that allows it to flex (bend) when weight is applied to it and then actively recoil to its original position when the weight forces are released (the foot is lifted off the ground).
11
Emphasize that this device is not a brace. It is a “gait-leg”! It gives one a leg up! Like a treadmill, the DBS simply helps one to walk . . . further and further. . . if one uses it. It is not like the old AFO and KAFO braces that just hold your leg in place and help prevent you from falling or WALKING well. The “gait-leg”, my name for what DBS calls a brace, simply, like the treadmill, helps me to walk properly, frequently, and further. BUT, I have to use it and practice, practice, practice. And, like any other sport, through practice and coaching, I, and not the “gait-leg”, walk better and better. IT IS NOT A BRACE to hold you UP and BACK! It is a “gait leg” that simply assists one to become a more accomplished athlete in the sport of walking. D.S.
Some Benefits Of the DBS Brace
The following benefits have been reported or observed by wearers of a DBS brace(s):
• Over time and with continued modification of the orthosis there have been corrections of physical and structural deformities without surgery.
• Improved balance when standing and walking • A normalized gait • Improved body alignment • Decreased fatigue when mobile or standing • Decreased pain, including for some, reduced back pain • Walking without crutches, canes or walkers • Ability to walk gracefully • Decreased stress on shoulders, wrist and hands because of less dependency on crutches
and canes. • There is empirical evidence of increased strength of some muscles. • Ability to hike long distances, to run, to dance, to snowshoe • Weight loss due to being more mobile • Being able to walk so that others do not know that the wearer is wearing a brace • Avoiding altogether or delaying the use of wheel chairs and/or scooters • Improved self esteem and self image • Joy at being able to move more efficiently • Because of improved body alignment, clothes fit better • Almost unique to DBS is the on-going intervention and feedback with the orthotist, and
availability of a wearers support network
Marmaduke (Loke) designed a very flexible brace to be used specifically for golf which has worked out well and has been a stimulus for spending more time keeping physically fit and has allowed me to enjoy playing golf in ways I hadn’t experienced since high school—a healthy development both physically and mentally. T.G. (After) seeing other people doing dances, and working out a little, (I was inspired.) Now I can dance again. M.R.
12
My son was meeting me at the Phoenix airport and he walked by me because I was walking so well he did not recognize me. B.M.
Factors to Consider When Making the Decision to Get a DBS Brace
From the very beginning of this process it is important to know that DBS provides the
tools to enable someone to walk using a DBS but it does not make anyone do the work necessary to accomplish the task.
Getting a DBS involves time, commitment, and money! The first consideration is:
Are you physically able to use a DBS? The first step in determining this is to send a video of your condition and how you walk to your Dynamic Bracing Solutions orthotist, or make an appointment with your local DBS orthotist, to see if you are a viable candidate for a DBS brace. At that time, you can then get an idea as to what the range of the cost would be, and then you will be able to proceed to the next steps in making your decision.
Also take into consideration other health conditions and factors that might affect your ability
to use the DBS brace.
After determining eligibility, you may want to consider the following factors: 1. Emotional readiness—If you haven’t worn a brace at all or haven’t worn one on a daily
basis, are you ready to commit to the reality of wearing a brace? Have you come to some acceptance of using this piece of equipment? If you already are wearing a conventional brace, are you ready to commit to wearing a brace that is unlike any other brace you have used and may require unlearning years of compensatory movement?
2. What is your ability to commit the time necessary to learning to use the brace?
Successful DBS wearers have had to commit time every day for months and sometimes, even years to retrain the muscles to work well in the brace.
3. What is your ability to persevere and to tolerate frustration? Learning to walk in a DBS brace effectively and efficiently requires multiple repetitive cycles of correct foot, knee, hip and trunk motions. If you 1) have given up easily and/or become bored quickly in other learning situations, 2) have limited ability to deal with frustration or 3) feel you cannot develop the tolerance for the frustration that will occur, you might want to consider your ability to succeed in learning to use the DBS brace. • Perseverance—DBS wearers have had to be able to persevere over time and in spite
of frustrations until they are able to “get it.” Then they are happy that they persevered. If you give up easily and/or become bored easily on other learning experiences, you might want to examine deeply your commitment to this process.
• Frustration--The training regimen for use of the DBS brace is a very personal journey. Although a unique component of getting a DBS brace includes continued on-going support and feedback if you want it, there will be times when you can become frustrated
13
at your apparent lack of progress or accomplishment. If you doubt your tolerance for frustration and feel you cannot develop the tolerance needed, or if you do not have the ability to deal with that frustration, you may be tempted to give up too soon on learning to use the DBS. The orthotist, physical therapist, and family may be helpful in encouraging you through the rough spots.
4. Are you worth it? DBS wearers have had to balance the cost of the brace with how they
value themselves and the potential for an improved life style. Those that finally make the decision in favor of the DBS have said, “I am worth the cost and the work!”
5. What is your support system? Are family or friends or other important persons in your life
supportive of your choice? Although getting the brace and using it are ultimately personal choices, the people close to you can affect positively or negatively your ability to proceed with its use. It is helpful to have people on your side.
6. Recognize that you may come up against unexpected emotions as you proceed with
wearing the brace. Wearers have talked about having to deal with unexpected memories and experiences such as forgotten feelings related to original hospitalizations and treatments.
7. Priorities and costs—Getting a DBS involves real money, even if insurance will pay for
part of it. Wearers have had to put priorities on where their money goes. Is it to a DBS brace, a new car, a college education, taking money out of retirement funds, a child’s wedding, or from another purpose? Some DBS wearers have chosen to take out loans, or apply for grants from charitable groups as ways to finance their DBS brace.
8. There will be additional costs that need to be factored into your budget, depending on
the resources you have at hand. Transportation costs and lodging costs may be necessary if you are in a remote location from a DBS facility. DBS wearers have found it helpful to have a set of parallel bars or handrails in a hallway, a full length mirror, and some sort of video capability either with a camera phone, a digital camera with a movie mode, a video camera or a web cam. Other costs could include multiple visits to the orthotist, physical therapists and other therapists, and/or some brace modifications. Some of these costs (including mileage and other transportation costs) may be deductible from income taxes; your tax advisor should be consulted.
9. A part of the preparation for getting the DBS brace is researching insurance options.
Some insurance policies allow for getting durable medical equipment from outside of their network, some do not. Some insurance policies will pay more for a brace than others. Some DBS wearers have chosen to change insurance policies for the year that they bought the DBS brace, sometimes paying more money for premiums for that year in order to be better compensated for their purchase. The important factor is whether the increased premium costs are outweighed by the reimbursement from the insurance company. See Chapter 6, and Appendix A.
14
I chose to get a DBS brace because I was at a point in my life that my choice in conventional bracing was a locked knee KAFO (long leg brace) and it was a “no brainer” to have a DBS AFO (short leg brace) rather than a locked knee KAFO. M.E. Dr. Eulberg emphasized the eventual wear, tear and damage to my knee, hip and back from the conventional AFO. The need to maintain the best possible health for as long as possible led me to realize that the DBS brace was not optional. I needed to concentrate on where I wanted to be in the future and on how to get there. J.W.
Expectations and Reality
Often, we will hear something and automatically change it, ignore it or believe it. We will attempt to fast track learning skills. What someone is told and what they hear as it relates to them are often two different things. Or, what they are told, and how they believe it will work in their case, are two different issues. People with long-term neuromuscular conditions who have overcome so many obstacles in life often underestimate the time required to rewire the brain. It is not just knowhow. It also requires endless good practice cycles in order for the brain to stimulate nerve endings so they start connecting, and it takes time to develop muscle memory and time to maintain that muscle memory. Add into the mix that the learner is fighting all previous known safety movement strategies that have gotten one through life. It is a part of human nature to follow the well-known safe path. Even when people are told this, they have no idea of how strong those internal safety mechanisms truly are and what it will take to conquer them.
Cognitively, everyone will understand what needs to be done, and they may say to
themselves, “Well it doesn’t look too hard. I’ll show them.” One must understand that learning to use the DBS brace is not a race or contest! The person who masters the techniques will soon catch up and far surpass the others who try to take shortcuts. It will take more time and effort to learn to use it than you will believe. You will expect to “catch on” much more quickly—but patterning takes lots of repetition before your body learns the new dynamics. M.E.
15
About Learning
Part of the Dynamic Bracing Solutions system includes training and feedback during the learning process. Therefore, this may be the first brace where you have not just been given your brace and sent home to figure out by yourself how to walk correctly in the brace. The experience of many long-term brace wearers is that they have never had anyone take time to teach them how to walk correctly.
The DBS bracing system is different because the ability to walk successfully in it takes learning new skills and many hours of practice in order to feel comfortable and competent in using it. When you took possession of your new brace, you should have been given some training in how to walk in it and then a DVD illustrating the preliminary exercises that are needed to train your body to move correctly.
The technical term for what has to happen in learning to use the brace, in addition to teaching the muscles and the body to move correctly, is neural programming. Essentially, neural programming is the action of creating pathways in the muscles, spine, and also the brain that, through practice, tell the body how to move. Persons with long-term disabilities involving walking have “forgotten” or never learned how to walk correctly and have developed compensatory methods of getting from point A to point B. These may not work with your DBS brace or are excessively inefficient and fatiguing. So, through the exercises and practice, the brain pathways are retrained and the body learns to walk differently.
This is often the source of frustration for the new DBS brace wearer, as many of us feel that we have the skills, and maybe some of us do, to learn quickly to walk in the brace. For those of us whose reality is different from our expectations, this is how learning works:
First of all, every time we do something, we are establishing or reinforcing neural pathways in the central nervous system. If we do it wrong, our body and brain will record the wrong way it was done and the action will be reinforced every time it is repeated. Then, to do the motion correctly, we will have to unlearn that action by establishing and practicing the correct actions. This then takes more time. Therefore, it behooves us to “do it right” as we are learning and practicing. Easier said than done, but it is a goal to work toward.
Another factor in learning that has been in play for some DBS brace wearers is that we have no standard against which to judge if we are moving correctly. If we have no memory of how it was to walk correctly, then we cannot “know” when we are doing it right. This again can be frustrating because we may think we are doing it right, and then get feedback either from the orthotist or the physical therapist that tells us we need to go back to practicing basic exercises.
For many of us, this learning process means that we will have to break down the exercises on the DVD into smaller parts, learning little bits of the motion, before we can do the complete motions. This is where a physical therapist can be of value, in that he or she can assess
16
the actions, and help break down the steps and help put them together for greater success. That person can also give us sensory feedback that helps us learn to feel the new way of moving.
Another frustration that happens with the learning process is that often we seem to be making little or no progress, or going backwards, or standing still in our learning to use the DBS brace. According to developmental learning specialists, a person goes through a series of expansions, i.e., making progress and moving forward, and plateaus, i.e., consolidating what has been learned. Knowing this is how people learn, and accepting this as normal, can help reduce the frustration and possible discouragement that can come after months of practice without any apparent progress.
Another factor in learning that is talked about in education is the topic of learning styles. Proponents of learning styles state that if a person knows his or her learning style and then can tailor his or her learning to fit with that style, they will learn better and more quickly. Some experts question whether there is such a thing as learning style and also question how many styles there are. Discussion aside, if you know that you learn better by seeing something done than by hearing how it is done, then try to use that in your training. This is where a mirror comes in handy for some, while repeating out loud the motions as you do them might make the learning easier for others. Another modality is the tactile one, where you have to touch or feel to learn. Perhaps the most effective way to learn is to use all of the modalities, seeing, hearing, touching, moving and feeling.
In the long run, it is not so important that you know the name of your learning style, as it is to be able to find the manner and the tools that will help you learn how to walk correctly in your DBS brace. Ultimately, when you can feel that you are doing it right and have feedback that tells you that you are doing it correctly and safely, you will then be able to move on to the next step in becoming proficient in your DBS brace. By the way, it is also a sign of progress when you can feel (catch yourself) doing it wrong and can correct it. Follow Marmaduke Loke’s instructions in detail. Do it all as prescribed. Work for stability in each exercise before moving to the next one. M.P.
Trust
Trust comes with time and practice. It cannot be willed to happen nor hurried or rushed!! Trusting enough to walk comfortably and correctly in the DBS brace involves two factors:
1. Trusting the brace itself — If you are wearing a traditional brace or no brace at all
and you change to a DBS brace, the physical changes that were built into the brace to correct any deformities and the dynamic response component can make you unsure about whether the brace will be stable enough to keep you from falling. Another factor in trusting the brace involves putting full body weight on the brace. This may be something that you may not have done in your previous brace or if you were walking without a brace and “favoring” a disabled limb.
17
The exercises that are recommended and illustrated on the DVD will help with trust in using the brace. One of the purposes of the practice of standing and falling within the parallel bars, as well as the core movement exercises, is to help you learn to trust the brace and teach you that it is stable enough to hold you up, both when standing and when walking.
2. Trusting yourself — This trust may be harder to achieve, because learning to use the
DBS brace may go contrary to everything you have learned in order to keep yourself safe. The mistrust may start the first time you put the DBS brace on and your center of gravity changes, causing a perceived instability because you no longer have the tried and true means of standing that you have used for years. The mistrust also manifests itself in the fact that many of us watch our feet as we walk, not trusting that we can look farther ahead and not lose our footing and fall down. By holding our heads up and looking farther ahead, a practice that helps with balance when using the DBS brace, your body learns to trust that it can anticipate potential pitfalls and can compensate for them, thus keeping you safe. Overcoming the mistrust may mean identifying those fears, facing them and then putting security and protection into the learning process. Parallel bars are one of the tools that contribute to safety while learning to use the brace. Constant practice and being successful in walking will reduce the fear and increase the trust. See Parallel Bars, Appendix D. There can be, however, a deeper trust issue that manifests itself, and that is that our bodies have been trained to walk a certain way to compensate for our disability and the physical habits that have been successful in protecting us need to be unlearned. These behaviors may be so ingrained that we are not cognitively aware that we are doing them. And, unlearning them may be our biggest challenge. Again, practice and feedback from a gait expert will help you become aware of the compensatory patterns that you have. Then, as you practice, you can get the feeling of the correct way to walk, and ultimately your body will “trust” that it is doing it right.
Gaining TRUST when there are major FEAR issues while learning new MOVEMENTS during which, at the same time, your body/mind wants desperately to retreat back to what it knows is safer is an amazing journey for those that can conquer it. M.L.
18
Communication
Keeping in communication with the DBS orthotist is part of the support system that makes wearing a DBS brace successful. The “Dynamic” in the Dynamic Bracing Solutions is not limited to the design of the brace! Wearing it and learning it is also a dynamic process. This means that as you progress, it is helpful to get feedback from the orthotist either through office visits or through video communication or by telephone or email. Also, as you wear the brace, your leg(s) and your gait may change, which may mean that the brace needs to be modified over time in order for you to walk comfortably and competently.
Your DBS orthotist can often tell you if what is happening with the brace is normal or needs some intervention to fix a problem.
In other words, the DBS orthotist continues to be involved in your progress after you get your brace. However, you must be the one to initiate the communication. You have only you to keep track of your progress while the DBS orthotist has many clients. At the same time, the orthotist is willing and happy to hear from you and will be responsive to your needs. You should not feel reluctant to contact him/her.
Other support persons with whom you can keep in the communication loop are your DBS referring physician and your physical therapist. These people can also give you feedback and advice that will keep you safe and healthy.
Other sources of communication for many wearers are other DBS wearers who have come to know each other because they wear a DBS brace. It is very helpful to be able to communicate with another wearer and “compare notes” on progress and learn how to solve some problems.
There are DBS wearers known to the orthotist and to Dr. Eulberg who have expressed willingness to network with other wearers. This can be helpful, especially for those wearers who are in remote areas away from each other. A private Facebook group has been established for DBS wearers. Ask your orthotist or contact Dr. Eulberg to get an invitation to join this group.
19
CHAPTER 2
WEARING THE DBS BRACE
Pre-Preparation for the DBS Brace
Physical: People who have weakness or instability of their legs/feet develop walking patterns that work to provide them with the maximum sense of stability/security/safety possible. Over the years, the progression of the disability may be related to bad habits, or progression of weakness such as in Post-Polio Syndrome. Some of these maneuvers, many unconscious and automatic, can include hyperextension of the knee (back-knee), trunk lean to one side or the other or leaning forward or backward at the waist/hips; short steps on one side or with both legs; slower walking speed; and/or abnormal compensatory movements with one or both arms. Many individuals have learned to move their shoulders, trunk, and pelvis all as one unit, and/or not put all of their weight on the affected leg.
DBS wearers have found that starting physical therapy before they actually get their DBS
brace allows them to progress more easily. This may give an individual a “jump start” on achieving flexibility, learning to move the pelvis separate from the shoulders and upper body, and begin to develop muscle memory and change the neural programming. See Appendix B.
The most effective and efficient use of a DBS brace requires putting 100% of the body’s weight on the affected leg for the “stance” phase of gait (that part of walking when the foot is on the ground and the other foot is partially or totally off the floor). In order to do this, the DBS wearer must move the pelvis over and a bit to the outside of the braced leg while at the same time leaving the shoulders and head centered. Some people can self monitor effectively and correct their old habits/patterns and learn to do this by practicing in front of a mirror; others benefit from an observant physical therapist, orthotist or support person.
Some techniques that professionals can use to help an individual increase the flexibility of the hips, pelvis, and low back and begin the process of developing new “muscle memory” are:
• Manual stretching
• Use of a “therapy ball” with the client moving the hips in all directions (forward/backward, to the left and to the right, in circles, and in diagonals) while sitting and balancing on the ball
• Watsu (a form of passive movement in the water combined with massage)
• While holding on to parallel bars, a walker or a counter, stand in front of a mirror. Practice the movements of the pelvis forward and backward, to the left and to the right, and in forward diagonals to the left and to the right. At the same time, keep the shoulders and head in one position and move only with the lower body. These movements may
20
feel very foreign to you, weird and contorted at first. Before you get the brace(s) you may not be able to do these activities completely. You may only be able to move the pelvis a tiny distance when you first begin, but with practice and stretching of the tissues, you should be able to move the pelvis several inches in all directions and still be balanced!! Doing these activities without adequate support in the beginning can be dangerous!
• Use Wii Fit, a Nintendo Wii game console application, to analyze center of gravity and weight shift patterns. Initially it may be difficult to do these with the feet so close together on the Wii Fit platform. Hold on to some form of support, such as the back of a chair or counter!
Prior to having the brace delivered to you, the initial training begins. Stretching, increasing range of motion, and learning to move the pelvis independent of the shoulders and head can begin. In fact the time spent working on these maneuvers prior to getting the brace may decrease the time spent doing it after you get the brace and allow you to move forward faster! Ask your orthotist for a copy of the training DVD at the time of casting.
Selecting a Physical Therapist
Working with a physical therapist during the process of learning how to walk with the DBS has been identified by clients as one of their more valuable resources. Many DBS wearers have found that their physical therapist is not only a mentor but also is their sounding board through both the physical rehabilitation and the emotional journey that wearers go through. Qualifications and characteristics of physical therapists that DBS wearers have identified as helpful are:
• Select a physical therapist who works in a clinic that does long term or outpatient PT as opposed to a hospital based PT whose primary job is to get people ready to transfer home or to another facility after a trauma.
• Select a physical therapist who has skill and understanding in working with gait
rehabilitation. It may be helpful to the physical therapist to let him/her know that the training is similar to rehabilitation for prosthetics (artificial leg) wearers as opposed to brace wearers. Some DBS wearers have sought out physical therapists that specialize in gait training for amputees.
• A therapist that is open to learning about the unique features of the DBS methodology,
by consulting with the DBS orthotist, viewing DBS’s video, and reviewing the PT’s suggestions in Appendix B.
Adapting the demonstrations to the individual wearer’s needs and abilities is important. Be aware that some therapists say they know about your neuromuscular condition or about this brace (or something similar), but over time the client and/or therapist discover the DBS process is unique.
21
• For persons with long-term neuromuscular problems, the PT’s knowledge of the disability and the emotional impact, i.e., the issues of relearning and trust that come up, is an asset. Then, the PT can help find ways around the barriers that may arise in the process.
• Look for a PT who is willing to work with you over the long haul. Your relationship can
last for years.
• Lastly, a sense of humor on the part of the physical therapist and on the part of the DBS wearer helps, especially when the going gets tough.
In addition to humor, my PT has a great talent for deciding when to push/when not to push/when to suggest/when to shove/to inspire, when to lay off. J.E-F.
• If your physical therapist is not familiar with DBS and its gait training program, consult
your orthotist or other DBS brace wearers for PT referral resources. After I learned that the principles used in the design of the DBS were the same ones that are used in building prosthetics, I changed my therapy approach to gait training from that of teaching walking in a brace to teaching walking with a prosthesis. This approach improved the progress significantly. DA.V., PT
Some Helpful Practice Hints
• Set up a TV with the training video on it such that it is behind you and visible in your mirror and can be seen as you practice. Then follow along with the motions that Marmaduke is demonstrating. By setting up the TV this way, the demonstration video’s illustrations are moving in the same direction that you are.
• View a John Wayne western and watch how he walks.
• Watch the ballroom dancing competitions on PBS TV or Dancing with the Stars on the
networks as models of how to move. Observe how their upper bodies do not move while they get movement in the hips and pelvis. Also look at how they hold their bodies in an upright position.
• The honor guards at the Tomb of the Unknowns in Arlington National Cemetery have the
desired walk down perfectly. It is beautiful to watch and a great inspiration.
• Watch how toddlers walk. They raise their arms to help their hip movement and improve their balance. Raising one or both arms while practicing may help with hip movement and balance.
22
• If having difficulty performing some of the exercises in the brace, try doing them with the
brace off (using parallel bars as needed for safety) and then transferring this knowledge/ability to doing the exercises while wearing the brace.
• Music can help. It facilitates a rhythm and can help reduce stress and boredom. Select
music with a steady beat of about the tempo you are able to walk.
• Practice in the water, if you have an AFO (short leg brace). The buoyancy can make it easier to move and facilitate the feeling of the correct way to move the hips. Also, falling in water is a lot safer! The brace is waterproof and the foam is not very absorbent, so it can be wiped almost dry, leaving a damp feeling that will dry quickly. Various types of “water shoes” or sneakers designed to be worn when hiking in and out of water or along bodies of water can be worn in the water to keep the brace in place on the foot and give a non-slip surface on the sole. (Be sure to remember to insert the SACH heel into the water shoe) Be aware that the KAFO (long leg brace) has a metal knee joint that will not stand up to being in the water like an AFO will.
• Set goals based on skill accomplishment rather than time! Celebrating the ability to do
diagonals, the hula hoop, the cha-cha and eventually walking correctly can reduce the chances of frustration and discouragement that can come from setting the goal of being able to master the DBS brace in a specified time frame.
Permission to Follow Rules . . . and Not Follow Rules Circumstances will come up when the prescribed routine and practice schedule that DBS
wearers have set for themselves have to be modified. These can include everything from physical changes in our bodies to an opportunity to do something that does not put us in an environment where we can practice safely, or just not feeling like practicing that day.
Goals and priorities change with time and with circumstances. One wearer could not
change back and forth between her new brace and her old brace without it being very painful so she chose to wear her DBS brace all of the time, even though she had not learned all of the preliminaries of walking most efficiently in the brace. She consulted with her orthotist before making this decision.
Another user was happy to just be able to walk in the DBS brace with the use of a cane,
even though more practice and training may have given him independence from the cane. Taking a traveling vacation, going to see family, or taking a business trip where all of the
time will be spent at work may make it at least inconvenient, if not impossible, to transport the brace and to practice wearing it.
Practicing and learning to use the DBS brace is a priority in our lives or we would not
have made the commitment to have one. At the same time, the brace is only a tool that will help improve the quality of life and we should not have it control our lives.
23
Constant and consistent practice will help speed the process and following the routine of
exercises will help insure that wearers can do it correctly. Deviating from these two principles can slow down the process. However, wearers should give themselves permission to do what fits with their lifestyle, their goals and their priorities and not feel guilty about the choices that they have to make in learning to use and wear the DBS brace. The learning process is a long one and if the ultimate goal is kept in mind, then, in spite of and maybe because of the ups and downs that happen along the way, the goal will be achieved.
The “spring” that you do get [when walking in the brace] was a lot easier when I got thru that [part of the training]. But as far as finally clicking “everything,” I didn’t get to that part. I gave up. I am trying to lose weight and going back to training on brace in the next few weeks. J.D.
Aches and Pains
Many people who get a DBS brace notice a marked decrease in pain shortly after putting
on their DBS, or after doing the flexibility exercises. However if new symptoms occur it is important to address the problem early.
If the ankle or knee is better supported in the DBS brace, and the pain due to abnormal
stretching of ligaments, muscles and other tissues is relieved, then the individual may not be able to go back and forth between no brace/their previous brace and the DBS brace. They may need to begin wearing the DBS brace full time before they are fully competent in the most efficient gait pattern. Your orthotist can guide you in this regard if you experience significant pain when using whatever device(s) you had previously used and no pain or much less pain when wearing the DBS. If you have had back pain, this may be reduced or eliminated when your body is better structurally aligned and you are walking in a more efficient manner.
Others who have not had much back pain may find that parts of their back or pelvis are
“sore” after moving their body in ways that they have never experienced or are unaccustomed to moving. This soreness nearly always goes away over time as the tissues stretch and become “used” to the new pattern.
Similar soreness may happen in muscles that are not used to being used in the manner
that is necessary for proper walking with DBS brace (not unlike the soreness a person experiences when they do some unaccustomed activity – like raking leaves in the fall, or shoveling after the first heavy snowfall). This discomfort can be reduced by application of heat or ice and the use of an over the counter pain reliever, such as acetaminophen (brand name = Tylenol) or ibuprofen (Advil) or naproxen (brand name = Aleve) or aspirin. Your other medical conditions will determine which of these pain medicines are safe for you to take.
A problem that is frequently seen in people who have an abnormal gait (“walk funny”) is sacroiliac dysfunction or “S-I problems”. The sacroiliac joints are on each side of the low back (pelvis) and pain from the S-I joint may be located directly over the joint or radiate down into the
24
buttock, or down the leg in various patterns – over the lateral hip, into the knee, into the lower leg. Patients may have no pain in their back, legs, or other parts of their body, but may display a functional leg length difference and adaptive foot position. This may affect how the brace fits and how the wearer walks from day to day.
Some other symptoms reported by patients include a sensation of the leg on the affected
side “being too long”. Many medical doctors are unfamiliar with SI joint problems and tend to diagnose and treat this as a “disc” problem, arthritis, or other condition. Many physical therapists, doctors of osteopathy (D.O.), and chiropractors are more familiar with S-I joint problems. Sometimes, the pain from a S-I problem will spontaneously go away, often as suddenly and inexplicably as it came on.
Chronic S-I dysfunction can be treated with correcting the leg length difference, various
forms of manipulation, and specific exercises to attempt to strengthen the muscles around the joint. Acute S-I joint pain may be treated with heat, ultrasound, electrical stimulation, and sometimes a supportive belt low down on the pelvis. In very acute situations, such as severe S-I pain after lifting something with the body twisted, some form of pain medication including prescription pain medication may be needed.
Other modalities of treatment have been reported useful by some DBS wearers. These
include, but are not limited to, neuro-muscular injury oriented massage therapy, homeopathic treatments, acupuncture, and oral and/or topical preparations.
Generally your DBS orthotist will recommend that you establish a good working
relationship with a physical therapist prior to being fit with a DBS brace. See Selecting a Physical Therapist on page 20. This facilitates getting treatment for some of the aches and pains that you might experience as you go through the process.
I have the “boulder” in my shoe that was very painful when I first put the brace on but I had been forewarned. It is going away slowly. My knee pain has diminished a lot. J.D. In the beginning, I would practice for one hour in my DBS KAFO, then put my old AFO on for the rest of the day. Switching made my knee painful and swollen, so I began to leave the KAFO on full-time. I had no pain in the KAFO. I tried wrapping my knee with an Ace bandage and staying off of it as much as possible, but nothing worked except staying in my KAFO. M.E.
25
Skin Issues It is important to pay attention to the condition of your skin especially in areas where the
brace applies pressure to correct positioning of joints in your leg. Pressure is needed to align your leg and foot to the best possible position. But too much pressure can cause severe redness, numbness and/or pain, and if left unattended, blisters, sores, and skin breakdown can occur. Gradual build up of wearing time in the brace will allow the skin to toughen and, perhaps, build up a small amount of callous. Compression stockings can help control swelling and may prevent development of skin breakdown or irritation. Thin underliners, such as Comfort Sleeves (http://comfortsleeves.com/), Body Glide, and other products are available to reduce skin irritation.
There is a small group of people who may experience extreme sensitivity. These people
may need to consult a dermatologist to determine the cause and to seek relief. Closely examine your skin after wearing the brace, especially initially or after
modifications have been made, including areas that cannot easily be seen. A mirror can be helpful to see areas on the back of your leg or on the sole of your foot. Some redness at the site of pressure is normal, but it should completely fade or nearly so within 15-20 minutes of taking the brace off. If the redness does not fade or you have tender areas after 15- 20 minutes, you need to contact the orthotist to determine if other adjustments need to be made.
If you develop a blister or skin breakdown, frequently you will need to stop wearing the
brace until the skin heals. However, prevention is better than treatment because, even after the sore heals, the new skin will not be as strong as your original skin was.
If you do develop a sore spot or blister, you need to contact the orthotist and be evaluated
for what adjustments need to be made in the brace to modify the pressure at that spot. To prevent further damage to your skin and allow the skin to heal, a gel or silicone pad can be applied over the damaged skin. One such product is made by Band-Aid and is called “Advanced healing Blister Ampoules” and is available at most pharmacies or large grocery stores in the first aid section.
Fitting and Refitting
Ideally the goal should be for the brace to feel as if it is part of your own body.
Indications that the DBS brace may need to be adjusted/refit are: (1) it feels too loose and your leg slaps against the front or back of the brace “bell clapping”, (2) you lose the sensation that your leg is in close contact with the brace at all times, (3) you “know” that you are doing everything well to walk in the brace and no matter how hard you try you can not do it correctly, and/or (4) you are experiencing balance loss in situations where you did not. Unlike conventional braces with Velcro straps or laces or buckles, DBS braces have little adjustability for changes in the circumference of a person’s leg or foot. Therefore if a DBS wearer loses or gains a significant amount of weight or the amount of edema (swelling) in the leg
26
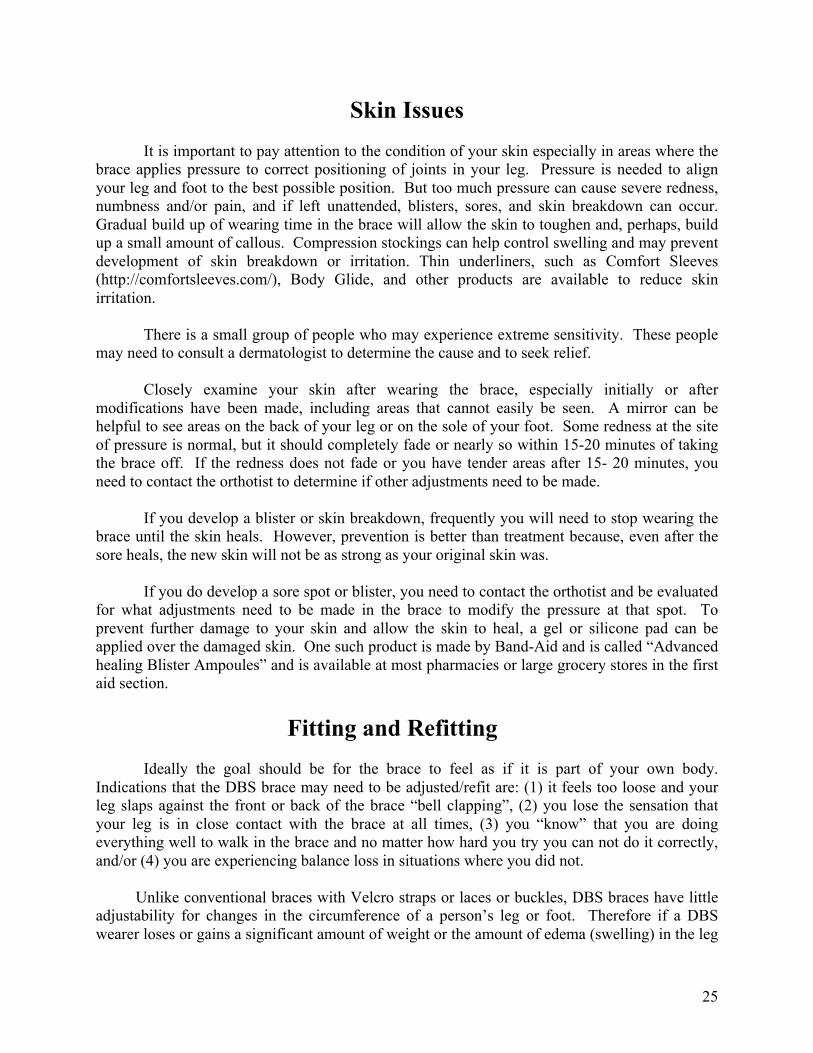
and/or foot changes, the brace may need to have adjustments made by the orthotist. For some the addition of a Hardcastle clip may solve the problem. Likewise, if you experience new skin issues due to pressure at certain points, the orthotist will usually need to hollow out an area in the brace or its padding or add additional padding at some points. Be sure to be vigilant regarding skin issues that may develop after any new adjustment has been made. Persons who are fit with DBS to correct deformities (“remodel”) will require frequent re-evaluation by the orthotist as the deformity decreases and the limb allows new extra pressure to be applied to certain areas. The ultimate goal is to achieve the maximum correction of the deformity. Modification can be needed as often as once every 4-6 weeks, but most often at least once every 3-6 months. The orthotist can instruct you in the interval needed in your particular situation. I liked checking in with Marmaduke (Loke) when possible for check ups. Of late, I have used Dave Hardcastle (a Denver orthotist) who is closer than Marmaduke. Good move. I used Maggie Hanlon (physical therapist) for getting an insert in my left shoe. She has commented on my walking, etc. J.O. Be patient. My brace is like a retainer for my teeth—it pulls my leg back into correct alignment as my right knee is/has been moving inward. G.S. The brain rut memory I had about how it felt wearing the old loosey-goosey brace apparently enabled me in gradually forgetting how tight (and safe) the DBS brace should be and as it was at first. I am shocked at how wonderfully safe the new modifications are now and how I had forgotten what it felt like in the first place. Our brain rut memories must be like a huge tree with so very many branches. It all speaks to having frequents check-ups with the people who catch these things when we don’t. J.E-F.
27
CHAPTER 3
Putting It On and Taking It Off Please note: These are basic instructions. There can be individual variations depending on the needs and abilities of the wearer. Practice, and sometimes experimentation, will help the wearer find the easiest, most effective method for putting the DBS brace on and taking it off. Also, these instructions may assist a caregiver in helping a wearer put the brace on and take it off.
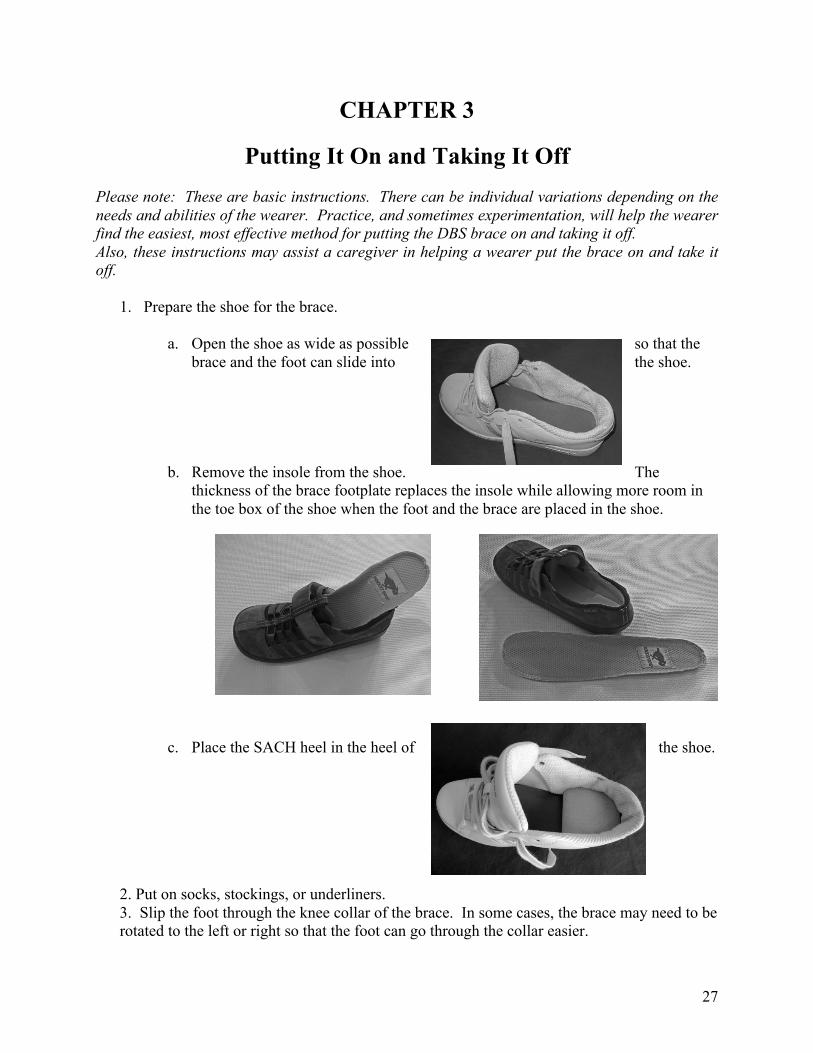
1. Prepare the shoe for the brace.
a. Open the shoe as wide as possible so that the brace and the foot can slide into the shoe.
b. Remove the insole from the shoe. The thickness of the brace footplate replaces the insole while allowing more room in the toe box of the shoe when the foot and the brace are placed in the shoe.
c. Place the SACH heel in the heel of the shoe.
2. Put on socks, stockings, or underliners. 3. Slip the foot through the knee collar of the brace. In some cases, the brace may need to be rotated to the left or right so that the foot can go through the collar easier.
28
d. e. f. g. h.
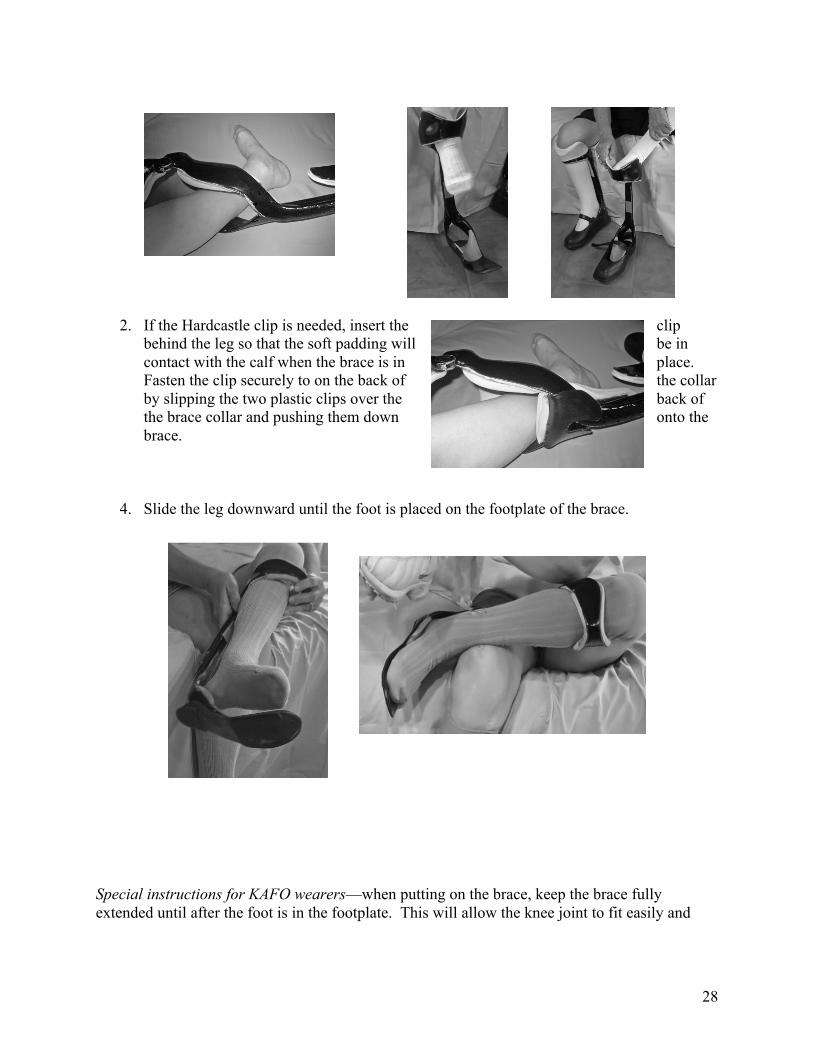
2. If the Hardcastle clip is needed, insert the clip behind the leg so that the soft padding will be in contact with the calf when the brace is in place. Fasten the clip securely to on the back of the collar by slipping the two plastic clips over the back of the brace collar and pushing them down onto the brace.
4. Slide the leg downward until the foot is placed on the footplate of the brace. Special instructions for KAFO wearers—when putting on the brace, keep the brace fully extended until after the foot is in the footplate. This will allow the knee joint to fit easily and
29
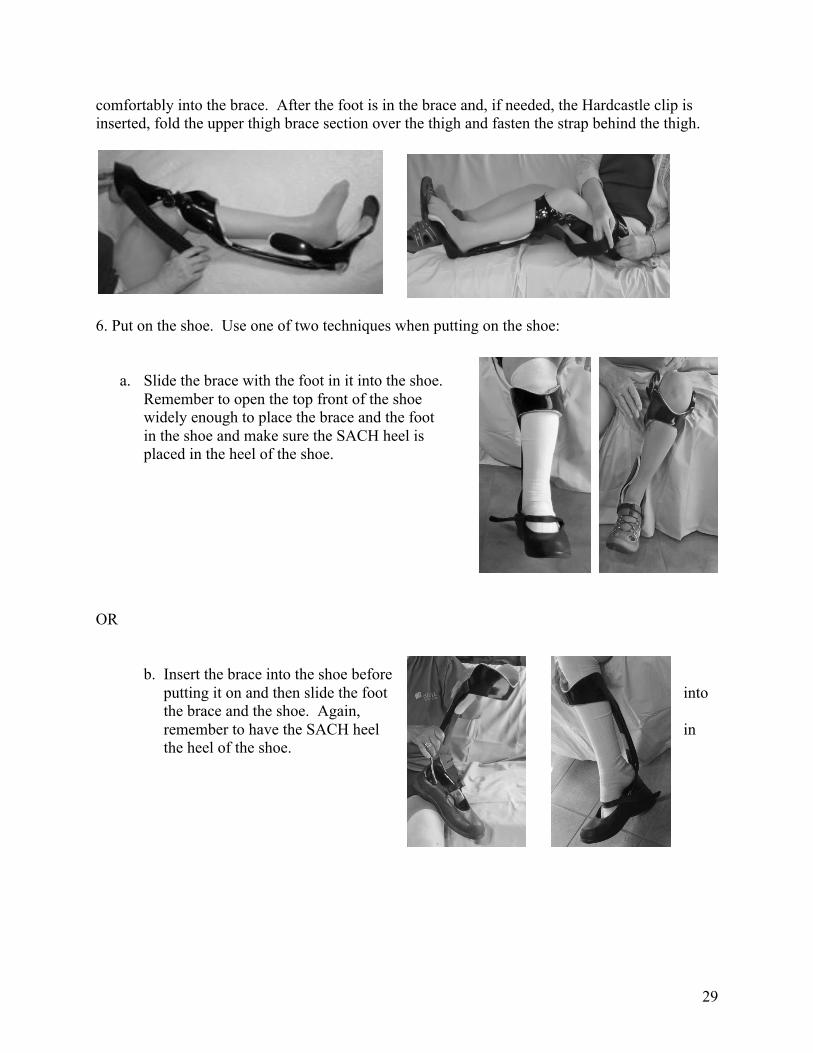
comfortably into the brace. After the foot is in the brace and, if needed, the Hardcastle clip is inserted, fold the upper thigh brace section over the thigh and fasten the strap behind the thigh.
6. Put on the shoe. Use one of two techniques when putting on the shoe:
a. Slide the brace with the foot in it into the shoe. Remember to open the top front of the shoe widely enough to place the brace and the foot in the shoe and make sure the SACH heel is placed in the heel of the shoe.
OR
b. Insert the brace into the shoe before putting it on and then slide the foot into the brace and the shoe. Again, remember to have the SACH heel in the heel of the shoe.
30
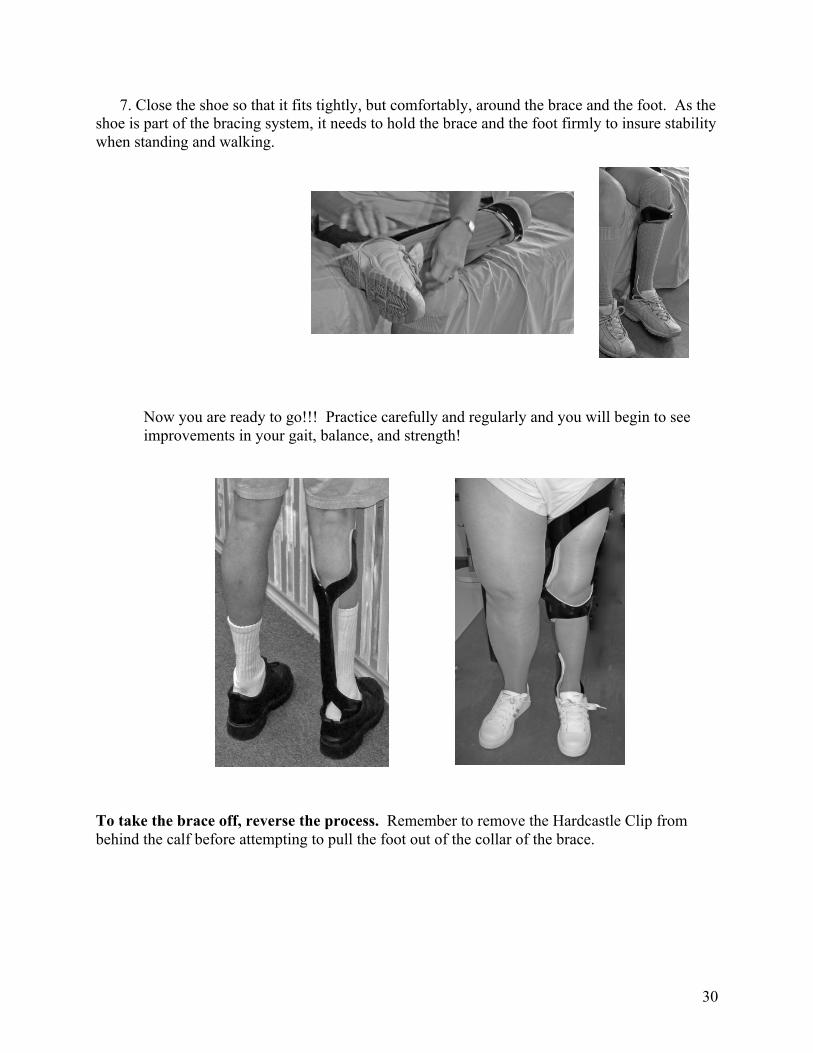
7. Close the shoe so that it fits tightly, but comfortably, around the brace and the foot. As the shoe is part of the bracing system, it needs to hold the brace and the foot firmly to insure stability when standing and walking.
Now you are ready to go!!! Practice carefully and regularly and you will begin to see improvements in your gait, balance, and strength!
To take the brace off, reverse the process. Remember to remove the Hardcastle Clip from behind the calf before attempting to pull the foot out of the collar of the brace. !!!
31
CHAPTER 4
FOOTWEAR WITH A DBS BRACE
Shoes
The DBS brace system itself has three integral components: the brace, the shoe, and the SACH heel, all of which must work together. See The Dynamic Bracing Solutions (DBS) System, Chapter 1. The use of proper shoes, especially during the training phase, is very important! The shoe, brace and SACH heel need to function as one solid unit! The sole of the shoe needs to be as flat as possible to allow the “ground reaction” forces to maximally support the knee and allow the wearer to feel that, when standing and moving forward, he/she is totally supported and stable. When the wearer becomes proficient in the techniques of walking with the DBS brace, the toe of the shoe can have slightly more curve upward (called the toe spring). To keep the shoe tight on the foot and decrease any wobble in the shoe, the shoe generally should either be a tie shoe or have an adjustable strap across the instep. It would be helpful if the tongue is padded and the insole is removable.
A closed heel shoe allows the SACH heel (the foam pad that goes under the heel of the
brace) to stay in place and later be transferred from shoe to shoe. If a person wants to wear open back shoes/sandals then the SACH heel may need to be attached to the brace or the shoe so that it will stay in the correct position and not slip out. A shoe with laces that go well down toward the toe allows you to open the shoe wide to get the brace in when putting on the brace. This allows you the most ability to control looseness/tightness of the shoe and also at various places across your foot.
As fashions change the amount of curve of the sole frequently changes. In the past,
the shoes that had the flattest soles were “court shoes,” or tennis shoes as used for playing tennis, or “boat shoes”. In the early 21st century the flattest shoes tend to be the “skateboard” shoes. All of these shoes are designed to give the wearer the maximum surface in contact with the ground – the tennis court, the deck of the boat, or the surface of the skateboard-- for the maximum stability of the person wearing this shoe. This design trend is also desired for DBS brace wearers. An “earth shoe”, rocker bottom shoe, or a shoe with a pronounced upward curve of the toe usually does not work well with a DBS orthosis.
One way to check to see if a shoe meets this requirement is to take a ruler or other
straight edge and place it on the shoe across the ball of the foot to test if the shoe is flat side to side and then along the length of the shoe (from heel to toe) and check how much distance there is between the flat edge and the sole of the shoe – see photos below.
32
Flat surface side to side on sole of shoe. Flat surface from toe to heel with minimal toe spring
Not acceptable - shoe canted to one side Less desirable - sole not flat into heel – and heel not flat side to side and moderate toe spring from ball of foot to toe
The less open space between the straight edge and the sole of the shoe the better! If you are unable to find shoes that are flat enough in the toe, they can be “filled in” by a shoe repair person – see example in the following photo.
Note the bottom of the shoe and the tip of the toe, resulting in the flat sole.
33
The life of the shoe may not be as long as you think (hope) it might be, so be aware that
excessive wear can occur with the upper part of the shoe as well as the sole. In order to work optimally, the shoe and brace must function as one solid, stable unit! Shoes can change in the support they provide after cleaning, exposure to water, or with wear. Some signs that the shoe has lost some of its integrity and support are: new pains when wearing the shoe/brace combination; “turning over” of the shoe upper portion; excessive wear on one side of the sole; or new inability to correct one’s gait.
One way to prolong the life of the shoe, if the back of the brace wears down the heel cup
is to have an orthotist or shoe repair person make a leather liner for the cup of the heel. Or line it with duct tape. Many shoe suggestions are available on the HGI Facebook page. Refer to Guidelines for Choosing Shoes, Appendix C.
The SACH Heel The SACH heel, the Solid Ankle Cushion Heel, is an integral part of the DBS bracing system. Information about SACH heels, measuring for them, and their density is contained in Appendix C.
Clips David Hardcastle, an original Denver DBS orthotist, designed a “clip” as a more permanent and strong substitute for padding at the knee. It is intended, along with the custom-made DBS brace/ orthotic, to push the knee forward into a “normalizing” mode. Modifications are often needed when the knee changes its form or direction. When to suspect you might need “a clip”: You may need a clip when there becomes a looseness or space between the knee against the brace front (this can be subtle if you catch it early) and indicates that the knee is becoming corrected. This is a relatively common event for those who had the “back-knee” problem before getting the DBS brace. Where to go to get an evaluation for the clip, and who makes them: Go to your orthotist who made the brace in the first place. Learning to use a clip is easy and relatively quick. Your orthotist will show you how to put the clip on within minutes as clips can be easily attached; one just has to “get the hang of it”. Some practice for a couple of days or less will usually suffice.
34
Stockings, Socks, Underliners
Some individuals’ skin can tolerate being in direct contact with the brace or the padding
lining the brace, but many cannot, at least not for extended periods of time. Standard knee high length stockings may work if your lower leg from ankle to knee joint is a bit shorter than average. However, these are frequently too short and the socks just work their way down below the front (pre-tibial) cuff of the brace and leave the skin in direct contact with the padding. During hot or humid weather when a person’s skin perspires there is more friction as the leg moves slightly up and down with each step.
DBS wearers are a creative lot; some of the solutions others have discovered are:
1) Finding and buying “over the knee”, “boot socks”, tights, or thigh high
stockings, including thigh high nylon hosiery. Two layers of nylon hosiery can make the surfaces glide and slide over each other effortlessly and quietly. Wearers have been able to find “over the knee” stockings on the Internet and at The Vermont Country Store. Some other department stores intermittently have over the knee stockings for women to wear with knee high boots or mini-skirts. Comfort Sleeves, liners for orthotics, are also available from www.comfortsleeves.com. They can be folded over the top of the brace to stay in place.
2) Dusting your skin and the inside of the brace with talcum powder or corn starch. 3) Lycra or spandex form fitting pants, leggings, or “compression” hose worn under the
brace. 4) Cutting the toe out of a sock and using the “tube” to pull over your knee and fold over the
cuff of the brace to put a layer between the parts of the leg that are irritated by contact with the inner portion of the brace.
5) Long underwear or leggings especially in the winter; some long underwear is made of
silk or similar thin materials.
Persons with a tendency to have swelling of the ankle and foot edema, fluid retention may need to use compression hose of some type in order to control the swelling. Compression hose will also provide a buffer between the skin and the brace. Control of swelling is essential with DBS because there are very limited ways to adjust the circumferences of the brace at the knee or foot. The swelling does not have to be totally eliminated but it must be fairly consistent on a day to day basis and from morning to evening. !!!!!
35
CHAPTER 5
SOME EXTRAS
Repairs The good news about DBS AFOs is that there are no joints to break! Obviously this is not true of KAFOs because they have a metal knee joint. All mechanical devices can break from time to time. This is also true for DBS orthoses, although the structural failure of the materials is fairly uncommon. If the materials of the brace begin to “delaminate” (a layer that starts to separate from the body of the brace), -- it can be repaired fairly simply by the orthotist when caught early.
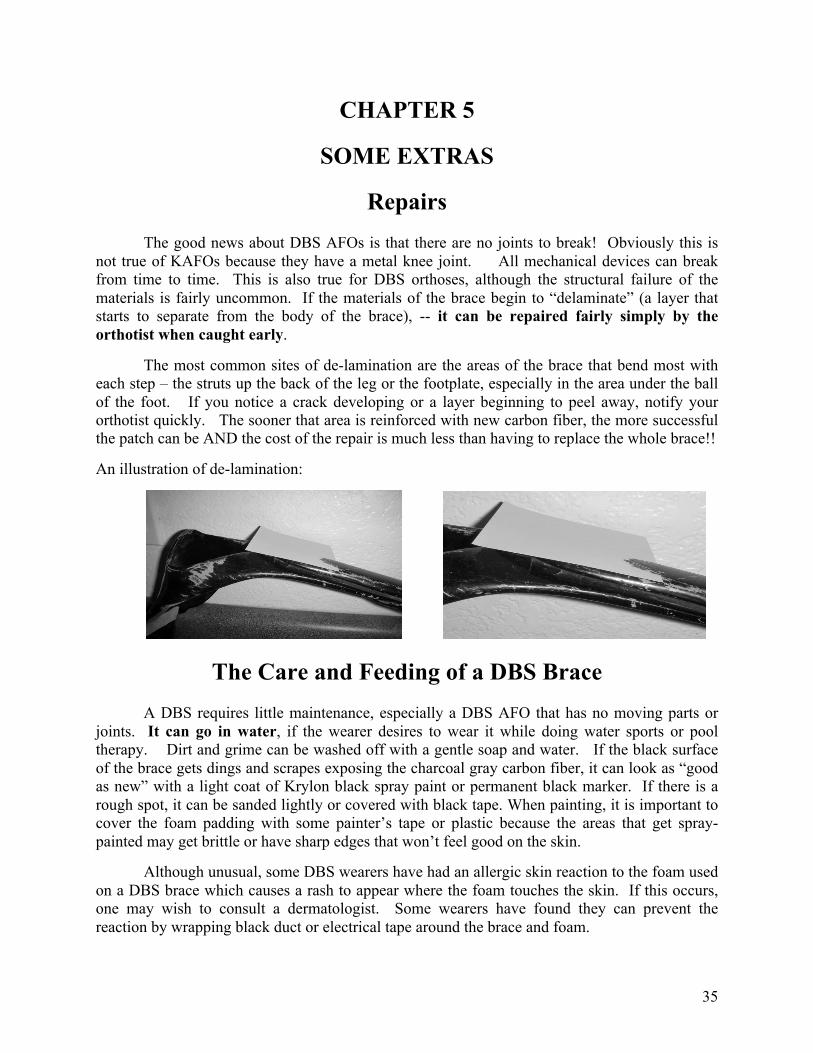
The most common sites of de-lamination are the areas of the brace that bend most with each step – the struts up the back of the leg or the footplate, especially in the area under the ball of the foot. If you notice a crack developing or a layer beginning to peel away, notify your orthotist quickly. The sooner that area is reinforced with new carbon fiber, the more successful the patch can be AND the cost of the repair is much less than having to replace the whole brace!!
An illustration of de-lamination:
The Care and Feeding of a DBS Brace
A DBS requires little maintenance, especially a DBS AFO that has no moving parts or joints. It can go in water, if the wearer desires to wear it while doing water sports or pool therapy. Dirt and grime can be washed off with a gentle soap and water. If the black surface of the brace gets dings and scrapes exposing the charcoal gray carbon fiber, it can look as “good as new” with a light coat of Krylon black spray paint or permanent black marker. If there is a rough spot, it can be sanded lightly or covered with black tape. When painting, it is important to cover the foam padding with some painter’s tape or plastic because the areas that get spray-painted may get brittle or have sharp edges that won’t feel good on the skin.
Although unusual, some DBS wearers have had an allergic skin reaction to the foam used
on a DBS brace which causes a rash to appear where the foam touches the skin. If this occurs, one may wish to consult a dermatologist. Some wearers have found they can prevent the reaction by wrapping black duct or electrical tape around the brace and foam.
36
Supplemental Equipment for Training Success
• A carrying bag for transporting the brace and the shoes at the time of delivery, to and from physical therapy and when traveling, until the wearer uses the brace(s) full time as a primary brace. The brace may not fit in a suitcase easily, so it is helpful to have a bag that is dedicated for the DBS brace. Sports bags often accommodate a KAFO. It is also helpful if it can be carried on the back, as a backpack, especially if one walks with a cane or crutches. DBS wearers have used everything from backpacks to tote bags to duffle bags to constructing a custom bag. See Hints for Making a Custom Carry Bag, Appendix D.
• Parallel bars
o Some kind of parallel bars or rails in the home will facilitate the learning process because they are always available and you don’t have to leave home to practice.
o They can be purchased or home-made.
o Home-made bars can be constructed out of either PVC pipe or aluminum conduit
and a 4 x 8 sheet of ! inch plywood. In the case of the conduit, the uprights and bars can be welded. See Appendix D for further instructions.
o In order to use the DBS brace properly, it is necessary to stand totally upright. To
achieve this, the height of the bars needs to be adjusted to take this into account. A rule of thumb is that when using a DBS brace it might be advisable to have the bars an inch or so above the handles of your crutches, canes or walkers. This may feel awkward in the beginning. Or for persons who do not utilize upper extremity walking aids, as your arms hang from your side, measure the height from the floor to one or two inches above the crease in your wrist. To determine the width between the bars, figure a comfortable reach but include room to do the side by side and hula hoop exercises without hitting the bars. Depending on your reach, about 36 inches apart will allow the flexibility of use. You may want to consult with your orthotist or PT who understands the DBS brace.
o Put the bars in a comfortable place in the house. As you will probably be
spending hours using them, a comfortable, pleasant location will motivate you to practice more. See Hints on Building a Set of Parallel Bars, Appendix D.
• Handrails in a hallway
o An alternative to parallel bars is mounting handrails in a hallway in the home.
Again, place them at a comfortable height using the directions above. They should be long enough that you can take at least a few steps in them, the more steps in one direction the better.
37
o They can be made using stair railing and brackets screwed securely into the wall. Conduit or PVC pipe are other alternatives. See Hints for Installing Handrails, Appendix D.
o There are tension type bars that could be used between walls, door frames, or
other sturdy uprights and are available from photographic lightling outlets (or less sturdy versions from bed & bath stores ….
• A full length or closet mirror
o This invaluable tool allows you to get visual feedback as you practice. It need not be costly. There are free-standing mirrors as well as door or wall mounted ones. It is helpful to attach a plumb bob with a suction cup hook or a strip of blue painters tape down the middle of the mirror to visually help keep your body centered.
• A video camera or alternative
o Recording your work on a video gives you the ability to get visual feedback and
analyze your progress.
o It is the tool that allows you to communicate remotely with your orthotist and get feedback
o It allows you to track your progress and can help with the motivation to keep
working.
• Notes, posters, other aids
o At least one wearer has made a poster with reminders on it and placed it in her exercise area so she can refer to the written word as she practices.
o Colored painters’ tape applied to your walking surface either as a solid line along your path and/or as individual blocks to identify where to place each foot to achieve equal step length.
• Phone numbers of your orthotist, your doctor and your physical therapist.
38
Driving with a Right Leg DBS Wearing a DBS brace on the left leg usually does not cause any problems with driving, unless a person drives a car with a clutch (standard transmission). Even then, most clutches require enough pressure to depress the pedal. This often requires drivers to use the upper leg and hip to use the clutch. However when an individual needs to wear a brace on the right leg, the DBS design may make it hard or impossible to depress the accelerator because the ankle portion does not bend. Depressing the brake can be accomplished using the entire leg and pushing from the knee or hip.
It is highly recommended that one practice driving in an empty parking lot.
There are a number of techniques that can be used to overcome this difficulty: 1. Taking the brace off when driving and putting it back on when not driving. With a right
KAFO it might be helpful to have velcro or a hidden zipper put in the inseam on the pant leg. This eases removal of the brace for driving.
2. Using hand controls on the vehicle for the brake and/or accelerator. For people who lack
sensation (especially touch and proprioception) in their leg(s) it might be best to use hand controls.
3. Placing the right foot next to the accelerator and rotating (turning) the foot and leg onto the
accelerator as needed and pushing on and pulling away from the accelerator using the upper leg/hip. In this scenario, most people use their left leg/foot for the brake.
4. Use left foot on brake and accelerator if the left ankle/foot is stronger.
While I was in training to use my 2 DBS braces and beginning to think about driving with them, I sort of scared myself into thinking I couldn’t drive with them. I mentioned it to my brother and he gave me a gift of . . . a “transferable hand-grip driving system”. ! I thought they might be expensive, complicated and permanently affixed to the car, but they were not. A search of the Internet for” portable hand controls” will lead you to several websites that carry them. Then, I decided to try driving on my own without the hand controls even after I received them, and discovered I could!! So, I first recommend trying it solo first.
I do not have strength for lifting my right leg onto and off the accelerator, but I am accustomed to placing my foot next to the pedal and pushing and pulling away from the pedal with my hip. I can pull way back quickly from the pedal if need be, and I can lift with my left leg to hit the brake, making it safe. Then, I reach down with my right hand and replace my right foot near the pedal. I do this often. The DBS is very solid and can be relied on to stay where I put it and it is not too heavy to move. I have a bit of a problem with lifting my right leg into the car, but nothing that stops me.
As always, with us it seems, it’s a matter of accommodating or modifying and trying to make it work and very often there is a way!! J.E-F.
39
Navigating Transportation Safety Administration (TSA) and Other Security Checkpoints
Although there may not be any metal in your brace, it may set off security detectors. The basics of security checks are: • Allow time to go through a thorough TSA/security inspection • Expect to be patted down and/or to show your brace • Wear clothes that allow for the inspection to occur:
o Be able to pull up a pant leg o Wear a skirt o Wear shorts o Install Velcro/hidden zipper in the inseam of your pants on the KAFO side
TSA regulations state you do not have to take off your brace and put it through the machine, but some DBS wearers have encountered overly zealous inspectors and delays if they do not take off their brace. Your rights are very clearly outlined in the following links/pages – be informed of what they are.
A TSA link for anyone traveling who has special needs:
http://www.tsa.gov/travelers/airtravel/specialneeds/index.shtm A specific link for people with “Mobility Disabilities”:
http://www.tsa.gov/travelers/airtravel/specialneeds/editorial_1371.shtm A specific link for “orthopedic shoes, support appliances and other exterior medical devices”. There is also a section for walkers, canes and crutches at this same link:
TSA Cares is a helpline to assist travelers with disabilities and medical conditions. TSA recommends that passengers call 72 hours ahead of travel to for information about what to expect during screening.
Carrying stuff Carrying purses and bags of all kinds can challenge your balance. It might be helpful to have a small back pack for daily use rather than a purse over one shoulder pulling you to that side. A fanny pack will also keep you centered. At the grocery store if the clerk makes 2 bags of about equal weight, then you will stay balanced.
Going Up and Down Hills and/or Stairs
The initial walking techniques taught to you by the DBS clinician are designed for walking on firm, flat, even surfaces, such as floors or flat sidewalks. The shift of weight onto the foot that is stepping ahead, then getting the hip forward, and rolling forward on the foot are still the basic techniques when confronted with surfaces that are not flat. In fact, on uneven terrain you may need to “exaggerate” the weight shift, “wiggle”, to maintain your stability and balance. There will be times during your “learning phase” that you encounter situations that are not flat or smooth (like the phone ringing upstairs when you are downstairs practicing “the walk”). However you should not consistently plan to walk up and down stairs, up or down inclines, or on uneven terrain until your DBS clinician says you are doing well with the basics.
Going up and down inclines: When going down an incline (downhill) the person wearing a DBS brace may feel like the knee is going to buckle or that (s)he will fall forward. To avoid this, the DBS wearer must come down hard, with all their weight, onto the heel of the braced foot when it makes contact with the ground (“crush” the heel). This compresses the SACH heel and keeps the heel level with or slightly lower than the foot. This eliminates the thrust forward that otherwise would occur on heel strike and the wearer then rolls forward onto the front of the foot in the same way that normal gait with the brace proceeds. If there is a very steep decline it may be safer to side step or walk in a zigzag fashion down the slope. When going uphill the ankle of the brace may flex (bend) enough to allow relatively easy walking up a gentle slope. If the slope of the incline exceeds the capacity of the brace to bend, a DBS wearer may have to turn the foot slightly inward or outward while walking up the hill or, with a steeper hill, may have to side step up the slope or traverse the incline in a zigzag pattern rather than straight on. Some DBS wearers on very steep hillsides find it works best to walk up the hill “backwards”. Many DBS wearers note that it is harder to get their weight forward on their braced leg when walking up inclines (Gravity is not always our friend!!).
Stairs: For each DBS wearer there will be an “ideal” stair height and width that allows him/her to go up and down stairs one foot after the other. On stairs that have a rise (vertical distance between each step) that is higher than this “ideal,” the DBS wearer may have to go up one stair at a time, usually leading with the stronger leg. The same may apply to going down some stairs, but then it usually works best to lead down with the weaker (braced) leg. The old mantra taught by physical therapists that may be worth remembering is “Up with the good; down with the bad”! Another technique would be to side step up or down the stairs using a railing or wall.
41
Beyond Basics to Mastery
Anyone who endeavors to use a DBS brace quickly comes to understand that using the brace is a life-long learning process. Veteran DBS wearers have learned that even after they have mastered the moves necessary to walk in the DBS brace and are able to ambulate under various conditions, they keep coming up with situations and circumstances where they have more to learn and more to practice. And, as their confidence and skill increases they start looking to do things that they never thought possible before, which means learning and mastering a new level of skills.
For example, one wearer said, after four years of wearing her DBS brace, “Finally I got up this morning and put on my brace and didn’t have to think about how to walk in it and didn’t have to take those first few practice steps before I went about my day.” Another veteran wearer talked about having to go back into physical therapy so she could learn to carry her grocery bags and keep her balance.
So, during our lifetimes, mastery will come with practice and then, by setting new goals, we can move on to mastery at the next level. Isn’t that wonderful?!!!
Networking (You don’t need to do this alone!)
Over the past few years, DBS wearers have realized that they would like to learn how
others have done it, want to share their successes and joys, and/or need to gripe about their learning process. As a result, some networking options have been developed.
• Facebook: A closed group on Facebook has been established. To access this
group, contact Marny Eulberg, [email protected], or Margaret Hinman, [email protected], for an invitation. The group is listed as the Human Gait Institute (DBS wearers).
• Discussion Groups:Where there is more than one DBS wearer in an area, discussion groups have been organized which not only provide shared support but also social sharing opportunities. To set up a group in your area contact one of the persons below for start up information:
o Contact Marny Eulberg or Margaret Hinman for information on about the
group in Colorado.
o Contact Karla Stromberger ([email protected]) for information on the West Coast group
42
Chapter 6
INSURANCE
General Insurance Information Dealing with insurance companies regarding DBS can be daunting, so here are some quick tips to help maximize the chances of having the claim paid. Some individuals have almost had to sell their firstborn to get reimbursement! The battle is not for the fainthearted! Many of these tips are also discussed in more detail in the following section.
• Most DBS clinicians have not and will not sign an agreement to accept your insurance as payment in full, therefore, you will likely have to deal with the insurance company yourself, if you wish to recoup some of the money that you paid for DBS!
• Before even beginning to get a DBS, know what kind of insurance you have, and if it is a HMO, a PPO, Medicare, etc. since each type of insurance has its own rules, procedures and restrictions. Determine if you have a maximum benefit amount for orthopedic braces or Durable Medical Equipment (DME).
• Consider changing insurance companies in the policy year that you get the brace if the increased cost of insurance can (or might) mean that they will pay more for the brace.
• Talk to your insurance customer service department more than once to find out what the insurance will cover and how to appeal if necessary. See if you get the same answer from different customer service representatives.
• Consider the prior authorization route first, and if you can get that, have them send you a
written copy of the authorization. If denied, be prepared to appeal, or ask for reimbursement after you get your brace. Upon first contact with the insurance company, find out about how to do appeals and reimbursements so you have all the documents, procedures and information that you will need if you have to appeal.
• During the whole process write everything down, including the dates, times and the persons you talk with.
• Ask for their information in writing.
• Know the difference between prior authorization and prior certification.
• Be precise, concise, accurate, and to the point in anything you send to the insurance company. Claims agents probably only spend about 3-5 minutes on any claim, so fewer words that make the pertinent points are better.
43
• Use bullets, bold type, and highlighters to emphasize the most pertinent information. • Introduce your claim with a short cover letter using bullets and phrases, not long
sentences listing what is in the claim, and printing it on colored paper. The claims agent will remember your claim when you call to check on its status.
• In the cover letter consider a sentence informing the insurance company that our wounded warriors at Tripler Army Medical Center in Hawaii are using this brace and are able to return to active duty, something conventional bracing usually will not allow.
• Use before and after photos, i.e., without a brace, in the conventional brace (if you have one), and in the DBS — front, back, and side views. Have each view showing the differences on a page (3 pages total) with perhaps one quick phrase as to what to look at in the transformation
• In the cover letter include a sentence about how this brace will prevent or delay future costs to the insurance company for wheel chairs, shoulder replacements or surgeries due to using crutches or other upper extremity assistive devices and documenting what the current insurance company has already spent on devices that haven’t worked.
• Don’t bother with a long history of your disability, how many times you have fallen, or how many bones have been broken when you fell, unless your current insurance company has paid for the treatment of theses injuries, because it probably won’t be read or will interfere with the main point—the DBS is the best/only correction for your disability.
• Call frequently to keep track of the status of your claim and keep notes.
• Feel free to borrow from and customize any of the documents in this Handbook. They
and similar documents have been used to make successful claims to insurance companies.
• Health Saving Account (HSA), Flexible Savings Account (FSA), or taking a medical deduction on your income tax are considerations could affect the timing of when you are casted for your brace and when you are fit with it. Be aware of your benefit year and then look at how to make maximum use of your benefits. This could mean either paying for the brace in one benefit year or paying for the first half of the brace in one benefit year and the second half in the next benefit year.
Theft and Loss Insurance
Some wearers have added a rider to their homeowners policy to cover theft and loss of the brace at a very low yearly rate. This might be something to consider.
44
Insurance Reimbursement for Your DBS Brace
Many DBS orthotists have chosen not to file claims with insurance companies. If this is the case, with your DBS orthotist, then you will need to file the claim with your insurance company in order to receive any reimbursement for the cost of the DBS brace(s). In September 2009, Medicare eliminated the process whereby a patient could personally file an initial claim directly with Medicare. Only a Medicare certified orthotist can file a claim with Medicare. If you want a claim submitted to Medicare for partial reimbursement for the cost of your brace(s) make sure your orthotist is Medicare certified! The orthotist is required to submit the first claim with Medicare; the patient can, and frequently will need to, do the paperwork required for processing an appeal of a denial or of an inadequate reimbursement.
Keep in mind that the information below reflects the experiences of
some DBS wearers and is not a guarantee that it will apply in every circumstance. Your dealings with the insurance company may be unique to your particular case and to your insurance company.
There are many different medical/health insurance companies and each has its own set of
rules and procedures that change from time to time and many have different coverage for braces, depending on which state laws apply to their contract with you or your employer. It is useful, early on in your process of considering a DBS brace, to review your insurance and asses the likelihood that the insurance will pay for all or part of the cost of the brace. You can start gathering this information by calling the insurance company customer service office (phone number usually printed somewhere on your insurance card) and reading the written copy of your policy.
If it has become clear that an individual’s current medical insurance is unlikely to pay for
the brace, some individuals have changed insurance companies and selected a company that was more likely to cover it. Changing insurance ideally should be done prior to the person being casted and paying the initial down payment, but absolutely must be done prior to receiving the brace and making the final payment.
In general, the least predictable and most restrictive insurance plans are going to be the
HMOs (Health Maintenance Organizations such as Kaiser, Secure Horizons, Cigna HMO, and any that have HMO somewhere in the name). The HMOs frequently only pay for care from their “preferred providers”. If you have insurance (HMO or PPO) that has “preferred providers” or “approved providers”, you will need to find out about the process for using an orthotist who is not an approved provider. The insurance usually requires a prescription and a letter of medical necessity from a physician explaining why you need this specialized care and pointing out that none of the insurance company’s “preferred providers” can provide the same, necessary service. See Sample Letters to insurance companies, Appendix A.
45
Some insurance companies will explicitly state what they will pay for a brace, usually up to some maximum; others lump braces into the category “DME” (durable medical equipment) which then also usually sets a yearly maximum benefit for all DME including canes, crutches, wheelchairs—power and manual, hospital beds, and other devices that are expected to last a year or more. It is useful to inquire from your insurance company or review the insurance policy to clarify exactly what that insurance company includes as DME and also answer the question “Does the ‘out of pocket’ maximum apply to DME?” At least one DBS wearer was reimbursed under the DME yearly appropriation from her HMO (Kaiser) for her DBS braces; she simply gave evidence of the bill after putting in a claim and did not complicate the process by asking for an “out of plan” approval for the DBS braces.
It may be useful to call the insurance company more than once and ask the same
questions again as some DBS wearers have found that they receive different, sometimes conflicting information, from different service people. Persistence and frequent contacts with the insurance company throughout the process has yielded positive results for some DBS clients.
As you go through the process, do keep notes with dates, times, the person you talked
with, and what you were told. You may need to recite the details back to the insurance company when the company says “we have no record of that” or “this is not a benefit of your plan (after someone had told you it would be covered)”. If someone from the insurance company says that the company will pay for the brace or a certain amount toward the total cost of the brace – get it in writing! Make a file and keep copies of all correspondence sent by you and sent to you!
Some insurance companies require a “prior authorization” (PA). This is most commonly
required by HMOs, PPOs, and others when the anticipated cost is over a certain dollar amount. Your primary care physician frequently must submit this to the insurance company, although sometimes the client can do the “legwork” necessary to obtain a PA. Be aware that, for some insurance companies, there is a difference between prior authorization and pre-certification: prior authorization generally means that they authorize the procedure but do not agree to cover a certain dollar amount; pre-certification means the insurance company agreed to pay a certain dollar amount for the device in advance.
Some DBS wearers who have applied for a PA and been denied and then later requested
reimbursement for their out of pocket expenses for the DBS orthosis have received the reimbursement, even though they technically did an “end run” around the insurance company rules, but others have been denied “because they did not follow the rules”.
A few clients have been able to obtain a prior authorization in advance of getting the
brace but only with persistence on the behalf of the client AND by the physician or physician’s office staff. It is not unusual to take 20-30 minutes of being on hold and transferred from department to department when your request is not a common request or for an unusual device. One insurance company in Colorado has a menu that when the physician chooses the number for “prior authorization for DME” the caller is directed to leave a message on voice mail and the physician’s call will be returned, however, they never return the call and later claim they did not receive the message. However, pretending one does not have a touch tone phone eventually
46
connects the caller with a live person who then instructs the caller about what information is required and a fax number for the submitted information!!
All insurance companies are required to have an appeals process in place. Don’t be hesitant to appeal if your initial claim is denied. So, part of your task in dealing with insurance companies is to inquire about the appeals process. You may need it and should consider using the appeals process if your request for payment has been denied or is believed to be inadequate. Many DBS clients plan ahead and use all or part of their HSA (Health Savings Account) or FSA (Flexible Savings Account) to pay for the brace. It may be useful to plan ahead if one anticipates that they will meet the income tax deduction for medical expenses for the year. Make certain that the initial down payment for the brace and the final payment are all made during the same tax year. !
Notes on Filing a Medicare Claim
Medicare policy does not allow payment of claims outside of Medicare certified Durable Medical Equipment (DME) providers. The initial claim must now be submitted by the Medicare certified orthotist and cannot be submitted by the patient.
There are several Medicare Regions in the United States and each has a different fiduciary agent and each may have somewhat different policies for handling claims. Some DBS wearers who live less than a hundred miles apart but are in different Medicare regions have received vastly different amounts of reimbursement from Medicare for their DBS braces. If Medicare pays the claim then the supplemental insurance(s) should also pay their share.
DBS wearers can do much or all of the work required to submit an appeal or appeals to Medicare if the initial claim was denied or the person feels the reimbursement was inadequate.
DBS wearers should customize their appeals to fit their individual circumstances. Be
concise and precise. Consider printing the cover letter on colored paper so the appeal will stand out. On it list the forms and information that were sent with the appeal. Use a highlighter to emphasize critical information in a document that includes a lot of text. Considering the number of claims that are processed, the Medicare readers probably don’t take much time to read extraneous information, so any way you can help them get to the point will probably help your case.
To insure that the claim has reached Medicare, it is suggested that it be sent with a “Return Receipt Requested” form from the Post Office.
Another helpful hint is to call Medicare about a week after sending in the claim. It means waiting on hold but will give the claimant the knowledge of where the claim is in the process and may expedite the processing of the claim.
47
APPENDIX A
FORMS AND LETTERS
Suggestions for “Letters of Medical Necessity” for DBS
If you file a claim with your insurance company for reimbursement for all or part of the cost of your DBS brace(s), the insurance company will require a prescription and a letter of medical necessity from a physician. The stronger the letter explaining the need for this type of brace, the more likely the insurance company is to approve the claim. In an ideal world, insurance companies would want you to function as well as possible and have the best medical care, however what motivates them most is saving money. A letter stating the benefits of this brace to prevent fractures, eliminate the need for surgery, or the need for another brace that would be equally or more expensive is usually most effective. For example, a letter from an orthopedic surgeon who has examined you and who has recommended surgery to correct some of your problems, but would be better addressed by the brace alone, may be especially useful to demonstrate the cost savings! The physician can also refer the reader to the DBS website (dynamicbracingsolutions.net) for more detailed information about a DBS orthosis.
It can save time and forms being sent back and forth for lack of required information if
the letter from the physician contains an ICD-9 diagnosis code (your physician or their office will know what that means) and the physician’s UPIN and NPI numbers. Coming in 2013 or 2014 will be a revised diagnosis code to the ICD-10 instead of the ICD-9. Make sure the physician’s letter is attached to all of your forms. If the physician sends the letter to the insurance company directly, it will never be connected to your appeal. Below are some examples of letters that have been used successfully by some DBS wearers and that you may give to your physician/medical provider as an example when you request that he/she write a letter of medical necessity for you. Note: these are samples, there is no guarantee that these letters will work for your situation or your particular insurance company!!
For a DBS AFO for a client who would otherwise need a conventional KAFO (long leg brace):
“To whom it may concern: On (date) I examined (name of patient) and prescribed/recommended a custom engineered and designed dynamic triplanar control AFO utilizing the methodology of Dynamic Bracing Solutions. Ms. ________’s diagnosis is ____________________. Her _______ leg is significantly weak as outlined in my report/progress notes that are attached. The following interventions have been tried and no longer are working: (list and detail why it doesn’t/hasn’t worked, e.g., ‘ the other options tried were a polypropylene AFO and a Toe-Off AFO; neither of these have been sufficient to control her knee hyperextension and she has had
48
much difficulty getting appropriate fit of either of these braces so that she would feel stable and she has broken all of the braces within a year due to excess torque created by her abnormal gait. In addition while wearing these devices, she had continued pain in the right knee that has prohibited her from walking/standing long enough to perform her usual activities of daily living. Then discuss advantages of DBS, e.g., ‘A DBS brace will supply the knee support she needs, correct the deformities of her knee and ankle/foot and allow her to walk with minimal upper extremity assistive devices which is necessary because she has significant weakness of her left upper extremity that limits her ability to use a cane or crutch in the left hand. Then describe what would be the next step using conventional technology (such as a KAFO) and approximate cost of this. Sincerely, Dr. Helpful For a DBS client with deformity of foot/ankle and/or significant pain
not relieved by previous interventions: “I have strongly recommended that Mr. S be fitted and trained in the use of a custom engineered dynamic triplanar AFO made by Dynamic Bracing Solutions of San Diego, CA for his right foot/leg. He had polio as a child and has had residual weakness of his right ankle/foot especially the ankle evertors and dorsiflexors and now has heel cord tightness and a markedly supinated foot that goes into more varus at the heel whenever he weight bears on it (see photo of his leg/foot enclosed). He has worn a conventional polypropylene AFO that he has modified to provide more medial-lateral support and uses bilateral walking sticks when outside but these are no longer sufficient. The DBS brace is capable of providing significant remodeling of the soft tissue deformities and, in my opinion is the only alternative to complex ankle surgeries for this gentleman. I had one other polio survivor who had slightly greater supination who was fitted with a DBS AFO and now has less than 5 degrees of heel varus/forefoot supination! See copy of my examination and assessment of Mr. S. done _____. I request that you consider paying the $______ cost of this brace because it is less expensive and much less of a risk for Mr. S than major ankle reconstruction surgery.” Sincerely, Dr. Helpful
For a client who currently uses a conventional KAFO:
To Whom It May Concern: I have prescribed a dynamic triplanar control KAFO ( knee-ankle-foot orthosis) utilizing the methodology of Dynamic Bracing Solutions for Ms. ____________. Her diagnosis is _________. She has severe muscular weakness of her ankle/foot including her gastroc-soleus complex and moderately severe weakness of her left quadriceps. She has developed severe genu
49
recurvatum of 30 degrees when weight bearing. She currently uses an offset knee joint KAFO and bilateral forearm crutches but is going into more and more hyperextension. Her current brace does not adequately control the valgus forces at her knee and in fact the valgus deformity of her knee has progressed while using her current orthosis. In my opinion, a dynamic triplanar KAFO custom engineered to meet her unique needs is the only alternative that will partially correct the deformities of the foot and knee, provide adequate medial-lateral control of the knee and ankle, allow her to walk with an unlocked knee joint, and likely allow her to walk with no crutches or, at most, a single cane or crutch. Decreasing the use of canes or crutches will minimize the risk of developing significant carpal tunnel syndrome or disabling osteoarthritis or tendonitis of the wrist, elbow, or shoulder commonly seen in long term crutch wearers.
Sincerely, Dr. Helpful
Example of a Successful Appeal Letter to Medicare
To: Whom It May Concern, From: Medicare # I am appealing your previous decision regarding payment for my Dynamic Bracing Solutions brace. This is the only brace that provides me with the opportunity to walk independent of crutches and prevents me from needing a wheel chair. It also saves me from needing eventual shoulder surgery due to the overuse of crutches and it keeps my hands from aggravated arthritis and carpel tunnel syndrome. It has also improved my posture, reducing the chances of back problems as I age. Essentially, it allows me to live independently for many more years. It has given me a new lease on life—I am thrilled about its potential. Attached are:
1. Medicare decision letter 2. Invoice from Dynamic Bracing Solutions 3. Information regarding the Dynamic Bracing Solutions brace 4. Copy of letter from my physician, stating the cause for medical necessity for this specific
brace 5. A copy of a February 20, 2007 evaluation done by my physician and/or physical therapist 6. Photos showing the visible improvement that the brace provides for me as compared to
no bracing and convention bracing technology 7. Documentation of improvement of bone density, muscle strength, etc., as applicable
I look forward to a quick positive response from you with regards to payment for this brace. Sincerely,
50
Invoices and Reimbursement Codes
A part of any financial transaction includes an invoice for services. The DBS invoice has 2 parts that are significant to the wearer when it comes to reimbursement: the insurance reimbursement codes and the descriptive paragraph cited below.
The number and types of reimbursement codes that the orthotist uses will determine the amount of reimbursement that you will receive. Therefore it is important that you check that section of the invoice when you receive it. Ask your orthotist if the listed codes will increase the reimbursement. If not, ask for a new invoice with additional codes. If the orthotist does not have, or is not aware ,of the additional codes refer him/her to Jason Jennings, an orthotist in Houston, or Marny Eulberg, MD, or contact either of them yourself. Your DBS orthotist knows how to contact them.
The following paragraph is usually part of the invoice submitted to the insurance company. When you have any correspondence with your insurer, highlighting this paragraph may help the reader an understanding of the significance of the DBS and may help with your claim. Highlighting will also make it stand out if there is a lot of other text in your correspondence.
Highlight this paragraph when submitting to insurance Think of our advanced services as similar to providing a trans-femoral prosthesis. The more involved services to provide triplanar control and dynamic response technologies require 50-100 times more time than conventional bracing systems. Similar to Prosthetic technologies, high-tech materials and unique designs are developed to solve the individual’s structural and functional needs to enhance independent function. Many documented cases have shown the ability to prevent the progression of deformities, improve alignment, improve deformities, prevent some surgeries, and has reversed the effects of disuse atrophy. It is documented that our clients are more active, more efficient, regained lost activities, improved balance, reduced falls, and depend on less assistive devices that cause harm to upper extremities compared to when they used conventional bracing systems.
51
APPENDIX B
PHYSICAL THERAPISTS
Goals for DBS Wearers and Physical Therapists
• Improved strength • Increased specific functional gains/Activities of Daily Living (ADL) • Improved gait pattern/normalized gait pattern • Improved balance • Decreased number of falls • Improved endurance • Increased range of motion in some areas • Decreased fatigue with activities
Suggested Pre-DBS assessment and training
• Use a timed walking test for research (HGI is using the L Walking test that is a longer
version of Timed Up and Go) • Manual Muscle Test • Range Of Motion test • Posture evaluation • ADL assessment based on a 24 hour day • Note pre-existing pain - intensity, precipitating events, location • Video-tape and photos with and without conventional bracing • Pre-training in new recommended movement patterns (see DBS DVD) • Pre-brace stretching of contractures (tightness) as appropriate • Consider using taping techniques to help facilitate pre-brace changes for stability and
movement patterns – test skin first for a few days • Core stability exercises and pelvic range of motion are helpful pre-brace • Start the pelvic exercises supine or on the ball and include the pelvic clock and Kegel
exercises
The Learning Process in Physical Therapy
The value of working with a physical therapist is that the PT will be able to assess the readiness of the wearer to do the actual learning exercises that will help one function in the DBS. The PT may suggest lead up exercises to improve strength and flexibility in combination with the DBS routines. The PT will help break down all of the exercises into smaller components (incremental steps) as one proceeds through the learning process. Also the continuing assessment of the wearer’s progress by the PT can guide the wearer in relearning the skills that are needed as
52
one moves forward. Sometimes this needs to be repeated many times during training. See Selecting a Physical Therapist Chapter 2.
Considerations for Physical Therapists
• It can be challenging to learn to use the DBS for persons who have longstanding atypical gait patterns – with practice and time these will improve
• It is important for the PT to work within recommendations of orthotists to train in the use of DBS; watch DBS Orthotic Training DVD with patient
• PT may need to slow down therapy to allow the DBS wearer’s emotional response to DBS to catch up with the physical progress, especially when decreasing use of other assistive devices
• Be very cautious to not fatigue the patient with gait training – start with shorter session and increase duration as progress occurs.
• Encourage home program emphasis of 3 to 4 sessions per day of 10 to 15 minutes – include functional skills into this program – kitchen, bathroom, indoors, outdoors
• Utilizing sensory feedback in all modalities helps patients with long- term atypical gait patterns to learn new movements and to recognize prior movement pattern
• Note new pain - intensity, precipitating events, and location
• Try walking/hiking sticks to encourage fully upright posture and to bring knees forward into the knee cuff of the brace
• Consider raising parallel bar height and/or crutch height about an inch so that person stands straighter and allows the weight to go into the knee cuffs
• Help reduce hip flexion contracture, if present, being careful to not overstretch anterior hip capsule that could lead to instability
• Teach patient to get down to/up from the floor
• Teach use of stairs and inclines (DVDs of these may be available)
• Re-assess 24 hour ADL skills
• Never forget the trunk – may need additional work
• Sacroiliac (SI) joint might be destabilized and need balancing
• Videotape patient at regular intervals and review with patient
• Schedule periodic re-visits to prevent bad habits after initial training
53
• Recognize that training could last for years
• It is important to train a support person in what to look for and how to help break habits. At times just a word from the support person can bring the wearer’s gait pattern back on track. They are a good resource in preventing fatigue.
APPENDIX C
Shoes and SACH Heels
Guidelines for choosing shoes for DBS braces
• Your shoe size and width may change from what you wore prior to your DBS.
• FLAT shoes are BEST – especially in the first several months -
o These need to be flat to the front and back and side-to-side. See photos on page 32 to demonstrate this.
o The heel of the shoe to tip to the outside or the inside. o Skate board shoes, deck shoes or court shoes usually work best.
• The shoes must either lace up or have velcro fasteners right up to the ankle joint in order
to hold the brace in the shoe.
• The tongue must be well padded or able to be padded.
• The shoe must have a deep enough heel cup to accommodate the brace and the SACH heel without the brace coming out of the shoe.
• In general the insole of the shoe should be removable.
• Sandals work best if they have a heel cup and a back piece from the rear strap to the sole.
• The degree of cushioning built into the heel of the shoe should be a consideration when you are trying on the shoes. If the density of the heel of the shoe is harder than your original shoes, then it might be recommended to have a SACH heel that is of softer density for the new shoes. And the opposite is true.
• There is a way to measure how much of a SACH heel you need in the new shoes if the heel height of the new shoe is different than your original shoes.
• Resource of shoes that work with their braces can be found sometimes on the HGI FB site.
• A good way to test shoes for appropriateness is to do your DBS exercises in them.
54
• Any new shoes are going to slow you down for a few days as you acclimate to them.
• Go back to doing your exercises for a few days in the new shoes, and then take off!
SACH HEEL MEASUREMENTS
Measuring for the Appropriate Height of the SACH Heel
The DBS brace system has three integral components: the brace, the shoe, and the SACH heel, all of which must work together. The SACH heel, the Solid Ankle Cushion Heel, is the insert that is placed between the heel of the DBS brace and the inside of the heel of the shoe. The purposes of the SACH heel are (1) to allow the dynamics of the brace to function correctly, (2) to compensate for leg length differences and heel cord tightness, and (3) to facilitate walking on uneven surfaces. When you were fitted with the brace the SACH heel you were given was selected based on your brace heel height and the slope of the shoes that you brought with you to the fitting. If you have SACH heels for both left and right, the SACH heels may be different. It is helpful to mark them “Left” and “Right.” As you change shoes you may need to change the height of the SACH heel to optimize your walking with the brace. It may also become necessary to change the density/squishiness of the SACH heel.
The most common need for different thicknesses of the SACH heel is variable heel heights of shoes. This is especially true of women’s shoes that can be either totally flat (the heel not any higher than the toe of the shoe) such as Ked’s canvas shoes or, at the other extreme, have up to a 4 inch heel. The height needed for the SACH heel may also change, usually decrease, if you have heel cord tightness and the brace was designed to gradually stretch this out. Then as the tightness is reduced, the compensatory height of the SACH heel can be decreased to provide more stretch over time.
Some people are able to “feel” if the SACH heel height is correct or not; others depend on their orthotist or physical therapist to identify the need for change/adjustment.
Obviously the brace will not work in a shoe with a heel height much higher than the heel height molded into your brace. If the heel is raised too much, your body weight will be shifted too far forward and your knee may feel like it is going to buckle, or you will just feel like you are leaning forward. If the heel is too low, your knee may be pushed into hyperextension and it will take more work to be able to roll forward and off the ball of your foot and the tips of your toes.
So what is a person to do? You can have SACH heels made in a variety of thicknesses and then wear different heel pads with different shoes. How do you know what is the correct thickness of the SACH heels? The answer is to measure the difference in elevation at the point in the shoe where the ball of your foot fits and at the back of the shoe where your heel would be and then adjust the SACH heel accordingly. See photos on the following page:
55
Measurement at ball of Measurement at heel – foot – 16-3/4 inches 16-1/4 inches Step by Step Instructions for Measuring SACH Heel Height
Most often the orthotist adds 1/2 to 5/8 inch (the usual average heel height of most day to day shoes) to their calculations for heel elevation of the brace. You should ask the orthotist what the height is of your original SACH heel, and keep a record of it.
Start with the first shoe to which your DBS braces were fitted:
• Unlace the shoe to expose the lowest point at the ball of the foot – the braced shoe most likely had the insole removed.
• Place the shoe on a counter that has a cabinet overhead.
• Place a measuring stick at the lowest point on the inside of the heel of the shoe. Measure
the distance from the heel to the bottom of the cabinet. Write down the measurement.
• Now place the measuring stick on the inside at the lowest part of the ball of the foot. Measure the distance from this point to the cabinet. Write down this measurement.
• Subtract the heel distance to the cabinet from the ball of the foot distance. This is the height of the heel of the shoe.
• Make the same measurements with your new shoes with the insole removed.
56
The difference in measurement between the original DBS shoes and your new ones is the amount of the SACH heel that you need to add or remove:
o i.e.., if the measurement is less than your original shoe, then it would be helpful to reduce the measured amount/depth from your SACH heel;
o i.e.: If the measurement is greater, then this is the amount/depth of SACH heel that should be added to the initial one.
A useful hint is to write the measurement of the heel height into the insole of the shoe with a permanent marker. Two examples:
• If the difference in the slope between the new and old shoes is, for example, " inch higher (more), then you need to decrease the height of your SACH heel by " inch.
• If the difference in the slope between the new and old shoes is, for example, 3/8 inch lower (less), then you need to add a 3/8 inch addition to your SACH heel – usually with an additional heel pad or obtaining SACH heels in varying thicknesses. This may mean also adding 3/8 to the other shoe so that the hips remain level.
A Word about Density of SACH Heels SACH heels come in at least 3 densities. Find out from your orthotist what the density is of your original DBS shoe heels. If the density of the heel of the new SHOE is harder than your original DBS shoes, you may need a softer SACH heel. And, the opposite is true. If you gain a lot of weight (hopefully not unless it is muscle!) then you may need a denser SACH heel. And, the opposite is true. If you become more athletic on your DBS, you may need a denser SACH heel during athletic endeavors.
57
Appendix D
Construction Hints
Hallway railings and/or parallel bars A firm walking surface will make practice easier and allow you to utilize the full “ground/floor reaction” features of your brace, so it is better not to have carpet in your practice area. Where there is wall-to-wall carpeting, plywood can be placed over the carpet temporarily while practicing and leaned against the wall while not practicing. When selecting materials for handrails or parallel bars, choose materials that will provide you with the strength and support that meets your needs for feeling safe and secure. Installing bars in a hallway:
Materials • Stair railing cut to the length of the hallway.
Hardware/lumber yards will cut them to length for a small fee
• Stair railing brackets and hardware. At least 2 for each railing and spaced no more than 6 feet apart along the railing.
• Molly anchors to prevent the railings from coming off the wall if unable to find the studs.
Tools • Electric drill • Screw driver • Level • Tape measure or yardstick
Instructions • Fasten the bars securely into studs in walls using the stair railing brackets and hardware.
Studs are usually 16” to 18” on center. If studs are not available, use molly anchors. • Set the height of the bars by one of the following methods:
o If using crutches or canes, measure the height of the top of the hand grips and set the top of the bars to that height – they may need to be an inch or two higher
o Measure the height from the floor to the crease in your wrist and add one to two inches.
58
Building a set of parallel bars:
Materials • 4’ x 8’ x ! inch finished grade plywood • 2 – 8’ x 1.5” conduit pipe or PVC pipe • 12 feet of 1” conduit pipe or PVC pipe to be cut into four 32-36” pieces for uprights
(based on your measurements for the height of the bars) • 4 elbows, if using PVC pipe • 4 flanges of the same diameter as the upright pipe to be screwed into the plywood
(plumbing department of hardware store) • Nuts and bolts to fasten the flanges to the plywood • 4 compression connectors to stabilize the uprights
after they are inserted into the flanges (electrical department of hardware store)
• 4 electrical knock out seals of the same diameter as the conduit—if using conduit
• Paint or polyurethane to finish the wood surface (optional)
• Blue painter’s tape
Tools • Saw (or have the hardware store make the cuts) • Tape measure or yardstick • Drill • Screw driver • Someone to weld the uprights to the bars—if using conduit • Another option is to use threaded conduit and T connectors/elbows.
Instructions • Lay out and measure pieces, establishing where cuts are to be made and where bars are to
be placed on the plywood. N. B.—craftsmen suggest measuring twice and cutting once to avoid errors.
• Optional—apply a finish to the plywood
59
• Cut the uprights to the same height (see instructions for installing bars in the hallway for guidelines for height of the bars)
• Connect the uprights to the bars • Measure for the placement of the finished bars on the plywood • Drill holes and fasten the flanges to the plywood • Set the bars into the flanges and secure them with the tube fasteners. • Place a strip of blue painter’s tape lengthwise along the center of the plywood. • Go to work on your exercises!!!!!!
Hints for making a custom carrying bag:
• In selecting the material for the bag, consider using duck cloth, corduroy or upholstery material as they are sturdy and can be washable. Looking in the remnants at a fabric store can save on the cost. Another light weight and sturdy fabric that could be used is rip-stop nylon or parachute material. Some wearers have made a carrier out of a towel or pillow case.
• Use strapping material and hook and loop tape (Velcro) to make the straps. Also use hook and loop tape for closures.
• Making the case as a backpack is easier to carry, especially if you use crutches or canes. With that in mind, center it on your back using two straps rather than slinging it over one shoulder. This keeps the load even on the back and prevents an unbalance which can affect the walker’s stability.
• To determine the size needed, lay out the brace and the shoes together and measure the circumference around the largest area. Then add at least 4 inches to allow for ease of insertion. Also allow another inch for the seam. Measure the height of the brace and add about 8 inches to allow for seams and for the volume of the contents.
• For a KAFO, the length from the front of the knee collar to the top of the brace plus 4 inches should be the width of the bag. This will allow the KAFO to be flexed at the knee and the bag will not be so long.
• Keep the final case narrower than your back so that it does not interfere with your ability to move your arms as you walk.
• A pleat or a placket sewn into the bottom of the case will allow for easier opening. • Most KAFOs fit into sports bags.