37
The Filling Procedure Model(s): ECO Series
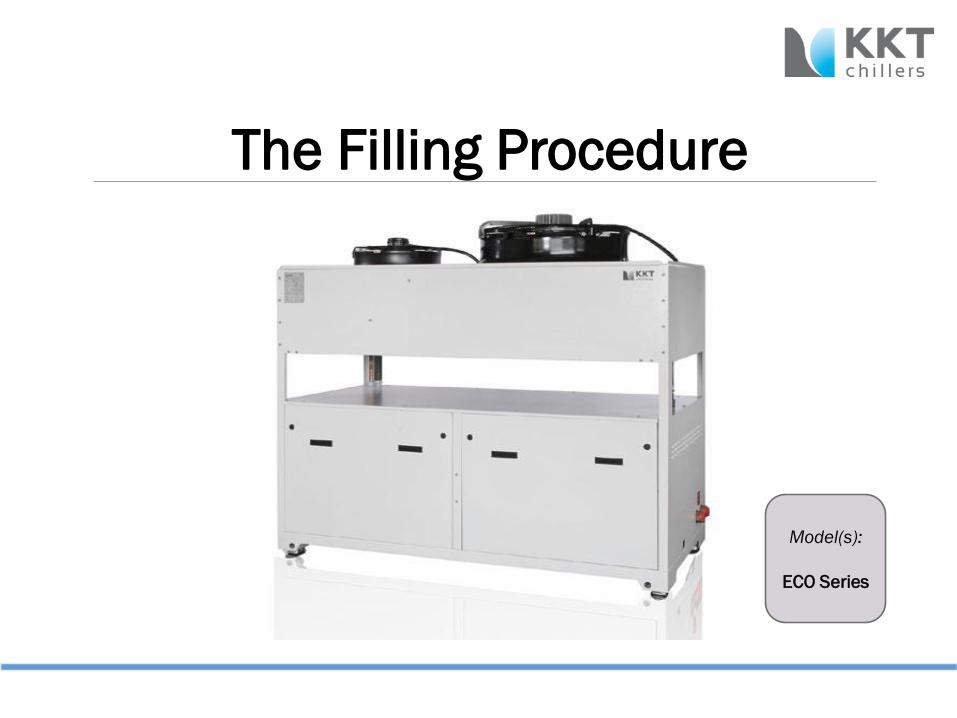
The Filling Procedure
Model(s):
ECO Series

4/6/2016 Filling Procedure/ TSG Manager AF 2
What is needed!
1. Pump
2. 3 water hoses with metric adapters (found on the chiller pump)
3. Glycol (Premixed 37% of KKT Protect)
4. Hand tools
5. Pressure gauge
6. Chiller key
4/6/2016 Filling Procedure/ TSG Manager AF 3
Method of Filling
What is “The Push-Through Method”?
It is the most effective method for purging air out of the closed water loop
system. The trap air will travel throughout the system and make its way back to
the chiller by means of an external pump.
The external pump is used to push through the chiller, IFP, and MRI system. In
a form of a bypass at the chiller, a bucket is ran inline of the external pump to
collect the purged glycol to be recirculated into the system.

4/6/2016 Filling Procedure/ TSG Manager AF 4
Connecting to the Chiller
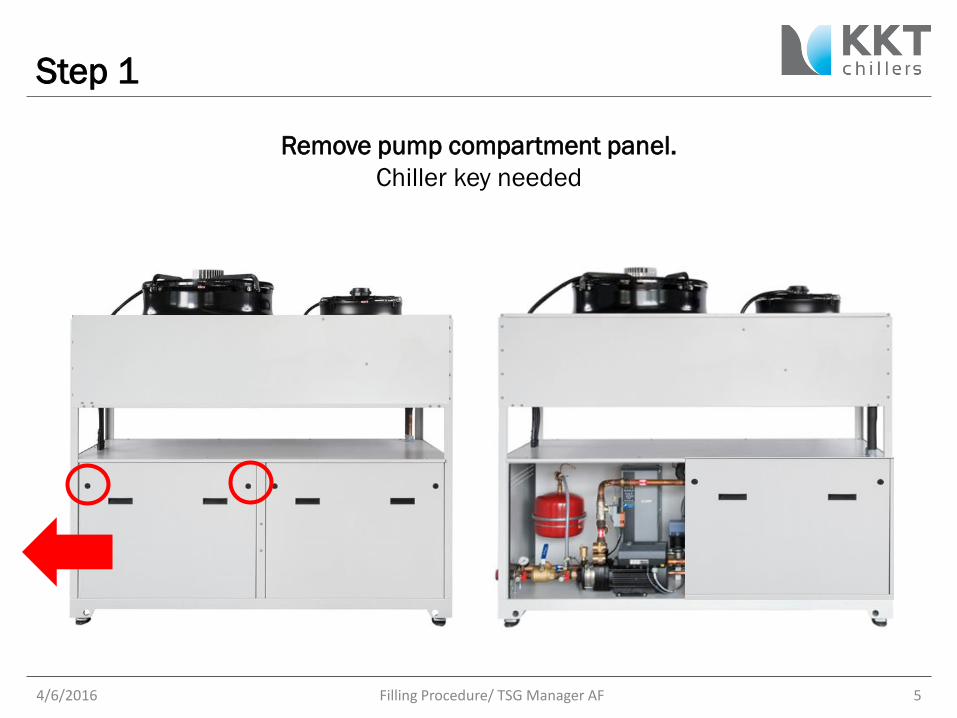
1. Remove the pump compartment panel.
2. Connect the discharge port of the pump to the drain valve of the chiller via
hose.
3. Connect inlet port of the pump to the glycol bucket via hose.
4. Connect a hose from the drain valve before the filter ball valve to the
glycol bucket.
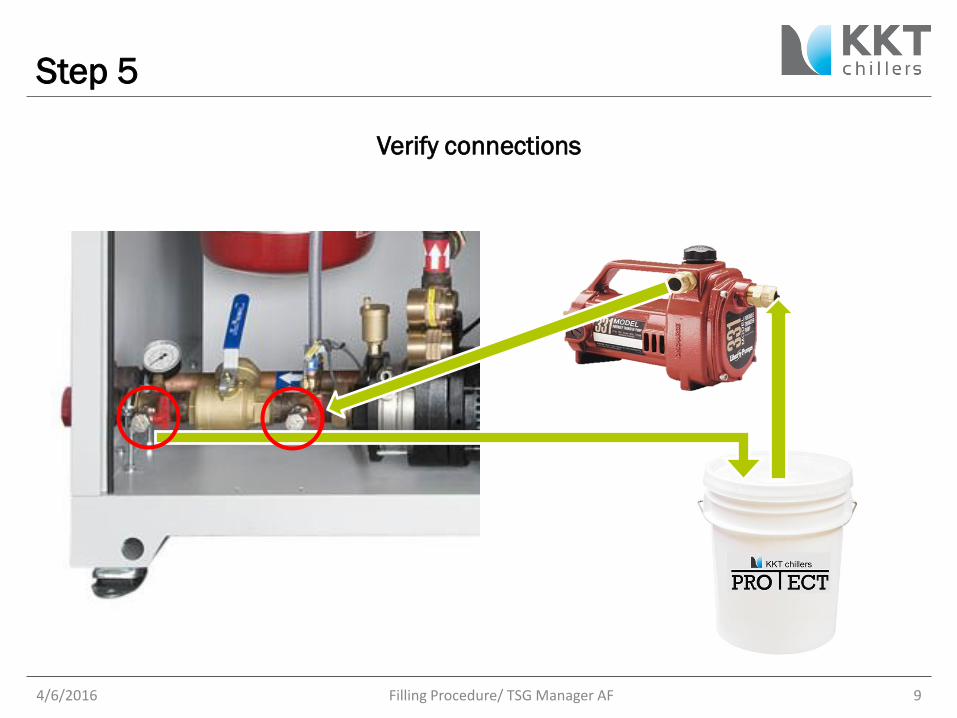
5. Verify connections
4/6/2016 Filling Procedure/ TSG Manager AF 5
Step 1
Remove pump compartment panel.
Chiller key needed

4/6/2016 Filling Procedure/ TSG Manager AF 6
Step 2
Connect discharge port of the pump to
the drain valve of the chiller via hose.

4/6/2016 Filling Procedure/ TSG Manager AF 7
Step 3
Connect inlet port of the pump to the glycol bucket via hose.

4/6/2016 Filling Procedure/ TSG Manager AF 8
Step 4
Connect a hose from the drain valve before the filter ball valve to the glycol
bucket.
4/6/2016 Filling Procedure/ TSG Manager AF 9
Step 5
Verify connections

4/6/2016 Filling Procedure/ TSG Manager AF 10
Steps before filling
1. Verify the chiller is powered off!
2. Remove fuses from the“17F1” pump fused breaker!
3. Verify IFP is powered off!
4. Verify filter ball valve to the chiller is closed!
5. Verify all valves to the IFP are open.
6. Verify air bleeders are open.
7. Verify pipe run and check for any bypass loops installed on the contractors
piping from the chiller to the IFP. (If installed, close the valve)
8. Verify chiller height from scanner.
9. Verify expansion tank nitrogen pressure.

4/6/2016 Filling Procedure/ TSG Manager AF 11
Step 1
Verify the chiller is powered off!
4Q1 should be on the “0” position

4/6/2016 Filling Procedure/ TSG Manager AF 12
Step 2
Remove fuses from the“17F1” pump fused breaker!

4/6/2016 Filling Procedure/ TSG Manager AF 13
Step 3
Verify IFP is powered off!
4F1 should be on the “0ff” position
4/6/2016 Filling Procedure/ TSG Manager AF 14
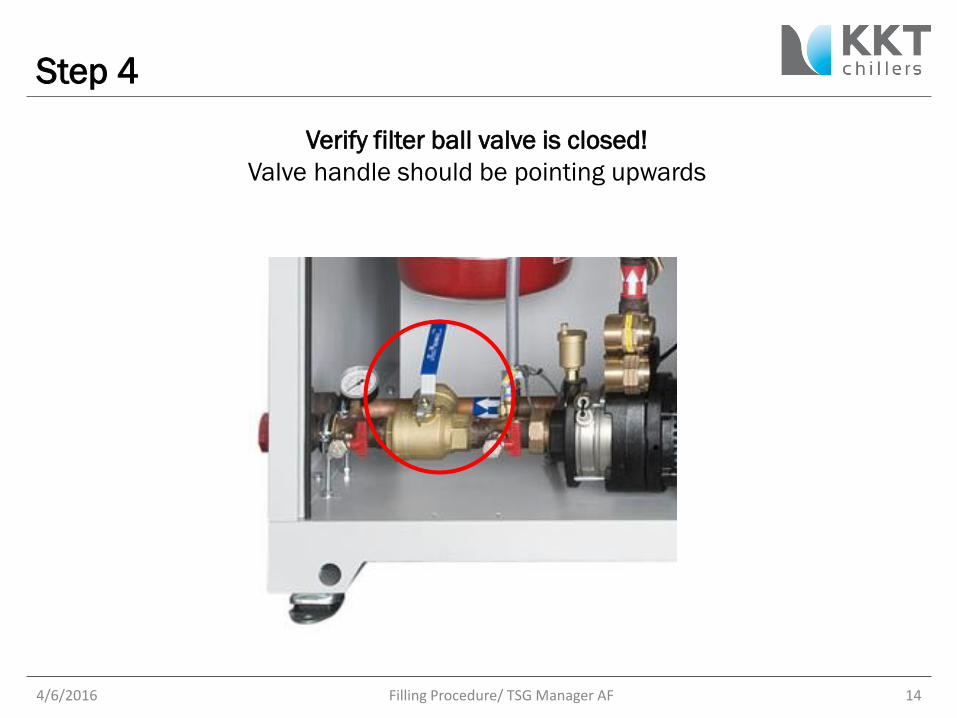
Step 4
Verify filter ball valve is closed!
Valve handle should be pointing upwards

4/6/2016 Filling Procedure/ TSG Manager AF 15
Step 5
Verify all valves to the IFP are open.

4/6/2016 Filling Procedure/ TSG Manager AF 16
Step 6
Verify all air bleeders are open.
IFP, Chiller, and Water Loop
4/6/2016 Filling Procedure/ TSG Manager AF 17
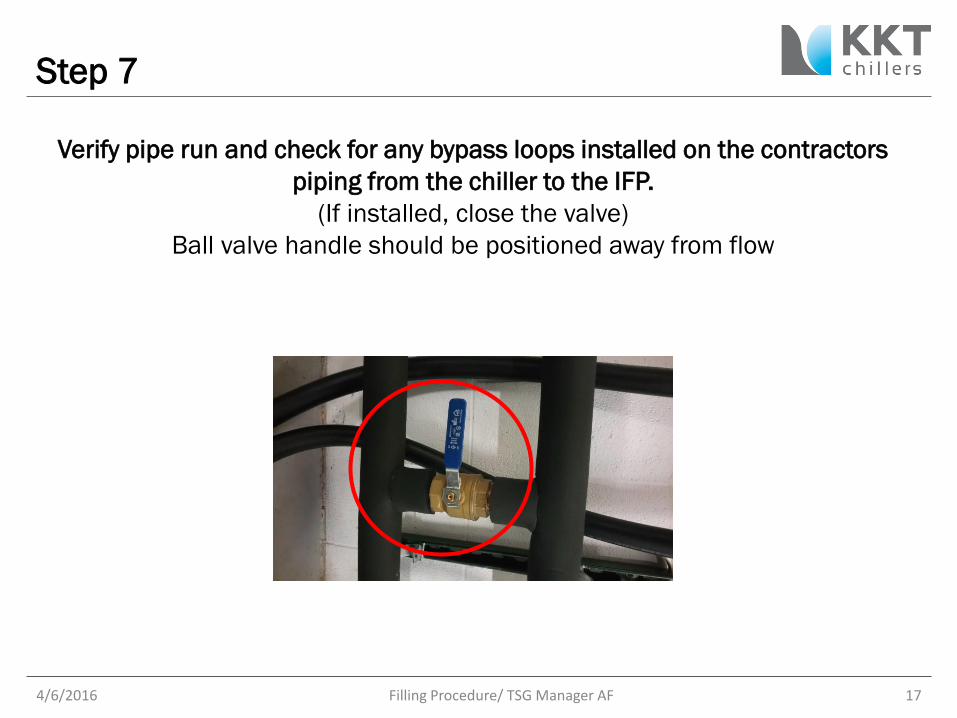
Step 7
Verify pipe run and check for any bypass loops installed on the contractors
piping from the chiller to the IFP.
(If installed, close the valve)
Ball valve handle should be positioned away from flow
4/6/2016 Filling Procedure/ TSG Manager AF 18
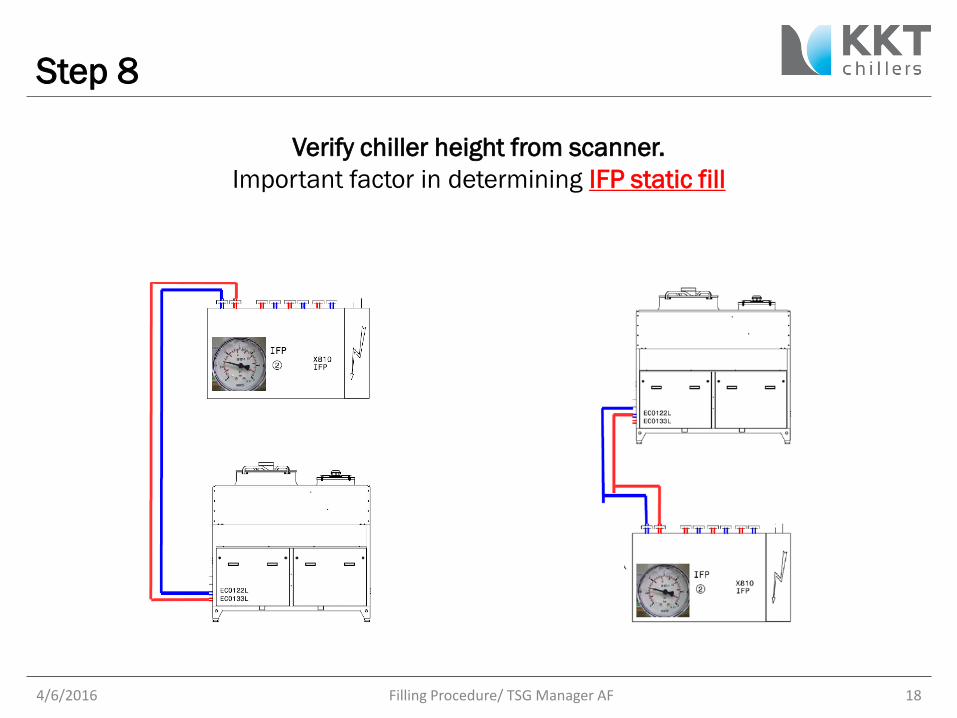
Step 8
Verify chiller height from scanner.
Important factor in determining IFP static fill

4/6/2016 Filling Procedure/ TSG Manager AF 19
Step 9
Verify expansion tank nitrogen pressure!
The reserve and operating tank should be pressurized at 0.6 Bar.
Remove cap and check with a pressure gauge.

4/6/2016 Filling Procedure/ TSG Manager AF 20
Filling the System
1. Power on the chiller!
2. Power on the IFP!
3. Verify that the 3 way valve at the IFP is open.
4. Power on external filling pump and open the drain valves. Perform “The
Push-Through Method”.
5. Fill the system to static on the IFP.
6. After desired pressure, close the drain valves and power off the external
pump.

4/6/2016 Filling Procedure/ TSG Manager AF 21
Step 1
Power on the chiller!
“4Q1” should be on the “I” position.
“17F1” should have the fuses removed!
Powering on the chiller will ensure the chiller sends a signal to the IFP to activate the 3 way valve
to the open position. This makes it easier to purge the system while performing “The Push-Through
Method”.
4/6/2016 Filling Procedure/ TSG Manager AF 22
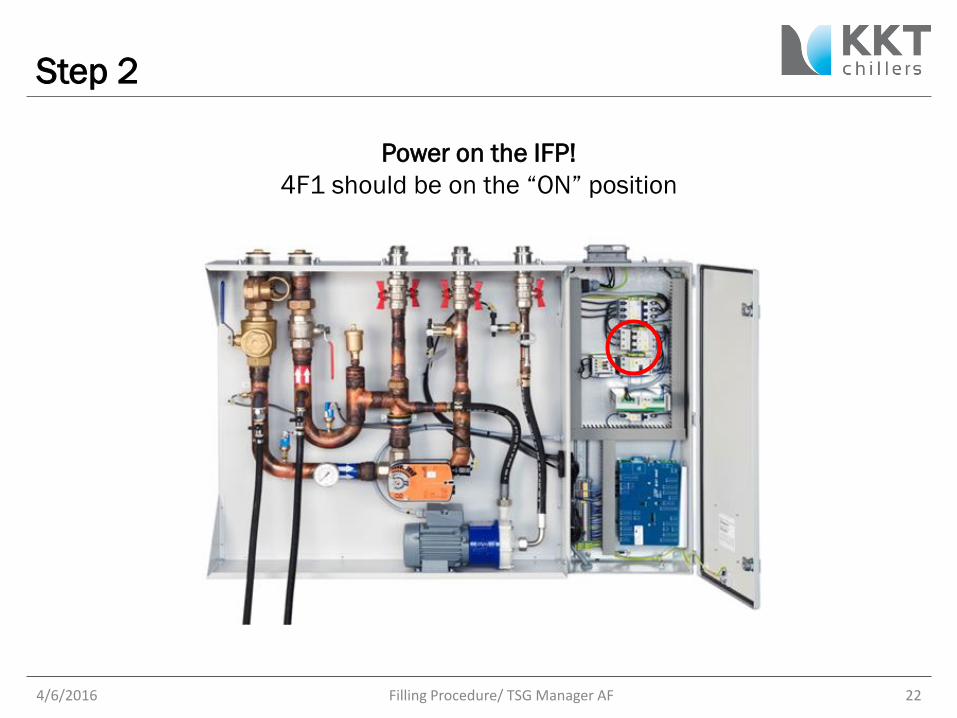
Step 2
Power on the IFP!
4F1 should be on the “ON” position

4/6/2016 Filling Procedure/ TSG Manager AF 23
Step 3
Verify that the 3 way valve at the IFP is open.
Position should be at “9”
4/6/2016 Filling Procedure/ TSG Manager AF 24
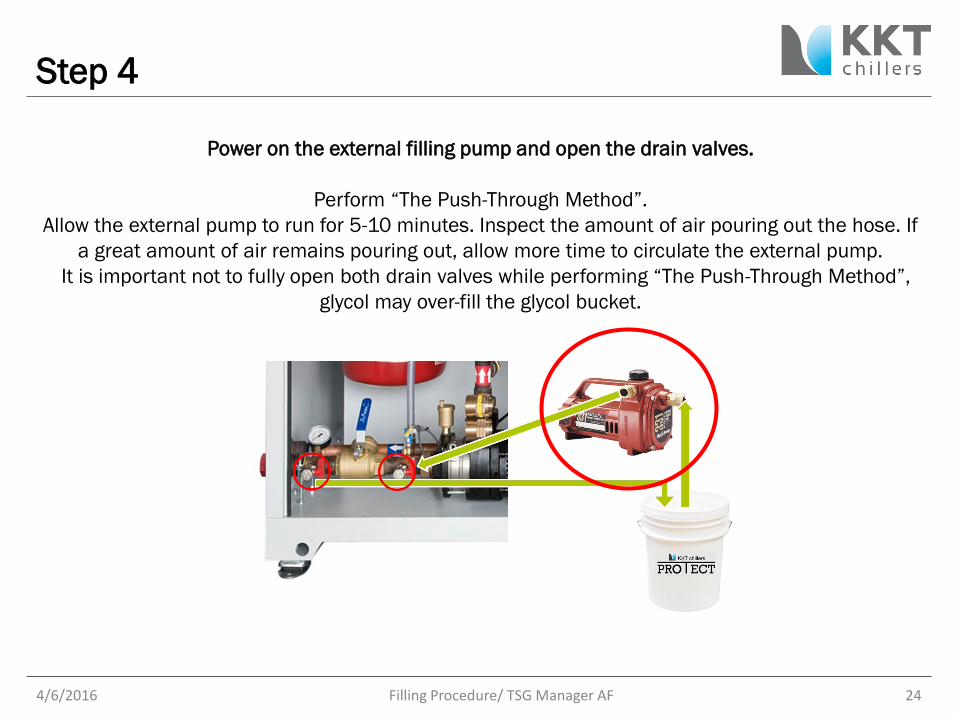
Step 4
Power on the external filling pump and open the drain valves.
Perform “The Push-Through Method”.
Allow the external pump to run for 5-10 minutes. Inspect the amount of air pouring out the hose. If
a great amount of air remains pouring out, allow more time to circulate the external pump.
It is important not to fully open both drain valves while performing “The Push-Through Method”,
glycol may over-fill the glycol bucket.

4/6/2016 Filling Procedure/ TSG Manager AF 25
Step 5
Fill the system to static on the IFP.
Chiller higher than the IFP panel → 1.7–1.9bar, Read at the IFP
Limitation: 10m above IFP
Chiller lower than the IFP panel or on the same level → 1.1–1.5bar, Read at the IFP
Limitation: 30m below IFP

4/6/2016 Filling Procedure/ TSG Manager AF 26
Step 6
After desired pressure, close the drain valves
and power off the external pump.
4/6/2016 Filling Procedure/ TSG Manager AF 27
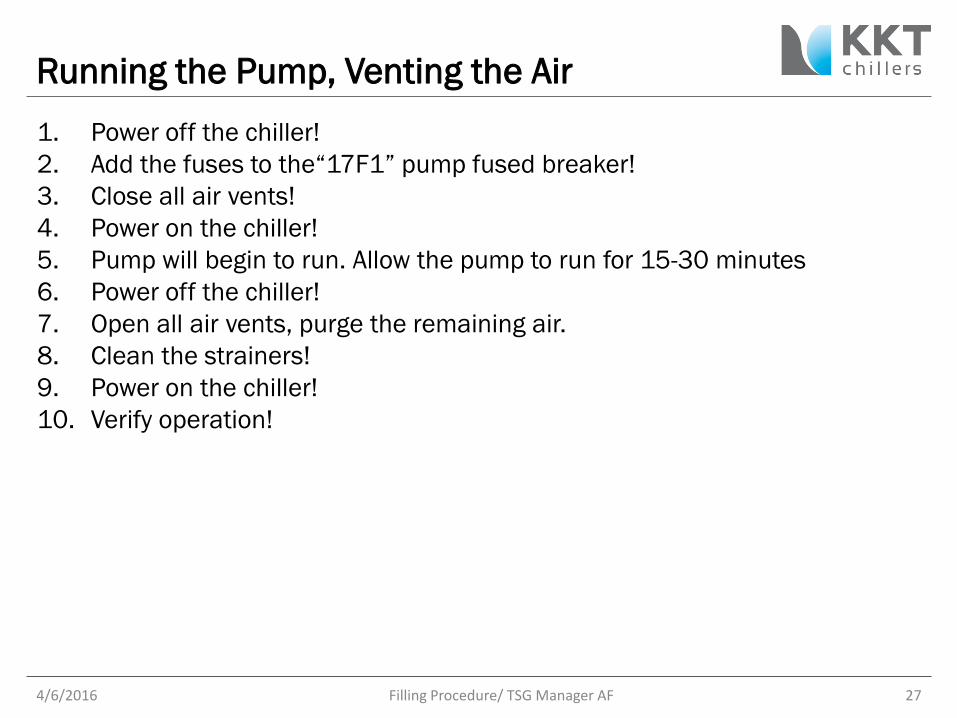
Running the Pump, Venting the Air
1. Power off the chiller!
2. Add the fuses to the“17F1” pump fused breaker!
3. Close all air vents!
4. Power on the chiller!
5. Pump will begin to run. Allow the pump to run for 15-30 minutes
6. Power off the chiller!
7. Open all air vents, purge the remaining air.
8. Clean the strainers!
9. Power on the chiller!
10. Verify operation!

4/6/2016 Filling Procedure/ TSG Manager AF 28
Step 1
Powered off the chiller!
4Q1 should be on the “0” position

4/6/2016 Filling Procedure/ TSG Manager AF 29
Step 2
Add the fuses to the“17F1” pump fused breaker!

4/6/2016 Filling Procedure/ TSG Manager AF 30
Step 3
Close all air vents!
IFP, Chiller, and Water Loop

4/6/2016 Filling Procedure/ TSG Manager AF 31
Step 4
Power on the chiller!
4Q1 should be on the “I” position

4/6/2016 Filling Procedure/ TSG Manager AF 32
Step 5
Pump will begin to run. Allow the pump to run for 15-30 minutes.

4/6/2016 Filling Procedure/ TSG Manager AF 33
Step 6
Powered off the chiller!
4Q1 should be on the “0” position

4/6/2016 Filling Procedure/ TSG Manager AF 34
Step 7
Open all air vents, purge the remaining air.
If the pressure on the manometers drops. Repeat Steps 4-6 of “Filling the
System”

4/6/2016 Filling Procedure/ TSG Manager AF 35
Step 8
Clean the strainers!
Clean the filter strainer before the next-to last pass. The filter ball valve allows
you to clean the strainers with minimal loss of glycol. Please be sure to clean
the strainers at the IFP and chiller!
4/6/2016 Filling Procedure/ TSG Manager AF 36
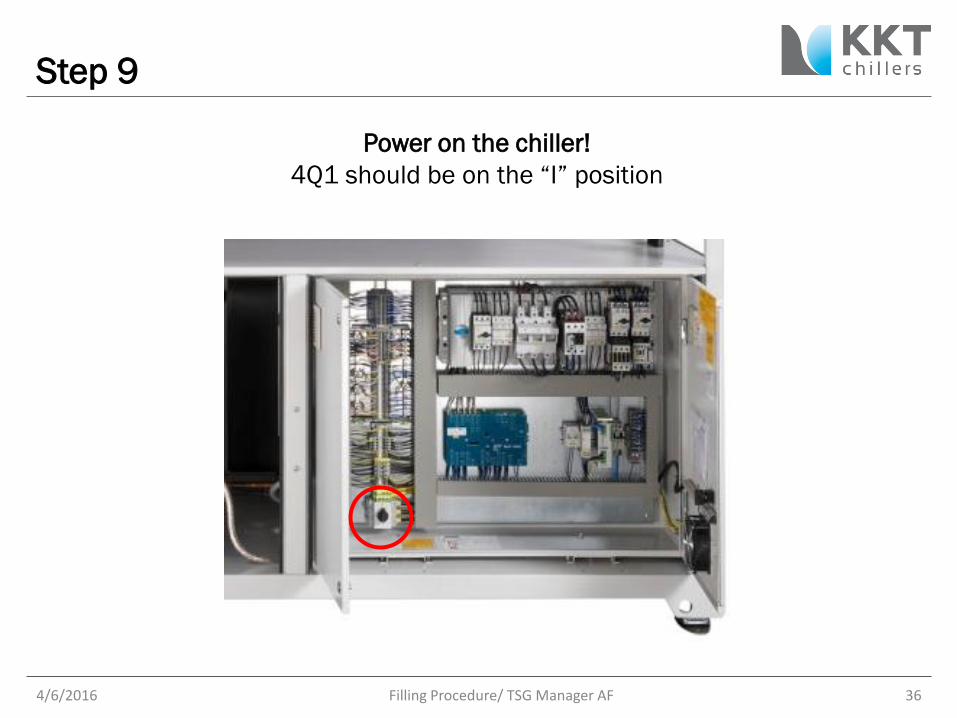
Step 9
Power on the chiller!
4Q1 should be on the “I” position

4/6/2016 Filling Procedure/ TSG Manager AF 37
Step 10
Verify Operation!
Pressure at the pump:
1.1-1.5 bar.
IFP Pressure differential:
(Day Mode) 3-4 Bar
(Night Mode) 1.4 Bar


