THE LIMITED ORTHOPEDIC EXAMINATION WITH ORTHOPEDIC TESTSThe Orthopedic examination has basic portions: 1. History2. Clinical Examination 3. Radiographic Imaging and Reading. HISTORY: The history is the record of the patient¶s incident whether accidental or unplanned form the day the time and a step-by-step development until the time of history taking. This includes any doctors seen, medications taken, changes in pains or any thing relating to the injury. Generally find out what happened and what was injured, to whom, where it happened, why it happened, and ho it happened and the mechanic of the injury oretiological events leading to the patients condition (In this text I have included various examples of in-depth questions to ask specifically relative to the type of claim i.e., Workers Compensation or Industrial, Auto-accident and so forth). Next ask about pain correlations. Where is your pain/are your p ains? Have the patient point with their own fingertips to the spot in pain. Ask the patient to describe the characteristi cs of the pain such as ³aching´, ³burning´, ³sharp´, and ³dull´. These characteristics tell us what tissue injuries may be involved. In cases of workers compensation or personal injury always have the patient write the history in their own w ords after the first visit. Of course you still take a complete history upon the initial v isit. The history in their own words and w riting provides insurance foryou in the event of deposition and discovery, or actual court proceedings. The next section is past medical history (Please review actual reports or audits I have included in the text) any unusual childhood illness. Any past surgeries or tumors benign or m alig nant. Any p revious industrial or personal injuries. Ask the following:· Age ± may determine treatment · Present Occupation· Previous occupation
Transcript
8/8/2019 The Limited Orthopedic Examination With Orthopedic Tests
THE LIMITED ORTHOPEDIC EXAMINATION WITHORTHOPEDIC TESTS
The Orthopedic examination has basic portions:
1. History
2. Clinical Examination
3. Radiographic Imaging and Reading.
HISTORY:
The history is the record of the patient¶s incident whether accidental or unplanned formthe day the time and a step-by-step development until the time of history taking. Thisincludes any doctors seen, medications taken, changes in pains or any thing relating tothe injury. Generally find out what happened and what was injured, to whom, where ithappened, why it happened, and ho it happened and the mechanic of the injury or etiological events leading to the patients condition (In this text I have included variousexamples of in-depth questions to ask specifically relative to the type of claim i.e.,Workers Compensation or Industrial, Auto-accident and so forth).
Next ask about pain correlations. Where is your pain/are your pains? Have the patientpoint with their own fingertips to the spot in pain. Ask the patient to describe thecharacteristics of the pain such as ³aching´, ³burning´, ³sharp´, and ³dull´. Thesecharacteristics tell us what tissue injuries may be involved.
In cases of workers compensation or personal injury always have the patient write thehistory in their own words after the first visit. Of course you still take a complete historyupon the initial visit. The history in their own words and writing provides insurance for you in the event of deposition and discovery, or actual court proceedings.
The next section is past medical history (Please review actual reports or audits I haveincluded in the text) any unusual childhood illness. Any past surgeries or tumors benignor malignant. Any previous industrial or personal injuries.
Ask the following:
· Age ± may determine treatment
· Present Occupation
· Previous occupation
8/8/2019 The Limited Orthopedic Examination With Orthopedic Tests
· History of any hospitalization for spinal or extremity injuries.
· Any past accidents whether industrial or non-industrial
· Any allergies
· Any medications taken and the response
Again, always take the history in the patient¶s own words or at the least as related bythe patient.
Taking the patients height, weight, blood pressure, respiration, and pulse follows thehistory. Note the patient¶s race, body build (ectomorphic, endomorphic, mesomorphic,obese) and attitude.
THE BASIC CLINICAL EXAMINATION The Clinical examination consists of three basic sections:
· Examination of the Part complained of
· Investigation of possible sources of pain and referred symptoms
· General Examination of the body as a whole
The area of examination must be exposed with the proper lighting. An Orthopedicinspection is performed checking the bones for alignment, deformities or shortening.This is followed by examination of the soft tissues for shape and contours making sureto make a bilateral comparison. Note any skin discolorations including cyanosis,pigmentations, etc. Ask and check for nay signs of scars or sinuses, such as scars fromprevious surgeries. Palpate the part complained of checking the bones, skin,temperature, and soft tissues for signs of spasm, atrophy or wasting any areas of localtenderness fasciculation¶s or an abnormal tissue consistency. Measurement of theextremities (see examination sheets provided in this text) for any unusual differences inmuscular girth is commenced. Exact knowledge of atrophied musculature will tell thelevel of nerve tissue damage.
8/8/2019 The Limited Orthopedic Examination With Orthopedic Tests
Range of motion both active and passive is initiated with pain responses noted as todegree and occurrence of pain or manifestations. Note any creptations during theactive and passive motion. In cervicothoracic injuries ROM for the cervicothoracicspine, shoulder, elbow, wrist and hand is commenced. In lumbosacral injuries,Lumbosacral rom as well as hip, knee, and ankle are commenced. Always note the
degree of patient pains upon motion as mild, slight, moderate, and severe and note themotion eliciting the pain.
Measure the strength and power of the muscle that are responsible for each movementof the joint. This is classified into´
0=No contraction (zero)
1=Flicker of contraction (trace)
2=Slight power sufficient to move the joint (poor)
3=Power sufficient to move the joint against gravity (fair)
4=Power to move the joint against gravity plus added resistance (good)
5=Normal power full range of motion vs. gravity with full resistance. Investigation of anypossible courses of referred symptoms is noted. For example, a patient has shoulder pain. Investigate the brachial plexus. A pain in the lower portion of the scapula couldindicate a possible gall bladder disease especially on the right side. This is especiallytrue in susceptible individuals (Obese female over forty).
Your localization and objective testing will reveal weakness and its level. You can elicitpain response with your muscle testing, which can reveal muscle, or joint (depending onwere the pain is located) what is precluding an active contraction or work activity.
Oftentimes a forensic evaluation of muscle strength is not considered complete absenta functional analysis. Thus the patient should be asked to perform maneuvers. For example arising from a squatted position or stepping onto a chair gives a goodindication of proximal leg strength. Minor¶s sign can be noted if the patient must usetheir arms on their legs when arising form the squat. Bouncing while in the Squatposition or the ³Bounce Home Test´ will indicate the integrity of the feet, ankles, knees,hip joints as well as the low back. A patient that must push off a chair from a seat
position to arise may have spasm quadriceps weakness. Handgrip strength or dynamometer testing (test of three). Patients with weakness about the pelvic girdle mayarise from the supine position by first turning prone, then kneeling and slowly pushingthemselves erect by standing bent forward and using the arms to climb up the thighs(again a + Minor¶s sign).
Examine the spinal cord and peripheral nerve integrity with spinal level correlationthrough testing the deep tendon reflexes. Grade them into classifications:
8/8/2019 The Limited Orthopedic Examination With Orthopedic Tests
If sensation is disturbed, its anatomic pattern should be recognized. For example it iswell established that a stocking and glove distribution can be due to peripheral nervewhere a radiating pain or radiculopathy is usually due to the nerve roots. In any eventthe finding of motor weakness and reflex change can determine the anatomiclocalization of disease or trauma. This occurs through your synthesis of the data noted
and correlated with your knowledge of the afferent nerves, the synaptic connectionswithin the spinal cord, and the motor nerves, as well as the descending motor pathways. Thus much like the EMG, you can determine much about the integrity of thedisc, the motor neuron, the cord and tissue synaptic connections and the sensorypathway to the cord.
Examine the superficial reflexes when they correlate with appropriate level of investigation.
Abdominal 2+ Upper Thoracic 8,9,10
2+ Lower Thoracic 10, 11, 12
Cremasteric 2+ Lumbar 2,3
Plantar 2+ Lumbar 4,5, Sacral 1,2
8/8/2019 The Limited Orthopedic Examination With Orthopedic Tests
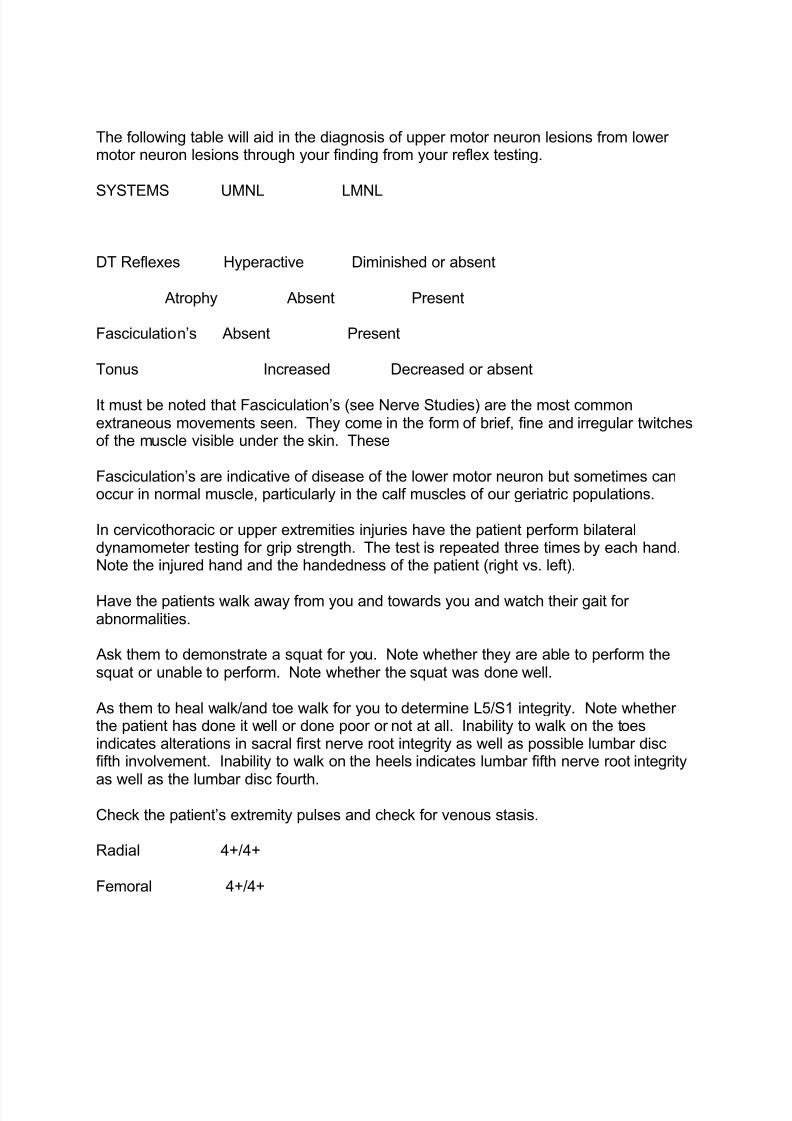
The following table will aid in the diagnosis of upper motor neuron lesions from lower motor neuron lesions through your finding from your reflex testing.
SYSTEMS UMNL LMNL
DT Reflexes Hyperactive Diminished or absent
Atrophy Absent Present
Fasciculation¶s Absent Present
Tonus Increased Decreased or absent
It must be noted that Fasciculation¶s (see Nerve Studies) are the most commonextraneous movements seen. They come in the form of brief, fine and irregular twitchesof the muscle visible under the skin. These
Fasciculation¶s are indicative of disease of the lower motor neuron but sometimes canoccur in normal muscle, particularly in the calf muscles of our geriatric populations.
In cervicothoracic or upper extremities injuries have the patient perform bilateraldynamometer testing for grip strength. The test is repeated three times by each hand.Note the injured hand and the handedness of the patient (right vs. left).
Have the patients walk away from you and towards you and watch their gait for abnormalities.
Ask them to demonstrate a squat for you. Note whether they are able to perform thesquat or unable to perform. Note whether the squat was done well.
As them to heal walk/and toe walk for you to determine L5/S1 integrity. Note whether the patient has done it well or done poor or not at all. Inability to walk on the toesindicates alterations in sacral first nerve root integrity as well as possible lumbar discfifth involvement. Inability to walk on the heels indicates lumbar fifth nerve root integrity
as well as the lumbar disc fourth.Check the patient¶s extremity pulses and check for venous stasis.
Radial 4+/4+
Femoral 4+/4+
8/8/2019 The Limited Orthopedic Examination With Orthopedic Tests
4+ is considered normal for peripheral bilateral vascular pulses. Note any edema byarea and check for tenderness of the extremity. Check homan¶s sign (see orthopedictests) bilaterally.
Run the Waltenberg pinwheel down the dermatome patterns and note whether they areintact or not. Locate any areas of numbness. Often, a slow and careful assessment of the dermatomes using a Pin can be more accurate although more time consuming. It issaid, ³anything worth doing is worth doing well´.
Segmental Level of peripheral Nerves.
C2 ± Area under the chin
C3 ± Area in the front and back of the neck
C4 ± Shoulder area
C6 ± Thumb area
C7 ± Chiropractic index finger
C8 ± Ring and little fingers
T4 ± Nipples line
T10 ± Umbilical line
L1 ± Inguinal area
L3 ± Knee area
L5 ± Anterior ankle and foot containing big toe plus two.
S1 ± Heal and little toe plus one.
In cases where you suspect possible head trauma run a ENT examination checking theears, eyes, nose and throat for any possible bleeding (see Neurological DiagnosticModalities). Of course check the pupils of the eyes for ipsilateral dilation, or bilateraldilation or constriction. Check the retina for any possible hemorrhage or internal cranialedema.
8/8/2019 The Limited Orthopedic Examination With Orthopedic Tests
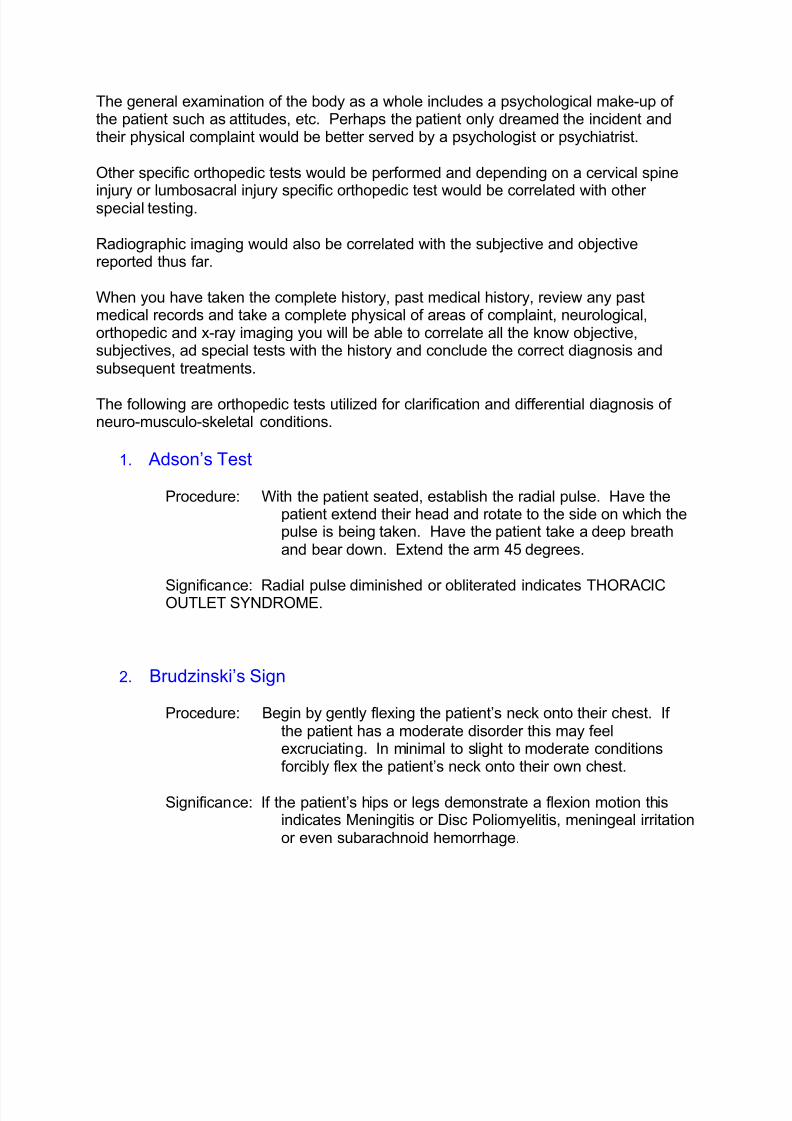
The general examination of the body as a whole includes a psychological make-up of the patient such as attitudes, etc. Perhaps the patient only dreamed the incident andtheir physical complaint would be better served by a psychologist or psychiatrist.
Other specific orthopedic tests would be performed and depending on a cervical spine
injury or lumbosacral injury specific orthopedic test would be correlated with other special testing.
Radiographic imaging would also be correlated with the subjective and objectivereported thus far.
When you have taken the complete history, past medical history, review any pastmedical records and take a complete physical of areas of complaint, neurological,orthopedic and x-ray imaging you will be able to correlate all the know objective,subjectives, ad special tests with the history and conclude the correct diagnosis andsubsequent treatments.
The following are orthopedic tests utilized for clarification and differential diagnosis of neuro-musculo-skeletal conditions.
1. Adson¶s Test
Procedure: With the patient seated, establish the radial pulse. Have thepatient extend their head and rotate to the side on which thepulse is being taken. Have the patient take a deep breathand bear down. Extend the arm 45 degrees.
Significance: Radial pulse diminished or obliterated indicates THORACICOUTLET SYNDROME.
2. Brudzinski¶s Sign
Procedure: Begin by gently flexing the patient¶s neck onto their chest. If the patient has a moderate disorder this may feelexcruciating. In minimal to slight to moderate conditionsforcibly flex the patient¶s neck onto their own chest.
Significance: If the patient¶s hips or legs demonstrate a flexion motion thisindicates Meningitis or Disc Poliomyelitis, meningeal irritationor even subarachnoid hemorrhage.
8/8/2019 The Limited Orthopedic Examination With Orthopedic Tests
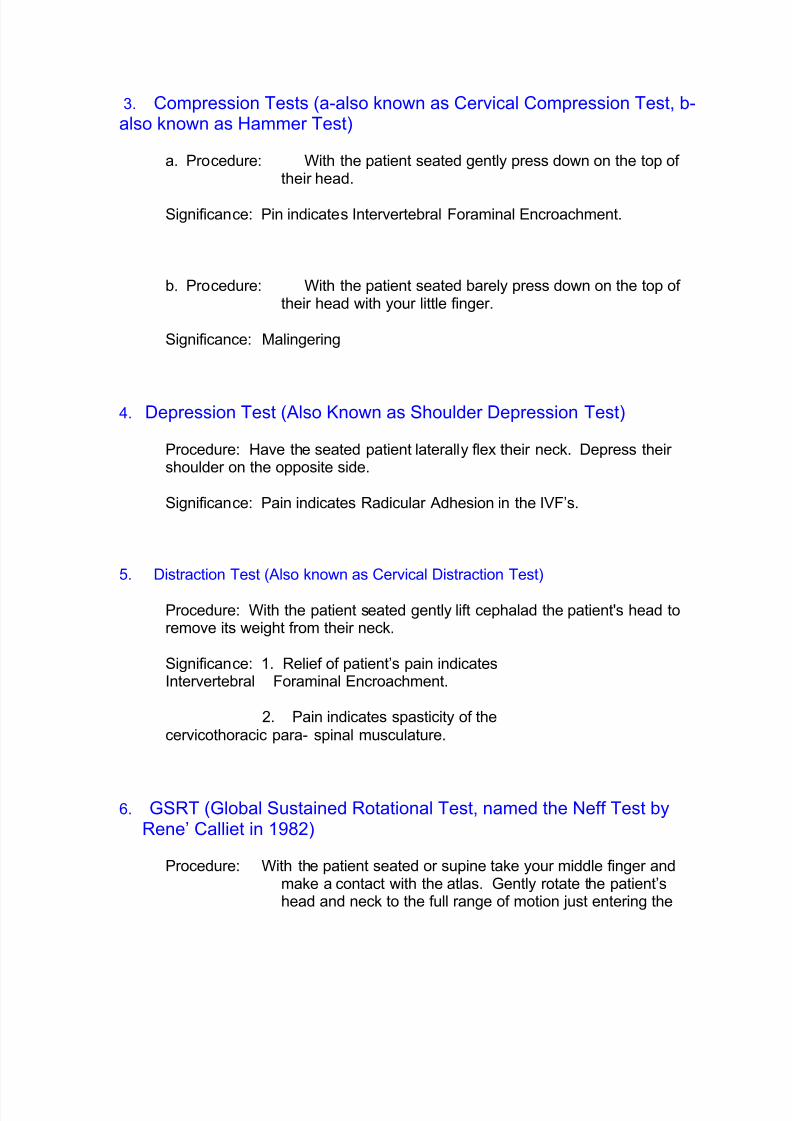
b. Procedure: With the patient seated barely press down on the top of their head with your little finger.
Significance: Malingering
4. Depression Test (Also Known as Shoulder Depression Test)
Procedure: Have the seated patient laterally flex their neck. Depress their shoulder on the opposite side.
Significance: Pain indicates Radicular Adhesion in the IVF¶s.
5. Distraction Test (Also known as Cervical Distraction Test)
Procedure: With the patient seated gently lift cephalad the patient's head toremove its weight from their neck.
Significance: 1. Relief of patient¶s pain indicatesIntervertebral Foraminal Encroachment.
2. Pain indicates spasticity of thecervicothoracic para- spinal musculature.
6. GSRT (Global Sustained Rotational Test, named the Neff Test byRene¶ Calliet in 1982)
Procedure: With the patient seated or supine take your middle finger andmake a contact with the atlas. Gently rotate the patient¶shead and neck to the full range of motion just entering the
8/8/2019 The Limited Orthopedic Examination With Orthopedic Tests
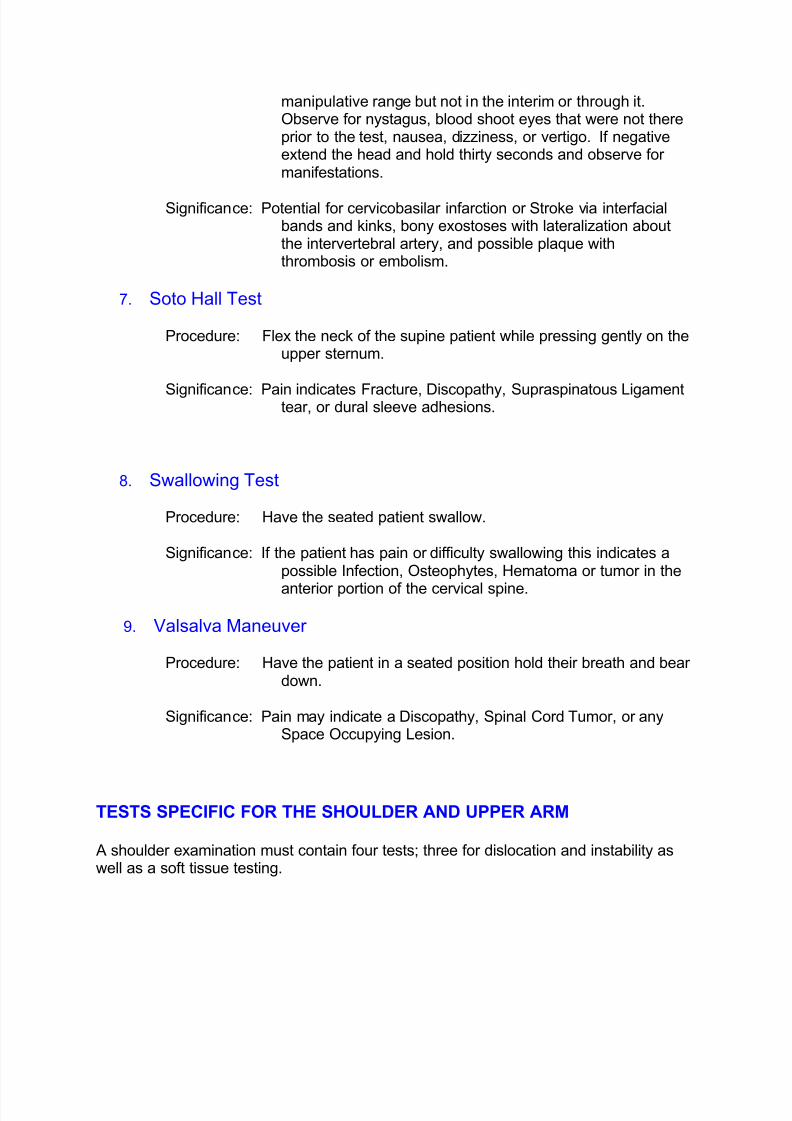
manipulative range but not in the interim or through it.Observe for nystagus, blood shoot eyes that were not thereprior to the test, nausea, dizziness, or vertigo. If negativeextend the head and hold thirty seconds and observe for manifestations.
Significance: Potential for cervicobasilar infarction or Stroke via interfacialbands and kinks, bony exostoses with lateralization aboutthe intervertebral artery, and possible plaque withthrombosis or embolism.
7. Soto Hall Test
Procedure: Flex the neck of the supine patient while pressing gently on theupper sternum.
Procedure: The shoulder to be tested is abducted between 80 and 120 degreesforward flexed 0 and 20 degrees and laterally rotated, 0 and 30 degrees". Theexaminer places one hand on the shoulder and the other on the relaxed upper arm and
draws the humorous forward.
Significance: Movement may be accompanied by click and/or apprehension.
11. Posterior:
Procedure: Examiner pulls up on the arm at the wrist while pushing downon the Humerus with the other hand.
Significance: If more than 50% posterior translation @ patientis apprehensive patient has posterior instability.
12. Inferior
Procedure: Also known as the Sulcus Sign Test. The patient sits with thearm by the side. The Examiner grasps the patient¶s forearmbelow the elbow and pushes the arm distally.
Significance: Presence of Sulcus sign=Inferior
instability.
13. A/C Shear
Procedure: Patient seated examiner cups hands over the deltoid muscle with onehand on the clavicle and one hand on the spine of the scapula then squeezes theheels of the hands together.
Significance: Pain or abnormal movement = acromioclavicular joint pathology .
14. Speed Test:
8/8/2019 The Limited Orthopedic Examination With Orthopedic Tests
Procedure: Examiner resists shoulder forward shoulder flexion with thepatient's forearm supinated and the elbow is completelyextended.
Significance: Increased tenderness in the bicipital groove is indicative of
bicipital tendonitis. ST is more effective than Yergason's becauseST moves bone over the tendon during the test.
15. Supraspinatous Shoulder is abducted 90 degrees with no rotation, andresistance to abduction is provided by the examiner. The shoulder is then medicallyrotated and angled forward 30 degrees so that the patient's thumbs point toward thefloor. Resistance to abduction is again given while the examiner looks for weaknessor pain.
Significance: Supraspinatous muscle or tendon tear,
neuropathy of the suprascapular nerve.
16. Brachial Plexus C5-C7 nerve roots and median nerve-Arm is abductedand laterally rotated behind the coronal plane with the shoulder girdle fixedin depression. The elbow is then passively extended with the wrist held inextension and the forearm in Supination.
Significance: Pain, ache, tingling in the thumb and first three fingers = median nervetension or nerve root tension.
17. Codman's Arm Drop Patient to fully abduct arm and lower it slowly.
Significance: If arm drops to side (patient is unable to lower itslowly) it indicates ROTATOR CUFF TEAR.
18 . Dugus Test Patient to touch opposite shoulder with hand. If patient isunable to touch opposite shoulder, it indicatesDISLOCATION.
19. Apprehension Flex, abduct and externally rotate patient's arm.
Significance: As external rotation begins to exceed 90 degrees alook of apprehension on the patient's face indicatesCHRONIC TENDENCY TOWARDS DISLOCATION.
8/8/2019 The Limited Orthopedic Examination With Orthopedic Tests
Procedure: Gently flex the patient s elbow 90 degrees. With one hand
pull down on the elbow and stabilize it while moving the patients wristlaterally with the other hand (to externally rotate the patients arm)
Significance: If the biceps tendon slips out of the bicipital groove, which attimes is palpable, and/or the patient experiences pain in the region, itindicates a TEAR OF THE TRANSVERS HUMERAL LIGAMENT. Oftentime¶s pain alone indicates tendonitis of the long head of the bicepstendon.
TESTS FOR THE ELBOW:
21. COZEN¶S TEST
Procedure: Gently extend and pronate the arm of the patient andextend their wrist. Stabilize the elbow and attempt to flex the wrist whilethe patient resists.
Significance: Excessive motion indicates a TEAR OF THECOLLATERAL LIGAMENT (Valgus stress = medial collateral ligament:Varus stress = lateral collateral ligament)
22. TENNIS ELBOW TEST ± MILL¶S MANEUVER
Procedure: With the patient¶s arm pronate, have them flex the wrist.Then have the patient attempt to supinate the forearm against the doctor¶sresistance.
Significance: Pain at the lateral Epicondyle indicates LATERALEPICONDYLITIS. Pain at the medial Epicondyle indicatesMEDICAL EPICONDYLITIS AKA Golfers Elbow
23. STABILITY TESTS
8/8/2019 The Limited Orthopedic Examination With Orthopedic Tests
Procedure: Elbow flexed to 90 degrees. Examiner resists pronationas the elbow is extended.
Significance: Tingling or Paresthesia in median nerve distributionindicates median nerve entrapment.
28. PINCH GRIP TEST
Procedure: Thumb and first finger should touch tip to tip.
Significance: If pads of finger and thumb touch then pathology to the anterior interosseous nerve brach of the median nerve. Thus entrapment of the anterior interosseous nerve as it passes between the two heads of the Pronator Teres muscle.
29. PHALEN¶S TEST
Procedure: Flex the wrist of the patient to the maximum degree possibleand hold there for a minute.
Significance: Pain and Paresthesia in the hand indicates CARPALTUNNEL SYNDROME:
30. TINEL¶S WRIST SIGN
Procedure: Tap the median nerve of the patient at their flexor Retinaculum.
Significance: Pain and Paresthesia in the wrist and/or hand indicatesCARPAL TUNNEL SYNDROME.
31. UNCLES TEST
Procedure: Extend the wrist of the patient to the maximum degreepossible and hold there for a minute.
Significance: Pain and Paresthesia in the wrist and/or hand indicatesCARPAL TUNNEL SYNDROME
8/8/2019 The Limited Orthopedic Examination With Orthopedic Tests
Procedure: Hold the metacarpophalangeal joint of the patient in a few
degrees of extension and try to move the proximal interphalangeal jointinto flexion. If this cannot be done, flex the metacarpophalangeal joint afew degrees aNd try again to flex the PIP joint.
Significance: Delay in the appearance of the ³flush´ indicates PARTIALOR COMPLETE OBSTRUCTION OF ONE OF THE ARTERIES.
33. BUNNEL-LITTLE TEST
Procedure: Hold the metacarpophalangeal joint of the patient in a few degreesof extension and try to move the proximal interphalangeal joint into flexion. If thiscannot be done, flex the metacarpophalangeal joint a few degrees and try again to flexthe PIP joint.
Significance: If the PIP can be flexed in the second position, it indicatesTIGHTNESS OF THE INTRINSIC MUSCLES of the patients HAND. If thePIP cannot be flexed in either situation it indicates PIP JOINT CAPSULECONTRACTION.
34. RETINACULAR TEST
Procedure: Hold the PIP joint of the patient in a neutral position and tryto flex the DIP joint. If this cannot be done, flex the PIP joint a fewdegrees and repeat.
Significance: If the DIP joint can be flexed in the second position only, itindicates TIGHTNESS OF THE INTRINSIC MUSLES OF THE HAND OR THERETINACULAR LIGAMENTS. If the DIP joint cannot be flexed in either position, itindicates the patient has DIP JOINT CAPSULE CONTRACTURE.
TEST FOR THE LUMBOACRAL, SACROILIAC, ILIOFEMORAL JOINTS
35. LEWIN¶S TEST
Procedure: Stabilize the supine patient¶s thighs upon the table andask the patient to sit up.
8/8/2019 The Limited Orthopedic Examination With Orthopedic Tests
Significance: Pain and/or inability to perform may indicate SCIATICAor LUMBAR ARTHRITIS
36. MINOR¶S SIGN
Procedure: Observe the patient rising from the sitting position.
Significance: This may indicate sciatica if the patient supportsThemselves on one side, keeping the affected side Bent over.
37. NERI¶S BOWING SIGN
Procedure: The standing patient is bent forward. Flexion of The knee onthe affected side indicates pain in the leg due to pull on the hamstringsand the pelvis.
Significance: This may indicate sciatica if the patient supports themselves onone side, keeping the affected side bent over.
38. LASEQUE TEST
Procedure: With the patient in the supine position, raise their µ leg.
Significance: Sciatic pain at 0-30 degrees indicates Altered Sacroiliac joint Dynamics due to a hot disc assaulting the nerve. Sciatic pain at 30-60degrees indicates Altered Lumbosacral Joint Dynamics due to a Sprain.Sciatic pain at 60-90 degrees indicates Altered L1-L4 joint dynamics.
39. Well Leg Raising Test
Procedure: With the same patient supine, raise the uninvolved leg.
Significance: Sciatic distribution in the opposite leg Differentiates anddemonstrates a Discopathy.
40. GOLDTHWAIT TEST
Procedure: With the patient supine place on hand under their lumbar spine and raise their leg.
8/8/2019 The Limited Orthopedic Examination With Orthopedic Tests
Significance: Pain BEFORE vertebral motion indicates alteredsacroiliac joint Dynamics of SI Strain/Sprain.
Pain AFTER vertebral movement begins indicates Altered Lumbosacral or Lumbar joint dynamics of Strain/Sprain.
41. BECHTEREW¶S CHECK TEST
Procedure: Ask your patient to be seated and extend their legs.
Significance: If the Patient can extend only one leg at a time, and theill leg from a Laseque test has difficulty being Raised this indicates aTRUE SCIATIC CONDITION. If low back pain occurs during extension,this indicates a possible LUMBAR DISCOPATHY. If the patient had a
positive Laseque test but has no difficulty sitting ad raiding the ill legsuspect an alleged case of MALINGERING.
42. LEG LOWERING TEST
Procedure: With your patient in a supine position, flex their thigh 90degrees and extend their leg. Ask them to lower their leg and stop half way down.
Significance: If the patient¶s leg drops or the patient is unable to stop, it indicatesDiscopathy.
43. GILLET TEST II
Procedure: With the patient standing, place one thumb on the 2 nd sacraltubercle and other thumb on the Ilium at the same level. Ask the patient toflex the thigh.
Significance: If the Ilium fails to move inferior it indicates a SACROILACRESTRCTION-STRAIN/SPRAIN.
44. HIBB¶S TEST
Procedure: With the patient prone and their knee flexed 90 Degreesinternally rotate the femur.
8/8/2019 The Limited Orthopedic Examination With Orthopedic Tests
Procedure: With the patient prone, grasp both ankles and flex the kneesupon the thighs.
Significance: If the patient reports pain in the lumbar or lumbosacral areaindicates ALTERED LUMBAR OR LUMBOCARL JOINT DYNAMICS due to spastic
internal and external rotator of the leg.
50. GAENSLEN¶S TEST-SI SPECIFIC TEST
Procedure: With the patient supine, flex on thigh onto the abdomen andhold it there. Next, hyperextend the other hip by slowly lowering the femur ff the table. Gently apply downward pressure on the hyperextended thigh.
Procedure: Have the patient kneel on a bench. Grasp the ankles and ask the
patient to touch the floor.
Significance: A claim that pain prevents this motion indicatesMALINGERING.
55. FFEN TEST
Procedure: Palpate a given area and ask the patient if this is painful.Come back to it later and run a pin wheel down the dermatome over thearea and ask the patient what they can feel or are they numb?
Significance: Coached patients know they have pains ad have numbness.Oftentimes if the patient is not truly experiencing the problem they get confused andforget what part is numb and which part is painful. However it is not consistent for apatient to have severe palpable muscular pain and numbness of the same tissues at thesame time.
TESTS FOR THE HIP AND PELVIC JOINTS
56. LEG LENGTHDISCRPANTY-TRUE LEG LENGTH
Procedure: Measure from the patients ASIS to their medial malleolus. If discrepancy in length exists, flex hip and knees. Observe whether the knee of one legis higher or more anterior than the other.
Significance: One knee HIGHER indicates discrepancy in TIBIALENGTH. One knee ANTERIOR indicatesdiscrepancy in FEMUR LENGTH.
57. LEG LENGTH DISCREPANY ± APPARENTY LEG LENGTH
Procedure: Measure from the umbilicus to the medial malleolus.
Significance: If this differs from leg to leg, and ASIS to malleolus measurementsare equal, the discrepancy indicates PELVIC OBLIQUITY.
8/8/2019 The Limited Orthopedic Examination With Orthopedic Tests
Procedure: With the patient in the prone position, check their leglength at the medial malleoli. If discrepancy exists, flex their knees andgently stretch by Dorsiflexion the feet and recheck. Have the patient turn
their head to the side and recheck.
Significance: If the short leg becomes the long leg on knee flexion, itindicates an ALTERED SACROILIAC JOINT. If turning the head alters the leg length, it indicates
ALTERED CERVICAL JOINT DYNAMICS.
59. OBER¶S TEST
Procedure: With the patient on their side, abduct and extend their thigh and then drop it.
Significance: If their leg fails to descend or descends in clonic anner, itindicates CONTRACTURE OF THE TENSOR FASCIA LATA TISSIE.
60. THOMAS TEST
Procedure: With the patient supine, flex one knee onto their abdomen.
Significance: Involuntary flexion of the opposite hip indicates HIPJOINT FLEXION CONTRACTURE.
61. TRENDELENBERG SIGN
Procedure: With the physicians hands on the patient¶s iliac rests, havethe standing patient flex on hip.
Significance: If their hip on the flexed side fails to raise, or if it falls, this indicatesa WEAKNESS OF THE OPPOSIE GLUTEUS MEDIUS OR SACROILIAC JOINTSPRAIN.
62. ANVIL TEST
8/8/2019 The Limited Orthopedic Examination With Orthopedic Tests
Procedure: With the patient in the supine position, tap their inferior Calcaneus.
Significance: Pain indicates FEMORAL FRACTURE:
TEST FOR THE KNEE
63. GRINDING TEST FOR THE PATELLA
Procedure: With the patient supine, push the patella distally. Ask thepatient to contract the quadriceps against resistance to the patella¶supward movement.
Significance: Palpable crepitus as the patella moves upward indicatesROUGHENING OF THE ARTICULAR SURFACE.
64. REDUCTION CLICK TEST
Procedure: With the patient supine, flex their knee while rotating itboth internally and externally. Then extend the knee while continuing torotate it.
Significance: A clicking sound during extension and rotation indicatesthat the damaged MENISCUS HAS SLIPPED BACK INTO PLACE.
65. EFFUSION TEST-MAJOR
Procedure: With the patient supine, push the patella down into theTrochlear groove and quickly release it.
Significance: If the patella rebounds (a blottable patella) this indicates JOINTEFFUSION.
66. EFFUSION TEST-MINOR
8/8/2019 The Limited Orthopedic Examination With Orthopedic Tests
Procedure: With the patient supine, push the patella from the Suprapatelar pouch tothe infrapatelar area den then from lateral to medial. Next tap the medial side of theknee just posterior to the patella.
Significance: If a fluid wave causes fullness on the lateral side of the
joint, it indicates MINOR EFFUSION.
67. APPRENHENSION TEST
Procedure: With the patient supine, push their patella laterally.
Significance: A look of apprehension on the patient¶s face indicates a CHRONICTENDENCY TOWARDS FREQUENT LATERAL DISLOCATION.
68. TINEL¶S KNEE SIGN
Procedure: Tap the infrapatelar branch of the saphenous nerve at the medial side of the Tibial tubercle.
Significance: Hypersensitivity indicates NEURITIS, NEUROMA OR AREGENERATING NERVE.
69. DRAWER SIGN
Procedure: With the patient¶s knee flexed and foot stabilized Flat upon the table, movethe patient¶s proximal Tibia anterior and posterior.
Significance: Abnormal anterior movement indicates RUPTURE OF THE ANTERIOR CRUCIATE LIGAMENT. abnormal posterior movement indicatesRUPTURE OF THE POSTERIOR CRUCIATE LIGAMENT.
70. APLEY¶S COMPRESSION TEST
Procedure: With the patient prone and their knee flexed 90 degrees, stabilize theleg and place direct pressure firmly on the heel directed through the tibia. As themenisci are compressed between the tibia and femur, rotate the leg internally andexternally.
8/8/2019 The Limited Orthopedic Examination With Orthopedic Tests
Significance: Pain on the medial side of the knee indicates MEDIAL MINISCUSDAMAGE. Pain on the lateral side of the knee is indicative of LATERAL MENISCUSDAMAGE.
71. APLEY¶S DISTRACTION TEST
Procedure: With the patient in the same positioin as for the compressiontest, traction the patients leg upwards while at the same time gently rotatingit internally and externally.
Procedure: With the patient supine, fully flex and externally Rotate their leg, whilemaintaining the rotation, Slowly extend the leg while palpating the joint space andapplying posterior force to the knee. Repeat with internal rotation.
Significance: A painful click on extension with EXTERNAL ROTATION indicatesMEDIAL MENISCUS TEAR, with INTERNAL ROTATION, LATERAL MENISCUSTEAR.
73. STABILITY KNEE TEST
Procedure: With the patient seated, slightly flex their knee and push laterally on the
ankle and medially on their knee (Valgus stress). Repeat while pushing medially on theankle and laterally on the knee (Varus stress).
Significance: Palpable gapping on the medial side of the knee under VALGUSSTRESS indicates MEDIAL COLLATERAL LIGAMENT TEAR. Gapping on the lateralside of the knee under VARUS STRESS indicates LATERAL OLLATERAL LIGAMENTTEAR.
TESTS FOR THE ANKLE AND FOOT
74. DORSIFLEXION TEST
Procedure: With the patient seated extend the leg and try to dorsiflex their ankle. If Dorsiflexion is limited, flex their knee and repeat.
8/8/2019 The Limited Orthopedic Examination With Orthopedic Tests
Significance: If the patient's knee fails to fully extend and offers a rubbery resistanceto further extension and ending in a sharp end point this indicates MENISCUSDAMAGE.
80. TOE-HEAL WALKING TEST
Procedure: Have the patient first walk on his heals and then on his toes.
Significance: An inability to walk on the toes indicates a first sacral nerve rootinvolvement (5th Lumbar Disc). Whereas an inability to walk on the heels is indicativeof a 5th lumbar nerve root involvement (4th lumbar disc).