51
The Linux iPAQ HOWTO
| Date post: | 04-Jun-2018 |
| Category: |
Documents |
| Upload: | trinhthuan |
| View: | 219 times |
| Download: | 0 times |
The Linux iPAQ HOWTO

Table of ContentsThe Linux iPAQ HOWTO.................................................................................................................................1
Instructions for Familiar v0.5.3...............................................................................................................1Michel Stempin...........................................................................................................................1
Preface..................................................................................................................................................................31. Introduction..........................................................................................................................................32. Audience of this document..................................................................................................................43. Organization of the material................................................................................................................44. Prerequisite..........................................................................................................................................55. Versions...............................................................................................................................................56. Sources of further information.............................................................................................................57. Legal information.................................................................................................................................6
7.1. Copyright.............................................................................................................................67.2. NO WARRANTY................................................................................................................67.3. Trademarks..........................................................................................................................6
8. Online version......................................................................................................................................69. Conventions used in this document.....................................................................................................710. Feedback............................................................................................................................................711. Acknowledgments..............................................................................................................................8
Chapter 1. Connecting a PocketPC iPAQ to a GNU/Linux host....................................................................91.1. Creating a connection on the GNU/Linux host.................................................................................9
1.1.1. pppd configuration............................................................................................................91.1.2. Naming the iPAQ............................................................................................................10
1.2. Creating a connection on the iPAQ................................................................................................111.2.1. Disabling ActiveSync.....................................................................................................111.2.2. Creating a new "modem" connection.............................................................................11
1.3. Connecting the iPAQ to the PC......................................................................................................111.3.1. On the GNU/Linux host..................................................................................................121.3.2. On the iPAQ....................................................................................................................12
1.4. Transferring files between the iPAQ and the GNU/Linux host......................................................121.4.1. Downloading and running the mini FTP server..............................................................131.4.2. Transferring files using FTP...........................................................................................14
Chapter 2. Backing up the PocketPC iPAQ...................................................................................................172.1. Downloading the backup software..................................................................................................172.2. Backing up the Bootloader..............................................................................................................172.3. Backing up PocketPC.....................................................................................................................18
Chapter 3. Setting up a serial terminal connection to the iPAQ..................................................................193.1. Shutting down ppp..........................................................................................................................193.2. Setting up minicom.........................................................................................................................19
Chapter 4. Installing the bootloader...............................................................................................................214.1. Downloading the bootloader...........................................................................................................214.2. Flashing the bootloader...................................................................................................................224.3. Verifying the bootloader.................................................................................................................234.4. Rebooting the iPAQ........................................................................................................................23
The Linux iPAQ HOWTO
i
Table of ContentsChapter 5. Bootstrapping Familiar GNU/Linux............................................................................................25
5.1. Downloading the root image...........................................................................................................255.2. Performing bootloader configuration..............................................................................................255.3. Flashing the root filesystem............................................................................................................255.4. Booting GNU/Linux for the first time............................................................................................26
Chapter 6. Setting up an USB network...........................................................................................................286.1. Connecting to the LAN...................................................................................................................28
6.1.1. USB networking on the GNU/Linux host.......................................................................286.1.2. USB networking on the iPAQ........................................................................................296.1.3. Bringing up the USB network........................................................................................30
6.2. Connecting to the Internet...............................................................................................................326.3. Shutting down USB networking.....................................................................................................346.4. Automating the USB connection....................................................................................................35
Chapter 7. Installing Familiar GNU/Linux....................................................................................................367.1. Upgrading packages definition.......................................................................................................367.2. Running SSH..................................................................................................................................377.3. Installing additional Familiar packages..........................................................................................37
Chapter 8. Installing Opie................................................................................................................................388.1. Bootstrapping Opie.........................................................................................................................388.2. Finishing Opie installation..............................................................................................................39
Chapter 9. Reinstalling PocketPC...................................................................................................................409.1. Restoring PocketPC........................................................................................................................409.2. Checking PocketPC restoration......................................................................................................419.3. Restoring the original bootloader....................................................................................................41
Appendix A. GNU Free Documentation License...........................................................................................43A.1. PREAMBLE..................................................................................................................................43A.2. APPLICABILITY AND DEFINITIONS......................................................................................43A.3. VERBATIM COPYING................................................................................................................44A.4. COPYING IN QUANTITY...........................................................................................................44A.5. MODIFICATIONS........................................................................................................................45A.6. COMBINING DOCUMENTS.......................................................................................................46A.7. COLLECTIONS OF DOCUMENTS............................................................................................46A.8. AGGREGATION WITH INDEPENDENT WORKS...................................................................47A.9. TRANSLATION............................................................................................................................47A.10. TERMINATION..........................................................................................................................47A.11. FUTURE REVISIONS OF THIS LICENSE...............................................................................47A.12. How to use this License for your documents...............................................................................48
The Linux iPAQ HOWTO
ii
The Linux iPAQ HOWTO
Instructions for Familiar v0.5.3
Michel Stempin
Copyright © 2002 by Michel Stempin
Revision History
Revision v1.1 2002−08−30 Revised by: ms
Corrections as suggested by Jamey Hicks
Revision v1.0 2002−08−11 Revised by: ms
Initial version
Table of ContentsPreface
1. Introduction2. Audience of this document3. Organization of the material4. Prerequisite5. Versions6. Sources of further information7. Legal information8. Online version9. Conventions used in this document10. Feedback11. Acknowledgments
1. Connecting a PocketPC iPAQ to a GNU/Linux host1.1. Creating a connection on the GNU/Linux host1.2. Creating a connection on the iPAQ1.3. Connecting the iPAQ to the PC1.4. Transferring files between the iPAQ and the GNU/Linux host
2. Backing up the PocketPC iPAQ2.1. Downloading the backup software2.2. Backing up the Bootloader2.3. Backing up PocketPC
3. Setting up a serial terminal connection to the iPAQ3.1. Shutting down ppp3.2. Setting up minicom
4. Installing the bootloader4.1. Downloading the bootloader4.2. Flashing the bootloader4.3. Verifying the bootloader4.4. Rebooting the iPAQ
5. Bootstrapping Familiar GNU/Linux
The Linux iPAQ HOWTO 1
5.1. Downloading the root image5.2. Performing bootloader configuration5.3. Flashing the root filesystem5.4. Booting GNU/Linux for the first time
6. Setting up an USB network6.1. Connecting to the LAN6.2. Connecting to the Internet6.3. Shutting down USB networking6.4. Automating the USB connection
7. Installing Familiar GNU/Linux7.1. Upgrading packages definition7.2. Running SSH7.3. Installing additional Familiar packages
8. Installing Opie8.1. Bootstrapping Opie8.2. Finishing Opie installation
9. Reinstalling PocketPC9.1. Restoring PocketPC9.2. Checking PocketPC restoration9.3. Restoring the original bootloader
A. GNU Free Documentation LicenseA.1. PREAMBLEA.2. APPLICABILITY AND DEFINITIONSA.3. VERBATIM COPYINGA.4. COPYING IN QUANTITYA.5. MODIFICATIONSA.6. COMBINING DOCUMENTSA.7. COLLECTIONS OF DOCUMENTSA.8. AGGREGATION WITH INDEPENDENT WORKSA.9. TRANSLATIONA.10. TERMINATIONA.11. FUTURE REVISIONS OF THIS LICENSEA.12. How to use this License for your documents
The Linux iPAQ HOWTO
The Linux iPAQ HOWTO 2
PrefaceToday, Personal Digital Assistants (PDAs) are getting more and more popular, allowing the power of a5−year old PC to fit in your hand, for the high−end models. Most of these PDAs come with an operatingsystem and a set of softwares such as a contact management, a diary, a mail reader, a task manager, acalculator, a terminal emulator, a file explorer, a multimedia reader, a spreadsheet, a word processor, and ofcourse, games.
Unfortunately, all these softwares are proprietary, and only licensed to the final user, who have no way tomodify or improve them. Even worse, software development is difficult too, since proprietary developmenttools are required, which mean in turn that a programmer has to learn this tool and the provided ApplicationProgramming interface (API).
Hopefully, an alternative to this sad situation exists. Free Software, best represented by the GNU/Linuxoperating system, has proven its capability to provide quality tools through knowledge sharing, communitysupport and good will. Moreover, the power of creativity is given back to the developers, allowing them towrite programs using whatever API they prefer best, or even write their own if they want to.
This document proposes you to free your iPAQ from commercial software licenses by replacing theproprietary softwares by a GNU/Linux operating system and a set of application softwares that will providethe same (or even better...) tools than the original ones. Not only will it give you a taste of freedom, but it willalso bring you back the joy of creativity, knowledge, and fun.
I hope you'll enjoy reading this document as much as I have enjoyed writing it.
1. Introduction
As an electronic engineer, I always enjoyed minimalistic systems. They always provide a kind of challenge toyour accepted rules, as your dogmas tend to collapse when facing the crude reality. On minimal systems, thisphenomenon tends to happen even quicker than on complex ones. One other interesting feature of thisminimalistic approach is that it tends to keep things humanly manageable, which is comfortable, as today'scomputer science requires you to master a broad set of concepts, tools and computer languages...
Back in 1980, my first computer was a Goupil 2, quickly followed by an Apple II+, where I startedprogramming. Having undergone dozens of computers, computer languages, and proprietary operatingsystems, I discovered Linux in 1994, when my company at that time (Lectra Systèmes), decided to take aUnix−like operating system on a PC platform as its base for application development. After careful evaluationand pushed by Pierre Ficheux and Daniel Roche, Linux was preferred to other commercial products, firstbecause of its good performance but also because of its price. At that time, emails were not on everybody'scomputer, and the computer community was just emerging from the universities. We thus followed the growthof Free Software, and as an engineer, I found working like that was fun.
Since then, I tried to keep on working with GNU/Linux as much as possible, although I should not beconsidered as a Free Software activist. I am just pragmatic, and I still use commercial software whenever Idon't find the corresponding free tools. I know, I should write my own, but sometimes, I am just too lazy, orfocused on the more important goal that required this tool. I don't feel too guilty for that, as I try to participateto the Free Software movement whenever I can.
I got a first Uniden® PDA, but I should say that it belongs now to one of my brothers, since I was very
Preface 3
disappointed by the fact that there was no (at least documented) way to change the software on it, or even towrite programs for it without having to learn tons of things about DLL's major enhancement (I already playedwith shared libraries on my Amiga 500 in 1987...), and the virtues of Hungarian notation (I still find this isone of the silliest things ever invented, especially since polymorphisms in Object Oriented Programming).
I was a kind of shocked when I first saw my actual boss, Jean−Marc Lange, play with its iPAQ PDA. Butwhat really stunt me is when I discovered by browsing on the Web that some crazy persons did it. Yes, thanksto what was formerly named Compaq® (now Hewlett Packard®), and a lot of good−willed persons, it waspossible to put Free Software on this machine.
I took this as a challenge, and I think that writing this document on converting an iPAQ to GNU/Linux is mybest effort to help the Free Software Community.
This document was also a good exercise to practice DocBook. If you read these lines, it means that I was ableto master it!
2. Audience of this document
This text should be considered as a step−by−step approach of converting an iPAQ to a GNU/Linux operatingsystem, onto which the Opie application suite will be installed. Of course, you can choose to install somedifferent softwares (like the X11 system), but I chose this alternative to provide a strict replacement to theoriginal softwares, and I considered Opie as one of the most advanced projects.
Although a lot of things on this can be found on the Internet (especially at http://www.handhelds.org), I thinkthere is a need for a self−contained source of information that can help everybody achieve this transformationsuccessfully.
3. Organization of the material
The document introduces its topics in a logical order, corresponding to the steps required to put GNU/Linuxon an iPAQ.
Chapter 1 begins with the proper setup of connection of an iPAQ running PocketPC to a GNU/Linux host.
Chapter 2 covers the backup of the original system and user data.
Chapter 3 quickly shows how to setup a terminal connection to the iPAQ, that will be used later to entercommands for the bootloader and the first stage of the GNU/Linux installation.
Chapter 4 shows the bootloader's installation procedure.
Chapter 5 continues with the installation of a minimum GNU/Linux bootstrap
The GNU/Linux bootstrap will be used to install the desired packages. At that point, we should consider thatwe have a running system, though not very attractive from a user point of view.
Chapter 6 provides an in−depth view on how to setup an USB network between the GNU/Linux host and theiPAQ.
The Linux iPAQ HOWTO
2. Audience of this document 4
Chapter 7 finishes the installation of the Familiar GNU/Linux distribution.
Chapter 8 covers the installation of the basic Opie packages, providing us with a more comfortable graphicalinterface, then completes the Opie installation by describing the installation of the remaining Opie packages.
Chapter 9 covers the optional step of restoring the original software back on the iPAQ, just in case where yourboss want its original system back...
4. Prerequisite
There is no prerequisite background to use this document, beside being able to launch a shell command underGNU/Linux either in a text display or in an Xterm, to be able to edit a text file using whatever text editor youare familiar with, and know how to use the iPAQ user interface.
For this guide, I used a Compaq (now HP) iPAQ 3850 iPAQ running PocketPC 2002, but all the givenexamples should work without problem on other iPAQs too, as long as they have a serial connectioncapability. I will be glad to add new targets if you succeeded in doing it on other platforms.
Of course, you will need a computer running the Linux operating system. For this guide, I used the Red Hat7.2 distribution, but it should work on others, with minor changes due to distribution−specific glitches.
This computer will need to be connected to the Internet, as the transformation requires downloading somefiles for the iPAQ. It is also possible to pre−download them and work locally.
In order to download files to the iPAQ, the computer will also have to run either an FTP and/or an HTTP (likeapache) server.
5. Versions
This document describes the installation of the following versions:
Backup and flashing utility − BootBlaster_1.18• Bootloader − bootldr−2.18.01• Linux distribution − familiar−0.5.3• Graphical interface − opie_1.5.0−20020515•
6. Sources of further information
There is much useful information available on the Internet; the following is a sampling. Internet sites, ofcourse, tend to be highly volatile while printed books are hard to update. Thus, this list should be regarded asbeing somewhat out of date.
http://www.handhelds.orgThis site is the home of GNU/Linux on iPAQs. You'll find the distributions, tools, packages andrelated information.
The Linux iPAQ HOWTO
4. Prerequisite 5
7. Legal information
7.1. Copyright
This document is copyright© 2002 by Michel Stempin.
Permission is granted to copy, distribute and/or modify this document under the terms of the GNU FreeDocumentation License, Version 1.1 or any later version published by the Free Software Foundation; with noInvariant Sections, with no Front−Cover Texts, and with no Back−Cover Texts. A copy of the license isincluded in the appendix entitled "GNU Free Documentation License" (see Appendix A).
7.2. NO WARRANTY
THERE IS NO WARRANTY FOR THE PROGRAMS OR EXAMPLES GIVEN IN THIS DOCUMENT,TO THE EXTENT PERMITTED BY APPLICABLE LAW. EXCEPT WHEN OTHERWISE STATED INWRITING THE COPYRIGHT HOLDERS AND/OR OTHER PARTIES PROVIDE THE PROGRAMS OREXAMPLES "AS IS" WITHOUT WARRANTY OF ANY KIND, EITHER EXPRESSED OR IMPLIED,INCLUDING, BUT NOT LIMITED TO, THE IMPLIED WARRANTIES OF MERCHANTABILITY ANDFITNESS FOR A PARTICULAR PURPOSE. THE ENTIRE RISK AS TO THE QUALITY ANDPERFORMANCE OF THE PROGRAMS OR EXAMPLES IS WITH YOU. SHOULD THE PROGRAMSOR EXAMPLES PROVE DEFECTIVE, YOU ASSUME THE COST OF ALL NECESSARY SERVICING,REPAIR OR CORRECTION.
IN NO EVENT UNLESS REQUIRED BY APPLICABLE LAW OR AGREED TO IN WRITING WILLANY COPYRIGHT HOLDER, OR ANY OTHER PARTY WHO MAY MODIFY AND/ORREDISTRIBUTE THE PROGRAMS OR EXAMPLES AS PERMITTED ABOVE, BE LIABLE TO YOUFOR DAMAGES, INCLUDING ANY GENERAL, SPECIAL, INCIDENTAL OR CONSEQUENTIALDAMAGES ARISING OUT OF THE USE OR INABILITY TO USE THE PROGRAMS OR EXAMPLES(INCLUDING BUT NOT LIMITED TO LOSS OF DATA OR DATA BEING RENDERED INACCURATEOR LOSSES SUSTAINED BY YOU OR THIRD PARTIES OR A FAILURE OF THE PROGRAMS OREXAMPLES TO OPERATE WITH ANY OTHER PROGRAMS), EVEN IF SUCH HOLDER OR OTHERPARTY HAS BEEN ADVISED OF THE POSSIBILITY OF SUCH DAMAGES.
7.3. Trademarks
iPAQ" was a trademark of Compaq, Inc., now Hewlett Packard, Inc.
Linux" is a trademark of Linus Torvalds.
Windows", PocketPC" 2002 and ActiveSync" are trademarks of Microsoft Corporation.
8. Online version
The original DocBook SGML version of this document, as well as some various other formats (DVI,multiple−files HTML, single−file HTML, PDF, PostScript, RTF, and TeX) can be found at:
http://mstempin.free.fr/linux−ipaq
The Linux iPAQ HOWTO
7. Legal information 6
9. Conventions used in this document
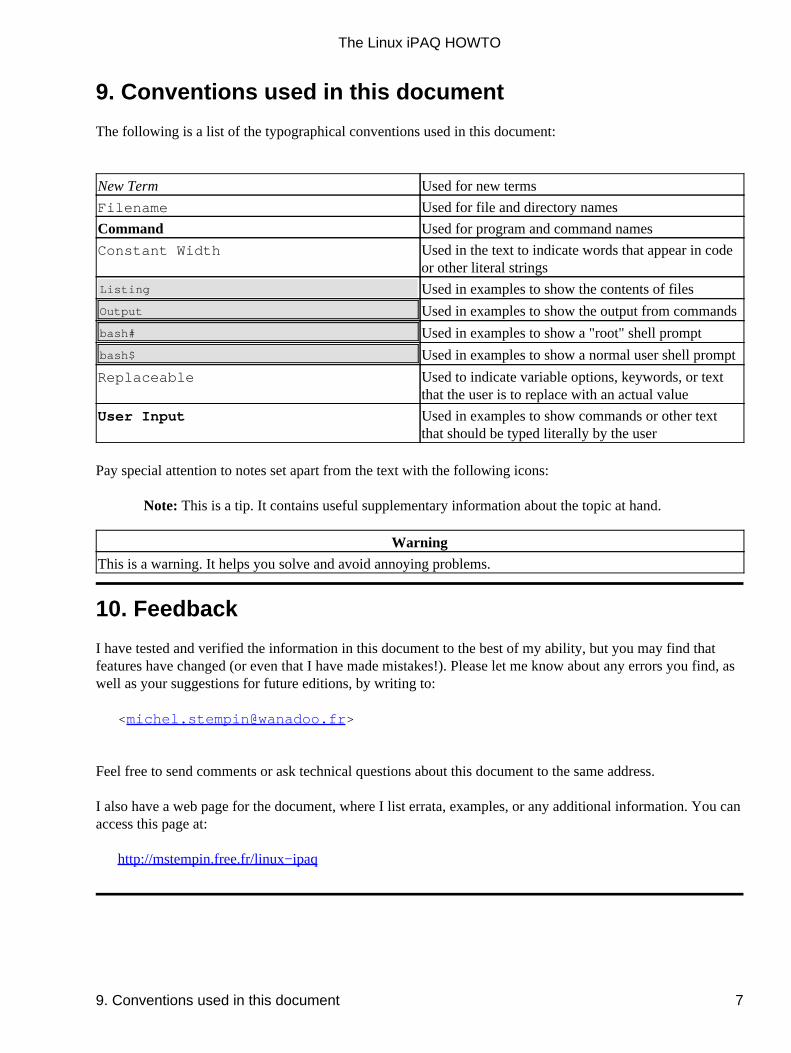
The following is a list of the typographical conventions used in this document:
New Term Used for new terms
Filename Used for file and directory names
Command Used for program and command names
Constant Width Used in the text to indicate words that appear in codeor other literal strings
Listing Used in examples to show the contents of files
Output Used in examples to show the output from commands
bash# Used in examples to show a "root" shell prompt
bash$ Used in examples to show a normal user shell prompt
Replaceable Used to indicate variable options, keywords, or textthat the user is to replace with an actual value
User Input Used in examples to show commands or other textthat should be typed literally by the user
Pay special attention to notes set apart from the text with the following icons:
Note: This is a tip. It contains useful supplementary information about the topic at hand.
Warning
This is a warning. It helps you solve and avoid annoying problems.
10. Feedback
I have tested and verified the information in this document to the best of my ability, but you may find thatfeatures have changed (or even that I have made mistakes!). Please let me know about any errors you find, aswell as your suggestions for future editions, by writing to:
Feel free to send comments or ask technical questions about this document to the same address.
I also have a web page for the document, where I list errata, examples, or any additional information. You canaccess this page at:
http://mstempin.free.fr/linux−ipaq
The Linux iPAQ HOWTO
9. Conventions used in this document 7

11. Acknowledgments
I would like to thank Sophie Calot for understanding the long hours I spent on writing this document, havingconfidence in me that I was doing something important, even if she is not the kind of girl that will use it...
I would like to thank also everybody at HandHelds.org. Without their first work, nothing would have beenpossible. This document is only another way of explaining what they discovered, I simply hope that I addedsome valuable information and a usefull approach of the subject.
The Linux iPAQ HOWTO
11. Acknowledgments 8
Chapter 1. Connecting a PocketPC iPAQ to aGNU/Linux host
1.1. Creating a connection on the GNU/Linux host
Although the iPAQ's cradle has an USB cable, we will not be able to use it while the iPAQ is runningPocketPC, as its use is limited to the proprietary ActiveSync program.
The only possibility will be to use the slower serial cable attached to the cradle and PPP (Point to Pointprotocol), which provides a way to use TCP/IP over a serial line. In Chapter 6, as GNU/Linux is installed, wewill setup a faster USB network.
For now, we will have to setup PPP both on the PocketPC iPAQ and on the GNU/Linux host.
1.1.1. pppd configuration
On the GNU/Linux host, PPP is implemented by the pppd command, which uses either options specified afterthe name pppd on the command line, separated by space characters, or a configuration file. This method willbe preferred, as it is tedious to type the same things over and over.
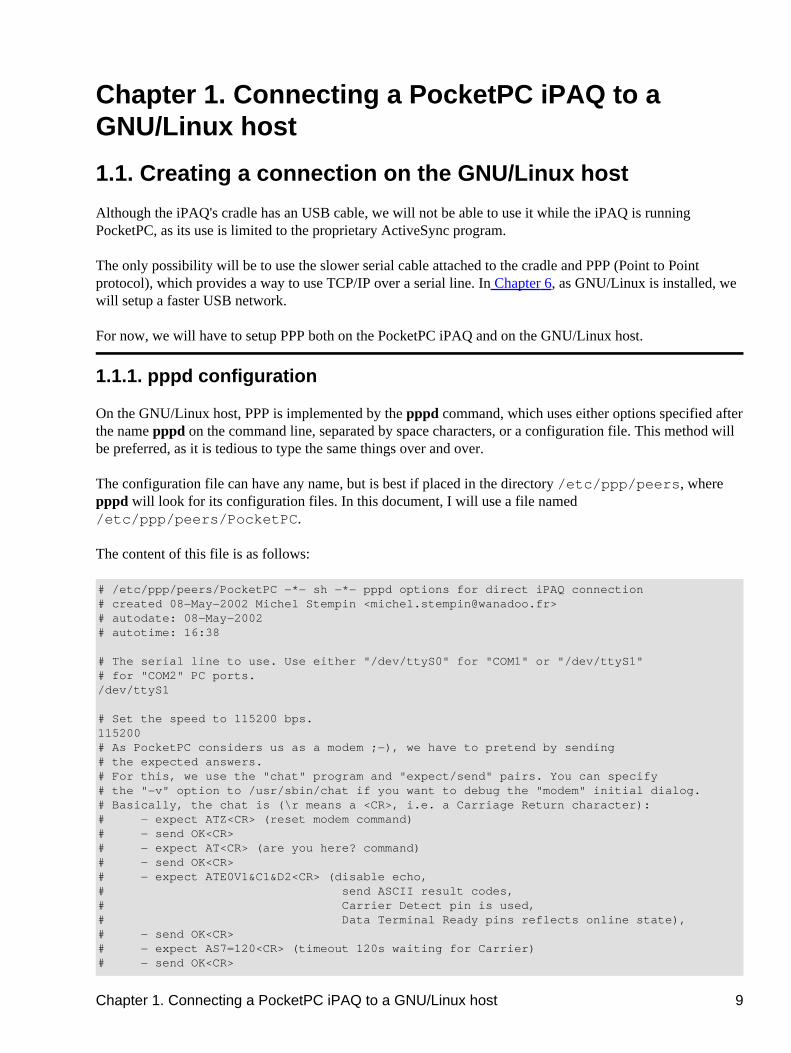
The configuration file can have any name, but is best if placed in the directory /etc/ppp/peers, wherepppd will look for its configuration files. In this document, I will use a file named/etc/ppp/peers/PocketPC.
The content of this file is as follows:
# /etc/ppp/peers/PocketPC −*− sh −*− pppd options for direct iPAQ connection# created 08−May−2002 Michel Stempin <[email protected]># autodate: 08−May−2002# autotime: 16:38
# The serial line to use. Use either "/dev/ttyS0" for "COM1" or "/dev/ttyS1"# for "COM2" PC ports./dev/ttyS1
# Set the speed to 115200 bps.115200# As PocketPC considers us as a modem ;−), we have to pretend by sending# the expected answers.# For this, we use the "chat" program and "expect/send" pairs. You can specify# the "−v" option to /usr/sbin/chat if you want to debug the "modem" initial dialog.# Basically, the chat is (\r means a <CR>, i.e. a Carriage Return character):# − expect ATZ<CR> (reset modem command)# − send OK<CR># − expect AT<CR> (are you here? command)# − send OK<CR># − expect ATE0V1&C1&D2<CR> (disable echo,# send ASCII result codes,# Carrier Detect pin is used,# Data Terminal Ready pins reflects online state),# − send OK<CR># − expect AS7=120<CR> (timeout 120s waiting for Carrier)# − send OK<CR>
Chapter 1. Connecting a PocketPC iPAQ to a GNU/Linux host 9
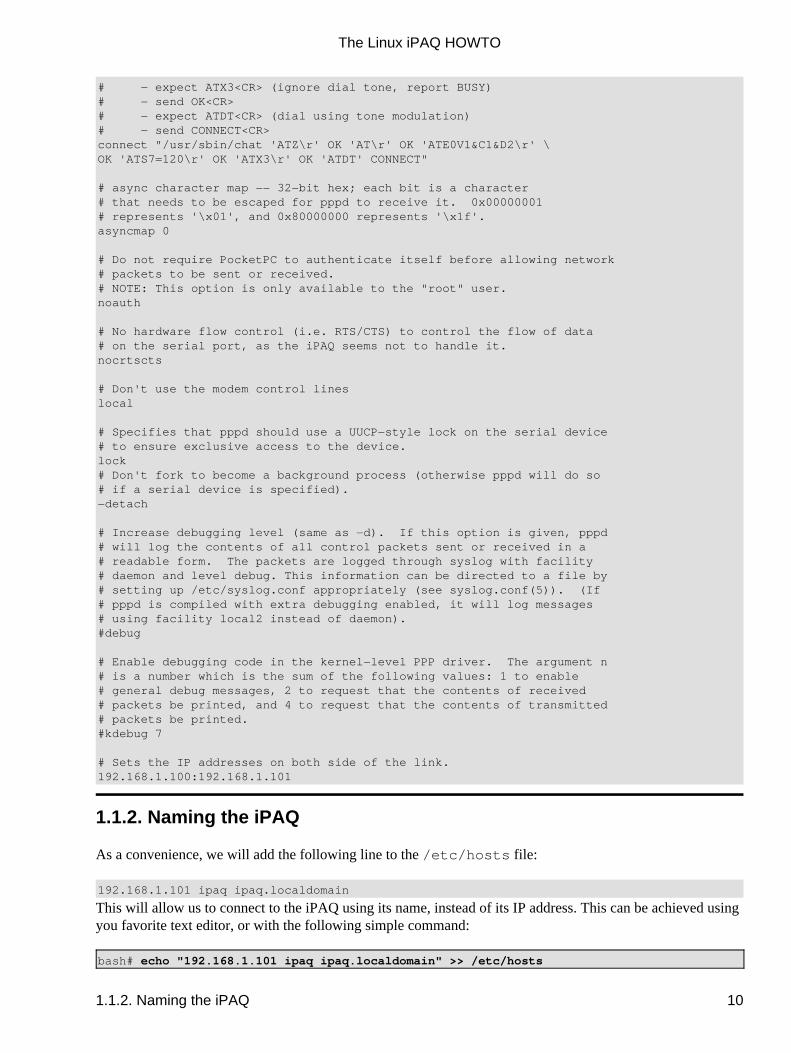
# − expect ATX3<CR> (ignore dial tone, report BUSY)# − send OK<CR># − expect ATDT<CR> (dial using tone modulation)# − send CONNECT<CR>connect "/usr/sbin/chat 'ATZ\r' OK 'AT\r' OK 'ATE0V1&C1&D2\r' \OK 'ATS7=120\r' OK 'ATX3\r' OK 'ATDT' CONNECT"
# async character map −− 32−bit hex; each bit is a character# that needs to be escaped for pppd to receive it. 0x00000001# represents '\x01', and 0x80000000 represents '\x1f'.asyncmap 0
# Do not require PocketPC to authenticate itself before allowing network# packets to be sent or received.# NOTE: This option is only available to the "root" user.noauth
# No hardware flow control (i.e. RTS/CTS) to control the flow of data# on the serial port, as the iPAQ seems not to handle it.nocrtscts
# Don't use the modem control lineslocal
# Specifies that pppd should use a UUCP−style lock on the serial device# to ensure exclusive access to the device.lock# Don't fork to become a background process (otherwise pppd will do so# if a serial device is specified).−detach
# Increase debugging level (same as −d). If this option is given, pppd# will log the contents of all control packets sent or received in a# readable form. The packets are logged through syslog with facility# daemon and level debug. This information can be directed to a file by# setting up /etc/syslog.conf appropriately (see syslog.conf(5)). (If# pppd is compiled with extra debugging enabled, it will log messages# using facility local2 instead of daemon).#debug
# Enable debugging code in the kernel−level PPP driver. The argument n# is a number which is the sum of the following values: 1 to enable# general debug messages, 2 to request that the contents of received# packets be printed, and 4 to request that the contents of transmitted# packets be printed.#kdebug 7
# Sets the IP addresses on both side of the link.192.168.1.100:192.168.1.101
1.1.2. Naming the iPAQ
As a convenience, we will add the following line to the /etc/hosts file:
192.168.1.101 ipaq ipaq.localdomain
This will allow us to connect to the iPAQ using its name, instead of its IP address. This can be achieved usingyou favorite text editor, or with the following simple command:
bash# echo "192.168.1.101 ipaq ipaq.localdomain" >> /etc/hosts
The Linux iPAQ HOWTO
1.1.2. Naming the iPAQ 10
1.2. Creating a connection on the iPAQ
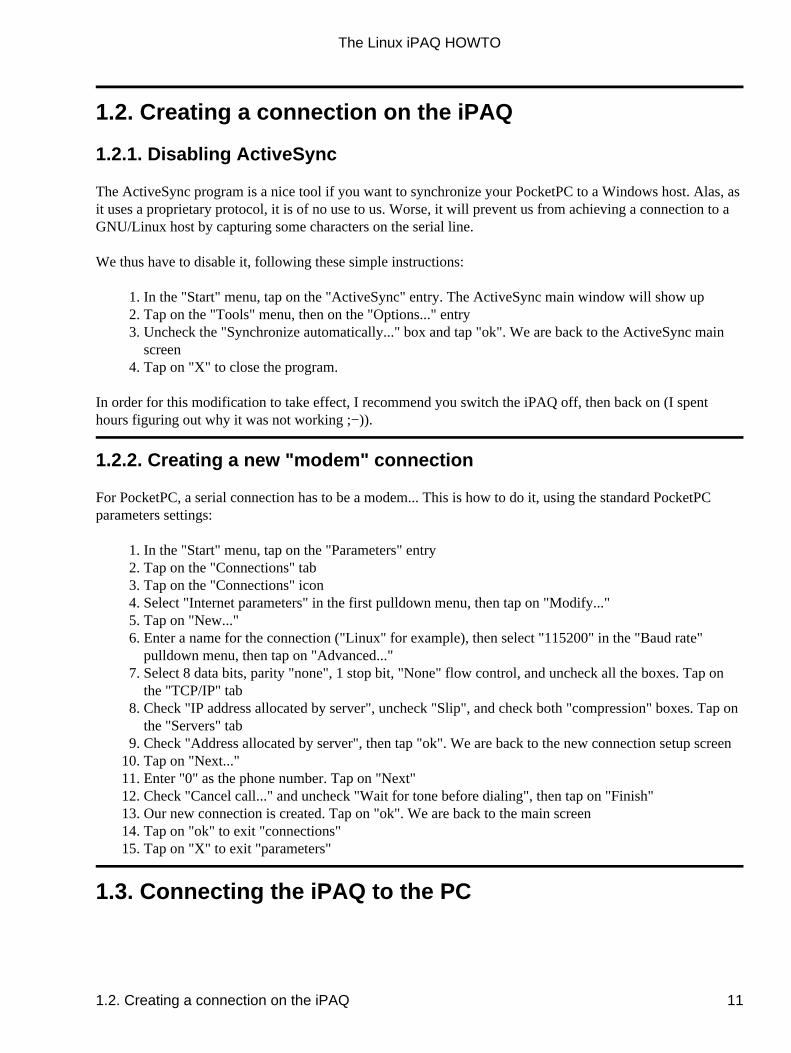
1.2.1. Disabling ActiveSync
The ActiveSync program is a nice tool if you want to synchronize your PocketPC to a Windows host. Alas, asit uses a proprietary protocol, it is of no use to us. Worse, it will prevent us from achieving a connection to aGNU/Linux host by capturing some characters on the serial line.
We thus have to disable it, following these simple instructions:
In the "Start" menu, tap on the "ActiveSync" entry. The ActiveSync main window will show up1. Tap on the "Tools" menu, then on the "Options..." entry2. Uncheck the "Synchronize automatically..." box and tap "ok". We are back to the ActiveSync mainscreen
3.
Tap on "X" to close the program.4.
In order for this modification to take effect, I recommend you switch the iPAQ off, then back on (I spenthours figuring out why it was not working ;−)).
1.2.2. Creating a new "modem" connection
For PocketPC, a serial connection has to be a modem... This is how to do it, using the standard PocketPCparameters settings:
In the "Start" menu, tap on the "Parameters" entry1. Tap on the "Connections" tab2. Tap on the "Connections" icon3. Select "Internet parameters" in the first pulldown menu, then tap on "Modify..."4. Tap on "New..."5. Enter a name for the connection ("Linux" for example), then select "115200" in the "Baud rate"pulldown menu, then tap on "Advanced..."
6.
Select 8 data bits, parity "none", 1 stop bit, "None" flow control, and uncheck all the boxes. Tap onthe "TCP/IP" tab
7.
Check "IP address allocated by server", uncheck "Slip", and check both "compression" boxes. Tap onthe "Servers" tab
8.
Check "Address allocated by server", then tap "ok". We are back to the new connection setup screen9. Tap on "Next..."10. Enter "0" as the phone number. Tap on "Next"11. Check "Cancel call..." and uncheck "Wait for tone before dialing", then tap on "Finish"12. Our new connection is created. Tap on "ok". We are back to the main screen13. Tap on "ok" to exit "connections"14. Tap on "X" to exit "parameters"15.
1.3. Connecting the iPAQ to the PC
The Linux iPAQ HOWTO
1.2. Creating a connection on the iPAQ 11
1.3.1. On the GNU/Linux host
1.3.1.1. Manual connection
On the GNU/Linux host, you can launch the connection manually by typing:
bash# /usr/sbin/pppd call PocketPC
This launches pppd, calling the iPAQ with the option file we created in Section 1.1.1.
1.3.1.2. Automatic connection
Alternatively, you can launch it automatically, by adding the following lines to your /etc/inittab file:
# Run a connection to the iPAQppp:2345:respawn:/usr/sbin/pppd call PocketPC
This last line tells the init process (father of all) to launch the same command whenever it enters into runlevels 2,3,4 or 5, and to respawn (relaunch) it when it dies.
You can enter these two lines either using your favorite text editor, or by issuing the following commands:
bash# echo "# Run a connection to the iPAQ" >> /etc/inittabbash# echo "ppp:2345:respawn:/usr/sbin/pppd call PocketPC" >> /etc/inittab
For this automatic feature to take effect, you have to tell the running init process to re−read its configurationby typing:
bash# init q
You can observe if pppd is running by checking the /var/log/messages file.
1.3.2. On the iPAQ
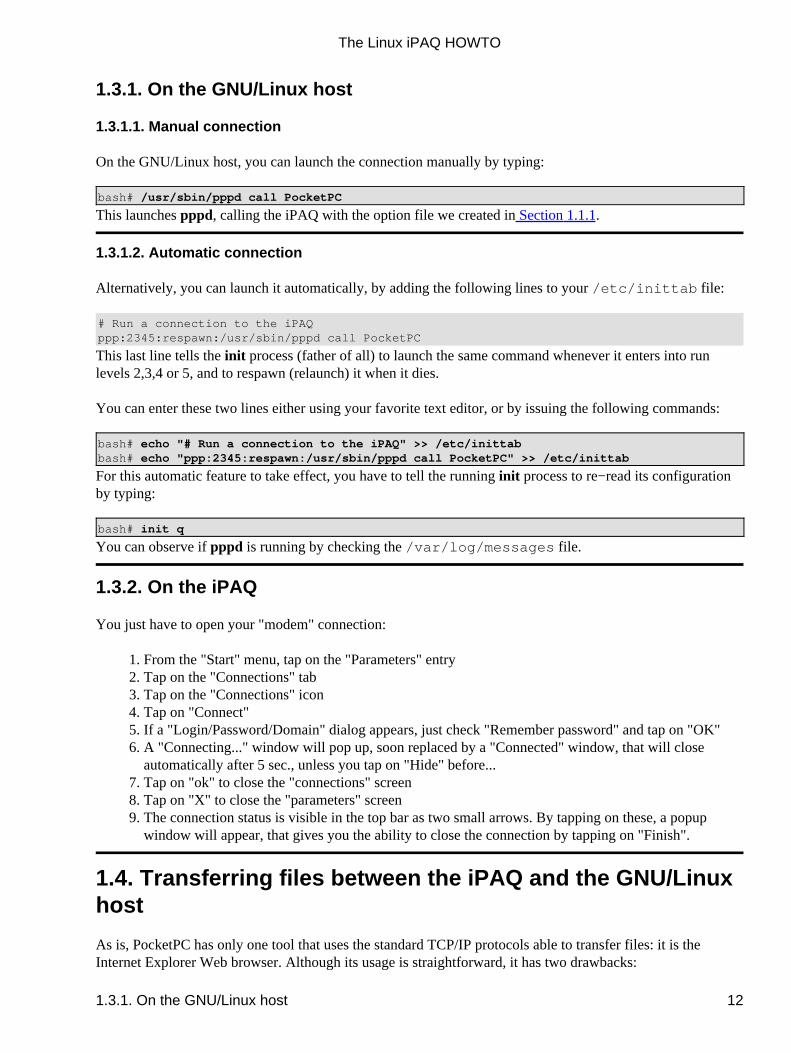
You just have to open your "modem" connection:
From the "Start" menu, tap on the "Parameters" entry1. Tap on the "Connections" tab2. Tap on the "Connections" icon3. Tap on "Connect"4. If a "Login/Password/Domain" dialog appears, just check "Remember password" and tap on "OK"5. A "Connecting..." window will pop up, soon replaced by a "Connected" window, that will closeautomatically after 5 sec., unless you tap on "Hide" before...
6.
Tap on "ok" to close the "connections" screen7. Tap on "X" to close the "parameters" screen8. The connection status is visible in the top bar as two small arrows. By tapping on these, a popupwindow will appear, that gives you the ability to close the connection by tapping on "Finish".
9.
1.4. Transferring files between the iPAQ and the GNU/Linuxhost
As is, PocketPC has only one tool that uses the standard TCP/IP protocols able to transfer files: it is theInternet Explorer Web browser. Although its usage is straightforward, it has two drawbacks:
The Linux iPAQ HOWTO
1.3.1. On the GNU/Linux host 12
it requires a running Web server on the GNU/Linux host1. it is only able to transfer file in one direction (from the GNU/Linux host to the iPAQ)2.
That is, it does not fulfill our requirements: to be able to exchange files in both directions.
The workaround I have found is to use it initially to download a minimum FTP server on the PocketPC iPAQ,which will be used for all subsequent transfers.
1.4.1. Downloading and running the mini FTP server
As we will use a Web browser on the iPAQ, we need first to set up a Web server on the GNU/Linux host,place the mini FTP server so it can be accessed from the iPAQ, then download it and install it.
1.4.1.1. Setting up a Web server on the GNU/Linux host
Giving all the details required to set up a Web server on a GNU/Linux host is beyond the scope of this guide.Maybe you already have done it for another task, or your GNU/Linux distribution has already done it for you.
So, I will only describe what is required to set up the Apache Web server. I will assume that you already haveinstalled the required package for it, using your distribution's packaging tool.
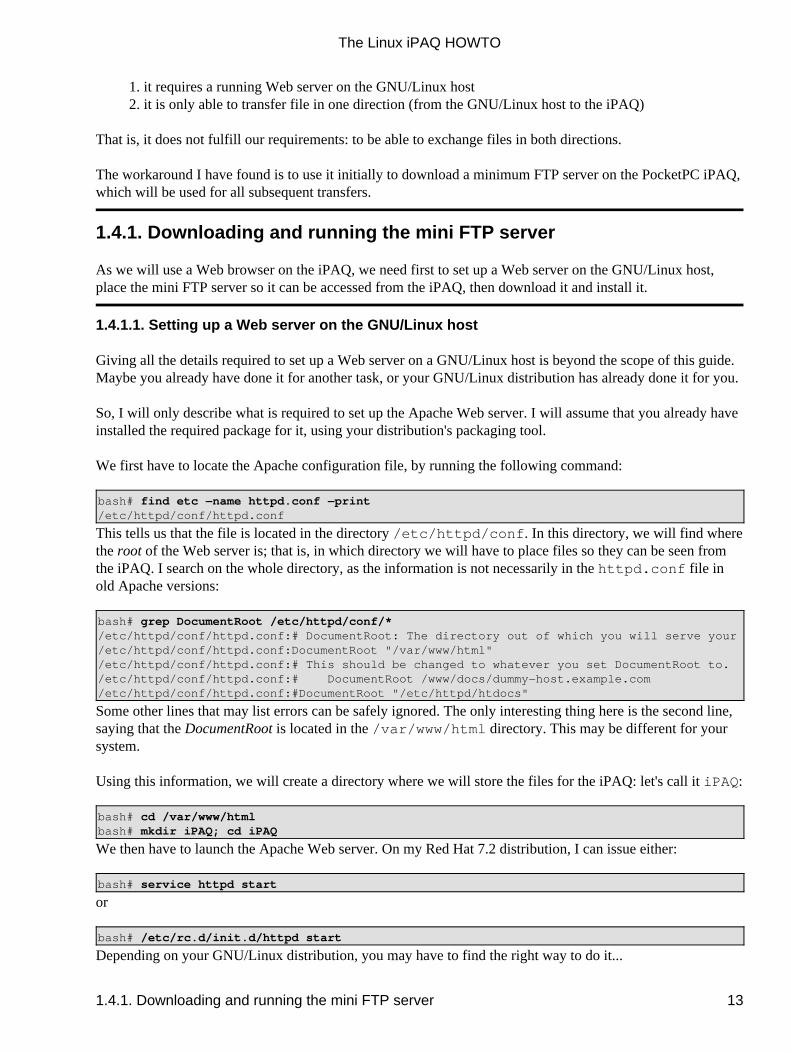
We first have to locate the Apache configuration file, by running the following command:
bash# find etc −name httpd.conf −print/etc/httpd/conf/httpd.conf
This tells us that the file is located in the directory /etc/httpd/conf. In this directory, we will find wherethe root of the Web server is; that is, in which directory we will have to place files so they can be seen fromthe iPAQ. I search on the whole directory, as the information is not necessarily in the httpd.conf file inold Apache versions:
bash# grep DocumentRoot /etc/httpd/conf/*/etc/httpd/conf/httpd.conf:# DocumentRoot: The directory out of which you will serve your/etc/httpd/conf/httpd.conf:DocumentRoot "/var/www/html"/etc/httpd/conf/httpd.conf:# This should be changed to whatever you set DocumentRoot to./etc/httpd/conf/httpd.conf:# DocumentRoot /www/docs/dummy−host.example.com/etc/httpd/conf/httpd.conf:#DocumentRoot "/etc/httpd/htdocs"
Some other lines that may list errors can be safely ignored. The only interesting thing here is the second line,saying that the DocumentRoot is located in the /var/www/html directory. This may be different for yoursystem.
Using this information, we will create a directory where we will store the files for the iPAQ: let's call it iPAQ:
bash# cd /var/www/htmlbash# mkdir iPAQ; cd iPAQ
We then have to launch the Apache Web server. On my Red Hat 7.2 distribution, I can issue either:
bash# service httpd start
or
bash# /etc/rc.d/init.d/httpd start
Depending on your GNU/Linux distribution, you may have to find the right way to do it...
The Linux iPAQ HOWTO
1.4.1. Downloading and running the mini FTP server 13

1.4.1.2. Getting the PocketPC mini FTP server
Copy in this directory the FTPS006AP.ZIP file (aka, the ftpserv zipped file), downloaded from thefollowing location:
http://www.oohito.com/wince/arm_j.htm
Unzip the archive using the following command:
bash# unzip FPS006AP.ZIPArchive: FTPS006AP.ZIP inflating: ftpsvr.exe inflating: ftpsvr.txt
We are interested in the ftpsvr.exe file.
1.4.1.3. Downloading the mini FTP server on the PocketPC iPAQ
If everything is OK, you should be able to download the ftpsvr.exe file by fetching the following URL inthe Internet Explorer Web browser on the PocketPC iPAQ:
http://192.168.1.100/iPAQ/ftpsvr.exe
Note: You may have to go into the "Display" menu, and enable the "URL bar" option to beable to enter the URL.
A "Download" popup menu should open, asking you if you want to download the ftpsvr.exe file, givingyou the option to open it after downloading. I suggest you to check this last option.
On the PocketPC iPAQ, you can now close Internet Explorer and go back to the main "Today" screen. In thelower right corner, you should have a small icon. When you tap on it, a window "FtpSvr for Windows® CEVer 0.06" should open, that is a little too large on my iPAQ, so you may have to move it around to see itcompletely.
This window tells you that the FTP server is running, listening on port 21. You have the option to stop it,uninstall it (don't!), or exit.
Everything is ready now to be able to transfer files in both directions.
Whenever you want to restart the mini FTP server, you just have to click on the ftpsvr.exe icon where yousaved it after downloading it (normally in the "My Documents" folder).
1.4.2. Transferring files using FTP
On the GNU/Linux host, you can either use the command line ftp, or your favorite graphical FTP client. I willshow here the basic, command line option:
bash$ ftp ipaqConnected to ipaq (192.168.1.101).220 FtpSvr (Version 0.06).Name (ipaq:root):
The Linux iPAQ HOWTO
1.4.1. Downloading and running the mini FTP server 14
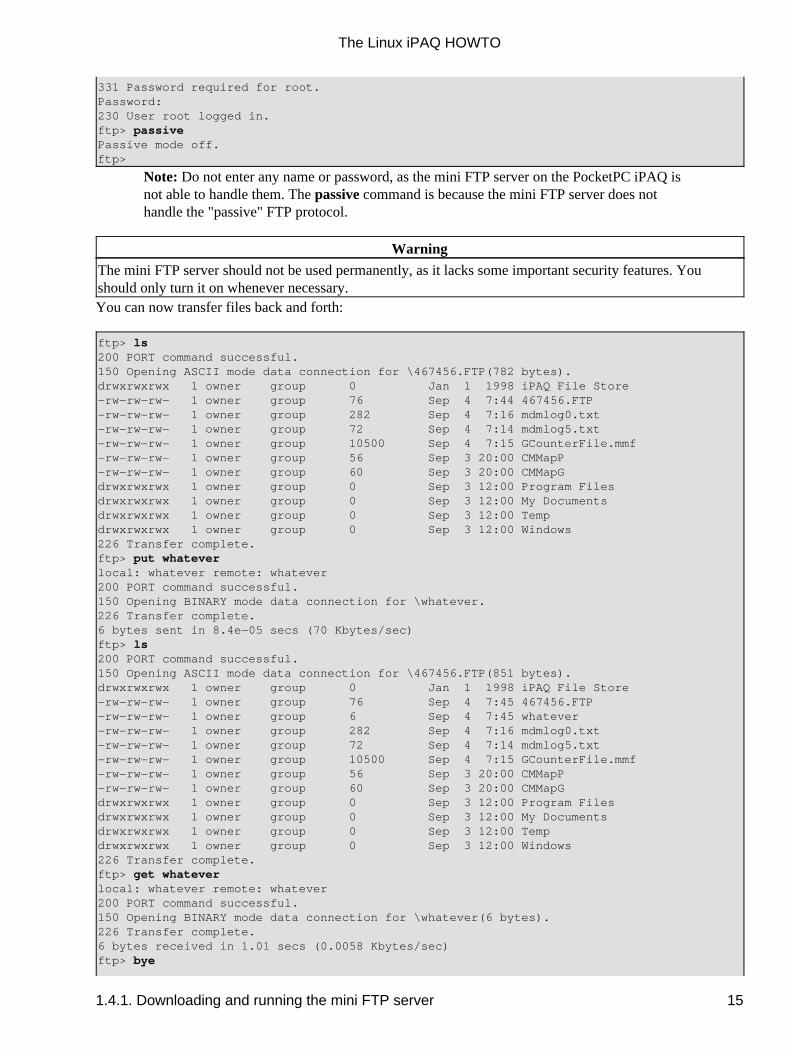
331 Password required for root.Password:230 User root logged in.ftp> passivePassive mode off.ftp>
Note: Do not enter any name or password, as the mini FTP server on the PocketPC iPAQ isnot able to handle them. The passive command is because the mini FTP server does nothandle the "passive" FTP protocol.
Warning
The mini FTP server should not be used permanently, as it lacks some important security features. Youshould only turn it on whenever necessary.You can now transfer files back and forth:
ftp> ls200 PORT command successful.150 Opening ASCII mode data connection for \467456.FTP(782 bytes).drwxrwxrwx 1 owner group 0 Jan 1 1998 iPAQ File Store−rw−rw−rw− 1 owner group 76 Sep 4 7:44 467456.FTP−rw−rw−rw− 1 owner group 282 Sep 4 7:16 mdmlog0.txt−rw−rw−rw− 1 owner group 72 Sep 4 7:14 mdmlog5.txt−rw−rw−rw− 1 owner group 10500 Sep 4 7:15 GCounterFile.mmf−rw−rw−rw− 1 owner group 56 Sep 3 20:00 CMMapP−rw−rw−rw− 1 owner group 60 Sep 3 20:00 CMMapGdrwxrwxrwx 1 owner group 0 Sep 3 12:00 Program Filesdrwxrwxrwx 1 owner group 0 Sep 3 12:00 My Documentsdrwxrwxrwx 1 owner group 0 Sep 3 12:00 Tempdrwxrwxrwx 1 owner group 0 Sep 3 12:00 Windows226 Transfer complete.ftp> put whateverlocal: whatever remote: whatever200 PORT command successful.150 Opening BINARY mode data connection for \whatever.226 Transfer complete.6 bytes sent in 8.4e−05 secs (70 Kbytes/sec)ftp> ls200 PORT command successful.150 Opening ASCII mode data connection for \467456.FTP(851 bytes).drwxrwxrwx 1 owner group 0 Jan 1 1998 iPAQ File Store−rw−rw−rw− 1 owner group 76 Sep 4 7:45 467456.FTP−rw−rw−rw− 1 owner group 6 Sep 4 7:45 whatever−rw−rw−rw− 1 owner group 282 Sep 4 7:16 mdmlog0.txt−rw−rw−rw− 1 owner group 72 Sep 4 7:14 mdmlog5.txt−rw−rw−rw− 1 owner group 10500 Sep 4 7:15 GCounterFile.mmf−rw−rw−rw− 1 owner group 56 Sep 3 20:00 CMMapP−rw−rw−rw− 1 owner group 60 Sep 3 20:00 CMMapGdrwxrwxrwx 1 owner group 0 Sep 3 12:00 Program Filesdrwxrwxrwx 1 owner group 0 Sep 3 12:00 My Documentsdrwxrwxrwx 1 owner group 0 Sep 3 12:00 Tempdrwxrwxrwx 1 owner group 0 Sep 3 12:00 Windows226 Transfer complete.ftp> get whateverlocal: whatever remote: whatever200 PORT command successful.150 Opening BINARY mode data connection for \whatever(6 bytes).226 Transfer complete.6 bytes received in 1.01 secs (0.0058 Kbytes/sec)ftp> bye
The Linux iPAQ HOWTO
1.4.1. Downloading and running the mini FTP server 15
221 Goodbye
The Linux iPAQ HOWTO
1.4.1. Downloading and running the mini FTP server 16
Chapter 2. Backing up the PocketPC iPAQThere are several reasons why you should consider backing up the PocketPC iPAQ before proceeding to theGNU/Linux replacement:
the operating system replacement is a destructive operation, that will erase everything on the machine• the software that comes pre−installed on the machine is licensed to you (remember you paid for it!),so even if you don't want it, you should keep it as valuable
•
if you are not satisfied with GNU/Linux, this will be the only way to go back to the original operatingsystem
•
concerning your own data, remember that you are the only one able to re−create it...• if you experiment on someone else's iPAQ (you probably shouldn't, anyway), you will have to restoreeverything to its original state
•
This is why I urge you to backup your iPAQ. When it comes to safety procedure, it is better to havesuspenders, a belt, and a parachute than nothing...
2.1. Downloading the backup software
The software that we will use to backup everything on the PocketPC iPAQ is included in the software thatwill be used in chapter Chapter 4 to replace the original bootloader. This software can be downloaded from:
ftp://handhelds.org/feeds/BootBlaster/BootBlaster_1.18.exe
I recommend you also download the corresponding md5sum file, so you can check BootBlaster's integrity.The md5sum can be downloaded from:
ftp://handhelds.org/feeds/BootBlaster/BootBlaster_1.18.exe.md5sum
Transfer the BootBlaster_1.18.exe file onto the iPAQ, by following the steps in Section 1.3 and Section 1.4.2.
You can check the integrity by running the following command:
bash$ md5sum −c BootBlaster_1.18.exe.md5sumBootBlaster_1.18.exe: OK
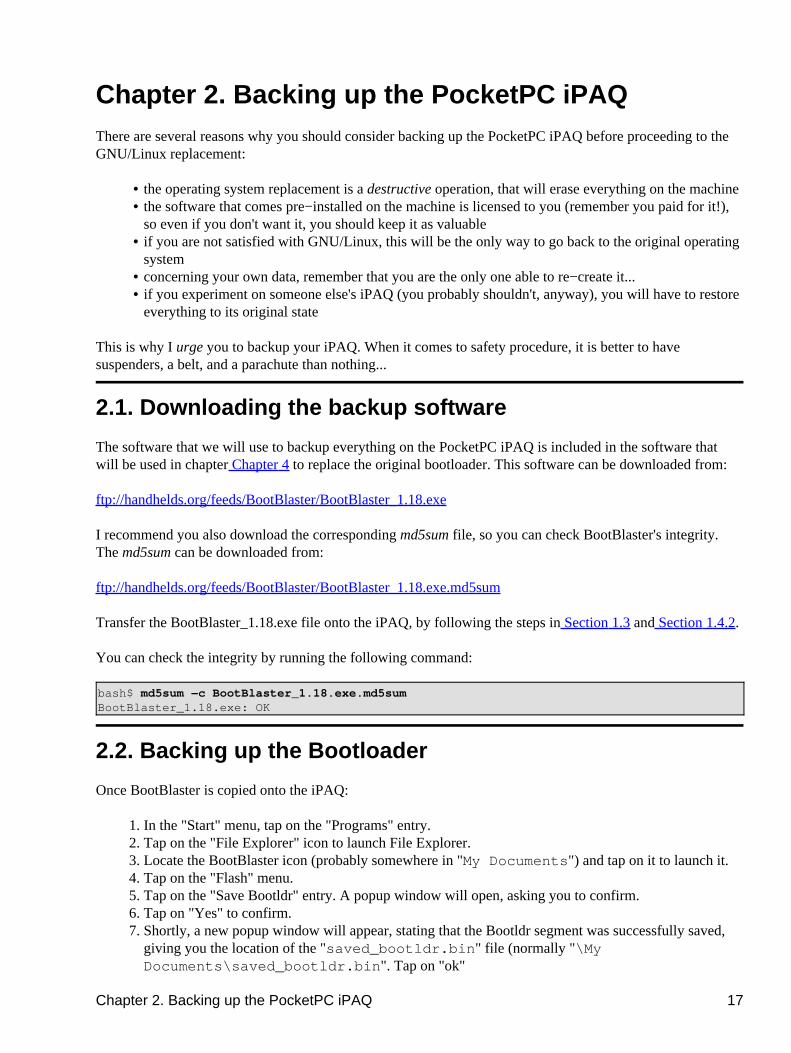
2.2. Backing up the Bootloader
Once BootBlaster is copied onto the iPAQ:
In the "Start" menu, tap on the "Programs" entry.1. Tap on the "File Explorer" icon to launch File Explorer.2. Locate the BootBlaster icon (probably somewhere in "My Documents") and tap on it to launch it.3. Tap on the "Flash" menu.4. Tap on the "Save Bootldr" entry. A popup window will open, asking you to confirm.5. Tap on "Yes" to confirm.6. Shortly, a new popup window will appear, stating that the Bootldr segment was successfully saved,giving you the location of the "saved_bootldr.bin" file (normally "\MyDocuments\saved_bootldr.bin". Tap on "ok"
7.
Chapter 2. Backing up the PocketPC iPAQ 17
Tap on the "X" button to close BootBlaster.8. Tap on the "X" button to close File Explorer.9. Transfer the saved_bootldr.bin file onto the GNU/Linux host, by following the steps inSection 1.3 and Section 1.4.2.
10.
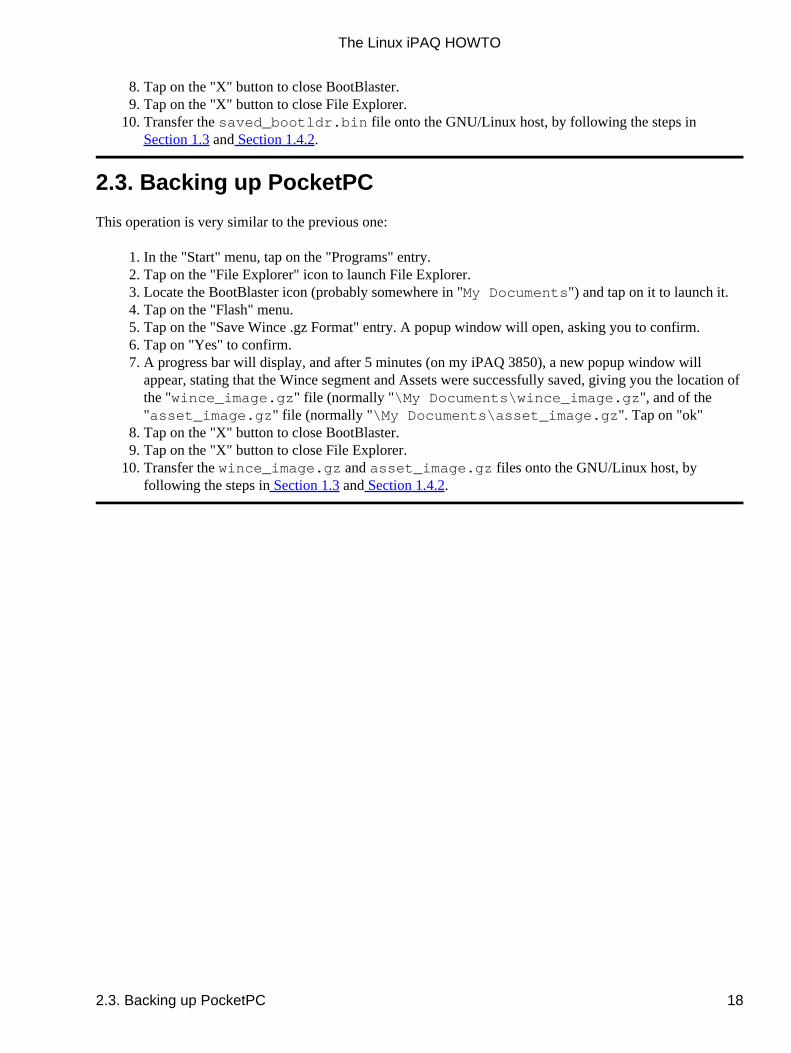
2.3. Backing up PocketPC
This operation is very similar to the previous one:
In the "Start" menu, tap on the "Programs" entry.1. Tap on the "File Explorer" icon to launch File Explorer.2. Locate the BootBlaster icon (probably somewhere in "My Documents") and tap on it to launch it.3. Tap on the "Flash" menu.4. Tap on the "Save Wince .gz Format" entry. A popup window will open, asking you to confirm.5. Tap on "Yes" to confirm.6. A progress bar will display, and after 5 minutes (on my iPAQ 3850), a new popup window willappear, stating that the Wince segment and Assets were successfully saved, giving you the location ofthe "wince_image.gz" file (normally "\My Documents\wince_image.gz", and of the"asset_image.gz" file (normally "\My Documents\asset_image.gz". Tap on "ok"
7.
Tap on the "X" button to close BootBlaster.8. Tap on the "X" button to close File Explorer.9. Transfer the wince_image.gz and asset_image.gz files onto the GNU/Linux host, byfollowing the steps in Section 1.3 and Section 1.4.2.
10.
The Linux iPAQ HOWTO
2.3. Backing up PocketPC 18
Chapter 3. Setting up a serial terminal connectionto the iPAQIn this chapter, we will set up a serial terminal connection to the iPAQ that will be used later for:
taking control of the bootloader to send the GNU/Linux bootstrap image to the iPAQ and flash it• taking control of the GNU/Linux on the iPAQ while there is no graphical interface•
On the GNU/Linux host, we will use minicom as a terminal emulator.
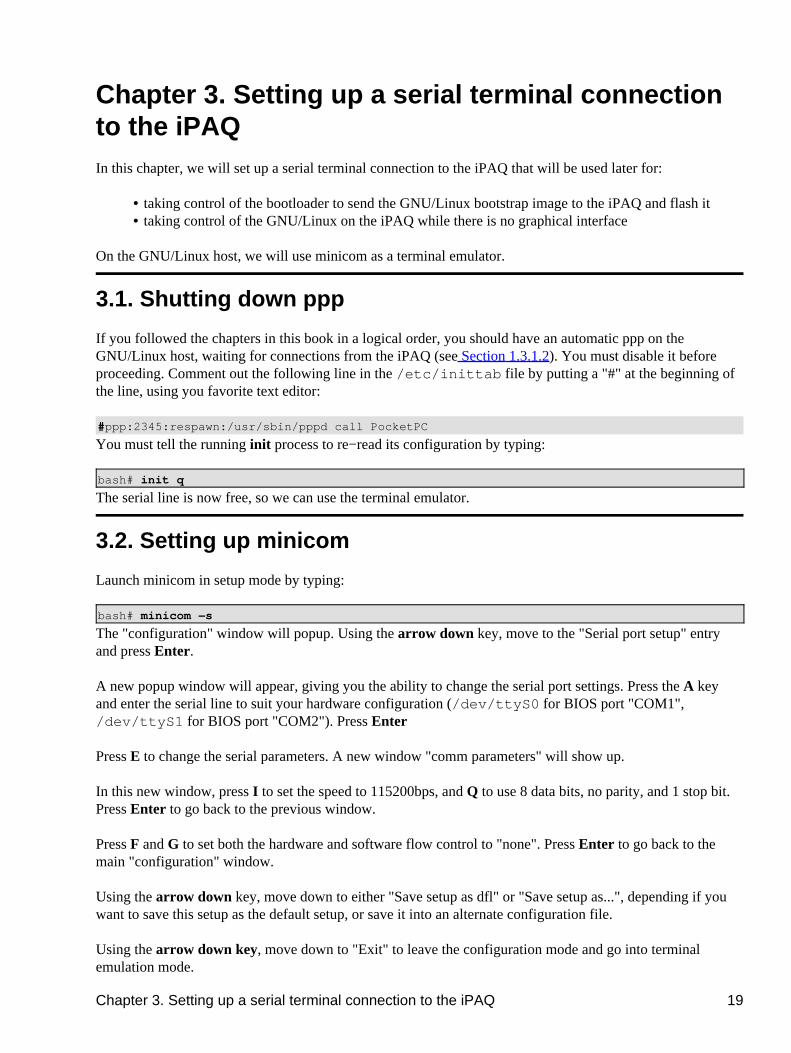
3.1. Shutting down ppp
If you followed the chapters in this book in a logical order, you should have an automatic ppp on theGNU/Linux host, waiting for connections from the iPAQ (see Section 1.3.1.2). You must disable it beforeproceeding. Comment out the following line in the /etc/inittab file by putting a "#" at the beginning ofthe line, using you favorite text editor:
#ppp:2345:respawn:/usr/sbin/pppd call PocketPC
You must tell the running init process to re−read its configuration by typing:
bash# init q
The serial line is now free, so we can use the terminal emulator.
3.2. Setting up minicom
Launch minicom in setup mode by typing:
bash# minicom −s
The "configuration" window will popup. Using the arrow down key, move to the "Serial port setup" entryand press Enter.
A new popup window will appear, giving you the ability to change the serial port settings. Press the A keyand enter the serial line to suit your hardware configuration (/dev/ttyS0 for BIOS port "COM1",/dev/ttyS1 for BIOS port "COM2"). Press Enter
Press E to change the serial parameters. A new window "comm parameters" will show up.
In this new window, press I to set the speed to 115200bps, and Q to use 8 data bits, no parity, and 1 stop bit.Press Enter to go back to the previous window.
Press F and G to set both the hardware and software flow control to "none". Press Enter to go back to themain "configuration" window.
Using the arrow down key, move down to either "Save setup as dfl" or "Save setup as...", depending if youwant to save this setup as the default setup, or save it into an alternate configuration file.
Using the arrow down key, move down to "Exit" to leave the configuration mode and go into terminalemulation mode.
Chapter 3. Setting up a serial terminal connection to the iPAQ 19

The Linux iPAQ HOWTO
Chapter 3. Setting up a serial terminal connection to the iPAQ 20
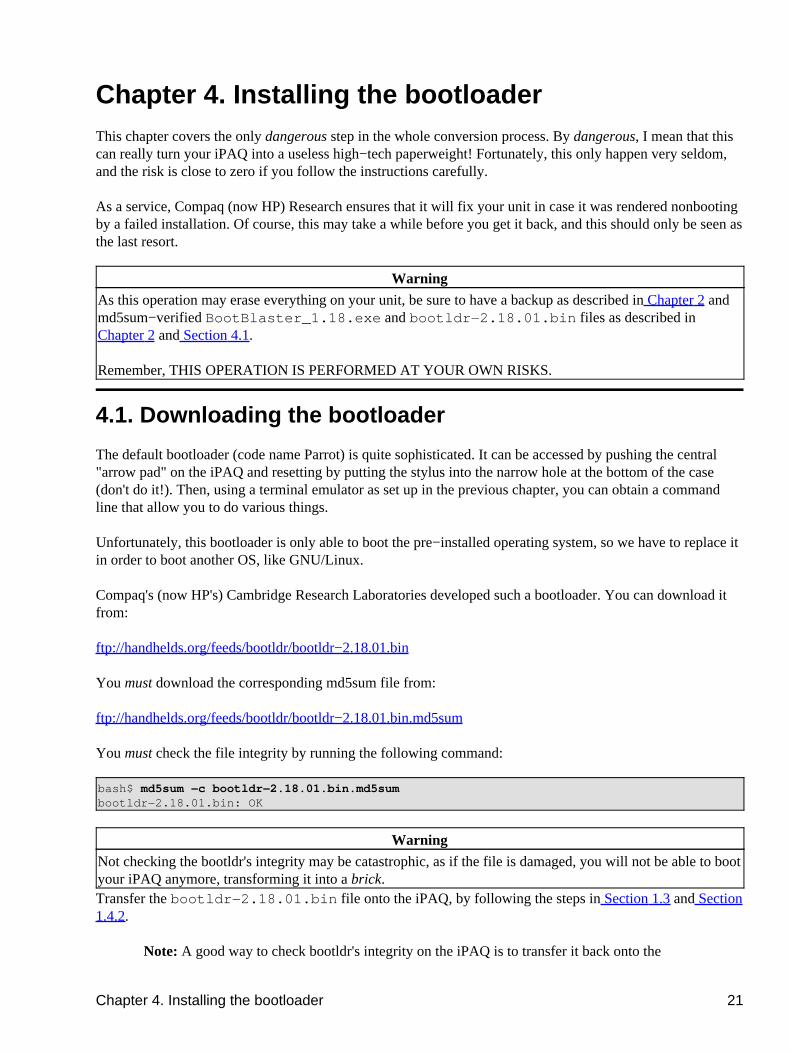
Chapter 4. Installing the bootloaderThis chapter covers the only dangerous step in the whole conversion process. By dangerous, I mean that thiscan really turn your iPAQ into a useless high−tech paperweight! Fortunately, this only happen very seldom,and the risk is close to zero if you follow the instructions carefully.
As a service, Compaq (now HP) Research ensures that it will fix your unit in case it was rendered nonbootingby a failed installation. Of course, this may take a while before you get it back, and this should only be seen asthe last resort.
Warning
As this operation may erase everything on your unit, be sure to have a backup as described in Chapter 2 andmd5sum−verified BootBlaster_1.18.exe and bootldr−2.18.01.bin files as described inChapter 2 and Section 4.1.
Remember, THIS OPERATION IS PERFORMED AT YOUR OWN RISKS.
4.1. Downloading the bootloader
The default bootloader (code name Parrot) is quite sophisticated. It can be accessed by pushing the central"arrow pad" on the iPAQ and resetting by putting the stylus into the narrow hole at the bottom of the case(don't do it!). Then, using a terminal emulator as set up in the previous chapter, you can obtain a commandline that allow you to do various things.
Unfortunately, this bootloader is only able to boot the pre−installed operating system, so we have to replace itin order to boot another OS, like GNU/Linux.
Compaq's (now HP's) Cambridge Research Laboratories developed such a bootloader. You can download itfrom:
ftp://handhelds.org/feeds/bootldr/bootldr−2.18.01.bin
You must download the corresponding md5sum file from:
ftp://handhelds.org/feeds/bootldr/bootldr−2.18.01.bin.md5sum
You must check the file integrity by running the following command:
bash$ md5sum −c bootldr−2.18.01.bin.md5sumbootldr−2.18.01.bin: OK
Warning
Not checking the bootldr's integrity may be catastrophic, as if the file is damaged, you will not be able to bootyour iPAQ anymore, transforming it into a brick.Transfer the bootldr−2.18.01.bin file onto the iPAQ, by following the steps in Section 1.3 and Section1.4.2.
Note: A good way to check bootldr's integrity on the iPAQ is to transfer it back onto the
Chapter 4. Installing the bootloader 21
GNU/Linux host and check it again with md5sum.
4.2. Flashing the bootloader
If you followed the steps sequentially, you should have BootBlaster_1.18.exe andbootldr−2.18.01.bin on your PocketPC iPAQ. We will flash the new bootloader by doing thefollowing:
In the "Start" menu, tap on the "Programs" entry.1. Tap on the "File Explorer" icon to launch File Explorer.2. Locate the BootBlaster icon (probably somewhere in "My Documents") and tap on it to launch it.3. Tap on the "Flash" menu.4. Tap on the "Program" entry. A warning popup window will open, asking you to confirm.5. Tap on "Yes" to confirm.6. A File dialog will open, enabling you to choose the bootloader file you want to use. Select the oneyou downloaded in Section 4.1
7.
A dialog will ask you to confirm the file you want to flash. Tap on "Yes" to continue.8. Wait patiently. The process of flashing the new bootloader takes about 15 seconds. During this time,BootBlaster will display what it is doing:
Erasing flash...a. Protecting Wince Partitions...
BootBlaster protects the PocketPC partitions before proceeding to bootloader flashing. Itlooks like PocketPC is still able to boot the machine, even if the bootloader is erased, as longas it PocketPC is not touched.
Warning
It is not safe to erase the bootloader if GNU/Linux is installed in flash −−GNU/Linux depends on the bootloader to configure the machine before jumpinginto GNU/Linux.Up to and including this point, it is perfectly safe to reboot your iPAQ. If your machine takesmore than 15 seconds to perform this operation, reboot the iPAQ by pushing the recessedreset button at the bottom right and repeat this step.
b.
Programming Flash...
This is the sensitive point, as during this time, your bootloader is not in a consistent state.This operation is very short, so the chance that you get a power loss while doing it is small.
Warning
If your iPAQ hangs while programming, send e−mail to<[email protected]> and/or get on the IRC and ask for help. Leavethe iPAQ plugged in and do not reset it.
c.
9.
Once flashing has been performed, a dialog will open, stating that you have a valid OHH (OpenHandHeld) Boot loader 2.18.1 in flash, and how to access the serial console. Tap on "ok" to close thisdialog.
10.
The Linux iPAQ HOWTO
4.2. Flashing the bootloader 22
4.3. Verifying the bootloader
Before reseting your iPAQ, you must check that you have a valid bootloader.This is how to verify it:
In BootBlaster, tap on the "Flash" menu.1. Tap on the "Verify" entry. A popup window will open, stating that you have a valid OHH (OpenHandHeld) Boot loader 2.18.1 in flash, and how to access the serial console. Tap on "ok" to close thisdialog.
2.
Note: It looks like this step is performed automatically after flashing the bootloader in recentversions of BootBlaster.
Warning
If it does not say that you have a valid bootloader, do not reset your iPAQ. Instead, try programming the flashagain. If that doesn't work, program your flash with your saved bootloader. If that doesn't work, send e−mailto <[email protected]> and/or get on the IRC and ask for help. Leave the iPAQ plugged in anddo not reset it.
4.4. Rebooting the iPAQ
If you reset your iPAQ by pushing the recessed reset button at the lower right of the unit, the bootloader willboot PocketPC if present, just as usual.
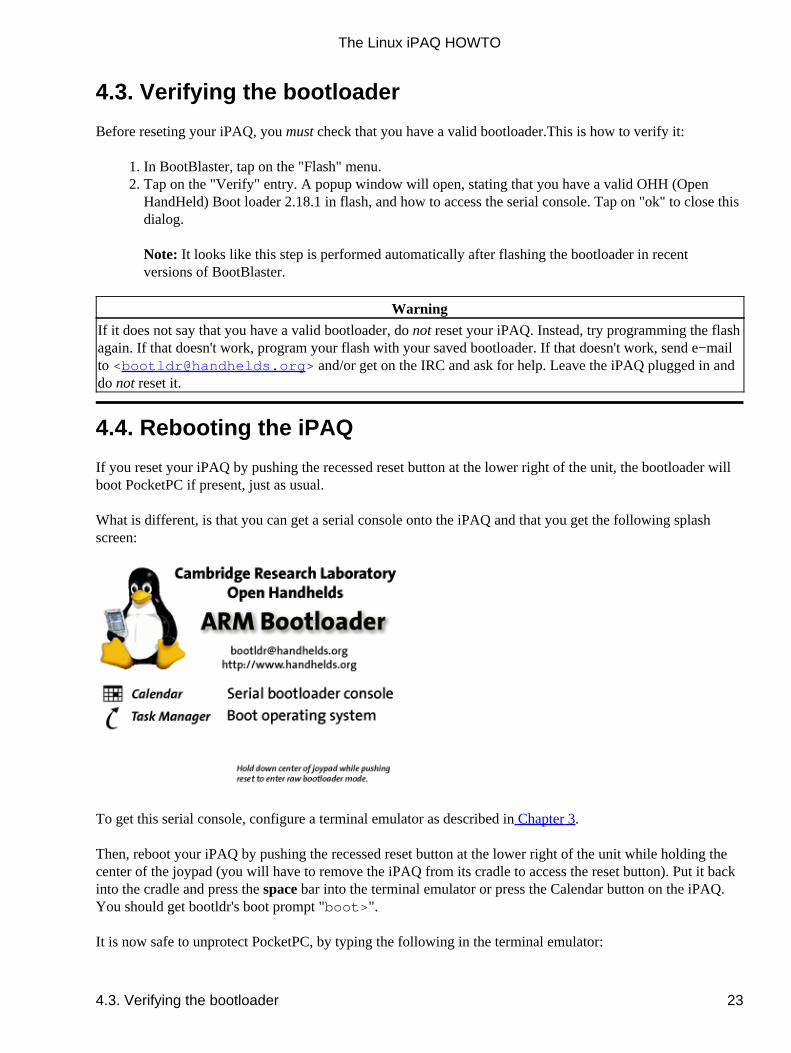
What is different, is that you can get a serial console onto the iPAQ and that you get the following splashscreen:
To get this serial console, configure a terminal emulator as described in Chapter 3.
Then, reboot your iPAQ by pushing the recessed reset button at the lower right of the unit while holding thecenter of the joypad (you will have to remove the iPAQ from its cradle to access the reset button). Put it backinto the cradle and press the space bar into the terminal emulator or press the Calendar button on the iPAQ.You should get bootldr's boot prompt "boot>".
It is now safe to unprotect PocketPC, by typing the following in the terminal emulator:
The Linux iPAQ HOWTO
4.3. Verifying the bootloader 23

boot> pflash 0x40000 0xffff 0 addr=00040000 len=0000FFFF protect=00000000Protect=00000000boot>
Bootloader's installation is now complete.
The Linux iPAQ HOWTO
4.3. Verifying the bootloader 24
Chapter 5. Bootstrapping Familiar GNU/LinuxIn this chapter, we will install the Familiar GNU/Linux bootstrap onto the iPAQ. It will be used in nextchapter to install the full−blown Familiar GNU/Linux onto the iPAQ.
5.1. Downloading the root image
The root image is a verbatim copy of the GNU/Linux root partition that provides a minimal bootableGNU/Linux. You can download it from:
ftp://handhelds.org/familiar/releases/v0.5.3/install/H3800/task−bootstrap.jffs2
In this chapter, I suppose that you have set up a terminal connection, as described in Chapter 3.
5.2. Performing bootloader configuration
In order to boot GNU/Linux with the correct kernel arguments, the flash partitions need to be setup correctly,by typing:
boot> partition resetargv[1]=resetdefining partition: bootldrdefining partition: rootdefining partition: assetboot>
This command defines three partitions:
the bootloader partition• the GNU/Linux partition• the asset partition, containing unit specific information•
5.3. Flashing the root filesystem
Issue the following commands:
boot> set ymodem 1 setting param <ymodem> to value <1>boot> load rootloading flash region rootusing ymodemready for YMODEM transfer...
This command tells the iPAQ to be ready to receive the root image using the xmodem protocol. You just haveto feed it from the running minicom window, by pressing Ctrl−A and S. A small popup window will appear,allowing you to choose the transfer protocol. Using the arrow down key, move down to the "ymodem" entryand press Enter.
A file selector window will open, where you need to specify the file to download. Using the arrow right keyand pressing Enter, you can go to the directory containing the root image file transfered in Section 5.1. Usingthe arrow down key, move down to the correct file, and hit space to select the file, then press Enter.
Chapter 5. Bootstrapping Familiar GNU/Linux 25
A window will open, displaying the current transfer status. The transfer should take about 15 minutes, so bepatient. When completed, a beep will awake you, so press Esc to close the window. The following linesshould appear:
94208F6013CD23402361CC8905022946 task−bootstrap.jffs200600000 bytes loaded to C0000400
Erasing sector 00040000Erasing sector 00080000Erasing sector 000C0000Erasing sector 00100000Erasing sector 00140000...Erasing sector 01F40000Erasing sector 01F80000writing flash..addr: 00040000 data: E0021985addr: 00050000 data: 12512501addr: 00060000 data: 8CF607FF...addr: 00610000 data: C8E314FEaddr: 00620000 data: 9B95ACF1addr: 00630000 data: FFFFFFFFverifying ...formatting ... done.boot>
This mean that the bootloader first erases the flash memory, then writes to it the downloaded image, verifies itand finally formats it correctly.
5.4. Booting GNU/Linux for the first time
Simply issue the following command:
boot>boot
The familiar penguin should appear on the iPAQ's screen, as well as the following output in the terminalemulator:
booting jffs2...booting boot/zImage from partition >root<Scanning all of flash for your JFFS2 convenience. Est Time: 6−12 seconds!build_list: max = 01F7FFBC
...
Generating SSH DSA host key (this is slow, please be patient)...Generating DSA parameter and key.Your identification has been saved in /etc/ssh/ssh_host_dsa_key.Your public key has been saved in /etc/ssh/ssh_host_dsa_key.pub.The key fingerprint is:0f:45:15:0e:dd:b3:cf:10:a3:5e:89:27:d6:c7:f6:04 [email protected] OpenBSD Secure Shell server: sshd.
familiar login:
The Linux iPAQ HOWTO
5.4. Booting GNU/Linux for the first time 26

Note: Generating the DSA keys takes quite a long time, but don't be afraid, as this is doneonly when you boot for the first time.
You can login as the "root" user by providing the default "rootme" password.
The Linux iPAQ HOWTO
5.4. Booting GNU/Linux for the first time 27
Chapter 6. Setting up an USB networkSetting up an USB network will allow us to speed up the installation by providing a faster, as well as an easierway to transfer files than the serial method used up to now.
There are two steps involved in setting up the network:
Establish the iPAQ connection to the LAN (Local Area Network), if it exists. Anyway, if it does notexist, this connection will be used to access the Internet. We will use the mechanism known asproxy_arp, that will assign two IP addresses to the host, one for itself and one for the iPAQ.
1.
Establish the iPAQ connection to the Internet. If the GNU/Linux host is part of a LAN and alreadyhas access to it, then no further work is required, and the iPAQ should be able to access it too.However, if the host is directly connected to the Internet through a modem, then we will have to set amechanism called NAT (Network Address Translation), in order to map iPAQ's address to the same IPaddress the GNU/Linux host uses to access the Internet. This is required, as your ISP (Internet ServiceProvider) probably supplied only a single address to you. Another consideration will be to declare theiPAQ to the firewall, so it gets proper authorizations to access the Internet.
2.
6.1. Connecting to the LAN
For this step, work is needed both on the GNU/Linux host and on the iPAQ.
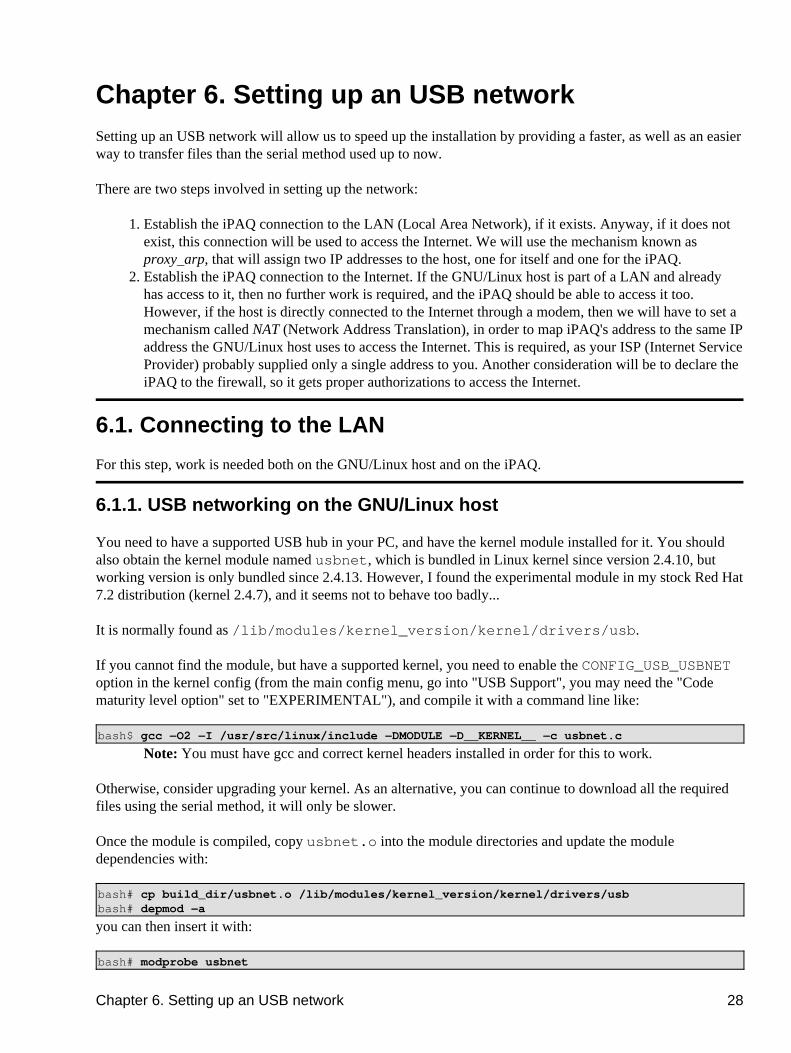
6.1.1. USB networking on the GNU/Linux host
You need to have a supported USB hub in your PC, and have the kernel module installed for it. You shouldalso obtain the kernel module named usbnet, which is bundled in Linux kernel since version 2.4.10, butworking version is only bundled since 2.4.13. However, I found the experimental module in my stock Red Hat7.2 distribution (kernel 2.4.7), and it seems not to behave too badly...
It is normally found as /lib/modules/kernel_version/kernel/drivers/usb.
If you cannot find the module, but have a supported kernel, you need to enable the CONFIG_USB_USBNEToption in the kernel config (from the main config menu, go into "USB Support", you may need the "Codematurity level option" set to "EXPERIMENTAL"), and compile it with a command line like:
bash$ gcc −O2 −I /usr/src/linux/include −DMODULE −D__KERNEL__ −c usbnet.c
Note: You must have gcc and correct kernel headers installed in order for this to work.
Otherwise, consider upgrading your kernel. As an alternative, you can continue to download all the requiredfiles using the serial method, it will only be slower.
Once the module is compiled, copy usbnet.o into the module directories and update the moduledependencies with:
bash# cp build_dir/usbnet.o /lib/modules/kernel_version/kernel/drivers/usbbash# depmod −a
you can then insert it with:
bash# modprobe usbnet
Chapter 6. Setting up an USB network 28
6.1.2. USB networking on the iPAQ
On the iPAQ side, the USB driver is included in the bootstrap image. However, we need to create all the filesneeded to start/stop/suspend/resume the USB network.
Note: At the time of this writing, there is an existing unstable package namedusbnet_1.1_arm.ipk that is supposed to do what we describe here. Unfortunately, it isrelying on ifup/ifdown configuration that is not described, so we will not use it.
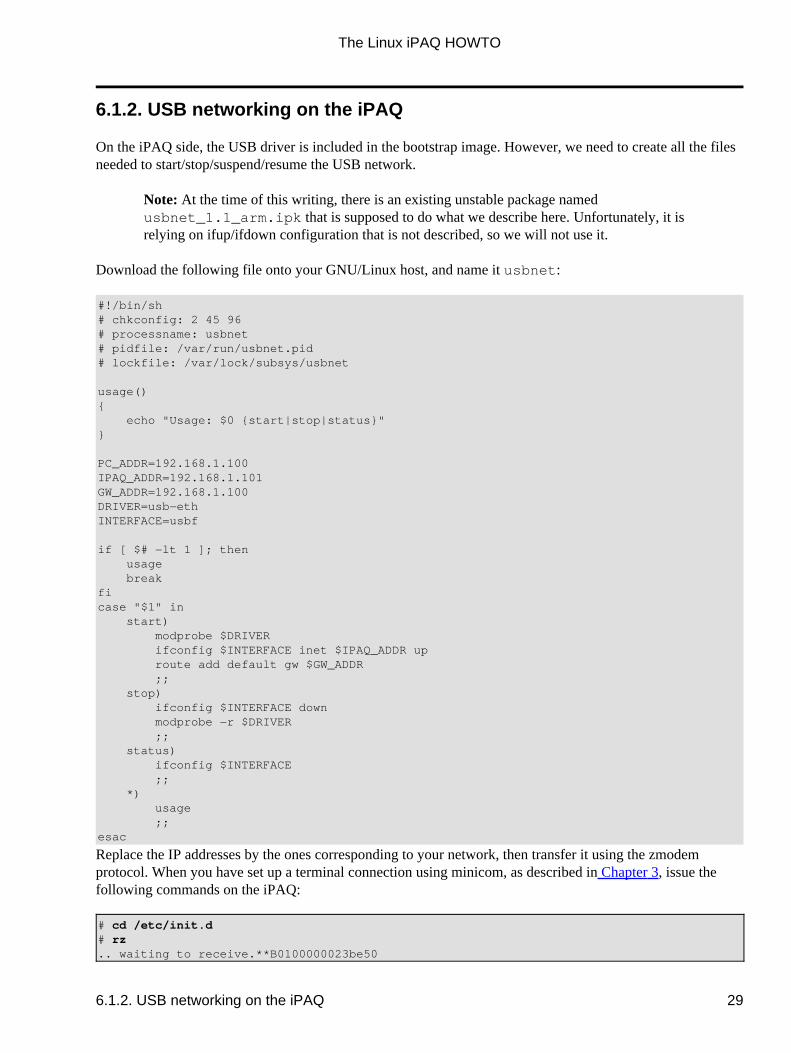
Download the following file onto your GNU/Linux host, and name it usbnet:
#!/bin/sh# chkconfig: 2 45 96# processname: usbnet# pidfile: /var/run/usbnet.pid# lockfile: /var/lock/subsys/usbnet
usage(){ echo "Usage: $0 {start|stop|status}"}
PC_ADDR=192.168.1.100IPAQ_ADDR=192.168.1.101GW_ADDR=192.168.1.100DRIVER=usb−ethINTERFACE=usbf
if [ $# −lt 1 ]; then usage breakficase "$1" in start) modprobe $DRIVER ifconfig $INTERFACE inet $IPAQ_ADDR up route add default gw $GW_ADDR ;; stop) ifconfig $INTERFACE down modprobe −r $DRIVER ;; status) ifconfig $INTERFACE ;; *) usage ;;esac
Replace the IP addresses by the ones corresponding to your network, then transfer it using the zmodemprotocol. When you have set up a terminal connection using minicom, as described in Chapter 3, issue thefollowing commands on the iPAQ:
# cd /etc/init.d# rz.. waiting to receive.**B0100000023be50
The Linux iPAQ HOWTO
6.1.2. USB networking on the iPAQ 29
This command tells the iPAQ to be ready to receive the package using the zmodem protocol. You just have tofeed it from the running minicom window, by pressing Ctrl−A and S. A small popup window will appear,allowing you to choose the transfer protocol. Using the arrow down key, move down to the "zmodem" entryand press Enter.
A file selector window will open, where you need to specify the file to download. Using the arrow right keyand pressing Enter, you can go to the directory containing the usbnet file. Using the arrow down key,move down to the correct file, and hit space to select the file, then press Enter.
A window will open, and minicom will beep. Press Esc to close the window. Press Enter to get back the shellprompt.
Make this script executable by issuing:
# chmod +x /etc/init.d/usbnet
Based on this file, we will create the necessary setup needed to launch USB networking automatically whenyou boot, so we have to create a symbolic link to this script into the /etc/rc2.d directory, which is thedirectory containing the scripts to launch when you go into runlevel 2 (the normal runlevel):
# cd /etc/rc2.d# ln −s ../init.d/usbnet S45usbnet.sh
For this first time, we can just launch it manually by typing:
# /etc/init.d/usbnet startSA1100 USB Controller Core Initializedusbctl: Opened for usb−ethusbctl: Started for usb−eth
We also need to create the files required to stop/start the USB network when going into suspend/resumemode. Using the previous script, they are easy to create:
# cat >/etc/suspend−scripts/S33usbnet#!/bin/sh/etc/init.d/usbnet stopCtrl−D# cat >/etc/resume−scripts/R33usbnet#!/bin/sh/etc/init.d/usbnet startCtrl−D# chmod +x /etc/*scripts/*usbnet
6.1.3. Bringing up the USB network
If you have not already done it, insert the usbnet module on the GNU/Linux host:
bash# modprobe usbnet
Note: Depending on your GNU/Linux USB configuration, you may not have to issue thiscommand: it will be done automatically for you by the USB subsystem.
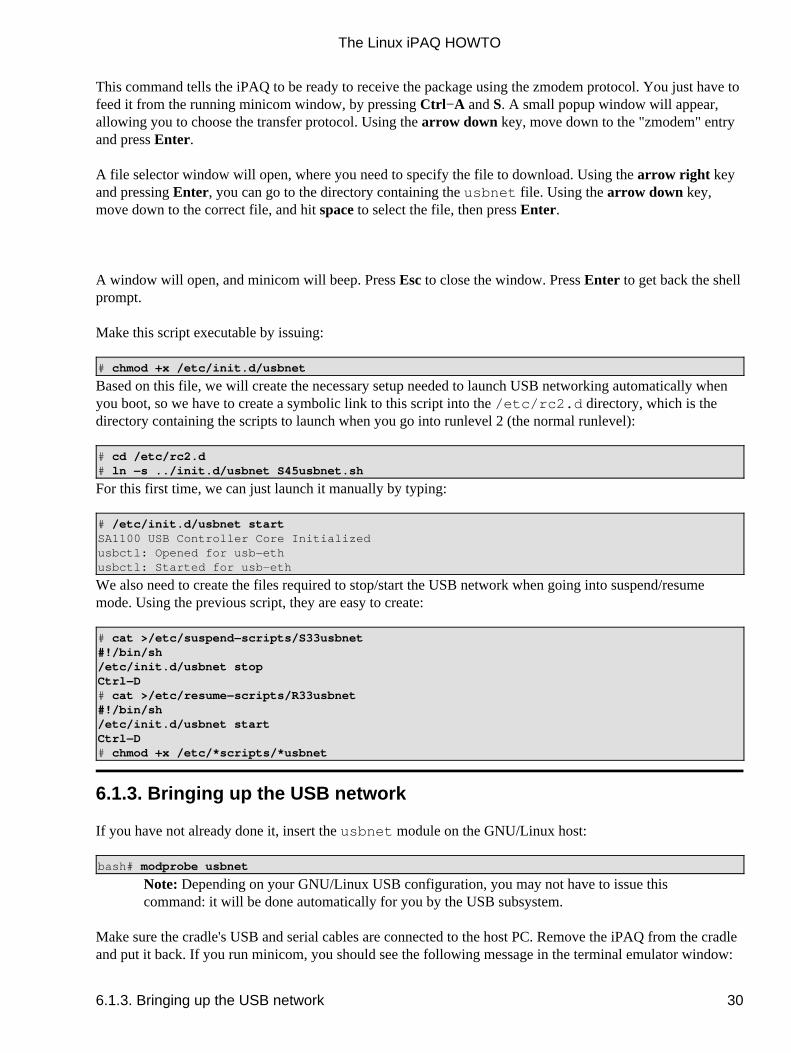
Make sure the cradle's USB and serial cables are connected to the host PC. Remove the iPAQ from the cradleand put it back. If you run minicom, you should see the following message in the terminal emulator window:
The Linux iPAQ HOWTO
6.1.3. Bringing up the USB network 30
usbctl: zombie suspended −−> [resume] −−> zombie. Device in powered state.usbctl: zombie −−> [reset] −−> default. Device in default state.usbctl: Resettingusbctl: default −−> [address assigned] −−> address. Device in address state.usbep0: I have been assigned address: 14usbctl: address −−> [configure] −−> configured. Device in configured state.usbep0: Configured (OMP=00000040 IMP=00000040)usbep0: fixme: set interface not supported
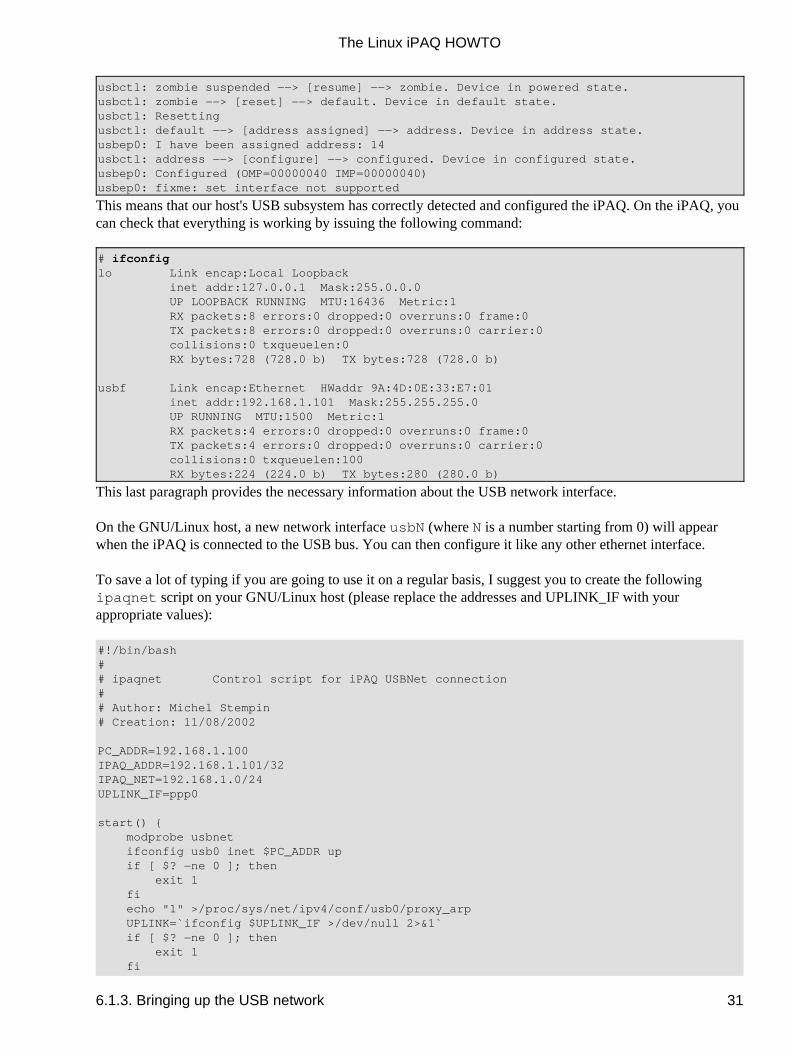
This means that our host's USB subsystem has correctly detected and configured the iPAQ. On the iPAQ, youcan check that everything is working by issuing the following command:
# ifconfiglo Link encap:Local Loopback inet addr:127.0.0.1 Mask:255.0.0.0 UP LOOPBACK RUNNING MTU:16436 Metric:1 RX packets:8 errors:0 dropped:0 overruns:0 frame:0 TX packets:8 errors:0 dropped:0 overruns:0 carrier:0 collisions:0 txqueuelen:0 RX bytes:728 (728.0 b) TX bytes:728 (728.0 b)
usbf Link encap:Ethernet HWaddr 9A:4D:0E:33:E7:01 inet addr:192.168.1.101 Mask:255.255.255.0 UP RUNNING MTU:1500 Metric:1 RX packets:4 errors:0 dropped:0 overruns:0 frame:0 TX packets:4 errors:0 dropped:0 overruns:0 carrier:0 collisions:0 txqueuelen:100 RX bytes:224 (224.0 b) TX bytes:280 (280.0 b)
This last paragraph provides the necessary information about the USB network interface.
On the GNU/Linux host, a new network interface usbN (where N is a number starting from 0) will appearwhen the iPAQ is connected to the USB bus. You can then configure it like any other ethernet interface.
To save a lot of typing if you are going to use it on a regular basis, I suggest you to create the followingipaqnet script on your GNU/Linux host (please replace the addresses and UPLINK_IF with yourappropriate values):
#!/bin/bash## ipaqnet Control script for iPAQ USBNet connection## Author: Michel Stempin# Creation: 11/08/2002
PC_ADDR=192.168.1.100IPAQ_ADDR=192.168.1.101/32IPAQ_NET=192.168.1.0/24UPLINK_IF=ppp0
start() { modprobe usbnet ifconfig usb0 inet $PC_ADDR up if [ $? −ne 0 ]; then exit 1 fi echo "1" >/proc/sys/net/ipv4/conf/usb0/proxy_arp UPLINK=`ifconfig $UPLINK_IF >/dev/null 2>&1` if [ $? −ne 0 ]; then exit 1 fi
The Linux iPAQ HOWTO
6.1.3. Bringing up the USB network 31
echo "1" >/proc/sys/net/ipv4/conf/$UPLINK_IF/proxy_arp echo "1" >/proc/sys/net/ipv4/ip_forward ip route del $IPAQ_NET dev usb0 ip route add $IPAQ_ADDR dev usb0}
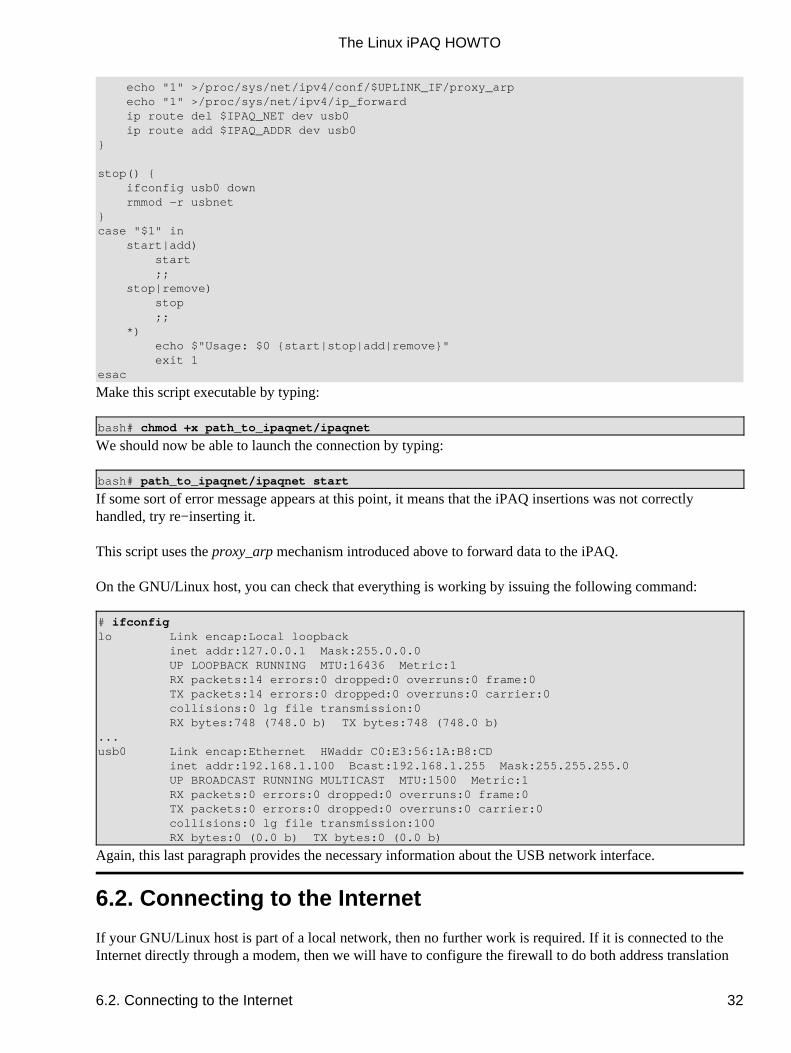
stop() { ifconfig usb0 down rmmod −r usbnet}case "$1" in start|add) start ;; stop|remove) stop ;; *) echo $"Usage: $0 {start|stop|add|remove}" exit 1esac
Make this script executable by typing:
bash# chmod +x path_to_ipaqnet/ipaqnet
We should now be able to launch the connection by typing:
bash# path_to_ipaqnet/ipaqnet start
If some sort of error message appears at this point, it means that the iPAQ insertions was not correctlyhandled, try re−inserting it.
This script uses the proxy_arp mechanism introduced above to forward data to the iPAQ.
On the GNU/Linux host, you can check that everything is working by issuing the following command:
# ifconfiglo Link encap:Local loopback inet addr:127.0.0.1 Mask:255.0.0.0 UP LOOPBACK RUNNING MTU:16436 Metric:1 RX packets:14 errors:0 dropped:0 overruns:0 frame:0 TX packets:14 errors:0 dropped:0 overruns:0 carrier:0 collisions:0 lg file transmission:0 RX bytes:748 (748.0 b) TX bytes:748 (748.0 b)...usb0 Link encap:Ethernet HWaddr C0:E3:56:1A:B8:CD inet addr:192.168.1.100 Bcast:192.168.1.255 Mask:255.255.255.0 UP BROADCAST RUNNING MULTICAST MTU:1500 Metric:1 RX packets:0 errors:0 dropped:0 overruns:0 frame:0 TX packets:0 errors:0 dropped:0 overruns:0 carrier:0 collisions:0 lg file transmission:100 RX bytes:0 (0.0 b) TX bytes:0 (0.0 b)
Again, this last paragraph provides the necessary information about the USB network interface.
6.2. Connecting to the Internet
If your GNU/Linux host is part of a local network, then no further work is required. If it is connected to theInternet directly through a modem, then we will have to configure the firewall to do both address translation
The Linux iPAQ HOWTO
6.2. Connecting to the Internet 32
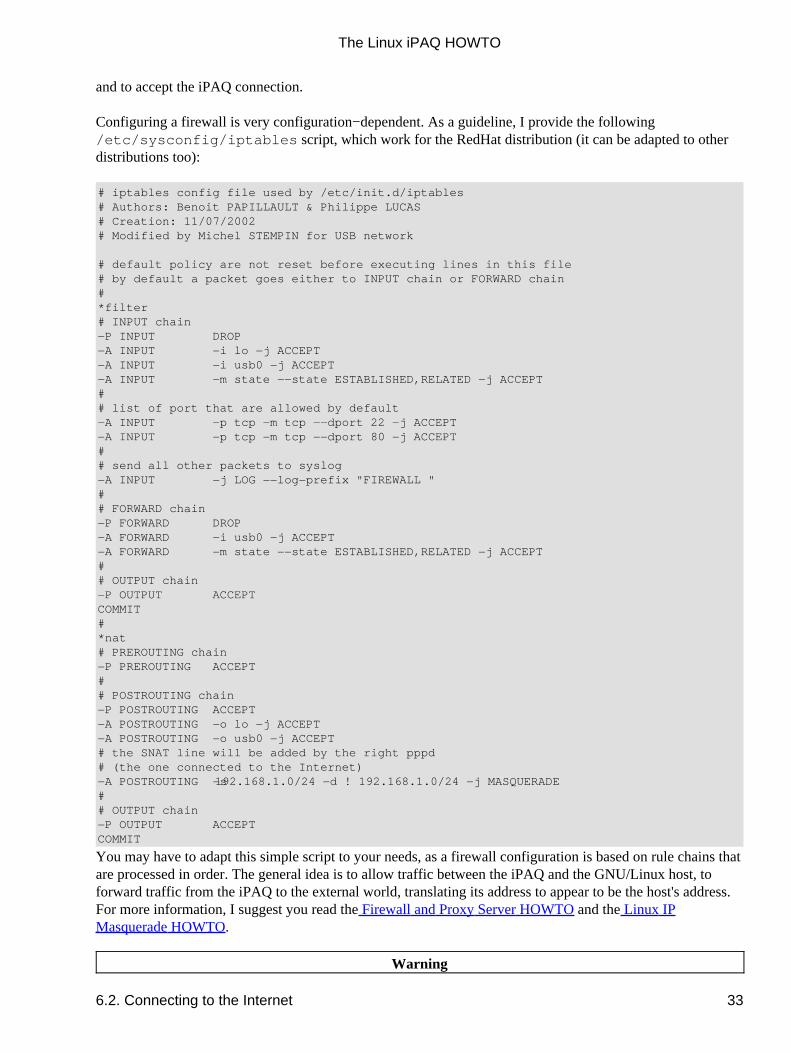
and to accept the iPAQ connection.
Configuring a firewall is very configuration−dependent. As a guideline, I provide the following/etc/sysconfig/iptables script, which work for the RedHat distribution (it can be adapted to otherdistributions too):
# iptables config file used by /etc/init.d/iptables# Authors: Benoit PAPILLAULT & Philippe LUCAS# Creation: 11/07/2002# Modified by Michel STEMPIN for USB network
# default policy are not reset before executing lines in this file# by default a packet goes either to INPUT chain or FORWARD chain#*filter# INPUT chain−P INPUT DROP−A INPUT −i lo −j ACCEPT−A INPUT −i usb0 −j ACCEPT−A INPUT −m state −−state ESTABLISHED,RELATED −j ACCEPT## list of port that are allowed by default−A INPUT −p tcp −m tcp −−dport 22 −j ACCEPT−A INPUT −p tcp −m tcp −−dport 80 −j ACCEPT## send all other packets to syslog−A INPUT −j LOG −−log−prefix "FIREWALL "## FORWARD chain−P FORWARD DROP−A FORWARD −i usb0 −j ACCEPT−A FORWARD −m state −−state ESTABLISHED,RELATED −j ACCEPT## OUTPUT chain−P OUTPUT ACCEPTCOMMIT#*nat# PREROUTING chain−P PREROUTING ACCEPT## POSTROUTING chain−P POSTROUTING ACCEPT−A POSTROUTING −o lo −j ACCEPT−A POSTROUTING −o usb0 −j ACCEPT# the SNAT line will be added by the right pppd# (the one connected to the Internet)−A POSTROUTING −s 192.168.1.0/24 −d ! 192.168.1.0/24 −j MASQUERADE## OUTPUT chain−P OUTPUT ACCEPTCOMMIT
You may have to adapt this simple script to your needs, as a firewall configuration is based on rule chains thatare processed in order. The general idea is to allow traffic between the iPAQ and the GNU/Linux host, toforward traffic from the iPAQ to the external world, translating its address to appear to be the host's address.For more information, I suggest you read the Firewall and Proxy Server HOWTO and the Linux IPMasquerade HOWTO.
Warning
The Linux iPAQ HOWTO
6.2. Connecting to the Internet 33
This firewall configuration is very basic and does not provide a bulletproof (although reasonable) setup foryour machine. You should really consider writing your own, based on your particular needs.On the RedHat distribution, You will need to restart the firewall by typing:
# service iptables restart
For other distributions, this is probably something close to:
# /etc/rc.d/init.d/iptables restart
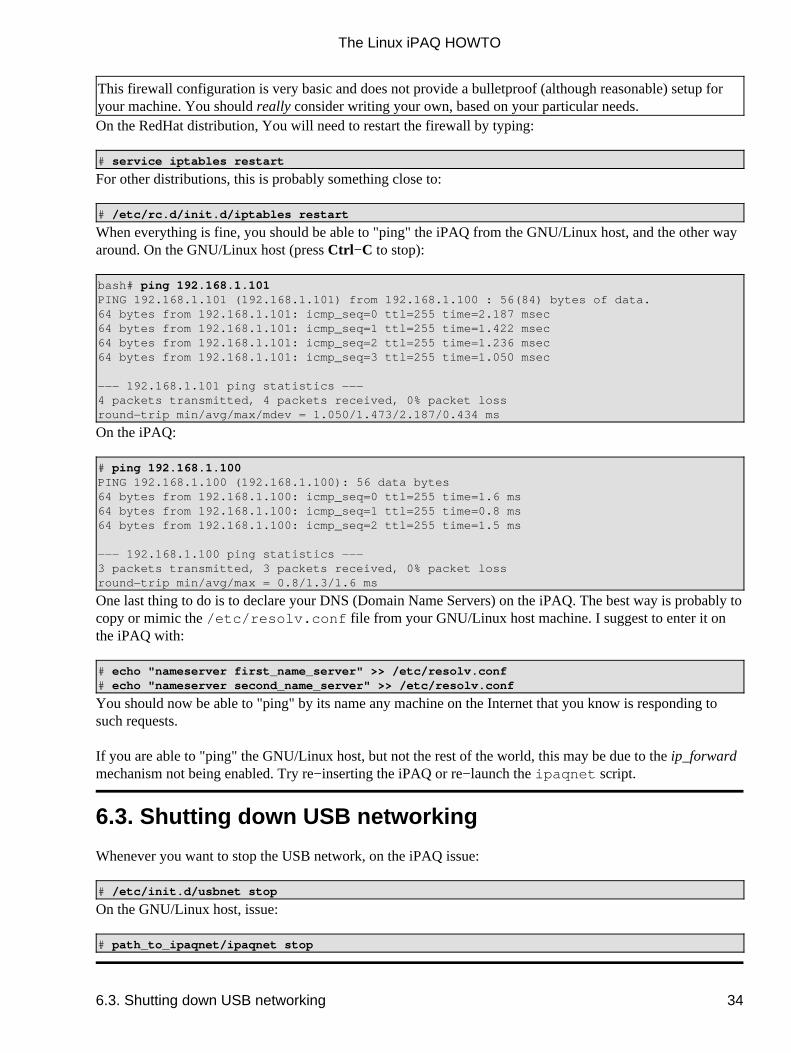
When everything is fine, you should be able to "ping" the iPAQ from the GNU/Linux host, and the other wayaround. On the GNU/Linux host (press Ctrl−C to stop):
bash# ping 192.168.1.101PING 192.168.1.101 (192.168.1.101) from 192.168.1.100 : 56(84) bytes of data.64 bytes from 192.168.1.101: icmp_seq=0 ttl=255 time=2.187 msec64 bytes from 192.168.1.101: icmp_seq=1 ttl=255 time=1.422 msec64 bytes from 192.168.1.101: icmp_seq=2 ttl=255 time=1.236 msec64 bytes from 192.168.1.101: icmp_seq=3 ttl=255 time=1.050 msec
−−− 192.168.1.101 ping statistics −−−4 packets transmitted, 4 packets received, 0% packet lossround−trip min/avg/max/mdev = 1.050/1.473/2.187/0.434 ms
On the iPAQ:
# ping 192.168.1.100PING 192.168.1.100 (192.168.1.100): 56 data bytes64 bytes from 192.168.1.100: icmp_seq=0 ttl=255 time=1.6 ms64 bytes from 192.168.1.100: icmp_seq=1 ttl=255 time=0.8 ms64 bytes from 192.168.1.100: icmp_seq=2 ttl=255 time=1.5 ms
−−− 192.168.1.100 ping statistics −−−3 packets transmitted, 3 packets received, 0% packet lossround−trip min/avg/max = 0.8/1.3/1.6 ms
One last thing to do is to declare your DNS (Domain Name Servers) on the iPAQ. The best way is probably tocopy or mimic the /etc/resolv.conf file from your GNU/Linux host machine. I suggest to enter it onthe iPAQ with:
# echo "nameserver first_name_server" >> /etc/resolv.conf# echo "nameserver second_name_server" >> /etc/resolv.conf
You should now be able to "ping" by its name any machine on the Internet that you know is responding tosuch requests.
If you are able to "ping" the GNU/Linux host, but not the rest of the world, this may be due to the ip_forwardmechanism not being enabled. Try re−inserting the iPAQ or re−launch the ipaqnet script.
6.3. Shutting down USB networking
Whenever you want to stop the USB network, on the iPAQ issue:
# /etc/init.d/usbnet stop
On the GNU/Linux host, issue:
# path_to_ipaqnet/ipaqnet stop
The Linux iPAQ HOWTO
6.3. Shutting down USB networking 34
6.4. Automating the USB connection
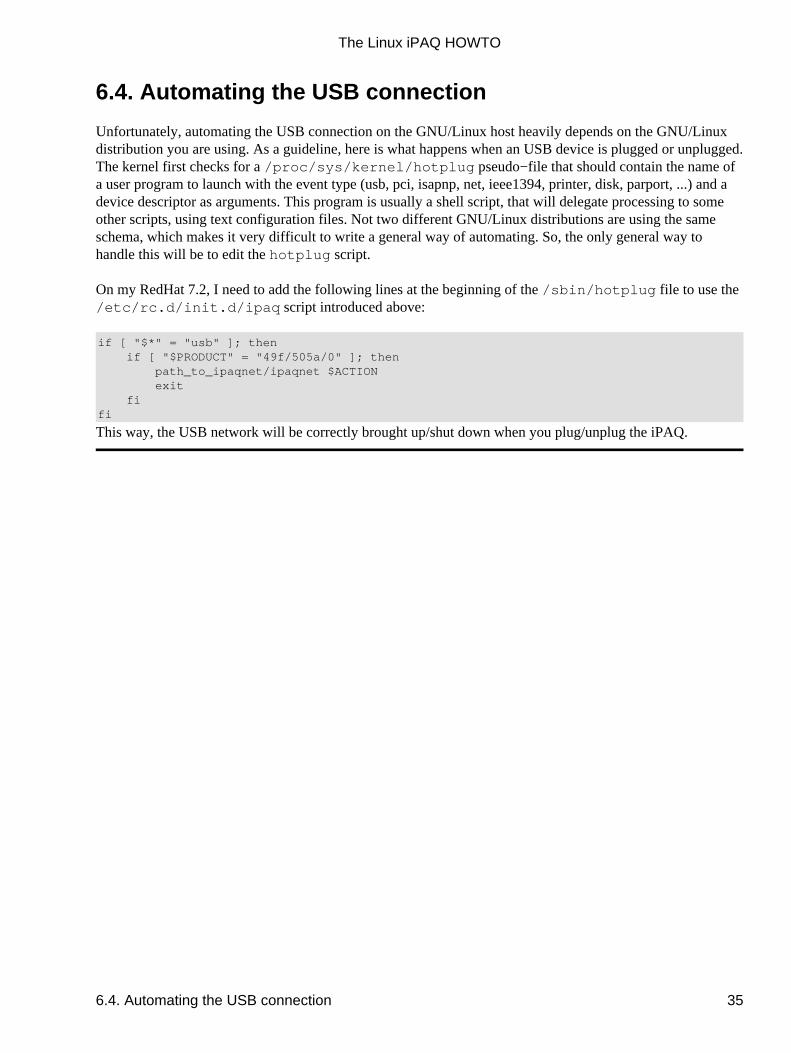
Unfortunately, automating the USB connection on the GNU/Linux host heavily depends on the GNU/Linuxdistribution you are using. As a guideline, here is what happens when an USB device is plugged or unplugged.The kernel first checks for a /proc/sys/kernel/hotplug pseudo−file that should contain the name ofa user program to launch with the event type (usb, pci, isapnp, net, ieee1394, printer, disk, parport, ...) and adevice descriptor as arguments. This program is usually a shell script, that will delegate processing to someother scripts, using text configuration files. Not two different GNU/Linux distributions are using the sameschema, which makes it very difficult to write a general way of automating. So, the only general way tohandle this will be to edit the hotplug script.
On my RedHat 7.2, I need to add the following lines at the beginning of the /sbin/hotplug file to use the/etc/rc.d/init.d/ipaq script introduced above:
if [ "$*" = "usb" ]; then if [ "$PRODUCT" = "49f/505a/0" ]; then
path_to_ipaqnet/ipaqnet $ACTION exit fifi
This way, the USB network will be correctly brought up/shut down when you plug/unplug the iPAQ.
The Linux iPAQ HOWTO
6.4. Automating the USB connection 35
Chapter 7. Installing Familiar GNU/LinuxIn this chapter, we will install the Familiar GNU/Linux distribution onto the iPAQ.
Provided that the iPAQ is able to access the Internet as described in Chapter 6, it is quite easy, as the FamiliarGNU/Linux distribution is made up of packages that can be downloaded and installed directly.
The first thing will be to update the package definitions to match the latest packages available.
We will then run SSH to definitively get rid of the serial terminal and work at full speed using USB.
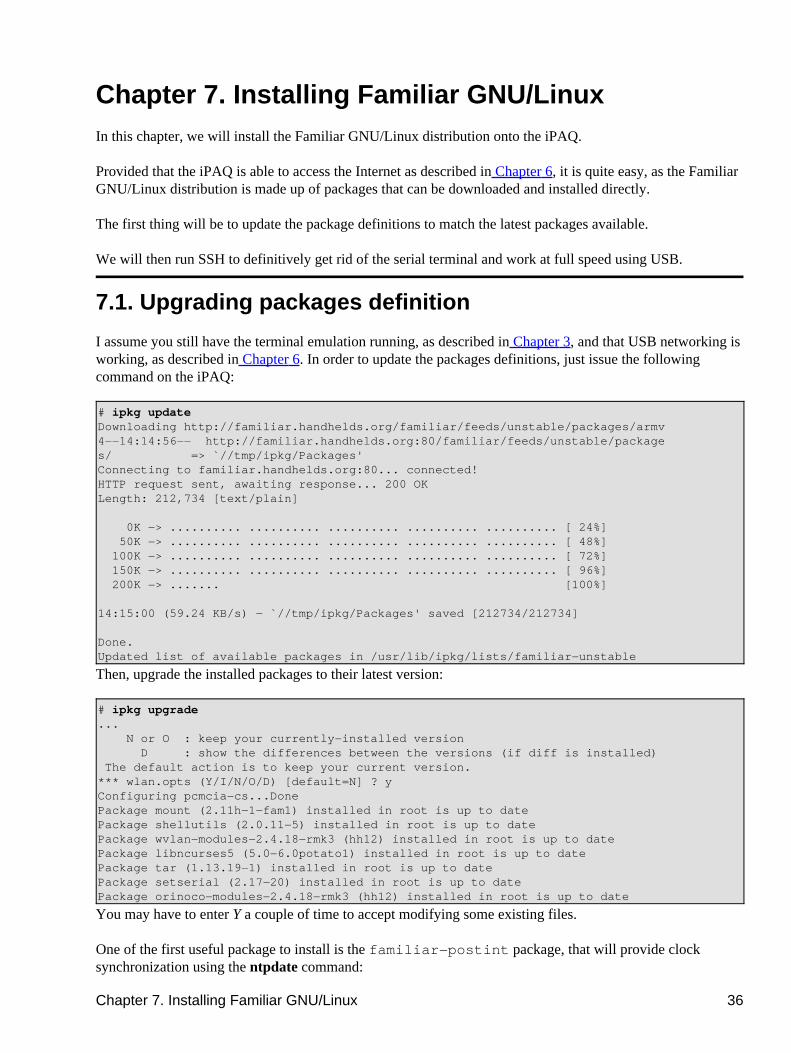
7.1. Upgrading packages definition
I assume you still have the terminal emulation running, as described in Chapter 3, and that USB networking isworking, as described in Chapter 6. In order to update the packages definitions, just issue the followingcommand on the iPAQ:
# ipkg updateDownloading http://familiar.handhelds.org/familiar/feeds/unstable/packages/armv4−−14:14:56−− http://familiar.handhelds.org:80/familiar/feeds/unstable/packages/ => `//tmp/ipkg/Packages'Connecting to familiar.handhelds.org:80... connected!HTTP request sent, awaiting response... 200 OKLength: 212,734 [text/plain]
0K −> .......... .......... .......... .......... .......... [ 24%] 50K −> .......... .......... .......... .......... .......... [ 48%] 100K −> .......... .......... .......... .......... .......... [ 72%] 150K −> .......... .......... .......... .......... .......... [ 96%] 200K −> ....... [100%]
14:15:00 (59.24 KB/s) − `//tmp/ipkg/Packages' saved [212734/212734]
Done.Updated list of available packages in /usr/lib/ipkg/lists/familiar−unstable
Then, upgrade the installed packages to their latest version:
# ipkg upgrade... N or O : keep your currently−installed version D : show the differences between the versions (if diff is installed) The default action is to keep your current version.*** wlan.opts (Y/I/N/O/D) [default=N] ? yConfiguring pcmcia−cs...DonePackage mount (2.11h−1−fam1) installed in root is up to datePackage shellutils (2.0.11−5) installed in root is up to datePackage wvlan−modules−2.4.18−rmk3 (hh12) installed in root is up to datePackage libncurses5 (5.0−6.0potato1) installed in root is up to datePackage tar (1.13.19−1) installed in root is up to datePackage setserial (2.17−20) installed in root is up to datePackage orinoco−modules−2.4.18−rmk3 (hh12) installed in root is up to date
You may have to enter Y a couple of time to accept modifying some existing files.
One of the first useful package to install is the familiar−postint package, that will provide clocksynchronization using the ntpdate command:
Chapter 7. Installing Familiar GNU/Linux 36
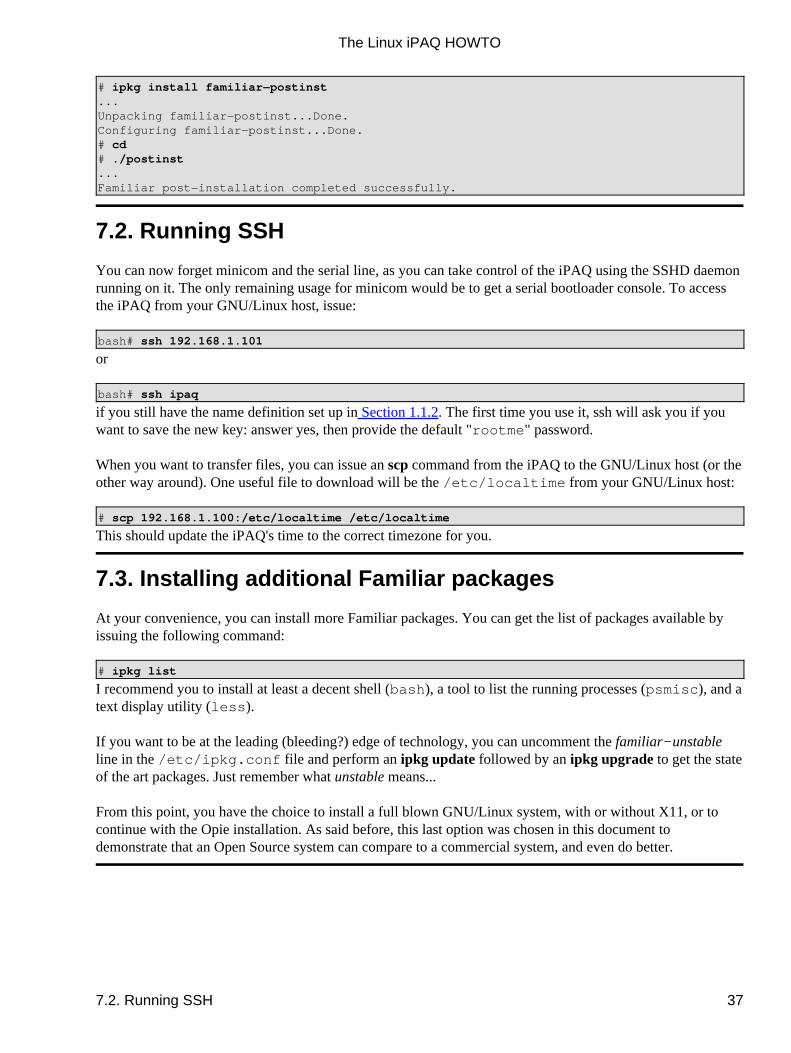
# ipkg install familiar−postinst...Unpacking familiar−postinst...Done.Configuring familiar−postinst...Done.# cd# ./postinst...Familiar post−installation completed successfully.
7.2. Running SSH
You can now forget minicom and the serial line, as you can take control of the iPAQ using the SSHD daemonrunning on it. The only remaining usage for minicom would be to get a serial bootloader console. To accessthe iPAQ from your GNU/Linux host, issue:
bash# ssh 192.168.1.101
or
bash# ssh ipaq
if you still have the name definition set up in Section 1.1.2. The first time you use it, ssh will ask you if youwant to save the new key: answer yes, then provide the default "rootme" password.
When you want to transfer files, you can issue an scp command from the iPAQ to the GNU/Linux host (or theother way around). One useful file to download will be the /etc/localtime from your GNU/Linux host:
# scp 192.168.1.100:/etc/localtime /etc/localtime
This should update the iPAQ's time to the correct timezone for you.
7.3. Installing additional Familiar packages
At your convenience, you can install more Familiar packages. You can get the list of packages available byissuing the following command:
# ipkg list
I recommend you to install at least a decent shell (bash), a tool to list the running processes (psmisc), and atext display utility (less).
If you want to be at the leading (bleeding?) edge of technology, you can uncomment the familiar−unstableline in the /etc/ipkg.conf file and perform an ipkg update followed by an ipkg upgrade to get the stateof the art packages. Just remember what unstable means...
From this point, you have the choice to install a full blown GNU/Linux system, with or without X11, or tocontinue with the Opie installation. As said before, this last option was chosen in this document todemonstrate that an Open Source system can compare to a commercial system, and even do better.
The Linux iPAQ HOWTO
7.2. Running SSH 37
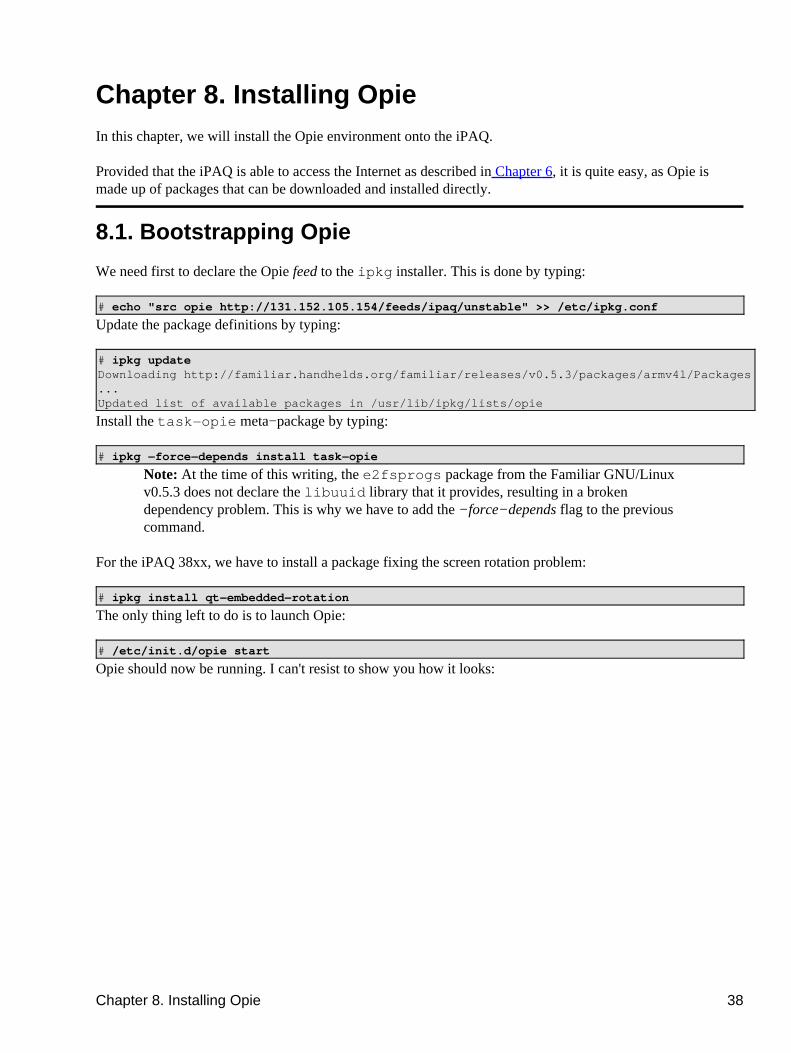
Chapter 8. Installing OpieIn this chapter, we will install the Opie environment onto the iPAQ.
Provided that the iPAQ is able to access the Internet as described in Chapter 6, it is quite easy, as Opie ismade up of packages that can be downloaded and installed directly.
8.1. Bootstrapping Opie
We need first to declare the Opie feed to the ipkg installer. This is done by typing:
# echo "src opie http://131.152.105.154/feeds/ipaq/unstable" >> /etc/ipkg.conf
Update the package definitions by typing:
# ipkg updateDownloading http://familiar.handhelds.org/familiar/releases/v0.5.3/packages/armv4l/Packages...Updated list of available packages in /usr/lib/ipkg/lists/opie
Install the task−opie meta−package by typing:
# ipkg −force−depends install task−opie
Note: At the time of this writing, the e2fsprogs package from the Familiar GNU/Linuxv0.5.3 does not declare the libuuid library that it provides, resulting in a brokendependency problem. This is why we have to add the −force−depends flag to the previouscommand.
For the iPAQ 38xx, we have to install a package fixing the screen rotation problem:
# ipkg install qt−embedded−rotation
The only thing left to do is to launch Opie:
# /etc/init.d/opie start
Opie should now be running. I can't resist to show you how it looks:
Chapter 8. Installing Opie 38

8.2. Finishing Opie installation
At this point, you have the choice either to continue to install the Opie applications from the command line, aswe did before, or to use the graphical package manager. For this last one, you can launch it by tapping on theSettings tab, then tapping on the Software icon.
However, from my experience, it still suffers from minor problems, so my recommendation would be tocontinue to use the ipkg command line tool.
Use the task−opie−xxx meta−package to install a group of application at once.
You may choose to install the Konqueror/Embedded Web browser, which is definitively one of the bestbrowser with such a small footprint. To install it, add a new feed to the ipkg installer by typing:
# echo "src konqueror http://bolug.uni−bonn.de/files/konq−e" >> /etc/ipkg.conf
Update the package definitions by typing:
# ipkg updateDownloading http://familiar.handhelds.org/familiar/releases/v0.5.3/packages/armv4l/Packages...Updated list of available packages in /usr/lib/ipkg/lists/konqueror
Install the konqueror package by typing:
# ipkg install konqueror
At this point, you now have a fully functional iPAQ running GNU/Linux, as a perfect replacement forPocketPC, having almost the same capabilities (except maybe for the synchronization facility) but with all theadvantages of an open source solution.
Enjoy and have fun! I just hope you will not follow the last chapter of this document, dealing with PocketPCre−installation!
The Linux iPAQ HOWTO
8.2. Finishing Opie installation 39
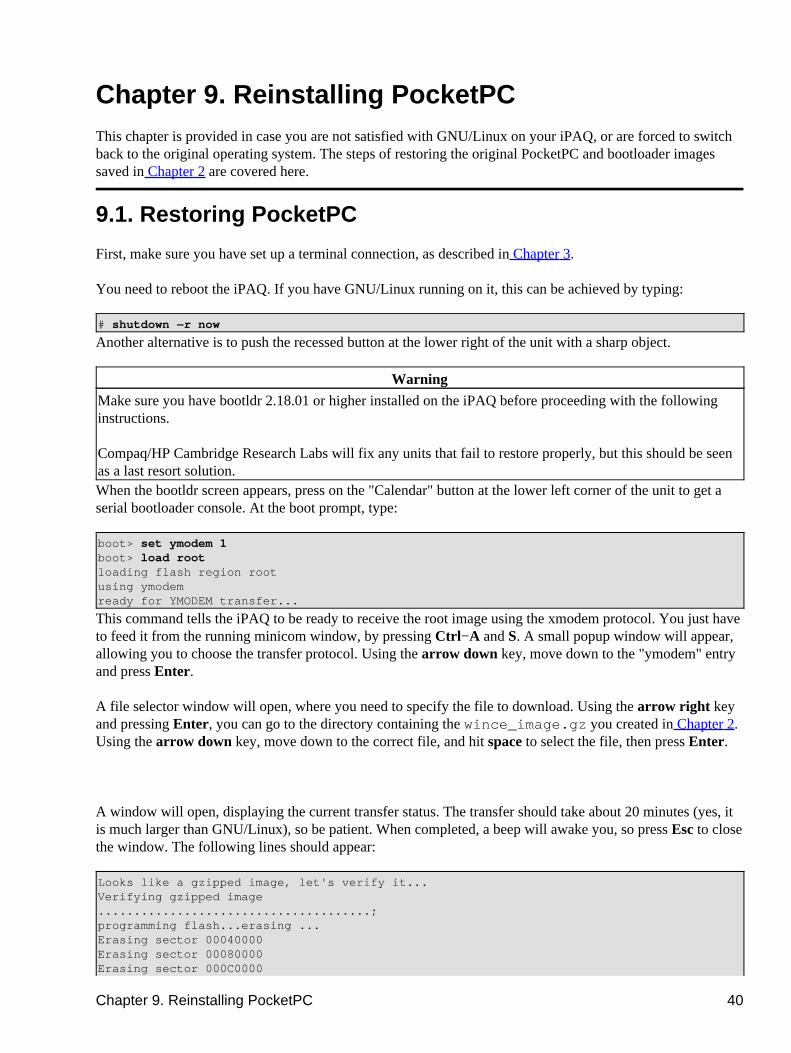
Chapter 9. Reinstalling PocketPCThis chapter is provided in case you are not satisfied with GNU/Linux on your iPAQ, or are forced to switchback to the original operating system. The steps of restoring the original PocketPC and bootloader imagessaved in Chapter 2 are covered here.
9.1. Restoring PocketPC
First, make sure you have set up a terminal connection, as described in Chapter 3.
You need to reboot the iPAQ. If you have GNU/Linux running on it, this can be achieved by typing:
# shutdown −r now
Another alternative is to push the recessed button at the lower right of the unit with a sharp object.
Warning
Make sure you have bootldr 2.18.01 or higher installed on the iPAQ before proceeding with the followinginstructions.
Compaq/HP Cambridge Research Labs will fix any units that fail to restore properly, but this should be seenas a last resort solution.When the bootldr screen appears, press on the "Calendar" button at the lower left corner of the unit to get aserial bootloader console. At the boot prompt, type:
boot> set ymodem 1boot> load rootloading flash region rootusing ymodemready for YMODEM transfer...
This command tells the iPAQ to be ready to receive the root image using the xmodem protocol. You just haveto feed it from the running minicom window, by pressing Ctrl−A and S. A small popup window will appear,allowing you to choose the transfer protocol. Using the arrow down key, move down to the "ymodem" entryand press Enter.
A file selector window will open, where you need to specify the file to download. Using the arrow right keyand pressing Enter, you can go to the directory containing the wince_image.gz you created in Chapter 2.Using the arrow down key, move down to the correct file, and hit space to select the file, then press Enter.
A window will open, displaying the current transfer status. The transfer should take about 20 minutes (yes, itis much larger than GNU/Linux), so be patient. When completed, a beep will awake you, so press Esc to closethe window. The following lines should appear:
Looks like a gzipped image, let's verify it...Verifying gzipped image......................................;programming flash...erasing ...Erasing sector 00040000Erasing sector 00080000Erasing sector 000C0000
Chapter 9. Reinstalling PocketPC 40
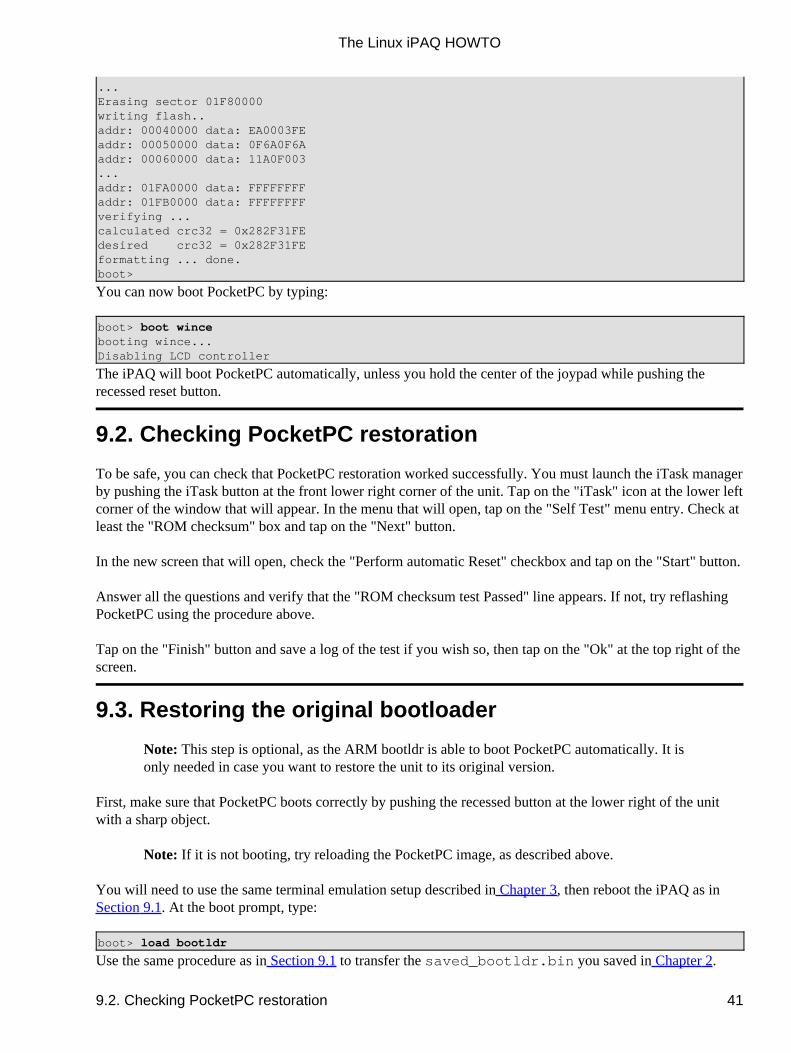
...Erasing sector 01F80000writing flash..addr: 00040000 data: EA0003FEaddr: 00050000 data: 0F6A0F6Aaddr: 00060000 data: 11A0F003...addr: 01FA0000 data: FFFFFFFFaddr: 01FB0000 data: FFFFFFFFverifying ...calculated crc32 = 0x282F31FEdesired crc32 = 0x282F31FEformatting ... done.boot>
You can now boot PocketPC by typing:
boot> boot wincebooting wince...Disabling LCD controller
The iPAQ will boot PocketPC automatically, unless you hold the center of the joypad while pushing therecessed reset button.
9.2. Checking PocketPC restoration
To be safe, you can check that PocketPC restoration worked successfully. You must launch the iTask managerby pushing the iTask button at the front lower right corner of the unit. Tap on the "iTask" icon at the lower leftcorner of the window that will appear. In the menu that will open, tap on the "Self Test" menu entry. Check atleast the "ROM checksum" box and tap on the "Next" button.
In the new screen that will open, check the "Perform automatic Reset" checkbox and tap on the "Start" button.
Answer all the questions and verify that the "ROM checksum test Passed" line appears. If not, try reflashingPocketPC using the procedure above.
Tap on the "Finish" button and save a log of the test if you wish so, then tap on the "Ok" at the top right of thescreen.
9.3. Restoring the original bootloader
Note: This step is optional, as the ARM bootldr is able to boot PocketPC automatically. It isonly needed in case you want to restore the unit to its original version.
First, make sure that PocketPC boots correctly by pushing the recessed button at the lower right of the unitwith a sharp object.
Note: If it is not booting, try reloading the PocketPC image, as described above.
You will need to use the same terminal emulation setup described in Chapter 3, then reboot the iPAQ as inSection 9.1. At the boot prompt, type:
boot> load bootldr
Use the same procedure as in Section 9.1 to transfer the saved_bootldr.bin you saved in Chapter 2.
The Linux iPAQ HOWTO
9.2. Checking PocketPC restoration 41

The Linux iPAQ HOWTO
9.2. Checking PocketPC restoration 42
Appendix A. GNU Free Documentation LicenseVersion 1.1, March 2000
Copyright (C) 200 Free Software Foundation, Inc. 59 Temple Place, Suite 330, Boston, MA02111−1307 USA Everyone is permitted to copy and distribute verbatim copies of thislicense document, but changing it is not allowed.
A.1. PREAMBLE
The purpose of this License is to make a manual, textbook, or other written document "free" in the sense offreedom: to assure everyone the effective freedom to copy and redistribute it, with or without modifying it,either commercially or noncommercially. Secondarily, this License preserves for the author and publisher away to get credit for their work, while not being considered responsible for modifications made by others.
This License is a kind of "copyleft", which means that derivative works of the document must themselves befree in the same sense. It complements the GNU General Public License, which is a copyleft license designedfor free software.
We have designed this License in order to use it for manuals for free software, because free software needsfree documentation: a free program should come with manuals providing the same freedoms that the softwaredoes. But this License is not limited to software manuals; it can be used for any textual work, regardless ofsubject matter or whether it is published as a printed book. We recommend this License principally for workswhose purpose is instruction or reference.
A.2. APPLICABILITY AND DEFINITIONS
This License applies to any manual or other work that contains a notice placed by the copyright holder sayingit can be distributed under the terms of this License. The "Document", below, refers to any such manual orwork. Any member of the public is a licensee, and is addressed as "you".
A "Modified Version" of the Document means any work containing the Document or a portion of it, eithercopied verbatim, or with modifications and/or translated into another language.
A "Secondary Section" is a named appendix or a front−matter section of the Document that deals exclusivelywith the relationship of the publishers or authors of the Document to the Document's overall subject (or torelated matters) and contains nothing that could fall directly within that overall subject. (For example, if theDocument is in part a textbook of mathematics, a Secondary Section may not explain any mathematics.) Therelationship could be a matter of historical connection with the subject or with related matters, or of legal,commercial, philosophical, ethical or political position regarding them.
The "Invariant Sections" are certain Secondary Sections whose titles are designated, as being those ofInvariant Sections, in the notice that says that the Document is released under this License.
The "Cover Texts" are certain short passages of text that are listed, as Front−Cover Texts or Back−CoverTexts, in the notice that says that the Document is released under this License.
Appendix A. GNU Free Documentation License 43
A "Transparent" copy of the Document means a machine−readable copy, represented in a format whosespecification is available to the general public, whose contents can be viewed and edited directly andstraightforwardly with generic text editors or (for images composed of pixels) generic paint programs or (fordrawings) some widely available drawing editor, and that is suitable for input to text formatters or forautomatic translation to a variety of formats suitable for input to text formatters. A copy made in an otherwiseTransparent file format whose markup has been designed to thwart or discourage subsequent modification byreaders is not Transparent. A copy that is not "Transparent" is called "Opaque".
Examples of suitable formats for Transparent copies include plain ASCII without markup, Texinfo inputformat, LaTeX input format, SGML or XML using a publicly available DTD, and standard−conformingsimple HTML designed for human modification. Opaque formats include PostScript, PDF, proprietaryformats that can be read and edited only by proprietary word processors, SGML or XML for which the DTDand/or processing tools are not generally available, and the machine−generated HTML produced by someword processors for output purposes only.
The "Title Page" means, for a printed book, the title page itself, plus such following pages as are needed tohold, legibly, the material this License requires to appear in the title page. For works in formats which do nothave any title page as such, "Title Page" means the text near the most prominent appearance of the work'stitle, preceding the beginning of the body of the text.
A.3. VERBATIM COPYING
You may copy and distribute the Document in any medium, either commercially or noncommercially,provided that this License, the copyright notices, and the license notice saying this License applies to theDocument are reproduced in all copies, and that you add no other conditions whatsoever to those of thisLicense. You may not use technical measures to obstruct or control the reading or further copying of thecopies you make or distribute. However, you may accept compensation in exchange for copies. If youdistribute a large enough number of copies you must also follow the conditions in section 3.
You may also lend copies, under the same conditions stated above, and you may publicly display copies.
A.4. COPYING IN QUANTITY
If you publish printed copies of the Document numbering more than 100, and the Document's license noticerequires Cover Texts, you must enclose the copies in covers that carry, clearly and legibly, all these CoverTexts: Front−Cover Texts on the front cover, and Back−Cover Texts on the back cover. Both covers must alsoclearly and legibly identify you as the publisher of these copies. The front cover must present the full title withall words of the title equally prominent and visible. You may add other material on the covers in addition.Copying with changes limited to the covers, as long as they preserve the title of the Document and satisfythese conditions, can be treated as verbatim copying in other respects.
If the required texts for either cover are too voluminous to fit legibly, you should put the first ones listed (asmany as fit reasonably) on the actual cover, and continue the rest onto adjacent pages.
If you publish or distribute Opaque copies of the Document numbering more than 100, you must eitherinclude a machine−readable Transparent copy along with each Opaque copy, or state in or with each Opaquecopy a publicly−accessible computer−network location containing a complete Transparent copy of theDocument, free of added material, which the general network−using public has access to downloadanonymously at no charge using public−standard network protocols. If you use the latter option, you must
The Linux iPAQ HOWTO
A.3. VERBATIM COPYING 44

take reasonably prudent steps, when you begin distribution of Opaque copies in quantity, to ensure that thisTransparent copy will remain thus accessible at the stated location until at least one year after the last timeyou distribute an Opaque copy (directly or through your agents or retailers) of that edition to the public.
It is requested, but not required, that you contact the authors of the Document well before redistributing anylarge number of copies, to give them a chance to provide you with an updated version of the Document.
A.5. MODIFICATIONS
You may copy and distribute a Modified Version of the Document under the conditions of sections 2 and 3above, provided that you release the Modified Version under precisely this License, with the ModifiedVersion filling the role of the Document, thus licensing distribution and modification of the Modified Versionto whoever possesses a copy of it. In addition, you must do these things in the Modified Version:
Use in the Title Page (and on the covers, if any) a title distinct from that of the Document, and fromthose of previous versions (which should, if there were any, be listed in the History section of theDocument). You may use the same title as a previous version if the original publisher of that versiongives permission.
A.
List on the Title Page, as authors, one or more persons or entities responsible for authorship of themodifications in the Modified Version, together with at least five of the principal authors of theDocument (all of its principal authors, if it has less than five).
B.
State on the Title page the name of the publisher of the Modified Version, as the publisher.C. Preserve all the copyright notices of the Document.D. Add an appropriate copyright notice for your modifications adjacent to the other copyright notices.E. Include, immediately after the copyright notices, a license notice giving the public permission to usethe Modified Version under the terms of this License, in the form shown in the Addendum below.
F.
Preserve in that license notice the full lists of Invariant Sections and required Cover Texts given in theDocument's license notice.
G.
Include an unaltered copy of this License.H. Preserve the section entitled "History", and its title, and add to it an item stating at least the title, year,new authors, and publisher of the Modified Version as given on the Title Page. If there is no sectionentitled "History" in the Document, create one stating the title, year, authors, and publisher of theDocument as given on its Title Page, then add an item describing the Modified Version as stated inthe previous sentence.
I.
Preserve the network location, if any, given in the Document for public access to a Transparent copyof the Document, and likewise the network locations given in the Document for previous versions itwas based on. These may be placed in the "History" section. You may omit a network location for awork that was published at least four years before the Document itself, or if the original publisher ofthe version it refers to gives permission.
J.
In any section entitled "Acknowledgements" or "Dedications", preserve the section's title, andpreserve in the section all the substance and tone of each of the contributor acknowledgements and/ordedications given therein.
K.
Preserve all the Invariant Sections of the Document, unaltered in their text and in their titles. Sectionnumbers or the equivalent are not considered part of the section titles.
L.
Delete any section entitled "Endorsements". Such a section may not be included in the ModifiedVersion.
M.
Do not retitle any existing section as "Endorsements" or to conflict in title with any Invariant Section.N.
If the Modified Version includes new front−matter sections or appendices that qualify as Secondary Sectionsand contain no material copied from the Document, you may at your option designate some or all of these
The Linux iPAQ HOWTO
A.5. MODIFICATIONS 45
sections as invariant. To do this, add their titles to the list of Invariant Sections in the Modified Version'slicense notice. These titles must be distinct from any other section titles.
You may add a section entitled "Endorsements", provided it contains nothing but endorsements of yourModified Version by various parties−−for example, statements of peer review or that the text has beenapproved by an organization as the authoritative definition of a standard.
You may add a passage of up to five words as a Front−Cover Text, and a passage of up to 25 words as aBack−Cover Text, to the end of the list of Cover Texts in the Modified Version. Only one passage ofFront−Cover Text and one of Back−Cover Text may be added by (or through arrangements made by) any oneentity. If the Document already includes a cover text for the same cover, previously added by you or byarrangement made by the same entity you are acting on behalf of, you may not add another; but you mayreplace the old one, on explicit permission from the previous publisher that added the old one.
The author(s) and publisher(s) of the Document do not by this License give permission to use their names forpublicity for or to assert or imply endorsement of any Modified Version.
A.6. COMBINING DOCUMENTS
You may combine the Document with other documents released under this License, under the terms definedin section 4 above for modified versions, provided that you include in the combination all of the InvariantSections of all of the original documents, unmodified, and list them all as Invariant Sections of your combinedwork in its license notice.
The combined work need only contain one copy of this License, and multiple identical Invariant Sections maybe replaced with a single copy. If there are multiple Invariant Sections with the same name but differentcontents, make the title of each such section unique by adding at the end of it, in parentheses, the name of theoriginal author or publisher of that section if known, or else a unique number. Make the same adjustment tothe section titles in the list of Invariant Sections in the license notice of the combined work.
In the combination, you must combine any sections entitled "History" in the various original documents,forming one section entitled "History"; likewise combine any sections entitled "Acknowledgements", and anysections entitled "Dedications". You must delete all sections entitled "Endorsements."
A.7. COLLECTIONS OF DOCUMENTS
You may make a collection consisting of the Document and other documents released under this License, andreplace the individual copies of this License in the various documents with a single copy that is included inthe collection, provided that you follow the rules of this License for verbatim copying of each of thedocuments in all other respects.
You may extract a single document from such a collection, and distribute it individually under this License,provided you insert a copy of this License into the extracted document, and follow this License in all otherrespects regarding verbatim copying of that document.
The Linux iPAQ HOWTO
A.6. COMBINING DOCUMENTS 46

A.8. AGGREGATION WITH INDEPENDENT WORKS
A compilation of the Document or its derivatives with other separate and independent documents or works, inor on a volume of a storage or distribution medium, does not as a whole count as a Modified Version of theDocument, provided no compilation copyright is claimed for the compilation. Such a compilation is called an"aggregate", and this License does not apply to the other self−contained works thus compiled with theDocument, on account of their being thus compiled, if they are not themselves derivative works of theDocument.
If the Cover Text requirement of section 3 is applicable to these copies of the Document, then if the Documentis less than one quarter of the entire aggregate, the Document's Cover Texts may be placed on covers thatsurround only the Document within the aggregate. Otherwise they must appear on covers around the wholeaggregate.
A.9. TRANSLATION
Translation is considered a kind of modification, so you may distribute translations of the Document under theterms of section 4. Replacing Invariant Sections with translations requires special permission from theircopyright holders, but you may include translations of some or all Invariant Sections in addition to theoriginal versions of these Invariant Sections. You may include a translation of this License provided that youalso include the original English version of this License. In case of a disagreement between the translation andthe original English version of this License, the original English version will prevail.
A.10. TERMINATION
You may not copy, modify, sublicense, or distribute the Document except as expressly provided for under thisLicense. Any other attempt to copy, modify, sublicense or distribute the Document is void, and willautomatically terminate your rights under this License. However, parties who have received copies, or rights,from you under this License will not have their licenses terminated so long as such parties remain in fullcompliance.
A.11. FUTURE REVISIONS OF THIS LICENSE
The Free Software Foundation may publish new, revised versions of the GNU Free Documentation Licensefrom time to time. Such new versions will be similar in spirit to the present version, but may differ in detail toaddress new problems or concerns. See http://www.gnu.org/copyleft/.
Each version of the License is given a distinguishing version number. If the Document specifies that aparticular numbered version of this License "or any later version" applies to it, you have the option offollowing the terms and conditions either of that specified version or of any later version that has beenpublished (not as a draft) by the Free Software Foundation. If the Document does not specify a versionnumber of this License, you may choose any version ever published (not as a draft) by the Free SoftwareFoundation.
The Linux iPAQ HOWTO
A.8. AGGREGATION WITH INDEPENDENT WORKS 47

A.12. How to use this License for your documents
To use this License in a document you have written, include a copy of the License in the document and put thefollowing copyright and license notices just after the title page:
Copyright (c) YEAR YOUR NAME. Permission is granted to copy, distribute and/or modifythis document under the terms of the GNU Free Documentation License, Version 1.1 or anylater version published by the Free Software Foundation; with the Invariant Sections beingLIST THEIR TITLES, with the Front−Cover Texts being LIST, and with the Back−CoverTexts being LIST. A copy of the license is included in the section entitled "GNU FreeDocumentation License".
If you have no Invariant Sections, write "with no Invariant Sections" instead of saying which ones areinvariant. If you have no Front−Cover Texts, write "no Front−Cover Texts" instead of "Front−Cover Textsbeing LIST"; likewise for Back−Cover Texts.
If your document contains nontrivial examples of program code, we recommend releasing these examples inparallel under your choice of free software license, such as the GNU General Public License, to permit theiruse in free software.
The Linux iPAQ HOWTO
A.12. How to use this License for your documents 48


