105

The MLN Manualmln version 1.0.1
November 4, 2009

Contents
1 Overview 61.1 Main Concepts . . . . . . . . . . . . . . . . . . . . . . . . . . . 6
1.1.1 Virtual Host . . . . . . . . . . . . . . . . . . . . . . . . . 61.1.2 Filesystem Template . . . . . . . . . . . . . . . . . . . . 61.1.3 Virtual Switch . . . . . . . . . . . . . . . . . . . . . . . 61.1.4 Virtual Networks . . . . . . . . . . . . . . . . . . . . . . 71.1.5 Projects . . . . . . . . . . . . . . . . . . . . . . . . . . . 71.1.6 The MLN Language . . . . . . . . . . . . . . . . . . . . 7
2 Templates 102.1 Downloading Templates and Template Versions . . . . . . . . . . 11
2.1.1 Version numbering of Templates . . . . . . . . . . . . . . 112.1.2 Dealing with a slow download . . . . . . . . . . . . . . . 122.1.3 Downloading and Registering templates manually . . . . 12
2.2 Managing Templates . . . . . . . . . . . . . . . . . . . . . . . . 12
3 Building Projects 133.1 mln build . . . . . . . . . . . . . . . . . . . . . . . . . . . . . . 133.2 Non-Root Building . . . . . . . . . . . . . . . . . . . . . . . . . 143.3 Upgrading Running Projects . . . . . . . . . . . . . . . . . . . . 14
4 Starting and Stopping 154.0.1 Setting splay-time to slow down booting and shutting down 154.0.2 Choosing between xterm, screen, and none . . . . . . . . 154.0.3 What projects are running? . . . . . . . . . . . . . . . . . 16
5 MLN Syntax 175.1 Language Features (superclasses and variables) . . . . . . . . . . 17
5.1.1 Keywords and values . . . . . . . . . . . . . . . . . . . 185.1.2 Blocks . . . . . . . . . . . . . . . . . . . . . . . . . . . 195.1.3 Including other files . . . . . . . . . . . . . . . . . . . . 19
5.2 Syntax in depth . . . . . . . . . . . . . . . . . . . . . . . . . . 205.2.1 The global block . . . . . . . . . . . . . . . . . . . . . . 205.2.2 Switch blocks . . . . . . . . . . . . . . . . . . . . . . . . 20
1
5.3 The host block . . . . . . . . . . . . . . . . . . . . . . . . . . . . 215.3.1 Scalar Keywords . . . . . . . . . . . . . . . . . . . . . . 215.3.2 Host blocks . . . . . . . . . . . . . . . . . . . . . . . . . 245.3.3 Summary . . . . . . . . . . . . . . . . . . . . . . . . . . 285.3.4 Inheritance . . . . . . . . . . . . . . . . . . . . . . . . . 28
6 The MLN daemon, Distributed virtual networks and Migration 306.1 Base Setup . . . . . . . . . . . . . . . . . . . . . . . . . . . . . 30
6.1.1 MLN Daemon setup . . . . . . . . . . . . . . . . . . . . 306.1.2 The Master server . . . . . . . . . . . . . . . . . . . . . 32
6.2 Writing a distributed project . . . . . . . . . . . . . . . . . . . . 326.3 Collecting status information . . . . . . . . . . . . . . . . . . . . 33
6.3.1 Project status . . . . . . . . . . . . . . . . . . . . . . . . 336.3.2 Server status . . . . . . . . . . . . . . . . . . . . . . . . 33
6.4 Migration . . . . . . . . . . . . . . . . . . . . . . . . . . . . . . 346.4.1 Live Vs Cold migration . . . . . . . . . . . . . . . . . . . 34
6.5 SANs and live migration . . . . . . . . . . . . . . . . . . . . . . 35
7 Backups (Export/Import) 367.1 Taking backups with MLN export . . . . . . . . . . . . . . . . . 367.2 Restoring projects with MLN import . . . . . . . . . . . . . . . . 367.3 Distributed backups/restores . . . . . . . . . . . . . . . . . . . . 37
8 Setting Ownerships 388.0.1 Example: Starting as root, but running as someone else . 39
9 Using the iSCSI plugin for Xen enabled MLN servers 429.1 The iSCSI backend server . . . . . . . . . . . . . . . . . . . . . . 429.2 How the build process works with the iSCSI plugin . . . . . . . . 449.3 Using the MLN iSCSI plugin with iSCSI hardware . . . . . . . . 459.4 Setting up the iSCSI backend server . . . . . . . . . . . . . . . . 46
9.4.1 Create a LVM volume group . . . . . . . . . . . . . . . . 469.4.2 Install iscsitarget . . . . . . . . . . . . . . . . . . . . . . 469.4.3 Download the iscsi-backend script . . . . . . . . . . . . . 479.4.4 Configure iscsi-backend and define security boundaries . . 489.4.5 Run the iscsi-backend script . . . . . . . . . . . . . . . . 499.4.6 (Optional) Create local repository of templates . . . . . . 49
9.5 Preparing the MLN servers . . . . . . . . . . . . . . . . . . . . . 509.5.1 Download and install the open-iscsi software . . . . . . . 509.5.2 Install the iscsi.pl plugin . . . . . . . . . . . . . . . . . . 529.5.3 Setting up san_path in mln.conf . . . . . . . . . . . . . . 529.5.4 Building a project using the iSCSI plugin . . . . . . . . . 53
9.6 Working with iSCSI - Some useful notes and tips . . . . . . . . . 549.6.1 Keeping track of iSCSI sessions . . . . . . . . . . . . . . 55
2
9.6.2 Manually connecting to an iSCSI volume . . . . . . . . . 559.6.3 Location of iSCSI disks devices on MLN servers . . . . . 569.6.4 Restarting the iSCSI service - beware! . . . . . . . . . . . 569.6.5 Number of threads per iscsitarget on the backend server . 579.6.6 More than one iSCSI server . . . . . . . . . . . . . . . . 579.6.7 Backend network for improved performance and security . 58
10 Using MLN in Amazon’s Elastic Computing Cloud (EC2) 6010.1 Amazon Elastic Computing Cloud . . . . . . . . . . . . . . . . . 62
10.1.1 Instance types and machine images . . . . . . . . . . . . 6210.1.2 Amazon machine images (AMI) . . . . . . . . . . . . . . 6310.1.3 Networking, Elastic IPs and Security groups . . . . . . . 6310.1.4 Permanent storage through Volumes . . . . . . . . . . . . 6410.1.5 How will a VM differ in the cloud from when it is on your
server? . . . . . . . . . . . . . . . . . . . . . . . . . . . 6410.1.6 Regions and Availability Zones . . . . . . . . . . . . . . 6510.1.7 Pricing . . . . . . . . . . . . . . . . . . . . . . . . . . . 66
10.2 The MLN EC2 Plugin . . . . . . . . . . . . . . . . . . . . . . . . 7010.3 Getting an Amazon account . . . . . . . . . . . . . . . . . . . . . 72
10.3.1 Additional tools . . . . . . . . . . . . . . . . . . . . . . . 7310.4 Setting up EC2 command-line tools on your machine . . . . . . . 74
10.4.1 Test the command-line tools . . . . . . . . . . . . . . . . 7510.5 Download a filesystem template . . . . . . . . . . . . . . . . . . 7610.6 Installing The Plugin . . . . . . . . . . . . . . . . . . . . . . . . 76
10.6.1 Testing the plugin . . . . . . . . . . . . . . . . . . . . . . 7710.6.2 Configuring the plugin . . . . . . . . . . . . . . . . . . . 77
10.7 Using the EC2 Plugin . . . . . . . . . . . . . . . . . . . . . . . . 7710.7.1 EC2 plugin syntax . . . . . . . . . . . . . . . . . . . . . 8010.7.2 Re-using filesystems for faster uploads . . . . . . . . . . 8110.7.3 Supplying extra information to each instance through user
data . . . . . . . . . . . . . . . . . . . . . . . . . . . . . 8310.7.4 Using elastic IPs . . . . . . . . . . . . . . . . . . . . . . 8410.7.5 Using EBS volumes . . . . . . . . . . . . . . . . . . . . 8510.7.6 Using different EC2 accounts for different projects / in-
stances . . . . . . . . . . . . . . . . . . . . . . . . . . . 8810.7.7 Adding more nodes to existing project . . . . . . . . . . . 8910.7.8 Moving an existing project / vm into EC2 and back again . 92
10.8 Known Issues . . . . . . . . . . . . . . . . . . . . . . . . . . . . 93
11 Writing MLN plugins 9511.1 The MLN data structure . . . . . . . . . . . . . . . . . . . . . . . 95
11.1.1 Querying the data tree . . . . . . . . . . . . . . . . . . . 9711.2 Writing plugins . . . . . . . . . . . . . . . . . . . . . . . . . . . 98
11.2.1 Example plugin and Available subroutines . . . . . . . . . 98
3

11.3 Plugin API suppary . . . . . . . . . . . . . . . . . . . . . . . . . 10111.3.1 Reading The Data Tree . . . . . . . . . . . . . . . . . . . 101
11.4 Modifying The Data Tree . . . . . . . . . . . . . . . . . . . . . . 10211.4.1 Tips for the plugin writer . . . . . . . . . . . . . . . . . . 103
Introduction
MLN is a powerful tool that can configure and administer virtual networks for you.Key features of MLN include:
• Support for Xen, VMware Server or User-Mode Linux virtual machines,
• Root permissions not required, and
• Easy installation with pre-existing virtual machine templates.
For a quick start, take a look at Section . However, this document will also pro-vide in-depth explanations of the motivation for MLN as well as its features andadvantages.
4

Quick Guide for the Impatient
1. MLN depends on the following software:
• Perl
• uml-utilities
• bridge-utils
• screen
• sudo
2. Download MLN:
• wget http://mln.sourceforge.net/files/mln-latest.tar.gz
• tar zxf mln-latest.tar.gz
3. Run the interactive setup:
• cd mln-latest
• ./mln setup
• During the setup process, accept all defaults by simply hitting Return ateach prompt.
4. Build an example project:
• ./mln build -f examples/simple-network.mln
5. Start your new virtual network:
• ./mln start -p simple-network
6. Now you should have 3 xterms, one for each virtual host in the simple-network
project. Login as root to each one (no password) and play!
7. Stop your new virtual network:
• ./mln stop -p simple-network
5

Chapter 1
Overview
The goal of this chapter is to explain the key concepts related to the inner workingsof MLN.
1.1 Main Concepts
1.1.1 Virtual Host
A virtual host consists of its own filesystem and runs in software on top of your OS.MLN uses either User-Mode Linux (UML) or Xen and can use different filesystemsbased on different Linux distributions. MLN will customize the filesystem for thevirtual host you wish to build based on your high-level specification.
1.1.2 Filesystem Template
A template is a basic pre-customized filesystem for a virtual host. You can down-load templates from the project homepage and choose which hosts should be builtfrom those templates. Templates differ in what distribution they are based on andhow much software they contain. For example, one template might be a user desk-top environment with graphical login and numerous productivity applications whileanother might be a small firewall environment using busybox to replace applica-tions and conserve space.
1.1.3 Virtual Switch
MLN supports the virtual switch capability provided by UML. uml_switch is sim-ply a process that opens up a Unix-socket and listens to it. It accepts networkpackets on that socket and behaves just like a typical home-network switch. Vir-tual hosts can connect to these switches. For Xen, the switch is a so-called ethernetbridge-device that can connect several network interfaces together like a switch.
6

1.1.4 Virtual Networks
Virtual hosts connected to virtual switches constitute a virtual network, which mlnis mainly all about. Many virtual hosts and switches make pretty large networksand it is MLN’s job to configure and build these networks for you. You can chooseto build automatically functional networks or you can build lots of virtual machinesthat are connected to switches and configure networking on them by hand too if youlike. It’s up to you.
Virtual networks can also be part of your real networks. Meaning that neither yourphysical hosts nor the virtual hosts can tell the difference, they are simply on thesame LAN.
1.1.5 Projects
One virtual network is one project. MLN can build and run several projects at thesame time. Sometimes it is sensible to keep them apart, other times you might wishto connect them together. Projects are identified by their name.
1.1.6 The MLN Language
You might wonder how you should tell mln what the virtual network should looklike? The answer is the mln configuration language. This language looks muchlike a declarative programming language. The goal is that easy networks shouldbe easy to write while complex networks should be possible to write (and in somecases hopefully easy as well). Based on your needs, you can omit or add parts toyour project to make it do exactly what you want. Sometimes the point is to buildsimple networks without much configuration of the virtual hosts. This is a typicalsetting for student assignments. So if you don’t want much, you shouldn’t haveto write much. Here is an example of a small network consisting of two machinesand a switch. If you understand this configuration without too much hassle, thenthe rest of mln should be straight forward for you.
global {project simple_network
}
switch lan {}
host starfish {
network eth0 {switch lanaddress 10.0.0.1netmask 255.255.255.0
}}
7

host catfish {
network eth0 {switch lanaddress 10.0.0.2netmask 255.255.255.0
}}
8

Installation and Use
9
Chapter 2
Templates
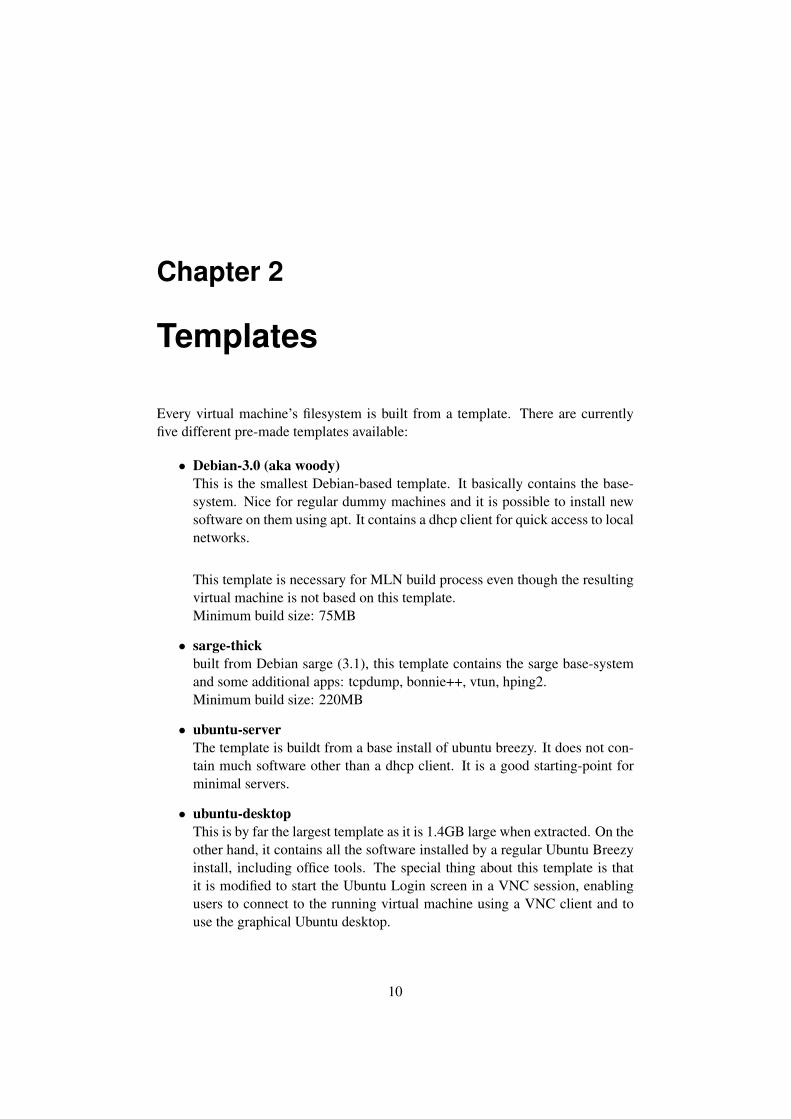
Every virtual machine’s filesystem is built from a template. There are currentlyfive different pre-made templates available:
• Debian-3.0 (aka woody)This is the smallest Debian-based template. It basically contains the base-system. Nice for regular dummy machines and it is possible to install newsoftware on them using apt. It contains a dhcp client for quick access to localnetworks.
This template is necessary for MLN build process even though the resultingvirtual machine is not based on this template.Minimum build size: 75MB
• sarge-thickbuilt from Debian sarge (3.1), this template contains the sarge base-systemand some additional apps: tcpdump, bonnie++, vtun, hping2.Minimum build size: 220MB
• ubuntu-serverThe template is buildt from a base install of ubuntu breezy. It does not con-tain much software other than a dhcp client. It is a good starting-point forminimal servers.
• ubuntu-desktopThis is by far the largest template as it is 1.4GB large when extracted. On theother hand, it contains all the software installed by a regular Ubuntu Breezyinstall, including office tools. The special thing about this template is thatit is modified to start the Ubuntu Login screen in a VNC session, enablingusers to connect to the running virtual machine using a VNC client and touse the graphical Ubuntu desktop.
10

• busyboxBusybox is a small linux distribution usually meant for floppies and the like.It makes a nice router in virtual networks, because it takes very little space.Complex things, like adding users and groups, are not supported in this im-age.Minimum build size: 25MB
• blimpThis is a typical LAMP fileystem with apache, mysql and PhP. Pre-installedsoftware is Drupal, Mediawiki and request-tracker.
The default host filesize is 250MB. You can set a smaller size, but MLN will refusebuilding hosts where the assigned size is smaller then the actual template.
2.1 Downloading Templates and Template Versions
MLN has it’s own download manager. It is launched by typing:
mln download_templates
The first thing the download manager does, is to fetch the latest list of availabletemplates. It then prompts you for every available template and asks if you wantto download it. The default answer to that question is “No”, so by pressing en-ter, you’ll skip to the next template. The presented template will show the word“NEW!” if you have an older version or you don’t have any version of it.
The templates are compressed and will be unpacked automatically when down-loaded.
The good thing with versions, is that you don’t have to specify what version of thetemplate you want. You actually don’t have to know anything about the versions.When you say: sarge-thick.ext2, then mln will use the newest version that you haveautomatically.
You can also specify exactly what template you want to use. If mln does not finda version for your template, it will assume it is one of your own templates and tryto use it. So if you say template foobar.ext2, then mln will assume you have a templatecalled exactly that in your templates directory.
2.1.1 Version numbering of Templates
The syntax of the version syntax is:template-name\textbf{-V\emph{m}.\emph{n}}.ext2
11

Where m and n are the major and minor version numbers respectively.
2.1.2 Dealing with a slow download
The MLN download manager fetches its templates form one particular sourceforgemirror. This does not suit everyone, off course. If you feel brave, then you areinvited to edit the mln script and change the URL to a mirror closer to you. Youshould find the variable in the beginning of the script. But, we cannot guarantee,that you will find all templates on all mirrors. We will update mln as soon as wefigure out how we can let sourceforge choose the mirror itself. Any pointers arewelcome. As of version 0.71 this is how it is done, however.
2.1.3 Downloading and Registering templates manually
If you have downloaded templates manually from a faster sourceforge.net mirroror modified or even made one yourself, you can add it to MLN’s template registrywith this command:
mln register_template [ -m ‘‘message’’ ] -t template
If the template-name contains a valid version tag, then MLN will take notice ofit, and you can use the template name in your configurations without the versionname in order to get the latest version of the template.
2.2 Managing Templates
MLN keeps track of its templates by storing them in your templates directory. Itis possible to share the templates directory between several users, since one onlytakes copies of the template. Just make sure every one has read access to them.A list of all downloaded templates is stored in a file called templates.list, also storedin your templates folder. If you want to have a list of the templates mln knows oflocally, you can write:
mln list_templates
There is currently no support for removing templates, so you will have to removethem by hand and delete the corresponding line from the templates.list file.
12
Chapter 3
Building Projects
As of version 0.73, MLN assumes that a non-root user build the projects. In orderfor the build process to work, you will need to at least have the default template,which is obtained during the setup process.
3.1 mln build
To build a project, specify the name of the project file you would have created orwould like to use.
mln build -f project-file.mln
The build command is rather simple, but a few extra steps can prevent some frus-trations later on. First, you need a project file that describes the project you wantto build. For rather complex networks it’s a good idea to run a simulation first. Thesimulation just reads the project file and outputs the corresponding data structure.That way you can double-check if something is misspelled or just simply wrong.To run a simulation, add the option -s} after the \texttt{build command:
mln build -s -f project-file.mln
Here you can see how mln understands the project file. If you like what you see,you can start the build process. The name of the project might correspond to analready existing project and that will be overwritten when you build this one. Youwill, however, be asked for permission to do so. If you are sure that you want tooverwrite any existing project with the same name and don’t want to be botheredabout it, add the -r option after the build command.
13

mln build -r -f project-file.mln
3.2 Non-Root Building
Normally, you need to mount a filesystem in order to modify its contents. root isthe only user allowed to do that. MLN has a way to circumvent this.
The trick is to do everything we can as regular users, like copying and resizingthe templates. Before the filesystem images are mounted, MLN boots into a user-mode-linux system ourselves and, as root, mounts the images from there and con-figure them.
Note, that one effect that not being root, is that you cannot build on behalf of some-one else. So the owner, sudo} and \texttt{group (see Syntax chapter) keywords won’twork.
3.3 Upgrading Running Projects
MLN has, as of 0.71, the possibility to upgrade running virtual networks. This isdone the following way: When you build a new project, mln stores a copy of theproject file along with the project. You can then update your own copy, by changingvariables, adding/removing hosts and switches (as long as you don’t change thename of the project). Then, you can run the mln command for upgrading, and itwill compare its own copy and your new copy to figure out which virtual hostsneed to be rebuilt. This comparison is quite complex, i.e. if you change a variablein a superclass, all machines that inherit from it will have to be rebuilt, but not theones that inherit, but override the variable themselves. So a change in the syntax,might not give a change in the semantics.Why is it necessary to upgrade a running project? Why can’t you just rebuild?Important question. The answer is, that you can get far by just rebuilding thewhole project. But sometimes it is not what you want. You don’t have to rebuild(and thereby delete the old filesystems) a project just because you want to add amachine. If your system is running while you want to upgrade, add the “-S” option,mln will boot the machines which have been rebuilt or added. This is handy whenusers are active on your virtual network while you upgrade.
mln upgrade -S -f new-project-file.mln
14

Chapter 4
Starting and Stopping
Every host and switch has their own start and stop scripts, similar to system initscripts. When a project is started, all start-scripts are run in alphabetical order.There is support for setting a boot order on each host. The default position is 99(last). Any number smaller then 99 will have precedence. The stopping happensthe same way, except that the stop scripts have the reversed order, meaning 99 willbe taken down first. So machines that boot first will be taken down last.
mln <start | stop> -p project-name
Note: you don’t have to specify the path of the project, only its name. MLN willlook for that project in it’s project directory.
Hosts can also be started and stopped individually within a project like this:
mln <start | stop> -p project-name -h hostname
4.0.1 Setting splay-time to slow down booting and shuttingdown
Starting a project with many hosts can tax a system and is often the most resourceconsuming part of the virtual network. To ease the process, you can issue a pausebetween every host to ease the pressure:
mln <start | stop> -s seconds -p project-name -h hostname
4.0.2 Choosing between xterm, screen, and none
Even though you decided on one way the vm should start, you can also set thisat boot-time using the -t type option. Currently, “screen”, “xterm”, and “none” aresupported. Example:
15

mln start -s -p project-name -t screen
4.0.3 What projects are running?
You can view the status of your projects with this command:
mln status
Your output will then look something like this:
################ MLN - Status #################dmz-lan host choke-firewall downdmz-lan host gateway downdmz-lan host server downdmz-lan host workstation downdmz-lan switch dmz-switch downdmz-lan switch lan-switch downexternal_switch switch ext downflab host choke1 downflab host choke2 downrh host dummy uprh host redhat uprh switch lan up
16

Chapter 5
MLN Syntax
The philosophy behind the syntax is that is should be easy to create simple net-works and possible to create complex ones. The more features you want to put intoyour project, the longer the project file gets. But it should always be easy to readthe project file and understand the functionality of the network.Every project needs to have a global block where the name of the project is stated.This block looks like the following:
global {project project_name
}
What follows can be one or more hosts and a set of switches if desired. A projectcould simply be a group of machines not connected together but all of them co-nencted to the lan. Let us have a look at the main language features.
5.1 Language Features (superclasses and variables)
Writing simple networks does not require much work and you should be able tohave a good result after only a few lines. You might want to tweak the networka bit, and start to add users and different root passwords to the virtual hosts. Onemachine might need an extra network interface so that it can function as a gatewayfor the rest of the virtual network, and so you add a few more lines. Steadily yourproject file grows. To ease the task of maintaining larger projects, we added supportfor inheritance and variables. Through inheritance, you can specify a superclassfor a group of hosts. Every host that is set to inherit from that superclass willinherit that configuration. Locally specified attributes will override the inheritedvalue. Variables can be used to make sure the same value is placed correctly severalplaces, like the ip address of your nameserver or the the template filesystem youwant to use.
17

You do not have to use these features in the project file, but when you are writinglarge network projects, you fill find it much easier to correct errors, typos and toadd new features this way. Here is an exxample that uses both inheritance andvariables:
global {project syntax-example$standard_memory = 64M
}
superclass common {free_spacememory $standard_memory
}
host one {superclass common
}
Here, we define a variable “$standard_memory” already in the global block andwe use it in the superclass. Host “one” will inherit the settings from the superclass.You can have hierarchies of superclasses, but a host can only inherit from onesuperclass. In the next example, we override the global variable and we also insertthe variable into a text string:
global {project syntax-example$standard_memory = 64
}
superclass common {free_space$standard_memory = 128
}
host one {superclass commonmemory $[standard_memory]M
}
The resulting string is now “128M” for the host “one”. Notice how the variablename is enclosed in brackets when inserted into text.
5.1.1 Keywords and values
The configuration is generally contructed from either blocks or keyword-valuepairs. A keyword-value pair is not written with any assignment operator like=} or \texttt{:=, but straight forward:
18

memory 64M
Usually we put one keyword-value pairs separate lines for elegance, but this is alsopossible:
memory 64M; term screen
5.1.2 Blocks
Blocks are enclosed by curly brackets. They are usually on the form of:
block {line1line2
}
Exceptions to this rule are hosts, switches and network interfaces, which all havean extra parameter to them:
host one {network eth0 {
address dhcpswitch lan
}}
switch lan {}
The reason for this is to keep compatability with earlier versions of MLN. Thereader of the plugin chapter later in this manual, will discover that MLN createssub-blocks out of these parameters when it builds its internal data structure.
5.1.3 Including other files
It is possible to spread the configuration into separate files and to include them intoother configurations. In order to do so, you use the \#include keyword. It can beused anywhere in the configuration, and the MLN parser will simply continue onthe next file as if it was the same file:
#include /my/other/config.mln
19

5.2 Syntax in depth
5.2.1 The global block
This block contains all the gloabal information for the project and is also the placewhere you define variables and assign values to them. Possible keywords andblocks are:
project <name>
The name of your project. If not specified, the build tool will prompt you fora name.
beforeProjectStart \{ \}
Run a list off commands before the project starts. Example:
global {project xen_on_lanafterHostsStart {
echo ‘‘You can connect to the virtuam machine using ‘screen -r xeno’}
}
beforeHostsStart \{ \}
Run a list of commands after the switches have started, but before the hostsare started.
afterHostsStart \{ \}
Run a list of commands after the Hosts have started.
afterProjectStart \{ \}
Run a list of commands after the entire project has started.
5.2.2 Switch blocks
Each switch block defines one instance of a switch. Usually, only the name ofthe switch is enough, but some extra features are available. The range of featuresfor a switch depends on wether it has User-Mode Linux or Xen virtual machinesconnected to it. Mixing of the two on the same switch is currently not supported,although it is not impossible to achieve. Possible features are:
For User-Mode Linux
type <type>
This is the type of network component you want. The uml_switch has theopportunity to act as a hub. This will be enabled if you supply type hub in theswitch block. Default is a regular switch.
20

socket <path>
Every network component opens up a unix socket and listens on it. Thevirtual machines will connect to that socket if they want to send through thatswitch. You can specify that the socket should be placed somewhere else,e.g. outside the projects directory. This is useful when you want to connectdifferent projects together.
tap <tap-device>
With this option, you can connect the switch to a tap device. If the tap deviceis connected to a ethernet bridge on you computer, then every virtual hostconnected to that switch will be on your LAN. See the command enable\_bridge
for more information.
owner <user>
The owner of the socket for a switch.
group <group>
The group that owns the socket for a switch.
sudo <user>
The owner of the socket and process of a switch.
Xen
bridge <bridge\_interface>
Usually, the switch will define a name for the bridge interface, but you canoverride ig with this option.
5.3 The host block
The host block is the most complex part of the mln syntax. It is not necessary toassign a value to each keyword, so you can get away with pretty small blocks ofcode for simple hosts.
5.3.1 Scalar Keywords
filepath <path>
Use a different path to store the filesystem images of the virtual machines.This is used if you wish to place the filesystems on a SAN or distributedfilesystem. he name of the image will be “hostname.project”
swap <size>
This keyword adds a swapfile to the vm. Example:
swap 128M
21

owner <user>
The owner of this host’s filesystem image. Currently only for User-ModeLinux.
group <group>
The group that owns this host’s filesystem image. Currently only for User-Mode Linux.
cow\_filesystem basename
Assign this host to use a copy-on-write filesystem with basename as filesys-tem base for reading. Note: Copy-on-write filesystems are not currentlysupported in Xen.
sudo <user>
Implies owner and assumes root is the one that runs the host’s start script.The effect is that although it is started by root, the other user owns the filesys-tem image and owns the process. Currently only for User-Mode Linux.
size <size>
The size of the filesystem for this host expressed in megabytes and with atrailing “M”. I.e 250M. Note, that this size needs to be larger than the size ofthe template in order to make it fit in. Default value: 250M.
free\_space
With this keyword you can set how much space should be added to the tem-plate, giving you at least that amount of free space on the host. This keywordwill override size. There will always be residual free space on the templateto begin with, so the actual amount of free space will be this much or more.
A special case is this: “free\_space 0M”. The host will then end up with thesize of the template, giving you the smallest possible size of that host.
term [xterm|screen|none]
This keyword describes how the virtual machine should start. It usuallyneeds a terminal to which to connect its console. There are three optionshere:
1. You start the machine in an xterm. The xterm will open when you startthe given machine but will terminate when you log out.
2. You start the machine in a backgrounded terminal using screen. You canthen connect to the machine’s console at your leisure using the commandscreen -r hostname. This is the recommended option if you want the project torun for a while and/or have a lot of machines.
3. For Xen-based machines, you can choose to have no terminal managerby specifying term none. For non-Xen machines, mln reverts to the default.This is possible since the Xen management command, xm, incorporates the
22

features provided by screen. To list virtual machines, use xm list, and to accessa virtual machine use, e.g., xm console myhost.myproject.
Default value: xterm. As of version 0.73, this value can be set at boot-timetoo, using the “-t term” option with the start command. Example:mln start -t screen -p myproject
color <color-name> This keyword makes only sense if xterm is the terminal used.It sets the color of that particular xterm when the virtual machine starts. Thishelps distinguish the xterms. The background color is always black. Defaultfront color is lightgrey.
root\_password <encrypted password>
Specify the root password. Supply the encrypted variant of the password.No default.
template <template>
Specify what template you wics to build this host from. The template needsto be downloaded AND registered beforehand.
nameserver <ip>
IP address of nameserver.
memory <amount of ram>
The amount of RAM memory for this host when it is started. This amount isnot fully used until necessary, meaning that the whole amount is not lockedat startup. Default 32M
boot\_order <priority>
If you want any machines to start before someone else, assign them a lowerboot order. A value of 1 means highest priority. Several hosts can have thesame priority. Default value is 99, which is also the lowest priority. Note thatthe shut down order is automatically determined by the boot order. Machinesthat are booted first, are shut down last.
superclass <name>
The superclass of this host. Superclasses are a way to gather informationabout a class of machines. If the machine has a superclass, it will inherit allvariables from that class. A host can also overwrite the keywords locally.Note that also superclasses can have superclasses of their own, creating ahiearrchy where only the leaf nodes ar actual hosts. Only Hosts are build.
kernel <path-to-kernel>
You use this if you want to specify a special home-grown UML kernel forthis virtual machine. Write the absolute path of the kernel to avoid errors.Remember to add the modules\_dir keyword too, if you need to copy any mod-ules. Example:
23

kernel /opt/uml/linux2.6.4
modules\_dir <dir>
Copy the modules from this directory. Usually used together with the kernel
keyword. Example:
modules_dir /opt/uml/modules/2.6.4-1um
lvm [lvcreate options]
Please read the LVM chapter for an introduction on how to use LVM.
xen
Use the Xen virtual machine instead of the default User-Mode Linux.
hvm
Use the Xen hardware virtualization.
vncpassword <cleartextpassword>
(HVM) set a password for the Xen HVM VNC session.
vncdisplay <displaynumber>
(HVM) Use a specific VNC display number. (The port number will be 5900+ displaynumber)
5.3.2 Host blocks
modules
What modules are to be loaded ad boot time. The presence of this block willcopy all the available modules for the kernel into the filesystem. The oneslisted in the block will be written into /etc/modules. So if you want to havemodules, you at least need this empty block. Example:
modules {nattun}
users
Add users to the virtual machine. You have to supply and encrypted versionof the password. The syntax is like this:
users {name password [homedir] [uid].
24

.}
The home directory and UID are optional. Adding users is not supported onthe busybox filesystems.
startup
Commands that are to be run at each boot. They will be placed in a bashscript /etc/init.d/startup and this file is linked to from /etc/rc2.d/S99startup. Exam-ple:
startup {iptables -t nat -A POSTROUTING -o eth0 -j MASQUERADEecho 1 > /proc/sys/net/ipv4/ip_forwardroute add -net 10.1.1.0 netmask 255.255.255.0 gw 10.0.0.3}
mount
This block contains all the other filesystems you wish to mount in additionto the root filesystem. These can be both images and folders and can resideanywhere on the host machine. You can also choose any mountpoint you likeexcept for the root. Note, that these filesystems will not be mounted duringthe building phase, meaning that you cannot as of now copy any files intothe filesystem or use it as /home while you add users. We will address thisissue in the next versions, however. Example:
mount {/disks/backup.ext2 /mnt/backup ext2 defaults/folders/www-data /var/www hostfs ro10.0.0.1:/my/mnt /mnt nfs defaults}
The filesystems supported are decided by the virtual machine kernel. “hostfs”for direct access to folders on the host are only supported in User-ModeLinux. NFS is also possible, but it assumes that the filesystem and the umlkernel has the appropriate software. The last field, containing the options,can be omittet. In that case “defaults” will be written in /etc/fstab.
network iface
Configure a network device. Example for DHCP:
network eth0 {switch < switch-name | socket >address dhcp
}
25
Static IP example:
network eth0 {switch < switch-name | socket >address x.x.x.xnetmask x.x.x.x
[ broadcast x.x.x.x ][ gateway x.x.x.x ][ mac x:x:x:x:x:x ][ slirp [ slirp path] ] (for UML)[ bridge <bridge-name> ] (for Xen)
}
If the MAC address of the interface is not specified, it will be generated ran-domly.
The simplest way to setup networking for a User-Mode Linux is using theslirp software package. It provides NAT-like acces to the internet and sup-ports UDP and TCP traffic (no ICMP). You need to have slirp installed onyour system. You can also download compiled slirp binaries from the MLNsite. Here is an example:
network eth0 {slirp
}
An interface connected to a TUN/TAP device: (UML)
network eth0 {
tun_iface <iface_name>tun_address <tun_address>address x.x.x.xnetmask 255.255.255.252
[ broadcast x.x.x.x ]gateway <tun_address>
}
This last example makes a point about the nature of the TUN/TAP connec-tions. They involve only two addresses, and you get away with a muchsmaller netmask. It also a good idea if the gateway for the virtual hosts inter-face points the physical host side of the connection. The TUN/TAP can becalled whatever you want, and it is enabled and destroyed automatically bymln if started and stopped by root. In order to utilize this functionality butstill run the host as a different user, see the owner} and \texttt{sudo keyword.
26

Connecting a Xen host to the network is particlary easy, because youa remost likely already root and the xend daemon has set up the proper require-ments for you. If you omit both the switch and the bridge from a hostsnetwork interface, then MLN will assume that it should be connected to the“xenbr0” bridge. This bridge device is set up by xend 3.0.1 and later and isconnected to your lan already. Here is one such host:
host one {network eth0 {
address dhcp}
}
The interface settings can be changed to a static address if you do not have adhcp server on your lan.
files
Use this block to specify what files are to be copied into a virtual host’sfilesystem at boot time. The files you want to copy have to be in the direc-tory configured as your files-directory. If you are unsure where that is, runmln write\_config. Example:
files {foobar /root/foobar 644scripts/scpecial_script.sh /usr/local/rum-me.sh 755}
Note that the first field is the path to the file you want to copy relative to yourfiles folder. The second field is where in the virtual machine’s filesystem youwant to put the file. The last field is the permissions the file shall have.
groups
You can add groups and assign users to groups. The following example willcreate a group called admin and assign the user jack to it:
users {jack lkjlkadlfasd
}
groups {admin {
jack}
}
27

Block Type functionglobal Contains name of project and variable declarations. Suitable
place to put information regarding the entire project (i.e. for plu-gins to use
switch An ethernet switch shared amongst one or more virtual machineshost Each host block corresponds to one virtual machine in the project.superclass A special class for grouping configurations which other virtual
machines can inherit from. Usefull when you have lots of similarvirtual machines in the same project. Hierarchies of superclassescan be built.
Table 5.1: The different 1. level blocks.
5.3.3 Summary
5.3.4 Inheritance
The most organized way to keep a consistent configuration is through superclasses.A superclass is configured simply as a host, but it will not be built into a VM.Other hosts can inherit the configuration from a superclass by using the superclass
keyword. Here is an example:
superclass common {term screenmemory 64M
network eth0 {netmask 255.255.255.0gatway 10.0.0.1
}}
host one {superclass commonnetwork eth0 {
address 10.0.0.2}
}
host two {superclass commonnetwork eth0 {
address 10.0.0.3}
}
In this example the hosts one and two inherit from the superclass common.
28

Administration
29
Chapter 6
The MLN daemon, Distributedvirtual networks and Migration
If you have more than one server for virtual machine hosting, then there is a chanceyou want to spread projects accross those servers but still manage them from singlecommands. The MLN daemon is a way to achieve this.
The daemon runs as a process on each server and recieves instruction regardingMLN projects from one or more authorized sources. From the user perspective,one writes the MLN project on one host, and builds it just like before. MLN willthen detect if the project is distributed and attempt to contact the other servers andsend them the project as well. The same goes for starting/stopping/upgrgading andremoval of projects. Another aspect is the collection of status information in orderto monitor serveral servers and make decisions based on their free resources. TheMLN daemon provides a specialized status command that lets the user see the am-mount of projects and virtual machines running on each server. For the servers thatuse Xen, the status command collects output from the xm list command and displaysthat as well. We will show examples of this later in this chapter.
In this chapter we walk through the few steps involved in setting up the MLNdaemon and writing distributed projects.
6.1 Base Setup
6.1.1 MLN Daemon setup
Consider the following example: We have three servers, master, backend1 andbackend2. The master is our main MLN server and has no need to run the dae-mon, as all the MLN commands will be issued there. The servers backup1 andbackup2 are dedicated MLN servers which are controlled mainly from the masterand therefore need to run the MLN daemon. The easiest way to transform an unin-
30

stalled machine into an MLN dedicated server is through the specialized installCD, which you can find a link to here: LINK MISSING. But any machine whereMLN is installed can run the mln daemon.
In MLN terms, a server that runs a part of a project is called a service\_host. It pro-vides a service to the virtual machines, i.e keeping the filesystem and letting it run.
Lets look at the necessary configuration. The MLN daemon does not allow anyconnections by default, so we need to define the IP addresses of the hosts we wantto allow. This is done in the /etc/mln/mln.conf file on each of the backend servers:
daemon_allow 128.39.73.10daemon_allow 128.39.74.*
Here, we set that the host with IP address 128.39.73.10 and all host on subnet128.39.74.* are allowed to connect to the daemons. Further, we need to give thebackends a necessary ID so that they understand which part of the project is to bebuildt on them. The ID is their service host tag, and will be used when writingprojects later. It has to be either an IP address or a relsolve-able name. The mostnatural is to use their hostnames. Here is how it would look on backend1:
service_host backend1.vlab.iu.hio.no
Lastly, we define the ammount of memory reseverd for the server itself. This is notacted upon by the MLN daemon, but helps with the status output to quickly seewhere there is resources to add more virtual machines. For Xen users, the defaultreserved ammount is 192 MB. If the backend is installed thorugh our specializedinstaller CD, the reserved ammount is 128MB.
daemon_max_memory 128M
Once this is added to the /etc/mln/mln.conf file, we can start the server the followingway (as root if you run Xen):
master:~# mln daemon
If you wish to start the daemon in he background, add the -D pidfile option like this:
master:~# mln daemon -D /var/run/mln.pid
31
6.1.2 The Master server
There is little configuration needed on the machines that will send projects to theservice hosts. The first thing needed is a service\_host tag here as well because theprojects will be spread out accross all three servers. In the /etc/mln/mln.conf at masterwe set the following:
service_host master.vlab.iu.hio.no
Next we need to define that master should collect daemon status information fromthe two backend servers when we issue the mln daemon\_status command. So we addthe following two lines to the mln.conf file:
daemon_status_query backend1.vlab.iu.hio.nodaemon_status_query backend2.vlab.iu.hio.no
Here also, we set the ammount we would like to reserve for the server itself:
daemon_max_memory 192M
We are now ready to write a distributed project and build it.
6.2 Writing a distributed project
A distributed project is not much different from a regular one, except that one usesthe service\_host tag on the hosts and switches to decide where they shall be placed.Here follows a distributed project, where we place one virtual machine on eachservice host:
global {project dtest
}
superclass common {xennameserver 128.39.89.10network eth0 {
netmask 255.255.255.0gateway 128.39.73.1
}}
host one {superclass commonnetwork eth0 {
address 128.39.73.11}
32

service_host master.vlab.iu.hio.no}
host two {superclass commonnetwork eth0 {
address 128.39.73.12}service_host backend1.vlab.iu.hio.no
}
host three {superclass commonnetwork eth0 {
address 128.39.73.13}service_host backend2.vlab.iu.hio.no
}
Make sure the MLN daemons are running on all your servers before you start thebuild. The project can be buildt with the usual command:
master:~# mln build -f dtest.mln
MLN will send the project to all other service hosts before doing the build itself.That way, all the servers can do their share in paralell. Once the build is done atthe main server it will start query the other servers for their output until everyoneis done.
The project is started with the usual: mln start -p dtest.
6.3 Collecting status information
You can get the status information from either special projects or the servers itself.
6.3.1 Project status
mln status -p projctname
6.3.2 Server status
mln daemon_status [-s]
The daemon status command will query all the daemons and gather statistics fromthem. With the -s option, only a summary will be printed. Without it, you willbe presented with detailed data from each daemon, especially if you run Xen. In
33

that case you will get the output from xm list with some additional information fromeach server.
6.4 Migration
MLN supports migration of virtual machines from one service host to anotherthrough the upgrade command. Lets say we have a third backend server, back-end3, and want to move one of the virtual machines over to it. The way we do thisis by making a copy of our original project file and edit the service_host line forthe particular host we wish to move. This is an excerpt of that file:
host three {superclass commonnetwork eth0 {
address 128.39.73.13}# notice how the next line has changed:service_host backend3.vlab.iu.hio.no
}
Now, we issue the upgrade command from our main server. Note, that all theinvolved servers need to have their MLN daemon running at this point. Especiallythe two servers involed in the migration process:
master:~# mln upgrade -f dtest2.mln
The server, backend2, which is where the vm three is located prior to the upgradewill shut down the vm and await contact from the new service host. The serverbeing the new service_host for the vm three will contact the other server and fetchthe compressed filesystem image. Once it is transferred, it will do the other changeswhich migh be on the upgrade list.
6.4.1 Live Vs Cold migration
Xen supports live migration, meaning the ability to move a running virtual ma-chine from one location to another without shutting it down. For this feature towork, one needs to have a shared network storage of the filesystem so that both in-volved servers can access the filesystem simultaneously. Further both servers needto be of the same CPU architecture and on the same subnet.
MLN does at this version not support live migration. The method currently used,cold migration, means shutting the vm down and moving the filesystem to the otherlocation. This method might sound inferior to live migrations promise of seamlessmigration and uptime, but there are som benefits to MLN’s approach as well:
34

• The migration can be to any other location. No same subnet is required.
• One can change platform of the server, i.e go from a Intel-based server to anAMD-based one.
• One can change virtualization platform and and system variables in the sameprocess. You could start out with a light-weight User-Mode Linux VM andmigrate it to a Xen virtual machine with more memory.
• It does not require shared network storage of the filesystem images.
Unless uptime is of the absolute importance, cold migration is a suitable option formost.
6.5 SANs and live migration
MLN supports live migration of entire networks using Xen, as long as the virtualmachines filesystem is placed on a concurrent network storage. SANs using AoE(ATA over Ethernet) or NFS or other distributed filesystems are supported. MLNneeds to get a hint, that a filesystem placed in a certain location actually is on a san.Use the san\_path option in the mln.conf file to point to distributed filesystems, likethis:
san_path /mounts/mlnsan
Two servers will attempt to live migrate IF:
• Both servers are connected to the SAN and aware of it
• The virtual machines run Xen
• The virtual machines are up
• The respective xend daemons accepts migrations from the other servers
The live migration is triggered the same way as a normal upgrade whith differ-ent service\_host}. \textbf{IMPORTANT: If you plan to live migrate, you should ONLYchange the service host and nothing else of the virtual machines. Remember also,to change the service host of the switch.
35
Chapter 7
Backups (Export/Import)
Backing up virtual machines is convenient as you don’t have to take care of backupsoftware inside each of the VMs. MLN does not offer a backup management sys-tem, it does not take backups regularly nor does it support rotation. MLN offersa way to extract a project into a convenient form so that you can build whateverbackup scheme you want around it.
7.1 Taking backups with MLN export
MLN can save projects into directories and compress them. This can be utilized tocreate “snapshots” of an entire project. The snapshot will contain the following:
• The projects mln configuration file
• A folder “images” which contains all filesystems from each virtual machine
The way to create such a snapshot, is to invoke the mln export command:
mln export -p myproject -d myproject_july_2008 -z -s
This command will now stop all the virtual machines belonging to the project“myproject” ( -s option). It will then create a folder called “myproject_july_2008”and store all filesystems there. Next, it will create a tarball from the directory ( -zoption).
7.2 Restoring projects with MLN import
MLN can read a folder or tarball created with the export command and use it torestore a project to a previous state:
36
mln import -p myproject -d myproject_july_2008.tar.gz
Note, that this is a crude way of doing backups and that some finer-grained backupscheme, perhaps running as software inside the VM could complement this. Whenrestoring a project, the filesystem is restored to a previous state, which will havean effecto on logfiles and timestamps and the like. You should test it in a scenariobest describing a real emergency on your site before relying on it.
7.3 Distributed backups/restores
These commands also work if the project is spread accross many servers. In thatcase, all filesystems will be extracted from the remote servers and stored in thesame folder for convenience. Likewise, when importing, all filesystems are trans-ported back to the server they belong to. Make sure that the MLN daemons run onall servers and that they allow access from the particular machine performing thebackup.
37
Chapter 8
Setting Ownerships
MLN is able to set the ownership of virtual machines and switches, making it pos-sible to run your projects as someone else then root, even if you are root when youbuild. This is recommended if you plan to have some security on your projects.This is also handy if parts of the network are to be owned by different users, typi-cally in class.
There are three keywords you may use for this purpose: sudo, owner and group.
• sudo user|uidThis keyword is used if you plan to run the host as a user account that nor-mally does not correspond to a human, or a special user. The project isstill started and stopped by root. The sudo command is incorporated intothe start-script of the host. The application sudo has to be installed on yoursystem for this to work.
Also, this may cause problems when the term for the host is set to “xterm”.Users can’t normally open windows in others’ X sessions.
• owner user|uidHere, the purpose is to build the host for somebody else. Building as rootis faster then as a regular user. With this keyword, you can build a projectwhere ownership is spread among several users. These user can then startand stop those hosts themselves as long as their project points to the samefolder (this can be set with the -P dir option at command time too).
• group user|uidsets the group ownership on the filesystem image. This one is most usefulfor switches that are started as root but you want write access for other usersthat are in a special group too.
Switches that have external sockets but run as a specialized user need to have writepermission in the folder where the socket is stored. Further, MLN does not createthose users, they have to exist beforehand.
38

8.0.1 Example: Starting as root, but running as someone else
Part of the network setup is done in the actual start-script for a host, so running thescript itself as root can prove convenient.
global {project own-test}
switch lan {group uml-net
}
superclass host {
sudo mln-usergroup uml-net
term screen
network eth0 {switch lan
netmask 255.255.255.0broadcast 10.0.0.255
}}
host te1 {superclass host
network eth0 {address 10.0.0.1}
network eth1 {tun_iface owtesttun_address 192.168.0.1address 192.168.0.2netmask 255.255.255.252gateway 192.168.0.1
}
}host te2 {
superclass host
network eth0 {address 10.0.0.2}
}
In this example, the entire project is built and started as root, but the running in-stances will belong to the user called mln-user. One of the hosts, te1, has an extranetwork interface connected to a tunnel device. This is set up properly by MLN aslong as the project is started as root.
39

The screen and the host processes will belong to mln-user and he can connect to itsconsole.
40

Storage
41

Chapter 9
Using the iSCSI plugin for Xenenabled MLN servers
ISCSI is an exiting storage area network (SAN) technology, which enables you toshare block devices over a network. A block device, as opposed to a filesystem, willbe viewed by the client as a new device. All IO will be passed on directly to thatdevice and no local filesystem caching will be done. It is connection based, whichmeans you set up one connection per shared device. Using iSCSI has becomepopular with regard to virtualization because of its stability and performance.The MLN iSCSI plugin enables you to utilize an iSCSI SAN backend with MLN. Itcan use iSCSI targets which are set up users, or it talks to a daemon backend whichwill dynamically deploy new iSCSI shares using LVM to partitions on one or morebackend servers. This allows a very flexible way to deploy new virtual machineswith centralized storage, a prerequisite for live migration. Once everything is setup, you can easily deploy new projects and all the iSCSI parts will be taken care oftransparently.This guide will explain the following topics:
• How the MLN plugin works
• Setting up a backend iSCSI server for use with MLN
• Installing iSCSI software and the plugin on MLN servers
• How to use the MLN plugin with iSCSI hardware
• Additional notes on administering iSCSI-based virtual machines
9.1 The iSCSI backend server
The backend server is any Linux machine running the iscsitarget software, whichis available for many different recent Linux distributions, such as Ubuntu 8.04. Italso resides over a LVM volume group, which will be the repository for the VMs
42

disks. In addition, the backend server may have a set of MLN filesystem templatesstored locally for ease of deployment. This is not a requirement, however. Finally,the backend server also runs a simple daemon which will accept requests from eachMLN server when new VMs are built. You can set up any machine as a server andalso have several servers function this way.
Linux server with iscsitarget software
Dynamically managedLVM volumes iSCSI connections
MLN servers
VMswith iSCSI
VMs withoutiSCSI
plugin backend
Dynamic iSCSI managementusing a Linux backend server
Figure 9.1: The iSCSI backend daemon and iscsitarget software will transform aLinux server into a dynamic backend for filesystem storage.
43
9.2 How the build process works with the iSCSI plu-gin
The goal of the plugin is to handle automatic creation and connections to iSCSItargets. This should happen in a transparent way to the user. Here follows a de-scription of what happens under the hood:
1. A new project is built on one of the servers, containing a host with theiscsi [server] line. For example:
global {project iscsitest
}
host example {xeniscsi sanserver
}
2. During the build process, the iscsi.pl plugin will be run and it will look forthat line. If found it will send a message to the iscsi-backend daemon runningon the iSCSI backend server. The message sent to the server will contain thefollowing information:
• The name of the project
• The name of the VM
• The size of the filesystem
• The template used
3. The iscsi-backend.pl daemon does not care about projects, only disks. Uponreceiving the message It will go ahead and create a LVM volume called “ex-ample.iscsitest” with the required size. Next it will check if it has a localcopy of the template used. If so, it will copy it on the volume and resize it. Ifnot, it will leave the volume as is and expect the MLN server to copy the tem-plate over at a later time. This will certainly be an impact on the network, sofor larger templates which are used often, it is strongly recommended to keepa copy on the iSCSI backend server. After the disk is ready, a new volumeis dynamically added to the iscsitarget software using the ietadm commandand the corresponding information written to /etc/ietd.conf in case of servicerestarts and reboots. A message is sent back to the MLN server saying if thedisk was created and also if a local template was found. In addition, a iSCSIURI is returned, which the MLN server can use to connect to it.
4. Once the message is received on the MLN server that the process is completeit will connect the iSCSI volume using the open-iscsi initiator software. The
44

disk is then mounted up and MLN can continue to configure the filesystemaccording to its specification. When the configuration is done, the disk isunmounted and the iSCSI connection is closed. The start and stop scriptswill also be edited by the plugin so that every time the VM is started orstopped, the connection will be established or closed respectively.
9.3 Using the MLN iSCSI plugin with iSCSI hardware
Some users have iSCSI hardware running at their site instead of a Linux server.Naturally, they can’t use the approach where they install software and have volumescreated dynamically. That changes the the way in which the plugin functions.Instead, the user will have to create the disks manually and share them using theinterface of the iSCSI hardware. Once these disks are created, the user needs todecide which virtual machines use which disks.
iSCSI connections
MLN servers
VMswith iSCSI
VMs withoutiSCSI
Using iSCSI hardware withpre-allocated disks
iSCSI hardware
pre-allocated disk partitions
Figure 9.2: The iSCSI plugin can also be used together with iSCSI hardware werethere are pre-configured targets.
45

The MLN syntax will be slightly different in this case. Say the user has setup some shares on the iSCSI hardware box called iqn.example.org:mln.vmdisk.1,iqn.example.org:mln.vmdisk.2 and so on. For the host “example”, vmdisk.1 ischosen as the drive. The syntax now looks the following:
host example {iscsi sanserveriscsi_target iqn.example.com:mln.vmdisk.1
}
Note: The user needs to be sure that the disk is large enough to accommodate thetemplate.MLN will simply use this resource and not attempt to talk to the iSCSI hardwareand simply connect to the server. This may have some implications: The iSCSIplugin will now copy the template onto the disk resource and that may introduceperformance hits while this is going on.
9.4 Setting up the iSCSI backend server
These are the necessary steps involved in setting up the backend server. This hasbeen tested using a standard Ubuntu 8.04 install. If you are using iSCSI hardware,you can skip this section.
9.4.1 Create a LVM volume group
What disks you want to use is up to you. Let’s say you have only a single blockdevice, /dev/md0, which is a software RAID of some sort. But this could also be asingle hard-drive or partition.
pvcreate /dev/md0vgcreate mlnsan /dev/md0
9.4.2 Install iscsitarget
From Ubuntu 8.04 and up you can install iscsitarget from the package repositories:apt-get install iscsitargetYou can also download and install manually from http://iscsitarget.sourceforge.net.Installing iscsitarget will also install the ietadm tool which allows dynamic addi-tions of the iSCSI service.
Test the iSCSI server before moving on
Lets create a disk image and test the iSCSI software. Do the following steps andgo over the corresponding section on “Preparing the MLN servers”.
46

1. Create a volume and call it “testdisk”. Put a filesystem on it.
lvcreate -L 1GB -n testdisk mlnsanmkfs.ext3 /dev/mlnsan/testdisk
2. Start the iscsitarget daemon and find a vacant target ID number:
/etc/init.d/iscsitarget startcat /proc/net/iet/volume
Just pick a TID which was not in use by any of the existing volumes. (Ifyou only just installed iscsitarget, you will probarbly have no targets and thenumber 1 will work just fine). Use the number every time you see [number] inthe next steps.
3. Add a new target and connect the LVM volume to it
ietadm --op new --tid=[number] --params Name=testdiskietadm --op new --tid=[number] --lun=0 --params Path=/dev/mlnsan/testdisk,Type=blockio
4. Check again if the volume is shared:
cat /proc/net/iet/volume
You should now be able to see the target:
tid:[number] name:testdisklun:0 state:0 iotype:blockio iomode:wt path:/dev/mlnsan/testdisk
Move over to corresponding section “Preparing the MLN servers” 9.5 where youwill install open-iscsi and attempt to connect to this target.
9.4.3 Download the iscsi-backend script
The latest version of the backend script can be found in the Plugin section of theMLN homepage. It is a tarball containing the deamon itself and a start/stop scriptfor the /etc/init.d folder.
tar xzf MLN-iscsi-backend-*.*.tar.gzcd MLN-iscsi-backendcp iscsi-backend /usr/local/bincp init.d/iscsi-backend /etc/init.d/
The script contains its own configuration, so before you run it, you need to edit thescript. This is covered next.
47

9.4.4 Configure iscsi-backend and define security boundaries
The script needs to be made aware as to what LVM volume group to use and whatIPs to accept requests from. Changing these settings is done very quickly: Openthe script in a text editor and edit the following parts (they are onlu in the beginningof the script)
1. First you need to define the prefix name of all your iSCSI target that thescript will create:
my $ISCSI_PREFIX = ‘‘sanserver.mydomain.com:’’;
2. First you need to define the prefix name of all your iSCSI target that thescript will create:
my $ISCSI_PREFIX = ‘‘sanserver.mydomain.com:’’;
3. The \$LVM\_VG variable needs to contain the name of your volume group:
my $LVM_VG = ‘‘mlnsan’’;
4. Next, you define where the script should look for pre-uploaded templates.
my $TEMPLATE_PATH = ‘‘/mln/templates’’;
5. Finally you need to set the access permissions. The script will allow com-mands based on IP addresses or ranges which are defined in an array. Youwill have to define the IPs or ranges as perl regular expressions. Here aresome examples:
# only the IPs 10.0.0.1, 10.0.0.2 and 10.0.0.3:my @ACCESS_LIST = (‘10\.0\.0\.1’,‘10\.0\.0\.2’,‘10\.0\.0\.3’);
# The range 10.0.0.*my @ACCESS_LIST = (‘10\.0\.0\.\d+’);
# The range 10.0.0.* and 192.168.0.3my @ACCESS_LIST = (‘10\.0\.0\.\d+’,‘192\.168\.0\.3’);
Save and close the file. You are ready to try the script.
48

9.4.5 Run the iscsi-backend script
The script can be run in the foreground or in the background as a daemon. It isadvisable to run it in the foreground when you test it for the first time, in orderto familiarize yourself with the output. TO run it in the foreground, simply runiscsi-backend as a command. You will have to run it as the user root, due to the othercommands which this script execute.
If you want to run it in the background, you can either use the start script whichwas provided with the tarball:
/etc/init.d/iscsi-backend start
Or you can run it with the detach option from the command line:
iscsi-backend -D /var/run/iscsi-backend.pid
In background mode, all output will printed in the logfile /var/log/iscsi-backend. Youcan keep track of progress using this command:
tail -f /var/log/iscsi-backend
You will also find messages in syslog regardless if it is run in the fore- or back-ground. The messages contain less output then the main logfile, but keep youposted on the general activity. Here is an example of the daemon starting and afilesystem being created:
Nov 27 14:42:41 sanity iscsi-backend[6950]: MLN iSCSI backend (v. 1.0) on mlnsan [ 81.90G left]Nov 27 14:43:45 sanity iscsi-backend[6950]: sa9client.sa9 created,size 3.77GB - time: 50s
In order to stop the backgrounded daemon, you can use this command:
/etc/init.d/iscsi-backend stop
9.4.6 (Optional) Create local repository of templates
In order to reduce the impact on the network when building a new VM, it is stronglyrecommended to copy templates which you use often to the backend server. De-cide upon a directory where you want to put them, and simply transfer them usingsomething like scp. Make sure to specify the location in the iscsi-backend script(look in the configuration section of the script).
49
my $TEMPLATE_PATH = ‘/mln/templates’’;
You can use whatever method to copy the templates, i.e scp. Make sure they arenot compressed.
9.5 Preparing the MLN servers
The MLN servers are the servers which run the MLN software and the virtualmachines. There are only few steps necessary to make iSCSI work on them. Thishas been tested on Debian 4.0.
9.5.1 Download and install the open-iscsi software
The open-iscsi project is under active developement and using one of the stablereleases from their site might be a better choice than the package that follows thedistribution. During the time of writing, version 2.0-869 worked best in our setup,so here follows the steps to install it:
1. Download the latest stable open-iscsi package.
wget http://www.open-iscsi.org/bits/open-iscsi-2.0-869.2.tar.gz
2. Install a compiler and header files. Note: Make sure you use the correctheader files depending on your Xen Dom0 kernel.
apt-get install gcc linux-headers-2.6.18-6-xen-amd64
You can get the correct kernel version by running the uname -a command.
3. Compile and install
tar xzf open-iscsi-2.0-869.2.tar.gzcd open-iscsi-2.0-869.2makemake install
It is advisable to double-check the version number both on the open-iscsi service andthe iscsiadm tool before moving on.
iscsiadm -V
50

Should produce:
iscsiadm version 2.0-869
And for the service:
/etc/init.d/open-iscsi startgrep iscsi /var/log/syslog
Should produce (amongst the entire output):
Nov 28 15:00:02 legolas iscsid: transport class version 1.1-646.iscsid version 2.0-869
Now that iSCSI is running on the server, it is time to test if we can connect to thebackend iSCSI server.
Test the iSCSI connection before moving on
If you followed the instructions above in Section 9.4.2, you should now be able toconnect to the disk you created on the server. In the following instructions, makesure that sanserver is exchanged with the name or IP address of the server runningthe iscsitarget software.
# Connect to the iSCSI targetiscsiadm -m node -T testdisk -p sanserver -o newiscsiadm -m node -T testdisk -p sanserver -l
Check if the session is active:
iscsiadm -m session --show
Should produce something like:
tcp: [137] [sanserver]:3260,1 testdisk
The name of the disk-device will vary, based on the order of iSCSI devices con-nected. Instead of using the devices /dev/sdX it is better to get the accurate namefrom /dev/disk/by-path/. As a last check, lets mount the disk:
mount /dev/disk/by-path/ip-sanserver:3260-iscsi-testdisk-lun-0 /mnt
If this was successful, you are ready to proceed. However, it may be a good idea toclose the connection first:
51

umount /mntiscsiadm -m node -T testdisk -p sanserver -uiscsiadm -m node -T testdisk -p sanserver -o delete
Verify that the session is closed:
iscsiadm -m session --show
The session should now be gone.
9.5.2 Install the iscsi.pl plugin
The latest version of the MLN iSCSI plugin can be found on the plugin section ofthe MLN homepage. If you want to see if the plugin is installed and what version,you can run the following command:
mln write_config
The command will print out the configuration and default values. At the end of theoutput, look for:
iSCSI backend plugin version X.X
If the plugin is not installed, simply download the iscsi.pl plugin from the MLNhomepage and copy the plugin to MLNs plugin directory:
cp iscsi.pl /etc/mln/plugins
Repeat the mln write_config command.
9.5.3 Setting up san_path in mln.conf
This step is necessary if you plan to use serveral MLN servers and you want tolive-migrate virtual machines between them. MLN does not understand by de-fault which machines are conencted to an external storage. For MLN to understantthat disks shared by iSCSI are network shared, you need to provide a hint in the/etc/mln/mln.conf configuration file, add the following line:
san_path /dev/disk/by-path/ip-
This line will explain to MLN that all the locations of disk drives that start with/dev/disk/by-path/ip- are on a SAN. You are now ready to test iSCSI using MLN.
52
9.5.4 Building a project using the iSCSI plugin
This example project consist of only one virtual machine with its disk connectedthrough iSCSI.
global {project mini
}
host me {xeniscsi sanserver
}
Before you build, make sure the iscsi-backend daemon is running on the sanserver.
mln build -f mini.mln
Amongst the output you should see som iSCSI-realated lines, such as:
---> meISCSI plugin enabledTemplate Debian-3.0r0-V1.1.ext2Contacting sanserver for ISCSI partitiongot sanserver:mln.me.mini, but need to copy template manuallyWaiting for block device to appearCopying image with dd to iSCSI device, please wait.210668+1 records in210668+1 records out107862336 bytes (108 MB) copied, 23.7579 seconds, 4.5 MB/sRunning fsck on filesysteme2fsck 1.40-WIP (14-Nov-2006)Resizing filesystemresize2fs 1.40-WIP (14-Nov-2006)iscsi_createFilesystem did filesystem creationISCSI plugin enabled for mountFilesystem actionWaiting for block device to appearConfigure host XenImporting modules from: /lib/modules/2.6.18-6-xen-686Adjusting /etc/inittab for XENWriting XEN configuration file for me, doneISCSI plugin enabled for umountFilesystem action+---> PROJECT mini FINISHED
Although the iSCSI plugin will display extra information, most of the details arehidden. One interesting part of the output is the result of the dd command. This willbe invoked if the template is not stored beforehand on the sanserver and means thatthat the MLN server is now pushing the template over the iSCSI connection ontothe new disk. This process may put some strain on your network. It is thereforestrongly recommended to put a copy of often-used filesystems om the sanserver as
53

described in Section 9.4.6.
It is now possible to boot the virtual machine:
mln start -p mini
This should produce the following:
Connecting to iSCSI target sanserver:mln.me.miniStarting me.mini in screen
The virtual machine should boot normally. You can connect to it and verify that itcam up properly.
To shut down the virtual machine, run:
mln stop -p mini
This will output the following:
me... OKInitiating background wait loop before disconnecting iSCSI device
The last line needs a bit of explanation. The MLN servers are not connected to allthe iSCSI filesystems all the time. In fact, only when the virtual machine is started,the iSCSI connection is initiated. Likewise, when a virtual machine is stopped,the connection is terminated. However, we cannot simply shut down the iSCSIconnection whlie the virtual mahcine boots down. Instead we need to wait for ituntil it has gracefully shut down until we terminate the iSCSI connection. This isachieved by starting a background process which will check the virtual machinesstatus every 3 seconds until it is down. Once it is gone, the process will terminatethe connection and itself.
This works also if you choose to destroy a virtual machine. In that case the waitwill be very short.
9.6 Working with iSCSI - Some useful notes and tips
Before this chapter is at an end, we have collected some notes which should beuse-ful for admins and users who wish to run virtual machines using iSCSI. If youare unfamiliar to iSCSI, we highly recommend you glance over the topics listedunderneath.
54

9.6.1 Keeping track of iSCSI sessions
You may at times wonder what MLN servers are connected to what disks and alsowhich volumes are shared by the iSCSI backend at any moment. This informationmay be important if some virtual machines have gone down without your know-ing1. In those cases, the iSCSI connection may still be there even if the VM isdown. On the MLN servers, the following command will show you what sessionsare currently registered:
iscsiadm -m session --show
On the iSCSI backend using iscsitarget, you can check both which volumes areshared and which sessions are active. This information is located in two files inthe /proc directory. In order to view all sessions, type the following:
cat /proc/net/iet/session
If you want to get more information about the volumes which are shared in thossessions, type:
cat /proc/net/iet/volume
9.6.2 Manually connecting to an iSCSI volume
MLN will automatically disconnect from an iSCSI volume and remove all tracesof it once the VM is taken down using the mln stop command. If you wish tomount the filesystem on your MLN server in order to inspect it or run a filesys-tem check on it, you need to connect to the iSCSI volume manually. This is nothard. The only information you need is the name of the volume, which you canget by looking at the /proc/net/iet/volume file on the iscsi backend server. If the nameis example.com:mln.me.mini, and the name of the iscsi backend server is sanserver, thenyou can connect using the following command:
iscsiadm -m node -T example.com:mln.me.mini -p sanserver -o newiscsiadm -m node -T example.com:mln.me.mini -p sanserver -l
Take a look at the next section in order to mount the virtual machines disk, afteryou have connected. You may disconnect using the following commands:
iscsiadm -m node -T example.com:mln.me.mini -p sanserver -uiscsiadm -m node -T example.com:mln.me.mini -p sanserver -o delete
1Like if the users have run the poweroff command inside the VM
55

9.6.3 Location of iSCSI disks devices on MLN servers
Normally, when you conenct to an iSCSI volume, you will have a disk device cre-ated for you which looks like your other disks, like /dev/sdg and so on. But this mayeaslily lead to confusion if you have many different devices conencted in differentorder. After a while you will loose track of which of these devices correspond towhat virtual mahcines disk.
A better way to access the devices, is to use one of their more proper names. Thesenames can be found in the /dev/disk/ folder. The most readable of the names are theones underneath the by-path subfolder. All iSCSI connected disks will begin withip- and contain the name of the volume too. This way it is very easy to see whichone belongs to what VM. As an example, the disk corresponding to the VM me.mini
which we created above will have the device like
/dev/disk/by-path/ip-sanserver:3260-iscsi-example.com:mln.me.mini-lun-0
The example.com part may look diffrerent based on wow you configure the iscsi-backend
script. You can treat that disk like any other disk device and mount it:
mount /dev/disk/by-path/ip-sanserver:3260-iscsi-example.com:mln.me.mini-lun-0 /mnt
Remember, that if this is a disk for a fully virtualized virtual machine, you need tojump past the partitioning table and master boot record:
mount -o offset=32256 /dev/disk/by-path/ip-sanserver:3260-iscsi-example.com:mln.me.mini-lun-0 /mnt
9.6.4 Restarting the iSCSI service - beware!
Many online howtos which describe adding new volumes to the iscsitarget serviceuse the same basic approach:
1. Edit /etc/ietd.conf and add the new volume to be shared.
2. Restart the iSCSI service:
/etc/init.d/iscsitarget restart
This method works if you previously had no targets or sessions running. If youalready have virtual machines which are running over iSCSI it is advised not torestart the service. The potential consequence is that the MLN serverl hickups itssession to the volume and that the virtual machine will be unable to do IO to the
56

disk for a period of time. The virtual machines reaction to this is to switch thefilesystem into read-only mode. A mode it will not recover from until you haverebooted the virtual machine.This type of error can be very hard to spot from the outside, because the virtual ma-chine will still respond to PING packages and let you log into it. However, someservices inside the virtual machine may break and that is how you probarbly willnotice it.
The best course of action is to not restart the iscsitarget service if you have runningvirtual machines. If you need to add volumes manually, then look at the iscsi-backend script and how it uses the ietadm command to dynamically add volumeswithout restarting the service.
9.6.5 Number of threads per iscsitarget on the backend server
In the default setup of iscsitarget, every shared volume will use eight threads. Thisis from the moment it is shared, not only when there is a connection from a MLNserver. This may lead to a very high number of processes on the iscsi backendserver and is something one should take into account. With 50 volumes, 400threads will be on your system only for them.Linux is powerfull enough to handle this, but you should make sure you haveenough CPUs to cope with it. If you start seing performance issues as the num-ber of volumes increases, you should also keep an eye on the number of contextswitches your system is performing every second. Tools like Munin may give youa nice overview over how the operating system is doing.
9.6.6 More than one iSCSI server
You can limit the pressure on the iscsi backend server by setting up more servers.You can follow the exact same procedure as described above to set up additionalservers. From MLNs point of view, the iSCSI server is the value following the iscsi
keyword.
57

Linux server
iSCSI connections
MLN servers
VMswith iSCSI
VMs withoutiSCSI
Hybrid approach using bothLinux backends and hardware
iSCSI hardware
Figure 9.3: The iSCSI plugin is not exlusive in terms of backends. You can useseveral backends, both hardware and more dynamic ones.
You can even use different iSCSI servers for different virtual machines in the sameproject:
global {project example
}
host one {xeniscsi sanserver1
}
host two {xeniscsi sanserver2
}
9.6.7 Backend network for improved performance and security
For added security, it is advisable to keep all the iSCSI traffic on a sepparated new-tork which is not reachable from the internet. This will also greatly reduce therisk that a virtual machine which is very active on the network degrades the diskperformance of all the virtual machines. Most production environments today havesepaprated storage networks.
It is also advisable to have good network cards with solid drivers on this backend
58

network. Using the ifconfig command, look for dropped packages on the devicepointing to the storage network.
59

Chapter 10
Using MLN in Amazon’sElastic Computing Cloud(EC2)
IMPORTANT: Using Amazon EC2 costs money
Although it is free to create an account in EC2, actual usage will becharged on your credit card. Using MLN to manage instances in EC2will therefore also result in usage and, subsequently, money charged.MLN can not be held responsible for what you spend on EC2 and youuse the software on your own risk. It is strongly advised to keep a closeeye on your instances in EC2 at all times.
Cloud computing is becoming a buzzword now that virtualization technologieshave established themselves in the marked. This infrastructure-for-sale conceptcan be a valuable resource for researchers and business, looking for a quick way todeploy numerous systems, often for a short period of time, without managing theserver hardware.The ability to utilize such frameworks is of importance for researchers and engi-neers who need to deploy test systems rapidly or to enhance local server capacityby scaling the number of compute nodes for a business infrastructure. Knowinghow cloud frameworks work is essential for designing and developing autonomicarchitectures which can run on top of them.Amazon’s Elastic Computing Cloud (EC2) is a popular Xen-based cloud comput-ing framework for businesses, private and research. It consists of a set of servicesand an API which offer a degree of flexibility and pricing along with a increas-ing wealth of tools to manage its virtual machine instances. The pay-as-you-gophilosophy enables users to experiment with little cost.This chapter teaches you how to manage virtual machines in the EC2 cloud the
60

same way as you would manage local Xen instances through the common MLNcommands. MLN’s design features such as projects, templates and plugins workwell with EC2 and expand the functionality of what EC2 alone offers. While mosttools only let you manage instances manually, setting up 10 instances each withspecial permanent storage attached to them can become cumbersome. MLN letsyou automate most of the process, and is therefore especially suited for larger de-ployments.
Server / Desktop
Amazon EC2
Server / Desktop
Amazon EC2
Server / Desktop
Amazon EC2
Run Xen VMs managed by MLN on your server or desktop
MLN can transfer the VMs to the Amazon cloud and lets you start/stop/remove instances with regular MLN commands
The VMs can be "migrated" back to your server for updates and changes before they are yet again transferred back to the cloud.
Figure 10.1: The MLN EC2 plugin allows you to migrate virtual machines intoEC2 and manage them like regular MLN projects.
With the MLN plugin it is also possible to migrate Xen instances from your localserver and into the EC2 cloud. This has many applications, such as creating a smallcluster locally and moving it into the cloud only when you need lots of processingpower and are prepared to pay for it. Also, it is possible to transparently increasevirtualization capability by building temporary virtual machines in the cloud andusing them to support local infrastructure while your local servers are already filled
61

up with virtual machines.
10.1 Amazon Elastic Computing Cloud
This section is for those who are unfamiliar with the EC2 framework. Also, notethat some details may have changed over time and as a result, the information inthis manual may not have been properly updated yet.
10.1.1 Instance types and machine images
In Amazon jargon, a VM is called an instance. Normally, you would define thehardware setup of a new virtual machine based on your needs, but in EC2 you areleft with picking from specific choices. The types differ in amount of memory,storage space, CPUs and EC2 compute units. A Compute unit is simply a mea-surement of the power of the CPU, different from GHz. One EC2 compute unit(ECU) corresponds to about 1.0 - 1.2 GHz 2007 Xeon processor.
Every instance will have its root partition on a relatively small disk partition (max10GB). In addition, they have one or two disks with much more capacity attachedto the VM. You can specify the mountpoint in through the MLN EC2 plugin.
There are currently five instance types to chose between: The difference in comput-
Type Arch Memory Disks CPUs and ECUsStandard Small(m1.small)
i386 1.7G 1 x 160 GB 1 CPU with 1 ECU
Standard Large(m1.large)
x86_64 7.5G 2 x 420 GB 2 CPUs with 2 ECUs each
Standard Extra Large(m1.xlarge)
x86_64 15G 2 x 845 GB 4 CPUs with 2 ECUs each
High-CPU Medium(c1.medium)
i386 1.7G 1 x 350 GB 2 CPUs with 2.5 ECUs each
High-CPU Extra Large(c1.xlarge)
x86_64 7G 2 x 845 GB 8 CPUs with 2.5 ECUs each
ing power and storage space is quite large. A small instance is suitable for a rarelyused service or for a service which requires little power. The larger instances haveconsiderably more power both in terms of ECUs and memory and can be utilizedfor computations on an on-demand basis. Each of these types have different costs,which we will review in a later section. This means that in order to minimize ex-penditure, you should pick an instance which is as close to your needs as possibleand not over-provision.
62

10.1.2 Amazon machine images (AMI)
When creating a new virtual machine, one also picks what filesystem it is beingbooted from. In EC2 these filesystems are called AMIs (Amazon Machine Im-ages). EC2 does not support booting from a CD or install media and installing ona blank disk. You have to have ready-made filesystems.
All EC2 users can create and upload their own AMIs, which are nothing short ofregular VM filesystem images. The actual uploading and storage is slightly morecomplicated, and utilizes the Amazon Simple Storage Service (S3). All EC2 usershave an account on S3 as well. Once you have uploaded a machine image, it willbe given a unique identifier of the form ami-[random text and numbers], like ami-4338df2a.You use this identifier when you wish to boot an instance of it. MLN will handlethese instances for you.
It is possible to make these AMIs available to other EC2 users. Tools such asrightscale.com or the elasticfox plugin to Firefox, lets you browse these and createinstances from them directly.
It is important to note, that no changes which an instance makes to the AMI willbe saved when the instance shuts down. This enables that you can boot multipleinstances from the same AMI. We will discuss this in section 10.1.5.
10.1.3 Networking, Elastic IPs and Security groups
EC2 only supports DHCP on the virtual machines. This means that you cannotassign fixed internal IPs to each instance directly. Further, it means that each timean instance is booted, its address will have changed.
Each instance is given two addresses: one private, which is the IP address whichthe VM knows about through DHCP, and a public one which can be used to contactthe VM from the outside. Each VM instance is also part of a security group. Youcan look at security groups like a set of firewall rules which apply to that particularVM. These firewall rules address the port, subnets and protocols which are allowedto access the instance through its publicly routable address.
There are ways to get a fixed address to your instance. One alternative is to usea dynamic DNS service, like dyndns.org. The other alternative is to subscribe toso-called elastic IPs which are offered by the EC2 framework. Every user cancurrently have a maximum of 5 elastic IPs per region (but you can apply for more).If you assign one of your elastic IPs to a running instance, it can be reached throughthat address. However, this does not change the instance’s internal address. Also,because of the scarceness of IPv4 addresses, you are charged for the time you havean unassigned elastic IP address. This means, that you don’t pay for it as long asyou are utilizing it.
63

Internal IP through DHCP
External, routable IP
?
Assignedelastic IP
Un-assignedelastic IP
Outside EC2 Inside EC2
Filtering based on security group
?
?
Internet
Instance A
Instance B
Figure 10.2: Each instance has an internal IP which it got from DHCP. The externalIP is random as well and enable outside contact to the instance. Elastic IPs can beused to assign a fixed routable IP address to a running instance.
10.1.4 Permanent storage through Volumes
Since no changes are being stored to the AMI, where are you going to save yourdata? EC2’s answer to this is to use their Elastic Block Store (EBS) to create diskvolumes which are permanent. These volumes can be attached to running instancesand mounted, using them as a fixed storage point.
EC2 supports making snapshots of EBS volumes and reverting back to them. Thisis convenient way of taking backup of your data.
EBS volumes can only be attached to one instance at a time. It can not be used asa distributed storage amongst several instances. Also, the instance has to run in thesame availability zone as the volume in order attach to it.
10.1.5 How will a VM differ in the cloud from when it is on yourserver?
One should spend some time and think about the difference between what a VMin EC2 and the same running on your local machine. Here is a list of the mostimportant differences:
• No changes to the VMs filesystem will be savedYes, this is a potentially big deal. Once the instance is shutdown or hascrashed, all the stored data will be gone. This means that you need to thinkclosely about how you are going to handle permanent data. EC2’s answer
64

to this is to create EBS volumes, which are permanent and can be attachedto running instances. The MLN EC2 plugin can automate this for you. Onepositive side to this, is that for multiple, similar instances, you only need onemachine image. So for a cluster of 32 compute nodes, only one AMI needsto be uploaded.
Some have come up with a neat workaround to this issue, by putting theirsystems filesystem into an EBS volume and booting only a minimal in-stance which pivot-roots into the EBS volume. This way you can get per-sistent images with a little tinkering. Read the forum thread for more info:http://developer.amazonwebservices.com/connect/thread.jspa?threadID=24091&start=0&tstart=0
• Only one NIC and no fixed internal IPSThe consequence is that you will have a hard time pre-configuring servicesto use specific IP addresses. You will also have difficulties creating internalnetwork topologies since you only have one NIC. The MLN EC2 pluginsupports assigning elastic IPs but there is also a dyndns plugin which can beused.
• Fixed root partition and hard drivesAll instance types have specific disk sizes and numbers. You have to be smarton how to mount them at boot time. For instance, if you have an image withusers already on it, you cannot simply mount a disk on /home as that wouldblind the existing home directories. The MLN plugin supports specifyingthe mount points of the disk drives.
Still, with these limitations, EC2 seems to be a popular choice among engineers.Once one is familiar with them and knows a few workarounds, systems can still becreated which function pretty well in the cloud.
10.1.6 Regions and Availability Zones
The entire cloud spans two continents. Significant difference in network times canbe achieved based on where you chose to locate your instances. Currently, tworegions exist: US and EU, called us-east-1 and eu-west-1 respectively. Each ofthese regions consist of so-called availability zones.All availability zones are physically and network-wise separated so that an outagewould only affect nodes within the affected zone. Instances will be put into zonesand it is advisable to put instances which are going to communicate heavily intothe same zone. It is not possible to "share" the same zone as a different EC2 user.In fact, the actual zone mapping is different between users.
65

a
c
ba
b
EC2Region: us-east-1
Zones: us-east-1a us-east-1b us-east-1c
Region: eu-west-1
Zones: eu-west-1a eu-west-1b
Figure 10.3: The entire EC2 framework is divided into two regions, US and EUwith three and two availability zones respectively.
10.1.7 Pricing
Getting a user account on EC2 is free and no usage will result in no charges. Thisis a benefit with EC2, since it allows gradual and careful experimenting before onecommits larger amounts of money to it.
EC2’s pricing is based on usage and uptime metrics on the different services theyoffer. The more powerfull, complex your instance is, the more you pay. The morenetwork in and out of the cloud, the more you pay. One interesting thing is that youpay for the time the instance is up, not the amount of CPU cycles it has consumedwhile being up. This means that an instance which no-one uses practically seepsmoney. The new type of system administrator needs to be smart about this andcreate dynamic deployments which are only up when they are supposed to be used.This ability strongly affects the end-outcome on your monthly bill.
The following prices are based on numbers gathered in March 2009:
• Instances, per hour
Region US EUType Linux/UNIX Windows Linux/UNIX Windowsm1.small $0.10 $0.125 $0.11 $0.135m1.large $0.40 $0.50 $0.44 $0.54m1.xlarge $0.80 $1.00 $0.88 $1.08c1.medium $0.20 $0.30 $0.22 $0.32c1.xlarge $0.80 $1.20 $0.88 $0.128
• Data TransferThis is "in" and "out" of Amazon EC2 itself. (Not traffic from instancesthemselves.)
66
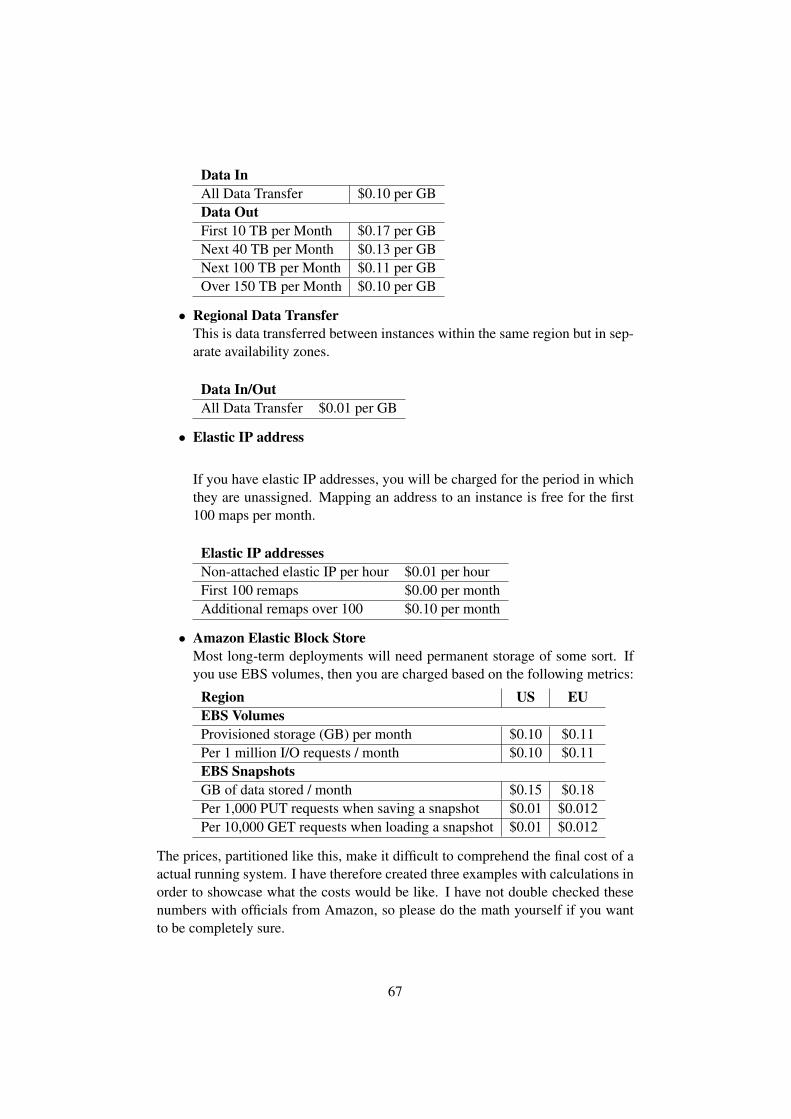
Data InAll Data Transfer $0.10 per GBData OutFirst 10 TB per Month $0.17 per GBNext 40 TB per Month $0.13 per GBNext 100 TB per Month $0.11 per GBOver 150 TB per Month $0.10 per GB
• Regional Data TransferThis is data transferred between instances within the same region but in sep-arate availability zones.
Data In/OutAll Data Transfer $0.01 per GB
• Elastic IP address
If you have elastic IP addresses, you will be charged for the period in whichthey are unassigned. Mapping an address to an instance is free for the first100 maps per month.
Elastic IP addressesNon-attached elastic IP per hour $0.01 per hourFirst 100 remaps $0.00 per monthAdditional remaps over 100 $0.10 per month
• Amazon Elastic Block StoreMost long-term deployments will need permanent storage of some sort. Ifyou use EBS volumes, then you are charged based on the following metrics:
Region US EUEBS VolumesProvisioned storage (GB) per month $0.10 $0.11Per 1 million I/O requests / month $0.10 $0.11EBS SnapshotsGB of data stored / month $0.15 $0.18Per 1,000 PUT requests when saving a snapshot $0.01 $0.012Per 10,000 GET requests when loading a snapshot $0.01 $0.012
The prices, partitioned like this, make it difficult to comprehend the final cost of aactual running system. I have therefore created three examples with calculations inorder to showcase what the costs would be like. I have not double checked thesenumbers with officials from Amazon, so please do the math yourself if you wantto be completely sure.
67

Amazon offers a monthly pricing calculator for cost estimation:http://calculator.s3.amazonaws.com/calc5.html
Example: Small server with little traffic
Let’s assume you want to run one small instance which is up all the time and hasonly about 3GB of network traffic each month. The uploaded filesystem bundleis 1,5 GB. The running instance has two volumes, one for logfiles (5GB) and theother for users (20GB).
We will disregard the cost for keeping the AMI in S3, which would be $0.376 eachmonth. The remaining cost for this instance is shown in the table below.
The numbers are rounded in the output for the sake of formatting. The most
Storage Network Uptime TotalMonth Year Month Year Month Year Month Year
US $2.5 $30 $0.406 $4.87 $74.4 $892.8 $77.31 $927.7EU $2.75 $33 $0.406 $4.87 $81.84 $982.1 $85.0 $1019.95
striking finding in this example is the dominance of uptime costs for the instancerelative to storage. If one would find a way to schedule the instance’s uptime as toonly be up when really needed, the cost can be cut dramatically. Also notice, thatthe EU is close to %10 more expensive than US.
Example: Website with lots of traffic and permanent storage
In the next example, we will consider a larger site with three webservers, eachrunning a type c1.medium instance. In addition there is a database server of typem1.large. Each of the webservers have 5GB volumes for logfiles and 2GB vol-umes for web content. The database has a 50GB volume for logging and a 100GBvolume for the database. The expected traffic totals to 5GB in and 30GB out permonth for the entire site.
Again, we disregard the cost of keeping the S3 machine images and the smallinvestment it was in uploading them to S3.
Storage Network Uptime TotalMonth Year Month Year Month Year Month Year
US $17.1 $205.2 $5.6 $67.21 $744.0 $8928 $766.7 $9200.4EU $18.81 $225.72 $5.6 $67.21 $818.4 $9820.8 $842.8 $10113.7
Again, the costs for uptime dwarf the costs for storage and networking. Eventhough we have simplified the calculation and disregarded volume snapshots forbackups, something which would be very likely, the uptime for four semi-powerfulinstances contributes to over %97 of the total estimate. This should be especially
68

concerning if the site is not fully utilized most of the time. Unfortunately this isthe common scenario for most sites. Sysadmins, therefore, need to be smart abouttheir deployments and scale based on the actual need instead of leaving everythingon all the time.
Let us now assume, that the sysadmins are able to boot up webservers based onthe actual usage. As a result only one webserver is needed %70 of the time whiletwo webserver were running %20 of the time and only %10 of the total time calledfor all three webservers to be up. In the original calulation, the number of machinehours for the three webservers was calculated as follows:
24 ∗ 31 ∗ 3 = 2232
With the scaling of the system, we have instead:
24 ∗ 31 ∗ (1 + 0.3 + 0.1) = 1041.6
The difference is 1190.4 compute hours, corresponding to a reduction in cost of$238.08 per month and $2856.96 annually for the US. So with simple starting /stopping of instances according to the load can reduce the total cost with %31 inour case. Again, these numbers are only examples and one should always do theanalysis based on local factors. However, it is obvious that these kind of reductionsare the holy grail for many admins (and sales people). One rarely goes into thediscussion of how many man-hours are needed to manage a dynamic site ratherthan keeping the static one, something which can be costly to overlook.
Example: 16 node (128 CPU) cluster which is only used when needed
In this example, we are interested in an on-demand cluster. Imagine a case wherea small company needs computing power only on special occasions and that theycannot afford to buy and maintain their own infrastructure. This could be a mediacompany which create small animated movies like commercials or documentaries.Their solution is to use EC2 to boot up their 16 node render farm each time some-one has to render a movie.
The render farm consists of 16 c1.xlarge instances, the most powerful EC2 offers.This gives a sum of 128 CPUs (or cores) and 112 GB of RAM to the cluster. Everynode has 1GB of permanent storage for logs. In addition, there is a manager nodeof type c1.medium. Its job is to provide a VPN link to the companies network andmanage the compute nodes. The traffic is relatively small, except when a largermovie in high quality is completed and subsequently downloaded into the compa-nies network before the cluster is shut down. In case the download should fail, weassume a 150GB storage for the manager node for eventual downloads. Note, thatthe compute nodes can be shut down as soon as rendering is completed and onlythe manager node stays up for the duration of the download of the movie. The
69

network speed between EC2 and the company is measured at 6 Mbit.
Calculating the cost per month makes no sense here, so we will calculate it foreach job instead. Lets imagine a rendering job which takes 5 hours to complete.The result is a movie file of 4.7 GB. We assume the size of the job is 150 MB.Uploading the job to the manager node takes less than 5 minutes. Downloading theresulting file will take approx. two hours.
Region Storage Uptime Network Total per jobUS ($15*) $65.6 $0.872 $66.47EU ($16.5*) $72.16 $0.87 $73.03
Table 10.1: * the price for the EBS volume is per month and not per job
This example is a very good case for cloud computing as a concept. The abilityto rent large amounts of infrastructure for short periods of time can be very cost-effective. Only $66 to render a movie in a 128 CPU cluster sounds cheap (thoughI am not a rendering expert.) Notice that the cost of the EBS volume is in thetable, but not in the sum at the end. The reason is that the cost of the volumewill be permanent each month, and not directly related to the individual job. Alsonotice, that IO requests to the volume are not part of the calculation. This is mostlybecause it is difficult to assess how many IO operations are needed.
10.2 The MLN EC2 Plugin
Amazon offers an API to their storage and cloud framework. As a result, severaltools have emerged. MLN makes use of two bundles of command line tools tomanage filesystems and instances respectively. You can practically do everythingfrom the command line once the bundles are installed and configured. However,setting up an instance and managing it can be cumbersome for more than one in-stance. One example is a lack of inherent grouping mechanism in EC2. Further,the naming scheme for all the components in EC2 (instances, machine images,volumes) makes it difficult for a human to keep track of what runs where and isconnected to who.
MLN tries to mitigate these issues by offering its management commands to theuser and keeping track of all the details under the hood. You can go and find thesedetails yourself, but most of the time they are just in the way. Through MLN youcan build a VM which is running in EC2 instead of on your local machine. Theplugin tries to be as transparent as possible, so once the EC2 command-line bundlesare installed, MLN will call the proper commands for you. This is the typical buildprocess of a new VM which is managed through MLN:
1. You specify inside that particular VM that it is an EC2 instance by adding aec2 block. (We will cover all available ec2 keywords later in this chapter.)
70

host nomad {xentemplate Debian-4.0.ext3ec2 {
type m1.small}network eth0 {
address dhcp}
}
2. During the build process this VM is built like a local VM. It gets a copy of itsfilesystem with eventual size metrics and configures it with regard to otherMLN plugins or options (users, software etc.)
3. Once the filesystem is finished, the EC2 plugin will edit some files insidethe VMs filesystem. Most notably /etc/fstab to fit with EC2s design and toadd the single or two disk drives which every instance gets. Some startupscripts may be created as well, depending on the ec2 features you are using(like attaching to a volume once the instance boots). Also, the kernel mod-ules which correspond to the kernel which EC2 is using are copied into thefilesystem. This can be either i386 or x86_64 modules based on the chosentype.
4. The filesystem is now made into a so-called bundle. This is an Amazonpackaging format necessary before the image can be uploaded. The bundleconsists of of an XML file called the manifest, and a series of part-files whichcontains and encrypted and compressed piece of the image.
5. The bundle is then uploaded into the region where the instance belongs. Thismay take time depending on the network and size of the bundle. It is there-fore wise to start with a small image first when testing.
6. The bundles are uploaded into buckets, which are like containers. Each re-gion needs its own bucket. MLN will automatically create the buckets mlneu
and mlnus for the EU and US respectively. Before the bundle can be used itneeds to be registered. When the entire process is finished, MLN will havethe ami identifier for the image and store it in the project folder.
7. Finally, start and stop scripts are created. They contain checks to see if theVM is already up and the necessary commands to create and shutdown theinstance. The instance ID is stored in the project folder if MLN managed tostart the virtual machine.
Since EC2 is based on Xen, it is recommended to use templates which you knowwork with Xen. However, it is not mandatory to have Xen installed on the systemwhich is running MLN and the EC2 plugin. If you solely want to run instances in
71

EC2, no local Xen installation is necessary (which is good news for many laptops).That said, having Xen on the local machine gives you more features, like the pos-sibility to run an instance on your machine and then move it into the cloud. This isgreat for testing, if you want to have local access to the VM first and configure itjust right before moving it out and starting to pay for it.
10.3 Getting an Amazon account
In order to use EC2, you need to create an account first and then download a setof credentials which the API tools use when they connect to Amazon. Accountcreation is done on the http://aws.amazon.com. Once your account is created, youwill need to go with your browser to "Your account" and "Access identifiers". EC2requires you to keep track of several items. It is recommended that you create adirectory, ~/.amazon, in your home folder and store these items there in order for theplugin to find them.
mkdir ~/.amazon
• Your account numberThis number represents your account. It is somewhat hidden away on thepage (upper right corner, underneath the "Sign Out" link). If you can’t findit, search for "Account Number" in the browser.Store this number in ~/.amazon/user.txt
echo ‘‘<user>’’ > ~/.amazon/user.txt
• Access key IDThis is a string consisting of letters and numbers.Store this string in ~/.amazon/access.txt
echo ‘‘<access>’’ > ~/.amazon/access.txt
• Secret Access keyIf you don’t have a key there yet, click on the "Generate" button to createone. Store this string in ~/.amazon/secret.txt
echo ‘‘<secret>’’ > ~/.amazon/secret.txt
• The X.509 Certificate file and private keyThe easiest is to make Amazon generate the certificate right there for youand to download the private and key and certificate.
72

Store the certificate as ~/.amazon/cert.pem
Store the private key as ~/.amazon/pk.pem
echo ‘‘<private-key>’’ > ~/.amazon/pk.pemecho ‘‘<certificate>’’ > ~/.amazon/cert.pem
10.3.1 Additional tools
Since the API is available to everyone, we have a range of tools to chose from,where MLN is only one option. The other tools are mainly graphical and someoffer additional features with extra cost for business. Here is a non-complete list oftools which you can use in conjunction with MLN.
AWS management console
Amazon has launched their own management console (they hadn’t before) whichis readily available for all EC2 users. The console provides easy access to most ofthe basic functionality. It can be accessed here:
http://console.aws.amazon.com
RightScale
One example of a service which offers additional features is http://www.rightscale.com.Once you have an Amazon EC2 account, you can create an account on RightScaleand manage your instances without extra cost.
RightScale has a nice interface for managing security groups.
Elasticfox
Elasticfox is an Amazon EC2 plug-in to the popular Firefox web-browser. It iseasy to set up and install and allows you to manage instances and volumes.
Command-line tools
There is no reason to forget the command-line tools which will be installed anywayif you are going to use the EC2 plugin. Many simple commands can be run justto check the status of your isntances. For example, even if there is a way to checkwhich virtual machines are up through MLN, many still use xm list because theyprefer that output. Likewise, if you want to see what EC2 instances are running,you can type ec2-describe-instances or simply ec2din.
73

10.4 Setting up EC2 command-line tools on your ma-chine
This section describes a step-by-step process of setting up the EC2 command-linetools on your system. Completing these steps is a prerequisite for the MLN EC2plugin to work properly.
1. Install curl. Some Linux distributions do not have curl installed by default:
apt-get install curl
2. Install Java runtime environment. If you are an Debian Lenny (Version 5.0.0)user, you need to download java from http://java.sun.com. The OpenJDKpacakges contain a bug (per march 2009) which makes the api tools unableto run.
If: you run Ubuntu, or any other distribution with sun Java packages, installthem with your package manager. Example from Debian Etch (4.0):
apt-get install sun-java5-bin
Else: Download the JRE binaries from http://java.sun.com, and install them.Make sure you download for the correct platform.
chmod +x jre-6u13-linux-i586.bin./jre-6u13-linux-i586.binmkdir /usr/lib/jvmmv jre1.6.0_13 /usr/lib/jvm
3. Download API-tools
wget http://s3.amazonaws.com/ec2-downloads/ec2-api-tools.zipunzip ec2-api-tools.zipmv ec2-api-tools-1.3-30349 /usr/local
Note: The actual version numbers may have changed, do not copy this textverbatim.
4. Insert credentials or follow the steps described in 10.3
mkdir .amazonecho ‘‘<private-key>’’ > .amazon/pk.pemecho ‘‘<certificate>’’ > .amazon/cert.pemecho ‘‘<access>’’ > .amazon/access.txt
74

echo ‘‘<secret>’’ > .amazon/secret.txtecho ‘‘<user>’’ > .amazon/user.txt
5. Install AMI tools
apt-get install ruby libopenssl-ruby1.8wget http://s3.amazonaws.com/ec2-downloads/ec2-ami-tools.zipunzip ec2-ami-tools.zipmv ec2-ami-tools-1.3-31780 /usr/local/
Note: The actual version numbers may have changed, do not copy this textverbatim.
6. Make everything work at next login. Edit .bashrc:
export EC2_PRIVATE_KEY=/root/.amazon/pk.pemexport EC2_CERT=/root/.amazon/cert.pemexport EC2_AMITOOL_HOME=/usr/local/ec2-ami-tools-1.3-31780export EC2_HOME=/usr/local/ec2-api-tools-1.3-30349export JAVA_HOME=/usr/lib/jvm/java-1.5.0-sun-1.5.0.14export PATH=$JAVA_HOME/bin:$EC2_HOME/bin:$EC2_AMITOOL_HOME/bin:$PATH
Note: The actual version numbers may have changed, do not copy this textverbatim. Also, if you installed Java from Sun, make sure the JAVA_HOMEpath is set correctly.
10.4.1 Test the command-line tools
Once the lines are added to .bashrc you can test if everything works from a newshell. Simply start a new shell and try the following tests:
1. Test the API-toolsThis should work without any authentication and should print informationabout the different security groups (firewall rules) you can chose from. Ifyou just created an account, only the default group will be printed. You cancreate new and change these groups yourself.
ec2-describe-group
2. Test the AMI-toolsIf the API tools worked, the AMI tools will probarbly work too, so there isno strict need to test if they work. However, if you want to be sure, or youare trying to debug a problem, this command will create a bundle for youfrom a filesystem:
75

ec2-bundle-image --batch -p test \-i /opt/mln/templates/Debian-4.0r0-V1.0.ext3 -u $(cat.amazon/user.txt ) \--cert .amazon/cert.pem --privatekey .amazon/pk.pem
Also, if you want to test wether uploading such a bundle works, the followingcommand should do the trick:
ec2-upload-bundle -m /tmp/test.manifest.xml \-a $(cat .amazon/access.txt ) -s $(cat .amazon/secret.txt ) -b mln
If the upload was a success you might as well delete the bundle after it wasuploaded in order not to waste money storing it:
ec2-delete-bundle --bucket mln --manifest /tmp/test.manifest.xml \-y -a $( cat .amazon/access.txt ) -s $(cat .amazon/secret.txt )
10.5 Download a filesystem template
If you are already using MLN, then you probarbly have some templates installed. Ifnot, then the Debian-4.0 and Lenny template have been tested and found to work inthe EC2 cloud. It is a good idea to start with a simple template first and advance tobigger templates when everything works as expected. You can download a pluginusing the command:
mln download_templates
10.6 Installing The Plugin
1. Download and install the latest version of the plugin. The plugin can befound on the plugin page on http://mln.sourcefoge.net. You can install itwith the following command:
wget -O /etc/mln/plugins/ec2.pl http://mln.sourceforge.net/files/ec2.pl
2. Download kernel modules for the default Xen 32bit kernel used by EC2
wget http://s3.amazonaws.com/ec2-downloads/modules-2.6.16-ec2.tgztar xzf modules-2.6.16-ec2.tgzmv lib/modules/2.6.16-xenU /opt/mln
76

3. Download kernel modules for the default Xen 64bit kernel used by EC2
wget http://s3.amazonaws.com/ec2-downloads/ec2-modules-2.6.16.33-xenU-x86_64.tgztar xzf ec2-modules-2.6.16.33-xenU-x86_64.tgzmv lib/modules/2.6.16.33-xenU /opt/mln/
10.6.1 Testing the plugin
You should be able to see the plugins version number when you run the write_configcommand:
root@server# mln write_config[ omitted output ]AMAZON EC2 plugin version 1.0
10.6.2 Configuring the plugin
If you saved some of the files on different locations, you need to edit the pluginand change some of its settings. This is not difficult and efforts have been made tomake it as easy as possible. If you open up the plugin in an editor, you will find thefollowing block at the beginning:
###################### CONFIGURATION####################my $EC2_MODULES_i386 = "/opt/mln/2.6.16-xenU";my $EC2_MODULES_x86_64 = "/opt/mln/2.6.16.33-xenU";my $EC2_USER = "/root/.amazon/user.txt";my $EC2_SECRET = "/root/.amazon/secret.txt";my $EC2_ACCESS = "/root/.amazon/access.txt";my $EC2_CERT = "/root/.amazon/cert.pem";# Valid types: m1.small, m1.large, m1.xlarge, c1.medium, c1.xlargemy $EC2_DEFAULT_TYPE = "m1.small";my $EC2_DEFAULT_AVAILABILITY_ZONE = "";my $EC2_DEFAULT_KERNEL = "";my $EC2_DEFAULT_RAMDISK = "";my $EC2_DEFAULT_GROUP = "default";my $EC2_DEFAULT_MOUNT1 = "/mnt";my $EC2_DEFAULT_MOUNT2 = "/mnt2";my $EC2_DEFAULT_REGION = "US"; # Alternative: EUmy $EC2_DEFAULT_ARCH = "i386"; # Alternative: x86_64#####################
Many of these variables are self-explanatory and can be changed by you. The mostimportant thing is to make sure the paths are correct.
10.7 Using the EC2 Plugin
Once the plugin is installed, the only thing you need to do to make an EC2 instance,is to include the ec2 block inside of the host declaration. This is a minimal project
77
with only one instance.
global {project ec2
}host one {
xenec2 { }network eth0 {
address dhcp}
}
The xen keyword needs to be present, as this is a Xen virtual machine, even whenit runs in the Cloud. It is, however not necessary to have Xen installed on yoursystem when you build. The network block is important, as this is the only waya virtual machine can get online (and you access it). Multiple network cards areignored, as this is not currently supported by EC2 anyway.
The ec2 block works with superclasses. In this example, we have three hosts, allrunning in EC2:
global {project musketeers
}superclass common {
xenec2 { }network eth0 {
address dhcp}
}host athos {
superclass common}host porthos {
superclass common}host aramis {
superclass common}
One can override ec2 settings locally in each host. You are not limited to havingEC2-only projects. You can have local virtual machines in addition, just leave outthe ec2-block. This makes sense if you want to deploy instances which are sup-posed to be visible on your local LAN. In that case you might want to have a localgateway VM as part of the project which the instances can open tunnels to andwould provide local ethernet bridging to them.
The only way to access your EC2 instances is through SSH (but you can readthe boot console if you need to debug something). Make sure you use templates
78

which have the SSH service installed and that you have users either on the templatedirectly or include them in the MLN configuration directly. One idea is to use theMLN SSHkey plugin to automatically copy SSH keys into the virtual machines atbuild time for password-less access.
Building a project
A project is built the same way as regular projects:
mln build -f musketeers.mln
The output is too long to present here. Notice, during the building of the projecta series of lines starting with "EC2: ". These are messages coming directly fromthe EC2 plugin. Some of this output is from the EC2 API calls which the pluginexecutes and putting the EC2 prefix in front of its output.
The time it takes to build a project depends on the size of the compressed bundleand your network connection. The upload of the filesystem bundle dominates thebuilding progress. The EC2 plugin will try to estimate the time it takes to uploadthe bundle and calculate the average speed, but the result is somewhat misleading,since the API upload command spends a considerable amount of time waiting forthe upload to actually begin.
Starting/Stopping a project
Starting the project is done using the common MLN syntax. In this example, wehave a project ec2 which only contains the virtual machine one:
server:~# mln start -p ec2Starting one in Amazon cloud OK: i-ca365ea3
Notice, that the instance ID is printed out along with the message that the virtualmachine has started in the cloud. There is no need to write down or remember thisID, as MLN stores it in the project folder.
Stopping the project is done in the same fashion:
huldra:~# mln stop -p ec2Terminating one in Amazon cloudINSTANCE i-ca365ea3 running shutting-down
Stopping the virtual machine will initiate a graceful shutdown and after a period oftime the virtual machine will actually be down.
79

Checking the status and removing a project
The command mln status -p <project> can be used to check upon the status of a givenproject. In the case of EC2, the EC2 will print out additional information:
server:~# mln status -p ec2ec2 host one up i-340d655d ec2-174-129-138-128.compute-1.amazonaws.com
The instance ID and external DNS address is printed. The last item is useful forconecting to the VM, because (unless you use a elastic IP or dynamic DNS) youhave no other way of knowing where to connect.
If you want to check the status directly from the command-line through the EC2API tools, run the command ec2-describe-instances or its alias ec2din. This will giveyou the same information which you would also see in the other EC2 tools avail-able, like Firefox’s elasticfox plugin. Note, that the virtual machines started byMLN also will show up there, but that they only show you the instance ID. Thereis no way to currently tag an instance with a better description, like its hostname,although RightScale provides this feature internally on their webpages. In essence,MLN does the same, so the status output links the hostname with the instance ID.
10.7.1 EC2 plugin syntax
Without any keywords, the EC2 plugin will use mostly default values. This trans-lates to an instance of the smallest kind, i386 architecture and no additional vol-umes or elastic IP addresses. The additional hard-drive will be mounted on /mnt
There are many ways in which this can be changed. Here follows a summary ofthe syntax before the individual settings are discussed:
ec2 {type <ec2 type>region < EU | US >zone <availability-zone>elastic_ip <IP>bucket <bucket>arch <arch>user_data <user data>user_data_override <user data>user_file <path>credential_folder <path>use <host>group <security group>mount1 <path>mount2 <path2>volumes {
persistent_<size> <device> <mountpount> <options><size> <device> <mountpoint> <options><vol-id> <device> <mountpoint> <options>
}}
80

Some of these features are not without further explanation and discussion. Theyare highlighted in the next subsections below. The ones that do not require muchexplanation are:
• type
You can specify all instance types which are offered by EC2: m1.small,m1.large, m1.xlarge, c1.medium and c1.xlarge.
• region
The region in where the image will be uploaded to and where the instancewill be located. Two values are possible, EU and US. Default is US, whichcan be changed in the ec2.pl plugin.
• bucket
Upload the image to a different bucket other than the default mlnus for the USand mlneu for EU.
• zone
Specify the availability zone. This availability zone has to be located in theregion the instance is meant to run in. Also, if you connect the instance toa volume, the zone will be overridden to match the same zone where thevolume is located.
• group
Specify which particular EC2 security group to be part of.
• arch
Specify the architecture. Possible values are: i386 and x86_64. Default is tofollow the architecture that corresponds to the instance type.
• mount1 and mount2
These can be used to specify where the extra disks will be mounted. In thecase of the type m1.small, only one disk is offered. In the other cases, twodisks are available.
In the following subsections, we will look at some more important features, whichcan improve performance and use some of the additional EC2 features, such aselastic IPs and volumes.
10.7.2 Re-using filesystems for faster uploads
MLN creates one filesystem per instance. Building a project with three instanceswill therefore result in three filesystems being bundled and transferred into EC2.This will increase the time it takes to deploy the project, as well as the bill, becausemore data is sent over the network. This is also particularly wasteful if the threeinstances are practically identical except their hostnames.
81

MLN offers a solution to this, which lets instances point to other instance’s machineimage. This is accomplished through the use keyword in the ec2 block. One canpoint to other virtual machines in the same project and will then boot off theirfilesystem instead of their own. Here is a new version of the Three Musketeerswhere two of them point to the one. All for one, and one for all, if you will.
global {project musketeers
}superclass common {
xenec2 { }network eth0 {
address dhcp}
}host athos {
superclass common}host porthos {
superclass commonec2 {
use athos}
}host aramis {
superclass commonec2 {
use athos}
}
When this project is built, only the filesystem belonging to athos will actually beuploaded, and the deployment time should therefore be only a third compared tothe original project.
Many will at this point wonder if this will not result in confusion, when the projectis started and we end up with three instances with the hostname athos? MLNutilizes a feature called user-data which EC2 offers to send a text string to eachindividual instance at boot time. This string will be different for each of the threeinstances, containing the string "h=hostname;", for example "h=porthos;" in thecase of porthos. Inside the instance is a little shell script which MLN createdwhich will look for this information and change the hostname if it finds this string.This way we will end up with three instances all with different hostnames but fromthe same image.
Notice that this feature only works if MLN was able to install the script on yourLinux distribution in a way that it actually was executed. You can pass other infor-mation as well using the user-data functionality. The next subsection discusses thisin more detail.
82

10.7.3 Supplying extra information to each instance throughuser data
EC2 offers two ways in which you can pass information to individual instancesat creation time. This is not the same as when the machine image is bundled anduploaded, but works when a new instance is booted from an image. The typicalcase when to use this is when there are multiple virtual machines which are practi-cally identical except perhaps their hostname and some additional hints about whatthe instance is supposed to do. Since network configurations are identical for in-stances (they use DHCP) there is little left to individualize. Savvy programmerswill create images that contain sophisticated software which can grow the instanceinto any particular role. Tools like cfengine could be used to make a base virtualmachine image into a webserver, just by passing it a little hint.
EC2 offers two distinct ways to send data to your instance: One way is the user-dataoption, which basically adds the string to the command which starts the instance.The other is user-file, which sends the contends of a file as data. Inside the virtualmachine, the data can be pulled using a command like:
wget --timeout 15 -q -O - http://169.254.169.254/1.0/user-data
This command works on all instances regardless of user-file or user-data was used.
MLN offers both ways to append data. The most notable difference is that if youuse the following:
ec2 {user_data this is my string
}
Then the text "This is my string" will be sent to the instance every time it boots.However, if you send the contends of a file like this:
ec2 {user_file /path/to/file
}
The the contents of the file will be read every time the instance is created. Thismeans, that if the contents of that file have changed, then the information sent tothe instance will have changed too. This is therefore a more dynamic solution.
EC2 does not support the use of both user-data and user-file. If MLN encountersboth used in the same block, then user_file will override user_data. One importantthing to consider, is that if the use keyword is used, the EC2 plugin will actually
83

send something using user-data. If you have specified some string as well, then theresult is the concatenation of those two strings. Consider the following inside thehost pathos:
Code Result in user-datae2 {
user_data foobar
} foobare2 {
user_data foobar
use athos
} h=pathos;foobare2 {
user_data_override foobar
use athos
} foobare2 {
user_data foobar
user_file /path/to/file
} <contents of file>e2 {
user_file /path/to/file
use athos
} <contents of file>
Notice, that using user_data_override or user_file will break the mechanism that ensuresindividual hostnames when the use keyword is used. Smart sysadmins will ensureindividual hostnames on their own accord.
10.7.4 Using elastic IPs
Elastic IPs enables you to have a consistent connection point to your instance. Youcan request an elastic IP using the different management tools available to EC2.From the command line, you can run the following to get a new IP:
ec2-allocate-address
To view the addresses you have currently, type:
ec2-describe-addresses
In MLN, an elastic IP will be assigned to a host at boot time. In the host block, usethe following:
84

ec2 {elastic_ip X.X.X.X
}
10.7.5 Using EBS volumes
EBS volumes provide persistent storage for your instances. Volumes have to beattached to existing instances only, meaning you cannot say "start instance X withvolume Y as /var/log" with the existing EC2 tools. This is possible with MLN.MLN supports three different ways in which you can use volumes in your projects:
• Volumes are created and destroyed along with the projectThis is the most basic approach. For each line in the volumes block that startswith a size, a new volume is created. MLN stores the volume ID for thatvolume and adds a line to the start script of the instance which attaches thevolume every time the instance is booted. Inside the filesystem, fstab ismodified so that the volume is mounted on the correct position. However,a volume comes without any filesystem, so MLN also creates a start-scriptwhich will create the filesystem the first time the volume is mounted. Thisresults in a fully automatic process for adding volumes to instances.
ec2 {volumes {
2G hda1 /opt ext3 defaults}
}
Once the host is removed, these volumes will be deleted with it. This meansthat you need to fetch eventual valuable information from the volume beforethe project is removed or rebuilt. It is generally recommended to use hdaX
as disk descriptors. The otherwise common sdaX will be used for the mainpartitions. Most importantly, make sure the VMs template has block-devicesin /dev for the disks you want to use.
• Volumes created along with the project but remain after the vm / projectis removedThis feature is similar to the one above in that volumes are dynamicallycreated during the build process of the project. The main difference is thatonce the project is removed, the volumes stay behind and have to be removedmanually by yourself.
ec2 {volumes {
persistent_2G hda1 /opt ext3 defaults
85

}}
There is no way to tag volumes or add descriptions to them. It is thereforehard, in retrospect, to know which volume belonged to what instance. Theonly hint is the date the volume was created. Amazon is aware that severalusers have asked for the possibility to tag or add descriptions to volumes.MLN will support this as soon as it is available. For now, you can takepersonal notes by looking in the folder called ec2 in the projects folder. Thereyou will find files named after the disk and hostname. The contents of thosefiles are the respective volume IDs.
• An existing, manually created volume is usedSometimes you already have a volume which you want to connect to a virtualmachine. In that case, use the volume ID instead of size on that given line. Inthe case of a pre-existing volume, MLN will not assume that there is a needto format it. You need to make sure yourself that there actually is a filesystemon that volume, or else it will fail to mount (but it will be connected to theinstance, so you can log in and format the volume the first time it is used.)You can create a volume manually on the command line. This command willcreate a volume in the US in the availability zone us-east-1a with the size of3 GB:
ec2-create-volume --region us-east-1 -z us-east-1a -s 3
The output of this command will give you the volume ID, which you can usein the project file:
ec2 {volumes {
vol-jd8372hd hda1 /opt ext3 defaults}
}
If you are unsure about which volumes you currently have, use the commandec2-describe-volumes to get a listing. You can also use the AWS managementconsole, elsticfox or rightscale. In the two latter you can add descriptions tothe volumes which are only visible inside the given tool, but helps you keeptrack.
It is possible to combine these features and to have more than one volume attachedto a VM. In the following example, we want a volume of size 2GB mounted on/var/log and also connect a previously created volume to /opt:
86

ec2 {volumes {
vol-jd8372hd hda1 /opt ext3 defaults2G hda2 /var/log ext3 defaults
}}
Things you should know about volumes
The most important thing about volumes, is that they are located in availabilityzones and can only be attached to instances within the same availability zone. Ifyou assign an existing volume to a VM, MLN will check the location of that volumeat build time and deploy the VM in the same zone. If you assign two volumes, eachin a different zone, only one of them will end up being connected.The location of the volume overrides the zone-keyword. So if the three musketeerswere all set to be deployed in the zone us-east-1b, but athos would have a volume,which is located in us-east-1c, then athos would be deployed there instead. This cancreate confusion and sometimes lead to extra costs, since traffic between zones inthe same region is charged $0.01 per GB. It is therefore important to know whatyou are doing when deploying large projects and existing volumes. In the case oftransient volumes (i.e those that are created at build time) then MLN will adhere tothe zone keyword and create the volume where the instance is supposed to run.
Another important thing about transient volumes is that they are created at buildtime and unlike instance, you pay for as long as they exist. So if you build a projectin the US with ten 4GB volumes, you will be charged $4.0 ( 10 * 4 * $0.1) everymonth even if the project is not running, until the project is removed.
Attaching / Detaching volumes manually
You can attach/detach volumes to running instances. The main difficulty is identi-fying the correct instance first before you attach anything to it. If the instance wascreated using MLN, you can look up the current identifier of the instance by read-ing the corresponding file in the projects ec2 directory. So for the porthos instance,we can run:
cat /opt/mln/projects/root/musketeers/ec2/porthos.instance
Once we know the identifier, we can run the following command to attach a volme:
ec2-attach-volume vol-3411f05d -i i-48b6d121 -d hda2
87

If the volume has never been used before, one needs to add a filesystem to it. Thisis done from the instance. In order to detach the volume, one can run:
ec2-detach-volume vol-3411f05d -i i-48b6d121 -d hda2
10.7.6 Using different EC2 accounts for different projects / in-stances
For the most part, this documentation has been assuming that one EC2 user will beusing MLN to manage its instances. It is, however, possible that one sysadmin orprovider might manage several projects for different customers. In that case, MLNoffers a way to individualize the ownership of virtual machines to different EC2users. The only thing necessary is to have a folder with the EC2 users credentialsin it in the same way as the .amazon folder we created above.
In the following example, we create a project consisting of two webservers and adatabase server for a customer. The credentials of the customer are located in thefolder /customers/customer1. Notice how volumes are used in order to provide perma-nent storage. All instances will get a 2GB volume to store their logfiles in. Thewebservers each have a small partition at /var/www while the database has a 10GBpartition for the database files. In order to speed up deployment, www2 will usewww1’s filesystem. It is important to realize, that since www2 will be a copy ofwww1, they need to have the same volumes block too, or else they will be expect-ing partitions which are not present. Even though www2 is a copy, it will still haveits individual volumes connected to it.
The complexity in this project is a good example of how MLN can ease the de-ployment process. Keeping track of three instances and manually (and correctly)connecting six volumes each time the instances are started will already be a com-plicated task.
global {project customer1
}
superclass common {ec2 {
credential_folder /customers/customer1volumes {
2G hda1 /var/log ext3 defaults,noatime}
}xennetwork eth0 {
address dhcp}
}
88

host web1 {superclass commontemplate webserver.ext3ec2 {
volumes {1G hda2 /var/www ext3 defaults
}}
}
host web2 {superclass commontemplate webserver.ext3ec2 {
volumes {1G hda2 /var/www ext3 defaults
}use web1
}}
host db {superclass commontemplate database.ext3ec2 {
type c1.mediumvolumes {
10G hda2 /var/lib/mysql ext3 defaults,noatime}
}}
One important aspect, is that MLN will run all its commands relative to that projectas customer1, but when you later run commands on the command-line, you willbe the original EC2 user. This means that you cannot expect to see customer1’sinstances just by running ec2din. Managing these virtual machines should thereforebe done only through MLN’s commands to avoid confusion.
10.7.7 Adding more nodes to existing project
One attractive aspect of cloud computing is the ability to scale your infrastructurebased on the current load. This would then directly connect usage to cost andkeep your infrastructure cheap when there is low activity. Technically, the mainidea is to have some sort of load balancing and an array of backend servers whichyou increase/decrease based on your demands. Load balancing can be achievedin several ways, depending on the service you run. Let’s assume that customer1from the previous section has DNS loadbalancing which is not explicitly part of theMLN project. However, when the load increases, they would like to increase thenumber of webservers. In MLN this can be achieved with the mln upgrade command.The only thing necessary is to make an updated version of the customer1.mln file withan additional webserver:
89
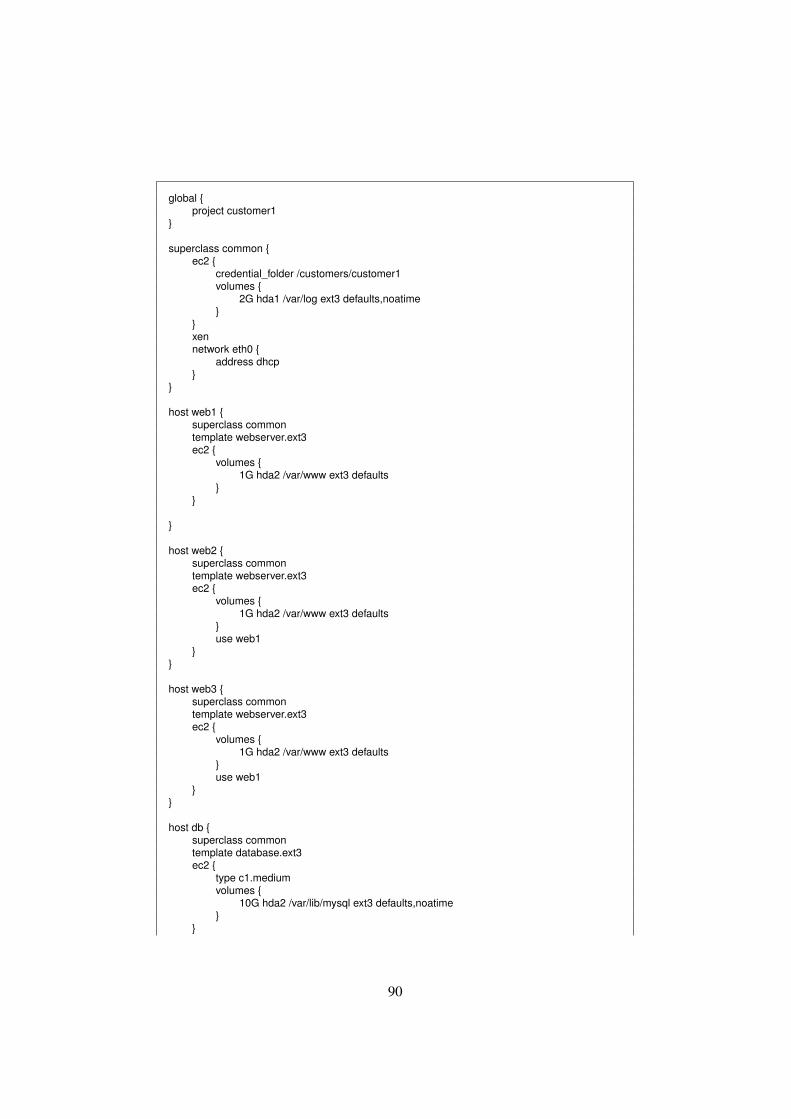
global {project customer1
}
superclass common {ec2 {
credential_folder /customers/customer1volumes {
2G hda1 /var/log ext3 defaults,noatime}
}xennetwork eth0 {
address dhcp}
}
host web1 {superclass commontemplate webserver.ext3ec2 {
volumes {1G hda2 /var/www ext3 defaults
}}
}
host web2 {superclass commontemplate webserver.ext3ec2 {
volumes {1G hda2 /var/www ext3 defaults
}use web1
}}
host web3 {superclass commontemplate webserver.ext3ec2 {
volumes {1G hda2 /var/www ext3 defaults
}use web1
}}
host db {superclass commontemplate database.ext3ec2 {
type c1.mediumvolumes {
10G hda2 /var/lib/mysql ext3 defaults,noatime}
}
90
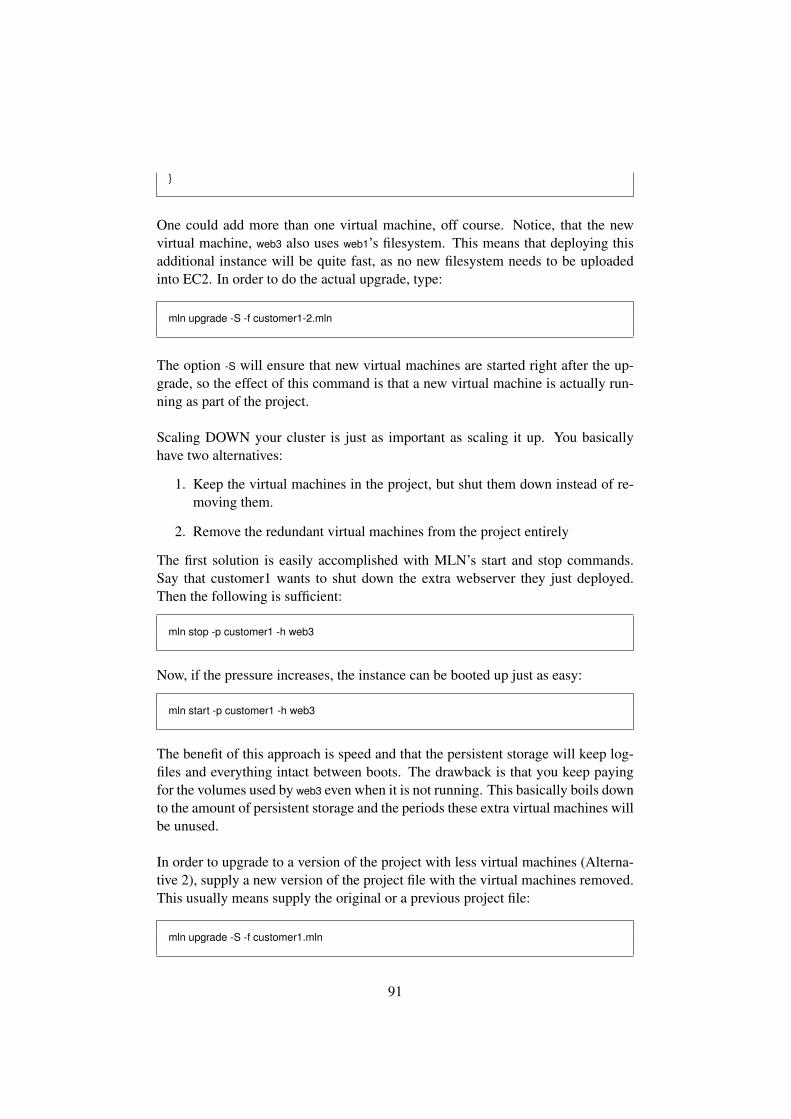
}
One could add more than one virtual machine, off course. Notice, that the newvirtual machine, web3 also uses web1’s filesystem. This means that deploying thisadditional instance will be quite fast, as no new filesystem needs to be uploadedinto EC2. In order to do the actual upgrade, type:
mln upgrade -S -f customer1-2.mln
The option -S will ensure that new virtual machines are started right after the up-grade, so the effect of this command is that a new virtual machine is actually run-ning as part of the project.
Scaling DOWN your cluster is just as important as scaling it up. You basicallyhave two alternatives:
1. Keep the virtual machines in the project, but shut them down instead of re-moving them.
2. Remove the redundant virtual machines from the project entirely
The first solution is easily accomplished with MLN’s start and stop commands.Say that customer1 wants to shut down the extra webserver they just deployed.Then the following is sufficient:
mln stop -p customer1 -h web3
Now, if the pressure increases, the instance can be booted up just as easy:
mln start -p customer1 -h web3
The benefit of this approach is speed and that the persistent storage will keep log-files and everything intact between boots. The drawback is that you keep payingfor the volumes used by web3 even when it is not running. This basically boils downto the amount of persistent storage and the periods these extra virtual machines willbe unused.
In order to upgrade to a version of the project with less virtual machines (Alterna-tive 2), supply a new version of the project file with the virtual machines removed.This usually means supply the original or a previous project file:
mln upgrade -S -f customer1.mln
91

10.7.8 Moving an existing project / vm into EC2 and back again
One of the most exiting features of MLN combined with EC2, is that you can movevirtual machines into EC2 from your own server. This means you can have a run-ning project where you log into the virtual machines and configure them just rightbefore you then push the whole thing into EC2. This enables you to transitionbetween a weak local setup, where only the configuration is important, into a pow-erful cluster when you need to do some production work.
The way to do this, is to utilize the upgrade command in MLN. By adding the ec2
block to the hosts which are to run in the cloud. It is possible with projects whereonly some of the virtual machines run in the cloud and some locally.
In this example, host nomad had the following configuration in the first version ofthe project file:
host nomad {xenusers {
joe}network eth0 {
address 10.0.0.3netmask 255.255.255.0gateway 10.0.0.1
}template etch.ext3free_space 4000M
}
After editing the MLN-file for that project, nomad now has the following configura-tion:
host nomad {ec2 {}xenusers {
joe}network eth0 {
address dhcp}template etch.ext3free_space 4000M
}
Notice, that the network configuration was changed too. This is very important.Without DHCP, the virtual machine will not get online inside EC2 and you need
92

to make that change yourself for now. By simply adding the empty block ec2 { } wehave made this into a cloud instance with all settings picked from default values.Next, you need to effectuate the change by running the MLN upgrade command:
mln bupgrade [-S] -f new_version.mln
By adding the -S option, the virtual machines will be automatically started afterthe upgrade.
Common features in MLN which no longer work in EC2
Some parts of the configuration for a virtual machine will no longer have any effectonce the virtual machine is transfered to the EC2 cloud. Most important is mem-ory and network interfaces, since this is predetermined by EC2. All the featureswhich address the filesystem itself, such as users, passwords, groups and startupcommands should work like before, except the network configuration. Since EC2only supports DHCP, you have to change your configuration of the eth0 interface toDHCP or else the instance will not get online.
10.8 Known Issues
These are the main issues you should be aware of:
Filesystems are created even if "use" keyword is used
MLN will always create a filesystem from the template and configure it eventhough it is not going to be uploaded. This will slow down a scaling process due tothe time it takes to make a copy of the image.The reasoning behind this is that should the project be migrated back from EC2, itwould need a filesystem locally. Future versions of this plugin may have a featureto explicitly not create any filesystem.
The eth0 interface has to be set to dhcp by you
MLN will not check if the eth0 interface is actually dhcp. This should be eas-ily accomplished with an additional plugin or inside the EC2 plugin. Right now,however, you need to make sure of it yourself.
93

Writing Plugins
94

Chapter 11
Writing MLN plugins
MLN offers support for extra plugins that can configure the virtual machines innew ways i.e adding apache-conf specifications directly into the project file. Theycan also support new virtualization technologies, like VMware or KVM. A pluginmay also function as a wrapper for a special kind of storage, like iSCSI. Writinga plugin is supposed to be easy for the user. This chapter shows how to createplugins and how to work with the MLN data structure for projects. The same datastructure can be used to debug you plugins before you actually build the project.
Plugins allow you to basically insert code into strategic places during MLN’s exe-cution, without diving into the MLN code itself. Based on the way MLN includesthe plugins, only plugins in the PERL programming language are supported.1
The entry points for where your code can be executed are called plugin hooks’.Which hooks you want to use depends on what you want to achieve. You willseldomely have to make use of all the possible hooks. This chapter will try toexplain the signifficance of each hook and show examples on how they are used.
11.1 The MLN data structure
Before we go into the details of the hooks, we need to learn about the internal datastructure used by MLN to store information about a project. This data structure isimportant to allmost all plugins in some way or another.
The data for the entire project is stored in a tree-structure. One can get/set valuesfrom that structure inside a plugin. When mln parses a project file it will buildthe tree structure automatically even with new keywords and blocks, so there is noneed to write parsing code in the plugin.
1It should not be too difficult to write a perl wrapper for your favourite programming language.
95

The data is addressed by its path in the directory structure. At the root is the nameof the project followed by three mandatory blocks: hosts, superclasses and global.Every block contains a set of regular lines and a set of subblocks. The data canbe accessed in different ways depending on what you want. This is a very liberalapproach. It means that the plugin can place data where it wants and in the style itwants as long as it does not break the semantics of the tree structure. Lets see anexample:
global {project myparse
}
superclass hosts {memory 128M
}
host one {superclass hostsnetwork eth0 {address dhcp
}}
If you want to see the resulting raw tree structure from a project file, you can usethe mln parse command:
mln parse -f myparse.mlnglobal {
project myparse}switch {}superclass {
hosts {memory 128M
}}host {
one {superclass hostsnetwork {
eth0 {address dhcp
}}
}}
Notice, how the host and and network blocks are divided into a subdirectories. Thisis the only major difference between the project textfile and the data tree.
96

11.1.1 Querying the data tree
More specific queries can be run in case you are interested in certain aspects of thedata. The same mechanism is available as an API and can be used inside a pluginto access the data. One has three quesry mechanisms depending on the data youare interested in: a single Scalar value, an Array block or a Hash subtree. Thesequeries can be triggered by the -S, -A} and \texttt{-H arguments followed by a querypath. The result of the queries takes variables and inheritance in account, so whatyou get as a result is the same that MLN will get internally, as will your plugins.
Examples
mln parse -f myparse.mln -S /host/one/network/eth0/addressdhcp
This query will get the scalar value corresponding to the keyword “address” at“/host/one/network/eth0”. It can also be used to check if a block is present or not:
kyrre@fs~$ mln parse -f myparse.mln -S /host/one/network/eth01
If you want to get all the lines in a block, use the -A query type:
kyrre@fs~$ mln parse -f myparse.mln -A /host/onememory 128Msuperclass hosts
The “-A” query will give you all the lines belonging to a block, but no sub-blocks.This is usefull if you have a block with a list of lines in it that are not keyword/valuepairs, like a list of modules to load or a list of commands to run.
If you are more interested in an entire subtree, you can use the -H query to get it:
kyrre@fs~$ mln parse -f myparse.mln -H /host/onenetwork {
eth0 {address dhcp
}}memory 128Msuperclass hosts
The entire tree can be displayed with this query:
97
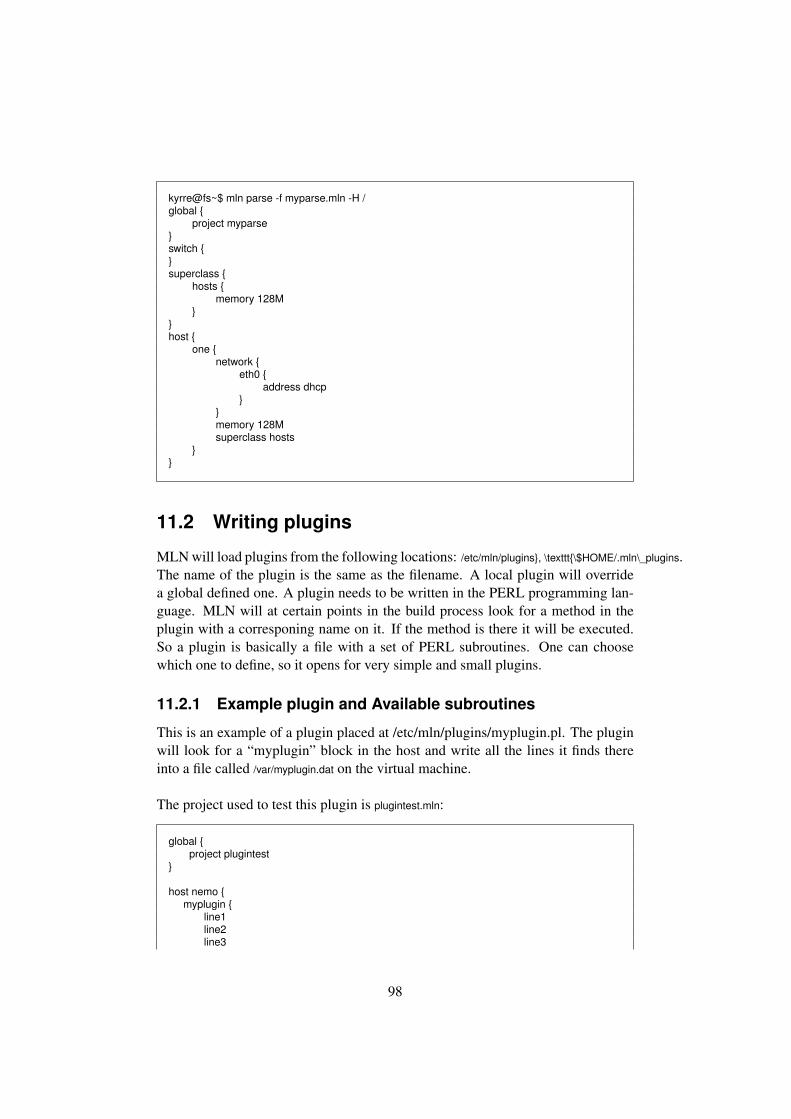
kyrre@fs~$ mln parse -f myparse.mln -H /global {
project myparse}switch {}superclass {
hosts {memory 128M
}}host {
one {network {
eth0 {address dhcp
}}memory 128Msuperclass hosts
}}
11.2 Writing plugins
MLN will load plugins from the following locations: /etc/mln/plugins}, \texttt{\$HOME/.mln\_plugins.The name of the plugin is the same as the filename. A local plugin will overridea global defined one. A plugin needs to be written in the PERL programming lan-guage. MLN will at certain points in the build process look for a method in theplugin with a corresponing name on it. If the method is there it will be executed.So a plugin is basically a file with a set of PERL subroutines. One can choosewhich one to define, so it opens for very simple and small plugins.
11.2.1 Example plugin and Available subroutines
This is an example of a plugin placed at /etc/mln/plugins/myplugin.pl. The pluginwill look for a “myplugin” block in the host and write all the lines it finds thereinto a file called /var/myplugin.dat on the virtual machine.
The project used to test this plugin is plugintest.mln:
global {project plugintest
}
host nemo {myplugin {
line1line2line3
98

}}
The MLN parser will read everything into the tree structure even if it is not a knownkeyword or block. So it should be possible to see the plugin with a query withoutadding parsing information:
mln parse -f plugintest.mln -A /host/nemo/mypluginline1line2line3
The output shows that the parser has added myplugin to the datastructure and wecan proceede with the actual plugin. We start out with the mandatory routine,which is required to write the version number and perhaps some info about theplugin.
# MyPlugin
sub myplugin_version {print("myplugin version 1");
}
1;
Notice the “1;” at the end of the plugin. This is required for all plugins and it willfail without it. Next one only has to write subroutines that we want to use.
The next subroutine is written for the user. Before MLN starts to build the project,it writes out data about the machines to be buildt. In addition it looks for a methodcalled plugin\_printHost and calls it for each host it finds. For this plugin, the methodcould look like this:
sub myplugin_printHost {
my $hostname = $_[0];
# first we check if this host has a myplugin block:my @myplugin_lines = getArray("/host/$hostname/myplugin");
if ( @myplugin_lines ){out("myplugin is enabled on this host:\n");my $line;foreach $line (@myplugin_lines){
out("$line\n");}
}}
99

Notice the use of the getArray method to get the data we are interested in. The samequeries can be issued from inside the plugin, returing either a scalar, and array or ahash. The result can be seen if we run mln build with the simulation flag on:
mln build -s -f plugintest.mln
++ printing Superclasses ++
++ printing Hosts ++--> Host nemonemo: template = Debian-3.0r0-V1.0.ext2myplugin is enabled on this host:line1line2line3++ printing global settings ++Project: plugintestDefault uml kernel: /opt/mln/uml/uml-2.6.12-rc2-mm3/linux ()Default module path: /opt/mln/uml/uml-2.6.12-rc2-mm3/
Parsing complete
The last method we need is the one that does the acctual writing to file. MLNhas already some functions for file modification, so we can use them. Once con-figuration process for each filesystem is done, MLN looks if any plugins have aplugin\_configure method and calls it. This is where we put our code too:
sub myplugin_configure {
my $hostname = $_[0];# first we check if this host has a myplugin block:my @myplugin_lines = getArray("/host/$hostname/myplugin");
if ( @myplugin_lines ){out("Writing myplugin lines to /var/myplugin.dat\n");writeToFile($hostname,"/var/myplugin.dat",\@myplugin_lines,"600");
}}
This is basically it for a simple plugin. Let us just have a quick glance at modifica-tion of the data structure. Lets say, that for the writer of this plugin it is importantto have more than the default ammount of 32M or RAM. The way to solve this, isto check the ammount of ram present and if it is too low, then it is increased. Thebest place to do this is right after the project file has been parsed. The method namefor this is plugin\_postParse. This method is only called once, so we need to check allthe hosts from that single method. Here is how it could look:
sub myplugin_postParse {# we need to check all the hosts in the same method.# set memory to be at least 64M
# we use ’getHosts()’ instead of ’keys getHash("/host")’
100

# because it has better performance and we# dont need the entire hash anywaymy $host;foreach $host ( getHosts("/host") ){
# we check for the presence of a myplugin blockif ( getScalar("/host/$host/myplugin") ) {
my $memory = getScalar("/host/$host/memory");# we strip the ’M’ from the value:$memory =~ s/(\d+)M/$1/;if ( not $memory or $memory < 64 ){
setScalar("/host/$host/memory","64M");}
}}
}
We use the setScalar() call to modify a single keyword/value pair in the data structure.Similar methods exist for hash and arrays. Since we make the modification right inthe beginning, we are able to check the result without actually building. We issuea query instead:
kyrre@fs:~$ mln parse -f plugintest.mln -H /hostnemo {
myplugin {line3 1line1 1line2 1
}memory 64M
}
We see, that the amount of memory has been added to the host nemo. Note, that thelines inside the myplugin block are in a different order and that they are followedby a “1”. This is typical for when one gets the hash. The array query should beused directly on the block that matters if order is important.
This summarizes the current available methods for a plugin that MLN will call.If there should be a need to have even more such methods, please let the MLNdevelopers know of it and it will be added.
11.3 Plugin API suppary
11.3.1 Reading The Data Tree
You have three different query options:
my $memory = getScalar("/myproject/host/memory");
101

Returns the string corresponding to the value belonging to the keyword memory.This method is reccomended if you have keywords that you know and want to seeif they are defined. Examples are: "/myproject/host/jumbo/netowork/eth0/address"
my @modules = getArray("/myproject/host/jumbo/modules");
This one is better for blocks that will not contain any keyword/value pairs, butrather a list of lines that you don’t know what will be. This is usefull for thingslike the list of modules, startup commands or users. Note that getArray will ignoresub-blocks.
my %keywords = getHash("/myproject/host/jumbo/network");
Here, MLN will create a nested hash of the subtree from that address on. Bothlines and blocks are present. One needs knowledge of what to expect in order totraverse the hash afterwars. The first word of every line is always considered to bethe keyword and is the key in the hash.
11.4 Modifying The Data Tree
You can modify the contents of the data tree almost the same way as you get data.You can insert a single scalar, array or hash at a given position in the tree. Thetypical case is to change some single keyword/vaules at some positions:
setScalar("/host/jumbo/network/eth0/address","dhcp");
If the entire path does not exist, then mln will create it. Chanegeing an array canbe done the same way, but one has to remember, that setArray will overwrite thearray at that position, so if you want to simply add or modify a line, you will haveto get the array first, modify it, and then put it back again:
my @array = getArray("/host/nemo/myplugin");$array[1] = "line2 was modified";push(@array,"last line");setArray("/host/nemo/myplugin",\@array);
The same can be done with an getHash/setHash. It is recommended that the modifica-tions to the data tree are made in the \_postParse plugin method so that the changesare visible to mln as quicly as possible. Also, that way it is easy to check for thedesired results using mln’s command line queries.
102
11.4.1 Tips for the plugin writer
1. If you make a specialized plugin, make sure it is not triggered for all hosts,but that it checks fore some hint in the data if it is enabled, just like theexample above.
2. If your plugin modifes a confguration file, make sure the changes are keptconsistent and convergent through serveral runs of the plugin. This meansthat in the case of an upgrade, the plugin will run on a filesystem it ran onpreviously, so the changes should not end in double lines but should alwasytry to produce the same result. Check how your plugin behaves in an up-grade.
3. Use the mln parse -f file.mln with additional queries to check the result.
103


![5.3.1 Index [jspmntc.edu.in]](https://static.documents.pub/doc/80x56/61bd22f561276e740b0fbaf4/531-index-.jpg)


