15
This weekend, make the spud gun which was featured in the MAKE: 03 magazine. You’ll be able to make a potato go farther and faster than it has ever gone before!
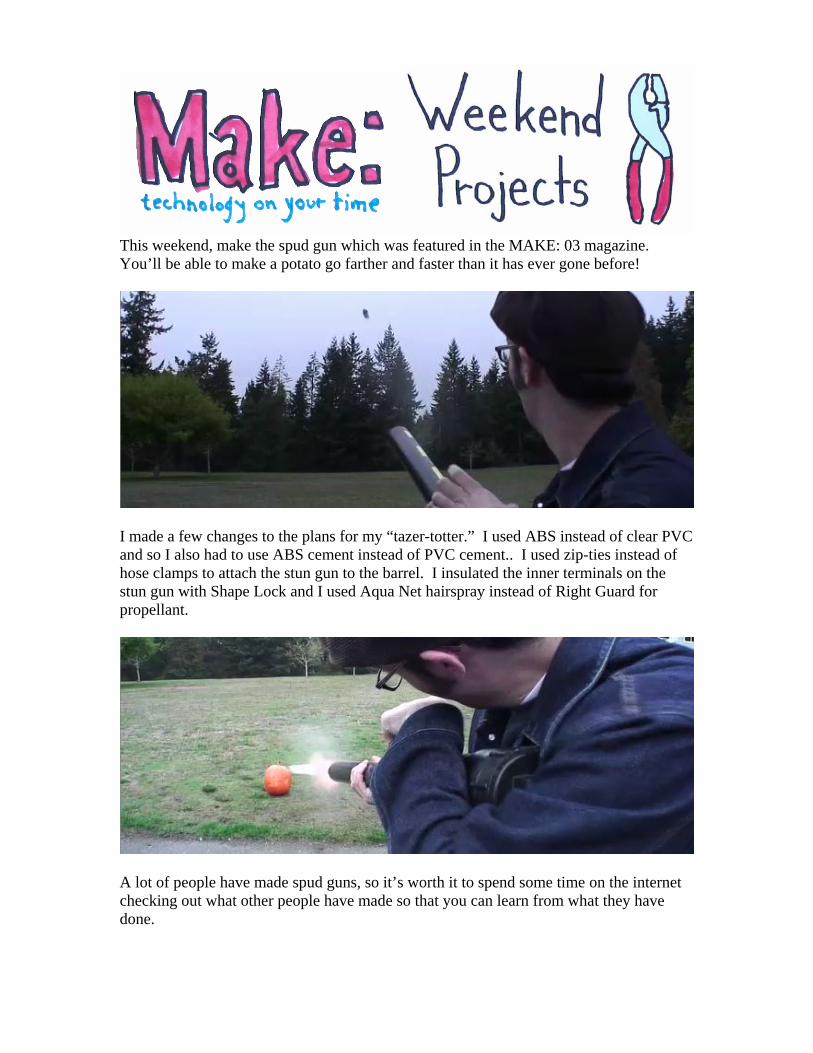
I made a few changes to the plans for my “tazer-totter.” I used ABS instead of clear PVC and so I also had to use ABS cement instead of PVC cement.. I used zip-ties instead of hose clamps to attach the stun gun to the barrel. I insulated the inner terminals on the stun gun with Shape Lock and I used Aqua Net hairspray instead of Right Guard for propellant.
A lot of people have made spud guns, so it’s worth it to spend some time on the internet checking out what other people have made so that you can learn from what they have done.
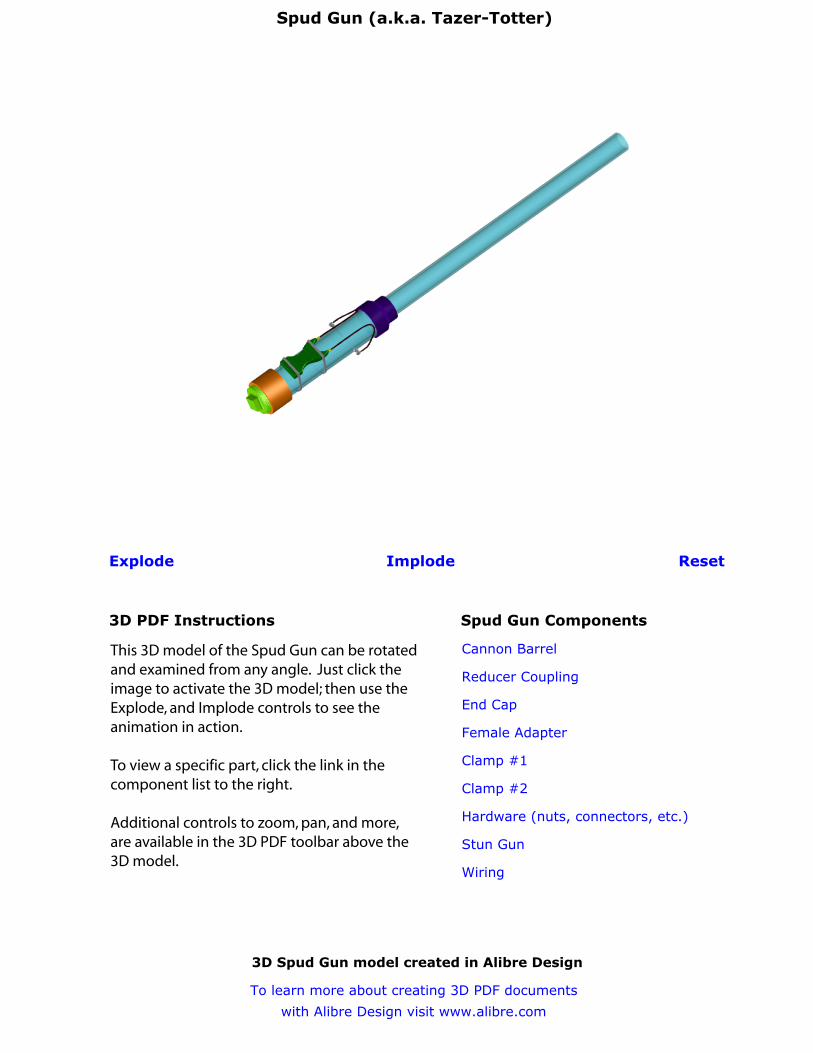
Spud Gun (a.k.a. Tazer-Totter)
Explode Implode Reset
Spud Gun Components
Cannon Barrel
Reducer Coupling
End Cap
Female Adapter
Clamp #1
Clamp #2
Hardware (nuts, connectors, etc.)
Stun Gun
Wiring
3D Spud Gun model created in Alibre Design
To learn more about creating 3D PDF documents
with Alibre Design visit www.alibre.com
This 3D model of the Spud Gun can be rotated and examined from any angle. Just click the image to activate the 3D model; then use the Explode, and Implode controls to see the animation in action.
To view a specific part, click the link in the component list to the right.
Additional controls to zoom, pan, and more, are available in the 3D PDF toolbar above the 3D model.
3D PDF Instructions
PROJECTS: spudgun www.makezine.com/03/spudgun
108 Make: Volume 03
ph
oto
gra
ph
by
Cas
imir
A. s
ien
kie
wic
z

109Make:
The nighT LighTer 36 By William Gurstelle
set up: p.112 Make it: p.114 use it: p.118
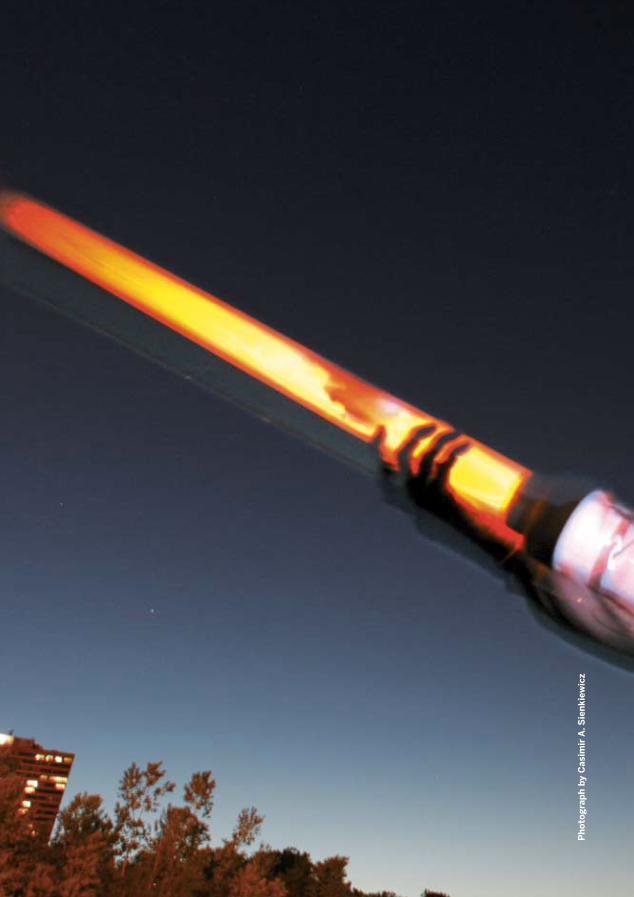
Launch potato projectiles 200+ yards with this stun-gun triggered, high-powered potato cannon with see-thru action. (Good thing potatoes are biodegradable.) >>
110 Make: Volume 03
PROJECTS: spudgun www.makezine.com/03/spudgun
The potato cannon, a.k.a. the spud gun, is a popular and very entertaining amateur science project. It’s simple to make, and few devices offer such bang for the buck. You can use the Night Lighter both day and night, but when it’s dark, the clear PVC provides an excellent view of the interior ballistics. Also, the stun gun gives better performance than weaker sparks from piezoelectric or flint/steel igniters. It’s fun both to fire and simply to watch in action.
A basic spud gun can be built with plain, white PVC for less than $25. The Night Lighter 36 costs more, but I scrounged leftovers from plastics suppliers and built mine for less than $50. After mastering basic gun construction, the intrepid potato cannoneer may want to design and assem-ble more complex and artistic devices.
poTAToes, bewAre
william gurstelle enjoys making interesting things that go whoosh then splat. He is the author of Backyard Ballistics (2001), Building Bots (2002), and The Art of the Catapult (2004). Visit backyard-ballistics.com for more information.

111Make:
Illu
stra
tion
by
Tim
Lill
is
prinCipLes oF spud gunnerY:Serious spud gun designers tinker with the ardor of hot-rod builders. Our NL-36 improves upon the basic potato cannon by substituting transparent tubing and a stun gun igniter.
beVeLed edge Load a spud, and the sharp-ened front edge cuts a plug that seals airtight against the barrel.
bArreL The three-foot barrel guides the potato plug along its trajectory as it picks up speed from the explosion.igniTion ChAMber A
spark from a stun gun ignites hydrocarbon-rich aerosols, causing the internal combustion that sends the spud. You can watch it all through the clear pVC.
rAnge CoMpArisons wiTh oTher FAMiLiAr proJeCTiLes our spud gun propels a 9-ounce potato plug approximately 200 yards. here's how this compares with some other launch events.
shot put: 16 pounds, 25 yards (olympic record)
Cell phone toss: 4-5 ounces, 90 yards (savonlinna record)
Football punt: 14-15 ounces, 98 yards (nFL record)
baseball throw: 5.25 ounces, 149 yards (guinness record, 1957)
Civil war cannon: 6-pound ball, 1,500 yards
sCud-b missile carrying 10-ounce potato payload: 186 miles
CheMiCAL reACTion Fire, everyone's favorite exo-
thermal reaction, breaks aerosol propellants into hot, expanding
Co2 and water vapor.
25 90 98 149 1,500
186 miles
Not to scale.
PROJECTS: spudgun www.makezine.com/03/spudgun
112 Make: Volume 03
36-inch length of 2-inch diameter transparent schedule 40 pVC pipe (1)
14-inch length of 3-inch transparent schedule 40 pVC pipe (1)used mainly in the food- processing industry, transparent pVC is available from industrial plastic suppliers such as harrington plastics or ryan herco. Check your local business listings. You can also order it from McMaster-Carr (www.mcmaster.com). Transparent pVC is gen-erally expensive, but you might find reduced-price remnants at plastics suppliers or food- processing companies.
Large potatoes
3- to 2-inch diameter pVC reducing fitting socket a.k.a. reducer coupling or bell reducer (1)
3-inch pVC female adapter (1)
3-inch pVC end plug (1)use schedule 40 grade for all pVC fittings. source from large home or hardware stores or plastics suppliers.
pVC primer and cementAvailable wherever pVC is sold.
SET UP. Visit makezine.com/03/spudgun for source list.
MATeriALs
113Make:
Lexel sealant, or other clear latex or silicone sealant
I-inch drill bit
15-inch long hose clamps (2)
¼-inch bolts, 2 inches long, full threaded (2)
stun gun, 100,000 volt output or better (1)Available from suppliers on the internet. i bought mine from Cabelas (cabelas.com) for less than $20.
Large crimp-on spade connectors (2)
sanding drum for drill
¼-inch hex nuts (4)
Crimp-on butt connectors (2)
2-foot length of insulated 12-gauge or thicker wire (1)
small wire nuts (2)
Aerosol spray containing hydrocarbons (i used right guard unscented.)
electrical tape
4-foot long/1-inch diameter wooden dowel, or broom handle (1)
Ph
otog
rap
h b
y K
irk
von
Roh
r
oTher TooLs:
hacksawdrill screwdriverplierswire strippers or knifewrench for ¼-inch bolt
114 Make: Volume 03
PROJECTS: spudgun www.makezine.com/03/spudgun
ConsTruCTing The MighTY poTATo CAnnon
sTArT>>
MAKE IT.
1a. Cut pipes. Measure and mark a cutting line 14 inches from one end of the 3-inch diameter PVC pipe. Use the hacksaw to cleanly and squarely cut the pipe. This will be the cannon’s combustion chamber. Then measure, mark, and cut a 36-inch length of the 2-inch diameter PVC pipe. This will be the cannon’s barrel.
1b. Taper end of gun. Use a file or a drill and sanding attachment to taper one end of the long 2-inch diameter pipe, so that it forms a sharp edge. A clean, sharp edge is important, since it should cut the perfect-sized potato plug projectile as you ram the potato into the muzzle of the gun.
1. prepAre The pVC
Time: An Afternoon Complexity: Low
2. ATTACh The eLeCTrodes
2a. drill electrode holes. Four inches from one end of the 3-inch diameter pipe, drill a slightly undersized hole for the ¼-inch bolt. Drill a second hole directly opposite the first hole, four inches from the end.
when pVC gets hot, it re-leases poisonous chlorine gas. perform this step in a well-ventilated area.
The 3-inch pipe will con-tain the fuel and the spark, and act as the combustion chamber.
36"
2"
14"
3"
Ph
otog
rap
hy b
y D
avid
Alb
erts
on
115Make:
>>
2b. Attach electrodes. Screw in the 2-inch long bolts, with nuts attached (two per bolt), into the holes in the 3-inch pipe. The nuts go outside the barrel. The bolts should tap themselves into the softer plastic, but don't over-tighten or you'll strip the PVC. Position and adjust the nuts as needed so there is a ¼-inch gap between the bolt ends inside the barrel.
3a. inspect parts. Check the 3-inch pipe ends and 3- to 2-inch reducing connector for cracks, dirt, and abra-sion, and remove any plastic burrs with a knife. Don’t use damaged PVC pipe or fittings.
3b. weld parts. Following the proce-dure at right, solvent-weld the 3- to 2-inch reducing connector to the end of the 3-inch pipe closest to the elec-trode bolts. Then join the unthreaded side of the female adapter to the other end of the 3-inch pipe, and attach the 2-inch barrel to the narrow end of the 3- to 2-inch reducing connector.
3c. Let the cannon dry for several hours in a well-ventilated area before using. You don’t want to fire it while the solvents are wet and flammable.
3d. screw the 3-inch pVC end plug into the back of the chamber after drying.
3. soLVenT-weLd The pVC
The spud gun is composed of PVC pipes and fittings that are solvent-welded in place using PVC cement and primer. To prevent leaks and weak spots where the parts are joined, the solvent welding must be done properly. Meanwhile, the primer and cement are toxic and flammable, so you need to work in a well-ventilated area, keep the chemicals away from open flames, and follow all safety precautions on the labels. First, we’ll solvent-weld the reducing connector to the front of the combustion chamber. Then we’ll follow the same procedure to attach the threaded adapter to the back of the chamber and to connect the barrel.
1. Clean the weld surfaces with pVC primer. Apply the primer with a dauber or brush (usually inside the cap). The primer cleans and softens the pVC and allows the cement to pen-etrate the surface.
2. brush on a thick coat of pVC solvent, first to the end of the pipe, and then to the fitting socket. Leave no bare spots.
3. immediately join the pipe and the fitting socket, pushing the pipe to its full depth and making sure it’s seated squarely with a slight twist. if you’ve used enough solvent cement, you should see a small, continuous ooze of cement around the fitting. once joined, you can’t reposition the pipes or otherwise fix errors. if you accidentally put the wrong fitting on a pipe, you need to trim it off and start over.
This is the spark gap that will ignite the fuel, firing the cannon.
1.
2.
3.
how to solvent weld
116 Make: Volume 03
PROJECTS: spudgun www.makezine.com/03/spudgun
4. wire The igniTion
4a. Test-fit butt connectors. Using a sharp utility knife, remove excess insulation from each crimp-on butt connector. With the stun gun turned off, test-fit the trimmed ends of the connectors over the gun’s main elec-trodes. These are the twin electrodes that point forward, rather than toward each other, and we’re hooking these up to our ignition wires, in order to bring the spark into the combustion chamber.
4b. prepare ignition wires. Cut the wire into two, 1-foot wires. These are the ignition wires. For each, attach a crimp-on spade to one end and the untrimmed end of a butt connector to the other end.
4c. Attach ignition wires to stun gun electrodes by crimping on the modified butt connectors.
4d. Cover the stun gun test leads (inboard electrodes) with wire nuts cut down to size, or other high-voltage insulators. Insulate all exposed metal areas of the ignition path on the stun gun and bolt electrodes, with electri-cal tape or silicone glue. It's easy for electricity to find its way underneath any insulation gap at the base of the electrodes.
(depending on the make and model of the stun gun, you may need to modify these directions and con-nect the wires in other ways, such as with wire nuts or soldering.)
wire nuts need to be trimmed to fit onto the test electrodes.
117Make:
5. ATTACh The igniTer
6a. Cover bolt connections with globs of silicone sealant. To further insulate, wrap the whole ignition area with bub-ble wrap, and tape down. The stun gun operates at such high voltage that the wrap still may not completely prevent shocks. Avoid contacting electrodes when operating the cannon. Don’t be the path of least resistance!
Congratulations! Your Night Lighter 36 potato cannon is complete.
6. FinAL insuLATion
5a. Attach the stun gun body to the rear of the chamber using two hose clamps. Do not over-tighten. Position the stun gun body at a 90-degree angle to the axis of the electrode bolts.
5b. Attach ignition wires to elec-trode bolts, securing the spade connectors underneath the bolt head or between the nuts. You may have to bend the spades to widen them enough to fit around the bolt.
Finish X
now go use iT »
PROJECTS: spudgun www.makezine.com/03/spudgun
118 Make: Volume 03
Firing The nighT LighTer 36 poTATo CAnnon
1. Remove the end plug.
2. Center and push a potato into the cannon, keep-ing your hand clear of the edge. You may want to wear a leather glove. The muzzle’s sharp edge will cut the potato into a plug that should fit snugly on all sides. Any gaps will reduce performance.
3. Use the stick to push the potato plug 30 inches down into the barrel.
4. Direct a stream of aerosol into the firing chamber. Unscented deodorant works well, but check the label to make sure your choice contains hydrocar-bons such as alcohol, propane, butane, or isobu-tane. Start out with a one- to two-second burst, and determine the optimal amount by trial and error.
5. Immediately replace the end plug and screw it in securely.
6. Turn the stun gun on, and double-check that the firing area is clear.
7. Press the stun gun’s ignition button. Enjoy your work. For a tracer, stick a glowstick into the spud.
If you have a misfire, and the projectile is not ejected, carefully remove the end cap, and ventilate the combustion chamber thoroughly.
MAinTenAnCe
Aerosol chemicals can gum up the inside of the cannon. Every few shots, clean it out with a rag and cleaner. The residue can also make the end plug hard to unscrew. If necessary, use pliers.
sAFeTY And LegALiTY
During construction, don’t take shortcuts or substitute inferior materials. The vapors from PVC cement are flammable, so allow all joints to dry fully before exposing the gun to ignition sources.
When using the potato cannon, exercise extreme caution. Wear eye protection, and check the area in front of you before firing. Never look down the gun's barrel, or point it at anything you don’t want to hit. Excess fluid stays in the chamber and evaporates slowly, so you should always treat the gun as if it can fire. Check frequently for signs of wear, and never operate a damaged gun. Avoid contact with (or proximity to) the ignition path. Stun guns hurt.
PVC is more brittle in cold weather, so don’t use the cannon in temperatures below 60ºF.
neither the author nor this magazine assumes liability for your spud gun or your actions.
Potato cannons may not be legal in your area (even if it is legal to tote a 12-gauge down Main Street). Check with local law enforcement regarding the rules in your area, and obey them. Also, check the laws regarding stun gun usage.
editor's note: Author William Gurstelle uses PVC for his Night Lighter 36 and other designs, but some spud gunners believe this is unsafe, since PVC can shatter and is not recommended for pip-ing compressed gases. They advise using materials made out of ABS (with ABS cement), which is more flexible than PVC, but not available in transparent.
Alternatively, you can use Schedule 80 transparent PVC, which is thicker and stronger than Schedule 40, but more expensive.
how To use Your spud gun responsibLY
USE IT.