• This demonstration covers the implementation of the Form DS‐7002 , the Training/Internship Placement Plan in SEVIS. • The DS‐7002 or T/IPP is required for all exchange visitors in the categories of Intern, Trainee, and Student Intern. 1
Transcript
• This demonstration covers the implementation of the Form DS‐7002 , the Training/Internship Placement Plan in SEVIS.
• The DS‐7002 or T/IPP is required for all exchange visitors in the categories of Intern, Trainee, and Student Intern.
1
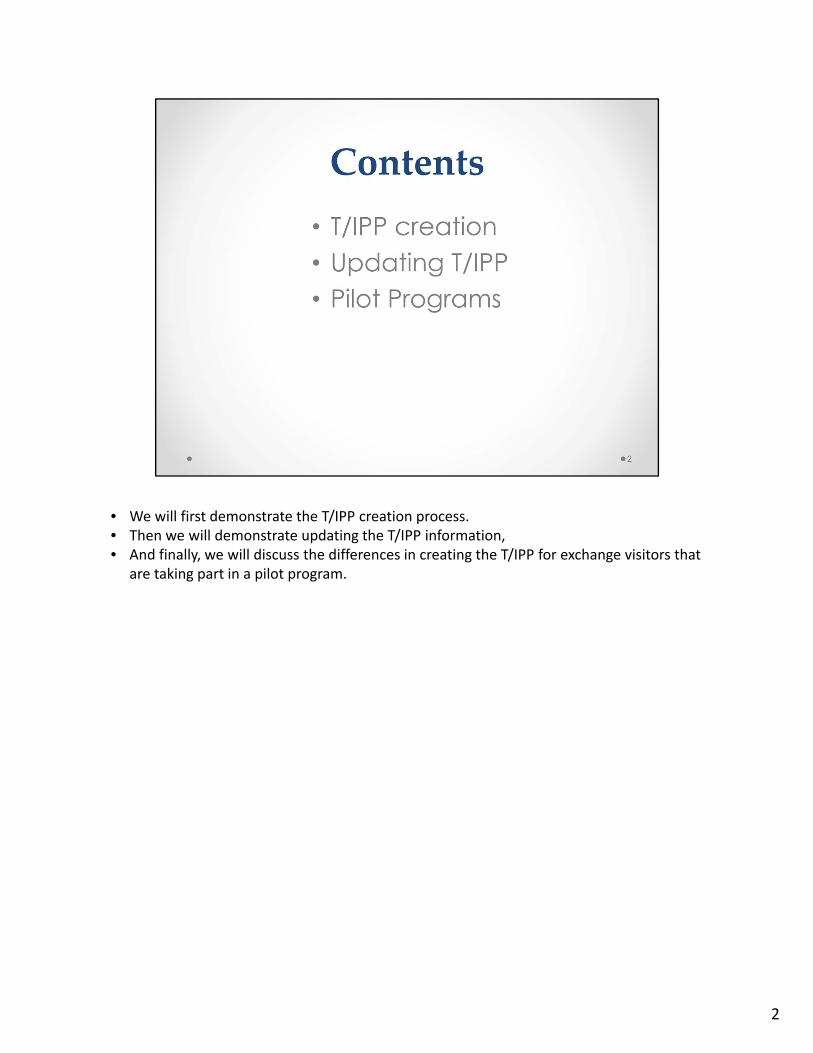
• We will first demonstrate the T/IPP creation process.• Then we will demonstrate updating the T/IPP information,• And finally, we will discuss the differences in creating the T/IPP for exchange visitors that
are taking part in a pilot program.
2
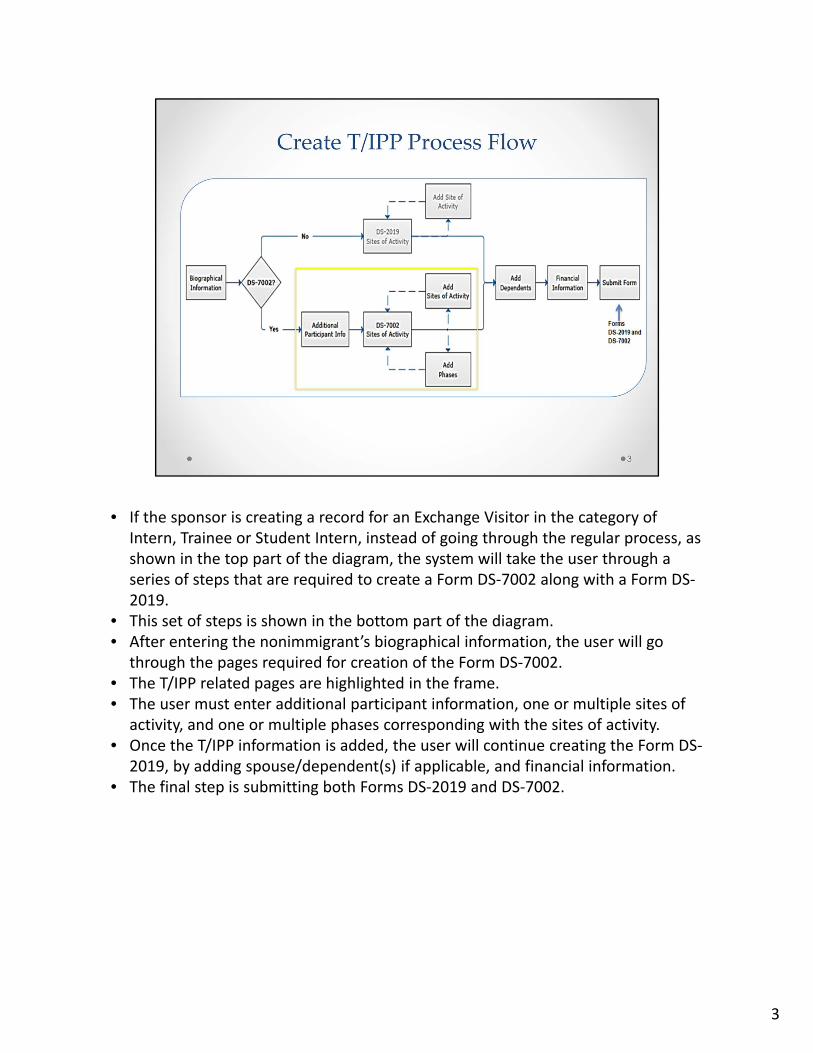
• If the sponsor is creating a record for an Exchange Visitor in the category of Intern, Trainee or Student Intern, instead of going through the regular process, as shown in the top part of the diagram, the system will take the user through a series of steps that are required to create a Form DS‐7002 along with a Form DS‐2019.
• This set of steps is shown in the bottom part of the diagram.• After entering the nonimmigrant’s biographical information, the user will go
through the pages required for creation of the Form DS‐7002.• The T/IPP related pages are highlighted in the frame. • The user must enter additional participant information, one or multiple sites of
activity, and one or multiple phases corresponding with the sites of activity.• Once the T/IPP information is added, the user will continue creating the Form DS‐
2019, by adding spouse/dependent(s) if applicable, and financial information. • The final step is submitting both Forms DS‐2019 and DS‐7002.
3
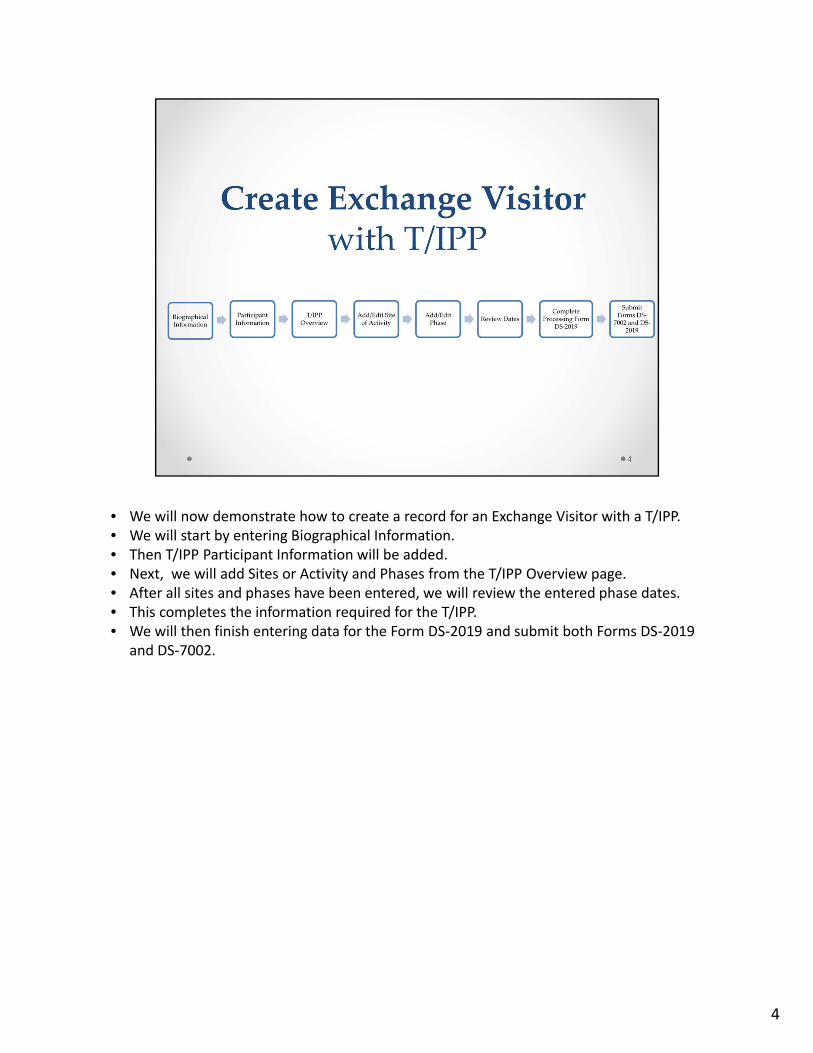
• We will now demonstrate how to create a record for an Exchange Visitor with a T/IPP. • We will start by entering Biographical Information.• Then T/IPP Participant Information will be added.• Next, we will add Sites or Activity and Phases from the T/IPP Overview page.• After all sites and phases have been entered, we will review the entered phase dates.• This completes the information required for the T/IPP.• We will then finish entering data for the Form DS‐2019 and submit both Forms DS‐2019
and DS‐7002.
4
• Creating an exchange visitor record along with a T/IPP starts with filling out the nonimmigrants’ biographical information.
• The Email Address, Program Begin Date and Program End Date entered on this page will populate the fields on the Exchange Visitor Participant Information page.
• Clicking the Next button opens the Exchange Visitor Participant Information page.
5
• The Exchange Visitor Participant Information page contains the Form DS‐7002 Participant Information block.
• The Email Address and Program Dates are displayed as entered on the previous page. • The user must enter additional information about the participant.
• Clicking the Next button opens the T/IPP Overview Page which is the main page for managing T/IPP information.
6
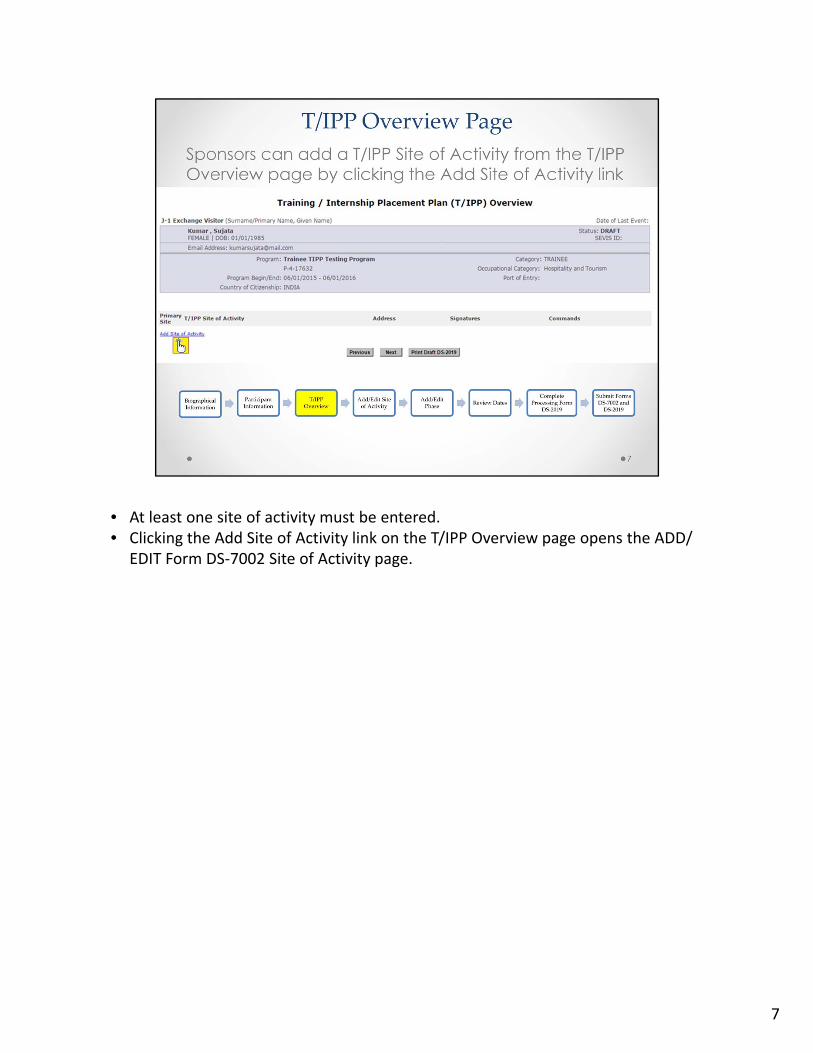
• At least one site of activity must be entered.• Clicking the Add Site of Activity link on the T/IPP Overview page opens the ADD/
EDIT Form DS‐7002 Site of Activity page.
7
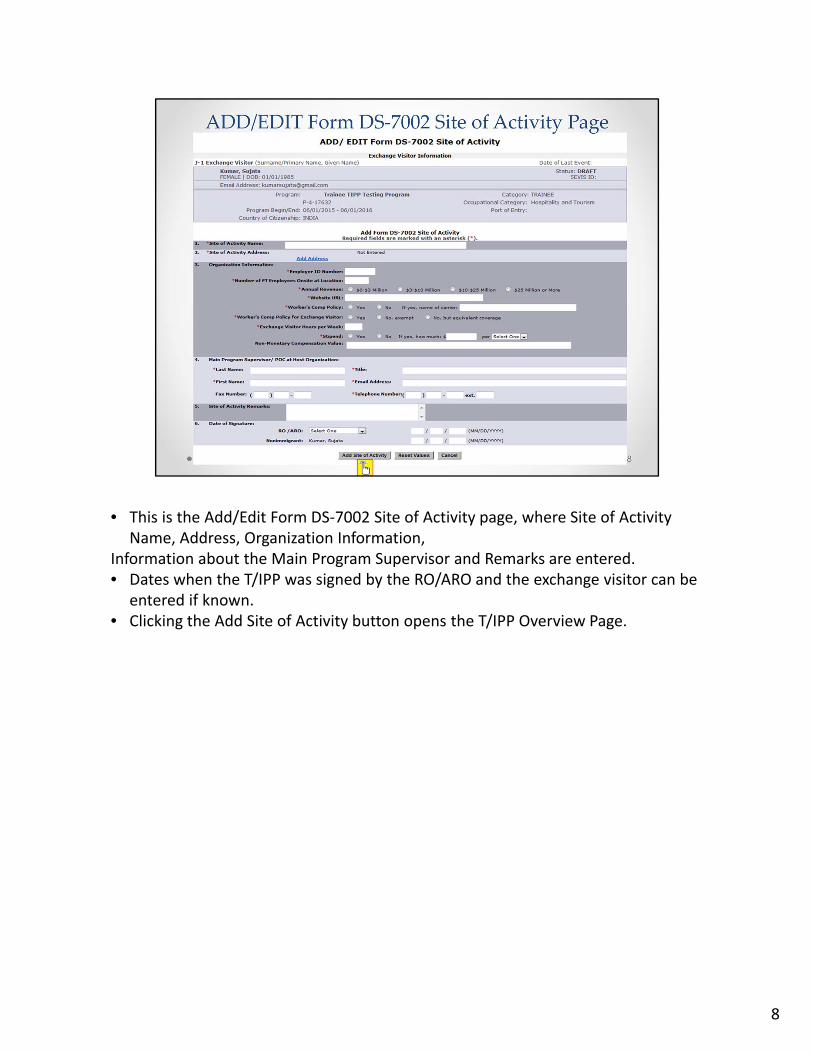
• This is the Add/Edit Form DS‐7002 Site of Activity page, where Site of Activity Name, Address, Organization Information,
Information about the Main Program Supervisor and Remarks are entered.• Dates when the T/IPP was signed by the RO/ARO and the exchange visitor can be
entered if known. • Clicking the Add Site of Activity button opens the T/IPP Overview Page.
8
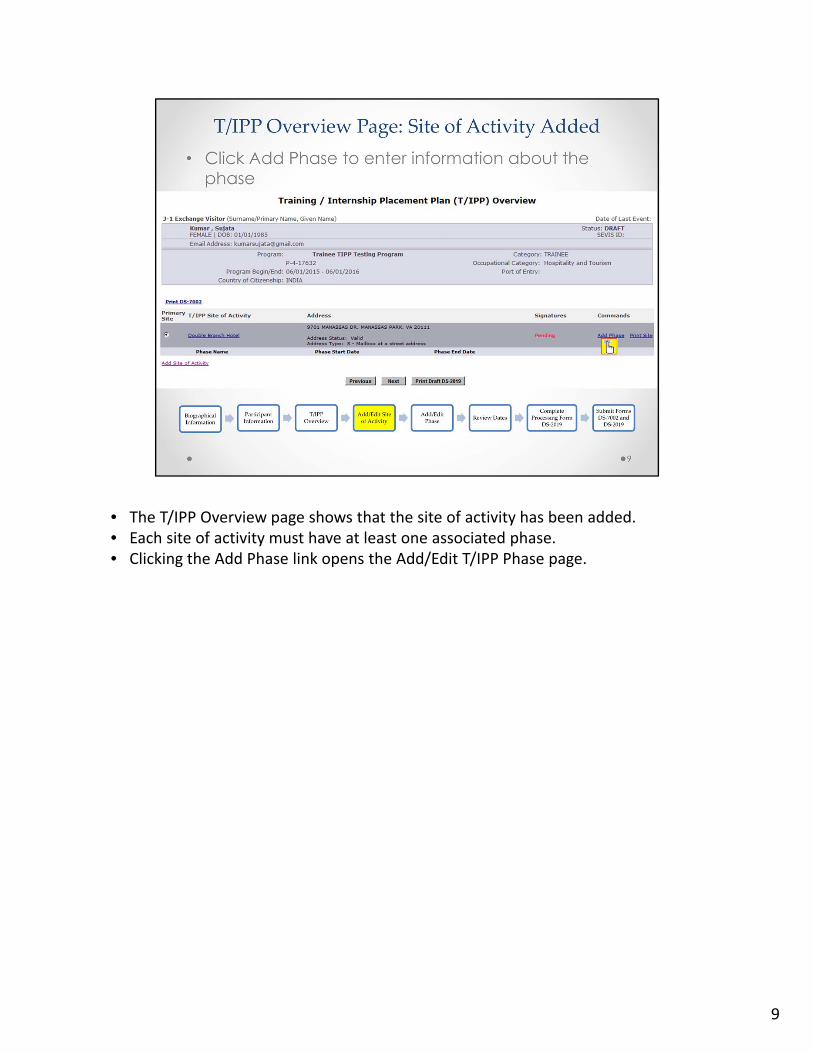
• The T/IPP Overview page shows that the site of activity has been added.• Each site of activity must have at least one associated phase.• Clicking the Add Phase link opens the Add/Edit T/IPP Phase page.
9
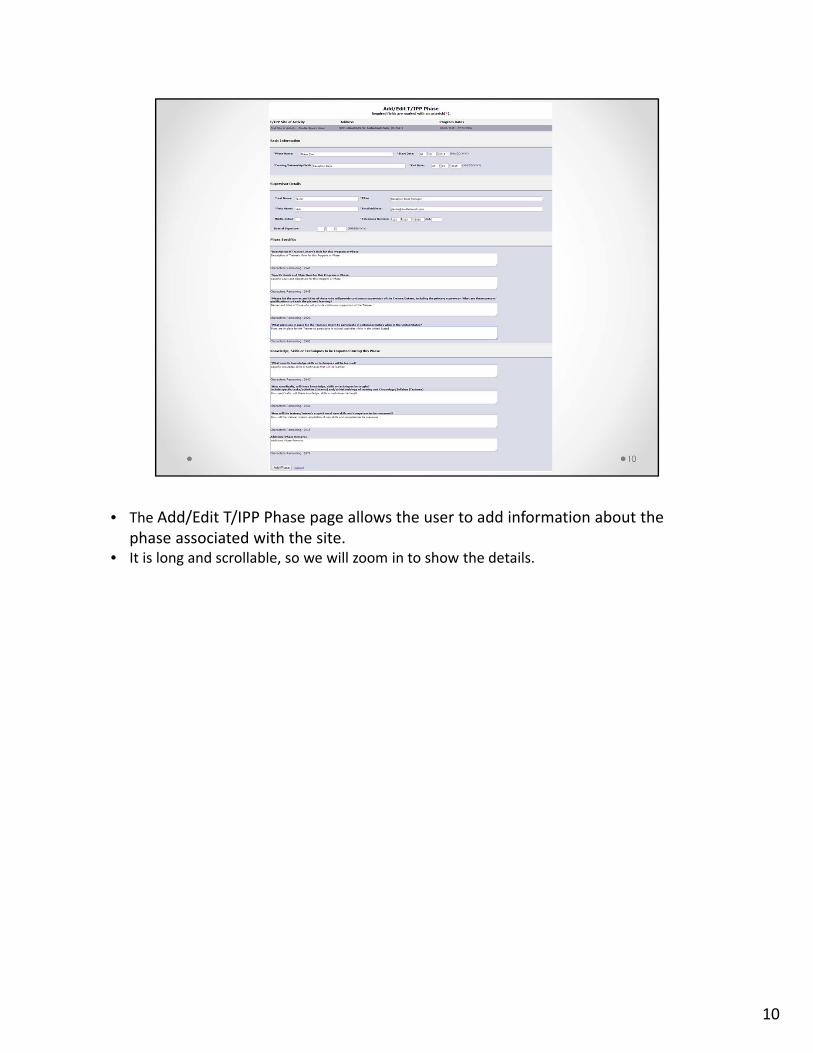
• The Add/Edit T/IPP Phase page allows the user to add information about the phase associated with the site.
• It is long and scrollable, so we will zoom in to show the details.
10
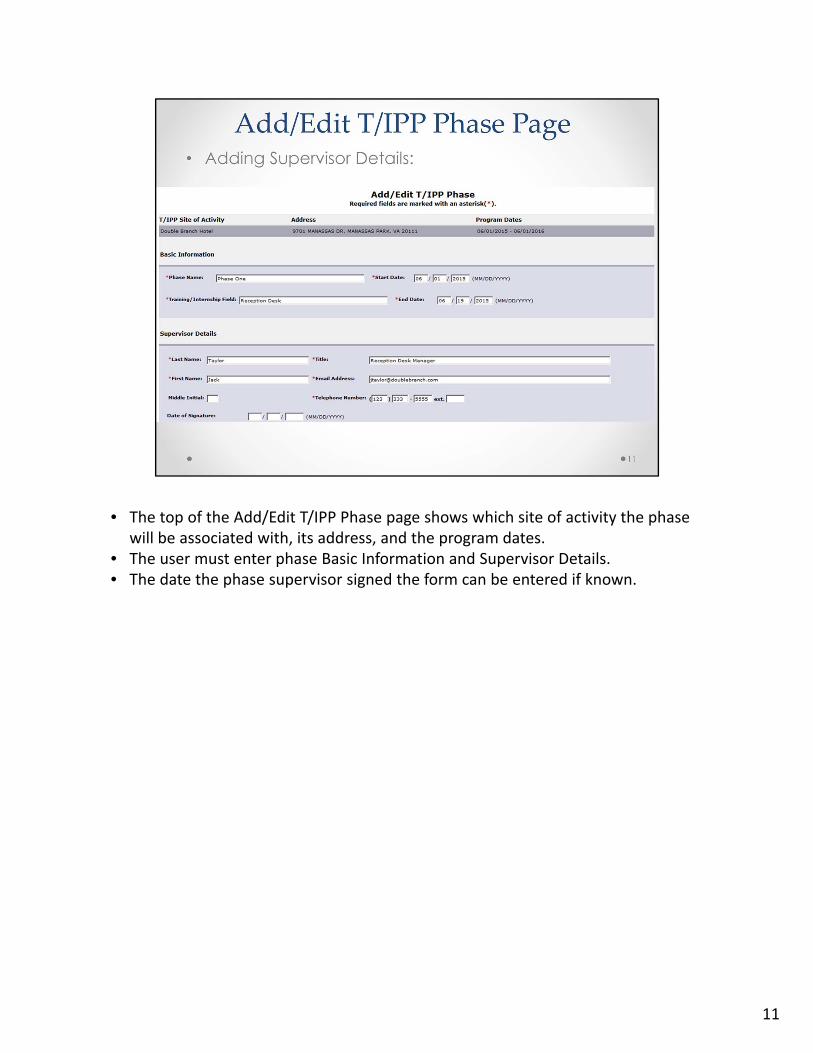
• The top of the Add/Edit T/IPP Phase page shows which site of activity the phase will be associated with, its address, and the program dates.
• The user must enter phase Basic Information and Supervisor Details.• The date the phase supervisor signed the form can be entered if known.
11
At the bottom of the Add/Edit T/IPP Phase page the user must enter Phase Specifics and ...
12
…Knowledge, Skills or Techniques to be Imparted during this phase.
• The system allows the user to cut and paste into the fields. • Each text box can hold up to 3000 characters. The countdown feature displays
the number of remaining characters. • Clicking the Add Phase button opens the T/IPP Overview page.
13
• The T/IPP Overview page shows that the phase has been added.
• It also shows the phase start date and phase end date and whether or not all signature dates have been recorded.
• Pending means that not all signature dates have been entered.• When signature dates have been recorded for the RO/ARO, nonimmigrant and
the phase supervisor for each phase associated with the Site of Activity, the system displays Complete in the Signatures column.
14
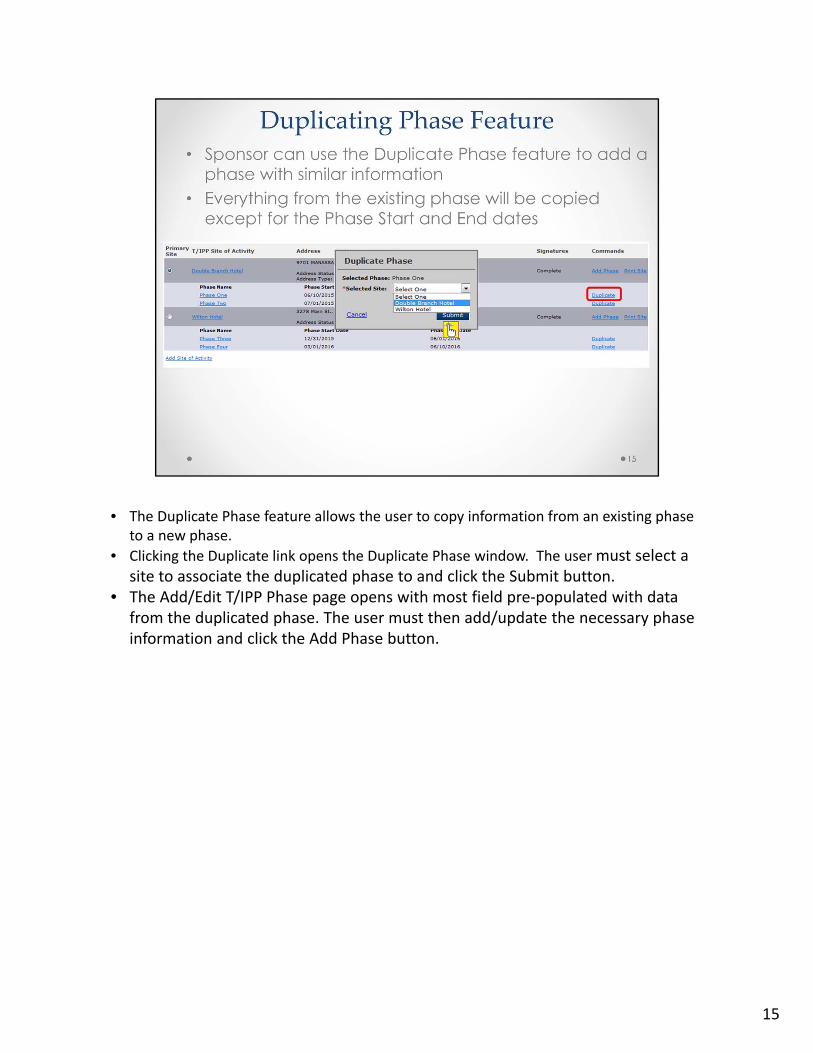
• The Duplicate Phase feature allows the user to copy information from an existing phase to a new phase.
• Clicking the Duplicate link opens the Duplicate Phase window. The user must select a site to associate the duplicated phase to and click the Submit button.
• The Add/Edit T/IPP Phase page opens with most field pre‐populated with data from the duplicated phase. The user must then add/update the necessary phase information and click the Add Phase button.
15
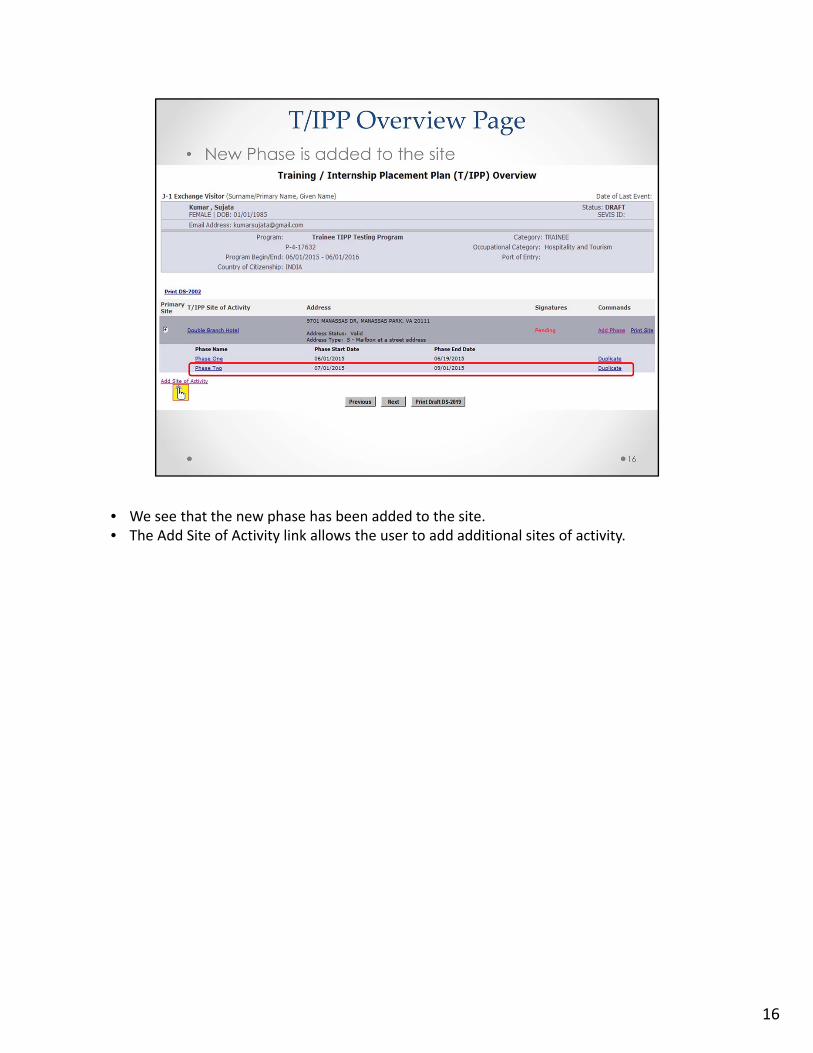
• We see that the new phase has been added to the site.• The Add Site of Activity link allows the user to add additional sites of activity.
16
• The users can print the Form DS‐7002 for either a single site of activity and its associated phases by clicking the Print Site link, or print all Forms for all sites and phases by clicking the Print DS‐7002 link.
• When all sites and phases have been added, clicking the Next button will open the T/IPP Review Dates page.
17
• The T/IPP Review Dates page shows the dates for all phases and checks that there is no time between the Program Begin Date and Program End Date that is not covered by a phase.
• All phase dates across all sites are being combined to determine the date validation. As long as the program duration is covered, the coverage can occur over all sites and phases.
• If there are multiple phases, phase dates can overlap.• If there are no gaps, the system will display a confirmation message.• If there are any gaps, the validation error message will provide the dates of the
gaps.• In order to proceed, the user must edit the phase dates so that there are no
gaps, which can be done on the current page.• Clicking the Next button from the T/IPP Review Dates page concludes the T/IPP
creation process and opens the Exchange Visitor Dependents Menu page.
18
• If the exchange visitor will be accompanied by a spouse and/or dependents, the user can enter their data from this page.
• Clicking the Next button opens the Financial Information page.
19
• The user must finish creating the Form DS‐2019 by entering Financial information.
• Clicking the Submit DS‐2019 button, completes the process.
20
• This process results in the creation of both Forms – DS‐2019 and DS‐7002.• The user now can print both forms.• All new records created in the categories of Intern, Trainee, and Student Intern will be
required to create a T/IPP after the June 26 release.• Records created before June 26 will not require a SEVIS‐generated T/IPP.
21
• We will now demonstrate how to update T/IPP information on an Exchange Visitor record
22
• The Initial status record displays the T/IPP information block at the bottom, which displays basic T/IPP information and provides access for managing it.
• Names of the sites and phases are links to read‐only site and phase pages.• Clicking on the Manage Sites and Phases link opens the T/IPP Overview page.• All fields are editable in Draft or Initial status before visa issuance.• After visa issuance, the T/IPP fields are locked but may be edited after validation.
23
• The T/IPP Overview page allows the user to update T/IPP Information, add sites and phases, duplicate phases, edit phase dates and print the T/IPP.
• Additional Participant Information is a link to the Form DS‐7002 Participant Information Page.
• Clicking the link with the site name opens the read‐only Form DS‐7002 Site of Activity page, which has control buttons to Edit or Delete the site.
24
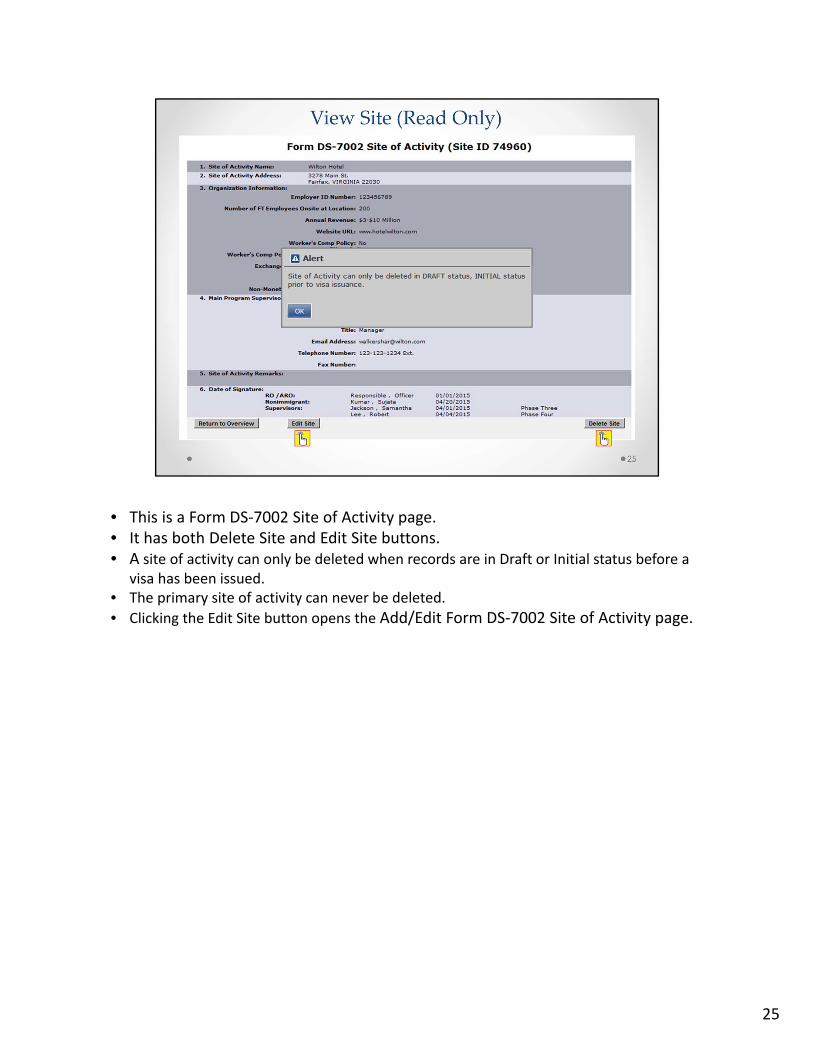
• This is a Form DS‐7002 Site of Activity page.• It has both Delete Site and Edit Site buttons.• A site of activity can only be deleted when records are in Draft or Initial status before a
visa has been issued.• The primary site of activity can never be deleted.
• Clicking the Edit Site button opens the Add/Edit Form DS‐7002 Site of Activity page.
25
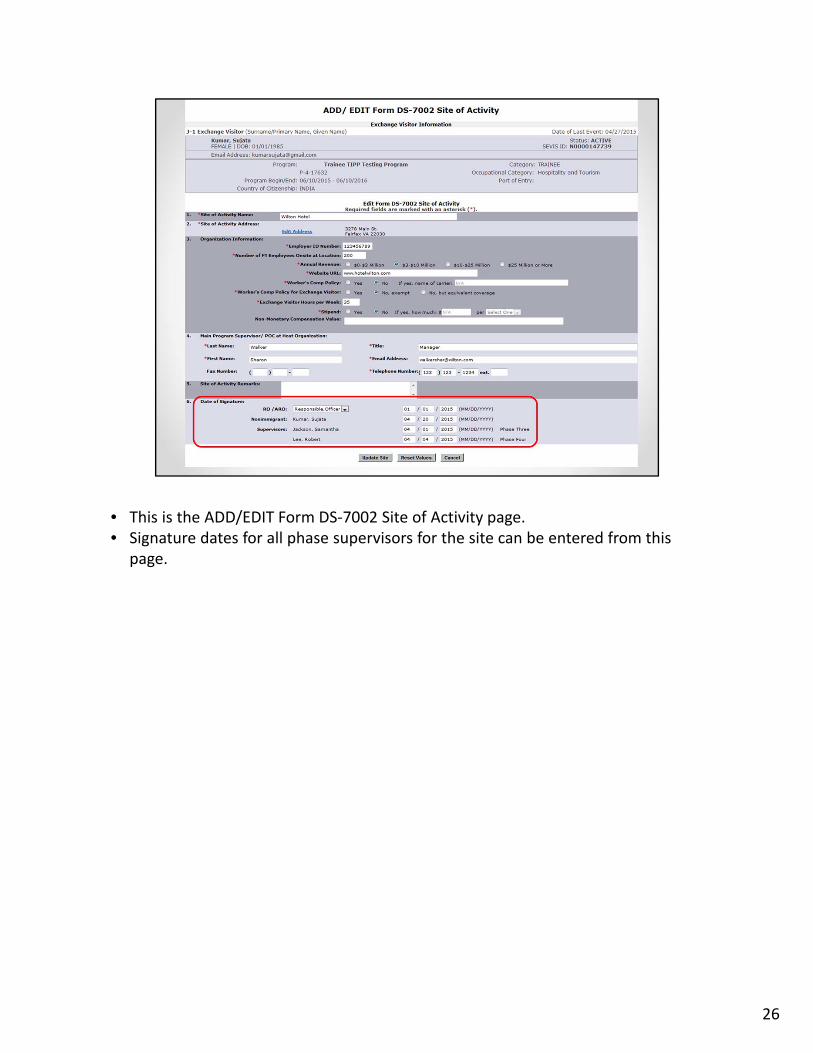
• This is the ADD/EDIT Form DS‐7002 Site of Activity page.• Signature dates for all phase supervisors for the site can be entered from this
page.
26
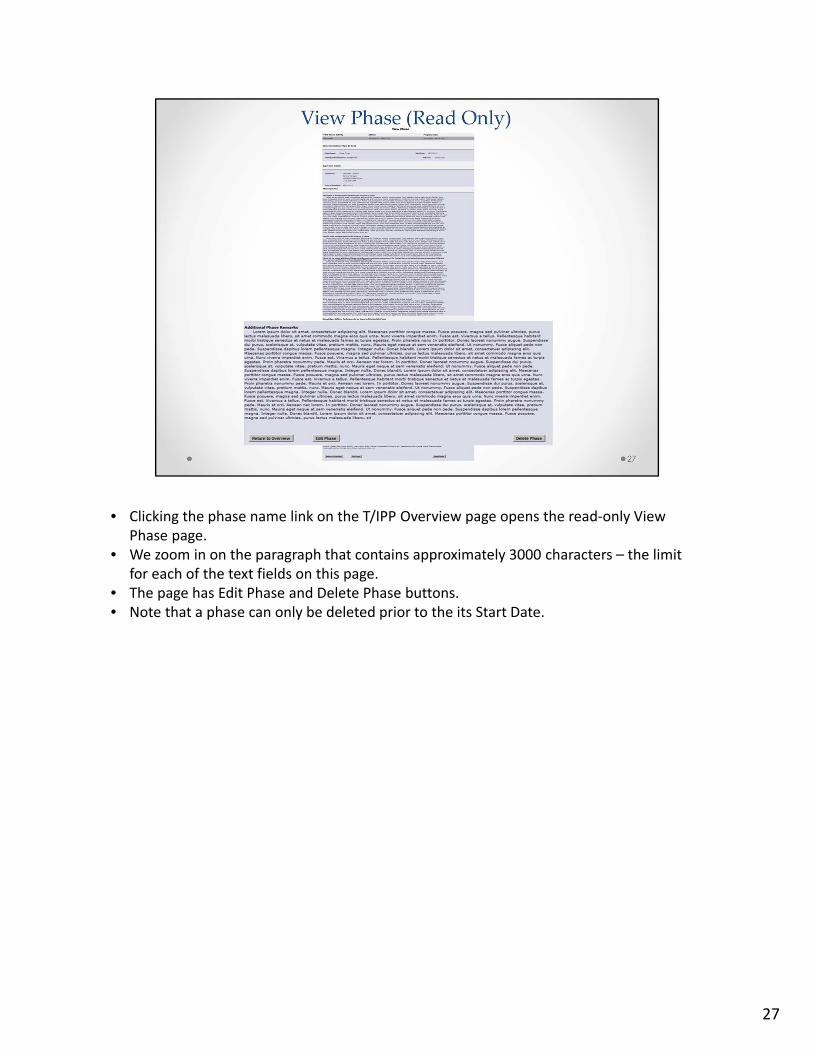
• Clicking the phase name link on the T/IPP Overview page opens the read‐only View Phase page.
• We zoom in on the paragraph that contains approximately 3000 characters – the limit for each of the text fields on this page.
• The page has Edit Phase and Delete Phase buttons.• Note that a phase can only be deleted prior to the its Start Date.
27
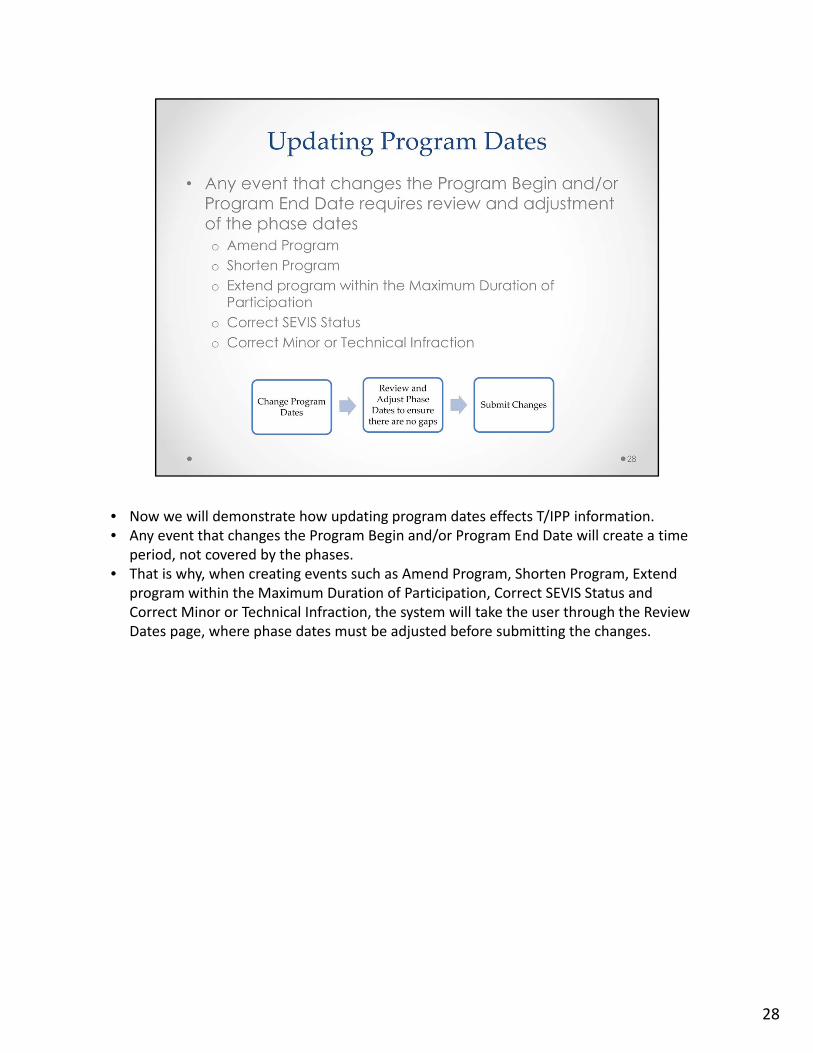
• Now we will demonstrate how updating program dates effects T/IPP information.• Any event that changes the Program Begin and/or Program End Date will create a time
period, not covered by the phases.• That is why, when creating events such as Amend Program, Shorten Program, Extend
program within the Maximum Duration of Participation, Correct SEVIS Status and Correct Minor or Technical Infraction, the system will take the user through the Review Dates page, where phase dates must be adjusted before submitting the changes.
28
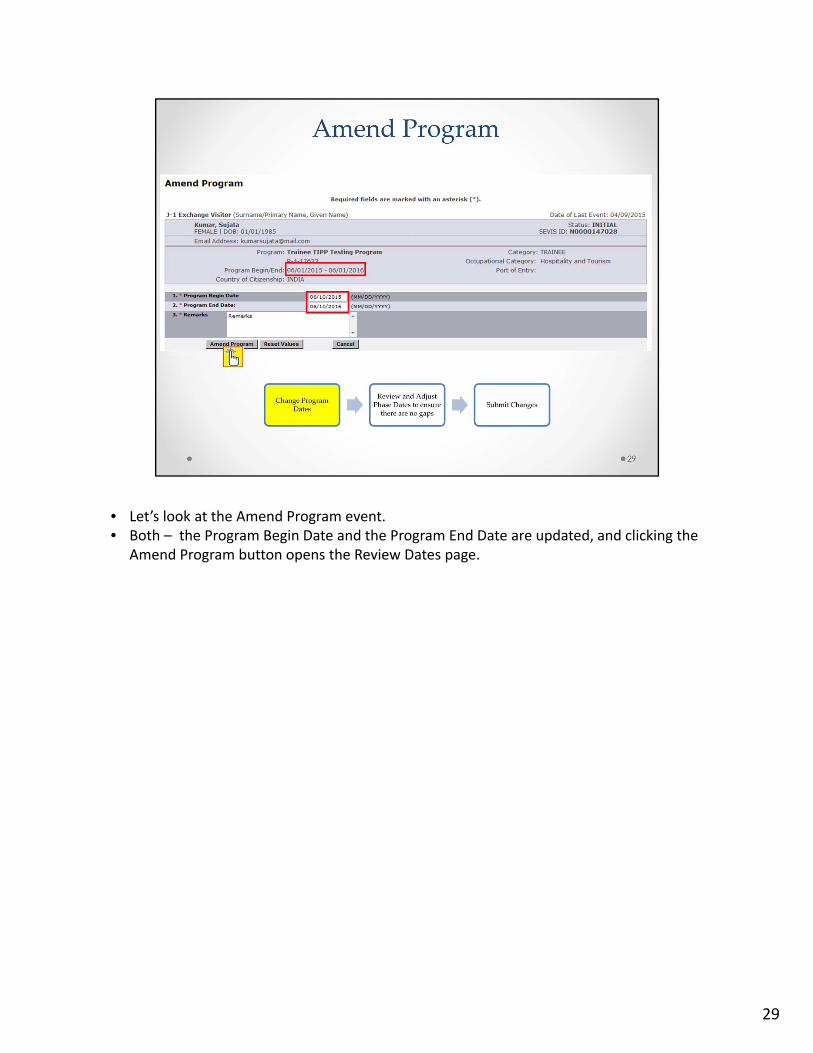
• Let’s look at the Amend Program event.• Both – the Program Begin Date and the Program End Date are updated, and clicking the
Amend Program button opens the Review Dates page.
29
• The validation error message on the T/IPP Review Dates page will display the time gaps, which makes updating phase dates easier.
• Clicking the Submit button opens the Update Successful page.
30
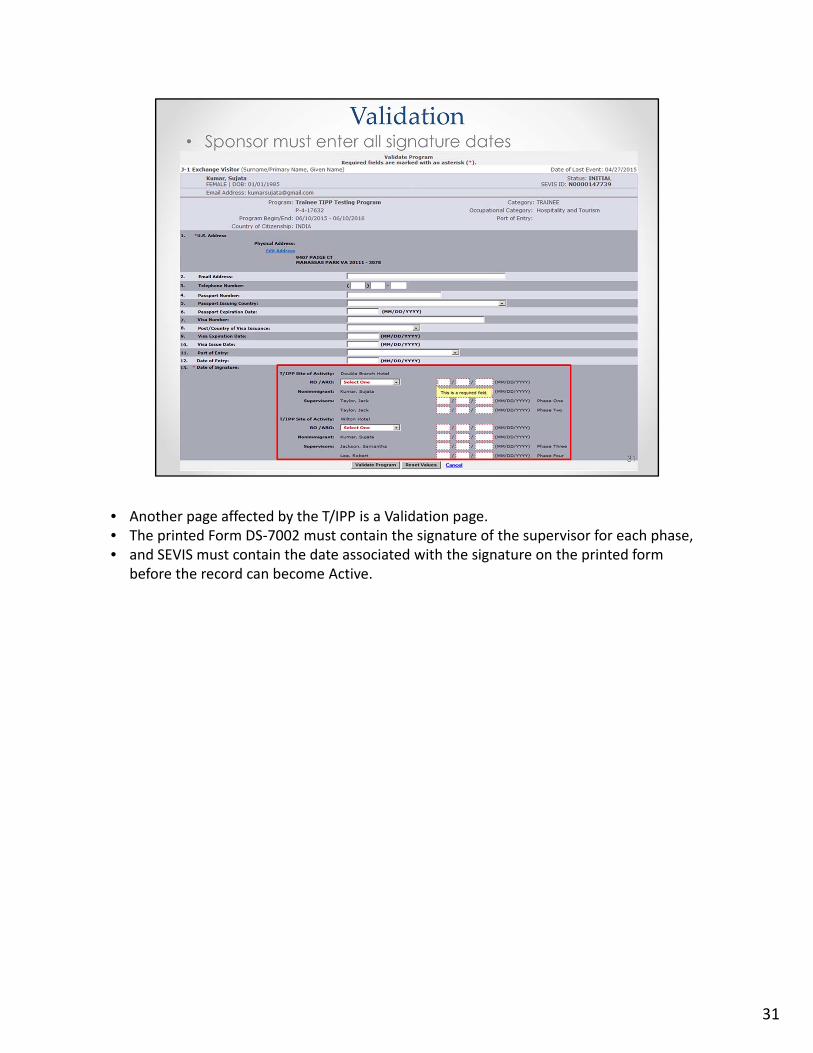
• Another page affected by the T/IPP is a Validation page.• The printed Form DS‐7002 must contain the signature of the supervisor for each phase,• and SEVIS must contain the date associated with the signature on the printed form
before the record can become Active.
31
• Now we will talk about two pilot programs, for which the creation of T/IPP is not required when creating the DS‐2019.
32
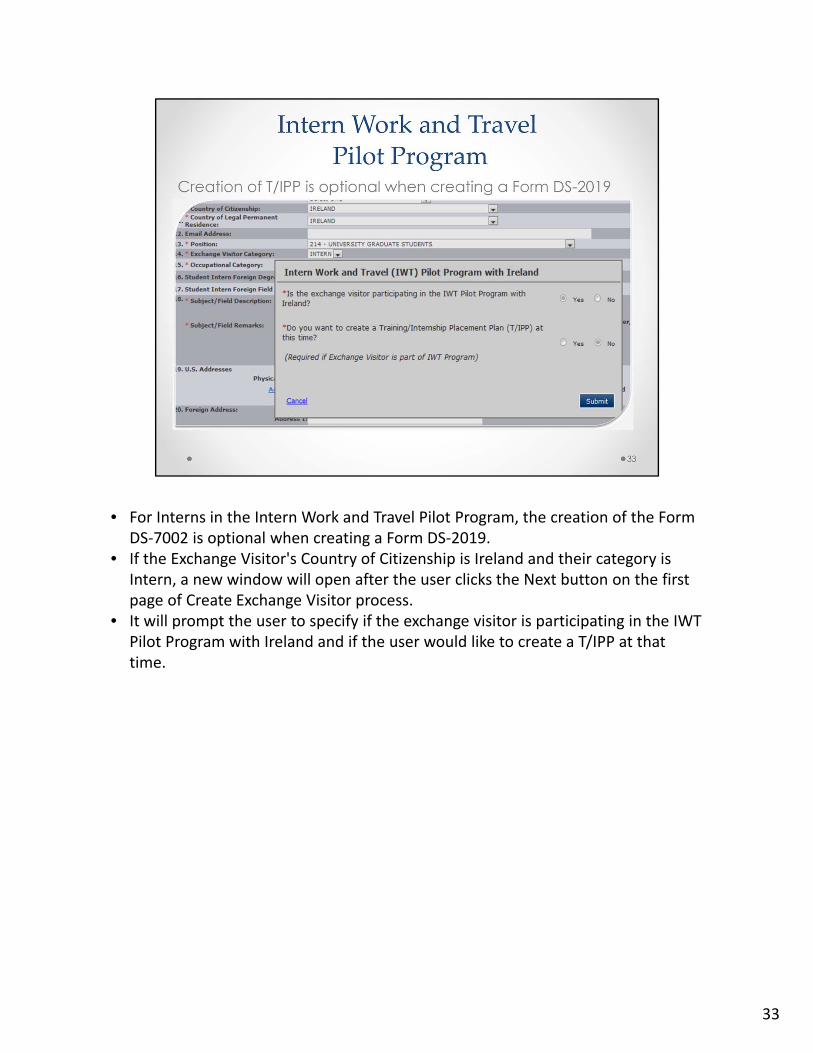
• For Interns in the Intern Work and Travel Pilot Program, the creation of the Form DS‐7002 is optional when creating a Form DS‐2019.
• If the Exchange Visitor's Country of Citizenship is Ireland and their category is Intern, a new window will open after the user clicks the Next button on the first page of Create Exchange Visitor process.
• It will prompt the user to specify if the exchange visitor is participating in the IWT Pilot Program with Ireland and if the user would like to create a T/IPP at that time.
33
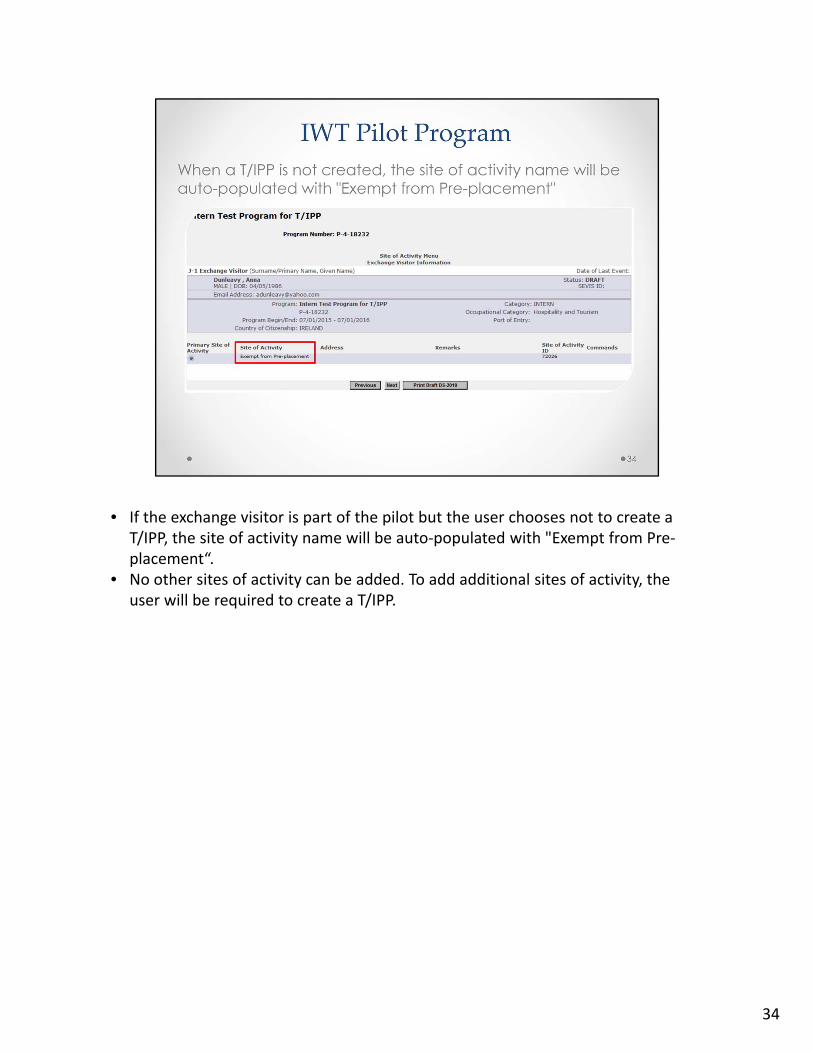
• If the exchange visitor is part of the pilot but the user chooses not to create a T/IPP, the site of activity name will be auto‐populated with "Exempt from Pre‐placement“.
• No other sites of activity can be added. To add additional sites of activity, the user will be required to create a T/IPP.
34
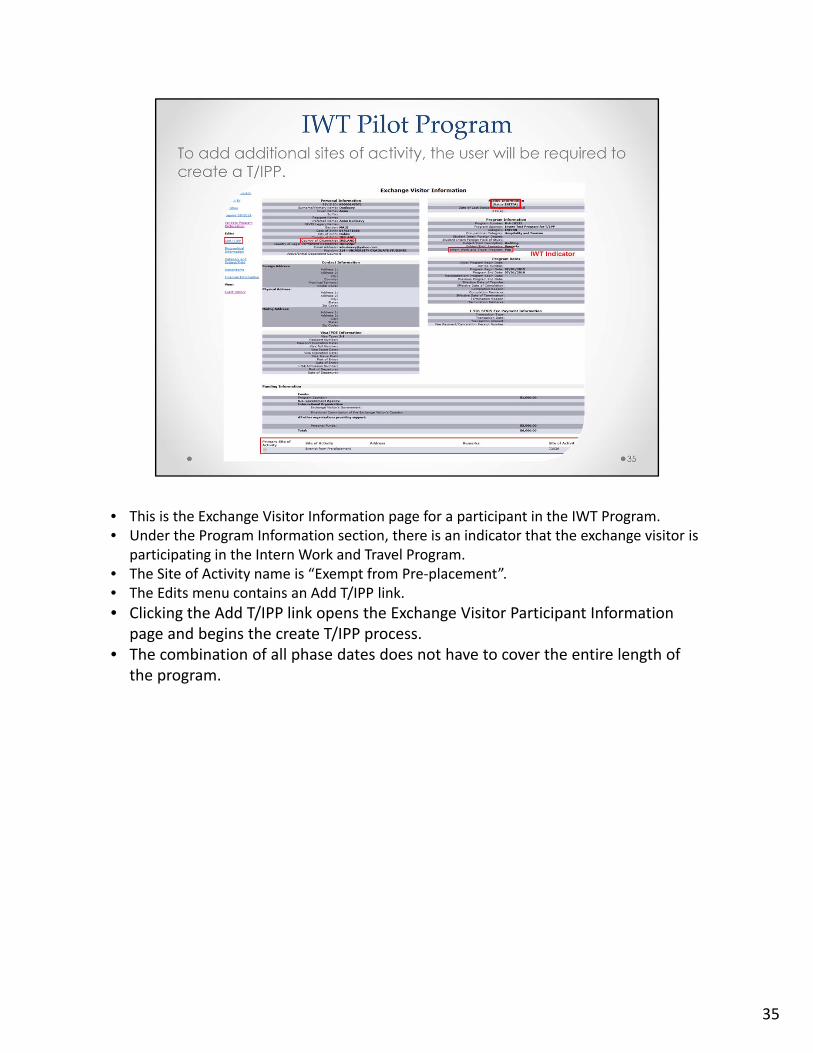
• This is the Exchange Visitor Information page for a participant in the IWT Program. • Under the Program Information section, there is an indicator that the exchange visitor is
participating in the Intern Work and Travel Program. • The Site of Activity name is “Exempt from Pre‐placement”. • The Edits menu contains an Add T/IPP link.
• Clicking the Add T/IPP link opens the Exchange Visitor Participant Information page and begins the create T/IPP process.
• The combination of all phase dates does not have to cover the entire length of the program.
35
After the T/IPP is created, the bottom of the Exchange Visitor Information page will show the T/IPP block in addition to the regular site of activity.
36
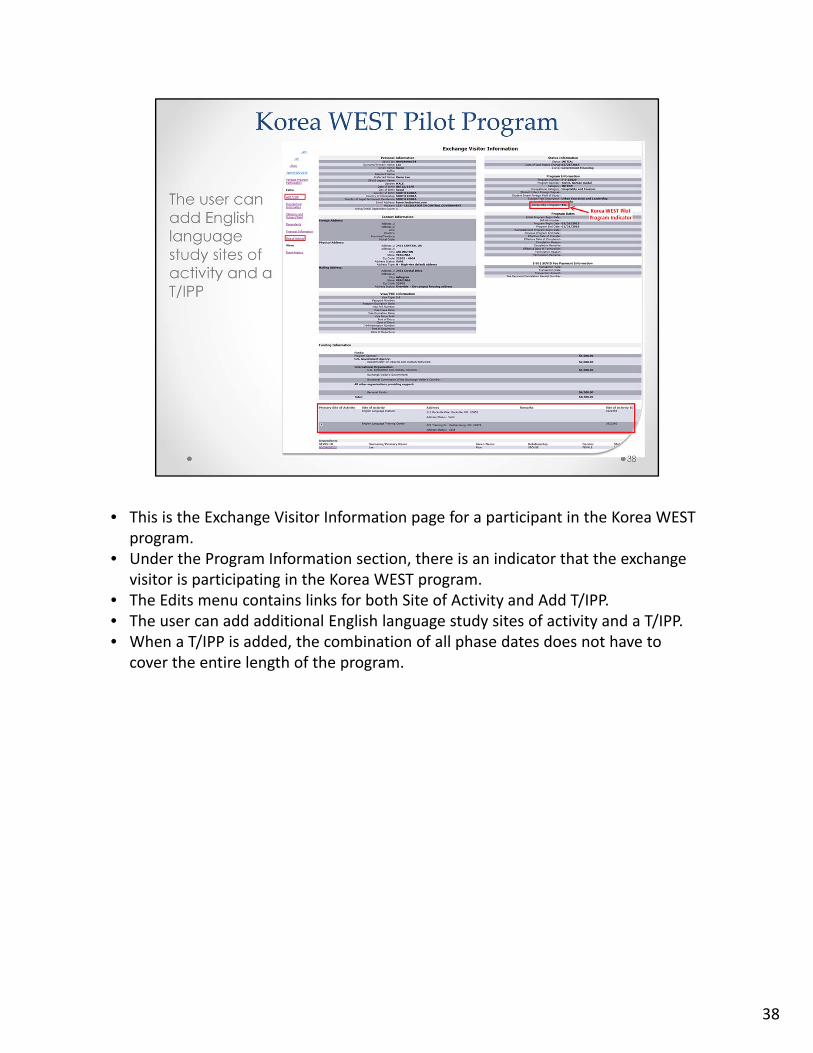
• For Interns in the Korea Work English Study &Travel Pilot Program, the creation of the Form DS‐7002 is optional when creating a Form DS‐2019.
• The maximum program length for Korea WEST intern can be 18 months.• At least one English language study site of activity is required.
• A new window will open after the user clicks the Next button on the first page of the Create Exchange Visitor process. It will ask the user if they would like to create a T/IPP at that time.
• If a T/IPP is not created, the user follows the normal create DS‐2019 process.
37
• This is the Exchange Visitor Information page for a participant in the Korea WEST program.
• Under the Program Information section, there is an indicator that the exchange visitor is participating in the Korea WEST program.
• The Edits menu contains links for both Site of Activity and Add T/IPP. • The user can add additional English language study sites of activity and a T/IPP. • When a T/IPP is added, the combination of all phase dates does not have to
cover the entire length of the program.
38
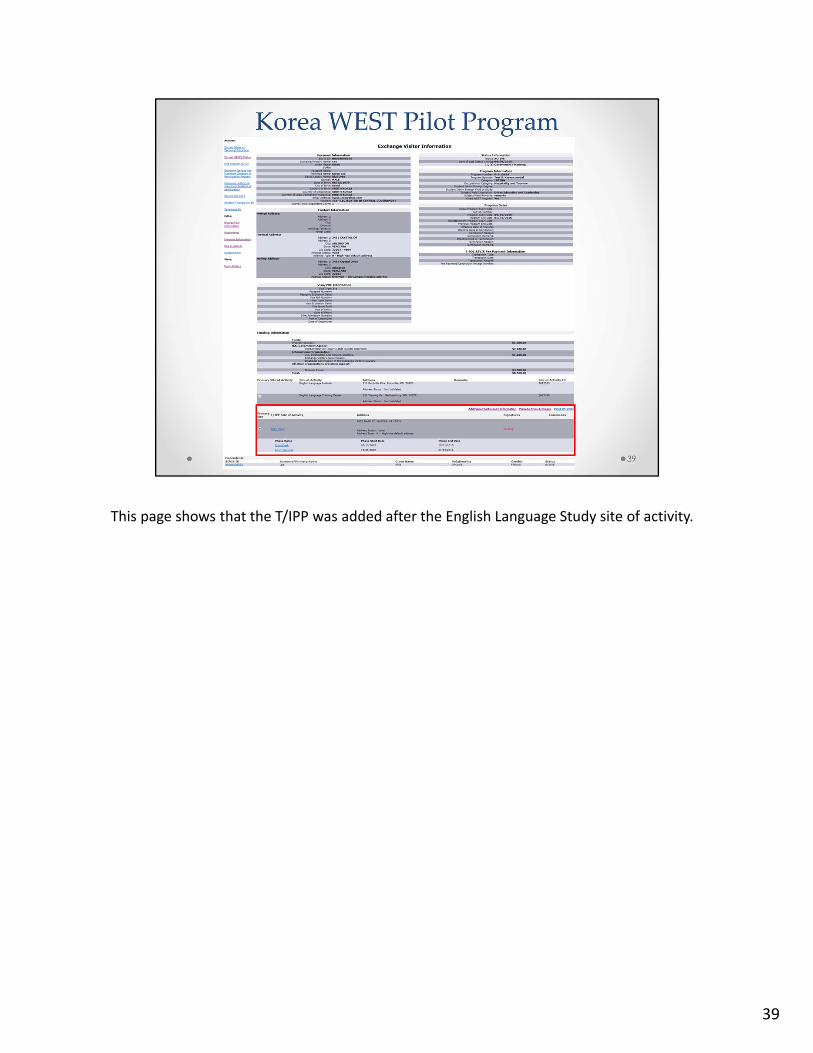
This page shows that the T/IPP was added after the English Language Study site of activity.
39
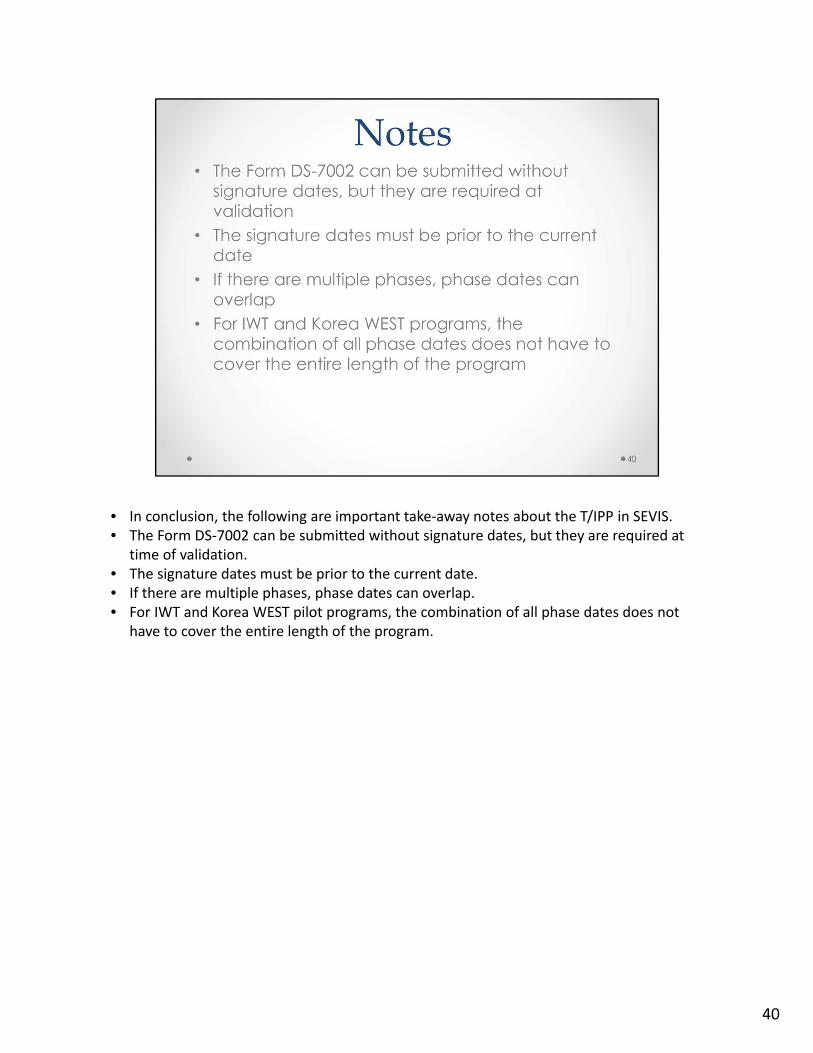
• In conclusion, the following are important take‐away notes about the T/IPP in SEVIS.• The Form DS‐7002 can be submitted without signature dates, but they are required at
time of validation.• The signature dates must be prior to the current date.• If there are multiple phases, phase dates can overlap.• For IWT and Korea WEST pilot programs, the combination of all phase dates does not
have to cover the entire length of the program.
40
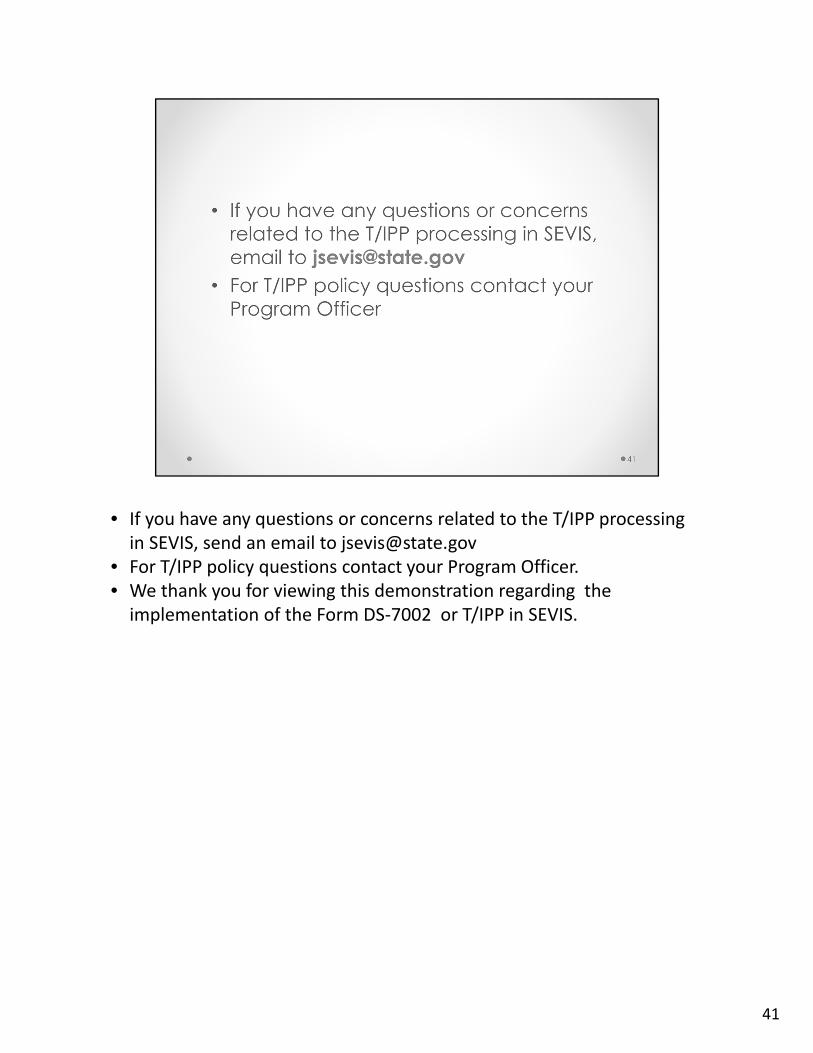
• If you have any questions or concerns related to the T/IPP processing in SEVIS, send an email to [email protected]
• For T/IPP policy questions contact your Program Officer.• We thank you for viewing this demonstration regarding the implementation of the Form DS‐7002 or T/IPP in SEVIS.