98
TIBCO Spotfire Miner™ 8.2 Java/C++ Extensibility November 2010 TIBCO Software Inc.

TIBCO Spotfire Miner™ 8.2Java/C++ Extensibility
November 2010
TIBCO Software Inc.

IMPORTANT INFORMATION
SOME TIBCO SOFTWARE EMBEDS OR BUNDLES OTHER TIBCO SOFTWARE. USE OF SUCH EMBEDDED OR BUNDLED TIBCO SOFTWARE IS SOLELY TO ENABLE THE FUNCTIONALITY (OR PROVIDE LIMITED ADD-ON FUNCTIONALITY) OF THE LICENSED TIBCO SOFTWARE. THE EMBEDDED OR BUNDLED SOFTWARE IS NOT LICENSED TO BE USED OR ACCESSED BY ANY OTHER TIBCO SOFTWARE OR FOR ANY OTHER PURPOSE.
USE OF TIBCO SOFTWARE AND THIS DOCUMENT IS SUBJECT TO THE TERMS AND CONDITIONS OF A LICENSE AGREEMENT FOUND IN EITHER A SEPARATELY EXECUTED SOFTWARE LICENSE AGREEMENT, OR, IF THERE IS NO SUCH SEPARATE AGREEMENT, THE CLICKWRAP END USER LICENSE AGREEMENT WHICH IS DISPLAYED DURING DOWNLOAD OR INSTALLATION OF THE SOFTWARE (AND WHICH IS DUPLICATED IN THE TIBCO SPOTFIRE MINER LICENSES). USE OF THIS DOCUMENT IS SUBJECT TO THOSE TERMS AND CONDITIONS, AND YOUR USE HEREOF SHALL CONSTITUTE ACCEPTANCE OF AND AN AGREEMENT TO BE BOUND BY THE SAME.
This document contains confidential information that is subject to U.S. and international copyright laws and treaties. No part of this document may be reproduced in any form without the written authorization of TIBCO Software Inc.
TIBCO Software Inc., TIBCO, Spotfire, TIBCO Spotfire Miner, TIBCO Spotfire S+, Insightful, the Insightful logo, the tagline "the Knowledge to Act," Insightful Miner, S+, S-PLUS, TIBCO Spotfire Axum, S+ArrayAnalyzer, S+EnvironmentalStats, S+FinMetrics, S+NuOpt, S+SeqTrial, S+SpatialStats, S+Wavelets, S-PLUS Graphlets, Graphlet, Spotfire S+ FlexBayes, Spotfire S+ Resample, TIBCO Spotfire S+ Server, TIBCO Spotfire Statistics Services, and TIBCO Spotfire Clinical Graphics are either registered trademarks or trademarks of TIBCO Software Inc. and/or subsidiaries of TIBCO Software Inc. in the United States and/or other countries. All other product and company names and marks mentioned in this document are the property of their respective owners and are mentioned for
2

identification purposes only. This software may be available on multiple operating systems. However, not all operating system platforms for a specific software version are released at the same time. Please see the readme.txt file for the availability of this software version on a specific operating system platform.
THIS DOCUMENT IS PROVIDED “AS IS” WITHOUT WARRANTY OF ANY KIND, EITHER EXPRESS OR IMPLIED, INCLUDING, BUT NOT LIMITED TO, THE IMPLIED WARRANTIES OF MERCHANTABILITY, FITNESS FOR A PARTICULAR PURPOSE, OR NON-INFRINGEMENT. THIS DOCUMENT COULD INCLUDE TECHNICAL INACCURACIES OR TYPOGRAPHICAL ERRORS. CHANGES ARE PERIODICALLY ADDED TO THE INFORMATION HEREIN; THESE CHANGES WILL BE INCORPORATED IN NEW EDITIONS OF THIS DOCUMENT. TIBCO SOFTWARE INC. MAY MAKE IMPROVEMENTS AND/OR CHANGES IN THE PRODUCT(S) AND/OR THE PROGRAM(S) DESCRIBED IN THIS DOCUMENT AT ANY TIME.
Copyright © 1996-2010 TIBCO Software Inc. ALL RIGHTS RESERVED. THE CONTENTS OF THIS DOCUMENT MAY BE MODIFIED AND/OR QUALIFIED, DIRECTLY OR INDIRECTLY, BY OTHER DOCUMENTATION WHICH ACCOMPANIES THIS SOFTWARE, INCLUDING BUT NOT LIMITED TO ANY RELEASE NOTES AND "READ ME" FILES.
TIBCO Software Inc. Confidential Information
Reference The correct bibliographic reference for this document is as follows:
TIBCO Spotfire Miner™ 8.2 Java/C++ Extensibility, TIBCO Software Inc.
Technical Support
For technical support, please visit http://spotfire.tibco.com/support and register for a support account.
3

Important Information 2
Overview 6
Extension Files 7Default Extension File Names 8Explorer IML Files 9Java Files 11C++ Library Files 12Image Files 12Help Files 12Manuals 12extension.xml Files 13
Development Tools 15Java Compiler 15C++ Compiler 15Optional Tools 16
Architecture Features 17XML 17Pipeline 17Data Types 17Output Caches 18Node State 18Client-Server 19
Infrastructure Java Classes 20XML Property Objects 20Column Meta-Data 20
Graphical User Interface Classes 21Overview 21Activity Node Model 21
JAVA/C++ EXTENSIBILITY 1
4
Special Interfaces 22Node Dialog 24Viewers 24
Engine Classes 25Overview 25General Methods 25Constructors 25Initialization 25Output Meta Data 26CNKProc Objects 26
Example: Copying Inputs 28Simple Java Version 28Simple C++ Version 32Extended Java Version 38
The TIBCO Spotfire Pipeline 50Overview 50C++ Libraries 54C++ Classes 55
5
OVERVIEW
Spotfire Miner is written in Java and C++. The graphical user interface and some computational components are in Java. The underlying pipeline architecture and other computational components are in C++.
The same techniques that TIBCO uses to create nodes in Spotfire Miner can be employed by users to create additional nodes. Creating nodes in Java or C++ requires a much greater level of programming expertise than creating nodes with Spotfire S+. The target audience for this material is a Java programmer with some experience using Swing. For C++ nodes, the programmer should also have experience with numerical programming in C++.
The first section of this chapter details the various items that need to be created to add a component to Spotfire Miner. The next section discusses the architecture of the graphical user interface classes used to create and coordinate property dialogs, viewers, and computations. Later sections discuss writing the computational classes using Java or C++.
To create new components for Spotfire Miner, you will need to be familiar with a variety of Java classes. Javadoc for the classes discussed in this document is available in the doc/javadoc directory.
6

EXTENSION FILES
The Spotfire Miner software is implemented using a large number of Java and C++ object files, image files, etc, stored in various subdirectories within the Spotfire Miner installation directory. It is possible to extend Spotfire Miner by adding additional files to various subdirectories, but it is difficult to keep track of the multiple files implementing an extension. Spotfire Miner supports an extension mechanism where all of the files implementing an individual extension can be placed within a single new directory. A single extension may implement more than one node; normally, an extension would contain a set of related nodes.
When Spotfire Miner starts, it looks for a directory named extensions within the Spotfire Miner installation directory. If this directory exists, each subdirectory under extensions is processed to load each extension. Next, Spotfire Miner looks for a directory named extensions in the user’s work directory and processes any subdirectories of this as additional extensions. (The user’s default work directory is depends on the operating system.) Extensions are loaded from both places so that stable extensions to be used by multiple users can be defined once (in the Spotfire Miner installation directory), and users can develop new extensions in their own directories.
Extensions are only processed when Spotfire Miner is started. There is currently no way to dynamically add or remove extensions from Spotfire Miner while it is executing.
To create an extension, create a new subdirectory within the extensions directory (in the Spotfire Miner installation directory, or the user work directory). The name of this subdirectory is not important; it is useful to give it a name that identifies the extension, but the directory name is not otherwise interpreted. All of the files implementing the extension should be stored within this directory. This would normally include:
• An XML file describing the extension nodes.
• A small icon file for each node, used in the Explorer pane.
• A large icon file for each node, used in the worksheet.
• A Java jar file containing the Java class files.
7
• Possibly a Windows DLL with compiled C++ code.
• Possibly help files in a format such as compiled HtmlHelp
• Possibly documentation in a format such as PDF
The following subsections describe how these files should be named, and how these files are used to implement an extension.
Default Extension File Names
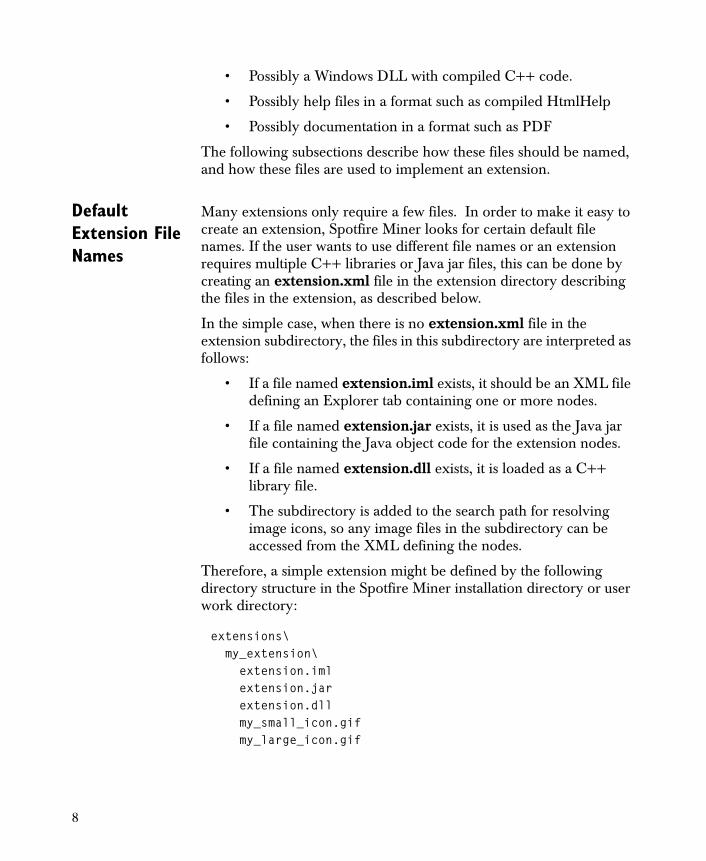
Many extensions only require a few files. In order to make it easy to create an extension, Spotfire Miner looks for certain default file names. If the user wants to use different file names or an extension requires multiple C++ libraries or Java jar files, this can be done by creating an extension.xml file in the extension directory describing the files in the extension, as described below.
In the simple case, when there is no extension.xml file in the extension subdirectory, the files in this subdirectory are interpreted as follows:
• If a file named extension.iml exists, it should be an XML file defining an Explorer tab containing one or more nodes.
• If a file named extension.jar exists, it is used as the Java jar file containing the Java object code for the extension nodes.
• If a file named extension.dll exists, it is loaded as a C++ library file.
• The subdirectory is added to the search path for resolving image icons, so any image files in the subdirectory can be accessed from the XML defining the nodes.
Therefore, a simple extension might be defined by the following directory structure in the Spotfire Miner installation directory or user work directory:
extensions\ my_extension\ extension.iml extension.jar extension.dll my_small_icon.gif my_large_icon.gif
8

In this case, the extension subdirectory is named my_extension, and the extension uses two gif files.
Explorer IML Files
An Explorer IML file is an XML file that describes one or more Spotfire Miner nodes that appear within an Explorer tab. The XML tags are described in the IMML_3_0.dtd file in the xml directory. This directory also includes several IML files used for the default Explorer tabs.
An IML file defines the list of nodes in an Explorer tab with XML such as:
<?xml version="1.0" encoding="UTF-8"?><ExplorerTree>
<ExplorerPage labelText="Programming Examples"><ExplorerNodeList>
<ExplorerFolder expanded="true" labelText="Copy Columns">
<ExplorerNodeList>...ActivityNode Definitions...
</ExplorerNodeList></ExplorerFolder>
</ExplorerNodeList></ExplorerPage>
</ExplorerTree>
Each component in the Explorer tab is described with an XML ActivityNode object. The XML description contains:
• Name of the main computational engine Java class.
• Name of the main graphical user interface Java class.
• Number of inputs
• Number of outputs
• ID number for the node (if in a worksheet)
• Current label text for the node
• Default label text for the node (also used as the help topic)
• Name of GIF file with 16 by 16 icon used in Explorer
• Name of GIF file with 70 by 70 icon used on worksheet
9

• x-position (if in a worksheet)
• y-position (if in a worksheet)
• Property values set in the node property dialog
10

For example, the XML for the Correlations node in the Explorer pane is:
<ActivityNode engineClass= "com.insightful.miner.CorrelationsEngineNode" guiClass= "com.insightful.miner.CorrelationsNodeModel" numInputs="1" numOutputs="1" id="" >
<DisplayInfo labelText="Correlations"
defaultLabelText="Correlations"
smallIcon="correlation_small.gif"
largeIcon="correlation_large.gif"
x="0"
y="0" />
<ArgumentList>
<XTProps>
<Property name="useGlobal" value="true" />
<Property name="useCache" value="global" />
<Property name="correlationColumns" value="" />
<Property name="correlation" value="true" />
<Property name="covariance" value="false" />
</XTProps>
</ArgumentList>
</ActivityNode>
XML describing a new node can be created in either a simple text editor such as Notepad or a special XML editor such as XMLSpy. The easiest way to get started on creating an Explorer IML file is to copy xml\DefaultExplorer.iml to another name, and edit the file to include your component descriptions.
Java Files For most new components, it is necessary to write Java code implementing the new component. This code should be compiled with a Java compiler and placed in a Java archive (jar) file.
11
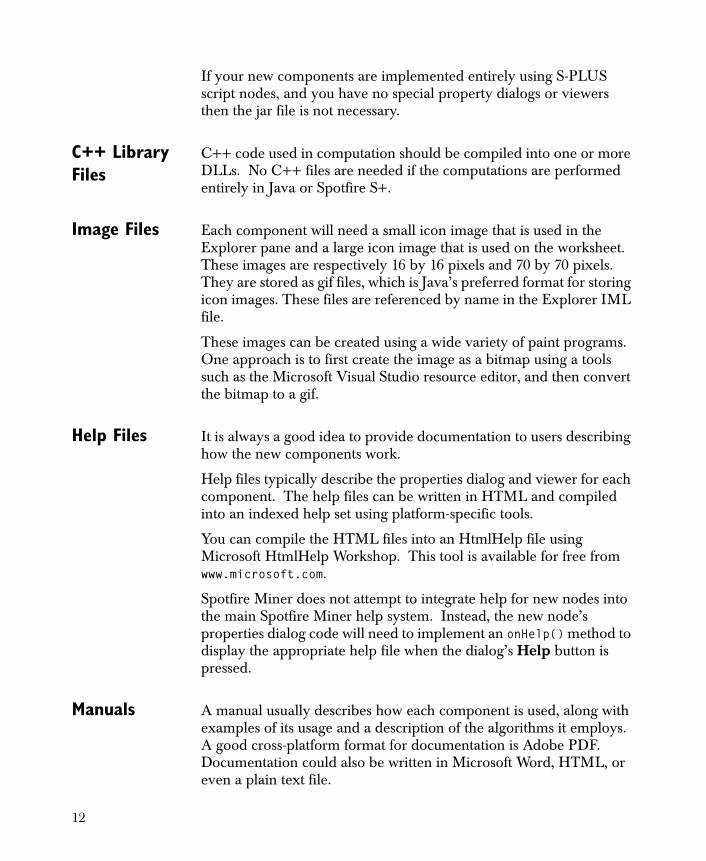
If your new components are implemented entirely using S-PLUS script nodes, and you have no special property dialogs or viewers then the jar file is not necessary.
C++ Library Files
C++ code used in computation should be compiled into one or more DLLs. No C++ files are needed if the computations are performed entirely in Java or Spotfire S+.
Image Files Each component will need a small icon image that is used in the Explorer pane and a large icon image that is used on the worksheet. These images are respectively 16 by 16 pixels and 70 by 70 pixels. They are stored as gif files, which is Java’s preferred format for storing icon images. These files are referenced by name in the Explorer IML file.
These images can be created using a wide variety of paint programs. One approach is to first create the image as a bitmap using a tools such as the Microsoft Visual Studio resource editor, and then convert the bitmap to a gif.
Help Files It is always a good idea to provide documentation to users describing how the new components work.
Help files typically describe the properties dialog and viewer for each component. The help files can be written in HTML and compiled into an indexed help set using platform-specific tools.
You can compile the HTML files into an HtmlHelp file using Microsoft HtmlHelp Workshop. This tool is available for free from www.microsoft.com.
Spotfire Miner does not attempt to integrate help for new nodes into the main Spotfire Miner help system. Instead, the new node’s properties dialog code will need to implement an onHelp() method to display the appropriate help file when the dialog’s Help button is pressed.
Manuals A manual usually describes how each component is used, along with examples of its usage and a description of the algorithms it employs. A good cross-platform format for documentation is Adobe PDF. Documentation could also be written in Microsoft Word, HTML, or even a plain text file.
12

extension.xml Files
If the file extension.xml exists within an extension subdirectory, it must be an XML file that describes exactly which files compose the extension. This allows extension files with arbitrary names (other than extension.jar, etc), or multiple Java jar and library files, as well as some other specialized features.
An extension.xml file is exactly like an XTProps object file. Here is an example:
<?xml version="1.0" encoding="UTF-8"?><IMML version="3.00">
<XTProps><Property name="jarFile" value="“>
<Property name=”copy.jar" value=”” /><Property name=”copy2.jar" value=”” />
</Property><Property name="libraryFile" value="copy.so" /><Property name="explorerFile" value="copy.iml" />
</XTProps></IMML>
Each top-level property (like jarFile, libraryFile) can have one or more values. If there is only one value, it can be specified in the same <Property> clause, as with the libraryFile and explorerFile peoprties above. If a property have multiple values, they are listed in subproperties, as with the jarFile property above.
Most of the property values are file names. Each file name may be an absolute file, or a file name relative to the extension subdirectory. The special file name “.” stands for the extension subdirectory itself.
The property names recognized are:
• explorerFile: Value is one or more Explorer IML files. Each IML file defines a new Explorer tab with one or more nodes.
• jarFile: Value is one or more Java jar files containing code for the extension. One or more of the values may be a directory, in which case the directory itself is used to search for Java .class files for individual classes. For example, if an extension only used the single Java class temp in the default package, one could put the class file temp.class in the extension subdirectory, and specify the jarFile property as “.”. This may be useful during development.
13

• libraryFile: Value is one or more C++ library files that is loaded when the extension is processed.
• imageDirectory: Value is one or more directories that will be searched for image gif files for icons, etc. If an extension has many image files for many nodes, it may be convenient to put them in an images subdirectory, and specify that this property valuea as “images”. The image directories are searched after the system image directories, so it is prudent to use unique image files names that won’t conflict with the system image files.
• jniDirectory: Value is one or more directories that is used when executing the Java System.loadLibrary(name) method to dynamically link code that can be called directly via Java JNI. The files specified by the libraryFile property are not automatically linked via Java JNI.
• initExtensionClass: Value is one or more fully-specified Java class names (including packages, if it is not a class in the default package). After all of the library files and Java jar files are processed, each of these classes is initialized by calling the Java static method “void initExtension(String extensionName, String extensionDirPath)” on the class (if this class and method is defined), passing the name of the extention subdirectory within extensions and the full pathname of this extension subdirectory. This initialization routine can do whatever linking and loading that is necessary. It may be useful to save the extension subdirectory path in a global variable, for future use.
14
DEVELOPMENT TOOLS
You will need Java and possibly C++ compilers to create new nodes.
Java Compiler To compile the Java code, you will need a Java compiler that supports version 6 of the Java SE platform.
Sun’s version of the JDK is available from:
http://java.sun.com/javase/6
Java Classes The Spotfire Miner distribution includes a copy of Sun’s Java Runtime Environment ( JRE) version 6. This is in the directory:
splus/java/jre
It is placed in the same location as it would be in Spotfire S+ for consistency between the Spotfire S+ and Spotfire Miner products. Some of the Spotfire S+ Connect/Java code currently relies on the JRE being in this particular location relative to the main Spotfire S+ directory.
The Spotfire Miner Java archive (jar) file and related jar files are in the directory:
splus/java/jre/lib/ext
The Miner.jar file in this directory will need to be specified in the classpath of the JDK so the Spotfire Miner and pipeline classes can be found. Other jar files from this directory used by the Spotfire Miner classes will also be required: you should add all of the jar files that are not included in your JDK.
C++ Compiler If you are using C++ to perform computations, you need Microsoft
Visual C++®6.0.
Include Files The include files for the C++ pipeline classes in cnkbase are in the include directory in the Spotfire Miner distribution.
Lib Files Debug and release versions of the cnkbase.lib file are available in Debug and Release subdirectories of the lib directory.
15

Optional Tools While the compilers are the only tools strictly required for developing new nodes, we use some additional tools as a standard part of Spotfire Miner development. Developers of new nodes may find that using these or similar tools significantly increases their effectiveness.
Source Control If you are doing serious development, it’s highly recommended that you use a source control system. This allows you to save revisions of your work as you go, with the ability to track changes, back out changes, and merge concurrent changes by multiple developers.
Build System The multiple steps involved in compiling Java code, compiling C++ code, and packaging the pieces up for distribution can get repetitive. These tasks can be invoked automatically from a Windows batch file. A preferable cross-platform solution is to use a build system such as the open-source product Ant:
http://ant.apache.org
This is the build system we use for Spotfire Miner.
16

ARCHITECTURE FEATURES
The architecture for Spotfire Miner has a number of key features that are important for understanding how the application works. This section points out these features.
XML The product relies heavily on XML for storing and exchanging information. XML is used as the storage format for worksheets, model information, default settings, and other external files.
The initial implementation of Spotfire Miner also used Java XML objects internally. These have been replaced with usage-specific data structures for improved efficiency.
Pipeline Spotfire Miner’s computational engine is designed around a rich pipeline architecture. The pipeline is a C++ infrastructure for passing buffers of data between analytic components. The components created in the graphical user interface map directly to related engine computational components. This is discussed further in the section The TIBCO Spotfire Pipeline on page 50.
Data Types The pipeline (and the product in general) knows about four data types: continuous, categorical, string, and date.
Continuous
Continous columns are used to represent any sort of numerical data, and are stored as double values.
Categorical
Categorical columns are used for values falling into a finite set of categories, such as True/False or Small/Medium/Large. They are stored as integer codes into a table of string labels. The string labels are used for display.
String
String columns are used for informational columns such as names or addresses that do not represent categories and are not used in computations.
17

Date
Date columns are used to represent dates and times. They are stored as a long representing the number of milliseconds since an origin of January 1, 1970. This is the same origin used by Java. A string representation of the time is used for display. Options under Tools:Options specify the default date formats for reading and displaying date values.
Output Caches The pipeline is designed to pass blocks of data between components, rather than passing all of the data at once. It is this capability that allows the product to scale to handle a very large number of rows of data.
Global and component level settings are available to determine whether a copy of the data is stored for each node output. By default, each computed output has a corresponding copy of the data in an output cache file.
If all of the computations can be performed in a blockwise fashion with a single pass through the data, all of the data can be passed from node to node without storing the values. This would be the case in a network containing a series of Read Text File, Create Columns, and Write Text File nodes. The advantage of not caching output values is a savings in file space usage.
The advantage of caching values is that it provides greater interactivity. Additional components can be hooked to an output and executed without having to recompute the previous component outputs. The data at the output can also be viewed in the viewer. This interactivity is the reason the product caches node outputs by default.
Some computational components cannot operate in a blockwise fashion with a single pass through the data. For example, logistic regression needs to make multiple passes through the data as it performs numerical optimization. For this type of node, the preceding output caches corresponding to its inputs will be created regardless of the cache settings.
Node State Each node is always in one of three states: created, configured, or computed.
18

Created
A created node has been created and possibly linked to other nodes, but does not have all of its required property values specified. The user needs to provide extra information in the corresponding property dialog before the node can be executed. This state is indicated by a red status indicator.
Configured
A configured node has all required inputs linked to other nodes, and all of its required properties set. It is ready to be executed. This state is indicated by a yellow status indicator.
Computed
A computed node has been executed successfully, and has valid results. The node has up-to-date view information and it can be used in operations such as Create Filter, Create Predictor, and Generate PMML.
Client-Server Spotfire Miner is designed to support cross-platform client-server configurations. A common scenario would be to create an Spotfire Miner worksheet on the desktop, deploy it to a Windows or UNIX server, where the Spotfire S+ engine performs the analysis.
User-written classes will need to maintain this separation between the client and server classes, and communicate information via XML. In particular, the Java engine-side classes can not create arbitrary Java objects and then pass these objects to client-side classes. Instead, any information constructed by the engine should be represented as XML. The Spotfire Miner classes include methods for transferring XML objects between the client and server.
19

INFRASTRUCTURE JAVA CLASSES
Some important classes for storing and exchanging information are XTProps for storing property information and XTMetaData for storing column metadata. The classes discussed in later sections use these to communicate information.
XML Property Objects
The XTProps class provides a flexible data structure for storing name/value pairs, with the additional capability of elements having child elements. This corresponds to the XTProps element in our XML. The parties using the properties must agree on how to interpret the items. Methods are available to get and set properties, and to read and write the properties as XML.
Column Meta-Data
Column metadata consists of column name, type, role, and additional information depending on the column type. Continuous columns have a mean, min, max, standard deviation, row count, and missing value count. Categorical columns have category labels and counts.
The column name, type, and role information can be gathered before all of the data has been read. The other summaries are only available once the node has been executed.
This information is stored in an XTMetaData object. This class has methods for getting and setting metadata values, and reading and writing the metadata as XML.
20
GRAPHICAL USER INTERFACE CLASSES
Overview Spotfire Miner is structured as a client/server application. Each component such as a Read File node has a corresponding ActivityNodeModel object on the client, and an EngineNode object on the server.
The ActivityNodeModel keeps track of the node properties and reacts to requests to check the node status, show the properties, and show the viewer.
The EngineNode gets the properties from the ActivityNodeModel, gets data from the pipeline, does the actual computation, outputs data to the pipeline, and stores any necessary view information in a standard location that ActivityNodeModel can access.
The ActivityNodeModel will typically have helper classes that are used to show a properties dialog and perhaps a custom viewer.
A key element of the architecture is that any information needed by the engine is stored in an XML structure that can be retrieved from the ActivityNodeModel, and any information needed by the ActivityNodeModel for viewing results is stored in an XML cache file on the engine. Direct method calls between the client and server classes can not be used as this will not work in a client/server environment.
Activity Node Model
Each type of node is completely described in the XML description of the node in the Explorer or a worksheet. The application creates an ActivityNodeModel by finding the appropriate class name from the node’s XML description and using reflection to instantiate a new object initialized based on the other elements in the XML description.
Typically a new class that extends ActivityNodeModel will be created for each new type of node. For instance, the Read Text File node uses a ReadTextFileNodeModel.
The important methods that are typically overridden are the methods to check the state of the node, show the properties dialog, and show the viewer. Model nodes override additional methods used for prediction, PMML generation, and/or column filter creation.
21
Constructors The constructor method is typically empty. When the constructor is called, the node properties have not been initialized. Any subclass initialization that depends on the node properties should be implemented by overridding the initializeNodeModel method, which is called after the properties are set.
public ReadTextFileNodeModel() { }
General Methods This class has a wide variety of methods that are used by the application to find out about the node. For most of these, the default implementation is used. Exceptions are discussed in the following subsection.
When overriding methods, it’s often necessary to get information on the current node properties. The method getXTProps() returns this information.
Check Properties The isPropertiesValid() method returns a boolean indicating whether all of the required properties are specified. This method will usually check the XTProps object containing model information to determine whether additional information is needed. This method is almost always overridden.
Display Dialog The showPropertiesDialog() method displays the properties dialog for the node. Typically this will construct a dialog passing the XTProps object to the dialog’s constructor, and show the dialog. The dialog gets current settings from the properties object and puts final settings back into the properties object. This method is almost always overridden.
Show Viewer The showView() method displays the viewer for the node. By default, the Table View is presented. This method is only overridden if the node has a custom viewer. Viewers should be non-blocking.
Special Interfaces
Every node has the ability to display a property dialog, execute, and display a viewer. In addition, some nodes support additional menu item operations such as Create Predictor, Create Filter, and Generate PMML. The ActivityNodeModel indicates that it can support this type of functionality by implementing the appropriate interface.
22

Column Filter Generator
Some nodes are able to create a Filter Columns node where the columns selected are determined based upon the node’s computational results. These include Correlations, Linear Regression, and Regression Tree.
The node supports this functionality by implementing the ColumnFilterGenerator interface. This interface has a single method:
public String[] getFilterColumnsToExclude()
This method returns an array of the columns that the filter should exclude. Useful helper tools are available in the ColumnFilterTools class. In particular, this class provides support for launching the standard Column Filter Specification dialog.
PMML Generator The model nodes built into Spotfire Miner are all able to create a Predictive Model Markup Language (PMML) description of their model. PMML is an XML standard for describing data mining models. For models such as Principal Components that don’t have a definition in PMML, an alternate XML description is produced.
A node indicates that it supports PMML generation by implementing the PMMLGenerator interface. This interface has a single method:
void writePMML(FileOutputStream str)
The PMML generation in Spotfire Miner is typically performed by taking the XML representation of the model and transforming it using XSL. This is done using the applyXSLTransform() method in XMLTree.
Predictable Node Model
Model nodes such as Linear Regression can generate a Predict node that can get predicted values for new data. These nodes extend PredictableNodeModel. An object of this type can be used in the constructor for a Predict node.
Currently, the Predict node classes have a lot of knowledge in their methods regarding how to predict for the various kinds of models. As this information is in the Predict node rather than the specific model’s classes, it isn’t possibly to add a new model without adding new code to the PredictEngineNode and PredictNodeModel. In the future we may change these methods to use reflection and invoke code in the specific model classes.
23

Node Dialog The user has great latitude in how the node’s properties dialog is implemented. In the application each node has its own class extending NodeDialog. Information is passed between the dialogs and the node model via the node model’s XTProps. This mechanism is displayed in the example in section Extended Java Version on page 38.
Viewers The application uses a wide array of viewers. The default viewer is the Table View. Some nodes have custom Java viewers. For other nodes, HTML is displayed in Internet Explorer or Netscape using the utility class HtmlFrame.
24

ENGINE CLASSES
Overview For each type of node, there is a class extending EngineNode that is responsible for providing metadata to the activity node model and coordinating the computations when the node is executed.
The actual computation will be performed by methods in the EngineNode class for a Java-based computation, or in a C++ class for a C++-based computation. Coordination between the pipeline, the EngineNode, and other classes performing the computation is handled by a CNKProc object.
It is possible for multiple activity node model classes to use the same engine node class. For example, several of the S-PLUS related nodes all use the SplusScriptEngineNode class. Engine node code can also be shared by having multiple classes extend a parent class that does most of the computation for that family of nodes.
General Methods
The EngineNode class has a wide variety of useful utility methods. These methods typically are not overridden. Exceptions are discussed in the following subsections.
The getNodeProperties() method is useful for determining the properties specified for the node.
The getInputMetaData() and getOutputMetaData() methods are useful for getting information about the inputs and outputs of the node.
Constructors The constructor is typically a single no-argument constructor:
public ReadTextFileEngineNode() {}
Initialization Actual initialization is performed in the procCreate() method. This is where the CNKProc object for the node is created. This initialization is performed every time the node is executed. This method is a good place to initialize any class member variables and to print any initial messages regarding the computations the node will be performing.
25

Output Meta Data
The calculateOutputMetaData() method is called to determine the names and types of the output columns. The pipeline takes care of computing the numerical summaries.
This method will often use getInputMetaData() to find out about the inputs and getNodeProperties() to find out about the properties. This information is then used to determine the output information.
This method may be called before the data has been read, and should be able to handle this case properly.
CNKProc Objects
The CNKProc object provides the connection to the pipeline. The pipeline can be thought of as having a series of procedures (procs) connected by buffers. Each procedure is represented by a CNKProc object. This object has methods for obtaining property values, getting data from input buffers, and writing data to output buffers. Running a component consists of the pipeline repeatedly telling the CNKProc object to access the input buffers and use the contents of the buffers to create new values and write them to the output buffers.
Java Procs If the computation is to be performed in Java, a CNKProcJavaTransform object is used. This provides a wide variety of methods for marshalling data back and forth between the C++-level pipeline code and Java code.
The setExecObject() method of this object is used to indicate a Java class implementing the CNKProcJavaTransformExec interface to perform the actual computation. This interface has a single execute() method that is called once for each block of data.
public void execute(CNKProcJavaTransform proc);
Often the EngineNode will itself implement this interface, with the computation for each block performed by its execute() method.
A typical procCreate() call for this case is of the form:
public CNKProc procCreate() throws Exception { CNKProcJavaTransform proc = new CNKProcJavaTransform(); proc.setExecObject(this); return(proc);}
26

An example execute() method is in the section Simple Java Version on page 28.
C++ Procs If the computation is to be performed in C++, the CNKProc class will be a simple class extending CNKProc with information on what C++ class to use. This information is specified in the createPeerObject() method.
public void createPeerObject() { createCNKObject(“cnkmisc”,
new String[] { "CNKProcKMeans", "CNKProc", "CNKObj" });
}
The section The TIBCO Spotfire Pipeline on page 50 discusses the C++ pipeline classes including the C++ CNKProc class that will be extended to perform the computations in C++. An example using C++ is available in the section Simple C++ Version on page 32.
C++ Tips Here are some useful tips regarding the computational code requirements.
• When creating a Java node calling a C++, the createPeerObject() method is the key Java method. This specifies the peer C++ class, and which shared object library to load.
• When creating a C++ proc, the key methods are the constructor, destructor, init(), execute(), setProperty(), and getProperty().
• In a C++ proc, be sure to call the super-class init() method from the init() method in your child class.
• In a C++ proc, be sure to set and get the properties using consistent types. If you set a property as one type and get it as another, the result will be incorrect.
• In a C++ proc, be sure to include the CNK_DEFINE_ACCESSIBLE_CLASS macro at the top of your code. This is necessary for the C++ CNKProc object to be created.
27
EXAMPLE: COPYING INPUTS
This section presents a simple example of the steps needed to create a new node. We will create a node that simply copies data from its inputs to its outputs. While the computation involved is trivial, this will show what’s involved in creating a node.
We begin with an implementation involving no parameters and written completely in Java. Later extensions include computation performed in C++ and a dialog to pass parameters.
For all of the examples presented here, the full code is available in the examples/programming directory.
Simple Java Version
For the first implementation, we will use a minimal set of Java classes.
Recall that typically we will need to implement a class extending ActivityNodeModel to handle GUI operations, a class extending EngineNode to handle engine operations, and possibly other classes for the properties dialog and custom viewer.
Node Model To keep things simple we will not include a properties dialog or custom viewer. As there are no parameters, we do not need to validate whether all of the properties are set. In this case we can use the default implementation of ActivityNodeModel.
Engine Node The Java implementation of the engine node will primarily need computation-specific code for computing the output column name and type information (the output metadata) and for actually copying the data when the node is executed. In addition, there will be some essentially boilerplate code.
We start with a simple implementation of the execute() and calculateOutputMetaData() methods. Later we will provide more extensive implementations.
Implementation
The file FirstCopyEngineNode.java contains:
import com.insightful.miner.*;import com.insightful.cnkjava.*;
28

/** * Very simple implementation of engine node copying each * input to the corresponding output. Assumes the same * number of inputs as outputs. To keep this short, no * error checking is performed. */
public class FirstCopyEngineNode extends EngineNode implements CNKProcJavaTransformExec {
/** * Empty constructor just uses the super method. */
public FirstCopyEngineNode() {
}
/** * Boilerplate for specifying this class provides the * execute() method. */
public CNKProc procCreate() throws Exception { CNKProcJavaTransform proc = new CNKProcJavaTransform(); proc.setExecObject(this); return(proc); }
/** * Passes the input column name/type information as the * output information. */
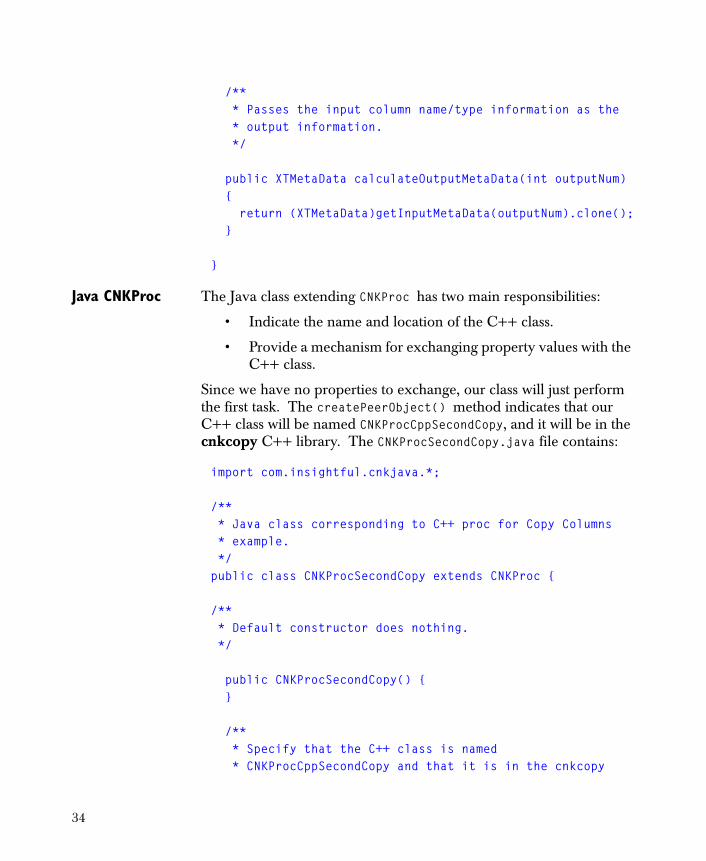
public XTMetaData calculateOutputMetaData(int outputNum) { return (XTMetaData)getInputMetaData(outputNum).clone(); }
/** * Copies the two inputs to the two outputs when the node
29
* is executed. */
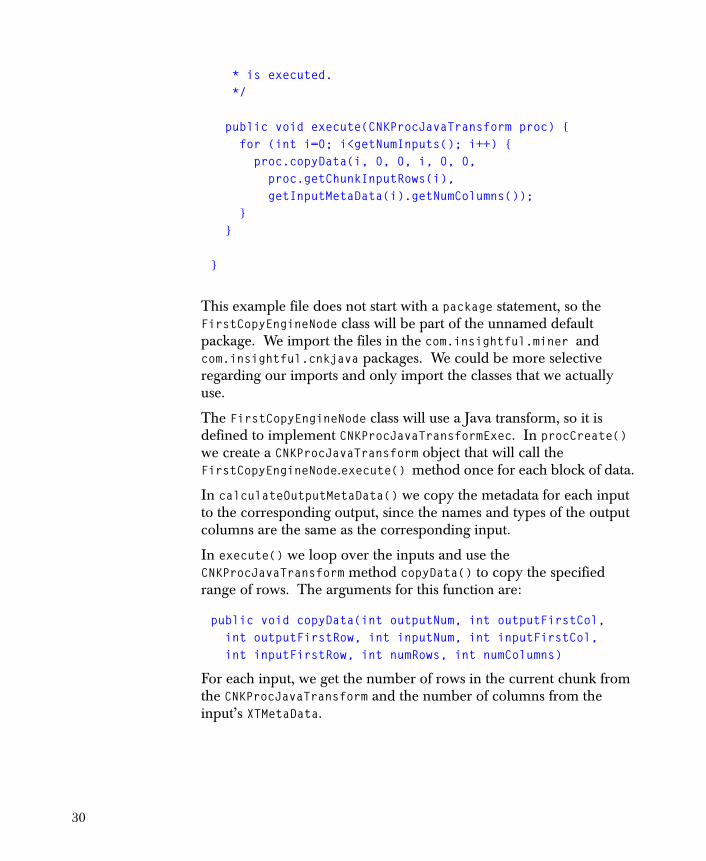
public void execute(CNKProcJavaTransform proc) { for (int i=0; i<getNumInputs(); i++) { proc.copyData(i, 0, 0, i, 0, 0, proc.getChunkInputRows(i), getInputMetaData(i).getNumColumns()); } }
}
This example file does not start with a package statement, so the FirstCopyEngineNode class will be part of the unnamed default package. We import the files in the com.insightful.miner and com.insightful.cnkjava packages. We could be more selective regarding our imports and only import the classes that we actually use.
The FirstCopyEngineNode class will use a Java transform, so it is defined to implement CNKProcJavaTransformExec. In procCreate() we create a CNKProcJavaTransform object that will call the FirstCopyEngineNode.execute() method once for each block of data.
In calculateOutputMetaData() we copy the metadata for each input to the corresponding output, since the names and types of the output columns are the same as the corresponding input.
In execute() we loop over the inputs and use the CNKProcJavaTransform method copyData() to copy the specified range of rows. The arguments for this function are:
public void copyData(int outputNum, int outputFirstCol, int outputFirstRow, int inputNum, int inputFirstCol, int inputFirstRow, int numRows, int numColumns)
For each input, we get the number of rows in the current chunk from the CNKProcJavaTransform and the number of columns from the input’s XTMetaData.
30

Compilation
Now that we have our Java code, we need to compile it and place it in a jar file. The specific steps for compiling the code and creating the jar will vary based on the Java development tools used.
For example, suppose you have Spotfire Miner installed in D:\Program Files, and you have Sun’s JDK1.4 installed in D:\java\jdk1.4.0. To compile the example files in the Spotfire Miner distribution using the Miner.jar in the distribution, first change into the directory containing the Java source code and then use the javac command:
cd "D:\Program Files\TIBCO\miner82\examples"
D:\java\jdk1.4.0\bin\javac -classpath "D:\Program Files\TIBCO\miner82\tools\splus\java\jre\lib\ext\Miner.jar" *.java
The directory with the *.java files will now also contain *.class files. These need to be put into an extension.jar file, which we will then copy into the extension directory. The jar command creates a jar file:
D:\java\jdk1.4.0\bin\jar cvf extension.jar *.class
XML Description Next we need to create the XML description of this node. Let’s label it as the First Copy Columns node, use the default icons, and specify two inputs and outputs. The XML to create a new page with a folder containing this description is:
<?xml version="1.0" encoding="UTF-8"?><ExplorerTree>
<ExplorerPage labelText="Programming Examples"><ExplorerNodeList>
<ExplorerFolder expanded="true" labelText="Copy Columns"><ExplorerNodeList>
<ActivityNodeengineClass="FirstCopyEngineNode"guiClass=
"com.insightful.miner.ActivityNodeModel"numInputs="2" numOutputs="2" >
31
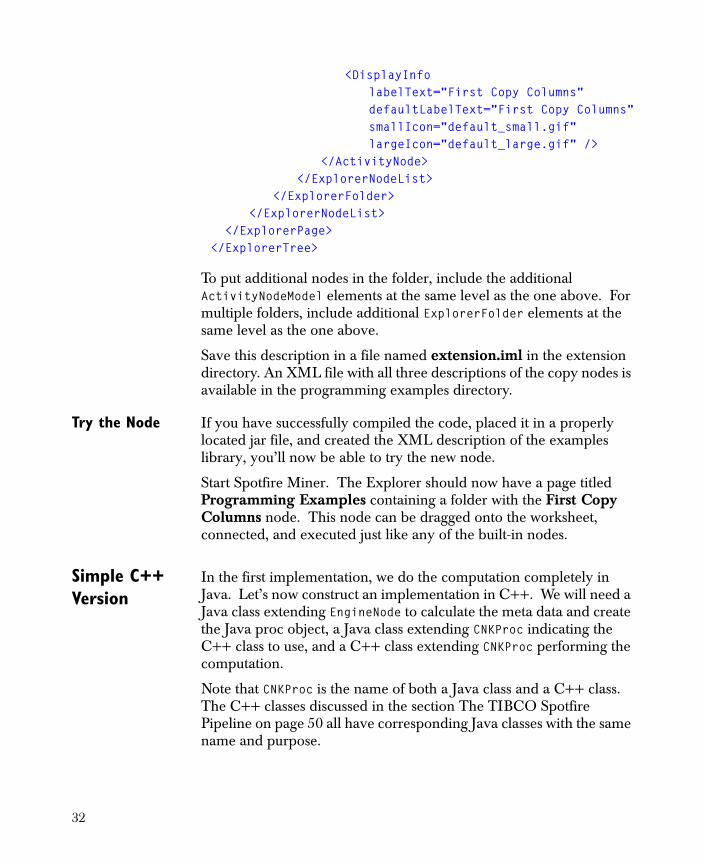
<DisplayInfo labelText="First Copy Columns"defaultLabelText="First Copy Columns"smallIcon="default_small.gif"largeIcon="default_large.gif" />
</ActivityNode></ExplorerNodeList>
</ExplorerFolder></ExplorerNodeList>
</ExplorerPage></ExplorerTree>
To put additional nodes in the folder, include the additional ActivityNodeModel elements at the same level as the one above. For multiple folders, include additional ExplorerFolder elements at the same level as the one above.
Save this description in a file named extension.iml in the extension directory. An XML file with all three descriptions of the copy nodes is available in the programming examples directory.
Try the Node If you have successfully compiled the code, placed it in a properly located jar file, and created the XML description of the examples library, you’ll now be able to try the new node.
Start Spotfire Miner. The Explorer should now have a page titled Programming Examples containing a folder with the First Copy Columns node. This node can be dragged onto the worksheet, connected, and executed just like any of the built-in nodes.
Simple C++ Version
In the first implementation, we do the computation completely in Java. Let’s now construct an implementation in C++. We will need a Java class extending EngineNode to calculate the meta data and create the Java proc object, a Java class extending CNKProc indicating the C++ class to use, and a C++ class extending CNKProc performing the computation.
Note that CNKProc is the name of both a Java class and a C++ class. The C++ classes discussed in the section The TIBCO Spotfire Pipeline on page 50 all have corresponding Java classes with the same name and purpose.
32

Engine Node The engine node corresponding to a C++ proc differs from the version for the straight Java implementation in a variety of ways:
• The class does not implement CNKProcJavaTransformExec.
• The procCreate() method creates a Java class corresponding to the C++ proc rather than registering the current class.
• There is no execute() method.
It is similar in its imports, constructor, and the calculateOutputMetaData() method.
The notable aspect of this code is the construction of the CNKProcSecondCopy object in procCreate(). The rest of the code is familiar from the previous example.
The SecondCopyEngineNode.java file contains:
import com.insightful.miner.*;import com.insightful.cnkjava.*;
/** * Very simple implementation of engine node copying each * input to the corresponding output using a C++ proc. */
public class SecondCopyEngineNode extends EngineNode {
/** * Empty constructor just uses the super method. */
public SecondCopyEngineNode() {
}
/** * Create the CNKProcSecondCopy object. */
public CNKProc procCreate() throws Exception { CNKProcSecondCopy proc = new CNKProcSecondCopy(); return(proc); }
33
/** * Passes the input column name/type information as the * output information. */
public XTMetaData calculateOutputMetaData(int outputNum) { return (XTMetaData)getInputMetaData(outputNum).clone(); }
}
Java CNKProc The Java class extending CNKProc has two main responsibilities:
• Indicate the name and location of the C++ class.
• Provide a mechanism for exchanging property values with the C++ class.
Since we have no properties to exchange, our class will just perform the first task. The createPeerObject() method indicates that our C++ class will be named CNKProcCppSecondCopy, and it will be in the cnkcopy C++ library. The CNKProcSecondCopy.java file contains:
import com.insightful.cnkjava.*;
/** * Java class corresponding to C++ proc for Copy Columns * example. */public class CNKProcSecondCopy extends CNKProc {
/** * Default constructor does nothing. */
public CNKProcSecondCopy() { }
/** * Specify that the C++ class is named * CNKProcCppSecondCopy and that it is in the cnkcopy
34
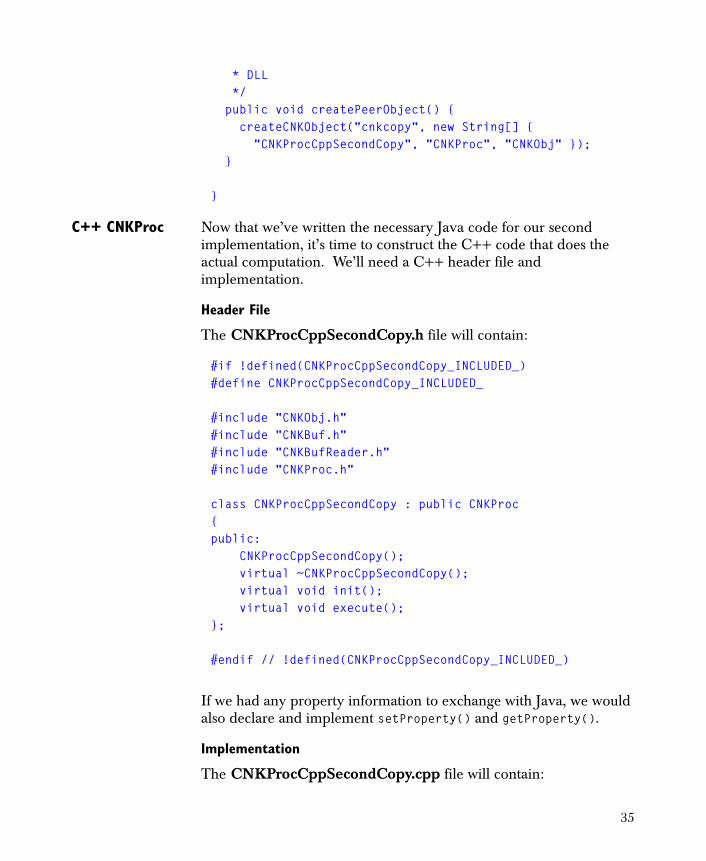
* DLL */ public void createPeerObject() { createCNKObject("cnkcopy", new String[] { "CNKProcCppSecondCopy", "CNKProc", "CNKObj" }); }
}
C++ CNKProc Now that we’ve written the necessary Java code for our second implementation, it’s time to construct the C++ code that does the actual computation. We’ll need a C++ header file and implementation.
Header File
The CNKProcCppSecondCopy.h file will contain:
#if !defined(CNKProcCppSecondCopy_INCLUDED_)#define CNKProcCppSecondCopy_INCLUDED_
#include "CNKObj.h"#include "CNKBuf.h"#include "CNKBufReader.h"#include "CNKProc.h"
class CNKProcCppSecondCopy : public CNKProc{public: CNKProcCppSecondCopy(); virtual ~CNKProcCppSecondCopy(); virtual void init(); virtual void execute();};
#endif // !defined(CNKProcCppSecondCopy_INCLUDED_)
If we had any property information to exchange with Java, we would also declare and implement setProperty() and getProperty().
Implementation
The CNKProcCppSecondCopy.cpp file will contain:
35

#include "CNKProcCppSecondCopy.h"
CNK_DEFINE_ACCESSIBLE_CLASS(CNKProcCppSecondCopy)
CNKProcCppSecondCopy::CNKProcCppSecondCopy() : CNKProc(){}
CNKProcCppSecondCopy::~CNKProcCppSecondCopy(){}
voidCNKProcCppSecondCopy::init(){ CNKProc::init();}
voidCNKProcCppSecondCopy::execute(){ long inputRows = executeRequestRows(); if (inputRows<0) return;
for (int inputNum = 0; inputNum<getNumInputs(); inputNum++) {CNKBufReader* rdr = getInputBufReader(inputNum);CNKBufWriter* wtr = getOutputBufWriter(inputNum);int numColumns = rdr->getBuf()->getNumColumns();
// copy input to output wtr->copyBufData(rdr, 0, 0, 0, 0,
inputRows, numColumns); }
executeReleaseRows(inputRows);}
For details on the C++ classes and methods used here, see the section The TIBCO Spotfire Pipeline on page 50.
36
Now that we have the C++ source and header files, we need to compile the code to create the DLL.
Compilation
The programming examples directory contains a Visual C++ 6.0 project cnkcopy.dsp that is configured to build the cnkcopy.dll.
The cnkcopy.dsp project was created as follows:
1. Use File:New to generate an empty Win32 Dynamic-Link Library project .
2. Add CNKProcCppSecondCopy.cpp and CNKProcCppSecondCopy.h to the project.
3. For both Debug and Release configurations, add ..\..\..\include\cnkbase to the Additional include directories. This is specified in the General Settings dialog on the C/C++ tab in the Preprocessor category.
4. For both Debug and Release configurations, add cnkbase.lib to the Object/library modules. This is specified in the General Settings dialog on the Link tab in the General category.
5. For the Debug configuration, add ..\..\..\lib\cnkbase\Debug to the Additional library path. This is specified in the General Settings dialog on the Link tab in the Input category. For the Release configuration, specify the settings in the Release subdirectory.
The relative file paths (such as ..\..\..\include\cnkbase) work when the cnkcopy.dsp project is located in the programming examples directory. If it were moved somewhere else, these paths would need to be changed to reference the Spotfire Miner directory.
To try this example, build the Release version of this DLL and copy it to the file extension.dll in the extension directory
XML Description The XML description for this node differs from the previous version only in the engine class name and label text.
<ActivityNode engineClass="SecondCopyEngineNode" guiClass="com.insightful.miner.ActivityNodeModel" numInputs="2"
37

numOutputs="2" > <DisplayInfo labelText="Second Copy Columns" defaultLabelText="Second Copy Columns" smallIcon="default_small.gif" largeIcon="default_large.gif" /></ActivityNode>
Extended Java Version
The previous implementations are relatively simple in that they use a minimal number of computation classes. Let’s extend this to cover additional functionality that will often be needed for a new node:
• Add a property dialog
• Validate whether required properties are specified
• Provide a custom viewer
• Use lower-level buffer manipulation routines
In this example we will write all of the code in Java. If we prefer to use C++, we still need to use Java for the GUI classes. We can use C++ for the computation as described in the previous example.
This example will use a single input and output. Multiple inputs and outputs would require a more sophisticated dialog than the one presented here.
Node Model The node model class defined in the file ThirdCopyNodeModel.java will take care of launching the property dialog, launching the viewer, and validating whether the required properties are set.
import com.insightful.miner.*;
import org.w3c.dom.Element;import org.w3c.dom.Document;import javax.xml.parsers.DocumentBuilderFactory;
import java.awt.Frame;import javax.swing.JOptionPane;import java.util.Vector;
/** * Node model for example of a node copying specified * columns for a single input to an output. */
38

public class ThirdCopyNodeModel extends ActivityNodeModel {
/** * Boilerplate constructor. */
public ThirdCopyNodeModel() { }
/** * Show the properties dialog */
public void showPropertiesDialog(boolean modality) { NodeDialog dialog = ThirdCopyDialog.getInstance(); dialog.setModal(modality); dialog.show(this); }
/** * Make sure that at least one column is specified and * that all of the columns are actually present in this * input. */
public boolean isPropertiesValid() { Vector columns = getXTProps().getSubProperties( ThirdCopyEngineNode.COLUMNS_ATTRIBUTE_TAG); boolean valid = (columns.size() > 0);
try { if (isInputValid()) { XTMetaData md = getInputMetaData(0); for (int i=columns.size()-1; i>=0; i--) { // Check that column is present for the input if (!md.containsColumn((String)columns.get(i))) return false; } }
39

} catch (Exception e) { e.printStackTrace(); valid = false; }
return valid; }
/** * Display the cached input metadata as HTML */
public void showView(Frame frame) { try { // Get cached summary XTMetaData cacheMD = getNodeCacheXTMetaData( ThirdCopyEngineNode.INPUT_MD_CACHE_NAME);
if (cacheMD == null) { AcceleratorOptionPane.showOKDialog(frame, "No view information stored.", "No View Information", JOptionPane.WARNING_MESSAGE); } else { String htmlString = cacheMD.getHtmlString( XMLTree.META_DATA_XSL_FILE, getLabelText()); new HtmlFrame(htmlString); } } catch (Exception e) { e.printStackTrace(); } }}
Node Dialog The node dialog will have two pages:
• A page with a list box to select which columns to copy.
• The standard Advanced page with general node options.
40

The column selection control is a list box of column names with selection indicating which Columns to Copy. Use the standard Windows selection mechanism of shift-click to select a range of items and ctrl-click to change the selection state of a single item.
The standard property dialogs used in Spotfire Miner are singletons. There is only a single dialog of each type that is reused. This reduces the memory usage and the time needed to display the dialog. A ramification of this is that the state of the dialog is not reset when it is closed. Any initialization to the dialog needs to be done when the dialog is restored.
The key methods for setting and getting the properties are restoreProperties() and saveProperties(). The constructor and getInstance() methods are boilerplate routines, and the createOptionsPanel() method defines the first page of the dialog.
We override the onHelp() method to launch a message box with some help information. While it’s preferable to display a more descriptive external help file, we use the message box to keep the example self-contained.
The file ThirdCopyDialog.java contains:
import com.insightful.miner.*;import javax.swing.*;import java.awt.*;import java.util.Vector;
public class ThirdCopyDialog extends NodeDialog {
// Static instance of the dialog private static ThirdCopyDialog instance = null;
// Controls private JList listBox; private DefaultListModel listModel;
public static ThirdCopyDialog getInstance() { if (instance == null) { instance = new ThirdCopyDialog(); } return(instance); }
41
private ThirdCopyDialog() { super(); pack(); setMinimumSize(new Dimension(500,500)); }
/** * Restore the list of column names and selection state. */
public void restoreProperties() { super.restoreProperties();
Vector inputNames = null; try { // The ActivityNodeModel is stored as the "model" // in the NodeDialog. We get info from it. inputNames = getNodeModel().getInputMetaData(0 ).getColumnNames(); } catch (Exception e) { e.printStackTrace(); inputNames = new Vector(); }
Vector selectionNames = getNodeModel().getXTProps( ).getSubProperties( ThirdCopyEngineNode.COLUMNS_ATTRIBUTE_TAG);
listModel.clear(); listModel.setSize(inputNames.size());
// Select any columns listed in the selection names. String curName = null; for (int i=0; i<inputNames.size(); i++) { curName = (String) inputNames.get(i); listModel.add(i, curName); if (selectionNames.contains(curName)) { listBox.addSelectionInterval(i, i); }
42

}
}
/** * Method called by the dialog to save properties in Model */ public void saveProperties() throws NodeDialog.DialogException { super.saveProperties(); XTProps props = getNodeModel().getXTProps();
// clear old selected values props.removeProperty(new String [] {ThirdCopyEngineNode.COLUMNS_ATTRIBUTE_TAG});
// Save the names of the selected columns Object [] selectedValues = listBox.getSelectedValues();
for (int i=0; i < selectedValues.length; i++) { props.set(new String [] {ThirdCopyEngineNode.COLUMNS_ATTRIBUTE_TAG, (String) selectedValues[i]}, ""); }
// Clear out the list to release memory listModel.clear(); }
/** * Create the first options page. We hardcode label text * in this example. It's preferable to put the text in * an external ResourceBundle for potential * internationalization. */ public JPanel createOptionsPanel() { JPanel optionsPanel = new JPanel(new GridBagLayout()); optionsPanel.setBorder( BorderFactory.createEmptyBorder(5,5,5,5));
43

listModel = new DefaultListModel();
listBox = new JList(); listBox.setModel(listModel); listBox.setSelectionMode( ListSelectionModel.MULTIPLE_INTERVAL_SELECTION); JScrollPane scrollPane = new JScrollPane(listBox); scrollPane.setBorder( BorderFactory.createLoweredBevelBorder());
JLabel label = new JLabel("Columns to Copy"); label.setBorder( BorderFactory.createEmptyBorder(0, 0, 5, 0)); label.setLabelFor(listBox);
GridBagConstraints constraints = new GridBagConstraints();
constraints.anchor = constraints.NORTHWEST; optionsPanel.add(label, constraints ); constraints.gridy = 1; constraints.weighty = 1.0; constraints.weightx = 0.5; constraints.fill = constraints.BOTH; constraints.gridheight = constraints.REMAINDER; optionsPanel.add(scrollPane, constraints);
return optionsPanel; }
/** * Method called when the user presses the help button */ public void onHelp() { AcceleratorOptionPane.showOKDialog(this, "This dialog copies specified columns from\n" + "the input to the output. Selected the\n" + "columns to be copied. For multiple selection,\n" + "use SHIFT+click to select a range of items and\n" + "CTRL+click to add items to the current selection.", "Copy Dialog Usage",
44

JOptionPane.INFORMATION_MESSAGE); }}
Engine Node The engine node implementation displays a variety of functionality:
• Return the metadata for the specified columns.
• Store the column names before executing the proc for each chunk, and delete these names after execution is complete.
• Print an information message and copy the selected columns for each chunk.
• After execution, store the input metadata in a cache that can be accessed later for viewing.
The code for this in the file ThirdCopyEngineNode.java is:
import com.insightful.miner.*;import com.insightful.cnkjava.*;
import java.util.Vector;
/** * Extended implementation of engine node copying each * input to the corresponding output. Assumes a single * input and output. Stores the input metadata in a * cache as an example of caching information for use * in a viewer. */
public class ThirdCopyEngineNode extends EngineNode implements CNKProcJavaTransformExec {
// Statics referred to by node model and dialog to // set/get properties public final static String COLUMNS_ATTRIBUTE_TAG = "colsToCopy"; public final static String INPUT_MD_CACHE_NAME = "imdCache";
// Store information for use in all chunks private Vector m_columnNames = null;
45
/** * Empty constructor just uses the super method. */
public ThirdCopyEngineNode() {
}
/** * Boilerplate for specifying this class provides the * execute() method. */ public CNKProc procCreate() throws Exception { CNKProcJavaTransform proc = new CNKProcJavaTransform(); proc.setExecObject(this); return(proc); }
/** * Look at which columns will be copied and return their * metadata. */
public XTMetaData calculateOutputMetaData(int outputNum){ if (outputNum > 0) { return null; }
XTMetaData inMD = getInputMetaData(0); XTProps props = getNodeProperties(); Vector columns = props.getSubProperties( COLUMNS_ATTRIBUTE_TAG);
if (columns == null || columns.size() == 0){ return null; }
XTMetaData outMD = inMD.selectiveClone(columns);
return outMD; }
46

/** * Store the column names to be referred to when * executing. This shows how to store information for * use in multiple chunks. */
public void procSetProperties(CNKProc proc) { m_columnNames = getNodeProperties().getSubProperties( COLUMNS_ATTRIBUTE_TAG); if (m_columnNames == null || m_columnNames.size() == 0){ printlnWarning( "No columns specified. No columns will be copied."); } }
/** * Copies the specified columns to the output. Prints an * information message about the current chuck. */
public void execute(CNKProcJavaTransform proc) {
if (m_columnNames != null) { // Print informational message long firstRow = proc.getChunkInputPosition(0); printlnInformation("Copying rows " + firstRow + " to " + (firstRow + proc.getChunkInputRows(0)));
XTMetaData inMD = getInputMetaData(0); XTMetaData outMD = calculateOutputMetaData(0);
// Copy specified columns int inColNum, outColNum; int rowCount; String colName = null; for (int i=0; i < m_columnNames.size(); i++) { colName = (String) m_columnNames.get(i); inColNum = inMD.nameToOrdinal(colName); outColNum = outMD.nameToOrdinal(colName);
47
// Some error checking if (inColNum < 0) { proc.addError("Column '" + colName + "' not present in input metadata"); } if (outColNum < 0) { proc.addError("Column '" + colName + "' not present in output metadata"); } if (!inMD.getColumnType(inColNum).equals( outMD.getColumnType(outColNum))) { proc.addError( "Input and output column types do not match for column '" + colName + "'"); }
if (!proc.hasError()) { rowCount = proc.getChunkInputRows(0); proc.copyData(0, outColNum, 0, 0, inColNum, 0, rowCount, 1); } } } }
/** * Stores the input metadata in a cache for use when * viewing. Called after the proc has been executed. */
public void procExtractResults(CNKProc proc) throws Exception { setNodeCache(INPUT_MD_CACHE_NAME, getInputMetaData(0)); }
/** * Delete the information that we stored. */
public void procDelete(CNKProc proc) { super.procDelete(proc);
48
m_columnNames = null; }}
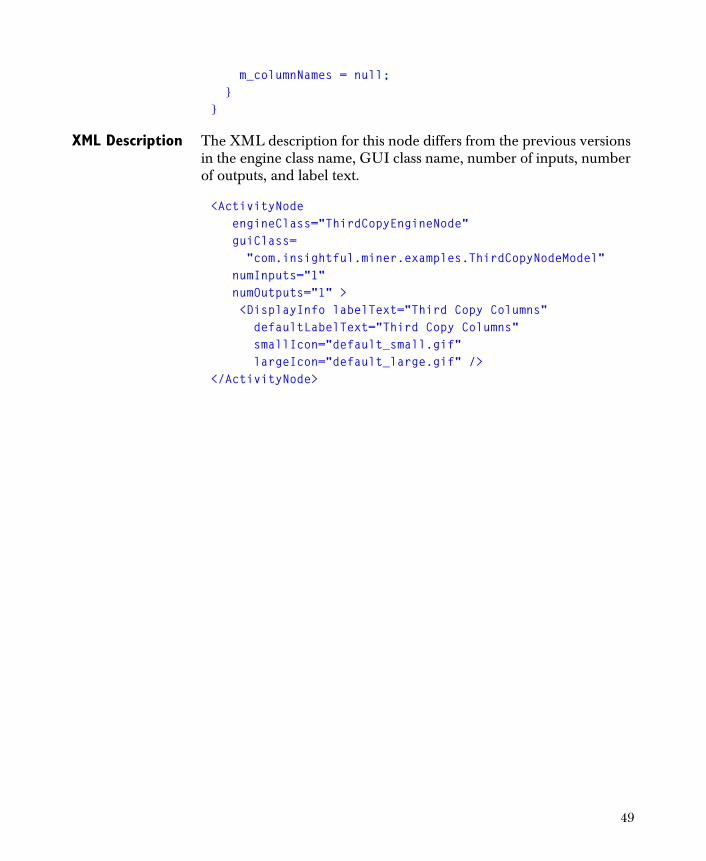
XML Description The XML description for this node differs from the previous versions in the engine class name, GUI class name, number of inputs, number of outputs, and label text.
<ActivityNode engineClass="ThirdCopyEngineNode" guiClass= "com.insightful.miner.examples.ThirdCopyNodeModel" numInputs="1" numOutputs="1" > <DisplayInfo labelText="Third Copy Columns" defaultLabelText="Third Copy Columns" smallIcon="default_small.gif" largeIcon="default_large.gif" /></ActivityNode>
49
THE TIBCO SPOTFIRE PIPELINE
Overview The TIBCO Spotfire Pipeline is a C++ system for accessing and manipulating very large data sets.
The core of the TIBCO Spotfire Pipeline system is a set of C++ classes representing Buf, Proc, and Pipeline objects. In order to create entirely new Proc components, it is necessary to implement them as new C++ classes. This chapter describes the C++ classes used by the TIBCO Spotfire Pipeline system, and explains how new components can be implemented. New C++ Proc classes need to follow certain rules to work within the pipeline.
The Java package com.insightful.cnkjava contains peer classes for each of the classes presented here. The architecture description here is also informative for the straight Java programmer. For Java-oriented method descriptions, see the javadoc in doc/javadoc.
Basic Objects A pipeline is composed of only a few different types of objects.
Proc
A Proc is a data processing object. There are many different types of procs, used for performing different operations, including reading data from a file or database, performing a transformation on some data, accumulating count information, or constructing a linear model from a data stream.
Buf
A Buf is a data buffer. A buf has multiple named columns which can contain elements of different types, and N rows of data. A buf is used like a circular buffer.
When a proc produces new data rows, they are written to a buf. One or more procs read the data rows from the buf, in the order that they were written. The only way that one proc in a pipeline can send data to another one is through an intermediate buf object.
50

Pipeline
A Pipeline object contains a set of bufs and procs. When a pipeline is executed, it repeatedly executes the procs, which read data from and to bufs, until no procs can be executed (typically because all of the data has been processed).
Constructing a Pipeline
The typical way to construct a pipeline, followed in the example pipeline-construction functions, is to first create the bufs. Next, the procs in the pipeline are created. The inputs and outputs of the procs are specified as bufs, essentially "wiring together" the procs into a pipeline. Finally, the bufs and procs are encapsulated into a pipeline object, which can be executed.
Object Initialization
The basic model for constructing an object is to create it, and then set various properties to configure it, and then to initialize it. During initialization, any storage allocation needed before executing the pipeline is done, according to the set properties.
Proc and Buf objects need to be initialized before they are executed within a pipeline. Therefore, when they are created, their error string is set to "uninitialized". The pipeline execution methods will not use any procs or bufs with error strings set, so this prevents executing the pipeline before it is initialized.
Object Name Each object can optionally have a name string. This name is used to identify the object in status messages.
Error String Each object can have an associated error string. Normally, if no error has occurred, the error string is the empty string "". If an error occurs while initializing or running an object, its error string is set to a string describing the error. The only way to clear an error is to initialize the object.
Column Types A buf object, described below, represents a data buffer with rows and columns, something like an Spotfire S+ data frame. As with a data frame, different columns can store different types of data. Currently, there are four different data types: double, factor, string, and timeDate.
Double
The double type is simple; each value is interpreted as a floating point number.
51

Factor
The factor data type is much more complicated. A factor column maintains a list of strings, representing the levels of the factor. When a string is read from a file or database into a factor data column (by the file reader proc), each string value is compared to the list of level strings, and converted into a level number (1 through the number of levels).
If you know all of the possible factor levels that can be read ahead of time, you can simply set up a factor column with these levels. However, if you don't know all of the possible factor levels, there is a potential problem. The pipeline is designed to be used for problems with very large amounts of data. If every new factor level that appears is simply added to the level list, then it is possible that the system would allocate more and more different level strings, until you run out of memory. Even if the number of possible levels is relatively small, there are situations where it is useful to restrict it even further. Some operations such as tree modeling and crosstabs can take massive amounts of time or space for variables with many factor levels.
To control the number of automatically-created factor levels, each column has two properties, max.auto.levels and overflow.level. For a factor data type, the max.auto.levels property determines the maximum number of levels that will be automatically created. The actual number of levels in a factor can be set larger than this, by explicitly setting the level strings. The default value of max.auto.levels is 10. A simple way to disable auto-creation of factors is by setting max.auto.levels to 0.
The overflow.level property is used when handling a new factor level. If adding the new level would cause the number of levels to exceed the max.auto.levels property, the overflow.level string is used instead. For example, if the levels are "yes" and "no", max.auto.levels is 2, and overflow.level is "yes", then all other factor values will map to "yes". If the overflow level is not one of the existing levels, it is added, but it is done soon enough so that the total number of levels will not exceed max.auto.levels. If overflow.level is "", the default, then overflow levels are mapped to NA.
52
String
String columns are used for informational columns such as names or addresses that do not represent categories and are not used in computations. The actual string value is stored separately for each row. The number of characters stored can be set for each column.
The underlying pipeline can handle full Unicode multibyte characters. However, the import/export library used by Spotfire Miner only supports 8-byte ASCII. This includes all of the characters in most Romance languages, but not the full character sets for some Asian languages.
The string width value actually specifies the number of bytes used. Multibyte characters may use more than one byte per character, in which case the number of characters that can be stored for a string will be less than the string width setting.
Time/Date
Time/Date columns are used to represent dates and times. They are stored as a long representing the number of milliseconds since an origin of January 1, 1970. This is the same origin used by Java. A string representation of the time is used for display. Options under Tools:Options specify the default date formats for reading and displaying time/date values.
Buf Objects A buf object represents a data buffer with N rows by P columns. The
number of rows, number of columns, their names, and their data types are determined when the buf is created. The actual storage in a buf is allocated when the buf is initialized.
A buf object acts like a circular buffer. One proc can write a series of rows of data into a buf, and one or more procs can read this data, in order. As a proc reads a chunk of data from a buf, it releases the chunk. Only when all reading procs have released a chunk of data is the space available to be filled by newly-written rows.
It is very important that the bufs be sized large enough. Before a proc can run, it needs to reserve a chunk of data from its input bufs, as well as the space for its output data in its output bufs. While a proc is executing, it cannot allocate more space from its output bufs. Therefore, if a buf is too small, you can have a situation where a reading proc cannot execute (because its input buf doesn't have
53

enough rows available), but the proc writing to that buf cannot write to it (because the buf doesn't have enough free rows for writing to). In general, a buf needs to contain a number of rows equal to the maximum number of rows the writing proc can request, plus the maximum number of rows that any of the readers can ask for. To avoid this problem, the default number of rows for a buf is 2000, and for any of the procs is 1000 rows.
C++ Libraries The C++ pipeline classes used by Spotfire Miner are divided into five libraries: cnkbase, cnkio, cnkjava, cnkmisc, and cnksp. These are distributed as dynamic linked libraries (*.dll).
Header files for the cnkbase library are available in include/cnkbase. Debug and Release versions of cnkbase.lib are available in lib/cnkbase. As programmers are not expected to directly use or extend the other libraries, these files are only provided for cnkbase.
User-written procs belong in a user-written library, as shown in the example in section Simple C++ Version on page 32
Cnkbase Library
The cnkbase library provides the core pipeline implementation. This includes classes for procs, bufs, and the pipeline.
Programmers implementing new procedures or doing pipeline programming in general will use these classes.
Cnkio Library
The cnkio library provides file and database IO support. The CNKProcFile class supports all of the file and database read/write nodes in Spotfire Miner.
Cnkjava Library
The cnkjava library provides support for communicating between C++ and Java. This includes the CNKJava class with infrastructure for passing information between C++ and Java, and the CNKProcJavaTransform class used to call back into Java to perform computations in Java.
Java programmers will use the Java side of this connection.
54
Cnkmisc Library
The cnkmisc library contains the C++ code for the various C++ procs in Spotfire Miner. This includes components such as linear regression, neural networks, trees, and clustering.
TIBCO will continue to add classes to this library to expand the functionality of Spotfire Miner. Other programmers will be adding components to their own library.
Cnksp Library
The cnksp library provides support for calling Spotfire S+ from the pipeline. This is used by the Java class CNKProcSplusTransform to call into Spotfire S+.
Programmers wishing to write components using Spotfire S+ should typically use the SplusScriptEngineNode in Java.
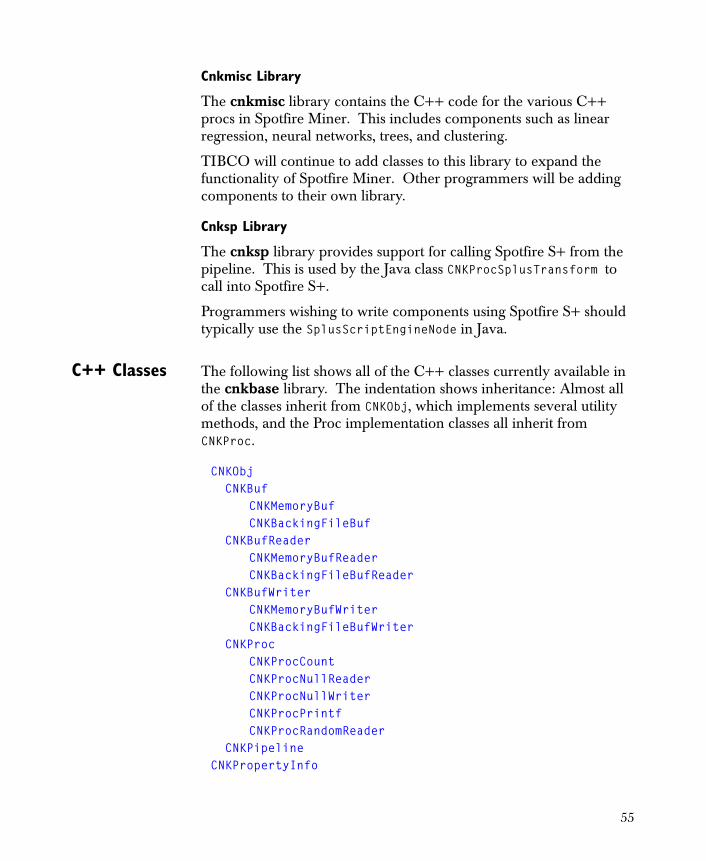
C++ Classes The following list shows all of the C++ classes currently available in the cnkbase library. The indentation shows inheritance: Almost all of the classes inherit from CNKObj, which implements several utility methods, and the Proc implementation classes all inherit from CNKProc.
CNKObjCNKBuf
CNKMemoryBufCNKBackingFileBuf
CNKBufReaderCNKMemoryBufReaderCNKBackingFileBufReader
CNKBufWriterCNKMemoryBufWriterCNKBackingFileBufWriter
CNKProcCNKProcCountCNKProcNullReaderCNKProcNullWriterCNKProcPrintfCNKProcRandomReader
CNKPipelineCNKPropertyInfo
55

These classes, and their publicly-accessible methods, will be described below.
All of these classes have similarly-named header files (CNKObj.h, CNKBuf.h, etc.) which are available in the include/cnkbase directory.
CNKObj: Main Parent Class
Almost all of the object classes inherit directly or indirectly from CNKObj, a class containing several useful utility methods. This class also introduces some style rules used in all of the other classes.
CNKObj:: CNKObj(); virtual ~CNKObj(); virtual void init();
Individual CNKObj objects can be created and destroyed, although these objects are not very useful by themselves. Note that the constructor has no arguments; this is true of all of the CNK object constructors.
Objects are created and initialized as follows:
1. Create the object, calling the constructor with no arguments.
2. Set the object properties by calling class-specific methods.
3. Call init() to initialize object using the properties.
Each subclass should redefine init() to call its parent class init(), and then perform whatever class-specific initialization is needed. For example, CNKBuf::init() starts by calling CNKObj::init().
There are several reasons for using this approach. First, it allows object classes to have many properties, without having to maintain constructors with all of these properties. Second, this simplifies the Java-to-C++ communication facility. Finally, it allows an object to be re-initialized, by changing properties and calling init() again.
One downside of this approach is that one has to be careful not to use an object between changing its properties and calling init(), since it may be in an inconsistent state.
CNKObj:: void setName(const char* name); const char* getName();
56
These methods set and get a name associated with the CNK object. The initial value for name is NULL.
This is a good opportunity to mention several aspects related to string properties. First, string properties can be NULL, and code that retrieves these values should check for that. Second, any string properties that an object needs to keep around should be copied. For example, the object cannot assume that the string passed into setName will live longer than the call to setName. Putting it another way, a CNK object "owns" the storage for any string properties it has. To copy a string into new storage, use the copyString utility function described below. Third, the const char* declarations specify that the object will not modify the string passed into it, and that it does not allow the external users to modify this string. These rules should be followed for other CNK objects.
CNKObj:: void setError(const char* error); void setError(const char* error, const char* val); void setError(const char* error, int val); void setError(const char* error, long val); void setError(const char* error, double val); const char* getError();
These methods set and get an error string associated with a CNK object. Initially the error value is NULL, indicating no error. If an error occurs during any operation on an object, its error string should be set to a string describing the error. You shouldn't do anything with an object if it has an error, other than setting its properties, and calling init() (which should clear the error string).
Because getError() returns NULL for no error, it can be used in code such as "if (xx.getError()) ...".
The two-argument methods for setError are convenient for creating common error strings. They format and save an error string of the form "<firstarg>: <secondarg>". For example, setError("bad arg", 34) will set the error string to "bad arg: 34".
CNKObj:: // message severity levels enum severity_enum { severity_debug,
severity_verbose, severity_information,
57

severity_warning, severity_error };
void addError(const char* msg); void addWarning(const char* msg); void addInformation(const char* msg); void addVerbose(const char* msg); void addDebug(const char* msg); void addMessage(const char* msg, int severity);
Each object can have a set of messages. Typically these are items such as warning messages, debug information, or status messages. The severity of the message can be used to determine when to display the message. These methods are used to add messages of various types.
CNKObj:: static void setMaxMessages(long val); static long getMaxMessages();
static void setMaxMessageLength(long val); static long getMaxMessageLength();
To avoid memory usage problems due to an unanticipated number of messages, the maximum number of messages to store can be set using setMaxMessages(). Setting this to a positive number sets the maximum number of messages that will be stored. Additional messages will be discarded.
The maximum number of characters per message can be set with setMaxMessageLength().
CNKObj:: long getNumMessages(); long getNumMessagesAdded(); long getNumMessagesAtLevel(int severity);
The getNumMessages() method returns the total number of messages stored. The getNumMessagesAdded() gets the number of messages that have been submitted for storage. This second method will return a larger value than the first if the number of messages submitted exceeds getMaxMessages(). This can be used to track something like the total number of rows dropped due to inappropriate values, while
58

only storing messages for the first few rows. The getNumMessagesAtLevel() method returns the number of messages at a specified severity level.
CNKObj:: const char* getMessage(long i); int getMessageSeverity(long i);
The getMessage() method returns the specified message. Its argument is an index into the list of messages with a range of 0 to getNumMessages(). The getMessageSeverity() method returns the severity code for this message.
CNKObj:: static char* copyString(const char* str); static char* copyString(const char* str, const char* str2); static char* copyString(const char* str, int max_chars); static char* copyString(const char* str, const char* str2, int max_chars); static void releaseString(char* str);
These are useful utility methods for allocating and releasing strings. copyString allocates a string that is a copy of its argument. The versions with two char arrays construct a string of the form "<firstarg>: <secondarg>". The max_chars argument indicates the maximum number of characters to copy. releaseString releases a string allocated by copyString. All of these methods detect and handle NULL arguments correctly: copyString(NULL) just returns NULL, and releaseString(NULL) does nothing.
These are static class methods, so they can be used anywhere, even outside of the CNK object classes, with calls such as CNKObj::copyString(str).
CNKObj:: static double getDoubleNaN(); static int isDoubleNaN(double val);
static double getDoubleNA(); static int isDoubleNA(double val);
static long getLevelNumNA();
59

static int isLevelNumNA(long val);
static const char* getStringNA(); static int isStringNA(const char* val);
static CNKTimeDate getTimeDateNA(); static int isTimeDateNA(CNKTimeDate val);
These are useful utility methods for accessing the NaN value for various buffer types, used in Spotfire Miner and Spotfire S+ for representing NA values. getDoubleNaN() returns the double NaN value. isDoubleNaN(val) returns true (non-zero) if the argument is an NaN value, false otherwise. The other methods provide this functionality for other column types.
CNKObj:: static double convertLevelNumToDouble(long val); static long convertDoubleToLevelNum(double val); static const char* convertLevelNumToString(long val); static long convertStringToLevelNum(const char* val); static CNKTimeDate convertLevelNumToTimeDate(long val); static long convertTimeDateToLevelNum(CNKTimeDate val); static CNKTimeDate convertDoubleToTimeDate(double val); static double convertTimeDateToDouble(CNKTimeDate val);
These methods provide support for conversions between data types. They support any conversions that do not vary based on a specified format string.
The convertDoubleToTimeDate() and convertTimeDateToDouble() methods convert between a double giving the number of days since January 1, 1970 and a timeDate value. Hours, minutes, and seconds are the fractional part of the double.
CNKObj:: double convertStringToDouble(const char* val); const char* convertDoubleToString(double val); CNKTimeDate convertStringToTimeDate(const char* val); const char* convertTimeDateToString(CNKTimeDate val);
void setConverter(CNKConverter* val); CNKConverter* getConverter(); static void setDefaultConverter(CNKConverter* val);
60

static CNKConverter* getDefaultConverter();
These methods support conversions between string and double or time/date values. Such conversions depend upon a formatting string that indicates things like whether 01/10/2002 represents January 10, 2002 or October 1, 2002.
Code using a pipeline can create a class extending CNKConverter that provides this support. Programmers creating Spotfire Miner nodes will use the methods such as convertStringToDouble(), and will not use a CNKConverter directly.
CNKObj:: static void copyPlainToUTFString( const char* inputPlainString, char* outputUTFString, int maxOutputBytes); static void copyUTFToPlainString( const char* inputUTFString, char* outputPlainString, int maxOutputBytes); static void copyWideCharToUTFString( const wchar_t* inputWideCharString, char* outputUTFString, int maxOutputBytes); static void copyUTFToWideCharString( const char* inputUTFString, wchar_t* outputWideCharString, int maxOutputChars);
String values are typically stored as UTF-8 char arrays using the same conventions as the Java Native Interface ( JNI). This is a format that uses one, two, or three bytes as needed to represent multibyte characters in a char array.
Other common standards for representing characters in a char array are to use a single byte per character or two bytes for every character. These methods support conversions between a UTF-8 representation, a single-byte representation (plain string), and a two-byte representation (wide char string).
CNKObj:: virtual void setProperty(CNKPropertyInfo* propInfo); virtual void getProperty(CNKPropertyInfo* propInfo);
These methods are defined in all of the CNK object classes, to support the Java-to-C++ communication facility.
61

CNKPropertyInfo Information other than the actual data is stored and exchanged using properties. A property is a name/value pair where the name uniquely identifies the piece of information being stored, and the value is the information being stored.
The methods CNKObj::setProperty and CNKObj::getProperty are used to set and get property values for an object.
One use for this is to pass parameters from Java to the C++ code implementing the component. It may also be used to communicate results such as numeric summaries back to the Java code after computation is complete.
A property is stored in a CNKPropertyInfo object. CNKPropertyInfo is defined in CNKPropertyInfo.h with the following methods:
CNKPropertyInfo:: const char* getPropName(); int isPropName(char* name);
getPropName() returns the property name for this object. isPropName(char* name) compares this string to the argument "name", returning true (non-zero) if they are the same.
CNKPropertyInfo:: virtual long getPropAsINT32(); virtual void setPropAsINT32(long val); virtual INT64 getPropAsINT64(); virtual void setPropAsINT64(INT64 val); double getPropAsDouble(); void setPropAsDouble(double val); int getPropAsLogical(); void setPropAsLogical(int val); const char* getPropAsString(); void setPropAsString(const char* val);
These methods get/set the argument to a single long, double, etc. value.
CNKPropertyInfo:: CNKBuf* getPropAsCNKBuf(); void setPropAsCNKBuf(CNKBuf* buf); CNKProc* getPropAsCNKProc(); void setPropAsCNKProc(CNKProc* proc);
62

These methods are similar to getPropAsInt, etc., except that they can interpret the objects representing pointers to CNKBuf and CNKProc objects. For getPropAsCNKBuf/getPropAsCNKProc, if the argument is not a valid CNKBuf/CNKProc, they return NULL.
CNKPropertyInfo:: virtual CNKPropertyInfo* getNextProp();
Some code will store a series of properties in an array or linked list. When this is the case, getNextProp() can be used to get the next property in the list.
CNKPropertyInfo:: void* getPropAsObject(); virtual void* getPropAsObjectEnv(); const char* getPropAsObjectType(); void setPropAsObject(void* object);
These methods can be used to set and get a C pointer to some unknown object. With Java, this would be a Java JNI object.They are passed as void* pointers, and the calling C code must be able to cast these pointers and interpret them correctly. getPropAsObjectType() returns a string specifying the particular type of object system that the properties come from: in the case of Java, this would be the string "java". Other systems such as Spotfire S+ that may communicate with this library may pass other types of objects. getPropAsObjectEnv() returns an environment variable associated with the object, if the system has such a variable. In Java, this would be a JNIEnv object.
CNKPropertyInfo:: void setPropToUnknownPropertyFlag();
This method sets the argument value to a special value that can be used to detect that a property name has not been found. This is called in CNKObj::setProperty and CNKObj::getProperty when none of the properties match.
The normal way to implement setProperty is with code such as the following:
void CNKProcRandomReader::setProperty( CNKPropertyInfo* propInfo) {
63
if (propInfo->isPropName("seed")) { setSeed(propInfo->getPropAsINT32()); } else if (propInfo->isPropName("total.rows")) { setTotalRows(propInfo->getPropAsINT64()); } else { CNKProc::setProperty(propInfo); }}
This code checks the property name against each of the accepted string values, extracts the argument value as the appropriate type, and calls an object method to set the appropriate property. If none of the property names match, the superclass method is called to handle any other property names. getProperty is implemented in much the same way:
void CNKProcRandomReader::getProperty( CNKPropertyInfo* propInfo) { if (propInfo->isPropName("seed")) { propInfo->setPropAsINT32(getSeed()); } else if (propInfo->isPropName("total.rows")) { propInfo->setPropAsINT64(getTotalRows()); } else { CNKProc::getProperty(propInfo); }}
This code calls an object method to get the appropriate value, and calls propInfo->setPropAsXXX to set the first argument appropriately. As with setProperty, if none of the property names match, the superclass method is called to handle any other property names.
One downside of the setProperty/getProperty scheme for passing information between Java and C++ is that the Java code needs to use the same property names as the C++ methods (like "total.rows" in the example above). Maintaining consistency between the C++ property names and the ones used by the Java functions is a possible source of error. Strictly speaking, the documentation of a subclass of CNKObj should include documentation for the property names that it can interpret via get/setProperty.
64

CNKBuf, CNKBufReader, CNKBufWriter: Data Buffers
The three classes CNKBuf, CNKBufReader, and CNKBufWriter together are used to implement a first-in-first-out (FIFO) data buffer containing multiple rows, where each row contains multiple columns of data. The different columns can contain data of different types.
A CNKBuf object contains the actual data in the buffer. In addition, it contains information about the number and types of the columns. CNKBuf has methods for accessing the column type information, such as the list of level strings for a given factor column.
CNKBufReader and CNKBufWriter objects are used to read or write the data within a CNKBuf. These objects are used, rather than accessing the CNKBuf directly, because there may be multiple CNKProc objects reading a given CNKBuf at a time. Each of the CNKBufReader objects represents a connection between a particular CNKBuf and a particular CNKProc. The same mechanism is used for writing to a CNKBuf, even though currently only one CNKBufWriter can write to a given CNKBuf.
CNKBufReader and CNKBufWriter objects cannot be created independent of a CNKBuf or CNKProc. They are created by passing a CNKBuf object to the CNKProc::setInputBuf or CNKProc::setOutputBuf methods, which creates the appropriate CNKBufReader or CNKBufWriter object, and establishes the connections between the CNKBufReader (or CNKBufWriter), the CNKProc, and the CNKProc objects. When a CNKBuf or CNKProc object is deleted, these connections are automatically removed.
The CNKBuf class is the heart of the pipeline architecture. The design of the data-manipulation components (in the CNKProc class) is very simple, to make it as easy as possible to create new components.
CNKBuf objects, used to coordinate data flow between CNKProc objects, are somewhat more complicated. A CNKProc component must follow certain rules when accessing a CNKBuf object, in order for this coordination to work. Loosely speaking, a CNKBuf can be viewed as a first-in-first-out (FIFO) buffer of data rows. One CNKProc can write a series of data rows into the CNKBuf (using a CNKBufWriter object), and one or more other CNKProc objects can read out these data rows in the same order (using CNKBufReader objects). Things are a bit more complicated, because (1) a given CNKBuf has a limited size, so it can only store a certain number of written data rows at a time, and (2) the pipeline architecture is designed so that all CNKBuf methods return
65
immediately: it does not support "suspending" a CNKBuf data access method, if the data is not currently available. To handle these limitations, components accessing a CNKBuf must follow these rules:
1. Before writing data to a CNKBuf (using a CNKBufWriter), the CNKProc must reserve space for the data, and wait for the space to become available. Once the space is available, data can be written into it, and then some or all of the written rows must be released.
2. Before reading data from a CNKBuf (using a CNKBufReader), the CNKProc must request a certain number of data rows, and wait for them to become available. Once the data is available, the block of data can be read, and then some or all of the data rows must be released.
The CNKBuf is designed so that the CNKBuf's associated CNKBufWriter has to wait until all of the associated CNKBufReader objects have consumed the written data rows, before that storage can be used for more data. Given this design, if a CNKBuf is set up with no readers, then the CNKBuf will fill up with data and then stop, since no one will ever read the data. It has been useful to make an exception to the rules in this case: if a CNKBuf has no readers, then it acts like there is an attached reader that automatically reads all data rows as they are written.
CNKBuf Subclasses: CNKMemoryBuf and CNKBackingFileBuf
As far as a proc object is concerned, all bufs (and buf readers and buf writers) are the same, implementing the same methods. In actuality, there are several different types of buf classes, implemented as subclasses of CNKBuf. CNKBuf does not have a public constructor, so creating a buf involves creating an instance of one of these subclasses.
The CNKMemoryBuf class implements a CNKBuf with a FIFO buffer of rows in memory. Procs must write and read rows sequentially to a CNKMemoryBuf, as described above. The only method specific to a CNKMemoryBuf is the constructor:
CNKMemoryBuf:: CNKMemoryBuf();
The CNKBackingFileBuf class implements a CNKBuf with an associated file that contains the data in the buffer. It can be used to support procs that need to read their input data multiple times, or in random access order. This class is described in more detail below.
66

When a CNKMemoryBuf or CNKBackingFileBuf, is passed to one of the CNKProc::setInputBuf or CNKProc::setOutputBuf methods, this actually creates an instance of CNKMemoryBufReader or CNKBackingFileBufReader (subclasses of CNKBufReader) or CNKMemoryBufWriter or CNKBackingFileBufWriter (subclasses of CNKBufWriter). These subclasses implement exactly the same methods as their parent classes, so it is not normally necessary to be aware of the exact class created.
CNKBuf Methods The main buffer class is CNKBuf.
CNKBuf:: virtual ~CNKBuf(); virtual void init();
These are the CNKBuf destructor and init() methods. A CNKBuf is created with new CNKMemoryBuf() or new CNKBackingFileBuf() (as described above), then the properties of the columns and the readers and writers are created, and then init() is called to initialize it, which allocates the storage for the buffer data.
CNKBuf:: virtual int isCNKMemoryBuf(); virtual int isCNKBackingFileBuf(); virtual CNKMemoryBuf* getCNKMemoryBuf(); virtual CNKBackingFileBuf* getCNKBackingFileBuf();
These methods can be used if it is necessary to determine the particular class used to implement a CNKBuf. isCNKMemoryBuf() and isCNKBackingFileBuf() return non-zero if the object is of the paticular subclass. getCNKMemoryBuf() and getCNKBackingFileBuf() return the coerced object if it has the given subclass, otherwise they return NULL.
CNKBuf:: virtual int isMultiPass(); virtual int isRandomAccess();
These methods return non-zero if the buf supports multi-pass access, or random-access by readers. Currently, these both return 1 for CNKBackingFileBuf, and 0 for CNKMemoryBuf. In the future, there may be other classes that support multi-pass access but not random-access.
67

CNKBuf:: void setNumRows(long numRows); void setNumColumns(int cols); long getNumRows(); int getNumColumns();
Set/get the number of rows and columns that can be stored in the CNKBuf at once. This should not be changed after calling init(), when the storage is actually allocated.
CNKBuf:: int getNumReaders(); int getNumWriters(); CNKBufReader* getBufReader(int index); CNKBufWriter* getBufWriter(int index); CNKProc* getBufReaderProc(int index); CNKProc* getBufWriterProc(int index);
A CNKBuf object can have multiple CNKBufReader and CNKBufWriter objects (though currently it is an error to have more than one CNKBufWriter). These methods can be used to find out the number of readers and writers, and access them, and access the CNKProc objects they are linked to.
The getBufReaderProc and getBufWriterProc methods can be used to go from a CNKBuf to the connected CNKProc objects. CNKProc::getInputBuf and getOutputBuf will go in the other direction. Using both of these, one can traverse a pipeline graph, without dealing directly with the CNKBufReader and CNKBufWriter objects between the CNKBuf and CNKProc objects.
CNKBuf:: void setColumnName(int colNum, const char* name); const char* getColumnName(int colNum);
Each column in a CNKBuf has a name. These methods are used to set/get the column name of the specified CNKBuf column. colNum is the column number, from 0 through getNumColumns()-1. A column name may be NULL.
CNKBuf:: enum column_type { column_type_double,
column_type_factor,
68

column_type_string, column_type_timeDate};
void setColumnType(int colNum, int typeNum); int getColumnType(int colNum); int columnTypeIsDouble(int colNum); int columnTypeIsFactor(int colNum); int columnTypeIsString(long colNum); int columnTypeIsTimeDate(long colNum);
Each column in a CNKBuf has a column type. The possible types are identified by the integer values CNKBuf::column_type_double, CNKBuf::column_type_factor, CNKBuf::column_type_string, or CNKBuf::column_type_timeDate. The type of a CNKBuf column can be set/get with setColumnType and getColumnType. The methods columnTypeIsDouble, etc. return true (non-zero) if the specified column is of type column_type_double, etc.
If the column type is CNKBuf::column_type_double, each value in the column is interpreted as a floating point number. Missing values are represented as the special NaN value returned by CNKObj::getDoubleNaN().
If the column type is CNKBuf::column_type_factor, each value in the column represents one of a list of string "factor levels", or the missing value. The implementation is complicated. The actual values in the CNKBuf are stored as double values (and NaN values). In order to interpret these double values as factor levels, the CNKBuf maintains for each column a list of factor level strings. As new factor values are stored, this list is grown. The actual double values stored in the CNKBuf are the positions of the corresponding factor levels in the level list (0.0, 1.0, ...). Methods for accessing the factor levels for a column are described below.
If the column type is CNKBuf::column_type_string, each value is a char array representing a string. Typically values are stored in the UTF-8 format. As the pipeline itself does not manipulate the values of the char arrays, it is possible to pass around strings using other char array conventions.
If the column type is CNKBuf::column_type_timeDate, each value is stored as a long representing the number of milliseconds since an origin of January 1, 1970. This is the same origin used by Java. The
69

integer part of this number is the number of days, and the fractional part represents a fraction of a day, e.g. the hours, minutes, and seconds.
CNKBuf:: void setNumLevels(int colNum, int i); int getNumLevels(int colNum); void setLevelName(int colNum, int i, const char* level_name); const char* getLevelName(int colNum, int i); void setMaxAutoLevels(int colNum, int val); int getMaxAutoLevels(int colNum); void setOverflowLevel(int colNum, const char* val); const char* getOverflowLevel(int colNum);
These methods access the factor level list associated with each CNKBuf column. Note that this list is associated with every column, even if it does not have type CNKBuf::column_type_factor.
At any time, each column has a certain number of factor levels. The size of this list can be accessed with setNumLevels and getNumLevels, and individual level names can be accessed with setLevelName and getLevelName. Normally, there is no need to call setNumLevels explicitly: If setLevelName is called to set a level name beyond the end of the list, it is automatically extended.
The set/getMaxAutoLevels and set/getOverflowLevel methods access additional properties associated with each column that control how new factor levels are created. If you know all of the possible factor levels that can be read ahead of time, you can simply set up a factor column with these levels. However, if you don't know all of the possible factor levels, there is a potential problem. The pipeline is designed to be used for problems with very large amounts of data. If every new factor level that appears is simply added to the level list, then it is possible that the system would allocate more and more different level strings, until you run out of memory. Even if the number of possible levels is relatively small, there are situations where it is useful to restrict it even further: some operations such as tree modeling and crosstabs can take massive amounts of time or space for variables with many factor levels.
70

The "MaxAutoLevels" property determines the maximum number of levels that will be automatically created. The actual number of levels in a factor can be set larger than this, by explicitly setting the level strings. The default value of this property is 10. A simple way to disable auto-creation of factors is by setting this property to 0.
The "OverflowLevel" property is used when handling a new factor level. If adding the new level would cause the number of levels to exceed the "MaxAutoLevels" property, the "OverflowLevel" string is used instead. For example, if the levels are "yes" and "no", "MaxAutoLevels" is 2, and "OverflowLevel" is "yes", then all other factor values will map to "yes". If the overflow level is not one of the existing levels, it is added, but it is done soon enough so that the total number of levels will not exceed "MaxAutoLevels". If the "OverflowLevel" property is "", the default, then overflow levels are mapped to NA.
CNKBuf:: double mapLevelToDouble(int colNum, const char* level_name); const char* mapDoubleToLevel(int colNum, double val);
These methods handle mapping between double values and factor level strings, for the specified CNKBuf column, which may or may not actually have the type CNKBuf::column_type_factor.
mapLevelToDouble takes a string, and returns the double value used to represent this factor level. If the string does not already appear in the factor level list for this column, it may be added. This method uses the "MaxAutoLevels" and "OverflowLevel" properties of the column to determine whether to create a new factor level.
mapDoubleToLevel takes a double, presumably retrieved from a factor column, and returns the factor level string corresponding to that value. If the double is a NaN value, or if the value doesn't correspond to any factor level, this returns NULL.
CNKBuf:: int getEOF();
Each CNKBuf has a single EOF flag, can be set (via CNKBufWriter::setEOF()) when a CNKProc has written all of the data to the CNKBuf that it ever will. Normally, a CNKProc reading from a
71

CNKBuf will call CNKBufReader::getEOF() to check whether there EOF has been set. CNKBuf::getEOF() gives the same information: it returns true (non-zero) if the EOF flag has been set for the CNKBuf.
CNKBuf:: virtual INT64 getTotalNumRows();
If the CNKBuf knows the total number of rows in its data set (it has reached the EOF of a sequential stream, or it has a backing file), then this method returns the total number of rows. If it doesn't know this information, it returns -1.
CNKBuf:: virtual long getMinRowsToAvoidDeadlock(); virtual int isDeadlockPossible();
When a CNKProc is executed, it reads data rows from one or more input CNKBufReader objects, and writes data rows to one or more CNKBufWriter objects. Before reading and writing these rows, it must request a certain amount of rows, by calling CNKBufReader::setRequestRows or CNKBufWriter::setRequestRows, as described below.
When calling the setRequestRows methods, a CNKProc should not ask for more rows than the size of the CNKBuf, since this request can never be satisfied. This is not enough, though. There is another situation where a problem can occur, even if the request is for fewer rows than the size of the CNKBuf.
Suppose that a CNKBuf has 100 rows. Further suppose that this CNKBuf has one CNKProc that wants to write 60 rows at a time, and another CNKProc that wants to read 80 rows at a time. When the pipeline is executed, the writing CNKProc requests space for writing 60 rows, the request is satisfied (there are 100 free rows), and the 60 rows are written. Now, there is a problem. The reading CNKProc will request 80 rows, but this cannot be satisfied: there are only 60 rows available to read. The writing CNKProc will request space for writing an additional 60 rows, but this cannot be satisfied: there are only 40 available rows. Therefore, both the reading and the writing CNKProc will wait forever for their row requests to be satisfied. This is a deadlock.
72

To avoid this problem, the CNKBuf must have at least as many rows as the largest possible CNKBufWriter::setRequestRows value plus the largest possible CNKBufReader::setRequestRows value (from the multiple readers).
In order to determine whether this is true, it is necessary to know the maximum number of rows a given CNKProc will request from its input or output. CNKProc maintains two properties, the maximum number of rows that will be requested from any of its inputs (accessed with CNKProc::getNumRows), and the maximum number of rows spaces that will be requested from any of its outputs (accessed with CNKProc::getOutputNumRows).
The getMinRowsToAvoidDeadlock and isDeadlockPossible methods are used to check whether the CNKBuf has enough rows to avoid this deadlock. getMinRowsToAvoidDeadlock() returns the minimum number of rows that would be necessary to avoid deadlock. isDeadlockPossible() returns true (non-zero) if this value is less than CNKBuf::getNumRows().
isDeadlockPossible() is called from CNKBuf::init(), to check whether a deadlock is possible. If it is, the error string is set for the CNKBuf.
CNKBackingFileBuf Methods
CNKBackingFileBuf is a subclass of CNKBuf that implements a data buffer with an associated "backing file" on disk. Whereas CNKMemoryBuf only supports procs that sequentially read their input data, CNKBackingFileBuf can be used with procs that need to scan through their input data multiple times, or access it in random order.
A CNKBackingFileBuf can be used in two ways,
1. as a file writer, or
2. as a file reader.
In the first case, the backing file is initially empty, the CNKBackingFileBuf has a single buf writer, and zero or more sequential buf readers. As the pipeline executes, the buf writer writes data to the CNKBackingFileBuf, which writes it to the backing file, and also passes it to any sequential readers. In the second case, the backing file is an existing data file, the CNKBackingFileBuf has no buf writer, and it has exactly one buf reader. As the pipeline executes, the
73

single buf reader can access the data sequentially, or read the data in multiple passes or via random access. As different parts of the data are accessed, they are read into memory from the backing file.
A CNKBackingFileBuf backing file (also called a "data cache file") contains a packed binary representation of the data values. In order for a CNKBackingFileBuf to read an existing data cache file, it must be set with the same column specification as was used to create it, so it knows the number of columns, factor levels, etc.
CNKBackingFileBuf:: CNKBackingFileBuf(); virtual ~CNKBackingFileBuf(); virtual void init();
These are the CNKBackingFileBuf constructor, destructor and init() methods. A CNKBackingFileBuf object is created with CNKBackingFileBuf(), then the properties of the columns and the readers and writers are created, and then init() is called to initialize it, which allocates the storage for the buffer data, and opens the backing file.
CNKBackingFileBuf:: void setBackingFileName(const char* nam); const char* getBackingFileName();
Access the name of the backing file. If this is set to NULL, an error is set on init().
CNKBackingFileBuf:: void setBackingFileTotalRows(INT64 val); INT64 getBackingFileTotalRows();
Set/get the initial number of rows in the backing file. When using a CNKBackingFileBuf to write a backing file, this should be set to 0. When using a CNKBackingFileBuf to read a backing file, this should be set to the number of rows of data in the file.
CNKBackingFileBuf:: long getBackingFileRowBytes(); long getBackingFileColumnOffsetBytes(int colNum); int getBackingFileColumnWidthBytes(int colNum);
74

These methods return information about the storage of the data in the backing file. getBackingFileRowBytes returns the number of bytes for each row. getBackingFileColumnOffsetBytes returns the offset in bytes from the beginning of the row to the specified column data. getBackingFileColumnWidthBytes returns the number of bytes used to store the data for the specified row.
CNKBackingFileBuf:: void closeBackingFile();
This method closes the backing file if it is open.
CNKBufReader Methods
Here are the methods for reading a CNKBuf using a CNKBufReader. Note that there is no public constructor for a CNKBufReader object (it is created automatically in CNKProc::setInputBuf), and no public init() method (it is initialized in CNKBuf::init()).
CNKBufReader:: CNKBuf* getBuf(); CNKProc* getProc();
Returns the CNKBuf or CNKProc linked by this CNKBufReader.
CNKBufReader:: virtual void setRequestRows(long numRows); virtual long getRequestRows();
A CNKProc calls setRequestRows to set the number of data rows that are desired. setRequestRows can be called multiple times, to adjust this number up or down. getRequestRows returns the last row request. When the CNKBuf is initialized, the row request number is initialized to zero.
When a CNKProc calls setRequestRows, if numRows is greater than the total number of rows in the CNKBuf, or if numRows is greater than CNKProc::getNumRows(), then an error string is set for the CNKProc.
CNKBufReader:: virtual long getRowsReady();
getRowsReady returns the number of data rows that are available to read. At any given time, it may be less than the row request, equal to it, or even greater (if there happen to be more rows available than the request). However, the programmer can depend on it's always
75
increasing, until releaseRows is called to release some of the read data rows. Therefore, it is safe to save the value returned by getRowsReady, and then process that many rows, without calling it again to check.
Note that different CNKBufReader objects associated with the same CNKBuf may have different numbers of rows ready at any given time. They will all read the same series of data rows, but one CNKBufReader may read it in different chunk sizes than another.
CNKBufReader:: virtual int getEOF();
A CNKProc writing a stream of data into a CNKBuf can set an EOF flag after it has written all of the data to the CNKBuf that it ever will, to terminate the series of data rows. getEOF() returns true (non-zero) if the current available chunk includes the end of the data. This is still meaningful when reading the data in a random access mode: that getEOF() returns true (non-zero) if and only if the current chunk defined by {getChunkPosition(), getRowsReady()} contains the end of the data.
CNKBufReader:: virtual INT64 getTotalNumRows();
If the CNKBuf knows the total number of rows in its data set (it has reached the EOF of a sequential stream, or it has a backing file), then this method returns the total number of rows. If it doesn't know this information, it returns -1.
CNKBufReader:: virtual int isReady();
isReady returns true (non-zero) if the CNKBuf is ready to be read. Normally, this is true if getRowsReady() is greater than or equal to getRequestRows(). It also returns true if getEOF() is true, since the CNKBuf is as ready as it ever will be: it will never have any more rows available. A CNKProc calling isReady should check for this case. isReady() will always return false (zero) if the error string of the CNKBuf is not NULL: in this case, the CNKProc should not try accessing the row data.
CNKBufReader::
76
virtual double getDouble(long rowNum, int columnNum); virtual long getLevelNum(long rowNum, long colNum); virtual const char* getString(long rowNum, long colNum); virtual CNKTimeDate getTimeDate(long rowNum, long colNum);
Returns a single value stored in the CNKBuf at a given row and column. rowNum is the row number in the currently-accessible chunk of data rows: the first row is always accessed with rowNum==0. rowNum should be less than getRowsReady(). columnNum is the column number for the data, from 0 to CNKBuf::getNumcolumns()-1.
These methods respectively return a value for use as a double, factor, string, or timeDate.
CNKBufReader:: virtual void getDoubleArray(long firstRowNum, int columnNum, long numRows, double* ptr);
This method copies multiple values from a column of values stored in the CNKBuf into the array *ptr. columnNum identifies the column in CNKBuf of the data being copied, from 0 to CNKBuf::getNumcolumns()-1. firstRowNum is the row number of the first row to copy in the currently-accessible chunk of data rows: it should be zero or greater. numRows is the number of values to copy. firstRowNum + numRows should be less than getRowsReady().
CNKBufReader:: virtual void releaseRows(long numRows);
After reading up to getRowsReady() data rows (using the methods getDouble, etc.), releaseRows(numRows) is called to release the first numRows rows of the available rows. A CNKProc may release all of the getRowsReady() data rows at once, or fewer rows. If fewer rows are released than were requested, this is a simple way to access a moving window over the data.
If numRows is less than zero, or greater than getRowsReady(), then an error string is set for the CNKProc using this CNKBufReader.
CNKBufReader:: virtual void releaseAll();
77

releaseAll() should be called when the reader is no longer interested in reading this data. After calling releaseAll(), no requests will be satisfied. This method allows a reader to "disconnect" from the buf. This is needed for multipass or random-access readers, to tell the buf that they are through reading, since it isn't enough that EOF has been reached. This should be called from streaming readers, too, when they set themselves "done", in case there are other resources that can be released.
CNKBufReader:: virtual INT64 getChunkPosition();
At any time, a CNKBufReader can access a "chunk" of data rows from a potentially-very-large series of data rows. getChunkPosition returns the row number of the first row in the chunk, counted from the start of the series when CNKBuf::init() was called. If the data is being read sequentially, this value is the same as the sum of all releaseRows calls since CNKBuf::init() was last called.
CNKBufReader:: virtual void setChunkPosition(INT64 where);
The setChunkPosition method sets the position of the beginning of the current chunk. This may change the value returned by getRowsReady(). For random-access bufs, this can be set to any value, forward or backward. For multi-pass bufs, this can be set forward, or to 0 to reset the stream. Setting this backwards (except to 0) will cause a buf error. For normal sequential streaming bufs, setting this backwards will cause a buf error.
For any type of access, setChunkPosition can be used to skip ahead in the data stream. To skip forward to the EOF, call setChunkPosition(max_int64).
CNKBufReader:: virtual int isMultiPass();
virtual int isRandomAccess();
These methods return non-zero if this CNKBufReader CNKBuf supports multi-pass access, or random-access.
78

CNKBufWriter Methods
Most of the methods for CNKBufWriter are similar to those for CNKBufReader. Like the other class, where is no public constructor for a CNKBufWriter object (it is created automatically in CNKProc::setOutputBuf), and no public init() method (it is initialized in CNKBuf::init()).
CNKBufWriter:: CNKBuf* getBuf(); CNKProc* getProc();
Returns the CNKBuf or CNKProc linked by this CNKBufWriter.
CNKBufWriter:: virtual void setRequestRows(long numRows); virtual long getRequestRows();
A CNKProc calls setRequestRows to request space for writing a given number of data rows. This number must be less than or equal to the total number of rows in the CNKBuf. setRequestRows can be called multiple times, to adjust this number up or down. getRequestRows returns the last row request.
When a CNKProc calls setRequestRows, if numRows is greater than the total number of rows in the CNKBuf, or if numRows is greater than CNKProc:: getNumRows(), then an error string is set for the CNKProc.
CNKBufWriter:: virtual long getRowsReady();
getRowsReady returns the number of data rows that are available to write. At any given time, it may be less than the row request, equal to it, or even greater (if there happen to be more rows available than the request). However, the programmer can depend on it's always increasing, until releaseRows is called to release some of the read data rows. Therefore, it is safe to save the value returned by getRowsReady, and then process that many rows, without calling it again to check.
CNKBufWriter:: virtual int isReady();
79

isReady returns true (non-zero) if the CNKBuf is ready to be written to. Normally, this is true if getRowsReady() is greater than or equal to getRequestRows(). isReady() will always return false (zero) if the error string of the CNKBuf is not NULL: in this case, the CNKProc should not try accessing the row data.
CNKBufWriter:: virtual void setDouble(long rowNum, int columnNum, double val); virtual void setLevelNum(long rowNum, long colNum, long val); virtual void setString(long rowNum, long colNum, const char* val); virtual void setTimeDate(long rowNum, long colNum, CNKTimeDate val);
setDouble stores a single double value into the CNKBuf at a given row and column. rowNum is the row number in the currently-accessible chunk of data rows: the first row is always accessed with rowNum==0. rowNum should be less than getRowsReady(). columnNum is the column number for the data, from 0 to CNKBuf::getNumcolumns()-1.
These methods respectively set a value as a double, factor, string, or timeDate.
CNKBufWriter:: virtual void setConvertDouble(long rowNum, int columnNum, double val); virtual void setConvertFactor(long rowNum, int columnNum, const char* level); virtual void setConvertString(long rowNum, long colNum, const char* level);
setConvertDouble, setConvertFactor, and setConvertString are useful methods for setting a given item in the CNKBuf to the specified double or factor level value. These methods check whether the column type is double or factor, and converts the given value if it is not. In some cases, the conversion may not be meaningful, but it tries to do something reasonable.
With setConvertDouble, if the column is actually a factor column, the double is converted into a string (such as "1.2"), and that string is used as the factor level. If there are only a few different double values stored in this way, the resulting factors may be useful.
80
With setConvertFactor, if the column is actually a double column, the argument is registered as a factor level for the column (by calling CNKBuf::mapLevelToDouble), and the value associated with that factor level is assigned. The order of the values is not particularly meaningful.
CNKBufWriter:: virtual void setDoubleArray(long firstRowNum, int columnNum, long numRows, double* ptr);
This method copies multiple values from the array *ptr into a column of values stored in the CNKBuf. columnNum identifies the column in CNKBuf of the data being copied, from 0 to CNKBuf::getNumcolumns()-1. firstRowNum is the row number of the first row to copy in the currently-accessible chunk of data rows: it should be zero or greater. numRows is the number of values to copy. firstRowNum + numRows should be less than getRowsReady().
CNKBufWriter:: virtual void releaseRows(long numRows);
After writing up to getRowsReady() data rows (using the methods such as setDouble, etc.), releaseRows(numRows) is called to release the first numRows rows of the available rows, so they can be read by other CNKProc objects. A CNKProc may release all of the getRowsReady() data rows at once, or fewer rows.
If numRows is less than zero, or greater than getRowsReady(), then an error string is set for the CNKProc using this CNKBufWriter. In addition, if this is called after the EOF flag has been set with setEOF, an error string is set for the CNKProc.
CNKBufWriter:: virtual void setEOF();
setEOF() should be called after a CNKProc has written all of the data to the CNKBuf that it ever will, and called releaseRows to release these rows. This sets a flag in the CNKBuf, so the CNKProc objects reading this CNKBuf will know not to wait for any more data. After this is called, releaseRows should never be called again: if it is, an error string is set for the CNKProc.
CNKBufWriter::
81
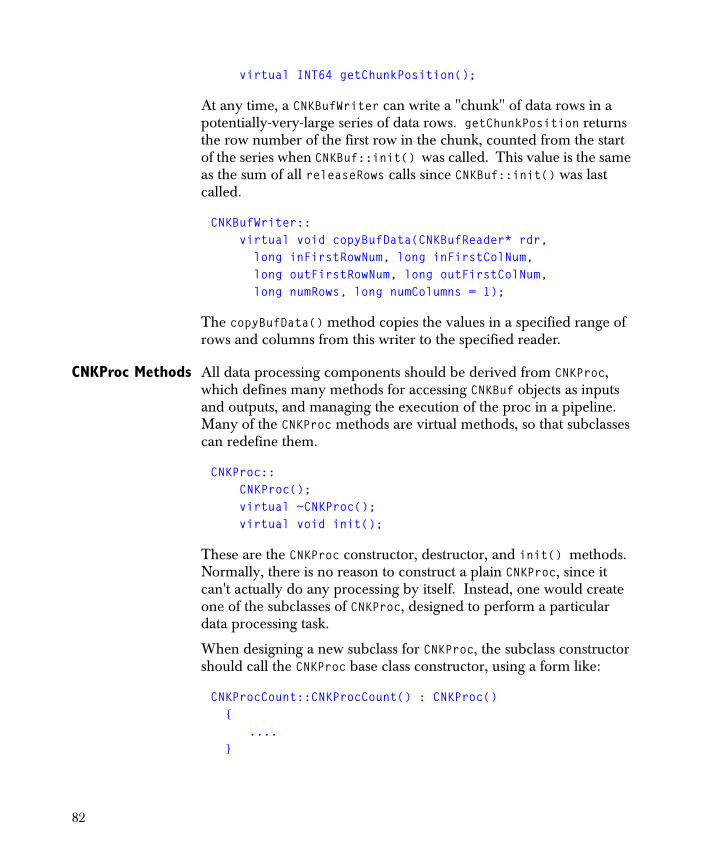
virtual INT64 getChunkPosition();
At any time, a CNKBufWriter can write a "chunk" of data rows in a potentially-very-large series of data rows. getChunkPosition returns the row number of the first row in the chunk, counted from the start of the series when CNKBuf::init() was called. This value is the same as the sum of all releaseRows calls since CNKBuf::init() was last called.
CNKBufWriter:: virtual void copyBufData(CNKBufReader* rdr, long inFirstRowNum, long inFirstColNum, long outFirstRowNum, long outFirstColNum, long numRows, long numColumns = 1);
The copyBufData() method copies the values in a specified range of rows and columns from this writer to the specified reader.
CNKProc Methods All data processing components should be derived from CNKProc, which defines many methods for accessing CNKBuf objects as inputs and outputs, and managing the execution of the proc in a pipeline. Many of the CNKProc methods are virtual methods, so that subclasses can redefine them.
CNKProc:: CNKProc(); virtual ~CNKProc(); virtual void init();
These are the CNKProc constructor, destructor, and init() methods. Normally, there is no reason to construct a plain CNKProc, since it can't actually do any processing by itself. Instead, one would create one of the subclasses of CNKProc, designed to perform a particular data processing task.
When designing a new subclass for CNKProc, the subclass constructor should call the CNKProc base class constructor, using a form like:
CNKProcCount::CNKProcCount() : CNKProc(){
....}
82

Likewise, the subclass init method should call the CNKProc::init(), as follows:
void CNKProcCount::init(){
CNKProc::init();....
}
The destructor ~CNKProc() will be called automatically after the destructor of a derived class. It is not necessary to add any special declaration or call. ~CNKProc() removes any links to input or output CNKBuf objects, deleting any existing CNKBufReader or CNKBufWriter objects.
CNKProc:: void setInputBuf(int index, CNKBuf* buf); void setOutputBuf(int index, CNKBuf* buf); int getNumInputs(); int getNumOutputs(); CNKBuf* getInputBuf(int index); CNKBuf* getOutputBuf(int index); CNKBufReader* getInputBufReader(int index); CNKBufWriter* getOutputBufWriter(int index);
These are the methods a CNKProc uses for accessing its input and output CNKBuf objects. Any CNKProc can have any number of inputs and outputs. They are referenced by index number, starting from 0.
setInputBuf and setOutputBuf create an input or output, creating a CNKBufReader or CNKBufWriter to represent the link between the CNKProc and the specified CNKBuf. This is the only way to create a CNKBufReader or CNKBufWriter. If the input or output index already has an assigned CNKBuf, it is removed first (destroying the corresponding CNKBufReader or CNKBufWriter), before creating a new one. If the buf argument is NULL, any existing link is destroyed, and nothing is left in its place.
getNumInputs and getNumOutputs return the current number of input and output CNKBufs. Note that there is no method for explicitly setting the number of inputs and outputs: the number of inputs or outputs is defined as the largest index of a non-NULL input or output. If existing links are removed, these numbers may decrease.
83

After inputs and outputs have been created, they can be accessed with getInputBuf and getOutputBuf (returning the linked CNKBuf objects), and getInputBufReader and getOutputBufWriter (returning the CNKBufReader or CNKBufWriter objects for the link). These methods check the validity of their index argument: if the index is invalid, they will return NULL.
CNKProc:: virtual void setNumRows(long val); virtual long getNumRows(); virtual void setOutputNumRows(long val); virtual long getOutputNumRows();
CNKProc maintains two properties, the maximum number of rows that will be requested from any of its inputs (accessed with set/getNumRows), and the maximum number of rows spaces that will be requested from any of its outputs (accessed with set/getOutputNumRows). These properties should be set when a CNKProc is created. The values of these properties are used by CNKBuf::getMinRowsToAvoidDeadlock() and CNKBuf::isDeadlockPossible() to determine whether the CNKBuf is large enough to avoid deadlock during pipeline execution.
Many CNKProc objects take an input chunk, process it, and write an output chunk with the same number of rows. In cases like these, the getOutputNumRows value should be the same as the getNumRows value. To handle this case more easily, if the "OutputNumRows" value is less than zero (the default), getOutputNumRows() will simply return the value of getNumRows(). Therefore, many CNKProc objects will only need to call setNumRows.
CNKProc:: virtual void execute(); virtual int isReady(); virtual void setDone(int val); virtual int isDone();
These methods determine how the pipeline engine executes the CNKBuf. Derived classes redefine CNKProc::execute(), and possibly the other methods, to implement their particular data processing behavior. This set of methods is deliberately small, to make it easier to define new components.
84
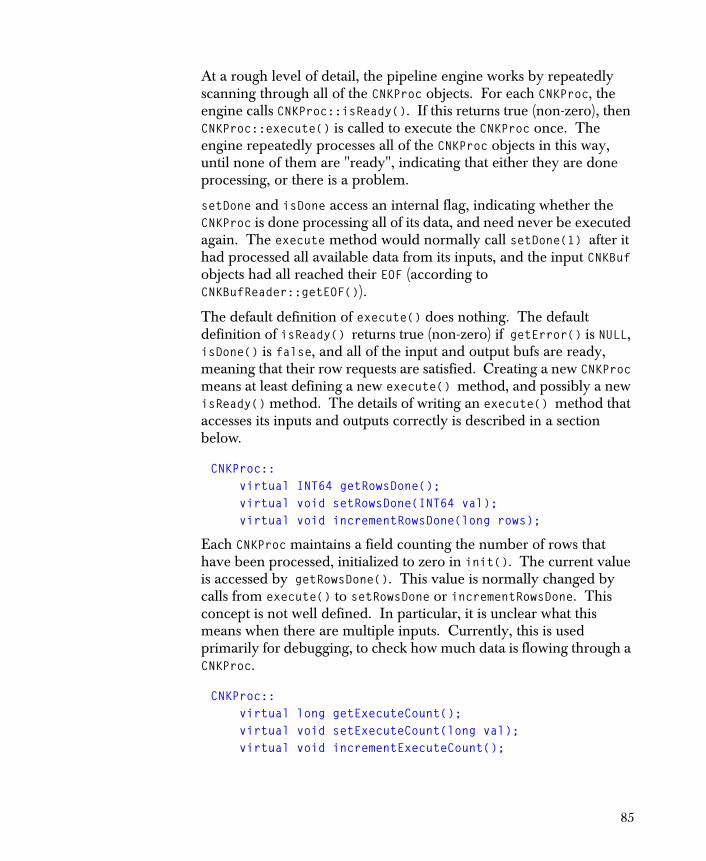
At a rough level of detail, the pipeline engine works by repeatedly scanning through all of the CNKProc objects. For each CNKProc, the engine calls CNKProc::isReady(). If this returns true (non-zero), then CNKProc::execute() is called to execute the CNKProc once. The engine repeatedly processes all of the CNKProc objects in this way, until none of them are "ready", indicating that either they are done processing, or there is a problem.
setDone and isDone access an internal flag, indicating whether the CNKProc is done processing all of its data, and need never be executed again. The execute method would normally call setDone(1) after it had processed all available data from its inputs, and the input CNKBuf objects had all reached their EOF (according to CNKBufReader::getEOF()).
The default definition of execute() does nothing. The default definition of isReady() returns true (non-zero) if getError() is NULL, isDone() is false, and all of the input and output bufs are ready, meaning that their row requests are satisfied. Creating a new CNKProc means at least defining a new execute() method, and possibly a new isReady() method. The details of writing an execute() method that accesses its inputs and outputs correctly is described in a section below.
CNKProc:: virtual INT64 getRowsDone(); virtual void setRowsDone(INT64 val); virtual void incrementRowsDone(long rows);
Each CNKProc maintains a field counting the number of rows that have been processed, initialized to zero in init(). The current value is accessed by getRowsDone(). This value is normally changed by calls from execute() to setRowsDone or incrementRowsDone. This concept is not well defined. In particular, it is unclear what this means when there are multiple inputs. Currently, this is used primarily for debugging, to check how much data is flowing through a CNKProc.
CNKProc:: virtual long getExecuteCount(); virtual void setExecuteCount(long val); virtual void incrementExecuteCount();
85

Each CNKProc contains a field counting the number of times that it has been executed. This field is incremented by the pipeline engine, which calls incrementExecuteCount(). The current value, retrieved by getExecuteCount(), can be useful during debugging.
CNKProc:: virtual void checkBufs(int inputs, int outputs); virtual void checkBufs(int minInputs, int maxInputs,
int minOutputs, int maxOutputs);
These methods are useful utility methods that can be called from the init() method to check the number of inputs and outputs that have been defined. If they wrong number is found, the error string of the CNKProc is set to an error.
For the two-argument method, if the number of inputs and outputs is not exactly the number specified, the error string is set.
For the four-argument method, the number of inputs and outputs must be in the specified ranges. For example, checkBufs(0,2,1,1) checks that the number of inputs is 0, 1, or 2, and the number of outputs is exactly 1.
CNKProc:: virtual long executeRequestRows(); virtual void executeReleaseRows(long rows);
These methods are useful utility methods that handle the most common input and output manipulation from an execute() method. Using these methods, many simple CNKProc execute() methods can be defined in only a few lines.
The operation of these methods, and how they can be used in a custom execute() method, are described below.
Creating a Subclass of CNKProc
Creating a new subclass of CNKProc requires defining a new init() and execute() method, and possibly a new isReady() method, as well as creating new methods specific to the new class. The pipeline is informed of the class’s existence using a special macro.
CNK_DEFINE_ACCESSIBLE_CLASS Macro
The function for creating a new object of a class is created by using the macro CNK_DEFINE_ACCESSIBLE_CLASS (defined in CNKPropertyInfo.h, which is included by CNKObj.h). Given the name
86

of a class, this creates and exports a regular C function (with a long, ugly name including the class name) that creates an instance of that class. For example, CNKProcRandomReader.cpp contains the line:
CNK_DEFINE_ACCESSIBLE_CLASS(CNKProcRandomReader)
The init() Method
If a subclass of CNKProc redefines the init() method, the redefined init() method should start by calling its superclass method: CNKProc::init().
Most init() methods should check that the CNKProc has the right number of input and output CNKBufs. This is most easily done by calling CNKProc::checkBufs.
The init() method performs any initialization that the object requires, based on the values of any properties that have been set. Some of these properties may be common to all CNKProc objects, such as the input and output bufs (accessed with getNumInputs, etc), and the number of rows (accessed with getNumRows, etc). Some properties may be specific to this particular class. For example, a file reader object would have methods for setting properties such as the file name, file type, etc. Within the init() method, these properties are used to initialize any internal data structures required to execute the object.
Although the main data storage mechanism for the TIBCO Spotfire Pipeline is the CNKBuf data structure, it is also possible to allocate and use storage within a given CNKProc object. For example, a model-building CNKProc may allocate internal storage for accumulating and processing the data being modeled. If these internal data structures are of a fixed size, they can be specified as part of the CNKProc subclass instance variables. If the internal data structures can have different sizes depending on the number of columns and rows of the inputs, then they could be allocated dynamically, within the init() method. In this case, the dynamically-allocated data should be released if the init() method is called a second time, and it should be released in the class destructor.
The execute() Method
The execute() method needs to manage its inputs and outputs, as well as actually performing the data manipulation operation. More explicitly, the execute() method should perform the following steps:
87

1. Request input and output data rows.
The execute() method must call CNKBufReader::setRequestRows to request access to its input data, and call CNKBufWriter::setRequestRows to allocate space for its output data.
It is important to note that a CNKProc cannot assume that any other parts of the pipeline are being processed in parallel. Therefore, if CNKBufReader::setRequestRows has been called to request access to a certain number of rows, and these rows are not yet ready (according to CNKBufReader::isReady()), then the execute() method must simply return, waiting until it is called again later to see if the data is ready. An execute method should never enter a wait loop, waiting for some event to occur in some other part of the pipeline.
When a CNKBuf is initialized via CNKBUF::init(), the row requests for all its readers or writers are initialized to zero, so initially CNKBufReader::isReady() and CNKBufWriter::isReady() will always return true (non-zero) for all of the inputs and outputs of a CNKProc. When execute() is called the first time, with zero rows available on its inputs and outputs, it will need to call setRequestRows to request the appropriate number of input and output rows.
In many situations, this processing can be done by calling CNKProc::executeRequestRows(). This utility method calls setRequestRows on all of the inputs (requesting getNumRows() rows) and outputs (requesting getOutputNumRows() rows). Then, it calls isReady() on all of the inputs and outputs, to check whether the requests are satisfied. If all of the inputs and outputs are ready, executeRequestRows returns the minimum number of rows available on any of the inputs or outputs. This may be less than getNumRows() if one of the inputs has encountered an EOF. If any of the inputs or outputs is not ready, then this method returns -1. If executeRequestRows() returns less than zero, the execute method should simply return, to wait for the input and output row requests to be satisfied.
2. Process data.
The execute() method must actually perform the data processing, reading data from its inputs with methods such as CNKBufReader::getDouble, and writing the resulting data to its outputs with methods such as CNKBufWriter::setDouble.
88

If the CNKProc has outputs, the execute() method may set the column names and types of the output CNKBuf objects if they are not set already. This can be done easily by calling CNKBuf::setUnknownColumnInfo.
3. Release data rows.
After reading from the inputs and writing to the outputs, the execute() method must release the input data rows that it has been reading (by calling CNKBufReader::releaseRows), to prepare for reading the next chunk of input data. It must also release the output data rows it has been writing (by calling CNKBufWriter::releaseRows), so that the output data can be read by other components.
The execute() method does not necessarily need to release all of its input and output rows. If an input had access to 100 rows and the execute method released 95, the last 5 rows would be available on the input as the first 5 rows the next time that a chunk of rows was requested. By repeatedly releasing less than all of the input rows, the execute method would access a rolling, overlapping window over the input data. There is less reason for releasing less than the full set of output rows: once an output row has been written, there is little reason to change it.
Along with releasing the rows, the execute() method should perform several other housekeeping chores: handling the EOF flags, calling setDone, and calling incrementRowsDone.
If an input buf has its EOF flag set (accessed via getEOF()), this signals the end of the input data. The execute() method has to detect and handle this situation. Note that even if the EOF flag is set, the buf may still contain data that the CNKProc needs to process. Only when (inbuf->getEOF() && inbuf->getRowsReady()==0) is true has all of the input data been released.
The execute() method has to handle the situation where the CNKProc has processed all of its data, and it is "done". When this occurs, after releasing all of its input and output rows, the CNKProc should call setEOF() on all of its outputs, and then call setDone(true) to signal that it should not be executed again.
The execute() method should also call incrementRowsDone(long rows), to update the number of rows processed by the CNKProc (accessed by getRowsDone()).
89

Releasing rows and performing these other tasks can often by done by calling CNKProc::executeReleaseRows(long rows), passing the number of rows to release. This utility method calls releaseRows(rows) on all inputs and outputs, releasing the specified number of rows, and calls incrementRowsDone(rows). If any of the inputs have been totally consumed
(inbuf->getEOF() && inbuf->getRowsReady()==0)
then it is assumed that the CNKProc is done: the setEOF() method is called on all of the outputs, and setDone(true) is called on the CNKProc. If none of the inputs have been totally consumed, setRequestRows(getNumRows()) is called on all of the inputs, and setRequestRows(getOutputNumRows()) on all of the outputs, to prepare for the next chunk.
The isReady() Method
Most of the time, it is not necessary to redefine isReady(). The default implementation of CNKProc::isReady() returns true (non-zero) if the CNKProc is not done (according to isDone()), and it does not have an error (according to getError()), and all of its inputs and outputs have their row requests satisfied (according to CNKBufReader::isReady() and CNKBufWriter::isReady()).
It might be useful to redefine isReady() for CNKProc objects that want to handle their inputs and outputs differently, such as running when only one of the inputs or outputs is ready, rather than all of them. For example, this could be used in a merge operation that handles multiple inputs.
CNKProcCount: Counts and Summaries
This proc has a single input buf, and no outputs. It performs several different types of counting operations on the input data:
1. For all input columns, it accumulates the counts of the number of NA and non-NA values, the minimum and maximum non-NA values that have appeared in the column, and some additional numeric summaries.
2. For factor input columns, it maintains counts of the number of times each factor level appears.
3. Optionally, a set of factor columns can be selected, and crosstabs will be calculated for them, counting the number of times each combination of factor levels appears.
90

After reading a set of input rows, the accumulated max, min, counts, and crosstab values can be extracted from the proc.
CNKProcCount:: CNKProcCount(); virtual ~CNKProcCount(); virtual void init(); virtual void execute();
These are the constructor, destructor, and init() methods. The execute() method is run when this CNKProc is executed within a pipeline.
CNKProcCount:: void setCrossSize(int val); int getCrossSize(); void setCrossColumn(int crossNum, int colNum); int getCrossColumn(int crossNum);
Defines the set of input columns for which crosstabs will be calculated. setCrossSize sets the number of columns for crosstabs: if this is zero, no crosstabs will be calculated. setCrossColumn specifies the input column to be read for each of the crosstabs. crossNum is the crosstab column in the range 0..getCrossSize()-1. colNum gives the column number of the specified input columns.
CNKProcCount:: double getMin(int colNum); double getMax(int colNum); double getMean(int colNum); double getStdDev(int colNum); INT64 getCountNA(int colNum); INT64 getCountOK(int colNum);
After some input rows have been processed, these methods can be used to extract information accumulated for each input column. colNum is the number of the input column, starting from 0.
getMin and getMax return the minimum and maximum values for all non-NA values read from the specified input column. getMean and getStdDev return the mean and standard deviation of the specified column. If no non-NA values have been read (or less than two values for getStdDev), these return NaN.
91
getCountNA returns the number of NA values read. getCountOK returns the number of non-NA values read.
CNKProcCount:: int getColumnNumLevels(int colNum); const char* getColumnLevelName(int colNum, int levelNum); INT64 getColumnLevelCount(int colNum, int levelNum); int getColumnLevelInt(int colNum, int levelNum);
After some input rows have been processed, these methods can be used to get the accumulated counts for each factor level of a factor column.
getColumnNumLevels returns the number of factor levels that have been accumulated for the given column. If it is not a factor column, then it would return 0. This only returns the number of factor levels that have been encountered: this may be less than the number defined for this column, as given by CNKBuf::getNumLevels. NA values are also accumulated as a separate level, and included in this count, whether or not NAs appear in the data.
getColumnLevelName returns the string name associated with the specified level number for this column. If the "level" is the special level for NAs, this returns "NA".
getColumnLevelCount returns the number of data rows that contain the factor level levelNum for the given column.
[## Describe getColumnLevelInt ##]
CNKProcCount:: void setCrossIndex(int crossNum, int levelNum); INT64 getCrossCount();
After some input rows have been processed, these methods can be used to get the accumulated crosstab counts. Each of these counts is specified by a particular combination of factor levels for all of the crosstab columns. Each count is retrieved by setting the desired column factor level for each crosstab column (by calling setCrossIndex), and then calling getCrossCount to retrieve a single count.
92
setCrossIndex sets the crosstab level for the crosstab column specified by crossNum. The level for this column is set to levelNum, which is interpreted the same as in getColumnLevelName above. Note that the column is specified by the crosstab column number (from 0 to getCrossSize()-1), rather than the input column number. Therefore, levelNum should range from 0 to getColumnNumLevels(getCrossColumn(crossNum)).
CNKProcCount:: int getNumCountBlocks();
CNKProcCount dynamically allocates "count blocks" to store the counts for new factor levels. The number of these blocks can grow greatly, especially when accumulating crosstabs. This method returns the number of count blocks in use for a given count proc.
Utility Procs When developing a proc, it is sometimes useful to have simple components available to provide data, accept data, and print data values. The CNKProcNullReader, CNKProcNullWriter, CNKProcPrintf, and CNKProcRandomReader procs are utilities for use in debugging new procs.
CNKProcNullReader : Null reader proc
The null reader proc is mainly used for testing the TIBCO Spotfire Pipeline. It has no inputs, and one output buf. It writes 1,2,3,... on its first column output, 2,3,4,... on the next, etc.
CNKProcNullReader:: CNKProcNullReader(); virtual ~CNKProcNullReader(); virtual void init(); virtual void execute();
These are the constructor, destructor, and init() methods. The execute() method is run when this CNKProc is executed within a pipeline.
CNKProcNullReader:: void setTotalRows(INT64 rows); INT64 getTotalRows();
93

These methods set/get the total number of rows to be written by this proc, before the proc sends an EOF to the output buf, and specifies that it is done.
CNKProcNullReader:: void setAccessBuf(int val); int getAccessBuf();
These methods access a flag that determines whether the proc actually writes values to its output buf. By setting this to false (zero), one can measure the minimum time for the pipeline to run, without any data being transferred. In this case, the values read from the output buf would be undefined.
CNKProcNullWriter : Null Writer Proc
The null writer proc is mainly used for testing the TIBCO Spotfire Pipeline. It has one input buf, and no outputs. It simply consumes all of its input rows.
CNKProcNullWriter:: CNKProcNullWriter(); virtual ~CNKProcNullWriter(); virtual void init(); virtual void execute();
These are the constructor, destructor, and init() methods. The execute() method is run when this CNKProc is executed within a pipeline.
CNKProcNullWriter:: void setAccessBuf(int val); int getAccessBuf();
These methods access a flag that determines whether the proc actually reads values from its input buf. By setting this to false (zero), one can measure the minimum time for the pipeline to run, without any data being transferred.
94

CNKProcPrintf
The CNKProcPrintf proc prints information about each block of data. It prints the position of the block in the data, the number of rows, the number of columns, and the data values for the first few rows in the block. The number of rows printed can be specified, with the default of 2.
CNKProcPrintf():: CNKProcPrintf(); virtual ~CNKProcPrintf(); virtual void init(); virtual void execute();
These are the constructor, destructor, and init() methods. The execute() method is run when this CNKProc is executed within a pipeline.
CNKProcPrintf():: virtual void setProperty(CNKPropertyInfo* propInfo); virtual void getProperty(CNKPropertyInfo* propInfo);
These methods can be used to get and set the “num.to.print” property, which determines how many rows are printed per block.
CNKProcRandomReader : Random Data Creation Proc
This proc has a single output buf, to which it writes a specified number of rows of random numbers, from a uniform distribution from 0.0 to 1.0. This can be useful as a source of data for testing new pipelines.
The number of columns to be generated is specified by outbuf. If a column in the output buffer has the type "factor", then the values generated for that column will be randomly chosen from the five levels "lev1", "lev2", ..., "lev5".
CNKProcRandomReader:: CNKProcRandomReader(); virtual ~CNKProcRandomReader(); virtual void init(); virtual void execute();
95

These are the constructor, destructor, and init() methods. The execute() method is run when this CNKProc is executed within a pipeline.
CNKProcRandomReader:: void setTotalRows(INT64 rows); INT64 getTotalRows();
These methods set/get the total number of rows to be written by this proc, before the proc sends an EOF to the output buf, and specifies that it is done.
CNKProcRandomReader:: void setSeed(long seed); long getSeed();
These methods set/get the random seed used for initializing the random number generator: it should be a long between 1 and 2147483646 (otherwise the seed is set to 1). If a random reader proc is created with the same seed value and the same number of columns, it will generate the same sequence of random numbers.
CNKPipeline : Pipeline Object
A CNKPipeline object packages up a set of CNKProc and CNKBuf objects so the procs can be executed to process a series of data chunks. After a pipeline is constructed, its init() method should be called to initialize the pipeline. This will initialize all of the bufs and procs in the pipeline, so it is not necessary to init them explicitly.
CNKPipeline:: CNKPipeline(); virtual ~CNKPipeline(); virtual void init();
These are the CNKPipeline constructor, destructor, and init() method. A CNKPipeline is created with new CNKPipeline(), then a number of CNKProc and CNKBuf objects are added to the pipeline, and then init() is called to initialize it, which will initialize all of the bufs and procs in the pipeline.
CNKPipeline:: void addProc(CNKProc* proc); void removeProc(CNKProc* proc); int getNumProcs();
96

CNKProc* getProc(int i); CNKProc* getProc(const char* name);
void addBuf(CNKBuf* buf); void removeBuf(CNKBuf* buf); int getNumBufs(); CNKBuf* getBuf(int i); CNKBuf* getBuf(const char* name);
These are methods for adding and removing CNKProc and CNKBuf objects from a pipeline. At any point, a pipeline contains an ordered list of CNKProc objects and an ordered list of CNKBuf objects. The addProc, removeProc, addBuf, and removeBuf methods add or remove a given CNKProc or CNKBuf from the corresponding list. The getNumProcs() and getNumBufs() methods return the sizes of the two lists. The getProc and getBuf methods allow retrieving a CNKProc or CNKBuf by index in the list (0..N-1), or by the name of the CNKProc or CNKBuf (according to CNKObj::getName()).
CNKPipeline:: void execute(long max_exec); int getAnyProcReady();
The CNKPipeline::execute method executes the pipeline by repeatedly calling the execute() method of CNKProc objects in the pipeline. Before calling the CNKProc::execute method for a CNKProc, the CNKProc's isReady and isDone methods are called to check whether it is ready to execute. If none of the CNKProc objects are ready to execute, then this method returns: the pipeline is done.
If the max_exec argument is 0 or less, then the pipeline is executed until none of the CNKProc objects are ready to execute. If max_exec is greater than 0, then the CNKPipeline::execute method will return after calling CNKProc::execute at most max_exec times.
Every time that the CNKPipeline::execute method calls the execute() method for a CNKProc, it also calls CNKProc::incrementExecuteCount(), to update the count of the times that the CNKProc has been executed.
The getAnyProcReady() method returns true (non-zero) if at least one of the CNKProc objects in the pipeline is ready to execute.
CNKPipeline::
97

INT64 getLastExecutionCount(); INT64 getTotalExecutionCount();
These methods return the number of times that the pipeline has executed a CNKProc. getLastExecutionCount() returns the number of CNKProc-executions during the last call to CNKPipeline::execute. getTotalExecutionCount() returns the total number of CNKProc-executions since the pipeline was initialized with init().
98


