PLUS… - Club News brings us all the coverage of past and upcoming events from the Sonoran Desert Model Builders. - In Tips and Tricks, Dave Diaz shows us how make a simple base to display figures. 1 In This Issue… In This Issue… Tiger 1 Late Command Tiger 1 Late Command - The Scorpion Gallery brings us photos of our member’s models.
Transcript
PLUS…
- Club News brings us all the coverage of past and upcoming events from the Sonoran Desert Model Builders.
- In Tips and Tricks, Dave Diaz shows us how make a simple base to display figures.
1
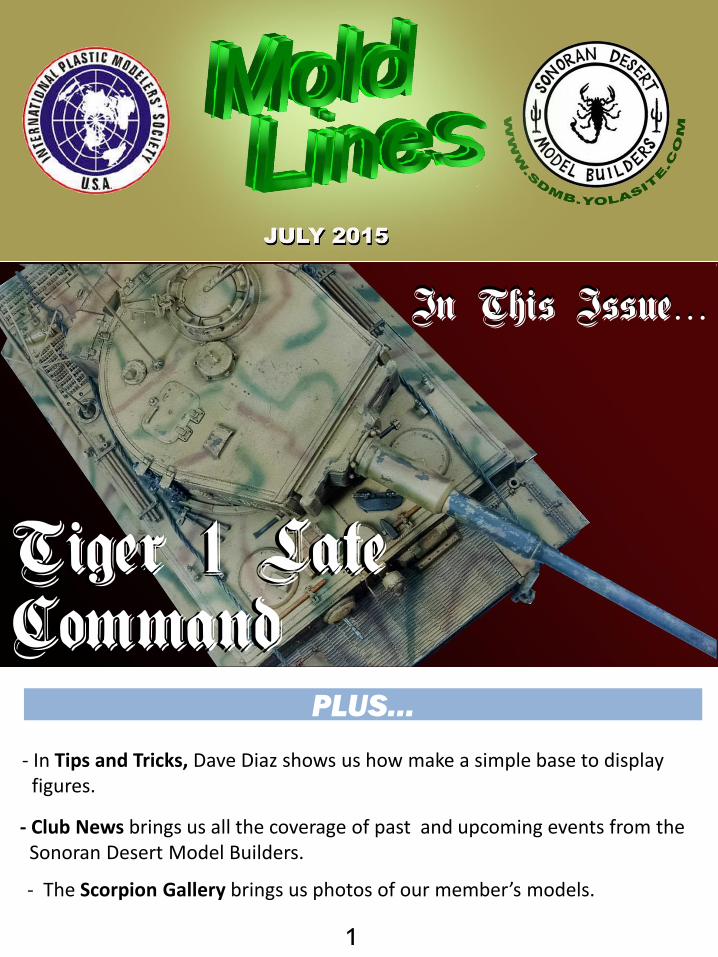
In This Issue… In This Issue…
Tiger 1 Late Command Tiger 1 Late Command
- The Scorpion Gallery brings us photos of our member’s models.
Mold Lines is the official publication of the Sonoran Desert Model Builders Modeling club. We publish it on a monthly basis and it is your source for Club news, interviews, model reviews, photos or our member’s modeling work as well as articles on modeling techniques and other articles of interest to our
members.
WHO ARE THEY? The Sonoran Desert Model Builders is a chartered IPMS model club in Tucson, Arizona dedicated to advancing each other’s skills through tip sharing, encouragement and, most importantly, hands-on building. Our members enjoy a deep camaraderie and level of respect for each other as well as a passion for model building. We build it all... cars, airplanes, armor, ships, figures, sci-fi...
Our mission is simple… LET’S BUILD!
WHERE CAN I
FIND THEM?
We meet at the Patrick K. Hardesty Midtown Multi-Service Building from 6:30 to 8:30 P.M.
1100 South Alvernon Way Tucson, AZ
MEETING DATES 2015
JANUARY ……………… 8 th
FEBRUARY ……………… 5 th
MARCH …………….. 12 th
APRIL ……………… 2 nd
MAY ……………… 7 th
JUNE ……………… 4 th
JULY ……………… 2 nd
AUGUST ……………… 6 th
SEPTEMBER ….………… 3 rd
OCTOBER ….….………. 1st
NOVEMBER ..…….…… 5 th
DECEMBER ……..…… 3 rd
2
Editor’s Workbench
I then looked at the canopy and noticed it was perfect, no scratches, no ugly sink marks. I decided to keep it on my desk as filler work and started putting it together while glue or paint was drying on other projects. I started talking about the project with some of the SDMB members and their enthusiasm turned into inspiration. I decided to go ahead and build it, and what did I discover? It was fun! I was having a blast scratch building the cockpit and looking at color schemes for it. It is one of those instances when you ask yourself, why hadn’t I done this before? While not making any promises I may build some more things with wings in the future. So, if there is a genre of modeling you have never tried, go on and try it. You may even have fun with it.
3
So, I finally took the leap. While I mostly build armor and sci-fi models (there were two or three years that I spent working solely on figures) there has been one genre I have yet to dive into, aircraft. Through more than 20 years (I even built a car once… yes shiny and clean…. Ugh!….a car) I had never built an aircraft. Last year I won an aircraft at a raffle in one of our local swap meets. As I stared at the old and discolored box of a 1/72nd scale Hasegawa F-9 Panther I began to wonder how I could chop that thing and turn it into some sci-fi spaceship. I placed it in the closet with the rest of the stash and it slept there for a few months. About a month ago I opened the box just for curiosity’s sake and I was surprised by the sharp detail of the model. It was very simple with very few parts, but the parts had no defects at all.
QUESTION OF THE MONTH
4
Last month’s “Question of the Month” was about strange places. Not a haunted house, but odd places where you have built a model. Since I have never built anything outside my workbench I guess I am pretty boring, but some of our club members had some interesting anecdotes to share with us.
In the early 1980s I built a 1/48 Tamiya Rufe while at sea aboard USS Midway (CV-41). The Midway was forward deployed and home ported in Yokosuka Japan. I finished it in grey overall with black cowl. After that a few guys bought models and tried their hand at model building. The craze didn't last but it was a fun diversion for a little. - Steve Barlow
As a result of this injury I was assigned light duty at the Main Police Station downtown working the information desk on the midnight shift. I was just answering phone calls and writing call back police reports and guess what I did to pass the time... yes sir, I brought a model to work on! I There was several times I was answering police related questions from John Q Public with a paint brush in my hand and a plastic figure in the other. - Derek Campbell
In the patient waiting area of the cystoscopy department at NYU Medical Center, New York
City. When I was a child in New Jersey, my father ran that particular department of the hospital. I would occasionally spend the day with him at work. During one visit, I built the Monogram 1/48 P-61 Black Widow, unpainted but with decals, while sitting in the waiting room there. - Dave Brown
Next Month’s Question is…. Show us where you build now! Take a photo of your workbench and share it with us!
“Wow! You sure have a well equipped workbench!”
CLUB NEWS
• Monthly Club Meeting – The SDMB held their monthly meeting on June 4th , 2015 from 6:30 pm to 8:30 pm. This month we had our first theme discussion, dedicating the month to Armor and Sci-fi. It was really fun to see all the models from these two categories that were on display. We had a great time talking about techniques and ideas regarding these modeling genres. Next month we will dedicate it to Figures and Aircraft, two subjects that will generate plenty of excitement.
• Make and Take at the Pima Air and Space Museum - This event is designed to introduce children to the hobby of model building and the math and historical research used to build accurate scale models. It was held on June 6th , 2015 from 1:00 PM – 2:30 PM.
RECENT EVENTS
5
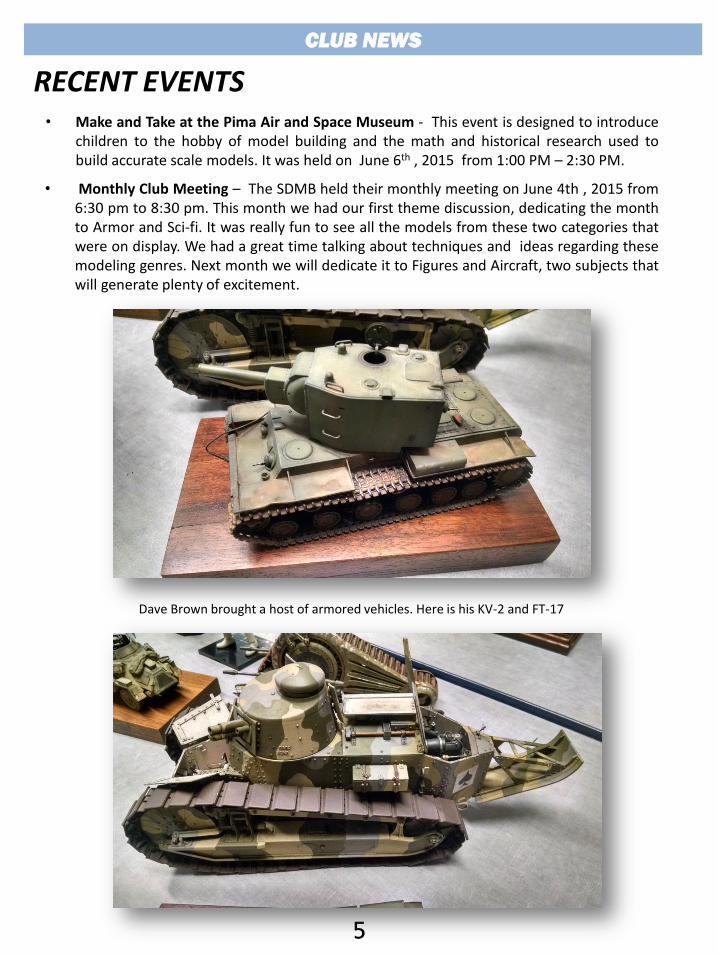
Dave Brown brought a host of armored vehicles. Here is his KV-2 and FT-17
CLUB NEWS
RECENT EVENTS
6
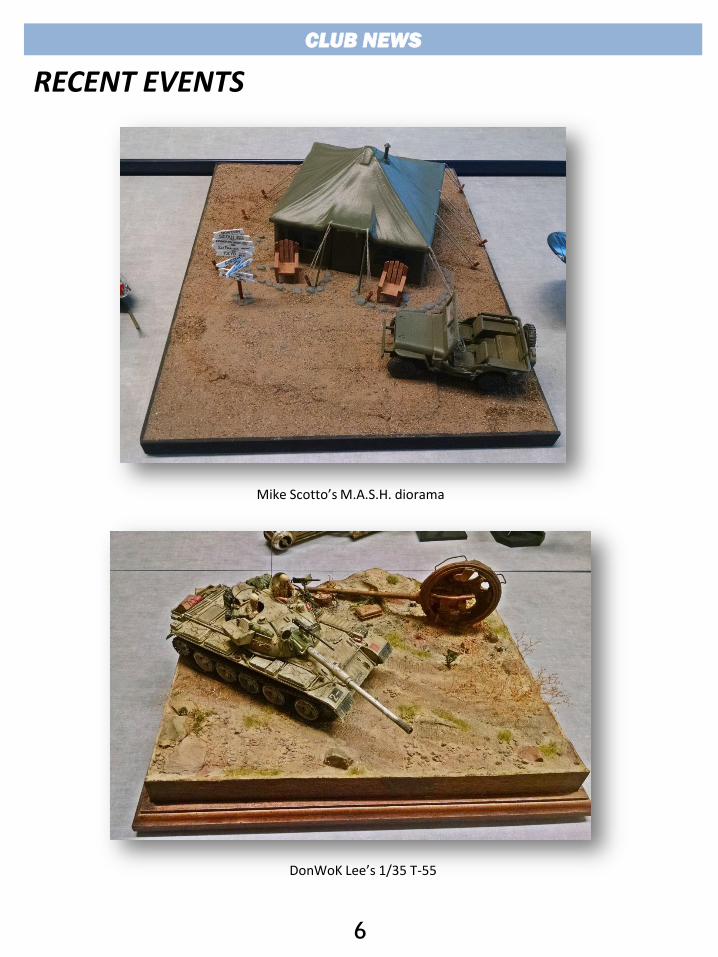
Mike Scotto’s M.A.S.H. diorama
DonWoK Lee’s 1/35 T-55
CLUB NEWS
RECENT EVENTS
7
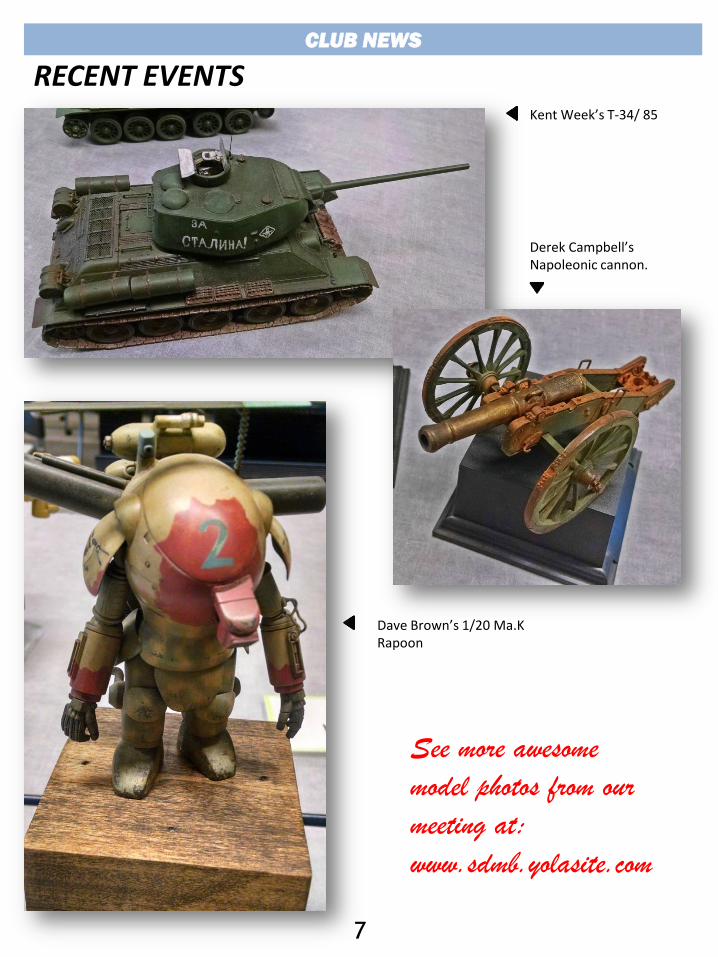
Kent Week’s T-34/ 85
Dave Brown’s 1/20 Ma.K Rapoon
See more awesome
model photos from our
meeting at:
www.sdmb.yolasite.com
Derek Campbell’s Napoleonic cannon.
CLUB NEWS
• Make and Take at the Pima Air and Space Museum - This event is designed to introduce children to the hobby of model building and the math and historical research used to build accurate scale models. The event will take place July 11th , 2015 from 1:00 PM – 2:30 PM.
• Plastic Model Swap Meet - Model Mania presents their September Plastic Model Swap Meet. This will take place at the Fraternal Order of Police (FOP), 3445 N Dodge Blvd, Tucson, AZ on September 19th, 2015.
UPCOMING EVENTS
8
• SDMB Monthly Meeting – Our club’s meeting will be held on July 2nd , 2015 from 6:30 – 8:30 at the Patrick K. Hardesty Midtown Multi-Service Building.
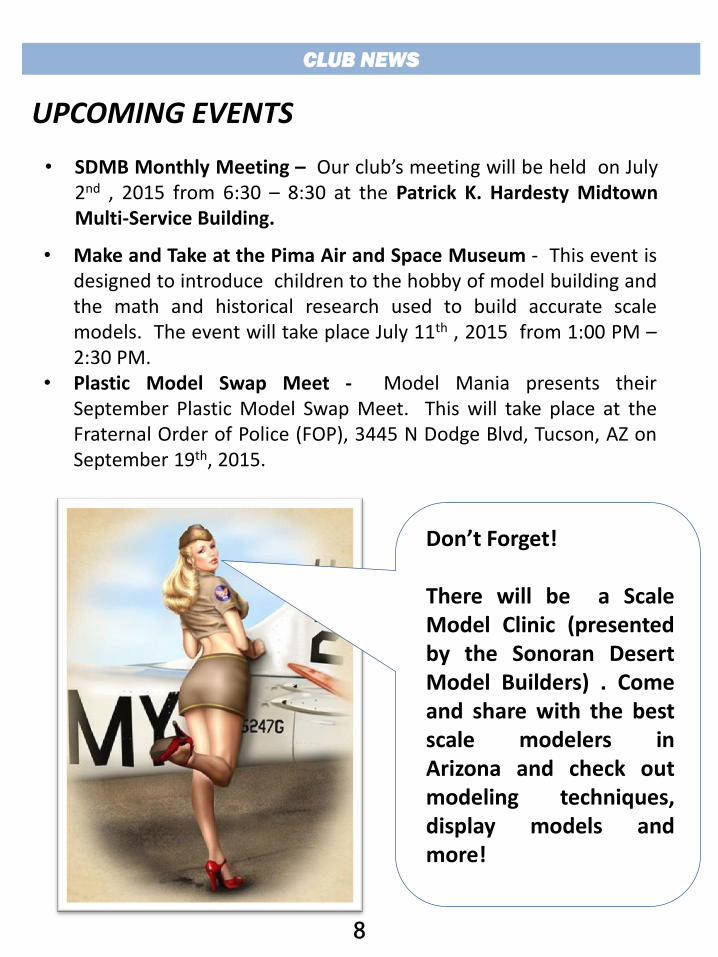
Don’t Forget! There will be a Scale Model Clinic (presented by the Sonoran Desert Model Builders) . Come and share with the best scale modelers in Arizona and check out modeling techniques, display models and more!
9
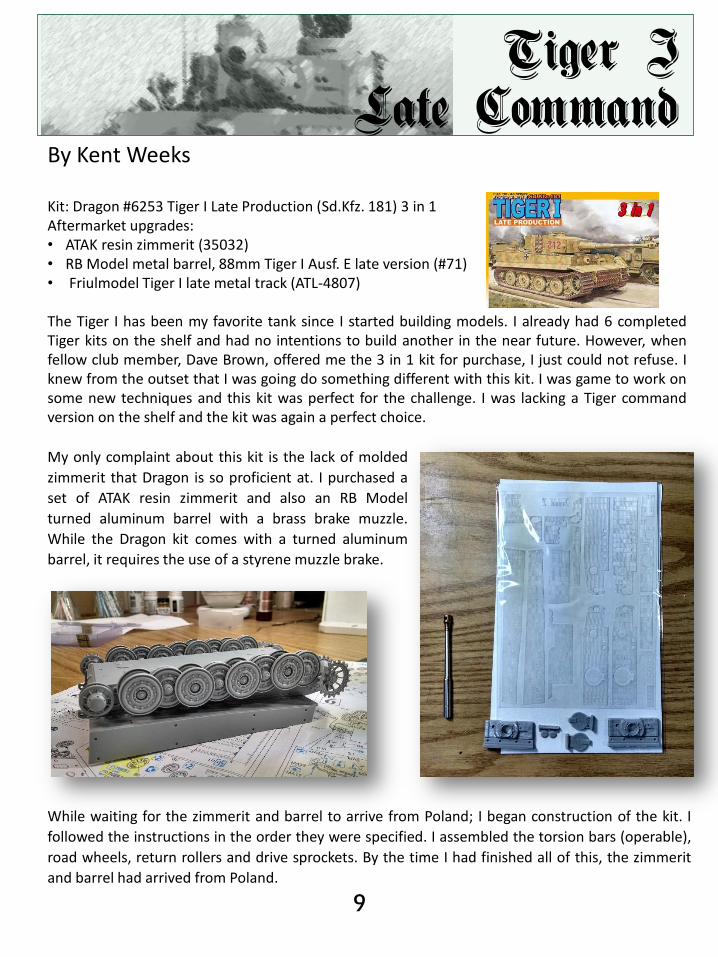
Kit: Dragon #6253 Tiger I Late Production (Sd.Kfz. 181) 3 in 1 Aftermarket upgrades: • ATAK resin zimmerit (35032) • RB Model metal barrel, 88mm Tiger I Ausf. E late version (#71) • Friulmodel Tiger I late metal track (ATL-4807)
The Tiger I has been my favorite tank since I started building models. I already had 6 completed Tiger kits on the shelf and had no intentions to build another in the near future. However, when fellow club member, Dave Brown, offered me the 3 in 1 kit for purchase, I just could not refuse. I knew from the outset that I was going do something different with this kit. I was game to work on some new techniques and this kit was perfect for the challenge. I was lacking a Tiger command version on the shelf and the kit was again a perfect choice.
By Kent Weeks
My only complaint about this kit is the lack of molded
zimmerit that Dragon is so proficient at. I purchased a
set of ATAK resin zimmerit and also an RB Model
turned aluminum barrel with a brass brake muzzle.
While the Dragon kit comes with a turned aluminum
barrel, it requires the use of a styrene muzzle brake.
While waiting for the zimmerit and barrel to arrive from Poland; I began construction of the kit. I
followed the instructions in the order they were specified. I assembled the torsion bars (operable),
road wheels, return rollers and drive sprockets. By the time I had finished all of this, the zimmerit
and barrel had arrived from Poland.
Tiger I Late Command
10
Tiger I Late Command
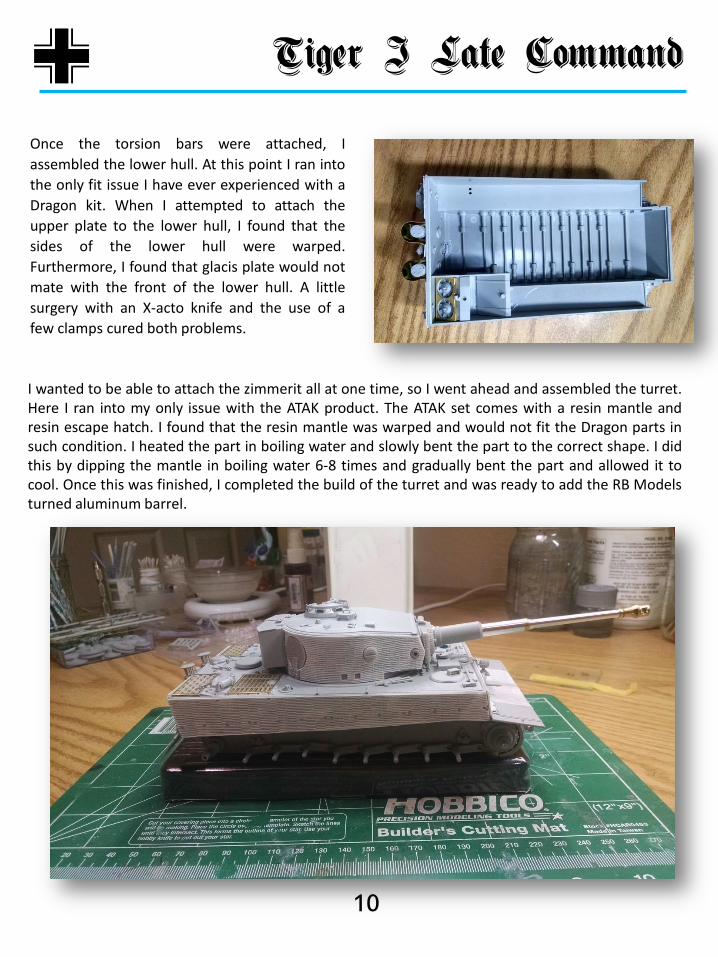
Once the torsion bars were attached, I
assembled the lower hull. At this point I ran into
the only fit issue I have ever experienced with a
Dragon kit. When I attempted to attach the
upper plate to the lower hull, I found that the
sides of the lower hull were warped.
Furthermore, I found that glacis plate would not
mate with the front of the lower hull. A little
surgery with an X-acto knife and the use of a
few clamps cured both problems.
I wanted to be able to attach the zimmerit all at one time, so I went ahead and assembled the turret. Here I ran into my only issue with the ATAK product. The ATAK set comes with a resin mantle and resin escape hatch. I found that the resin mantle was warped and would not fit the Dragon parts in such condition. I heated the part in boiling water and slowly bent the part to the correct shape. I did this by dipping the mantle in boiling water 6-8 times and gradually bent the part and allowed it to cool. Once this was finished, I completed the build of the turret and was ready to add the RB Models turned aluminum barrel.
11
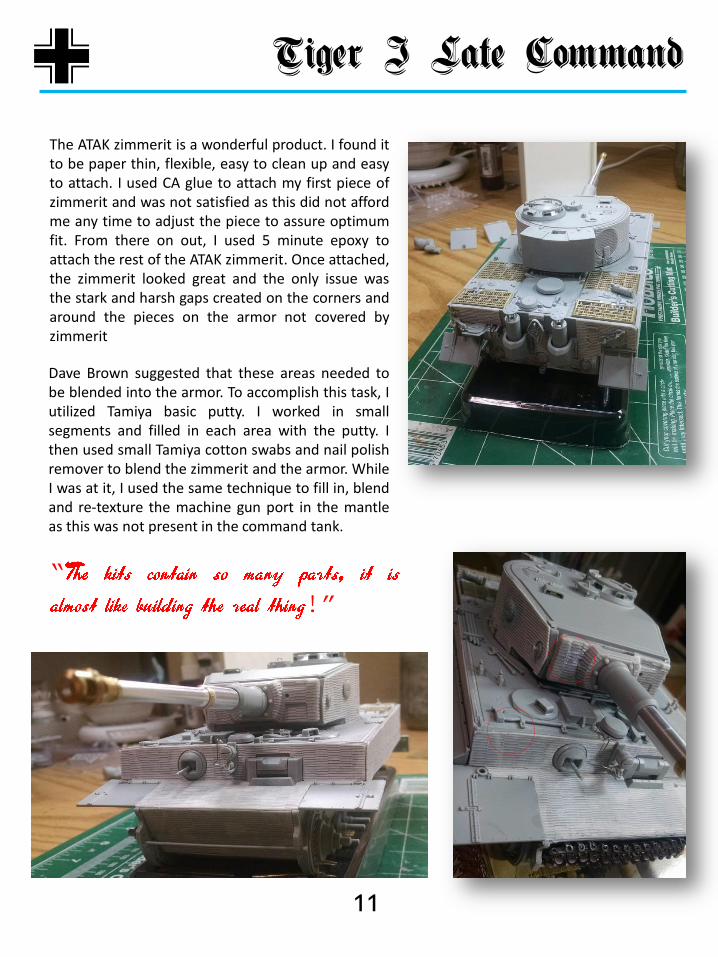
The ATAK zimmerit is a wonderful product. I found it to be paper thin, flexible, easy to clean up and easy to attach. I used CA glue to attach my first piece of zimmerit and was not satisfied as this did not afford me any time to adjust the piece to assure optimum fit. From there on out, I used 5 minute epoxy to attach the rest of the ATAK zimmerit. Once attached, the zimmerit looked great and the only issue was the stark and harsh gaps created on the corners and around the pieces on the armor not covered by zimmerit
Dave Brown suggested that these areas needed to be blended into the armor. To accomplish this task, I utilized Tamiya basic putty. I worked in small segments and filled in each area with the putty. I then used small Tamiya cotton swabs and nail polish remover to blend the zimmerit and the armor. While I was at it, I used the same technique to fill in, blend and re-texture the machine gun port in the mantle as this was not present in the command tank.
“
!”
Tiger I Late Command
12
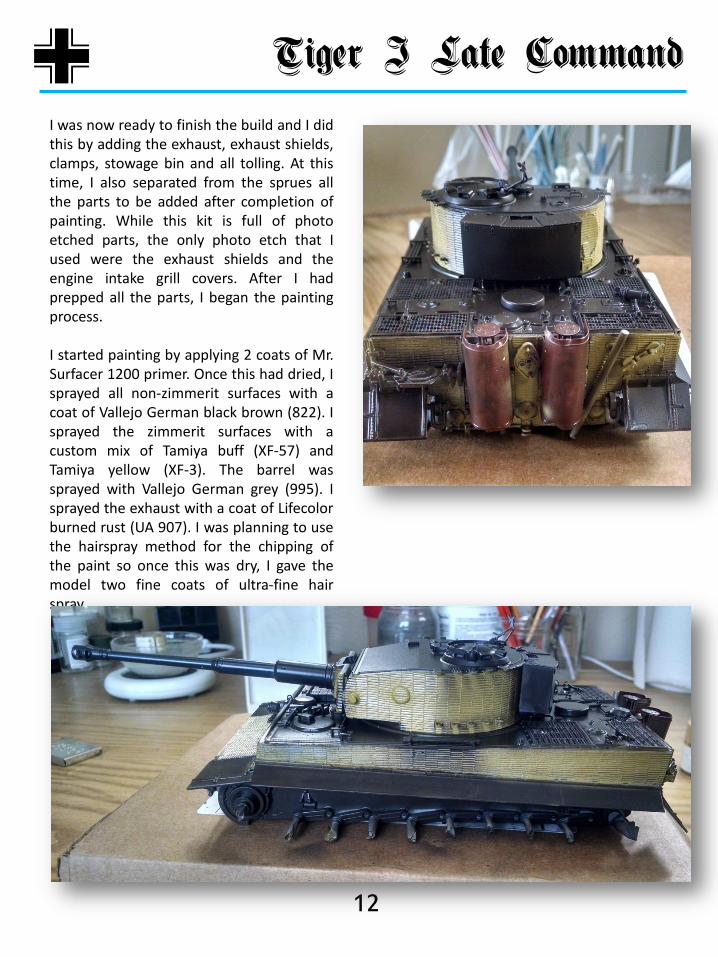
I was now ready to finish the build and I did this by adding the exhaust, exhaust shields, clamps, stowage bin and all tolling. At this time, I also separated from the sprues all the parts to be added after completion of painting. While this kit is full of photo etched parts, the only photo etch that I used were the exhaust shields and the engine intake grill covers. After I had prepped all the parts, I began the painting process. I started painting by applying 2 coats of Mr. Surfacer 1200 primer. Once this had dried, I sprayed all non-zimmerit surfaces with a coat of Vallejo German black brown (822). I sprayed the zimmerit surfaces with a custom mix of Tamiya buff (XF-57) and Tamiya yellow (XF-3). The barrel was sprayed with Vallejo German grey (995). I sprayed the exhaust with a coat of Lifecolor burned rust (UA 907). I was planning to use the hairspray method for the chipping of the paint so once this was dry, I gave the model two fine coats of ultra-fine hair spray.
Tiger I Late Command
13
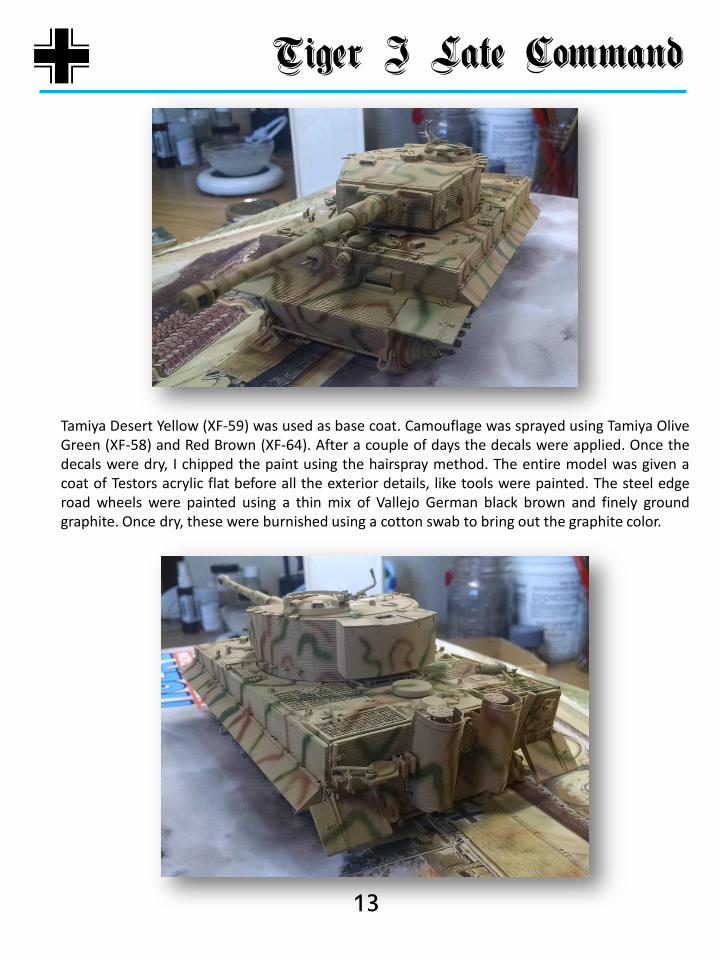
Tamiya Desert Yellow (XF-59) was used as base coat. Camouflage was sprayed using Tamiya Olive Green (XF-58) and Red Brown (XF-64). After a couple of days the decals were applied. Once the decals were dry, I chipped the paint using the hairspray method. The entire model was given a coat of Testors acrylic flat before all the exterior details, like tools were painted. The steel edge road wheels were painted using a thin mix of Vallejo German black brown and finely ground graphite. Once dry, these were burnished using a cotton swab to bring out the graphite color.
Tiger I Late Command
14
Tiger I Late Command
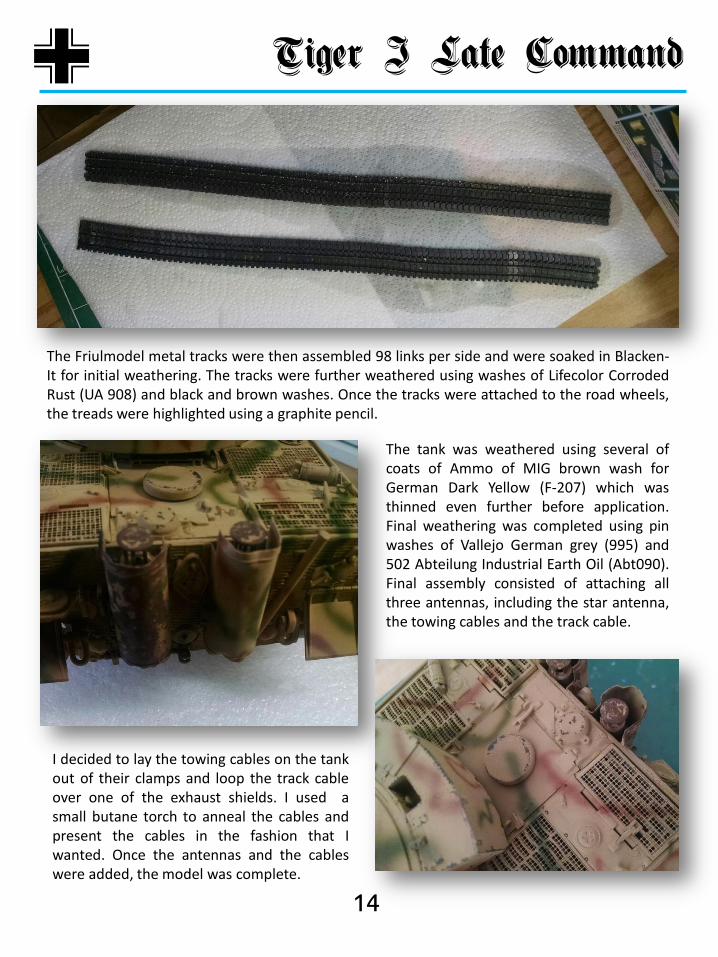
The Friulmodel metal tracks were then assembled 98 links per side and were soaked in Blacken-It for initial weathering. The tracks were further weathered using washes of Lifecolor Corroded Rust (UA 908) and black and brown washes. Once the tracks were attached to the road wheels, the treads were highlighted using a graphite pencil.
The tank was weathered using several of coats of Ammo of MIG brown wash for German Dark Yellow (F-207) which was thinned even further before application. Final weathering was completed using pin washes of Vallejo German grey (995) and 502 Abteilung Industrial Earth Oil (Abt090). Final assembly consisted of attaching all three antennas, including the star antenna, the towing cables and the track cable.
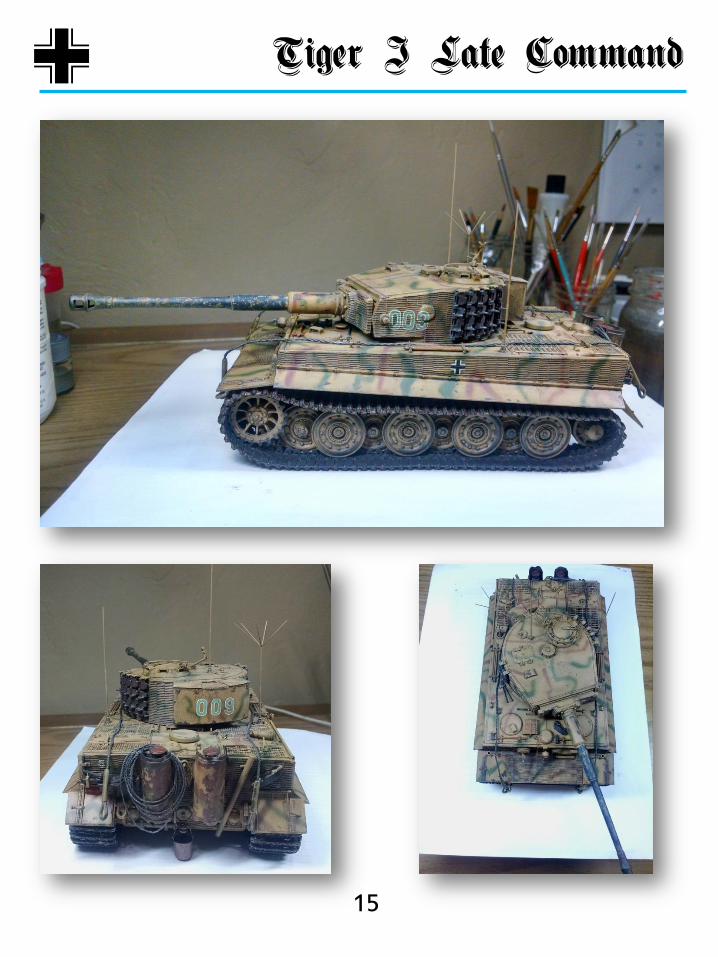
I decided to lay the towing cables on the tank out of their clamps and loop the track cable over one of the exhaust shields. I used a small butane torch to anneal the cables and present the cables in the fashion that I wanted. Once the antennas and the cables were added, the model was complete.
15
Tiger I Late Command
Tips and Tricks
16
July 2015
This month we continue our series on how to make simple bases. This time we will look at figure bases. Figures are very different from aircraft, armor and cars in that a figure has to stand, therefore is very difficult to display a figure with no base. Figure bases made out of beautiful shiny wood can be very elaborate but this article will focus on how to make a cool looking base out of everyday materials.
Base Technologies – part 3 By Dave Diaz
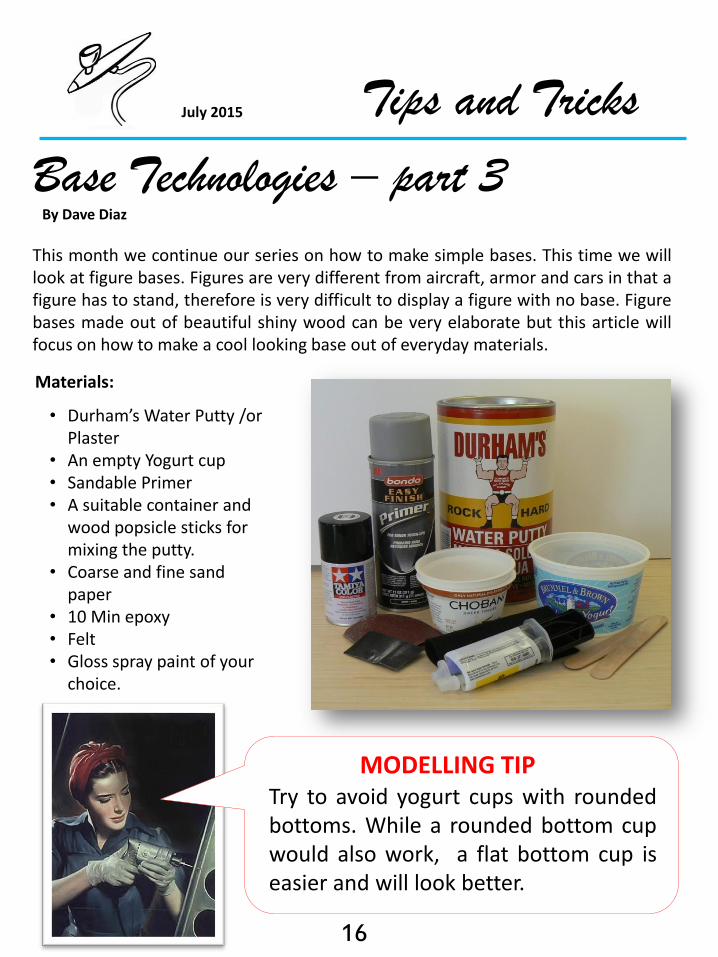
Materials:
• Durham’s Water Putty /or Plaster
• An empty Yogurt cup • Sandable Primer • A suitable container and
wood popsicle sticks for mixing the putty.
• Coarse and fine sand paper
• 10 Min epoxy • Felt • Gloss spray paint of your
choice.
MODELLING TIP Try to avoid yogurt cups with rounded bottoms. While a rounded bottom cup would also work, a flat bottom cup is easier and will look better.
Tips and Tricks
17
July 2015
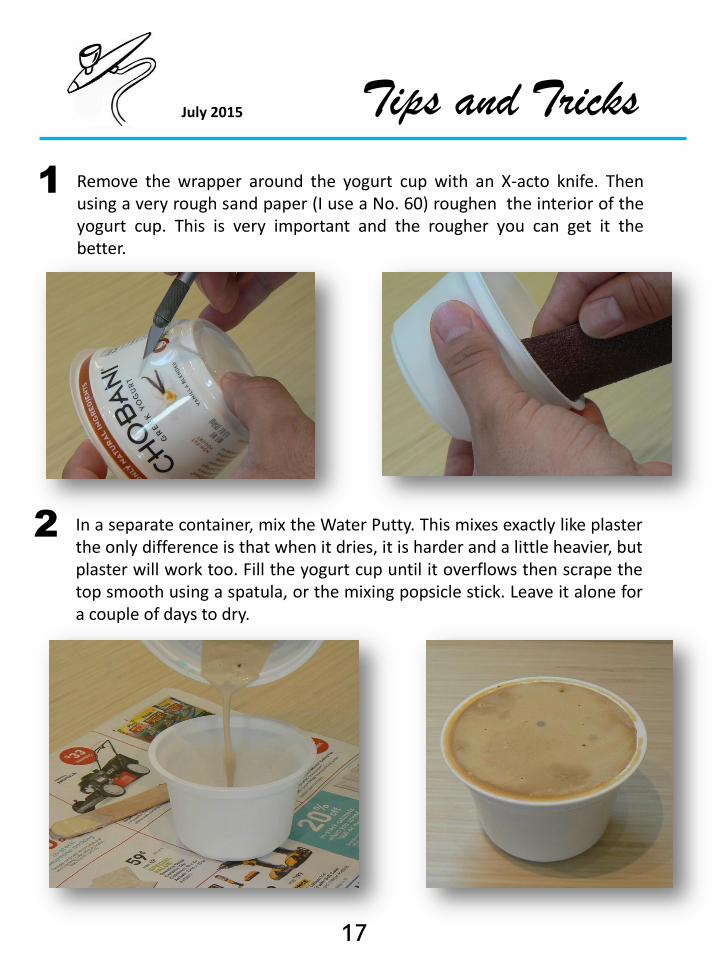
Remove the wrapper around the yogurt cup with an X-acto knife. Then using a very rough sand paper (I use a No. 60) roughen the interior of the yogurt cup. This is very important and the rougher you can get it the better.
1
2 In a separate container, mix the Water Putty. This mixes exactly like plaster the only difference is that when it dries, it is harder and a little heavier, but plaster will work too. Fill the yogurt cup until it overflows then scrape the top smooth using a spatula, or the mixing popsicle stick. Leave it alone for a couple of days to dry.
Tips and Tricks
18
July 2015
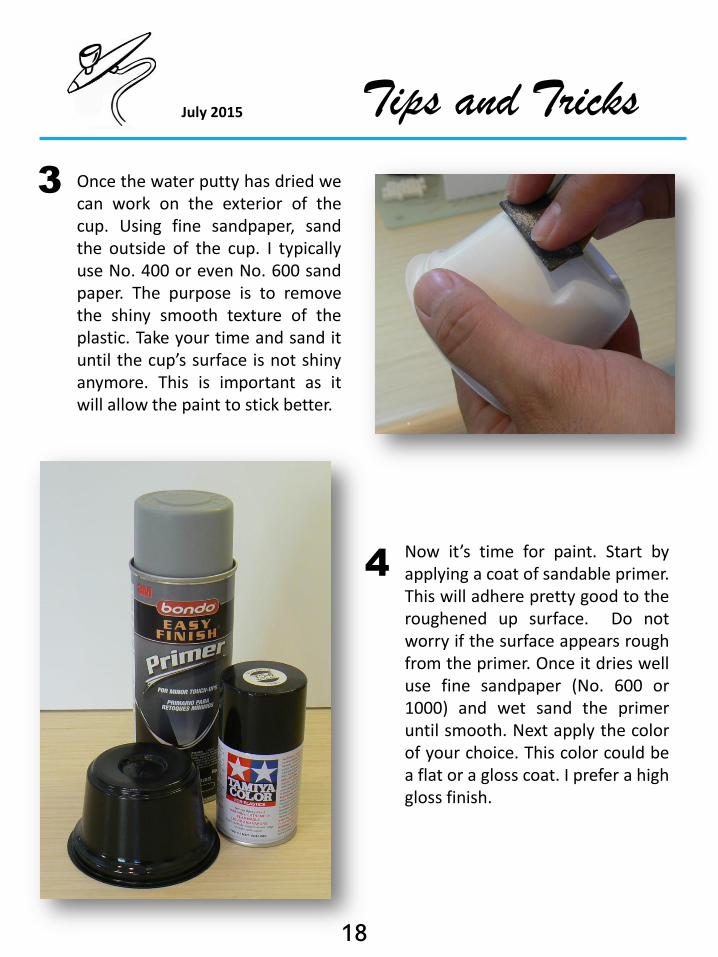
Once the water putty has dried we can work on the exterior of the cup. Using fine sandpaper, sand the outside of the cup. I typically use No. 400 or even No. 600 sand paper. The purpose is to remove the shiny smooth texture of the plastic. Take your time and sand it until the cup’s surface is not shiny anymore. This is important as it will allow the paint to stick better.
3
4 Now it’s time for paint. Start by applying a coat of sandable primer. This will adhere pretty good to the roughened up surface. Do not worry if the surface appears rough from the primer. Once it dries well use fine sandpaper (No. 600 or 1000) and wet sand the primer until smooth. Next apply the color of your choice. This color could be a flat or a gloss coat. I prefer a high gloss finish.
Tips and Tricks
19
July 2015
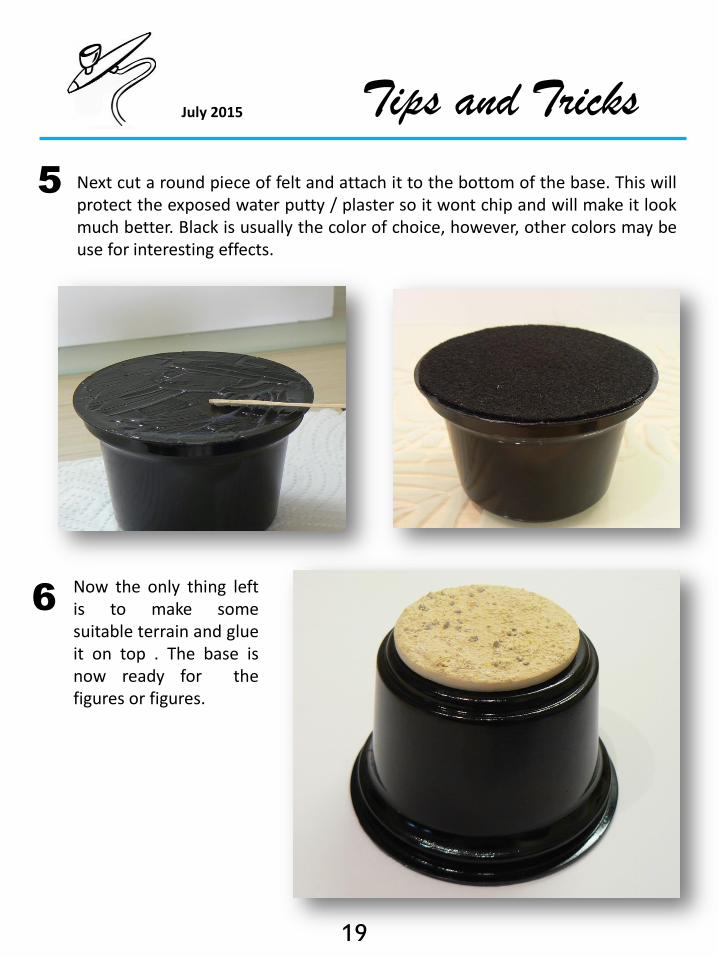
Next cut a round piece of felt and attach it to the bottom of the base. This will protect the exposed water putty / plaster so it wont chip and will make it look much better. Black is usually the color of choice, however, other colors may be use for interesting effects.
5
6 Now the only thing left is to make some suitable terrain and glue it on top . The base is now ready for the figures or figures.
SCORPION GALLERY
20
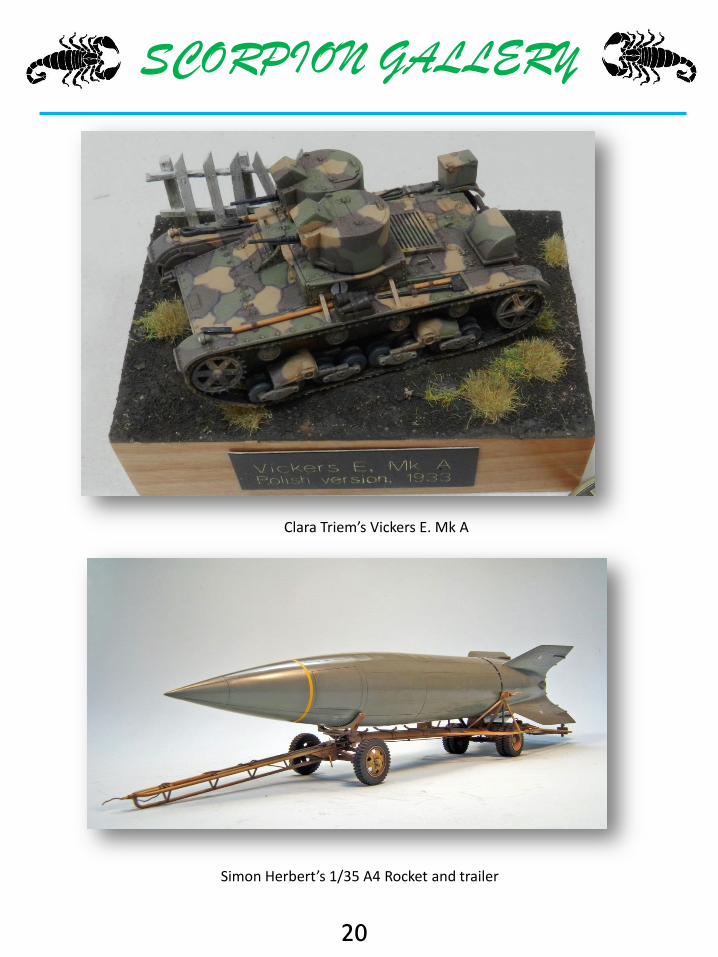
Clara Triem’s Vickers E. Mk A
Simon Herbert’s 1/35 A4 Rocket and trailer
SCORPION GALLERY
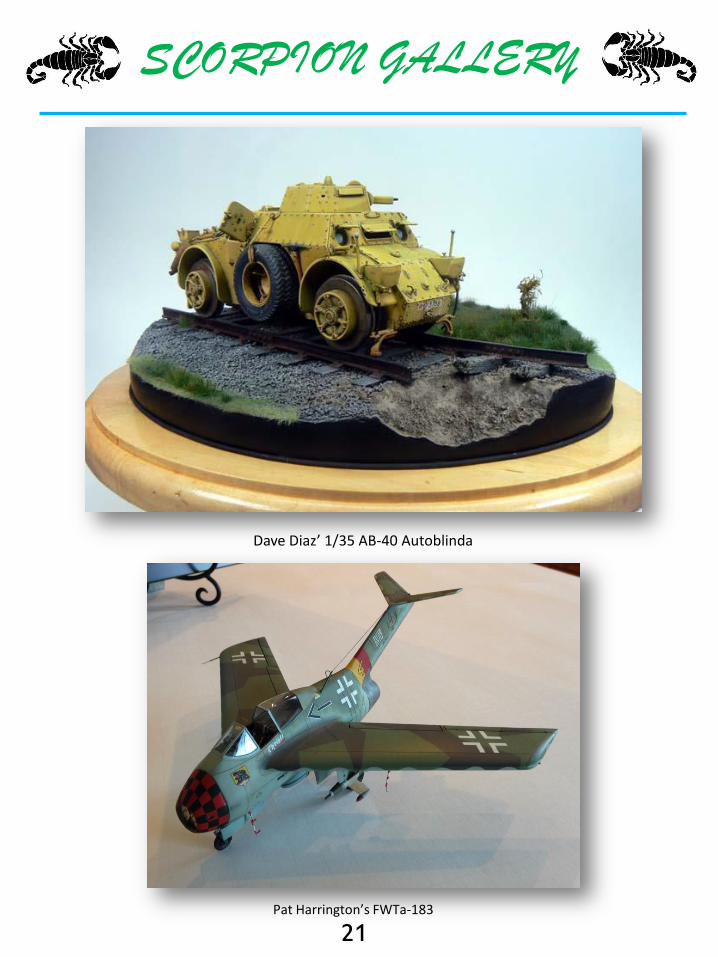
21
Dave Diaz’ 1/35 AB-40 Autoblinda
Pat Harrington’s FWTa-183
22
SDMB Club Officers
HOW CAN I JOIN THE SDMB?
Test the water before you join!
Here's how: Drop by and say "hello" at one of our monthly meetings (see our Next Meeting page for date and location details). If you like what you see and hear then drop by again the next month
and be sure to bring your questions and we'll help you get started! The first two meetings are free so drop on by! After your second meeting we would appreciate you joining our club. Our club dues
pay for various things such as community programs and sponsorships of trophies in contests. We are happy to have visitors but even happier when you join our club of award winning modelers.
Visit our website at www.sdmb.yolasite.com You can also find us on Facebook.
SDMB is an affiliated club of the International Plastic Modeler’s Society


![ESC/POS Command Manual - Support Technique AURES ESCPOS.pdf · ESC/POS Command Manual 3 Command Descriptions Command Notation [Name] The name of the control command. [Format] The](https://static.documents.pub/doc/80x56/5a9d989d7f8b9a21688cc662/escpos-command-manual-support-technique-escpospdfescpos-command-manual-3-command.jpg)


