TIRT10_1 SAP for Retail – Associate Academy I SAP for Industries - SAP for Retail Date Training Center Instructors Education Website Participant Handbook Course Version: 62 Course Duration: 10 Day(s) Material Number: 50089893 An SAP course - use it to learn, reference it for work
No part of this publication may be reproduced or transmitted in any form or for any purpose without theexpress permission of SAP AG. The information contained herein may be changed without prior notice.
Some software products marketed by SAP AG and its distributors contain proprietary softwarecomponents of other software vendors.
Trademarks
• Microsoft®, WINDOWS®, NT®, EXCEL®, Word®, PowerPoint® and SQL Server® areregistered trademarks of Microsoft Corporation.
• IBM®, DB2®, OS/2®, DB2/6000®, Parallel Sysplex®, MVS/ESA®, RS/6000®, AIX®, S/390®,AS/400®, OS/390®, and OS/400® are registered trademarks of IBM Corporation.
• ORACLE® is a registered trademark of ORACLE Corporation.
• INFORMIX®-OnLine for SAP and INFORMIX® Dynamic ServerTM are registered trademarksof Informix Software Incorporated.
• UNIX®, X/Open®, OSF/1®, and Motif® are registered trademarks of the Open Group.
• Citrix®, the Citrix logo, ICA®, Program Neighborhood®, MetaFrame®, WinFrame®,VideoFrame®, MultiWin® and other Citrix product names referenced herein are trademarks ofCitrix Systems, Inc.
• HTML, DHTML, XML, XHTML are trademarks or registered trademarks of W3C®, World WideWeb Consortium, Massachusetts Institute of Technology.
• JAVA® is a registered trademark of Sun Microsystems, Inc.
• JAVASCRIPT® is a registered trademark of Sun Microsystems, Inc., used under license fortechnology invented and implemented by Netscape.
• SAP, SAP Logo, R/2, RIVA, R/3, SAP ArchiveLink, SAP Business Workflow, WebFlow, SAPEarlyWatch, BAPI, SAPPHIRE, Management Cockpit, mySAP.com Logo and mySAP.com aretrademarks or registered trademarks of SAP AG in Germany and in several other countries allover the world. All other products mentioned are trademarks or registered trademarks of theirrespective companies.
Disclaimer
THESE MATERIALS ARE PROVIDED BY SAP ON AN "AS IS" BASIS, AND SAP EXPRESSLYDISCLAIMS ANY AND ALL WARRANTIES, EXPRESS OR APPLIED, INCLUDING WITHOUTLIMITATION WARRANTIES OF MERCHANTABILITY AND FITNESS FOR A PARTICULARPURPOSE, WITH RESPECT TO THESE MATERIALS AND THE SERVICE, INFORMATION, TEXT,GRAPHICS, LINKS, OR ANY OTHER MATERIALS AND PRODUCTS CONTAINED HEREIN. INNO EVENT SHALL SAP BE LIABLE FOR ANY DIRECT, INDIRECT, SPECIAL, INCIDENTAL,CONSEQUENTIAL, OR PUNITIVE DAMAGES OF ANY KIND WHATSOEVER, INCLUDINGWITHOUT LIMITATION LOST REVENUES OR LOST PROFITS, WHICH MAY RESULT FROMTHE USE OF THESE MATERIALS OR INCLUDED SOFTWARE COMPONENTS.
g200892901829
About This HandbookThis handbook is intended to complement the instructor-led presentation of thiscourse, and serve as a source of reference. It is not suitable for self-study.
Typographic ConventionsAmerican English is the standard used in this handbook. The following typographicconventions are also used.
Type Style Description
Example text Words or characters that appear on the screen. Theseinclude field names, screen titles, pushbuttons as well asmenu names, paths, and options.
Also used for cross-references to other documentationboth internal (in this documentation) and external (inother locations, such as SAPNet).
Example text Emphasized words or phrases in body text, titles ofgraphics, and tables
EXAMPLE TEXT Names of elements in the system. These include reportnames, program names, transaction codes, table names,and individual key words of a programming language,when surrounded by body text, for example SELECTand INCLUDE.
Example text Screen output. This includes file and directory namesand their paths, messages, names of variables andparameters, and passages of the source text of a program.
Example text Exact user entry. These are words and characters thatyou enter in the system exactly as they appear in thedocumentation.
<Example text> Variable user entry. Pointed brackets indicate that youreplace these words and characters with appropriateentries.
Course OverviewThe training courses TIRT10 (SAP for Retail - Associate Academy I) and TIRT20(SAP for Retail - Associate Academy II) both have a duration of two weeks andform the basis for the associate certification in SAP Retail. The academy takes placefor a total of four weeks.
This course contains the basic contents of course IRT310 (Master Data in SAP forRetail), SAPIRT (Overview of Functions in SAP for Retail), and IRT370 (SAP RetailStore). It covers both application functions and Customizing settings.
The first week of TIRT10 (SAP for Retail – Associate Academy I) covers theorganizational structures and master data in SAP Retail. These organizationalstructures must be maintained before master data, such as the article or vendor masterrecord, is created. This is also required to correctly implement all of the SAP Retailprocesses.
During the second week, the course is based on the business scenarios in the RetailSolution Map and explains the functions using a sample core process for a retailcompany. The process begins with promotion planning for stores, and demonstratesthe subsequent logistics processing, and merchandise distribution from the vendorthrough the distribution center to the stores.
The Planning unit describes the most important planning functions in SAP Retail inconnection with SAP NetWeaver BI (SAP NetWeaver Business Intelligence).
The areas of requirements planning and stock allocation are only introduced brieflysince these are explained in greater detail in TIRT20.
The purchasing area introduces perishables planning, invoice verification, and vendorevaluation. Only the main features of purchase order management, order optimization,and seasonal procurement are discussed since these are explained in more detail inthe subsequent TIRT20 course.
Inventory management, picking, and merchandise distribution are logistics themesand are discussed in detail. Multi-channel retailing is explained in detail in courseIRT370 (SAP Retail Store), which also includes additional functions regarding thesubject of stores.
As alternatives to TIRT10 and TIRT20, to prepare for the certification exam, you canalso attend the regular courses SAPIRT (5 days), IRT310 (5 days), IRT320 (5 days),IRT330 (5 days) and IRT370 (2 days).
Lesson OverviewIn this lesson you will learn how to log on to the system, and also the meaning of thevarious screen elements in the SAP GUI environment.
Lesson ObjectivesAfter completing this lesson, you will be able to:
• Log on to the system
• Name and use the elements on a SAP GUI screen
Business ExampleHow do I log on to an SAP system, and what do the different SAP GUI screenelements mean?
Logging on to the SystemYou can access SAP systems using different configurations of front-end programs,for example, For example, the Business Explorer (BEx) is the front end for the SAPBusiness Information Warehouse (SAP BW). However, all solutions delivered bySAP are also always accessible by way of a general front end program, the SAP GUI(Graphical User Interface). The SAP GUI is the standard point of entry for almost allSAP solutions. There are different variants of the SAP GUI, which are all the samegraphically, but are implemented in different ways. The information given below isbased on the assumption that you are using the SAP GUI in a Windows environment.
The SAP GUI program connects the front-end computer with a specific SAP system.Theoretically, it is possible to enter the relevant selected SAP system into the SAPGUI call in a command line, but for day-to-day work this is not practical. SAPtherefore provides another program for the front end: SAP Logon. When the SAPLogon program is called, it displays a list of SAP systems for which you can start thelogon process. This list is compiled from a file on the front end: saplogon.ini. Thisfile is typically preconfigured in a central location and made available to end users.When logging on to a system, the SAP Logon program also enables “load balancing”using the available resources of the chosen system.
When logging on to an SAP system, you will be prompted to enter the followinginformation: user and password. If you are using a Single Sign-On solution, you donot need to enter this information. You also have the option of specifying a clientwhen logging on; the client field usually already contains an appropriate default value.
Hint: A client usually represents the mapping of a particular company in anSAP system. This means that in an SAP system with multiple clients, severalcompanies can be represented and used in parallel. The client is representedas a key field in the tables of the database used by the SAP system. Whenworking in a client, you only have access to data from the same client. Eachclient therefore represents an independent business entity.
At log on, you can select any of the logon languages supported by your system.Installed SAP systems can support a large number of languages. At the very least,this means English and one other selected language. Which languages your systemsupports depends on the number of installed languages. On the logon screen, you can
also change your password using the New Password pushbutton. You can only do thisonce per day. Your system administrators can also add text of their choice to the logonscreen. For more information on how to do this, see SAP Note 205487.
Note: SAP Notes contain supplementary information on particular functions,or corrections to known errors in SAP products. You can access SAP Noteson the Internet, for example, by entering a valid user and password in SAPService Marketplace: http://service.sap.com/notes
Hint: When you log on to a system once, you can work in several parallelsessions (editing windows of the SAP system) at the same time. Thesystem administrator can use a system parameter to specify how manysessions are permitted during each logon to the SAP system. This parameter(rdisp/max_alt_modes) applies to all users in a system and can be setto values from 2 to 6.
Figure 2: The Logon Screen of an SAP System
User data is client-specific. This means you might be able to log on to client 100 ofyour system but might not have a user for client 200. The data stored for a particularuser within a client is called the “user master record”.
As of SAP R/3 release 4.6, multiple logons are logged. This is for security reasonsand licensing considerations. Each time the same user logs on to a system for a secondtime or more, a message is displayed with three options:
• Close all existing session(s) and log on again
• Keep existing session(s) open, and open an additional session (this is recordedin the log).
• Cancel the new logon
When you have logged on successfully, the initial screen of the SAP system isdisplayed. This is also known as the“SAP Easy Access” screen.
Screen LayoutThe SAP Easy Access screen is the standard entry screen in SAP systems. On the leftof the screen, a tree structure is displayed containing a list of the available SAP systemmenus. On the right of the screen, a customized logo can be displayed. This logo isprovided centrally by system administration. It cannot be set for individual users.
Figure 3: SAP Easy Access
If you have administrator authorization, you can find a detailed description of how toconfigure the logo on the SAP Easy Access screen under Extras→ AdministrationInformation. Note that this graphic is stored in the system and transported to the frontend for each logon. Although the graphic is transferred in a compressed format, thelogo for the initial screen should not be larger than 20 KB. You can also suppress the
graphic, either by choosing “Low Speed Connection” in the SAP Logon program(see SAP Note 161053) or by stopping the system from accessing it by deselectingthe indicator under Extras→ Settings.
For an example of a typical screen graphic (with different elements), you can chooseChoose System→ User Profile→ Own Data and click on the Defaults tab page. Thegraphic corresponding to your user is then displayed as follows:
An SAP screen can contain the following simple screen elements:
• Command field : You can start applications directly by entering the transactioncode in the command field. The command field is normally hidden. selection.You can find the transaction code for an application in the tree structure on theSAP Easy Access screen, in the status bar (see below) or in the applicationitself under System→ Status.
• Menu bar : The menu bar is the top line of any primary window in the SAPsystem. The menus displayed here depend on the application that you arecurrently using. Some menus also contain submenus.
• System toolbar : The pushbuttons in the standard toolbar are shown on everySAP screen. If any pushbuttons cannot be used in a particular application, theyare grayed out. If you leave the cursor positioned over a pushbutton, a textappears displaying the name and the purpose of the pushbutton in question. Ifapplicable, the corresponding keyboard shortcut is also displayed.
• Title bar : The title bar names the function that you are currently in.
• Application toolbar : This shows the pushbuttons available in the applicationthat you are currently in.
• Checkboxes : With checkboxes within a field group, you can select severaloptions at the same time.
• Radio buttons : You can only select one option at a time.
• Tab : These groups several subscreens to provide a clear layout.
• Status bar : The status bar displays information about the current system status,such as warnings and errors. You can also change the display variant to show,for example, the transaction code of the transaction you are currently in.
Other screen elements include Input fields and Pushbuttons .
Exercise ObjectivesAfter completing this exercise, you will be able to:
• Log on to the SAP system
Business ExampleYou want to work in an SAP system.
Task: Logging on to the System and First StepsLog on to the training system and carry out the first steps in the system. The menupaths refer to the standard SAP menu.
1. Start the SAP Logon menu and select the SAP system named by the instructor.Choose the Logon pushbutton.
Enter the client, user name, initial password, and logon language supplied bythe instructor. When you log on for the first time, enter a new password of yourchoice twice in the window that appears.
2. What is the maximum number of sessions (SAP system screens) you can open inparallel by choosing the menu path System→ Create Session?
3. What is the name of the function accessed via the menu path Tools →Administration→ Monitor→ System Monitoring → User Overview in thestandard SAP menu? Which transaction code corresponds to calling the samemenu path?
Task: Logging on to the System and First StepsLog on to the training system and carry out the first steps in the system. The menupaths refer to the standard SAP menu.
1. Start the SAP Logon menu and select the SAP system named by the instructor.Choose the Logon pushbutton.
Enter the client, user name, initial password, and logon language supplied bythe instructor. When you log on for the first time, enter a new password of yourchoice twice in the window that appears.
a) Follow the instructions in the exercise.
2. What is the maximum number of sessions (SAP system screens) you can open inparallel by choosing the menu path System→ Create Session?
a) Depending on the settings in the corresponding system parameter, youcan open between 2 and 6 sessions. In this training system, it should bepossible to open 6 sessions.
3. What is the name of the function accessed via the menu path Tools→Administration→ Monitor→ System Monitoring→ User Overview in thestandard SAP menu? Which transaction code corresponds to calling the samemenu path?
a) The function is called User List - see title bar. You can find out thetransaction code (here SM04) by choosing System→ Status, for example.You can also display the transaction code of the current transaction inthe status bar.
Lesson OverviewThis lesson describes various options for accessing functions in the SAP system.
Lesson ObjectivesAfter completing this lesson, you will be able to:
• Access functions in the SAP system in different ways
• Describe the standard System and Help menus
Business ExampleNone
Favorites List and User MenuOnce the user has logged on, two overview trees for selecting functions are displayedon the left of the screen:
• The user-defined favorites list
• The role-based user menu or the SAP menu
Favorites include functions in the SAP system, and links to Internet content and tofiles on the end user's front end server. The Favorites list is initially empty. Each enduser can individually edit their Favorites list, which can only be seen by them. Sincethe data on Favorites is stored in the SAP system, each user can have a different set ofFavorites in each system they use. Favorites can be organized in folders. To edit yourFavorites, choose Favorites from the menu on the SAP Easy Access screen.
You can add a function that is currently highlighted with the cursor in the user(or SAP) menu to your personal favorites list by choosing Favorites→ Add in theFavorites menu. You can also “drag and drop” the highlighted function with themouse. You can also add URLs and file links to the favorites list if you chooseFavorites→ Add Other Objects. To expand or collapse the Favorites list, choose thetriangular arrow symbol in front of the file.
Depending on the system settings, the end user can switch between the role-baseduser menu and the standard SAP menu.
Hint: System administrators can use the table USERS_SSM to determinewhether or not a user can switch between these menus. If the user is notallowed to change the menu, the relevant user menu is displayed anyway.The availability of the user menu or SAP menu does not affect the user'sauthorizations. This means a user can always access the functions they areauthorized to use by specifying their transaction codes (see below).
The role-based user menu is created on the basis of the role(s) assigned to the userand transferred to the front end. You are therefore advised to make roles as small aspossible. Large roles can sometimes mean a longer transfer time to the front end.If several roles are assigned to a user, some functions may be repeated in different
positions in their role-based user menu. If you do not want these to appear twice, seeSAP note 357693 (and the other notes listed therein) for information on identifyingand deleting duplicates, and related questions.
Hint: If they have the appropriate authorizations, users in the SAP system candisplay a different user menu than the one defined in the user master record.To do this, choose the Other Menu pushbutton. By choosing Create Role, youcan display the role maintenance function, transaction PFCG.
Calling FunctionsThere are several methods of navigating within an SAP system:
• Entering a transaction code in the command field
• Choosing menu entries in the menu bar
• Using the entries in the Favorites, or the user menu or SAP menu
You can use the keyboard to access the SAP Easy Access menu and the commandfield, and call functions of the system from there.
Hint: To navigate in the system using the keyboard, you can use thefollowing keys:
• “TAB”: jump within a field group from one field element to the next
• “CTRL + TAB”: jump from one field group to the first element ofthe next field group
• “CTRL + /”: jump directly to the command field
For further shortcuts, see Customizing of Local Layout (Alt+F12)→ SAPGUI Help.
When the cursor is in the command field, you can press F1 to display the input help,which lists possible input options for this field. The following entries are possible:
• /n to end the current transaction
• /nXXXX to call the transaction XXXX starting from a different transaction.Without the prefix, calling XXXX only works if you are starting from the SAPEasy Access menu.
• /o displays your sessions
• /oXXXX to call the transaction XXXX in a new session, starting from a differenttransaction.
• /nend to end the logon session with a confirmation prompt.
• /nex to end the logon session without a confirmation prompt.
• /i to delete the current active session.
Note: Contrary to the norm, you do not use F4 to display input help for thecommand field. In the command field, F4 help only lists the last 15 differententries that have been made in the field. This list is stored in the registryon the front end and applies for all sessions of one front end (independentof the system used).
Hint: To search for a specific character string or transaction in thestandard SAP menu or the user menu, enter search_sap_menu orsearch_user_menu in the command field. The result of the search isdisplayed as a hit list that displays how you can use menus or transactioncode to reach the functions found.
To select menu options in the menu bar using the keyboard, use the key combinationAlt + <underlined initial letter of the required menuoption>.
The Standard “System” and “Help” MenusThe System menu and the Help menu are displayed on every SAP screen, and arealways in the same format.
In the System menu, you can access a variety of system functions. This menu alsocontains functions that you can only access using this menu (and not in any otherway). You can choose System→ Log Off to exit the session, and System→ Statusto obtain valuable information about the system and the function currently beingexecuted, such as the transaction code.
Access to the online documentation is available under the Help menu.. You can alsodisplay the “Release Notes” and configure the standard settings for your F4 Help.However, you will mostly use the Help menu to navigate to the specific section ofthe online documentation relevant for your current work in the current context. Thiscontext-sensitive help is also called “Application Help”. The tool for accessing theonline documentation as a whole is the “SAP Library”.
Exercise ObjectivesAfter completing this exercise, you will be able to:
• Describe the different methods of calling functions and use them to navigatein the system
Business ExampleNone
Task 1: : Various Ways of Calling Up the User OverviewWho is currently logged on to the training system?
1. Call the transaction for displaying which user is logged on. Choose the followingpath (from the standard SAP menu):
Tools→ Administration→ Monitor→ System Monitoring→ User Overview
2. To leave the user overview, either use the F3 button, or choose the Back button inthe system toolbar. In the SAP Easy Access screen, enter SM04 in the commandfield. This displays the user overview directly.
Task 2: : Some Possible Entries in the Command FieldWhich of the following are possible entries in the command field?
1. Start this exercise in the SAP Easy Access screen. Make the following entries inthe command field without returning to the SAP Easy Access screen in between.Make a note of your observations (you need not make any other entries on eachscreen that appears other than after you have entered /nend: choose No here):
Task 1: : Various Ways of Calling Up the User OverviewWho is currently logged on to the training system?
1. Call the transaction for displaying which user is logged on. Choose the followingpath (from the standard SAP menu):
Tools→ Administration→ Monitor→ System Monitoring→ User Overview
a) For the solution, see the question.
2. To leave the user overview, either use the F3 button, or choose the Back button inthe system toolbar. In the SAP Easy Access screen, enter SM04 in the commandfield. This displays the user overview directly.
a) For the solution, see the question.
Task 2: : Some Possible Entries in the Command FieldWhich of the following are possible entries in the command field?
1. Start this exercise in the SAP Easy Access screen. Make the following entries inthe command field without returning to the SAP Easy Access screen in between.Make a note of your observations (you need not make any other entries on eachscreen that appears other than after you have entered /nend: choose No here):
SU3 Calls administration of your own user settings
SM04 Unsuccessful attempt to call the user overview. You canonly call a transaction directly (without using a prefix)starting from the SAP Easy Access screen.
/nsm04 Successful attempt to call the user overview. “/n” first endsthe existing transaction, and then calls the new transactionspecified.
/nend The system displays a question asking you to confirm thatyou want to log off. You could leave the system at this point.
/nex No confirmation prompt is displayed, and the session isended without displaying a question.
Lesson OverviewThis lesson introduces the help options available through the F1 and F4 buttons.
Lesson ObjectivesAfter completing this lesson, you will be able to:
• Use the basic functions of F1 help
• Use the F4 help
• Display information using the online documentation
Business ExampleYou want to obtain further information on fields that can be edited, such as themeaning of the field and the possible entries.
F1 HelpYou can use the F1 key to display explanations for fields, menus, functions, andmessages. The F1 help also displays technical information on the current field. Forexample, there you will also find the Parameter ID, which you can use for youruser to preassign values to input fields that also reference this parameter ID. Forexample, you can also obtain interesting information by calling up the F1 Help forthe command field.
You can also use other buttons in the “Performance Assistant” dialog box to displayinformation on the selected field. One of the most important pieces of information,besides the link to the context-sensitive Application Help, is the link to the TechnicalInformation. Use Technical Information to display detailed information, such as theparameter ID assigned to the field. Parameter IDs are not covered in detail at this point.
Note: You may need to activate the Performance Assistant first by choosingHelp→ Settings→ F1 Help.
F4 HelpChoosing F4 displays information on the possible input values for a field.Alternatively, you can call the F4 help using the pushbutton directly on the right ofthe selected field. If a field contains a “checkmark” symbol, you can only continuein the application if a permitted value is entered in this field (required or mandatoryentry). By using different transaction and screen layouts, or in Customizing, the usercan define many fields as required or optional, hide fields, or enter default valuesand make the fields invisible.
F4 help displays a list of possible entries for a field. If there is a large number ofpossible entries, an additional selection screen is displayed “in between”. If the resultslist is very large, the F4 help only displays the number of entries specified by the useron the F4 Help tab under Help→ Settings. The default value is 500. Familiarizeyourself with the other settings on this page.
SAP Library (Online Documentation)The SAP Library provides valuable help when getting to know system functions.It allows you to access the online documentation. The information stored herenot only describes the use of system functions, but also explains the concepts ofsystem architecture, provides examples of possible useful configurations of variedprocesses and warnings against possible errors and their consequences. The onlinedocumentation also contains many Tips and Tricks to facilitate and accelerateday-to-day work in the system.
Hint: The SAP Library is also available on the Internet. To do this, enter theaddress http://help.sap.com or choose http://www.sap.com→ Education→SAP Help Portal. From here you can access documentation for all products indifferent releases using a (solution-specific) full text search.
Exercise ObjectivesAfter completing this exercise, you will be able to:
• Become familiar with the F1 and F4 help options
Business ExampleYou want to display more detailed information for a field on your screen.
Task: Using the F1 and F4 HelpYou call the F1 and F4 help within transaction SU3.
1. Using either the system menu or the transaction code SU3, call the maintenanceof your own user data. Display the F1 help for various input fields. Find out theparameter ID for the “Logon Language” field from the Technical Information.Use the display in the Performance Assistant.
2. Call up the F4 help for the Logon Language field. What is the languageabbreviation for “Ukrainian”?
Task: Using the F1 and F4 HelpYou call the F1 and F4 help within transaction SU3.
1. Using either the system menu or the transaction code SU3, call the maintenanceof your own user data. Display the F1 help for various input fields. Find out theparameter ID for the “Logon Language” field from the Technical Information.Use the display in the Performance Assistant.
a) The “logon language” is on the Defaults tab page. When you chooseTechnical Information in the Performance Assistant, you can see that theparameter ID for this field is SPR.
2. Call up the F4 help for the Logon Language field. What is the languageabbreviation for “Ukrainian”?
a) Follow the steps in the task description. The language ID for Ukrainianis UK.
Lesson: Options for Personalizing the User Interface
Lesson OverviewYou will learn about various options for personalizing your SAP GUI interface.
Lesson ObjectivesAfter completing this lesson, you will be able to:
• Use different personalization options in the SAP system
Business ExampleThe end user would like to personalize their access to SAP systems.
Ways of Personalizing the SAP GUIEnd users have a wide range of options for personalizing the GUI in the system.Some of these options are described here. You can adjust the layout of your initialscreen under Extras→ Settings, for example by deactivating the picture on the rightof the screen, or displaying the technical names (transaction codes) on the SAP EasyAccess screen.
You can customize the local layout using the following pushbutton:
If you choose the Customizing of Local Layout For example, under Options→ LocalData, you can manage the history. If it is activated, the history compiles a smalldatabase on the front end containing the last x entries for input fields in transactions.You can define the value for “x” yourself. These entries are listed as input help forfields declared accordingly. The history records the data with a certain delay, whichyou can minimize by choosing Options... → Local Data→ History→ Immediately.
The Options... also include settings for specifying the speed with which quick infotexts are displayed, and for displaying system messages as dialog boxes (Options→Messages). There is a large number of other help options and customizing settings,such as the choice of color scheme for your GUI.
Note: Under Customizing of Local Layout and then New Design→ Generalyou can adjust the font size in your SAP GUI window. However, you mustcancel and restart the SAP Logon program and log on to the system againbefore this setting takes effect.
TIRT10_1 Lesson: Options for Personalizing the User Interface
Figure 11: Two of Many Personalization Options
You can set up personal default values under System→ User Profile→ Own Data.You can choose the Address, Defaults, and Parameters tabs.
Hint: You can use parameters to enter default values in frequently usedinput fields. However, this is only possible if the corresponding input fieldis assigned a parameter ID. To find a parameter ID, position the cursor inthe input field in question, press F1, and choose Technical Information.The system displays a dialog box and the parameter ID is displayed underFeld-Daten (if the field is assigned a parameter ID). You copy thisparameter ID, for example “XUS”, and assign it a value - in this case, youruser name - on the Parameters tab in your user profile. As a result, the systementers this value as default in all fields with the parameter ID XUS.
You can also personalize the favorites on the SAP Easy Access screen and the displayvariants in the status bar.
Hint: Make use of the information displayed in the status bar at the bottomright hand corner of the GUI window. For example, you can have the systemdisplay the current transaction code here.
TIRT10_1 Lesson: Options for Personalizing the User Interface
Exercise 4: Options for Personalizing theUser Interface
Exercise ObjectivesAfter completing this exercise, you will be able to:
• You will learn about simple options for personalizing the interface.
Business ExampleYou want to personalize your front end according to your requirements.
Task: Simple Personalization OptionsYou will make simple adjustments to your front end.
1. Choose Customizing of Local Layout and activate Quick Cut and Paste. Thentest this function for some of the fields in your user profile (SU3). You can thendeactivate the function again in the same way.
2. Display the current transaction code in the status bar.
Solution 4: Options for Personalizing theUser Interface
Task: Simple Personalization OptionsYou will make simple adjustments to your front end.
1. Choose Customizing of Local Layout and activate Quick Cut and Paste. Thentest this function for some of the fields in your user profile (SU3). You can thendeactivate the function again in the same way.
a) Choose the button for the layout menu and choose the menu option QuickCut and Paste. The use of this function is explained in the status bar.
2. Display the current transaction code in the status bar.
a) Choose the button in the status bar for selecting the display options andchoose Transaction. The transaction code is displayed in the status bar forthis session for each transaction accessed from now on.
1. Within an SAP system, you can only work in one window (session) at a time.
Answer: False
Within one logon, it is possible to work in up to 6 windows (session) in parallel.
2. Which of the following statements apply for a client in an SAP system?
Answer: A, D
The data from all clients in an SAP system is stored on one shared database.However, this data is kept separate so that it is possible to manage and controldifferent companies in different clients. In an SAP system, a client does notmean a “customer”.
3. Making the following entries in the command field results in a productiveaction in the system:
Answer: A, B, D, E, F
Starting from SAP Easy Access, useful transaction codes can be entered directly.Starting from other functions in the systems, you need to add the prefix /n./nend and /nex are alternative options for logging off. ?SM04 is not aproductive entry. search_sap_menu is a permitted entry, it generates asearch template for entries in the SAP menu.
4. You can use the F1 button for the following:
Answer: A, E
The F1 help provides field documentation and technical information for the field.
5. You can use the F4 button for the following:
Answer: D
The F4 help provides a list of possible entries for a selected field.
6. The context-sensitive SAP Library is also available using the F1 button.
Answer: True
In the F1 help window, you can display this context-specific help by choosingthe Application Help pushbutton.
7. The following personalization options are available with the SAP GUI:
Answer: A, B, D, F
A number of personalization options are available under Extras in the menuand the Customizing of Local Layout pushbutton as well as in the status barand under Help→ Settings. However, end users cannot influence the size ofinput fields. It is also not possible to define a user-specific picture for the SAPEasy Access screen.
8. What is the name of the transaction for setting up SAP Retail as your initialmenu?
Answer: C
The correct answer is W10T. All the other answers are made up.
9. How can you specify that a transaction code is to be used when startingprocessing?
Answer: C
You make this setting in the user profile under Own Data, Defaults.
10. How can you access the help or explanations on fields, menus, functions, andmessages?
Answer: B
You can obtain explanations of fields, menus, functions, and messages usingthe F1 key.
Unit OverviewThis course is based in part on the SAP Retail Solution Map, which is explainedin this unit. The unit also explains the organizational structures supported by SAPRetail along with their links. These are a basic requirement for working in an SAPRetail system.
It describes additional controls that must be maintained for the Industry Solution SAPfor Retail at organizational structure level. There is a directory at the end of this unitcontaining the most important technical SAP terms.
Unit ObjectivesAfter completing this unit, you will be able to:
• Understand the structure of the Solution Map for SAP for Retail
• Show that the organizational structures and their links, which are supported bySAP Retail, are a basic requirement for working in SAP Retail
• In the Implementation Guide, locate the settings for the organizational structures
• Describe the range of solutions provided by SAP (as at October 2007)
• Describe the SAP ERP (Enterprise Resource Planning) architecture
• Explain the key technological terms in the SAP environment, such as ALE,RFC, BAPI, and so on
Unit ContentsLesson: Solution Map and Organizational Structures in Retail . . . . . . . . . .. . . . . . 44
Unit 2: Introduction and Organizational Structures in Retail TIRT10_1
Lesson: Solution Map and Organizational Structures inRetail
Lesson OverviewThis lesson provides a short, initial overview of the structure and usage of the SolutionMap for SAP for Retail. The Solution Map is a dynamic object, which is constantlybeing modified and enhanced to reflect developments and changes to the SAP forRetail software and its environment. The current version of the Solution Map for SAPfor Retail is available on SAP Service Marketplace.
The most important organizational elements in SAP Retail are introduced in theOrganizational Structures in Retail section.
Lesson ObjectivesAfter completing this lesson, you will be able to:
• Understand the structure of the Solution Map for SAP for Retail
• Show that the organizational structures and their links, which are supported bySAP Retail, are a basic requirement for working in SAP Retail
• In the Implementation Guide, locate the settings for the organizational structures
Business ExampleYou have decided to implement the Industry Solution SAP for Retail. You haveanalyzed your current organizational structures and discussed how they are mapped tothe corresponding structures in SAP Retail using the Solution Map for SAP for Retail.In a second stage, you now create the organizational units and their links in SAP Retail.
TIRT10_1 Lesson: Solution Map and Organizational Structures in Retail
SAP Retail Solution MapThe Solution Map is a uniform, multi-level analysis tool that maps strategies andprocesses for certain industries and indicates the solutions already developed by SAPand its partners for these processes, as well as developments planned in the nearfuture. The Solution Map for SAP for Retail maps typical business processes in aretail company. It consists of five main areas:
• Planning
• Requirements Planning and Stock Allocation
• Purchasing
• Logistics
• Multi-Channel Retailing
It also serves as the basis for the structure of the second part of this course.
Figure 12: SAP Retail Solution Map
To view the current SAP Business Map, see SAP Service Marketplace.
Unit 2: Introduction and Organizational Structures in Retail TIRT10_1
Organizational Structures in Retail
Organizational StructuresFlexible organizational units in SAP Retail make it possible to display even complexorganizational structures. A large number of organizational units makes it possibleto map the legal and organizational structure of a retail company from differentbusiness viewpoints. Many organizational units are also data retention levels, whichmeans that, when there are several organizational units like this, different data canbe stored for each one.
SAP Retail is client-capable. A client is a corporate group that can subdivide intosubsidiaries. In SAP Retail, organizational units can be set up for the individualdepartments of a company.
This means that the organizational units reflect the stock allocation of a companyfrom a business viewpoint in SAP Retail.
TIRT10_1 Lesson: Solution Map and Organizational Structures in Retail
The variable organizational structures in the SAP system offer the followingadvantages:
• The flexibility to be able to map complex company structures
• Separate logistical views (purchasing, sales and distribution), the managerialaccounting view and the external accounting view
• The option of cross-company-code processing
Organizational structures are maintained in Customizing (Implementation Guide).They must be created individually and then assigned to each other.
Figure 14: IDES Retail
SAP's Internet Demonstration and Evaluation System (IDES) enables you to carry outretail-specific processes. New retail structures, master data and Customizing settingshave been created especially for IDES to complement the existing industry-relevantorganizational structures.
The IDES Group encompasses several subgroups: IDES Europe, IDES America, andIDES Asia. A second retail subgroup (IDES Smart Retailer Inc. and IDES RetailGmbH based in Los Angeles, USA) serves as a demo company to model typical retailprocesses. This company operates predominantly as a retailer, but also as a wholesaler.
Unit 2: Introduction and Organizational Structures in Retail TIRT10_1
Figure 15: Overview of Parties Involved in Retail Processes
Articles (trading goods) are procured for distribution centers, from which they are thendelivered to retail stores and external customers. However, stores and customers canalso receive the goods directly from the vendor (third-party business). In the retailsector, the articles are sold to the end consumers from the stores. Other possibledistribution channels include Internet sales or call centers, for example.
The required organizational structures, master data, and settings have been definedin Customizing. From a supply chain perspective, IDES Smart Retail Inc. thereforeincludes the distribution centers and stores; other important business partners arevendors and customers.
The most important organizational units in SAP Retail are listed below.
TIRT10_1 Lesson: Solution Map and Organizational Structures in Retail
Financial Accounting and Controlling
Figure 16: Organizational Structures in Financial Accounting and Controlling
The client is a corporate group that can subdivide into subsidiaries.
The controlling area is an organizational unit of the internal accounting, whichsubdivides the company from the controlling viewpoint. One or more company codescan be assigned to a controlling area, if they have the same chart of accounts.
The company code is an organizational unit of the external accounting, whichsubdivides the company from the financial accounting viewpoint. You can set upseveral company codes in one client to keep several independent accounts at the sametime. You must, however, set up at least one company code in each client.
The company code is an independent accounting unit of the financial accounting. Thiscan be, but does not have to be, identical to the controlling area.
In a central organization, generally a maximum of one uniform chart of accounts isdefined at corporate group level and this is then valid for all company codes. In adecentralized organization, the chart of accounts is created on company code level.All the company codes that belong to a cross-company-code cost accounting must usethe same operational chart of accounts.
The company is defined from the controlling viewpoint using the controlling area,operating concern and profit center. The controlling area structures a company fromthe controlling viewpoint.
Unit 2: Introduction and Organizational Structures in Retail TIRT10_1
Figure 17: Organizational Structures in Financial Accounting
The company is defined from the accounting viewpoint using the company codeand business area.
A company code is an independent accounting unit in the sense of a legallyindependent company. It is the central organizational element of the financialaccounting. In Retail, the entire company can represent a company code, but adistribution chain or even each individual site can be displayed as a company code too.
In a client, you can set up several business areas, which can be assigned to an accountin all company codes that are defined in this client. At business area level, you cancarry out settlements and profit and loss statements for internal purposes.
The business area is an organizational unit of the accounting, which corresponds toa defined activity area of the company or an area of responsibility in the company.Business areas enable you to structure operating levels according to their businesscontents. This means that distribution chains or individual sites, for example, canbe displayed as business areas. For a consistent document entry, it makes sense forbusiness areas in all company codes to have the same meaning.
Each valuation-relevant transaction creates a Financial Accounting document, whichlists the G/L accounts posted to and the details of the posting.
TIRT10_1 Lesson: Solution Map and Organizational Structures in Retail
Figure 18: Organizational Structures: Valuation
A site can be a store, a distribution center, or a production location. In SAP Retail, thesite is the selling and inventory management organizational unit. Every site belongs tojust one company code.
Stocks are updated by goods movements on both a quantity and value basis. Therelevant G/L accounts of the accounting, which are affected by this transaction, aredetermined and posted to via automatic account determination.
A valuation area is the organizational unit for value-based inventory management.In SAP Retail, the valuation area must always correspond to a site. Inventorymanagement on a value-only basis is carried out at valuation area level.
Every site is a valuation area in SAP Retail. This is already determined when thesystem is set up as a Retail system and it is unchangeable. The valuation area does notappear on the screen, it is controlled internally.
Unit 2: Introduction and Organizational Structures in Retail TIRT10_1
Logistics
Figure 19: Organizational Structures in Purchasing
A purchasing organization procures articles for several sites and negotiates purchaseconditions with the vendors. A complete purchasing transaction is managed by onepurchasing organization. Authorizations for master data maintenance and purchasingmanagement are assigned per purchasing organization.
A purchasing organization can be assigned to one company code. If this is the case,the purchasing organization can only purchase for sites that belong to the samecompany code.
A reference for one purchasing organization can also be applied to anotherorganization, so that the conditions, contracts and purchasing info records can beused together.
A purchasing group is similar to a purchasing department in that it consists of oneor more buyers. Purchasing groups are responsible for maintaining master data andcontrol data and for operational purchasing management. Authorizations can beassigned to each purchasing group individually. The purchasing group is not a dataretention level.
A purchasing area can be used as a connecting link between the purchasingorganization and the purchasing group. In reporting, it is used as an additionalhierarchy level. However, it is not a data retention level. In order to map thisconnecting link, one functional area is assigned to a combination of a purchasingorganization and a purchasing group in Customizing.
To be able to keep track of the goods flow in the company, article stocks must bemanaged on a quantity basis in the system.
In SAP Retail, the site is the selling and inventory-managing unit. A site can bea store or a distribution center.
The storage location is an organizational unit that makes it possible to differentiatebetween stocks in a site. In a distribution center, a storage location can mapvarious logistical functions (for example, a cross-docking storage location, alean-WM-managed storage location). As a rule, one storage location can be assignedto a store, but additional storage locations can also be managed for outdoor stock(for example, camping articles, furniture).
You can differentiate between stocks of an article in a storage location on the basis ofbatches. It is also possible to maintain expiration dates.
Unit 2: Introduction and Organizational Structures in Retail TIRT10_1
Figure 21: Inventory Management in the Distribution Center
WM: Warehouse Management
MM: Materials Management
Transactions that cause a change in stock and the resulting stock updates are enteredin the system in real time, enabling physical stock levels to be mirrored exactly in theinventory management.
There are three different types of organizational structure in a distribution center:inventory management on the storage location (MM-managed storage location),inventory management on the storage location with a storage location that is managedby a lean WM, and inventory management on the storage bin with a WM-managedstorage location = Warehouse Management system.
For complex distribution centers, the Warehouse Management system allows stockto be differentiated up to storage bin level. This means that structures, such as those ofa high rack storage area, can be mapped.
The Warehouse Management system is integrated into the whole system by connectinga storage location to a warehouse number. If, for example, a goods receipt isposted to the inventory management, an action to put away the goods is triggered inthe Warehouse Management. A complex warehouse structure is managed under awarehouse number.
TIRT10_1 Lesson: Solution Map and Organizational Structures in Retail
Different warehouse subareas that can be distinguished according to theirorganizational and technical characteristics are defined as storage types, for example,goods receipt area, goods issue area, high rack storage area and picking area.The individual storage bins are defined in a storage type. They are the smallestorganizational units that can be called in the system. They can be called usingcoordinates such as 05-04-03 for aisle 05, stack 04, level 03. When an article appearson a storage bin, it is flagged as quant.
Transport orders are used to transport the articles within the warehouse (for example,from the goods receipt area to the storage bin).
The Lean WM is a warehouse structure with which transport orders can be used aspick orders, even in simply structured warehouses. Transport orders can be createdfor deliveries (excluding goods receipt or goods issue), even if storage bins are notmanaged in the WM. Inventory management occurs at storage location level only. Thesystem does not use quants to update the stock data at storage bin level, but displaysthe fixed storage bins.
You can use the Lean WM if you want to use transfer orders to pick deliveries in awarehouse that you do not manage with the Warehouse Management system.
Figure 22: Organizational Structures in Sales
The sales organization is an organizational unit of the logistics, which subdivides thecompany according to the requirements of sales and distribution.
Unit 2: Introduction and Organizational Structures in Retail TIRT10_1
Every sales organization represents a selling unit in the legal sense and is, forexample, responsible for product liability and any customer's rights of recourse. Itis also responsible for the sales and distribution of the article, and negotiates salesconditions. You can use sales organizations to divide your market into regions, forexample, into countries. A complete sales business transaction is always managedin a sales organization.
In SAP Retail, a sales organization can be assigned to a purchasing organization. Thismeans that the hierarchy creation that is displayed in the figure may be enforced. Forstatistical purposes, this may be of interest. In some cases, both terms are identical.
A reference to another sales organization can be created for a sales organizationat sales document type level. The sales document types of the referenced salesorganization are then used.
In combination with the distribution channel, the sales organization forms adistribution chain. Sales and distribution uses different distribution channels, such asdistribution lanes or distribution channels. Possible distribution channels include, forexample, sales to the consumer via various store chains or mail order. Distributionchannels are assigned to sales organizations.
A distribution chain is fixed for SAP Retail by the distribution chain category tosupply sites and wholesale customers, or to supply consumers.
References to other distribution chains in the same sales organization can be createdfor a distribution chain. This means that customer and article master data, salesdocument types and condition types can be accessed from the distribution chain that isbeing referenced.
A division must be defined, although SAP Retail does not use it in the retail functions.Together with the division, a distribution chain forms a sales area. If just one divisionis created, then the sales area is functionally almost identical to the distribution chainfor retail.
TIRT10_1 Lesson: Solution Map and Organizational Structures in Retail
Copy Function
Figure 23: Organizational Structures: Copy Function
In the SAP System, you have the option of processing existing organizationalstructures. The following functions are available:
• Copy:
Use this function if you want to create a new organizational unit using theexisting settings as a template.
• Delete:
Use this function if you want to delete an existing organizational unit with alldependent entries.
• Check:
Use this function to check all the settings for an existing organizational unit.
Please note that only the system settings (in Customizing) are deleted or copied.Master data is not included in this process.
If you only want to process mandatory activities in the system settings, then you mustuse the copy function to create the new organizational units. This is the only way youcan make all the necessary system settings.
Trousers with zipper belt forkids, 32 inch, colourful trousersfor children with zi CornflakesGroup ## Salt Crackers Group ##Mango Group ## Coconut Group## Kitchen towels, extra strongTrousers for children with zipperChild's scarf, colored Sunglasses,black Sun Shade, cream-coloredPeaked cap Rain cape ChocoChips Group ## PineappleGroup ## Peanuts Flips Group## Nuts Mix Group ## Ladder,Aluminium Group ## ShowerCabin Group ## Net Apple Group## Mousse Make-up Group ##Dreamy Creamy FoundationGroup ## Handbag, Fake FurGroup ## Handbag "Hippie"Wallet, multi-colour T-shirtfor kids, short arm neckerchieffor kids, colourful Schoolbagpencil-case School-uniform Shirtfor youngsters, longsleeve TieSet: Shirt with tie Pretzel SticksWholewheat cookies Candyassorted
TIRT10_1 Lesson: Solution Map and Organizational Structures in Retail
Exercise 5: Navigation
Exercise ObjectivesAfter completing this exercise, you will be able to:
• Navigate in the menu for the SAP Retail system
• Make your own system settings
Business ExampleYou use SAP Retail as a retailing system in your company. Now make some defaultsettings in the system so that you can work through the processes in this course moreeasily.
Task 1: Set Up SAP Retail as your Initial ScreenYou want to store the retailing menu (SAP Retail) as the initial screen for your user.This menu will appear automatically every time you log on to your system in thefuture.
Caution: Since the training systems are reset each week, your user-specificsettings will be lost. As a result, you must configure the following settingsagain at the start of a new training week.
1.
Hint: If the SAP Easy Access screen of SAP Business InformationWarehouse is displayed the first time you log on to the system, enters000 in the command field and confirm the entry. This brings you to theSAP Easy Access menu.
To make this setting, access the function for maintaining your user defaults bychoosing System→ User Profile→ Own Data. Select the Defaults tab page andenter transaction W10T as your start menu. Save the entries you have made.
Unit 2: Introduction and Organizational Structures in Retail TIRT10_1
2. Make sure the SAP Easy Access menu for Retailing is now available.
Task 2: Maintain User ProfileIf you want the values for the organizational structures to be proposed as default valuesin the fields of some of the transactions, you can enter these values in the parameters.
1. To access the function for maintaining your user parameters, choose System→User Profile→ �Own Data and choose the Parameters tab. Call up the F4 helpin the Parameter ID column. On the Restrictions tab page, click on the long,thin bar containing the gray triangle. You can now make entries in the ShortDescription field.
2. In this client, you normally work with company code R300 in purchasingorganization R300 and belong to purchasing group R30.
You usually work with the self-service department store distribution chain,which consists of the sales organization RG10 and distribution channel R1. Inaddition, you want the value R1 to be displayed for the division.
Use the F4 help and enter the following terms in the Short Description field.Note that the entry is case-sensitive!
Company code, purchasing organization, purchasing group, sales organization(VKO), Distribution channel (VTW), and DIVISION (SPA).
Enter the keys as parameter IDs and their values as parameter values and thensave your settings.
Task 3: Create FavoritesIn later exercises, you will require a Web address which we will now add to yourfavorites.
1. Add the URL of the SAP Retail Store to your favorites. Press the right mousebutton and choose Web address or file, then make the following entries:
Unit 2: Introduction and Organizational Structures in Retail TIRT10_1
Solution 5: Navigation
Task 1: Set Up SAP Retail as your Initial ScreenYou want to store the retailing menu (SAP Retail) as the initial screen for your user.This menu will appear automatically every time you log on to your system in thefuture.
Caution: Since the training systems are reset each week, your user-specificsettings will be lost. As a result, you must configure the following settingsagain at the start of a new training week.
1.
Hint: If the SAP Easy Access screen of SAP Business InformationWarehouse is displayed the first time you log on to the system, enters000 in the command field and confirm the entry. This brings you to theSAP Easy Access menu.
To make this setting, access the function for maintaining your user defaults bychoosing System→ User Profile→ Own Data. Select the Defaults tab page andenter transaction W10T as your start menu. Save the entries you have made.
a) System→ User Profile→ Own Data
Make your settings as specified in the task. The system opens a secondsession. The system issues the following message:
User TIRT10-## was saved
2. Make sure the SAP Easy Access menu for Retailing is now available.
Answer: The SAP menu consists of the following subnodes:
TIRT10_1 Lesson: Solution Map and Organizational Structures in Retail
Task 2: Maintain User ProfileIf you want the values for the organizational structures to be proposed as default valuesin the fields of some of the transactions, you can enter these values in the parameters.
1. To access the function for maintaining your user parameters, choose System→User Profile→ �Own Data and choose the Parameters tab. Call up the F4 helpin the Parameter ID column. On the Restrictions tab page, click on the long,thin bar containing the gray triangle. You can now make entries in the ShortDescription field.
a) System→ User Profile→ Own Data
Make your settings as per the task.
2. In this client, you normally work with company code R300 in purchasingorganization R300 and belong to purchasing group R30.
You usually work with the self-service department store distribution chain,which consists of the sales organization RG10 and distribution channel R1. Inaddition, you want the value R1 to be displayed for the division.
Use the F4 help and enter the following terms in the Short Description field.Note that the entry is case-sensitive!
Company code, purchasing organization, purchasing group, sales organization(VKO), Distribution channel (VTW), and DIVISION (SPA).
Enter the keys as parameter IDs and their values as parameter values and thensave your settings.
a) Make your settings as per the task. Maintain the following parameterID and parameter values:
TIRT10_1 Lesson: Solution Map and Organizational Structures in Retail
Exercise 6: Organizational Units
Exercise ObjectivesAfter completing this exercise, you will be able to:
• Find organizational structures in the Implementation Guide (IMG)
Business ExampleA new employee needs to become familiar with the most important elements ofyour company structure quickly. Show the structures in the SAP system to the newemployee.
Task 1:Display the existing organizational structures in the Implementation Guide (IMG).
1. View the definition and assignments of some organizational levels in theImplementation Guide:
2. Where can you find the definition of a company code in the ImplementationGuide? Specify the menu path.
________________________________________________
3. For the duration of the course you will use R300 as your company code. What isthe name of this company code?
Unit 2: Introduction and Organizational Structures in Retail TIRT10_1
Lesson: Technologies
Lesson OverviewThis lesson contains information on SAP's range of solutions (as at October 2007),provides an overview of the SAP ERP (Enterprise Resource Planning) architecture,and explains the key technological terms, such as ALE, RFC, and BAPI.
Lesson ObjectivesAfter completing this lesson, you will be able to:
• Describe the range of solutions provided by SAP (as at October 2007)
• Describe the SAP ERP (Enterprise Resource Planning) architecture
• Explain the key technological terms in the SAP environment, such as ALE,RFC, BAPI, and so on
Business ExampleYour company is getting ready to use SAP Retail, and you want to familiarize yourselfin advance with the most important technical terms. Because the SAP Retail solutionwill be a large component of your system landscape, you obtain information onadditional solutions provided by SAP and on how to integrate them into your systemlandscape.
The basic components of the SAP solution suite are the industry solutions SAP xApps(SAP Collaborative Cross Applications), SAP Business Suite with solutions formidsize companies, and SAP NetWeaver BI.
You can use the SAP xApps (Collaborative Cross Applications) to link existingapplications by accessing existing datasets and functions using open interfaces. Thismeans you can implement new applications that are based on an existing infrastructure.
The SAP Business Suite contains a wide range of options for integrating your internalbusiness processes as well as to integrate your system with business partners' systems.You can integrate cross-company processes using various techniques, for exampleusing Application Link Enabling (ALE), Electronic Data Interchange (EDI), XMLdata exchange, or Collaborative Cross Applications (xApps) and Web Services.
SAP NetWeaver BI provides an open integration and application platform whichcan be used to implement Enterprise Services Architecture. You can unify businessprocesses across technology barriers, integrate applications for your employees asrequired, and access and format data in a simple and structured manner.
Figure 25: Distributed Business Processes
Cross-company applications, such as Financials, Human Resources, or DemandPlanning, are performed at company headquarters, while planning and control ofProduction and Materials Management take place at decentralized plants. Application
Unit 2: Introduction and Organizational Structures in Retail TIRT10_1
Link Enabling (ALE) integrates business processes between SAP systems, andbetween SAP and non-SAP systems. The technology exchanges data betweenapplication systems in a controlled and consistent manner.
The basic concept of Application Link Enabling is to guarantee operation of adistributed but integrated system landscape. This includes exchange of messagescontrolled according to business criteria with consistent data storage in looselycoupled application systems. Application integration does not take place using acentral database, but by means of synchronous and asynchronous communication. Aprimary characteristic of ALE is the coupling of the different systems by means ofsecure and consistent data transfer.
Figure 26: ALE Sample Scenario
Both master data and application data can be exchanged using Application LinkEnabling (ALE). To do this, the Customizing data must be synchronized. Thisincludes, for example, organizational units (company code, site), units of measurementand measure, and other parameters that must be defined in the system. These settingsmust be the same in both systems in certain areas, so that data can be exchangedbetween these systems.
The EDI application scenarios are processes in which two partners are involved: thesender and the recipient of an EDI message.
The IDoc interface comprises a data structure definition and a processing logic forthis data structure.
The data structure is the IDoc. It is the exchange format agreed on by thecommunicating systems. You can use IDocs to define exception handling within theSAP system by means of SAP Business Workflow, without having to have access tothe data as an SAP application document.
Electronic Data Interchange (EDI) and Application Link Enabling (ALE) are used toexchange business data with other systems. You need an IDoc interface comprisinga data structure definition and a processing logic for the structure for both formsof data transfer. The information can be transmitted using an IDoc (IntermediateDocument). The data structure is the IDoc. It is the exchange format agreed on by thecommunicating systems.
The structure of an IDoc is described by the IDoc type. The information containedin the IDoc type includes which data is stored where (row and offset). It is assignedin the message category.
While the message category simply contains the semantics of a message (for example,article master data), the IDoc type for a message category contains the precisestructure of the document.
Unit 2: Introduction and Organizational Structures in Retail TIRT10_1
Figure 28: Sending an IDoc
The process for sending an IDoc begins with the generation of a message in IDocformat in the sending system and ends with the creation of an application documentin the target system. This includes the following steps: After the IDoc has beengenerated, it is stored in the database. If all the information on the recipient is known,the message can be sent. It is transferred to the communication layer and transportedto the target system. Here, it is saved in the database. If all the information requiredfor further processing is available, the message can be passed on to the application.This process creates an application document.
BAPIs (Business Application Programming Interfaces) are the standard SAPinterfaces. They play an important role in technical integration and business dataexchange between SAP components and between SAP and non-SAP components.Their characteristics integrate these components, so that they constitute a key elementin developing integration scenarios in which several components are linked, either bymeans of a local network or through the Internet.
BAPIs allow integration on a business rather than a technical level. This meansthe coupling is more stable and the systems are independent of the communicationtechnology implemented.
Unit 2: Introduction and Organizational Structures in Retail TIRT10_1
Figure 30: EDI Interface Technology
The communication partners must agree on the structure for the messages exchanged.If you do not want to use the standard SAP messages, you can use the internationalstandards for Electronic Data Interchange (EDI) for automatic message exchange. Inthis case, the IDocs must be converted to EDI standards by a separate EDI subsystem.
Electronic Data Interchange (EDI) involves the transfer of business messages betweentwo systems. There are large numbers of these messages. The most common typesare purchase order messages from a customer to a vendor or invoice messages from avendor to a customer. In most cases, EDI eliminates the need to send paper printoutsof these documents. There are many standards for these messages; for example,ANSIX.12 in the US, and UN/EDIFACT in Europe. On the SAP side, the EDIinterface is based on IDoc technology, which is independent of EDI standards.
Customer exits are predefined in the application and generally comprise severalcomponents. These application enhancements can be used by customers to enhanceapplication functions. Application enhancements are inactive and are only processedand activated by the customer if required. The customer receives a catalog containingan overview of the existing SAP enhancements and groups the desired enhancementsin an enhancement project.
Customers can use function module exits to implement additional logic in anapplication function. The SAP application programmer determines where functionmodule exits are defined in an application function, and which data is transferred.The programmer creates the corresponding function modules with their short text,interface, and documentation, and describes the functions to be performed by thefunction module exit in the corresponding SAP documentation. The customer createsthe source text for the function modules, as well as screens, text elements, customerIncludes for the function group, and any other elements required. The ABAP programis not executed until the customer activates the enhancement project that contains thefunction module as a component. Function module exits have no effect until this point.
Unit 2: Introduction and Organizational Structures in Retail TIRT10_1
Figure 32: BAdI
Business Add-Ins (BAdIs) are enhancements to the standard system. They unite thebenefits of customer exits and Business Transaction Events. They are defined to coverpossible user requirements that are too specific to be included in the standard SAPsystem but are required frequently and are therefore predefined. A distinction is madebetween enhancements that can only have a maximum of one implementation andthose that can be used by any number of customers at the same time. Business Add-Inscan also be defined with a dependency on a filter value. For example, implementationsof an Add-In can be distinguished according to the filter value Country or according toother criteria. The enhancement technology is designed in such a way that interfacescan be defined for ABAP sources, screens, GUI interfaces, and tables, so thatcustomers can integrate their own enhancements in the standard. These interfaces thatare required in order to complete a task are grouped together in a Business Add-In.
In the definition view, an application programmer defines locations in a source atwhich software layers (industries, partners, customers, and so on) can insert codingwithout modifying the original object. Users of Business Add-Ins can program thelogic they require or adopt a standard implementation provided in the implementationview.
In contrast to customer exits, Business Add-Ins are based on a multi-level systemlandscape (SAP, country versions, IS solutions, partner, customer, and so on) ratherthan two levels (SAP, customer). Definitions and implementations of BusinessAdd-Ins can be created on any level of the system landscape.
The upward compatibility of the Business Add-In interfaces is guaranteed; that is tosay, the call of an enhancement from the standard software and the validity of thecalling interface are unaffected by release upgrades.
Figure 33: Remote Function Call
A Remote Function Call (RFC) calls a function module (for a procedure) in a partnersystem. The calling system is the RFC client and the system called is the RFC server.RFC is based on the established RPC model (Remote Procedure Call) from theUNIX TCP/IP environment. RFCs are responsible for the communication manager,parameter transfer, and error handling. To access an RFC module from an SAPsystem, the system requires not only the import and export parameters, but also atechnical connection. This connection is referred to as the RFC connection or RFCdestination.
For example, you can access a certain query in an SAP NetWeaver BI from an SAPsystem, so as to obtain a certain key figure (for example, an allocation rule for theallocation table) as the final result.
Unit 2: Introduction and Organizational Structures in Retail TIRT10_1
Figure 34: Workflow
Definition of the term "Workflow" according to the Workflow Management Coalition(WFMC): "Workflow is the computer-supported simplification and automation of abusiness process."
SAP is one of the founding members of the WFMC and is actively involved indefining workflow standards.
A workflow in an SAP system (or between SAP systems) is used to speed up andregulate business processes. A workflow model is used to assign a process and itssub-steps to various persons or to their role in the company. The automated sequenceensures that the relevant employees receive their tasks quickly.
A workflow definition has a modular structure that comprises individual linked steps.A step in a workflow definition can refer to a multistep or single-step task.
A single-step task is a basic business task. It refers to one object and is described byan object method.
SAP Business Workflow defines the responsible processors. In backgroundprocessing, manual intervention is not necessary, while dialogs must be processed bythe employees responsible. Each task is assigned a list of possible processors. Thesystem selects the processors responsible from this list at runtime.
Unit 2: Introduction and Organizational Structures in Retail TIRT10_1
Figure 36: SAP ERP Architecture
This diagram provides an overview of the ERP (Enterprise Resource Planning)solutions developed by SAP. The software solution SAP R/3 was developed anddelivered by SAP in 1992. R/3 was delivered in releases 1.2, 3.0, 4.0, 4.5, and 4.6C.Up to SAP R/3 release 4.6C, R/3 had a two-level architecture that comprised SAPBasis and the SAP application.
A three-level architecture was introduced with SAP R/3 Enterprise in 2001, furthersubdividing the application area into Core Component and Extension Set.
In SAP ERP, which has been available since March 2003, SAP provides additionalcomponents that support the ERP business processes. These include functionalenhancements, such as Self Services, SAP SEM (Strategic Enterprise Management),and Internet Sales.
The next step in SAP development is the SAP ERP Central Component.
International Communication StandardARTS
The international Association for Retail Technology Standards (ARTS) developed acomprehensive data model some years ago, mapping business processes at store levelalmost seamlessly. This means that solutions based on this data model are preparedfor almost all conceivable business processes. The main advantage of the data
model is that different applications – from the cash desk through Store MerchandiseManagement, Financial Accounting, and shift planning – write, exchange, and usetheir data on a shared database. In addition to the classic store applications, the datamodel also allows direct integration of new applications for analysis, forecasting,revision, and ad hoc reporting. These areas are becoming increasingly important,since there is significant potential for improving results in these areas. ARTSconstitutes a shared language, rendering time- and cost-intensive interpreters betweenthe applications obsolete. It is possible to implement this complex data model atstore level because hardware and databases that were previously only implemented atcompany headquarters have now become affordable. The well-documented ARTSdata model is manufacturer- and platform-independent, freely accessible, and alsoworks in heterogeneous system landscapes. It is also e-commerce-enabled, since thebusiness processes in this area are ultimately the same as those in a store.
GS1 Germany/CCG
GS1 Germany (previously CCG, Centrale für Coorganisation GmbH) is theservice and competence center for cross-company business processes in the Germanconsumer products business and related economic areas. GS1 is a founder memberof the international EAN organization, whose standards are currently in force in129 countries. GS1 Germany is recognized as a standardization association by theantitrust authorities and supports the norm committee for Data and Goods Movementsin Consumer Trading in DIN.
GLN/ILN
The Global Location Number (GLN) identifies the full company or site name andaddress. It is assigned sequentially when solicitations are received and cannot bechosen by the company. In German-speaking countries, GLN is also referred to asILN, (International Location Number). A company is assigned a GLN when itregisters on the EAN•UCC (European Article Number) system and this forms thebasis for the article identification and the bar codes on merchandise packaging. TheGLN always comprises 13 characters. The fixed basic number has 7, 8, or 9 charactersincluding the country prefix. Since the last character is a check digit, the remaining3-5 digits of the basic number can be generated for individual use (for example, fordifferent stores, plant sections, loading ramps, and so on). The GLNs of all systemparticipants are normally publicized by the EAN administrator for the state – togetherwith the name and address of the company.
EAN
EAN stands for International Article Number (previously European Article Number)and is a product ID for retail articles. The EAN is a 13- or 8-digit number managedinternally, which is assigned to manufacturers on request. In Germany, an annual
Unit 2: Introduction and Organizational Structures in Retail TIRT10_1
charge is levied for the assignment of an ILN, which is prerequisite to applying for anEAN. The EAN is usually printed on the packaging as a machine-readable bar codeand decoded by a laser scanner when payment is made at scanner cash desks.
UCC
The abbreviation UCC stands for the Uniform Code Council. This is one of the mostinfluential organizations worldwide, specializing in globalization and standardization.The UCC was founded in 1984, proceeding from the “Uniform Product CodeCouncil” organization, which in turn resulted from the “Uniform Grocery ProductCode Council”, founded in the early 1970s. The latter was founded by the US groceryindustry with the aim of designing a uniform bar code. For example, the UCCdeveloped the bar code “Universal Product Code” (UPC).
UPC
The Universal Product Code (UPC) with 12-digit numbers was introduced in theUS as early as 1973. A year later, the Europeans began thinking about a similarsystem, which was to be compatible with UPC. To this end, a leading digit wasadded to the UPC, so that it comprised 13 digits. The difference between EAN andUPC-A is that the leading digit in UPC-A is always a zero. The European ArticleAssociation, later renamed EAN International, was founded in 1977. The associationhas member organizations in 98 countries. In recent years, efforts have been made tounite the two systems EAN and UPC. The US product code, which is managed bythe Uniform Code Council (UCC), is now integrated in every EAN. The system wasnamed EAN•UCC. EAN-13 was introduced in North America on January 1, 2005,but conversion to 14-character GTIN is recommended.
GTIN
The Global Trade Item Number (GTIN) is a global identification number forproducts and packages. GTIN is an umbrella term for the code schemas of the barcode indicators, which are assigned with the EAN, the UCC code, or the electronicproduct code (EPC) and managed by GS1.
SSCC18
SSCC18 = Serial shipping container label format (UCC/EAN-128). This labelstandard was introduced to automate processing between trading partners for shipping,distribution, transportation, and receipt. It is the “license plate” that indicates thecontent of the containers and pallets.
SINFOS
SINFOS GmbH is a service company that aims to optimize business processesbetween industry on the one side and retail on the other. The aim is to rationalizeelectronic goods transfer by enabling companies to exchange article master datamultilaterally instead of bilaterally, using the SINFOS data pool. SINFOS is
currently used in Germany, Finland, the Netherlands, Austria, and Spain. Around1900 companies have joined the local country pools. All five countries are continuingdevelopment of the system and refer to the same content, rules, functions, andstructures. Country-specific aspects are taken into account. This is guaranteed by aninternational work group. The group “ensures” that agreements are adhered to, andensures that continued development takes place. This procedure enables companiesto exchange article master data between the pools in the five countries without lossof data. This means that the principle of “Interoperability of Data Pools ” (IODP),which is unique worldwide, is able to function. SINFOS is part of the Global DataSynchronization (GDS) work group as part of the Global Commerce Initiative(GCI). This work group develops concepts for formulating rules for worldwide masterdata reconciliation.
RFID
Radio Frequency Identification (RFID) is a technology used to identify objectswithout touching them and without their radio tags (RFID tags) having to be visible.RFID technology has already been implemented in many areas, for example for skipasses and for remote control central locking devices for automobiles. The automaticmonitoring and localization of products in delivery chains is referred to as trackingand tracing. RFID technology can only be used if there RFID antennas and readers areavailable, for example at goods receipt and logistics transfer locations.
RFID Tag/RFID Transponder
In the simplest case, this is a label comprising a chip and an antenna. If it isself-adhesive, it can be affixed to parts. RFID tags can be implanted under human andanimal skin as glass cylinders. This has already been approved in the US. RFID tagscan also be cast in synthetic resin so that they can withstand tough conditions. Simpletags are passive: this means they can only transmit their information if they receiveenergy from electromagnetic waves from readers. Active tags have their own sourceof energy and ability to transmit. In their simplest form, RFID tags only have one tagID, a serial number that is unique worldwide, and transmit this as required. However,tags can also have writable storage areas, so that for example an electronic deliverynote can be stored on a pallet tag. This is important if shipments are to be checked atlocations where there is no access to the Internet or to the EPCglobal network.
EPC
The Electronic Product Code (EPC) on RFID tags will increasingly replace theEAN code on bar code labels. EPC is a number schema that can identify all objectsuniquely worldwide and that is produced by EPCglobal Inc., New Jersey (USA) andBrussels (Belgium). EPCglobal Inc. is an international organization resulting fromthe merger of EAN International and the Uniform Code Council, Inc. (UCC). TheEPC number has a fixed structure. The first two bytes are used for internal networkcontrolling purposes and format/version specifications, the next numbers are assigned
Unit 2: Introduction and Organizational Structures in Retail TIRT10_1
by GS1 in Germany, and these are followed by the part number according to EAN.The EPC number ends with the serial number, which is used to uniquely identifyindividual parts. The scientific approach for the EPCglobal network was developedby the Auto-ID Center, a project at the Massachusetts Institute of Technology (MIT)in Boston (USA). This project gave rise to the network of Auto-ID labs, in whicha number university institutes worldwide participate. After completing the basicresearch on RFID, MIT handed over the continued work on the EPCglobal projectand its market distribution to EPCglobal Inc. EPC is represented in Germany byGS1 Germany.
GAAP
The United States Generally Accepted Accounting Principles (US-GAAP) aregenerally used to define the U.S. reporting regulations that govern accountingand year-end closing in a company. Within the United States, the regulations arereferred to simply as GAAP, which roughly corresponds to the German "Grundsätzeordnungsmäßiger Buchführung".
Unlike the reporting requirements of several other countries, US-GAAP has nolegal basis but is developed by private organizations. However, the Securities andExchange Commission (SEC) has a great deal of influence on it. There are varioushierarchy levels of US-GAAP, known as the "house of GAAP". These are based onthe binding standards set by the Financial Accounting Standards Board (FASB). TheFASB is managed by a private foundation, which is financed in the most part bythe U.S. economy.
GoB
The generally accepted accounting principles, known in Germany as the Grundsätzeordnungsmäßiger Buchführung (GoB), are partially written and partially unwrittenaccounting rules, which arise predominantly from the areas of science and practice,law, and recommendations from economic associations. Their aim is to protectcreditors and company owners as much as possible from incorrect information anddata, as well as potential losses.
Unit OverviewThis unit describes the structure of business partner master records, explains the taskof the account group, and specifies the options for the maintenance of differentpurchasing data for the vendor.
Unit ObjectivesAfter completing this unit, you will be able to:
• Name the different customer categories
• Describe the structure of a customer master record
• Describe the structure of a vendor master record
• Explain how you can maintain various types of purchasing data for the vendor
Lesson ObjectivesAfter completing this lesson, you will be able to:
• Name the different customer categories
• Describe the structure of a customer master record
Business ExampleYou deliver goods to new customers and create their customer master records so thatthe delivery and payroll processes run smoothly in the system.
As a customer is regarded as a business partner of the company in financialaccounting, the customer master record is used by both sales and financial accounting.Customers are classified as debitors in financial accounting.
Every site has a customer master record.
Figure 39: Customer: Business Partner
“Business partner” is an SAP term.
A business partner is a person or organization with which you do business.
In the SAP system, business partners are defined according to roles that they fulfilland according to requirements that they apply to you. Examples include:
• Contact person, for example, someone with whom you want to keep regularcontact (for example, management)
• Personnel, for example, sales employees or employees who you representat trade fairs
When you are defining a business partner, you should remember who expects paymentfrom you (for example, a commission or fee) and who receives documents from you(for example, forms, letters or other messages).
When you are creating customer master records, you must create a master record for asold-to party. When you create these mandatory roles, the SAP system automaticallycompletes the partner role view of this master record with entries for the ship-to party,bill-to party and payer. The SAP system defaults the same person for all four partnerroles. You can overwrite these default values.
Figure 40: Customer: Customer Account Groups
The account group is a template for creating customer master records.
• The data fields in the master record that are either hidden or displayed, and areeither required entry or optional entry fields
• The number range for the customer of the sold-to party or the ship-to partyand so on
• A number of other control elements
Example:
A customer master record for a ship-to party (created with account group 0002)contains certain views and data fields. This master record requires informationrelevant to shipping. All the fields relevant to billing are hidden.
Account groups are contained in the standard system. If required, you can createadditional account groups.
Figure 41: Organizational Structures in Wholesale (Example)
The data in the vendor master record is subdivided into three categories:
• General Data:
This includes the address and banking details of the creditor. The data is valid ona client-wide basis. You will also find the procurement monitoring fields here.
• Purchasing Data:
This includes the purchase order currency, incoterms and various control data ofthe creditor. This data is maintained for the relevant purchasing organization.You can also enter alternative data that is only valid for specific sites or forvendor sub-ranges.
• Financial Accounting Data:
This includes, for example, the number of the reconciliation account and thepayment methods for the automatic payment transactions. Financial accountingdata is maintained at company code level.
A vendor master record may be blocked, if, for example, the quality of the productssupplied by this vendor is substandard. You can use the source list to block a vendorfor an individual article/SKU.
These are vendor-related entries, which you can maintain for every purchasingorganization in your client. It concerns data that is important for purchasing, such aspurchasing data and partner functions.
In addition to maintaining the data that is valid for the entire purchasing organization,you can also maintain data for a specific site and/or vendor sub-range in thepurchasing data and partner function screens. This may include, for example, termsof payment or Incoterms that differ from the terms of payment or Incoterms in thepurchasing organization. You can create this alternative data for the vendor at thefollowing data retention levels:
• Vendor sub-range (VSR)
• Site
• Vendor sub-range/site
The data retention level from which the system defaults data, for example, in apurchase order, is determined in the following sequence:
Vendor sub-ranges are specified by vendors. Reasons for creating sub-ranges include,for example:
• Different conditions
• Different addresses
• Different control data for requirements planning and purchase orders
In the vendor master, the purchasing data and partner roles can be created separatelyfor each sub-range.
The link between vendor and article is created using the purchasing info record. Thearticle maintenance automatically creates and maintains the purchasing info record.Among other things, information is created about conditions, terms of delivery andpayment agreements. Purchasing info records can provide default values when thepurchase order is being created.
An article is assigned to a sub-range in the purchasing view of the article (purchasinginfo record). A sorting number can also be assigned, to sort the articles in a purchaseorder in the standard vendor way.
In the vendor master purchasing data, you can choose which supply regions a vendorsupplies.
Each site can be assigned to one supply region.
The system checks the supply regions of the vendor master when a purchase order iscreated for a site that is assigned to a supply region. If the vendor is not responsiblefor that particular region, the system issues a warning message.
If supply regions have been created in the vendor master, the information is taken intoaccount in the supply source determination of the purchasing.
For certain operative functions, you can use partner functions to create a link betweenthe vendor and other credit-side master records. The corresponding partner functionsmust be defined in these master records.
The partner functions created in the vendor master can be defaulted and used inpurchase orders and contracts.
Vendor Master Records:
• Only one vendor master record is required if a vendor is also the order recipient,vendor, invoicing party and payee.
• Several vendor master records are required if these functions are distributedto different locations or companies. They are linked to each other by partnerfunctions.
You can enter a contact person for each partner function.
Partner functions allow you to assign different locations or companies to a vendormaster record.
Partner functions refer to different functions that a particular vendor may have in thebusiness relationship with you.
Exercise ObjectivesAfter completing this exercise, you will be able to:
• Maintain vendor data
• Find the Customizing settings that you require
Business ExampleThe vendor Northern Milk offers you better conditions if you purchase its wholerange of yoghurts. You create a vendor sub-range for these articles and maintain therelevant purchasing data in the vendor master.
Task 1:The vendor master record already exists in the system under the number R1TV03##.Familiarize yourself with the vendor data.
1. Display all data of vendor R1TV03## (Display→ Central). The company codeis R300, and the responsible purchasing organization is also R300 too. Select allviews (except for the withholding tax view).
2. In Customizing, check that you can create purchasing data for this account groupat vendor sub-range level.
3. In the Purchasing Data of the vendor, create a new vendor sub-range GR## withthe description “Yoghurt”.
Hint: To do this, choose Vendor → Change
Task 3:For articles from the Yoghurt sub-range, the vendor named a certain seller, who is thecontact person for this article. You now want to create this information in the system.
1. Create alternative data for the Yoghurt vendor sub-range.
2. On what other levels can you create alternative data?
_________________________________________________
3. You select your sub-range GR## and maintain the following alternativepurchasing data: The responsible seller for the article of the VSR is Mr Smithand his telephone number is 089/23046-7. You want to specify the purchasinggroup R30 as a default when creating the article. The planned delivery time is3 days.
Task 1:The vendor master record already exists in the system under the number R1TV03##.Familiarize yourself with the vendor data.
1. Display all data of vendor R1TV03## (Display→ Central). The company codeis R300, and the responsible purchasing organization is also R300 too. Select allviews (except for the withholding tax view).
a) Retailing: Master Data→ Vendor Data→ Edit Vendors→ Vendor→Display→ Central
Vendor R1TV03##
Company Code R300
Purch. Organization R300
b) Select all boxes (except for Withholding tax) and choose Enter
The vendor was created with the account group 0001 Vendor.
2. In Customizing, check that you can create purchasing data for this account groupat vendor sub-range level.
a) IMG: Logistics - General→ Business Partner→ Vendors→ Control→Define Account Groups and Field Selection (Vendor)
b) Select group 0001
c) Choose Details
In the Data Retent. Levels: Purchasing subscreen, the Vendor sub-rangerelevant checkbox is selected, which means that data can be created atthis level.
3. In the Purchasing Data of the vendor, create a new vendor sub-range GR## withthe description “Yoghurt”.
Hint: To do this, choose Vendor→ Change
a) Retailing: Master Data→ Vendor Data→ Edit Vendors→ Vendor→Change→ Central
Vendor R1TV03##
Company Code R300
Purch. Organization R300
b) Select the Purchasing data checkbox and chooseEnter
c) In the Purchasing data view: choose Extras→ Vendor Sub-ranges
Sub-range GR##
VSR description Yogurt
d) Select the green arrow to return to the purchasing data
Task 3:For articles from the Yoghurt sub-range, the vendor named a certain seller, who is thecontact person for this article. You now want to create this information in the system.
1. Create alternative data for the Yoghurt vendor sub-range.
a) Choose Alternative data
b) Answer the query with YES
2. On what other levels can you create alternative data?
_________________________________________________
a) Alternative data can also be maintained at site level.
3. You select your sub-range GR## and maintain the following alternativepurchasing data: The responsible seller for the article of the VSR is Mr Smithand his telephone number is 089/23046-7. You want to specify the purchasinggroup R30 as a default when creating the article. The planned delivery time is3 days.
a)
Sub-range GR##
b) In the Alternative Data subscreen, select the Purchasing Data checkboxand choose Enter
Unit OverviewThis unit describes the concept of the site profile and the corresponding referencesites, specifies how sites can be subdivided, explains the department store/shopconcept and the space management function, and describes how blocking reasons areset and how they work.
Unit ObjectivesAfter completing this unit, you will be able to:
• Describe the structure of sites
• Name the various site categories
• Describe the concept of the site profile and the reference site that belongsto the profile
• Create a site
• List the ways you can subdivide sites
• Describe how you can set blocking reasons and how blocking reasons work
Lesson ObjectivesAfter completing this lesson, you will be able to:
• Describe the structure of sites
• Name the various site categories
• Describe the concept of the site profile and the reference site that belongsto the profile
Business ExampleYou plan on changing the product presentation of your stores. All your company'sstores should look the same to customers and should carry the same merchandisecategories and articles.
The store is undergoing renovation and will have to close temporarily.
Figure 50: Sites: Site and Distribution Chain Categories
The distribution chain category describes the logistical function of a distribution chain.In retail, a distinction is made between consumer distribution chains and distributionchains that are delivered by distribution centers.
In SAP Retail, a distinction is also made between two site categories:
• Distribution centers that provide goods for other sites or customers
• Stores that present merchandise and sell it to consumers
A site is always a combination of the site master and the customer master.
• The site master is required as it is an inventory-management organizationalunit with own requirements planning.
• A site is also a customer as sales functions, such as deliveries and billing, arecarried out for it from a central viewpoint.
• A distribution center (DC) is also a vendor as it supplies other sites withmerchandise. A distribution center delivers merchandise to stores of one ormore distribution chains.
A distribution center has to be assigned to a distribution chain.
A store is always assigned to a specific distribution chain and may be supplied bydistribution centers via several distribution chains.
As a site is also always a customer in the SAP System, all the customer functions canbe used. In the site profile in Customizing, you can choose to hide functions.
The following can be partner functions of a site:
• Sold-to party
• Ship-to party
• Bill-to party
• Payer
One storage location is assigned to each store for inventory management. Distributioncenters can have more than one storage location. The storage location provides a linkto the Warehouse Management System.
A store can be subdivided into departments according to retail business aspects. Adepartment can be defined for each store and merchandise category. Departments canbe assigned to a receiving point.
One of the unloading points can be assigned to each receiving point.
The merchant ID, which you can assign to a store, is used to settle credit card sales(for example, American Express, Visa Card) with the relevant clearing houses.
You can also assign time and merchandise category-related supplying sites to a store.
The data that are required or possible in the site master record are defined in thesite profile.
Site profiles subdivide the site categories and control the site maintenance interface.This is carried out when the site category is assigned and the field status is maintained.The account group controls the screen structure for the customer and vendor segmentin the site master.
You can also use the transaction-based field selection to control the field status andthe screen structure of the general site master data. The following list of prioritiesdetermines whether a field, or the contents of a field, is displayed or hidden in atransaction:
• Hiding a field is the top priority.
• This is followed by display, required entry and optional entry fields.
To create a new site, you can also enter a reference site in the site profile. The copyrule determines the Customizing tables that are to be copied from the reference siteto the new site. Templates can also be entered for the customer and, if necessary,for the vendor master record.
Various site profiles, which you can copy and adjust according to your requirements,have already been delivered.
There is no number range for sites. Numbers are assigned externally. As a rule,customers and vendors that belong to a site receive the same key as the correspondingsite. However, for customers and vendors there are number ranges that are determinedvia the respective account group. When a new customer or vendor is created for thesite, a check is carried out against these number ranges.
Exercise ObjectivesAfter completing this exercise, you will be able to:
• Create a new site profile as a copy of an existing profile
• Find and implement the functions for hiding fields in a site profile
• Implement the transaction-dependent definition of required entry fields
Business ExampleYou want to create several stores for your distribution chain. To minimize the amountof work involved, all stores should be created with the same templates. The employeecreating the stores must maintain certain fields immediately.
Task 1:You familiarize yourself with the site profile settings.
You create your own site profile so that you can use your template to create a new site.
1. Create a new site profile with the number P2## as a copy of profile P160.
2. You want to use your new site profiles to create stores. Select the relevant sitecategory.
Task 2:Also depending on the transaction you are using (Create, Change, Display), thefields in the site master can be defined as required entry, optional entry, display, orhidden fields.
1. Find out whether the Sales area (floor space) field (in the Layout data area) mustbe maintained when you create a new site.
Task 3:You can now define the tables that should be copied from the reference site when anew site is created.
1. To do this, use the copy rule used in the site profile. Which copy rule doesyour site profile P2## use?
6. The Block Reason and Blocking period fields should be hidden in the sites thatyou create with your new profile. Make this change and save.
a) Double-click the Block group
b) Hide the Block Reason and Blocking period fields (set the radio button)
c) Field status → Save
Task 2:Also depending on the transaction you are using (Create, Change, Display), thefields in the site master can be defined as required entry, optional entry, display, orhidden fields.
1. Find out whether the Sales area (floor space) field (in the Layout data area) mustbe maintained when you create a new site.
a) IMG: Logistics - General → Plant Master → Control Data →Transaction-Dependent Field Selection
b) Select Create plant
c) Choose Details
d) Choose FieldStat. site
e) Double-click the Layout data group
The Sales area (floor space) field is an optional entry field, so it does nothave to be entered.
Task 3:You can now define the tables that should be copied from the reference site when anew site is created.
1. To do this, use the copy rule used in the site profile. Which copy rule doesyour site profile P2## use?
Lesson ObjectivesAfter completing this lesson, you will be able to:
• Create a site
• List the ways you can subdivide sites
• Describe how you can set blocking reasons and how blocking reasons work
Business ExampleYou plan on changing the product presentation of your stores. All your company'sstores should look the same to customers and should carry the same merchandisecategories and articles.
The store is undergoing renovation, which means that it will close temporarily.
A store may have several unloading points. The carrier brings the goods to thisunloading point.
A store has several departments. The department can be defined for each store andmerchandise category. When there is a delivery to a store, for each article you candetermine for which department the delivery item is determined.
The store also has several receiving points. One of the unloading points is assignedto each receiving point. One receiving point can be assigned to each department(example: department stores). The unloading point of a store is maintained in thecustomer master data of the store.
Figure 56: Sites: Unloading Point - Receiving Point - Department
You create departments (in Customizing) which you will assign to sites withinyour company at a later stage. As a rule, departments are assigned to stores. Youcan then assign the departments, which are assigned to the store, to the individualmerchandise categories. A merchandise category cannot be assigned to more than onedepartment. However, several (different) merchandise categories can be assignedto one department.
When assigning the departments to the stores, you can assign a receiving point toeach department in the site maintenance. Only one receiving point can be assignedto a department. However, several (different) departments can be assigned to onereceiving point.
Your receiving points are assigned to the defined unloading points. A receiving pointcan only be assigned to one unloading point. However, several (different) receivingpoints can be assigned to an unloading point. Unloading points must already havebeen created in the customer view of the site.
Department Stores and ShopsThe store categories Department Store and Shop were added to the site category Storefor the department store/shop concept. The target groups are retail companies thatwant to perform detailed inventory management at department level.
If you want to process the departments in a store as independently operating units, youmust define them as shops (site category Store, store category Shop). In this context,the department store is the organizational unit that covers the individual shops, and iscreated with the site category store and the store category department store. If you usethe store categories Department Store and Shop, you can map multiple placements ofarticles in a site from an inventory management point of view. In this case, the systemmanages the stock in the individual shops.
Figure 57: Department Store/Shop Concept
The basic concept of the SAP site is unchanged for the store categories DepartmentStore and Shop. All the processes in the standard (Retail) system are - in additionto the store level (Store Category:_) - also available at shop level (Store Category:Shop). This means the department store is fully integrated into the site master datamodel. Department Store and Shop are store categories that have a certain relationshipin the site master data concept. If you create the site master data for a shop, for thisshop you must select an assignment to the relevant department store. If you link ashop to a department store, the system can assign to the appropriate shop the data,which you processed at department store level. This reduces the time and effortinvolved in manual data entry at shop level.
The department store/shop model and the store model with departments are twodifferent ways of managing articles. The department store/shop model manages thearticles in more detail than the store model with departments, since the assortment isdivided among the different shops and can only be used logistically within the shops.
There are two user-friendly mass maintenance transactions that can be used to createshops. In one of the transactions, you start with the department store and create anumber of shops. In the other transaction, you start with a category and create shopsin several department stores for this category.
Due to renovations, a site will be blocked from May 01 - 31. The report run on May1 will set the blocking reasons contained in the blocking reason (profile) as generalblocks in the customer segment of the site. The report run on the May 31 removesthese blocks again.
In Customizing, you can define blocking reasons (blocking profile) for an order block,delivery block or billing block.
You are able to block a site by assigning one of these blocking reasons to a site andspecifying a time interval.
On a daily basis, the background processing (report RWWLOCKD) checks whetherthere is a blocking reason for a site, and sets central blocks (delivery blocks, billingblocks and order blocks) in accordance with the blocking profile, if the sites shouldbe blocked from the current date (Block from), or removes the blocks for the currentdate (Block to).
Exercise ObjectivesAfter completing this exercise, you will be able to:
• Create a site with your site profile
• Create a customer for your site
Business ExampleYou will soon be opening a new store and creating the relevant master record.
Task:For the new store you use the site profile, which you have already maintained inthe Sites lesson with the settings you wanted. Alternatively, you can use the siteprofile P160.
1. Use the site profile P2## or P160 to create the site RF##. Do not enter areference site. Determine the reference site from the site profile.
2. Your site belongs to company code R300, purchasing organization R300 andsales area RG10/R1/R1. The sales area is a combination of sales organization,distribution chain and division.
The address is GM Store Gr##, Long Street 100 in 94124 San Francisco. Thecountry key is US and the language is English. Your new store has a salesarea of 1000 m².
3. From where is the existing data in the new store defaulted?
6. Confirm the individual customer views and take a closer look at them. Oncethe last customer view is displayed, the system automatically goes back to thesite master data.
7. As a rule, your new store is supplied by distribution center R7##. Assign thisdistribution center to your store as a supplying site and save.
You receive a query regarding copying classification data of the store. ChooseNo in response to this query.
8. Once you have saved, the system takes you to the Customizing data that is to becopied. Confirm this by selecting the appropriate button.
Task:For the new store you use the site profile, which you have already maintained inthe Sites lesson with the settings you wanted. Alternatively, you can use the siteprofile P160.
1. Use the site profile P2## or P160 to create the site RF##. Do not enter areference site. Determine the reference site from the site profile.
a) Retail: Master Data→ Site Data→ Site→ Create
Site RF##
Site profile P2##/P160
b) Choose YES to confirm the query
2. Your site belongs to company code R300, purchasing organization R300 andsales area RG10/R1/R1. The sales area is a combination of sales organization,distribution chain and division.
The address is GM Store Gr##, Long Street 100 in 94124 San Francisco. Thecountry key is US and the language is English. Your new store has a salesarea of 1000 m².
a) Go to the Organization/calendar tab
Company code R300
Purch.Organization R300
Sales organization RG10
Distribution channel R1
Division R1
Calendar Factory calendar USstandard
b) Address tab
GM Store Gr##
Long Street 100
Address
94124 San Francisco
Country US
Language English
c) Go to the Layout/blocks tab
Sales Area 1,000 m²
3. From where is the existing data in the new store defaulted?
a) P160 is defaulted from the site profile as the account group for creatingthe customer.
6. Confirm the individual customer views and take a closer look at them. Oncethe last customer view is displayed, the system automatically goes back to thesite master data.
a) Confirm each view by choosing Enter.
7. As a rule, your new store is supplied by distribution center R7##. Assign thisdistribution center to your store as a supplying site and save.
You receive a query regarding copying classification data of the store. ChooseNo in response to this query.
a) In the site master, choose Supplying Sites.
Supplying site R7##
b) Site → Save
8. Once you have saved, the system takes you to the Customizing data that is to becopied. Confirm this by selecting the appropriate button.
Exercise ObjectivesAfter completing this exercise, you will be able to:
• Create a new shop for the department store
Business ExampleIn addition to your stores, you also have large department stores in which you managestock at department level. A new department for children's fashion is opened in adepartment store of this kind.
Task:You create a new shop for an existing department store RD##.
1. Display your department store RD##. You can navigate to the assigned shopsby choosing Display Assortments. Which shops are already assigned to thedepartment store?
2. You now create a new shop RK## Fashion Shop Kids for your departmentstore RD##.
3. The articles from Category R3053 are assigned to the shop. It will be openedthis day next week.
4. The shop is on the first floor of the department store and has a sales area of350m². 4 employees are working in the shop this year. Maintain this informationin the detail data for the shop.
5. Save the shop you have just created.
6. In the background, a site master is created for the shop. You can display this sitemaster by choosing Environment→ Display Plant Master. Organizational datais already assigned to the shop. Where does this data come from?
Task:You create a new shop for an existing department store RD##.
1. Display your department store RD##. You can navigate to the assigned shopsby choosing Display Assortments. Which shops are already assigned to thedepartment store?
a) Retailing→ Master Data→ Site Data→ Department Store/Shop→Display Department Store/Shop
Site RD##
Site, general
b) Display Assortments
The shops RM## and RW## are already assigned.
2. You now create a new shop RK## Fashion Shop Kids for your departmentstore RD##.
a) Retailing→ Master Data→ Site Data→ Department Store/Shop→Create Shops via Department Store
3. The articles from Category R3053 are assigned to the shop. It will be openedthis day next week.
a)
Category R3053
Opening date One week from today
b) Select Set Up Shop Data
4. The shop is on the first floor of the department store and has a sales area of350m². 4 employees are working in the shop this year. Maintain this informationin the detail data for the shop.
a) Choose Det. Maint
Floor 1
Sales area 350 m²
Employee 4
In Current year
Choose [F3] to go back to the shop overview.
5. Save the shop you have just created.
a) Shops→Save (Online)
6. In the background, a site master is created for the shop. You can display this sitemaster by choosing Environment→ Display Plant Master. Organizational datais already assigned to the shop. Where does this data come from?
a) Environment→ Plant Master
Enter
The shop data was copied from the relevant department store.
Lesson OverviewThe layout concept allows you to optimally structure the sales area of your storesin connection with your assortment. At the same time, it forms the basis for usingspace management systems.
Lesson ObjectivesAfter completing this lesson, you will be able to:
• Describe the structure of a layout concept
• Explain the space management function
• Use the layout workbench to maintain layouts
Business ExampleYou want to increase the recognition value of your stores among customers, and soyou define certain sort criteria, according to which the articles should be presented inthe store.
The Layout ConceptYou can assign layouts to the assortments of a store.
Every layout consists of layout modules that represent a fixed area in a store (forexample, a shelf). The layout area represents the spatial assignment of a layoutmodule in the layout.
An article can be assigned from the article maintenance to one or several layoutmodules.
The layout modules can be assigned to one or more layouts.
The layout can determine how the assortment list is sorted.
For the time planning, you can use the layout module versions with various validityperiods. In a layout module, the validity periods for individual versions are unique andcannot overlap. Due to the time-based scheduling of the layout modules in versions,you can, for example, map seasonal changes in a shelf.
Figure 62: Layout Module Versions
The fixture can enhance the layout concept, so that you can arrange your assortmentsaccording to their position. It displays your goods on the sales area provided. Youcan only place a limited number of fixtures on the sales floor provided. Fixturesare assigned to layout module versions.
You can fill a fixture differently depending on the layout module version, and youcan assign it to a layout module version several times. In the system this is mappedwith an assignment number. If you assign each fixture to a layout module version onlyonce, the assignment number is irrelevant.
To allow different capacities to be maintained differently for one and the same fixturefor each layout module, the capacity is specified when a fixture is assigned to thelayout module version. In this case, the system first proposes the default capacity ofthe fixture that is defined in the basic data.
A layout module version is made up of one or more fixtures. The measurements of afixture are irrelevant. Therefore, one or more fixtures are always assigned to a layoutmodule version, regardless of the fixture measurements. The existing information ofthe shelf section is replaced by the fixture ID when articles are assigned to layoutmodule versions. Fixtures are designed to be as flexible as possible, in order to givethe users different ways of managing the shelf.
The assignment of fixtures to the layout module version is only available in the layoutmodule version maintenance, but not in the fixture master.
Hint: If you want to use fixtures in your operational processes, you must setthis in the Customizing. You cannot reverse this selection.
Since stores generally carry thousands of articles, it can take a lot of time and effort toassign layout modules and assortments to the stores and to create the correspondinglisting conditions in the host system. It also takes a lot of time and effort to makechanges to individual store layout modules, but this can be avoided in a lot of cases. Inparticular in the case of stores, the assortments of which are similar (but not identical),you can use layout module variants to greatly simplify these processes.
A layout module variant can be understood as a sort of "exception module". You createa module variant of this kind to include certain articles in a layout module versionor to remove certain articles from a layout module version. Layout module variantscannot be used alone; they are to be used in connection with a layout module version.Therefore, they serve as "modifiers" for the layout modules in question. Normally,module variants are assigned to sites that differ from the standard assortment least.
There is no limit to the number of changes a module variant can contain. The numberof articles that have just been added does not have to correspond to the number ofarticles that have been removed.
Figure 64: Sites: Procedure for Integrated Layout Maintenance
Space management optimizes the placement of an article on a shelf from a businessviewpoint. In this case, key figures are defined, and the position of an article shouldbe optimized according these key figures. This usually concerns sales data andrevenue data, or the gross margin.
If there is not a suitable interface for space management:
• Data is maintained twice
• Space management is not integrated into relevant business processes
• New articles are not included in the planning process
• Optimization results are not used
This interface guarantees regular data interchange and ensures that the spacemanagement program is provided with the most up-to-date data, and that spacemanagement is included in all relevant business processes.
When activities, for which space management is relevant, are carried out in SAPRetail (for example, a new article is included in the assortment and is assigned to ashelf), the interface is triggered - partly by a workflow, or automatically - whichmeans that you are guaranteed that it is immediately taken into account in the spacemanagement program and data inconsistencies are avoided.
The optimized data can then be used again in SAP Retail, for example, the optimizedshelf quantities can be used in listing.
Exercise ObjectivesAfter completing this exercise, you will be able to:
• Create layouts and assign stores
Business ExampleYou created a new store. For the effect of recognition, the articles in this store shouldbe presented in the same sequence they are presented in existing stores.
Task:Since some additional articles are carried in your store, you create a new layout on thebasis of existing data, and you enhance this layout according to your requirements.
1. In the layout module maintenance, create the new layout module ##01 with thedescription Confectionary GR## and the layout module ##02 should havedescription Beverages GR## :
2. You now want to fill your layout module with articles. Call the LayoutWorkbench and display your layout module Confectionery GR## . Whichversions already exist for your module and for how long are these versions valid?
___________________________________________
3. In version 0000, you include some articles from merchandise category RS11310Cookies/Crackers. Select all articles with the unit of measure EA for theassignment.
4. Now copy a separate layout L## as a copy of layout FOOD with the descriptionLayout Group##. Save your layout and confirm the information message.
5. Add the modules ##01 and ##02 to your new layout L##. To do this, use theright side of the screen and choose Layout Modules.
6. Can a layout module appear more than once in a layout?
7. Can an area appear more than once in a layout?
8. What do you do if you want to replace an existing assigned layout module withanother?
9. In the layout maintenance, you realize that a layout module is missing. Wherecan you create this layout module now from the layout maintenance?
10. Assign layout L## to store R1##.
11. The layout module ##01 receives a second version that is valid from the 21stto the 28th of the following month. Copy version 0000 with all the articlesthat belong to it.
Task:Since some additional articles are carried in your store, you create a new layout on thebasis of existing data, and you enhance this layout according to your requirements.
1. In the layout module maintenance, create the new layout module ##01 with thedescription Confectionary GR## and the layout module ##02 should havedescription Beverages GR## :
a) Retailing: Master Data→ Assortment/Listing→ Layout→ LayoutModule Maintenance
b) Table View → Change→ Display
c) Choose New Entries:
Layout Module ##01
Description Confectionery GR##
Layout Module ##02
Description Confectionery GR##
d) Table View → Save
2. You now want to fill your layout module with articles. Call the LayoutWorkbench and display your layout module Confectionery GR## . Whichversions already exist for your module and for how long are these versions valid?
___________________________________________
a) Retailing: Master Data→ Assortment/Listing→ Layout→ LayoutWorkbench
b) Program → Execute
c) Go to the Start: Layout Modules tab
d) Layout module ##01
Version 0000 was automatically created with the validity period fromtoday to December 31, 9999.
3. In version 0000, you include some articles from merchandise category RS11310Cookies/Crackers. Select all articles with the unit of measure EA for theassignment.
a) Expand layout module ##01 and click version 0000.
b) Select Assign Materials
c) Enter merchandise category RS11310 on the By Material tab and chooseF8
d) Select the Unit of Measure column and choose Sort in Ascending Order
e) Select some of the articles with the unit of measure EA
f) Choose Assign
g) Enter
h) Save and exit the Layout Workbench.
4. Now copy a separate layout L## as a copy of layout FOOD with the descriptionLayout Group##. Save your layout and confirm the information message.
a) Retailing: Master Data→ Assortment/Listing→ Layout→ LayoutMaintenance
b) Table View→ Display→ Change
c) Select FOOD and Edit→ Copy with Assignments to layout: L##
d) Table View → Save
e) Confirm the information message by choosing Enter.
5. Add the modules ##01 and ##02 to your new layout L##. To do this, use theright side of the screen and choose Layout Modules.
a) Select L## and choose Update.
b) In the lower half of the screen on the right-hand side, select layout modules##01 and ##02, and choose Assign.
6. Can a layout module appear more than once in a layout?
Answer: Yes, but always with different layout areas.
7. Can an area appear more than once in a layout?
Answer: No, unique numbers are assigned automatically in sequence.
8. What do you do if you want to replace an existing assigned layout module withanother?
Answer: You can choose Replace to replace a layout module with another inone or more layouts. Caution: the result is visible only after you save.
9. In the layout maintenance, you realize that a layout module is missing. Wherecan you create this layout module now from the layout maintenance?
a) Choose Layout Module Maintenance
b) Go to the Start: Layout Modules tab
c) Layout Module ##01
d) Program → Execute
e) Select L##
f) Layout Areas button
g) Choose New Entries
Use consecutive numbers for the areas (for example, Area 1 = Module##01)
10. Assign layout L## to store R1##.
a) In the layout maintenance, choose the Stores tab
b) Select L## and choose Update.
c) Select store R1## and choose Assign.
d) If the following query is displayed: The layout XYZ is assigned to siteF1##. Do you want to replace it? Confirm by choosing Yes.
e) Table View → Save
f) Table View → Exit
11. The layout module ##01 receives a second version that is valid from the 21stto the 28th of the following month. Copy version 0000 with all the articlesthat belong to it.
Unit OverviewThis unit explains the different ways in which articles can be grouped, and presentsthe elements of the classification as the basis of the merchandise category hierarchy. Italso explains how to create merchandise categories and article hierarchies, and thedifferences between them. It names the controls that are linked with the merchandisecategory in the site.
Unit ObjectivesAfter completing this unit, you will be able to:
• Explain the basic terms of the classification
• Describe the class types used in SAP Retail
• Name the controls that are are linked with the merchandise category in the site
• Explain the inventory management on a value-only basis and make the necessarysettings for it
• Describe the objective of the article hierarchy
• Explain the difference to the merchandise category hierarchy
• Describe the structure and the attributes of the article hierarchy
• Create an article hierarchy and assign articles to this hierarchy on atime-dependent basis
Lesson OverviewThis lesson explains how classification elements form the basis of the merchandisecategory hierarchy.
Lesson ObjectivesAfter completing this lesson, you will be able to:
• Explain the basic terms of the classification
• Describe the class types used in SAP Retail
Business ExampleYou include various new merchandise categories in your assortment. Therefore, youneed a new merchandise category hierarchy that you want to include in your existinghierarchy.
Since the merchandise category hierarchy in the SAP system is stored in the classsystem, this topic is now treated as a prerequisite.
A merchandise category hierarchy always consists of a top node and hierarchylevels arranged under this node. Each merchandise category can be assigned to onemerchandise category hierarchy level. There is no limit on the number of hierarchylevels that can be created.
Within a merchandise category hierarchy, the merchandise category of an article isalways the lowest merchandise category hierarchy level. Articles are always assignedto the merchandise categories, and never to the hierarchy levels.
A class (classification system) is a group of similar objects described by their commoncharacteristics. Among other things, objects can be articles, batches and documents.
The class type is a class that has been subdivided according to various objects andorganizational areas. In the classes that belong to a class type, there are only objectsof one type, for example, sites.
The class type controls, among other things, whether multiple assignments of a site orsite groups respectively to other groups are allowed or not.
Any number of hierarchy levels can be created in the classification.
When you set up a class hierarchy, the characteristics of the higher-level classes arealso inherited by the lower classes. Inherited characteristics are flagged with a specialindicator. You can use this indicator to show from which class a characteristic hasbeen inherited.
Characteristic inheritance is the transfer of a characteristic and its values to all thelower classes in the class hierarchy.
A class type is specified for each application, and in the classification system there is acertain article or site grouping behind each class type. This setting specifies whichclass types are actually used, for example, by an application running on site groups.
Example:
The allocation table can use site groups. In this case, these site groups group sites, forwhich supply is to be guaranteed, into one group. The allocation table then uses suchclass types that are assigned to the application “03 Promotion and Allocation Table”.
The site groups of the relevant class types in the classification system must bemaintained as a prerequisite for this.
Basic Principles of Inventory Management on aValue-Only Basis
Figure 71: Inventory Management on a Value-Only Basis
In value-based inventory management, goods movement are not posted on an articlebasis. There is no quantity-based, but only a value-based update which is posted to avalue-only article. To find the value-only article for posting, the system uses valueonly article determination.
A value-only article can be created for each merchandise category. To fine-tuneinventory management on a value-only basis in a merchandise category, several grouparticles can be created for this merchandise category.
A merchandise category hierarchy value-only article can be created for a merchandisecategory hierarchy node. It therefore incorporates all articles of the merchandisecategories under this node. If a store uses cross-merchandise-category inventorymanagement, you must decide on a merchandise category hierarchy level on which theinventory management is to be carried out. Without this limitation, sales values thatdo not make business sense may appear - especially in statistics showing comparisonsbetween sites.
In the store, you use the "IM Profile" in the Valuation/Inventory Management viewof the site master to determine the type of inventory management to be used for thestore in question. Eight profiles are delivered in the standard system; these cannot be
TIRT10_1 Lesson: Correlation between Sites and Merchandise Categories
changed. Within a merchandise category on value-based inventory management, youcan post some articles on an article basis, for example, when these are particularlyvaluable items.
You can define your own profiles by copying one of the existing profiles (using thecustomer namespace). In the copy, you can set the Value-only mat. free indicator. Thisway, every value-only article can be used in any hierarchy level.
Valuation at retail must have been activated in the store.
5. In future, the store R1## will sell articles from the merchandise categoriesRF11111 and RF11112. Assign the two new merchandise categories to the store.
Task 2:You also want to carry the articles in these merchandise categories in some other sites.To reduce the amount of work involved in this, you use the mass maintenance.
1. Choose Retailing: Master Data → Site Data → Environment → Sitesto Merchandise Category and allocate the merchandise categories of themerchandise category hierarchy level RF11100 to the sites R4## and R5##.
5. In future, the store R1## will sell articles from the merchandise categoriesRF11111 and RF11112. Assign the two new merchandise categories to the store.
a) Scroll down the merchandise category overview and enter:
Mer.cat. RF11111
Mer.cat. RF11112
b) Site → Save
Task 2:You also want to carry the articles in these merchandise categories in some other sites.To reduce the amount of work involved in this, you use the mass maintenance.
1. Choose Retailing: Master Data → Site Data → Environment → Sitesto Merchandise Category and allocate the merchandise categories of themerchandise category hierarchy level RF11100 to the sites R4## and R5##.
a) Retailing: Master Data → Site Data→ Environment→ Sites toMerchandise Category
Merchandise category hierarchy RF11100
Program→ Execute
b) Select the merchandise category hierarchy and choose Assignment→Create
c) On the following screen, select the sites R4## and R5##.
Lesson ObjectivesAfter completing this lesson, you will be able to:
• Describe the objective of the article hierarchy
• Explain the difference to the merchandise category hierarchy
• Describe the structure and the attributes of the article hierarchy
• Create an article hierarchy and assign articles to this hierarchy on atime-dependent basis
Business ExampleSince the standard merchandise category hierarchy you use is oriented towards thepurchasing viewpoint, you want to set up an alternative hierarchy. This hierarchy willfocus on the sales viewpoints.
Defining the Article HierarchyThe article hierarchy gives you the option of grouping articles according tocustomer-specific criteria. Thereby, often sales-relevant aspects are taken into accountwhile the merchandise category hierarchy is oriented towards the material attributesof the article.
The article hierarchy is taken into account in planning, in operative processes andin reporting.
You also have the option of linking shops with the article hierarchy in order to displaymerchandise areas in the department store.
If a tree does not yet exist, define a top node (root node) on the Node Assignments tabpage and specify a description for it. A node must have a description. You can assignan unlimited number of nodes to the top node, select descriptions for the nodes anddefine the node characteristics on the Node Attributes tab. On the ArticleAssignmentstab, you can assign articles to every node of the hierarchy. On the Language-SpecificTexts tab, you can maintain language-dependent node descriptions for each node, andon the Free Text tab, texts can be defined for each node.
In the standard, the article hierarchy maintenance offers the following access optionsin the detail view:
Access with Node ID Only:
If you want to navigate to the detail maintenance with a hierarchy node, you can usethe node collective search help to select a node or enter a node ID and a key datedirectly (in the case of a scheduled hierarchy).
Access with Article Only:
If you want to navigate to the detail maintenance with an article of the hierarchy, youcan use the article search help to select an article or enter an article number and a keydate directly (in the case of a scheduled hierarchy). The detail maintenance is alwaysaccessed with the parent node of the articles's directly assigned node.
If the user wants to navigate to the detail maintenance with an article of the hierarchy,and wants to restrict the search for an article (because, for example, he/she alwaysworks with articles of a certain node), this node can be selected as an additionalselection criterion.
By setting the Operative indicator, the Valid From date of the node assignment isset to the current date.
By setting the Deletion Flag indicator, the Valid To date is set to the current date or, inthe case of an OTB-relevant change, it is set to the end date of the complete deliveryperiod. The logically deleted node assignment can be physically deleted on the enddate (for example, by a scheduled deletion report).
You can navigate from the hierarchy maintenance to, for example, the departmentstore/shop maintenance, by choosing Event. You can only navigate to the departmentstore/shop maintenance from a node that is flagged as a Category.
Every article hierarchy is created with the status planned. Time-dependent node andarticle assignments can be defined in this status, but these changes do not affect theoperational assignments. An article hierarchy can be activated and in this way usedoperatively as soon as the planning of the assortment structure is complete.
Once the hierarchy is activated, only limited changes can be made to it. In anunscheduled article hierarchy, only article assignments can be changed. In a scheduledhierarchy, only the future structure and article assignments can be deleted manually.
An article hierarchy, which should no longer be used operatively, can be deactivated.Deactivated article hierarchies cannot be changed or activated.
The article hierarchy is included as a node search help in many operative SAP forRetail processes (including Price Planning Workbench and Purchase Order).
The following Attributes of the hierarchy can be defined for a new article hierarchythat is to be created:
• Distribution Chain (Sales Organization and Distribution Channel)
If a BW update is set, you can only activate an article hierarchy that doesnot depend on the distribution chain or article hierarchies that depend on thedistribution chain and that do not have that same distribution chain.
• BW
This indicator specifies whether the article hierarchy is to be transferred to SAPBI. Specification is optional.
• Multiple Material Assgt
The “Multiple Material Assign.” indicator controls the assignment of an articlewithin an article hierarchy.
• Scheduling
By setting the “Structure Scheduling” indicator, structural changes can bescheduled on a time-basis, in other words, the change becomes valid when the“Valid From” date is reached.
• Language-Specific Hierarchy Descriptions
The article hierarchy automatically has the status planned. To use the hierarchy inoperative processes and extract it to SAP BI, the hierarchy must be activated.
Customizing Settings for the Article HierarchyTo make it easier to navigate in the article hierarchy, you can define a hierarchy levelsemantic (description of the hierarchy level) in Customizing. The levels are definedtop down, in other words, the first level in the hierarchy structure corresponds to thetop node level of the article hierarchy, the second level corresponds to the child nodelevel of the top node, and so on. Furthermore, one level of the article hierarchy can bedefined as the category level in the table.
Defining hierarchy level semantics only makes sense in properly defined hierarchystructures. The node in the hierarchy does not transfer the semantics when nodesare moved between levels. Once the semantics have been defined, they can only bechanged if no article hierarchy exists yet in the system.
In the Customizing table, you can maintain an article hierarchy level as a categorylevel. When a hierarchy node is created (in the hierarchy maintenance or from anexternal system by means of the BAPI interface), the system checks whether it isa node from this category level. Defining nodes or an article hierarchy level asa category means that:
• The category is the root node of the assigned Consumer Decision Tree (CDT).
• The category defines the uppermost assortment-forming node.
• In Category Management, the category is the uppermost relevant node for theupdate to SAP BI.
• If multiple article assignment is used, the category is the node to resolve themultiple assignment. Within the category, the article is always assigned uniquely.
• If multiple article assignment is used, the category is the node to determinethe department store-shop assignment.
• Defining a category level makes it easier to maintain the category if a certainlevel of the article hierarchy and therefore all nodes of this level are defined ascategories. Alternatively, you can manually maintain hierarchy nodes by meansof the hierarchy maintenance, but only if no level is selected as a category. Aplausibility check ensures that only one level can be defined as a category level.
You can only change the category indicator if there is no article hierarchy in the system.
In the dialog screen, you can create an Event pushbutton for every level of the articlehierarchy; this will allow you to navigate to every other program or every othertransaction without making any modifications. At this point, you can determine adescription for the Event pushbutton.
If an internal number range interval is globally defined for the article hierarchy, theinternal number assignment in Customizing can be overridden by an external numberassignment on a level-specific basis.
The following additional Customizing settings can also be checked:
• Change documents
When the change document flag is set, change documents are generated whenarticles and nodes are changed in active article hierarchies. The flag status ischecked when the article hierarchy is activated.
• Check End Nodes
If the Check End Nodes indicator is selected, the system performs a check forvalue-only articles in an active article hierarchy which ensures that the articlesare only attached to end nodes.
• Delete Check
If the Delete Check indicator is activated, node assignments can only be deletedif no nodes or articles are assigned to the node.
• CDT Update
You can use this parameter to control the update of the master data of the articlehierarchy in SAP BW. If the parameter is activated, the master data is updated toSAP BW without scheduling information, provided that the indicator for the BWupdate is also set for the hierarchy. If the parameter is not activated, the masterdata of the article hierarchy (up to ten levels) is updated to SAP BI along withthe scheduling information (validity periods of the scheduled article hierarchies).
• Number Range Interval
You can use this parameter to globally specify an internal or external numberrange interval for the article hierarchy on a customer-specific basis.
• Sorting
You can use this parameter to define the sorting within the tree display. Bydefault, the article hierarchy is sorted by the technical node ID. However, youcan also define sorting by the node description.
Individual tree columns can also be hidden in the article hierarchy dialog maintenance.If a number is assigned internally, you can navigate directly using the description of thearticle hierarchy node by hiding the non-descriptive “Node ID” column, for example.
Exercise ObjectivesAfter completing this exercise, you will be able to:
• Display the active article hierarchy and its levels in SAP Retail
• Display the category level
• Display the main assignment of articles and their time dependency as well asmultiple article assignments
Business ExampleIn addition to the merchandise category hierarchy, you can also create and use anarticle hierarchy in SAP Retail. However, if you want to use the price-shop report inoperative assortment planning and control (OSPS), the department store/shop conceptwith multiple stock placement of articles, and assortment planning in SAP MAP,you must have an active article hierarchy.
Task: Displaying Article HierarchiesYou want to familiarize yourself with the article hierarchy data in SAP Retail.
1. Display the active article hierarchy. Access the article hierarchy node R3 anddisplay all the nodes beneath it. What are the names of the four levels in thearticle hierarchy?
2. Select level Department and take a look at the information in the header data(right-hand side) concerning status, category, and validity period.
3. You are on the Department level, for example, R3051, Fashion Men. What isthe meaning of the symbol with the green plus sign?
4. In the Department level, for example, R3051, Fashion Men, choose levelR305114, Private Label. On the right-hand side, the ArticleAssignments tab pagedisplays all articles that are already assigned to this hierarchy node. You can alsofind out about the main assignment and the validity period of the assignment onthis tab. Take a look at article 700010. Is it marked as main assignment in thishierarchy node? If so, what is the validity period of this assignment?
Then return to the initial screen.
5.
You now want to check whether another article is used several times in the activearticle hierarchy. Re-access the display of the article hierarchy R3.
In the left area of the hierarchy node display, choose the Search Help button.In the new dialog box, enter article number 700014008 for the current dateand the active hierarchy R3. Press Enter to confirm your entries. What resultis displayed?
Caution: Do not choose the green checkmark to confirm.
Task: Displaying Article HierarchiesYou want to familiarize yourself with the article hierarchy data in SAP Retail.
1. Display the active article hierarchy. Access the article hierarchy node R3 anddisplay all the nodes beneath it. What are the names of the four levels in thearticle hierarchy?
a) Master Data→ Article Hierarchy Data→ Display
Make your settings as specified in the task. For example, expand nodeR3051 (Fashion Men) and then node R30511 (Basic). The Hierarchy Levelcolumn displays four levels of the article hierarchy. They are: Enterprise,Department, Theme, and Area.
2. Select level Department and take a look at the information in the header data(right-hand side) concerning status, category, and validity period.
Department level, for example, R3051, Fashion Men
Status
Category
Validity
a)
Field Name or Data Type Values
Status Activated
Category Indicator is set
Validity 15.12.2005 to 31.12.9999
3. You are on the Department level, for example, R3051, Fashion Men. What isthe meaning of the symbol with the green plus sign?
Answer: Articles are already assigned to this hierarchy level.
4. In the Department level, for example, R3051, Fashion Men, choose levelR305114, Private Label. On the right-hand side, the ArticleAssignments tab pagedisplays all articles that are already assigned to this hierarchy node. You can alsofind out about the main assignment and the validity period of the assignment onthis tab. Take a look at article 700010. Is it marked as main assignment in thishierarchy node? If so, what is the validity period of this assignment?
Then return to the initial screen.
Answer: Yes, the article is marked as the main assignment. The assignment isvalid from 05/01/2006 through 31/12/9999.
5.
You now want to check whether another article is used several times in the activearticle hierarchy. Re-access the display of the article hierarchy R3.
In the left area of the hierarchy node display, choose the Search Help button.In the new dialog box, enter article number 700014008 for the current dateand the active hierarchy R3. Press Enter to confirm your entries. What resultis displayed?
Caution: Do not choose the green checkmark to confirm.
a) Article 700014008 is assigned to two nodes. The main assignment is fornode R305243, and the multiple assignment is for node R305413.
Exercise 14: Creating and Extending theArticle Hierarchy
Exercise ObjectivesAfter completing this exercise, you will be able to:
• Describe the structure and the attributes of the article hierarchy
Business ExampleYou want to introduce a new department in your stores and would therefore like totentatively enhance the article hierarchy.
Task: Create Article HierarchyYou extend your existing article hierarchy in an article hierarchy that is alreadyplanned. Once the decision for introducing the new department is final, the changeswill be activated.
1. Create a new distribution-chain-independent article hierarchy ## with thedescription AH## as a copy of the active hierarchy “R3”. Copy the hierarchywith your article assignments. The assignments should be scheduled andmultiple assignment of articles should be enabled.
2. Now change the copied article hierarchy and add a new department and twonew themes in this department. For one theme, you create two new areas thatcorrespond to your brands. Assign the following IDs and descriptions:
The validity starts with the current date and runs indefinitely.
3. Assign the articles R1TA08## and R1TA09## to the lowest node R30##11 –Loveal.
4. Now compare the new planned hierarchy with the active article hierarchy, andsee where the differences are. To do this, simulate the copy of the new node youhave created (R30##) under the highest node of the active article hierarchy.Also compare the assigned articles.
Solution 14: Creating and Extending theArticle Hierarchy
Task: Create Article HierarchyYou extend your existing article hierarchy in an article hierarchy that is alreadyplanned. Once the decision for introducing the new department is final, the changeswill be activated.
1. Create a new distribution-chain-independent article hierarchy ## with thedescription AH## as a copy of the active hierarchy “R3”. Copy the hierarchywith your article assignments. The assignments should be scheduled andmultiple assignment of articles should be enabled.
a) Master Data→ Article Hierarchy Data→ Create
Enter the hierarchy ID ## and leave the fields for the sales organization andthe distribution channel empty. On the With Template subscreen, enter theID of the active article hierarchy R3. Select the With Article Assignmentsindicator along with the indicators:
• Multiple Article Assignment
• Structure Scheduling
The indicator for BI extraction is already set.
On the Language Maintenance subscreen, enter the text AH## in thelanguage EN. Choose Execute . Two messages appear informing you thatthe BI connection is not supported and the article hierarchy cannot be usedin operative processes (this is possible only with active article hierarchies).
2. Now change the copied article hierarchy and add a new department and twonew themes in this department. For one theme, you create two new areas thatcorrespond to your brands. Assign the following IDs and descriptions:
The validity starts with the current date and runs indefinitely.
a) Master Data→ Article Hierarchy Data→ Change
Enter the hierarchy ID ## and choose Execute . The highest node R3 –Enterprise is automatically selected. On the right-hand side, the nodes onthe Node Assignments tab page are maintained using the Create NodeAssignment pushbutton.
Enter the current date in the Valid From field and accept December 12,9999 as the Valid To date. Choose Enter.
Then, on the left-hand side of the screen, select the node that has just beencreated, and create the two themes in the same way. Then, on the left-handside of the screen, select the theme R30##1 and create the two areas.
3. Assign the articles R1TA08## and R1TA09## to the lowest node R30##11 –Loveal.
a) Master Data→ Article Hierarchy Data→ Change
In the article hierarchy tree, select the node R30##11 and maintain thearticle assignment in the right-hand screen area on the Article Assignmentstab page. Choose Create Multiple Assignments to do this.
4. Now compare the new planned hierarchy with the active article hierarchy, andsee where the differences are. To do this, simulate the copy of the new node youhave created (R30##) under the highest node of the active article hierarchy.Also compare the assigned articles.
a) Master Data→ Article Hierarchy Data→ Simulate
In this transaction, enter the article hierarchy ID ## as the source hierarchyalong with the department node you have just created (R30##). The targethierarchy is the active hierarchy R3 and the target node is the highest nodeof this hierarchy, which is also called R3. In the case of a copy, the newnode R30## was assigned as a child node under the node R3.
Set the With Article Assignments indicator and choose Enter.
On the Checks subscreen, set all indicators for the target hierarchy. ChooseExecute. The system then displays which nodes and which articles aremissing in the active hierarchy.
1. How many active article hierarchies can there be in the system?
Answer: B, C
In the system there can be several distribution-chain-dependent articlehierarchies and exactly one distribution-chain-independent article hierarchy.
2. The article hierarchy replaces the merchandise category hierarchy.
Answer: False
The article hierarchy is an optional hierarchy that can be used in SAP Retailin addition to the merchandise category hierarchy. It is taken into account inplanning, operative processes, and reporting. There are functions in SAP Retail(for example, the purchasing list or multiple stock placement in the departmentstore/shop concept) that must have an article hierarchy.
3. The article hierarchy has the following attributes:
Answer: A, C
The article hierarchy can be scheduled and multiple assignments can be activated.
Unit OverviewThis unit explains the term assortment and the concept of assortment management.It also explains how to set up listing procedures and their parameters, as well aspossible combinations.
Unit ObjectivesAfter completing this unit, you will be able to:
• Explain the terms assortment and listing, and their use in SAP Retail
• Name the different ways of managing assortments
• Decide which of these options are suitable for your assortment management
• Name the different listing procedures and describe their options
• Choose a suitable listing procedure to list articles
• Create an assortment list for the listed articles
• Create different assortment list types for an individual cycle control in the system
• Maintain various assortment list profiles for your stores
Lesson ObjectivesAfter completing this lesson, you will be able to:
• Explain the terms assortment and listing, and their use in SAP Retail
• Name the different ways of managing assortments
• Decide which of these options are suitable for your assortment management
Business ExampleBased on criteria that you established previously, you have to decide which articlesyour new store can order.
Definition: AssortmentThe assortment is part of the cross-company merchandise offering that is assigned to aspecified target group for a particular validity period.
An assortment determines if a store, a distribution center or a customer can receivecertain articles at a certain time. The assortment can therefore be used to checkpurchase orders and sales orders.
By assigning articles to assortments, you determine which assortments and, therefore,which articles a store can buy and sell. A site cannot buy or sell articles that arenot included in one of its assortments.
In assortment management, you determine for each site and each article respectivelywhich site may procure an article in which time period. This is also called listing.
The assortment is an SAP Retail object, to which articles are assigned, that is listed,for a particular period of time.
There are two types of assortments:
• Local Assortments
These are termed type A for stores and type B for distribution centers. Whenyou create a site (in other words, a store or distribution center), the systemautomatically creates a local assortment and then assigns it to the site. This localassortment is site-specific and cannot be assigned to another site. Each site hasone local assortment.
• General Assortments
General assortments are type C assortments. They can be assigned to any numberof customers, and every customer can be assigned several general assortments.If you have set the indicator for multiple assignments in Customizing, you canalso use assortments of this type to assign stores and distribution centers.
Assortment ManagementThe assortment management demands of retailers differ greatly. Some requireidentical assortments in all areas, while others demand assortments unique (forexample) to each store. Assortment Management takes account of these differencesand offer a variety of tools to allow any combination of article assortments as wellas the structuring of article assortments for wholesale.
The main tasks of assortment management for retail sites or customers are:
• Determining articles that can be sold at a point of sale in a store
• Adding these articles to the article assortment that is assigned to this store'sdistribution center.
• Determining the distribution centers from which articles are to be distributed,when stores are to be supplied from the warehouse
• Determining the stores in which the article can be sold at the point of sale
• Determining the articles that should be included in the customer assortment
Figure 77: Assortment Management
An assortment is an object that is assigned articles for a particular validity period.This assignment results in listing conditions, which serve as the basis for variousevaluations.
Once an assortment user is assigned to an assortment, articles for the assortment userin question can be used in various business functions. The most important assortmentuser in Retail is the retail site. The assortments of a site include all the articles that arerelevant in its business activities.
Figure 78: Multiple Assignments of Assortments
In Customizing, you can determine whether the multiple assignment (n:m) ofassortments to sites should be possible, or whether assortments should be limited to a1:1 combination of the site and the assortment. If you activate multiple assignment inCustomizing, a site can have different assortments and an assortment can be assignedto different sites.
If a site is created, the system automatically generates a site-specific local assortment.
• In the case of 1:1 assignment, every site has exactly one local assortment. Noother assortment can be assigned to this site.
• In the case of n:m assignment, every site still has a local assortment, but there isno limit to the number of general assortments that can be assigned to this site.
Hint: Converting an existing 1:1 assignment to multiple assignment
In earlier releases of the ERP system, only a 1:1 assignment of assortments tosites was possible. Accordingly, every store could only have one assortment,and a certain assortment could only ever be assigned to one store. In thecurrent release, you can choose between the old 1:1 assignment and the newn:m assignment. This less restrictive assignment means that you have theoption of assigning previously created assortments to an existing store (forexample, when new stores are opened) , and you can more precisely adjustthe goods on offer in a store by assigning one or more general assortmentsto the store. You should only decide on single assignment (1:1) or multipleassignments (n:m) after careful consideration. This is particularly importantbecause changing the assignment method affects all aspects of the listingprocess.
You can find a detailed description of how to convert the 1:1 assignmentto multiple assignments at http://help.sap.com under the menu optionUpgrading to Multiple Assignment of Assortments to Site in the SAP onlinedocumentation for SAP Retail.
Figure 79: Assortment Management with the General Assortment
In many retail companies, the assortments, for example, for a distribution chain orfor a particular region, are generally identical or are only slightly different. For thisreason, you should only define a few general assortments and then assign them to agroup of assortment users.
Depending on how the indicator for the multiple assignment of assortments to sitesis set in Customizing, you have the following options:
• If the indicator is set, stores, distribution centers or customers can be used asassortment users.
• If the indicator is not set, only customers can be used as assortment users.
You can significantly reduce the number of listing condition records on the databaseby using multiple assignments, as a general assortment can sometimes be assigned to alarge number of sites. This is due to the fact that articles are listed for assortments andnot for sites, and therefore, the listing conditions created are valid for all the sites thatare assigned to the assortment. Unlike local assortments - which you cannot changeusing the assortment maintenance and which you therefore cannot assign to othercustomers or sites - in general assortments (assortment category C) you can assign anunlimited number of sites or customers, provided that the multiple assignment (n:massignment) of sites to assortments is activated in Customizing.
Exclusion modules can be used to define exceptions for assortments. This means thatindividual articles are explicitly excluded from being listed in an assortment.
Figure 80: Assortment Management with the Reference Site
In addition to the individual assignment of a general assortment to an assortment user,you also have the option of defining reference sites and assigning them to sites ina 1:m assignment.
The main advantage of the reference site is the one-time assignment of generalassortments. All dependent sites (sites that are assigned to the reference site)automatically adopt all the assortments from the reference site. Via this pointerfunction, changes made to general assortments and changes relating to assignments ofgeneral assortments to the reference site, are automatically conveyed. .
Assortments can only be assigned by means of reference sites if multiple assignment(n:m) is set in Customizing.
If you delete the assignement of a site to a reference site, all the assignments of thereference site's assortments to the site are also deleted.
Figure 81: An Overview of the Assortment Management Options
A site cannot be assigned to an assortment twice (directly and via the reference site).However, the site can be assigned to an assortment directly and to another assortmentvia the reference site.
Figure 83: Assortment Management with the General Assortment (Example)
In assortment management with the general assortment you can map areas (forexample, beverages, confectionary) that reflect (among other things) the departmentsin the stores. For each of these areas, you create one or more general assortmentswith different article assignments.
Then you assign the general assortments to the stores.
Assortment MaintenanceIn the assortment maintenance, you can assign assortment users to general assortments.
There is a user-friendly assortment assignment tool available for assigning assortmentusers to general assortments. This tool allows you to sort the displayed sites, forexample, according by region (as above), or to select for sites that are not yet assignedfor new sites that have been created. The system displays two tree structures: a list ofthe general assortments and their already assigned sites on the left, and a list of sitesfor which assignments are still possible on the right. You drag and drop to assign theselected sites to the desired assortment.
You can also create or change new general assortments in that assortment assignmenttool.
In the assortment maintenance, you assign merchandise categories (and assortmentgrades, if applicable), a layout, or an article hierarchy (with the correspondinghierarchy node) to the assortment. However, it is only possible to assign customersin the 'Create/Change Assortments' transaction, while sites can be assigned in thetransaction for creating or changing the assortment and in the tool for assigningassortments.
Assortment ModulesAn assortment can consist of one or more assortment modules. An assortmentmodule is a group of articles. Examples are Household Cleaner or Ladies' Blouses.
Assortment modules can be created manually, or automatically from the applications(article maintenance, promotion, etc.). To minimize the time and maintenance effort,modules should be created automatically rather than manually.
Figure 85: Maintaining Assortment Modules
A profile module is created automatically during the article maintenance for eachassortment and merchandise category.
You generate shelf modules during the maintenance of layout modules that areassigned to the assortments.
A promotion module contains the articles that are to be dealt with together in apromotion or a theme.
A standard module contains any articles from any merchandise categories. Itcontains the regular long-term rule assortment and is created manually.
The local module is only valid for one site and is therefore the “local assortment”.
You can use an exclusion module to exclude articles from the existing assortment fora certain period of time.
Rack jobber modules are modules for which vendors deliver and present articles instores themselves. A rack jobber module can only be assigned to exactly one vendor.An article that is listed in a rack jobber module cannot be listed in any other module.
In Sales and Distribution, you use assortment modules to maintain a number ofarticles for value contracts. Like standard modules, you can also use these modulesfor assortment functions. You use a different transaction for creating them in Salesand Distribution (WSV2).
Create Assortments for New SitesIf you open new sites and want to create assortments for them in a very short time,you can select one of the following options:
• Setup based on Merchandise Category
• Assortment Copy
• Assign the new site to the general assortments (directly or via a reference site)
However, you must check whether or not the multiple assignment is active. Theassortment copy is only possible if the indicator is not set, while the site can only beassigned to general assortments when multiple assignments is active.
1. Setup based on Merchandise CategoryYou can organize the assortment of the new site by addingarticles from available merchandise categories that are already assigned to theassortment, and executing transaction WSM8 (Reorganize Listing ConditionsBy Merchandise Category).
You can define one or more merchandise categories and add them to the targetassortment. The system checks the existing listing conditions for every combinationof articles and assortments. If an article is not in the target assortment, the articleis listed there.
2. Assortment Copy
If the indicator for the multiple assignment of assortments to sites is not set inCustomizing, you can simply copy the contents (the assigned articles) of a wholeassortment to the local assortment of the new site. If the new assortment is to containthe same articles as an assortment that already exists, you only need to copy the listingconditions from the source assortment.
Figure 87: Assortment Copy
The source assortment can consist of one or more assortment modules. When youcopy an assortment into an other assortment, you also copy these assignments. Ifthe source assortment consists of modules A,B and C, the target assortment has thesame modules. You can execute the copy program for assortments in dialog mode(transaction WSK1) or in the background (transaction WSK3). In both cases, thesystem checks in advance that there are no problems that would prevent listing.
3. Assignment of General Assortments/Reference Site
If the indicator for the multiple assignments of assortments to sites is set inCustomizing, you can assign existing general assortments to the site. This means thatall articles contained in these assortments are also valid for the new site.
Figure 88: Assignment of General Assortments/Reference Site
In addition to the individual assignment of a general assortment to an assortment user,you also have the option of assigning a reference site to the new site. This meansthat the new site has the same assignments to assortments as the reference site. Ifassortments are already assigned to a site, it can only be assigned to a reference siteif the reference site does not have the same assortment assignments. The referencesite is assigned in transaction REFSITE.
Further Maintenance for the Operative Use of New SitesTo operatively use a new store that has just been created, not only must assortments beassigned to this store, but purchasing and logistics data also have to be maintainedfor this store. To proceed with this as efficiently as possible, you can arrange similarstores into groups and maintain data for a whole group at once, instead of for everyindividual store.
Store groupings can be formed on the basis of different criteria, for example accordingto geographical location, size and demographic aspects. Some retail companies usethe same store groupings for all functional areas, while other retail companies usedifferent store groupings for different functional areas. Large and rapidly expandingretail companies may open a new store every second day or even more often. It iscritical that such store openings run smoothly, as this has a significant influence on themark that a retail chain leaves in a new market. Therefore, simple and efficient datamaintenance is very important in this process, both when setting up the master data ofthe new store and when processing the first purchase orders.
You can use store groupings for the maintenance of purchasing data (vendor/sitedata, purchasing info records and purchase conditions), assortment data andlogistics&replenishment data. After you use reference stores to create the masterdata for a new store, and a multiplier for the consumption data, you can carry outthe forecast for the new stores and then start a replenishment run to automaticallygenerate the first store orders.
Reference stores for purchasing and logistics data are also defined and assigned intransaction REFSITE.
Figure 89: Process of a Store Opening
Reference Site for Purchasing Data
You can maintain vendor and site data, purchasing info records and purchasingconditions for a group of sites. Use the reference sites for the purchasing to do this.Such a reference site represents all sites that are assigned to it. The data is only storedat reference site level and is always used if there is no specific corresponding dataat store level.
As an extension of the supply source determination, the vendor and site data canalso be used to limit vendors to only the assigned sites. If a vendor is assigned to areference site, this vendor supplies all sites that are assigned to the reference site.
Reference Site for Logistics and Replenishment Data
You can maintain logistics and replenishment data for all stores (general referencestore) or for all stores of a certain distribution chain (reference store at distributionchain level). You can now also use transaction REFSITE to create a store groupingaccording to customer-specific criteria. Since the replenishment and logistics datausually do not differ in different distribution chains, but rather between groups of sites(that are defined by common attributes such as size, geographical location, and so on),it may be a good idea to maintain this data on the reference site. There is a separatemass maintenance tool that can be used to maintain logistics and replenishmentdata at this level.
The section Create Assortments for New Sites already dealt with the various ways youcan create assortments for new stores.
Subsequent Listing of ArticlesUnder certain circumstances, in the case of goods receipt or a stock transfer, articlesmay be delivered to a site in which they are not listed. A promotion article may belisted in a distribution center, which then delivers the article to stores for which thisarticle is not listed. Or a vendor sends a new article instead of an old article that isno longer carried. The site may accept the new article, even if it is not currentlycontained in the assortment of the site.
For each site you can specify whether the goods receipt is allowed for deliveriesof this kind. If the goods receipt is allowed, the system automatically creates thecorresponding article master data and listing conditions ("Subsequent Listing"), sothat the goods receipt can be posted for this delivery. If subsequent listing is notallowed, the delivery cannot be accepted and must be returned to the sender.
To make subsequent listing possible, you must define under what circumstancessubsequent listing should be carried out, by making the relevant settings in the sitemaster data. You have the following selection options:
• Always
• Never
• On the basis of the decision of the user during the goods receipt
Exercise ObjectivesAfter completing this exercise, you will be able to:
• Evaluate information about assortments
• Assign a reference site to the stores
Business ExampleYou have a lot of stores in your company that plan their assortments in a very similarway. You therefore use reference sites, the assortment of which is assigned to otherstores.
Task 1:In future, the site RS## should be used as a reference site for the assortments of storeR5##.
1. Define RS## as a reference site for assortments and then assign site R5## to thisreference site. Then choose Create Job Without Param. Control, Immediateand Save.
2. Can you also assign a customer master to a reference site?
Task 2:The system contains a general assortment with the key R1KIDSS##. Obtain anoverview of the organization and structure of the assortment.
1. Display the assortment R1KIDSS##. You want to add the new merchandisecategories RF11311 and RF11312 to this assortment. Assign the merchandisecategories RF11311 and RF11312 with the assortment grade 1 to the assortmentR1KIDSS##.
Task 1:In future, the site RS## should be used as a reference site for the assortments of storeR5##.
1. Define RS## as a reference site for assortments and then assign site R5## to thisreference site. Then choose Create Job Without Param. Control, Immediateand Save.
a) Retailing: Master Data→ Assortment/Listing→ Mass Maintenance→ Reference Sites Management
Task 2:The system contains a general assortment with the key R1KIDSS##. Obtain anoverview of the organization and structure of the assortment.
1. Display the assortment R1KIDSS##. You want to add the new merchandisecategories RF11311 and RF11312 to this assortment. Assign the merchandisecategories RF11311 and RF11312 with the assortment grade 1 to the assortmentR1KIDSS##.
a) Retailing: Master Data→ Assortment/Listing→ Assortment→ GeneralAssortment→ Change
Exercise ObjectivesAfter completing this exercise, you will be able to:
• Create general assortments
• Assign merchandise categories and sites to a general assortment
Business ExampleIn a workshop, you and your colleagues have developed a concept for futureassortment planning. You have defined different article areas and want to define twogeneral assortments for these article areas: large (L) and small (S). For each store,you decide, depending on the size of the department, which general assortment isassigned to the individual areas of the store.
Task 1:You start by implementing your concept in the Food area.
1. Create two new assortments FOOD-##-L and FOOD-##-S by using theassortments FOOD-L and FOOD-S as the copy template. Also copy theassortment users, which are already assigned to the templates, to your newassortments.
For your general assortments, assign the descriptions Groceries, LargeAssortment and Groceries, Small Assortment.
2. Which assortment category do the two new assortments have?
Task 2:Once you have defined the assortments with the relevant merchandise categories,assign articles to the assortment. Use the mass maintenance function Setup Based onMerchandise Category to do this.
1. List all articles in merchandise categories RS12110 to RS12320 in theassortments FOOD-##-L and FOOD-##-S with listing procedure B1. Notethat articles are also listed in the supplying sites of the stores. However, localassortments should not be selected for listing.
Task 3:
1. Store R4## will have a large food department. You assign the appropriateassortment. Select the relevant assortment and assign your store R4## to theassortment in the Assortment User tab.
2. Which other assortment users are assigned to your assortment FOOD-##-L?
1. Check which listing conditions were created for your store R4##. To do this,check the tree display of listing conditions in evaluations for the article. Displayall the listing conditions for merchandise category RS12310 for the assortmentFOOD-##-L .
2. Expand the nodes for the other sites of the tree structure in the example of anarticle and compare the listing modules. What do you notice?
Task 1:You start by implementing your concept in the Food area.
1. Create two new assortments FOOD-##-L and FOOD-##-S by using theassortments FOOD-L and FOOD-S as the copy template. Also copy theassortment users, which are already assigned to the templates, to your newassortments.
For your general assortments, assign the descriptions Groceries, LargeAssortment and Groceries, Small Assortment.
a) Retailing: Master Data→ Assortment/Listing→ Assortment→ GeneralAssortment→ Create
Assortment FOOD-##-L
Template FOOD-L
Assortment Name Food, large assortment ##
Assortment FOOD-##-S
Template FOOD-S
Assortment Name Food, small assortment ##
2. Which assortment category do the two new assortments have?
Task 2:Once you have defined the assortments with the relevant merchandise categories,assign articles to the assortment. Use the mass maintenance function Setup Based onMerchandise Category to do this.
1. List all articles in merchandise categories RS12110 to RS12320 in theassortments FOOD-##-L and FOOD-##-S with listing procedure B1. Notethat articles are also listed in the supplying sites of the stores. However, localassortments should not be selected for listing.
a) Retailing: Master Data→ Assortment/Listing→ Assortment→ MassMaintenance→ Assortment→ Setup Based on Merchandise Category
Assortment FOOD-##-L
Merchandise Category RS12110 to RS12320
Listing Procedures B1
b) Select Also List Supplying Site
c) Do not select List Local Assortments Also
Task 3:
1. Store R4## will have a large food department. You assign the appropriateassortment. Select the relevant assortment and assign your store R4## to theassortment in the Assortment User tab.
a) Retailing: Master Data→ Assortment/Listing→ Assortment→ GeneralAssortment→ Change
Assortment FOOD-##-L
b) Go to the Assortment User tab
Assortment User R4##
c) Save and then choose Create Job Without Param.Control, Immediateand then Save.
2. Which other assortment users are assigned to your assortment FOOD-##-L?
a) The stores 1241, 1251 and 1271 are already assigned to the assortment.
Task 4:
1. Check which listing conditions were created for your store R4##. To do this,check the tree display of listing conditions in evaluations for the article. Displayall the listing conditions for merchandise category RS12310 for the assortmentFOOD-##-L .
a) Retailing: Master Data→ Assortment/Listing→ Evaluations→ ForMaterial→ Tree Display of Listing Conditions
b)
Merchandise Category RS12310
Assortment FOOD-##-L
c) Choose Execute
2. Expand the nodes for the other sites of the tree structure in the example of anarticle and compare the listing modules. What do you notice?
Lesson OverviewCreate a listing procedure together with its parameters and other possible combinations
Lesson ObjectivesAfter completing this lesson, you will be able to:
• Name the different listing procedures and describe their options
• Choose a suitable listing procedure to list articles
Business ExampleBased on criteria that you established previously, you have to decide which storescan order which articles.
Basic Listing Procedures
Figure 91: Basic Procedure: Profile Check with Merchandise Category
The basic procedure 'profile check' examines whether the article's merchandisecategory has been assigned to the assortment. Only then the article will be listedfor this assortment.
A listing algorithm describes how the assortment grades are combined in theassortment grade rule. Assortment grade rules describe the relationship between thevarious assortment grades. A quantity of assortment grade rule entries that belongtogether are grouped together in a "Listing Algorithm".
Several listing algorithms can be used for defining the assortment grade rules. Thelisting algorithm that is to be used must then be entered in the listing procedure.
You must maintain assortment grades and listing algorithms to be able to use theassortment grade rules.
Currently, a maximum of 20 assortment grades can be contained in an assignment rule.
If space management is used for listing, then you are guaranteed that there will bespace on the shelf for the new article and that the article will be listed in the storeswhere that shelf can be found (in other words, in the stores to which the relevantlayout module is assigned) and in the distribution centers that deliver to these stores.
A layout module can contain several layout module versions. Layout module versionshave a time reference and contain articles in a shelf. Layout module versions cancontain articles from different merchandise categories. An article can be assigned toseveral layout module versions and can also be positioned in different places on ashelf in the same layout module version. The versions allow you to plan in advance.In a layout module, the validity periods for individual versions are unique and cannotoverlap.
Due to the time-based scheduling for layout modules, you can map seasonal changesin a shelf.
The listing period corresponds to the validity period of the layout module versions towhich the articles are assigned.
There are layout module variants at layout module version level. Layout modulevariants refer to just one layout module version and are used to map regional or evenstore-specific variances in layout modules. The layout module variants have the samevalidity period as their versions.
This procedure checks whether the classifying parameters of the article (characteristicsand values) correspond to those of the assortment.
Only then will the article be listed for this assortment.
Customizing Settings for the Listing Procedure
Figure 97: Listing Procedure - Control
Assortment listing procedure:
If this indicator is set, the listing procedure defined in the assortment must be used.Otherwise, the procedure entered in the dialog is used.
External procedure:
Once an entry is provided, this procedure can be used directly in dialog mode (inassortment maintenance transactions).
Multiple listing:
If an article has already been listed by an assortment module, it can only be listed byother modules too if you set this indicator. This is the standard case (for example, inpromotion listing and standard listing).
Sequence control:
You can use this control to set up various combinations of basic procedures.
The type of check is determined by the rules and links of the basic procedures. Eachbasic procedure must be linked with a function module. The rules are implementedwith user exits and you can replace them with your own rules.
Figure 98: What happens in listing?
Listing updates listing conditions in table WLK1. Among other things, listingconditions contain the validity periods and the module numbers.
Data is also added to MVKE, the table in which the sales data for the article is stored(for example, the distribution chain and the sales unit of measure).
Furthermore, data is stored in table MARC. It contains site-specific article data,such as RP type, planning cycle, planning calendar, and so on. Data records for therespective supplying sites are also written into table MARC alongside the listed sitesof a distribution chain.
Data records are also created by the listing in tables MARD, WLK2, MBEW andMAW1, among others.
The contents of the tables can be checked in transaction se16.
Exercise ObjectivesAfter completing this exercise, you will be able to:
• Define a listing procedure
• List articles in your assortment
Business ExampleYou have to decide which checks should be carried out in future to determine whicharticles are to be listed in the stores. For that purpose you have to know the settingsfor the listing procedures.
Task:You are now going to look at the listing procedure in more detail.
1. To date, listing of articles in your assortments was done via the merchandisecategory check. In Customizing, check the settings for the relevant existingbasic listing procedure.
2. Check the basic procedure, which lists an article in a site if its merchandisecategory and possibly also or its assortment grade are managed there.
Which indicator do you use to control whether or not the assortment gradeshould be checked during the listing?
5. Look at the listing algorithm in more detail. Which assortment levels does theassortment grade rule Extended assortment contain for the listing algorithm 01and in what way are these two connected?
Task:You are now going to look at the listing procedure in more detail.
1. To date, listing of articles in your assortments was done via the merchandisecategory check. In Customizing, check the settings for the relevant existingbasic listing procedure.
a) IMG: Logistics - General→ Assortment→ Assortment→ ListingProcedures
2. Check the basic procedure, which lists an article in a site if its merchandisecategory and possibly also or its assortment grade are managed there.
Which indicator do you use to control whether or not the assortment gradeshould be checked during the listing?
a) IMG: Logistics - General→ Assortment→ Assortment→ ListingAlgorithm
A listing algorithm describes the combination of assortment grades. Thisalso defines which assortment grades are added in a result assortment grade.
5. Look at the listing algorithm in more detail. Which assortment levels does theassortment grade rule Extended assortment contain for the listing algorithm 01and in what way are these two connected?
Lesson OverviewThe following lesson defines the attributes of the assortment list and explains how touse them.
Lesson ObjectivesAfter completing this lesson, you will be able to:
• Create an assortment list for the listed articles
• Create different assortment list types for an individual cycle control in the system
• Maintain various assortment list profiles for your stores
Business ExampleYour stores are regularly informed about changes to existing articles and any newarticles that are being added to your assortment.
Attributes of the Assortment List
Figure 99: Assortment List: Definition
The assortment list provides an overview of the listed assortment. The assortmentlist keeps the store or customer (assortment user) informed of any changes in theassortment (new or discontinued articles, price changes, promotion articles, and so on).
Assortment lists can be configured according to the situation and assortment, andthey can be prepared in different media (in print format, or as an electronic messagesent for a store retailing system).
Assortment List Versions:
• Full Version
This version contains all currently valid articles and article data (from the dateon which the assortment list was created).
• Change Version
This version contains only those articles that have been changed since the lastmessage was created.
• Mixed Version
This version contains the last full version with all the subsequent changes andtherefore shows the current status. This means that a current version can beprinted out at any time.
The version management provides an overview of the versions that have been created,together with their validity periods, and a display (of the assortment list) on the screen.
Figure 100: Contents of the Assortment List
The assortment list contains selected data of the article maintenance, which is relevantfor the assortment user (store or customer).
A source of supply is determined for the articles, so that the store knows with whomto place orders (several vendors are also possible here).
Transactional data could also be read here (promotion, allocation tables, purchaseorders). This data should support the requirements planning of a store, for example.However, note that an evaluation of this data has a significant effect on performance.
Store layout information is available for creating shelf-edge labels, for articleplacement, and for planning by visual inspection of the shelves.
Customizing Settings for the Assortment List
Figure 101: Assortment List Type
For each assortment list type, you can create your own cycle control for thepreparation of assortment lists.
The cycle control includes:
• The lead time
• The cycle for generating change versions
• The number of change versions until a full version of the assortment list is created
One assortment list type can be assigned to every article. An assortment list type mustbe assigned to an article if the article is to appear in the assortment list.
It is recommended to create just a few types assortment list types in the same way asarticle types were created.
The control of the logistic quantities uses the parameters for the assortment list todetermine which transaction data (for example, previous purchase orders) should beread for an assortment list. To be able to do this, you must have already maintainedthe assortment list types.
You specify a logistical unit of measure - for example, a purchase order quantity or aquantity to be allocated - for each of the various assortment list types.
If quantities from previous logistical processes (for example, old purchase orders) areto appear in the assortment list, then the past period limits the number of days forwhich the system searches documents of the relevant article. This prevents the systemfrom reading documents that are too old.
Figure 102: Assortment List Profile
The assortment list profile groups together the control parameters to generateassortment lists. It can be used for several sites. An assortment list profile can beassigned to every site. Without an assortment list profile, no assortment list can begenerated for the site.
The assortment list profile parameters control the generation and the appearance ofassortment lists. With these parameters, you can determine the following:
• Whether IDocs are created for electronic distribution
• Whether the data is stored in the assortment list version management
• How the articles are sorted
• What data is created
• What an assortment list entry should look like
• In the assortment list, whether articles should also appear for the sales period(after the listing period is finished)
It is advisable to maintain just a few assortment list profiles. If sites have the sameassortment list profile, they are processed more quickly when the assortment listsare generated.
Exercise ObjectivesAfter completing this exercise, you will be able to:
• Request assortment lists and set the corresponding control options.
Business ExampleYou want to inform your store about changes in your assortment, and therefore youuse a new assortment list for articles of certain merchandise categories.
Task 1:Generate a new assortment list.
1. Now generate an assortment list of assortment list type S for site R1##, themerchandise categories RS11110 to RS11120 and distribution channel RG10/R1by requesting it manually.
2. Display the assortment list you have created and check the sorting and thevalidity of your assortment list. Where are these settings made?
Task 2:You are now dealing with the settings for the assortment list in Customizing.
1. Display the settings for assortment list type S in Customizing.
3. Which sorting procedure is used in profile RSUP in the assortment list type S?
4. Are layout modules also analyzed in this assortment list setting?
Task 4:Assortment list functions and options
1. How can the SAP Retail assortment list support the MRP controller? Mentionthe assortment list functions and options. Which ones are options important forplanning by visual inspection?
2. Which three prerequisites must be fulfilled so that an article can be included inan assortment list, and so that an assortment list can be created for a store.
1. Now generate an assortment list of assortment list type S for site R1##, themerchandise categories RS11110 to RS11120 and distribution channel RG10/R1by requesting it manually.
a) Retailing: Master Data→ Assortment/Listing→ Assortment List→Generate→ Manual Selection:
Sales Organization RG10
Distribution Channel R1
Customer No. -Plant R1##
Merchandise Category RS11110 to RS11120
Assortment List Type S
Choose Program→ Execute or F8
2. Display the assortment list you have created and check the sorting and thevalidity of your assortment list. Where are these settings made?
a) Retailing: Master Data→ Assortment/Listing→ Assortment List→Display
Sales Organization RG10
Distribution Channel R1
Customer No. -Site R1##
Assortment List Type S
Time Period for Selection Today
Program→ Execute
Sorting is carried out according to vendor and merchandise category,and the validity period is 7 days.
The settings for the validity are made in the assortment list type inCustomizing, where as the settings for sorting can be made in theassortment list profle for the respective assortment list type in Customizing.
1. How can the SAP Retail assortment list support the MRP controller? Mentionthe assortment list functions and options. Which ones are options important forplanning by visual inspection?
a) The assortment list supports the MRP controller in planning by visualinspection insofar as the assortment list can be printed out in paper form,can be sorted according to the layout and can contain the purchase ordervalues.
2. Which three prerequisites must be fulfilled so that an article can be included inan assortment list, and so that an assortment list can be created for a store.
Unit OverviewThis unit explains how you can create an article master record, use the article fastentry, configure the article maintenance for each user, and discontinue articles.
Unit ObjectivesAfter completing this unit, you will be able to:
• Name the various article categories
• Explain the connection between the views of the article maintenance and theorganizational units
• Create an article master record with its views
• Adapt the article master record to suit your individual needs
• Structure the data screens and combine them in screen sequences
• Enter core master data using maintenance groups
• Describe the different ways of copying the article
• Name and configure the maintenance and default options of the PRICAT function
• Edit and post a PRICAT catalog item
• Name the subsequent functions of the article monitor
• Describe the mass maintenance process for master data
• Explain the difference between follow-up and replacement articles and their use
• Name the possible uses of the article list
• Describe the different kinds of article lists
• Create your own article lists
• Select an article for logical and physical discontinuation at the end of its life cycle
• Describe the most important subsequent processing procedures in articlediscontinuation
Lesson OverviewThis lesson describes how you can create an article master record.
Lesson ObjectivesAfter completing this lesson, you will be able to:
• Name the various article categories
• Explain the connection between the views of the article maintenance and theorganizational units
• Create an article master record with its views
Business ExampleYou accept a new article into your assortment and create it manually with thenecessary data. You first determine which settings are already available in the articletype and which fields are already filled due to a reference article.
Single articles are articles that don't have any characteristics in common with otherarticles, for example unscented cleaning agents. Generic articles with variants arearticles that only differ from one another in certain characteristics values, for example,colors or sizes.
Structured articles are made up of several different articles. You must entercomponents and quantities which are used for the components in the structured articles.
The display is a number of single articles or variants of one or more generic articles,which is purchased as an individual article, and therefore has as an article numberand purchasing price, and purchase price conditions. Displays are made up by themanufacturer or vendor.
A sales set is a number of single articles or variants of one or more generic articles. Asales set has an own article number, sales price and sales price conditions.
Purchasing sets are already purchased as sets, are managed as a set right through thesupply chain and are sold as a set or as individual components.
A prepack consists of a number of variants of one or more generic articles, ispurchased as an individual article, and therefore has an article number, a purchaseprice and purchase price conditions. Unlike displays, the components in prepacksmust belong to the same merchandise category as the prepack itself.
The basic data of an article incorporates all client-wide-valid data of an article, whichis valid regardless of the vendors who supply the article or the sites in which the articleis carried. The following belong to the basic data: units of measure, EANs, articlegroupings, control data for internal processes (for example, assortment list types),validity data, different texts, characteristics from merchandise categories and possiblyother freely definable classification data.
In listing, you determine in which sites an article is to be carried and in which periodinbound deliveries can be received and sales are possible.
In the purchasing data, a connection is created between articles andvendors/purchasing organizations.
Sales data controls the sale of an article in a distribution chain. The sales datacontains sales prices and internal control data for shipping.
Important logistics data for the distribution centers and stores is recorded in thelogistics views. It includes requirements planning parameters and forecasting data.
The POS (Point of Sale) data contains POS-specific data in addition to POS receipttexts.
In addition to article-relevant data, an article master record contains data from otherareas that are relevant for the article. These areas are called user departments inthe article master. Unnecessary data storage is reduced when all data is stored in asingle database object.
Possible organizational data entries for the individual views:
• There are no restrictions to basic data.
• Listing can be restricted as soon as you enter the article master: SalesOrganization and Distribution Channel.
• In order to be able to create purchasing data, you must enter a purchasingorganization and a vendor. You have the option of restricting the validity to asite and/or vendor sub-range (VSR).
• Sales data can be maintained for the connection sales organization - distributionchannel. Additionally, sales data can be maintained at site level or price listlevel (wholesale customers).
• The logistics data can be maintained for one distribution center or one store,or for the reference sites. If it is maintained for the reference sites, thenit is automatically maintained for all sites. Reference sites are defined inCustomizing. There is a reference distribution center and a client-wide validreference store or reference stores at distribution chain level. Don't specify oneparticular site or distribution center in the initial screen; instead always maintainthe data of the reference site.
• You must enter at least one distribution chain to ensure the POS data is complete.
The data that is maintained in a view can be valid for various organizational levels.
Due to the large amount of data in the article maintenance, templates are availablewhen you create article master records.
Reference articles provide default values when you create and enhance article data.All data that has been created for the reference articles is made available, exceptEAN/UPCs, consumption values, forecast values, and prices and conditions forPurchasing and Sales.
The merchandise category reference article provides a reference for all articlescreated in that merchandise category. The merchandise category reference article isautomatically determined from the merchandise category when the new article iscreated. You can overwrite this merchandise category reference article by specificallyentering another article as a reference.
Articles with similar attributes are divided into groups and assigned to an article type.Every article master record has to be assigned to just one article type.
Article types can be defined in Customizing. Certain article types common to retailare delivered in the standard system, but these can be changed or deleted at any time,or article types can be added.
Usually the trading goods (HAWA) article type is used for articles from the non-foodand hardware area.
Figure 110: Article Types - Control Options
The article type determines:
• Which user areas (user departments) can be entered for articles of this article type
• What type of procurement is allowed
• What type of inventory management is planned for the article(quantity/value-update)
• Which stock and consumption accounts are assigned
• Whether the article number is assigned internally or externally
• Which fields are available on a screen and how they are to be populated
• Valuation details: group of valuation classes in the account category reference;price control (moving average price, standard price)
You have to provide a unique number every time you create an article master record.There are two types of number assignment:
• Internal Number Assignment:
In this case, the SAP system assigns the numbers. The number that has beenassigned can be found within the permitted number range interval.
• External Number Assignment:
In this case, the user assigns the numbers. The intervals for external the numberassignment check can be determined numerically and alphanumerically.
You determine the number range intervals for groups. You assign one or more articletypes to each group.
If you assign an article type to a group then you can therewith determine an internaland an external number range interval for each article type.
If you group together several article types into one group, then you can also determinean internal and an external number range interval. This means that several articletypes can have the same number range intervals.
Another article type attribute that you can define determines whether the numberrange is to be checked when numbers are assigned externally.
Different units of measure can be used when dealing with an article. You can create aEuropean Article Number (EAN) for each existing unit of measure of an article (orderunit, delivery unit, and so on). An EAN uniquely identifies an article in a specific unitof measure. It is also possible to assign several EANs to one unit of measure. If youdo this, you must define one EAN as the main EAN (for example, several vendorswith vendor EANs for an article and a separate internal EAN).
The EAN category controls the assignment and checking of an EAN entered in thesystem.
• The next free number is determined from the number range (in case of internalassignment) and a number keyed in is checked against the number range whenan external number range was specified in the EAN category.
• The check-digit algorithm issues the check-digit in an internally assigned numberand checks the check-digit when an EAN is keyed in.
To assign perishables- and weight-EANs you must enter your own number rangesin a special number range object (EANGEWICHT) and choose the relevant checkalgorithms.
Exercise ObjectivesAfter completing this exercise, you will be able to:
• Create a single article for an existing merchandise category
Business ExampleYou want to create a new article in SAP Retail. Since you already know all of theimportant data for this article, create it in full. Use the merchandise category referencearticle as a template.
Task 1: Create Article (Initial Screen)Create an article master record for your new article.
1. The article number A1## should be assigned to the article. You create thearticle with the article type HAWA in the merchandise category RS11310(Cookies/Crackers) with the article category 00 Single Article.
2. You want to maintain the views Purchasing, Sales, Logistics: DistributionCenter, Logistics: Stores, and POS for this article. To make the task easier, youwant to retain this view selection permanently.
3. You usually work in the Basic Data and Listing views with the distribution chainRG10/R1. The article is also delivered by vendor RS1103 and the responsiblepurchasing organization is R300. To make the task easier, you want to retainthese validity areas permanently.
Task 2: Create Basic Data View in Article Master RecordOnce you have made your settings for the validity areas and views, confirm yourentries by choosing Enter and navigate to the basic data view of the article.
1. The article has the description: Chocolate cookies 250g packet. Enter this asthe article short text.
2. The base unit of measure for the article is each (piece). The cookies are alwaysordered in cartons containing 24 pieces. Assign the alternative unit of measureCAR to the article with the corresponding conversion to pieces, and define thisunit as the order unit (OUn).
3. In the base unit of measure EA, the cookies have a gross weight of 260 gramsand a net weight of 250 grams.
You want to create measurements for packing in cartons. The carton is 60cmlong, 40cm wide, and 30cm high.
Alternatively, you can purchase the cookies by the pallet. Create the appropriatealternative unit of measure for this, so that each pallet contains 432 pieces(each) of cookies.
4. You manage your own instore EANs with reference to the base unit EA. Let thesystem issue an internal EAN. Select the EAN category provided for this unit.
Task 3: Create Listing View in Article Master RecordYou now switch to the article listing view. Here, you determine to which assortmentsthe article should be assigned.
1. Your article is going to be included in all the general assortments of thedistribution chain RG10/R1, but only if the merchandise category with theassortment grade of the article is also assigned to the corresponding assortment.Which listing procedure do you choose for distribution centers and for stores?
2. You copy the proposed listing period for the stores and distribution centers.However, the article is sold in stores from the 1st of the following month untilDecember 31, 9999.
3. As you have recently decided to use the general assortments for your stores, toreduce the number of listing conditions, you do not include local assortmentsin your article listings. Which setting do you have to consider in the listingview in this case?
4. You also want to decide manually for which assortments the article will belisted. Therefore you display all assortments that are proposed for listing. Whichsettings do you have to make?
Now execute listing.
Task 4: Create Purchasing View in Article Master RecordNow enter the purchasing data of the article.
1. Go to the Purchasing view and maintain the vendor-relevant data.
2. Which unit of measure is defaulted as the order unit of measure?
3. You want to be able to order the chocolate cookies in cartons and in pallets.Which indicator should you choose?
4. Which purchasing group is set by default?
5. Enter the following, vendor-relevant data:
The article belongs to subrange 000001 (Cookies) of vendor RS1103. Theminimum order quantity is 5 cartons. The planned delivery time is 3 days. Youhave negotiated a net purchasing price of USD 0.75 per item with your vendor.
Task 5: Create Sales View in Article Master RecordYou now maintain the data for the sale of the article.
1. Go to the sales view.
2. Which purchasing price does the system default as the basis for calculatingthe sales price?
Confirm the error message: No reference store exists for distribution chainRG10/R1 and delete the entries in the fields Sales Org. and Distr. Chl in theValidity Area dialog box.
4. The source of supply for the article for stores should always be the distributioncenter, that is, you require stock transport orders. Which key controls this?
Task 7: Create POS View in Article Master RecordFinally, now maintain some data especially relevant for the POS management.Navigate to the POS view for stores.
1. At the cash register, the receipt should read: Chocolate cookies, 250g. Enter thistext in your language for the unit of measure EA. Then save the article.
Task 8: Create Additional Data in Article Master RecordAfter you have created your article, you want to make some changes to your articledata.
1. Branch to the change mode for your A1## article.
2. In the basic data, create the manufacturer EAN for the unit of measure carton.The manufacturer EAN is a 12-digit number with a check digit in accordancewith the standard EAN check digit algorithm (a total of 13 digits). Select theEAN category provided for this, enter the first 12 digits of the manufacturerEAN (3000000000##) and let the system default the check digit automatically.
3. Where can you enter more EANs for the unit of measure EA? What do you haveto look out for when allocating several EANs for the same unit of measure?
4. In the additional data, choose the Layout Modules tab page and check whetheryour A1## article is already assigned to a layout module. Then assign layoutmodule 4 (General module) to the article.
5. Which texts can you maintain for this article using the additional data?
Task 1: Create Article (Initial Screen)Create an article master record for your new article.
1. The article number A1## should be assigned to the article. You create thearticle with the article type HAWA in the merchandise category RS11310(Cookies/Crackers) with the article category 00 Single Article.
a) Master Data→ Article Data → Article→ Create
Field Name or Data Type Values
Article A1##
Article Type HAWA Trading goods (excl.perishables)
Mdse Catgry RS11310
Artl category 00 Single article
2. You want to maintain the views Purchasing, Sales, Logistics: DistributionCenter, Logistics: Stores, and POS for this article. To make the task easier, youwant to retain this view selection permanently.
a) Select the required views and choose Default Views.
3. You usually work in the Basic Data and Listing views with the distribution chainRG10/R1. The article is also delivered by vendor RS1103 and the responsiblepurchasing organization is R300. To make the task easier, you want to retainthese validity areas permanently.
a)
Field Name or Data Type Values
Purchasing Org. R300
Vendor RS1103
Sales Organization RG10
Distribution Channel R1
Select the required validity areas and choose Default Areas of Validity.
Task 2: Create Basic Data View in Article Master RecordOnce you have made your settings for the validity areas and views, confirm yourentries by choosing Enter and navigate to the basic data view of the article.
1. The article has the description: Chocolate cookies 250g packet. Enter this asthe article short text.
a) Enter the data to the right of article number A1## as specified in the task.
2. The base unit of measure for the article is each (piece). The cookies are alwaysordered in cartons containing 24 pieces. Assign the alternative unit of measureCAR to the article with the corresponding conversion to pieces, and define thisunit as the order unit (OUn).
a) In the Units of Measure/EANs/Dimensions screen area, make your settingsas specified in the task.
To indicate cartons as an order unit, set the indicator for OUn to CAR.
3. In the base unit of measure EA, the cookies have a gross weight of 260 gramsand a net weight of 250 grams.
You want to create measurements for packing in cartons. The carton is 60cmlong, 40cm wide, and 30cm high.
Alternatively, you can purchase the cookies by the pallet. Create the appropriatealternative unit of measure for this, so that each pallet contains 432 pieces(each) of cookies.
a) In the Units of Measure/EANs/Dimensions screen area, scroll to the rightand enter the following data in the base unit of measure EA row:
Field Name or Data Type Values
Gross Weight 260
Net Weight 250
Weight Unit G
b) In the alternative unit of measure CAR row, enter:
Field Name or Data Type Values
Length 60
Width 40
Height 30
Unit of Dimension CM
c) In the alternative unit of measure PAL row, enter:
Field Name or Data Type Values
AUoM PAL
Number 432 40
LUn EA
4. You manage your own instore EANs with reference to the base unit EA. Let thesystem issue an internal EAN. Select the EAN category provided for this unit.
a) For the base unit of measure EA, select IE in the Ct column. Then chooseCheck Screen Data and confirm the warning message.
Task 3: Create Listing View in Article Master RecordYou now switch to the article listing view. Here, you determine to which assortmentsthe article should be assigned.
1. Your article is going to be included in all the general assortments of thedistribution chain RG10/R1, but only if the merchandise category with theassortment grade of the article is also assigned to the corresponding assortment.Which listing procedure do you choose for distribution centers and for stores?
Answer: You choose listing procedure B1 for both stores and distributioncenters.
2. You copy the proposed listing period for the stores and distribution centers.However, the article is sold in stores from the 1st of the following month untilDecember 31, 9999.
a) Choose the Listing tab page. Enter B1 as the listing procedure and thesales period as specified in the task.
3. As you have recently decided to use the general assortments for your stores, toreduce the number of listing conditions, you do not include local assortmentsin your article listings. Which setting do you have to consider in the listingview in this case?
Answer: The Local Assortments Also indicator must not be set.
4. You also want to decide manually for which assortments the article will belisted. Therefore you display all assortments that are proposed for listing. Whichsettings do you have to make?
Now execute listing.
Answer: Set the Maint. Assorts Man. indicator and then choose Execute Listing.View the listing result and copy all proposed assortments by choosing Copy.
Task 4: Create Purchasing View in Article Master RecordNow enter the purchasing data of the article.
1. Go to the Purchasing view and maintain the vendor-relevant data.
a) Choose the Purchasing tab page.
2. Which unit of measure is defaulted as the order unit of measure?
Answer: Carton (CAR) is proposed as the order unit.
3. You want to be able to order the chocolate cookies in cartons and in pallets.Which indicator should you choose?
Answer: Set the Var. Order Unit indicator to 1.
4. Which purchasing group is set by default?
Answer: The purchasing group is R30.
5. Enter the following, vendor-relevant data:
The article belongs to subrange 000001 (Cookies) of vendor RS1103. Theminimum order quantity is 5 cartons. The planned delivery time is 3 days. Youhave negotiated a net purchasing price of USD 0.75 per item with your vendor.
a)
Field Name or Data Type Values
Vendor Subrange 000001
Min. qty 5
Planned delivery time 3
Net Price 0.75 USD per EA
Task 5: Create Sales View in Article Master RecordYou now maintain the data for the sale of the article.
1. Go to the sales view.
a) Choose the Sales tab page.
2. Which purchasing price does the system default as the basis for calculatingthe sales price?
Which unit of measure is the purchasing price based on?
Answer: The net/net purchasing price is USD 0.75 and refers to the base unit EA.
3. The system sets a default sales price for the article. What is it?
What is the markup with which the system calculates this price?
You change the final price of the article to USD 0.89 per item. What is themarkup calculated by the system?
You want to use this as the sales price. Ensure the indicator for saving thecalculated prices has been set.
Answer: The proposed final price is 0.99 USD/EA.
The price is calculated with a planned markup of 32%.
If you change the sales price to USD 0.89, the system calculates a new markupof 18.667%.
Since you want to use the new price of USD 0.89 per item, set the SaveCalculated Price indicator.
Task 6: Create Logistics View in Article Master RecordYou now enter the logistics data for the article.
1. Navigate to the logistics view for distribution centers.
Which RP type is used to plan the article for distribution centers?
Answer: Choose the Logistics: DC tab page. In the RP Parameters screen area,the RP Type is set to R1. This means that the article is ordered via time-phasedplanning.
2. The article is ordered every Wednesday from the vendor for the distributioncenters. Which key determines this setting?
Answer: You define the planning cycle (Stock Planner/Replenishment Datascreen area) using a defined planning calendar. For this article, the planningcalendar with the key P02 was set.
3. Navigate to the logistics view for stores.
Confirm the error message: No reference store exists for distribution chainRG10/R1 and delete the entries in the fields Sales Org. and Distr. Chl in theValidity Area dialog box.
4. The source of supply for the article for stores should always be the distributioncenter, that is, you require stock transport orders. Which key controls this?
Answer: In the Stock Planner/Replenishment Data screen area, enter 2 (stocktransfer) in the Supply Source field.
Task 7: Create POS View in Article Master RecordFinally, now maintain some data especially relevant for the POS management.Navigate to the POS view for stores.
1. At the cash register, the receipt should read: Chocolate cookies, 250g. Enter thistext in your language for the unit of measure EA. Then save the article.
a) Choose the POS tab page and make the settings as specified in the task.
Save your article.
Task 8: Create Additional Data in Article Master RecordAfter you have created your article, you want to make some changes to your articledata.
1. Branch to the change mode for your A1## article.
a) Master Data→ Article Data→ Article→ Change
Enter your article number A1## and confirm by choosing Enter.
2. In the basic data, create the manufacturer EAN for the unit of measure carton.The manufacturer EAN is a 12-digit number with a check digit in accordancewith the standard EAN check digit algorithm (a total of 13 digits). Select theEAN category provided for this, enter the first 12 digits of the manufacturerEAN (3000000000##) and let the system default the check digit automatically.
a) In the Units of Measure/EANs/Dimensions screen area, enter 3000000000##for the unit of measure Carton in the EAN/UPC column. In the Ct column,select HE and set the AP indicator (automatic check digit determination).Then check the screen data.
3. Where can you enter more EANs for the unit of measure EA? What do you haveto look out for when allocating several EANs for the same unit of measure?
Answer: Choose Additional Data and select the Additional EANs tab page. OneEAN for each unit of measure must be selected as the main EAN (indicator: M).
4. In the additional data, choose the Layout Modules tab page and check whetheryour A1## article is already assigned to a layout module. Then assign layoutmodule 4 (General module) to the article.
a) Make your settings as specified in the task.
5. Which texts can you maintain for this article using the additional data?
Go back to the Basic data and save your article.
Answer: Short text, Basic data text, Sales text, Inspection text
Exercise ObjectivesAfter completing this exercise, you will be able to:
• Specify internal number range intervals for EANs and their attributes
• Use a new EAN in the article master
Business ExampleIn future, you would also like to manage self-defined EANs for your article in thesystem.
Task 1: Create an EAN Category with Number RangeIntervalDefine a new EAN category that is to use its own number range.
1. Firstly, you need to create a number range for the EANs you define yourself.As the interval number, select 20+ <your group number ##>; the intervalareas are defined as follows:
The inserted number range interval must be assigned internally.
Hint: When you save, a transport system message appears that you canignore by choosing Enter.
What does the current number field mean? Use the F1 Help to make a note ofthe answer.
Hint: When you save, a transport system message appears; chooseEnter to confirm it.
2. You now wish to create your own EAN category. The EAN category numbercorresponds to your group number and your EAN category has the descriptionTest EAN Group##.
The number range object for your EAN should be EUROPARTNR and youshould use the number range that you just created as the internal number range.Enter the standard EAN check digit algorithm as the check digit algorithm.
Task 2: Assign EAN CategoryYou now want to use the EAN category you just created to assign your own EANs toyour articles.
1. Assign the new unit of measure PAC to your A1## article with the conversionrate of 1 PAC = 72 EA. Select this as the delivery unit.
2. Assign the EAN category that you created to the new unit of measure. Onlycheck the EAN that is set by default. Do not save the change to your article.
Task 1: Create an EAN Category with Number RangeIntervalDefine a new EAN category that is to use its own number range.
1. Firstly, you need to create a number range for the EANs you define yourself.As the interval number, select 20+ <your group number ##>; the intervalareas are defined as follows:
Group 01 10000101 - 10000200
Group 02 10000201 - 10000300
Group 03 10000301 - 10000400
Group 04 10000401 - 10000500
Group 05 10000501 - 10000600
Group 06 10000601 - 10000700
Group 07 10000701 - 10000800
Group 08 10000801 - 10000900
Group 09 10000901 - 10001000
Group 10 10001001 - 10001100
Group 11 10001101 - 10001200
Group 12 10001201 - 10001300
Group 13 10001301 - 10001400
Group 14 10001401 - 10001500
Group 15 10001501 - 10001600
Group 16 10001601 - 10001700
Group 17 10001701 - 10001800
Group 18 10001801 - 10001900
The inserted number range interval must be assigned internally.
Hint: When you save, a transport system message appears that you canignore by choosing Enter.
What does the current number field mean? Use the F1 Help to make a note ofthe answer.
Hint: When you save, a transport system message appears; chooseEnter to confirm it.
a) IMG: Logistics - General→ Material Master→ �Settings for Key Fields→ �International Article Numbers (EANs)→ �Define Number Ranges forEANs/UPCs
Choose Change Intervals and then Insert Interval. Create your new intervalas specified in the task. Since you require an internal number assignment,do not select the Ext field.
b) The Current Number field contains the last number assigned for internalnumber range intervals.
c) Save the number range you have just created.
2. You now wish to create your own EAN category. The EAN category numbercorresponds to your group number and your EAN category has the descriptionTest EAN Group##.
The number range object for your EAN should be EUROPARTNR and youshould use the number range that you just created as the internal number range.Enter the standard EAN check digit algorithm as the check digit algorithm.
a) IMG: Logistics - General→ Material Master→ �Settings for Key Fields→�International Article Numbers (EANs)→ �Define Attributes of EANs/UPCs
b) Choose New Entries and enter the data as specified in the task:
Task 2: Assign EAN CategoryYou now want to use the EAN category you just created to assign your own EANs toyour articles.
1. Assign the new unit of measure PAC to your A1## article with the conversionrate of 1 PAC = 72 EA. Select this as the delivery unit.
a) Master Data→ Article Data→ Article→ Change
Select the Basic Data view.
b) In the Units of Measure/EANs/Dimensions screen area, configure yoursettings as specified in the task.
2. Assign the EAN category that you created to the new unit of measure. Onlycheck the EAN that is set by default. Do not save the change to your article.
a) Select the row with the alternative unit of measure PAC and in the Ct field,enter the EAN category ##. Confirm your entries with Enter.
Check that the number range interval that you created is now taken intoaccount and that the check digit is correct.
Lesson OverviewIn this lesson, you learn how to configure data screens and screen sequences ofthe article master. You also learn how to configure the article master accordingto user-specific requirements.
Lesson ObjectivesAfter completing this lesson, you will be able to:
• Adapt the article master record to suit your individual needs
• Structure the data screens and combine them in screen sequences
Business ExampleTo create articles in your company, you determine how the article master is to bedisplayed. You therefore discuss which data screens, subscreens, and fields arerelevant or irrelevant for your purposes. You also check the possibility of configuringthe article master so that it is dependent on data such as user, article type, ortransaction code.
In the article maintenance, you can maintain all views relevant to the articlemaintenance in the correct sequence.
The data screens that correspond to the individual views are also sub-divided intoseveral subscreens.
The subscreens group together several data fields according to different datamaintenance aspects.
Figure 114: Article Master - Screen Sequence
User-specific dialogs for article master maintenance allow you to save data fromvarious views in a compressed format on as few screens as possible. They also allowyou to integrate your own fields, create user-specific dialogs, and transfer data morequickly.
The maintenance dialog for the article master is controlled by a screen sequencethat contains a selection of data screens.
The logical screen contains the field groups required for the dialog (subscreen).
Influencing Factors: Here you can determine for example which standard screensequence is called for certain transactions or users.
When creating your own data screens, you should use the available Retail subscreens.Own subscreens are necessary if alternative field groupings or new fields are required.
To create your own subscreens, copy the standard program into your own functiongroup (see IMG instructions). Then create the desired subscreens in the new functiongroup.
You can only integrate fields from your own tables and subscreen containers into theexisting program by using modifying functions.
For more specific details on how to create a customized article master, see Notes38229 and 44410 on SAP Service Marketplace.
Figure 116: Assign Screen Sequences to the Influencing Factors
You can assign a screen sequence to a combination of one or more transactions, users,article types or industries. The screen sequence then appears automatically if the usersin question select this transaction, article type or industry.
For this, you have to create groups of transactions, users, article types or industries, byassigning them to a transaction, user, article type or industry reference according toyour requirements. The screen reference number can be freely assigned. To add newusers when assigning users to a user screen reference, choose New Entries.
• Screen reference “Transaction”:
This controls which screens are displayed, and in what sequence, during thearticle master record maintenance based on the transaction code. The values thatare valid for this screen reference are fixed and cannot be set by the user.
• Screen reference “User”:
This controls which screens are displayed, and in what sequence, when articlemaster records are maintained based on the user. Users are automatically dividedinto groups when the same screen reference is assigned.
• Screen reference “Article Type”:
This controls which screens are displayed, and in what sequence, when articlemaster records are maintained based on the article type.
• Screen reference “Industry”:
This controls which screens are displayed, and in what sequence, when articlemaster records are maintained based on the industry. For SAP Retail, you select“*” as the industry.
To determine whether a field is suppressed or displayed in the article maintenance,or whether entering a field value is mandatory or optional (in other words, whetherit is a required entry or an optional entry field), the field must be assigned to a fieldselection group. You can assign each field to only one field selection group.
You can maintain several field references for each field selection group. For eachcombination of field reference and field selection group, you specify whether thesefields are to be hidden, displayed only, or filled/able to be filled.
You can then assign these field references to the article types in article typemaintenance. Each article type is then assigned exactly one field reference.
In the detail view of the Customizing transaction Assign Fields to Field SelectionGroups, you control the reference behavior of the individual fields.
When you create an article master record with reference, the field content is copiedfrom the reference article as default value, but only in case the Propose field cont.indicator is set.
By means of the field attributes, you can determine whether changes to the referenceshould affect master records that were created with this reference. If you have set thePropose field cont. indicator, so that the field content is proposed from the reference,you can also set the Copy field content indicator. The field content is then also copiedas follows every time the reference is changed:
• From the generic article to the variants
• From the reference site to the dependent sites
• From client level to the lower validity areas of the article
If you have set the Propose field cont. indicator, by setting the Incl.initial valuesindicator, you can determine that the field content will also be copied when thereference field contains its initial value.
To restrict the article types for which the field content is proposed, set the Restrict artlcat. field accordingly.
In the general control for Retail master data, you define parameters that are importantfor different subfunctions in SAP Retail on client level.
Reference sites provide specific logistics data when creating or changing articledata. This logistical data relates, for example, to data for requirements planning,forecasting and warehouse management. This minimizes the time and effort involvedin entering data. Changes to the reference articles can automatically be integratedinto the relevant data records.
Here you enter a distribution center that is used as a template for copying article datarelevant for distribution centers, and you also enter a store that is used as a templatefor copy functions of article data relevant for stores.
You can use the setting Distribution Chain Control to maintain a reference site foreach distribution chain. You can only create reference sites for store distributionchains. Furthermore, none of the stores entered here can be the same as the referencestore in the general Retail Master Data control.
Exercise ObjectivesAfter completing this exercise, you will be able to:
• Make and define user-specific article master settings (swapping and hidingsubscreens)
• Assign these article master settings to a user
Business ExampleYou want to reduce your employees’ workload as far as possible and therefore, in thearticle master, you want only the fields that they need to process to be displayed in theright sequence. Also, you want to change the sequence in which the article masterviews appear.
Task 1: Configure the Article Master ViewsYou want to configure a customized article master view for your employees.
1. In the article maintenance, display the basic data for article R1TA12##. Use thetechnical help of the screen data to make a note of the program name and thescreen numbers of the “General Data” and “Validities” screen modules.
Program name: ______________________________________________
Screen Number “General Data”: _____________________________________
Screen Number “Validities”:__________________________________________
2. You want to configure your own article master view for your employees. Openthe Implementation Guide in a new session and choose:
Logistics – General→ Material Master→ Configuring the Material Master→Define Structure of Data Screens for Each Screen Sequence.
Create your own screen sequence on the basis of the “Retail Fashion Tab Pages”screen sequence. Your screen sequence receives the number Z<B>, where <B>is the letter that belongs to your group number (see the conversion table); forexample, Group 06 copies screen sequence 33 to ZI. Choose the description“Retail Standard Gr##”.
Copy the screen sequence with all dependent entries.
8. Hide the “Care Code” subscreen in the Basic Data view and have a look atthe new data screen.
Task 2: Assign Screen Reference to UserYou now wish to assign the changed article master to your user in the system:
1. Enter a 2-character screen reference for your user (for example, your initials)under Assign Screen Sequences to User/Article Type/Transaction/Industry Sectoron the Screen Reference level.
2. Now select dialog structure Screen sequence control and add a new entry byassigning your screen reference (see 1.) and the number of your screen sequence(see the previous exercise under 2.) to transaction 03. Select “*” as the screenreference of the article type and the industry sector.
3. You now want to change the sequence of the main screens so that the Logistics:Store and the Logistics: Distribution Center views appear immediately afterthe Basic Data view.
Save the entries you have made.
4. Now check your settings in the article maintenance.
Firstly, check that the defaulted views appear in the sequence that has just beenset. Afterwards, go to the Basic Data view for article R1TA12## and check thatthe Validities data screen now appears before the General Data screen and thatthe Care Code data screen is suppressed.
5. Please delete the user link to your own screen sequence.
Task 1: Configure the Article Master ViewsYou want to configure a customized article master view for your employees.
1. In the article maintenance, display the basic data for article R1TA12##. Use thetechnical help of the screen data to make a note of the program name and thescreen numbers of the “General Data” and “Validities” screen modules.
Program name: ______________________________________________
Screen Number “General Data”: _____________________________________
Screen Number “Validities”:__________________________________________
a) Master Data→ Article Data→ Article→ Display
b) Select the Basic Data view.
c) Click on a field in the relevant screen module (“General Data” or“Validities”) in the Basic data view of the article, and choose F1 Help
d) Choose Technical Information:
Program Name: SAPLMGD2
Screen Number “General Data”: 2002
Screen Number “Validities”: 2004
2. You want to configure your own article master view for your employees. Openthe Implementation Guide in a new session and choose:
Logistics – General→ Material Master→ Configuring the Material Master→Define Structure of Data Screens for Each Screen Sequence.
Create your own screen sequence on the basis of the “Retail Fashion Tab Pages”screen sequence. Your screen sequence receives the number Z<B>, where <B>is the letter that belongs to your group number (see the conversion table); forexample, Group 06 copies screen sequence 33 to ZI. Choose the description“Retail Standard Gr##”.
Copy the screen sequence with all dependent entries.
a) IMG: Logistics – General→ Material Master→ Configuring the MaterialMaster→ Define Structure of Data Screens for Each Screen Sequence
b) Select screen sequence 33 and choose Copy As.
c) Enter the numbers and descriptions as specified in the task. Confirm yourentries with Enter.
3. What is a screen sequence?
Answer: If required, use the F1 Help.
The screen sequences defines the sequence of the information units on thearticle master screen. A screen sequence is composed of data screens. Forinformation about the screen sequences defined in the standard system, see theIMG documentation on configuring the material master.
4. Compare the subscreens of data screens 08 (Logistics: DC) and 09 (Logistics:Store).
Can subscreens with their programs appear on multiple data screens? Justifyyour answer.
Data screen 08 contains the distribution center of the distribution center anddata screen 09 contains the logistics view of the store. They both containsome of the same subscreens. That means that the subscreens appear inseveral data screens, together with their program.
5. Examine the subscreens for data screen 04 (Basic data). What subscreens arethere behind screens 2002 and 2004?
2002: ____________________________
2004: ____________________________
a) Select screen 04→ View Subscreen.
b) Select each subscreen and choose View Subscreen.
a) To hide a subscreen, you have to overwrite the screen number with 0001.
8. Hide the “Care Code” subscreen in the Basic Data view and have a look atthe new data screen.
a) Overwrite screen number 3001 with screen number 0001.
b) Save
c) Select the row that was changed
d) Choose View Data Screen.
Task 2: Assign Screen Reference to UserYou now wish to assign the changed article master to your user in the system:
1. Enter a 2-character screen reference for your user (for example, your initials)under Assign Screen Sequences to User/Article Type/Transaction/Industry Sectoron the Screen Reference level.
a) IMG: Logistics – General → Material Master → Configuringthe Material Master → Assign Screen Sequences to User/ArticleType/Transaction/Industry Sector
b) Choose dialog structure User screen reference.
c) Choose New Entries
d) Enter a 2-character screen reference for your user (for example, yourinitials).
2. Now select dialog structure Screen sequence control and add a new entry byassigning your screen reference (see 1.) and the number of your screen sequence(see the previous exercise under 2.) to transaction 03. Select “*” as the screenreference of the article type and the industry sector.
a) IMG: Logistics – General → Material Master → Configuringthe Material Master → Assign Screen Sequences to User/ArticleType/Transaction/Industry Sector
b) Dialog structure Screen sequence control
c) Make the relevant entries
d) Table View → Save
3. You now want to change the sequence of the main screens so that the Logistics:Store and the Logistics: Distribution Center views appear immediately afterthe Basic Data view.
Save the entries you have made.
a) IMG: Logistics - General→ Material Master→ Configuring the MaterialMaster→ Maintain Order of Main and Additional Screens
b) Select your screen sequence.
c) Choose Details.
d) For Logistics: Store, enter sequence number 11 and for Logistics: DC,enter sequence number 12.
e) Press ENTER.
f) Choose Sort Main Screens.
g) Table View → Save
4. Now check your settings in the article maintenance.
Firstly, check that the defaulted views appear in the sequence that has just beenset. Afterwards, go to the Basic Data view for article R1TA12## and check thatthe Validities data screen now appears before the General Data screen and thatthe Care Code data screen is suppressed.
5. Please delete the user link to your own screen sequence.
a) IMG: Logistics – General → Material Master → Configuringthe Material Master → Assign Screen Sequences to User/ArticleType/Transaction/Industry Sector
Lesson OverviewYou learn the different options for article fast entry in SAP Retail: core article, articlecopy, and price catalog. You can use this to copy article and price information fromthe vendor to the SAP system.
Lesson ObjectivesAfter completing this lesson, you will be able to:
• Enter core master data using maintenance groups
• Describe the different ways of copying the article
• Name and configure the maintenance and default options of the PRICAT function
• Edit and post a PRICAT catalog item
Business ExampleYou work as a purchaser in a company and are responsible for maintaining certainarticle data. You should be able to create and change articles as efficiently as possible.You therefore decide to work with core master data.
You want your vendor to carry out the majority of the data maintenance, and thereforeyou obtain the article data from a data pool. However, you obtain sensitive data suchas prices directly from your vendor and not from the data pool. Before it is posted toyour SAP system, you want to check the data that the vendor has provided.
Core Master DataArticle core master data are regular articles that are generated by an externalapplication. In this way, for example, this function is integrated into the SAP RetailPurchase Order Manager function. This means that the user can create missingarticles without exiting from the purchase order function. When the relevant settingsare made, these articles only have the article segments or article data that is required inthe purchase order.
To be able to use such articles in all functions, they must be completed. To distinguishbetween articles that were generated with the standard function, you should flag coremaster data with an entry in the Creation Status field on the Basic data view of thearticle (Table MARA). You can use this status to select article core master datadirectly in the article monitor for the further processing.
Figure 121: Core Master Data: Maintenance
Maintenance GroupsMaintenance groups are required to create article core master data and to maintainarticles via integrated of the mass maintenance.
A maintenance group contains a number of fields that can be maintained. InCustomizing, the fields are grouped together into field groups according to theirdependencies. A field group contains all fields that must be maintained together. Forexample, you can maintain the cross-site maintenance status and the correspondingdate at the same time; this means that both fields are assigned to a field group.
You have the option of creating customer-specific field groups.
In order to achieve an application-specific separation of the fields to be maintained,for each application one or more maintenance groups can be created. Different fieldgroups can be assigned to these maintenance groups. Field groups can be assignedto several maintenance groups.
For each maintenance group, one or more templates can be created, in which defaultvalues are maintained for the fields in the field group. To uniquely identify articlecore master data, a template should be used to assign a value in the Creation Statusfield. This creation status is used in the article monitor to select article core masterdata that must be completed.
Maintenance groups make it easier to edit or display articles by restricting the numberof available fields.
You can use maintenance groups to define - via the assigned field groups - whichfields are used or displayed in individual applications.
• When processing Article Core Master Data and in the Integrated Mass Change,you use maintenance groups to, for example, flexibly define the fields that aredisplayed for processing.
• In the Article List and in the Article Monitor, you use maintenance groups to, forexample, determine fields that are displayed in the results list.
Article CopyYou can use this function to copy article master records to create new article masterrecords or change existing ones. In addition to the main article data, you can alsocopy additional master data, such as purchasing info records, purchasing and salesconditions, bills of material, and replenishment data.
• The article copy function allows you to simply and quickly create new articleson the basis of the data of a source article.
• In contrast to creating a new article using a reference article, the article copyfunction allows you to either copy all data or to restrict the copy to certainsegments (the only restriction is that pricing reference articles are not copied).
The article copy function gives you the option of copying a source article with allcreated segments and data, thereby creating an identical article. You can change thearticle by calling transaction MM42 (for example, you can change the article text).Pricing reference articles in generic articles and EANs are not copied.
Figure 124: Article Copy Options
When you create and change article master records, you can determine which dataof the source article the system copies.
You have the following options when copying articles:
• Copying a source article
All field values of the selected segments are copied.
• Copying a source article with no different fields
Copying all field values of the source article with no differences at variant orsite level.
• Individual control of the segments to be copied
The copy volume is defined by restricting specific segments, for example, inforecords, listing conditions or prices.
PRICAT: DefinitionPRICAT processing refers to the function used to transfer article and price informationin a standard format. The information can be sent to the retailer bilaterally directlyfrom the vendor, or multilaterally by means of a data pool. The business processallows you to import the logical message type PRICECATALOGUE02. This meansyou can receive information on new articles or changes to existing articles from avendor or a data pool. The information is stored in a catalog in the SAP system. Theindividual catalog items correspond to an SAP article. The catalog items contain thedescription, conditions (including taxes), and logistics information on the articles.
From transaction W_PRICAT_MAINTAIN you can navigate to the defaults anddata merging maintenance. At client level, the default table is implemented asa Customizing table, since changes have extensive consequences. However, theClient-Vendor and Client-Vendor, Merchandise Category levels are application tables,and the business requirement is to be able to change these tables in the operativesystem. The default and merging logic can be controlled for each field of the PRICATdata pool. The settings of the fine granular level override the settings of the higherlevel. Besides the selection of fields which the system displays in online processingand their display settings (e.g. ready for input), you also choose one of five possiblestorage options, which determine how each PRICAT pool field should be populated.The defaults and enhancement logic is used for both the online processing and batchposting.
Online ProcessingThe online processing was completely redeveloped for ERP2005 and now:
• There is a new dialog interface for the mass data processing
• Scheduled transfer of data to the R/3 master data is possible
• Additional PRICAT information, such as generic articles and prices, is nowtransferred
When new generic articles are created, one variant must be selected as mastervariant, from which the data is then copied for the generic article header level anddisplayed in an extra line. If a generic article (header) is already created, it is displayedin a separate master data line with the hat symbol. Some fields are not displayed in thePRICAT item display, but they can be reached and edited by clicking on the relevanthotspots (for example, the valid-to date of a price condition). There are hotspots forprices, texts, characteristics, units of measure and bills of material. 1 to n columnsand 1 to m rows can be selected at the same time. If you choose Mass Maintenance, adialog box appears on which the selected column names appear again and in whichyou can enter the required field contents. The field contents are then copied intoall lines of the selected columns. If the available selection criteria in transactionW_PRICAT_MAINTAIN: Catalog number, EAN of base UoM, valid-from date,and processing status are not sufficient, a selection report can be generated, thefurther selection fields of which can be selected within the framework of the reportgeneration. The required selection reports should be generated at the start of a project,for example, by the relevant consultant, but not by the end user.
The upper section of the selection screen is static and is always available. Theselection fields, which were chosen when the selection report was created, appear inthe lower section of the screen. The selection report that applies for a user depends onthe profile (on the start screen of W_PRICAT_MAINTAIN). In that profile for theonline processing you determine the selection report and variant that is used. For eachPRICAT-EAN, the current article master record can be displayed in a separate line.The same applies for the original data record that was sent from the pool. Changedfields can be highlighted in color.
After the immediate update has started in the article master, a lock symbol appears.If you choose the refresh button, the traffic light and the processing status indicatewhether the update took place without errors. Clicking the traffic light opens a log thatcontains error messages.
The condition technique is used to create prices for all distribution chains in thesystem and for all purchasing organizations of the vendor, provided no restrictions aredefined in online processing and that a corresponding data retention level (conditiontable) for the organizational level is maintained in Customizing.
Exercise ObjectivesAfter completing this exercise, you will be able to:
• Use maintenance groups to create core master data
• Use the article monitor
• Describe the integrated mass maintenance
• Carry out the article copy
Business ExampleYou often create core master data. Since you only create data for one vendor and acertain merchandise category, you prepopulate these fields in the maintenance groupwith which you create core master data.
Afterwards you create core master data that is completed via the article monitor. Thenyou also copy another existing article.
Task 1: Maintenance GroupsYou want to create a template for an existing maintenance group, so that certain fieldsare already prepopulated when you create a core article with this maintenance group.
1. To do this, go to the maintenance transaction of the maintenance groups.
2. Create a template for your maintenance group MG## and enter the followingvalues:
Task 2: Core Master DataUse the maintenance group, to which you just added a template, to create a new corearticle master record (single article).
1. Select the master data transaction to do this. Under Units of Measure, view thedata that was copied from the reference article or from the template. Maintainanother unit of measure and select it as order unit.
Change the article description of the article in the Descriptions view in articleGroup ##. Then make sure to choose Enter. List the article in the generalassortment R1KIDSS## and maintain the season (0001) and the next year asa season year. Choose Yes to confirm the dialog box that informs you that thelisting data is adjusted. Assign it to the hierarchy node with the descriptionSchool ## (use the search help to search for the relevant ID). Save the corearticle and make a note of the number.
Task 3: Article CopyYour vendor offers you children's trousers for a low price. These trousers are similar tochildren's trousers that you already carry and that sell well. You accept your vendor'soffer and maintain article master data for the new trousers.
You use the trousers, which are already in your assortment, as the copy template.However, only certain variants are copied, since the new trousers are delivered infewer colors.
1. You copy the source article R1TA03## with all article data, but you restrictthe variants to the colors red and royal blue. The article number should beR1TA99##. Copy the article.
2. Change the article short text of the new article to Children's Trousers##
Task 1: Maintenance GroupsYou want to create a template for an existing maintenance group, so that certain fieldsare already prepopulated when you create a core article with this maintenance group.
1. To do this, go to the maintenance transaction of the maintenance groups.
a) In transaction WRFMGROUP, select your maintenance groups in the tree,choose Change Mode and then Show/Hide.
2. Create a template for your maintenance group MG## and enter the followingvalues:
Article Type FASH
Creation Status 01
Mdse Catgry RF1T0##
Info record category 0
Vendor R1TV01##
Purchasing Org. R300
a) Master Data→ Article Data→ Article→ Manage Maintenance Groups
b) Transaction WRFMGROUP: In the tree, under the Cross-Applicationnode, select your maintenance group MG##.
c) Choose Change Mode and then Show/Hide. A new window appears inwhich you can maintain templates. Enter values in the aforementionedfields.
3. Save your entries.
a) Choose Save.
Task 2: Core Master DataUse the maintenance group, to which you just added a template, to create a new corearticle master record (single article).
1. Select the master data transaction to do this. Under Units of Measure, view thedata that was copied from the reference article or from the template. Maintainanother unit of measure and select it as order unit.
Change the article description of the article in the Descriptions view in articleGroup ##. Then make sure to choose Enter. List the article in the generalassortment R1KIDSS## and maintain the season (0001) and the next year asa season year. Choose Yes to confirm the dialog box that informs you that thelisting data is adjusted. Assign it to the hierarchy node with the descriptionSchool ## (use the search help to search for the relevant ID). Save the corearticle and make a note of the number.
a) Path: SAP Easy Access menu→ Logistics→ Retailing→ Master Data→ Article Data→ Article→ Process Core Master Data
b) Transaction WRFMATBODY
c) Use the F4 help to select your maintenance group MG## and thecorresponding Template 0001.
d) The data for the article type, merchandise category and other fields ispreassigned. Enter article category 00 (single article). Choose Enter.
e) The views for which data can be maintained are displayed on the left-handside. Select Units of Measure. The data from the reference article isproposed, and displayed in the right-hand screen area.
f) Enter another unit of measure (for example, carton) with the relevantquantity for each base unit and unit of weight, and select it as an order unitby setting the relevant indicator.
g) Select the Descriptions view and overwrite the description in the right-handcolumn for the language EN.
h) Proceed in this way in the other views, and maintain the required values onthe right-hand side of the screen. Save the article.
Task 3: Article CopyYour vendor offers you children's trousers for a low price. These trousers are similar tochildren's trousers that you already carry and that sell well. You accept your vendor'soffer and maintain article master data for the new trousers.
You use the trousers, which are already in your assortment, as the copy template.However, only certain variants are copied, since the new trousers are delivered infewer colors.
1. You copy the source article R1TA03## with all article data, but you restrictthe variants to the colors red and royal blue. The article number should beR1TA99##. Copy the article.
a) Master Data→ Article Data→ Article→ Copy
b) The article R1TA03## is used as the source article and the numberR1TA99## is entered as the target article. You do not have to maintainany other data in the Target Material subscreen, since everything is copiedfrom the source article. The Underlying Material Data and the AdditionalMaterial Data indicators are set. However, you choose Variant Filters toselect the variants of the colours red (color code 3) and royal blue (colorcode 51) only.
c) Choose Execute.
2. Change the article short text of the new article to Children's Trousers##
a) Master Data→ Article Data→ Article→ Change
b) Enter the article number R1TA99##, select the Basic data view andchoose Enter. Change the short text to Children's Trousers##.
Exercise ObjectivesAfter completing this exercise, you will be able to:
• Use the PRICAT function to transfer article and price information
Business ExampleBefore a new season starts, your vendor provides a new catalog with items in a datapool. You use the PRICAT interface to copy this data into your SAP system, but youwant to check and edit the items before you create them as articles in your system.
Task: Edit Price CatalogYou create your own profile ## to edit the catalog items in the online processing.
1. Specify that you want to display the lines with the original catalog data and thearticle master. Changes between these lines and the work item line should behighlighted in color.
2. Now view the defaults maintained at client and vendor level. Which fieldsare prepopulated with fixed values?
3. Specify the profile you have just created and access the online processing. Usethe F4 Help to select the catalog for your vendor R1TV01## and choose Execute.
4. Create your own user-specific layout with the name LA## and the descriptionLayout##, and add the columns for the article hierarchy ID and the articlehierarchy node.
5. Check if the layout has changed, and that you can see the columns for the articlehierarchy ID and the article hierarchy node.
6. Change the sales price of an item and save the entries. Exit from the catalog.
7. Call the catalog again and check whether the change was saved.
8. Now post a single article. Check the status and the traffic light.
Task: Edit Price CatalogYou create your own profile ## to edit the catalog items in the online processing.
1. Specify that you want to display the lines with the original catalog data and thearticle master. Changes between these lines and the work item line should behighlighted in color.
a) Menu path: IMG→ Sales and Distribution→ Electronic Data Interchange→ PRICAT Inbound→ Configure Online Processing
b) Choose New Entries to enter a new profile. Enter the ID and the description.Set the indicators Incl. Art.Mast and Incl. Original.
c) Under Compare, enter 3 - Compare with Original and Article Master;under Layout, enter 2 - Item and Units of Measure (Split Screen); andunder Save Variant, enter U - Only as User-Specific Variant.
2. Now view the defaults maintained at client and vendor level. Which fieldsare prepopulated with fixed values?
a) Master Data → Article Data → Price Catalog Inbound Processing→Maintain Price Catalog
Then choose Environment → Default → Field Catalog or FieldCatalog: ILN/Vendor to navigate to transaction W_PRICAT_PRE1 orW_PRICAT_PRE2.
The Valuation Class and Article Type fields are prepopulated at clientlevel. The Article Hierarchy ID and Article Hierarchy Node fields areprepopulated at vendor level.
3. Specify the profile you have just created and access the online processing. Usethe F4 Help to select the catalog for your vendor R1TV01## and choose Execute.
a) Master Data→ Article Data → Price Catalog Inbound Processing→Maintain Price Catalog
Specify the profile ## and choose Execute.
On the following selection screen, select a catalog by choosing the F4 Helpfor the Price Catalog field. Restrict the search to your vendor R1TV01##,or display all catalogs and then select the catalog of your vendor bydouble-clicking it. Choose Execute to navigate to the online processing.
4. Create your own user-specific layout with the name LA## and the descriptionLayout##, and add the columns for the article hierarchy ID and the articlehierarchy node.
a) Choose Select Layout and then Change Layout from the list.
b) Copy the Hierarchy and Hierarchy Node columns from the right-handcolumn to the left-hand column.
c) Save your layout.
d) Specify the ID LA## and the description Layout## and select theUser-specific and Default setting checkboxes.
e) Choose Enter.
5. Check if the layout has changed, and that you can see the columns for the articlehierarchy ID and the article hierarchy node.
a) The Hierarchy and Hier. Node columns now appear on the screen and thefixed values that were maintained are displayed.
6. Change the sales price of an item and save the entries. Exit from the catalog.
a) Navigate to the Sales Price field in the Work Item line of an item andchange the price to any value.
b) Select this row and choose Save.
c) Choose Back (F3) to exit the catalog.
7. Call the catalog again and check whether the change was saved.
a) Choose Execute to open the catalog. You see that the changed sales pricewas saved and is displayed here. It is also highlighted in blue, because theoriginal has been changed.
8. Now post a single article. Check the status and the traffic light.
a) Select an item (work item row) that is a single article (article category00), and choose Create/Change. The padlock symbol appears once theitem is posted in the background.
b) Choose Refresh. The padlock symbol disappears, a third row is added withthe article master data, and the status of the item changes to 04 - Forwarded.
TIRT10_1 Lesson: Article Monitor and Mass Maintenance
Lesson: Article Monitor and Mass Maintenance
Lesson OverviewYou use the article monitor to select articles and display them in a results list to carryout subsequent functions for the article. These include generating the article list,carrying out mass changes, changing the article type, or displaying or changing thearticle.
Lesson ObjectivesAfter completing this lesson, you will be able to:
• Name the subsequent functions of the article monitor
• Describe the mass maintenance process for master data
• Explain the difference between follow-up and replacement articles and their use
Business ExampleIn your company, you use the core article function and want to enhance them in afollow-on step to complete article master records. For this, you use the article monitor.
You use mass maintenance as a central function to quickly enter or change specificdata in a large number of existing article master records.
Article monitorThe article monitor makes it easier to promptly add further master data to the articlecore master data, so that these then complete articles can be operatively used in allapplications.
Restrictions are defined in a selection screen, in order to select certain article coremaster data. The result is displayed in a list, in which the columns are determined bya maintenance group. To complete the article, you can navigate from this list to thenew mass maintenance, the article type change transaction or the article maintenancetransaction. An article list can also be generated from the selected article core masterdata.
Mass Changes to Master DataThe maintenance of master data (for example for vendors or purchase orders) can takea very long time if you have to carry out every change individually. You can edit themaster data much quicker if you only have to carry out a change once, and if thesystem then automatically updates all data records in question. Mass maintenancetools are made available for this purpose. You can use these tools to change a largenumber of master data records at once.
TIRT10_1 Lesson: Article Monitor and Mass Maintenance
Figure 132: Mass Maintenance of Master Data
You can call such a tool from various master data transactions (for example, from thearticle master menu area) or by choosing Logistics→ Central Functions→ MassMaintenance. If you call one of these tools from the master data maintenance, theobject type that is to be changed (for example, the customer) is already set by default.
You must select the object that is to be changed (for example, customer or vendor).However, the mass maintenance transaction is also integrated into the individualarea menus (for example, Master Data→ Vendor Data→ Environment→ MassMaintenance). In this case, the object is already set by default.
As the next step, you select the tables that are to be changed.
You restrict the data records that are to be changed, by -for example - selecting allarticles, with their short texts containing the character string “screw”.
The system selects the data records. Depending on the number of data records that areselected, the system may ask if you want to continue to work online, or if you want toexecute the changes in the background. If you choose the second option, a workflowlater informs you that the changes have been carried out. If you continue to workonline, the system displays the selected data records.
In the next step, select the fields that are to be changed. Enter the new value in therelevant column, select the column header and the data records that are to be changed,and select Change field values.
Save the changes you have made. The system carries out a consistency check forthe changed data. The system does not carry out any changes that would lead todata inconsistencies, and records this in the log. The system issues a log about thechanges that have been carried out, and about any errors that have occurred. In certainapplications, you can call up the objects that contain errors in change mode to correctthe errors. To do this, select Change Object.
You should only use this mass maintenance tool to change customer or vendormaster data. You do have the option of changing articles, but there are other, betterperforming mass maintenance tools. Transaction MASS_MARC is used to changelogistics data. The Integrated Mass Change (transaction WRFMASSMAT) can beused to change other article data.
Integrated Mass Change
• The integrated mass change is a simple and quick way of changing existingarticles.
• The maintenance dialog allows you to change basic article data and additionaldata, such as info records.
• The changeable fields are restricted when you use maintenance groups.
The structure of the integrated mass change is based on the structure of thelogistics/replenishment mass maintenance. The fields that are to be changed aredetermined by a maintenance group. Every field is assigned to a maintenancelevel, and here the maintenance levels correspond to the article master views BasicData/Purchasing/Sales/Logistics/POS. After you selected the articles that are relevantfor the change, the maintenance levels are displayed on the left-hand side of the screen.The organizational levels currently saved for the selected articles are displayed assublevels of the respective maintenance level: For example, if the selected article forthe distribution chains RG10/R1 and RG10/R5 is maintained, the Sales maintenancelevel has the sublevels RG10/R1 and RG10/R5. After you select a maintenance orsublevel, the relevant articles appear in list format on the right-hand side of the screen.
You can execute the integrated mass change as an independent function or from otherfunctions, for example from the article monitor.
Only the integrated mass maintenance application gives you the option of temporarilychanging maintenance groups, which means that you can add additional changeablefields.
You can also create a user-specific default maintenance group for the massmaintenance.
TIRT10_1 Lesson: Article Monitor and Mass Maintenance
Follow-Up/Replacement ArticleYou can assign one or more follow-up articles, and one or more replacement articles,to an article (the original article). A follow-up article permanently replaces anoriginal article, while a replacement article only replaces an original article for acertain period of time.
You can carry out this assignment at different levels, via local assortments for a siteand via general assortments for a group of sites or for all sites.
You can display, change and delete existing assignments of follow-up or replacementarticles to original articles.
Articles or article core master data must be created for all articles that are to beassigned. Original articles and follow-up and replacement articles are active articles,in other words they are not logically deleted at basic data level.
Original articles and follow-up and replacement articles do not belong to the followingarticle categories:
In Customizing, define follow-up categories for follow-up and replacement articlesand define which checks the system carries out. You can find Customizing settings forfollow-up categories in the Implementation Guide (IMG) under Logistics - GeneralMaterial Master→ Retail-Specific Settings→ Settings for Follow-Up/ReplacementMaterial→ Maintain Follow-Up Categories.
TIRT10_1 Lesson: Article Monitor and Mass Maintenance
Exercise 24: Article Monitor
Exercise ObjectivesAfter completing this exercise, you will be able to:
• Name the most important functions of the article monitor
• Name the different options for mass maintenance
Business ExampleArticles in your company are entered and further processed in various ways. Thearticle monitor allows you to apply certain filter values to select specific articlesand then to further process them. You can also branch directly to the article masterrecord or to integrated mass maintenance.
Mass maintenance allows you to change specific data in multiple articles.
Task 1: Article Monitor and Mass MaintenanceIn article fast entry, you have created various articles and core articles that you nowwant to manage and further process using the article monitor.
1. Call the article monitor. As the selection criterion, use the articles R1TA24##,R1TA30##, and R1TA31##, and the number of the core article that you created.
2. Amongst other things, the article that you created in the previous exercise isdisplayed in the results list. You navigate from the list to the mass maintenance.
Task 2: Carry Out Mass MaintenanceYou can branch directly to integrated mass maintenance from the article monitor.
1. In the Mass Maintenance, select a maintenance group, by means of which youdecide which fields can be changed. You want to change basic and logistics data.
2. Execute the selection to determine the articles that can be changed. In the BasicData view, change the creation status 01 to blank and maintain the fashiongrade 0001 high fashion.
Check the Assortment List Type (it should be F) and the Transportation Groupand Loading Group fields (it should be 0001 in both cases).
In the Logistics: Distribution Center view for the Reference-DC P100, enter thedistribution profile FT2 and check that the RP type is ND.
Task 1: Article Monitor and Mass MaintenanceIn article fast entry, you have created various articles and core articles that you nowwant to manage and further process using the article monitor.
1. Call the article monitor. As the selection criterion, use the articles R1TA24##,R1TA30##, and R1TA31##, and the number of the core article that you created.
a) Path: Master Data→ Article Data→ Article→ Article Monitor
b) To select the article, enter your R1TA24##, R1TA30##, andR1TA31## articles in the General Article Data screen area along with thecore article, and choose Execute.
2. Amongst other things, the article that you created in the previous exercise isdisplayed in the results list. You navigate from the list to the mass maintenance.
a) Select the articles and choose Mass Maintenance.
Task 2: Carry Out Mass MaintenanceYou can branch directly to integrated mass maintenance from the article monitor.
1. In the Mass Maintenance, select a maintenance group, by means of which youdecide which fields can be changed. You want to change basic and logistics data.
a) Choose Select Maintenance Group and use the F4 Help to select anapplication-specific maintenance group for the mass maintenance. Thedescription of the maintenance group is Mass Changes Basic + LogisticsData.
2. Execute the selection to determine the articles that can be changed. In the BasicData view, change the creation status 01 to blank and maintain the fashiongrade 0001 high fashion.
Check the Assortment List Type (it should be F) and the Transportation Groupand Loading Group fields (it should be 0001 in both cases).
In the Logistics: Distribution Center view for the Reference-DC P100, enter thedistribution profile FT2 and check that the RP type is ND.
TIRT10_1 Lesson: Article Monitor and Mass Maintenance
Save your entries.
a) Copy the articles into the matrix by double-clicking the Basic Data view inthe left-hand screen area. There select the articles that should be changedand choose Fast Entry.
b) A new subscreen opens in the lower screen area. Maintain the relevantvalues there. Select the row and choose Continue .
c) On the left-hand side of the screen, choose Logistics: Distribution Centerand the reference distribution center P100. In the right-hand screen area,change the corresponding values.
d) Save your entries. When you save, the changes made at the referencedistribution center level are transferred to dependent distribution centers,provided that these are not already filled with different values.
Lesson OverviewAn article list is a predefined selection of article numbers. It allows you to use adefined group of article numbers across applications.
Lesson ObjectivesAfter completing this lesson, you will be able to:
• Name the possible uses of the article list
• Describe the different kinds of article lists
• Create your own article lists
Business ExampleYou want to make sure that articles from different merchandise categories, which allbelong to a motto or theme (for example, t-shirt, pants, and skirt in marine-look), aredistributed to the stores together. To do this, you create an article list, which is thenused in the allocation table, for example.
Uses of the Article ListSince work is distributed between different system landscapes, a number of articlesmay be determined in one system (for example, in SAP Retail) and then should beavailable for further processing (such as reporting) in another system (for example,SAP BI).
Dynamic article lists are composed of saved selection criteria which can be usedto determine the currently valid range of article numbers.
• Static Article Lists:
Static article lists contain both the selection criteria and the article numbers thatmatched the selection criteria when the article list was released in the system.For example, if a static article list is generated in SAP BI, only the articlenumbers are saved in SAP Retail without the selection criterion.
Only static article lists without selection criteria are available for data exchangebetween SAP BI and SAP Retail.
Figure 135: Article List: Tree Structure
Creating Article ListsThe maintenance screen of the article list is divided into three areas. The articlelist hierarchy is maintained in the area on the left-hand side. Here, the article listscan be grouped together on a business or application-specific basis. The hierarchiesare created under an end node in the right-hand area of the screen. In the hierarchytree, end nodes with assigned article lists are flagged by a folder symbol, while theother hierarchy nodes are not end nodes or they are end nodes without article listassignments.
The header data of the article list is created in the first step:
• Name and short text
• Access status (control: who can maintain/use the article list?)
• Maintenance group - to define the article fields that should be displayed besidethe article number and the article short text in the selection result list (forexample, merchandise category, article category, article type).
• Maximum number of articles to be selected
• Article List Type:
Static: Selection criteria are executed once and the result set is saved statically.When the article list is used operatively, only the saved article numbers are readfrom the database, a new selection is not made.
Dynamic: Only the selection criteria are saved. When the article list is usedoperatively, the selection criteria are evaluated dynamically, and the determinedarticle numbers are returned as the result set.
• Validity of the Article List
After you create the header data, choose Edit selection to define the selection criteriathat are to be used to determine the resulting range of articles. After the selectioncriteria have been determined, you can choose the Results List button to determineand display the result.
In the case of a static article list, you can change the new article list by choosing thechange button in the toolbar in the right-hand screen area of the main maintenancescreen. For example, articles, which do not correspond to the selection criteria createdpreviously, can be manually added to the result set, or existing articles can be removed.The manually maintained article numbers are saved on the database as an enhancementof the static result list. The deleted article numbers are removed from the database.
In the processing screen for the article list header data, you can change the selectionconditions by choosing Process Selection Criteria. However, this does notautomatically adjust the existing result set, because this is saved statically. If youchoose Edit Results List, the results list appears.
To make a new selection in the case of static article lists, you must choose UpdateResult. All relevant articles are then listed in the updated result list.
• Would still be included in the selection subset, even though the selectionconditions have been changed (symbol [=])
• Would not be included in the selection subset anymore, because the selectioncriteria have been changed (symbol (-))
• Due to changed selection conditions or due to a previous manual deletion, wouldhave been added or added again (symbol (+))
• Were added manually and, in accordance with the changed selection conditions,are either included or omitted (“Manual” indicator)
In the right-hand area of the main maintenance screen, you can also execute theUpdate Result function if - for example - you have not changed the selection criteria,but, because new articles have been created, you can assume that the selection resultmay have to be expanded or reduced accordingly.
You can also call the Display Material Status function for static article lists. Here, acheck is carried out for the articles that are statically saved in the article list, to seewhether these articles still exist on the database, or whether the article may havebeen flagged for deletion.
Existing article lists (static and dynamic) can be used within the article search helpin basically each transaction in which you can enter an article number. If a multipleselection can be made in the application, more than one article number of the articlelist can be returned to the application. In the case of applications that can only acceptone article number, one article number must be selected from the article list.
Article lists have a validity period and can be automatically deleted once the validityperiod has expired. The Valid To date of an article list can be changed online. Inaddition to deleting the article list, the validity also controls the display in the F4 Help.The article list can only be selected if the current system date is in the validity interval.
The use of article lists is controlled with a status, which is specified as Planned,Released and Released + Not Modifiable. Only the user who created the article listcan use article lists that have the status Planned. Released article lists can be used byall users, and the status Released + Not Modifiable guarantees that the definition ofthe article list cannot change until the validity period has expired (only the validitydate itself can still be changed).
The article lists created in SAP Retail are available for a simplified selection ofarticles (extraction) for reporting in SAP BI. The extraction is only possible forstatic article lists.
You can also generate article lists from reporting results in SAP BI and then transferthem to SAP Retail (data retraction). You can do this both when executing a queryonline and in background processing (offline). The article list supports you in SAP BIwhen you select article numbers for article-specific evaluations.
In SAP BI, in the Business Content, there are objects for mapping article lists. FromSAP Retail, these objects are filled with the static article lists created there. Extractionis carried out via three different extractors. The attribute and hierarchy extractorsdetermine their data via separate function modules. Text is extracted via direct accessto the tables. You can use the release status as a selection parameter for the attributeextraction.
The purpose of the data retraction from SAP BI to SAP Retail is to make a queryresult, which contains a number of articles, available in SAP Retail, and to save themas a new article list there.
Exercise ObjectivesAfter completing this exercise, you will be able to:
• Explain how an article list is created and how it can be used
Business ExampleYou want to create an article list to be used in discontinuation; this article list onlycontains articles of a vendor with which you will no longer work in future.
Task:Branch to the article list.
1. To create an article list, select the node with the name ALGR## in the relevanttransaction.
2. Under AL GR. ##, create a dynamic article list AL## and select your vendorR1TV01## as a selection criterion.
Save the article list.
3. Extend the validity of the article list by a month, and release it.
Save these changes.
4. Check whether the article list is available in the discontinuation workbench.
1. To create an article list, select the node with the name ALGR## in the relevanttransaction.
a) Master Data→ Article Data→ Article List→ Edit
b) Switch from display mode to change mode. In the article list tree on theleft-hand side of the screen, select Master Data and then select the nodewith the name AL GR. ##.
2. Under AL GR. ##, create a dynamic article list AL## and select your vendorR1TV01## as a selection criterion.
Save the article list.
a) Select the node AL GR. ## in the article list hierarchy.
b) Then, in the right-hand screen area, choose Create Material List to add anew article list. Assign the name AL## and make sure that the StaticType flag is not set.
c) Then select your articles by choosing Edit Selection. Then use your vendorR1TV01## as a criterion.
d) Choose Enter. Choose F3 to navigate back to the initial screen. Savethe article list.
3. Extend the validity of the article list by a month, and release it.
Save these changes.
a) The validity and status can be changed in the right-hand screen in theMaterial List Assignment subscreen. Change the status from 1 Plannedto 2 Released. The article list is now available in the F4 Search Helpfor all users.
Lesson ObjectivesAfter completing this lesson, you will be able to:
• Select an article for logical and physical discontinuation at the end of its life cycle
• Describe the most important subsequent processing procedures in articlediscontinuation
Business ExampleYou include a new article in your assortment and you need to maintain the datanecessary for supply chain processes.
The employees who work with the article master in different areas should only be ableto process the data that is relevant to them.
Your stores are regularly informed about changes to existing articles and any newarticles that are being added to your assortment. Due to a particular article's poor salesfigures, you decide to remove it from your store's assortment.
In certain cases, you may decide that your company is no longer to carry a particulararticle; for example, if the vendor no longer carries the article, because there are lessexpensive alternatives, or because the article is out-of-date.
You can remove the article by deleting the article listing conditions or by discontinuingthe article.
• Deleting the article listing conditions
If you delete an article assignment to an assortment owner, then the listingconditions that belong to it are also deleted. The article master record remainsand there may still be stock available, however, no more orders can be placed forthe article. However, you may still be able to sell it.
• Discontinue article
The consequences of discontinuing an article are much greater than deletinglisting conditions. When an article is discontinued, the article master recordis deleted from the database along with all the article data that belongs to it,including purchasing info records and listing conditions.
The following types of article discontinuation are available in the system:
• Article Discontinuation for the vendor:
Certain vendors can no longer supply the article for any of the company's sites.
• Article Discontinuation for the Assortment:
The article can no longer be procured internally or externally for particularassortments (sites) and can no longer be sold.
• Article Discontinuation for the Distribution Chain:
The article can no longer be carried and sold in any assortments in a certaindistribution chain .
• Client-Wide Article Discontinuation:
If an article is to be discontinued from all assortments, it can be discontinued ona client-wide basis. The article can no longer be used in any operative businessprocesses.
The date from which a site can no longer order an article from a vendor. Thedelivery date of the purchase order document must be before this block date.You need to provide this date for all types of article discontinuation.
• Sales block date:
The date from which an article is no longer allowed to be sold in a site. Specifythis date for the article discontinuation for the assortment and for the distributionchain.
• You decide to discontinue an article on a particular date (ordering block date,sales block date) and start preparing for the discontinuation process. One way ofreducing the stock you have in storage more quickly is to run a promotion.
• After this, the article discontinuation is triggered for a particular day.
• If the article is, for example, still in stock, in a stock allocation, an arrangementor a purchase order, then you cannot discontinue the article. You must changethis data to eliminate the error messages.
• In certain cases, the system automatically defaults a solution, for example,transfer posting the stock to value-only articles. You can implement theseautomatic follow-up actions or you may decide to let the responsible usersprocess the problems manually.
• If there are problems that could not or cannot be solved automatically, the usersresponsible receive detailed messages in their integrated inboxes.
• If all the necessary changes have been made and the sales blocking time hasarrived, then the article is first deleted logically, and then, at a previously definedpoint in time, deleted physically from the database.
Figure 140: Subsequent Processing in Article Discontinuation
SAP delivers a range of standard subsequent processing procedures. These proceduresare used to resolve errors that occur during article discontinuation. Customers can,however, define additional procedures and link them up with the error messages usingthe assignment table for subsequent processing procedures.
At present, the following subsequent processing procedures are available:
• AK: Delete material from promotion
• AM: Delete material from product catalog
• EB: Reset source list entries
• IF: Delete information records for supplying plants
• IS: Delete information records
• LK: Reset listing conditions
• QB: Reset quota arrangement
• VM: Transfer posting to value-only article
• VK: Reset selling period
Subsequent processing procedures are assigned to the possible error messages. Onesubsequent processing procedure can be defined as the standard procedure for eacherror message.
The processor group is an object from the HR organization model.
Exercise ObjectivesAfter completing this exercise, you will be able to:
• Explain the differences between the simplified and the complete checks forarticle discontinuation
• Flag an article for logical and physical discontinuation
• Trigger an automatic follow-up procedure
• Find and solve a problem resulting from the discontinuation process that youhave been allocated as processor.
Business ExampleYou have decided that the articles R1TA50## and R1TA51## should no longer becarried in the store RT##. To avoid further orders being placed for these articles in thestore, you discontinue the article in assortment RT##.
Task 1:
1. Execute the discontinuation for an assortment. Select the correct menu pathfor this.
2. You want to discontinue article R1TA50## and article R1TA51##(using themultiple selection function) for your assortment RT##.
3. For performance reasons, you first select the simplified check. If only oneproblem per article occurs during the discontinuation check, the system canexecute the relevant follow-up action immediately and set the deletion flag rightaway. The result should be given immediately. If you wish, you can use the testmode before performing the actual check.
4. Which result provides the simplified check for the discontinuation of botharticles?
Task 2:As you cannot use the simplified check to discontinue article R1TA50##, you use thecomplete check instead.
1. Discontinue article R1TA50## with the complete check. Select the correctmenu path for this.
2. Check the article R1TA50## for the assortment RT##. Deactivate the offlinechecks to receive the discontinuation log directly.
Hint: If you forget to deactivate the offline checks, you can see theresult by choosing Discontinue→ Worklist.
3. Perform the follow-up actions defaulted by the system and then check the articleagain (choose Edit→ Check article again). Which error message cannot beprocessed automatically?
1. Execute the discontinuation for an assortment. Select the correct menu pathfor this.
a) Retailing: Master Data→ Article Data→ Article→ Discontinue→Assortment
2. You want to discontinue article R1TA50## and article R1TA51##(using themultiple selection function) for your assortment RT##.
a)
Assort-ment
RT##
Article Using multiple selection (arrow after the article field):R1TA50## and R1TA51##
3. For performance reasons, you first select the simplified check. If only oneproblem per article occurs during the discontinuation check, the system canexecute the relevant follow-up action immediately and set the deletion flag rightaway. The result should be given immediately. If you wish, you can use the testmode before performing the actual check.
a) Simplified check
Deselect the Test Mode indicator and do not change the other indicators.
4. Which result provides the simplified check for the discontinuation of botharticles?
a) The article cannot be discontinued as a purchase order exists.
Task 2:As you cannot use the simplified check to discontinue article R1TA50##, you use thecomplete check instead.
1. Discontinue article R1TA50## with the complete check. Select the correctmenu path for this.
a) Retailing: Master Data→ Article Data→ Article→ Discontinue→Assortment
2. Check the article R1TA50## for the assortment RT##. Deactivate the offlinechecks to receive the discontinuation log directly.
Hint: If you forget to deactivate the offline checks, you can see theresult by choosing Discontinue→ Worklist.
a)
Assortment RT##
Article R1TA50##
b) Complete check
c) Deselect the Offline checks checkbox.
Hint: If you forget to deactivate the Offline checks, you can see theresult by choosing Discontinue→ Worklist.
3. Perform the follow-up actions defaulted by the system and then check the articleagain (choose Edit→ Check article again). Which error message cannot beprocessed automatically?
Unit OverviewThis unit explains how you can create variants via characteristics on the merchandisecategory and via the characteristics profiles. You will learn how to create a genericarticle with variants, how to control the sales price maintenance for the variants, andhow to maintain additionals for an article.
Unit ObjectivesAfter completing this unit, you will be able to:
• Create characteristics with characteristics values
• Group characteristics values together
• Create characteristics profiles and assign them to the merchandise category
• Explain the difference between generic articles and single articles
• List the prerequisites for creating a generic article and create a generic articlewith variants
• Maintain different prices for individual variants of a generic article
• Explain which controls are necessary for additionals and set the most importantparameters
Lesson OverviewThis lesson explains the role of characteristics, and tells you how they are created andwhat attributes they can have.
Lesson ObjectivesAfter completing this lesson, you will be able to:
• Create characteristics with characteristics values
• Group characteristics values together
• Create characteristics profiles and assign them to the merchandise category
Business ExampleYou add the area Sport to your textiles assortment. You carry the sports textiles indifferent colors and sizes. You should be able to assign the different colors and sizesto the different articles as simply and efficiently as possible.
Create characteristicsCharacteristics refer to attributes of an object, such as the color of a blouse, the sizeof a T-shirt or the flavor of a yoghurt.
You create characteristics for merchandise categories or merchandise categoryhierarchy levels. Within a grouping, the values of the characteristics are passed onfrom one level to the next. You can copy, restrict or add the values of the superiorhierarchy level in the subordinate level, depending on how the characteristic is defined.
We differentiate between:
• Variant-creating characteristics (suitable for creating generic articles)
Characteristic ValuesCharacteristic values are the concrete attributes of a characteristic, for example,characteristic = color, characteristic values = red, blue, yellow.
Characteristics can be valued differently for each individual article, for example, anarticle with the characteristic Color can receive the value Red, while another articlecan receive the value Blue.
Characteristic values can be created with two different transactions.
Use the characteristic maintenance (transaction CT04) to create a characteristic. Ifyou want to use the new characteristic value storage, you have to assign a functionmodule in the characteristics maintenance, which is used to carry out the value check.The name of the function module delivered by SAP is WRF_CHECK_CHAR_VAL.
After you save the new characteristic, you can navigate to the new maintenancetransaction (WRFCHVAL), to create the characteristic values for this characteristic.You can only navigate to the new transaction for characteristics that use the functionmodule named above as value check. The new characteristic value maintenanceis also only possible for character format (CHAR) characteristics, and when themaximum number of characters is 18.
In addition to the actual characteristic values, up to ten customer-specific valuescan be maintained via the maintenance dialog (for example, for colors, an internalcolor code can be converted into a pantone color code, and so on). The characteristicvalues maintained in this way, and the characteristic values created directly for thecharacteristic by means of transaction CT04, are stored in different tables.
The use of color and size characteristics in operative processes (for example, in themarkdown planning, in the operative planning, in BI) is supported.
• Characteristic typing
• direct/high-performance access to color and size information by means of thearticle basic data (table MARA)
• Color and size information updated to SAP BI
Characteristic typing is used to assign the information to a characteristic (whichcan have any value and description), information about whether a color, a mainsize or an additional size is concerned. This information is required as a control inoperative processes (for example, price planning workbench). The characteristicsvalues of a typed characteristic are also stored redundantly in table MARA for eachvariant of a generic article, so that the operative processes can perform better whenaccessing variants of a special color or size. The characteristic is typed as a colorcharacteristic, size characteristic (main size) or size characteristic (second size) in thenew characteristic value maintenance. You also have the option of selecting Nottyped for characteristics that do not fit into a color or size schema, but for which youstill want to use the new value storage.
Furthermore you define the check option, which has an effect during the articlemaintenance, is also defined. You can use this to control whether additionalcharacteristic values, which were not defined in the new characteristic value storageand therefore are only valid for this article, can be created spontaneously during the
article maintenance. In addition to the characteristic value that is a maximum of 18characters long, language-dependent descriptions can also be created (a maximum of10).
If additional columns were defined in Customizing for the characteristic type inquestion (for example, analyzing color, pantone color), values can also be created forthe characteristic type. The values in the additional columns can be interpreted asan alternative identification of the characteristic values. There can be an improvedselection of the relevant internal characteristic values within the framework of thesearch help.
In the case of color and size characteristics, as a rule, a large number of characteristicvalues is concerned (for example, several thousand color values, which are subject toconstant seasonal enhancements), where, in the case of individual generic articles,only a very limited section from the characteristic value spectrum is required (forexample, 20 colors and 20 sizes). This spectrum of relevant characteristic values canvary from one generic article to the next.
Against this background, it is important that the available characteristic values canbe logically bundled into groupings defined by the customer. This means that youcan quickly compile the characteristics relevant to you, by navigating through theindividual groupings.
After the characteristic values are saved, you can group the existing characteristicvalues application-specifically in form of a hierarchy. The first time the maintenanceof the characteristic value groupings is called, only the root node of the hierarchythat represents the characteristic exists.
The left-hand screen area displays the hierarchy tree that lists the created characteristicvalue groups. Characteristic values can be assigned to the individual hierarchy nodesat every level (screen area on the bottom right: characteristic values assignment), sothat the characteristic values can be bundled and distributed correctly for the user.Characteristic value can be assigned to any number of hierarchy nodes. The possibleuse of a hierarchy node can also be restricted to a fixed number of merchandisecategories (upper right screen area: merchandise category restriction). This meansthat, in the article maintenance, this node is not displayed in the characteristicvalues search help, if the respective article does not belong to one of the specifiedmerchandise categories within the restriction lis. If there are no restrictions, the nodeis available to all merchandise categories.
The hierarchical characteristic value grouping defined in this way is then availableduring the article maintenance when the search help is used to select the characteristicvalues. For improved orientation, the individually defined additional columns (forexample, analyzing color, pantone color) are also available in this maintenance andin the characteristic values search help.
You can also use transaction WRFCHVALTYPE to type characteristics. Generally,this only concerns characteristics that do not use the new value storage characteristicvalues. The other characteristics are typed directly in the new maintenance of thecharacteristic values.
The check option cannot be maintained in such characteristics. Here, in thecharacteristic maintenance (CT04) in the Values tab, the Additional Values indicatormust be set if you want to be able to create characteristic values in the articlemaintenance on an ad-hoc basis.
If a typing is carried out subsequently and variants already exist, which use thischaracteristic, there is a report you can use to redundantly store the color and sizeinformation in table MARA.
Value and Quota ScalesTo determine quota scales for a characteristic, you must first create a value scale forthe characteristic. A value scale is a table that contains all the values of a characteristic.The characteristic values will be automatically transferred to the value scale when it iscreated. By creating a quota scale, you can assign a quota to every value in the valuescale. You can also create several quota scales for each value scale. You can use quotascales as input help when you create component lists for prepack articles.
You can create value and quota scales only for those characteristics with the data type“Character String”. The procedure can calculate proposed distribution quantities forgeneric articles with a maximum of two variant-creating characteristics. However, itis particularly suited to generic articles with a single variant-creating characteristicsuch as color-pure, fashionable articles that only differ in size.
When the generic article items are being processed in a purchase order or allocationtable, the quota scales for variant-creating characteristics are evaluated. Based onthese quota scales, the system defaults a distribution of the total quantity among thegeneric article variants.
Integration
The system searches for existing quota scales when you create a generic article item ina purchase order or an allocation table. It searches through various levels and stops assoon as a quota scale is found on one level.
Exercise ObjectivesAfter completing this exercise, you will be able to:
• Create a characteristic for which the new characteristic value storage can beused. Values are maintained for this characteristic, and are then grouped togetherinto characteristic value groups.
Business ExampleIn companies that work with a lot of generic articles and a large number of variants foreach generic article, it is important that the maintenance of the characteristic valuesand the selection of these values for the article creation is as user-friendly as possible.
Task: Creating a Characteristic (New CharacteristicMaintenance)You want to add textiles to your assortment, and so created a new merchandisecategory hierarchy level “Apparel”, and created the merchandise category“Sportswear” under this hierarchy level. In the merchandise category “Sportswear”,generic articles are created with the characteristics Color and Size. You want to usethe new characteristic values maintenance for these characteristics.
1. Create a new characteristic Color##. Enter the following information:
Field Name or Data Type Values
Characteristic Color ##
Description Color Group ##
Data Type CHAR (character format)
Number of Chars 10
Maintain the check using function module WRF_CHECK_CHAR_VAL.
Enter a customer-specific value in the Analyzing Color column.
2. The various color characteristic values are likely not to be relevant for allarticles, but can be restricted to certain values depending on the season. Maintaintwo characteristic values groups and divide the values among both seasons. Thebasic colors black and white are included in both groups.
3. Create a characteristic profile MP## with the new characteristic Color## and theexisting characteristic Size.
4. Assign the characteristics profile to merchandise category RF1T0## –Sweat-Shirts GR##.
Task: Creating a Characteristic (New CharacteristicMaintenance)You want to add textiles to your assortment, and so created a new merchandisecategory hierarchy level “Apparel”, and created the merchandise category“Sportswear” under this hierarchy level. In the merchandise category “Sportswear”,generic articles are created with the characteristics Color and Size. You want to usethe new characteristic values maintenance for these characteristics.
1. Create a new characteristic Color##. Enter the following information:
Field Name or Data Type Values
Characteristic Color ##
Description Color Group ##
Data Type CHAR (character format)
Number of Chars 10
Maintain the check using function module WRF_CHECK_CHAR_VAL.
Enter a customer-specific value in the Analyzing Color column.
a) Master Data→ Merchandise Category Data → Characteristics→Characteristics Management.
Choose to create the characteristic (data type: CHAR, number ofcharacters: 10) and on the Values tab page, maintain the check usingfunction module WRF_CHECK_CHAR_VAL.
b) Use transaction WRFCHVAL to create characteristic values.
2. The various color characteristic values are likely not to be relevant for allarticles, but can be restricted to certain values depending on the season. Maintaintwo characteristic values groups and divide the values among both seasons. Thebasic colors black and white are included in both groups.
a) Use transaction WRFCHVALGRP to group together the characteristicvalues. Under your characteristic Color##, maintain the groupsSpring/Summer and Autumn/Winter.
3. Create a characteristic profile MP## with the new characteristic Color## and theexisting characteristic Size.
a) In transaction CLWE, create a characteristics profile, maintain adescription and use the Characteristics tab to assign the two characteristics.The Relevancy Indicator is 2.
4. Assign the characteristics profile to merchandise category RF1T0## –Sweat-Shirts GR##.
a) Assign the profile to the merchandise category in transaction WG22.Maintain the profile and then choose Create.
Lesson OverviewThis lesson shows you how to create generic articles and variants.
Lesson ObjectivesAfter completing this lesson, you will be able to:
• Explain the difference between generic articles and single articles
• List the prerequisites for creating a generic article and create a generic articlewith variants
• Maintain different prices for individual variants of a generic article
Business ExampleYour vendor is offering a new T-shirt for the new season in various colors and sizes.
The Structure of a Generic Article with VariantsVariants are articles that only differ from one another in certain characteristics values(for example, color, size, or flavor). They are compiled under one generic article.Using generic articles makes variant maintenance easier because the data that is validfor all variants only needs to be entered once for the generic article.
Generic articles are created with the article category 01 Generic article.
To be able to create a generic article in a merchandise category, there must be atleast one variant-creating characteristic in the merchandise category. In order toflag a characteristic as Relevant to variants you use the Relevancy Indicator whenassigning the characteristic to the merchandise category or to the characteristicsprofile. The relevancy indicator must be set to 2, to be able to use this characteristic tocreate variants of a generic article.
Several characteristic profiles can be assigned to one merchandise category. Whenyou create an article in the merchandise category in question, you can select one ofthe assigned characteristic profiles. The characteristics of the characteristic profiledetermines the possible variants (matrix/list) for the generic article. Otherwise thevariants are created when you use the merchandise category characteristics to create ageneric article.
A generic article matrix is formed from the variant-creating characteristics. You canselect the variants that are to be created by simply selecting the relevant checkboxes.If you have three characteristics, one is fixed and the two unfixed characteristicsform the matrix. If you have more than three characteristics, the possible variantsare displayed in a list.
Figure 145: Generic Article: Assigning Numbers for Variants
In SAP Retail, the generic article variants are usually numbered based on the genericarticle's number with internal number assignment in form of a sequential three-digitsuffix.
You can use a user exit to compose the article numbers of the variants, for example,from:
With variant listing, the system checks if exactly the same variant does not alreadyexist as part of a generic article in the module.
Generic Article Pricing
Figure 147: Generic Article: Pricing Control (1)
Influencing Factors in the Pricing ControlGeneric article variants can either automatically inherit a sales price from the genericarticle or have their own separate sales price.
The sales price calculation for variants is controlled by means of a pricing profileand a pricing reference article.
The pricing profile in the article master record (Basic Data) of the generic article canhave the following attributes:
• 0 = No generic article price is defaulted; all variants can be calculatedindividually.
• 1 = The generic article price is defaulted; all variants can be calculatedindividually.
• 2 = All variants have the sales price of the generic article and cannot becalculated individually.
The pricing profiles are preset and cannot be changed.
The pricing reference article field contains the article number of the article fromwhich the variants receive their price.
• If the pricing reference article field contains the generic article number, then thevariant has the price that was inherited from the generic article.
• If the Pricing Reference Article field is empty or contains the variant's ownarticle number, then a separate price has to be calculated for the variant.
• If the field contains the article number of another variant, then the variant has theprice of the variant that was entered.
In the Sales view, choose Variant Prices to maintain the pricing reference article foreach variant.
For each variant, the field for the pricing reference article contains either the genericarticle number (then the variant inherits the generic article price), or the variant'sown article number (then a separate price is calculated for the variant), or the articlenumber of another variant, if the variant is to have the same price.
If the field for the pricing reference article remains empty, then the result is the sameas entering the variant's own article number.
Exercise ObjectivesAfter completing this exercise, you will be able to:
• Create a generic article with variants
Business ExampleYour current summer collection contains a new dress in different colors, for whichyou now want to create the master record in the system.
Task 1: Creating a Generic Article – Basic DataNow create the dress as a generic article in the system.
1. Create the summer dress as a generic article with the views Basic Data, Listing,Purchasing and Sales. The article number A2## should be assigned to thearticle. It belongs to the article type Fashion and to the merchandise categoryRF12124. The article is delivered in the purchasing organization R300 by thevendor RF1304. You now want to create the article for the distribution channelRG10/R1.
2. Use the characteristic profile RFP02 to create the generic article variants.
3. The dress is offered is the colors beige and blue and in the sizes 10-16. Selectthe relevant colors under Basics and assign the sizes to the article.
4. The dress is offered in the following color-size combinations:
10 12 14 16
beige X X X
blue X X X
5. Go to the basic data view of the article. The article receives the descriptionSummer dress Gr. ##.
6. All generic article variants have the unit of measure Each. Let the systemdetermine the instore EANs for the variants.
Task 2: Creating a Generic Article – ListingYou now determine in which assortments your dress should be included. You usethe listing procedure, which checks merchandise categories and assortment grades,to list in stores and distribution centers.
1. Go to the Listing view and list the generic article with all its variants. The articleis carried in the stores from the 1st of the following month until the end of thecurrent year.
2. Perform the listing and display the results for the assortments.
Task 3: Creating a Generic Article – PurchasingMaintain the purchasing data for your vendor RF1304 in the Purchasing tab.
1. The purchasing group 001 is responsible for the vendor.
2. The planned delivery time is 20 days.
3. You have agreed on a purchasing price of 43 USD for each dress. However,all the variants of size 10 are going to be delivered at a price of 40 USD foreach piece.
Task 4: Creating a Generic Article – SalesIn the Sales tab, maintain sales data for the distribution chain RG10/R1.
1. The variants of the color beige are not to be sold until one month from today.Maintain the corresponding point in time for these variants (For sale from).
2. You sell the dress in distribution chain R10/R1 for a price of 199 USD each.
3. Save the article data.
Task 5: Creating a Generic Article with 3 CharacteristicsYour vendor offers you men's trousers, which have color, size and waist size variants.Create this article in the merchandise category Bus. Cas. Trousers (RF13121).
1. Create the Basic Data for a generic article A3## in the merchandise categoryRF13121 with the article type Fashion.
2. The characteristics can be determined from the characteristics profileMENSPANTS. There are the following trousers combinations:
Task 1: Creating a Generic Article – Basic DataNow create the dress as a generic article in the system.
1. Create the summer dress as a generic article with the views Basic Data, Listing,Purchasing and Sales. The article number A2## should be assigned to thearticle. It belongs to the article type Fashion and to the merchandise categoryRF12124. The article is delivered in the purchasing organization R300 by thevendor RF1304. You now want to create the article for the distribution channelRG10/R1.
a) Retailing: Master Data→ Article Data→ Article→ Create
Select the Basic Data, Listing, Purchasing and Sales views.
b)
Article A2##
Mdse Catgry RF12124
Article Type Fashion Goods
Artl category Generic article
Purchasing Org. R300
Vendor RF1304
Sales Organization RG10
Distribution channel R1
c) Enter
2. Use the characteristic profile RFP02 to create the generic article variants.
3. The dress is offered is the colors beige and blue and in the sizes 10-16. Selectthe relevant colors under Basics and assign the sizes to the article.
a) Choose the F4 Help beside the Colors field.
b) In the hierarchy, expand the Basics area.
c) Press CTRL, select beige and blue and choose Enter.
d) Choose the F4 Help beside the Sizes field. Select the sizes 10,12,14 and16, and choose Enter:
4. The dress is offered in the following color-size combinations:
10 12 14 16
beige X X X
blue X X X
a) To navigate to the generic article matrix, choose F3.
b) Select the combinations specified in the table.
5. Go to the basic data view of the article. The article receives the descriptionSummer dress Gr. ##.
a) Choose F3 to go back to the Basic Data view of the article.
Article Description Summer dress Gr##
6. All generic article variants have the unit of measure Each. Let the systemdetermine the instore EANs for the variants.
a) In the screen area Standard Values for Entering Variant EANs:
AlternativeUnit EA
EAN Category IE
Select Assign EANs Int.
b) Choose Variant EANs.
c) Confirm the warning message by choosing Enter.
d) You can go back to the basic data view of the article by choosing F8.
Task 2: Creating a Generic Article – ListingYou now determine in which assortments your dress should be included. You usethe listing procedure, which checks merchandise categories and assortment grades,to list in stores and distribution centers.
1. Go to the Listing view and list the generic article with all its variants. The articleis carried in the stores from the 1st of the following month until the end of thecurrent year.
a) Go to the Listing tab
Listing Procedures B1
Listed From and For Sale From <1st of the followingmonth>
Listed To and For Sale Till <December 31 of thisyear>
2. Perform the listing and display the results for the assortments.
a) Choose Execute Listing.
b) Choose Assorts.
Task 3: Creating a Generic Article – PurchasingMaintain the purchasing data for your vendor RF1304 in the Purchasing tab.
1. The purchasing group 001 is responsible for the vendor.
3. You have agreed on a purchasing price of 43 USD for each dress. However,all the variants of size 10 are going to be delivered at a price of 40 USD foreach piece.
a) Go to the Purchasing tab
Net Price: 43
b) Choose Variant Prices.
c) For variant blue/size 10, enter 40 as the price.
d) Select the copy rule Copy changes to subsequent nodes in the column.
e) Choose Use Rule.
f) Use the green arrow to go back.
Task 4: Creating a Generic Article – SalesIn the Sales tab, maintain sales data for the distribution chain RG10/R1.
1. The variants of the color beige are not to be sold until one month from today.Maintain the corresponding point in time for these variants (For sale from).
a) Double-click the For Sale From field.
b) For the variants of the color beige, maintain a selling time one monthfrom today.
c) Use the green arrow to go back.
2. You sell the dress in distribution chain R10/R1 for a price of 199 USD each.
Task 5: Creating a Generic Article with 3 CharacteristicsYour vendor offers you men's trousers, which have color, size and waist size variants.Create this article in the merchandise category Bus. Cas. Trousers (RF13121).
1. Create the Basic Data for a generic article A3## in the merchandise categoryRF13121 with the article type Fashion.
a) Retailing: Master Data→ Article Data→ Article→ Create
Article A3##
Article Type Fashion Goods
Mdse Catgry RF13121
Artl category 01
Enter
2. The characteristics can be determined from the characteristics profileMENSPANTS. There are the following trousers combinations:
Exercise 29: Pricing for Generic Articlesand Variants
Exercise ObjectivesAfter completing this exercise, you will be able to:
• Determine how you should calculate the prices of generic article variants
• Calculate the prices of a generic article variant differently
Business ExampleSize 10 clothes are going to be sold at a lower price than the other sizes
Task:The generic article has been created for the dress and you now want to sell all variantsof the size 10 dress for a lower price.
1. To calculate separate prices for the variants, you have to select a specific pricingprofile in the generic article’s Basic Data.
2. The settings in that pricing profile ensure that the generic article is defaulted asthe pricing reference article. Which pricing profile do you select?
4. In the distribution chain RG10/R1, you want to sell the dress in the variantbeige, size 10 for USD 189. Call the Sales view to maintain the sales price.
How can you maintain a separate sales price for this variant?
Solution 29: Pricing for Generic Articles andVariants
Task:The generic article has been created for the dress and you now want to sell all variantsof the size 10 dress for a lower price.
1. To calculate separate prices for the variants, you have to select a specific pricingprofile in the generic article’s Basic Data.
a) Retailing: Master Data→ Article Data→ Article→ Change
Article A2##
Sales Organization RG10
Distribution channel R1
Select the Basic Data and Sales views.
2. The settings in that pricing profile ensure that the generic article is defaulted asthe pricing reference article. Which pricing profile do you select?
4. In the distribution chain RG10/R1, you want to sell the dress in the variantbeige, size 10 for USD 189. Call the Sales view to maintain the sales price.
How can you maintain a separate sales price for this variant?
Lesson OverviewAdditionals support the presentation of an article in the sales floor. They can be usedfor all article categories.
Lesson ObjectivesAfter completing this lesson, you will be able to:
• Explain which controls are necessary for additionals and set the most importantparameters
• Assign additionals to an article
Business ExampleThe T-shirts are to be presented on the sales floor using special labeling.
Functions of the AdditionalsYou can assign additionals to your articles in order to support an effective presentationin sales and to support the logistics. Examples of additionals are price tickets, securitytickets, coat hangers and packing materials (particularly for private labels). You canuse this function to, for example, arrange for the vendor to put price tickets on thegoods you order.
Other services provided by the vendor, such as the ironing or prepacking of the goods,can also be treated as additionals.
Additionals are single articles that are created in a specific article type. Additionalsare assigned to individual articles during the article maintenance.
Procedures are defined for additionals articles. These procedures control at whichevents (for example, create purchase order) the system should create data for theadditionals article, how that data is determined and how/where to provide it.
The data for the additionals is provided in IDoc (Intermediate Document) form. Toprepare additionals IDocs for printing, you require an external program that convertsthe data into the relevant printer format.
Figure 150: Additionals: Functions
Information about listed articles can be transferred by means of assortment list IDocs.If additionals are assigned to an article, and the assortment list indicator is set forthe procedure for additionals, the information about these additionals is copied intothe assortment list IDoc.
You can include material and handling costs of the additionals in the pricing of anarticle. So for example, you have the option of increasing the retail price by the cost ofthe sew-in labels, or to include the costs for attaching price tickets in the distributioncenter in the price calculation of the assigned article.
The Additionals monitor provides an overview of the additionals documents that havebeen generated by follow-up actions and their status'.
Changes made to master or movement data, for example, to an article or a retail price,lead to change pointers being updated. You can use the change analysis to trigger thegeneration of additionals IDocs in the SAP system.
If the triggering event occurs, for example, when creating a purchase order, thesystem automatically determines the relevant additionals and processes the data ofthese additionals.
If necessary, you can also manually trigger the generation of additionals IDocs. Thefollowing are examples of cases in which you can use this option:
• You need a replacement for additionals that are lost or that can no longer be used.
• You want to centrally print posters or stoppers as part of a promotion.
Settings for Additionals
Figure 151: Additionals: General Settings
In the general control for Retail master data, you define parameters that are importantfor different subfunctions in SAP Retail on client level.
In this Customizing view, you can activate the Additionals component.
Hint: If you do not want to generate any additionals, you should not set theindicator, in order to improve the performance of the system.
Figure 152: Additionals: Merchandise Category Control
You must create an article master for an additional. To this master record, you have toassign an article type provided for additionals. The article type VKHM is providedfor this in the standard delivery.
Before you create an article master for an additional, you should define a suitablemerchandise category structure for the additionals. For the additionals merchandisecategories, you have to maintain the procedures for additionals that are allowed inCustomizing.
You determine the contents of the additionals IDoc with the logical message type.When choosing the merchandise categories, you should be aware of the fact that thesame additionals IDoc is used for all the additionals in one merchandise category,due to the Customizing settings.
For each merchandise category, you can enter a procedure for additionals that isautomatically defaulted when you assign an additional to an article. In a furtherCustomizing view, you can limit the allowed procedures for additionals for eachmerchandise category for additionals.
You define how the system should determine the number. You have the followingoptions:
• The number is determined from the corresponding document or the stock. Forexample, in the case of a goods receipt, the number of labels to be printed resultsfrom the goods receipt quantity.
• The number has a fixed value. In the case of shelf-edge labels, generally onlyone label is created.
When maintaining a message type in the additionals merchandise category, youdetermine the message type that is processed when messages from a delivery areedited for an additional.
Figure 153: Additionals: Procedure for additionals
If you want to create a label for an article, you have to assign the additionals articlemaster as well as the corresponding procedure in the additional data view. Theprocedure for additionals first has to be defined in Customizing, and it must containthe following control settings:
In the Additional req. column, select whether an additional must be created for theprocedure for additionals. This should be the rule. However, you can also use aprocedure for additionals to transfer texts entered as additional information, to whichno additionals are assigned. In this case, do not select the checkbox.
If you want to create additionals in the store, the necessary data is sent to the storein assortment list IDocs. For that purpose you need to select the Assortment listcheckbox in the corresponding procedure for additionals.
If additionals are to be created centrally, for example, in a distribution center, thedata changes made to an additional and to the article belonging to it (including thearticle conditions) are then grouped together and they trigger a data entry in a centraladditionals IDoc.
If the procedure for additionals can only be carried out in selected sites, enter acorresponding class with sites in the Class Type and Class fields
As the result of certain events in the applications, for example, when creating apurchase order, the system automatically determines the relevant additionals andprocesses the data of these additionals. In the respective application, additionalsdocuments are updated and then processed in a follow-up action (for example, theyare converted into additionals IDocs).
Depending on the application, you can control for which special parameters afollow-up action is triggered for the additional.
• In the case of purchase orders, you can differentiate according to the purchaseorder category and purchase order type, as well as according to the returnsindicator. The system can also check whether the procedure for additionals isassigned to the current vendor. This assignment ensures that a vendor onlyexecutes tasks that he can actually execute. In the context of vendor pricelabelling, only the vendor who can attach a price ticket to the goods shouldreceive the information about the corresponding additionals.
• In the case of goods movements, the movement type is used for control.
• Using the delivery application, you can control the creation of additionals IDocsfor inbound deliveries (shipping notification) and rough goods receipts.
• For sales orders, sales document categories and the sales document types areused in analysis. If the relevant indicator is set, the system can search themethods provided by the customer, in order to determine the internal proceduresfor additionals.
If a procedure for additionals is to be valid for all parameter values, you can enter anasterisk (*) in the field. If, for example, a procedure for additionals should be validfor document category F (purchase order) and all order types, enter * as the valuefor the order type.
You can determine when the additionals IDoc is created using these follow-up actions:
• Create additionals IDoc immediately (when posting in the application)
• Create a purchase order for additionals
• Wait for an external additionals IDoc request
• Control the update in RIS (Retail Information System) depending on theapplication.
Consider the following to derive the required procedures for additionals:
• Which applications must respond to additionals? Is the information about theassortment list IDoc in stores sufficient? Should you affix additionals, forexample, sales price tickets, to goods in a distribution center yourself? Is adedicated additionals management required to order additionals?
• Should relevant changes be centrally evaluated for certain additionals? That can,for example, be the case for the central printing of promotion posters.
• Should the sender be restricted by a plant class, since a goods receipt may occurduring a two-step stock transfer between distribution centers in both centers, butthe additional should only be applied in one of the two centers?
• Are additionals used to act as supplementary logistics services within theframework of merchandise distribution?
Standard SettingsSeven procedures for additionals are delivered:
• The methods 0001 and 0002 refer to the additionals management.
• Method 0003 shows how an additionals IDoc is created on the basis of a goodsreceipt.
• Method 0004 informs stores about additionals to which this procedure foradditionals is assigned.
• Methods 0005 and 0006 exemplify how procedures for additionals can be set assupplementary logistics services for procurement and delivery.
• Method 0007 displays a setting for the sales order processing. The additionalsare determined from the referenced sales document for the delivery.
The procedures act as copy templates for user-defined entries with "speaking"descriptions for the procedures for additionals. As soon as user-defined procedures foradditionals are set up, the standard entries should be deleted.
The Class Type and Class fields are not filled in the standard delivery. No classesare delivered.
Exercise ObjectivesAfter completing this exercise, you will be able to:
• Set up the procedures for additionals and assign them to a merchandise categoryfor additionals
Business ExampleYou have started carrying men's trousers in your assortment and you would like topromote the sale of these trousers with a suitable label during a summer festival. Thelabel will be printed in the store and attached to the garment there too.
Task 1:The data for the labels is created centrally and transferred to the store by theassortment list. The labels are printed in the store on a separate printer. An additionalsarticle must be specified.
1. In Customizing, create a suitable additionals procedure T0## by copyingprocedure 0004 (with all dependent entries) and selecting the fields as specifiedin the task.
The description for the additionals procedure is GR##, Print in store.
2. Now assign the procedure for additionals to the merchandise category PriceLabel.
3. How many copies are created for additionals of the merchandise categoryRT11120?
Task 2:Now assign your additionals procedure to article R1TA01## and then test the datacreation by generating an assortment list.
1. Assign the sales price label RT311121 to the article R1TA01## as an additionalwith the procedure for additionals T0##.
2. The article should have the following supplementary text on the label:SPECIAL OFFER FOR SUMMER FESTIVAL!
3. Save the changes to your article.
4. Manually generate an assortment list for the customer no. - site R1## withassortment list type F for the article R1TA01##. Ensure that the article is ageneric article and that also the variants are considered in the assortment list.
5. In the additionals IDoc overview, check whether the data for the additional iscontained in the assortment lists IDoc.
Task 1:The data for the labels is created centrally and transferred to the store by theassortment list. The labels are printed in the store on a separate printer. An additionalsarticle must be specified.
1. In Customizing, create a suitable additionals procedure T0## by copyingprocedure 0004 (with all dependent entries) and selecting the fields as specifiedin the task.
The description for the additionals procedure is GR##, Print in store.
a) IMG: Logistics – General→ Additionals→ Procedure for Additionals
b) Select procedure 0004 and choose Edit→ Copy As...
c) Overwrite 0004 with T0##, change description
d) Choose Enter.
e) Table View → Save
2. Now assign the procedure for additionals to the merchandise category PriceLabel.
a) IMG: Logistics – General→ Additionals→ Allowed Procedure forAdditionals per Merchandise Category
b) Select the row with merchandise category RT11120 and procedure 0004and choose Edit→ Copy As...
c) Overwrite Proc. for additional with T0##.
d) Choose Enter.
e) Table View → Save
3. How many copies are created for additionals of the merchandise categoryRT11120?
a) Choose Enter and choose F3 to go back (green arrow).
b) Article → Save
4. Manually generate an assortment list for the customer no. - site R1## withassortment list type F for the article R1TA01##. Ensure that the article is ageneric article and that also the variants are considered in the assortment list.
a) Retailing: Master Data→ Assortment/Listing→ Assortment List→Generate→ Manual Selection:
Sales Organization RG10
Distribution channel R1
Customer No. – Site R1##
Assortment list type F
Article R1TA01##
b) Program → Execute or F8
c) → Consider Variants
5. In the additionals IDoc overview, check whether the data for the additional iscontained in the assortment lists IDoc.
a) Retailing: Sales→ Additionals→ Environment→ IDoc Overview
Created On Today
Partner Number R1##
b) Program → Execute or F8
c) Double-click message type WBBDLD.
d) Double-click the last IDoc.
e) Expand the Data Records node.
f) Behind each segment E1WBB01, there is another segment E1WBB03 andthere is another segment E1WTADAL1 behind this segment too. The datafor the additional of the relevant article can be found in this segment.
1. If you group characteristic values together ...
Answer: A, B, D
2. To be able to use the characteristic value storage for a characteristic, thecharacteristic must be created in character (CHAR) format.
Answer: character (CHAR) format
The new characteristic values can be maintained only for characteristics with acharacter format (CHAR), and when the maximum number of characters is 18.
Unit OverviewThe unit describes how structured articles are mapped in SAP Retail, and explains theinventory management options of structured articles in the logistical process, as wellas the special features of the full product and the empties article.
Unit ObjectivesAfter completing this unit, you will be able to:
• Name the different structured articles and the basic differences between them
Lesson OverviewThis lesson explains the basic differences for structured articles, such as display,sales set, and prepacks. Prepacks are often provided by vendors in the textiles andfootwear sector.
Full products and empties also belong in the structured articles category. You can setup a deposit refund program for these articles.
Lesson ObjectivesAfter completing this lesson, you will be able to:
• Name the different structured articles and the basic differences between them
• Describe the particularities of prepacks
• Explain the setup of full products and empties
Business ExampleWhen you procure textiles, fixed quantity ratios of the respective colors and sizes areoften provided by specific vendors. You use the prepack master data to define thisquantity distribution.
You add beverages, which are sold in deposit bottles, to your assortment. To be able tomanage such articles with the SAP system, you create a full product and assign thedeposit bottles and empty cases components to this full product.
Structured articles are made up of several different articles. You have to enter thecomponents as well as the quantities in which they appear in the structured articles.
The display is a quantity of single articles or variants of one or more generic articles.A prepack is purchased as an individual article. Therefore, it has its own articlenumber, a purchase price and purchase price conditions. Displays are made up by themanufacturer or vendor.
The Sales set is a quantity of single articles or variants of one or more generic articles.It is sold as an individual article. Therefore, it has its own article number, a salesprice and sales price conditions.
Purchasing sets are already purchased as sets when the articles are purchased, aremanaged as a set right through the supply chain and are sold as a set or as individualcomponents. This means, for example, a wheelbarrow is ordered and posted,components (trough, frame and wheel) are delivered, which can be sold in the store asa wheelbarrow (set) or as single articles.
A prepack is a quantity of variants of one or more generic articles. A prepack ispurchased as an individual article. Therefore, it has its own article number, a purchaseprice and purchase price conditions. Unlike displays, the components in prepacksmust belong to the same merchandise category as the prepack itself.
• A structured article consists of several components. The components themselvesare also created as articles in the system
• Bills of material are used for structuring
• Structured articles can be left in their structure in logistics or they can be dividedinto individual components.
Figure 155: Structured Articles: Sales set
As a rule, a sales set is a collection of separate articles for the purpose of defining atotal sales price. The sales set articles can often be sold as separate articles.
From the purchasing point of view, sets can be considered as several articles. Froma sales point of view, the sales set is to be considered as one article that has a salesprice and a tax code.
Sales set components can be considered as individual articles. They may belong todifferent merchandise categories and have different tax codes. The set itself, however,can only have one tax rate
Inventory is managed at component level, if the components can be sold separately.It can also be carried out at set level. In Customizing, you can define the InventoryManagement split, that is define inventory managment at component or header level.
Another form is the price set: The set is formed simply by assigning a common salesprice. This is generally lower than the total of the components' sales prices whichcan basically all be sold individually. The components are not physically combinedby means of packaging.
If sets and the articles contained in them are sold individually in the store (for example,cases and a set of three cases), then you should carry the stock on the individual articlelevel (components). The component stock decreases as the sets are sold. Any profitlosses incurred by the sale of the set are posted to a separate account (POS inbound).
Figure 156: Structured Articles: Display
A display is always a quantity of articles grouped together by the manufacturer orvendor, which may have a common purchasing price and are usually bought under thesame article number. The articles are usually presented in the same packaging.
It is not until the display reaches the stores that it is split up into its individualcomponents for sale to the consumer. Displays are used most often in promotions.Usually, they are not ordered directly by the stores, but are allocated to the storescentrally.
As a rule, inventory is managed in the store at individual component level, and inthe distribution center, it is managed for complete displays. You can determine inCustomizing at which level the system should do the inventory split of the display(usually the split to components is only defined for stores; inventory in DistributionCenters is carried at header level).
Structured Articles: PrepackA prepack is a quantity of variants of one or more generic articles. A prepack ispurchased as an individual article. Therefore, it has its own article number, a purchaseprice and purchase price conditions. The components of a prepack must belong to
the same merchandise category as the prepack itself. A prepack can be composed bythe retailer, the manufacturer or the vendor. Prepacks are mostly used in the textilesector or shoe area.
Figure 157: Structured Articles: Prepack
In the retail sector, prepacks are only sold in their individual components, whereas inwholesale, they are sold as complete prepacks.
Prepacks allow you to order a predefined quantity of variants of a generic article. Inthe purchase order, you no longer have to fill the quantity fields of the variants, sincethese values are proposed from the prepack maintenance.
Note: Example for a prepack:You created sneakers as a generic article. Thissneakers are available in sizes 11, 12, and 13. The sneakers are alwaysordered with the following quantity ratios.
Size 11 = 3x
Size 12 = 5x
Size 13 = 3x
You define a prepack, which represents the above quantity ratios.
In the purchase order, you enter the article number of the prepack. If you nowselect the value 3 for the prepack, the sneakers are automatically orderedin the following quantities:
Size 11 = 9x
Size 12 = 15x
Size 13 = 9x
Inventory is usually managed in the store on individual component level, and in thedistribution center, it is managed on complete prepack level. The splitting type can beset in Customizing and the system then automatically carries out the inventory postingat the defined level (i.e. at component or header level).
Prepacks are integrated into the process of the stock allocation with the correspondingdata for the generic article in question, the characteristics and the assortment planning.This means that an intelligent prepack stock allocation is possible, which helps toimprove the stock turnover and to reduce markdowns. For more information, see SAPHelp Portal at: help.sap.com
In the master data, prepacks are created with the article category Prepack. Bills ofmaterial are used to assign generic articles with their variants. You call the bills ofmaterial maintenance by selecting the Components button in the Basic Data view.Then enter a generic article. Choose Continue. The system automatically sets thevariants of this generic article. You now only have to enter the required quantities.You can distribute the quantities of variants using value and quota scales.
Hint: If you have created quota scales for the variant-creating characteristicsof the generic article, the system can automatically determine the requiredquantities from the quota scales. To do this, expand the relevant genericarticle and the relevant characteristic in the tree structure, and select therequired quota scale.
Prepacks can also be created from the purchasing list. However, this occurs only ifplanning is carried out in the purchasing list and then released as an article masterrecord.
Figure 159: Use the Prepack Allocation Planning to Create a Prepack
The prepack allocation planning allows you to link several prepack articles with ageneric article, and to define how these prepack articles are composed. You candetermine the components of a prepack article using a matrix. You can process genericarticles with up to two characteristics. The first or main characteristic (for example,the color) is displayed in the rows of the matrix, and the second (for example, thesize) in the columns. Both characteristics are determined by the order which wasdefined in Customizing.
You can determine the stores that are going to sell the articles concerned usingassortments or allocation rules to which you assign the corresponding prepacks.You can also determine delivery phases specifically for a certain combination ofstore group and prepack article. You can also plan stock (putaway) to be kept inthe distribution center for replenishment purposes during a season. The plannedquantities for the article concerned can be sent to the MAP transaction according tomain characteristic and assortment using an interface, so that you can check whetherthe allocated quantities match the planned quantities.
The component list for a prepack article can be changed provided the Customizingsettings allow this. You can create new prepacks and include them in the allocation.You can also remove prepacks from the allocation. The transaction for prepackallocation planning enables you to trigger the creation of the vendor purchase ordersas follow-on documents for the allocation table. If you make changes to the allocationtable at a later date, the purchase orders will be changed automatically to reflect thesechanges.
Figure 160: Structured Article in the Logistical Process
In this Customizing view, you can determine on which levels in the logistics chain(distribution center, store) .. and in which transactions you want to split the set, displayand prepack bills of material for inventory management:
In purchase orders, the resolution is purely informative.
A split in the goods receipt means that, from this level, inventory is managed oncomponent level and the header article has no stock. You can determine the split ofthe structured articles at the following levels: store/DC, distribution chain, individualsites and for individual structured articles.
Figure 161: Settings for Structured Articles Maintenance
Sets, displays, prepacks and empties are structured articles that consist of severalcomponents. In this case, you must specify not only the components, but also thequantities in which the components are contained in the structured article. Thisrelationship is shown in the bills of material.
The bill of material usage key defines the enterprise areas, in which a bill of materialcan be used (for example production, sales). It controls the processing in thedownstream work areas.
The item category controls the classification of the item in a bill of material accordingto set criteria, such as the object reference (article master record) or the inventorymanagement. This enables item-relevant data to be processed for the bill of material.You can for example control field selection, default values in bill of materialmaintenance or special system activities with the item category that you select.
Stock item example: Article data, which enables you to manage the inventory, ismaintained for this item category.
Structured Articles: EmptiesAn empties article is a form of returnable transport packaging or sales packaging thatis usually subject to a deposit. The empties article is assigned to a full product.
You can flag a full product by setting the With bill of material for empties indicatorin the article master record when you are creating the basic data screen. The bill ofmaterial for empties shows the relationship between a full product and an emptiesarticle:
The full product and the unit of measure together make up the BOM header. Theempties articles that you have assigned form the components.
The individual BOM components and the full product itself all have their own articlemaster record.
In the standard SAP Retail system, you create an empties article as a single articlewith the article type Empties and a full product as a single article too, with the articletype Full products.
If you are listing a full product that is assigned an empties article, then the emptiesarticle will also automatically be listed.
Figure 162: Full Products and Empties Articles: Empties Processing
You can only move goods with tied empties when you have activated emptiesprocessing in Customizing.
When you activate the empties processing, stock fields that are necessary for updatingthe tied empties stock are initialized.
Exercise ObjectivesAfter completing this exercise, you will be able to:
• Create a prepack in SAP Retail
Business ExampleDue to an upcoming sports event, you plan to sell sneakers for men, which aredelivered to you in prepack quantities.
Task 1: Define Generic Articles for a PrepackCreate sneakers for men as a generic article. Only maintain the Basic Data view.
1. The men's sneakers have the article number A5## and belongs to the merchandisecategory RF11111 (athletics). As you want to carry the article in several colorsand sizes, you choose the article category generic articles. The article is afashion article with the article type: Fashion Goods.
2. The system determines the colors and sizes of the article from the characteristicsprofile RFP04.
3. The men's sneakers are offered is the colors black and camel and in the sizes 8.5and 9. Create all the possible combinations of these colors and sizes.
4. Enter Men's sneakers Gr## as the article short text.
5. Save your article.
Task 2: Create PrepackNow create a prepack with which you want to order the shoes from your vendor at alater stage. You only maintain the Basic Data view for the prepack too.
1. The prepack has the article number LOT_## and also belongs to yourmerchandise category for athletics RF11111. The article is a fashion articlewith the article type Fashion.
Ensure you select the correct article category.
2. Your article description is Sneakers prepack Gr##.
3. Now allocate the components to the prepack. Create the components from thegeneric article variants A5##. Enter a quantity for every combination. Theprepack should not contain more than 20 sneakers. Let the system check thisand adjust the quantities if necessary.
Task 1: Define Generic Articles for a PrepackCreate sneakers for men as a generic article. Only maintain the Basic Data view.
1. The men's sneakers have the article number A5## and belongs to the merchandisecategory RF11111 (athletics). As you want to carry the article in several colorsand sizes, you choose the article category generic articles. The article is afashion article with the article type: Fashion Goods.
a) Master Data→ Article Data → Article→ Create
Choose the Basic Data view and enter the information specified in the task.
2. The system determines the colors and sizes of the article from the characteristicsprofile RFP04.
a) Select characteristic profile RFP04 by double-clicking.
3. The men's sneakers are offered is the colors black and camel and in the sizes 8.5and 9. Create all the possible combinations of these colors and sizes.
a) Use the F4 Help to select the values black and camel, as well as the sizes8.5 and 9 from the Characteristic Value Assignment subscreen.
b) Confirm your entries by pressing Enter.
c) Press F3 to go to the generic article matrix.
d) Select all combinations.
e) Choose F8 to go back to the Basic Data view of the article.
4. Enter Men's sneakers Gr## as the article short text.
Task 2: Create PrepackNow create a prepack with which you want to order the shoes from your vendor at alater stage. You only maintain the Basic Data view for the prepack too.
1. The prepack has the article number LOT_## and also belongs to yourmerchandise category for athletics RF11111. The article is a fashion articlewith the article type Fashion.
Ensure you select the correct article category.
a) Retailing: Master Data→ Article Data→ Article→ Create
b) Select the Basic Data view.
Article LOT_##
Article Type Fashion Goods
Mdse Catgry RF11111
Artl category Prepack
c) Enter and confirm the message(s)
2. Your article description is Sneakers prepack Gr##.
a)
Description Sneakers prepack Gr##
3. Now allocate the components to the prepack. Create the components from thegeneric article variants A5##. Enter a quantity for every combination. Theprepack should not contain more than 20 sneakers. Let the system check thisand adjust the quantities if necessary.
a) Choose Components
Generic article A5##
Target total 20 EA
b) Enter the quantities for the individual components and adjust them to thetarget total if necessary.
Exercise ObjectivesAfter completing this exercise, you will be able to:
• Create a full product with the copy function.
• Assign empties components, such as deposit bottles and empty cases, to a fullproduct.
Business ExampleYou add Cola to your beverages assortment. To do this, you create a full product andassign the deposit bottle and empty case components to this full product.
Task 1: Create Full ProductCreate an article master record for your full product. You use the copy function to dothis.
1. Use article 311240 (water) as a template and so as a data source. The new article(target article) should receive the article number A6##.
2. Copy the underlying article data.
Task 2: Assign EmptiesAfter the new article A6## is created, you change the description to Cola and assignthe empties.
1. The full product Cola can be sold in individual bottles and in cases of 24 bottles.Create the empties components in question for the particular unit of measure.Note that a full product case consists of 24 bottles and an empty case. Use thearticle 311223 as a deposit bottle, use the article 311222 as an empty case. Savethe entries you have made. Note: To assign empties components to severalunits of measure, the article must be saved and then called again every time aunit of measure is maintained.
2. Which components and component quantities are as-signed to the unit of measure each in the Empties BOM?________________________________________________________________________________________
3. Which components and component quantities are as-signed to the unit of measure case in the Empties BOM?________________________________________________________________________________________
Task 1: Create Full ProductCreate an article master record for your full product. You use the copy function to dothis.
1. Use article 311240 (water) as a template and so as a data source. The new article(target article) should receive the article number A6##.
a) Master Data→ Article Data→ Article→ Copy
b)
Source article - article number 311240
Target Article - article number A6##
2. Copy the underlying article data.
a) Select Underlying Material Data.
Execute (F8)
Exit from the message text by choosing the Back arrow. You go backto the Copy Article entry screen.
Task 2: Assign EmptiesAfter the new article A6## is created, you change the description to Cola and assignthe empties.
1. The full product Cola can be sold in individual bottles and in cases of 24 bottles.Create the empties components in question for the particular unit of measure.Note that a full product case consists of 24 bottles and an empty case. Use thearticle 311223 as a deposit bottle, use the article 311222 as an empty case. Save
the entries you have made. Note: To assign empties components to severalunits of measure, the article must be saved and then called again every time aunit of measure is maintained.
a) On the Copy Article entry screen, click the target article number andchoose Change Article.
Or:
Master Data→ Article Data→ Article→ Change
and enter the new article number.
Select Basic Data and choose Enter.
On the basic data view, change the article description and chooseComponents.
b) On the Change Empties BOM input screen, enter CSE (for case) as theUnit of Measure and choose Enter .
In the Component Overview for component 311222 (empties), enter 1as the quantity and choose Enter.
Enter the Component quantity 24 for the component 311223 (depositbottle), and choose Enter.
Choose the Back arrow.
Save
Repeat the solution given in process a) to maintain the unit of measure EA(each), since only one bill of material can be created in a transaction.
On the Change Empties BOM input screen, enter EA as the Unit ofMeasure and choose Enter. In the Component Overview for component311223 (deposit bottle), enter 1 as the Quantity and choose Enter.
Back arrow
Save
2. Which components and component quantities are as-signed to the unit of measure each in the Empties BOM?________________________________________________________________________________________
a) Component 311223 (deposit bottle) with 24 bottles and component 311222(empty case) with one case.
3. Which components and component quantities are as-signed to the unit of measure case in the Empties BOM?________________________________________________________________________________________
a) Component 311223 (deposit bottle) with one bottle.
Lesson OverviewNormally, the base unit of measure of an article is used for inventory managementand requirements planning. However, for some articles it can be necessary tosimultaneously carry stock in different units of measure, or to also plan an article indifferent units of measure. In this case, you must create an article as logistical variants.
Lesson ObjectivesAfter completing this lesson, you will be able to:
• Describe the range of functions of logistical variants in SAP Retail
• Create logistical variants
Business ExampleYou carry a new yoghurt in the assortment, which is to be carried in the unit ofmeasure Each and in the unit of measure Tray.
• A logistical variant is the variant of a generic article for a specific unit of measure.
• Using logistical variants, you can carry separate stocks in various units ofmeasure for an article and the article can be procured in each of these unitsof measure.
You can assign different units of measure to each logistical variant's article masterrecord.
The following types of logistical variants exist:
The procurement variant is the variant for the unit of measure in which an articleis procured either from an internal or an external vendor. You can have severalprocurement variants for an article.
The sales variant is the variant for the unit of measure in which an article is carriedfor sale to the consumers. Sales transactions reduce the inventory of this unit ofmeasure (variant). For each generic article there is only one sales variant.
This variant can be sold in various sizes of packaging that you have to enter into thearticle master record of the variant as alternative units of measure.
The merchandise category in which the logistical variant is created must have at leastone characteristic that has the logistical unit of measure feature (relevancy indicator= 3).
Characteristics for logistical units of measure can also be grouped under characteristicprofiles and assigned to merchandise categories.
The logistical units of measure have to be defined in Customizing as units of measureunder General Settings - Check Units of Measurement.
When creating the generic article you determine which unit of measure will be usedas the sales unit of measure. The procurement units of measure are automaticallyassigned to the variants in this way.
If the indicator in the sales view is set to Sales UoM not variable, no other sales unitof measure can be assigned to the individual variants.
If the indicator has not been set, then you have to adjust the sales period in the listingaccordingly.
By assigning the units of measure in the basic data view, the following validity periodsfor listing and sales are assigned by the listing:
The variant with the sales unit of measure is listed for one day, so that the articlecannot be procured in this unit of measure. The sales period is defaulted from thevalidity period in the basic data.
The procurement variants are listed in connection with the validity period for exactlythis time-frame so that the article can also be procured in these units of measure. Thesales period is set to only one day (current date) as these variants and their units ofmeasure were not defined as sales units of measure.
Exercise ObjectivesAfter completing this exercise, you will be able to:
• Create additional units of measure as characteristics for logistical variants
• Create logistical variants and list them accordingly
Business ExampleIn your stores and distribution centers you want to define the units of measure inwhich you order, deliver and sell yogurt.
To do this, you add the required characteristic Logistical units of measure to themerchandise category for dairy products.
Task 1:Create a characteristic for logistical units of measure with the characteristic nameLO_ME1##.
1. The characteristic description is Log. units of measure Gr##. The data type isCharacter format and the number of characters should be limited to three.
2. Maintain the description in German: Log. Mengeneinheiten Gr##.
3. You should be able to choose from all characteristic values that are available inthe check table.
4. Save the characteristic.
Task 2:In future, merchandise category RS14110 should use your characteristic for thelogistical units of measure. You use a characteristic profile for this.
1. Create characteristic profile PRO2## and assign your characteristic LO_ME1##to it.
Set the relevancy indicator so that the characteristics can be recognized aslogistical units of measure.
2. You then assign characteristic profile PRO2## to merchandise categoryRS14110.
Task 3:Now create a new article yoghurt as a logistical variant. Select the Basic Data andListing views.
1. Your new article has the article number A7##. You want to create it in articletype FRIP (Perishables) and merchandise category RS14110. Logistical variantsare always created as generic articles.
2. Choose your characteristic profile PRO2## by double-clicking it, and createthe yogurt for the following combinations of characteristic values of yourcharacteristic LO_ME1##:
Each X
Pack X
Layer X
3. Enter “Yoghurt Gr##” as the article short text.
4. The unit of measure is calculated as follows:
EA = 1 EA
PAC = 12 EA
LAY = 600 EA
Task 4:Go to the Listing view and list the generic article with all its variants.
1. Use the listing procedure that checks merchandise categories and assortmentgrades.
2. Perform the listing and display the results for the assortments.
Go to the individual variants. Why are the listing and sales periods different?
Task 1:Create a characteristic for logistical units of measure with the characteristic nameLO_ME1##.
1. The characteristic description is Log. units of measure Gr##. The data type isCharacter format and the number of characters should be limited to three.
a) Retailing: Master Data→Merchandise Category Data→ Characteristics→ Characteristics Management.
Characteristic LO_ME1##
Enter
Description Log. units of measure Gr##
Data Type Character Format
Number of Chars 3
2. Maintain the description in German: Log. Mengeneinheiten Gr##.
a) Descriptions tab
DE Log. MengeneinheitenGr##
3. You should be able to choose from all characteristic values that are available inthe check table.
a) On the Values tab: click the Other Value Check button and choose thecheck table T006.
Task 2:In future, merchandise category RS14110 should use your characteristic for thelogistical units of measure. You use a characteristic profile for this.
1. Create characteristic profile PRO2## and assign your characteristic LO_ME1##to it.
Set the relevancy indicator so that the characteristics can be recognized aslogistical units of measure.
a) Retailing: Master data→Merchandise Category Data→ CharacteristicsProfile→ Create
Characteristic Profile PRO2##
Description Logistical Variants ##
b) Characteristics tab
Characteristic LO_ME1##
Relevancy Indicator 3
c) Save
2. You then assign characteristic profile PRO2## to merchandise categoryRS14110.
a) Retailing: Master data→Merchandise Category Data→ MerchandiseCategory → Change
b) Enter PRO2## in the Hierarchy assignment subscreen behindCharacteristic profile, and choose the Assign Profile button.
Task 3:Now create a new article yoghurt as a logistical variant. Select the Basic Data andListing views.
1. Your new article has the article number A7##. You want to create it in articletype FRIP (Perishables) and merchandise category RS14110. Logistical variantsare always created as generic articles.
a) Retailing: Master Data→ Article Data→ Article→ Create
b) Select the Basic Data and Listing views.
Article Number A7##
Merchandise Category RS14110
Article Type Perishables
Article Category Generic article
c) Enter
2. Choose your characteristic profile PRO2## by double-clicking it, and createthe yogurt for the following combinations of characteristic values of yourcharacteristic LO_ME1##:
a) Double-click the characteristics profile PRO2##.
b) Then select the F4 Help beside your characteristic LO_ME1##, andselect the values for Each, Pack and Layer in the Characteristic ValueAssignment subscreen.
c) Choose Enter.
d) To go to the generic article matrix, choose F3.
e) Select the combinations as follows:
Each X
Pack X
Layer X
f) Choose F8 to go back to the Basic Data view of the article.
3. Enter “Yoghurt Gr##” as the article short text.
a) Article short text:Yoghurt Gr##
4. The unit of measure is calculated as follows:
EA = 1 EA
PAC = 12 EA
LAY = 600 EA
a) Basic Data tab
b) In the Units of measure/EANs/dimensions subscreen:
Task 4:Go to the Listing view and list the generic article with all its variants.
1. Use the listing procedure that checks merchandise categories and assortmentgrades.
a) Listing tab
b) Listing Procedure: B1
c) Click the Execute Listing button.
d) Click the Assorts button.
e) Article → Save
2. Perform the listing and display the results for the assortments.
Go to the individual variants. Why are the listing and sales periods different?
EA: ___________________
PAC: ___________________
LAY: ___________________
a) Retailing: Master Data→ Article Data→ Article→ Change
b) Select the Listing view.
c) Click the Validity Area button.
EA: The variant EA is listed for a day; the selling period depends on thevalidity period. This means that the variant EA cannot be ordered, butit can be sold.
PAC: the variant PAC is listed as the validity period, but the selling periodis one day. This means that the variant PAC cannot be sold, but it canbe ordered.
• Describe some related components and solutions that are connected to themySAP Retail solution
Related Information
If you have completed the units on master data in good time and have finished onThursday, you can start the promotion process (unit 1 from SAP for Retail AssociateAcademy II) on Friday. However, note that the promotion process must be completedon Friday since the system is refreshed on the weekend. All of the data created on thecourse during the first week is therefore lost and cannot be accessed in the secondweek.
A client usually represents the mapping of a particular company in an SAPsystem. This means that in an SAP system with multiple clients, severalcompanies can be represented and used in parallel. The client is represented as akey field in the tables of the database associated with the SAP system. Whenworking in a client, you only have access to data from the same client. Eachclient therefore represents an independent business entity.
Command fieldIn the command field, you can start applications directly by entering a transactioncode.
EmptiesAn empties article (packing material, synonym: deposit article) is a form ofreturnable transport packaging or sales packaging that is usually subject to adeposit. The empties article is assigned to a full product. You can flag a fullproduct by setting the With bill of material for empties indicator in the articlemaster record when you are creating the basic data screen. The connectionbetween a full product and the empty is established by the BOM for empties(assignment of full-product and empties in category and quantity): The fullproduct and the unit of measure together make up the BOM header. The emptiesarticles that you have assigned form the components.The individual BOMcomponents and the full product itself all have their own article master record.
F1 HelpYou can use the F1 key to display explanations for fields, menus, functions,and system messages. The F1 help also displays technical information on thecurrent field.
F4 HelpF4 help provides input help (value help) for an input field.
FavoritesFavorites include functions in the SAP system, and links to Internet content andto files on the end user's front end server.
Field groupA field group includes related screen elements, for example, all checkboxesavailable for a particular selection.
Full productYou can flag a full product (synonym: full-product article) by setting the Withbill of material for empties indicator in the article master record when youare creating the basic data screen. The bill of material for empties shows therelationship between a full product and an empties article: The full product andthe unit of measure together make up the BOM header. The empties articles thatyou have assigned form the components.
Non-Tied Empties ArticleUntied empty means that stock of the “empty” empty is available.
PrepackA prepack is a quantity of variants of one or more generic articles. A prepackis purchased as an individual article. Therefore, it has its own article number, apurchase price and purchase price conditions. Unlike displays, the components inprepacks must belong to the same merchandise category as the prepack itself.
RoleA role is a collection of activities that a person executes to participate in one ormore business scenarios of an organization. Access to the transactions, reports,Web applications, and so on included in the role is provided by user menus.
SAP Easy AccessSAP Easy Access is the standard access screen in SAP systems. On the left of thescreen, a tree structure is displayed containing a list of the available SAP systemmenus. On the right of the screen, a customized logo can be displayed.
SAP LogonWhen you call the SAP Logon, it displays a list of SAP systems for whichyou can start the logon process. This list is compiled from entries in a file onthe front end: saplogon.ini. This file is typically preconfigured for end usersand made available from a central location. When logging on to a system, theSAP Logon program also enables load balancing using the available resourcesof the chosen system.
SAP NoteAn SAP Note is a text containing information for a particular question, problemsituation, or system message that can occur in connection with your work inthe system. All SAP notes are available in an online database. A possiblequestion could be, for example: “Which versions of database XY are released inconjunction with my SAP system release? ”
SAP systemAn SAP system could be an SAP R/3, SAP BW, or SAP CRM system, forexample. SAP systems are the central components of mySAP solutions withinthe framework of mySAP.com.
Structured articlesStructured articles are made up of several different articles. You must entercomponents and quantities which are used for the components in the structuredarticles.
Tied Empties ArticleEmpties are divided into tied and non-tied empties. Tied empty means that stockof the “full” empty is available.
Transaction codeA transaction code (or T-code) is a sequence of characters that identifies atransaction in the SAP system. A transaction code can contain between 0 and 20characters and must always begin with a letter. Permitted characters are lettersfrom A to Z, numbers from 0 to 9, and an underscore. To call a transaction, enterthe transaction code in the command field and press Enter.
User Master RecordThe user master record contains the definition of a user in the client. It containsfields such as Last Name, First Name, Initial Password, and Telephone Number.The user master record is used to set up the user context when a user logs on tothe system.
FeedbackSAP AG has made every effort in the preparation of this course to ensure the accuracyand completeness of the materials. If you have any corrections or suggestions forimprovement, please record them in the appropriate place in the course evaluation.


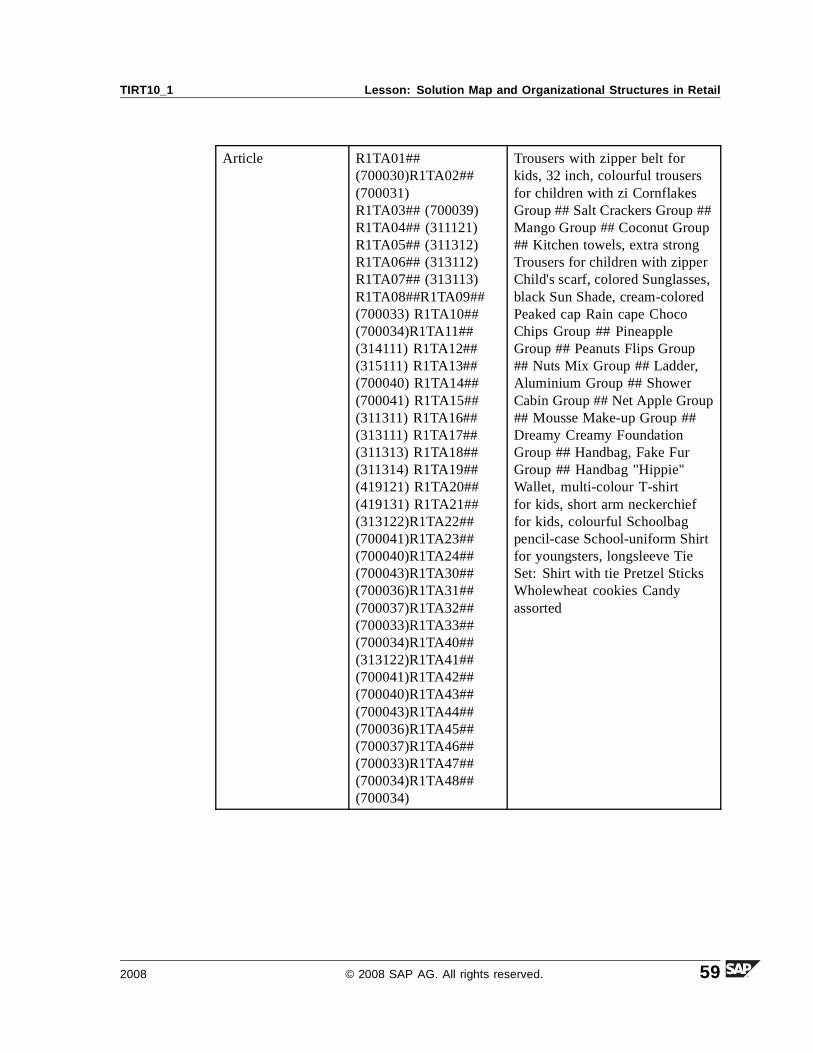

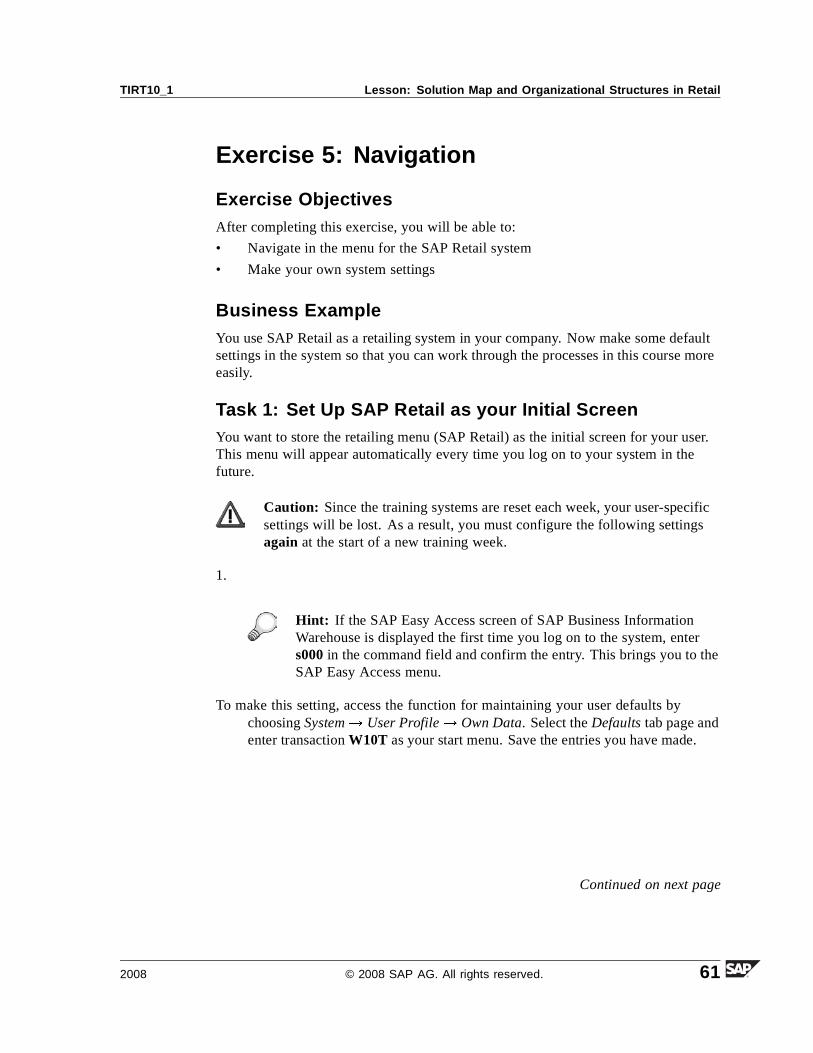


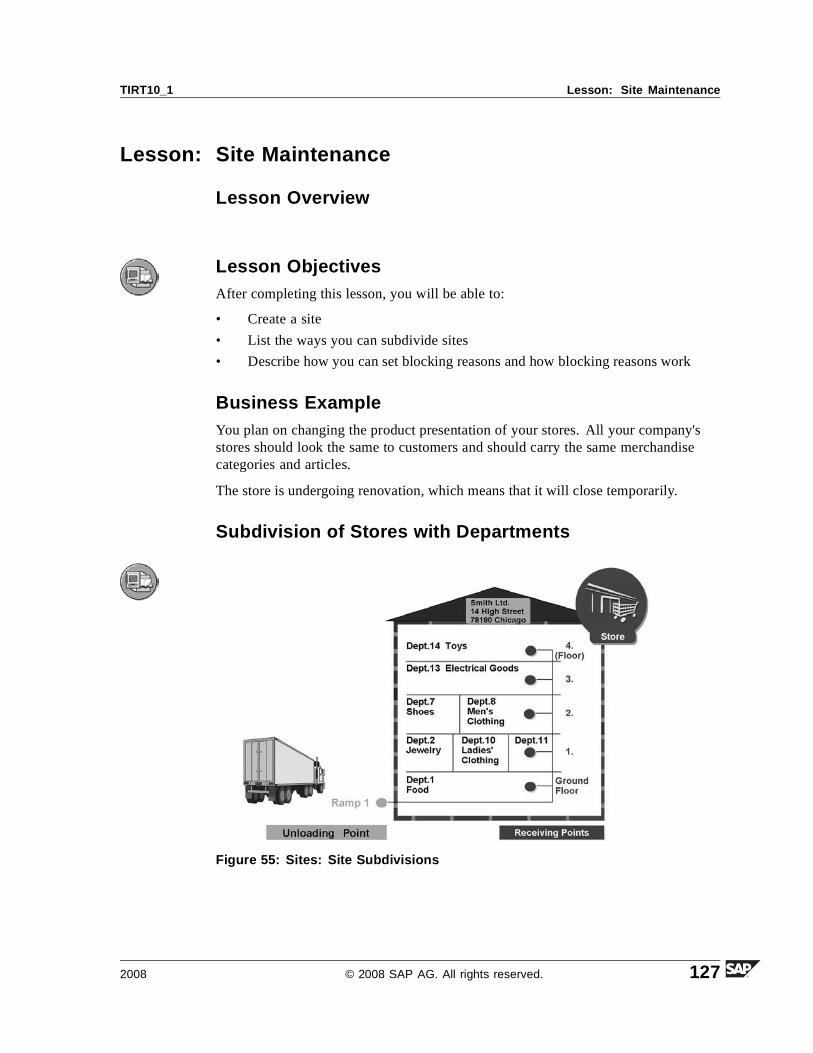


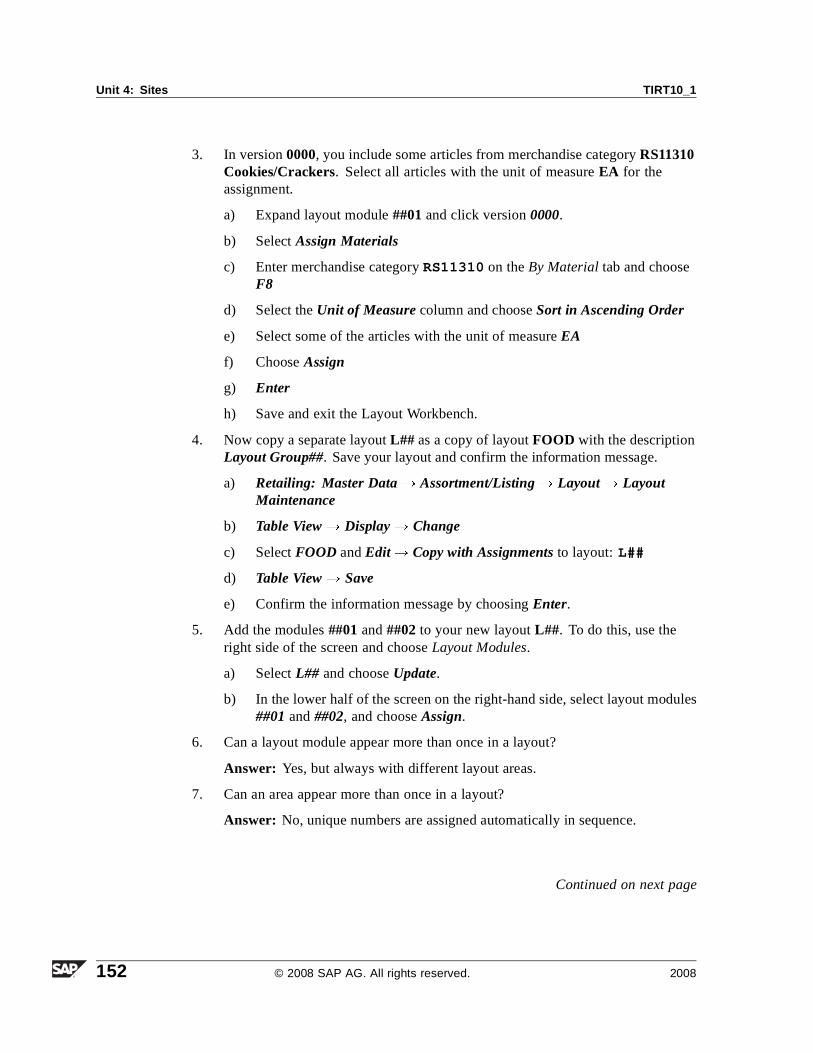


![BC480 en Col62 FV Part A4[1] - PDF Based Print Forms](https://static.documents.pub/doc/80x56/5477dc37b4af9f4d108b4a2e/bc480-en-col62-fv-part-a41-pdf-based-print-forms.jpg)


