70
Tobi McMillan, TTU/HHMI CISER Sahala Hardin, TTU/HHMI CISER Robyn Green, Lubbock Cooper High School
Tobi McMillan, TTU/HHMI CISER Sahala Hardin, TTU/HHMI CISER
Robyn Green, Lubbock Cooper High School

Activity Outline
Activity Estimated Time Requirement
Tsunami Background Information 10 - 30 min.
Youth Relief Scenario letter identity assignments region assignments/information
15 min.
Outbreak Simulation exchanging fluids activity puzzle cards determine most likely causes
45 – 60 min.
Testing the Waters 30 min.
Bacteria Inductive 30 min.
Gram Stain 60 min.
Kirby Bauer Suchman inquiry antibiotic plates
60 min.
Biomolecule Basics 60-90 min.
Group Presentations 30 min.
Objectives TLW research and identify the causes and the effects of the Southeast Asian tsunami of December 2004 and characteristics of specific regions in order to familiarize themselves with current global events. TLW organize and analyze information in a disease outbreak model in order to determine its source and path of infection in a survivor camp. TLW classify illustrations of bacteria and justify groupings in order to demonstrate understanding of common bacterial characteristics. TLW examine bacterial growth and differentiate between gram positive and gram negative stains in order to identify the source of disease at a survivor camp. TLW compare the effectiveness of antibiotics using the Kirby Bauer method to recommend treatment for the disease. TLW draw conclusions and explain recommendations to demonstrate their understanding of an infectious disease.
Biology of Disaster Relief Teacher TTU/HHMI 2006

Tsunami Background Information
Purpose The purpose of this lesson is for students to become familiar with the Southeast Asian tsunami, including its causes, effects and the characteristics of the people groups in the region. Teacher Background Teachers may choose to prepare and present the background information in a slide show or provide the necessary materials for students to research in groups. Materials Access to Internet, including the following websites
general tsunami information www.ess.washington.edu/tsunami/index.html www.tsunami.noaa.gov/ www.fema.gov/kids/tsunami.htm Southeast Asia tsunami information
news.nationalgeographic.com/news/2005/01/0107_050107_tsunami _index.html www.spaceimaging.com/gallery/tsunami/default.htmnewton.uor.edu/departments&programs/AsianStudiesdept/tsunami.htmlen.wikipedia.org/wiki/2004_Indian_Ocean_earthquake
Access to print resources that cover current events
Procedure 1. Introduce the tsunami to students with a brief synopsis. 2. Present slide show to class. 3. Discuss the causes and effects of the tsunami with students. Include a discussion of the general characteristics of the people groups in the region. or 1. Introduce the tsunami to students with a brief synopsis. 2. Divide students into groups to research different aspects of the tsunami. Students could produce a brief presentation/slide show, a brochure, or a report. 3. Allow time for students to share the information collected with others. 4. Discuss the causes and effects of the tsunami with students. Include a discussion of the general characteristics of the people groups in the region.
Biology of Disaster Relief Teacher TTU/HHMI 2006

Assessment Successful completion of viewing slide show or sharing product with others. Informal assessment through discussion of understanding of the causes and
effects of the tsunami. discussion questions may include: What causes tsunamis? What were some of the immediate effects of the tsunami? What might be some long-term effects of the tsunami?
How was the tsunami similar and different from Hurricane Katrina? How did local people and tourists react to the tsunami? How did unaffected nations react to the tsunami?
Biology of Disaster Relief Teacher TTU/HHMI 2006

Youth Relief Scenario
Purpose The purpose of this activity is to place students at the scene of the SE Asia tsunami by having them participate in a scenario that closely models actual relief efforts and problems that occurred after the tsunami in refugee camps. In this activity students will take on the role of both volunteers on a “Youth Relief Corps” team that is assisting in relief efforts as well as Indonesian survivors. Teacher Background The SE Asia tsunami occurred on December 26, 2004 with the epicenter located off the west coast of Sumatra, Indonesia. However, due to the magnitude of the initial undersea earthquake, a series of tsunamis were triggered that spread throughout the Indian Ocean. Affected areas spanned from communities across South and Southeast Asia, including parts of Indonesia, Sri Lanka, India and Thailand. It is important to note that although a large area was affected by the tsunami our scenario will focus only on specific regions in Northern Sumatra. For more info, go to en.wikipedia.org/wiki/2004_Indian_Ocean_earthquake. Prior to this activity teachers will need to print and prepare all materials listed. Materials Youth Relief Corp Letter (copies for classroom) 1 set of 24 Indonesian Profile Cards 3 copies of each Region Fact Sheet
Kota Sabang Aceh Besar Aceh Jaya Aceh Barat overhead of Sumatra Map with regions
Procedure
1. Following the presentation of the “Tsunami Background Information” have students read the Youth Relief Corp letter, which welcomes them to their assignment.
2. Read or convey the following scenario to the students. As a member of the Youth Relief Corps, they will be working with refugees at a relief camp in Banda Aceh. Survivors have been relocated there from four different regions of Northern Sumatra: Kota Sabang, Aceh Besar, Aceh Jaya, Aceh Barat. Recently in the camp a large number of people have become very ill and many are starting to die. Symptoms seem to be generic such as high fever and diarrhea, and the cause of the outbreak is unknown. It is the job of the Youth Relief Corps members to determine the source of the disease and its means of
Biology of Disaster Relief Teacher TTU/HHMI 2006

infection. However, first we must familiarize ourselves with the areas our survivors are from as well as the survivors themselves.
3. Give each student one Indonesian Profile Card and allow them to review
their card. Explain to students that they will now take on the role of the person on their card.
4. Project the overhead of the map. 5. Have students get into groups representing their prospective regions from
their Indonesian Profile Card. There should be four groups of six. Groups:
Aceh Besar Aceh Jaya Aceh Barat Kota Sabang
Iksan Zakaria Udin Rong
Nimarshi Narmada Santoso Balu
Letchmi Guntur Sudono Hendri
Kersen Sri Tuti Moa
Sujatmi Arijali Caara Bahavani
Gema Niakos Merpati Rhad
6. Once students are in their perspective groups, give each of the groups
three copies of their Region Fact Sheet. Allow groups time to both review their area’s information and locate their area on the overhead map.
7. Have each group come to the front and state the name of their region,
identify it on the overhead and share five or six interesting facts about their region with the class.
Assessment Informal assessment may be conducted through discussions for understanding geographic and demographic characteristics of Northern Sumatra.
Biology of Disaster Relief Teacher TTU/HHMI 2006

YOUTH RELIEF CORPS
Phone: 806-742-2784 Fax: 806-742-0367
E-mail: [email protected]
Youth Relief Corps
Congratulations! You have been accepted to work on a Youth Relief Corps volunteer team. Our purpose is to empower youth to meet needs of disaster survivors all around the globe. We’re so pleased you have chosen to volunteer with us. Your team has been selected to serve tsunami survivors from Indonesia. Your work will be focused on the area of Northern Sumatra. As a participant in the program you will have the opportunity to be involved in various aspects of relief. Based on the information you gather about your assigned region you will propose types of aid and supplies for Youth Relief Corps to send. Your careful observations and decision making will help us greatly. We look forward to working with you! Sincerely, Julie Isom Program Director Youth Relief Corps
Texas Tech University Room 16 Biological Sciences
Lubbock, Texas 79409
Biology of Disaster Relief Teacher TTU/HHMI 2006

Indonesian Profile
Cards
Biology of Disaster Relief Teacher TTU/HHMI 2006

YOUTH RELIEF CORPS Name: Balu Liyanage Age: 8 Region: Kota Sabang Surviving Family Members: Mother Bahavani
YOUTH RELIEF CORPS Name: Nimarshi Wasana Age: 13 Region: Aceh Besar Surviving Family Members: Brother Amar
Biology of Disaster Relief Teacher TTU/HHMI 2006

YOUTH RELIEF CORPS Name: Santoso Ligati Age: 24 Region: Aceh Barat Surviving Family Members: None
YOUTH RELIEF CORPS Name: Hendri Kanjani Age: 8 Region: Kota Sabang Surviving Family Members: Brother Jamil
Biology of Disaster Relief Teacher TTU/HHMI 2006

YOUTH RELIEF CORPS Name: Kersen Manado Age: 11 Region: Aceh Besar Surviving Family Members: Sister Nikla
YOUTH RELIEF CORPS Name: Arijali Pertiwi Age: 27 Region: Aceh Jaya Surviving Family Members: None
Biology of Disaster Relief Teacher TTU/HHMI 2006

YOUTH RELIEF CORPS Name: Moa Sukiwo Age: 6 Region: Kota Sabang Surviving Family Members: None
YOUTH RELIEF CORPS Name: Dian Nadomak Age: 13 Region: Kota Sabang Surviving Family Members: Father Rong
Biology of Disaster Relief Teacher TTU/HHMI 2006
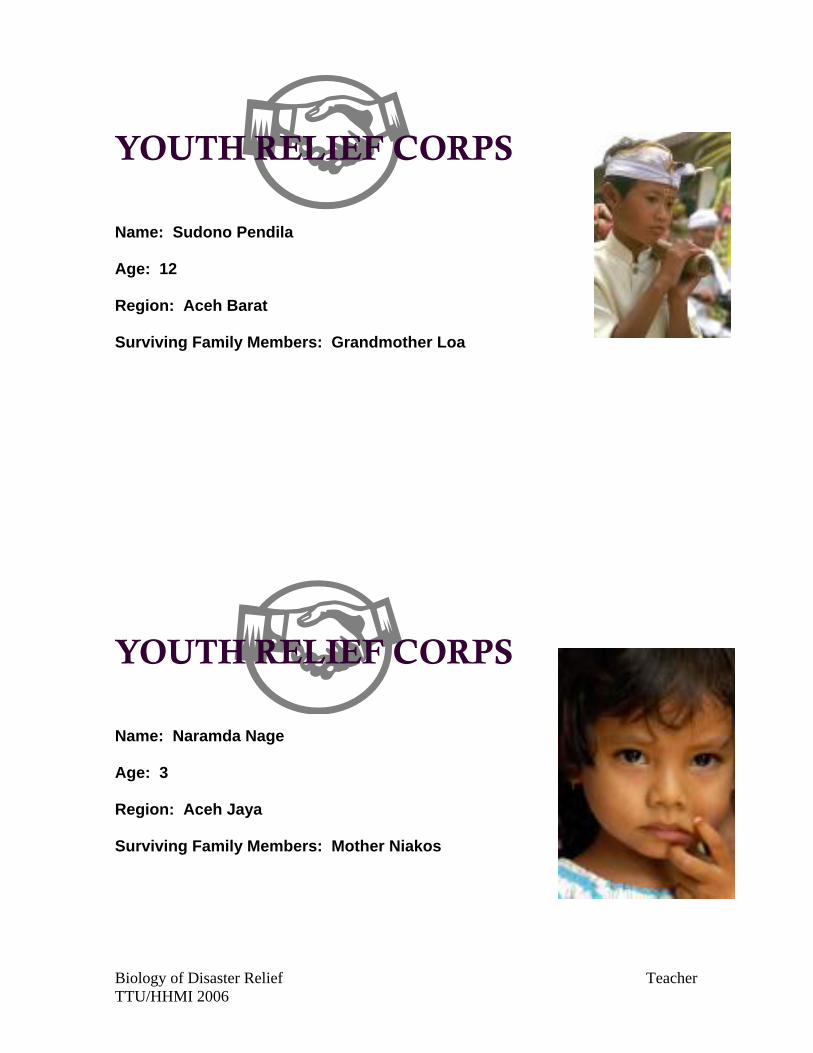
YOUTH RELIEF CORPS Name: Sudono Pendila Age: 12 Region: Aceh Barat Surviving Family Members: Grandmother Loa
YOUTH RELIEF CORPS Name: Naramda Nage Age: 3 Region: Aceh Jaya Surviving Family Members: Mother Niakos
Biology of Disaster Relief Teacher TTU/HHMI 2006

YOUTH RELIEF CORPS Name: Tuti Alatas Age: 43 Region: Aceh Barat Surviving Family Members: Husband Merpati, sister Caara
YOUTH RELIEF CORPS Name: Merpati Alatas Age: 58 Region: Aceh Barat Surviving Family Members: Wife Tuti, sister-in-law Caara
Biology of Disaster Relief Teacher TTU/HHMI 2006

YOUTH RELIEF CORPS Name: Caara Alatas Age: 40 Region: Aceh Barat Surviving Family Members: Sister Tuti, brother-in- law Merpati
YOUTH RELIEF CORPS Name: Niakos Nage Age: 43 Region: Aceh Jaya Surviving Family Members: Daughter Naramda
Biology of Disaster Relief Teacher TTU/HHMI 2006

YOUTH RELIEF CORPS Name: Bahavani Liyanage Age: 27 Region: Kota Sabang Surviving Family Members: Son Balu
YOUTH RELIEF CORPS Name: Iksan Sukamo Age: 7 Region: Aceh Besar Surviving Family Members: Mother Sujatmi, Sister Gema Biology of Disaster Relief Teacher TTU/HHMI 2006

YOUTH RELIEF CORPS Name: Letchmi Perkasa Age: 61 Region: Aceh Besar Surviving Family Members: Son Akeel
YOUTH RELIEF CORPS Name: Sri Suparmanputra Age: 13 Region: Aceh Jaya Surviving Family Members: None Biology of Disaster Relief Teacher TTU/HHMI 2006

YOUTH RELIEF CORPS Name: Rong Nadomak Age: 32 Region: Kota Sabang Surviving Family Members: Son Dian
YOUTH RELIEF CORPS Name: Udin Gamelan Age: 8 Region: Aceh Barat Surviving Family Members: None
Biology of Disaster Relief Teacher TTU/HHMI 2006

YOUTH RELIEF CORPS Name: Sujatmi Sukamo Age: 29 Region: Aceh Besar Surviving Family Members: Daughter Gema, son Iksan
YOUTH RELIEF CORPS Name: Gema Sukamo Age: 5 Region: Aceh Besar Surviving Family Members: Mother Sujatmi, brother I
ksan
Biology of Disaster Relief Teacher TTU/HHMI 2006

YOUTH RELIEF CORPS Name: Zakaria Liykiwim Age: 7 Region: Aceh Jaya Surviving Family Members: None
YOUTH RELIEF CORPS Name: Guntur Donoshi Age: 4 Region: Aceh Jaya Surviving Family Members: None
Biology of Disaster Relief Teacher TTU/HHMI 2006

Overhead Maps
Biology of Disaster Relief Teacher TTU/HHMI 2006

geographic map from www.humanitarianinfo.org/sumatra modified with captions by TTU/HHMI
Banda Aceh
Kota Sabang
Regions of Youth Relief Corps aid to displaced persons: Northern Sumatra, Indonesia
N
S
E W
INDIAN OCEAN
Aceh Besar
Aceh Jaya
Aceh Barat
Biology of Disaster Relief Teacher TTU/HHMI 2006

Biology of Disaster Relief Teacher TTU/HHMI 2006

Region Fact Sheets
Biology of Disaster Relief Teacher TTU/HHMI 2006

Biology of Disaster Relief Teacher TTU/HHMI 2006
Island name: Sumatra
Area: 473,607 sq mi Population: 40 million Tribes: Batak and Malays Exports: Produces 30% of country’s total exports
Region of Sumatra name:
A c e h J a y a Location: between Aceh Besar and Aceh Barat Terrain: coastal lowlands, lush flora and fauna, rainforests Climate: tropical, hot, humid Wildlife: turtles, orangutans, frogs, crabs, snakes, birds, butterflies, deer, fish Local industry: rice fields, aquaculture, banana and coconut sales Points of interest: “Jaya” is a local word for success. Parts of the Western coast are somewhat deserted and rugged. Many Achenese people practice open water fishing in small boats.
Country name: republic of Indonesia
Area: 1.91 million sq km Population: 242 million Capital City: Jakarta People: approximately 300 ethnic and tribal groups Language: Indonesian Religion: 90% Muslim Industry: oil, gas, textiles, coffee, rubber, timber, rice Geographic Location: Indonesia is an archipelago in the Indian and Pacific Oceans. It is situated between Southeast Asia and Australia. Indonesia is made up of about 17,500 islands and stretches across 300 miles. The landscape varies from island to island. Sandy beaches, volcanoes, rainforests, mountains, mangroves, rivers and waterfalls can be found throughout the country. Interesting Facts: 9.9 computers for every 1000 people 53% of the population lives in rural areas life expectancy for a child born in 2000 is 66 years average annual income per person is $800

Biology of Disaster Relief Teacher TTU/HHMI 2006
Island name: Sumatra
Area: 473,607 sq mi Population: 40 million Tribes: Batak and Malays Exports: Produces 30% of country’s total exports
Location: Northernmost tip of Sumatra Terrain: coastal lowlands, lush flora and fauna, rainforests Climate: tropical, hot, humid Wildlife: turtles, orangutans, frogs, crabs, snakes, birds, butterflies, deer, fish Local industry: rice fields, aquaculture, tourism Points of interest: Aceh Besar has coral reefs which are damaged from fishers who use bombs to kill and harvest fish. The city, Banda Aceh, is a popular stopping place for Muslim pilgrims traveling to Mecca. Marco Polo visited Aceh Besar in 1292.
Region of Sumatra name:
A c e h b e s a r
Country name: republic of Indonesia
Area: 1.91 million sq km Population: 242 million Capital City: Jakarta People: approximately 300 ethnic and tribal groups Language: Indonesian Religion: 90% Muslim Industry: oil, gas, textiles, coffee, rubber, timber, rice Geographic Location: Indonesia is an archipelago in the Indian and Pacific Oceans. It is situated between Southeast Asia and Australia. Indonesia is made up of about 17,500 islands and stretches across 300 miles. The landscape varies from island to island. Sandy beaches, volcanoes, rainforests, mountains, mangroves, rivers and waterfalls can be found throughout the country. Interesting Facts: 9.9 computers for every 1000 people 53% of the population lives in rural areas life expectancy for a child born in 2000 is 66 years average annual income per person is $800

Biology of Disaster Relief Teacher TTU/HHMI 2006
Country name: republic of Indonesia
Area: 1.91 million sq km Population: 242 million Capital City: Jakarta People: approximately 300 ethnic and tribal groups Language: Indonesian Religion: 90% Muslim Industry: oil, gas, textiles, coffee, rubber, timber, rice Geographic Location: Indonesia is an archipelago in the Indian and Pacific Oceans. It is situated between Southeast Asia and Australia. Indonesia is made up of about 17,500 islands and stretches across 300 miles. The landscape varies from island to island. Sandy beaches, volcanoes, rainforests, mountains, mangroves, rivers and waterfalls can be found throughout the country. Interesting Facts: 9.9 computers for every 1000 people 53% of the population lives in rural areas life expectancy for a child born in 2000 is 66 years average annual income per person is $800
Island name: Sumatra
Area: 473,607 sq mi Population: 40 million Tribes: Batak and Malays Exports: Produces 30% of country’s total exports
Location: West coast of Sumatra, below Aceh Jaya Terrain: coastal lowlands, lush flora and fauna, rainforests Climate: tropical, hot, humid Wildlife: turtles, orangutans, frogs, crabs, snakes, birds, butterflies, deer, fish Local industry: rice fields, aquaculture, rubber tree plantations Points of interest: Meulaboh is a well-known town in Aceh Barat. Many Achenese people practice open water fishing in small boats. The forests of Aceh Barat play an integral role in the economy. They provide domestic timber, fruit and rubber, as well as exports for commercial sales.
Region of Sumatra name:
A c e h b a r a t

Biology of Disaster Relief Teacher TTU/HHMI 2006
Island name: Sumatra
Area: 473,607 sq mi Population: 40 million Tribes: Batak and Malays Exports: Produces 30% of country’s total exports
Location: island north of Aceh Besar Terrain: coastal lowlands, lush flora and fauna, rainforests Climate: tropical, hot, humid Wildlife: turtles, monkeys, frogs, crabs, snakes, birds, butterflies, shrimp, fish Local industry: shrimp farms, fishing Points of interest: Fishermen use nets and lines to catch fish and shrimp. They use canoes and small motor boats for open water fishing. Kota Sabang is largely undiscovered by tourists.
Region of Sumatra name:
K o t a s a b a n g
Country name: republic of Indonesia
Area: 1.91 million sq km 242 million
Jakarta approximately 300 ethnic and tribal groups
Indonesian 90% Muslim oil, gas, textiles, coffee, rubber, timber, rice
ipelago in the Indian and Pacific Oceans. It ia and Australia. Indonesia is
ade up of about 17,500 islands and stretches across 300 miles. m island to island. Sandy beaches,
ains, mangroves, rivers and
ting Facts: 9.9 computers for every 1000 people 53% of the population lives in rural areas life expectancy for a child born in 2000 is 66 years average annual income per person is $800
Population:Capital City:People:Language:Religion:Industry: Geographic Location: Indonesia is an archis situated between Southeast AsmThe landscape varies frovolcanoes, rainforests, mountwaterfalls can be found throughout the country. Interes
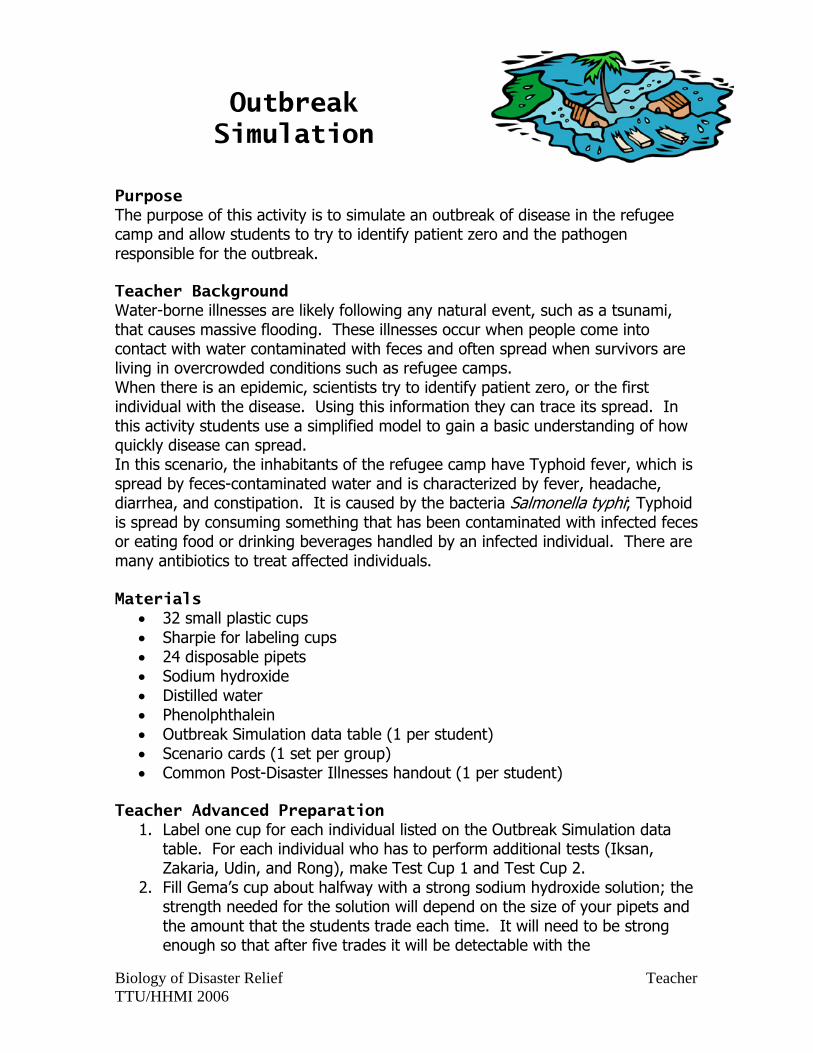
Outbreak Simulation
Purpose The purpose of this activity is to simulate an outbreak of disease in the refugee camp and allow students to try to identify patient zero and the pathogen responsible for the outbreak. Teacher Background Water-borne illnesses are likely following any natural event, such as a tsunami, that causes massive flooding. These illnesses occur when people come into contact with water contaminated with feces and often spread when survivors are living in overcrowded conditions such as refugee camps. When there is an epidemic, scientists try to identify patient zero, or the first individual with the disease. Using this information they can trace its spread. In this activity students use a simplified model to gain a basic understanding of how quickly disease can spread. In this scenario, the inhabitants of the refugee camp have Typhoid fever, which is spread by feces-contaminated water and is characterized by fever, headache, diarrhea, and constipation. It is caused by the bacteria Salmonella typhi; Typhoid is spread by consuming something that has been contaminated with infected feces or eating food or drinking beverages handled by an infected individual. There are many antibiotics to treat affected individuals. Materials
• 32 small plastic cups • Sharpie for labeling cups • 24 disposable pipets • Sodium hydroxide • Distilled water • Phenolphthalein • Outbreak Simulation data table (1 per student) • Scenario cards (1 set per group) • Common Post-Disaster Illnesses handout (1 per student)
Teacher Advanced Preparation 1. Label one cup for each individual listed on the Outbreak Simulation data
table. For each individual who has to perform additional tests (Iksan, Zakaria, Udin, and Rong), make Test Cup 1 and Test Cup 2.
2. Fill Gema’s cup about halfway with a strong sodium hydroxide solution; the strength needed for the solution will depend on the size of your pipets and the amount that the students trade each time. It will need to be strong enough so that after five trades it will be detectable with the
Biology of Disaster Relief Teacher TTU/HHMI 2006

phenolphthalein in each individual cup that is affected. Fill each of the remaining cups labeled with names with distilled water. The test cups should remain empty, but each of the other cups should be filled to the same amount.
Procedure
1. Each student should pick up the cup with their survivor’s name on it and a disposable pipet. Iksan, Zakaria, Udin, and Rong will also pick up their test cups, but they will not use them at this time. Each student will also need the Outbreak Simulation data table.
2. Students will pair up with someone from their region for the first trade. If they are related to someone in their region they should trade with that person if possible. Sometimes there are three related individuals in a region so only two of them can trade with one another.
3. Students will trade a certain amount of liquid with the person with whom they are trading (usually around 10 mL); the actual amount depends on the size of the pipets and the amount of liquid the students have. They will record the name of the survivor with whom they traded in the data table.
4. For the second trade the students will repeat the same procedure. They should continue to trade in their region and with a family member if possible, BUT they may not trade with the same person again. Make certain that everyone has found someone they can trade with before anyone begins trading. Make certain that all individuals trade at the same time throughout the activity.
5. Following the second trade, those individuals with test cups should return to their desk and place a small amount from their cup into Test Cup 1. This will be tested at the end of the activity.
6. For the third trade and all subsequent trades students can trade with someone outside of their region showing that all of the survivors are together in the refugee camp now and all come into contact with one another. They may not trade with anyone more than once.
7. Continue the same method for the fourth and fifth trade. Following the fourth trade, the individuals with test cups need to return to their desks and place a small sample from their cup into Test Cup 2.
8. After everyone has completed all five trades students should return to their desks to be tested. Place a few drops of phenolphthalein in each cup to test to see if the student has been infected. Any pink color indicates the student is affected; a clear result means they are unaffected. Students should record whether they are positive (pink) or negative (clear) in the last column. Those with test cups should record whether they were positive or negative for each of their cups.
9. Once each person completes their data, all of the data must be compiled into one class data table. Students should use the class data table to determine who is patient zero, or the individual who started the outbreak. Using logic and problem solving skills the students can narrow it down to
Biology of Disaster Relief Teacher TTU/HHMI 2006

Biology of Disaster Relief Teacher TTU/HHMI 2006
the first two individuals affected, but not any further. Sometimes they will only be able to narrow it down to four individuals. However, they should be able to identify the region and the family that first started the outbreak.
10. Once each group identifies patient zero or get as close as they can, pass out Scenario Cards to that group. Students will use this information to help fill in the story of the outbreak. Some of these cards are relevant to the story while others are not; students need to identify the relevant information.
11. Once the group decides on the story, give them the Five Common Post-Disaster Illnesses handout. Based on what they know so far, have them try to narrow down the list of possible illnesses.
12. Once each group comes to a conclusion, discuss as a class what they know at this point and the process they used to get there.
13. The students will perform further tests to clarify these answers in the following activities.
Safety Considerations The students should be careful when handling their unknown solutions since one of them is sodium hydroxide. Caution them not to touch or taste any of the solutions and to notify the teacher immediately if they come into contact with the solution. Assessment Any appropriate conclusion from the data available (Students may not know the
correct answer at this point, but their success should be measured by their ability to appropriately narrow down the information using their data.)

2006
Region Name Contact 1 Contact 2 Test Contact 3 Contact 4 Test Contact 5 Test Iksan Nimarshi Letchmi Kersen Sujatmi Ac
eh B
esar
Gema Zakaria Naramda Guntur Sri Arijali Ac
eh J
aya
Niakos Udin Santoso Sudono Tuti Caara Ac
eh B
arat
Merpati Rong Balu Hendri Moa Bahavani Ko
ta S
aban
g
Dian
Biology of Disaster Relief Teacher TTU/HHMI

Iksan and Gema bathed in the pools of water left by the tsunami near
where their house once stood.
Gema helped her mother Sujatmi
prepare what little food they had to eat as they traveled to a camp for
displaced persons near Banda Aceh.
After Zakaria’s wounds were treated he spent days searching for his
relatives among the wounded and the dead.
Following the tsunami Hendri ate whatever food he could find and
drank from pools of standing water.
Hendri was placed on a boat to Banda Aceh where he found food
and shelter in a survivor camp outside the city.
Zakaria ended up in the camp near Banda Aceh where he found comfort
in talking to others about his loss.
Some of the women from Aceh
Besar helped care for Kersen, Nikla, Nimarshi, and Amar and got them
safely to the relief camp.
Rong and his son Dian helped relief workers put up many of the tents in
the camp.
Tuti Alatas, Sri Suparmanputra and Sujatmi Sukamo helped prepare and serve the food provided for the relief
camp.
The Alatas family shared what little food they had with Santoso as they traveled together to the area surrounding Banda Aceh.
Biology of Disaster Relief Teacher TTU/HHMI 2006

Biology of Disaster Relief Teacher TTU/HHMI 2006
The children from different areas quickly became friends and often
played together in the camp.
Large shipments of food were dropped in a central area of the camp
every few days.
Due to the large number of displaced persons in the area the camp was
extremely overcrowded.
Sudono was extremely malnourished by the time he reached the relief
camp.
Gunter and his mother lived in a tent next to Naramda and her mother on
the west side of the camp.
Many of the people who died in the Banda Aceh area were buried in a
mass grave just west of the survivor camp.
Balu’s mother Bahavani was concerned about his health because
he seemed sick by the time he reached the camp.
Relief agencies were concerned about the Banda Aceh camp because it was located near where the city’s sewage treatment system had been
located.
The initial food distributions, delivered to the camp five days after the tsunami, contained only rice and
water.
The stench of decay in the area near Banda Aceh made some people feel
nauseated.

2006
Common Post-Disaster Illnesses
CONDITION SYMPTOMS CONTRACTION TREATMENT AND PREVENTION
Giardiasis Diarrhea, gas, nausea.
Symptoms begin 1 to 2 weeks after infected and last 2 to 6 weeks.
Caused by a microscopic parasite, Giardia intestinalis. The parasite is swallowed, lives in the intestine, and passes through the stool. Giardia is
found in places that have been contaminated with feces.
Prescription drugs can treat Giardia. Prevent giardiasis by practicing good
hygiene and avoiding water that is contaminated.
Hepatitis A Virus
Jaundice, fatigue, nausea, diarrhea, fever. Symptoms may be
prolonged or relapse over a 6 to 9 month period.
Hepatitis A is spread by consuming something that has been contaminated with infected feces. The virus is passed
through stool.
There is no specific treatment for Hepatitis A. People with the virus
should rest and avoid substances that may harm the liver. The Hepatitis A
vaccine can prevent the virus.
Cholera Diarrhea, rapid heart rate, vomiting, fatigue and leg cramps.
Caused by an infection of the intestine with the bacterium Vibrio cholerae.
Drinking water or eating food contaminated with the cholera
bacterium spreads the disease. The bacterium is passed through stool.
Cholera is treated by immediate replacement of fluids and salts lost
through diarrhea. A mixture of sugar, salts, and water drunk in large
amounts treats the disease. (Without treatment, death can occur within
hours).
Escherichia coli O157:H7
Diarrhea. High blood pressure, seizures, blindness, paralyis and
kidney failure may also occur. Symptoms of E. coli usually last 5 to
10 days.
Transmitted by eating undercooked, contaminated ground beef, drinking raw milk, swimming in or drinking sewage-
contaminated water. The organism is a strain of the bacterium Escherichia coli.
Antibiotics can treat E. coli. Prevent E. coli by practicing good hygiene and avoiding water that is contaminated.
The bacterium Salmonella typhi is ingested by consuming something that has been contaminated with infected
feces. People can also become infected after eating food or drinking
beverages that have been handled by a person who is infected.
Typhoid Fever Fever, headache, diarrhea,
constipation, rose-colored spots on chest, enlarged spleen and liver.
Antibiotic treatment for typhoid is available. Prevent typhoid by
practicing good hygiene and avoiding water that is contaiminated.
Biology of Disaster Relief Teacher TTU/HHMI

Testing the Waters Purpose The purpose of this activity is to let students culture a “water sample” from the refugee camp and analyze the results to determine if the disease agent is a bacteria, virus or parasite. Teacher Background The “water sample” the students will be testing is a broth culture of non-pathogenic Escherichia coli that will have to be prepared one day in advance. Teachers should order the indicated freeze-dried bacteria* prior to the activity; it can be kept refrigerated for up to 10 years. When you prepare the bacteria following the Ward’s protocol you will culture both a nutrient broth and a slant. The nutrient broth culture will be used for this activity and the Kirby-Bauer test. The slant will be used later on to create isolated colonies for the Gram Stain. Due to the nature of this scenario students may or may not have narrowed down the outbreak to be caused by bacteria. Therefore, DO NOT tell your students the true contents of the sample, but take appropriate safety precautions. After many natural disasters flood waters become polluted with feces from farming runoff, over crowding in temporary settlements and poor sanitation. As a result, water borne disease spread rapidly through refugee camps. Materials *Wards® Escherichia coli Freeze-Dried with Transfer and Growth Media Order # 85 V 1860 sterile Petri dishes (1 per group of 2 students) incubator nutrient agar sterile cotton swabs Parafilm Sharpie or permanent maker burn-up bin goggles gloves lab coat Safety Considerations Goggles and aprons required. Dispose of biohazardous materials appropriately. Always use sterile techniques and wash hands carefully at conclusion. Clean tabletops with 95% alcohol or bleach solution.
Biology of Disaster Relief Teacher TTU/HHMI 2006

Procedure ADVANCE PREPARATION
1. Follow Ward’s protocol for preparing bacterial culture. 2. Incubate for 24hrs at 37˚C. 3. Label the culture broth “Water Sample.” 4. Pour two agar plates for every two students. -one plate will be used for the initial culturing of the “water sample” -one plate will be used for Kirby-Bauer later in scenario 5. Pour four extra agar plates to plate your isolated colonies.
DAY ONE OF STUDENT EXPERIMENT 1. Each group of students should collect and put on goggles, lab coats and
gloves. Give each group of two students one nutrient agar plate, a Sharpie, sterile cotton swab and piece of Parafilm.
2. Have each group label the bottom of their plates with their names, date, and
class. (Remind students to write small and on the side of their dish so they can see results later.)
3. Let each group dip their swab into the “water sample” and inoculate their
plates using standard procedures:
a. Open the lid of the culture and insert a sterile cotton swab. Remove the swab and close the lid of the culture. b. Slightly open a sterile nutrient agar plate. Place the tip of the cotton swab near the top center of the agar. Streak the agar in a continuous back and forth movement from the top of the plate to the bottom. Turn the plate 90° and repeat movement to ensure complete transfer to the plate. Seal dish with Parafilm.
streak plate, starting at rotate plate 90° and the top streak again
c. Dispose of the contaminated swabs in burn-up bin.
Biology of Disaster Relief Teacher TTU/HHMI 2006

4. Incubate upside down for 24hrs at 37˚C.
DAY TWO OF STUDENT EXPERIMENT 1. Remove Petri dishes from incubator and have students make observations
about the growth on their plates. 2. Discuss observations with students and revisit the Common Post-Disaster
Illnesses information sheet. Determine which microorganism has caused the outbreak.
Assessment Successful completion of bacterial culture and lab questions. Informal assessment through class discussion. Biology of Disaster Relief Teacher TTU/HHMI 2006

Names ____________________
Testing
the Waters Purpose You have now determined the source of the disease outbreak was from nearby contaminated water. Your job now is to test a sample from the contaminated water and analyze the results to determine if the disease agent is a bacteria, virus or parasite. Materials water sample (provided by your teacher) 1 nutrient agar plate per group of 2 students 1 sterile cotton swab 1 strip of Parafilm Sharpie or permanent maker Safety Considerations Goggles and aprons required. Dispose of biohazardous materials appropriately. Always use sterile techniques and wash hands carefully at conclusion. Clean tabletops with 95% alcohol or bleach solution.
Procedure DAY ONE OF EXPERIMENT 1. Label the bottom of your nutrient agar plate with your names, date, and class.
(Remember to write small and on the side of your dish so you can see results later.)
2. When directed by your teacher, dip the sterile cotton swab into the water sample and inoculate your plates using standard procedures:
Inoculating Procedure: a. Open the lid of the culture and insert a sterile cotton swab. Remove the swab and close the lid of the culture. b. Slightly open a sterile nutrient agar plate. Place the tip of the cotton swab near the top center of the agar. Streak the agar in a continuous back and forth movement from the top of the plate to the bottom. Turn the plate 90° and repeat movement to ensure complete transfer to the plate. Seal dish with Parafilm.
Biology of Disaster Relief Teacher TTU/HHMI 2006

streak plate, starting at rotate plate 90° and the top streak again
c. Dispose of the contaminated swabs in burn-up bin.
4. Place in incubator upside down for 24hrs at 37˚C DAY TWO OF EXPERIMENT
3. Remove Petri dishes from incubator and make observations about the growth on your plates.
4. Revisit the Common Post-Disaster Illnesses information sheet. Determine
which microorganism has caused the outbreak by comparing the growth on your plate to the column labeled “Culture Growth Results.”
Growth Report 1. Describe the growth on your plate. 2. Which type of microorganism is the disease-causing agent? a. bacteria b. virus c. parasite 3. Which specific condition would you diagnose infected persons with at the camp? 4. Do you think further tests should be conducted? Why?
Biology of Disaster Relief Teacher TTU/HHMI 2006

Bacteria Inductive
Purpose The purpose of this lesson is for students classify bacteria according to shape and arrangement. Students should be able to recognize various types of bacteria after this lesson. Teacher Background Teachers need to prepare inductive cards that include several pictures of the following groups of bacteria:
Coccus: Spherical bacteria occurring singly. Diplococcus: Spherical bacteria arranged in pairs. Staphylococcus: Spherical bacteria arranged in groups. Streptococcus: Spherical bacteria arranged in chains. Bacillus: Rod-shaped bacteria occurring singly. Diplobacillus: Rod-shaped bacteria occurring in pairs. Streptobacillus: Rod-shaped bacteria occurring in chains. Spirullum: Spiral-shaped bacteria occurring singly. Coccobacillus: Bacteria that are a slightly oblong spherical shape.
Materials inductive cards (1 set per group)
Procedure 1. Divide students into groups of three to five students. 2. Give each group a packet of inductive thinking cards. 3. Allow the students to place the pictures into groups or categories that are logical and of their choosing. 4. Have one student from each group serve as a spokesperson to explain to the class what his/her group was thinking when they developed their categories and decided on the characteristics required for placement in each category. 5. After their reporting, give direct instruction on traditional classification of bacterial shapes. Bacteria are traditionally classified by shape and arrangement. Teach them the proper names: cocci, bacilli, spirilli, and the prefixes: strepto-, diplo- and staphylo-. Students should identify the different shapes/arrangements by holding them up during the direct instruction time. 6. Have the students regroup their cards based on traditional classification.
Biology of Disaster Relief Teacher TTU/HHMI 2006

Biology of Disaster Relief Teacher TTU/HHMI 2006
Assessment Successful regrouping of inductive cards. Informal assessment through discussion of bacterial classification.
discussion questions may include: How will this information help you determine the cause of the outbreak in the survivor camp? What are advantages or disadvantages of various bacteria arrangements?

Biology of Disaster Relief Teacher TTU/HHMI 2006

Biology of Disaster Relief Teacher TTU/HHMI 2006

Biology of Disaster Relief Teacher TTU/HHMI 2006

2006
Biology of Disaster Relief Teacher TTU/HHMI

Gram Staining
Purpose Students should now be familiar with bacteria and its growth. The purpose of this lesson is for students learn how to prepare and interpret a Gram stain. This will help them to determine what bacteria caused the disease outbreak in the survivor camp. Teacher Background The Gram stain is a common microbiological tool that is used to distinguish between two major groups of bacteria based on the different structure of their cell walls. Those bacteria known as Gram positive will be purple or dark blue when
viewed under the microscope. Gram negative bacteria will be pink or reddish in color. Danish bacteriologist Christian Gram discovered the procedure in 1882 when trying to differentiate between bacteria. It is now the first test done in the identification of bacteria. Gram positive bacteria have larger amounts of peptidoglycan in their cell walls than Gram negative bacteria have. Both bacteria absorb crystal violet and iodine, however the peptidoglycan in the cell walls of Gram positive bacteria retain the color when exposed to a decolorizing agent such as ethanol. Prolonged exposed to ethanol will destain both types of bacteria. The counter stain is added so that the Gram negative bacteria can be seen under the microscope. At the end of the procedure,
Gram positive bacteria appear purple because of the crystal violet and iodine, while Gram negative bacteria appear pink because of the safranin counter stain. The following websites have more information and examples: www.meddean.luc.edu/lumen/DeptWebs/microbio/med/gram/gram-stn.htm www.uphs.upenn.edu/bugdrug/antibiotic_manual/gram.htm. Before students gram stain, teachers need to gather the materials, including the cultured bacteria from the water sample.
Biology of Disaster Relief Teacher TTU/HHMI 2006

Materials Ward’s Gram Stain Kit strikers compound light microscopes microscope slides clothes pins wash bottles with distilled water sterile swabs aprons and goggles beakers for staining racks 95% alcohol or bleach solution bibulous paper isolated bacteria from water sample Bunsen burners sterile inoculating loops
Safety Considerations Goggles and aprons required. Be especially careful around flames; do not reach across Bunsen burner. Pull long hair back. If glass becomes broken, dispose in Sharps Box. Always use sterile techniques and wash hands carefully at conclusion. Clean tabletops with 95% alcohol or bleach solution.
Procedure DAY OF STUDENT TESTING THE WATERS
1. Use four plates previously made during Testing the Waters activity. 2. Use slant from Ward’s bacteria culture to swab four plates using the
following protocol from http://csm.colostate-pueblo.edu/biology/dcaprio/301L/301Lab3.html:
1. A small amount of bacteria is picked from the slant with a sterile loop. 2. Streak the loop over the surface to spread the sample over 1/3 to 1/2 of the plate (see diagram).
3. Flame the loop again to sterilize. Streak across the previous area once or twice, then streak another area (1/2 of remaining area). Do not return to the original culture after step 1!!
Biology of Disaster Relief Teacher TTU/HHMI 2006

4. Repeat the loop flaming and streak the last portion of the plate. On all streak areas, lines of streak should be close together without overlapping--cover as much surface area of the plate as possible. 5. Incubate plate 1-2 days. Petri plates are always incubated and stored upside-down to prevent condensation from falling on the agar surface.
DAY OF STUDENT EXPERIMENT
3. Have students work in groups of two to four. 4. Discuss with students that gram staining is important in bacteria
identification and in determining the most effective antibiotic to use. 5. Using the isolated bacteria samples you cultured from the Ward’s freeze-
dried E. coli slant, demonstrate Gram staining techniques for the students. Then have them prepare a gram stain according to instructions provided in the student handout.
6. Carefully monitor the students and help them maintain safe conditions. 7. Determine as a class if the isolated bacteria is Gram positive or Gram
negative. Special Caution: The first consideration is the correct preparation of the smear. Make a thin film of the bacteria on a clean glass slide, using a sterile loop or swab for viscous specimens. Air dry, then heat fix the slide by quickly passing it several times through a
flame (the slide should not become too hot to touch). Failure to follow these directions may cause staining artifacts and disrupt the normal morphology of bacteria and cells. The most common mistake made by students is to “overcook” their bacteria. Assessment Successful completion of stained bacterial slides by students. Completion of isolated bacteria illustration.
Biology of Disaster Relief Teacher TTU/HHMI 2006

Name __________________
Gram Stain Practice
Purpose To determine whether bacteria isolated from the water sample are Gram Negative (G-) or Gram Positive (G+). The structure of the cell wall determines whether the bacterium is G+ or G-. Different antibiotics work for G+ and G- so doctors may use the Gram +/- status of bacteria to prescribe medication. Materials Ward’s Gram Stain Kit strikers compound light microscopes microscope slides clothes pins wash bottles with distilled water sterile swabs aprons and goggles beakers for staining racks 95% alcohol or bleach bibulous paper isolated bacteria from water sample Bunsen burners sterile inoculating loops
Safety Considerations Goggles and aprons required. Be especially careful around flames; do not reach across Bunsen burner. Pull long hair back. If glass becomes broken, dispose in Sharps Box. Always use sterile techniques and wash hands carefully at conclusion. Clean tabletops with 95% alcohol or bleach solution.
Procedure 1. With a sterile loop, collect a small sample of the bacteria from the bacteria plates provided by your teacher. The agar plate should have several isolated colonies. You only need to collect one colony onto your loop. *You do not need to drag the loop across the entire plate, and you do no want agar on the loop. 2. Make a thin film of the bacteria on a clean glass slide using a sterile loop. 3. Air dry. 4. Heat fix the slide by quickly passing it several times through a flame (the slide should not become too hot to touch). Do not “cook” the bacteria or it will not stain properly. 5. Complete the following Gram staining procedure.
Biology of Disaster Relief Teacher TTU/HHMI 2006

Step 1 Crystal Violet 1 minute
Step 2 Water Rinse Until runs clear
Step 3 Gram’s Iodine 1 minute
Step 4 Water rinse Until runs clear
Step 5 * 95% ethanol Until thinnest parts are colorless (30s or less)
Step 6 Water rinse Until runs clear
Step 7 Safranin 1 minute
Water rinse Step 8 Until runs clear
*This is the most critical step.
6. Air dry or blot with bibulous paper. 7. Observe your slides under the microscope. When finished, dispose of slides according to your instructor. 8. Thoroughly wash table and hands with alcohol or bleach solution. Gram Stain Report Illustration of Gram stain of isolated bacteria: shape(s):__________________ arrangement:_______________ Gram: positive / negative bacteria identification:
Biology of Disaster Relief Teacher TTU/HHMI 2006

Biology of Disaster Relief Teacher TTU/HHMI 2006

Kirby-Bauer Antibiotic Resistance
Test Purpose Students have already determined the cause of the outbreak in the survivor camp. This lesson provides them an opportunity to compare the effectiveness of several antibiotics on the disease-causing bacteria. With this information they will make recommendations for the treatment of the survivors. Teacher Background The testing method for determining bacterial sensitivity to antibiotics is called the Kirby-Bauer method. It is done by growing pure colonies of the isolated organism on agar plates and placing antibiotic-soaked paper disks on top of the agar. As the plate incubates, the antibiotics diffuse from the disks into the culture medium. Bacterial growth will occur up to the disk if the antibiotic is not effective. However, if the antibiotic inhibits bacterial growth, a “zone of inhibition” forms around the disk. The nutrient agar plate used for this experiment needs to reach room temperature before use by the students. Teachers will also need to gather the materials listed. Materials graphic of petri dish with zones of inhibition incubator (set at 37°C) Sensi-Disc magazines of antibiotics Parafilm ™ blank sterile disks for control metric ruler sterile nutrient agar plates culture in solution Sharpie marking pens forceps sterile swabs red biohazard bags Bunsen burners strikers 95% alcohol or bleach solution
Safety Considerations Goggles and aprons required. Be especially careful around flames. Wash hands carefully upon completion of lab.
Procedure INTRODUCING KIRBY-BAUER
1. Use the Suchman Inquiry Model to introduce a discrepant event in which the students will derive an answer to the question “Why are there areas of no growth on the petri dish?” This inquiry model promotes active learning by the students in that they ask questions and find answers for themselves.
Biology of Disaster Relief Teacher TTU/HHMI 2006

Inquiry such as this requires that students apply process skills to seek patterns and draw conclusions.
a. Present the discrepant event. Hold up a picture of a prepared petri dish that shows areas of inhibition around antibiotic disks. b. Present the inquiry procedure to the students. They ask single questions to which the teacher can answer with a “yes” or a “no.”
c. Students gather information by questioning. d. They form a hypothesis based on the information and begin to solve the problem.
2. Students should come to the conclusion that, “There is a chemical within the disk that keeps bacteria from growing.” They should also realize that some of the “chemicals” work better than others on certain bacteria.
3. Tell them that this procedure is a common one used to test the
effectiveness of antibiotics. 4. Demonstrate the Kirby-Bauer procedure for the students.
KIRBY-BAUER TEST time requirements for growth: The Kirby-Bauer setup can be completed in a single class period. Results should be observed after 48 hour incubation period at 37°C. Sometimes a shorter incubation period is satisfactory, but 48 hours should be the maximum time before results are read because of contamination hazards.
1. Turn the petri dish upside down and lay it on the worktable. Be careful not to open the sterile agar plates while handling. With a Sharpie, divide the bottom of each petri dish into equal quadrants, numbering each 1-4. Write the numbers near the edges of the dish. Students should also write the name of their region near the top center of the dish.
2. To inoculate the plate:
a. Open the lid of the culture and insert a sterile cotton swab. Remove the swab and close the lid of the culture. b. Slightly open a sterile nutrient agar plate. Place the tip of the cotton swab near the top center of the agar. Streak the agar in a continuous back and forth movement from the top of the plate to the bottom. Turn the plate 90° and repeat movement to ensure complete transfer to the plate. Close the dish.
Biology of Disaster Relief Teacher TTU/HHMI 2006

streak plate, starting at rotate plate 90° and the top streak again
c. Dispose of the contaminated swabs and bacteria cultures in the red biohazard bag.
3. Light the Bunsen burner. To sterilize forceps, pass them back and forth through the flame of the burner several times. Allow the forceps to cool before picking up an antibiotic disk.
4. Slightly open an inoculated agar plate. With the sterilized forceps, position
the first antibiotic filter paper in the center of the quadrant 1. a. Gently press down the disks with your flamed forceps to ensure adequate contact with the agar. b. Resterilize the forceps and allow cooling before placing the next disk.
antibiotic disk
5. Repeat step 4 in quadrants 2 and 3. Make sure not to touch the sterile
forceps to the agar while still hot. 6. In quadrant 4, place a blank sterile disk for the control. 7. Allow the plates to sit at room temperature for about 10 minutes so that
the disks can become moist, and will stick to the agar better. Seal the Petri dishes with Parafilm™. Invert the plates, and mark in each quadrant which disks were used with the Sharpie. Incubate them in the inverted position at 37°C (body temperature) until the next class period. 48-hour incubation is preferable, but depending on the bacterial growth, results may sometimes be interpreted after 24 hours.
Biology of Disaster Relief Teacher TTU/HHMI 2006

8. Observe petri dishes after incubation. White or cloudy areas of the agar
indicate bacterial growth. Notice any clear areas, called zones of inhibition, surrounding the antibiotic disks. A clear area indicates that the antibiotic inhibited bacterial growth. A lightly cloudy area surrounding a disk indicates that bacterial growth was slowed. You may want to hold the dishes to the light to see more clearly.
zone of inhibition 9. With a metric ruler, measure to the nearest millimeter the size of the clear
zone surrounding each disk, beginning at the outside edge of the disc. It is usually easiest to turn the dish over and measure from the back. Record your measurements. If no clear zone is present, record the measurement as 0.
10. Soak the petri dishes in bleach solution then dispose of them in the red
biohazard bag. Students should thoroughly wash their hands with soap and warm water.
11. Clean the tables with 95% alcohol or bleach solution.
Assessment Successful completion of Kirby-Bauer test and lab write-up. Appropriate recommendation for treatment of disease.
Biology of Disaster Relief Teacher TTU/HHMI 2006

Name __________________
Kirby-Bauer Antibiotic Resistance
Test Purpose You have determined the cause of the disease outbreak in the survivor camp. Antibiotics are medications used to kill bacteria when it harms a human. In order to help the survivors, you now need to determine which antibiotic will be most effective in treating the disease. A Kirby-Bauer test will be used to determine this information. Materials 95% alcohol or bleach solution incubator (set at 37°C) Sensi-Disc magazines of antibiotics Parafilm ™ blank sterile disks for control metric ruler sterile nutrient agar plates culture in solution Sharpie marking pens forceps sterile swabs red biohazard bags Bunsen burners strikers
The following antibiotics are available for you to test:
Description Mode of Action Average Zone of Inhibition, in mm
Neomycin, 15μg Inhibits protein synthesis in gram positive bacteria 14-17
Kanamycin, 30μg Inhibits protein synthesis in gram negative bacteria 14-17
Ampicillin, 10μg Inhibits protein synthesis in gram positive bacteria 12-21
Penicillin, 10 units Inhibits protein synthesis in gram positive bacteria 12-21
Streptomycin, 10μg Inhibits protein synthesis in gram negative bacteria 12-14
Inhibits protein synthesis in most bacteria Tetracycline, 30μg 15-18
Safety Considerations Goggles and aprons required. Be especially careful around flames. Wash hands carefully upon completion of lab.
Biology of Disaster Relief Teacher TTU/HHMI 2006

Procedure 1. Turn the petri dish upside down and lay it on the worktable. Be careful not
to open the sterile agar plates while handling. With a Sharpie, divide the bottom of each petri dish into equal quadrants, numbering each 1-4. Write the numbers near the edges of the dish. Also write the name of your region near the top center of the dish.
2. To inoculate the plate:
a. Open the lid of the culture and insert a sterile cotton swab. Remove the swab and close the lid of the culture. b. Slightly open a sterile nutrient agar plate. Place the tip of the cotton swab near the top center of the agar. Streak the agar in a continuous back and forth movement from the top of the plate to the bottom. Turn the plate 90° and repeat movement to ensure complete transfer to the plate. Close the dish.
streak plate, starting at rotate plate 90° and the top streak again
c. Dispose of the contaminated swabs and bacteria cultures in the red biohazard bag.
3. Light the Bunsen burner. To sterilize forceps, pass them back and forth through the flame of the burner several times. Allow the forceps to cool before picking up an antibiotic disk.
4. Slightly open an inoculated agar plate. With the sterilized forceps, position
the first antibiotic filter paper in the center of the quadrant 1. a. Gently press down the disks with your flamed forceps to ensure adequate contact with the agar. b. Resterilize the forceps and allow cooling before placing the next disk.
Biology of Disaster Relief Teacher TTU/HHMI 2006

antibiotic disk
5. Repeat step 4 in quadrants 2 and 3. Make sure not to touch the sterile
forceps to the agar while still hot. 6. In quadrant 4, place a blank sterile disk for the control. Fill in the portions
of the report that you now know. 7. Allow the plates to sit at room temperature for about 10 minutes so that
the disks can become moist, and will stick to the agar better. Seal the Petri dishes with Parafilm™. Invert the plates, and mark in each quadrant which disks were used with the Sharpie. Incubate them in the inverted position at 37°C (body temperature) until the next class period.
8. Observe petri dishes after incubation. White or cloudy areas of the agar
indicate bacterial growth. Notice any clear areas, called zones of inhibition, surrounding the antibiotic disks. A clear area indicates that the antibiotic inhibited bacterial growth. A lightly cloudy area surrounding a disk indicates that bacterial growth was slowed. You may want to hold the dishes to the light to see more clearly.
zone of inhibition 9. With a metric ruler, measure to the nearest millimeter the size of the clear
zone surrounding each disk, beginning at the outside edge of the disc. It is usually easiest to turn the dish over and measure from the back. Record your measurements. If no clear zone is present, record the measurement as 0. Fill in the remainder of the report.
Biology of Disaster Relief Teacher TTU/HHMI 2006

10. Soak the petri dishes in bleach solution then dispose of them in the red biohazard bag. You should thoroughly wash their hands with soap and warm water.
11. Clean the tables with 95% alcohol or bleach solution.
Antibiotic-Resistance Report Illustrate your plate. Include quadrant and antibiotic labels and zones of inhibition. TO SCALE Fill in the table below with data from your plate.
quadrant antibiotic disk zone of
inhibition (mm)
effectiveness rank
1 (best) - 4 (worst)
1
2
3
4 sterile control
Biology of Disaster Relief Teacher TTU/HHMI 2006

Name __________________
Basics of Biomolecules
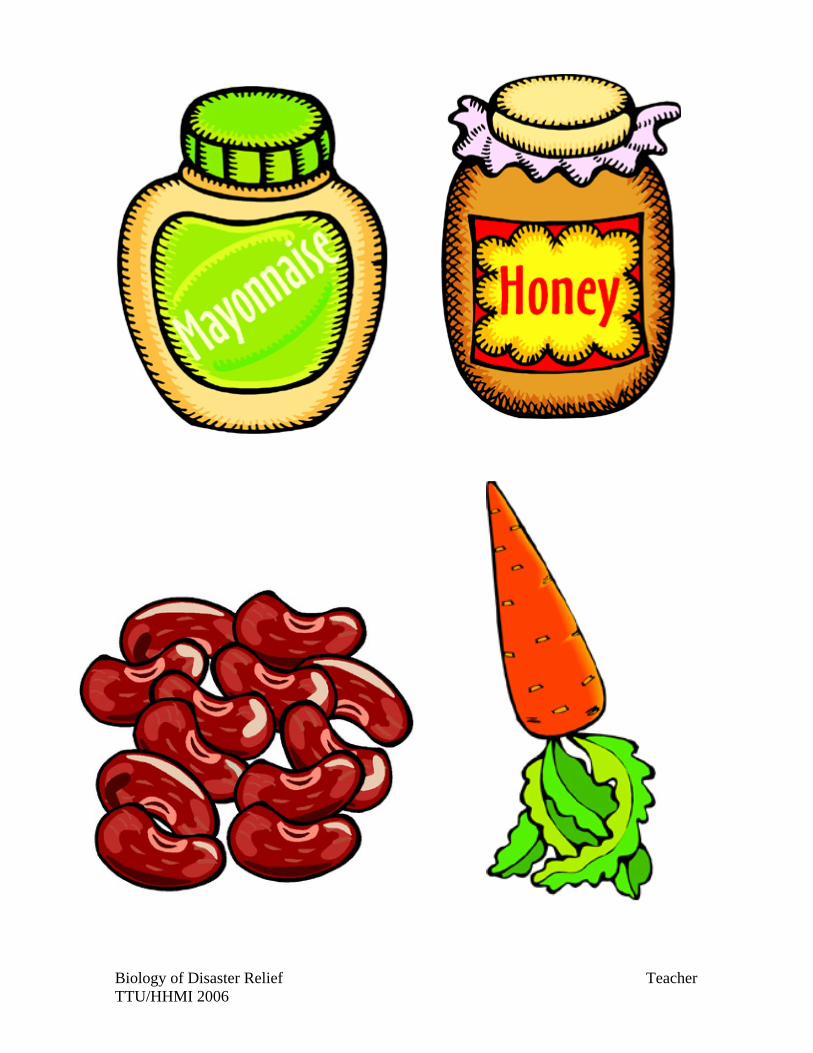
Purpose In addition to determining a treatment for the disease outbreak in the survivor camp, you also need to address the food needs of the survivors. In this experiment, you will determine what biomolecules make up foods and how these foods can best be distributed to the survivors. We will test for the following biomolecules:
name role
carbohydrates (including starches and
sugars)
provides energy; stored as glycogen if not being used
lipids
(including fats)
reserve supply of energy; component in cell membranes
cellular structure proteins and enzymes Materials Food Pyramid guide permanent marker 9 plastic cups test tube clamp test tube rack hot water bath Benedict’s solution 3 disposable pipettes Biuret reagent 3 test tubes iodine gloves/goggles 3 food samples
Safety Considerations Goggles and gloves required. Be especially careful around the chemicals. They are hazardous to your skin and
clothes. Wash hands carefully upon completion of lab.
Biology of Disaster Relief Teacher TTU/HHMI 2006

Procedure Place the test tubes in your test tube rack. Label each test tube with the name of the food substance being tested using masking tape and the permanent marker.
PART I: STARCH
1. Use a disposable pipette to put about 10 drops of each food in a corresponding plastic cup. Add 3-4 drops of iodine to each cup.
2. Starch is a long-chain form of a carbohydrate. If the substance in your
tube contains starch, it will turn a blue-black color when mixed with iodine. 3. Observe and record what you see in your Biomolecule Report. Note the
relative amount of starch in each substance. 4. Dispose of the cup in the trash. Retain the disposable pipette for use in the
next experiment. PART II: SUGAR
1. Use a disposable pipette to put about 10 drops of each food in the test tube with the matching label. Add 10 drops of Benedict’s solution to each test tube.
2. Use a test tube clamp to place the test tubes in a hot water bath. Heat the
test tubes for 2-3 minutes (do not boil). Return the test tubes to the test tube rack. Use the following table to determine the amount of sugar in each substance.
amount of
sugar none trace little some much
color blue blue/green green yellow orange/red
3. Observe the test tubes and record what you see in your Biomolecule Report. Sugars (also known as glucose) are the building blocks of other carbohydrates.
4. Empty and wash each test tube before moving on to the next test.
Biology of Disaster Relief Teacher TTU/HHMI 2006

PART III: LIPID 1. Use a disposable pipette to put about 10 drops of each food in a
corresponding plastic cup. Add 3-4 drops of Sudan III to each cup.
2. Lipids are fats. They can be solid or liquid. If the substance in your tube contains a lipid, it will turn a an orange-pink color when mixed with Sudan III.
3. Observe and record what you see in your Biomolecule Report. Note the
relative amount of lipids in each substance. 4. Dispose of the cup in the trash. Retain the disposable pipette for use in the
next experiment. PART IV: PROTEIN
1. Use a disposable pipette to put about 10 drops of each food in corresponding plastic cup. Add 10 drops of Biuret reagent to each cup.
2. Proteins are necessary for muscle development. If the food contains
protein, it will turn a pinkish-purple. 3. Observe and record what you see in your Biomolecule Report. Note the
relative amount of protein in each substance. 4. Dispose of the cup in the trash. Retain the disposable pipette for use in the next experiment.
Biomolecule Report
substance starch sugar lipids protein
Biology of Disaster Relief Teacher TTU/HHMI 2006

Biology of Disaster Relief Teacher TTU/HHMI 2006

Biology of Disaster Relief Teacher TTU/HHMI 2006

Biology of Disaster Relief Teacher TTU/HHMI 2006

Biology of Disaster Relief Teacher TTU/HHMI 2006
Biology of Disaster Relief Teacher TTU/HHMI 2006

Presentation of Conclusions and Recommendations
Purpose The purpose of this activity is for students to organize data and information they have collected; reflect on the given scenario and present their conclusions and recommendations for the refugee camp in Banda Aceh. Teacher Background Depending on your time and resources you may have your students present their conclusions and recommendations in the form of a power point, poster, written letter to the Youth Relief Corps administration, or some variation of these forms of assessment. Materials research materials presentation materials
Procedure Place students in groups of two or four and have them create a presentation of their conclusions and recommendations for the camp. Assessment Create appropriate rubric for chosen presentation format.
Biology of Disaster Relief Teacher TTU/HHMI 2006

Name __________________________
Biology of Disaster Relief Project
The following rubric describes a letter you will write to the director of Youth Relief Corps describing your plan to help the Indonesian victims of the December 24, 2004 tsunami. Each element must be included to receive full credit. You may ask for help from your group members, however this must be completed individually. Cheating will not be tolerated. This is a major grade and determines approximately 12% of you six weeks grade. It is DUE ______________.
Medical Care (20 pts) identify biotic and abiotic sources of disease outbreak (5) describe disease movement through survivor camp (5) describe short and long-term effects of disease (5) describe method and results of determining effective treatment (5)
Food (25 pts) determine and describe three necessary characteristics of food sent to the survivors (10) recommend most beneficial Breedlove blend (5) explain biomolecule content of blend and importance of each type of biomolecule (15)
Clean Water (25 pts) describe (possibly through a labeled illustration) a desalination set-up (5) design an experiment to test the boiling time necessary to rid water of pathogens; identify the independent variable, the dependent variable and at least three constants (20)
Shelter (10 pts) briefly recommend a temporary form of shelter that is appropriate for the survivor camp (10) Specifics (20 pts) completed in your own handwriting (write on front of pages only) neat rubric returned with project culturally sensitive professional tone correct grammar and spelling sources documented below (online sources are not acceptable)
Biology of Disaster Relief Teacher TTU/HHMI 2006


