Edit MenuUse the Edit commands to do the following:
• Undo or redo the last command.• Edit, undelete, select, or deselect rows of data, objects• Duplicate objects along a line or around an axis, or mi• Change the attributes and visibility of objects.
When you choose Edit from the menu bar, a menu similar to
t Menu Commands/Undo/Redo/Cut/Copy/Paste/Clear/Undelete/Duplicate/Duplicate/Mirror/Select/Select All/Deselect All/Attributes/Visibility/Show All/Command History/Clear Boundary/Source/Clear All Boundaries/Rep. Boundary/Source/Select Bodies/Deselect All Bodies/Select Faces/Deselect All Faces
Edit CommandsThe function of each Edit command is as follows:
Undo Reverses the effect of the last command.Redo Executes the last undone command againCut Deletes the selected items, copying them Copy Copies the selected items to the paste bufPaste Copies the contents of the paste buffer to Clear Deletes the selected items but does not coUndelete Restores an item that has been removed wDuplicate Duplicates the selected items using lines aSelect Selects items to be edited.Select All Selects all available items. Deselect All Deselects all currently selected objects.Attributes Changes the attributes of an item.Visibility Displays or hides objects.Show All Displays all invisible objects.Command History
Displays the list of commands you just exemacro.
Clear Bound-ary/Source
3D Boundary Manager
Resets a surface to its de
Clear All Boundaries
3D Boundary Manager
Deletes all defined bound
Reprioritize Boundary/Source
3D Boundary Manager
Changes the order of theBoundary list.
Select Bodies Meshmaker Selects objects for mesh Select Faces Meshmaker Selects faces. Toggles wi
Menut Commands/Undo/Redo/Cut/Copy/Paste/Clear/Undelete/Duplicate/Duplicate/Mirror/Select/Select All/Deselect All/Attributes/Visibility/Show All/Command History/Clear Boundary/Source/Clear All Boundaries/Rep. Boundary/Source/Select Bodies/Deselect All Bodies/Select Faces/Deselect All Faces
Edit/UndoUse this command to undo your last action. This is extremelytakes in sketches, but can be used to undo almost any actionstep with the Edit/Redo command.
> To undo the last step:• Choose Edit/Undo.
Your last step is now undone.
Edit/RedoUse this command to redo the last step cancelled by the Edit
> To redo the step that you cancelled with Edit/Undo:• Choose Edit/Redo.
The step is redone.
Edit/CutUse this command to remove objects or rows of data from ththem in the paste buffer.
> To cut items from the active view window:1. Select the items using one of the Edit/Select commands.2. Choose Edit/Cut. The items are removed from the screen
buffer.
Items that have been cut may be pasted back into the active wcommand. The items currently stored in the paste buffer are that are cut or copied into the buffer.
Menu Commandst/Undot/Redot/Cut/Copy/Paste/Clear/Undelete/Duplicate/Duplicate/Mirror/Select/Select All/Deselect All/Attributes/Visibility/Show All/Command History/Clear Boundary/Source/Clear All Boundaries/Rep. Boundary/Source/Select Bodies/Deselect All Bodies/Select Faces/Deselect All Faces
Edit/CopyUse this command to copy the selected objects or rows of daselected items are not deleted.
> To copy items into the paste buffer:1. Select the items by using one of the Edit/Select comman2. Choose Edit/Copy. The items are copied into the paste b
Items that have been copied may be pasted into the active wcommand. The items currently stored in the paste buffer are that are cut or copied.
Edit/PasteUse this command to copy the contents of the paste buffer toitems in the paste buffer may be pasted back into the same wview window. Items in the paste buffer can be pasted repeate
The Edit/Paste command only pastes the items that were plathe most recent Edit/Cut or Edit/Copy command. Each timeEdit/Copy is chosen, the buffer is overwritten with new items
> To paste an item or group of items in the same project:1. Select the items to paste.2. Choose Edit/Cut or Edit/Copy to place the items in the p3. Select the view window into which the items are to be pas4. Choose Edit/Paste.
The object appears in its new location.
Menu Commands/Undo/Redo/Cutt/Copyt/Paste/Clear/Undelete/Duplicate/Duplicate/Mirror/Select/Select All/Deselect All/Attributes/Visibility/Show All/Command History/Clear Boundary/Source/Clear All Boundaries/Rep. Boundary/Source/Select Bodies/Deselect All Bodies/Select Faces/Deselect All Faces
Edit/ClearUse this command to delete all the selected items. The deletepaste buffer.
> To clear items:1. Select the items by using one of the Edit/Select comman2. Choose Edit/Clear. The selected items are deleted from the screen.
Edit/UndeleteUse this command to restore an object that you have deletedmand. If you save the file after using the Edit/Clear commanthe objects.
> To restore a previously deleted object to your model:1. Choose any view window.2. Choose Edit/Undelete.
The last item to be deleted reappears.
Edit/DuplicateUse these commands to make copies of objects in the activecombine the functions of the Edit/Copy and Edit/Paste commitems and pasting them the number of times you specify. The
Before duplicating an item, you must first select it by clicking commands from the Edit/Select menu.
The Edit/Duplicate commands can only be used to copy itemitems to another project, use the Edit/Cut and Edit/Paste co
Along Line Duplicates the selected item along aAround Axis Duplicates the selected item and rev
around an axis.Mirror Duplicates the selected item and mir
Menu Commands/Undo/Redo/Cut/Copy/Paste/Clear/Undelete/Duplicate/Select/Select All/Deselect All/Attributes/Visibility/Show All/Command History/Clear Boundary/Source/Clear All Boundaries/Rep. Boundary/Source/Select Bodies/Deselect All Bodies/Select Faces/Deselect All Faces
Edit/Duplicate/Along LineUse this command to copy the selected objects along a straigthe items are duplicated can be vertical, horizontal, or lie at a
> To duplicate items along a line:1. Select the items by using one of the Edit/Select comman2. Choose Edit/Duplicate/Along Line.3. When you choose Edit/Duplicate/Along Line, the ancho
whichever point is currently selected. Any point in the draselected; however, selecting an anchor point on an item’smakes it easier to select the duplication line. The coordinadisplayed in the side window coordinate fields. Choose Reanchor point.
4. Enter the vector along which the objects will be copied in by clicking on a second point in the view window. This dedistance from the anchor point to copy the objects. The lecalculated automatically and appears in the Vector lengththe length, from which the vector is automatically recalcul
5. Choose Enter to accept the vector or choose Cancel to c6. Enter the number of copies to be made in the Total Numb
copies that you specify includes the original copied object7. Choose Enter or press Return.
The system copies the items, spacing them along the vector
Menu Commands/Undo/Redo/Cut/Copy/Paste/Clear/Undelete/Duplicate/Select/Select All/Deselect All/Attributes/Visibility/Show All/Command History/Clear Boundary/Source/Clear All Boundaries/Rep. Boundary/Source/Select Bodies/Deselect All Bodies/Select Faces/Deselect All Faces
Edit/Duplicate/Around AxisUse this command to copy the selected objects and revolve tmay duplicate items around the predefined x-, y-, and z-axes
> To duplicate items around an axis:1. Select the items by using one of the Edit/Select comman2. Choose Edit/Duplicate/Around Axis. New fields appear 3. Select the axis around which you wish to duplicate the ob4. Enter the angle between duplicates in the Angle field.
• A positive angle causes the item to be copied in the co• A negative angle causes the item to be copied in the c
5. Enter the number of copies to be made in the Total Numbcopies that you specify includes the original copied object
6. Choose Enter or press Return to accept the duplication ocancel the command.
The system copies the selected items, spacing each duplicatangle you specified. For example, the rectangle on the followtimes, each copy at an angle of 90 degrees. Note that the duselected.
Menu Commands/Undo/Redo/Cut/Copy/Paste/Clear/Undelete/Duplicate/Select/Select All/Deselect All/Attributes/Visibility/Show All/Command History/Clear Boundary/Source/Clear All Boundaries/Rep. Boundary/Source/Select Bodies/Deselect All Bodies/Select Faces/Deselect All Faces
Edit/Duplicate/MirrorUse this command to mirror and copy the selected objects abis similar to the Arrange/Mirror command, except that it copinstead of moving them.
> To mirror and duplicate items about a plane:1. Select the items by using one of the Edit/Select comman2. Choose Edit/Duplicate/Mirror.3. Select the first point on the plane. You may use the keybo
coordinates in the coordinate fields.4. Choose Enter to accept this point or choose Cancel to ca5. Select the point on the normal plane. (Again, you may en
keyboard.)6. Choose Enter to accept this point or choose Cancel to ca
A mirror-image copy of the selected items appears on the scrgle in the positive xy plane was duplicated around the y-axis.rectangle is highlighted, not the original one.
Menu Commands/Undo/Redo/Cut/Copy/Paste/Clear/Undeletet/Duplicate/Select/Select All/Deselect All/Attributes/Visibility/Show All/Command History/Clear Boundary/Source/Clear All Boundaries/Rep. Boundary/Source/Select Bodies/Deselect All Bodies/Select Faces/Deselect All Faces
object’s color changes to e items.ng faces of objects with the edge will be selected. Click comes selected. When you
nd deselected in a circular lly hidden behind other e right mouse button menu
it box below the list box.
ommands to select items:
dow appears.
or entering the object’s objects.
es by name.ox that you specify.3D objects.
Ansoft HFSS — Edit Menuics:
Go Back
Contents
Index
Menu Commands/Undo/Redo/Cut/Copy/Paste/Clear/Undelete/Duplicate/Duplicate/Mirrort/Select/Select All/Deselect All/Attributes/Visibility/Show All/Command History/Clear Boundary/Source/Clear All Boundaries/Rep. Boundary/Source/Select Bodies/Deselect All Bodies/Select Faces/Deselect All Faces
Edit/SelectUse these commands to select items to be edited. This commfrom the right mouse button menu.
> To select objects using the Edit/Select command:1. Choose Edit/Select. A list of objects appears on the right2. Select an object in one of the following ways:
• Choose the name of the object you want to select. Thethe selection color. On PCs, hold Ctrl to select multipl
• Click on the object itself with the mouse. When selectimouse, if you click on an edge, a face adjacent to thisagain on the same edge, and the next adjacent face becontinue to click on the edge, the faces are selected amanner. This allows you to select faces that are normafaces. You may also use the Next Behind function in thto select hidden faces.
• Enter the name (with wildcards, if necessary) in the ed
In the 3D Boundary Manager, use the following Edit/Select c
Edit/Select/By Name3D Boundary Manager
Use this command to select items by name.
> To select objects by name:1. Choose Edit/Select/By Name. The Select By Name win2. Select an Object, Boundary, or Face.3. Select the object by either highlighting the object’s name
name, and choosing OK. Use wild cards to select multiple4. Choose Done to select the objects.
By Name Selects objects, boundaries, and facBy Box Selects the objects that lie inside a bFaces Intersection Selects the intersecting faces of two
ace the box base vertex. ou can change these e you wish to modify and oard to enter the
ox size field in the side ys the change in to represent the opposite nd controlled box.ancel the action.
es.
D objects.
in the model appears.
e objects are selected. aces.
Ansoft HFSS — Edit Menuics:
Go Back
Contents
More
Index
Menu Commands/Undo/Redo/Cut/Copy/Paste/Clear/Undelete/Duplicate/Duplicate/Mirror/Select/Select All/Deselect All/Attributes/Visibility/Show All/Command History/Clear Boundary/Source/Clear All Boundaries/Rep. Boundary/Source/Select Bodies/Deselect All Bodies/Select Faces/Deselect All Faces
Edit/Select/By Box3D Boundary Manager
Use this command to select objects that lie completely withincal Pick option Object must be selected to use this comman
> To create a volume box:1. Choose Edit/Select/By Box.2. Select the point in the active window where you wish to pl
The coordinates of this point appear in the side window. Ycoordinates by double-clicking on the field of the coordinatentering a new value. Alternatively, you can use the keybcoordinates of this point in the coordinates fields.
3. Choose Enter to accept the Box Base Vertex.4. Enter the x, y, and z dimensions of the box in the Enter b
window. As you enter each value, the view window displadimensions. You can click on a point in the view windows vertex, but entering the values gives you a more precise a
5. Choose Enter to accept the values or choose Cancel to c
The objects within the box are selected. The box itself vanish
Edit/Select/Faces Intersection3D Boundary Manager
Use this command to select the intersecting surfaces of two 3
> To select intersecting surfaces:1. Choose Edit/Select/Faces Intersection. A list of objects 2. Select the two objects whose surfaces touch.3. Choose Pick Intersection. The intersecting surfaces of th4. Repeat steps 2 and 3 to select additional intersecting surf5. Choose Done when you are finished.
Menu Commands/Undo/Redo/Cut/Copy/Paste/Clear/Undelete/Duplicate/Duplicate/Mirror/Selectt/Select Allt/Deselect All/Attributes/Visibility/Show All/Command History/Clear Boundary/Source/Clear All Boundaries/Rep. Boundary/Source/Select Bodies/Deselect All Bodies/Select Faces/Deselect All Faces
Edit/Select AllUse this command to select all items.
> To select all selected items:• Choose Edit/Select All.All items are now selected.
Edit/Deselect AllUse this command to deselect any items that are currently se
> To deselect all selected items:• Choose Edit/Deselect All.All previously selected items are now deselected.
Deselecting Items With the Mouse> To deselect items with the mouse:
1. Click and hold the right mouse button to obtain the right m2. Choose Deselect All.All previously selected items are now deselected.
Menu Commands/Undo/Redo/Cut/Copy/Paste/Clear/Undelete/Duplicate/Duplicate/Mirror/Select/Select All/Deselect All/Attributes/Visibility/Show All/Command History/Clear Boundary/Source/Clear All Boundaries/Rep. Boundary/Source/Select Bodies/Deselect All Bodies/Select Faces/Deselect All Faces
Edit/AttributesThe commands in the Edit/Attributes menu are:
These attributes are set on an item-by-item basis.
Edit/Attributes/By ClickingUse this command to modify object attributes one item at a timay be changed:
• The name and color of a geometric object.• The visibility of the object.• Whether an object is used in the model from which a solu• The display of the object as wireframe or shaded.• Whether the orientation of the object is shown.
Clicking on the objects themselves is typically the most usefu
> To change the attributes of an object:1. Choose Edit/Attributes/By Clicking. The cursor change2. Select the object you want to change.
By Clicking Change various object attributes, including shading, and orientation.
ly include alphanumeric ot assign the same name to use by the system and can-
Ansoft HFSS — Edit Menuics:
Go Back
Contents
More
Index
Menu Commands/Undo/Redo/Cut/Copy/Paste/Clear/Undelete/Duplicate/Duplicate/Mirror/Select/Select All/Deselect All/Attributes/Visibility/Show All/Command History/Clear Boundary/Source/Clear All Boundaries/Rep. Boundary/Source/Select Bodies/Deselect All Bodies/Select Faces/Deselect All Faces
3. Choose OK. The Object Attributes window appears:
4. Change the attributes you wish to modify.5. Choose OK or press Return. The object’s attributes are c
object’s attributes completely unchanged, choose CancelThe following object attributes may be modified.
NameSpecifies the name of the object.
> To change the name:1. Click the left mouse button on the Name field.2. Enter the new name for the object.
Object names can be up to 15 characters long. They may oncharacters (a-z, A-Z, and 0-9) and underscores (_). You cannmore than one object. The name background is reserved fornot be assigned to an object.
n — that is, whether mate-te element mesh generated
-model” objects, and no est of the geometry and ot used in generating a solu-
ect:
Ansoft HFSS — Edit Menuics:
Go Back
Contents
More
Index
Menu Commands/Undo/Redo/Cut/Copy/Paste/Clear/Undelete/Duplicate/Duplicate/Mirror/Select/Select All/Deselect All/Attributes/Visibility/Show All/Command History/Clear Boundary/Source/Clear All Boundaries/Rep. Boundary/Source/Select Bodies/Deselect All Bodies/Select Faces/Deselect All Faces
ColorControls the object’s color.
> To change the color:1. Click on the box beside the Color field. A palette of colors2. Select the new color.
The color of the object has now been changed to the color yo
VisibilityControls the object’s visibility. Invisible objects that are defineincluded in the final model even though they are hidden.
> To toggle the visibility of an object:• Select Visibility.
The object is hidden.
ModelDetermines whether the object is used in generating a solutiorial properties and boundary conditions are defined and a finifor the object. By default, all objects are model objects.
No materials or boundary conditions can be specified for “nonmesh is created for them. These objects are saved with the rremain a part of the geometric model, even though they are ntion.
> To toggle between “model” and “non-model” status for an obj• Select Model.
frame button is active, the ed. If the button is inactive, ettings.
ontains an object that rests ously. Shading objects is occupying separate spaces.
rs. Arrows mark the
Ansoft HFSS — Edit Menuics:
Go Back
Contents
More
Index
Menu Commands/Undo/Redo/Cut/Copy/Paste/Clear/Undelete/Duplicate/Duplicate/Mirror/Select/Select All/Deselect All/Attributes/Visibility/Show All/Command History/Clear Boundary/Source/Clear All Boundaries/Rep. Boundary/Source/Select Bodies/Deselect All Bodies/Select Faces/Deselect All Faces
Display as WireframeDetermines the shading of the object. If the Display as Wireobject will appear in wireframe, even if the view is set to shadthe object’s appearance is determined by the View/Render s
> To set wireframe view for an object:• Select Display as Wireframe.
Displaying an object in wireframe is useful when the model cinside another. This allows you to see both objects simultanebest used when the model has two or more different objects This allows you to see the objects in their full sizes.
Show OrientationDetermines whether the object’s orientation is displayed.
> To show the object’s orientation:• Select Show Orientation. The object’s orientation appea
s. You may select any color coloring objects may allow
laying the current
e default. ncel the recoloring.
Ansoft HFSS — Edit Menuics:
Go Back
Contents
Index
Menu Commands/Undo/Redo/Cut/Copy/Paste/Clear/Undelete/Duplicate/Duplicate/Mirror/Select/Select All/Deselect Allt/Attributes/Visibility/Show All/Command History/Clear Boundary/Source/Clear All Boundaries/Rep. Boundary/Source/Select Bodies/Deselect All Bodies/Select Faces/Deselect All Faces
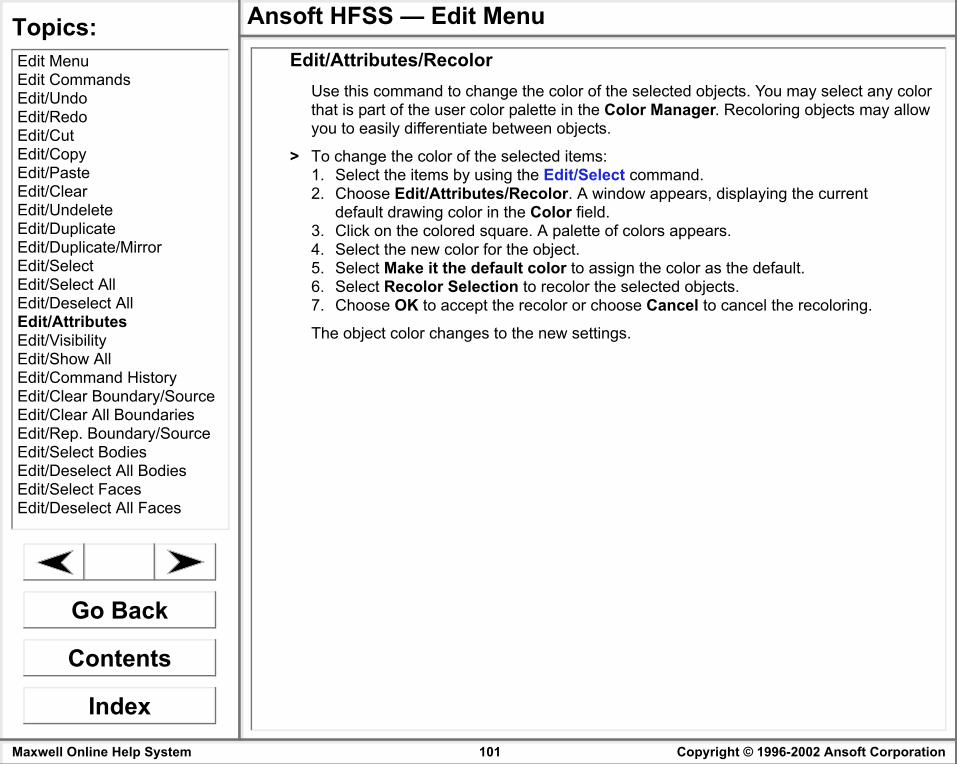
Edit/Attributes/RecolorUse this command to change the color of the selected objectthat is part of the user color palette in the Color Manager. Reyou to easily differentiate between objects.
> To change the color of the selected items:1. Select the items by using the Edit/Select command.2. Choose Edit/Attributes/Recolor. A window appears, disp
default drawing color in the Color field.3. Click on the colored square. A palette of colors appears.4. Select the new color for the object.5. Select Make it the default color to assign the color as th6. Select Recolor Selection to recolor the selected objects.7. Choose OK to accept the recolor or choose Cancel to ca
Menu Commands/Undo/Redo/Cut/Copy/Paste/Clear/Undelete/Duplicate/Duplicate/Mirror/Select/Select All/Deselect All/Attributes/Visibility/Show All/Command History/Clear Boundary/Source/Clear All Boundaries/Rep. Boundary/Source/Select Bodies/Deselect All Bodies/Select Faces/Deselect All Faces
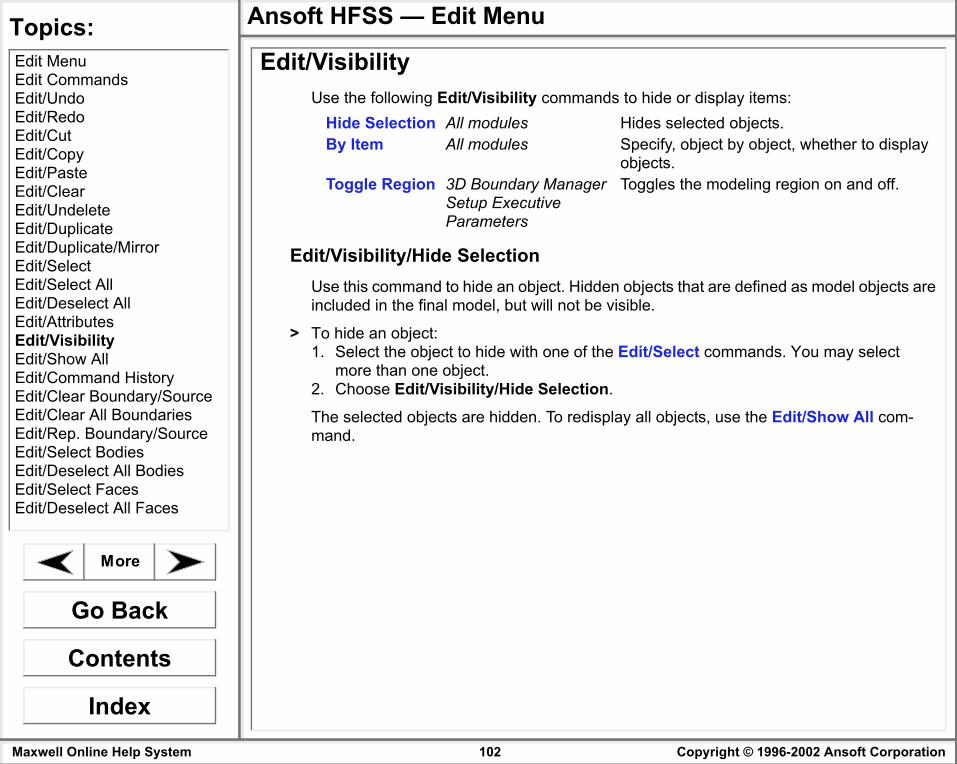
Edit/VisibilityUse the following Edit/Visibility commands to hide or display
Edit/Visibility/Hide SelectionUse this command to hide an object. Hidden objects that are dincluded in the final model, but will not be visible.
> To hide an object:1. Select the object to hide with one of the Edit/Select comm
more than one object.2. Choose Edit/Visibility/Hide Selection.
The selected objects are hidden. To redisplay all objects, usemand.
Hide Selection All modules Hides selected oBy Item All modules Specify, object by
do this:eld above Show and rting with 3D. The Show
elect the objects.ne of the following:
s. Objects are then use Edit/Show All.
Ansoft HFSS — Edit Menuics:
Go Back
Contents
More
Index
Menu Commands/Undo/Redo/Cut/Copy/Paste/Clear/Undelete/Duplicate/Duplicate/Mirror/Select/Select All/Deselect All/Attributes/Visibility/Show All/Command History/Clear Boundary/Source/Clear All Boundaries/Rep. Boundary/Source/Select Bodies/Deselect All Bodies/Select Faces/Deselect All Faces
Edit/Visibility/By ItemUse this command to either hide or display items.
> To hide or display items:1. Choose Edit/Visibility/By Item. The following window ap
2. Select the object to hide or display in one of the following • Click on the name of the object. You may select multip• Use wildcards to select objects with similar names. To
a. Enter the name fragment and the wildcard in the fiHide. For example, use 3D* to select all objects staand Hide buttons change to Sel and Desel.
b. Choose Sel to select the objects and Desel to des3. To change the visibility status of the selected object, do o
• To hide an object, select Hide.• To display an object, select Show.
4. Choose Done when you are finished changing the settinghidden or displayed accordingly. To redisplay all objects,
ust executed in the form of a or, it can be modified and
the macro is saved in mod3/ macro file is also read.
rs, rectangles, circles, arcs, eometry is highlighted in the nd, you can preview it in the
r appears.
Ansoft HFSS — Edit Menuics:
Go Back
Contents
More
Index
Menu Commands/Undo/Redo/Cut/Copy/Paste/Clear/Undelete/Duplicate/Duplicate/Mirror/Select/Select All/Deselect All/Attributes/Visibility/Show All/Command History/Clear Boundary/Source/Clear All Boundaries/Rep. Boundary/Source/Select Bodies/Deselect All Bodies/Select Faces/Deselect All Faces
Edit/Visibility/Toggle Region3D Boundary Manager, Setup Executive Parameters/Port Im
Use this command to toggle the visibility of the boundary regioor off. This does not affect the model itself.
> To toggle the boundary region: • Choose Edit/Visibility/Toggle Region.
The region toggles on and off.
Edit/Show AllUse this command to display all items that have been hiddenity commands.
> To display all hidden items:• Choose Edit/Show All.All items are now visible.
Edit/Command HistoryAnsoft Macro Editor
Use this command to display the list of commands you have jmacro. Once the macro is displayed in the Ansoft Macro Editsaved.
When the model is saved in the 3D Modeler as an .sm3 file, projname.mac. When the .sm3 file is read, its corresponding
Some geometries can be visualized, including boxes, cylindeand points. When you select the line in the macro editor, the g3D Modeler, and as you change the parameters of the commamodeler.
> To save the commands as a macro:1. Create the model using the Maxwell 3D Modeler.2. Choose Edit/Command History. The Ansoft Macro Edito
ctly conducting metal is boundary. metal is automatically
perfect E boundaries.
clear.
source cleared with the
ndary list.
s, choose Edit/Com-ccessing the Macro Edi- to this command.
Ansoft HFSS — Edit Menuics:
Go Back
Contents
Index
Menu Commands/Undo/Redo/Cut/Copy/Paste/Clear/Undelete/Duplicate/Duplicate/Mirror/Select/Select All/Deselect All/Attributes/Visibility/Show Allt/Command Historyt/Clear Bound./Sourcet/Clear All Boundaries/Rep. Boundary/Source/Select Bodies/Deselect All Bodies/Select Faces/Deselect All Faces
3. Use the Ansoft Macro Editor to modify the list of commanassociated with them.
4. Optionally, choose File/Apply Changes to immediately athe model. This allows you to make corrections without thEditor.
5. Choose File/Save to save any changes to the macro.
Choose File/Exit to return to the Maxwell 3D Modeler.
Edit/Clear Boundary/Source3D Boundary Manager
Use this command to reset selected surfaces to their default ing any boundaries or sources that you may have set.
• Any object assigned the material characteristics of a perfeautomatically assumed to be surrounded with a perfect E
• Any object assigned the material characteristics of a lossyassumed to be surrounded with an impedance boundary.
• Surfaces that are exposed to the background are reset to> To clear a condition:
1. Select the object whose boundary conditions you want to 2. Choose Edit/Clear Boundary/Source.
Use the Edit/Undo Clear command to restore a boundary orEdit/Clear Boundary/Source command.
Edit/Clear All Boundaries3D Boundary Manager
Use this command to delete all defined boundaries in the Bou
Note: To access this command and receive these featuremand History instead of File/Macro/Edit Macro. Ator directly from the software will not provide access
ndary in the Boundary list. s the order in which they d first, while the boundaries aries are defined is critical
ary moves down one
ually seed. This command
list; you may not move a
Ansoft HFSS — Edit Menuics:
Go Back
Contents
Index
Menu Commands/Undo/Redo/Cut/Copy/Paste/Clear/Undelete/Duplicate/Duplicate/Mirror/Select/Select All/Deselect All/Attributes/Visibility/Show All/Command History/Clear Boundary/Sourcet/Clear All Boundariest/Rep. Bound./Sourcet/Select Bodies/Deselect All Bodies/Select Faces/Deselect All Faces
> To clear all boundaries:• Choose Edit/Clear All Boundaries.
Use the Edit/Undo Clear command to restore the boundariesAll Boundaries command.
Use this command to change the position of the selected bouThe order the boundaries appear in the Boundary list indicatewere defined. The boundaries at the top of the list were defineat the bottom were defined last. The order in which the boundwhen two boundaries overlap.
> To change the order of the boundaries:1. Select the object whose order you want to change.2. Choose Edit/Reprioritize Boundary/Source. The bound
spot in the Boundary list.
Edit/Select BodiesMeshmaker
Use this command to select the objects that you want to mantoggles with the Edit/Deselect All Bodies command.
> To select a body to manually mesh: 1. Choose Edit/Select Bodies. A list of objects appears.2. Select the objects you want to manually mesh.3. Choose OK.
Note: Ports are automatically placed last in the Boundary boundary below a port.
Menu Commands/Undo/Redo/Cut/Copy/Paste/Clear/Undelete/Duplicate/Duplicate/Mirror/Select/Select All/Deselect All/Attributes/Visibility/Show All/Command History/Clear Boundary/Source/Clear All Boundaries/Rep. Boundary/Source/Select Bodiest/Deselect All Bodiest/Select Facest/Deselect All Faces
Edit/Deselect All BodiesMeshmaker
Use this command to deselect all of the selected bodies that
> To deselect the objects:• Choose Edit/Deselect All Bodies.
All the objects are now deselected.
Edit/Select FacesMeshmaker
Use this command to select the faces that you want to manuagles with Edit/Deselect All Faces.
> To select a face to manually seed: 1. Choose Edit/Select Faces. A list of faces appears.2. Select the name of the face you wish to manually seed.3. Choose OK.
The selected faces can now be manually seeded.
Edit/Deselect All FacesMeshmaker
Use this command to deselect all the faces you selected withmand.
> To deselect all the faces: • Choose Edit/Deselect All Faces.


![Trainingtech.mweda.com/download/hwrf/hfss/HFSS-ANSOFT HFSS... · 2014. 12. 20. · diag[1], diag[2], and diag[3] to the object’s X, Y, and Z axes, respectively “relative to object’s](https://static.documents.pub/doc/80x56/60fa2d851289cd07623970a4/hfss-2014-12-20-diag1-diag2-and-diag3-to-the-objectas-x-y.jpg)


![Combline Filter Tuning with Ansoft HFSS - dl.edatop.comdl.edatop.com/mte/ansoft/edatop.com_reed[1].pdf · 1 Combline Filter Tuning with Ansoft HFSS Presented by Jim Reed of Optimal](https://static.documents.pub/doc/80x56/5a703c537f8b9a93538bcc03/combline-filter-tuning-with-ansoft-hfss-dledatopcomdledatopcommteansoftedatopcomreed1pdfpdf.jpg)


