40
March 2016 Volume 27 No 09 Issue 297 A 100% NMRA Affiliated Club
March 2016 Volume 27 No 09 Issue 297A 100% NMRA Affiliated Club

Please note; schedules for club activities are notified in Train Talk - RAILWAY TIMETABLE - Page 38, and via email, if you have an email address and are not on our members email list, please advise ASAP so you can receive up to date news.Send to email; [email protected]
Disclaimer: The opinions expressed in ‘Train Talk’ are not necessarily the opinions of the DDMRC Inc. or it’s members.
PLEASE NOTE: Any personal items left and/or used at the club premises or events attended and/or organised by the club are the responsibility of the owner of said items.
The DDMRC Inc. Takes no responsibility for any loss or damage thereof. MOTION:04/02/03.
MEMBERSHIP FEESOne membership level only.
Ordinary @ $90.00* For Twelve Months
Pro-rata rates per Quarter(*Includes basic NMRA membership =$30.00 for Public Liability Insurance)
5. Adams Corner Coroner 26. Toowoomba Model Trains, Craft & 6. Presidents Report Hobby Expo7. Teditorial 27. OOPS! (www)8. On The Footplate 28. Modellers Corner (Teditor)8. Seeking Assistance (John Calnan) 29. Clubhouse Ditties (Anon)9. Modelling Tips & Tricks (Walthers) 30. Splitters Swamp Creek (Geoff Burns)10. NMRA Division 1 Report (Ian Venables) 32. The Dunlop Way (Ben Dunlop)13. Lionel (Hornby) Kearney (Teditor) 35. Jamestown News (Gary Sardoni)15. Name Change Meeting (Teditor) 37. Bunnings Easter Family Night (Teditor)16. HO Happenings (Mike Prowse) 38. Railway Timetable17. Wednesday Daylighters (Mike Prowse) 40. Backpage Photo (Geoff Evans)18. Buy/Sell & Display (Mike Prowse)19. Creative Modelling Lectures (Doug Clarkson)20. Railway Pics (Bill Waterhouse)22. Coff’s Harbour Branchline Modellers Forum (Arthur Hayes)24. NBL Preservation Group (Geoff Evans)
ADVERTISER INDEX:3 Train Pictures4 AR KITS5 Wuiske Promotions38 My Tool Store39 Southern Rail Models
Darling Downs Model Railway Club Inc.All correspondence mailed to:
DDMRC Inc.PO Box 883
Toowoomba Qld 4350
DDMRC Inc. Internet HomepagesWebsite:
Email: ddmrc.com.au
‘Train Talk’ Volume 27 No 09 (issue #297)March 2016
ABN 32 998 681 418
A 100% NMRA Affiliated Club
President Brent Smith 4687 7607Vice President Mike Prowse 4634 0462 Secretary Ted Freeman 4638 0397Treasurer Bill Waterhouse 4639 2434Committee Doug Clarkson 4528 2584
Barry Freeman 4635 7333 Lionel Kearney 4613 5785Gary Sardoni 4635 5920
Club Phone Number (07) 4638 1408
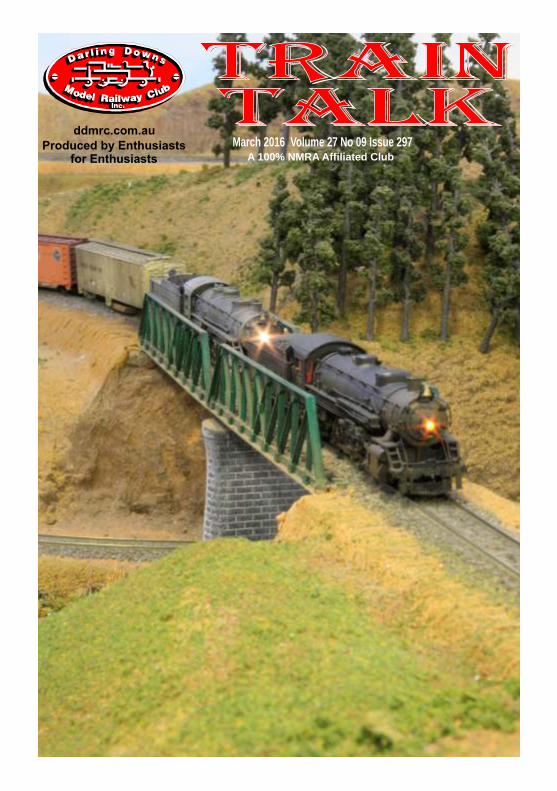
ON THE COVER: Shalvey Central Train engine 2102 gets assistance from Union Pacific 4-8-2 #7009 on a heavy Merchandise train on the N scale Byers Junction Layout. Photo Mikey.
2
March 2016

March 2016
3
4
March 2016
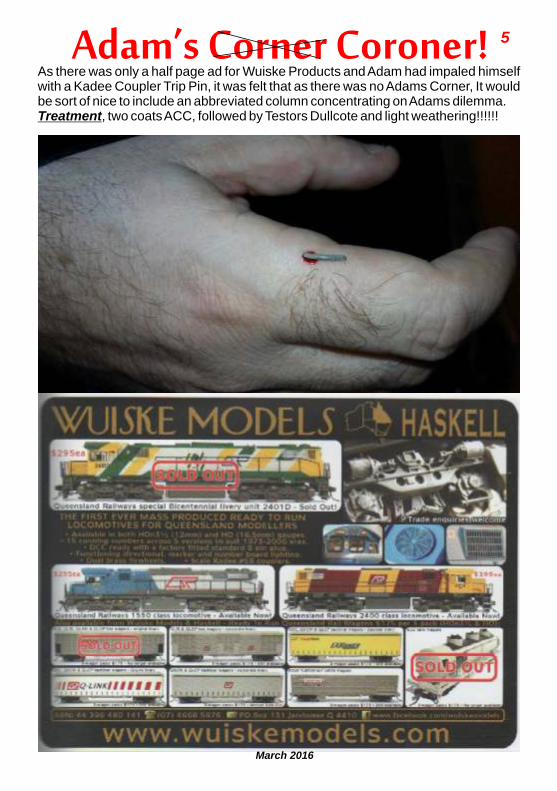
As there was only a half page ad for Wuiske Products and Adam had impaled himself with a Kadee Coupler Trip Pin, it was felt that as there was no Adams Corner, It would be sort of nice to include an abbreviated column concentrating on Adams dilemma.Treatment, two coats ACC, followed by Testors Dullcote and light weathering!!!!!!
5
March 2016

6
March is gone and April has arrived and the weather is finally starting to cool down a bit.
Just the time for a bit of Club involvement and a bit of a chat with the other Club members at the Showgrounds Venue.
Re-wiring of Jamestown is progressing steadily, as the lads try to unravel the maze of spaghetti-like wires to make sense of it all. They'll work it out one day and the wiring genius that put the whole thing together!
It has to be seen to be believed.
P r o g r e s s i s advancing at a solid rate of the new HO scale layout with the boys going through the stage of wiring the whole thing up ready to run sometrains on it. Well done to the small, but intrepid band of workers.
If you can help with anything over the Toowoomba Show period at the Showgrounds, even if it just standing around and talking to the people as they enter, please advise Ted at the earliest opportunity.
Upcoming events include Toowoomba Royal Show and of course, Anzac Day on the25th of April.
Stay safe and take care, until next time.
Smithy
March 2016
This issue of Train Talk is very late, Windows 7 and Corel Draw 15 seem to have a disliking to me pressing computer buttons.
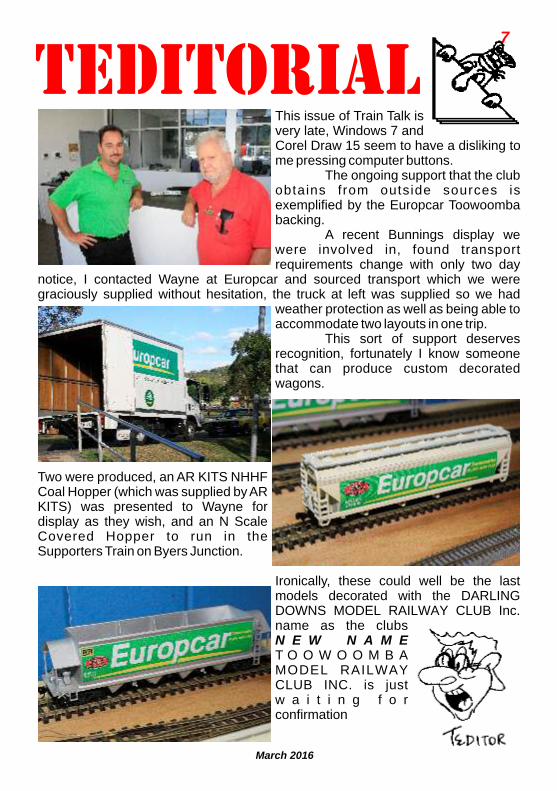
The ongoing support that the club obtains from outside sources is exemplified by the Europcar Toowoomba backing.
A recent Bunnings display we were involved in, found transport requirements change with only two day
notice, I contacted Wayne at Europcar and sourced transport which we were graciously supplied without hesitation, the truck at left was supplied so we had
weather protection as well as being able to accommodate two layouts in one trip.
This sort of support deserves recognition, fortunately I know someone that can produce custom decorated wagons.
Two were produced, an AR KITS NHHF Coal Hopper (which was supplied by AR KITS) was presented to Wayne for display as they wish, and an N Scale Covered Hopper to run in the Supporters Train on Byers Junction.
Ironically, these could well be the last models decorated with the DARLING DOWNS MODEL RAILWAY CLUB Inc. name as the clubs N E W N A M E T O O W O O M B A MODEL RAILWAY CLUB INC. is just w a i t i n g f o r confirmation
March 2016
7
8
This interesting Email came through to the club, do you have any suggestions for John, replies via Train Talk will be forwarded on.
Maybe you can answer a query for me please, a question that I have been given countless answers to, I'm building a large size N scale DCC layout on 2 levels here at home in Ireland , it's about 125 to 150sq ft in size when completed within I hope 5 yrs. I want to incorporate either a commercial airport or preferably an Air Force base on the layout, however trying to find a scale to work is like trying to find the ark of the covenant ,A 747 jet in 1/148 scale would look huge on an N scale layout while a 1/500 scale one would be about 5" long which would make a 747 the same size as a loco, it's driving me crazy trying to find a solution , by my reckoning an F-16 jet looks about the same length as a modern day loco , a jet in 1/144 scale is just under 4.75" long, So would I be better to stick with fighter jets in 1/144 scale plus the same scale for tanks ,,APC's etc Would you have any tips, ideas or even a suitable solution for me please, I would really love to have this base on my layout, but I need to have it looking as true to scale as possible , Some friends have said to put the airport / airbase in the distance in the layout which I can't do because the layout is L shaped in the corner of my spare bedroom and while each length of the L is about 15 ft long , it is only 5 ft deep so I can't put it back in the distance , Anyway, if you have any ideas I would deeply appreciate them please Thank you ever so much. Kind regards, John Calnan
March 2016
There is a policy at the DDMRC Inc.
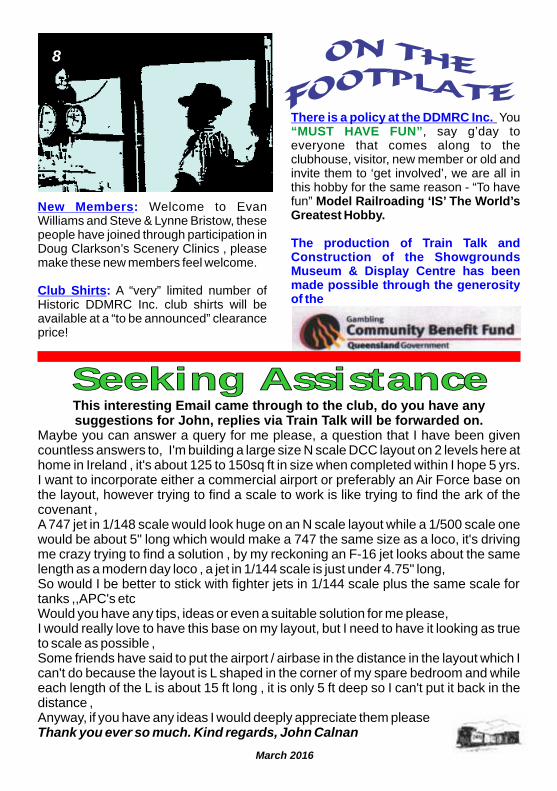
New Members:
The production of Train Talk and Construction of the Showgrounds Museum & Display Centre has been made possible through the generosity Club Shirts:of the
Welcome to Evan Williams and Steve & Lynne Bristow, these people have joined through participation in Doug Clarkson’s Scenery Clinics , please make these new members feel welcome.
A “very” limited number of Historic DDMRC Inc. club shirts will be available at a “to be announced” clearance price!
You, say g’day to
everyone that comes along to the clubhouse, visitor, new member or old and invite them to ‘get involved’, we are all in this hobby for the same reason - “To have fun” Model Railroading ‘IS’ The World’s Greatest Hobby.
“MUST HAVE FUN”
Seeking Assistance
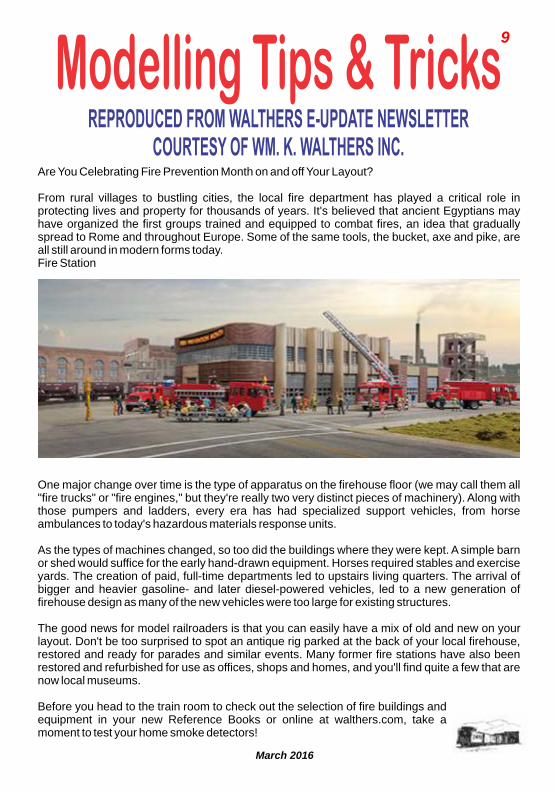
Are You Celebrating Fire Prevention Month on and off Your Layout?
From rural villages to bustling cities, the local fire department has played a critical role in protecting lives and property for thousands of years. It's believed that ancient Egyptians may have organized the first groups trained and equipped to combat fires, an idea that gradually spread to Rome and throughout Europe. Some of the same tools, the bucket, axe and pike, are all still around in modern forms today.Fire Station
One major change over time is the type of apparatus on the firehouse floor (we may call them all "fire trucks" or "fire engines," but they're really two very distinct pieces of machinery). Along with those pumpers and ladders, every era has had specialized support vehicles, from horse ambulances to today's hazardous materials response units.
As the types of machines changed, so too did the buildings where they were kept. A simple barn or shed would suffice for the early hand-drawn equipment. Horses required stables and exercise yards. The creation of paid, full-time departments led to upstairs living quarters. The arrival of bigger and heavier gasoline- and later diesel-powered vehicles, led to a new generation of firehouse design as many of the new vehicles were too large for existing structures.
The good news for model railroaders is that you can easily have a mix of old and new on your layout. Don't be too surprised to spot an antique rig parked at the back of your local firehouse, restored and ready for parades and similar events. Many former fire stations have also been restored and refurbished for use as offices, shops and homes, and you'll find quite a few that are now local museums.
Before you head to the train room to check out the selection of fire buildings and equipment in your new Reference Books or online at walthers.com, take a moment to test your home smoke detectors!
March 2016
9

10
Coming Events April Saturday 9th – CDMRA Table Sale, enquiries Charles Clarke. April Saturday 16th – Meeting at George Stainlay's, Scarborough. May Sat/Sun 7th/8th – Brisbane Train Show, AMRA at the RNA.
May Sat 21st – Meeting at Rob Mclear's, Kingaroy.
RoundtuitsEach year, leading up to Christmas, I'm going to definitely finish some project that is part finished on the workbench or that is carefully stored away in a box waiting for the next session of model making that will see it finished. It seems for me anyway, that this is a sure fire way of not getting that done.
I'm more likely to suddenly start something I didn't expect that has suddenly become urgent even though up until now was almost permanently 'on the back burner'. This is a serious problem I have as there must be 50 such projects sitting around. But to my surprise, eventually something new gets to see the light of day unexpectedly.
My trouble might be that I enjoy the actual building and construction so much that there is almost a sadness at leaving some subject that has taken a lot of thought and ingenuity to complete. What problem will I have to think about as I lay in bed waiting to go to sleep?
Coal Train Operations by Nigel Gartshore
Many of us see the long coal trains snaking through the countryside or at the ports without understanding how they are loaded and how this could be added to operations.
I recently upgraded a Coal Wash plant involving a train load out operation and was interested to see the operators loading the trains. In some cases at a lovely 2am!
When the train first arrives they radio the control through to the driver and the coal type to be loaded. The driver brings the train to the loader and awaits a clear signal to proceed into the load out. The operator radios that he is to proceed and at what speed he wants the train to proceed, in most cases this was 0.8km/h.
There are two types of loading, flood loading and batch loading. Flood is where the hydraulic gate opens and floods the wagon until the chute chokes from what is in the wagon and then slowly draws out as the wagon passes through. The second is batch loading where there are two sets of hydraulic gates in which the first empties onto scales and closes once the set wait is reached (usually half a wagon load). The second gate then opens and drops the coal into the wagon and is more accurate, but more expensive to install. As the locomotives proceed through under the bin the pantographs automatically drop via sensors on the track. The operators confirm this to the driver as it has been known for this system to fail and pantographs ripped off the locomotives from the chute.
March 2016
NMRA DIVISION 1 (QUEENSLAND)(www.Zelmeroz.com/anmra-1)
continued on page 11
After the locomotives have passed the bin, a chute is lowered down to the top of the first wagon just above the lip where rubber flaps help reduce the coal spilling over the edges. In the case of flood loading the operator opens the gate at defined spots on the wagon (usually lining up the welding seams on the wagon with a part of the structure - very technical). As the coal flows into the wagon it tends to drop towards the front and back, so even though the front of the wagon has past the chute it still fills the wagon to the front. Open too early and it flows over the front of the wagon. The gate is left open by the operator to another point on the wagon where they shut the gate and the remaining coal left in the chute continues to fill the wagon. Leave the gate open too long and the coal falls out over the back of the wagon
The operator usually loads the wagons light until the fourth wagon and until he gets weights back from the rail company's weigher. They then adjust their open and close points to try and get the nominal weight in the wagon. The operators load light as if the weigher shows the wagon is loaded too heavy. Then they must radio the train driver to stop and reverse the train to remove the overload. This is usually done by lowering the chute into the wagon and pushing the coal out of the wagon like a dozer blade. It drops into a pit under the rails that is cleaned out by a front end loader after the train, or as time permits.
There are a few different ways that the coal is fed to the bin. These are either from a tunnel with a conveyor leading out to the bin. Coal valves are opened under the stockpiles and coal is pushed into the valves via bulldozers which then travels into the bin at a set rate, usually something like 5000 tons per hour. Other methods use reclaimers that are like a large A-frame with numerous blades that look like a caterpillar track that pulls the coal off the stockpiles onto the conveyor then up to the Train Loads Out bin.
Modelling Operation If loading trains on a layout in a later era, the real operations can be incorporated into the model. I have seen on a layout in the US where they have a camera setup and people are placed in a wagon to represent people riding the trains as happens occasionally. In addition to this the overloading of a wagon could be modelled where the train needs to be reversed to take some of the coal out of the overloaded wagon. It is a requirement in Queensland that someone must go to the end of the train to ensure it can reverse safely. In addition to the reversing to unload a wagon, the train could be delayed due to the chute being too low and ripped of its bolts. They are designed to have sacrificial bolts that allow the chute to come off, rather than the whole bin structure taking the load of a train trying to take the chute with it. At times the coal mine has technical issues or the stockpiles are low and they can't keep up with the train. Then the loader operator either tells the driver to slow or even stop until the bin fills again with coal. Although the bins typically average between 300-500t of coal this is only about 3 to 5 wagons so it doesn't take long before the bin empties if flows to the bin stops. This is a brief overview that may help people incorporate some different changes to their operations.
Thank you to all of those wonderful people who sent me articles. I was over whelmed by the response and there will probably be different articles in every Newsletter this coming year. Some are quite long but very interesting and these may go over a couple of issues.
March 2016
11
continued on page 12
continued from page10
12
Please be Careful As we drive to meetings and to see or operate on layouts or to shows, we become involved with others road users, not as skilled or as courteous as we may be.
Model Railroaders I'm sure enjoy their rides to these meetings as it is often the best chance we get to compare notes and learn more about modelling before we are consumed at the meeting with friends we see less often.
Another group I belong to, not modellers, suffered a horrendous accident where two people spent many months in hospital recovering from the effects. One, a doctor herself, never fully recovered. The other, had a complete change of life situations which was traumatic for the family. That family upheaval due to the accident seemed to cause the victim mental problems that were never overcome.
Comment For some time now I have been suggesting that those of us interested, get together, either in person or via the internet and that we collectively design a storage and transporting container for our locomotives. While diesels are no such a problem, unless you run permanent multiple lash-ups, steam locos are a problem.
There is nothing so possibly harmful than over-handling a steam loco. Bits can easily be bumped off or bent, It's hard to carefully detach a tender from an engine and worst of all is doing this while at the same time disconnecting those small yet very tight 6 pin and 2 pin plugs you need to get electrical connection from engine to tender.
We should be able to come up with a box design where the loco inside is standing reliably on track or flanges in a groove, powered or unpowered. This box should have at least one end that can be hinged down so that the track or grove on that end, lines up with the track rails and the loco can be hand pushed out of the storage box onto the rail or from the rail back into the storage box.
This box would be best if it had consistent outside cross-section measurements so that the boxes can be carried and stored easily without much movement but the lengths could be made to suit the length of the locos so contained. Cushions, either fixed or moveable could be used inside the box when a loco is in it to prevent them moving about and so protect the contents. All you would then need to do is strap up the storage boxes you are going to take to a meeting, or to a show, or to your club, or display layout or friend's, ensure that the moveable end was properly latched and load your car.
On arrival at wherever you intend running, you line up your storage box on some straight track, drop the moveable end and either slowly push you loco, all in one piece onto the track with your finger and then run it without actually having to touch it except for the light pressure needed to get it out of the storage and onto the track. No fiddling around to get the tender attached, nor to get your plugs together, thus saving having to handle the loco except for a little light finger pressure on a coupler.
To get the loco back into the storage box, things are done in reverse order and once again the loco's only contact with a human is the light pressure on the coupler to get it back into storage.
Of course we might be really smart and have the rails/grooves in the box powered so that there is no need for human handling whatsoever! Even if you are so careful that you do not damage anything, that plug and unplugging is asking for trouble. The small cost and trouble you expend to make or buy the box would be worth it in what you pay in worry that the loco might drop or be otherwise damaged. Please let me know if you are interested in a discussion group about this matter.
March 2016
continued from page11
Continuing from last month, a few questions were thrust upon Lionel such as how he got into model trains, his interests in the hobby and thoughts on the club.
Lionel’s father worked at Commonwealth Oil Refinery’s (hence the COR Tanker in the collection), his venture into model trains being the Duchess of Athol set that he still has and still runs as good as the day
it was built. This set came about during a severe illness Lionel suffered as a youth, he was promised a Train Set if he got better, fortunately for Lionel, he did recover and his future in the hobby was sealed.
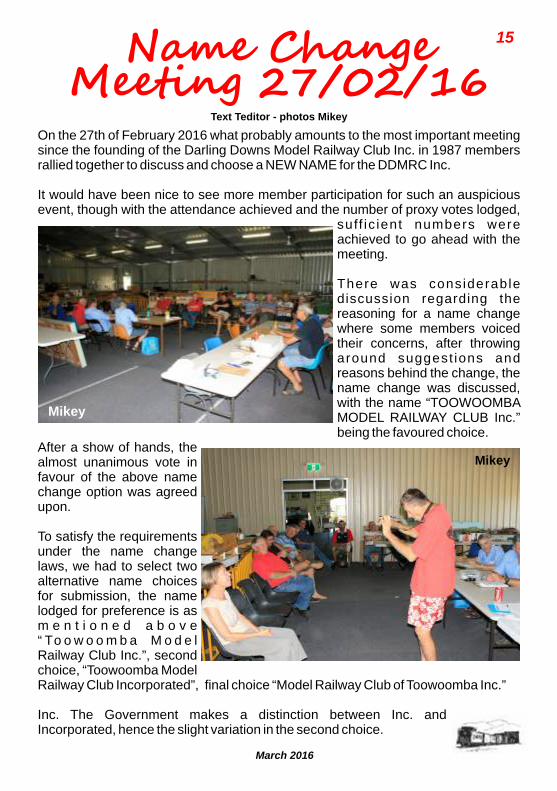
Lionel’s Hornby 3 Rail fascination has stayed with him throughout his life and the layout r e f l e c t s t h e o l d traditions of table top railways as depicted in the period Hornby catalogues that Lionel has displayed on his walls.
Lionel’s layout differs f r o m t h e e a r l y traditional 3 rail layouts i n h a v i n g s o m e
provision for new models of which he has a reasonable collection, its not really that hard to see the glint in his eye showing the passion for the Hornby trains though.
Can you see the startling similarity to the Hornby poster in Lionel’s layout, even if it wasn’t planned that way, it sure comes out as a look-a-like representation to me.
March 2016
13
Text Teditor - photos Mikey
continued on page 14

14It’s interesting to see the difference in the tracks of the Hornby 3 Rail product and modern set-track, the metal construction of the 3-rail will last a long time and due to the sliding pickups on the centre rail very little trouble occurs with stalling due to bad
pickup.
Lionel has a high regard for the club and has found great satisfaction in running trains on Jamestown, he feels it has been a real learning curve. He looks forward to the new HO layout and continued success of the club, thanks for being such a genial host Lionel.
March 2016
continued from page13
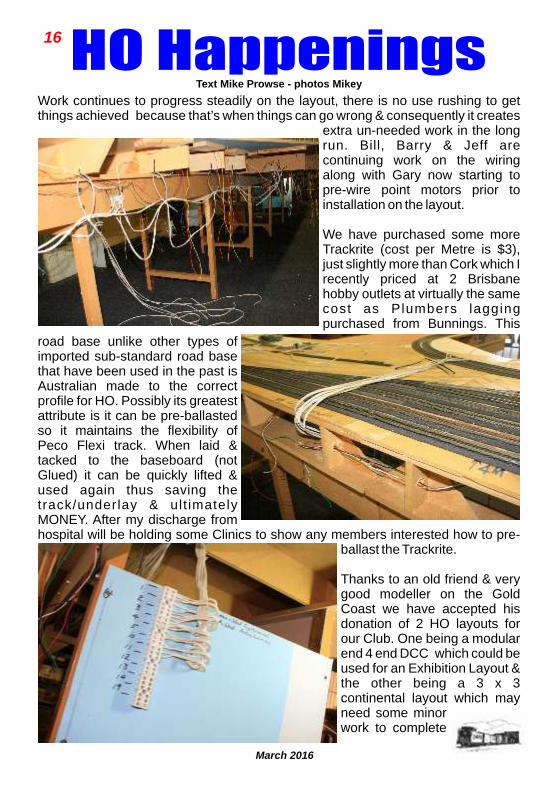
On the 27th of February 2016 what probably amounts to the most important meeting since the founding of the Darling Downs Model Railway Club Inc. in 1987 members rallied together to discuss and choose a NEW NAME for the DDMRC Inc.
It would have been nice to see more member participation for such an auspicious event, though with the attendance achieved and the number of proxy votes lodged,
suff ic ient numbers were achieved to go ahead with the meeting.
There was considerable discussion regarding the reasoning for a name change where some members voiced their concerns, after throwing around suggest ions and reasons behind the change, the name change was discussed, with the name “TOOWOOMBA MODEL RAILWAY CLUB Inc.” being the favoured choice.
After a show of hands, the almost unanimous vote in favour of the above name change option was agreed upon.
To satisfy the requirements under the name change laws, we had to select two alternative name choices for submission, the name lodged for preference is as m e n t i o n e d a b o v e “ To o w o o m b a M o d e l Railway Club Inc.”, second choice, “Toowoomba Model Railway Club Incorporated”, final choice “Model Railway Club of Toowoomba Inc.”
Inc. The Government makes a distinction between Inc. and Incorporated, hence the slight variation in the second choice.
March 2016
15
Mikey
Mikey
Text Teditor - photos Mikey
16
Work continues to progress steadily on the layout, there is no use rushing to get things achieved because that’s when things can go wrong & consequently it creates
extra un-needed work in the long run. Bill, Barry & Jeff are continuing work on the wiring along with Gary now starting to pre-wire point motors prior to installation on the layout.
We have purchased some more Trackrite (cost per Metre is $3), just slightly more than Cork which I recently priced at 2 Brisbane hobby outlets at virtually the same cost as Plumbers lagging purchased from Bunnings. This
road base unlike other types of imported sub-standard road base that have been used in the past is Australian made to the correct profile for HO. Possibly its greatest attribute is it can be pre-ballasted so it maintains the flexibility of Peco Flexi track. When laid & tacked to the baseboard (not Glued) it can be quickly lifted & used again thus saving the track/underlay & ult imately MONEY. After my discharge from hospital will be holding some Clinics to show any members interested how to pre-
ballast the Trackrite.
Thanks to an old friend & very good modeller on the Gold Coast we have accepted his donation of 2 HO layouts for our Club. One being a modular end 4 end DCC which could be used for an Exhibition Layout & the other being a 3 x 3 continental layout which may need some minor work to complete
March 2016
Text Mike Prowse - photos Mikey
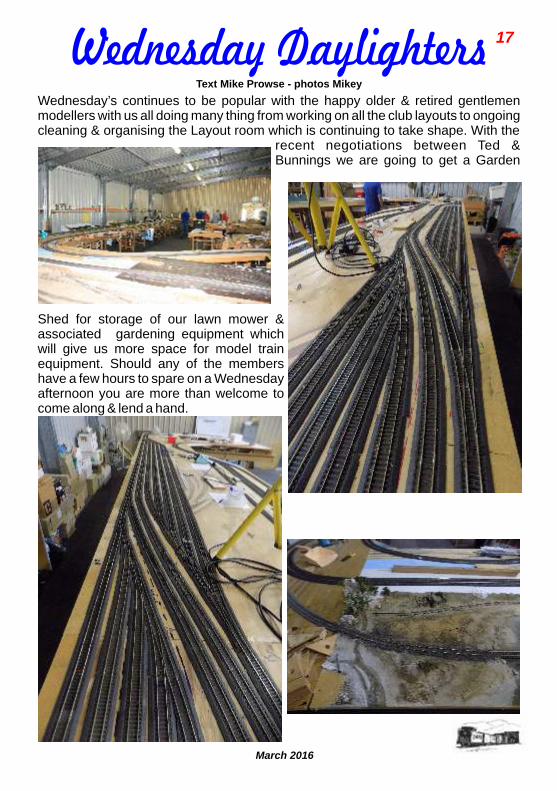
Wednesday’s continues to be popular with the happy older & retired gentlemen modellers with us all doing many thing from working on all the club layouts to ongoing cleaning & organising the Layout room which is continuing to take shape. With the
recent negotiations between Ted & Bunnings we are going to get a Garden
Shed for storage of our lawn mower & associated gardening equipment which will give us more space for model train equipment. Should any of the members have a few hours to spare on a Wednesday afternoon you are more than welcome to come along & lend a hand.
March 2016
17
Text Mike Prowse - photos Mikey
18
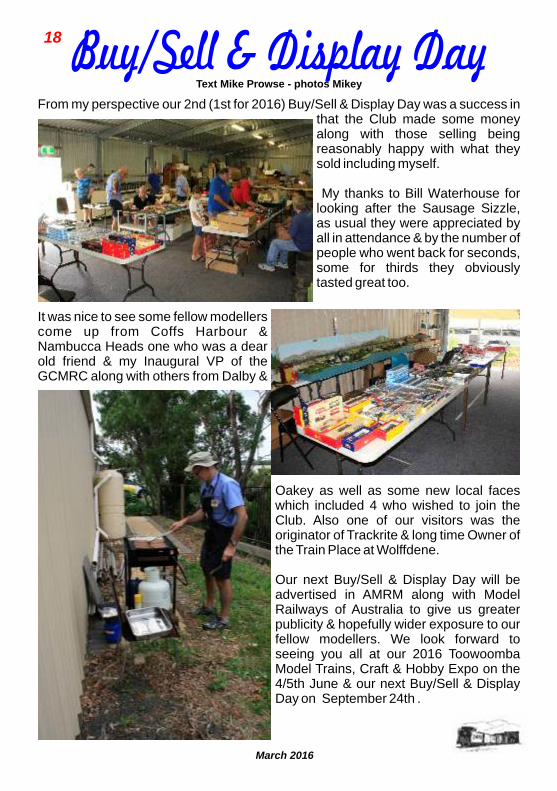
From my perspective our 2nd (1st for 2016) Buy/Sell & Display Day was a success in that the Club made some money along with those selling being reasonably happy with what they sold including myself.
My thanks to Bill Waterhouse for looking after the Sausage Sizzle, as usual they were appreciated by all in attendance & by the number of people who went back for seconds, some for thirds they obviously tasted great too.
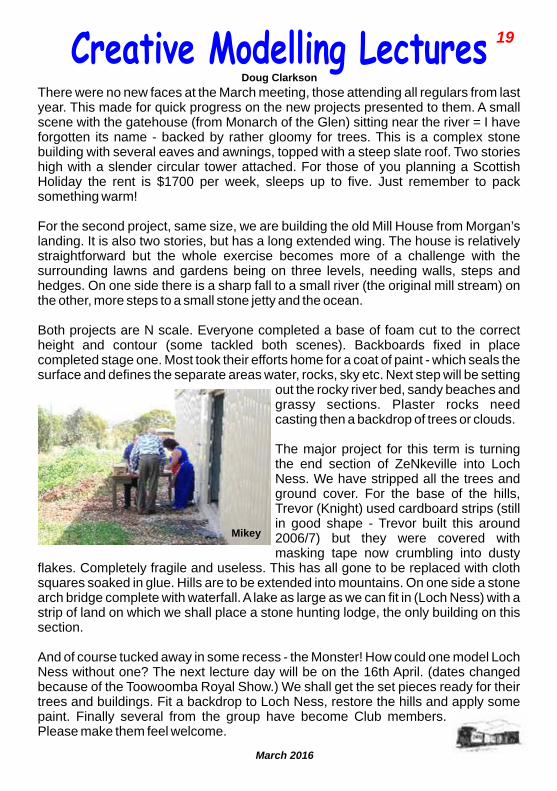
It was nice to see some fellow modellers come up from Coffs Harbour & Nambucca Heads one who was a dear old friend & my Inaugural VP of the GCMRC along with others from Dalby &
Oakey as well as some new local faces which included 4 who wished to join the Club. Also one of our visitors was the originator of Trackrite & long time Owner of the Train Place at Wolffdene.
Our next Buy/Sell & Display Day will be advertised in AMRM along with Model Railways of Australia to give us greater publicity & hopefully wider exposure to our fellow modellers. We look forward to seeing you all at our 2016 Toowoomba Model Trains, Craft & Hobby Expo on the 4/5th June & our next
on September 24th .
Buy/Sell & Display Day
March 2016
Text Mike Prowse - photos Mikey
There were no new faces at the March meeting, those attending all regulars from last year. This made for quick progress on the new projects presented to them. A small scene with the gatehouse (from Monarch of the Glen) sitting near the river = I have forgotten its name - backed by rather gloomy for trees. This is a complex stone building with several eaves and awnings, topped with a steep slate roof. Two stories high with a slender circular tower attached. For those of you planning a Scottish Holiday the rent is $1700 per week, sleeps up to five. Just remember to pack something warm!
For the second project, same size, we are building the old Mill House from Morgan’s landing. It is also two stories, but has a long extended wing. The house is relatively straightforward but the whole exercise becomes more of a challenge with the surrounding lawns and gardens being on three levels, needing walls, steps and hedges. On one side there is a sharp fall to a small river (the original mill stream) on the other, more steps to a small stone jetty and the ocean.
Both projects are N scale. Everyone completed a base of foam cut to the correct height and contour (some tackled both scenes). Backboards fixed in place completed stage one. Most took their efforts home for a coat of paint - which seals the surface and defines the separate areas water, rocks, sky etc. Next step will be setting
out the rocky river bed, sandy beaches and grassy sections. Plaster rocks need casting then a backdrop of trees or clouds.
The major project for this term is turning the end section of ZeNkeville into Loch Ness. We have stripped all the trees and ground cover. For the base of the hills, Trevor (Knight) used cardboard strips (still in good shape - Trevor built this around 2006/7) but they were covered with masking tape now crumbling into dusty
flakes. Completely fragile and useless. This has all gone to be replaced with cloth squares soaked in glue. Hills are to be extended into mountains. On one side a stone arch bridge complete with waterfall. A lake as large as we can fit in (Loch Ness) with a strip of land on which we shall place a stone hunting lodge, the only building on this section.
And of course tucked away in some recess - the Monster! How could one model Loch Ness without one? The next lecture day will be on the 16th April. (dates changed because of the Toowoomba Royal Show.) We shall get the set pieces ready for their trees and buildings. Fit a backdrop to Loch Ness, restore the hills and apply some paint. Finally several from the group have become Club members. Please make them feel welcome.
March 2016
19
Doug Clarkson
Mikey

20
March 2016
4470, 4913 29/09/1988 Lithgow
4475, 4428 12/09/1988 Mittagong
Submitted by Bill Waterhouse
March 2016
21
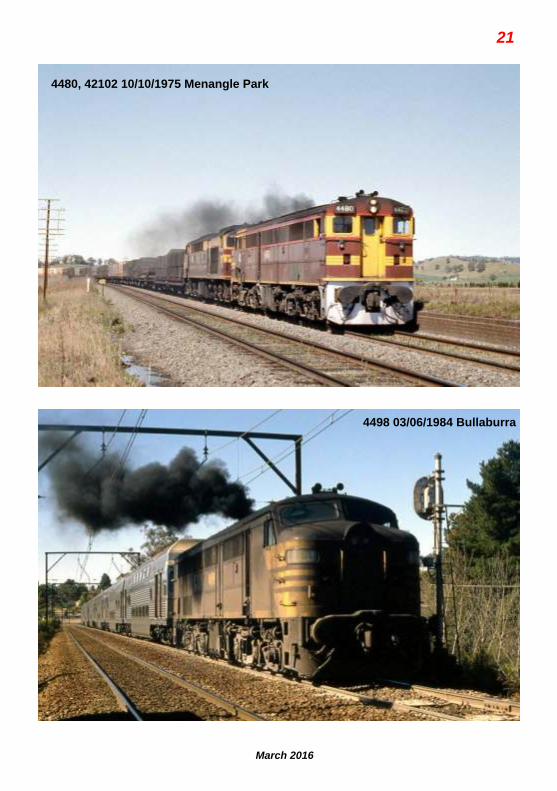
4480, 42102 10/10/1975 Menangle Park
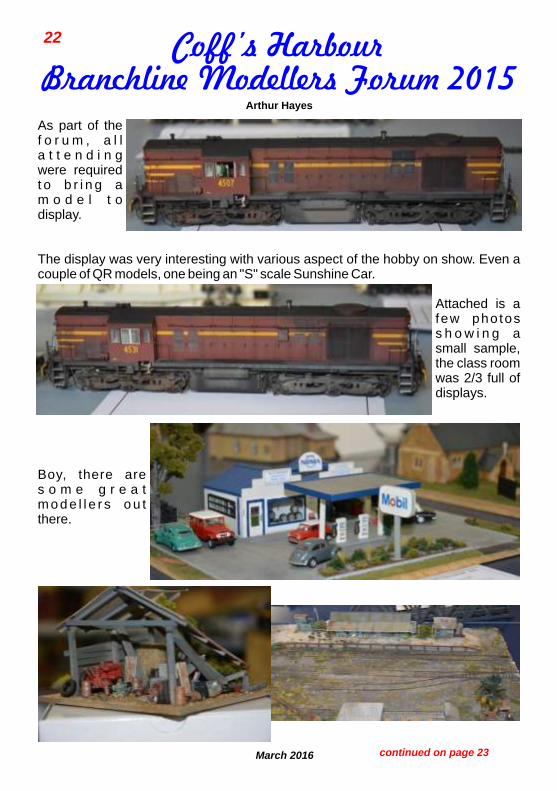
4498 03/06/1984 Bullaburra
22
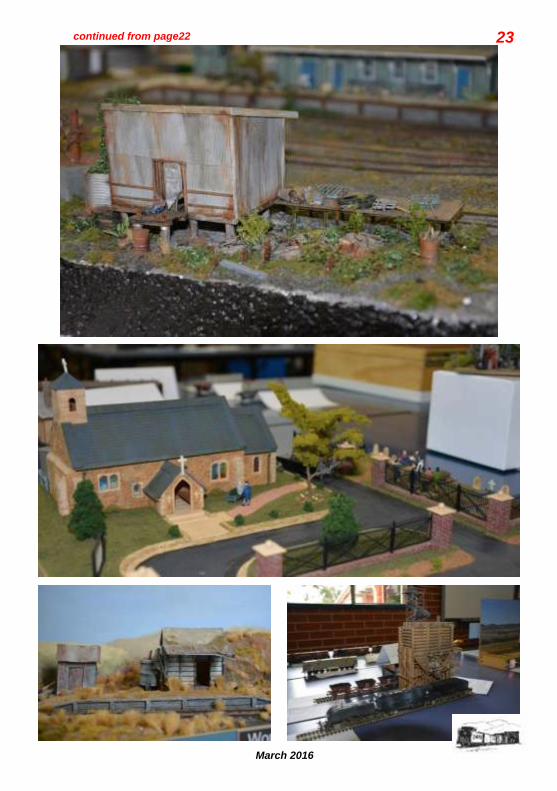
As part of the f o r u m , a l l a t t e n d i n g were required t o b r i n g a m o d e l t o display.
The display was very interesting with various aspect of the hobby on show. Even a couple of QR models, one being an "S" scale Sunshine Car.
Attached is a few pho tos s h o w i n g a small sample, the class room was 2/3 full of displays.
Boy, there are s o m e g r e a t m o d e l l e r s o u t there.
March 2016
Arthur Hayes
continued on page 23
March 2016
23continued from page22
24
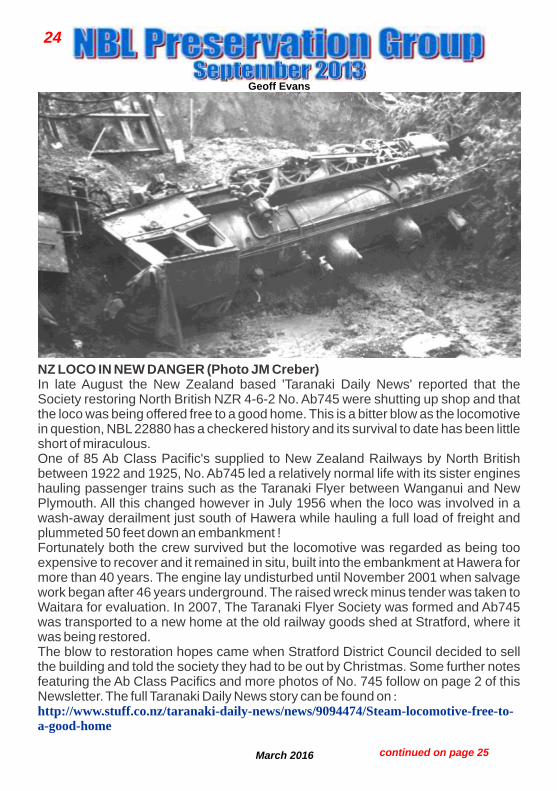
NZ LOCO IN NEW DANGER (Photo JM Creber) In late August the New Zealand based 'Taranaki Daily News' reported that the Society restoring North British NZR 4-6-2 No. Ab745 were shutting up shop and that the loco was being offered free to a good home. This is a bitter blow as the locomotive in question, NBL 22880 has a checkered history and its survival to date has been little short of miraculous. One of 85 Ab Class Pacific's supplied to New Zealand Railways by North British between 1922 and 1925, No. Ab745 led a relatively normal life with its sister engines hauling passenger trains such as the Taranaki Flyer between Wanganui and New Plymouth. All this changed however in July 1956 when the loco was involved in a wash-away derailment just south of Hawera while hauling a full load of freight and plummeted 50 feet down an embankment ! Fortunately both the crew survived but the locomotive was regarded as being too expensive to recover and it remained in situ, built into the embankment at Hawera for more than 40 years. The engine lay undisturbed until November 2001 when salvage work began after 46 years underground. The raised wreck minus tender was taken to Waitara for evaluation. In 2007, The Taranaki Flyer Society was formed and Ab745 was transported to a new home at the old railway goods shed at Stratford, where it was being restored. The blow to restoration hopes came when Stratford District Council decided to sell the building and told the society they had to be out by Christmas. Some further notes featuring the Ab Class Pacifics and more photos of No. 745 follow on page 2 of this Newsletter. The full Taranaki Daily News story can be found on : http://www.stuff.co.nz/taranaki-daily-news/news/9094474/Steam-locomotive-free-to-a-good-home
March 2016
Geoff Evans
continued on page 25

The design of the NZR Ab Class Pacifics can be traced back to the A Class which was introduced in 1906. A total of 141 Ab's were built by three different builders between 1915 and 1927 making them the largest class of steam locomotives ever to operate in New Zealand. An additional ten were rebuilt from the tank version of the Ab's – the Wab Class, between 1947 and 1957. The North British total of 85 locomotives included two built to replace engines lost on the ss Wiltshire when it was wrecked off the New Zealand coast in 1922. Ab 718 (NBL 22848) is seen below leading a Classmate on the Fairlie Branch farewell tour in March 1968.
One of the most stylish and elegant of the NZR steam classes, the Ab's were popular with their crews and no less than seven (including No. 745) have been preserved. The two NB locos lost on the Wiltshire, Nos 22878/ 79 are also believed to still exist in their watery grave. After No. 745 was derailed, the loco was purchased from NZR for just $1 by Mr. Tony Bachelor on the basis that it would eventually be salvaged. In 2001 he was project manager in charge of the rescue and the loco was successfully retrieved from the site of the washout. Tony has kindly allowed us to use these photos of the operation.
March 2016
25continued from page24
26
March 2016
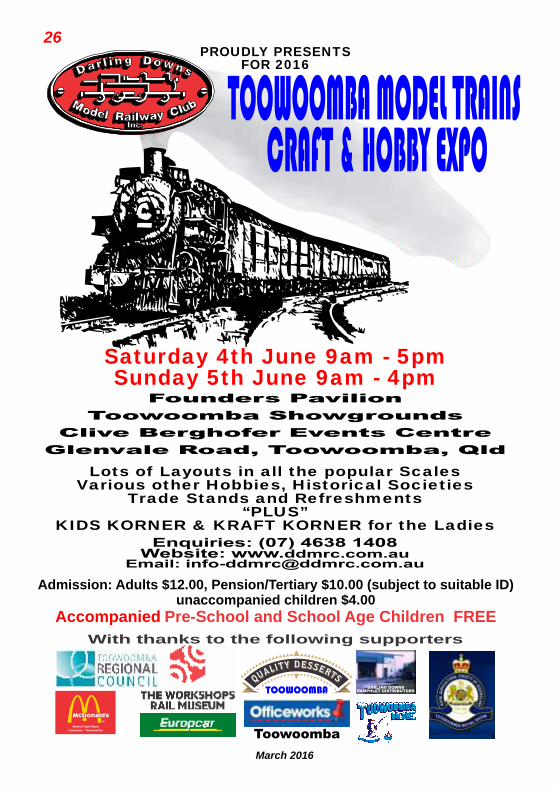
Admission: Adults $12.00, Pension/Tertiary $10.00 (subject to suitable ID)unaccompanied children $4.00
Accompanied Pre-School and School Age Children FREE
Lots of Layouts in all the popular ScalesVarious other Hobbies, Historical Societies
Trade Stands and Refreshments“PLUS”
KIDS KORNER & KRAFT KORNER for the Ladies
Saturday 4th June 9am - 5pmSunday 5th June 9am - 4pm
PROUDLY PRESENTSFOR 2016
With thanks to the following supporters

These came from the Internet, no information available except that they definitely qualify for the OOPS! Award
March 2016
27

28
This is a Modellers Corner with a difference, the Bellett Car Club of Australia held their Convention in Toowoomba in September 2015, as I used to race these
diminutive little cars and in fact brought one to QLD with me, I was told, “We’ll get you back into one”.A suitable candidate was sourced from Murwillumbah, Russell Hartwig took Michael and I down with a car trailer to collect it. We
not only collected a Bellett, but inside the house was this treasure. The plaque states built in 1900 by Douglas Charles Potter, Grandfather of the Bellett owner. Unfortunately, he wouldn’t throw it in as a bonus.
March 2016
Text by Teditor - Photos by Mikey
Clubhouse Ditties was brought back by demand, but it is you, the members who should be sending in your little quips and ditties, lets see them!
The legs shown at left are not particularly attractive, but they belong to the same Bill Waterhouse that is depicted in the cartoon below, penned by Bazza ‘waaaaay’ back in 1990 when similar wiring antics were being performed on the ‘at the time’ current HO layout. Some things never change.
B iggest d i f fe rence between now and then h a s b e e n t h e introduction of DCC, where there used to be many hundreds of wires to make a layout operate, now there are only ‘two’ required, albeit, several hundred times.
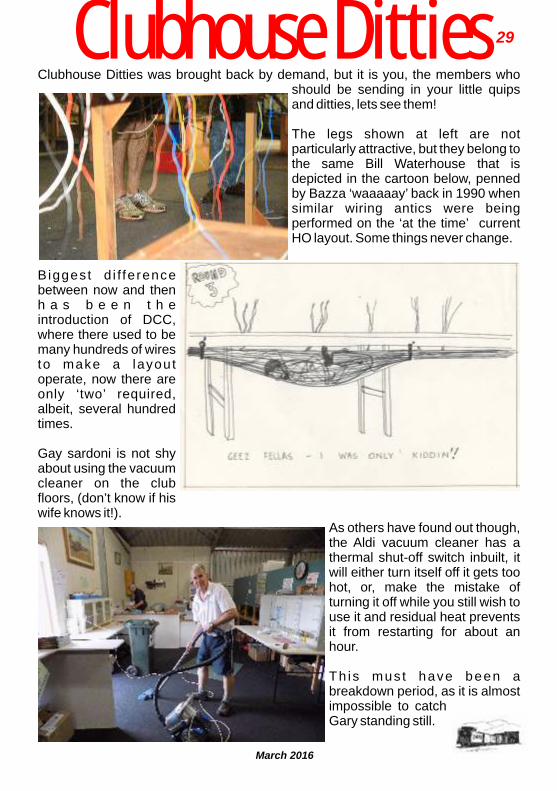
Gay sardoni is not shy about using the vacuum cleaner on the club floors, (don’t know if his wife knows it!).
As others have found out though, the Aldi vacuum cleaner has a thermal shut-off switch inbuilt, it will either turn itself off it gets too hot, or, make the mistake of turning it off while you still wish to use it and residual heat prevents it from restarting for about an hour.
Th is mus t have been a breakdown period, as it is almost impossible to catch Gary standing still.
March 2016
29Clubhouse Ditties
30
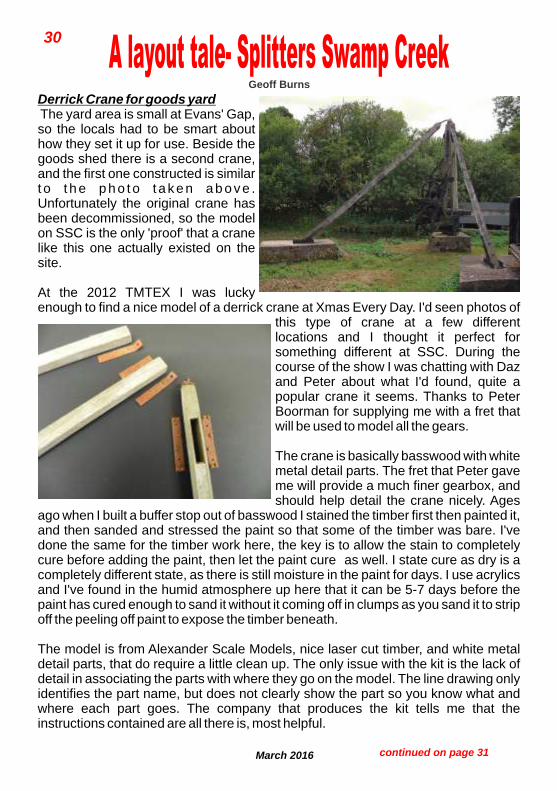
Derrick Crane for goods yard The yard area is small at Evans' Gap, so the locals had to be smart about how they set it up for use. Beside the goods shed there is a second crane, and the first one constructed is similar t o t h e p h o t o t a k e n a b o v e . Unfortunately the original crane has been decommissioned, so the model on SSC is the only 'proof' that a crane like this one actually existed on the site.
At the 2012 TMTEX I was lucky enough to find a nice model of a derrick crane at Xmas Every Day. I'd seen photos of
this type of crane at a few different locations and I thought it perfect for something different at SSC. During the course of the show I was chatting with Daz and Peter about what I'd found, quite a popular crane it seems. Thanks to Peter Boorman for supplying me with a fret that will be used to model all the gears.
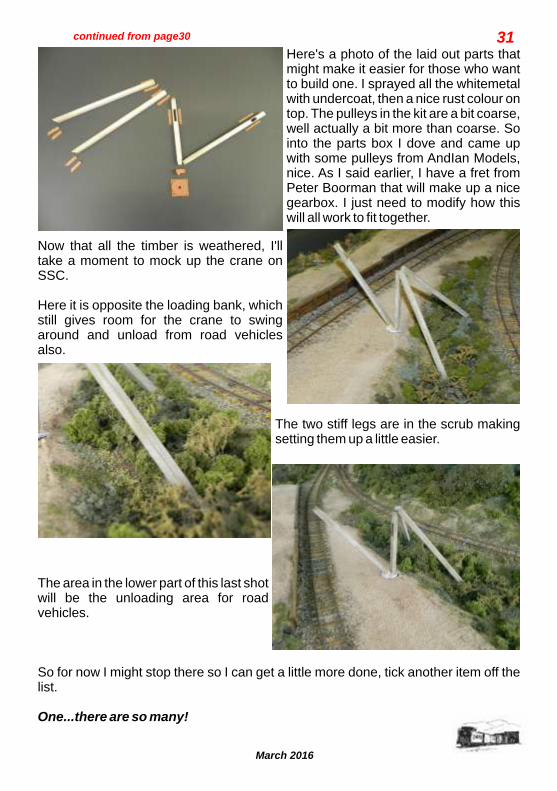
The crane is basically basswood with white metal detail parts. The fret that Peter gave me will provide a much finer gearbox, and should help detail the crane nicely. Ages
ago when I built a buffer stop out of basswood I stained the timber first then painted it, and then sanded and stressed the paint so that some of the timber was bare. I've done the same for the timber work here, the key is to allow the stain to completely cure before adding the paint, then let the paint cure as well. I state cure as dry is a completely different state, as there is still moisture in the paint for days. I use acrylics and I've found in the humid atmosphere up here that it can be 5-7 days before the paint has cured enough to sand it without it coming off in clumps as you sand it to strip off the peeling off paint to expose the timber beneath.
The model is from Alexander Scale Models, nice laser cut timber, and white metal detail parts, that do require a little clean up. The only issue with the kit is the lack of detail in associating the parts with where they go on the model. The line drawing only identifies the part name, but does not clearly show the part so you know what and where each part goes. The company that produces the kit tells me that the instructions contained are all there is, most helpful.
March 2016
Geoff Burns
continued on page 31
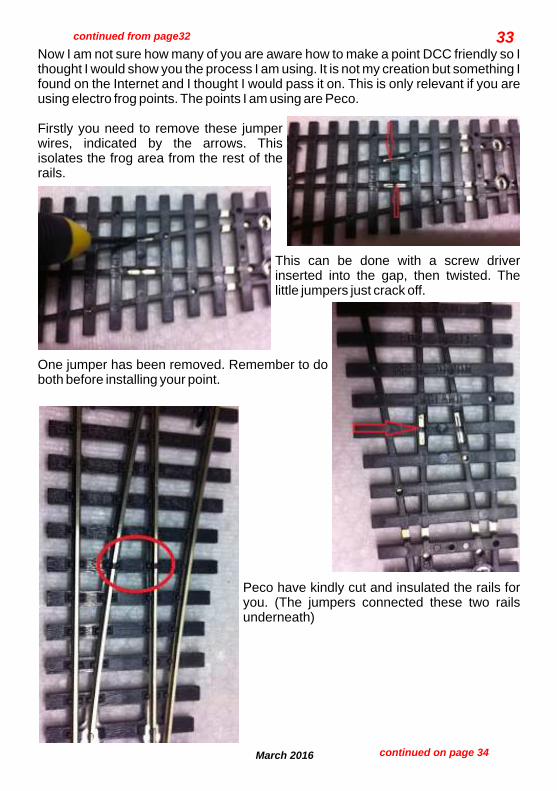
Here's a photo of the laid out parts that might make it easier for those who want to build one. I sprayed all the whitemetal with undercoat, then a nice rust colour on top. The pulleys in the kit are a bit coarse, well actually a bit more than coarse. So into the parts box I dove and came up with some pulleys from AndIan Models, nice. As I said earlier, I have a fret from Peter Boorman that will make up a nice gearbox. I just need to modify how this will all work to fit together.
Now that all the timber is weathered, I'll take a moment to mock up the crane on SSC.
Here it is opposite the loading bank, which still gives room for the crane to swing around and unload from road vehicles also.
The two stiff legs are in the scrub making setting them up a little easier.
The area in the lower part of this last shot will be the unloading area for road vehicles.
So for now I might stop there so I can get a little more done, tick another item off the list.
One...there are so many!
March 2016
31continued from page30

32
March 2016
Ben Dunlop
Got the track!The post man arrived after lunch today containing my order of track from Tom's. Thankfully I was having a day off work so I was able to get straight into laying it. The 2 pictures below are the afternoons progress. Plus I have added how to make points DCC friendly.
The view from the terminus
The opposite end.
Ø
×
continued on page 33
March 2016
33Now I am not sure how many of you are aware how to make a point DCC friendly so I thought I would show you the process I am using. It is not my creation but something I found on the Internet and I thought I would pass it on. This is only relevant if you are using electro frog points. The points I am using are Peco.
Firstly you need to remove these jumper wires, indicated by the arrows. This isolates the frog area from the rest of the rails.
This can be done with a screw driver inserted into the gap, then twisted. The little jumpers just crack off.
One jumper has been removed. Remember to do both before installing your point.
Peco have kindly cut and insulated the rails for you. (The jumpers connected these two rails underneath)
continued on page 34
continued from page32

34They have also been kind enough to provide a small wire which joins all the rails in the frog area. You just need to extend this wire and install it into a single throw switch. It will need to be connected as to provide the correct polarity to the frog area depending on the position of the point.
You also need to connect the two rails on the either side of the point to give the throw rails the same polarity as the rails they are thrown against.
The wiring is fairly straight forward, in the straight through position the single pole polarity switch will have all the red sections of the rails connected to the same polarity, including the frog.
In the thrown deviation direction, the single pole polarity switch will connect all the black sections, including the frog.
It is very important to note that track feeds must be on the heel end of the turnout and the frog ends ‘must’ be insulated to prevent backfeed from track feeds beyond the turnouts frog.
March 2016
Track PowerSingle pole switch
Frog
Track PowerSingle pole switch
Frog
Heel
Heel
continued from page 33

March 2016
35
by Gary Sardoni
Things continue to happen at "Jamestown", albeit slowly and steadily as indicated in the previous instalment. The most action has happened underneath the layout, so not all of the improvements are directly visible, but they are improvements nevertheless.
In the last month or so, with the assistance of Ted and Russell, I have managed to more-or-less understand "what's what" in terms of identifying the different electric circuits and their associated connections. At first sight, underneath the layout there were wires of all descriptions running in all different directions, and to my unknowing eye, it was total confusion. Fortunately, Ted and Russell were able to help me identify the respective circuits for operating points (turnouts), streetlights, lighting inside buildings etc.
There were also a number of redundant wires, which were part of "Jamestown" in its original guise, but which are no longer in use. Getting rid of this redundant wiring was a good first step as it tidied up some of the confusion under there. Visually, the appearance was tidier and consequently the remaining circuits were easier to identify.
The next priority was to re-do the track feeds. We already knew that the existing wiring on the continuous run was working, but due to the 'double layer' baseboard construction, it was difficult to identify exactly where the existing feeds were located, and we weren't actually sure how many feeds there were. We decided to disconnect the original track feed at the transformer, and rewire the whole track layout with a new bus wire feeding new electrical 'districts' that we created, using a Dremel to cut the track into sections at strategic locations. Passing loops and sidings were deliberately not hard wired. At present we are using point blades to make the track electrically live when the points are thrown.
This was done deliberately to keep the wiring as simple as possible and allow the layout to function in either DC or DCC mode. At some stage in the future, the sidings and loops might all be hard wired, but doing so would mean that on DC, locos could not be parked in a loop or siding, unless we created separate track switches for each loop or siding. Although DCC is becoming more popular over time, we don't believe that as a club, we are at the stage where we can assume that all prospective operators are exclusively DCC equipped.
The rewiring job described so far went fairly well and in two work sessions it was completed. Along the way, we had the occasional short circuit and one or two districts wired up with the track feeds 'wrong way round', and after Russell gave me a good tutorial on soldering feedwires to the outside of the rails, problems such as my dodgy soldering were quickly sorted out and fixed.
continued on page 36
36
March 2016
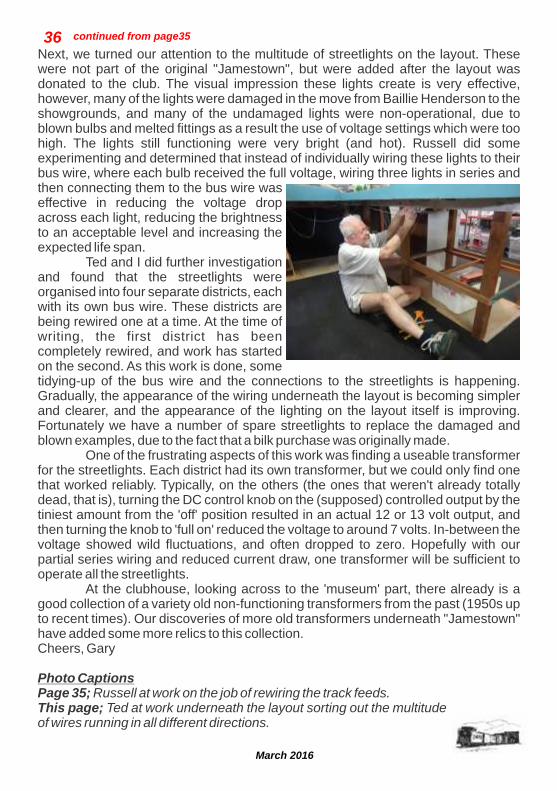
Next, we turned our attention to the multitude of streetlights on the layout. These were not part of the original "Jamestown", but were added after the layout was donated to the club. The visual impression these lights create is very effective, however, many of the lights were damaged in the move from Baillie Henderson to the showgrounds, and many of the undamaged lights were non-operational, due to blown bulbs and melted fittings as a result the use of voltage settings which were too high. The lights still functioning were very bright (and hot). Russell did some experimenting and determined that instead of individually wiring these lights to their bus wire, where each bulb received the full voltage, wiring three lights in series and then connecting them to the bus wire was effective in reducing the voltage drop across each light, reducing the brightness to an acceptable level and increasing the expected life span.
Ted and I did further investigation and found that the streetlights were organised into four separate districts, each with its own bus wire. These districts are being rewired one at a time. At the time of writing, the first district has been completely rewired, and work has started on the second. As this work is done, some tidying-up of the bus wire and the connections to the streetlights is happening. Gradually, the appearance of the wiring underneath the layout is becoming simpler and clearer, and the appearance of the lighting on the layout itself is improving. Fortunately we have a number of spare streetlights to replace the damaged and blown examples, due to the fact that a bilk purchase was originally made.
One of the frustrating aspects of this work was finding a useable transformer for the streetlights. Each district had its own transformer, but we could only find one that worked reliably. Typically, on the others (the ones that weren't already totally dead, that is), turning the DC control knob on the (supposed) controlled output by the tiniest amount from the 'off' position resulted in an actual 12 or 13 volt output, and then turning the knob to 'full on' reduced the voltage to around 7 volts. In-between the voltage showed wild fluctuations, and often dropped to zero. Hopefully with our partial series wiring and reduced current draw, one transformer will be sufficient to operate all the streetlights.
At the clubhouse, looking across to the 'museum' part, there already is a good collection of a variety old non-functioning transformers from the past (1950s up to recent times). Our discoveries of more old transformers underneath "Jamestown" have added some more relics to this collection.Cheers, Gary
Photo CaptionsPage 35; Russell at work on the job of rewiring the track feeds.This page; Ted at work underneath the layout sorting out the multitude of wires running in all different directions.
continued from page35
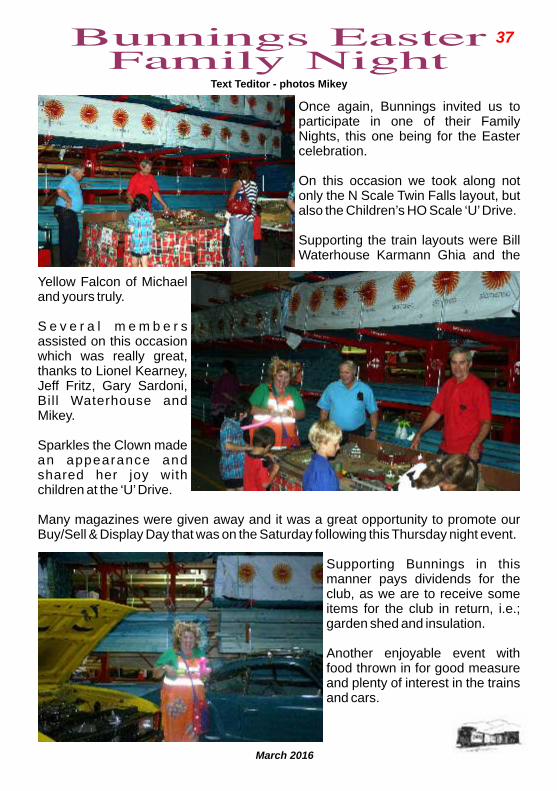
Once again, Bunnings invited us to participate in one of their Family Nights, this one being for the Easter celebration.
On this occasion we took along not only the N Scale Twin Falls layout, but also the Children’s HO Scale ‘U’ Drive.
Supporting the train layouts were Bill Waterhouse Karmann Ghia and the
Yellow Falcon of Michael and yours truly.
S e v e r a l m e m b e r s assisted on this occasion which was really great, thanks to Lionel Kearney, Jeff Fritz, Gary Sardoni, Bil l Waterhouse and Mikey.
Sparkles the Clown made an appearance and shared her joy with children at the ‘U’ Drive.
Many magazines were given away and it was a great opportunity to promote our Buy/Sell & Display Day that was on the Saturday following this Thursday night event.
Supporting Bunnings in this manner pays dividends for the club, as we are to receive some items for the club in return, i.e.; garden shed and insulation.
Another enjoyable event with food thrown in for good measure and plenty of interest in the trains and cars.
March 2016
37
Text Teditor - photos Mikey
38
March 2016
THIS COMING EVENTS LISTING IS PRESENTED AS ACCURATELY AS KNOWN AT THE TIME OF PRINTING, IF YOU WISH TO CONFIRM ANY DETAILS AND/OR HAVE ANY OTHER EVENTS FOR LISTING, PLEASE SEND THE INFORMATION TO THE CLUB EMAIL ADDRESS -
PLEASE ADVISE ANY ERRORS.
NOTE:
ALL EVENTS SUBJECT TO CONFIRMATION
* *April
*
June
Saturday afternoons at the showgrounds from 2pm, unless notified otherwise. Wednesday afternoons from 1pm till 4pm.
Indicates limited access at the Showgrounds4th Committee Meeting. McDonald’s Margaret Street, 7.30pm.
th Committee Meeting. McDonald’s Margaret Street, 7.30pm.30th Committee Meeting. McDonald’s Margaret Street, 7.30pm. (this committee meeting is in Lieu of the June one due to our own Toowoomba Model Trains, Craft & Hobby Expo)3rd Set up for Toowoomba Model Trains, Craft & Hobby Expo.4th, 5th Toowoomba Model Trains, Craft & Hobby Expo
7th, 8th, 9th Toowoomba Heritage Royal Show (The Museum &
Display Centre will be open during this event) 7th, 8th Brisbane Model Train Show.9
May

March 2016
39

An
E-u
nit
AB
A s
et th
at
was a
n E
7B
san
dw
ich
ed
betw
een
th
e r
ears
of tw
o E
8A
s.
Th
e
lead
un
it o
f th
is e
astb
ou
nd
, #4095, w
as t
he last
E-u
nit
th
e C
en
tral b
ou
gh
t. T
he t
rain
w
as p
rob
ab
ly th
e “
Excep
t S
atu
rday”
New
Yo
rk L
imit
ed
via
Detr
oit
. An
d it
sh
ou
ld b
e
makin
g m
on
ey b
ecau
se o
f all t
hat
head
en
d b
usin
ess.
Th
e r
oo
f lin
e o
f th
e d
ep
ot
sh
ow
s it
was
a s
imp
le b
uild
ing
.G
eo
ff E
van
s
40
March 2016


