40
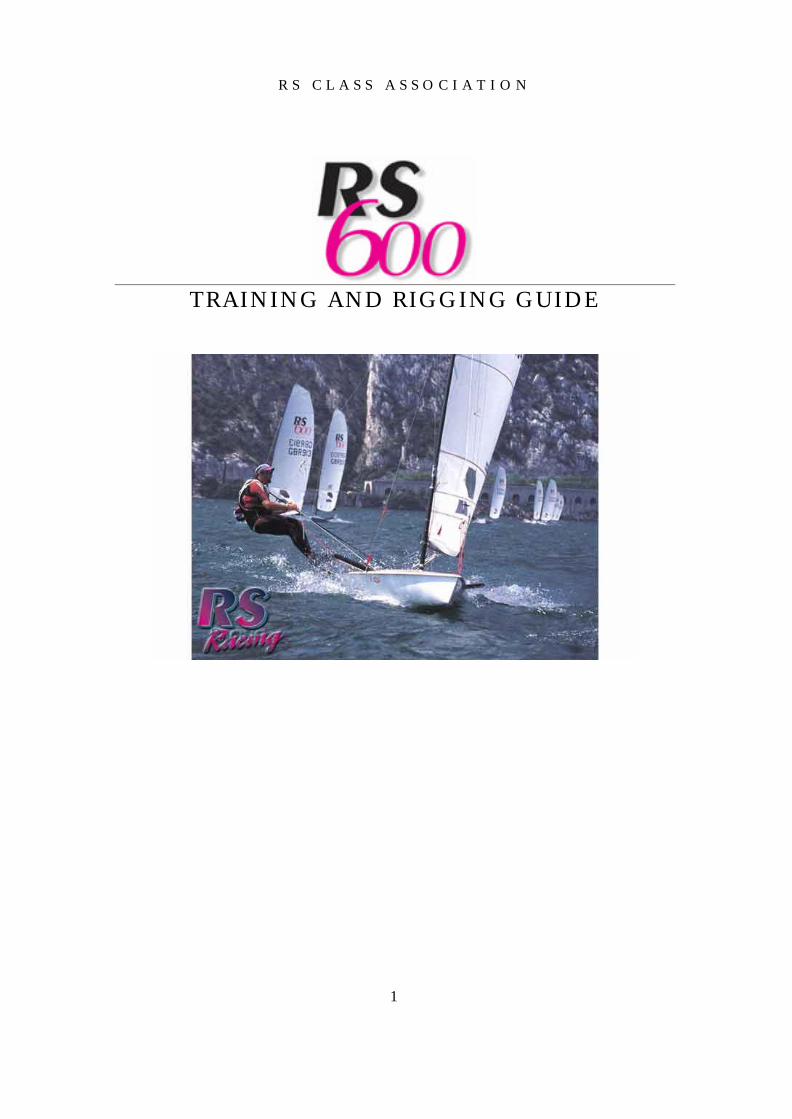
1 TRAINING AND RIGGING GUIDE RS CLASS ASSOCIATION
1
TRAINING AND RIGGING GUIDE
R S C L A S S A S S O C I A T I O N

2
CONTENTS
Page Section
3 RS Contacts
4 Introduction
5 RS 600 The History
7 RS 600 Specification
12 Care & Maintenance
14 Andy Iron’s Top Tips
17 A Tacking Ramble
19 Alex’s Article
21 Rig Settings
22 The Kicker , Cunningham & Outhaul
24 Reefing or the Baby Rig
26 RS Class Rules
29 RS 600 Class Rules
32 2002 RS Calendar & Training Events
33 2002 RS Racing Circuit Sailing Instructions
40 Continuous Kicker Splicing Guide

3
RS CONTACTS
CHAIRPERSON (nominated) Lesley Bennett Tel (h): 01243 512232
Tel (w): 07939 036339(m)
RS CLASS ASSOCIATION ADMINISTRATOR Heather Chipperfield
5 Haydens Court, Lymington , Hants, SO41 9EN
Tel (h): 01590 610273(OFFICE) Tel (w): 01590 610273(FAX)
MEMBERSHIP SECRETARY Jill Line
12 Princes Road, Clevedon, North Somerset. England BS21 7SZ
Tel (h): 01275 872466 Tel (w):
RS600 REPRESENTATIVE Roland Emmans
24 Leeside Court, Rotherhithe Street, London, SE16 5SZ.
Tel (h): 0207 237 2714 Tel (w): 0207 475 4791 Mobile 07767 768226
BUILDERS REPRESENTATIVES Martin Wadhams / Nick Peters
C/o LDC Racing Sailboats, Trafalgar Close, Chandlers Ford, Hants
Tel (h): Tel (w): 02380 274500
Useful web addresses:
http://www.rs -association.com
http://www.ldcracingsailboats.co.uk/

4
I N T R O D U C T I O N RS 600
Welcome to the RS 600 Training and Rigging Guide, put together for RS 600 Sailors by RS 600 Sailors. These pages have been put together from the collective wisdom and knowledge of the RS 600 Fleet built up since the boat inception in 1994. This guide aims to help new entrants into the class to quickly get up the learning curve of sailing an RS 600 and improve their enjoyment, as well as limiting their swimming practise by pointing out common problems and how to avoid them. It is also aimed to be a trouble-shooting guide for specific queries. I know from personal experience that one of the best ways to improve your 600 sailing is to go to Open Meetings. We in the RS family are very lucky to have a very well organised series of Open Meeting throughout the country (with both the GUL Grand Slam Circuit and the Fat Face Racing Circuit) throughout the year. There are very few things that are better than sailing in a big fleet of similar boats, picking up tips on the best ways to do things as well as seeing how not to do things! This is your guide, use it as you wish. We hope that it will provide a useful insight. Good luck, enjoy your sailing and we hope to see you on the RS Open Meeting Circuit very soon. Roland Emmans RS 600 Class Representative

5
RS 600 - THE HISTORY
• One of the most exciting boats you will ever sail • Equalised performance • Superb reefing system for ease of learning and strong wind control • Ultra-light, strong and long lasting • Ideal sailor weight: 67kg (10.5stones) - 95kg (15stones) • Portsmouth Yardstick handicap: 920
The RS600 heralded a new era in high performance single-handed sailing when it was introduced in 1994. Its stunning looks promise a performance to dream about. And the highly developed rig control and reefing system make this excitement available to an extraordinarily wide range of sailors.
The RS600 has won the support of hundreds of single-handed sailors. It is faster than most two-person boats, just about the lightest, most responsive production sailboat around and strong enough to take the punishment, making sailing an RS600 pure adrenaline. The Hull
It is no accident that the RS600 hull looks so fair and wickedly fast. Designed by high performance boffin Clive Everest, the shape was created using computer generated sections resulting in mathematically perfect curves. The enormous speed potential is matched by excellent handling. Vacuum bagged epoxy foam sandwich construction results in a hull that is fantastically strong, yet a remarkable 52kg light.
The foils are resin transfer moulded for an incredible strength to weight ratio. Helming from the wire is made easy by the purpose-designed geometry of the cockpit. High wing freeboard above the water gives a secure feel and all controls are easily reached. Performance Equalised
A simple performance equalisation system dramatically extends the competitive sailor weight range of the RS600.
Rig
The carbon fibre mast creates a uniquely dynamic rig and the flextop delivers awesome gust response. Lightweight is matched by great strength.
The sail is manufactured to exact tolerances by Hyde Sails. Full battens stabilise the shape and reduce flogging, while scrim Mylar offers tear resistance. The mast and sail work together to create a perfect rig. Tweak the cunningham and watch the mast bend, the sail flatten and the upper leach open. Power control like never before.

6
High performance is attainable from this big rig in only 8 knots of wind. Yet the state-of-the-art reefing system allows the speed to go on up as the wind increases. Simply remove the mast extension, step the rig using lower shroud and trapeze settings, roll the sail foot and zip up the excess. You can now sail with a rig that is nearly 20% smaller, yet the sail head still reaches the top of the mast for full tip response.
The reefing system not only assists speed in a breeze, but also makes mastering the RS600 within the reach of most competent sailors and a lot of fun along the way.
RS600 - Pure adrenaline!
BOAT TESTS REPORTS
"Intimidating as it may look, the RS600 is not, however, a boat reserved purely for super-heroes" "Sailors need to be fit and agile - and in the early stage at least, a good swimmer - but the rewards to be had from mastering a boat with such exhilarating performance are exceptional" "Stunning speeds upwind and down, even in relatively light winds, are balanced by (relatively) easy handling" "The ability to reduce the rig size, not just in strong winds, but also in the early stages of learning to sail the boat, is a real benefit" "Built from state-or-the-art epoxy glass composites over a foam core, the hull is at once both light and durable" "Think of it as a single handed skiff, both in terms of performance and fun, and you won't be far wrong"
Yachts & Yachting
"I had an absolute ball sailing this boat. What a great challenge! This is the sort of boat that sailing needs…" N.B. Glyn went on to own an RS600 prior to his tragic loss in the Sydney Hobart race in 1998. Yachting World - Glyn Charles
Courtesy of LDC Racing Sailboats

7
RS 600 SPECIFICATION
Basic Specification: PY 920
Designer Clive Everest & Nick Peters
Length 4.47m (14’8”)
Beam 1.93m-2.13m (6’4”-7”)
Hull Weight 52kg (115lb)
Sailing Weight 76kg (167lb)
Sail Area Full 12.14 sq metres
Sail Area Reefed 10.55sq metres
Hull Construction Epoxy GRP foam sandwich
Spars Carbon composite mast, Aluminium Alloy boom.
Foils Daggerboard & lifting rudder, resin transfer moulded.
Weight & Racks
Helm Weight Wing Set and Configuration
Less than 70kg (11stone) Wing Set B (2.133m beam (7ft))
Between 70-76kg (11stone – 12 stone) Wing Set A OR
Wing Set B when a compensating weight of 3kg is fi tted
Above 76kg Wing Set A (1.931m beam (6’4”))

8
RS 600- RIGGING
Rigging the RS 600 is very simple, with a single person capable of rigging the boat from fully packed in less than twenty minutes by a few simple steps. These comments are by no means exhaustive and should be read in conjunction with Andy Irons’ RS600 Tuning Guide, which is included in the next section.
Once the boat is out from its undercover / cocoon, it is a simple matter of connecting the shrouds/ trapeze lines which are combined, and the forestay onto the shackle loop three quarters of the way up the mast. It is worth tightening this shackle up using a pair of pliers or similar to ensure it is tight and prevent it coming up done with fairly disastrous consequences on the mast. A role of PVC tape is helpful when rigging the boat.
Raising the Mast
The mast can then be raised by connecting the shrouds, the usual position is three holes down on the chain plate (see Rig Settings section for further details) and the forestay. The mast can be lifted into place by one person by connecting both shrouds and leaving the forestay with the maximum amount of slack rope. This allows the mast to be lifted above deck level onto the mast foot, whilst the mast still being semi supported by the shrouds and forestay. Always put a safety figure of eight knot in the forestay rope, in case it slips out of the cleat. Don’t apply any significant rig tension yet.
Once the mast is in place, it is a good idea to tape up the shroud pins for safety and security. It is also helpful to have any extra set of larger shroud pins in the chain plates to hook the trapeze wires out of the way on when going down wind in the light stuff.
Trapeze Lines
A lot of people appear to favour the rope and disc trapeze handles rather than the metal “chopper” handles, the idea behind this seems to be the metal ones have a habit of hitting you in the face, or eye at just the wrong moment, they hurt a lot with the rubber end in place and even more without them!
Connecting the boom
The boom simply slides onto the mast and the metal boom bolt passed through the boom and mast and screws together. It is a good idea to periodically carefully spray some silicon spray into the boom bolt to make it easier to undo it at the end of a days sailing.
It can be difficult to get the boom bolt in straight away; the key appears to be to ensure that both the mast and boom are square. Here’s a useful tip if at the end of the days sailing the boom bolt does not want to come undone, try lifting up the outward end of the boom, with the kicker off, moving it up and down a few times. This usually frees the bolt off and makes it easier to undo.
Many people store a spare tiller extension inside the boom in case the worst should happen. This is done by drilling two small holes in the very outboard end of the boom and connecting a loop of shock cord between them. The tiller extension is then slid up the boom with the shock cord loop attaching over the rubber universal joint – leaving a secure tiller extension in place in case of need.
The Mast
9
RS 600 were originally provided with Angel masts, these can be identified from their teardrop shape and built in mast track. These were standard fit until 865, when manufacture ceased. The Angel masts were replaced by Superspar masts, which are round with an external mast track that is glued to the mast, these can sometime pull away so check it is well connected. The differences between the two mast types seem minimal, although they have different bend characteristics. The Angel mast seems to bend more at the tip and less lower down, this may be the result of the aluminium sleeve in the bottom section of the mast. In comparison the Superspar mast seems to have a more constant curve. Some people appear to like one types and others the other, although in practise there is nothing between them, as both can win open meetings.
Care needs to be taken to with the mast to ensure the bottom section can easily be removed. There is nothing more frustrating than deciding on a very windy day to go for a sail with the small or “baby” rig and then having to spend an hour or so getting the bottom section of the mast out. Washing the mast with fresh water after sailing in salt water and regular removal seems to prevent this problem. Washing of the mast seems to be more important with the Angel masts as a number have failed in windy conditions at the point where the aluminium sleeve in the bottom section meets the top section of the mast, due to corrosion between carbon, aluminium and salt water.
Both masts are identically rigged in a very simple manner with no spreaders but a set of diamonds to control the rigs flexing. The amount of diamond tension used is a feature of personal preference and weight. The more diamond tension that is used the less forgiving the mast will be in a gust but more powerful, more detail on this later.
Raising the sail
It is very important to get the sail all of the way up to the top of the mast before going out on the water. This induces a pre-bend in the mast prior as well as ensuring that the cunningham is effective and does not simply pull the sail down a few inches from the top of the mast. There are a number of methods that can be used to achieve this the favoured ones are: (A) put a slip knot in the halyard and use the cunningham to tension the sail to the top of the mast or (B) pull down on the main halyard with your foot.
The need to ensure the sail is at the top of the mast causes a few problems, namely the head board of the sail experiences wear and needs minor sail maker attention once ever couple of seasons depending upon usage. Secondly and more importantly the main halyard experiences an enormous amount of pressure during normal sailing and hence fails, as Kevlar does not like being bent under load and fail at the masthead pulley. They key to preventing this is to move the halyard down a couple of inches periodically or after a windy sail. Halyards can be end to ended, but generally need to be replaced once a season depending upon use.
The sail should be raised with the minimum amount of rig tension, as it makes the sail easier to go up. On both mast types the track and feeder can be a problem, with the mast on the ground spraying silicon into the mast and letting it dry appears to be beneficial. The tracks can also wear the boltrope and batten pockets over time.
Once the sail is up and before going a float do not forget to apply the required amount of rig tension by tensioning the forestay as this is very difficult / involves getting wet when out on the water.
10
The sail
RS 600 sails are very robust and a sail can be competitive for at least two seasons on the open circuit and many more for club racing. This is due to the sail being fully battened, and hence unable to flog. The fully battened nature of the sail means that it has the ability to produce lift just when you don’t want it to when out on the water or trying to launch. This is one of the best and worst features of an RS600.
The sail is connected to the boom (outhaul end) by a simple hoop onto a sliding track at the end of the boom, an increasing number of people are now using fast pins to connect this rather than what can be a fiddly pin and split ring – very difficult to undo with cold wet hands. The outhaul is looped through the clew of the sail and back on to a notch in the boom. This is usually tape it in place as once it has come out on the water it is very difficult to put back in even if you capsize the boat.
Foils
The RS 600 foils are well made and can stand up to a reasonable amount of abuse. The dagger board case may need some packing out. There are a number of favoured methods ranging from pro-grip to jap tape or velcro. Velcro seems to be the current favourite as you can stick it inside the casing fluffy side outwards to reduce the boards’ movement. The dagger board if not properly fitted can also slowly eat its way into the back of the casing, leaving a small “v” shape in the gel coat at the back of the case. This can be cured by filling in v –shape and the packing this area with either jap tape or velcro tape – making the board a better fit.
The rubber is large and needs to be used with care as a significant force is exerted by it when out on the water. Another tip seems to be a loop of shock cord to centre the tiller – this will prevent the boat going round in circles after a capsize.
Tiller Extension
Most RS 600s are fitted as standard with Holt twist grip universal joints, it is a good idea to tape these over to ensure that they don not come undone at the most inopportune time.
There are two basic types of tiller extensions carbon and aluminium. The carbon ones are lighter and give more feel on the tiller although they are more easy to break, if point loaded, and can not be bent straight although they can easily be repaired if both pieces are kept. Aluminium tiller extensions are heavier although they cope quite well with being sat upon and can relatively easily be straightened even out the water.
If you are tall an extra long tiller extension may be the order of the day as this will prevent you having to steer at the end of your finger tips when trapezeing from the front of the wing. 49er carbon tiller extensions are 30 to 40 cm longer and seem to solve this problem.
Kicker
Without doubt one of the best additions to a RS 600 is a continuous kicker, this allows the kicker to be pulled on from one side and let off on the other. This is a relatively simple process than can easily be achieved with the right tools; a copy of the LDC Splicing Guide is included at the back of this guide. Once complete, as with all of the control lines on a 600 it is imperative to ensure that the securing elastic is relatively tight and taking away the trailing ends.

11
Foot straps
This is an area of complete ambiguity among 600 sailors, some prefer to use them others have them on just in case and some people swear they are not needed. It appears to be an area of personal preference and security. If you decide to fit toe straps, have a quick look at the class rules to check where they can be fitted, most people, that use them, have them on the back of the wing bar. If you do fit them ensure that they are tight enough to just get you toes in, they should be used in a windsurfing manner. Any larger and there is the risk of the foot slipping through and getting stick, such that in a wipe out a broken ankle or worse is the end result.

12
RS 600 CARE & MAINTENANCE
Hull
The hull laminate is foam sandwich, which is stiff and very light. Foam sandwich is, however, liable to dent if subject to point loading. Store the boat on an approved RS 600 trolley when ashore and take particular care not to drag the trapeze hook over the hull when recovering from a capsize.
Keep your dinghy drained and well ventilated. The RS600 is made of epoxy resin, so is less prone to water absorption than a polyester hull. Nevertheless, it is advisable to take care because the gel coat is polyester and water absorption could cause blistering and a raised fibre pattern. Obviously in dealing in a marine environment equipment gets wet which in itself is not a problem. The problem starts when moisture is trapped for any length of time. The key therefore, is to store the boat properly ashore.
a) Ensure the boat is kept at an angle to allow water to drain away.
b) Use a breathable polycotton, acrylic or cotton duck cover.
c) If leaving an undercover on the boat, ensure that the transom is open for draining and that there is a hole below the daggerboard slot to allow water to drain.
Wash with fresh water. Fresh water evaporates far more quickly than salt water; so if your dinghy has been sailed in salt water wash it off thoroughly. The fittings will also work better if regularly washed.
Damage. Hull damage falls into three categories.
A) SERIOUS e.g. large hole, splits, cracks or worse. Don’t distress. Get the remnants back to a boat builder, such as RS who can repair most problems, making the boat as good as new.
B) MEDIUM. e.g. small hole or split, gel crazing. If this occurs during an event sailing can often be continued as long as leaking can be prevented by drying the area and applying a strong adhesive tape. CAUTION – if damage is close to a heavily loaded point then a close examination should be made to ensure joints and the laminate are fir for the prevailing conditions. Get the damage properly repaired as soon as possible.
C) SMALL. e.g. chips, scratches. This type of damage is obviously not life threatening but need to be attended to, firstly to keep the boat looking good and secondly to prevent water ingress into the laminat e. This type of damage can usually be repaired by the owner with the correct RS Gel coat pack.
Tying Down. Tying down your RS600 to its trailer is important because too much or too little tension could result in damage. Tie the boat down at the bow and ac ross the middle of the boat in the region of the trailer wheels. Pad the deck where the straps touch.
Foils
The foils are GRP with a foam core. Look after them as you do the hull. Wash with fresh water regularly. Repair any chips as soon as possible.

13
Spars
The mast is a carbon composite structure and is in two parts, which sleeve together. Separate the two parts regularly and wash with fresh water. Apply a thin layer of Vaseline to the sleeve. Check the sheave at the masthead.
The mast is finished with a coat of two-pack polyurethane varnish. This protects the laminate against UV degradation in sunlight. It is advisable to apply a new coat of varnish once a year. Lightly sand the mast to help the new varnish bond to the old.
The boom is aluminium alloy. Wash regularly and check the fastenings of all fittings are secure. Remove the boom from the mast when leaving the boat in the dinghy park for a long period to prevent electrolytic action between the carbon mast and the boom jaws. Leave the gooseneck bolt in the boom not the mast.
Sail
The sail should be rolled and stored dry, out of direct sun light.
When using a new sail for the first time, try to avoid extreme conditions because high loads on new sailcloth can diminish the racing life of the sail.
If your sail is stained in anyway, try to remove it using normal detergent and warm water. Do not attempt to launder the sail yourself.
Repairs should be temporarily made using sticky number cloth or sail repair tape and then returned to the sail maker for a professional repair. Watch out for wear and tear especially around the batten pockets and boltrope.
14
ANDY IRON’S TOP TIPS
Outlined below is a copy of an article Andy Irons wrote on the RS 600 that was published in Yachts & Yachting and can still be found on the RS website. Some of the points already made have been repeated here for good measure.
Here is a bit of history on Andy for those of you who don’t know him. Andy has sailed an RS600 since their inception in 1994. IN his time he has won the Nationals and numerous open meetings so he knows a thing or two about what makes these flying machines tick;
The RS600 is quite simply, one of the most exciting boats you will ever sail. Yet design development and rig technology mean that sailors from all sorts of backgrounds can learn the skills required to enjoy the high performance. A simple width and weight performance equalisation system means that the RS600 has the broadest competitive weight range of any single-handed dinghy. If you weigh less than 70kgs (11st) you will have wide wings, between 70-76kgs either wide or narrow, but wide wings must be accompanied by 3kgs of lead or if you weigh more than 76kgs (12st) you will have narrow.
The setting up of the boat is very similar whether you have wide (7ft beam) or narrow (6ft 4in) wings fitted. Some adjustments should be made for helm size but generally start with the standard setting. Your goal in tuning is to find that right ‘feel’ and being able to reproduce it in a variety of conditions.
The boat is amazingly simple with clearly laid out controls. With a hull that weighs only 52kgs constructed using vacuum bagged epoxy foam sandwich it is also extremely strong. The carbon fibre mast is engineered to create a uniquely dynamic rig and the flextop delivers awesome gust response, again lightweight is matched by incredible strength. The boat also boasts a state-of-the-art reefing system that allows the sail to be reduced by almost 20% and shortens the mast accordingly.
Given its simplistic nature any tuning guide is going to be quite a short guide when perhaps compared against other classes. Like any other one-design going fast in a straight line is not normally the problem but winning races involves an awful lot more than a well-tuned boat. Time spent practising on the water is probably ten times more important than time spent ‘bimbling’ ashore. However if you are new to the class there is a definite set of procedures to follow to check your boat is in racing mode. So lets take a closer look at the two broad areas: hull and rig.
Hull:
These are bullet proof and almost impossible to differentiate between an old one and a new one. Obviously you want a dry hull with no leaks and as scratch free as possible. The main areas to check for leaks are: around daggerboard case, transom join between hull and deck, rudder pintle and around the U-bolts that hold down the wings. The dagger boards never fit tightly in the case, hence they wobble about all over the place and eventually wear out the back of the case. Fix either a small piece of wood or plastic to the inside of each side of the case with glue; don’t make the board too tight though.
The foils are resin transfer moulded and offer an incredible strength to weight ratio. All they require is repairs from any groundings and a light sanding from time-to-time. The downhaul on the rudder requires checking for wear, as does the tiller extension flex joint. I would recommend a carbon tiller extension as they are much lighter and provide bags more ‘feel’ than an aluminium
15
one. I also choose to secure the rudder assembly down to the top rudder pintle to avoid it coming off. An unlikely occurrence but has happened in certain sea states.
Grip is important in this kind of boat. A loss of footing can end up with a costly swim. I prefer to wax the decks inside, with progrip on the wings. Simply wipe over all surfaces aft of the mast and reapply regularly. Some others guys prefer progripping their decks and central push-off bar as well. Both work equally well. I also prefer not to use toe loops on the wings but others find them useful for sea sailing.
If you are choosing from the options list for your new boat, definitely go for the split control lines, i.e. a separate eye riveted to the wings for kicker, outhaul and cunningham, it just makes life a little easier, as does a continuous kicker, also available as an optional extra.
Rig:
The carbon rig is probably the area that most sailors find the most difficult aspect of tuning their boat. Firstly lets look at rake and rig tension and then other ways to alter your mast and sail shape.
Rake is measured from the top of the mast to the transom bar on the centreline. Do not use chain plate holes as your only measure of rake as shroud and forestay lengths may vary a little but they can be used once a benchmark has been set. In medium airs (10-18 knots) the current fashion is 6900mm (on most boats, 3rd hole down from the top of chain plates). In light airs move up the chain plate one hole. In winds over 18 knots move down the chain plate by anything up to three holes but usually only one hole again unless nose-diving is likely to be a real problem. If you are sailing with the reefed rig you will need to reset your benchmark, probably finding the shrouds are now much lower down the chain plat es, maybe even on the very bottom hole. Helm size and wide or narrow winged boats should all fit into the above criteria. However if you are very light (< 10st) or very heavy (> 15st) you may need to find a slightly different benchmark.
Rig tension is also something that should be set prior to launching. It can be adjusted between races while afloat but this involves a capsize usually and a swim up to the bow. The benchmark for our medium air scenario is between 150-200 pounds. In light conditions try around 100 pounds and in strong conditions something above 200 pounds. I find that the flatter the water, the less rig tension I need. This may feel a little strange but seems fast.
Diamond wire tension is a bigger concern to helms than it should be. The range is 30 pounds for a 10st sailor up to 100 pounds for a 15st sailor. Once set I tend to leave alone but check from time-to-time that the bottle screw hasn’t worked lose during travel. Spreaders are fixed and all the same length so there is no need to worry about these.
There are several other controls that should be used to control the rig. An increasingly common way to pre-bend the mast is to use the main halyard. Hoist the sail to the top of the mast then thread the cunningham through a slip knot in the halyard where it emerges from the bottom of the mast. Pull down the cunningham to extract approximately another two inches of halyard from the bottom and then cleat. This will require changing the halyard on average twice a year to avoid failure and also crus hes the sail headboard after a while but the resulting pre-bend does see the sail set much better on the mast.
A common failing among new sailors is to under use the cunningham and kicker. I would suggest using as much cunningham as you can pull on and then some for up-wind sailing in a breeze. The cascade kicker should be slightly under load when onshore with the sail hoisted and halyard

16
tensioned (see above) but should be pulled block-to-block when beating in anything over 10 knots. Use these two controls to the full and see your mast now resemble a windsurfer rig but giving bags of forward power. Sail battens should be tied in securely so that all sail creases are removed but not so tight that the sail wont lie flat on the ground.
Another worthy tip before going afloat is to tape up almost everything. Shroud pins through chain plates, shroud reefing points, shrouds to spreaders, all split rings on trapeze gear, tiller extension joint onto tiller, all control line to shock cord knots, sail batten ties on sail.
In conclusion the RS600 is a simple boat to rig and once set up correctly really doesn’t need a lot of maintenance. Unfortunately this means the rest is down to the helm and to master this boat requires lots of on-the-water practise.
The RS Association is directing more resources and attach increased importance on training for sailors who want to both tune and master the handling techniques of their RS boat with help from fleet experts and qualified racing coaches.
Andy Irons
Picture: Andy Irons showing how it should be done in Garda.

17
A TACKING RAMBLE
Outlined below is an article written by Mark Sempers ex 600 sailor – now 49er sailor on how to tack a 600 without getting the dreaded going back wards feeling. It is probably a good idea to read this article in conjunction with the next one written by Alex Southon on his views of 600 sailing. There are some common themes as well as some different views, see which one you can relate to.
The really critical thing about tacking is flatness, and what you do with the mainsheet. Kicker, cunningham and outhaul settings will make it easier or harder, but the fundamental is to be flat. If the boat is heeled even slightly, the rudder drives the leeward aft corner into the water, the back of the boat gets a bite on the water, and instead of pivoting the boat, the rudder just makes a (very big) brake. All the way comes off the boat, and the reversing lights come on!
If the boat's leant to windward, the rudder helps pull the back out of the water, letting it all pivot around the keel nicely, with a lot less (apparent) angle on the rudder.
Depending on how confident you are, you can either unhook on the fly, going into the tack, or sit on the wing bar and unhook - it makes a difference only in terms of speed, neither approach is fundamental to the tack (if you sit on the bar, you'll have to ease some, and sail a bit lower to keep the boat moving prior to the tack.)
From the ready to tack position, ease some (more) sheet so that the boat is starting to heel over on top of you. Push the tiller down relatively gently at first, but keep increasing the rate of turn. Step into the middle of the boat; duck the boom (my knees just touch as I do this, staying on the balls of my feet). At the same time, I swivel the mainsheet jammer to the new side so the main is free to be eased more if necessary. Tack facing forwards, and watch the forestay (or other suitable point of reference) through the tack. Do all this staying as close to the front as you can manage, as digging the stern in stops the boat.
As soon as the boom is over my head, I start out for the 'new' side. I walk up the boat to the side-deck forwards (i.e., facing out over the side of the boat), spin round, front forwards, and sit onto the wing bar, as if in hiking boat. A useful detail at this point are to come from crouching behind the mainsheet jammer, and walk forwards as well as outwards, to get your weight well forwards on the wing bar (stops the stern digging in longer than necessary, helping keep way on the boat) As I reach the wing, I'm starting to straighten the tiller, and ease some more mainsheet as necessary to keep the boat flat, or rolling into a windward heel on the new tack. Ideal is to hit the wing bar just as the sail starts to power up, with some windward heel on - this will keep the boat bearing away. As this happens, I put my feet on the edge of the boat. (Caution, don't be tempted to hook your toes under the gunwhale and sit it out. If it goes wrong and the boat flicks over, you will be trapped, hung in an incredibly painful, potentially leg breaking position. Trust me!) Leeward heel at this point will tend to drive the boat back up to wind. If you don't bear away far enough, the drag on the rig will tend to pull the boat back up to wind - certainly if you're struggling with the tacks, aim to come out low.
The final bit, and a word on mainsheet: I enter the tack with the mainsheet in my forward hand, tiller aft hand. It all stays that way as I cross, steer through etc. On hitting the new wing bar, the tiller is behind my back (it stays outside of me as I come up to the new side) mainsheet has stayed in the same hand, which is now the aft hand as I have turned. The aft (and mainsheet) hand grabs the tiller extension, leaving the front hand free. This hooks up the trapeze ring, immediately start pushing off the boat so your bum hangs over the side of the wing, putting

18
weight on the wire. As this happens, the front hand is reaching for, and grabbing the mainsheet from the tiller hand, with the tiller still behind your back. Then a foot goes out, the rest of me follows, pulling in the eased mainsheet as I go (largely by virtue of my moving away from the centreline). The tiller is then, finally, passed over my head into the more normal dagger style grip, and all is go.
Properly executed, the boat will round up easily, and almost carve out of the tack. It's all about practise and timing, the advantage is that this can be slowed down pretty much as much as you like. Once the boat is through the wind (and pointing low), with you on the wing bar, it's pretty safe. Some people enter the tack with the mainsheet in the aft hand with the tiller, using the front hand to pull up and unhook. To do this, you need to pass the mainsheet back to the front hand in the boat, or drop the tiller, as it's difficult to manage both effectively. I simply pass the mainsheet under the elastic part of the trapeze wire, and unhook with my forward hand, still holding the (UNCLEATED!) mainsheet. In this way it's clear of the trap gear as it twangs inboard.
Lastly, a word on rig settings.... Things that make tacking easier: Soft diamonds, cunningham, slackish battens, outhaul, moderate kicker. Things that make tacking hard: Tight diamonds, excessive batten tension, slack cunningham, slack outhaul, excessive kicker. In an F4, I'd anticipate the outhaul almost fully tight, cunningham 2-3 inches off the boom (i.e. pretty tight), and the kicker almost full on - the sail should be pretty flat, with significant twist. You may need to read the above a few times, it's a bit wordy, but I've tried to describe what I do!
Mark.

19
ALEX’S ARTICLE
Outlined below is an article Alex Southon wrote for an RS Class Association news letter a couple of years ago. Alex has been at the front of 600 sailing for at least the last 4 years and know how to make these baby’s really hum, especially when it is WINDY.
Tacking and gybing 600’s drives many helms round the bend; how many times have the rest of the RS fleets learnt some new colourful language as 600’s go into irons. Current Inland National Champion, RS600 sex god, Alex Newton Southon lets us all into his boat handling secrets on how he tacks and gybes.
Tacking and gybing an RS600 is the most important thing to master, as around the course you can gain and lose many boat lengths per leg. The way I tack an RS600 is certainly not the only way to tack, but it suits me, every one has a different way to tack and it must suit you. But there are a few crucial things to take into account in making a good successful tack. The way I tack I feel is the safest way because it always keeps me on my feet, though it does take time to master and always needs to be practiced.
Imagine you are sailing upwind flat out, and it is time to make the first tack. W hat I do is let the out the mainsheet by six inches to a foot, depending on wind and wave conditions, and put the mainsheet into my tiller extension hand. At this point you have to make sure the boat is completely flat, or the boat will round up too quickly, and you will get stuck in irons. With your spare hand lift yourself off the wire by the handle and at this point you will need to put the helm down. For a brief second you are standing on the wing holding the trapeze handle. As soon as the boat feels like it is beginning to be un-balanced, it is time to step into the cockpit. Often one big step puts me into the middle of the boat ducking beneath the boom. I always face forward to see what is happening. As I come in I let go of the tiller but swap hands with the mainsheet as the boom goes over. I think it is more important to hold onto the mainsheet, as that is what is going to make you capsize if you have too much on. You can alter it during the tack depending on feel.
From the middle of the boat I swing around and sit down on the wing, letting the boat heel on top to bear away. I then reach in and pick up the tiller, at the same time with my mainsheet hand I clip onto the wire, then bring in the mainsheet as I jump out onto the new side.
Though this sounds very complicated it quickly becomes very fluid. You have to make sure it is one fluid action or you will have trouble. A good tack should take between four and five seconds.
What happens if you do a bad tack and get stuck into irons?
We have all been there in despair stuck into wind, but why? If you follow these few guide lines it will help.
1. Relax and take one thing at a time, but it has got to be fluid. Relax.
2. Always put on more Cunningham than you think to de power the mainsail. This brings the flow forward and makes the battens flick over faster by flattening the sail.
3. Before putting the helm down, make sure the boat is flat. This makes the boat tack easier and swing through the wind faster.
20
4. Always use your body weight. As you have not got a jib it’s harder for the boat to come through the wind. When you come out of the tack you must put your weight onto the new windward side, bringing the boat on top of you, making the boat bear away.
When you do get stuck into wind, it is important to get out of it as quick as possible. Let your kicker off, bring the dagger board up by 1/3 and roll the boat over to windward making the boat bear away.
And never get upset or it will get worse! (Often my weakness!)
Gybing is easier than tacking.
Before I gybe I always put loads of kicker on, because the main has got so much roach the head flicks over first and can put you in the drink. The kicker tightens up the leach and flattens off the main letting the whole main go over together. It also it helps after the gybe by not capzing you to windward.
You are now going down wind and thinking about gybing. You have to pick the right time.
Make sure the bow is out of the water or the boat will trip over.
Make sure the boat is completely flat.
Keep the boat going as fast as you can.
I now do the opposite to a tack. Hold the tiller but let go of the mainsheet. As I go into the gybe I flick the tiller extension over to the new side and initiate the gybe by tugging the mainsheet. As the boom comes over I then bear off again on the new side. Get your weight as fast as you can on to the new windward side. Once the boat is sorted reach in to get the mainsheet.
Let off the kicker to go down wind until the next gybe.
I am not saying that this is the only way to gybe but it helps me to keep the boat upright when its windy!
Happy 600 sailing.
Alex.

21
RIG SETTINGS
Here is a set of generally respected rig setting, as outlined by Andy Irons in his article; they provide a pretty good starting point for most peoples.
Mast Rake
For medium airs (10-18knots) 6900mm
(Three holes down on most boats)
(Measured from the top of the mast to the centre of the transom line)
In lighter airs up one hole and windier conditions down at least one hole.
Rig Tension
Light airs – around 100 pounds of tension – feels horrible and only works on flat water but seems quick.
Medium airs – between 150 – 200 pounds
WINDY – above 200 pounds or at much as you can pull on!
Diamonds
The tighter the diamond tension the more power the rig will produce and the less forgiving it becomes in gusts or tacks!
10 stone sailors – circa 30 pounds.
15 stone sailors – up to 100 pounds.

22
THE KICKER, CUNNINGHAM & OUTHAUL
The kicker and cunningham should be your best friends when sailing a 600, as they help to keep the big white thing (aka the sail) above the little white thing (aka the dagger board)!
Light airs: - Non-trapezing
Beating:
Here the sailors weight needs to be as far forward as possible to try to stop the transom dragging. You will need to slide up and down the wing bars to make the most of each puff. In these conditions use the kicker until it looks like the leech of the sail is beginning to hook, if you are not sitting on the wing just use the mainsheet tension and no kicker. Here creases are fast so no downhaul. The outhaul needs to be set to a maximum of a quarter on (about 1 inch off the boom in the middle of the chord of the sail. If it is very light then you may want to try to flatten the sail off using the outhaul.
Reaching
Again the weight needs to be kept forward, with enough kicker to power the rig up and little cunningham. The kicker will probably not be required until you are sitting on the side / wing. The board will need to be raised as far as you feel comfortable with- up to a quarter up, unless it is a broad reach, where the board may need to be raised further.
Running
Let everything off, cunningham, kicker and outhaul. The boom needs to be as far out as possible, with the course being adjusted in line with the puffs, but don’t push the boom out as it bends the battens the wrong way, only push the boom out if that is where it is from the natural wind pressure. The helm is likely to be sitting on the foredeck facing backward looking for the gusts. Be careful here with other boats crossing you, as it can be difficult to quickly get out of this position without capsizing. The board should again be half up or as far up as is comfortable. The helm should be steering to the wind pressure.
Medium Winds: - Trapezing
Beating
Once out on the wire you want to use at least half kicker, more as the wind increases, with some outhaul -about ½ to 1/3rd on. You probably don’t want to touch the cunningham until the boat feels like it is tripping over / stalling out, then apply cunningham until the boat feel lighter and it is starting to feel underpowered- i.e. you are no longer fighting with it. General rule: Kicker, then downhaul, then more kicker, then more downhaul, until you are tight on them both, then if you are still feeling like you are overpowered, start pulling the outhaul on.
Reaching
The same basic settings as for reaching but less cunningham, the board is unlikely to be moved. Let the kicker all of the way off, then let the cunningham all of the way off. Then pull the kicker back on with less / no cunningham – this releases the cunningham. This gives you power down the reach, as well as with the kicker on you will be able to stay on the wire longer and the main will be easier to play.
23
Running
Everything off here and steer to the gusts/ lulls as necessary. Keep the boat slightly on top of you to keep the rudder light. Use the waves here as well as the gusts to speed progress downhill.
Windy: - Flat out – Ahh!!
Beating
Full kicker, full cunningham and if you need to de-power the rig even further then pull the outhaul on some more until the boat feel as if it is no longer stalling / tripping over. It will suddenly become more manageable and you will be fighting it less. Try sailing with the main slightly eased to gain speed, then once you have your speed up, you will be pointing the same as you were but you will be going faster (apparent wind sailing). When it is windy it is very important to be flat and smooth, keeping the boat “in the groove”, which means keeping your eyes on the gusts and the lulls. Find a position for the main and steer from that position making small adjustments to find your fastest and most comfortable position. It is also important to move your weight along back and forwards along the wing until the rudder feels neutral (your rudder is a very effective brake, don’t use it as one!). The key here is to make sure you get the tack right.
Reaching
Keep the cunningham on full and keep the kicker on full as long as possible as this makes the main lighter to play. Let the outhaul off to a half way position, or until you feel you can cope!. If the boat begins to feels underpowered let the cunningham off first, but keep the kicker on as this keeps the main light and lets you play it.
Running
Use the kicker here to balance the boat, let it off until the boat feel uncomfortable and as if it is about to come over on top of you then pull a little bit on. Let at least half of the downhaul off or more if you dare! Let the outhaul half off; if the boat still seems underpowered let the kicker and cunningham off.

24
REEFING OR THE BABY RIG
When to reef
One of the main advantages of an RS 600 over many more traditional classes apart from the great racing, great socials and fleet support is the ability to reduce the sail area from 12.14 square metres to 10.55 square metres. This means when it is really howling and many other classes are confined to the dinghy park the RS 600 can be reefed and taken for a sail in “relative” control.
Although it is a macho thing about when to change down to the small rig, the baby rig can actually be equally as fast or faster around the racecourse than the full rig in certain conditions. Although these conditions are different for each sailor and when to change down depend heavily upon the conditions.
The current considered opinion within the fleet seems to be to change down when the wind is around 18 knots, although this is a higher number for flat water, or a heavier sailor. Here the smaller rig offers improved upwind performance, and better manageability leading to less capsizes which more than make up for the loss of down wind speed.
The RS 600 is blessed with a system that offers significantly more benefits than a simple reduction in sail area. The removal of the bottom section of the mast and rolling up of the bottom area of the sail, using the integral zip has the effect to reduce both the aerodynamic drag and the height of the centre of effort of the rig. The reduction in height of the centre of effort and hence gravity makes the boat more manageable, especially in a capsize.
How to reef
The reefing process is relatively simple: The mast needs to be un-stepped with the shrouds then lowered to the higher shroud point, with the bottom section of the shroud placed along the side of the wind bar in the boat to keep them out of the way. The shrouds may need to be connected to the bottom holes on the chain plates. The trapeze ropes and handles need to be undone form the normal position and reposition on the shorter trapeze line positions. Tape the bottom section of the trapeze lines back onto the trapeze lines to keep them out of the way. Unbolt the boom form the mast and remove the bottom section of the mast. This should be a relatively easy process, but if not try putting a screw driver through the boom bolt hole and twisting the mast with someone holding it steady at the diamonds. Once this has been completed the mast foot plug needs to be removed from the bottom section – a tiller extension pushed down the bottom section usually solves this problem.
Now place the mast foot plug in the main mast section and tape around the bottom to stop it falling out. When the mast is re- stepped the forestay is likely to be right at the end of its length, it can be difficult to get enough rig tension, if you remove the rolling block form the forestay it should allow you to get a little more tension. Reattach the boom into the new main mast section
Now roll the sail up into the integral zip within the sail. If the zip if not used much and the boat is sailed in salt water you may need to pro-lube the zip to help it along a bit, but as always a little bit of preventative care makes it much easier when you need it. Once this is done reattach the sail as normal and raise it in the normal manner. Once the sail is fully up have a look at the kicker and see if you can use the full length of the kicker, you may need to shorten the kicker strop to effect this.

25
Now you are ready to go with the baby rig. The baby rig is sailed in the same way as the full rig with the same use of the controls.
Go out and enjoy yourself……………………..

26
RS CLASS RULES
1. INTRODUCTION
1.1 The "RS One Design" classes have been created as strict one-design high performance racing boats. They have been designed against the fundamental principle that the racing results should depend solely on the attributes and skills of the crew. The fundamental objective of these Class Rules (the Rules) is to ensure that this concept is maintained in association with the class specific appendices.
1.2 The English text of these Rules shall govern.
2. DEFINED TERMS
2.1 All words that appear in quotation marks will, throughout these Rules have the meaning given to them as defined in appendix 1.
3. CLASS ASSOCIATION MEMBERSHIP
3.1 To be eligible to compete in events run under the auspices of the UK RS Class Association (the Class Association) the owner, joint owner or a nominated representative of an organisation owning the "RS One Design" must be a full member of the Class Association.
3.2 To be eligible to have results from individual "Circuit" events included in the overall series results the Helm or Crew must be a full member of the Class Association.
3.3 To be eligible to compete in the Class Association "National Championships" either the Helm or Crew must be a full member of the Class Association.
4. FUNDAMENTAL RULES
4.1 The complete boat and its crew/helmsman shall conform to these Rules at all times when racing.
4.2 The external and internal mouldings including the "Hull" of the "RS One Design" shall only be produced by a Licensed Builder from production moulds taken from the Master plugs held by the Copyright Holder.
4.3 All other equipment comprising "Spars", "Sails", "Foils", rudder stock, tiller, fittings, toe strap mountings, spinnaker chute mouldings, whether original or replacement, shall be those supplied by a licensed RS dealer except as specifically authorised by the individual class appendix to these Rules.
4.4 No additions, alterations or repairs may be made to the "RS One Design" unless specifically authorised by individual class appendix. These restrictions shall extend to the position and intended function of each item.
4.5 No significant performance advantage shall be obtained from any permitted replacement, addition or repair. The permitted replacements, additions, alterations and repairs described in the individual class appendix are subject to this overriding limitation.

27
4.6 Repairs and preventative maintenance may be carried out without violating these rules, provided repairs are made in such a way that the essential shape, characteristics or function of the original are not affected.
4.7 Preventative maintenance shall include the replacement of fastenings with alternatives provided that the equipment is replaced in the original position and in accordance with these rules where relevant.
4.8 Polishing or burnishing of hull and foils is permitted, but substantial filing or abrasion, other than for the purpose of repair, with the effect of modifying the shape or performance is not allowed. Painting and subsequent burnishing of a hull that requires refinishing is permitted.
4.9 Sponsorship & Advertising: All RS classes & events will be operated under the ISAF Category C. There will be no restriction on the number or coverage of advertisers logos or slogans except for the front 25% of the hull and bottom 10% of the mainsail are reserved for event and circuit sponsors.
5. LICENSED BUILDERS, HULL IDENTIFICATION, SAIL NUMBERS & INSIGNIA
5.1 The Builders of the "RS One Design" shall be only those licensed by the Copyright Holder under a Builder's Agreement (the Licensed Builde r).
5.2 Each hull shall carry a moulded-in hull number or individually numbered Royalty Plaque fixed in a readily visible position as prescribed by the Copyright Holder.
5.3 On being advised of the hull or Royalty Plaque number the Copyright Holder (or his authorised agent) shall issue each new hull with a Sail Number.
5.4 The Class Insignia shall be the "RS One Design" class logo as prescribed by the Licensed Builder, and shall be displayed on the top half of the mainsail, in the position prescribed by the Licensed Builder.
6. MEASURMENT
6.1 In the event of a dispute alleging non-compliance with these Rules, the matter shall be referred to the Rules Co-ordinator and relevant Class Rules Representative(s) of the Class Association. Their decision shall be final and binding on all parties.
6.2 In the case of a measurement dispute not explicitly covered by these Rules, the following procedure shall be adopted:
6.2.1 A sample of the dimensions for the disputed item shall be obtained by taking the identical measurement from five boats or items of equipment, which are not the subject of the dispute.
6.2.2 The dimension of the disputed boat or items of its equipment taken using the same technique as above shall be compared to the sample.
6.2.3 If any of the dimensions obtained from the disputed boat or item of equipment lie outside the corresponding range of dimensions found in the sample by more than 10%, of that range the matter together with the details of the measurement methods
28
and any other relevant information shall be referred to the Rules Co-ordinator of the Class Association.
6.2.4 The Rules Co-ordinator shall obtain a majority decision from the relevant Class Rules Representative(s), Licensed Builder and Copyright Holder. This decision shall be final and binding on all parties.
7. SAILING REQUIREMENTS
7.1 The total weight of all clothing and equipment worn by the helmsman or crew shall not exceed 12kg when weighted in accordance with Appendix H of the ISAF Racing Rules of Sailing.
7.2 No clothing and equipment of the helm and crew shall be worn with the specific feature of adding weight by water absorption or holding water in pockets, compartments, containers or any other method.
7.3 All sailors competing in a class that has weight and/or height equalisation are responsible for ensuring their boat settings are in accordance with the Rules when competing. For major events a weigh-in may be required at entry and the boat settings derived from that weigh-in will apply for the duration of that event. The sailors weight and/or righting moment is to be taken "bare" i.e. in a swimsuit or similar.
8. AMENDMENTS
Amendments to these Rules must be approved by each of the following:
8.1 The Copyright Holder
8.2 The Licensed Builder
8.3 A majority vote of the relevant members of the Class Association who return written replies within one month of the circulation of the proposed rule change.
APPENDIX 1: INDEX OF DEFINED TERMS
RS One Design - the classes adopted by the Class Association, as listed in schedule 1 of the UK RS Class Association Constitution Circuit - A series of open meetings organised each year by the Class Association, whose results count towards an overall trophy. National Championship - A series of races organised once each year by the Class Association.
Hull - The hull as supplied by a licensed RS dealer.
Spars - The spars as supplied by a licensed RS dealer.
Sails - The sails as supplied by a licensed RS dealer.
Foils - The centreboard/daggerboard/rudder as supplied by a licensed RS dealer.

29
RS 600 CLASS RULES
1. PERMITTED REPLACEMENTS, ADDITIONS, ALTERATIONS & REPAIRS
1.1.1 The following parts or equipment may be replaced providing that the replacement is of a similar type and performs the same function. The replacement parts or equipment may be obtained from any supplier: -
1.1.2 Blocks
1.1.3 Cam cleats
1.1.4 Rudder hangings and retaining device
1.1.5 Shroud adjusters
1.1.6 Sail batten
1.1.7 Control lines
1.2 The following parts or equipment may be replaced providing that the replacement performs a similar function. The replacement parts or equipment may be obtained from any supplier: -
1.2.1 Fastenings
1.2.2 Shackles, swivels and pins
1.2.3 Toe straps, lashings and tensioning elastics
1.2.4 Running rigging, ropes and lashings
1.2.5 Main Halyard and halyard securing device, maximum velocity ratio 2:1
1.2.6 Tiller extension
1.2.7 Batten tensioning devices
1.2.8 Bungs
1.2.9 Trapeze handles, rings and adjuster cleats
1.2.10 Wire rigging, kicking strap and rig tension purchases with the following restrictions on construction and sizes: -
1.2.10.1 Shrouds and forestay not less than 3mm 1x19 stainless steel wire
1.2.10.2 Trapeze wires and diamonds not less than 2.5mm 1x19 stainless steel wire.
1.2.10.3 Kicker cascade not less than 2.5mm 7x19 s/s wire.
30
1.2.11 Mainsheet swivel jammer / ratchet arrangement
1.2.12 Kicker and mainsheet boom attachment strops.
1.3 The following additions and alterations are permitted. Parts may be obtained from any supplier:
1.3.1 Non slip material of any kind (maximum thickness 2.5mm) may be added to the hull or decks
1.3.2 The use of flexible adhesive tape, thin line or shock cord, as long as this does not modify the effective sheeting of any sail nor the intended purpose or action of any equipment
1.3.3 Packers may be fitted under cleats
1.3.4 Any number and design of mechanical wind indication devices may be fitted
1.3.5 Calibration marks of any kind are permitted
1.3.6 Any compass, timing device or a combination of both may be fitted provided that it/they can only provide information relating to A) the boat's heading and B) current or elapsed time
1.3.7 Any additional equipment required for safety purposes may be fitted
1.3.8 Clips, ties or bags to secure safety or other equipment are permitted
1.3.9 Additional drainage holes and inspection hatches may be fitted to the hull provided they do not compromise the watertight integrity of any hull compartments
1.3.10 Sail battens may be tapered or adjusted as required
1.3.11 The head of the centerboard or rudder may be packed or sanded to maintain a good fit
1.3.12 A maximum of 4 foot straps may be fitted to the wings
1.3.13 A reaching toe strap may be fitted between the transom bar fixing on the transom and a hole drilled in the gunwhale flange no more than 750mm forward of the transom
1.3.14 Any number of items may be fitted to the hull or spars provided there sole function is to stow food and/or drinks
1.3.15 Maps, charts & means for recording compass headings may be carried or fixed to the hull
1.3.16 Control line takeaway systems may be altered or improved in any way, so long as any extra fastenings are made only to the inside of the fore & aft wing bar tubes, ad all lines/shockcord are maintained externally, alongside and close to any wing bar tube
1.3.17 Extra pins/hooks are allowed for the purpose of tidying trapeze wires, so long as no fixings are added to the hull or wings

31
1.3.18 Protective chafe pads of any material are allowed under the shroud u-bolts, so long as no fixings are added.
2. SAILING REQUIREMENTS
2.1 The RS600 shall be raced with only one person on board
2.2 The Sail No. shall be displaced on each side of the mainsail on the middle horizontal panel, with the upper numbers on the starboard side and the sail numbers should also be positioned in accordance with the relevant ISAF rule
2.3 The RS600 may only be raced if the Category Helm Weight (CHW) is correctly matched to the wing set and weight compensation as set out in clause 3.
3. 3. WEIGHT COMPENSATION
3.1 The wing set fitted to a hull shall be matched to the Category Helm Weight (CHW) of the helmsman as follows: -
• CHW less than 70kg (11st) Wing set "B" (7ft/2133mm beam)
• CHW between 70kg-76kg (11st-12st)…. Wing set "A" OR Wing set "B" when a compensating additional weight of 3kg is fitted.
• CHW above 76kg (12st). Wing set "A" (6'4/1931mm beam)
3.2 The 3kg weight shall be securely fastened to the hull or wings above deck level, and shall be clearly visible. It shall be sited between the centerboard casing and the main bulkhead, and be distributed equally about the centreline.
3.3 The wing set and weight used by a helmsman shall be registered with the Class Association, and entered on his membership card
3.4 A helmsman may change his registered wing set only once in a calendar year.

32
2002 RS CALENDAR & TRAINING EVENTS
33
2002 RS RACING CIRCUIT SAILING INSTRUCTI ONS
1.0 RULES
1.1 The regatta will be governed by the ‘rules’ as defined in the Racing Rules of Sailing. The regatta is designated category C. There will be no restriction on the number or coverage of advertisers logos or slogans except for the front 25% of the hull, and bottom 500mm of the mainsail, which are reserved for RS Association event sponsors.
1.2 The owner of the boat shall be a member of the RS Class Association.
1.3 In addition for National Championships, Inlands and all RS Racing Circuit events either the helm or crew shall be a member of the RS Class Association.
1.4 Competitors shall complete the entry form and pay the necessary dues in order to be eligible to race.
1.5 When provided at registration, competitors shall make every reasonable effort to display events sponsors’ promotional items on their boat and sails as directed. If sponsor promotional items come off whilst racing, competitors must obtain replacement items from the RS Association before the start of racing the following day, if the Association has sufficient stocks available.
1.6 Any individual caught stealing sponsor promotional items, e.g. flags, banners, prizes, shall be deemed to have committed a gross breach of good manners, and my be subject to a hearing under RRS 69.
2.0 NOTICES TO COMPETITORS
2.1 Notices to competitors will be posted on the Official Notice Board as defined at the briefing
3.0 CHANGES TO SAILING INSTRUCTIONS
3.1 Any changes to the Sailing Instructions will be posted on the Official Notice Board for at least two hours before the advertised start time of the race or races concerned; except that any change to the schedule of races shall be posted by 1900 hours on the day before it will take effect.
4.0 SIGNALS MADE ASHORE
4.1 Signals made ashore will be displayed at the location described in Event Appendix A.
4.2 When flag AP is displayed ashore (with two sound signals; one sound signal when lowered) ‘1 minute’, in ‘Race Signals’ is replaced with ‘not less than 30 minutes’. This adds to the meaning of AP in RRS Race Signals.
34
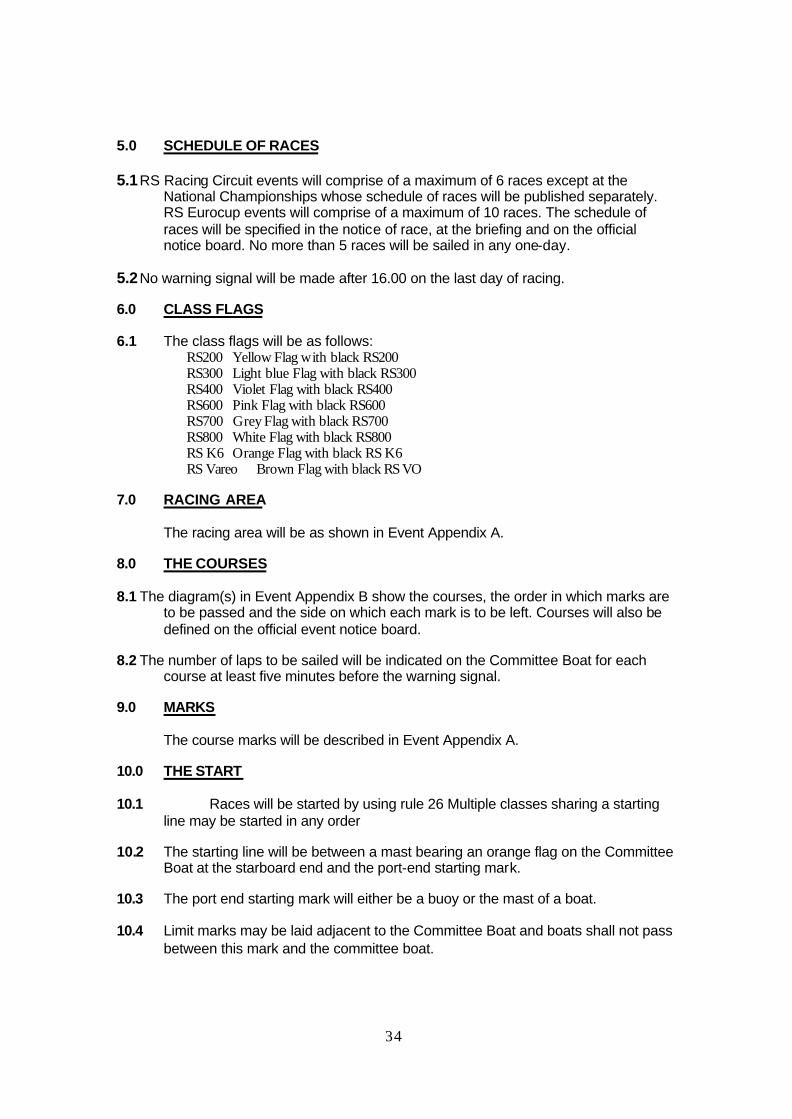
5.0 SCHEDULE OF RACES
5.1 RS Racing Circuit events will comprise of a maximum of 6 races except at the National Championships whose schedule of races will be published separately. RS Eurocup events will comprise of a maximum of 10 races. The schedule of races will be specified in the notice of race, at the briefing and on the official notice board. No more than 5 races will be sailed in any one-day.
5.2 No warning signal will be made after 16.00 on the last day of racing.
6.0 CLASS FLAGS
6.1 The class flags will be as follows: RS200 Yellow Flag w ith black RS200 RS300 Light blue Flag with black RS300 RS400 Violet Flag with black RS400 RS600 Pink Flag with black RS600 RS700 Grey Flag with black RS700 RS800 White Flag with black RS800 RS K6 Orange Flag with black RS K6 RS Vareo Brown Flag with black RS VO
7.0 RACING AREA
The racing area will be as shown in Event Appendix A.
8.0 THE COURSES
8.1 The diagram(s) in Event Appendix B show the courses, the order in which marks are to be passed and the side on which each mark is to be left. Courses will also be defined on the official event notice board.
8.2 The number of laps to be sailed will be indicated on the Committee Boat for each course at least five minutes before the warning signal.
9.0 MARKS
The course marks will be described in Event Appendix A.
10.0 THE START
10.1 Races will be started by using rule 26 Multiple classes sharing a starting line may be started in any order
10.2 The starting line will be between a mast bearing an orange flag on the Committee Boat at the starboard end and the port-end starting mark.
10.3 The port end starting mark will either be a buoy or the mast of a boat.
10.4 Limit marks may be laid adjacent to the Committee Boat and boats shall not pass between this mark and the committee boat.

35
10.5 Boats whose preparatory signal has not been made shall keep clear of the starting area and of all boats whose preparatory signal has been made. This adds to RRS 22.2
10.6 Individual recalls will be in accordance with RRS 29.2. The Race Committee shall be under no obligation to hail the sail numbers of boats that start prematurely.
10.7 A boat starting later than 5 minutes after her starting signal will be scored Did Not Start. This changes RRS A4.1.
10.8 When there are more than 60 entries in one class, the race committee may choose to use a gate start for this class. If so flag G will be flown from the committee boat and Event Appendix C will apply. This changes RRS 26.
10.9 BLACK FLAG RULE
10.9.1 At the discretion of the Race Officer the Black Flag Rule as per RRS 30.3 can be used.
10.9.2 If a start using a black flag is subject to a general recall, the sail numbers of the boats identified as infringing this instruction will be displayed on the Committee Boat prior to the preparatory signal for a minimum of three minutes. A long sound signal will be made when the numbers are displayed. (Adds to RRS 30.3)
10.9.3 Boats so identified shall immediately retire and remain well clear of all boats racing. A boat that fails to observe this instruction will be disqualified from all races in the series without a hearing (alteration of RRS 30.3 & 63).
10.9.4 It is the sole responsibility of competitors to find out if their sail number is or is not displayed and then to act in accordance with this instruction.
10.10 When, after a race has started there is a substantial wind shift during the first leg, the Race Committee may abandon the race and restart it (signalled by code flag”N” above the class signal.). This is in addition to RRS32.
11.0 CHANGE OF COURSE AFTER THE START
11.1 When after a race has started there is a substantial wind shift; the Race Committee may move one or more marks.
11.2 When the course to be made good is significantly changed by such an alteration, a boat will be stationed near the mark at the start of the leg affected, and will fly code flag “C” over a green or red flag indicating that the direction of that leg lies either to starboard or port respectively of its previous bearing. She will draw attention to this signal by making intermittent sound signals. When the leg affected is to windward, the approximate magnetic bearing of the new direction to the next mark will, when possible, be displayed near the start of that leg. (This changes RRS 33)

36
11.3 Notwithstanding Sailing Instruction 11.1 a mark will not be moved if it affects the point of sailing of any competitor during the time it is being moved.
12.0 THE FINISH
12.1 The finish line will be between a staff displaying a blue flag on the committee boat and the nearby mark, or the finishing mark. For courses that are shortened when the committee boat is in its normal position and flying flag S alongside the class flag, competitors shall complete the round equal to the leading boat then proceed to the normal finish line. Hoisting a blue flag on the race committee boat when the leading boat is on its last round will open the finish line.
12.2 Lowering the blue flag when the last boat has finished the race or the time limit has expired will close the finishing line. (This adds to the meaning of the Blue Flag and ‘S’ in Race Signals)
12.3 The finishing mark shall be a buoy or the mast of a boat bearing a blue flag.
12.4 A boat that has finished shall then pass completely through the finishing line, and no part of her shall thereafter again cross the finishing line from either direction while the finishing vessel is on station. This changes RRS28.1. A boat that infringes this Sailing Instruction will be scored DNF in the race she has just finished; this alters RRS 63.1 & RRS A4
13.0 PENALTY SYSTEM
13.1 The 720-turn penalty as described in RRS 44.1 & RRS 44.2 shall apply. RRS 44.3 shall not apply.
13.2 Touching a mark (other than a starting or finishing line mark) with any part of the boat or crew shall not constitute an infringement of the Rules and does not require a 360-degree turn; Manhandling a mark which results in an advantage is not allowed and a boat so doing shall promptly retire. If a boat touches a start or finish mark they shall complete a 360-degree turn. This alters RRS 31.
14.0 TIME LIMITS
14.1 The time limit shall be 75 minutes from the starting signal for the first boat. Boats that fail to finish within 15 minutes of the first boat will be scored with their observed position on the course at that time. At the discretion of the Race Officer positions when the boats last rounded the mark nearest the Committee Boat may be awarded. At the closure of the finishing line referred to in S.I. 12.2, all boats shall be deemed to have finished and may return to the start for subsequent starts or to the shore if there is to be no more racing. This adds to RRS 35.
15.0 PROTESTS AND REQUESTS FOR REDRESS
15.1 Protest forms will be available from the Race Office. They shall be delivered there within the protest time limit

37
15.2 For each class, the protest time limit is one hour after the last boat finishes, or where two or more races are to be sailed without coming ashore between them, within one hour of finishing the last race.
15.3 Notices will be posted within 30 minutes of the protest time limit to inform competitors of hearings in which they are parties to a hearing or named as witnesses. It shall be the responsibility of competitors to check the notice board for such notices.
15.4 On the last day of racing a request for reopening a hearing shall be delivered:
(a) Within the protest time limit if the party requesting reopening was informed of the decision on the previous day;
(b) No later than half an hour after the party requesting reopening was informed of the decision on that day.
This changes RRS 66
16.0 SCORING SYSTEM
16.1 The Low Points scoring system of RRS Appendix A will apply, as follows:
1st place = 1 point
2nd place = 2 points
3rd place = 3 points
Etc.
16.2 Discards - Boats will exclude their “worst” results as follows:
1 - 3 races sailed no excluded score
4 - 8 races sailed 1 excluded score
8 – 10 races sailed 2 excluded scores
Two races are required to be completed to constitute the series.
16.3 Series Tie If, after discard, two or more boats have the same points total the tie will be broken in accordance with RRS Appendix A8
17.0 SAFETY REGULATIONS

38
17.1 Adequate personal buoyancy for crew members shall be worn at all times whilst racing. Neither a wetsuit nor a drysuit constitute adequate personal buoyancy. (Alters RRS 40)
17.2 Wetsuits or drysuits shall be worn by all crewmembers between 1st November and 30th April inclusive. (Adds to RRS 40)
17.3 A boat that retires from a race shall indicate this fact accordingly upon the retirement sheet or on the declaration sheet if applicable.
18.0 REPLACEMENT OF CREW OR EQUIPMENT
18.1 For the series of races comprising an event only the helm named on the entry form will be eligible. If a different helm completes a race in the same boat then they will be considered a separate entry and their results cannot be combined with another helms results. In two person boats the registered crew may take over the helm for a very short period in exceptional circumstances.
18.2 Where event results are combined to form a circuit then only results scored by the same helm will count, results from a different helm shall not be combined, even when helming the same boat.
18.3 Distinguishing Numbers
Under exceptional circumstances, the Race Committee may permit a boat to use sails carrying a distinguishing number other than that required by RRS77 and RRS Appendix G.
18.3.1 Such permission is only valid if sought in writing before use.
18.3.2 Where a hull, spars or sails is damaged to such an extent that they cannot be used in the next race after all reasonable steps are taken to carry out repairs then competitors may change equipment with the prior agreement of the RS Rules Committee.
19.0 EQUIPMENT AND MEASUREMENT CHECKS
19.1 Measurement / Checking
A boat or equipment may be inspected at any time for compliance with the class rules and sailing instructions. On the water, a boat can be instructed by a race committee measurer to proceed immediately to a designated area for inspection.
19.2 Class Conformity
Every boat shall comply with the current relevant class rules. Failure to do so may result in disqualification without a hearing. This changes RRS 63.1.

39
19.3 RS200 only, the use of a pole to control the clew of the spinnaker is not permitted and the spinnaker may not be flown in a goose-winged fashion on the opposite side to the mainsail. The pole may be carried but not used.
20.0 DISCLAIMER OF LIABILITY
20.1 General
The race organisers shall not be responsible for any loss, damage, death or personal injury howsoever caused to the owner/competitor, his skipper or crew as a result of their taking part in the race or races. Moreover, every owner/competitor warrants the suitability of his boat for the race or races.
20.2.1 The safety of a boat and her entire management including insurance shall be the sole responsibility of the owner/competitor racing the boat, who shall ensure that the boat is fully found, thoroughly seaworthy and manned by a crew sufficient in number and experience who are physically fit to face bad weather. The owner/competitor shall be satisfied as to the soundness of the hull, spars, rigging, sails and all gear. He shall ensure that all safety equipment is properly maintained, stowed and in date and that all crew know where it is kept and how it is to be used.
20.2.2 Neither the establishment of these Sailing Instructions nor any inspection of the boat under these conditions in any way limits or reduces the absolute responsibility of the owner/competitor for his crew, the boat and the management thereof. The crews are nonetheless advised to satisfy themselves as to the experience of the skipper and the adequacy of all safety equipment and insurance arrangements.

40
CONTINUOUS KICKE R SPLICING GUIDE


