98
OFFICIAL MICROSOFT LEARNING PRODUCT 6293A Troubleshooting and Supporting Windows ® 7 in the Enterprise Companion Content

O F F I C I A L M I C R O S O F T L E A R N I N G P R O D U C T
6293A Troubleshooting and Supporting Windows® 7 in the Enterprise
Companion Content
2 Troubleshooting and Supporting Windows® 7 in the Enterprise
Information in this document, including URL and other Internet Web site references, is subject to change without notice. Unless otherwise noted, the example companies, organizations, products, domain names, e-mail addresses, logos, people, places, and events depicted herein are fictitious, and no association with any real company, organization, product, domain name, e-mail address, logo, person, place or event is intended or should be inferred. Complying with all applicable copyright laws is the responsibility of the user. Without limiting the rights under copyright, no part of this document may be reproduced, stored in or introduced into a retrieval system, or transmitted in any form or by any means (electronic, mechanical, photocopying, recording, or otherwise), or for any purpose, without the express written permission of Microsoft Corporation.
Microsoft may have patents, patent applications, trademarks, copyrights, or other intellectual property rights covering subject matter in this document. Except as expressly provided in any written license agreement from Microsoft, the furnishing of this document does not give you any license to these patents, trademarks, copyrights, or other intellectual property.
The names of manufacturers, products, or URLs are provided for informational purposes only and Microsoft makes no representations and warranties, either expressed, implied, or statutory, regarding these manufacturers or the use of the products with any Microsoft technologies. The inclusion of a manufacturer or product does not imply endorsement of Microsoft of the manufacturer or product. Links may be provided to third party sites. Such sites are not under the control of Microsoft and Microsoft is not responsible for the contents of any linked site or any link contained in a linked site, or any changes or updates to such sites. Microsoft is not responsible for webcasting or any other form of transmission received from any linked site. Microsoft is providing these links to you only as a convenience, and the inclusion of any link does not imply endorsement of Microsoft of the site or the products contained therein.
© 2011 Microsoft Corporation. All rights reserved.
Microsoft and the trademarks listed at http://www.microsoft.com/about/legal/en/us/IntellectualProperty /Trademarks/EN-US.aspx are trademarks of the Microsoft group of companies. All other marks are property of their respective owners.
Product Number: 6293A
Released: 05/2011

Troubleshooting and Supporting Windows® 7 in the Enterprise 3
4 Troubleshooting and Supporting Windows® 7 in the Enterprise

Troubleshooting and Supporting Windows® 7 in the Enterprise 5

6 Troubleshooting and Supporting Windows® 7 in the Enterprise

Troubleshooting and Supporting Windows® 7 in the Enterprise 7
Module 1 Implementing a Troubleshooting Methodology
Contents: Lesson 2: Overview of Troubleshooting Steps 8

8 Troubleshooting and Supporting Windows® 7 in the Enterprise
Lesson 2
Overview of Troubleshooting Steps
Contents: Additional Reading 9

Troubleshooting and Supporting Windows® 7 in the Enterprise 9
Additional Reading
The Process of Problem Reporting You can find more information on the processes of problem reporting at Microsoft® Operations Framework 4.0: http://go.microsoft.com/fwlink/?LinkId=214064.

10 Troubleshooting and Supporting Windows® 7 in the Enterprise
Module 2 Troubleshooting Startup Issues
Contents: Lesson 1: Overview of the Windows 7 Recovery Environment 11
Lesson 2: Configuring and Troubleshooting Startup Settings 15
Module Reviews and Takeaways 17

Troubleshooting and Supporting Windows® 7 in the Enterprise 11
Lesson 1
Overview of the Windows 7 Recovery Environment
Contents: Detailed Demonstration Steps 12

12 Troubleshooting and Supporting Windows® 7 in the Enterprise
Detailed Demonstration Steps
Demonstration: Examine the Startup Environment with Windows RE
Instructions For this demonstration, you will use the available virtual machine environment.
Before you begin the demonstration, you must complete the following steps:
1. On the host computer, click Start, point to Administrative Tools, and then click Hyper-V Manager.
2. In Hyper-V™ Manager, click 6293A-NYC-DC1, and then in the Actions pane, click Start.
3. In the Actions pane, click Connect. Wait until the virtual machine starts.
4. Log on by using the following credentials:
• User name: Administrator
• Password: Pa$$w0rd
• Domain: Contoso
5. Repeat steps 2 through 4 for 6293A-NYC-CL1.
Demonstration Steps
Task 1: Mount the product DVD, and restart the virtual machine 1. On your host computer, on 6293A-NYC-CL1, in the localhost – Virtual Machine Connection dialog
box, on the Media menu, point to DVD Drive, and then click Insert Disk.
2. In the Open dialog box, in the File name box, type C:\Program Files \Microsoft Learning\6293\Drives\Windows7.iso, and then click Open.
3. On 6293A-NYC-CL1, close the AutoPlay dialog box.
4. Click Start, and in the Search box, type shutdown /r, and then press Enter. Windows restarts.
Task 2: Start in Windows RE 1. While the virtual machine is restarting, when the Press any key to boot from CD or DVD message
appears, press Spacebar. The setup loads.
2. When prompted, in the Install Windows dialog box, click Next.
3. On the Install now page, click Repair your computer.
4. In the System Recovery Options dialog box, click Next.
Task 3: Use the Command Prompt tool 1. In the System Recovery Options dialog box, click Command Prompt.
2. At the command prompt, type the following command, and then press Enter:
C:
3. At the command prompt, type the following command, and then press Enter:
Dir
No files are visible because the logical C drive is mounted as drive E within Windows RE.

Troubleshooting and Supporting Windows® 7 in the Enterprise 13
4. At the command prompt, type the following command, and then press Enter:
E:
5. At the command prompt, type the following command, and then press Enter:
Dir
The directory structure of the logical “drive C” is visible.
6. At the command prompt, type the following command, and then press Enter:
Net start
The following services are started: DCOM Server Process Launcher, Plug and Play, Power, Remote Procedure Call (RPC), RPC Endpoint Mapper, Security Accounts Manager, Windows Event Log, and Windows Management Instrumentation.
7. At the command prompt, type the following command, and then press Enter:
Regedit
8. You successfully open the registry editor. Close the registry editor. At the command prompt, type the following command, and then press Enter:
Cd\windows\system32
9. At the command prompt, type the following command, and then press Enter:
msconfig.exe
10. You are unable to load the tool successfully, as it is restricted in Windows RE. In the System Configuration dialog box, click OK. At the command prompt, type the following command, and then press Enter:
Sc query
11. Examine the list of services. At the command prompt, type the following command, and then press Enter:
Bootrec /fixmbr
12. At the command prompt, type the following command, and then press Enter:
Bootrec /fixboot
13. At the command prompt, type the following command, and then press Enter:
Exit

14 Troubleshooting and Supporting Windows® 7 in the Enterprise
Task 4: Use the startup repair tool 1. In the System Recovery Options dialog box, click Startup Repair.
2. In the Startup Repair dialog box, click Finish.
3. In the System Recovery Options dialog box, click Restart.
To prepare for the next practice
• When you finish, leave both virtual machines running.

Troubleshooting and Supporting Windows® 7 in the Enterprise 15
Lesson 2
Configuring and Troubleshooting Startup Settings
Contents: Additional Reading 16

16 Troubleshooting and Supporting Windows® 7 in the Enterprise
Additional Reading
Understanding the BCD Configuration Settings For more information on editing the BCD, go to the Microsoft website: http://go.microsoft.com/fw k/?LinkId=69448lin .

Troubleshooting and Supporting Windows® 7 in the Enterprise 17
Module Reviews and Takeaways
Review questions Question: After installing a new video driver, your user’s computer becomes unstable and will not start correctly. What would you try first to resolve this problem?
Answer: Use Safe Mode to access System Restore and to roll back the configuration to a previous point. If System Restore is unavailable, attempt a driver rollback.
Question: The boot environment of a user’s computer is corrupt, and you suspect a virus. Before you can run virus removal tools, you must recover the boot environment. What command-line tool(s) could you use?
Answer: Bootrec.exe with the fixmbr and fixboot switches.
Question: Your user adds a new hard disk to the computer, which changes the computer’s partition numbering. To enable the computer to start, the user needs you to change the BCD. What tool would you use?
Answer: BCDEdit /enum to view the entries in the store. Then use BCDEdit to edit the store to reflect the changes in the computer.
Question: A user has reported a problem to the help desk. They are experiencing problems with starting their computer after a new device driver was added. You decide to start the computer by using a minimal boot, but want to configure that from Windows before restarting. What tool could you use?
Answer: System Configuration (MSConfig.exe) enables you to configure advanced startup options including various minimal startup environments.
Question: A system service is causing startup problems, and your help-desk user has started the problematic computer into Windows RE. What command-line tools, accessible from Windows RE, enable you to control the startup of services?
Answer: Sc.exe enables you to view and configure system services both within Windows RE and the running Windows operating system.
Question: The help desk recently installed a new device driver on a computer. A stop code is generated along with a blue screen during startup. What recovery mechanism would you try first?
Answer: Last Known Good might work because no one has logged onto the computer. However, if that does not work, safe mode and driver rollback might be worth trying, although the computer may not be able to boot from safe mode. If it cannot, try using Windows RE and a system restore point.
18 Troubleshooting and Supporting Windows® 7 in the Enterprise
Module 3 Using Group Policy to Centralize Configuration
Contents: Lesson 1: Overview of Group Policy Application 19
Lesson 2: Resolving Client Configuration Failures and GPO Application Issues 21
Module Reviews and Takeaways 24
Lab Review Questions and Answers 25

Troubleshooting and Supporting Windows® 7 in the Enterprise 19
Lesson 1
Overview of Group Policy Application
Contents: Question and Answers 20

20 Troubleshooting and Supporting Windows® 7 in the Enterprise
Question and Answers
Discussion: Group Policy Application Question: How would you use a GPO to distribute an application only to users in a single region?
Answer: Link the GPO that distributes the application to the region that requires the application. You create a GPO with various computer and user settings to standardize settings in a region.
Question: You link the GPO to the computers OU in that region. Which settings are applied?
Answer: When the GPO is linked to the Computers OU in a region, only the computer settings are applied to computers in the Computers OU. User settings would only be applied if user accounts existed in that OU. Linking the GPO to the region OU would result in both computer and user settings being applied in the region.
Question: Why might it be a benefit for roaming users to link printer distribution to a site rather than a specific OU?
Answer: If a GPO is linked to a site, then it applied to all users and computers in that site. The site corresponds to a physical location. Printers are specific to a physical location. As users roam local printers are installed on their mobile computers based on the site they are located in.
Question: How can you configure security settings in a GPO and ensure that they applied to all regions?
Answer: The GPO with security settings should be linked to the domain and enforced. Enforcing the GPO link ensures that no GPOs applied to OUs can override the domain-wide security settings.
Question: The home page for users is defined in a GPO that is linked to the domain. The home page points at the company intranet. The managers have a new web-based application that should being defined as their home page. This should be distributed by GPO. How can you do this?
Answer: Create a new GPO that defines the home page for managers and link it to the Managers OU in each region. The GPO linked to the Managers OU in each region overrides the settings defined at the domain.

Troubleshooting and Supporting Windows® 7 in the Enterprise 21
Lesson 2
Resolving Client Configuration Failures and GPO Application Issues
Contents: Question and Answers 22
Additional Reading 23

22 Troubleshooting and Supporting Windows® 7 in the Enterprise
Question and Answers
Discussion: Reasons for GPO Application Issues Question: What are some of the reasons that GPO settings might not apply as you think they should?
Answer: Possible reasons that GPO settings may not apply include:
• A GPO with user settings is not linked to a location where the user account resides.
• A GPO with computer settings is not linked to a location where the computer account resides.
• A computer is not able to communicate with a domain controller to download the GPO. This can be caused by network communication problems, incorrect time settings on the client computer, and corrupted computer accounts.
• A GPO was not properly tested and is configured incorrectly.
• Processing exceptions are preventing the GPO from being processed. Processing exceptions include:
• Blocked inheritance.
• Enforcement.
• Link order.
• WMI filtering.

Troubleshooting and Supporting Windows® 7 in the Enterprise 23
Additional Reading
Tools for Troubleshooting GPO Application For detailed information about how to use the Group Policy event log information, see Troubleshooting Group Policy Using Event Logs on the TechNet website at http://go.microsoft.com/fwlink/?LinkId=214065.

24 Troubleshooting and Supporting Windows® 7 in the Enterprise
Module Reviews and Takeaways
Review questions Question: You do not have permission to log on to domain controllers in your organization. However, you would like to perform Group Policy Modeling using the GPMC. How can you use GPMC on a Windows 7 computer?
Answer: Download and install the Remote Server Administrative Tools. This is preferred to using the RSoP snap-in which requires modifying the firewall.
Question: Your organization has a computer lab that is used for training. When users log on to computers in this lab, they should have only lab-specific settings. The instructor in the lab this week is indicating that users are not getting the default home page for the Web application that they are using for training. You know that a new GPO for the lab was created last Friday. What is the most likely cause of this problem?
Answer: The most likely cause of this problem is that the new GPO does not have loopback processing enabled.
Question: A new user in accounting called the help desk to explain that she does not have the department’s standard drive mappings. These drive mappings are configured by using Group Policy Preferences. What is the most likely cause of this problem?
Answer: There is likely a configuration problem with the new user account. Depending on how the drive mappings are configured for application, it is possible that the user in not in the correct group or the user account is not in the correct OU where the GPO is linked.
Troubleshooting and Supporting Windows® 7 in the Enterprise 25
Lab Review Questions and Answers Question: How did you discover the source of the problem in Exercise 1?
Answer: Answers may vary, but students may discover it by seeing that the NYC-CL1 computer was not in the same OU as NYC-LAB1.
Question: How did you discover the source of the problem in Exercise 2?
Answer: Answers may vary, but students may discover it by seeing the authentication failure in the system event log.
Question: Which of the tasks you performed in these labs do you not have permission to perform in your environment?
Answer: Answers may vary, but tasks related to managing user and computer accounts may not be permitted for desktop technician because they affect Active Directory® Domain Services (AD DS).
26 Troubleshooting and Supporting Windows® 7 in the Enterprise
Module 4 Troubleshooting Hardware Device, Device Driver, and Performance Issues
Contents: Lesson 1: Overview of Hardware Troubleshooting 27
Lesson 2: Troubleshooting Physical Failures 30
Lesson 4: Configuring Performance Options in Windows 7 32
Lesson 5: Troubleshooting Device Driver Failures 35
Module Reviews and Takeaways 38
Lab Review Questions and Answers 40

Troubleshooting and Supporting Windows® 7 in the Enterprise 27
Lesson 1
Overview of Hardware Troubleshooting
Contents: Question and Answers 28
Additional Reading 29
28 Troubleshooting and Supporting Windows® 7 in the Enterprise
Question and Answers
Discussion: Approaches to Troubleshooting Hardware Question: A user is unable to connect their cordless mouse to their portable computer. What would you check first?
Answer: Check to see if the Bluetooth module in their laptop was enabled in the BIOS, and/or was enabled by wireless connection on/off switches on the computer (if any are present).
Question: You just added a new video display to a user’s computer. The resolution of the display is very low, despite being capable of displaying at 1680x1050. What would you check?
Answer: Ensure that the driver installed correctly by opening Device Manager
Question: A user’s computer has repeatedly frozen. When this occurs, the computer accepts no input from keyboard or mouse, and all processing stops. What would you suspect as the problem, and what steps would you try to resolve the issue?
Answer: It is possible that there is a memory problem. Run memory diagnostics to verify this. Also, if any new hardware was recently introduced, determine if this is causing a conflict. If neither of these issues is related to the cause of the problem, it might be a software or device driver issue. However, memory is the most likely cause.

Troubleshooting and Supporting Windows® 7 in the Enterprise 29
Additional Reading
Considerations for USB Devices For more information abo t DevCon, see: u http://go.microsoft.com/fwlink/?LinkId=214079.

30 Troubleshooting and Supporting Windows® 7 in the Enterprise
Lesson 2
Troubleshooting Physical Failures
Contents: Additional Reading 31

Troubleshooting and Supporting Windows® 7 in the Enterprise 31
Additional Reading
Guidelines for Replacing Hardware Discover which devices are compatible with Windows 7 by visiting the Microsoft website at http://go.microsoft.com/fwlink/?LinkId=214077.

32 Troubleshooting and Supporting Windows® 7 in the Enterprise
Lesson 4
Configuring Performance Options in Windows 7
Contents: Questions and Answers 33
Additional Reading 34

Troubleshooting and Supporting Windows® 7 in the Enterprise 33
Questions and Answers
How Windows Uses Key System Components Question: Which hardware components are most likely to restrict performance for a Windows 7 computer?
Answer: Memory and processor, but all components can restrict performance for a workstation.
34 Troubleshooting and Supporting Windows® 7 in the Enterprise
Additional Reading
How Windows Uses Key System Components For more information about components, see “Solving Performance Problems” on the Microsoft TechNet website: http://go.microsoft.com/fwlink/?LinkID=140000.
Optimizing Performance by Configuring Windows Paging For more information about Page File Sizing see: http://go.microsoft.com/fwlink/?LinkId=214075.

Troubleshooting and Supporting Windows® 7 in the Enterprise 35
Lesson 5
Troubleshooting Device Driver Failures
Contents: Detailed Demonstration Steps 36

36 Troubleshooting and Supporting Windows® 7 in the Enterprise
Detailed Demonstration Steps
Demonstration: How to Use Group Policy to Manage Driver Installation
Demonstration Steps
Note You require the 6293A-NYC-DC1 virtual machine to complete this demonstration. Log on to the virtual machines as Contoso\Administrator with the password of Pa$$w0rd.
Modify the Group Policy settings
1. Switch to NYC-DC1.
2. Click Start, point to Administrative Tools, and then click Group Policy Management.
3. In Group Policy Management, expand Forest: Contoso.com, Domains, Contoso.com, and then click Default Domain Policy. On the Group Policy Management Console message box, click OK.
4. Right-click Default Domain Policy, and then click Edit.
5. In Group Policy Management Editor, under Computer Configuration, expand Policies, Administrative Templates, System, Device Installation, and then click Device Installation Restrictions.
6. In the right-pane, double-click Allow installation of devices using drives that match these device setup classes.
7. In the Allow installation of devices using drives that match these device setup classes dialog box, click Enabled, and then click Show.
8. Leave the window open.
Locate the setup class GUID
1. Click Start, and in the Search box, type \\NYC-CL1\d$\Labfiles\Mod04\ and then press Enter.
2. In Mod04, double-click keyboard driver.
3. Double-click type32, and then double-click type32.inf.
4. In notepad, locate the line that starts ClassGUID.
5. Select the GUID including the {} brackets and copy it.
Complete the GPO configuration
1. Switch back to Group Policy Management Editor.
2. In the Show Contents dialog box, click the cursor into the Value text box, and then paste the GUID into it.
3. Click OK twice.
4. In Group Policy Management Editor, double-click Allow administrators to override Device Installation Restriction policies.
5. Click Disabled, and then click OK.

Troubleshooting and Supporting Windows® 7 in the Enterprise 37
6. Double-click Display a custom message when installation is prevented by a policy setting.
7. Click Enabled, and in the Detail Text, type Contoso Policy restricts installation of certain devices, and then click OK.
8. Close all open windows.
Note Revert all virtual machines.

38 Troubleshooting and Supporting Windows® 7 in the Enterprise
Module Reviews and Takeaways
Review questions Question: If you do not configure device restrictions in GPOs, what security risks do USB removable storage devices pose?
Answer: Users can install devices and then copy sensitive data onto those devices. The data could then be distributed to non-authorized persons, or the device could be lost.
What two methods can you use to restrict specific device installation through GPO?
Answer: .INF files contain both a setup class GUID and a device identifier string. You can use either method to restrict device installation.
Question: Users are complaining that when they visit customer sites, they are unable to connect to their customers’ printers because of device-installation restrictions. What two possible actions could you take?
Answer: Enable device installation for setup class GUID for printers or add the drivers to the driver store using Pnputil.exe.
Question: Users on the help desk have tried to install a new driver for a user in the marketing department to enable them to use their new scanner. The driver is not part of the driver store and Group Policy prohibits installation of additional drivers. What GPO setting would you recommend changing in order to enable the installation of this driver?
Answer: No GPO setting needs to be changed. It would be better to install the driver into the store. Alternatively, you could change Allow installation of devices using drivers that match these device setup classes in Computer Configuration, select Policies, Administrative Templates, System, Device Installation\Device Installation Restrictions.
Question: You decide to install this driver into the driver store. Assuming the driver is in the D:\scanner folder and the driver INF file is called Scanner.inf, what command would you use?
Answer: Pnputil.exe -a D:\scanner\scanner.inf.
Question: Your user complains of poor performance. You discover that the disk component is bottlenecked. Before you rush out and purchase faster disks, what should you check?
Answer: Excessive paging, caused by insufficient memory, can lead to additional demands on the disks in the computer. Always verify there is sufficient memory for the current demands of the application set before attempting to improve disk throughput by obtaining faster disks.
Question: After you complete your check, what else could you do to improve the disk throughput on your user’s computer?
Answer:
• Ensure write-caching is enabled
• Minimize paging
• Distribute load across all available disks
• Implement faster disks
Troubleshooting and Supporting Windows® 7 in the Enterprise 39
• Consider using solid state disks
• Consider implementing a performance-enhancing disk array
• Defragment heavily used volumes.
Question: You need to view the application log on another computer without visiting that computer. How could you do this?
Answer: Configure event forwarding and subscriptions for the remote computer:
1. On the remote computer, run winrm quickconfig.
2. On the remote computer, add your computer account to the local Administrators group.
3. On your computer, run wecutil qc.
4. Configure the event log settings on your computer.

40 Troubleshooting and Supporting Windows® 7 in the Enterprise
Lab Review Questions and Answers
Lab A: Resolving Hardware Device and Device Driver Issues Question: In the lab, how did you recover the computer with the problematic device?
Answer: Uninstalling the device and restarting the computer resolved the problem.
Question: What other mechanisms did you attempt?
Answer: Answers will vary, but might include Safe Mode, Last Known Good, or Windows Recovery Environment (RE).
Lab B: Troubleshooting Performance-Related Issues (Optional) Question: In the lab, your user complained of poor performance. What did you discover?
Answer: All components were affected to some extent.
Question: What component was affected the most?
Answer: Memory were impacted most seriously.
Question: What solutions or mitigations would you recommend?
Answer: Run the demanding application on a more powerful computer, or add processor and memory capacity o the existing computer (the former being somewhat unrealistic). t

Troubleshooting and Supporting Windows® 7 in the Enterprise 41
Module 5 Troubleshooting Network Connectivity Issues
Contents: Lesson 2: Troubleshooting Network Connectivity Issues 42
Module Reviews and Takeaways 47
Lab Review Questions and Answers 48

42 Troubleshooting and Supporting Windows® 7 in the Enterprise
Lesson 2
Troubleshooting Network Connectivity Issues
Contents: Detailed Demonstration Steps 43
Additional Reading 46
Troubleshooting and Supporting Windows® 7 in the Enterprise 43
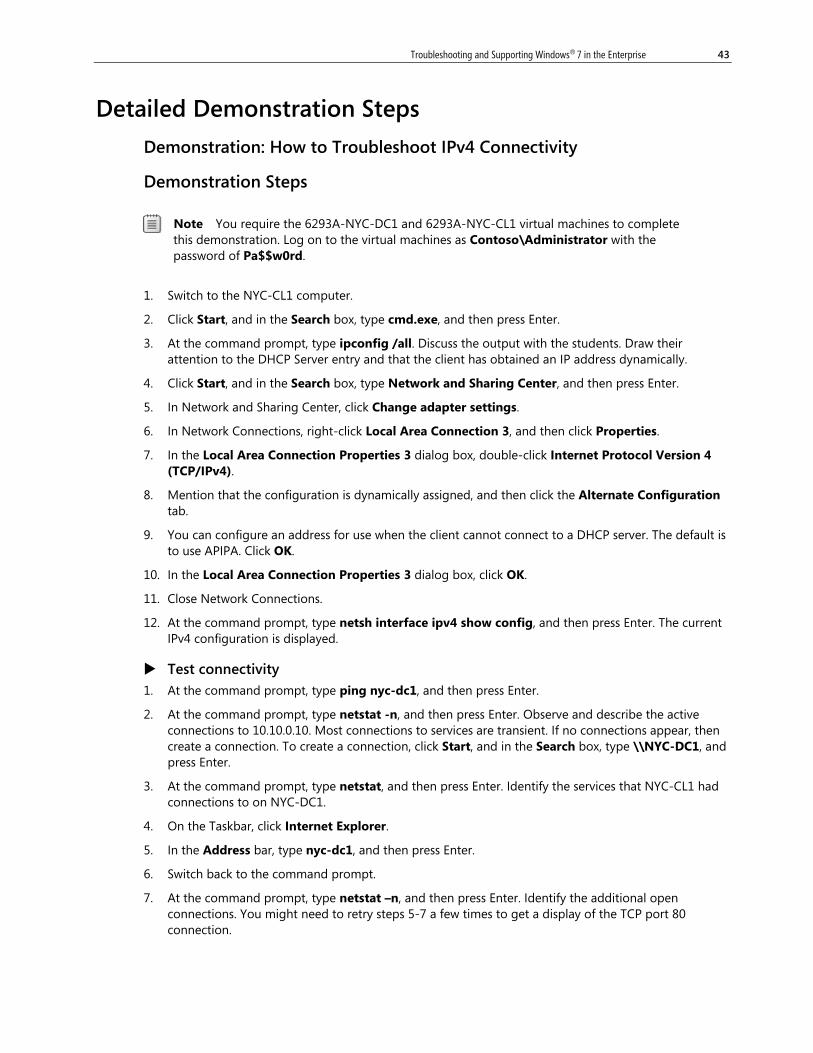
Detailed Demonstration Steps
Demonstration: How to Troubleshoot IPv4 Connectivity
Demonstration Steps
Note You require the 6293A-NYC-DC1 and 6293A-NYC-CL1 virtual machines to complete this demonstration. Log on to the virtual machines as Contoso\Administrator with the password of Pa$$w0rd.
1. Switch to the NYC-CL1 computer.
2. Click Start, and in the Search box, type cmd.exe, and then press Enter.
3. At the command prompt, type ipconfig /all. Discuss the output with the students. Draw their attention to the DHCP Server entry and that the client has obtained an IP address dynamically.
4. Click Start, and in the Search box, type Network and Sharing Center, and then press Enter.
5. In Network and Sharing Center, click Change adapter settings.
6. In Network Connections, right-click Local Area Connection 3, and then click Properties.
7. In the Local Area Connection Properties 3 dialog box, double-click Internet Protocol Version 4 (TCP/IPv4).
8. Mention that the configuration is dynamically assigned, and then click the Alternate Configuration tab.
9. You can configure an address for use when the client cannot connect to a DHCP server. The default is to use APIPA. Click OK.
10. In the Local Area Connection Properties 3 dialog box, click OK.
11. Close Network Connections.
12. At the command prompt, type netsh interface ipv4 show config, and then press Enter. The current IPv4 configuration is displayed.
Test connectivity 1. At the command prompt, type ping nyc-dc1, and then press Enter.
2. At the command prompt, type netstat -n, and then press Enter. Observe and describe the active connections to 10.10.0.10. Most connections to services are transient. If no connections appear, then create a connection. To create a connection, click Start, and in the Search box, type \\NYC-DC1, and press Enter.
3. At the command prompt, type netstat, and then press Enter. Identify the services that NYC-CL1 had connections to on NYC-DC1.
4. On the Taskbar, click Internet Explorer.
5. In the Address bar, type nyc-dc1, and then press Enter.
6. Switch back to the command prompt.
7. At the command prompt, type netstat –n, and then press Enter. Identify the additional open connections. You might need to retry steps 5-7 a few times to get a display of the TCP port 80 connection.

44 Troubleshooting and Supporting Windows® 7 in the Enterprise
Verify firewall configuration 1. Click Start, and in the Search box, type Windows Firewall with Advanced Security, and then press
Enter.
2. In Windows Firewall with Advanced Security, expand Monitoring, and then click Firewall. These are the active firewall rules.
3. Switch to the command prompt.
4. At the command prompt, type netsh advfirewall firewall show rule name=all dir=in, and then press Enter. This displays all inbound rules.
Note Leave all virtual machines in their current state for the subsequent demonstration.
Demonstration: How to Troubleshoot Name Resolution
Demonstration steps
Note You require the 6293A-NYC-DC1 and 6293A-NYC-CL1 virtual machines to complete this demonstration. Both 6293A-NYC-DC1 and 6293A-NYC-CL1 should be running.
Clear the name cache 1. On NYC-CL1, switch to the command prompt.
2. At the command prompt, type ipconfig /displaydns, and then press Enter.
3. At the command prompt, type ipconfig /flushdns, and then press Enter.
Test name resolution to NYC-DC1 1. At the command prompt, type ping nyc-dc1, and then press Enter.
2. At the command prompt, type ipconfig /displaydns, and then press Enter.
Create record in hosts file 1. At the command prompt, type notepad C:\windows\system32\drivers\etc\hosts, and then press
Enter.
2. Scroll to the end of the file and type 10.10.0.10 intranet, and then press Enter.
3. Click File, and then click Save. Close Notepad.
Test new record 1. At the command prompt, type ping intranet, and then press Enter.
2. At the command prompt, type ipconfig /displaydns, and then press Enter. You can see the intranet record in the cache.
Troubleshooting and Supporting Windows® 7 in the Enterprise 45
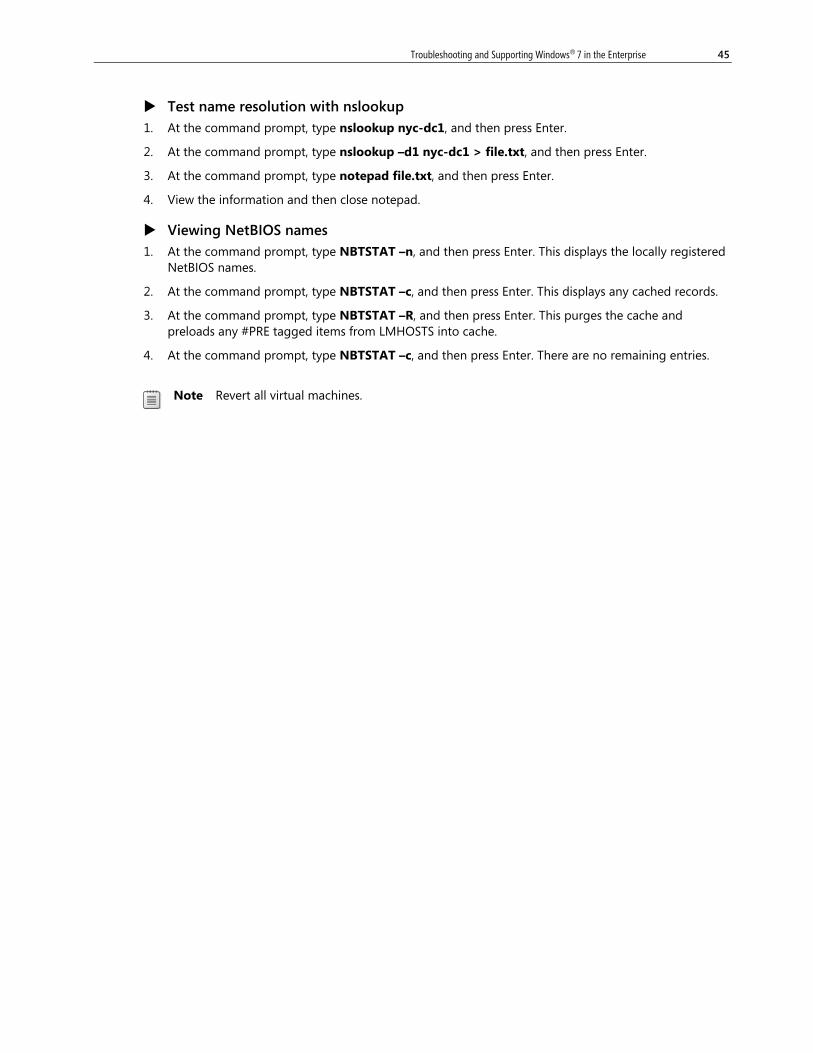
Test name resolution with nslookup 1. At the command prompt, type nslookup nyc-dc1, and then press Enter.
2. At the command prompt, type nslookup –d1 nyc-dc1 > file.txt, and then press Enter.
3. At the command prompt, type notepad file.txt, and then press Enter.
4. View the information and then close notepad.
Viewing NetBIOS names 1. At the command prompt, type NBTSTAT –n, and then press Enter. This displays the locally registered
NetBIOS names.
2. At the command prompt, type NBTSTAT –c, and then press Enter. This displays any cached records.
3. At the command prompt, type NBTSTAT –R, and then press Enter. This purges the cache and preloads any #PRE tagged items from LMHOSTS into cache.
4. At the command prompt, type NBTSTAT –c, and then press Enter. There are no remaining entries.
Note Revert all virtual machines.

46 Troubleshooting and Supporting Windows® 7 in the Enterprise
Additional Reading
Troubleshooting IPv4 Connectivity Download the PortQry tool from the Microsoft Download Center website at http://go.microsoft.com/fwlink/?LinkID=154516.
Troubleshooting and Supporting Windows® 7 in the Enterprise 47
Module Reviews and Takeaways
Review questions Question: You must reconfigure a client computer’s IPv4 configuration, but you do not have time to visit the computer. What tool could you use, from the command line, to reconfigure the client computer?
Answer: Use the netsh.exe command:
netsh interface ipv4 add dnsserver name="Local Area Connection 2" address=10.10.14.1 index=2
netsh interface ipv4 set address name="Local Area Connection 2" source=static address=10.10.14.1 mask=255.255.255.0 gateway=10.10.14.1.
Note You will need to use winrs.exe to execute this command: winrs -r:server_name command.
Question: To run the command-line tools, what would you need to do at the remote computer?
Answer: Enable Remote Management: run winrm quickconfig
Question: A client computer has obtained an IP address of 169.254.1.37. What would you do?
Answer: Check that the DHCP server is online, that it has sufficient scope addresses available, and that it is accessible from the problematic computer’s subnet.
48 Troubleshooting and Supporting Windows® 7 in the Enterprise
Lab Review Questions and Answers Question: In the lab, your user complained of being unable to log on. What solutions did you attempt?
Answer: Answers will vary, but may include checking that the domain controller was operational.
Question: What solution was successful?
Answer: Reconfiguring the IPv4 settings for the client computer, ideally by enabling the DHCP service on DC1, and disabling it on SVR1.
Question: In the lab, your user complained of being unable to connect to the Intranet. What solutions did you attempt?
Answer: Answers will vary, but might include trying the connection from another computer (CL2).
Question: What solution was successful?
Answer: Updating the erroneous record in DNS.

Troubleshooting and Supporting Windows® 7 in the Enterprise 49
Module 6 Troubleshooting Remote Connectivity Issues
Contents: Lesson 1: Troubleshooting VPN Connectivity Issues 50
Lesson 3: Troubleshooting User Issues by Using Remote Assistance 54
Lesson 4: Troubleshooting NAP Issues 57
Lesson 5: Troubleshooting DirectAccess Issues 60
Module Reviews and Takeaways 62
Lab Review Questions and Answers 63

50 Troubleshooting and Supporting Windows® 7 in the Enterprise
Lesson 1
Troubleshooting VPN Connectivity Issues
Contents: Detailed Demonstration Steps 51

Troubleshooting and Supporting Windows® 7 in the Enterprise 51
Detailed Demonstration Steps
Demonstration: How to Create a VPN Connection
Setup For this demonstration, you will use the available virtual machine environment. Before you begin the demonstration, you must complete the following steps:
1. On the host computer, click Start, point to Administrative Tools, and then click Hyper-V Manager. In Hyper-V™ Manager, click 6293A-NYC-DC1, and in the Actions pane, click Start.
3. In the Actions pane, click Connect. Wait until the virtual machine starts.
4. Log on using the following credentials:
• User name: Administrator
• Password: Pa$$w0rd
• Domain: Contoso
5. Repeat steps two through four for 6293A-NYC-SVR1 and 6293A-NYC-CL1.
Demonstration Steps
Configure dial-in settings for users 1. Switch to the NYC-DC1 virtual machine.
2. Click Start, point to Administrative Tools, and then click Active Directory Users and Computers.
3. In the navigation pane, expand Contoso.com, and then click Marketing.
4. In the results pane, double-click Adam Carter.
5. In the Adam Carter Properties dialog box, click the Dial-in tab.
6. Notice that the Network Access Permission defaults to Control access through NPS Network Policy. Click OK.
7. Double-click the Marketing security group, and then click the Members tab. Close the Marketing Properties dialog box.
8. Close Active Directory Users and Computers.
Configure routing and remote access as a VPN server
1. Switch to NYC-SVR1.
2. Click Start, point to Administrative Tools, and then click Server Manager. The Server Manager opens.
3. In the Server Manager (NYC-SVR1) list pane, right-click Roles, and then click Add Roles from the context menu. The Add Roles Wizard appears. Click Next.
4. On the Select Server Roles page, select Network Policy and Access Services, and then click Next.
5. On the Introduction to Network Policy and Access Services page, click Next.
6. On the Select Role Services page, select the Network Policy Server and Routing and Remote Access Services check boxes, and then click Next.
7. On the Confirm Installation Selections page, click Install.

52 Troubleshooting and Supporting Windows® 7 in the Enterprise
8. On the Installation Results page, verify Installation succeeded appears in the details pane, and then click Close.
9. Close the Server Manager. The Network Policy and Routing and Remote Access Services roles are installed on 6293A-NYC-SVR1.
10. Click Start, and then click Administrative Tools.
11. From the Administrative Tools menu, click Routing and Remote Access. The Routing and Remote Access administrative tool appears.
12. In the list pane, select and right-click NYC-SVR1 (Local), and then click Configure and Enable Routing and Remote Access.
13. Click Next on the wizard’s Welcome page.
14. On the Configuration page, click Custom configuration, and then click Next.
15. On the Custom Configuration page, select the VPN access check box, and then click Next.
16. In the Routing and Remote Access Server Setup Wizard, click Finish.
17. In the Routing and Remote Access dialog box, click OK.
18. In the Start the service dialog box, click Start service.
19. In Routing and Remote Access, in the navigation pane, right-click NYC-SVR1 (local), click Properties, and then click the IPv4 tab.
20. Click Static address pool, and then click Add.
21. In the New IPv4 Address Range dialog box, in the Start IP address box, type 10.10.0.70. In the Number of addresses box, type 25, and then click OK.
22. Click OK, and then click Start, point to Administrative Tools, and then click Network Policy Server. The Network Policy Server administrative tool appears.
23. In the list pane, expand Policies, and then click Network Policies.
24. Right-click the Connections to Microsoft Routing and Remote Access server policy, and then click Disable.
25. Repeat for any remaining policies.
Configure a VPN client
1. Switch to the NYC-CL1 computer, log off, and then log on using the following credentials:
• User name: Adam
• Password: Pa$$w0rd
• Domain: Contoso
2. Click Start, and then click Control Panel.
3. In the Control Panel, click View network status and tasks.
4. In the Network and Sharing Center window, under Change your networking settings, click Set up a new connection or network.
5. In the Set Up a Connection or Network dialog box, click Connect to a workplace, and then click Next.

Troubleshooting and Supporting Windows® 7 in the Enterprise 53
6. On the Do you want to use a connection that you already have? page, click Next.
7. In the Connect to a Workplace dialog box, click the Use my Internet connection (VPN) option. When prompted, click I’ll set up an Internet connection later.
8. In the Type the Internet address to connect to page, specify an Internet address of 10.10.0.11 and a Destination Name of HQ, and then click Next.
9. On the Type your user name and password page, leave the user name and password blank, and then click Create.
10. Click Close in the Connect to a Workplace dialog box.
11. In the Network and Sharing Center window, click Change adapter settings.
12. On the Network Connections page, right-click HQ, and then click Connect.
13. Use the following information in the Connect HQ text boxes, and then click Connect:
• User name: Adam
• Password: Pa$$w0rd
• Domain: Contoso
14. The VPN does not connect because there is no matching policy. Click Close.
To prepare for the next demonstration
• When you finish the demonstration, leave the virtual machines running.

54 Troubleshooting and Supporting Windows® 7 in the Enterprise
Lesson 3
Troubleshooting User Issues by Using Remote Assistance
Contents: Detailed Demonstration Steps 55

Troubleshooting and Supporting Windows® 7 in the Enterprise 55
Detailed Demonstration Steps
Demonstration: How to Use Remote Assistance (Optional)
Setup For this demonstration, you will use the available virtual machine environment. 6293A-NYC-DC1, 6293A-NYC-SVR1, and 6293A-NYC-CL1 should be running.
Demonstration Steps
Task 1: Create a document
1. Switch to NYC-CL1.
2. Click Start, point to All Programs, click Microsoft Office, and then click Microsoft Office Word 2007.
3. In the User Name dialog box, click OK.
4. In the Document window, type This is my document, and then click the Office button.
5. Click Save, and then click Save again.
Task 2: Request Remote Assistance
1. Click Start, and then in the Search box, type remote assistance.
2. In the Programs list, click Windows Remote Assistance.
3. In the Windows Remote Assistance Wizard, click Invite someone you trust to help you.
4. On the How do you want to invite your trusted helper page, click Save this invitation as a file.
5. On the Save as page, in the File name box, type \\Nyc-dc1\users\Public\Adam’s-Invitation.msrcincident, and then click Save.
6. A dialog box appears which contains a randomly-generated password. Take note of the password.
Task 3: Provide Remote Assistance
1. Switch to NYC-DC1.
2. Open Windows Explorer, navigate to C:\Users\Public, and then double-click Adam’s-Invitation.msrcincident.
3. In the Remote Assistance dialog box, in the Enter password box, type the password that you noted in the previous task, and then click OK.
4. Switch to NYC-CL1.
5. In the Windows Remote Assistance dialog box, click Yes.
6. Switch to NYC-DC1.
7. On the menu, click Request control.
8. Switch to NYC-CL1.
9. In the Windows Remote Assistance dialog box, click Yes.
10. Switch to NYC-DC1.
56 Troubleshooting and Supporting Windows® 7 in the Enterprise
11. In Word, click the Review menu, and then select the text in the document window.
12. In the menu, click New Comment, and then type This is how you place a comment in a document.
13. Click the cursor elsewhere in the document window.
14. In the Windows Remote Assistance – Helping Adam Carter menu, click Chat.
15. In the bottom Chat window, type Does that help?, and then press Enter.
16. Switch to NYC-CL1.
17. Observe the message.
18. Type Yes, thanks, press Enter, and then in the Menu, click Stop sharing.
19. Close all open windows.
20. Discard the file changes, and then log off NYC-CL1.
21. Switch to NYC-DC1.
22. Close all open windows, and then log off NYC-DC1.
When you finish the demonstration session, revert the virtual machines to their initial state by completing the following steps:
23. On the host computer, start Hyper-V Manager.
24. Right-click 6293A-NYC-DC1 in the Virtual Machines list, and then click Revert.
25. In the Revert Virtual Machine dialog box, click Revert.
26. Repeat these steps for both 6293A-NYC-SVR1 and 6293A-NYC-CL1.

Troubleshooting and Supporting Windows® 7 in the Enterprise 57
Lesson 4
Troubleshooting NAP Issues
Contents: Question and Answers 58
Additional Reading 59

58 Troubleshooting and Supporting Windows® 7 in the Enterprise
Questions and Answers
Discussion: How Would You Use NAP? Question: Can you envision using NAP? If so, what NAP enforcement method would be suitable?
Answer: Discuss with the class whether their organizations use a NAP solution or are considering using one. Use this as the opportunity for students to discuss how they might use NAP in their own environments. If necessary, start the ball rolling with comments about your own approach.
Also discuss the enforcement method they are using or considering using, and why. This is an opportunity to ensure the students understand how each enforcement method works, and what they need to implement it.

Troubleshooting and Supporting Windows® 7 in the Enterprise 59
Additional Reading
Best Practices for Troubleshooting NAP You can find out more about the relevant netsh commands on the Microsoft TechNet website at: http://go.microsoft.com/fwlink/?LinkID=128797.

60 Troubleshooting and Supporting Windows® 7 in the Enterprise
Lesson 5
Troubleshooting DirectAccess Issues
Contents: Additional Reading 61

Troubleshooting and Supporting Windows® 7 in the Enterprise 61
Additional Reading
Troubleshooting DirectAccess Client Issues For detailed information about troubleshooting DirectAccess, see the DirectAccess Troubleshooting Guide at http://go.microsoft.com fwlink/?Linkid=165904/ .
62 Troubleshooting and Supporting Windows® 7 in the Enterprise
Module Reviews and Takeaways
Review questions Question: Users are complaining that they are unable to connect to the corporate network using VPNs following recent firewall configuration changes. The team responsible for implementing security policies has determined that only TCP port 443 is allowed through into the internal network. Which tunneling protocol supports this restriction?
Answer: SSTP uses HTTPS over TCP port 443.
Question: A user from accounts has attempted to connect to the corporate network using a VPN, and keeps receiving error 800. To help resolve the issue, what would you attempt?
Answer: Ensure the appropriate ports are open on any firewalls:
• PPTP: For PPTP traffic, configure the network firewall to open TCP port 1723 and to forward IP protocol 47 for GRE traffic to the VPN server.
• L2TP: For L2TP traffic, configure the network firewall to open UDP port 1701 and to allow IPsec ESP formatted packets (IP protocol 50).
• SSTP: For SSTP, enable TCP 443.
Question: What tools could you use to help resolve the preceding problem?
Answer: PortQuery enables you to check whether a port is open. Also, in terms of host-based firewalls, use Windows Firewall with Advanced Security to view the active firewall rules.
Question: You have a VPN server with two configured network policies. The first has a condition that grants access to members of the Contoso group, to which everyone in your organization belongs, but has a constraint of day and time restrictions for office hours only. The second policy had a condition of membership of the Domain Admins group and no constraints. Why are administrators being refused connections out of office hours, and what can you do about it?
Answer: Administrators are also members of the Contoso group, and therefore the first policy condition is met. The second policy is not processed. The solution is either remove the administrators from the Contoso group, or else change the policy order so that the “administrator” policy is first in the list.

Troubleshooting and Supporting Windows® 7 in the Enterprise 63
Lab Review Questions and Answers Question: In the lab, your user complained of being unable to access the intranet. What solutions did you attempt?
Answer: Answers will vary, but may include checking the server-side and client-side VPN settings.
Question: What solution was successful?
Answer: Enabling the client-side NAP components.

64 Troubleshooting and Supporting Windows® 7 in the Enterprise
Module 7 Troubleshooting Logon and Resource Access Issues
Contents: Lesson 1: Troubleshooting User Logon Issues 65
Lesson 2: Troubleshooting User Profile Issues 67
Lesson 3: Troubleshooting File Access Issues 69
Lesson 4: Troubleshooting File Permissions Issues 73
Lesson 5: Troubleshooting Printer Access Issues 75
Module Reviews and Takeaways 79
Lab Review Questions and Answers 80

Troubleshooting and Supporting Windows® 7 in the Enterprise 65
Lesson 1
Troubleshooting User Logon Issues
Contents: Question and Answers 66
66 Troubleshooting and Supporting Windows® 7 in the Enterprise
Question and Answers
Discussion: Causes of Logon Issues Question: What are some logon problems that users may experience?
Answer:
Some of the reasons a user might be unable to log on include:
• Incorrect password. Many users accidentally type in the wrong password or forget their password. It is particularly common for users to forget their password after being forced to change it. In this scenario, the user password may need to be reset.
• Locked account. If a user attempts to log on with an incorrect password too often, then the account is locked for a period of time. When the account is locked, the user is unable to log on even with the correct password. When an account is locked, it can be unlocked by an administrator with appropriate Active Directory permissions, or the user can wait until the account unlocks automatically, typically after 15-30 minutes.
• Expired account. The user accounts for many contract workers are configured to expire on the date when the contract ends. Sometimes contracts are renewed and the expiry date on the account is not updated. After the expiry date, the users cannot log on, so the expiry date of the user account must be changed.
• Deleted account. User accounts accidentally deleted by network administrators must either be recreated or restored from a backup.
• Logging on locally. Changes to the user interface in Windows 7 make it much less likely that a user will attempt to logon locally instead of to the domain, however, it may occur anyway. Ensure that users with domain user accounts are logging on to the domain.
• Corrupted computer account. When a computer account is no longer valid for a domain, then users cannot use that computer account to access domain resources because the computer is not trusted by the domain. To resolve this problem, rejoin the computer to the domain.
• Incorrect Domain Name System (DNS) settings. When a computer is configured to use an incorrect DNS server, the computer is cannot find domain controllers to perform the logon process. To resolve this problem, configure the computer to use an appropriate DNS server.

Troubleshooting and Supporting Windows® 7 in the Enterprise 67
Lesson 2
Troubleshooting User Profile Issues
Contents: Questions and Answers 68

68 Troubleshooting and Supporting Windows® 7 in the Enterprise
Questions and Answers
Discussion: Issues with User Profiles Question: What are some of the issues that can occur that relate to user profiles?
Answer:
• Slow logons. If roaming user profiles are implemented, logons may be significantly slower, because the profile was copied from the network during part of the logon process. This is typically a problem only when users store large files in the profile, such as on the desktop or in a local My Documents. Outlook cached mailboxes are stored in the user profile.
• Corrupted roaming profiles. A corrupted roaming profile results when there are problems saving changes to a roaming profile during logoff. Typically this is caused by an application not closing correctly. When a profile is corrupted, it may not be updated the next time a user logs on, or the user may receive a prompt asking whether the local or the network profile should be used.
• Default profiles do not have corporate standard settings. The first time users log on, their profile is created from the default profile. The default profile on a computer does not contain application settings and customizations, such as a default save location in Word. As a result, the profile for a user must be updated after it is created.
• Machine specific settings do not roam. Whereas a roaming user profile allows user settings to move between computers, the roaming user profile does not contain any computer-specific settings such as applications or hardware drivers. Some user settings, such as shortcuts to applications, may not be valid on all computers to which a user logs on. Invalid shortcuts are still shown, but have an icon indicating that they are invalid. Registry settings for non-existent applications are ignored.

Troubleshooting and Supporting Windows® 7 in the Enterprise 69
Lesson 3
Troubleshooting File Access Issues
Contents: Questions and Answers 70
Detailed Demonstration Steps 71

70 Troubleshooting and Supporting Windows® 7 in the Enterprise
Questions and Answers
Discussion: Issues with File Access Question: What are some of the issues that can occur with file access?
Answer:
• Missing drive mappings. If drive mappings are missing, users cannot access their files. This is typically due to errors in configuring the drive mappings.
• Disconnected network drives. After logging on, drive mappings can appear as disconnected. This is typically due to network connectivity problems.
• Folders not redirected properly. If folder redirection is not configured properly, then users cannot access their files. For example, if My Documents is not redirected to a network location, the default local My Documents folder in the user profile is used. This is typically due to incorrect configuration of folder redirection.
• File synchronization errors with offline files. In some cases an offline copy of file is edited in the same timeframe as the copy on the file share. When this occurs, you must resolve the conflict by selecting which document is authoritative. You may need to manually merge the two documents to retain the most recent changes.
Troubleshooting and Supporting Windows® 7 in the Enterprise 71
Detailed Demonstration Steps
Demonstration: Using Group Policy Preferences for Drive Mappings
Demonstration Steps For this demonstration, you will use the available virtual machine environment. Before you begin the demonstration, you must complete the following steps:
1. On the host computer, click Start, point to Administrative Tools, and then click Hyper-V Manager.
2. In Hyper-V™ Manager, click 6293A-NYC-DC1, and then in the Actions pane, click Start.
3. In the Actions pane, click Connect. Wait until the virtual machine starts.
4. Log on using the following credentials:
• User name: Administrator
• Password: Pa$$w0rd
• Domain: Contoso
Detailed Steps
Task 1: Create a Group Policy preference that maps drive M to \\NYC-DC1\Marketing
1. On NYC-DC1, click Start, point to Administrative Tools, and then click Group Policy Management.
2. In the Group Policy Management window, if necessary, expand Forest: Contoso.com, expand Domains, expand Contoso.com, and then click Contoso.com.
3. Right-click Contoso.com, and then click Create a GPO in this domain, and Link it here.
4. In the New GPO window, in the Name box, type Drive Mappings, and then click OK.
5. In the Group Policy Management window, right-click Drive Mappings, and then click Edit.
6. In the Group Policy Management Editor window, under User Configuration, expand Preferences, expand Windows Settings, and then click Drive Maps.
7. Right-click Drive Maps, point to New, and then click Mapped Drive.
8. In the New Drive Properties window, on the General tab, in the Location box, type \\NYC-DC1\Marketing.
9. In the Drive letter area, click Use, select M, and then click Apply.
Task 2: Target the drive mapping to the Marketing group
1. On NYC-DC1, in the M: Properties window, on the Common tab, select the Item-level targeting check box.
2. Click the Targeting button.
3. In the Targeting Editor window, click New Item, and then click Security Group.
4. In the lower pane, next to the Group box, click the button.

72 Troubleshooting and Supporting Windows® 7 in the Enterprise
5. In the Select Group window, type marketing, and then click OK.
6. In the Targeting Editor, click OK.
7. In the M: Properties window, click OK.
8. Close all open windows.

Troubleshooting and Supporting Windows® 7 in the Enterprise 73
Lesson 4
Troubleshooting File Permissions Issues
Contents: Detailed Demonstration Steps 74

74 Troubleshooting and Supporting Windows® 7 in the Enterprise
Detailed Demonstration Steps
Demonstration: Calculating Effective Permissions
Demonstration Steps
Note You require the 6293A-NYC-DC1 and the 6293A-NYC-CL1 virtual machines to complete this demonstration. Log on to the virtual machines as Contoso\Administrator with the password of Pa$$w0rd.
Calculate effective permissions
1. On NYC-CL1, click Start, and then click Computer.
2. In Windows Explorer, browse to C:\Program Files.
3. Right-click Program Files, and then click Properties.
4. In the Program Files Properties window, on the Security tab, click Advanced.
5. In the Advanced Security Settings for Program Files window, on the Effective Permissions tab, click Select.
6. In the Select User, Computer, Service Account, or Group window, type Adam, and then click OK.
7. Read the effective permission for Adam. Adam has read permissions.
8. In the Advanced Security Settings for Program Files window, on the Effective Permissions tab, click Select.
9. In the Select User, Computer, Service Account, or Group window, type Administrator, and then click OK.
10. Read the effective permission for Administrator. Notice that even Administrator does not have full control permissions.
11. Close all open windows.

Troubleshooting and Supporting Windows® 7 in the Enterprise 75
Lesson 5
Troubleshooting Printer Access Issues
Contents: Questions and Answers 76
Detailed Demonstration Steps 77
76 Troubleshooting and Supporting Windows® 7 in the Enterprise
Questions and Answers
Discussion: Printer Access Issues Question: What are some the issues that can arise that relate to printing?
Answer:
• A network printer is not available to all users on a computer. When a network printer is installed on a Windows 7 computer, the printer is specific to the user profile and is not installed for all users on that computer.
• A user is unable to find a local printer. When users roam to different areas of the organization, it can be difficult for them to determine the name of a local printer and how to install it.
• A printer is not automatically available to users. Users can become frustrated when they are required to install their own printers. This is particularly a problem when older printers are replaced and printers need to be updated for all users.
• The default printer is not appropriate. Roaming users need to use different printers depending on their location. If the default printer is static then the user is forced to select the appropriate printer each time.
• A user cannot install a printer driver. Roaming users often need to install printers in remote locations. However, if fixing the problem involves adding new printer drivers, standard users do not have adequate permissions to do this.
Troubleshooting and Supporting Windows® 7 in the Enterprise 77
Detailed Demonstration Steps
Demonstration: Adding a Printer Driver to a Network Printer
Demonstration Steps
Note You require the 6293A-NYC-DC1 virtual machine to complete this demonstration. Log on to the virtual machine as Contoso\Administrator with the password of Pa$$w0rd.
Task 1: Add the Print and Document Services role
1. On NYC-DC1, click Start, point to Administrative Tools, and then click Server Manager.
2. In Server Manager, in the left pane, click Roles, and then click Add Roles.
3. In the Add Roles Wizard, click Next.
4. On the Select Server Roles page, select the Print and Document Services check box, and then click Next.
5. On the Print and Document Services page, click Next.
6. On the Select Role Services page, click Next to accept the default option of only Print Server.
7. On the Confirm Installation Selections page, click Install.
8. On the Installation Results page, click Close.
9. Close Server Manager.
Task 2: Attempt to resolve the problem
1. Click Start, point to Administrative Tools, and then click Print Management.
2. In Print Management, expand Print Servers, expand NYC-DC1 (local), and then click Printers.
3. Right-click Printers, and then click Add Printer.
4. On the Printer Installation page, click Add a new printer using an existing port, and then click Next.
5. On the Printer Driver page, click Next to accept the default of installing a new driver.
6. On the Printer Installation page, click Next to accept the default printer driver.
7. On the Printer Name and Sharing Settings page, click Next to share the printer.
8. On the Printer Found page, click Next.
9. Click Finish to complete the installation.

78 Troubleshooting and Supporting Windows® 7 in the Enterprise
Task 3: Add a printer driver to a printer
1. On NYC-DC1, in Print Management, if necessary, click Printers. Notice that the new printer is listed.
2. Right-click the new printer, and then click Properties.
3. In the printer properties, on the Sharing tab, click Additional Drivers.
4. Read the information on the screen. Notice that only the 64-bit driver is installed.
5. Select the x86 check box, and then click OK.
6. You are prompted for the location of an x86 driver.
7. Click Cancel, and then close all open windows.
Troubleshooting and Supporting Windows® 7 in the Enterprise 79
Module Reviews and Takeaways
Review questions Question: A user has called the help desk and complained about not being able to access some files. After the call was passed to you, you determined that the user was not added to the correct group. After adding the user to the correct group, the user is still unable to access the files. What other step is required?
Answer: After adding a user to a group, the user must log off and log on to update the security token that contains group membership information.
Question: You are distributing new laptop computers to executives in your organization. Is any additional configuration required to allow them to log on by using their domain user account and password when they are out of the office?
Answer: No. Cached credentials are enabled by default. The last 10 logons are cached.
Question: Your organization has recently introduced roaming user profiles to support users who move between computers that are in cubicles. Some users report very slow logon and logoff times. Where would you start the troubleshooting process?
Answer: Slow logon and logoff with roaming user profiles often is the result of large files in the profile. You should investigate the size of the profile and determine if there are large files that can be removed.
Question: You are distributing new laptop computers to executives in your organization. You have redirected the My Documents folder to each user’s home folder to ensure that the information is backed up. What feature do you need to implement to allow the executives to access these files when they are travelling without access to the network?
Answer: You need to enable offline files for the share, and verify that is enabled in Windows 7. You also need to provide instructions for executives on how to use Sync Center.
Question: A colleague has configured a new network printer with an IP address. He wants users to print directly to the printer over the network rather than print by using a print server. Users will add this printer manually, only if it is required. Why is the configuration a concern?
Answer: When a printer is accessed directly over the network by its IP address, Windows 7 treats it like a local printer. If a new printer driver needs to be installed, a standard user account does not contain the necessary permissions to add the driver. A network printer shared from a print server installs the printer driver without requiring user input.
Question: One department in your organization is using a new application that creates two folders in the root of the drive C. One folder is for the program executables, the other folder is for program data. What files permissions do you need to configure for these folders?
Answer: Users need Read and Execute permission for the folder with program executables. Users need Modify permission for the folder with program data. You do not need to configure any share permissions.
80 Troubleshooting and Supporting Windows® 7 in the Enterprise
Lab Review Questions and Answers Question: Is the solution to Exercise 1 a technical solution?
Answer: No. The solution is to modify user behavior to ensure that files are updated on the network. This includes training the user to use Sync Center to resolve conflicts.
Question: Do you have the permissions to implement the solution for Exercise 2 in your organization?
Answer: Answers may vary, depending on the job description of the student and the organization’s size. Students in smaller organizations likely are able to perform these tasks while students in larger organization are not, because their job roles are more specialized.
Question: Should users store files in My Documents?
Answer: Generally speaking, files should only be stored in My Documents if the folder has been redirected to a file share. You can use offline files to provide similar functionality to storing My Documents locally for roaming users.
Question: In Exercise 4, what process did you follow to find the required permission change?
Answer: Answers may vary, but should include viewing effective NTFS permissions and viewing the share per issions. m
Troubleshooting and Supporting Windows® 7 in the Enterprise 81
Module 8 Troubleshooting Security Issues
Contents: Lesson 2: Recovering BitLocker-Protected Drives 82
Module Reviews and Takeaways 85
Lab Review Questions and Answers 86

82 Troubleshooting and Supporting Windows® 7 in the Enterprise
Lesson 2
Recovering BitLocker-Protected Drives
Contents: Detailed Demonstration Steps 83

Troubleshooting and Supporting Windows® 7 in the Enterprise 83
Detailed Demonstration Steps
Demonstration: Encrypting a Partition by Using BitLocker
Demonstration Steps
Note You require the 6293A-NYC-DC1 and the 6293A-NYC-CL1 virtual machines to complete this demonstration. Log on to the virtual machines as Contoso\Administrator with the password of Pa$$w0rd.
Important After you complete this demonstration, revert the virtual machine. The process of encrypting the C: drive results in the Virtual Hard Disk (VHD) file for this virtual machine expanding to its full size of 64GB.
Verify that the BitLocker floppy disk is attached to NYC-CL1
1. On the virtual host, if necessary, open Hyper-V Manager.
2. Right-click 6293A-NYC-CL1, and then click Settings.
3. Click the Diskette Drive, click the option next to Virtual floppy disk (.vfd) file, click Browse, select C:\Programs Files\Microsoft Learning\6293\Drives\6293A-NYC-CL1\Virtual Hard Disks \BitLocker.vfd, and then click Open. This is the virtual floppy disk that is used as an alternative to a TPM.
4. Click OK to close the Settings dialog box.
Configure BitLocker to not require a TPM
1. On NYC-CL1, click Start, type gpedit.msc, and then press Enter.
2. In the Local Group Policy Editor window, browse to Computer Configuration\Administrative Templates\Windows Components\BitLocker Drive Encryption\Operating System Drives.
3. Double-click Require additional authentication at startup.
4. In the Require additional authentication at the startup window, click Enabled.
5. Verify that the Allow BitLocker without a compatible TPM check box is selected, and then click OK.
6. Close the Local Group Policy Editor window.
Enable BitLocker when a TPM is unavailable
1. On NYC-CL1, click Start, and then click Control Panel.
2. In Control Panel, click System and Security, and then click BitLocker Drive Encryption.
3. In the BitLocker Drive Encryption window, beside C:, click Turn On BitLocker. This is the window you would typically use to turn on BitLocker.
Note In the Hyper-V™ environment used for the labs, there is no way to use a virtual USB flash drive. Therefore BitLocker must be enabled at a command prompt.
4. Close the BitLocker Drive Encryption window.

84 Troubleshooting and Supporting Windows® 7 in the Enterprise
5. Click Start, point to All Programs, click Accessories, and then click Command Prompt.
6. At the command prompt, type the following command and the press Enter. You are required to do this at a command line because the graphical interface for BitLocker does not allow you to select a floppy disk for storing the key:
manage-bde.exe -on C: -rp -sk A:
7. Read the content in the command prompt window. The recovery key is listed here.
8. Restart NYC-CL1 to complete the encryption process for C:.
Save the recovery password to file
1. On NYC-CL1, logon as Contoso\Administrator with a password of Pa$$w0rd.
2. Click Start, and then click Computer. Notice that the icon for the C: drive indicates that it is encrypted.
3. Right-click Local Disk (C:), and then click Manage BitLocker.
4. Click Save or print recovery key again.
5. Click Save the recovery key to a file, Browse to A:\, and then click Save.
6. Close the BitLocker Drive Encryption (C:) window.
7. In Windows Explorer, browse to A:\, and then double-click the BitLocker Recovery Key text file.
8. Review the 48-digit recovery key.
9. Close all open windows.
Troubleshooting and Supporting Windows® 7 in the Enterprise 85
Module Reviews and Takeaways
Review questions Question: An employee that the organization recently dismissed had used EFS to encrypt files on a domain-joined portable computer. The user account is deleted from the domain, and no backup of the user account exists. No specific configuration of EFS has been performed. Can you recover the EFS encrypted files?
Answer: If you can locate the private key for the Administrator that was generated automatically when the first domain controller was installed then you can recover the EFS-encrypted files. The domain Administrator account is automatically configured as a recovery agent for EFS.
Question: You just received a new batch of 10 laptop computers that do not have a TPM. Is it still possible to protect the hard drive contents by using BitLocker?
Answer: Yes, but the VMK must be stored on a USB flash drive.
Question: One of the users in your organization wants to use BitLocker To Go when transporting files between work and home on a USB flash drive. The user has Windows XP on his computer at home. Is it practical to use BitLocker To Go when one of the computers is running Windows XP?
Answer: No. A Windows XP computer can use the BitLocker To Go Reader to access the contents of the USB flash drive, but will not be able to save changes back to the drive. This makes it impractical for moving files back and forth between two computers where work needs to be done.
Question: A user in purchasing accesses various websites to order supplies. She is concerned that her actions on these sites may be insecure. What two ways can she identify a website as using Secure Sockets Layout (SSL) to encrypt data communications?
Answer: Internet Explorer shows a lock icon when a site is accessed by using SSL. Additionally, if the URL for the website starts with https:// then it is using SSL.

86 Troubleshooting and Supporting Windows® 7 in the Enterprise
Lab Review Questions and Answers Question: Is the solution to Exercise 1 a technical solution?
Answer: No. The solution is to modify user behavior to ensure that files are updated on the network. This includes training the user to use Sync Center to resolve conflicts.
Question: Do you have the permissions to implement the solution for Exercise 2 in your organization?
Answer: Answers may vary, depending on the job description of the student and the organization’s size. Students in smaller organizations likely are able to perform these tasks while students in larger organization are not, because their job roles are more specialized.
Question: Should users store files in My Documents?
Answer: Generally speaking, files should only be stored in My Documents if the folder has been redirected to a file share. You can use offline files to provide similar functionality to storing My Documents locally for roaming users.
Question: In Exercise 4, what process did you follow to find the required permission change?
Answer: Answers may vary, but should include viewing effective NTFS permissions and viewing the share per issions. m
Troubleshooting and Supporting Windows® 7 in the Enterprise 87
Module 9 Troubleshooting Operating System and Application Issues
Contents: Lesson 1: Troubleshooting Application Installation Issues 88
Lesson 3: Applying Application and Windows Updates 91
Module Reviews and Takeaways 93
Lab Review Questions and Answers 94

88 Troubleshooting and Supporting Windows® 7 in the Enterprise
Lesson 1
Troubleshooting Application Installation Issues
Contents: Question and Answers 89
Additional Reading 90

Troubleshooting and Supporting Windows® 7 in the Enterprise 89
Question and Answers
Discussion: Application Deployment Issues Question: What are some reasons that application deployment or installation may fail?
Answer:
• Insufficient permissions.
Standard users are unable to perform manual installations of applications because they do not have the necessary permissions to modify system files. Automated installations avoid this problem by installing applications on the local system as a user with administrative permissions.
• Missing dependencies.
Many applications require additional software, such as operating system features, to function. For example, many applications need to run on a specific version of the .NET Framework.
• Application is not compliant with User Account Control (UAC).
UAC in Windows 7 runs all processes with standard user permissions, even for administrative users. Applications must request elevation to administrative permissions. Older applications designed for Windows XP were developed before UAC and do not request the elevated permissions required for installation. In some cases, UAC recognizes the problem and automatically elevates permissions, but not in all cases.
• Installation is prevented by AppLocker rules.
AppLocker is a new feature to help you control software installation and execution in Windows 7. You can configure AppLocker to allow the installation of only specific applications.

90 Troubleshooting and Supporting Windows® 7 in the Enterprise
Additional Reading
Troubleshooting Windows Installer Issues You can view a list of Windows Installer error codes on the MSDN website at http://go.microsoft.com/fwlink/?LinkId=214074.

Troubleshooting and Supporting Windows® 7 in the Enterprise 91
Lesson 3
Applying Application and Windows Updates
Contents: Questions and Answers 92
92 Troubleshooting and Supporting Windows® 7 in the Enterprise
Questions and Answers
Discussion: Why Are Application Updates Important? Question: Why are application updates important?
Answer: Application updates can provide:
• Security fixes. Software without updates may be vulnerable to exploitation from malware.
• Bug fixes. Updates often fix software flaws that impact functionality.
• Enhanced features. Updates may provide enhanced features to expand the capabilities of an application.
• Enhanced performance. Updates may enhance the performance of an application so it performs tasks more quickly.
Troubleshooting and Supporting Windows® 7 in the Enterprise 93
Module Reviews and Takeaways
Review questions Question: Your manager has provided you with a new application that you need to install for users in the Production department. To ensure that you can install it on all the computers, you need a list of installation prerequisites. Where can you find the prerequisites?
Answer: Application documentation from the vendor should include the necessary information about prerequisites. If you cannot obtain application documentation from the vendor website, then you may need to contact the vendor directly.
Question: A colleague is concerned that because standard users cannot install applications, you then cannot automate installation. Why is this not a concern?
Answer: Applications are installed by the Windows Installer service which has the necessary permissions to install applications for automated installation, even for standard users.
Question: A new application has been deployed for Marketing department users. For several users, the application is not starting, and then it closes silently. What sources will you use to determine the problem’s source?
Answer: The first place to look is the event logs or application specific logs because they may have an error message that indicates the problem that is occurring. You may also search the vendor website or the Internet in general to see if others are experiencing the same issue. You can also review configuration differences between the computers on which the application is working, and computers on which the application is not working.
Question: Before deploying Windows 7 computers to the Marketing department, you find during testing that an older application experiences errors. What can you use to help identify the problem’s source and mitigate it?
Answer: The Application Compatibility Toolkit is used to identify application errors and mitigate then when implementing a new operating system.
Question: Your organization implements many non-Microsoft applications. A colleague has proposed using WSUS to deploy application and operating-system updates. Are there any potential issues that may arise if you use WSUS?
Answer: Yes. WSUS is an excellent to for deploying updates for Microsoft applications such as Microsoft Office and Windows updates. However, WSUS does not deploy updates for all Microsoft applications, nor does it deploy updates for non-Microsoft applications. Microsoft System Center Configuration Manager 2007 is a better choice when updates for non-Microsoft applications need to be deployed.

94 Troubleshooting and Supporting Windows® 7 in the Enterprise
Lab Review Questions and Answers Question: If you are using WSUS to distribute updates to clients, how often should you test and approve updates?
Answer: Updates should be tested as quickly as possible after they are released from Microsoft. Typically, Microsoft releases updates once per month.
Question: Does your organization have a system so that it can recognize when one troubleshooting action creates another problem?
Answer: Answers may vary, but most organizations should have some sort of ticket-tracking system to allow support staff to identify recent changes that may be causing a current problem.

Troubleshooting and Supporting Windows® 7 in the Enterprise 95
Resources
Contents: Microsoft Learning 96
Technet and MSDN Content 97
Communities 97

96 Troubleshooting and Supporting Windows® 7 in the Enterprise
Microsoft Learning This section describes various Microsoft Learning programs and offerings.
• Microsoft Skills Assessments
Describes the skills assessment options available through Microsoft
• Microsoft Learning
Describes the training options available through Microsoft — face-to-face or self-paced
• Microsoft Certification Program
Details how to become a Microsoft Certified Professional, Microsoft Certified Database Administrators, and more
• Microsoft Learning Support
• To provide comments or feedback about the course, send e-mail to mailto:[email protected]
• To ask about the Microsoft Certification Program (MCP), send e-mail to mailto:mcphelp@ icrosoft.comm

Troubleshooting and Supporting Windows® 7 in the Enterprise 97
Technet and MSDN Content This section includes content from TechNet and MSDN for this course.
Module 1
• Microsoft Operations Framework 4.0
Module 2
• Boot Configuration in Windows Vista
Module 3 • Troubleshooting Group Policy Using Event Logs
Module 4
• Solving Performance Problems
Module 6
• Netsh Commands for Network Access Protection (NAP) Client
• DirectAccess Troubleshooting Guide
Module 9
• Error Codes
Communities This section includes content from Communities for this course.
Module 4
• The DevCon Command-Line Utility Functions As An Alternative to Device Manager
• Windows 7 Compatibility Center
• Windows 7 / Windows Server 2008 R2: Upgrade Paths, Registry Enhancements, Crash Dumps and Page File Sizing
Module 5
• PortQry Command Line Port Scanner Version 2.0

98 Troubleshooting and Supporting Windows® 7 in the Enterprise
Send Us Your Feedback You can search the Microsoft Knowledge Base for known issues at Microsoft Help and Support before submitting feedback. Search using either the course number and revision, or the course title.
Note Not all training products will have a Knowledge Base article – if that is the case, please ask your instructor whether or not there are existing error log entries.
Courseware Feedback Send all courseware feedback to [email protected]. We truly appreciate your time and effort. We review every e-mail received and forward the information on to the appropriate team. Unfortunately, because of volume, we are unable to provide a response but we may use your feedback to improve your future experience with Microsoft Learning products.
Reporting Errors When providing feedback, include the training product name and number in the subject line of your e- mail. When you provide comments or report bugs, please include the following:
1. Document or CD part number
2. Page number or location
3. Complete description of the error or suggested change
Please provide any details that are necessary to help us verify the issue.
Important All errors and suggestions are evaluated, but only those that are validated are added to the product Knowledge Base article.


