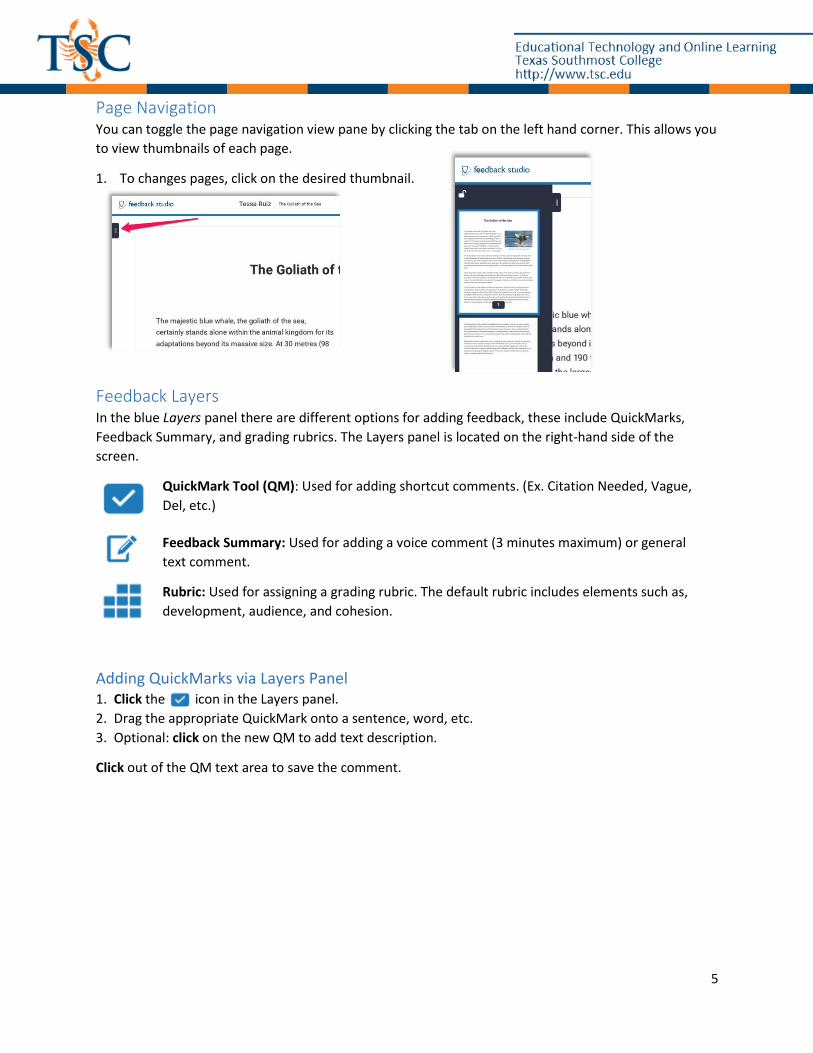
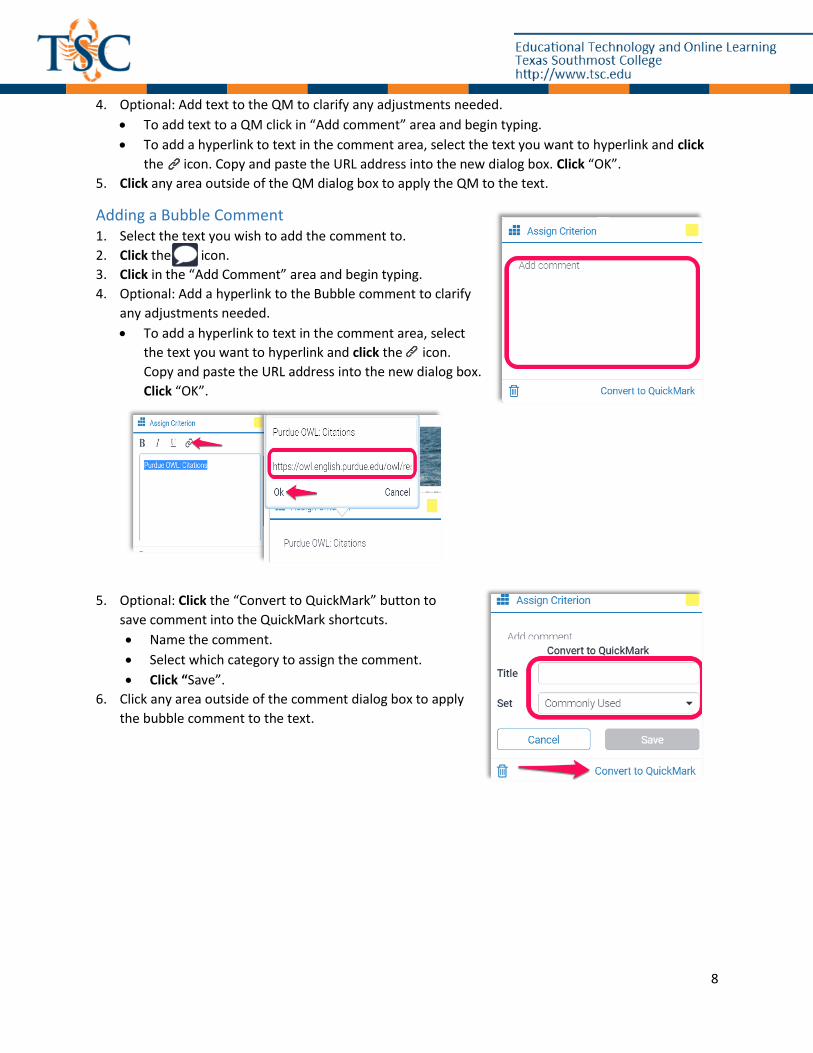
1 Turnitin Feedback Studio Guide Contents Enable Turnitin Feedback Studio .................................................................................................................. 2 Elements of the Assignment Inbox ............................................................................................................... 3 Feedback Studio Interface ............................................................................................................................ 4 Page Navigation ............................................................................................................................................ 5 Feedback Layers ............................................................................................................................................ 5 Adding QuickMarks via Layers Panel ........................................................................................................ 5 Adding Feedback: Voice Comment ........................................................................................................... 6 Adding Feedback: Text Comment ............................................................................................................. 6 Deleting a Comment Made in Feedback Summary .................................................................................. 6 Commenting Tools ........................................................................................................................................ 7 Adding a QuickMark Comment ................................................................................................................. 7 Adding a Bubble Comment ....................................................................................................................... 8 Deleting Comments .................................................................................................................................. 9 Similarity Layers ............................................................................................................................................ 9 Match Percentage ................................................................................................................................... 10 All Sources ............................................................................................................................................... 10 Filter and Settings ................................................................................................................................... 10 Excluded Sources .................................................................................................................................... 11 Rubrics in Feedback Studio ......................................................................................................................... 11 Peer Review ............................................................................................................................................ 11 Gradebook Integration ............................................................................................................................... 12
Transcript
1
Turnitin Feedback Studio Guide
Contents Enable Turnitin Feedback Studio .................................................................................................................. 2
Elements of the Assignment Inbox ............................................................................................................... 3
Feedback Studio Interface ............................................................................................................................ 4
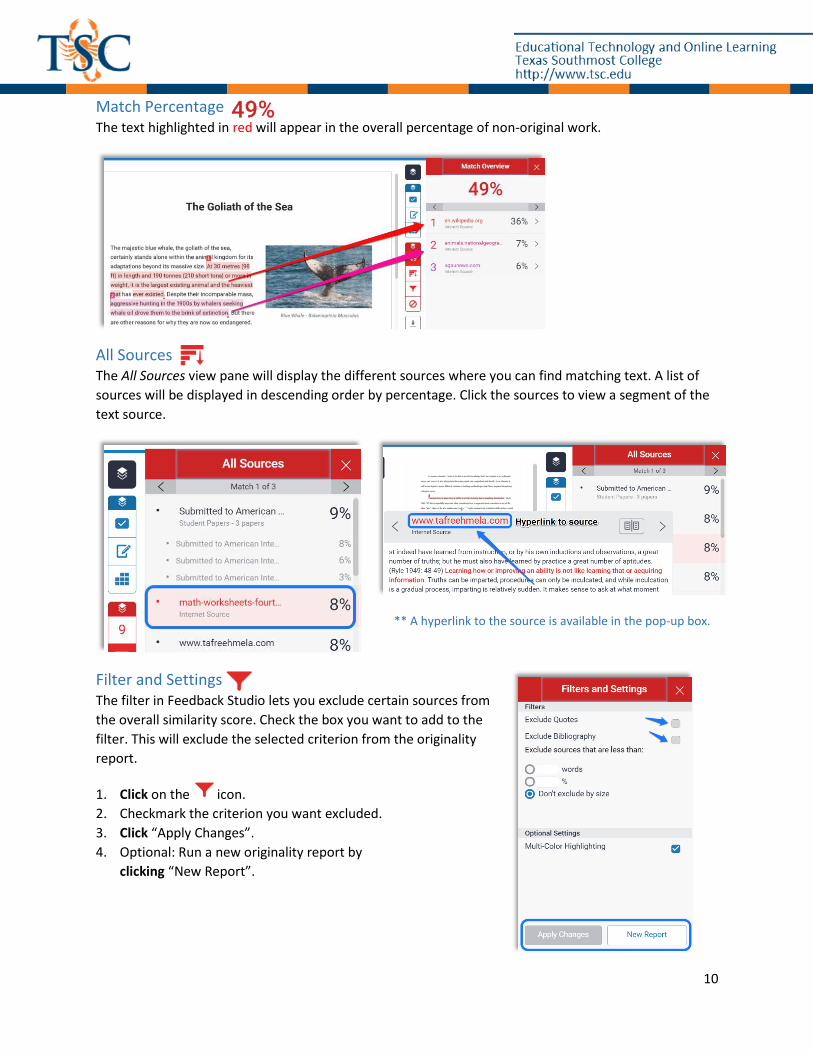
Match Percentage ................................................................................................................................... 10
All Sources ............................................................................................................................................... 10
Filter and Settings ................................................................................................................................... 10
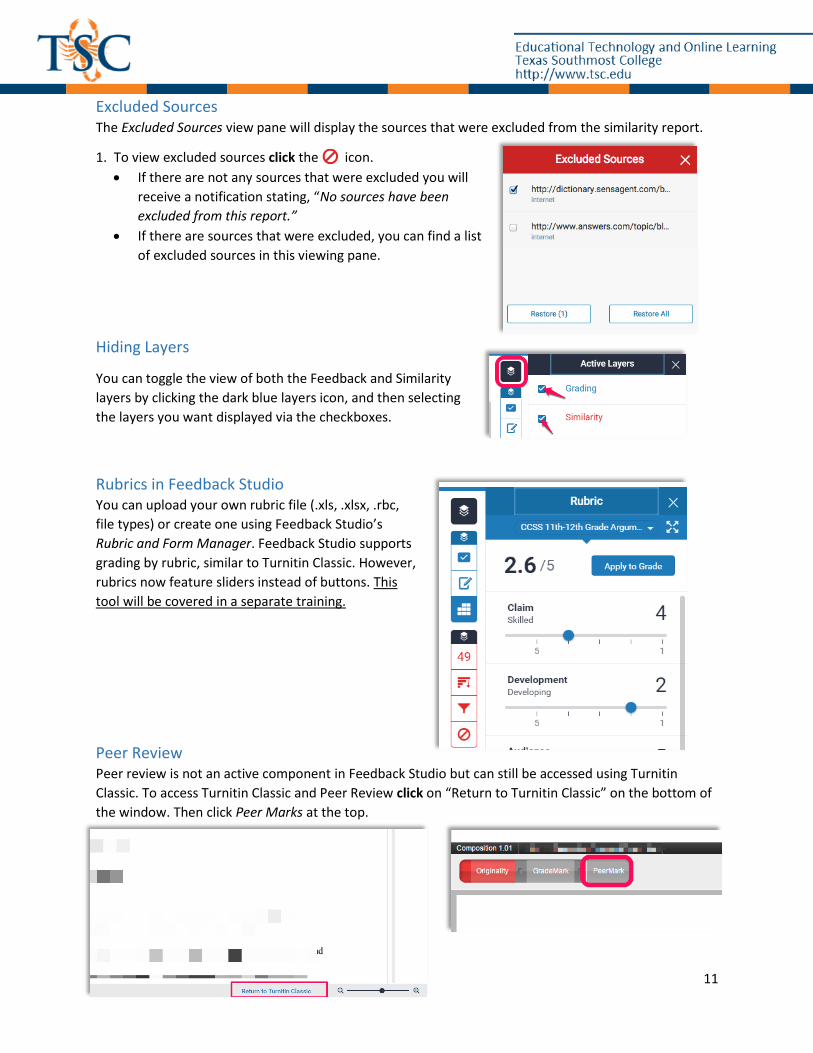
Rubrics in Feedback Studio ......................................................................................................................... 11