64
117 UNIT III: Standards, Guidelines, and BMPs DAVID STONNER

117
UNIT III: Standards,
Guidelines, and BMPs
DAVI
D ST
ONNE
R

118

119
CHAPTER 13Tending Treatments
MIC
HAEL
BILL
Topics Covered➤■ Types of Tending Treatments➤■ BMPs for Release Treatments➤■ Release and Thinning Methods➤■ BMPs to Protect Soil Productivity and Water Quality➤■ BMPs to Protect Visual Quality➤■ BMPs to Protect Cultural Resources➤■ BMPs to Slow the Spread of Invasive Species

120
Types of Tending TreatmentsTending treatments deliberately remove some trees in order to benefit remaining trees and, by doing so, affect the character of the stand. These treatments may be done in conjunction with the regeneration harvest, as in the uneven-aged system, or at various times between regeneration events, as in the even-aged system. The term “intermediate treatment” is often used to describe tending of even-aged stands, since these treatments are applied between planned regeneration events or at an intermediate time during the rotation. “Timber stand improvement” (TSI) or “forest stand improvement” (FSI) are the terms commonly used to describe tending treatments in Missouri, particularly as a prescription for younger stands where trees are often too small to be sold for wood products. Traditionally, tending is not implemented to regenerate a new age class or cohort.
There are many silvicultural practices that are classified as tending treatments. Generally, they can be lumped into three categories: release treatments, thinning, and pruning.
Release treatments are applied to young seedlings in order to reduce competing vegetation (weeding), to free saplings from overtopping by undesirable competing trees of the same age (cleaning), or to release younger trees from overtopping by older trees (liberation).
BMPs for Release TreatmentsWithout release treatments, suppressed desirable trees may suffer long-term reductions in growth or even succumb to premature mortality. These practices differ from thinning in that they are traditionally implemented at an early stage of stand development before site resources are fully utilized, while thinning is typically applied to redistribute resources after full site occupancy. Consider the following guidance when applying release treatments.
➤➤ To lower the cost of cleaning, release no more trees than are needed to reach a merchantable size (example: 150 trees per acre spaced approximately 17 feet apart).
➤➤ When deciding which trees to remove during cleaning, consider both overtopping trees and ones likely to become overtopping before the next scheduled entry.
➤➤ If timber quality is an objective, avoid removing too many neighbors during cleaning in order to retain future trainers.
➤➤ Deaden (girdle or herbicide) trees during liberation to minimize damage to desirable saplings.
Thinning is the practice of removing some trees to improve individual-tree growth and vigor, stand quality, and species composition. Often it’s the weaker, less competitive trees that are marked for thinning, since they are more likely to succumb to mortality. By doing so, the landowner can realize economic return from trees that will likely die before final harvest.
There are a number of principles that apply to thinning decisions. If the size and form of the trees is not important, a large number of small trees will produce the most wood per acre. However, this may not yield the highest merchantable volume, since individual trees will be relatively small. If size and form of the trees is important, the trees in the stand should be spaced out to allow increased size per individual. This will not produce the maximum wood per acre but will likely produce the most merchantable wood per acre. This, in turn, may yield higher-value forest products and, consequently, higher future returns to the landowner. For a tree to utilize the space made available by thinning, the tree must be capable of fairly rapid growth following release. Generally speaking, old or unhealthy trees do not respond as well as young or healthy trees to the new space created by thinning. There is a natural tendency for trees of the same age class to self-organize by size with the largest trees with the largest crowns growing the fastest. These trees are most capable of utilizing new space created by thinning. Trees that have had less space will have successively smaller crowns and, consequently, lower growth vigor. Therefore, smaller trees in the stand have less ability to capture the space made available in a thinning.
The process of thinning often involves removing smaller trees that are unlikely to respond vigorously to new space, while leaving larger trees that have the ability to utilize the new space quickly. This approach is called thinning from below, since the smaller trees targeted for thinning are also the shorter, overtopped trees. Thinning from below does not produce the most income in the short term but leaves the best possible forest for the future.
Thinning from above (taking the largest trees and leaving the smaller) is not usually recommended as it degrades the future potential of the stand.
A third alternative is called a proportional thinning, in which trees from all size classes are removed, and is a compromise between the two approaches described above.
A method of thinning that is not commonly used in Missouri is geometric thinning. In geometric thinning, trees are cut or retained on the basis of a predetermined spacing or density without consideration of their size or competitive position in the canopy. This method, often referred to as row thinning, is applied mainly in plantations where entire rows are typically removed to achieve density management goals.

121
Thinning is the practice of removing some trees to improve individual-tree growth and vigor, stand quality, and species composition. Often it’s the weaker, less competitive trees that are marked for thinning, since they are more likely to succumb to mortality. By doing so, the landowner can realize economic return from trees that will likely die before final harvest.
There are a number of principles that apply to thinning decisions. If the size and form of the trees is not important, a large number of small trees will produce the most wood per acre. However, this may not yield the highest merchantable volume, since individual trees will be relatively small. If size and form of the trees is important, the trees in the stand should be spaced out to allow increased size per individual. This will not produce the maximum wood per acre but will likely produce the most merchantable wood per acre. This, in turn, may yield higher-value forest products and, consequently, higher future returns to the landowner. For a tree to utilize the space made available by thinning, the tree must be capable of fairly rapid growth following release. Generally speaking, old or unhealthy trees do not respond as well as young or healthy trees to the new space created by thinning. There is a natural tendency for trees of the same age class to self-organize by size with the largest trees with the largest crowns growing the fastest. These trees are most capable of utilizing new space created by thinning. Trees that have had less space will have successively smaller crowns and, consequently, lower growth vigor. Therefore, smaller trees in the stand have less ability to capture the space made available in a thinning.
The process of thinning often involves removing smaller trees that are unlikely to respond vigorously to new space, while leaving larger trees that have the ability to utilize the new space quickly. This approach is called thinning from below, since the smaller trees targeted for thinning are also the shorter, overtopped trees. Thinning from below does not produce the most income in the short term but leaves the best possible forest for the future.
Thinning from above (taking the largest trees and leaving the smaller) is not usually recommended as it degrades the future potential of the stand.
A third alternative is called a proportional thinning, in which trees from all size classes are removed, and is a compromise between the two approaches described above.
A method of thinning that is not commonly used in Missouri is geometric thinning. In geometric thinning, trees are cut or retained on the basis of a predetermined spacing or density without consideration of their size or competitive position in the canopy. This method, often referred to as row thinning, is applied mainly in plantations where entire rows are typically removed to achieve density management goals.
Crop Tree ManagementAn alternative to thinning an entire stand down to a specific stocking level is crop tree management, which involves removing just the immediate competitors surrounding selected crop trees. More specifically, it is the trees whose crowns are in direct contact with the crop tree that are marked for removal. This approach to thinning is called a crown touching release. In fact, crown touching release can begin early in the life of a crop tree and, therefore, could be considered a release treatment. Crop tree management may be particularly appropriate for visually sensitive areas because it generally maintains an unthinned canopy matrix between crop trees. More information can be found at na.fs.fed.us/pubs/ctm/ctm_index.html.
Pre-commercial thinning usually occurs when stands are relatively young and trees are not large enough to sell for wood products. Pre-commercial thinning generates no revenue for the landowner and is considered an investment in the future benefit of the stand, although pre-commercial thinning can also be used to harvest firewood.
Timber Stand Improvement (TSI), also called forest stand improvement (FSI), is a class of tending treatments implemented to improve the quality of a residual stand. TSI operations improve residual stand quality by removing poorly formed, defective trees and species with lower wildlife or timber value. TSI is often performed in younger stands to release slower-growing, desirable species (e.g., oaks) before they are outcompeted and overtopped. Removing drought-sensitive species or species susceptible to decline can also be considered a TSI operation because these actions can improve stand health. Although TSI can be a commercial operation (i.e., generate
revenue), this operation is often considered pre-commercial due to the smaller stems cut in younger stands or the high defect of larger trees removed in mature stands.
Commercial thinning usually occurs when stands are older and trees are large enough to sell for wood products, which offsets or exceeds the cost of implementing the thinning. Although commercial thinning is usually favored by landowners, one must consider the dynamics of tree growth (described above) and be aware that there are tradeoffs in all these decisions.
A market for woody biomass can make thinning of young pole-timber stands (traditionally viewed as a pre-commercial thinning) a commercially viable option. However, the timber sale may need to integrate larger sawtimber trees along with smaller-diameter material slated for biomass harvesting in order to attract bids from loggers. For more guidance specific to woody biomass harvesting through thinning, see the Missouri Department of Conservation (2009) manual Missouri Woody Biomass Harvesting Best Management Practices Manual.
Thinning may be used for purposes other than increasing the growth of individual trees. For example, thinning can directly change the composition of the stand. This may be done for situations in which one species is particularly susceptible to a disease or pathogen. In Missouri, this is often applied to red oak species, which are susceptible to oak decline and red oak borers. In this situation, white oak species are favored as leave trees and red oak species favored for removal. The intent of this thinning is to leave trees that are less susceptible to future diseases. Thinning can be used as a tool for improving wildlife habitat. For example, thinning can result in significant crown expansion of soft-mast and hard-mast species, which in turn can increase the production of mast for wildlife. Thinning may also be used to reduce stand density when restoring woodland natural communities. See Chapter 11 for more details.
Figure 13.1. This stand was thinned from below during a pre-commercial timber stand improvement.
NOPP
ADOL
PAOT
HONG
122
Release and Thinning MethodsMechanical — Most cleaning, liberation, and thinning is applied by mechanically felling trees. Trees may also be girdled to create snags or to protect high-quality crop trees from felling damage. Liberation and thinning can be done with chain saws or machinery such as a harvester, while cleaning can be carried out with machinery or hand tools.
Chemical — If the trees are to be removed and left in the forest, herbicides may be a cost-effective choice. In this method, trees are killed using a herbicide. This is generally a low-cost solution to tree removal, which makes this an attractive approach for weeding, cleaning, and pre-commercial thinning. Chemical treatments may also be suitable in situations where the trees to remove are undesirable species capable of sprouting because herbicide will kill the entire tree. See Chapter 16 for more information on herbicide applications.
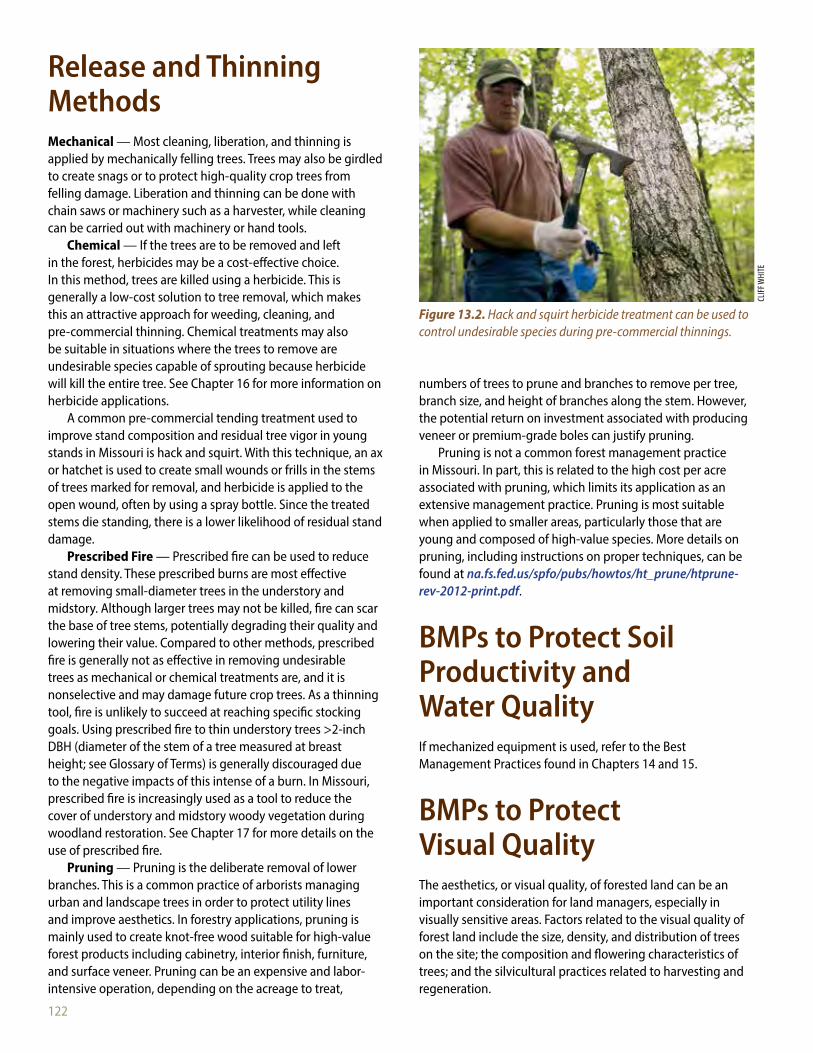
A common pre-commercial tending treatment used to improve stand composition and residual tree vigor in young stands in Missouri is hack and squirt. With this technique, an ax or hatchet is used to create small wounds or frills in the stems of trees marked for removal, and herbicide is applied to the open wound, often by using a spray bottle. Since the treated stems die standing, there is a lower likelihood of residual stand damage.
Prescribed Fire — Prescribed fire can be used to reduce stand density. These prescribed burns are most effective at removing small-diameter trees in the understory and midstory. Although larger trees may not be killed, fire can scar the base of tree stems, potentially degrading their quality and lowering their value. Compared to other methods, prescribed fire is generally not as effective in removing undesirable trees as mechanical or chemical treatments are, and it is nonselective and may damage future crop trees. As a thinning tool, fire is unlikely to succeed at reaching specific stocking goals. Using prescribed fire to thin understory trees >2-inch DBH (diameter of the stem of a tree measured at breast height; see Glossary of Terms) is generally discouraged due to the negative impacts of this intense of a burn. In Missouri, prescribed fire is increasingly used as a tool to reduce the cover of understory and midstory woody vegetation during woodland restoration. See Chapter 17 for more details on the use of prescribed fire.
Pruning — Pruning is the deliberate removal of lower branches. This is a common practice of arborists managing urban and landscape trees in order to protect utility lines and improve aesthetics. In forestry applications, pruning is mainly used to create knot-free wood suitable for high-value forest products including cabinetry, interior finish, furniture, and surface veneer. Pruning can be an expensive and labor-intensive operation, depending on the acreage to treat,
numbers of trees to prune and branches to remove per tree, branch size, and height of branches along the stem. However, the potential return on investment associated with producing veneer or premium-grade boles can justify pruning.
Pruning is not a common forest management practice in Missouri. In part, this is related to the high cost per acre associated with pruning, which limits its application as an extensive management practice. Pruning is most suitable when applied to smaller areas, particularly those that are young and composed of high-value species. More details on pruning, including instructions on proper techniques, can be found at na.fs.fed.us/spfo/pubs/howtos/ht_prune/htprune-rev-2012-print.pdf.
BMPs to Protect Soil Productivity and Water QualityIf mechanized equipment is used, refer to the Best Management Practices found in Chapters 14 and 15.
BMPs to Protect Visual QualityThe aesthetics, or visual quality, of forested land can be an important consideration for land managers, especially in visually sensitive areas. Factors related to the visual quality of forest land include the size, density, and distribution of trees on the site; the composition and flowering characteristics of trees; and the silvicultural practices related to harvesting and regeneration.
Figure 13.2. Hack and squirt herbicide treatment can be used to control undesirable species during pre-commercial thinnings.
CLIFF
WHI
TE

123
➤➤ Favor multiple species that vary in fall color and flowering characteristics.
➤➤ Use practices that maintain or enhance diversity in forest structure.
➤➤ Leave untreated or selectively treated areas adjacent to travel routes and recreation areas.
➤➤ Deaden trees by girdling or herbicide injection to mitigate the negative visual impact of mechanical removal — this has the added benefit of creating snags for wildlife.
➤➤ Avoid high stumps in close proximity to roads and trails.
➤➤ Consider the use of dormant season, leaf-off treatments — slash without leaves are less apparent and decay over a shorter period of time with lower fuel loadings.
BMPs to Protect Cultural ResourcesThe cultural resources found on forest lands are also important and include a variety of assets related to the current or historic cultural influences of a site. These may include physical objects such as artifacts, historic home sites or dwellings, or burial sites. On sites with important cultural resources, tending treatments that could potentially disrupt the soil surface, such as a thinning operation, should be carefully implemented to reduce the risk of damage to cultural resources. Specific Best Management Practices for cultural resources commonly found in forested areas are located in Appendix B.
➤➤ Inspect sites prior to harvest to ascertain potential for cultural resources occurrence. Clearly mark or flag areas to avoid.
➤➤ Avoid physical disturbance of the soil surface if a site has significant cultural resources.
➤➤ Minimize wheel and tracked vehicle traffic on cultural resource sites.
BMPs to Slow the Spread of Invasive SpeciesA potential problem during management activities is the spread of invasive plant species not previously found in the forest. Depending on the way you conduct tending treatments, you can increase or decrease these species.
➤➤ Prior to implementing management activities, scout for and locate invasive species infestations, consistent with the scale and intensity of operations.
➤➤ Plan management activities to limit the potential for the introduction and spread of invasive species.
➤➤ Plan for post-activity management of highly damaging invasive species.
➤➤ Consider the likely response of invasive plant species or target species when prescribing activities that result in soil disturbance or increased sunlight.
➤➤ Prior to moving equipment onto and off of an area with invasive species, scrape or brush soil and debris from exterior surfaces of the equipment in order to minimize the risk of transporting propagules. If practical, consider washing equipment.
➤➤ Take reasonable steps to avoid traveling through or working in small isolated populations of invasive species during forest management operations. This will help minimize their movement to noninfested areas.
➤➤ When conducting invasive plant removal, ensure that it is applied within the appropriate time window using suitable equipment and methods, such that introduction and spread of invasive species is limited.
➤➤ Be aware of and abide by state and federal regulations and quarantines that affect the movement of logs, coarse woody debris, and other tree parts due to the presence of invasive insects and diseases. Consult the Missouri Department of Agriculture for current quarantine information.
Figure 13.3. Pre-commercial management activities (timber stand improvement) using the high-stump technique can cause negative visual appearance in areas that are considered visually sensitive.
JOE A
LLEY
, USD
A

124
Additional ResourcesCrop Tree Management for Eastern Hardwoods. Available at na.fs.fed.us/pubs/ctm/ctm_index.html.Forest Management for Missouri Landowners, revised edition. Missouri Department of Conservation. 2007. Available at mdc.
mo.gov/node/5574.Minnesota Forest Resources Council. Sustaining Minnesota Forest Resources: Voluntary Site-Level Forest Management
Guidelines for Landowners, Loggers and Resource Managers. 2005. Available at frc.state.mn.us/initiatives_sitelevel.html.Wisconsin Forest Management Guidelines. PUB-FR-226, 2011. Available at dnr.wi.gov/topic/ForestManagement/guidelines.
html.Missouri Woody Biomass Harvesting Best Management Practices Manual. Missouri Department of Conservation. 2009.
Available at mdc.mo.gov/node/9806.
References to Other Chapters➤■ It is important to define the landowner’s objectives when prescribing silvicultural treatments. Developing a
management plan with a professional forester is important for identifying the objectives for desired stand conditions and for considering limitations or management requirements for reaching such goals. See Chapter 10.
➤■ Variation in characteristics among species makes certain species particularly desirable for specific management objectives. For example, managing for wildlife habitat often involves a mixture of hard mast and soft mast species, but managing for timber production often emphasizes species of high timber value. Foresters use an understanding of the silvics of individual species and the limitations of the site in order to prescribe realistic treatments that fit the landowner’s objectives and financial capability. See Chapter 11.
➤■ Soil productivity has economic implications in management. In areas with low site productivity, pre-commercial operations may not be economically feasible for improving wood production in the long term since overall tree growth potential is limited. Utilizing soil maps to determine soil productivity will help land managers make informed decisions on how and when to prescribe tending treatments. See Chapter 7.
➤■ Land managers must also consider other factors that affect how silviculture can be implemented to meet management objectives. Among these, protection of valuable cultural resources and maintenance of visual quality are all important considerations. These factors may not affect decisions in all management scenarios but warrant consideration when applicable. See Chapters 4 and 6.
➤■ Prior to beginning management activities, consult a professional forester, a Missouri Department of Conservation (MDC) private land conservationist, an MDC wildlife biologist, or an MDC natural history biologist for information about the occurrence of endangered or threatened species, species and natural communities of conservation concern, rare tree species, or sensitive communities present on or near the management area. These species and communities can be impacted by tending treatments. These professionals can help you modify management activities in order to maintain, promote, or enhance species and natural communities on the site. See the Resource Directory and Chapter 3 for more information.
➤■ Invasive species can be spread through tending treatments. Refer to invasive species guidance above to help slow the spread. See Chapter 9 for general information on invasive species management.
➤■ If the operation includes the use of equipment with ground disturbance, refer to Close Out Operations in Chapters 14 and 15 for further guidance.
➤■ Appendix C includes a pre- and post-Tending Treatment checklist that can be a helpful tool for managers to use in clarifying objectives, planning activities, and integrating management concerns.

125
CHAPTER 14Forest Roads/Trails
DAVI
D ST
ONNE
R
Topics Covered➤■ Forest Roads➤■ Types of Roads➤■ BMPs for Road Planning and Design➤■ BMPs for Removing Creek Gravel➤■ Minimizing Infrastructure➤■ BMPs to Reduce the Visual Impact of Roads➤■ BMPs to Protect Cultural Resources➤■ BMPs to Slow the Spread of Invasive Species
➤■ BMPs to Protect Soil Productivity and Water Quality
➤■ BMPs for Stream Crossings ➤■ BMPs for Placing and Using Waterbars➤■ Federally Required BMPs for Roads in Wetlands➤■ BMPs for Road Maintenance➤■ Closing Out a Road

126
Forest RoadsForest roads provide a wide variety of benefits including access for management and recreation as well as forage and corridors for wildlife. However, forest roads over time can become compacted. Surface runoff can move tons of sediment from the roadbed into the surrounding property if the road is not properly constructed and maintained.
Sediment leaving the roadbed can be deposited into streams, reducing water quality and habitat for aquatic species. Areas with steep slopes, erodible soils, and wet soils are areas with the highest risk. Problems can be prevented by using best management practices that limit surface flow, that restrict road use when it is too wet, and that ensure the runoff is not connected to stream channels. Outlined below are techniques that will help you properly and sustainably construct and maintain access roads and trails.
Types of RoadsThe type of road required for forest management activities depends on the landowner’s goals, topography, the scale of the operation, and timing of activities. Below is a description of the different types of forest roads.
➤➤ Temporary roads
➤● Temporary roads are only intended to be used short-term when the soil is firm.
➤● Usually these roads are made using a skidder blade with a minimum amount of advance planning or design.
➤➤ Permanent seasonal roads
➤● These are part of the permanent road system but should only be used when firm. These roads require proper planning in order to reduce impacts.
➤➤ Permanent all-season forest roads
➤● These have gravel surfaces, side and wing ditches, and culverts. They are designed for year-round use. Even these roads can become too wet to use, especially for heavily loaded log trucks.
BMPs for Road Planning and DesignAlways have a plan and a design before you build any new road or open an old road. Unplanned road construction may result in higher maintenance and reconstruction costs as well
as negatively impacted water quality. A professional forester with experience in designing and laying out forest roads and supervising construction can provide valuable advice.
➤➤ The development of a road plan should consider the following:
➤● How much traffic will use it?➤● What kinds of vehicles will it need to support?➤● Will it be used year-round or only seasonally?➤● Identify property lines to avoid building roads on
someone else‘s property.➤● Plan for close out of roads or a plan to continue
future maintenance.
➤➤ Consult a fisheries biologist to make sure water quality is addressed.
➤➤ If the road you build enters a public road, you will need to contact the authority in charge in order to obtain proper permits. If it is a state road, you must contact the Missouri Department of Transportation (1-888-275-6636).
➤➤ Locate roads on better-drained soils if available. Soils with rocky surfaces should be utilized if possible.
➤➤ Place roads along the edge of a ridge or other locations that provide good surface drainage, utilizing southern aspects when possible.
➤➤ Place roads away from streams, seeps, springs, wetlands, sinkholes, and caves.
➤➤ Walk the route and hang flagging once you determine the best location for the road. Your contractor or forester may suggest changes prior to construction based on their experience.
Figure 14.1. A log truck uses a temporary road on a ridge top. The use of this road will need to be restricted to dry periods.
DAVI
D ST
ONNE
R

127
➤➤ If surface material is needed, use crushed rock instead of creek gravel. Permits may be required to use creek gravel, and in-stream habitat, water quality, and cultural resources could be negatively affected. If you do decide to use creek gravel, make sure to carefully follow the Best Management Practices for Removing Creek Gravel.
➤➤ Forest roads should be designed to shed water. Water control methods include crowning the road, using the natural slope, side ditches, culverts, water turnouts (also known as wing ditches), broad-based dips, and waterbars.
BMPs for Removing Creek GravelIt is important to be diligent and take due care when removing aggregate material from a stream. When done properly, sand and gravel can be removed with minimal harm to the stream and can allow you to use some of this material on your property. However, removal does not address the causes of sand and gravel problems in the stream. It is important to remember that sand and gravel removal can create physical and economic problems for landowners above and below the removal area. If a removal technique is chosen, it should be conducted with the stream’s stability in mind. You should consider the following steps to ensure minimal impacts to others and to avoid damaging streams.
➤➤ Apply for the appropriate permits. Most stream work requires permits from state and federal agencies. Be sure you comply with all applicable laws. Contact Missouri Department of Conservation Fisheries offices to help determine if permits are needed and for assistance in applying for these permits.
➤➤ Restrict removal activities to sand and gravel bars that are loosely packed, in order to avoid damage to the stream. Bars covered with larger-sized materials that are well packed or vegetated are usually stable and should not be disturbed. Removal of sand or gravel in these areas can destabilize the stream and impact downstream stream banks and water quality. Missouri Department of Conservation Fisheries Division personnel can help you find locations where gravel removal will minimize harm to the stream.
➤➤ Remove gravel above the water line and leave a 10-foot buffer of undisturbed material between the normal water line and the excavation area.
➤➤ Avoid removing sand and gravel within 25 feet of streamside vegetation. Vegetation holds gravel and soil, keeping bars and banks in place.
➤➤ Use approved stream bank erosion structures and avoid channel straightening or packing sand and gravel on eroding stream banks.
➤➤ When removal is completed, smooth the area to avoid streambed erosion and other stream channel problems.
➤➤ Avoid using vehicles and heavy equipment in the water. If you must cross the stream, drive vehicles at right angles to stream flow.
➤➤ Sand and gravel removal should take place before March 15 and after June 15 to avoid harming spawning fish and their habitat.
➤➤ Keep fuel, oil, and other wastes out of the stream.
➤➤ Do not remove gravel from riffles (shoals) because they prevent erosion of the streambed. Riffles are very important to stream stability and are a major source of food and oxygen for aquatic life.
➤➤ Do not wash sand or gravel in the stream channel to avoid polluting the water with sediment. If you must wash sand or gravel, use a settling basin and wash your material outside the stream.
Figure 14.2. Permanent road using quarry-sourced crushed rock as surface material
MDC
FILE

128
Minimizing InfrastructureRoads take land out of production for the long term due to destruction of the soil structure, compaction, loss of permeability and porosity, and loss of the surface horizon due to erosion. Because of these effects, efforts should be made to keep the length and width of roads to a minimum without sacrificing safety. Development and use of a well-planned road system will allow for efficient access to as many acres as possible with the least amount of the site occupied by roads. No more than 1–2 percent of the management area should be occupied by roads.
When access is necessary in sensitive locations, minimize the number, length, and width of roads.
Minimize the number of new roads by using old roads. Most ridges in Missouri have been utilized as a road or trail at some point in the past and may be useable again if properly placed.
Take into account the following considerations when planning to reduce noise and visual impacts associated with the design and use of forest access roads:
➤➤ Noise from traffic, especially large trucks and heavy equipment operating on access roads, can be a concern to recreational users and nearby residents.
➤➤ There are potential increased costs involved in building forest access roads to accommodate visual quality concerns. There are also potential increased costs from using existing roads that require traveling greater distances.
➤➤ Visually appealing roads are often narrow with a canopy overtopping them. These types of roads generally do not dry out as quickly as wide day-lighted roads, and this can potentially reduce the number of days when the road is operable.
➤➤ Harvest roads used during wet periods can increase maintenance needs, create unsightly ruts and mud holes, and pump elevated levels of sediment out of the roadbed and onto adjacent lands.
BMPs to Reduce the Visual Impact of RoadsThe construction of roads during harvest operations can negatively impact visual quality. Landowner objectives for visual quality and the BMPs that would meet those objectives should be considered during road planning.
➤➤ Minimize the number of roads in visually sensitive areas by using existing roads or trails where possible.
➤➤ Consider viewing duration and visual penetration when planning roads. Refer to Figure 14.4.
➤➤ Orient logging road entrances onto public roads to screen the harvest from view. Refer to Figure 14.5.
➤➤ When planning new roads, consider if the road will be visible from nearby vantage points such as scenic overlooks, rivers, or lakes.
➤➤ Avoid tracking mud onto highways by using appropriate road surface material.
➤➤ Road rights of way and road entrances should be cleaned of debris, stumps, and logging slash during construction. Avoid creating a corridor of debris.
➤➤ Utilize merchantable timber within road clearings. Cut trees so the tops land away from the road. This puts the slash further out of sight and reduces the need for lopping.
➤➤ Reduce the height of dozed clearing debris during road construction.
➤➤ Refer to Chapter 4 for general guidance for determining if an area is visually sensitive.
Figure 14.3. This photo illustrates properly planned roads as a very small portion (1–2 percent or less) of the overall management area.
DAVI
D ST
ONNE
R

129
➤➤ Minimize the number of roads in visually sensitive areas by using existing roads or trails where possible.
➤➤ Consider viewing duration and visual penetration when planning roads. Refer to Figure 14.4.
➤➤ Orient logging road entrances onto public roads to screen the harvest from view. Refer to Figure 14.5.
➤➤ When planning new roads, consider if the road will be visible from nearby vantage points such as scenic overlooks, rivers, or lakes.
➤➤ Avoid tracking mud onto highways by using appropriate road surface material.
➤➤ Road rights of way and road entrances should be cleaned of debris, stumps, and logging slash during construction. Avoid creating a corridor of debris.
➤➤ Utilize merchantable timber within road clearings. Cut trees so the tops land away from the road. This puts the slash further out of sight and reduces the need for lopping.
➤➤ Reduce the height of dozed clearing debris during road construction.
➤➤ Refer to Chapter 4 for general guidance for determining if an area is visually sensitive.
BMPs to Protect Cultural ResourcesActivities that have a high potential to disturb cultural resource features include construction of access roads, log landings, and erosion control measures such as waterbars. Sites where an activity disturbs the natural surface of the ground at a level that is deeper than plow depth (approximately 7 inches) should be carefully investigated for the presence of cultural resources. Specific BMPs for cultural resources commonly found in forested areas are located in Appendix B.
➤➤ Avoid known cultural resource sites if possible when building roads, landings, or erosion control features like waterbars on skid trails.
➤➤ If cultural resource sites cannot be avoided, use “fill only” techniques to improve roads. Synthetic or natural covering such as treetops can be used to armor resources and protect their integrity. Remove tires and other synthetic materials after completion of the project. Natural materials may be left in place. Secure approval for covering from the State Historic Preservation Office at the Missouri Department of Natural Resources (MDNR) prior to placing fill over significant cultural resource sites.
➤➤ Minimize or eliminate maintenance (including widening) in or near cultural resource areas.
➤➤ Control erosion from road runoff to avoid impacts to adjacent cultural resources.
➤➤ Close roads and decommission sites close to important cultural resource sites once the forest management operation is complete.
The contact information for the state historic preservation officer is as follows:
State Historic Preservation Office (SHPO)PO Box 176Jefferson City, MO 65102800–361–4827 or 573–751–7858E-mail: [email protected]
Figure 14.5. The logging road entrances at “A” and “B” permit excessive visual penetration directly into the harvest area. They also present a safety hazard by joining the main road on curves. A more preferred entrance location at “C” breaks the line of sight into the harvest area and also exits onto the main road at a 90° angle in a safe area.
Figure 14.4. In this example, the harvest area has been designed so that the longer a viewer can see an area (viewing duration), the shorter the distance they can see (visual penetration). The goal is to provide some visual diversity, while at the same time reducing the apparent size of the harvest. The travel speed and road layout also affect the viewing duration. Fast travel speeds on straight roads provide less view durations than low speeds on curving roads.
Figure 14.6. An aesthetically pleasing forest road
COUR
TESY
OF W
ISCO
NSIN
DEP
ARTM
ENT O
F NAT
URAL
RES
OURC
ESDA
VID
STON
NER

130
BMPs to Slow the Spread of Invasive SpeciesRoad construction, because of the level of disturbance, has significant potential to influence the spread or establishment of invasive species.
➤➤ Plan to conduct activities to minimize the spread of invasive species and control them where they currently exist. More information related to invasive species management is found in Chapter 9.
➤➤ Prior to moving equipment onto and off of an activity area, scrape or brush soil and debris from exterior surfaces, to the extent practical, to minimize the risk of transporting seeds. If practical, consider washing equipment.
➤➤ Take reasonable steps to avoid traveling through or working in populations of invasives during forest management activities. This will help minimize the movement to noninfested areas.
➤➤ Prior to trucking, implement mitigation strategies to reduce the risk of transporting highly damaging invasive insect and disease species when present, to the extent practical (i.e., do not haul EAB-infested ash trees beyond the quarantined area).
➤➤ To the extent practical, use existing roads, skid trails, and landings to reduce disturbance, upgrading to ensure that water quality and site productivity is maintained and protected.
➤➤ Avoid constructing new roads, skid trails, and landings in areas infested with invasive species.
➤➤ Avoid spreading seeds and other propagules from infested to noninfested areas during road maintenance, reconstruction, new construction, and closure.
➤➤ Natural revegetation of haul roads, skid trails, and landings can help stabilize soil when revegetation is consistent with site conditions and goals. However, on disturbed sites with high potential for erosion, seeding and mulching may be warranted. Use locally sourced native seed or noninvasive cover crops (refer to seeding chart in Table 14.4) for revegetation in order to minimize the threat of highly damaging invasive species’ spreading. Use methods to minimize the amount of exposed, bare mineral soil.
➤➤ Ensure, to the extent practical, that fill and gravel are free of invasive species and their propagules, prior to placement on the site. Quarry rock is less likely to contain invasive plant seeds compared to creek gravel.
BMPs to Protect Soil Productivity and Water QualityThe use of best management practices during road construction activities can help ensure that water quality and aquatic habitat are protected.
➤➤ Plan to conduct activities during preferred operating periods when site and soil conditions are best for minimizing the impact of forestry practices on the natural resources. Preferred operating periods for a site may vary according to local and seasonal climatic conditions, equipment being used, and operating techniques. Work with a professional forester to help determine preferred operating periods.
➤➤ Minimize soil disturbance and removal of trees. Pile cleared debris on the lower sides of the road and cut banks.
➤➤ Construct road approaches to streamside management zones (SMZ), springs, sinkholes, caves, and wetlands in order to minimize surface runoff.
➤➤ Road grades should be kept at less than 8 percent. Where terrain necessitates a steeper grade, minimize the road section length.
➤➤ Forest roads should be designed to shed water. Water control methods include crowning the road, using the natural slope, side ditches, culverts, water turnouts (also known as wing ditches), broad-based dips, and waterbars. Refer to specific guidance below.
➤➤ Avoid traffic during wet periods. This can increase maintenance needs, create unsightly ruts and mud holes, and accelerate the movement of sediment from the roadbed.
➤➤ Avoid tracking mud on to public roadways. It is dangerous to motorists and creates a negative visual impact.
➤➤ Avoid burying wood debris in the road base. Eventually the wood will rot, requiring repair and reconstruction.
Slopes Treatment½ to 1 These slopes sometimes hold
without treatment. If the soil is unstable and subject to caving, the bank must be resloped to a lower angle.
1 to 1 Mulching and fertilization is almost always necessary.
2 to 1 Can loosen to apply fertilizer and seed; should use light mulch on droughty soils.
4 to 1 Can cultivate with machinery; drill in fertilizer and seed.

131
➤➤ Ensure, to the extent practical, that fill and gravel are free of invasive species and their propagules, prior to placement on the site. Quarry rock is less likely to contain invasive plant seeds compared to creek gravel.
BMPs to Protect Soil Productivity and Water QualityThe use of best management practices during road construction activities can help ensure that water quality and aquatic habitat are protected.
➤➤ Plan to conduct activities during preferred operating periods when site and soil conditions are best for minimizing the impact of forestry practices on the natural resources. Preferred operating periods for a site may vary according to local and seasonal climatic conditions, equipment being used, and operating techniques. Work with a professional forester to help determine preferred operating periods.
➤➤ Minimize soil disturbance and removal of trees. Pile cleared debris on the lower sides of the road and cut banks.
➤➤ Construct road approaches to streamside management zones (SMZ), springs, sinkholes, caves, and wetlands in order to minimize surface runoff.
➤➤ Road grades should be kept at less than 8 percent. Where terrain necessitates a steeper grade, minimize the road section length.
➤➤ Forest roads should be designed to shed water. Water control methods include crowning the road, using the natural slope, side ditches, culverts, water turnouts (also known as wing ditches), broad-based dips, and waterbars. Refer to specific guidance below.
➤➤ Avoid traffic during wet periods. This can increase maintenance needs, create unsightly ruts and mud holes, and accelerate the movement of sediment from the roadbed.
➤➤ Avoid tracking mud on to public roadways. It is dangerous to motorists and creates a negative visual impact.
➤➤ Avoid burying wood debris in the road base. Eventually the wood will rot, requiring repair and reconstruction.
Slopes Treatment½ to 1 These slopes sometimes hold
without treatment. If the soil is unstable and subject to caving, the bank must be resloped to a lower angle.
1 to 1 Mulching and fertilization is almost always necessary.
2 to 1 Can loosen to apply fertilizer and seed; should use light mulch on droughty soils.
4 to 1 Can cultivate with machinery; drill in fertilizer and seed.
➤➤ Avoid using invasive and exotic plants when seeding areas that were disturbed during road construction. Refer to forest roads invasive species BMPs above.
➤➤ Precautions are needed to prevent soil, water, and wetland contamination when using fuels, lubricants, and other materials associated with heavy equipment operations. Proper planning will help prevent or minimize spills of fuels, lubricants, or other materials. A basic spill kit should be kept on-site.
Figure 14.7. Installed turnout to drain water off of the road surface Figure 14.8. Construction of a crowned road surface
Figure 14.9. Guide for stabilizing road banks Figure 14.10. Broad-based dip construction: (a.) to spill water from road in small amounts, (b.) Three-inch rock in base of dips to allow water drainage, (c.) seeded as necessary to stabilize soil
MDC
FILE
MDC
FILE
MDC
FILE
MDC
FILE
Table 14 .1 . Spacing of Broad-based Drainage DipsRoad Grade
(percent)Approximate Distance Needed
Between Dips or Turnouts (feet)1 500
2 300
5 180
10 140

132
BMPs for Stream CrossingsRoad building and vehicle travel across streams should be avoided whenever possible because it increases sediment in the water, reducing water quality. Planning in advance will reduce the number of stream crossings necessary or eliminate them altogether. The following recommendations are specific to stream crossings and should be used in addition to general road construction recommendations.
➤➤ Note: Stream crossings that have uses other than forestry or agriculture applications may require special permits (404 permits). These permits can be applied for at the U.S. Army Corp of Engineers’ office. Special BMPs are required in forestry and agriculture in order to be exempt from the permit process. See section on Federally Required BMPs for Roads in Wetlands later in this chapter.
➤➤ All approaches to stream crossings, whether on temporary or permanent roads, should be made at gentle grades.
➤➤ Plan the location and type of stream crossings to minimize the number of stream crossings. Multiple stream crossings on the same stream may require a 404 permit.
➤➤ Cross streams only as needed, at narrow points, and at 90-degree angles. Locate crossings where stream banks are low, rocky, and level such as at riffles or at other level, shallow, and firm streambed locations.
➤➤ Use bridges or culverts to minimize erosion and to maintain normal stream flow. Consider clear-span bridges, bottomless arch culverts, and temporary stream crossings that retain the natural streambed. Use low-impact temporary portable bridges when possible. Plan culvert sizes to handle full bank flows.
➤➤ The county Soil and Water Conservation District technicians, MDC engineers, or MDC fisheries biologists (stream specialists) can advise you on temporary or permanent bridge construction, and on proper size, construction, and maintenance of culverts. If the culvert is too small, the road may wash out.
➤➤ Install properly sized culverts where permanent logging roads cross streams (see Table 14.2). Avoid using culverts smaller than 15 inches in diameter. Small culverts plug frequently and are difficult to clear of debris.
➤➤ Avoid culverts on perennial or intermittent streams. They retard flows, change stream channel configuration, and change channel gradient. Below-grade crossings or span crossings are preferable.
Table 14 .2 . How to Determine Properly Sized CulvertsDrainage Area
(acres)Culvert Pipe Diameter
(inches)Less than 10 15
10 18
50 42
100 48
200 72
Figure 14.11. Armored stream crossing
Figure 14.12. Logger placing portable bridge into place
Figure 14.13. Properly installed culvert
NATE
FORB
ESJA
SON
JACO
BSON
MIC
HAEL
BILL

133
➤➤ Stabilize culverts, bridges, and crossings with coarse rock or large stones. Use natural materials or clean rock and remove when the operation is complete. Protect permanent crossings with coarse rock or large stones that will not be moved by high flows.
➤➤ Protect and stabilize approaches to fords with crushed rock extending at least 50 feet from both sides of the stream bank approaches. Do not use fine gravels to line the streambed in the crossing. Flows will remove and carry them downstream.
➤➤ Use turnouts so runoff water does not enter the stream directly from the road ditches; allow a sufficient width for a filter strip.
➤➤ Stabilize exposed soil using seed and mulch, straw bales, rock, and silt fences.
➤➤ Do not remove culverts from stream channels following logging if the crossing may be used again within 10 years. If this option is used, the culvert size becomes even more critical. A long-term structure may have to withstand a wider range of flood and flow conditions.
➤➤ Avoid any practice that alters the flow of stream water, including changes to the channel gradient or width.
➤➤ Do not use logs or brush topped with soil for temporary crossings. This material may be transported by the stream and adversely affect water quality.
➤➤ Avoid crossing streams more than necessary to get the logs and woody biomass to the landing.
➤➤ Avoid draining water carrying sediment and pollutants directly into streams or intermittent drainages. Diverting it off into the surrounding vegetation will filter out sediment and allow it to soak into the soil.
➤➤ Do not locate roads in streambeds.
➤➤ Avoid constructing roads inside SMZs. Roads should be constructed in SMZs only where necessary to cross streams.
BMPs for Placing and Using WaterbarsWaterbars are a combination of a mound and a trench, angled at 30–45 degrees across skid trails and roads. Their purpose is to intercept, divert, and disperse water off exposed soil onto the forest floor where it will be filtered and where it will soak into the soil without causing erosion and sedimentation. Waterbars form a
significant, almost impassible bump and should be used only where machinery will no longer travel. Continued use will ruin waterbars. If the forest owner wishes to continue use of the road for recreation or for cutting firewood, broad-based dips can be substituted for waterbars. Other alternative methods may include open box culverts and conveyor belt structures (see Figure 14.14).
➤➤ Waterbars are generally built at a 30-degree angle (see Figure 14.15). If the angle is less than this, water will dam up and cut through waterbars.
➤➤ The distance between waterbars will vary from every 250 feet on gently sloping trails to every 40 feet or less on steep trails (see Table 14.3).
➤➤ Loose dirt should not be pushed into a pile to create a waterbar. A correctly built waterbar should consist of a shallow trench in the trail with dirt piled behind it. The height of waterbars will vary from 8 to 30 inches, with lower bars on gentle slopes and higher bars on steeper slopes.
➤➤ The bottom edge of a waterbar should be open to allow water to flow freely out into the leaf layer on the forest floor where it will be filtered and soak into the soil.
Figure 14.15. Waterbar diagram. Make sure to have waterbars angled at 30–45 degrees. W
ISCO
NSIN
’S FO
REST
RY B
EST M
ANAG
EMEN
T PRA
CTIC
ES FO
R WAT
ER Q
UALIT
Y, 19
95
Figure 14.14. Alternative water diversion structure using recycled conveyor belts in place of earth mounds
MDC
FILE

134
Federally Required BMPs for Roads in WetlandsRoads built for forest management in land described as a wetland under federal rules of Section 404 of the Clean Water Act are a special case. If the intended use is only for forest management, the construction and use are exempt from the permit requirements. To qualify, construction must comply with the following recommended best management practices:
➤➤ Roads and skid trails in waters of the United States must be the minimum number possible. The width and length must match with the forest management need and local conditions.
➤➤ All roads must be located far enough from streams or water (except where water must be crossed) to minimize the amount of material put into the waters.
➤➤ The road must be designed to prevent the restriction of normal flows.
➤➤ The fill must be stabilized and maintained to prevent erosion during and after construction.
➤➤ Use of trucks, tractors, and other heavy equipment in water and adjoining wetlands must be minimized. Avoid operating equipment in wetlands if at all possible.
➤➤ Disturbance of natural plant life in water and wetlands must be minimized.
➤➤ The construction and maintenance of the road must not prevent natural movement of aquatic wildlife living in the water or wetland, especially migration.Figure 14.17. Forester inspects a waterbar on a closed-out
skid trail
DAVI
D ST
ONNE
R
Figure 14.16. Features of a protected road (a.) waterbars at top of the grade, (b.) waterbars spaced properly at the recommended distance, (c.) waterbars located at a 30-degree angle downslope, (d.) stone riprap at diversion outlets, (e.) road is out-sloped and follows the contour, (f.) cut banks are seeded as necessary
MDC
FILE
➤➤ Avoid driving vehicles or equipment over waterbars once they have been built.
➤➤ Avoid building waterbars with blockages (such as stumps or logging debris) that prevent drainage.
Table 14 .3 . Spacing between WaterbarsRoad Grade
(percent slope)Approximate Distance Needed
between Waterbars (in feet)1 400
2 245
5 125
10 78
15 58
20 47
25 40
30 35
35 32
40 29

135
➤➤ Borrow material must be taken from upland sources whenever possible.
➤➤ Road construction and maintenance must not harm any threatened or endangered species listed under the Endangered Species Act, including no destruction or damage to critical habitat for listed species. Work with an MDC natural history biologist to determine if threatened or endangered species are found in the area.
➤➤ Fill material in breeding and nesting areas for migratory waterfowl, fish spawning areas, and wetlands must be avoided if any practical choice exists.
➤➤ The fill must not be located near a public water supply intake.
➤➤ The fill must not occur in areas of high shellfish (native clams) habitat.
➤➤ The fill must not occur in any part of the National Wild and Scenic River System.
➤➤ Fill material must be suitable and free from poisons.
➤➤ All temporary fills must be removed entirely and the area restored to its original elevation. Permanent roads requiring fill in jurisdictional wetlands may require CWA 404 permits.
Further state interpretations of the federally required best management practices for roads in wetlands are as follows:
➤➤ Avoid wetland impacts if possible.
➤➤ Minimize number of crossings.
➤➤ Cross at narrowest point if possible.
➤➤ Construct upland road approaches to wetlands so the surface runoff is diverted away from the road approach and does not enter the wetland.
➤➤ Maintain hydrological connectivity with at- or below-grade crossings (preferred) or culverts.
➤➤ Minimize elevation of roadbed above existing natural ground elevation.
➤➤ Remove road fills after completion of operation.
➤➤ If landings are necessary in a wetland, build them to the minimum size required for the operation and to achieve the landowner’s objectives.
➤➤ Avoid locating roads and landings in the wetland filters.
➤➤ Avoid operating equipment in areas of open water, springs, or seeps.
➤➤ Install culverts or bridges a maximum of 300 feet apart and at all natural drainage ways.
➤➤ Install at least one cross-drainage structure at each wetland crossing.
➤➤ For temporary roads, provide adequate cross-road drainage at all natural drainage ways.
➤➤ Temporary crossing structures include timber mats, culverts, bridges, and porous organic material such as corduroy or chunk wood.
➤➤ Temporary crossings should be removed promptly when work is complete. If organic material is used, remove as much as feasible, given site and material conditions.
➤➤ Any activities in wetlands must follow Missouri DNR and U.S. Army Corps of Engineers regulations.
➤➤ For permanent roads with fill, use permeable fill material for at least the first layer of fill.
➤➤ The height of roads on high ground should be less than 2 feet above the surrounding ground.
➤➤ Where a road crosses a stream, slough, swamp, or other wetland, the fill should not be higher than the road at either end. Normally, the road should be 2–3 feet above the ground, but it may be higher in low areas.
➤➤ Main roads at streams should be bridged or built with culverts large enough and numerous enough with permanent structures of a size and frequency to carry the expected flow of water. Where fords are used instead of bridges or culverts, they each must have a good rock base to protect the streambed.
➤➤ Soil must be stabilized around each structure where main roads cross seasonal or permanent streams with an average annual flow of 5 cubic feet per second or more. Structure stabilization is also required where rainwater runoff from the road can cause erosion and sedimentation.
➤➤ Where light-use roads cross seasonal or permanent streams, temporary bridges or culverts able to minimize interference with the flow of water should be used. When forest management use is completed, temporary bridges and culverts should be removed and the roads cross-ditched where needed to allow normal water flow.

136
➤➤ Get roadbed material from upland borrow pits whenever possible. The base of roads that cross sloughs or swamps may be logs, sand, or clay. Logs are preferred because they reduce the amount of fill required. Roads with only a sand or clay base gradually settle and must be built higher initially.
➤➤ Roads in swamps and river-bottom areas may be constructed with borrow material from a ditch along the upper side of the road and then capped with fill from an upland area.
➤➤ Continuous side ditches are preferred. Borrow ditches may be refilled if temporary roads are removed. They reduce the pooling of water on the upper side of the road if there are enough culverts to drain to the lower side.
➤➤ Ditch bottoms should follow surface contours, and culverts should be located in the lower areas.
➤➤ Ditches should not be required to carry water for more than one-quarter mile. They must also be separated from navigable water by vegetated filter strips.
➤➤ Avoid using ditches to convert wetlands into uplands.
BMPs for Road MaintenanceRoad maintenance is essential to ensure that water control structures function properly to protect water quality and aquatic habitat.
➤➤ Culverts and ditches must be kept free of debris and obstructions. Ditches on newly constructed roads may require frequent cleaning and checking after each major storm until revegetation has occurred.
➤➤ Install waterbars, broad-based dips, and other water control structures to moderate the flow of water on the road.
➤➤ Do not leave a berm on the side of the road; it will channel water down the road.
➤➤ Shape road surfaces periodically to maintain proper surface drainage. Fill in ruts and holes with gravel or compacted fill as soon as possible to reduce erosion potential.
➤➤ Temporary roads should be closed to reduce the maintenance costs associated with vehicular traffic. Consider doing the following before the last piece of equipment capable of doing road maintenance leaves the site:
➤● Remove all temporary drainage structures and replace with waterbars.
➤● Remove any stream crossing structures and reshape the stream channel to its original contour.
➤● Stabilize the roadbed, cut and fill slopes with seed, and mulch when necessary.
➤● If public access is a problem, close the road with a gate or some other structure at a point where topography prevents vehicles from going around the closure device.
➤➤ Permanent seasonal roads should have controlled access to keep maintenance costs low.
➤➤ Seed and mulch any remaining disturbed surfaces.
➤➤ Check all drainage structures to ensure they are in proper working order.
➤➤ Periodically inspect the road to ensure drainage is being maintained.
Closing Out a RoadNatural revegetation of haul roads, skid trails, and landings can help stabilize soil when it is consistent with site conditions and goals. However, on disturbed sites with high potential for erosion, seeding and mulching may be warranted. Seeding a forest access road after completion of use helps prevent soil erosion while providing wildlife food and habitat. Seeding can also soften negative visual quality impacts.
A seed mix appropriate for the season should be applied to disturbed areas immediately following road construction in order to promote reestablishment of plant growth to reduce erosion (refer to Table 14.4). For immediate cover, use temporary cover crops such as wheat, oats, or rye.
Inspect and maintain any soil-stabilization practices such as waterbars and ditches before closing out operation.
When seeding and mulching exposed soil, use clean straw and not hay to avoid spreading invasive species such as Sericea lespedeza, kudzu, crown vetch, or others.
Table 14 .4 . Seeding Rates (pounds pure live seed per acre [PLS/ac] — single species)Base Seeding Rates — Pounds Pure Live Seed Per AcreSpecies Base Rate
(100 percent) Pure Stand
Erosion Control Rating (use 200 percent seeding rate and have a good to excellent rating for erosion control)
Wildlife Habitat Rating (use 100 percent seeding rate)
Wet Soil Tolerance Rating
Drought Tolerance Rating
Seeding Dates: Spring
Seeding Dates: Fall/Winter
Cool Season LegumesAlsike Clover 3.2 Good Good High Low Mar. 1 – May 31 Aug. 1 – Oct.15
Ladino Clover 3.0 Good Fair Medium Low Mar. 1 – May 31 Aug. 1 – Oct.15
Red Clover 6.1 Fair Fair None Low Mar. 1 – May 31 Aug. 1 – Oct.15
Alfalfa 7.5 Fair Excellent None High Mar. 1 – May 31 Aug. 1 – Oct.15
Warm Season LegumesCommon Lespedeza 7.5 Poor Excellent Low High Mar. 1 – June 30 Oct. 1 – Mar. 1
Illinois Bundleflower 14.5 Fair Excellent None Medium Mar. 1 – June 30 Oct. 1 – Mar. 1
Partridge Pea 26.8 Fair Excellent None Medium Mar. 1 – June 30 Oct. 1 – Mar. 1
Purple Prairieclover 5.8 Poor Good None High Mar. 1 – June 30 Oct. 1 – Mar. 1
Roundhead Bushclover
6.3 Poor Good None High Mar. 1 – June 30 Oct. 1 – Mar. 1
Showy Ticktrefoil 10.0 Fair Excellent None High Mar. 1 – June 30 Oct. 1 – Mar. 1
Cool Season GrassesCanada Wildrye 15.3 Good Excellent Low Medium Mar. 1 – May 31 Aug. 1 – Oct. 15
Virginia Wildrye 15.0 Good Excellent Medium Medium Mar. 1 – May 31 Aug. 1 – Oct. 15
Orchardgrass 6.2 Fair Excellent None Medium Mar. 1 – May 31 Aug. 1 – Oct. 15
Perennial Ryegrass 7.3 Poor Good None Low Mar. 1 – May 31 Aug. 1 – Oct. 15
Redtop 1.7 Good Good Medium Low Mar. 1 – May 31 Aug. 1 – Oct. 15
Smooth Brome 8.0 Excellent Fair Low Medium Mar. 1 – May 31 Aug. 1 – Oct. 15
Timothy 3.1 Good Excellent Low Low Mar. 1 – May 31 Aug. 1 – Oct. 15
Warm Season GrassesBig Bluestem 8.0 Fair Good Medium High Mar. 1 – June 30 Oct. 1 – Mar. 1
Composite Dropseed 2.3 Fair Good None High Mar. 1 – June 30 Oct. 1 – Mar. 1
Eastern Gamagrass 8.0 Poor Good Medium Medium Mar. 1 – June 30 Oct. 1 – Mar. 1
Indiangrass 7.8 Fair Excellent Low Medium Mar. 1 – June 30 Oct. 1 – Mar. 1
Little Bluestem 6.4 Good Excellent None High Mar. 1 – June 30 Oct. 1 – Mar. 1
Sideoats Grama 7.5 Good Excellent None Medium Mar. 1 – June 30 Oct. 1 – Mar. 1
Switchgrass 4.7 Good Good Medium Medium Mar. 1 – June 30 Oct. 1 – Mar. 1
Warm Season ForbsGrayhead Coneflower 3.6 Fair Good None Medium NA Oct. 1 – Mar. 15
Pale Purple Coneflower
16.4 Poor Fair None Medium NA Oct. 1 – Mar. 15
Ox-eye False Sunflower
11.3 Poor Fair None High NA Oct. 1 – Mar. 15
Wild Bergamot 1.4 Fair Fair High Low NA Oct. 1 – Mar. 15
Foxglove Beardtongue 4.4 Fair Fair Medium High NA Oct. 1 – Mar. 15Figure 14.18. Road closed to prevent unauthorized access and to reduce maintenance costs
JASO
N JE
NSEN

137
➤● Remove all temporary drainage structures and replace with waterbars.
➤● Remove any stream crossing structures and reshape the stream channel to its original contour.
➤● Stabilize the roadbed, cut and fill slopes with seed, and mulch when necessary.
➤● If public access is a problem, close the road with a gate or some other structure at a point where topography prevents vehicles from going around the closure device.
➤➤ Permanent seasonal roads should have controlled access to keep maintenance costs low.
➤➤ Seed and mulch any remaining disturbed surfaces.
➤➤ Check all drainage structures to ensure they are in proper working order.
➤➤ Periodically inspect the road to ensure drainage is being maintained.
Closing Out a RoadNatural revegetation of haul roads, skid trails, and landings can help stabilize soil when it is consistent with site conditions and goals. However, on disturbed sites with high potential for erosion, seeding and mulching may be warranted. Seeding a forest access road after completion of use helps prevent soil erosion while providing wildlife food and habitat. Seeding can also soften negative visual quality impacts.
A seed mix appropriate for the season should be applied to disturbed areas immediately following road construction in order to promote reestablishment of plant growth to reduce erosion (refer to Table 14.4). For immediate cover, use temporary cover crops such as wheat, oats, or rye.
Inspect and maintain any soil-stabilization practices such as waterbars and ditches before closing out operation.
When seeding and mulching exposed soil, use clean straw and not hay to avoid spreading invasive species such as Sericea lespedeza, kudzu, crown vetch, or others.
Table 14 .4 . Seeding Rates (pounds pure live seed per acre [PLS/ac] — single species)Base Seeding Rates — Pounds Pure Live Seed Per AcreSpecies Base Rate
(100 percent) Pure Stand
Erosion Control Rating (use 200 percent seeding rate and have a good to excellent rating for erosion control)
Wildlife Habitat Rating (use 100 percent seeding rate)
Wet Soil Tolerance Rating
Drought Tolerance Rating
Seeding Dates: Spring
Seeding Dates: Fall/Winter
Cool Season LegumesAlsike Clover 3.2 Good Good High Low Mar. 1 – May 31 Aug. 1 – Oct.15
Ladino Clover 3.0 Good Fair Medium Low Mar. 1 – May 31 Aug. 1 – Oct.15
Red Clover 6.1 Fair Fair None Low Mar. 1 – May 31 Aug. 1 – Oct.15
Alfalfa 7.5 Fair Excellent None High Mar. 1 – May 31 Aug. 1 – Oct.15
Warm Season LegumesCommon Lespedeza 7.5 Poor Excellent Low High Mar. 1 – June 30 Oct. 1 – Mar. 1
Illinois Bundleflower 14.5 Fair Excellent None Medium Mar. 1 – June 30 Oct. 1 – Mar. 1
Partridge Pea 26.8 Fair Excellent None Medium Mar. 1 – June 30 Oct. 1 – Mar. 1
Purple Prairieclover 5.8 Poor Good None High Mar. 1 – June 30 Oct. 1 – Mar. 1
Roundhead Bushclover
6.3 Poor Good None High Mar. 1 – June 30 Oct. 1 – Mar. 1
Showy Ticktrefoil 10.0 Fair Excellent None High Mar. 1 – June 30 Oct. 1 – Mar. 1
Cool Season GrassesCanada Wildrye 15.3 Good Excellent Low Medium Mar. 1 – May 31 Aug. 1 – Oct. 15
Virginia Wildrye 15.0 Good Excellent Medium Medium Mar. 1 – May 31 Aug. 1 – Oct. 15
Orchardgrass 6.2 Fair Excellent None Medium Mar. 1 – May 31 Aug. 1 – Oct. 15
Perennial Ryegrass 7.3 Poor Good None Low Mar. 1 – May 31 Aug. 1 – Oct. 15
Redtop 1.7 Good Good Medium Low Mar. 1 – May 31 Aug. 1 – Oct. 15
Smooth Brome 8.0 Excellent Fair Low Medium Mar. 1 – May 31 Aug. 1 – Oct. 15
Timothy 3.1 Good Excellent Low Low Mar. 1 – May 31 Aug. 1 – Oct. 15
Warm Season GrassesBig Bluestem 8.0 Fair Good Medium High Mar. 1 – June 30 Oct. 1 – Mar. 1
Composite Dropseed 2.3 Fair Good None High Mar. 1 – June 30 Oct. 1 – Mar. 1
Eastern Gamagrass 8.0 Poor Good Medium Medium Mar. 1 – June 30 Oct. 1 – Mar. 1
Indiangrass 7.8 Fair Excellent Low Medium Mar. 1 – June 30 Oct. 1 – Mar. 1
Little Bluestem 6.4 Good Excellent None High Mar. 1 – June 30 Oct. 1 – Mar. 1
Sideoats Grama 7.5 Good Excellent None Medium Mar. 1 – June 30 Oct. 1 – Mar. 1
Switchgrass 4.7 Good Good Medium Medium Mar. 1 – June 30 Oct. 1 – Mar. 1
Warm Season ForbsGrayhead Coneflower 3.6 Fair Good None Medium NA Oct. 1 – Mar. 15
Pale Purple Coneflower
16.4 Poor Fair None Medium NA Oct. 1 – Mar. 15
Ox-eye False Sunflower
11.3 Poor Fair None High NA Oct. 1 – Mar. 15
Wild Bergamot 1.4 Fair Fair High Low NA Oct. 1 – Mar. 15
Foxglove Beardtongue 4.4 Fair Fair Medium High NA Oct. 1 – Mar. 15

138
Additional ResourcesA Landowner’s Guide to Building Forest Access Roads. Richard L. Wiest. NA-TP-06-98. Radnor, PA.Forest Management for Missouri Landowners, revised edition. Missouri Department of Conservation. 2007. Available at mdc.
mo.gov/node/5574.Missouri Woody Biomass Harvesting Best Management Practices Manual. Missouri Department of Conservation. 2009.
Available at mdc.mo.gov/node/9806.Missouri Watershed Protection Practices: Management Guidelines for Maintaining Forested Watersheds to Protect
Streams. Missouri Department of Conservation. 2006. Available at mdc.mo.gov/sites/default/files/resources/2010/07/9331_6294.pdf.
Sustaining Minnesota Forest Resources: Voluntary Site-Level Forest Management Guidelines for Landowners, Loggers and Resource Managers. Minnesota Forest Resources Council, St. Paul, Minnesota. 2005. Available at frc.state.mn.us/initiatives_sitelevel.html.
Wisconsin Forest Management Guidelines. PUB-FR-226, 2011. Available at dnr.wi.gov/topic/ForestManagement/guidelines.html.
References to Other Chapters➤■ Prior to beginning management activities, consult a professional forester, a Missouri Department of Conservation (MDC)
private land conservationist, an MDC wildlife biologist, or an MDC natural history biologist for information about the occurrence of endangered or threatened species, species and natural communities of conservation concern, or sensitive communities present on or near the management area. These species and natural communities can be impacted by road construction and maintenance activities. The professionals can help you modify management activities in order to maintain, promote, or enhance species and natural communities on the site. See the Resource Directory, and see Chapter 3 for more information.
➤■ Road construction activities in visually sensitive areas can have negative impacts on visual quality. See Chapter 4 for guidance on determining visually sensitive locations.
➤■ Road construction activities can negatively impact cultural resources. Make sure to avoid or mitigate impacts by referring to the guidance below. See Chapter 6 for general information related to cultural resources.
➤■ Invasive species can be spread through the use, maintenance, and construction of forest roads. Refer to invasive species guidance above to help slow the spread. See Chapter 9 for general information on invasive species management.
➤■ Road construction and maintenance can negatively impact soil and water resources. Refer to the BMPs to minimize the impacts on soil productivity and water quality. See Chapter 5 and Chapter 7 for more detailed information regarding potential impacts.
For mixtures: Use the single-species seeding rates from Table 14.4 for the appropriate site use multiplied by the desired seeding mixture percentages to determine the seeding rate per species. Final seeding rate for the mixture will equal each adjusted seeding rate added together.
For seeding Canada wildrye and Timothy as a conservation cover with each species making up 50 percent of the mix, the formula would be:
➤➤ 15.3 PLS pounds/acre × 50 percent = 7.6 pounds/acre seeding rate (Canada wildrye)
➤➤ 3.1 PLS pounds/acre × 50 percent = 1.5 pounds/acre seeding rate (Timothy)
➤➤ Total PLS for seeding mixture = 7.6 lbs Canada wildrye + 1.5 lbs Timothy = 8.1 lbs/acre total seeding rate.
139
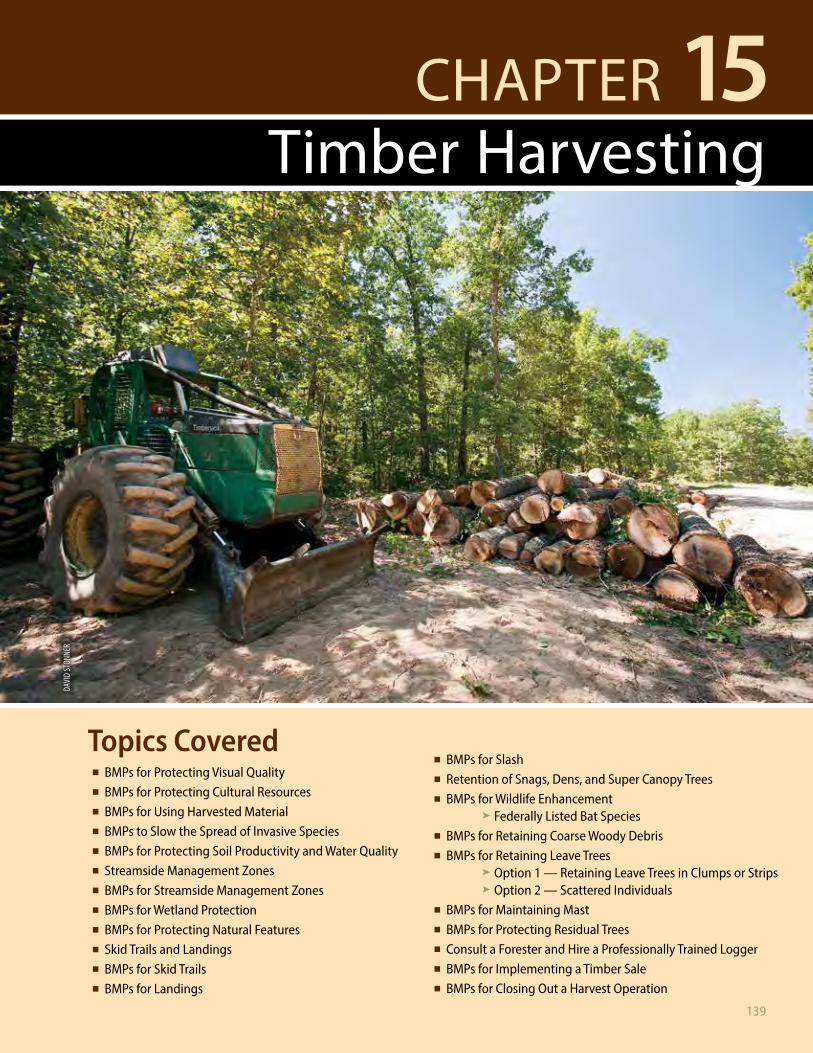
CHAPTER 15Timber Harvesting
DAVI
D ST
ONNE
R
Topics Covered➤■ BMPs for Protecting Visual Quality➤■ BMPs for Protecting Cultural Resources➤■ BMPs for Using Harvested Material➤■ BMPs to Slow the Spread of Invasive Species➤■ BMPs for Protecting Soil Productivity and Water Quality➤■ Streamside Management Zones➤■ BMPs for Streamside Management Zones➤■ BMPs for Wetland Protection➤■ BMPs for Protecting Natural Features➤■ Skid Trails and Landings➤■ BMPs for Skid Trails➤■ BMPs for Landings
➤■ BMPs for Slash➤■ Retention of Snags, Dens, and Super Canopy Trees➤■ BMPs for Wildlife Enhancement
➤➤ Federally Listed Bat Species➤■ BMPs for Retaining Coarse Woody Debris➤■ BMPs for Retaining Leave Trees
➤➤ Option 1 — Retaining Leave Trees in Clumps or Strips➤➤ Option 2 — Scattered Individuals
➤■ BMPs for Maintaining Mast➤■ BMPs for Protecting Residual Trees➤■ Consult a Forester and Hire a Professionally Trained Logger➤■ BMPs for Implementing a Timber Sale➤■ BMPs for Closing Out a Harvest Operation

140
The harvest of forest products in Missouri can help meet the social, environmental, and economic values of forest sustainability. This chapter includes site-level guidance
for timber harvesting to ensure that forests are healthy and viable for future generations.
BMPs for Protecting Visual QualityOne of the most significant social values that forests provide is the scenic landscape that people enjoy viewing. A goal of good management should be to buffer the visual impact of harvesting and other forest management activities. In resource management, trade-offs must be evaluated. Not all values can be given highest priority. A properly conducted harvest will accomplish most of the forest management goals while reducing the impact on scenery and recreation. Considerations for protecting visual quality should always be included in harvest plans.
➤➤ When planning a timber harvest in visually sensitive areas, evaluate the viewshed and modify harvest to utilize less aggressive cutting methods where appropriate. In regeneration harvests, consider leaving at least 20 to 30 square feet of basal area.
➤➤ Discuss planned management activities with adjoining landowners.
➤➤ Consider using less intrusive practices next to heavy cutting on adjacent ownerships (see Figure 15.1).
➤➤ Consider the entire vegetative community in and near the harvest area. Understory trees and shrubs such as flowering dogwood and redbud, as well as colorful fall species such as black gum, can be retained to reduce the visual impact of the harvest activities.
➤➤ Look for colorful species and large trees to leave for variation. See Chapter 4 for a list of species with good color.
➤➤ If the view from the road is not screened by a hill, high bank, or other landform, consider maintaining a 100-foot-wide buffer strip (screen) using irregular-shaped borders and feathered edges. Cut lightly within the buffer strip. Maintain residual trees, utilizing a distribution of sizes including large sawtimber to create a sufficient screen. Evaluate the soil profile for a fragipan layer or bedrock that will limit deep root development. These factors along with the soils, slope, and position can be used to avoid windthrow (see Figures 15.2, 15.4, and 15.5).
➤➤ In areas where the site slopes away, consider creating scenic vistas. In some situations harvesting or pruning lower branches may be desirable to open up panoramic views.
➤➤ Use cutting techniques that utilize the terrain to create a more natural appearance (see Figure 15.3).
➤➤ Shape cutting areas to shorten the line of sight and minimize the area that can be seen from one viewpoint. Consider using group selection harvesting rather than even-age regeneration cutting (clear-cutting) where applicable.
➤➤ Leave scattered groups of trees and clumps of woody vegetation in large cut areas. Refer to the section on retaining leave trees in this chapter for details on how to specifically integrate leave trees into even-age regeneration harvests (clear-cutting).
➤➤ In a leave tree (reserve tree) marking, mark trees on the side away from the road to reduce the negative visual impacts after the completion of the harvest.
➤➤ Use most of the merchantable wood from harvested trees. Refer to the guidelines in this chapter for specifics about slash retention and product utilization.
➤➤ Pull down hung-up trees; cut down bent and broken trees.
➤➤ Cut stumps less than 12 inches high.
➤➤ Skidding should be done in a careful manner to protect residual trees. Use low-impact equipment; avoid erodible soils or steep areas. Refer to the residual damage BMPs in this chapter.
➤➤ Rutting should always be avoided in sensitive locations.
➤➤ Consider using dormant season, leaf-off logging. Logging slash without leaves is less apparent.
➤➤ Create narrow openings into a harvest area in order to limit the view from public roads, lakes, rivers, or recreation areas.
➤➤ Even-aged regeneration clear-cutting (less than 10 square feet of retained basal area) should be restricted to 40 acres or less; this includes the combination of all stands that are connected within an area. These areas need to be separated by a manageable unit (typical stand).
➤➤ Previously clear-cut area regeneration should exceed 10 feet in height or achieve canopy closure along at least 50 percent of its perimeter before additional clear-cutting occurs, in order to ensure that the total clear-cut area does not exceed 40 acres.

141
The harvest of forest products in Missouri can help meet the social, environmental, and economic values of forest sustainability. This chapter includes site-level guidance
for timber harvesting to ensure that forests are healthy and viable for future generations.
BMPs for Protecting Visual QualityOne of the most significant social values that forests provide is the scenic landscape that people enjoy viewing. A goal of good management should be to buffer the visual impact of harvesting and other forest management activities. In resource management, trade-offs must be evaluated. Not all values can be given highest priority. A properly conducted harvest will accomplish most of the forest management goals while reducing the impact on scenery and recreation. Considerations for protecting visual quality should always be included in harvest plans.
➤➤ When planning a timber harvest in visually sensitive areas, evaluate the viewshed and modify harvest to utilize less aggressive cutting methods where appropriate. In regeneration harvests, consider leaving at least 20 to 30 square feet of basal area.
➤➤ Discuss planned management activities with adjoining landowners.
➤➤ Consider using less intrusive practices next to heavy cutting on adjacent ownerships (see Figure 15.1).
➤➤ Consider the entire vegetative community in and near the harvest area. Understory trees and shrubs such as flowering dogwood and redbud, as well as colorful fall species such as black gum, can be retained to reduce the visual impact of the harvest activities.
➤➤ Look for colorful species and large trees to leave for variation. See Chapter 4 for a list of species with good color.
➤➤ If the view from the road is not screened by a hill, high bank, or other landform, consider maintaining a 100-foot-wide buffer strip (screen) using irregular-shaped borders and feathered edges. Cut lightly within the buffer strip. Maintain residual trees, utilizing a distribution of sizes including large sawtimber to create a sufficient screen. Evaluate the soil profile for a fragipan layer or bedrock that will limit deep root development. These factors along with the soils, slope, and position can be used to avoid windthrow (see Figures 15.2, 15.4, and 15.5).
➤➤ In areas where the site slopes away, consider creating scenic vistas. In some situations harvesting or pruning lower branches may be desirable to open up panoramic views.
➤➤ Use cutting techniques that utilize the terrain to create a more natural appearance (see Figure 15.3).
➤➤ Shape cutting areas to shorten the line of sight and minimize the area that can be seen from one viewpoint. Consider using group selection harvesting rather than even-age regeneration cutting (clear-cutting) where applicable.
➤➤ Leave scattered groups of trees and clumps of woody vegetation in large cut areas. Refer to the section on retaining leave trees in this chapter for details on how to specifically integrate leave trees into even-age regeneration harvests (clear-cutting).
➤➤ In a leave tree (reserve tree) marking, mark trees on the side away from the road to reduce the negative visual impacts after the completion of the harvest.
➤➤ Use most of the merchantable wood from harvested trees. Refer to the guidelines in this chapter for specifics about slash retention and product utilization.
➤➤ Pull down hung-up trees; cut down bent and broken trees.
➤➤ Cut stumps less than 12 inches high.
➤➤ Skidding should be done in a careful manner to protect residual trees. Use low-impact equipment; avoid erodible soils or steep areas. Refer to the residual damage BMPs in this chapter.
➤➤ Rutting should always be avoided in sensitive locations.
➤➤ Consider using dormant season, leaf-off logging. Logging slash without leaves is less apparent.
➤➤ Create narrow openings into a harvest area in order to limit the view from public roads, lakes, rivers, or recreation areas.
➤➤ Even-aged regeneration clear-cutting (less than 10 square feet of retained basal area) should be restricted to 40 acres or less; this includes the combination of all stands that are connected within an area. These areas need to be separated by a manageable unit (typical stand).
➤➤ Previously clear-cut area regeneration should exceed 10 feet in height or achieve canopy closure along at least 50 percent of its perimeter before additional clear-cutting occurs, in order to ensure that the total clear-cut area does not exceed 40 acres.
Figure 15.1. This aerial photo shows an adjoining property that has had a liquidation harvest. Plan to use less intrusive practices next to heavy cutting on adjacent ownerships.
Figure 15.2. This aerial photo shows a landing (in yellow circle) set back away from the road with a screen being used along roadway.
Figure 15.3. Design cuts to blend with the terrain
Figure 15.4. Irregular or feathered edges are better than the straight edges of regeneration cuts (clear-cuts). Avoid creating abrupt changes from harvested areas to non-harvested areas. Create a gradual transition from areas that are to be heavily cut to areas that are to be lightly cut. An abrupt change results in what is known as a hard edge. This concentrates wildlife in a narrow strip, which favors predators. A feathered edge allows wildlife to nest and spread out, naturally reducing losses to predation.
Figure 15.5. Consider multiple-stage cuts or other management methods such as shelterwood and uneven-age cutting to enhance visual quality.
MDC
FILE
MDC
FILE
WOO
DLAN
D OW
NERS
’ GUI
DE TO
OAK
MAN
AGEM
ENT,
UNIV
ERSI
TY O
F MIN
NESO
TA EX
TENS
ION
WOO
DLAN
D OW
NERS
’ GUI
DE TO
OAK
MAN
AGEM
ENT,
UNIV
ERSI
TY O
F MIN
NESO
TA EX
TENS
ION
WIS
CONS
IN D
EPAR
TMEN
T OF N
ATUR
AL R
ESOU
RCES
Good
Poor

142
➤➤ Clear-cuts of 40 acres in size are not appropriate in highly fragmented forests in western and northern Missouri due to potential negative impacts on forest interior species.
➤➤ Due to potential negative forest health impacts, salvage harvesting may warrant the use of more aggressive management techniques, which could include even-age regeneration harvest (clear-cuts) exceeding 40 acres and exceptions to green-up requirements listed in this chapter.
➤➤ Consider slashing tops within 100 feet of public roads or visually sensitive areas so debris is no more than 3 feet high. This should be included in the bid specifications and in the harvest/sale contract. The time and effort required to conduct this practice will have a defined cost to the landowner. This should only be prescribed when an area is in a visually sensitive location and when meeting landowner objectives.
Forest Certification NoteWhen working on forest land that is enrolled in a forest certification system, it is important to know the standards that apply to that program and understand how to implement them. Some forest certification systems have guidelines concerning clear-cutting that differ from the guidelines provided here.
BMPs for Protecting Cultural ResourcesActivities that have a high potential to disturb cultural resource features include construction of access roads, log landings, and erosion control measures such as waterbars. When conducting activities that disturb the surface of the ground deeper than plow depth (approximately 7 inches), carefully investigate the site for the presence of cultural resources. More specific best management practices for cultural resources commonly found in forested areas are located in Appendix B.
➤➤ Inspect sites prior to harvest to determine the potential for cultural resource occurrence. Clearly mark or flag areas to avoid.
➤➤ Exclude cultural resource areas from the timber sale area if feasible. Maintenance of undisturbed vegetation contributes to protection of cultural resources.
➤➤ Maintain un-harvested buffers around caves and sensitive natural features to avoid potential impacts to cultural resources; sensitive communities; and rare, threatened, or endangered species.
➤➤ Do not operate or park wheeled vehicles within the buffer zone of sensitive areas such as springs, seeps, or caves.
➤➤ Avoid tree removal and equipment operation adjacent to cemeteries, historic buildings, foundations, etc.
➤➤ Avoid operating wheeled or tracked vehicles on known cultural resource sites.
➤➤ Trees may be cut from cultural resource sites. Minimize surface disturbance. Cable logs from locations.
➤➤ Avoid cultural resource sites when locating roads, landings, or temporary skid trails.
BMPs for Using Harvested MaterialUtilization is market driven and varies throughout Missouri. Markets for biomass, pulpwood, pallets, and to a limited extent, residential firewood, drive the markets for moderately defective and small-diameter logs. Mills sawing primarily for grade lumber, railroad ties, and cooperage typically do not want logs smaller than 13 inches in diameter on the small end of logs. Mills processing pallet logs can take logs to a 5-inch small-end diameter while pulp and fuel logs may be 3–4 inches in diameter on the small end. When harvesting, it benefits the landowner to ensure that logs are utilized for the highest valued product for which they are suitable.
➤➤ Log decks should clearly distinguish veneer, stave, or grade logs from lower-quality stems.
➤➤ Debris piles and cutoff logs remaining in the woods and in treetops should be short log segments, less than 3–4 feet in length, of small diameter, and/or should contain approximately 50 percent or more incipient decay, rot, hollow, shake, large knots, worm holes, stain, or other indicators of defective wood.
➤➤ Inspect log jobs to ensure that utilization objectives are being met.
➤➤ Encourage loggers to take advantage of all available markets for wood.
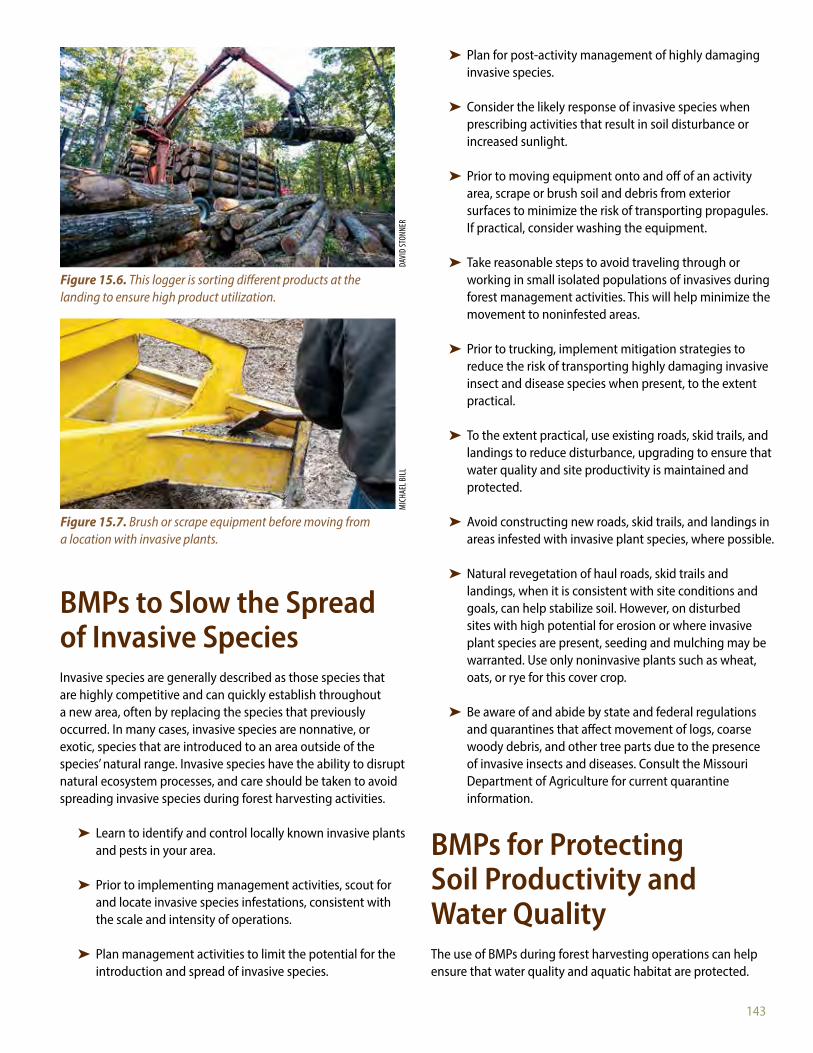
143
➤➤ Maintain un-harvested buffers around caves and sensitive natural features to avoid potential impacts to cultural resources; sensitive communities; and rare, threatened, or endangered species.
➤➤ Do not operate or park wheeled vehicles within the buffer zone of sensitive areas such as springs, seeps, or caves.
➤➤ Avoid tree removal and equipment operation adjacent to cemeteries, historic buildings, foundations, etc.
➤➤ Avoid operating wheeled or tracked vehicles on known cultural resource sites.
➤➤ Trees may be cut from cultural resource sites. Minimize surface disturbance. Cable logs from locations.
➤➤ Avoid cultural resource sites when locating roads, landings, or temporary skid trails.
BMPs for Using Harvested MaterialUtilization is market driven and varies throughout Missouri. Markets for biomass, pulpwood, pallets, and to a limited extent, residential firewood, drive the markets for moderately defective and small-diameter logs. Mills sawing primarily for grade lumber, railroad ties, and cooperage typically do not want logs smaller than 13 inches in diameter on the small end of logs. Mills processing pallet logs can take logs to a 5-inch small-end diameter while pulp and fuel logs may be 3–4 inches in diameter on the small end. When harvesting, it benefits the landowner to ensure that logs are utilized for the highest valued product for which they are suitable.
➤➤ Log decks should clearly distinguish veneer, stave, or grade logs from lower-quality stems.
➤➤ Debris piles and cutoff logs remaining in the woods and in treetops should be short log segments, less than 3–4 feet in length, of small diameter, and/or should contain approximately 50 percent or more incipient decay, rot, hollow, shake, large knots, worm holes, stain, or other indicators of defective wood.
➤➤ Inspect log jobs to ensure that utilization objectives are being met.
➤➤ Encourage loggers to take advantage of all available markets for wood.
BMPs to Slow the Spread of Invasive SpeciesInvasive species are generally described as those species that are highly competitive and can quickly establish throughout a new area, often by replacing the species that previously occurred. In many cases, invasive species are nonnative, or exotic, species that are introduced to an area outside of the species’ natural range. Invasive species have the ability to disrupt natural ecosystem processes, and care should be taken to avoid spreading invasive species during forest harvesting activities.
➤➤ Learn to identify and control locally known invasive plants and pests in your area.
➤➤ Prior to implementing management activities, scout for and locate invasive species infestations, consistent with the scale and intensity of operations.
➤➤ Plan management activities to limit the potential for the introduction and spread of invasive species.
➤➤ Plan for post-activity management of highly damaging invasive species.
➤➤ Consider the likely response of invasive species when prescribing activities that result in soil disturbance or increased sunlight.
➤➤ Prior to moving equipment onto and off of an activity area, scrape or brush soil and debris from exterior surfaces to minimize the risk of transporting propagules. If practical, consider washing the equipment.
➤➤ Take reasonable steps to avoid traveling through or working in small isolated populations of invasives during forest management activities. This will help minimize the movement to noninfested areas.
➤➤ Prior to trucking, implement mitigation strategies to reduce the risk of transporting highly damaging invasive insect and disease species when present, to the extent practical.
➤➤ To the extent practical, use existing roads, skid trails, and landings to reduce disturbance, upgrading to ensure that water quality and site productivity is maintained and protected.
➤➤ Avoid constructing new roads, skid trails, and landings in areas infested with invasive plant species, where possible.
➤➤ Natural revegetation of haul roads, skid trails and landings, when it is consistent with site conditions and goals, can help stabilize soil. However, on disturbed sites with high potential for erosion or where invasive plant species are present, seeding and mulching may be warranted. Use only noninvasive plants such as wheat, oats, or rye for this cover crop.
➤➤ Be aware of and abide by state and federal regulations and quarantines that affect movement of logs, coarse woody debris, and other tree parts due to the presence of invasive insects and diseases. Consult the Missouri Department of Agriculture for current quarantine information.
BMPs for Protecting Soil Productivity and Water QualityThe use of BMPs during forest harvesting operations can help ensure that water quality and aquatic habitat are protected.
Figure 15.6. This logger is sorting different products at the landing to ensure high product utilization.
Figure 15.7. Brush or scrape equipment before moving from a location with invasive plants.
DAVI
D ST
ONNE
RM
ICHA
EL B
ILL
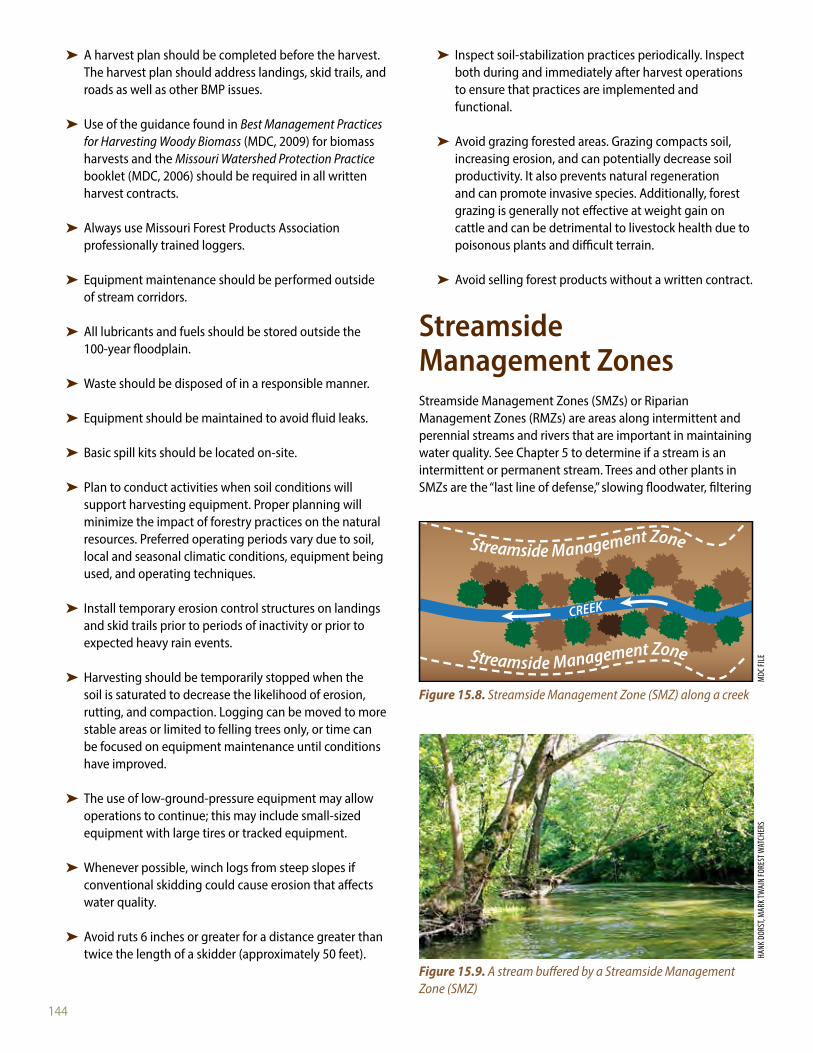
144
➤➤ A harvest plan should be completed before the harvest. The harvest plan should address landings, skid trails, and roads as well as other BMP issues.
➤➤ Use of the guidance found in Best Management Practices for Harvesting Woody Biomass (MDC, 2009) for biomass harvests and the Missouri Watershed Protection Practice booklet (MDC, 2006) should be required in all written harvest contracts.
➤➤ Always use Missouri Forest Products Association professionally trained loggers.
➤➤ Equipment maintenance should be performed outside of stream corridors.
➤➤ All lubricants and fuels should be stored outside the 100-year floodplain.
➤➤ Waste should be disposed of in a responsible manner.
➤➤ Equipment should be maintained to avoid fluid leaks.
➤➤ Basic spill kits should be located on-site.
➤➤ Plan to conduct activities when soil conditions will support harvesting equipment. Proper planning will minimize the impact of forestry practices on the natural resources. Preferred operating periods vary due to soil, local and seasonal climatic conditions, equipment being used, and operating techniques.
➤➤ Install temporary erosion control structures on landings and skid trails prior to periods of inactivity or prior to expected heavy rain events.
➤➤ Harvesting should be temporarily stopped when the soil is saturated to decrease the likelihood of erosion, rutting, and compaction. Logging can be moved to more stable areas or limited to felling trees only, or time can be focused on equipment maintenance until conditions have improved.
➤➤ The use of low-ground-pressure equipment may allow operations to continue; this may include small-sized equipment with large tires or tracked equipment.
➤➤ Whenever possible, winch logs from steep slopes if conventional skidding could cause erosion that affects water quality.
➤➤ Avoid ruts 6 inches or greater for a distance greater than twice the length of a skidder (approximately 50 feet).
➤➤ Inspect soil-stabilization practices periodically. Inspect both during and immediately after harvest operations to ensure that practices are implemented and functional.
➤➤ Avoid grazing forested areas. Grazing compacts soil, increasing erosion, and can potentially decrease soil productivity. It also prevents natural regeneration and can promote invasive species. Additionally, forest grazing is generally not effective at weight gain on cattle and can be detrimental to livestock health due to poisonous plants and difficult terrain.
➤➤ Avoid selling forest products without a written contract.
Streamside Management ZonesStreamside Management Zones (SMZs) or Riparian Management Zones (RMZs) are areas along intermittent and perennial streams and rivers that are important in maintaining water quality. See Chapter 5 to determine if a stream is an intermittent or permanent stream. Trees and other plants in SMZs are the “last line of defense,” slowing floodwater, filtering
Figure 15.8. Streamside Management Zone (SMZ) along a creek
Figure 15.9. A stream buffered by a Streamside Management Zone (SMZ)
MDC
FILE
HANK
DOR
ST, M
ARK T
WAI
N FO
REST
WAT
CHER
S
and trapping sediment to clean the water, and creating rich bottomland soil. SMZs require special treatment when harvesting timber/woody biomass and conducting other forest management activities in order to protect stream banks from erosion and provide shade to cool stream temperature. The deep, moist soils of many streamside forests provide excellent growing sites where high-quality trees and bottomland tree species can grow. Caves, springs, sinkholes, and lakes are other special areas treated like SMZs.
SMZs are composed of two parts. The primary filter strip starts at the top of the well-defined bank and extends 25 feet on both sides of the stream. A secondary filter strip varies in width depending on the steepness of the surrounding land. It is determined by multiplying the percent slope of the land immediately beyond the first 25-foot strip by a factor of 2. The resulting number is added to the 25-foot strip for the total width of the SMZ to be protected.
Note: The width of an SMZ should always be at least 50 feet. To determine SMZ widths wider than 50 feet, use the rule stated in this paragraph.
Example:➤● Percent slope is the rise/run × 100.➤● A rise in elevation of 5 feet over a distance of 25 feet is
5/25 = 0.2; 0.2 × 100 = 20 percent slope.➤● If the slope of the land beyond the first 25-foot strip is
20 percent, multiply 20 × 2 = 40 feet. The total SMZ is 25 feet + 40 feet = 65 feet on each side of the stream.
Figure 15.8 shows an SMZ. Table 15.1 lists the total width of filter strips for different slopes. These are the recommended widths to reduce the amount of sediment reaching streams from areas disturbed by logging or other activities.
Note: The exception to the SMZ rule stated previously is for large streams and rivers (third-order streams) with wide, flat floodplains. These areas should have a minimum of 100-foot SMZs on each side of the stream.
Table 15 .1 SMZ Width by SlopeSlope of Land between
Road and Stream (percent)
Width of Filter Strip for Common Logging Area
(feet)0 50*
10 50*
20 65
30 85
40 105
50 125
60 145
* Note: All Streamside Management Zones require a 50-foot minimum distance.
CREEK
Streamside Management Zone
Streamside Management Zone

145
and trapping sediment to clean the water, and creating rich bottomland soil. SMZs require special treatment when harvesting timber/woody biomass and conducting other forest management activities in order to protect stream banks from erosion and provide shade to cool stream temperature. The deep, moist soils of many streamside forests provide excellent growing sites where high-quality trees and bottomland tree species can grow. Caves, springs, sinkholes, and lakes are other special areas treated like SMZs.
SMZs are composed of two parts. The primary filter strip starts at the top of the well-defined bank and extends 25 feet on both sides of the stream. A secondary filter strip varies in width depending on the steepness of the surrounding land. It is determined by multiplying the percent slope of the land immediately beyond the first 25-foot strip by a factor of 2. The resulting number is added to the 25-foot strip for the total width of the SMZ to be protected.
Note: The width of an SMZ should always be at least 50 feet. To determine SMZ widths wider than 50 feet, use the rule stated in this paragraph.
Example:➤● Percent slope is the rise/run × 100.➤● A rise in elevation of 5 feet over a distance of 25 feet is
5/25 = 0.2; 0.2 × 100 = 20 percent slope.➤● If the slope of the land beyond the first 25-foot strip is
20 percent, multiply 20 × 2 = 40 feet. The total SMZ is 25 feet + 40 feet = 65 feet on each side of the stream.
Figure 15.8 shows an SMZ. Table 15.1 lists the total width of filter strips for different slopes. These are the recommended widths to reduce the amount of sediment reaching streams from areas disturbed by logging or other activities.
Note: The exception to the SMZ rule stated previously is for large streams and rivers (third-order streams) with wide, flat floodplains. These areas should have a minimum of 100-foot SMZs on each side of the stream.
Table 15 .1 SMZ Width by SlopeSlope of Land between
Road and Stream (percent)
Width of Filter Strip for Common Logging Area
(feet)0 50*
10 50*
20 65
30 85
40 105
50 125
60 145
* Note: All Streamside Management Zones require a 50-foot minimum distance.
CREEK
Streamside Management Zone
Streamside Management Zone
BMPs for Streamside Management ZonesThe use of SMZs during forest harvesting operations can help ensure that water quality and aquatic habitat are protected. The protection of SMZs should be outlined in the timber sale contract.
➤➤ Always leave at least one-third of the typical-size trees in the SMZ: 40 square feet of basal area (BA) or greater but not below C-level stocking (see Glossary) in a fully stocked stand of trees during an even-age regeneration or woody biomass harvest, but one-half to two-thirds of typical-size trees is recommended in most cases. Logs and woody biomass should be cabled out of the primary zone (first 25 feet) of the SMZ.
➤➤ Use of heavy equipment, like log skidders and bulldozers, is permissible in SMZs, but special care is needed (see previous recommendation for an example).
➤➤ In SMZs and other special areas, pull fewer logs and less woody biomass behind the skidder in order to minimize rutting. Cut trees so they fall away from wetlands and other special features.
➤➤ Leave most trees on stream banks. Trees on south and west banks are especially critical for cooling water temperature. A closed canopy should be maintained in SMZs. Maintain or manage stands with large trees closer (approximately 50 feet) to the stream to provide shade and to establish a root system to stabilize the bank. Riparian trees also provide large woody debris for fish and invertebrate habitat. Leave “hydraulically important” trees that protect specific stream corridor areas.
➤➤ Try to leave a variety of tree species and sizes in SMZs. Special exceptions may be needed in shade-intolerant tree species in order to regenerate the riparian forest; contact a professional forester for assistance.
➤➤ Avoid leaving treetops from harvesting activities in streams. Use directional felling to ensure treetops do not fall in streams. Naturally occurring trees and tops in water provide enough habitat, and tops may clog stream channels and damage bridges.
➤➤ Avoid exposing mineral soil during site preparation in an SMZ when heavy rain or snowmelt is likely to cause erosion and sedimentation.
➤➤ Avoid placing portable sawmills or log landings in SMZs.
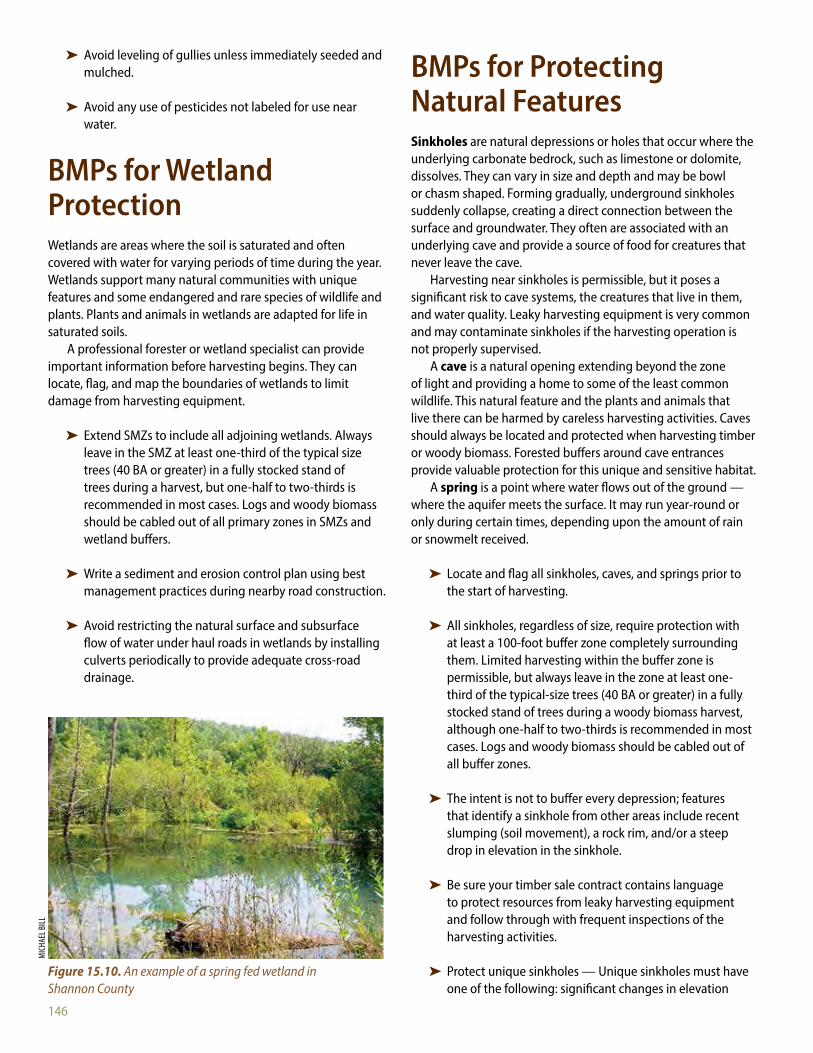
146
➤➤ Avoid leveling of gullies unless immediately seeded and mulched.
➤➤ Avoid any use of pesticides not labeled for use near water.
BMPs for Wetland ProtectionWetlands are areas where the soil is saturated and often covered with water for varying periods of time during the year. Wetlands support many natural communities with unique features and some endangered and rare species of wildlife and plants. Plants and animals in wetlands are adapted for life in saturated soils.
A professional forester or wetland specialist can provide important information before harvesting begins. They can locate, flag, and map the boundaries of wetlands to limit damage from harvesting equipment.
➤➤ Extend SMZs to include all adjoining wetlands. Always leave in the SMZ at least one-third of the typical size trees (40 BA or greater) in a fully stocked stand of trees during a harvest, but one-half to two-thirds is recommended in most cases. Logs and woody biomass should be cabled out of all primary zones in SMZs and wetland buffers.
➤➤ Write a sediment and erosion control plan using best management practices during nearby road construction.
➤➤ Avoid restricting the natural surface and subsurface flow of water under haul roads in wetlands by installing culverts periodically to provide adequate cross-road drainage.
BMPs for Protecting Natural FeaturesSinkholes are natural depressions or holes that occur where the underlying carbonate bedrock, such as limestone or dolomite, dissolves. They can vary in size and depth and may be bowl or chasm shaped. Forming gradually, underground sinkholes suddenly collapse, creating a direct connection between the surface and groundwater. They often are associated with an underlying cave and provide a source of food for creatures that never leave the cave.
Harvesting near sinkholes is permissible, but it poses a significant risk to cave systems, the creatures that live in them, and water quality. Leaky harvesting equipment is very common and may contaminate sinkholes if the harvesting operation is not properly supervised.
A cave is a natural opening extending beyond the zone of light and providing a home to some of the least common wildlife. This natural feature and the plants and animals that live there can be harmed by careless harvesting activities. Caves should always be located and protected when harvesting timber or woody biomass. Forested buffers around cave entrances provide valuable protection for this unique and sensitive habitat.
A spring is a point where water flows out of the ground — where the aquifer meets the surface. It may run year-round or only during certain times, depending upon the amount of rain or snowmelt received.
➤➤ Locate and flag all sinkholes, caves, and springs prior to the start of harvesting.
➤➤ All sinkholes, regardless of size, require protection with at least a 100-foot buffer zone completely surrounding them. Limited harvesting within the buffer zone is permissible, but always leave in the zone at least one-third of the typical-size trees (40 BA or greater) in a fully stocked stand of trees during a woody biomass harvest, although one-half to two-thirds is recommended in most cases. Logs and woody biomass should be cabled out of all buffer zones.
➤➤ The intent is not to buffer every depression; features that identify a sinkhole from other areas include recent slumping (soil movement), a rock rim, and/or a steep drop in elevation in the sinkhole.
➤➤ Be sure your timber sale contract contains language to protect resources from leaky harvesting equipment and follow through with frequent inspections of the harvesting activities.
➤➤ Protect unique sinkholes — Unique sinkholes must have one of the following: significant changes in elevation
Figure 15.10. An example of a spring fed wetland in Shannon County
MIC
HAEL
BILL

147
(30 percent slopes or greater), caves, permanent standing water, exposed rim rock, or different vegetation than the surrounding forest. These unique sinkholes should have a flagged buffer of at least 200 feet starting from the rim of the sinkhole, and no logging should take place within the buffer.
➤➤ If harvesting is needed in unique sinkholes, contact a professional forester or biologist for advice.
➤➤ Maintain a buffer zone around artificial upland water features such as ponds and wildlife watering facilities. The buffer should be at least 50 feet from the bank of the structure.
➤➤ Fens and seeps should have a minimum of 100 feet as a buffer surrounding them.
➤➤ Divert runoff from haul roads, skid trails, and log landings so it does not drain directly into sinkholes, caves, or springs.
➤➤ Establish staging areas for equipment, fuel and oil, chemicals, and other hazardous materials no closer than 200 feet from a sinkhole, cave, or spring.
➤➤ Leave a buffer zone between harvest areas and the cave opening — buffer zones should extend around the cave entrance and be 200 feet in width.
➤➤ Stockpile any excavated material well away from a cave opening so that the material cannot wash back into the opening.
➤➤ Leave a wide natural vegetated buffer area around any spring; the buffer should be a minimum of 200 feet in width.
➤➤ Utilize standard BMPs for SMZs when harvesting near streams and below springs.
➤➤ Limit harvesting in concave (bowl-shaped) areas that receive water from the surrounding landscape; the area should be harvested when the ground is dry to prevent rutting.
➤➤ Avoid disturbing soils in sinkholes with open swallets or underground streams.
➤➤ Avoid pushing soil, logging debris, or other waste materials into the bottom of any sinkhole, into any sinkhole opening, or into any drainage that ends in a sinkhole.
➤➤ Avoid draining equipment fluids onto the ground or parking logging equipment in the bottom of sinkholes.
➤➤ Avoid blocking or modifying cave entrances; avoid making loud noises near the entrance to caves.
Forest Certification NoteWhen working on forest land that is enrolled in a forest certification system, it is important to know the BMP standards that apply to that program and understand how to implement them. Some forest certification systems have very specific guidelines concerning the use of BMPs, and other programs require landowners to meet or exceed state-recommended BMPs such as those presented here.
Skid Trails and LandingsGood management seeks to limit the soil area impacted by infrastructure (roads, landings, and primary skid trails) and carefully considers timing, the equipment being used, and harvesting methods. A harvest plan should be completed before the harvest. The harvest plan should also address landings, skid trails, and roads as well as other BMP issues. Try to locate road landings and primary skid trails on better-drained or gravelly soils. Planning considerations should include careful determination of the appropriate operating seasons for any given soil, as well as using harvest layouts, strategies, and equipment that minimize the surface area of a site that will be impacted. The total amount of area occupied by primary skid trails and landings should be limited to no more than 10 percent of the area.
BMPs for Skid TrailsProper planning and the use of BMPs when using skid trails can help ensure that water quality and aquatic habitat are protected.
➤➤ Avoid placing skid trails near known natural heritage resources.
➤➤ Flag the location of main skid trails before work begins. Minimize the number of skid trails needed to log the site efficiently and limit soil compaction. Use old skid trails if they are suitable.
➤➤ Avoid skid trails that drain water onto a landing. If possible, skid uphill to the landing.
➤➤ Protect crop trees during harvesting. While flagging skid trails, mark trees for removal that will obviously be damaged during harvest. Use other marked or low-value trees, such as elm and hickory, and defective trees as bumpers.
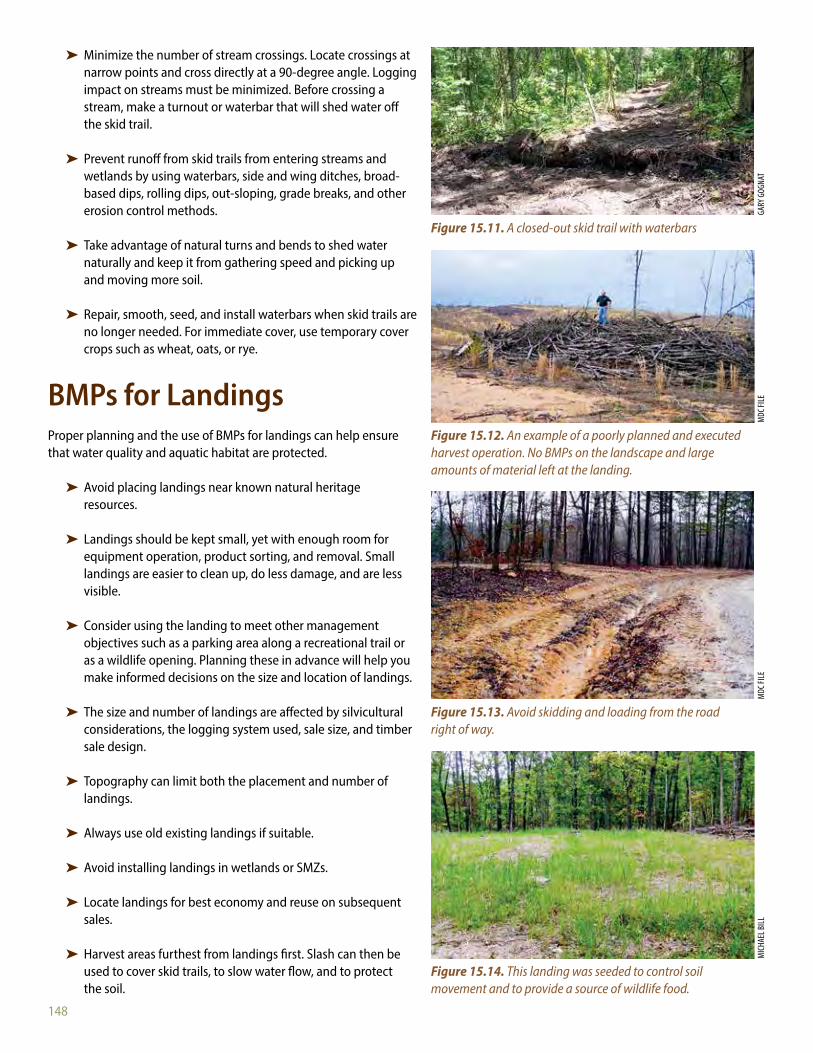
148
➤➤ Minimize the number of stream crossings. Locate crossings at narrow points and cross directly at a 90-degree angle. Logging impact on streams must be minimized. Before crossing a stream, make a turnout or waterbar that will shed water off the skid trail.
➤➤ Prevent runoff from skid trails from entering streams and wetlands by using waterbars, side and wing ditches, broad-based dips, rolling dips, out-sloping, grade breaks, and other erosion control methods.
➤➤ Take advantage of natural turns and bends to shed water naturally and keep it from gathering speed and picking up and moving more soil.
➤➤ Repair, smooth, seed, and install waterbars when skid trails are no longer needed. For immediate cover, use temporary cover crops such as wheat, oats, or rye.
BMPs for LandingsProper planning and the use of BMPs for landings can help ensure that water quality and aquatic habitat are protected.
➤➤ Avoid placing landings near known natural heritage resources.
➤➤ Landings should be kept small, yet with enough room for equipment operation, product sorting, and removal. Small landings are easier to clean up, do less damage, and are less visible.
➤➤ Consider using the landing to meet other management objectives such as a parking area along a recreational trail or as a wildlife opening. Planning these in advance will help you make informed decisions on the size and location of landings.
➤➤ The size and number of landings are affected by silvicultural considerations, the logging system used, sale size, and timber sale design.
➤➤ Topography can limit both the placement and number of landings.
➤➤ Always use old existing landings if suitable.
➤➤ Avoid installing landings in wetlands or SMZs.
➤➤ Locate landings for best economy and reuse on subsequent sales.
➤➤ Harvest areas furthest from landings first. Slash can then be used to cover skid trails, to slow water flow, and to protect the soil.
Figure 15.12. An example of a poorly planned and executed harvest operation. No BMPs on the landscape and large amounts of material left at the landing.
Figure 15.13. Avoid skidding and loading from the road right of way.
Figure 15.14. This landing was seeded to control soil movement and to provide a source of wildlife food.
MDC
FILE
MDC
FILE
MIC
HAEL
BILL
Figure 15.11. A closed-out skid trail with waterbars
GARY
GOG
NAT
➤➤ Always pile debris from clearing new landings on the downhill side to reduce soil erosion impacts.
➤➤ When possible, locate landings uphill on better-drained gently sloping sites.
➤➤ Natural revegetation of haul roads, skid trails, and landings when it is consistent with site conditions and goals can help stabilize soil. However, on disturbed sites with high potential for erosion, seeding and mulching may be warranted. Use only noninvasive plants such as wheat, oats, or rye for this cover crop (see Table 14.4).
➤➤ Avoid landings within view of travel routes or recreation areas. Use landforms and set them back in the woods as far as possible to decrease visibility.
➤➤ Avoid landings within a travel route right of way. This can result in a safety hazard and can have negative visual impacts.
➤➤ Before closing out a harvest operation, be sure to remove slash and other non-merchantable material. Back-blade landings and haul roads so they are smooth and free of ruts and mud holes. Seed exposed soil using seeding chart (see Table 14.4). For immediate cover, use temporary cover crops such as wheat, oats, or rye.
➤➤ If equipment oil changes are completed on the harvest area, the old oil and any containers, filters, etc., are to be removed from the harvest area for disposal.
➤➤ Pick up litter daily to keep the work area clean and visually appealing.
BMPs for SlashSlash includes all residual woody material created by logging or timber stand improvement. It is unavoidable when harvesting timber. Slash treatment should be specified in a harvest plan as well as in the harvesting contract. The treatment of slash has a defined cost and should only be done to meet the goals and objectives of a management plan or when working in visually sensitive areas. Slash provides soil nutrients and shelter for wildlife.
➤➤ When thinning and commercial harvesting with a chain saw, retain a minimum of one-third of the harvest residue (tops, branches, etc.) on site, distributed throughout the harvested area. This is particularly important during biomass regeneration harvest operations. This slash provides important wildlife habitat for many species as well as the continuation of the carbon cycle on the site. See Chapter 2 for more information.

149
➤➤ Always pile debris from clearing new landings on the downhill side to reduce soil erosion impacts.
➤➤ When possible, locate landings uphill on better-drained gently sloping sites.
➤➤ Natural revegetation of haul roads, skid trails, and landings when it is consistent with site conditions and goals can help stabilize soil. However, on disturbed sites with high potential for erosion, seeding and mulching may be warranted. Use only noninvasive plants such as wheat, oats, or rye for this cover crop (see Table 14.4).
➤➤ Avoid landings within view of travel routes or recreation areas. Use landforms and set them back in the woods as far as possible to decrease visibility.
➤➤ Avoid landings within a travel route right of way. This can result in a safety hazard and can have negative visual impacts.
➤➤ Before closing out a harvest operation, be sure to remove slash and other non-merchantable material. Back-blade landings and haul roads so they are smooth and free of ruts and mud holes. Seed exposed soil using seeding chart (see Table 14.4). For immediate cover, use temporary cover crops such as wheat, oats, or rye.
➤➤ If equipment oil changes are completed on the harvest area, the old oil and any containers, filters, etc., are to be removed from the harvest area for disposal.
➤➤ Pick up litter daily to keep the work area clean and visually appealing.
BMPs for SlashSlash includes all residual woody material created by logging or timber stand improvement. It is unavoidable when harvesting timber. Slash treatment should be specified in a harvest plan as well as in the harvesting contract. The treatment of slash has a defined cost and should only be done to meet the goals and objectives of a management plan or when working in visually sensitive areas. Slash provides soil nutrients and shelter for wildlife.
➤➤ When thinning and commercial harvesting with a chain saw, retain a minimum of one-third of the harvest residue (tops, branches, etc.) on site, distributed throughout the harvested area. This is particularly important during biomass regeneration harvest operations. This slash provides important wildlife habitat for many species as well as the continuation of the carbon cycle on the site. See Chapter 2 for more information.
➤➤ When thinning and commercial harvesting using a feller buncher or other mechanized harvester, leave one-third of treetops from sawtimber harvest and one-third of the typical-size small-diameter trees either on the ground or standing, distributed throughout the harvested area.
➤➤ Conduct harvest during leaf-off to minimize the appearance of slash.
➤➤ If moving slash on-site is desirable, use equipment that minimizes soil disturbance. Keep logging residue out of all streams, lakes, and open water wetlands, except in cases where residue placement is specifically prescribed for fish or wildlife habitat.
➤➤ Consider slashing tops within 100 feet of public roads or visually sensitive areas so debris is no more than 3 feet high. This should be included in the bid specifications and in the harvest/sale contract. The time and effort required to conduct this practice will have a defined cost to the landowner. This should only be prescribed when an area is in a visually sensitive location and when meeting landowner objectives.
Retention of Snags, Dens, and Super Canopy TreesBoth snags and den trees provide essential food and cover for many species of wildlife. Snags are standing dead trees. Den trees are alive with a cavity in the trunk or limbs large enough to shelter wildlife. Snags enhance the quality of wildlife habitats, providing nesting, denning, feeding and roosting sites, as well as escape areas.
Once a tree dies, the slow process of decay begins and birds utilize the tree for perching, feeding, and nesting. As the center of the snag softens, birds such as woodpeckers hollow
Figure 15.15. In this timber sale, tops have been slashed along the highway to enhance visual quality.
MIC
HAEL
BILL

150
out nest holes, which are later used by chickadees, kestrels, and screech owls. Many birds eat insects from snags, which prevents serious insect and disease problems in other trees. Snags also support many other organisms including insects, reptiles, and amphibians.
Den trees provide homes and food for many species including squirrels, raccoons, bears, owls, woodpeckers, and wood ducks. Many birds, mammals, and reptiles use tree cavities throughout the year for nesting, cover, and protection from the weather. Most oak species make good den trees because they are long-lived and provide a preferred food source. Other species such as hickory, American elm, sugar maple, American sycamore, eastern cottonwood, ash, and basswood also make excellent den trees.
Future den trees will show signs of rot, such as decayed branches, fungi, or wounds and scars.
Woodpecker activity also is a sign of disease or insect infestation. Good places for den trees are along streams and fence rows, as well as near small, isolated woodlots. Not all old, damaged trees make good den trees, however.
Super-emergent or super-canopy trees are large-diameter trees with crowns that extend well above the plane of the forest canopy; ideally at least 50–75 percent of the crown or 20–25 feet. Such trees are of high importance in bottomland forests and riparian areas to provide nesting sites for bald eagles and other raptors, for heron rookeries, and as potential large cavity trees.
BMPs for Wildlife EnhancementWhen conducting forest harvest activities it is important to plan to use BMPs to help protect and enhance wildlife habitat.
➤➤ Refer to Table 15.2 for recommended snag and den tree retention regarding forest cover pattern.
Table 15 .2: Remaining Trees (per acre)Heavily
ForestedRiparian Corridor
Bottomland Hardwoods
Dens Snags Dens Snags Dens SnagsMinimum 3 3 25 12 12 3
Optimum 7 6 25 12 12 3
* Note: Snags and dens > 10 inches in diameter are preferred — the larger the better.
➤➤ If not enough snags are present, deaden live trees by cutting a band about 3–4 inches wide around the tree with an axe or girdling the tree with a chain saw. Avoid using crop trees.
➤➤ Leave all snags that can be safely left in harvest areas.
➤➤ Retain large diameter (16-inch) standing dead trees with loose bark for bat maternity habitat. If trees meeting this criterion are removed, harvest during the winter months.
➤➤ If den trees are not present, create a one-fifth-acre (105-foot-diameter) group of trees surrounding at least one large tree that could potentially become a den tree. This should be done for every 5 acres harvested.
➤➤ If all den trees cannot be left, at a minimum leave those trees with holes high in the tree. The retention of dens located > 20 ft. high on the tree is important for many cavity-using wildlife species.
➤➤ Where conditions allow, leave or establish per acre:
➤● One snag larger than 20 inches DBH for pileated and red-headed woodpeckers
➤● Four snags between 10 and 20 inches DBH for species such as flying squirrel and the American kestrel
➤● Two snags between 6 and 10 inches DBH for species such as the eastern bluebird and black-capped chickadee
➤➤ Exceptions to the above den tree and snag guidelines may be made for a number of reasons, including:
➤● Operator safety (of loggers, aerial spray applicators, and others)
➤● Public safety (hazard trees near rights of way, along prescribed fire control lines, near recreation sites)
➤● Alignment of skid trails➤● Forest insects and diseases (such as oak wilt and pine
bark beetles)
➤➤ On average 2–4 super canopy (super-emergent) trees per acre, or those that have the potential to become such trees, should be retained in riparian areas or bottomland forest to provide the needed structural diversity. Preferred tree species include oak, cottonwood, and sycamore.
Figure 15.16. Den trees provide habitat for many cavity nesting species, such as the gray squirrel and the great horned owl.
MDC
FILE
NOPP
ADOL
PAOT
HONG

151
Figure 15.17. Special precautions should be considered when conducting timber harvesting activities in and around Indiana bat habitat.
Additional Considerations: Timber MarkingA common marking width covered by a timber marker during one pass is 40 yards (120 feet or 2 tree lengths). This equates to approximately 1 acre marked for every 125 yards traveled. Field technicians should use this reference to assist them in determining if enough snags or dens per acre are found within a given stand.
Federally Listed Bat SpeciesHabitats for imperiled bat species should be considered when conducting timber harvesting activities. Missouri is home to three federally-endangered bat species (gray bat, Indiana bat, and Ozark big-eared bat) and one bat species (northern long-eared bat) that is proposed for listing under the Act. See Chapter 3 for more information about threatened and endangered species.
For more information about Indiana and gray bats and their habitats and stressors, please access the U.S. Fish and Wildlife website at the following links:
➤➤ fws.gov/midwest/endangered/mammals/inba/index.html
➤➤ fws.gov/midwest/endangered/mammals/grbat_fc.html
For more information on best management practices for protecting Indiana bats in particular, go to mdc.mo.gov/node/9486.
BMPs for Retaining Coarse Woody DebrisCoarse woody debris consists of stumps, downed trees, and treetops with limbs larger than 6 inches at the large end. Coarse woody debris has many roles, such as providing seed germination sites, cycling nutrients and energy, acting as reservoirs of moisture during droughts, and promoting soil development and watershed protection. It also provides good habitat for a variety of insects, salamanders, snakes, and small animals that form the lower levels of the food chain. Many predators, ranging in size from shrews to black bears, rely on the food they find while searching in coarse woody debris. Ensuring that adequate snags and reserve trees are left during regeneration harvests is critical in maintaining coarse woody debris levels through time. Large fallen trees can provide important habitat for up to 50 years.
➤➤ Intentionally retain large-diameter trees as a future source of large coarse woody debris.
➤➤ Choose hardwood logs to leave, as they provide more hollows and cavities and are favored by certain amphibians.
Figure 15.18. Coarse woody debris can provide habitat and food for many wildlife species. This photo sequence shows coarse woody debris decomposing over time.
JIM R
ATHE
RT
MDC
, MOF
EP
Year 1 snag standing
Year 5
Year 10

152
➤➤ Debris from a variety of tree species and sizes should be left. In general, bigger is better.
➤➤ Refer to the section on slash management within this chapter for specifics about the retention of harvest residue to ensure soil productivity and wildlife habitat.
➤➤ Leave as many of the leaves and twigs (fine woody debris, or FWD) as possible on the harvesting site to encourage nutrient recycling and habitat for small animals.
➤➤ Avoid removing all coarse woody debris during biomass operations.
➤➤ Avoid leaving debris in places where it is likely to be swept into logjams that would cause water to cut around, eroding the bank and reducing water quality.
➤➤ Coarse woody debris left near permanent or seasonal water sources provides excellent wildlife benefits. If a site includes riparian areas, create four leave logs per acre in the riparian management zone, if fewer than this number already exist. The overall average number for the site, however, can remain at a minimum of two per acre.
➤➤ Exceptions to guidelines for providing coarse woody debris may be made for a number of reasons, including:
➤● Alignment of skid trails➤● Specific silvicultural applications (such as insect pests)
BMPs for Retaining Leave TreesTwo general options are recommended for retaining reserve trees (live trees left unharvested). Plans for retaining leave trees may utilize one of the options below. When appropriate, they may use the two options in combination.
Option 1 — Retaining leave trees in clumps or stripsOne option is to retain leave trees in clumps or strips. Consider the following guidance when prescribing this method.
➤➤ Benefits of clumping leave trees include:
➤● Potential to meet multiple management objectives simultaneously
➤● Visual quality➤● Equipment maneuverability➤● Longevity and durability of leave trees➤● Potential for greater biodiversity within clumps➤● Easier application in larger harvest units
➤● Breakup of harvest area and reduction in apparent harvest size
➤● Better regeneration and growth of sun-loving species on the rest of the site
➤● Potential to provide nesting sites for some interior forest species when clumps exceed two acres
➤● Increased animal feeding efficiency and protection from predators
➤➤ Distribute clumps throughout a harvest unit.
➤➤ Vary the size to be at least one-fifth or one-third acre in size.
➤➤ Locate clumps in draws and along protected slopes, near the edge of the stand on ridge-top locations, or just below the ridge if possible, to reduce the potential for windthrow.
➤➤ Leave travel lanes for wildlife in clear-cuts if the harvest area is wider than 300–400 feet.
➤➤ Center clumps around or coincide with such features as:
➤● Sinkholes, wetland inclusions, and seasonal ponds➤● One or more large active den trees or cavity trees or
at least good candidates for potential cavities➤● Mast trees➤● Raptor nests or rookeries➤● Sensitive communities or sites
Option 2 — Scattered individualsAs an alternative or supplement to clumps or strips, employ scattered individual leave trees, distributed throughout the site, especially if they are larger, wind-firm specimens of preferred species. Scattered leave trees may be easier to apply to small or narrow harvest units than clumps. Consider the following guidance when prescribing this method.
➤➤ Leave a variety of sizes and species of trees, along with the intended seed or shelter trees, to be retained during the final harvest.
➤➤ Snag and den trees should be protected (refer to guidance above).
➤➤ If using a combination of clumps and scattered trees, plan for and protect the integrity of reserve tree clumps in initial harvest entries.
➤➤ Prevent damage to leave trees in initial and follow-up harvest entries.
➤➤ Exceptions to the previous leave tree and snag guidelines may be made for a number of reasons:

153
➤➤ Debris from a variety of tree species and sizes should be left. In general, bigger is better.
➤➤ Refer to the section on slash management within this chapter for specifics about the retention of harvest residue to ensure soil productivity and wildlife habitat.
➤➤ Leave as many of the leaves and twigs (fine woody debris, or FWD) as possible on the harvesting site to encourage nutrient recycling and habitat for small animals.
➤➤ Avoid removing all coarse woody debris during biomass operations.
➤➤ Avoid leaving debris in places where it is likely to be swept into logjams that would cause water to cut around, eroding the bank and reducing water quality.
➤➤ Coarse woody debris left near permanent or seasonal water sources provides excellent wildlife benefits. If a site includes riparian areas, create four leave logs per acre in the riparian management zone, if fewer than this number already exist. The overall average number for the site, however, can remain at a minimum of two per acre.
➤➤ Exceptions to guidelines for providing coarse woody debris may be made for a number of reasons, including:
➤● Alignment of skid trails➤● Specific silvicultural applications (such as insect pests)
BMPs for Retaining Leave TreesTwo general options are recommended for retaining reserve trees (live trees left unharvested). Plans for retaining leave trees may utilize one of the options below. When appropriate, they may use the two options in combination.
Option 1 — Retaining leave trees in clumps or stripsOne option is to retain leave trees in clumps or strips. Consider the following guidance when prescribing this method.
➤➤ Benefits of clumping leave trees include:
➤● Potential to meet multiple management objectives simultaneously
➤● Visual quality➤● Equipment maneuverability➤● Longevity and durability of leave trees➤● Potential for greater biodiversity within clumps➤● Easier application in larger harvest units
➤● Breakup of harvest area and reduction in apparent harvest size
➤● Better regeneration and growth of sun-loving species on the rest of the site
➤● Potential to provide nesting sites for some interior forest species when clumps exceed two acres
➤● Increased animal feeding efficiency and protection from predators
➤➤ Distribute clumps throughout a harvest unit.
➤➤ Vary the size to be at least one-fifth or one-third acre in size.
➤➤ Locate clumps in draws and along protected slopes, near the edge of the stand on ridge-top locations, or just below the ridge if possible, to reduce the potential for windthrow.
➤➤ Leave travel lanes for wildlife in clear-cuts if the harvest area is wider than 300–400 feet.
➤➤ Center clumps around or coincide with such features as:
➤● Sinkholes, wetland inclusions, and seasonal ponds➤● One or more large active den trees or cavity trees or
at least good candidates for potential cavities➤● Mast trees➤● Raptor nests or rookeries➤● Sensitive communities or sites
Option 2 — Scattered individualsAs an alternative or supplement to clumps or strips, employ scattered individual leave trees, distributed throughout the site, especially if they are larger, wind-firm specimens of preferred species. Scattered leave trees may be easier to apply to small or narrow harvest units than clumps. Consider the following guidance when prescribing this method.
➤➤ Leave a variety of sizes and species of trees, along with the intended seed or shelter trees, to be retained during the final harvest.
➤➤ Snag and den trees should be protected (refer to guidance above).
➤➤ If using a combination of clumps and scattered trees, plan for and protect the integrity of reserve tree clumps in initial harvest entries.
➤➤ Prevent damage to leave trees in initial and follow-up harvest entries.
➤➤ Exceptions to the previous leave tree and snag guidelines may be made for a number of reasons:
Figure 15.19. Wildlife clump within a clear-cut
Figure 15.20. Aerial photo shows a stand with scattered individuals left within a shelterwood harvest and wildlife corridors left between clear-cuts
➤● Operator safety (of loggers, aerial spray applicators, and others)
➤● Public and contractor safety (hazard trees near rights of way, recreation sites, and roads)
➤● Forest insects and diseases➤● Shallow-rooted trees with little wind resistance. Avoid
reserving individual trees on mid-slopes, ridge tops, or in other areas with thin soil.
➤● Excessive shade inhibiting forest regeneration
For the most part, these potential problems can be avoided by carefully designing the retention of reserve trees and considering their distribution and composition.
Note: During partial harvests such as thinnings and uneven-aged selection harvests, ensure that the remaining stand includes snags and den trees as recommended in Table 15.2.
BMPs for Maintaining MastMast is important to many wildlife species. Consider the following BMPs when conducting forest harvesting activities to ensure that mast is protected and enhanced.
➤➤ Consider maintaining the diversity of mast sources on the site, as well as some level of current production of mast sources. For example, maintain landings as openings or avoid machinery operation in pockets of fruit-producing shrubs.
➤➤ When other factors are equal, favor mast producers over non-mast producers.
➤➤ Use long-term rotation ages to provide mast for wildlife. Uneven-aged management (UAM) is a silvicultural management strategy for this practice.
➤➤ Use directional tree felling to avoid damaging soft mast trees such as dogwood, cherry, mulberry, and persimmon.
➤➤ Refer to Table 15.3 for a list of hard and soft mast species.
Table 15 .3 . Hard and Soft Mast SpeciesHard Mast Species Soft Mast Species
oaks, hickory, pecan, walnut, hazelnut, and pine seed
serviceberry, pawpaw, hackberry, sugarberry, dogwoods, hawthorns, persimmon, spicebush, red mulberry, black gum, black cherry, wild plums, sumacs, Carolina buckthorn, gooseberries, wild roses, blackberries, raspberries, dewberries, elderberry, sassafras, green briars, coral berry, blueberries, grapes, hollies, pokeweed, poison ivy, and black locust
0 10 20 30 40 50 60 70 80YEARS
Good
Medium
Fair
Low
None
Soft Mast Hard M
ast
Forage
Figure 15.21. Relationship of hard mast and soft mast (forage) in an oak-hickory forest with stand age
MDC
FILE
MDC
FILE
MDC
FILE

154
BMPs for Protecting Residual TreesTrees should not be marked for cutting unless they can be safely and efficiently felled without excessive damage to the residual stand. Damage to leave trees incurred during timber harvesting can negatively impact individual-tree health and vigor. Damage to the residual stand will result in quality, volume, and value losses. When implemented carefully, residual stand damage can be minimized, although some damage is unavoidable. Pre-harvest planning and layout of landings and primary skid trails can help to minimize residual stand damage. Oversight of the logging crew may also help to minimize damage to the residual stand.
➤➤ Directionally fell trees to avoid damaging residual trees, while enhancing skidding efficiency.
➤➤ Only mark trees for harvest that can be safely felled without damaging residual trees.
➤➤ Remove limbs of felled trees before skidding (i.e., avoid whole-tree skidding).
➤➤ Keep residual stand damage to less than 10 percent of leave trees.
➤➤ Keep spatial extent of primary skid trails to less than 10 percent of harvest area.
➤➤ If partial harvesting with plans to reenter in the near future (e.g., shelterwood or selection system), consider a skid trail layout to accommodate not only present but future entries.
➤➤ Keep skid trails at least 20 feet from high-value leave trees.
➤➤ Leave unacceptable growing stock (UGS) trees or high stumps to serve as “bumpers” between skid trails and high-value leave trees and/or patches of reproduction.
➤➤ Mark and instruct the logger to protect desirable saplings and poles.
➤➤ Harvest when soils are dry or frozen.
➤➤ Avoid harvesting from spring to early summer when cambium is growing and bark is easily removed (i.e., peeling stage).
➤➤ Use the smallest equipment possible and size trails to accommodate equipment.
➤➤ Lay out a well-planned primary skid trail system.
Figure 15.22. This logger is using a small cable skidder to minimize residual damage.
Figure 15.23. When using mechanized felling equipment, it is important to take special care to avoid residual damage, as shown above.
DAVI
D ST
ONNE
RM
DC FI
LE
➤➤ Use automated felling machinery only if the operator is skilled in protecting residual trees.
➤➤ Mark trees for cutting that will obviously be damaged by the felling of larger-diameter trees.
➤➤ Woody biomass should be harvested at the same time as saw-log harvests to avoid re-entry.
Consult a Forester and Hire a Professionally Trained LoggerSustainable forestry demands a skilled workforce of trained foresters and loggers with the adaptability, knowledge, and experience to manage forest resources sustainably. A professional forestry operation is a complex process involving numerous steps and the coordination of activities before, during, and after the harvest. When forestry operations are conducted by an untrained workforce, there is a greater risk of unsustainable practices that do not achieve landowner objectives, can cause negative site impacts, and can reduce future stand productivity. This is why it is critical for a landowner to consult a professional forester before conducting a timber sale and to consider only those bids submitted from skilled and reputable logging firms.

155
➤➤ Avoid wet spots and poorly drained areas.
➤➤ Use straight and gently curving skid trails.
➤➤ If wolf trees are to be killed as part of a liberation treatment, consider girdling, which will help protect more desirable trees from felling damage while benefiting wildlife through snag creation.
➤➤ If regenerating with the shelterwood method, pay close attention to the length of time it takes for regeneration development to reach 2 inches in basal diameter as compared to the time that is intended to lapse before the final cut. Logging when the regeneration is larger than 2 inches can negatively impact future crop trees.
➤➤ Avoid damaging residual trees when skidding tree-length logs; some locations may require bucking trees in the woods to reduce impacts.
➤➤ Consider using leaf-off logging in sensitive areas.
➤➤ Consider leave-tree marking when using mechanical felling.
➤➤ Use automated felling machinery only if the operator is skilled in protecting residual trees.
➤➤ Mark trees for cutting that will obviously be damaged by the felling of larger-diameter trees.
➤➤ Woody biomass should be harvested at the same time as saw-log harvests to avoid re-entry.
Consult a Forester and Hire a Professionally Trained LoggerSustainable forestry demands a skilled workforce of trained foresters and loggers with the adaptability, knowledge, and experience to manage forest resources sustainably. A professional forestry operation is a complex process involving numerous steps and the coordination of activities before, during, and after the harvest. When forestry operations are conducted by an untrained workforce, there is a greater risk of unsustainable practices that do not achieve landowner objectives, can cause negative site impacts, and can reduce future stand productivity. This is why it is critical for a landowner to consult a professional forester before conducting a timber sale and to consider only those bids submitted from skilled and reputable logging firms.
Figure 15.24. Loggers who have been through the Professional Timber Harvester program have been trained to use best management practices to help protect forest health and water quality.
DAVI
D ST
ONNE
R
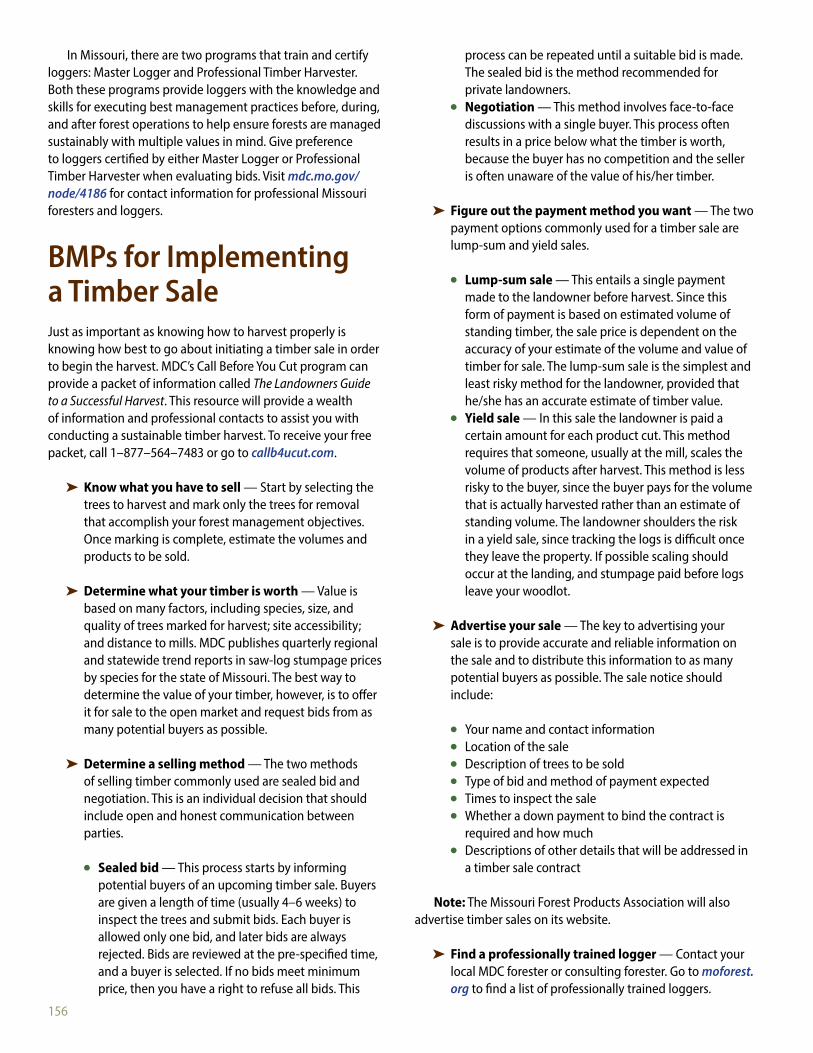
156
In Missouri, there are two programs that train and certify loggers: Master Logger and Professional Timber Harvester. Both these programs provide loggers with the knowledge and skills for executing best management practices before, during, and after forest operations to help ensure forests are managed sustainably with multiple values in mind. Give preference to loggers certified by either Master Logger or Professional Timber Harvester when evaluating bids. Visit mdc.mo.gov/node/4186 for contact information for professional Missouri foresters and loggers.
BMPs for Implementing a Timber SaleJust as important as knowing how to harvest properly is knowing how best to go about initiating a timber sale in order to begin the harvest. MDC’s Call Before You Cut program can provide a packet of information called The Landowners Guide to a Successful Harvest. This resource will provide a wealth of information and professional contacts to assist you with conducting a sustainable timber harvest. To receive your free packet, call 1–877–564–7483 or go to callb4ucut.com.
➤➤ Know what you have to sell — Start by selecting the trees to harvest and mark only the trees for removal that accomplish your forest management objectives. Once marking is complete, estimate the volumes and products to be sold.
➤➤ Determine what your timber is worth — Value is based on many factors, including species, size, and quality of trees marked for harvest; site accessibility; and distance to mills. MDC publishes quarterly regional and statewide trend reports in saw-log stumpage prices by species for the state of Missouri. The best way to determine the value of your timber, however, is to offer it for sale to the open market and request bids from as many potential buyers as possible.
➤➤ Determine a selling method — The two methods of selling timber commonly used are sealed bid and negotiation. This is an individual decision that should include open and honest communication between parties.
➤● Sealed bid — This process starts by informing potential buyers of an upcoming timber sale. Buyers are given a length of time (usually 4–6 weeks) to inspect the trees and submit bids. Each buyer is allowed only one bid, and later bids are always rejected. Bids are reviewed at the pre-specified time, and a buyer is selected. If no bids meet minimum price, then you have a right to refuse all bids. This
process can be repeated until a suitable bid is made. The sealed bid is the method recommended for private landowners.
➤● Negotiation — This method involves face-to-face discussions with a single buyer. This process often results in a price below what the timber is worth, because the buyer has no competition and the seller is often unaware of the value of his/her timber.
➤➤ Figure out the payment method you want — The two payment options commonly used for a timber sale are lump-sum and yield sales.
➤● Lump-sum sale — This entails a single payment made to the landowner before harvest. Since this form of payment is based on estimated volume of standing timber, the sale price is dependent on the accuracy of your estimate of the volume and value of timber for sale. The lump-sum sale is the simplest and least risky method for the landowner, provided that he/she has an accurate estimate of timber value.
➤● Yield sale — In this sale the landowner is paid a certain amount for each product cut. This method requires that someone, usually at the mill, scales the volume of products after harvest. This method is less risky to the buyer, since the buyer pays for the volume that is actually harvested rather than an estimate of standing volume. The landowner shoulders the risk in a yield sale, since tracking the logs is difficult once they leave the property. If possible scaling should occur at the landing, and stumpage paid before logs leave your woodlot.
➤➤ Advertise your sale — The key to advertising your sale is to provide accurate and reliable information on the sale and to distribute this information to as many potential buyers as possible. The sale notice should include:
➤● Your name and contact information➤● Location of the sale➤● Description of trees to be sold➤● Type of bid and method of payment expected➤● Times to inspect the sale➤● Whether a down payment to bind the contract is
required and how much➤● Descriptions of other details that will be addressed in
a timber sale contract
Note: The Missouri Forest Products Association will also advertise timber sales on its website.
➤➤ Find a professionally trained logger — Contact your local MDC forester or consulting forester. Go to moforest.org to find a list of professionally trained loggers.

157
➤➤ Draw up a timber sale contract — A contract protects the interests of both the seller and the buyer and must be agreed upon and signed by both parties. The contract does not need to be complex, but it should reflect what you and the logger have agreed to with respect to the sale. You may want to have a lawyer draft or review your contract. It is important that you include the provisions that you feel are important regarding your property. See sample timber sale contract in Appendix D.
➤➤ Supervise the timber harvest — One of the most important things you can do during the harvest is to inspect it periodically and have the sale administered by a professional forester. This provides oversight on the operation as it is taking place. It also is a good idea to walk the site with the logger prior to the harvest. During this walk, get to know the logger and clearly define your objectives for harvesting in the first place. A logger who is familiar with you and your objectives will likely do a better job.
➤➤ Practice good forestry — It is important that good forestry practices are applied during and after a harvest operation. Follow the best management practices set out in this manual in order to ensure that the harvest will be sustainable and will meet your forest management plan objectives.
BMPs for Closing Out a Harvest OperationThere can be many years or even decades between cutting cycles on a particular site. Ensuring that BMPs are functioning properly and the site is stabilized before the operation is closed will protect water quality and aquatic habitat over the long term.
➤➤ Inspect and maintain any soil-stabilization practices installed. Do not move the skidder from the harvest site until the waterbars and other work have been completed.
➤➤ Rehabilitate landings and skid trails in order to mitigate soil compaction and help reduce erosion. This could include disking, seeding, and mulching.
➤➤ Natural revegetation of haul roads, skid trails, and landings when it is consistent with site conditions and goals can help stabilize soil. On disturbed sites with high potential for erosion, seeding and mulching may be warranted. Use seed appropriate for the season on main skid trails, landings, and roads that will be closed. A seeding chart is located in Chapter 14.
➤➤ For jobs finished in the winter, use straw or bark mulch on areas most likely to erode.
➤➤ Avoid removing soil from the general harvest area to rehabilitate roads, landings, and skid trails. Use already-disturbed soil, if needed, rather than disturbing additional soil.
Figure 15.25. Mulching a landing with clean straw during a winter harvesting operation
MIC
HAEL
BILL

158
Additional ResourcesForest Management for Missouri Landowners, revised edition. Missouri Department of Conservation. 2007. Available at mdc.
mo.gov/node/5574.Missouri Watershed Protection Practices: Management Guidelines for Maintaining Forested Watersheds to Protect Streams.
Missouri Department of Conservation. 2006. Available at mdc.mo.gov/node/9331.Missouri Woody Biomass Harvesting Best Management Practices Manual. Missouri Department of Conservation. 2009.
Available at mdc.mo.gov/node/9806.Sustaining Minnesota Forest Resources: Voluntary Site-Level Forest Management Guidelines for Landowners, Loggers and
Resource Managers. Minnesota Forest Resources Council. 2005. Available at frc.state.mn.us/initiatives_sitelevel.html.Wisconsin Forest Management Guidelines. PUB-FR-226, 2011. Available at dnr.wi.gov/topic/ForestManagement/guidelines.
html.
References to Other Chapters➤■ Timber harvesting activities can potentially impact soil and water resources. The goal is to minimize this impact, to
maintain soil productivity, and to protect water quality. A decrease in soil productivity could affect the level of timber harvesting the forest can sustain, as well as other forest values, such as wildlife habitat and biodiversity. The assistance of professional foresters and soil consultants can aid you in meeting your sustainable forest management goals. Information and assistance are available from the Missouri Department of Conservation, the USDA Natural Resources Conservation Service (NRCS), or the University of Missouri Extension. Detailed soil maps of your property are available from the NRCS on the Center for Applied Research and Environmental Systems (CARES) and Web Soil Survey websites: cares.missouri.edu and websoilsurvey.nrcs.usda.gov/app/HomePage.htm. Refer to BMPs in this chapter to minimize the impacts to soil productivity and water quality. See Chapter 5 and Chapter 7 for more detailed information regarding potential impacts.
➤■ The NRCS Ecological Classification System (ECS) is currently under development. This tool will help you make informed decisions based on slope, aspect, geology, soil properties, and potential vegetative communities. Once the ECS is completed, this tool will provide valuable assistance when developing a forest management plan. More information on ecological classification systems is located in Chapter 11.
➤■ Prior to beginning a timber sale, consult a professional forester, a Missouri Department of Conservation (MDC) private land conservationist, an MDC wildlife biologist, or an MDC natural history biologist for information about the occurrence of endangered or threatened species, species and natural communities of conservation concern, rare tree species, or sensitive communities present on or near the management area. These species and natural communities can be impacted by harvesting activities, by site preparation activities, by altering the existing vegetation, or by introducing new species. These professionals can help you modify management activities to maintain, promote, or enhance species and natural communities on the site. See the Resource Directory, and see Chapter 3 for more information.
➤■ Timber harvesting activities in visually sensitive areas can have negative impacts to visual quality. Refer to guidance in this chapter when conducting activities in visually sensitive areas. See Chapter 4 for guidance on determining visually sensitive locations.
➤■ Consider the potential spread of invasive species when conducting timber harvest activities. See Chapter 9 for more information.
➤■ Timber harvesting activities can negatively impact cultural resources. It is important to take the proper steps to avoid or mitigate impacts. Refer to the guidance in this chapter. See Chapter 6 for general information related to cultural resources.
➤■ Appendix C includes a pre- and post-harvesting checklist that can be a helpful tool for managers to use in clarifying objectives, planning activities, and integrating management concerns.

159
CHAPTER 16Pesticide Use
CLIFF
WHI
TE
Topics Covered➤■ Pesticides➤■ Integrated Pest Management➤■ Characteristics That Determine a Chemical’s
Likelihood of Impacting Water Quality➤■ Soil and Site Characteristics That Influence Whether a
Chemical Will Reach Groundwater or Surface Water➤■ Certified Applicators and Operators in Missouri➤■ Selecting the Appropriate Chemical➤■ Selecting an Application Method➤■ BMPs for Spills and Emergency Response
➤■ BMPs to Protect Visual Quality➤■ BMPs to Slow the Spread of Invasive Species➤■ BMPs to Protect Cultural Resources➤■ BMPs for ANY Chemical Use
➤➤ General BMPs➤➤ Timing and Weather Considerations➤➤ Spill Containment Kit➤➤ Transportation of Chemicals➤➤ Mixing and Loading Operations➤➤ Pre-Application and Application Activities➤➤ Storage of Chemicals➤➤ Protecting Water Resources➤➤ Equipment Clean-Up: Container and Waste Disposal

160
PesticidesPesticides are defined as any material that is applied with the intent to kill, attract, repel, interrupt, or regulate growth rates of plants or pests. Pesticides include a wide assortment of chemicals with specialized names and functions; they are often grouped according to what they control. Some of the most common groups used in forestry include herbicides, insecticides, fungicides, growth regulators, and repellents.
Applications of pesticides can assist in meeting forest management objectives by promoting the establishment, survival, growth, or maintenance of desired tree species. Timber Stand Improvement (TSI) recommendations often include the use of pesticides as a cost-effective silvicultural activity. The acreage involved in TSI can vary depending on many variables, but the application rates will generally always be small.
As a standard best practice, prescriptions should call for the least amount of pesticide necessary to achieve management objectives. Use alternatives to chemical pesticides when they are legal, cost effective, and a viable option for meeting management objectives.
When pesticides are used, select the least-toxic and the narrowest spectrum products labeled for the target species. Follow all applicable label requirements, best management practices, and Missouri Department of Agriculture regulations.
Integrated Pest ManagementIntegrated Pest Management (IPM) is a concept that recognizes ecological, social, and economic values in resource planning and management.
IPM in a forest ecosystem is the process of managing a forest with all available tools so that potentially destructive organisms such as insects and diseases are maintained at a level that is below an economic or damage threshold. These tools are used in conjunction with forest management practices designed to meet the overall goals of the landowner. IPM tools include establishing acceptable pest thresholds (economic or damage), applying preventive cultural practices, and monitoring. Mechanical controls, biological controls, and chemical controls (including the use of pheromones) are all considered when developing an IPM approach.
As a rule of thumb, forest management practices that encourage good growth also produce more pest-resistant stands. Typically, pest problems arise in stands that are under stress. Many stress factors, but not all, are caused by poor management practices that can be avoided with proper
guidance and planning. Many insects, diseases, and plants do not significantly impact a landowner’s management objectives. A careful evaluation of the potential impact of these organisms should always take place before deciding to use a pesticide application. Pesticides should be considered as part of an overall program to control pest problems and not the sole solution.
Characteristics That Determine a Chemical’s Likelihood of Impacting Water QualityThere is a wide variety of chemicals available for use, and their individual characteristics are equally diverse. One of the more important concerns is what level of risk those characteristics pose to water quality.
➤➤ Solubility is the ability of a chemical to dissolve in water. The greater the solubility, the greater the chance that the chemical will leach to groundwater or move as a solution in surface water. Chemicals with very low water solubility tend to remain at the soil surface and can potentially move into surface water when attached to sediment runoff.
➤➤ Adsorption is the inherent ability of a chemical to attach to soil particles. Some chemicals stick very tightly to soil, while others are easily dislodged. Adsorption rates increase as soil organic matter increases. The greater a chemical’s ability to adhere to soil particles, the less the potential for that chemical to move (except by soil erosion in surface runoff). Conversely, the lower a chemical’s ability to adhere to soil particles, the greater the potential for that chemical to leach into groundwater or move in solution in surface runoff.
➤➤ Half-life is the time it takes for a chemical in soil to be degraded so that its concentration decreases by one-half. Each chemical will have successive half-lives, which will continually decrease its concentrations by one-half. The persistence of the chemical in soil is the time it takes for the chemical to degrade to the point where it is no longer active. Chemicals that do not break down quickly can be a hazard if they move into groundwater or surface water in toxic forms.

161
Soil and Site Characteristics That Influence Whether a Chemical Will Reach Groundwater or Surface Water
➤➤ Soils that are deep, high in organic matter, medium to fine textured (silty or clayey), and structurally sound are relatively good at “capturing” chemicals until they can be broken down by microbial activity.
➤➤ The greater the depth to groundwater, the more the filtering action of the soil.
➤➤ Soils that are shallow (less than 20 inches) or coarse textured and permeable are more likely to leach chemicals.
➤➤ Soils that are crusted or compacted are more likely to encourage chemical runoff in surface water.
➤➤ Surface water contamination can easily occur when chemicals are applied to sites adjacent to lakes, streams, wetlands, and natural drainage ways. If there is a quick conduit from the surface to the water table, such as a sinkhole, chemicals can be washed directly into the groundwater.
Forest Certification NoteWhen working on forest land that is enrolled in a forest certification system, it is important to understand which standards apply and how to implement them. All forest certification systems require compliance with state and federal regulations that govern the use of pesticides. Additionally, some forest certification systems may not allow the use of certain pesticides, regardless of the label recommendations.
Certified Applicators and Operators in MissouriThe Missouri Department of Agriculture regulates commercial applications of pesticides and any application for restricted use pesticides with the Missouri Pesticide Use Act. This is to protect the health and welfare of the citizens of Missouri and to prevent adverse effects to the environment. These certified applicators and operators must know how to read a pesticide label and be able to follow directions in order to use them properly and safely. There are three types of certified applicators and operators in Missouri:
➤➤ A certified commercial applicator is authorized to use, supervise the use of, or determine the need for the use of any pesticide, whether classified for restricted use or for general use, while engaged in the business of using pesticides on lands of another as a direct service to the public in exchange for a fee or compensation.
➤➤ A certified noncommercial applicator is authorized to use, or to supervise the use of, any pesticide that is classified for restricted use only, on lands owned or rented by the applicator or their employer.
➤➤ A certified public operator is authorized to use, or to supervise the use of, any pesticide that is classified for restricted use, in the performance of their duties as an official or employee of any agency of the state of Missouri, or any political subdivision thereof, or any other governmental agency.
Selecting the Appropriate ChemicalWhen the decision has been made to use a pesticide application, you need to know that it is the right pesticide for your particular pest management needs, whether the pesticide can be used safely under your application conditions, and how much product you need for the treatment area.
Before applying the pesticide, read the label in order to determine:
➤➤ What safety measures must be followed
➤➤ Where you can legally use the pesticide
➤➤ When to apply the pesticide. Consider factors such as the life cycle of the pest, pesticide characteristics, and its potential to contaminate the soil, surface water, and groundwater.
➤➤ How to apply the pesticide properly. This includes selecting the proper personal protection equipment and proper application methods, equipment, and formulations.
➤➤ If any special use restrictions apply, such as re-entry into the treated area or prohibitions against certain types of application methods or equipment
➤➤ If any restrictions apply on the use of the pesticide, such as environmental conditions (weather), buffers, and potential for drift

162
Selecting an Application MethodThe pesticide application method you choose depends on the nature and habits of the target pest, the characteristics of the target site, the properties of the pesticide, the suitability of the application equipment, and the cost and efficiency of alternative methods. Your choice is often predetermined by one or more of these factors. To make an effective, safe, and efficient application, read the label first, and make certain the application equipment is properly selected, operated, calibrated, and maintained.
There are several application methods including, but not limited to, broadcast, directed spray, foliar, basal, cut stump, hack and squirt, and spot and soil application. Your choice should be based on careful consideration of the nature and habits of the target, site, pesticide chosen, available equipment, cost, efficiency, and effectiveness. Care should be taken to minimize drift, overspray, soil disturbance, visual impacts, etc., and to avoid surface water and groundwater contamination.
If endangered, threatened, or special-concern species are known to be present, work with an MDC natural history biologist to select pesticides, application methods, and equipment with consideration to protect those species.
BMPs for Spills and Emergency ResponseA spill is the release of a pesticide or compound into the environment, including air, water, soil, etc., in any manner other than its intended use. Although accidents and emergencies involving pesticides are rare, unfortunately they can and do occur. Many pesticide accidents can be traced to applicator carelessness or misuse. Pesticide spills and accidents can result in water, soil, and air contamination; damage to plants; and injury to livestock, wildlife, or pets. They can also endanger the health of the applicator or other people.
➤➤ Familiarize yourself with the labels and Material Safety Data Sheets (MSDS) for the pesticide. These are a source of cautionary information and data.
➤➤ Maintain a spill containment and clean-up kit appropriate for the site and all materials.
➤➤ Should a spill occur, treat it properly. The recommended steps include the following:
➤● Protect yourself. Be sure you wear the necessary protective clothing and equipment so that you do not expose yourself to the material.
➤● Follow the Three Cs:➤➤ Control: Control the spill (stop the leak); for instance, a smaller container that is leaking can be placed inside a larger container.➤➤ Contain: Contain the spilled material in as small an area as possible. Do everything possible to keep it from spreading or getting worse. You may need to construct a small dam with a shovel or absorbent material such as fine sand or pet litter. It is important not to allow any chemical to get into any body of water, including storm sewers.➤➤ Clean up the spill: Specific recommendations regarding clean-up procedures can be obtained from the chemical manufacturer. The chemical manufacturer lists an emergency number on the product label, which anyone can call for information regarding how to respond to an emergency situation that involves a specific product. The MSDS for the product will also outline what to do in case of a spill.
BMPs to Protect Visual QualityThe use of herbicides can have negative impacts on visual quality. The following BMPs can be used to minimize these impacts:
Figure 16.1. Cut and treat operations are used to prevent resprouting of undesirable species.
CLIFF
WHI
TE
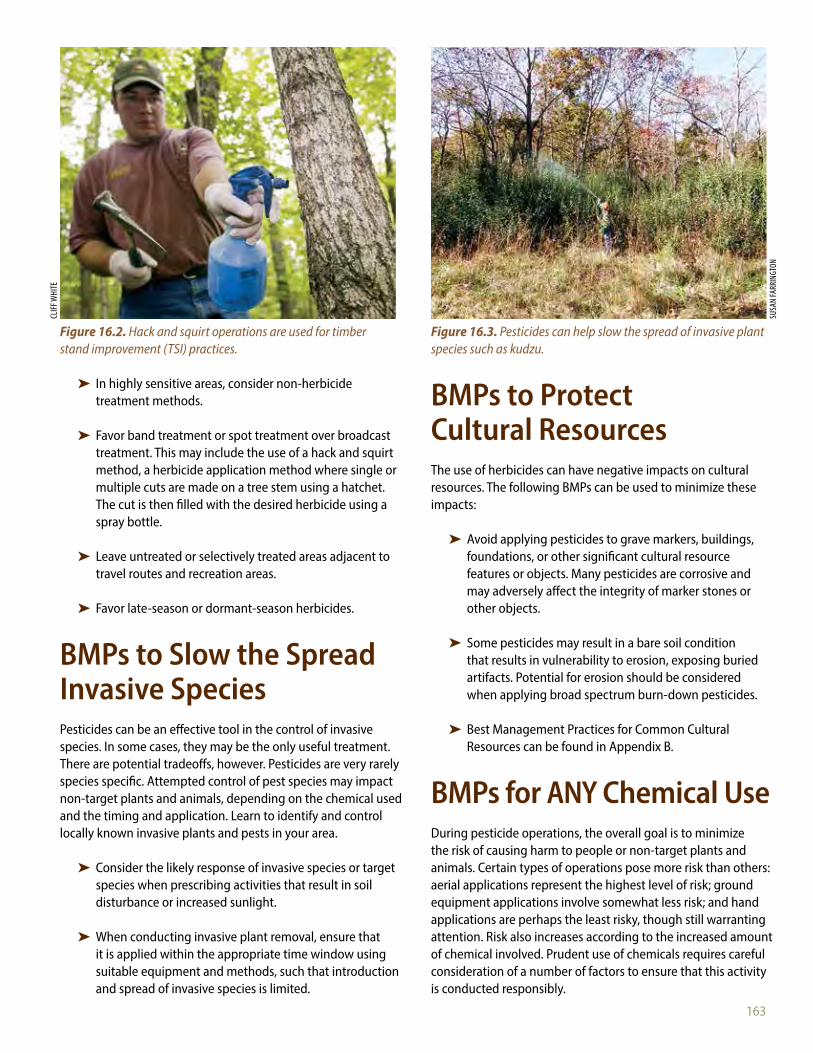
163
➤➤ In highly sensitive areas, consider non-herbicide treatment methods.
➤➤ Favor band treatment or spot treatment over broadcast treatment. This may include the use of a hack and squirt method, a herbicide application method where single or multiple cuts are made on a tree stem using a hatchet. The cut is then filled with the desired herbicide using a spray bottle.
➤➤ Leave untreated or selectively treated areas adjacent to travel routes and recreation areas.
➤➤ Favor late-season or dormant-season herbicides.
BMPs to Slow the Spread Invasive SpeciesPesticides can be an effective tool in the control of invasive species. In some cases, they may be the only useful treatment. There are potential tradeoffs, however. Pesticides are very rarely species specific. Attempted control of pest species may impact non-target plants and animals, depending on the chemical used and the timing and application. Learn to identify and control locally known invasive plants and pests in your area.
➤➤ Consider the likely response of invasive species or target species when prescribing activities that result in soil disturbance or increased sunlight.
➤➤ When conducting invasive plant removal, ensure that it is applied within the appropriate time window using suitable equipment and methods, such that introduction and spread of invasive species is limited.
BMPs to Protect Cultural ResourcesThe use of herbicides can have negative impacts on cultural resources. The following BMPs can be used to minimize these impacts:
➤➤ Avoid applying pesticides to grave markers, buildings, foundations, or other significant cultural resource features or objects. Many pesticides are corrosive and may adversely affect the integrity of marker stones or other objects.
➤➤ Some pesticides may result in a bare soil condition that results in vulnerability to erosion, exposing buried artifacts. Potential for erosion should be considered when applying broad spectrum burn-down pesticides.
➤➤ Best Management Practices for Common Cultural Resources can be found in Appendix B.
BMPs for ANY Chemical UseDuring pesticide operations, the overall goal is to minimize the risk of causing harm to people or non-target plants and animals. Certain types of operations pose more risk than others: aerial applications represent the highest level of risk; ground equipment applications involve somewhat less risk; and hand applications are perhaps the least risky, though still warranting attention. Risk also increases according to the increased amount of chemical involved. Prudent use of chemicals requires careful consideration of a number of factors to ensure that this activity is conducted responsibly.
Figure 16.2. Hack and squirt operations are used for timber stand improvement (TSI) practices.
Figure 16.3. Pesticides can help slow the spread of invasive plant species such as kudzu.
CLIFF
WHI
TE
SUSA
N FA
RRIN
GTON

164
General BMPs➤➤ Know the law: Federal and state regulations about pesticides are designed to protect the public and the environment from potential adverse effects of pesticides. It is the applicator’s responsibility to be familiar with these laws and to comply with the requirements. Laws and regulations about pesticide use are constantly evolving. It is the applicator’s responsibility to stay current on legal requirements at all government levels. By complying with federal and state pesticide laws, the applicator not only avoids penalties but also ensures that pesticides are handled and applied in as safe a manner as possible.
➤➤ Read the label: The pesticide product label is the main method of communication between a pesticide manufacturer and pesticide users. The information printed on or attached to the pesticide container is the label. By law, pesticide users are required to comply with all the instructions and to use the directions found on the pesticide product label. Labeling includes the label itself plus all other information referenced on the label or received from the manufacturer about the product when you buy it. The labeling gives you instructions on how to use the product safely and correctly.
➤➤ Conduct on-site meetings prior to applications: The contractor, landowner, and resource manager should meet on-site prior to moving equipment onto a site. Such meetings can help assure common understanding of landowner objectives, contract specifications, and site conditions.
Timing and Weather Considerations➤➤ Only apply chemicals under favorable weather conditions.➤➤ Avoid applying pesticides when the likelihood of significant drift exists. Use a drift control agent when appropriate.➤➤ Consider applying pesticides near dawn or dusk, when wind speeds are generally lowest.➤➤ Follow the directions on the label that tell you not to spray when the wind speed is above a certain threshold.➤➤ Limit broadcast applications to appropriate temperature and relative humidity conditions. High temperatures enhance loss of volatile pesticides and the rate of evaporation of droplets. Relative humidity also influences the rate of evaporation, with the rate increasing as humidity decreases.
Spill Containment Kit➤➤ Detergent or soap.➤➤ Hand cleaner and water.
➤➤ Activated charcoal, adsorptive clay, kitty litter, or other adsorptive materials.➤➤ Lime or bleach to neutralize pesticides in emergency situations.➤➤ Tools such as a shovel, a broom, a dustpan, and containers for disposal.➤➤ Protective clothing and equipment.
Transportation of Chemicals➤➤ The safest way to transport pesticides is secured in the back of a truck. Do not carry chemicals in the passenger compartment of any vehicle.➤➤ Inspect all containers prior to loading; ensure that all caps, plugs, and bungs are tightened.➤➤ Select transportation routes to minimize the impact of a potential spill on water quality.➤➤ Never leave pesticides unattended.➤➤ Have a copy of the label and MSDS along with emergency numbers handy.
Figure 16.4. Always read the label and carefully follow the instructions when applying any pesticide. Special precaution should be used when loading pesticides into application equipment.
MIC
HAEL
BILL
165
Mixing and Loading Operations➤➤ Handlers who mix and load concentrated pesticides have an especially high risk of accidental exposure and poisoning.➤➤ Review the label before opening the container to ensure you are familiar with and understand current use directions.➤➤ Avoid mixing more than you need or can apply at one time. Once mixed, many pesticides do not store well; and they can leave residue in containers, tanks, or lines if not cleaned out immediately.➤➤ Mix and load pesticides outside of riparian management zones and, where practical, in upland areas.➤➤ Exercise care and caution during mixing and loading of pesticides.➤➤ Avoid mixing near wells or where pesticide spills could enter open water or wetlands.➤➤ Fill equipment from water sources before introducing pesticides into mixing or application equipment.➤➤ Do not leave a spray or mix tank unattended while it is being filled.➤➤ Provide an air gap between the water source and the mixture surface to prevent back siphoning.➤➤ Avoid filling pesticide mixing or application equipment directly from a public water supply unless the outlet from the public water supply is equipped with a backflow-prevention device.➤➤ Avoid filling pesticide mixing or application equipment directly from surface water unless the equipment contains proper and functioning anti-back-siphoning mechanisms.➤➤ Triple rinse all empty plastic and metal pesticide containers and add the rinse water to the spray solution.
Pre-Application and Application Activities➤➤ Ensure that pesticide applicators are properly licensed in the appropriate category by the Missouri Department of Agriculture when a license is required.➤➤ Mark the boundaries of the area for treatment.➤➤ Read and follow all label directions carefully prior to using.➤➤ Prevent chemical leaks from equipment. Check all equipment for leaking hoses, connections, and nozzles.➤➤ Calibrate spray equipment to apply chemicals uniformly and in the correct quantities.➤➤ Employ the lowest reasonable equipment pressure when applying pesticides.➤➤ Select a nozzle type that produces the largest drops at a given rate and pressure appropriate to the chemical being applied.➤➤ During application, periodically check for leaking hoses and connections and for plugged or worn nozzles.➤➤ During the application, continue to monitor weather conditions. Wind speed or direction may change and force you to stop the operation.
➤➤ Make certain to post the treatment area, if desired or required.➤➤ Keep records of all pesticide applications, including the date, rate of application, application method, applicator information, weather conditions, and results.
Storage of Chemicals➤➤ If you store pesticides, you must protect and secure the area to keep out unauthorized people and animals. Also post signs that clearly indicate you store pesticides in the building. Read and follow the storage statements on the label.➤➤ Locate storage facilities at sites that minimize the possibility of impacts on water quality in case accidents or fires occur.➤➤ Select unloading and operational storage locations where spills resulting from accidents or vandalism will not have impacts on water quality.➤➤ Use storage buildings that have floors constructed of concrete or other impermeable materials, so that spills are easy to clean up. Storage buildings should contain drains or sills with sumps large enough to contain the contents of the largest container being stored.➤➤ Avoid storing pesticides for extended periods of time. To prevent deterioration, mark each container with its date of purchase and use older products first; buy only what you need.
Protecting Water Resources➤➤ Avoid broadcast application methods within filter strips and Streamside Management Zones (SMZs). Appropriate treatments within filter strips and SMZs include:
➤● Use of pesticides labeled for aquatic use➤● Manual or mechanical treatments➤● No treatment➤● Spot, banded, cut stump, basal bark, or hack and
squirt type treatments
➤➤ Avoid applying pesticides directly to water except where the pesticide is specifically labeled for application to water. When the pesticide does not have a full aquatic label, avoid riparian management zones, filter strips, or other reserve areas adjacent to all streams, lakes, wetlands, and ditches that contain water at the time of application. Always refer to the label to determine legal use and application.➤➤ Avoid applying herbicides in areas where the chemicals can kill stabilizing vegetation on slopes, gullies, and other fragile areas subject to erosion that drain into surface water.➤➤ Increase the width of the filter strip when using toxic to highly toxic insecticides.

166
Equipment Clean-Up: Container and Waste Disposal
➤➤ Rinse all empty plastic and metal pesticide containers three times and add the rinse water (rinsate) to the spray solution. To triple rinse containers properly:
➤● Empty the pesticide into the spray tank and allow for the pesticide container to drain.
➤● Fill the container 10–20 percent full with water (or solvent, in some cases), rinse and pour the rinse water into the spray tank.
➤● Repeat the previous step two more times and apply rinsate to the spray site.
➤● Apply all leftover solutions and rinsates to the treatment area, being sure not to exceed label recommendations.
➤➤ Rinse mixing apparatus at least three times. Apply rinsate in spray form to the area to be treated, being sure not to exceed label recommendations.➤➤ Clean equipment in areas where pesticide residues will not enter streams, lakes, wetlands, or groundwater.➤➤ Puncture and flatten containers not intended for return to the manufacturer.➤➤ Refer to the product label for additional information on proper disposal of rinsed and punctured containers.
Additional ResourcesMissouri Department of Agriculture has more information about plant pests and proper control methods at mda.mo.gov/
plants.National Pesticide Applicator Certification Core Manual (Randall et al. 2012) is available at U.S. Environmental Protection
Agency, Office of Pesticide Programs. nasda.org/9381/Foundation/11379/11383/6684.aspx.Sustaining Minnesota Forest Resources: Voluntary Site-Level Forest Management Guidelines for Landowners, Loggers and
Resource Managers. Minnesota Forest Resources Council. 2005. Available at frc.state.mn.us/initiatives_sitelevel.html.Wisconsin Forest Management Guidelines. PUB-FR-226, 2011. Available at dnr.wi.gov/topic/ForestManagement/guidelines.
html.
References to Other Chapters➤■ Prior to beginning management activities, consult a professional forester, a Missouri Department of Conservation (MDC)
private land conservationist, an MDC wildlife biologist, or an MDC natural history biologist for information about the occurrence of endangered or threatened species, species and natural communities of conservation concern, rare tree species, or sensitive communities present on or near the management area. These species and natural communities can also be impacted by pesticides. This is particularly important in Karst areas of the state. These professionals can help meet your pesticide use objectives, while also maintaining, promoting, or even enhancing these special resources. See the Resource Directory and see Chapter 3.
➤■ Consider visual quality impacts when prescribing the use of pesticides. Dead and dying vegetation can result in negative visual impacts in areas with high visibility. See Chapter 4 for guidance on determining visually sensitive locations and methods that can help mitigate concerns.
➤■ Cultural resources can be negatively impacted by the corrosive nature of some pesticides. Also, erosion on cultural sites can be accelerated where pesticides have eliminated all vegetation. Be sure to include any concerns for protecting these resources when developing plans for pesticide treatment. See Chapter 6 for general guidance in identifying and protecting cultural resources.
➤■ Appendix C includes a Chemical Application Record to help document pesticide application.

167
CHAPTER 17Fire Management
NOPP
ADOL
PAOT
HONG
Topics Covered➤■ Fire Management
➤■ Prescribed Fire Management➤■ Objectives That May Favor the Inclusion of
Prescribed Fire Practices➤■ Potentially Negative Impacts of Prescribed Fire➤■ Critical Elements of a Prescribed Burn Plan➤■ Firing Techniques➤■ Fire Behavior➤■ Firebreaks
➤■ Smoke Management➤■ BMPs to Protect Soil Productivity and
Water Quality➤■ BMPs to Protect Cultural Resources➤■ BMPs to Slow the Spread of Invasive Species➤■ BMPs to Protect Visual Quality and Minimize
Smoke Intrusions
➤■ Wildfire Prevention and Management

168
Fire ManagementSince the conclusion of the last glacial epoch some 10,000 years ago, Missouri’s natural landscape has been shaped by fire (e.g., Pyne 1982, Ladd 1991). Ignition sources included both lightning and deliberate Native American burning. Because of this, a majority of Missouri’s terrestrial natural communities depended on periodic fires to maintain their biological integrity and ecological function. Examples of this include the extensive tallgrass prairies and open grassy woodlands that once dominated northern and western Missouri and the millions of acres of shortleaf pine systems in the eastern and southern Missouri Ozarks. Prior to European settlement, the prevailing fire regime consisted of relatively frequent, low-intensity, dormant-season fires.
Uncontrolled or ecologically inappropriate fires can have destructive consequences for both natural and human systems. Forest management plans and activities should directly evaluate fire from two perspectives: (1) the extent to which ecologically appropriate prescribed fire is used to attain management goals and enhance ecological system integrity; and (2) awareness of the potential for destructive consequences of wildfires and poorly planned prescribed fire to natural resources, infrastructure, and property.
Fire is not appropriate for all sites in the contemporary environment, despite the fact that virtually all of Missouri’s landscape was once shaped and maintained by fires. Some silvicultural and wildlife habitat goals are not compatible with the application of fire, though some wildlife habitats and wildfire mitigation practices can be enhanced through a carefully developed and carefully implemented fire management program.
Therefore, the application of fire must be determined on a case-by-case basis. Factors to consider include past and current conditions, short- and long-term site goals, ecological context, costs, risk factors, potential for successful use of alternative treatments, and the human and biological context of the surrounding landscape.
This chapter is divided into two sections. The first section — Prescribed Fire Management — outlines factors essential in using prescribed fire safely and appropriately. The second section — Wildfire Prevention and Management — discusses wildfire mitigation and protection of resources from fire damage.
1Prescribed Fire Management
Prescribed fire is the intentional application of fire to natural fuels, under specific weather and site conditions, to accomplish planned land management objectives. Like all management practices, prescribed fire requires careful planning, experienced practitioners, and suitable equipment in order to ensure safe, successful attainment of management objectives and to prevent adverse effects.
First and foremost, any application of prescribed fire must be designed and implemented to ensure the safety of people, infrastructure, and surrounding lands. Like all natural processes, fire can be either positive or negative in its impacts, depending on the site-management objectives and fire behavior, which in turn is influenced by landscape factors, fuels, and weather conditions. Fire is a powerful force that, under certain conditions, can have massively destructive consequences to both natural systems and human infrastructure and life. At the same time, carefully designed and implemented prescribed fire is one of the most biologically effective and cost-efficient management tools to achieve specific land management goals.
Objectives That May Favor Inclusion of Prescribed Fire PracticesConsider the following when including prescribed fire as a management tool to meet landowner goals and objectives.
➤➤ Improving wildlife habitat for woodland and grassland species:
➤● Increasing ground-layer browse, soft mast and small seed sources, and insect availability for wildlife
➤● Increasing quality and diversity of native vegetation or restoring certain natural systems
➤● Sustaining habitat for targeted species of conservation concern such as the federally listed Mead’s milkweed
➤● Increasing flowering rates and pollinator habitat➤● Increasing northern bobwhite and turkey nesting and
brood rearing
➤➤ Improving watershed quality, especially after vegetation response that increases infiltration and reduces runoff, and also by promoting erosion-resistant ground-layer vegetation
➤➤ Reducing heavy fuel loads and potential for severe, destructive wildfires; protection of infrastructure and improvements from future severe fires
➤➤ Cost-efficient attainment of silvicultural objectives, particularly for shortleaf pine or initial site preparation
➤➤ Managing certain invasive species
➤➤ Reducing levels of certain destructive tree pests and diseases
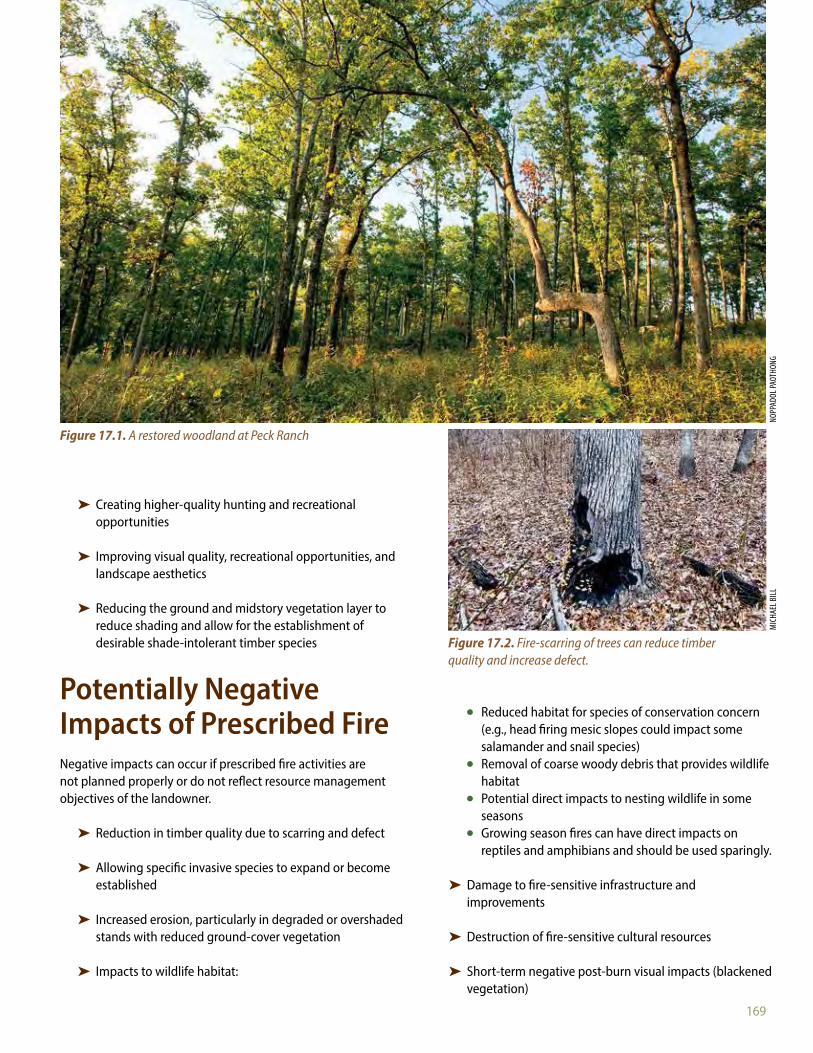
169
➤➤ Creating higher-quality hunting and recreational opportunities
➤➤ Improving visual quality, recreational opportunities, and landscape aesthetics
➤➤ Reducing the ground and midstory vegetation layer to reduce shading and allow for the establishment of desirable shade-intolerant timber species
Potentially Negative Impacts of Prescribed FireNegative impacts can occur if prescribed fire activities are not planned properly or do not reflect resource management objectives of the landowner.
➤➤ Reduction in timber quality due to scarring and defect
➤➤ Allowing specific invasive species to expand or become established
➤➤ Increased erosion, particularly in degraded or overshaded stands with reduced ground-cover vegetation
➤➤ Impacts to wildlife habitat:
➤● Reduced habitat for species of conservation concern (e.g., head firing mesic slopes could impact some salamander and snail species)
➤● Removal of coarse woody debris that provides wildlife habitat
➤● Potential direct impacts to nesting wildlife in some seasons
➤● Growing season fires can have direct impacts on reptiles and amphibians and should be used sparingly.
➤➤ Damage to fire-sensitive infrastructure and improvements
➤➤ Destruction of fire-sensitive cultural resources
➤➤ Short-term negative post-burn visual impacts (blackened vegetation)
Figure 17.1. A restored woodland at Peck Ranch
Figure 17.2. Fire-scarring of trees can reduce timber quality and increase defect.
NOPP
ADOL
PAOT
HONG
MIC
HAEL
BILL
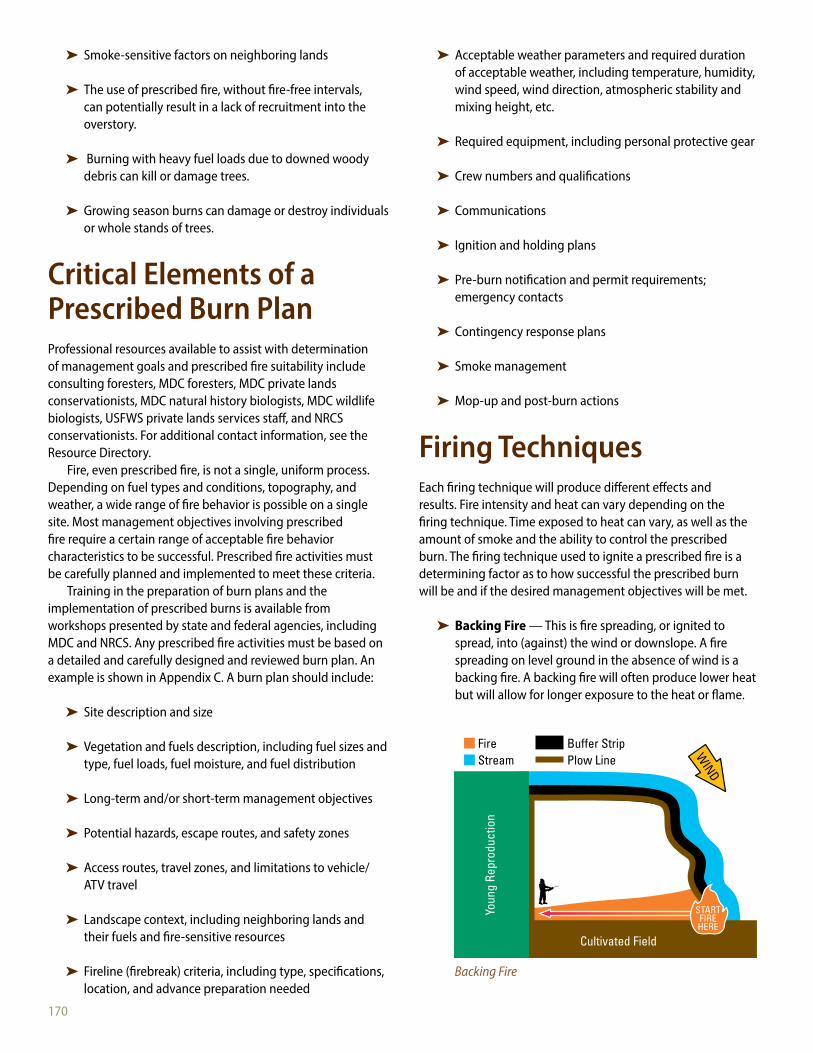
170
➤➤ Smoke-sensitive factors on neighboring lands
➤➤ The use of prescribed fire, without fire-free intervals, can potentially result in a lack of recruitment into the overstory.
➤➤ Burning with heavy fuel loads due to downed woody debris can kill or damage trees.
➤➤ Growing season burns can damage or destroy individuals or whole stands of trees.
Critical Elements of a Prescribed Burn PlanProfessional resources available to assist with determination of management goals and prescribed fire suitability include consulting foresters, MDC foresters, MDC private lands conservationists, MDC natural history biologists, MDC wildlife biologists, USFWS private lands services staff, and NRCS conservationists. For additional contact information, see the Resource Directory.
Fire, even prescribed fire, is not a single, uniform process. Depending on fuel types and conditions, topography, and weather, a wide range of fire behavior is possible on a single site. Most management objectives involving prescribed fire require a certain range of acceptable fire behavior characteristics to be successful. Prescribed fire activities must be carefully planned and implemented to meet these criteria.
Training in the preparation of burn plans and the implementation of prescribed burns is available from workshops presented by state and federal agencies, including MDC and NRCS. Any prescribed fire activities must be based on a detailed and carefully designed and reviewed burn plan. An example is shown in Appendix C. A burn plan should include:
➤➤ Site description and size
➤➤ Vegetation and fuels description, including fuel sizes and type, fuel loads, fuel moisture, and fuel distribution
➤➤ Long-term and/or short-term management objectives
➤➤ Potential hazards, escape routes, and safety zones
➤➤ Access routes, travel zones, and limitations to vehicle/ATV travel
➤➤ Landscape context, including neighboring lands and their fuels and fire-sensitive resources
➤➤ Fireline (firebreak) criteria, including type, specifications, location, and advance preparation needed
➤➤ Acceptable weather parameters and required duration of acceptable weather, including temperature, humidity, wind speed, wind direction, atmospheric stability and mixing height, etc.
➤➤ Required equipment, including personal protective gear
➤➤ Crew numbers and qualifications
➤➤ Communications
➤➤ Ignition and holding plans
➤➤ Pre-burn notification and permit requirements; emergency contacts
➤➤ Contingency response plans
➤➤ Smoke management
➤➤ Mop-up and post-burn actions
Firing TechniquesEach firing technique will produce different effects and results. Fire intensity and heat can vary depending on the firing technique. Time exposed to heat can vary, as well as the amount of smoke and the ability to control the prescribed burn. The firing technique used to ignite a prescribed fire is a determining factor as to how successful the prescribed burn will be and if the desired management objectives will be met.
➤➤ Backing Fire — This is fire spreading, or ignited to spread, into (against) the wind or downslope. A fire spreading on level ground in the absence of wind is a backing fire. A backing fire will often produce lower heat but will allow for longer exposure to the heat or flame.
Backing Fire

171
FIRIN
G TEC
HNIQ
UE IL
LUST
RATI
ONS:
COUR
TESY
OF W
ISCO
NSIN
DEP
ARTM
ENT O
F NAT
URAL
RES
OURC
ES➤➤ Strip Head Fire — This is a series of lines of fire ignited near and upwind (or downslope) of a firebreak or backing fire so they burn with the wind (or upslope) toward the firebreak or backing fire. A strip head fire will often produce increased heat, flame length, and overall fire intensity.
➤➤ Flanking Fire — This is a firing technique consisting of treating an area with lines of fire set into the wind, which burn outward at right angles to the wind.
➤➤ Grid or Spot Ignitions — These are methods of igniting prescribed fires in which ignition points are set individually at predetermined spacing with predetermined timing throughout the area to be burned; also called the point source ignition technique.
➤➤ Ring Head Fire — This is a fire started by igniting the full perimeter of the intended burn area so that the ensuing fire fronts converge toward the center of the burn. The fire is set around the outer perimeter of a resource to establish a protective black-line-buffer. A ring head fire will often produce the greatest fire intensity of all firing techniques.
Strip Head Fire
Flanking Fire
Grid or Spot Ignitions
Ring Head Fire
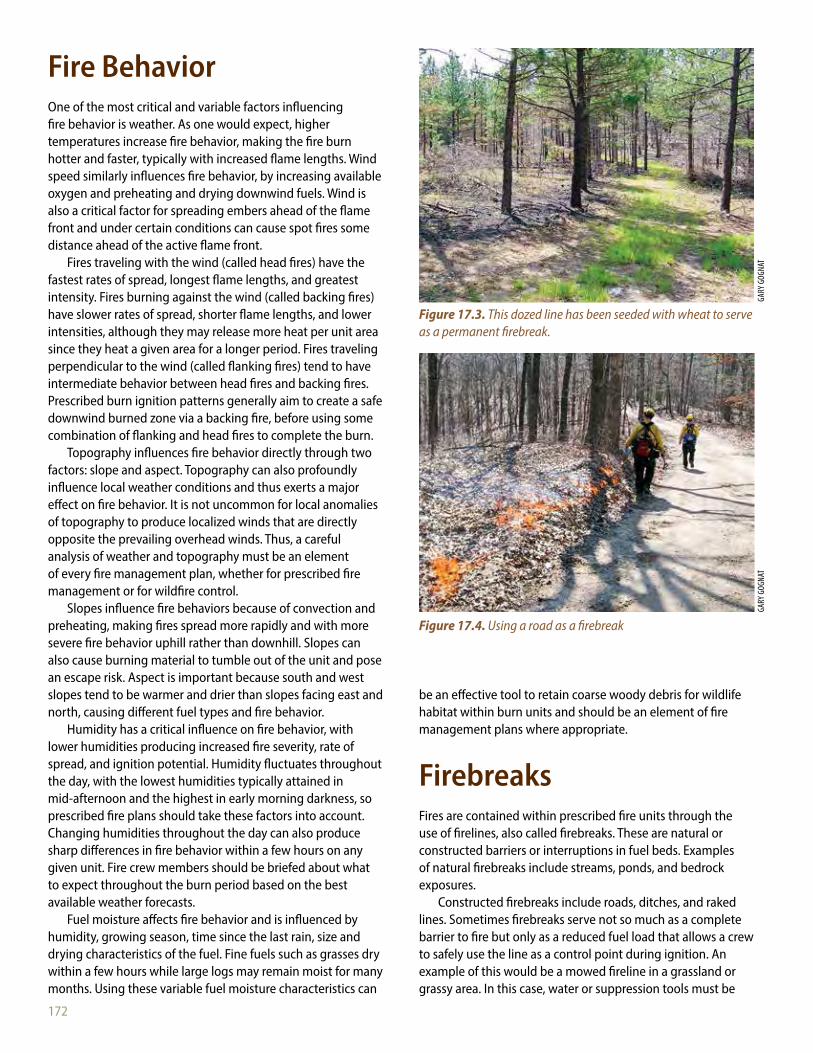
172
Fire BehaviorOne of the most critical and variable factors influencing fire behavior is weather. As one would expect, higher temperatures increase fire behavior, making the fire burn hotter and faster, typically with increased flame lengths. Wind speed similarly influences fire behavior, by increasing available oxygen and preheating and drying downwind fuels. Wind is also a critical factor for spreading embers ahead of the flame front and under certain conditions can cause spot fires some distance ahead of the active flame front.
Fires traveling with the wind (called head fires) have the fastest rates of spread, longest flame lengths, and greatest intensity. Fires burning against the wind (called backing fires) have slower rates of spread, shorter flame lengths, and lower intensities, although they may release more heat per unit area since they heat a given area for a longer period. Fires traveling perpendicular to the wind (called flanking fires) tend to have intermediate behavior between head fires and backing fires. Prescribed burn ignition patterns generally aim to create a safe downwind burned zone via a backing fire, before using some combination of flanking and head fires to complete the burn.
Topography influences fire behavior directly through two factors: slope and aspect. Topography can also profoundly influence local weather conditions and thus exerts a major effect on fire behavior. It is not uncommon for local anomalies of topography to produce localized winds that are directly opposite the prevailing overhead winds. Thus, a careful analysis of weather and topography must be an element of every fire management plan, whether for prescribed fire management or for wildfire control.
Slopes influence fire behaviors because of convection and preheating, making fires spread more rapidly and with more severe fire behavior uphill rather than downhill. Slopes can also cause burning material to tumble out of the unit and pose an escape risk. Aspect is important because south and west slopes tend to be warmer and drier than slopes facing east and north, causing different fuel types and fire behavior.
Humidity has a critical influence on fire behavior, with lower humidities producing increased fire severity, rate of spread, and ignition potential. Humidity fluctuates throughout the day, with the lowest humidities typically attained in mid-afternoon and the highest in early morning darkness, so prescribed fire plans should take these factors into account. Changing humidities throughout the day can also produce sharp differences in fire behavior within a few hours on any given unit. Fire crew members should be briefed about what to expect throughout the burn period based on the best available weather forecasts.
Fuel moisture affects fire behavior and is influenced by humidity, growing season, time since the last rain, size and drying characteristics of the fuel. Fine fuels such as grasses dry within a few hours while large logs may remain moist for many months. Using these variable fuel moisture characteristics can
be an effective tool to retain coarse woody debris for wildlife habitat within burn units and should be an element of fire management plans where appropriate.
FirebreaksFires are contained within prescribed fire units through the use of firelines, also called firebreaks. These are natural or constructed barriers or interruptions in fuel beds. Examples of natural firebreaks include streams, ponds, and bedrock exposures.
Constructed firebreaks include roads, ditches, and raked lines. Sometimes firebreaks serve not so much as a complete barrier to fire but only as a reduced fuel load that allows a crew to safely use the line as a control point during ignition. An example of this would be a mowed fireline in a grassland or grassy area. In this case, water or suppression tools must be
Figure 17.3. This dozed line has been seeded with wheat to serve as a permanent firebreak.
Figure 17.4. Using a road as a firebreak
GARY
GOG
NAT
GARY
GOG
NAT
used during ignition to prevent escapes, but the mowed line reduces fuel loads to make this safe for the crew to do so.
Sometimes burned zones are created in advance to serve as firebreaks; this can be accomplished through prescribed burning of a downwind or adjacent unit, or by burning a strip, called a blackline, to serve as a firebreak. Firebreaks should be sufficiently wide to at least contain the fire under highest intensity conditions specified in the prescription, but ecological considerations or site management objectives may impose restrictions on fireline size, configuration, and location. In most cases, fireline width should be at least 2.5 times the height of the adjacent fuel.
In all cases, firelines should be designed and installed to avoid damaging unique ecological features, wetlands, and cultural resources, and should not contribute to increased erosion or other potentially negative impacts. See Chapters 14 and 15 for specific best management practices for roads and trails. Fireline activities may promote invasive species, so care should be taken to ensure that equipment is cleaned before initiating construction and that soil disturbance is minimized.
Smoke ManagementSmoke is an issue that must be considered when planning and implementing prescribed fires. Because it will always travel beyond the burn unit, managers must ensure that prescribed fire activities comply with local air quality regulations and do not adversely impact road visibility or proximal smoke-sensitive resources, and that they do not create problems for area residents.
Smoke transport and dispersion is maximized by burning under unstable atmospheric conditions. During night and morning hours the atmosphere is typically more stable, causing smoke to lay in valleys and other low-lying areas. This is called an inversion, and as the air warms through the day the atmosphere becomes unstable, which is more conducive to smoke dispersion. Smoke dispersion is generally far better in daylight hours than at night.
Many elements of the prescription may influence smoke production. Wet fuels generate more smoke than dry fuels, and backing fires produce less smoke than head or flank fires.
As with any other forest management activity, applying accepted best management practices assures that the activity will be carried out in a responsible manner.
BMPs to Protect Soil Productivity and Water QualityThe use of BMPs during prescribed fire operations can help ensure that water quality and aquatic habitat are protected.

173
used during ignition to prevent escapes, but the mowed line reduces fuel loads to make this safe for the crew to do so.
Sometimes burned zones are created in advance to serve as firebreaks; this can be accomplished through prescribed burning of a downwind or adjacent unit, or by burning a strip, called a blackline, to serve as a firebreak. Firebreaks should be sufficiently wide to at least contain the fire under highest intensity conditions specified in the prescription, but ecological considerations or site management objectives may impose restrictions on fireline size, configuration, and location. In most cases, fireline width should be at least 2.5 times the height of the adjacent fuel.
In all cases, firelines should be designed and installed to avoid damaging unique ecological features, wetlands, and cultural resources, and should not contribute to increased erosion or other potentially negative impacts. See Chapters 14 and 15 for specific best management practices for roads and trails. Fireline activities may promote invasive species, so care should be taken to ensure that equipment is cleaned before initiating construction and that soil disturbance is minimized.
Smoke ManagementSmoke is an issue that must be considered when planning and implementing prescribed fires. Because it will always travel beyond the burn unit, managers must ensure that prescribed fire activities comply with local air quality regulations and do not adversely impact road visibility or proximal smoke-sensitive resources, and that they do not create problems for area residents.
Smoke transport and dispersion is maximized by burning under unstable atmospheric conditions. During night and morning hours the atmosphere is typically more stable, causing smoke to lay in valleys and other low-lying areas. This is called an inversion, and as the air warms through the day the atmosphere becomes unstable, which is more conducive to smoke dispersion. Smoke dispersion is generally far better in daylight hours than at night.
Many elements of the prescription may influence smoke production. Wet fuels generate more smoke than dry fuels, and backing fires produce less smoke than head or flank fires.
As with any other forest management activity, applying accepted best management practices assures that the activity will be carried out in a responsible manner.
BMPs to Protect Soil Productivity and Water QualityThe use of BMPs during prescribed fire operations can help ensure that water quality and aquatic habitat are protected.
➤➤ Carefully select fireline locations and consider weather, fuel, soil, and topographic conditions in the burn area in order to minimize impacts on water quality.
➤➤ Avoid burning piles of slash in riparian management zones.
➤➤ Use natural or existing barriers (e.g., roads, streams, and lakes) wherever possible, or wet lines for firelines where bladed or plowed firelines will erode soil and degrade water quality.
➤➤ Avoid plowed and bladed firelines in riparian management zones except where necessary to control wildfire.
➤➤ Where appropriate, protect the largest coarse woody debris from prescribed burning. Avoid prescribed burning after prolonged dry periods as large coarse woody debris (100 and 1,000 hour fuels) will be dry (< 20 percent fuel moisture) and will be more susceptible to being consumed by the fire.
➤➤ Prescribed burning should be carried out when the vegetative response to fire is the fastest, or when the duration of soil exposure to the elements is the shortest. If this is not possible, use appropriately sized, unburned buffer strips between burn areas and stream channels to minimize these impacts.
➤➤ When possible, avoid prescribed burning in wooded corridors during April and May to avoid reducing hydraulic roughness and minimize tree mortality. Unless necessary, don’t use head fire through riparian corridors. Burn intensity in wooded riparian corridors is normally low; prescribed burn ignition strategies should be undertaken that allow for burns to naturally extinguish as the flaming front enters a riparian corridor.
➤➤ Repeated intense burns may affect soil productivity. When conducting prescribed burns, use low- or moderate-burning intensity so that the minimum amount of forest floor is consumed consistent with meeting the objectives of the burn.
➤➤ Fall burning should generally be avoided on steep slopes with erodible soil, especially in areas with sparse ground-layer vegetation. Soils are more vulnerable to erosion processes during the winter months when there is no vegetation or organic litter on the site.

174
BMPs to Protect Cultural ResourcesIf no historic buildings or burial monuments are present, prescribed fire is unlikely to adversely affect most cultural resources. The greatest potential may be exposure of sensitive artifacts by soil disturbance during fireline installation involving ground disturbance or erosion from heavy and prolonged precipitation while ground is bare from the fire. Identification of important cultural resources in a fire management unit prior to implementation will allow avoidance of negative impacts. Precautions and preparations designed to protect cultural resources during prescribed fire should serve also to provide some level of preservation in the event of wildfires. Consider alternatives such as herbicide use, mowing, or other non-erosion-causing practices for fuel break maintenance on areas where prescribed fire will be used on a recurring basis.
➤➤ Protect below-ground archaeological sites from compaction and rutting.
➤➤ Avoid high-intensity fires around burial monuments.
➤➤ Plan fire frequency to preserve ground cover and large woody debris, limiting the potential erosion effects to cultural resources.
➤➤ Best Management Practices for Common Cultural Resources can be found in Appendix B.
BMPs to Slow the Spread of Invasive SpeciesPrescribed fire operations, because of the level of disturbance, have significant potential to influence the spread or establishment of invasive species.
➤➤ Incorporate invasive species considerations into the planning of prescribed burns.
➤➤ Consider the likely response of invasive species or target species when prescribing activities that result in soil disturbance or increased sunlight.
➤➤ Avoid placing firebreaks where there are infestations of invasive species.
➤➤ Avoid spreading invasive seeds and other propagules from infested to noninfested areas during prescribed fire activities and firefighting activities.
➤➤ Following a prescribed burn or wildfire, rehabilitate soil disturbance related to suppression activities, especially bladed or plowed firelines, where invasive species establishment is likely.
BMPs to Protect Visual Quality and Minimize Smoke IntrusionsThe use of BMPs during prescribed fire operations can help ensure that visual quality is protected and smoke impacts are minimized.
➤➤ When working in visually sensitive areas, consider the visual quality impacts of blackened vegetation and plan the timing and scale of operations to minimize impacts.
➤➤ Consider whether smoke from prescribed burn activities will impact people or visually sensitive areas such as high vehicular traffic areas, residential/business areas, and other areas with an increase in public use and interaction such as campgrounds and parks. Plan prescribed fire activities to minimize these impacts.
Figure 17.5. Smoke management is an important consideration when conducting prescribed burn operations.
GARY
GOG
NAT

175
2 Wildfire Prevention and Management
Wildfires are unplanned, uncontrolled ignitions in natural fuels. Typical ignition sources include lightning, arson, and accidental ignitions. Wildfires have tremendous destructive potential for both humans and natural systems and can pose large-scale major threats to health and safety.
Forest and woodland owners should be aware of the potential impacts of wildfires and delineate steps to be taken to minimize wildfire potential. They should outline responses in the event of a wildfire. For certain fire-sensitive resources such as residences and high-value timber stands, permanent or semi-permanent firebreaks such as forest access roads and trails can be used to reduce potential for wildfire damage.
Managers can assist landowners in implementing a variety of practices to strategically reduce the potential for significant wildfire damage. These practices include reducing fuel loads on neighboring units through mechanical treatment, harvest, or prescribed fire, as well as actions such as mowing, limb pruning, raking, and slash removal.
Additional protection for structures may also include fire-resistant construction techniques, fire-resistant landscaping practices, strategic design and placement of roads and
driveways, and careful management of infrastructure and surrounding vegetation to prevent fuel accumulations. More detailed information is available from Firewise (under Additional Resources at the end of this chapter).
Community Wildfire Protection Plans can also be used to help at-risk communities in planning to minimize the potential for negative impacts from wildfire. These plans are developed in collaboration with communities and agencies interested in reducing wildfire risk (under Additional Resources at the end of this chapter).
Figure 17.6. Dozer puts in a fireline during a wildfire operation
Figure 17.7. Destructive consequences of a summer wildfireSA
RAH
EGLY
SUSA
N FA
RRIN
GTON

176
Additional ResourcesTechnical terms have been defined by the National Wildfire Coordinating Group (NWCG) and can be reviewed at nwcg.gov/
pms/pubs/glossary/q.htm.The Oak Woodlands & Forests Fire Consortium: Our mission is to provide fire science information to resource managers,
landowners, and the public about the use, application, and effects of fire. Within these pages you should expect to find information on “everything fire”: oakfirescience.com.
Wildland Fire Incident Management Field Guide: The fireline handbook has recently been replaced by NWCG document PMS 210, the Wildland Fire Incident Management Field Guide. Available at nwcg.gov/pms/pubs/pubs.htm.
Firewise: Information on ways to protect homes located in fire-prone areas is available at firewise.org.Fire Adapted Communities: Information on ways to protect homes located in fire-prone areas is available at fireadapted.org.Florida Division of Forestry: Information on the use of prescribed fire to protect homes and benefit ecosystems is available at
prescribed-fire.org.National Fire Plan: Information on the impact of wildfires on communities and the environment is available at
forestsandrangelands.gov.National Interagency Fire Center: Wild-land fire information, fire statistics, and links to other agencies are available at nifc.gov.The Nature Conservancy: Information on the use of prescribed fire and training is available at conservationgateway.org/
ConservationPractices/FireLandscapes/Pages/fire-landscapes.aspx.Northern Prairie Wildlife Research Center: Information on the use of fire in wildlife management is available at npwrc.usgs.gov.U.S. Forest Service, Fire and Aviation Management: Information about wildfire activity and situation reports, fire management,
training, fire use, and fire prevention is available at fs.fed.us/fire/.Coalition of Prescribed Fire Councils: The goal of the Coalition is to create one voice to assist fire practitioners, policy makers,
regulators, and citizens with issues surrounding prescribed fire use. More information is available at prescribedfire.net/. Wisconsin Forest Management Guidelines. PUB-FR-226, 2011. Available at dnr.wi.gov/topic/ForestManagement/guidelines.
html.
References to Other Chapters➤■ Prior to beginning management activities, consult a professional forester, a Missouri Department of Conservation (MDC)
private land conservationist, an MDC wildlife biologist, or an MDC natural history biologist for information about the occurrence of endangered or threatened species, species and natural communities of conservation concern, rare tree species, or sensitive communities present on or near the management area. These species and natural communities can be impacted by site preparation activities, by altering the existing vegetation, or by introducing new species. These professionals can help you modify management activities to maintain, promote, or enhance species and natural communities on the site. See the Resource Directory. See Chapter 3 for more information.
➤■ Prescribed fire activities create blackened vegetation and smoke, which can have short-term negative impacts to visual quality. See Chapter 4 for guidance on determining visually sensitive locations.
➤■ Consider the potential spread of invasive species when preparing for and conducting prescribed fire activities. Depending on the site, circumstances, and invasive species, fire can either help control invasive species or result in their spread and proliferation. Careful analysis, planning, and implementation are required for successful outcomes. See Chapter 9 for more information.
➤■ Prescribed fire activities can negatively impact cultural resources, so make sure to plan to avoid them or mitigate impacts. See Chapter 6 for general information related to cultural resources.
➤■ Appendix C includes an example of a Missouri Department of Conservation Prescribed Burn Plan.
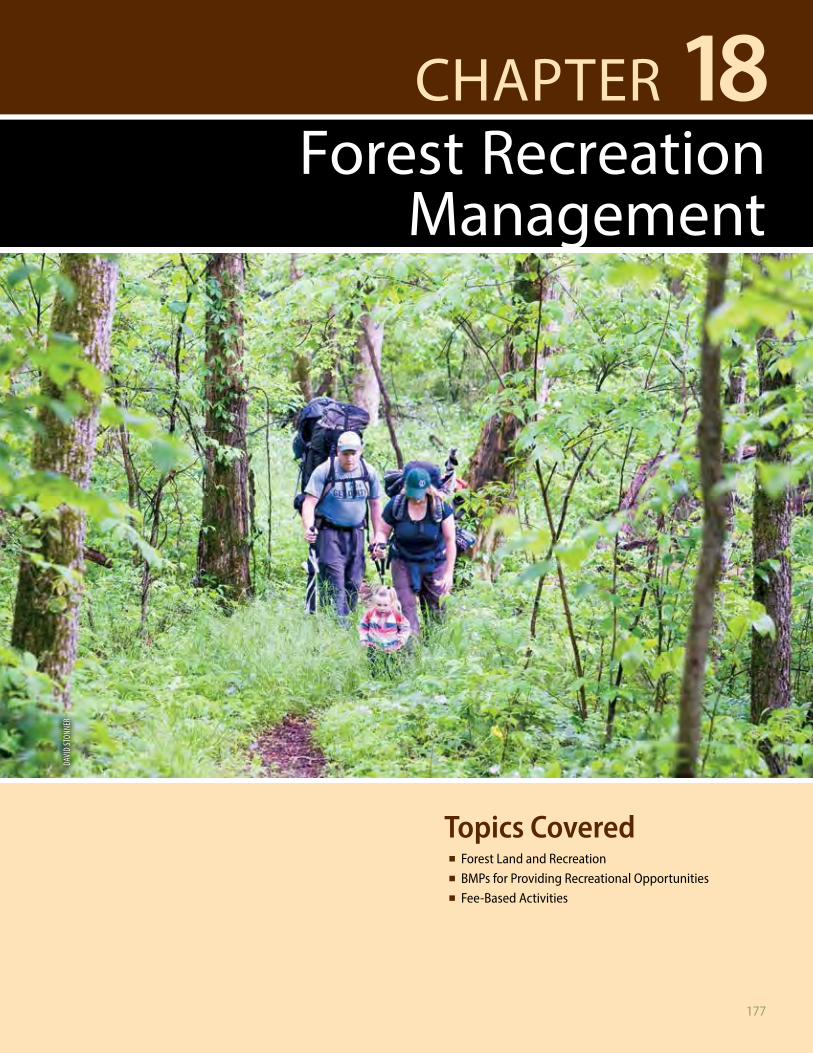
177
CHAPTER 18Forest Recreation
Management
Topics Covered➤■ Forest Land and Recreation➤■ BMPs for Providing Recreational Opportunities➤■ Fee-Based Activities
DAVI
D ST
ONNE
R

178
Forest Land and RecreationOne of the most prominent reasons most people choose to own forest land is to have a place to enjoy outdoor recreation. The range of opportunities they desire can include such activities as hunting, fishing, hiking, nature study, and camping. Often owners even consider the manual labor involved in maintaining and improving their property as much a recreational activity as it is work.
In order to enhance recreational opportunities, landowners frequently build roads and trails, clearings for a campsite, rustic cabins, or more elaborate second homes. Fishing ponds are also a popular development on private forest lands. Appropriate attention to how these improvements are implemented is important in order to minimize negative impacts to the property’s natural and cultural resources. Carefully planned developments may even enhance these resources in specific instances.
Increasingly, some landowners are providing recreational opportunities for a fee, using this as a way to generate income from their property. Most of the related developments are the same but may include more campsites, more trails, or larger buildings. Hunting is probably the most commonly offered fee-based recreational activity, and enhancing habitat may become the most significant landowner objective.
BMPs for Providing Recreational OpportunitiesIn order to protect or improve natural and cultural resources while enhancing recreational opportunities on forested properties, the following general considerations may be useful.
➤➤ Clearly identify desired recreational uses in the overall forest management plan.
➤➤ The plan should also specify actions needed to meet multiple objectives. For example, building one road for logging and hunting access is certainly more desirable than building two roads, one for logging and a separate one for hunting.
➤➤ Look for instances where achieving a management objective may conflict with providing a sought-after recreational opportunity. For example, if a landowner identifies and wants to protect a heron rookery, then he or she would want to restrict ATV riding to other parts of the property.
➤➤ When constructing roads, trails, or facilities follow the best management practices prescribed in Chapter 14.
➤➤ Monitor the condition of roads and trails and restrict use when recreational activities threaten to cause damage to soil and water resources. Soil damage and potential subsequent stream sedimentation can be caused by recreational vehicles (ATVs, pickups, dirt bikes, mountain bikes), horses, or by the trampling of too many hiking boots.
➤➤ Roads and trails should be placed on the land so that they are safe and enjoyable travel ways that “work with the land rather than against it.” The goal is to minimize travel hazards like steep slopes, soil erosion, and damage to streams. In some cases, an owner may want to rehabilitate or close an old road, or a part of it, if it is eroding a hillside.
➤➤ When planning recreational developments, consult a professional forester, a private land conservationist, a wildlife biologist, or a natural history biologist for information about the occurrence of endangered
Figure 18.1. Recreation trails should be designed properly to avoid negative impacts to water quality.
DAVI
D ST
ONNE
R

179
or threatened species and species of conservation concern. These special resources (i.e., rare tree species, sensitive communities, or unique sites) on or near the property can enhance landowners’ enjoyment of their property but may also need special care and concern.
➤➤ Planning should also identify cultural resource issues in terms of both protection and interpretation. The Department of Natural Resources State Historic Preservation Office may be able to assist with known sites. If no information is available, field inspections should be conducted before development plans are finalized to determine the presence or absence of cultural resources. Soil disturbance represents the most common threat to cultural resources, so knowing their location, or likely occurrence, and minimizing development in those areas is the most important management consideration. At the same time, observing cultural resources can certainly add to recreational experiences. For example, routing an access trail up next to an old cemetery, historic
springhouse, or long-abandoned smokehouse can add interest to a recreational outing.
➤➤ Leave flowering trees during vegetative management, create scenic vistas, and improve visual quality in other ways to enhance most recreational experiences.
➤➤ Management activities to enhance wildlife habitat are concurrently enhancing recreational experiences. It is important to consider what species are involved in the desired recreational activity and implement the appropriate management measures that promote the best habitat.
➤➤ Minimize any negative effects on habitat. For example, you may not want to push in a road so a cabin can be built in an area that has been a preferred roosting site for wild turkeys. Planning with careful attention to the full suite of management objectives is an important tool.
Figure 18.2. Leaving species and structural diversity will enhance visual quality.
DAVI
D ST
ONNE
R

180
➤➤ Carefully laid-out logging trails can later be used for hiking trails.
➤➤ Where fitting to the ecological land type, silvicultural techniques can favor more recreationally friendly areas such as open pine woodlands.
➤➤ Different regeneration methods can favor species with more desired visual qualities such as sugar maple or yellow poplar.
➤➤ Identify and eliminate hazard trees, block abandoned wells, and keep trails away from steep eroding slopes in order to keep users safe. Common sense and regular inspections of the property will generate the set of precautions that a landowner deems most appropriate to the situation.
Fee-Based ActivitiesDepending on land management objectives, development of a hunting lease enterprise offers many landowners the opportunity to supplement their income while enhancing wildlife habitat on their property. Hunting leases are an example of the broader concept of a recreational lease — an agreement between a person who controls access to property and a person who wishes to use the property for recreation. The lease grants an individual the right to participate in a specified recreational activity on a specific tract of property for a certain time and fee.
A hunting lease is an agreement between the landowner (lessor) and hunters (lessees) to grant access to land to hunt game (and conduct other specified activities) for a specified period of time. Hunters usually pay an agreed-upon dollar amount per acre or per hunter.
Commercial campgrounds represent another income-generating objective but need to be pursued in light of a full understanding of the market potential for such a development. They are expensive to construct and maintain and would not be profitable without sufficient numbers of users.
Figure 18.3. Properly planned forest roads can provide access and recreation after the harvest.
DAVI
D ST
ONNE
R


