20
USER GUIDE FOR THE NEW CORGI SPRINT Issued 27 th November 2008 Downloaded from www.Manualslib.com manuals search engine
| Date post: | 19-May-2018 |
| Category: |
Documents |
| Upload: | nguyendiep |
| View: | 214 times |
| Download: | 1 times |
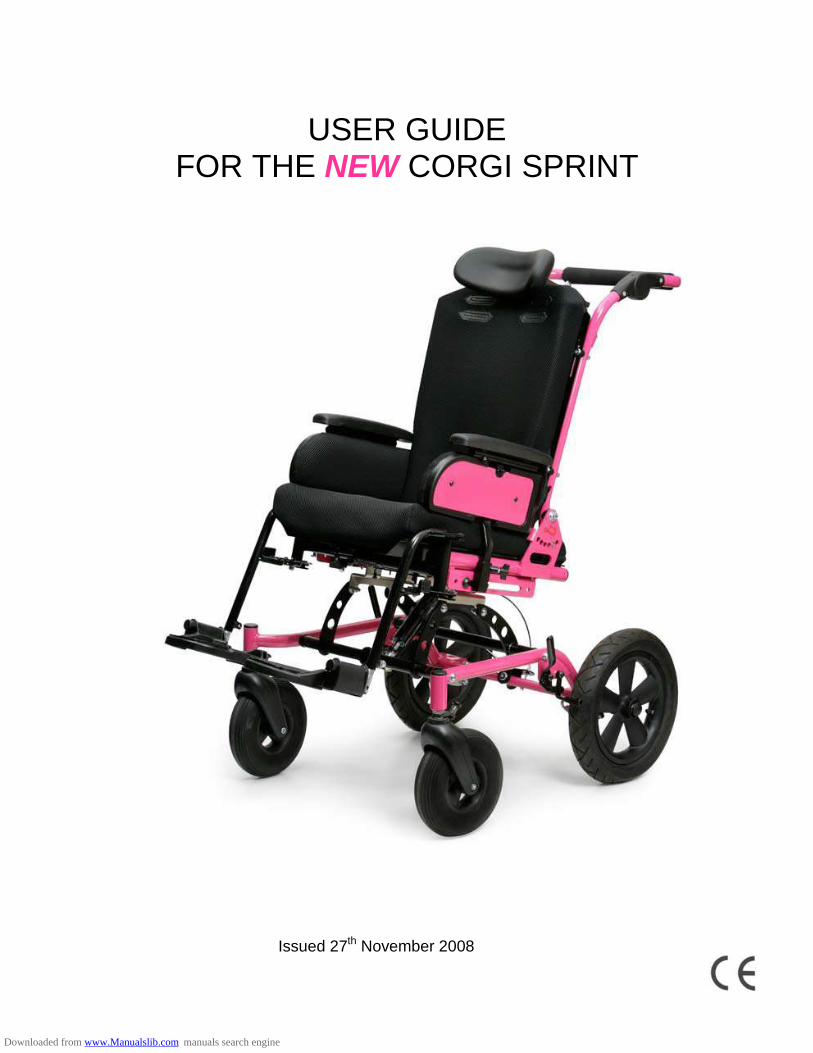
USER GUIDE FOR THE NEW CORGI SPRINT
Issued 27th November 2008
Downloaded from www.Manualslib.com manuals search engine

Contents
TITLE Page Safety Notes 2 Operating Instructions 3 – 9 Using your Wheelchair 10 Basic Technical Data 11 Occupied transport in a suitably modified vehicle 12 Details of attachment points 13 Key points relating to transportation 14 Care & Maintenance 15
Downloaded from www.Manualslib.com manuals search engine

1
SAFETY NOTES
Please read this user guide fully before using your wheelchair.
Expert medical advice must be sought before using your wheelchair. If you have any doubt about this speak to your Occupational Therapist.
Before using the wheelchair it is essential to ensure the backrest recline catches are engaged.
Each attendant should be familiar with the operation of the wheelchair. If there is any doubt they should read this User Guide.
Before setting off, ensure that the occupant is comfortable, and that clothes and any rugs which may be used are tucked in, so that they do not catch on the wheels.
Always apply the parking brake when the wheelchair is stationary and when getting in and out of the wheelchair.
Never tip the wheelchair forward when going down a kerb.
If the wheelchair is going to be used for transport in a vehicle you should carefully read the Transport Section of this guide.
The attendant must take precautions against fire risk. In buildings, check the locations of fire exits and make sure the emergency procedures are understood.
Do not let children play with, or hang on the wheelchair.
Do not use your wheelchair in a manner for which it is not designed.
Ensure that children are clear of moving parts before making adjustments.
Activate and your dealer cannot accept responsibility for the use of accessories other than those supplied by them.
Full concentration must be maintained during travel to avoid collisions or other dangerous situations.
Make sure that the wheelchair brakes are applied while adjusting the recline or the tilt of the seat. This will leave both hands free to operate these features, avoiding sudden movements which will cause discomfort to the occupant.
Do not overload the wheelchair. Other children should not ride on the back of the wheelchair, nor should loads be attached to the frame other than on the approved accessories.
Ensure that the occupant has the appropriate harness attached and other accessories fitted and adjusted to their requirements to prevent them from falling out of the wheelchair while travelling.
Do not stand on the footrest. Ensure the occupant’s feet are settled into the footrest before setting off.
Never leave the child unattended in the wheelchair at any time.
At all times when operating the wheelchair, be aware of the danger of injury to yourself, the occupant, or any other person, especially when going through narrow areas such as doorways.
Activate and your dealer cannot accept responsibility for any loss, damage or injury as a result of incorrect operation of your wheelchair.
2
Downloaded from www.Manualslib.com manuals search engine

Operating Instructions
FOLDING OF THE CORGI SPRINT To fold or unfold the Corgi Sprint the seat is removed The seat is removed by releasing the lever as shown
The Seat unit will then tilt backwards and can be lifted off the seat interface
3
Downloaded from www.Manualslib.com manuals search engine

Removing the rear wheels. The rear wheels are removed by pressing the button in the centre of the wheel as shown in the picture. When replacing the wheel you should clip it on and give it a shake to make sure that catch has engaged
Locking the front castors The front castors can be fixed so that they are in line with the rear wheels for a straight direction of travel. The pin is rotated to allow it to slide into the hole in the top of the castor.
4
Downloaded from www.Manualslib.com manuals search engine

BACKREST RECLINE ADJUSTMENT To adjust the back of the seat, the two catches can be pushed together, towards the centre and the back reclined into the required position. Please ensure that the catches are fully engaged before setting off. You should also check with your therapist about the use of the recline function. The child’s posture may not be acceptable in the reclined position.
USING THE TILT FACILITY To use the tilt, the small lever on the right-hand hand side is used. Press this lever with your foot to release the Tilt Strut so the chair can then be pushed downwards into the desired position. Please ensure brakes are on while using the tilt facility. The New locking Tilt pedal is is locked by locating the pop –pin as shown in the first picture. If the tilt lock is not required is can be held open by rotating the head 90 degrees to rest in the open position.
LATERAL SUPPORT RELEASE When placing the child into the wheelchair it is advised to swing the lateral supports away to the sides of the chair. To do this the ball underneath the attaching block can be pushed up which will release the support to be swung away. Ensure that the lateral support is clicked into place while the wheelchair is in use. LATERAL SUPPORT ADJUSTMENT To adjust the positioning of the lateral support there are two bolts on the back of the seat which can be loosened and the support will then slide up and down, to the preferred position, and moved in to support the trunk of the occupant. Please ensure the bolts are fully tightened before using the wheelchair.
Downloaded from www.Manualslib.com manuals search engine

OPERATING THE BRAKES When parking the wheelchair, the brakes should be applied. This is done by pushing the brake lever down to lock it against the wheel as shown.
ADJUSTING THE HEIGHT OF THE HANDLE To raise or lower the handle at the back of the wheelchair the buttons on the adjustment knuckles should both be pressed in. The handle can then be moved to the desired position and the buttons released. The locaters inside the knuckle will click into place automatically to secure the new position.
ADJUSTING THE ARMREST To adjust the height of the armrest there is a small hand wheel which can be unwound to release the grip. The armrest can then be pulled up or down and re-positioned and the screw then tightened. When adjusting the armrest ensure the occupant’s hands are kept away from the armrest, to prevent catching fingers when repositioning the armrest. 6
Downloaded from www.Manualslib.com manuals search engine

ADJUSTING THE HIP GUIDE The hip guide can be adjusted for height by releasing the hand wheel as shown. INCREASING WIDTH OF HIP GUIDE To increase or decrease the seat width, the hip guides can be pulled outwards. This is achieved by using a hand wheel which grips the main attaching bar of the hip guide to the base of the seat. This handwheel is found underneath the seat. The hand wheel can be loosened and the hip guide will then slide out to the preferred position. The hip guides will slide out individually to fit the occupant. The hand wheel will then need to be tightened in the new position before use. MOVING THE POMMEL The pommel can be taken off the seat to assist with putting the child in the wheelchair. This can be done by loosening the screw fitting in the centre (on the underneath of the chair) at the front. When the screw is loosened, the pommel bar will slide out of the bar attached to the base, and the pommel will come off the chair. This can be replaced by sliding back into the holder and the screw tightened. Ensure the pommel is firmly secured before setting off. THE DOUBLE FOOTREST The double footrest is made up of two separate footholders with a back support and a grip base to ensure the child’s foot is secure. Each foot piece is angle adjustable. THE SINGLE FOOTREST The angle of the footrest can be adjusted by using the lever handle on the bar underneath. When this lever handle is unwound, the footrest can be tipped back or forward to re-position it. When the preferred position is obtained the lever handle can be tightened. To re-position the handle, the centre button can be pushed in and the handle moved to a different position. TO LOWER THE FOOTREST If the footrest is too high or too low for the child this can be adjusted by loosening the bolt on the end of the bar which is attached to the chair. Then the bar can be lowered or raised to suit the child. When re-positioned, the bolt should be tightened and the footrest is ready to use.
7
Downloaded from www.Manualslib.com manuals search engine

TO REPOSITION THE FOOTREST There is also a facility to reposition the entire footrest away from, or in towards the wheelchair. This is achieved by using the screw fitting on the side of the chair at the very front, which holds the bar attaching the footrest to the base. When this screw is loosened the bar can be pulled or pushed to a new position, and then the screw should be tightened. The footplate can be removed when stowing the wheelchair into a vehicle. INDIVIDUAL SWINGAWAY AND FLIP-UP FOOTPLATES The individual swingaway footplates allow access for self loading. The footrest hangers are removable, or they can be rotated out of the way. The footplates themselves flip up , which may be sufficient for some situations.
ADJUSTING THE HEIGHT OF THE SWINGAWAY FOOTPLATES. The footplates are bolted to the vertical tube, which is pre-drilled for height settings. The footplate bolt should be removed and the the footplates re-mounted in the desired position. 8
Downloaded from www.Manualslib.com manuals search engine

HEADREST HEIGHT ADJUSTMENT The headrest can be lowered or raised by using the screw fitting on the silver block at the top of the chair back. When loosened the main bar can be moved and the screw re-tightened. Ensure the screw is fully tightened before the child uses the headrest. HEADREST ANGLE ADJUSTMENT To adjust the positioning of the headrest in relation to the child’s head, there is a small handle which can be unscrewed and the headrest can be moved up or down on the arm, to suit the child’s posture. Ensure that the headrest adjusting handle is fully tightened before use, so the best position is secured for the occupant. TO SET THE HEADREST To move the headrest to the perfect position for the posture of the child, a spanner is needed to loosen a bolt in order to move the cushion on a pivot up or down. When the headrest is in the required tilt, the bolt can then be tightened before use. TRAY TABLE ACCESSORY The tray table is fitted into the armrest by a long pin attached to the underside of the tray, which is inserted into a hole in the end of the armrest. This will then slide along so the tray is secure around the child. There is a rubber rim around the edge of the tray to prevent objects falling off.
9
Downloaded from www.Manualslib.com manuals search engine

Using your wheelchair
GETTING INTO THE WHEELCHAIR Make sure that that the two individual brakes are on. Either ask another helper to steady the wheelchair or place the handle up against a wall to minimize the risk of tipping. Place the child in the wheelchair, fasten the harnesses and make sure no clothing or rugs are caught on the pommel. It is also advised to check that the child’s feet are in a suitable position in the footrest. GETTING OUT OF THE WHEELCHAIR Make sure that the brakes are on. Reverse the procedure for getting into the wheelchair. NEGOTIATING A KERB OR SINGLE STEP To go down a kerb, approach the kerb until the front wheels are near the edge. Grip the handles firmly and tip the wheelchair backwards to balance on the rear wheels. Lower the wheelchair over the kerb on the rear wheels, returning the front wheels to the ground when you have reached the lower level.
NEVER TIP A WHEELCHAIR FORWARDS AT A KERB
ALWAYS MAKE USE OF RAMPS AND LIFTS IF THEY ARE AVAILABLE
DO NOT ATTEMPT TO MOUNT A FLIGHT OF STAIRS OR STEPS FOLDING THE WHEELCHAIR To fold the wheelchair for handling, the seat can be tilted forward so the chair can be made more compact. See instructions for tilting the backrest on page 4.
The Corgi Sprint wheelchair is designed to grow with your child. This means that the wheelchair will be used over a number of years. The seat position and the postural accessories will need to be checked regularly by your therapist. It is also important not to adjust the seat without your therapist, as it could have a detrimental effect to your child’s posture. Correct positioning is crucial to your child’s muscle and bone structure development. 10
Downloaded from www.Manualslib.com manuals search engine

Basic Technical Data
01 02 03 Seat width 260 -320 280-350 330-400 Seat depth 190-360 290-430 300-440 Backrest width 290 340 380 Later support width (inside) 220-320 270-350 310-380 Seat to footplate 300-420 300-420 330-450 Overall width 470 470 530 Handle height 980-1040 980-1040 980-1040 Seat height to floor 520 520 520 Recline range (degrees) 14 14 14 Tilt max. (degrees) 30 30 30 Corgi Power (2 x 200 watt motors, 2 x 24 amp batteries) Seat height 350-450 350-450 350-450
Dimensions given may be subject to minor change due to continuous development
11
Downloaded from www.Manualslib.com manuals search engine

Occupied transport of a Corgi Sprint in a suitably modified vehicle
SECURING THE WHEELCHAIR TO THE TRACK SYSTEM IN THE VEHICLE FLOOR The Corgi Wheelchair must be secured to the vehicle floor using a 4-point webbing restraint system. The Hook or Karabiner version should be used. THE WHEELCHAIR MUST BE IN A FORWARD FACING POSITION. Wheel the wheelchair into position and apply the brakes. The front of the wheelchair is secured first. Attach the front restraints to the track system making sure that they are locked in position. Attach the restraint to the tie-down point which is clearly marked on the wheelchair chassis. Now that the front of the wheelchair has been secured, carefully move the wheelchair backwards to take up the slack in the front restraints, and re-apply the brakes. The rear restraints are attached to the backrest bracket of the wheelchair frame at the clearly marked attachment point. When the restraint is also attached to the track system in the vehicle floor, use the ratchet to pull the restraint tight. Make sure that you have tensioned the restraint on both sides of the wheelchair, and check that the wheelchair feels secure. The restraints should be attached at an angle of no more than 45 degrees to the vehicle floor. If you are in any doubt, contact the restraint manufacturer for specific instructions relating to their system, or your dealer for queries relating to the wheelchair. SECURING THE PASSENGER RESTRAINT AROUND THE OCCUPANT AND ATTACHING TO THE TRACK SYSTEM IN THE VEHICLE FLOOR. The following points relate to the safety of the occupant:
Check that occupant weighs no more than 35kg.
Make sure that the seat base is at 90 degrees to the seat back. The seat back should be as upright as possible.
No additional seating cushions should be used in transportation. The wheelchair occupant is protected by a 3-point passenger restraint, described by the restraint manufacturer as a SPLIT REEL DOUBLE INERTIA. The double inertia reel is attached to the track system on the track closest to the vehicle wall, on which the upper torso anchorage is mounted. The stalk with the buckle is placed opposite the double inertia reel on the other track. These should be positioned about 14 inches/350mm behind the wheelchair backrest to ensure a steep angle of application of the lap belt. The lap belt is reeled out from the front of the double inertia reel, fed between the wheelchair hip guide and the backrest in order to maintain a steep angle over the pelvis. The belt must fit snugly over the pelvis and between the hip guide and the backrest on the other side of the seat unit. The clip then attaches to the stalk, which is fixed to the track in the vehicle floor. The lap belt should be adjusted to be close fitting to avoid abdominal intrusion on impact. The upper torso restraint is reeled out of the rear of the double inertia unit. The leading clip is passed over the occupant’s shoulder, and attached to the buckle on the lap belt. This will be found just above the lap belt attachment to the stalk. The remaining clip is then attached to the restraint anchorage on the vehicle wall. This should be adjusted to be at, or just above, shoulder level. The upper torso restraint should be adjusted to be close fitting and comfortable for the occupant. 12
Downloaded from www.Manualslib.com manuals search engine

Details of attachment points
The Front Restraints are attached as shown on the picture on the right
The Rear Restraints are attached to the bracket as shown below. Or the more recent models have a tiedown bracket as below.
13
Downloaded from www.Manualslib.com manuals search engine

Key points relating to transportation
1. The wheelchair must face forwards in the vehicle – in the direction of travel. 2. The wheelchair must be restrained with a 4-point tie-down. No other restraint system must be
used. 3. The occupant must be restrained by a 3-point passenger restraint. 4. The passenger restraint should be anchored at, or above, shoulder level. 5. The lap section of the passenger restraint should fit snugly over the pelvis of the occupant, at a
steep angle of application to avoid abdominal intrusion. 6. Check with the vehicle converter that the vehicle floor and side wall structures have the
appropriate strength required by the restraint manufacturers for the installation of the restraint systems.
7. Check that the vehicle converter has fitted the restraint system in conjunction with the restraint
manufacturer. All manufacturer’s recommendations and guidance notes should be followed. 8. Check that all vehicle operators are suitably trained in the use, care and maintenance of the
restraints.
Features to check on the wheelchair after the restraint system is in place
Are the brakes on?
Are the backrest recline mechanisms located?
Are the footrest rail fixings tight?
It is crucial that these instructions are followed carefully. If you are in any doubt then ask your restraint supplier about training.
INFORMATION ONLY
The Corgi wheelchair has been crash tested in accordance with the International Standard ISO7176 Part 19 and it passed. This dynamic wheelchair test is a voluntary one, and is part of the risk assessment when considering whether the Corgi wheelchair should be used for transportation in a vehicle. The test involves setting up a rig following the instructions that you have just read in this guide. The occupant was a 6 year old dummy, which weighed 24kg. The seating unit was set at the maximum size possible in order to fit the size of the dummy. The rig is then decelerated from 30mph to zero in about 50 milliseconds. One can not really see it as it happens so quickly. We regard this as a severe impact. The important thing is that the dummy was held in the position that it was put in, with minimal movement to the head, and the pelvis position was maintained. We also have to consider for other passengers in the vehicle. Nothing was detached from the wheelchair during the test, so other passengers were not at risk. We have to remember that in a real life incident the impact would be different to the impact in the test. This should be part of the consideration of the whole picture. You need to look at the vehicle, the wheelchair, the occupant, the other passengers, the driver, the distance to travel, the regularity of the journey, the method of loading and unloading, the suitability of the loading bay and the list goes on. . .
14 ABOVE ALL, BE PATIENT AND SEEK ADVICE – IT IS AVAILABLE.
Downloaded from www.Manualslib.com manuals search engine

CARE & MAINTENANCE
Your wheelchair has been designed and produced to a high standard. With correct use and maintenance it will give you many years of trouble-free service. Please read the following instructions:
Regularly inspect the tilt mechanism and all screw fittings and lever handles to ensure that they are in good working order.
Brakes, wheels and tyres are subject to wear. If they need to be replaced, the work must be carried out by a qualified rehabilitation engineer.
We recommend that the wheelchair is checked once a year by a qualified rehabilitation engineer.
Any damage or maintenance requirements should be assessed by a qualified rehabilitation engineer, or returned to your dealer.
Only genuine Colombo parts should be used when your wheelchair is repaired.
Regular lubrication of moving parts will extend the life of your wheelchair and will make adjusting parts easier. Use a spray lubricant and wipe off any excess spray. Any overspray will encourage a build up of dirt.
Make sure that you are familiar with the adjustments on your wheelchair. It should always adjust easily, so do not force the mechanism if it does not move easily. Stop and read the user guide again.
Wheels and other plastic or metal parts may be wiped clean with warm water and a mild detergent.
Never clean the wheelchair with abrasive cleaners, ammonia based, bleach based or spirit based cleaners.
After exposure to damp conditions, dry off your wheelchair with a soft cloth, and leave with the backrest upright in a warm, dry environment.
Store your wheelchair in a dry, safe place.
15
Downloaded from www.Manualslib.com manuals search engine


