36
User Manual 821121-ATA-PAK
User Manual
821121-ATA-PAK

2
IMPORTANT SAFETY INSTRUCTIONS
When using your telephone equipment, basic safety precautions should always be followed to reduce the risk of fire, electric shock and injury to persons, including the following: 1. Do not use this product near water places such as bath tub, wash bowl, kitchen sink, laundry tub, wet basement, swimming pool, etc. 2. Avoid using a telephone (other than the cordless type) in stormy weather. There may be a remote risk of electric shock from lightning. 3. Do not use the telephone to report a gas leak in the vicinity of the leak. 4. Use the power cord and batteries only indicated in this manual. Do not dispose batteries in a fire, which may cause explosion. Check with local codes for the possible special disposal instructions. 5. Plug the power adaptor into a power outlet which is near the equipment and easily accessed.
3
SAVE THESE INSTRUCTIONS
FCC PART 15
Warning: Changes or modifications to this unit not expressly approved by the party responsible for compliance could void the user's authority to operate the equipment. Note: This equipment has been tested and found to comply with the limits for a Class B digital device, pursuant to Part 15 of the FCC Rules. These limits are designed to provide reasonable protection against harmful interference in a residential installation. This equipment generates, uses and can radiate radio frequency energy and, if not installed or not used in accordance with the instructions, may cause harmful interference to radio communications. However, there is no guarantee that interference will not occur in a particular installation. If this equipment does cause harmful interference to radio or television reception, which can be determined by turning the equipment off and on, the user is encouraged to try to correct the interference by taking one or more of the following measures: � Reorient or relocate the receiving antenna. � Increase the separation between the equipment and receiver. � Connect the equipment to an outlet on a circuit different from that to which the receiver
is connected. � Consult the dealer or an experienced radio/TV technician for help. Notes: This device complies with Part 15 of the FCC Rules. Operation is subject to the following two conditions: (1) The device may not cause harmful interference, and (2) This device must accept any interference received, including interference that may cause undesired operation. Model: Analog Telephone Adaptor - 821121-ATA-PAK The responsible party: Cortelco 1703 Sawyer Road, Corinth, MS 38834 Tel: (662) 287 5281

4
Table of Contents
Section 1 Installation.................................................................................................................. 6 Section 2 What is Included in the Package ................................................................................ 7 Section 3 Wall Mount instructions .............................................................................................. 7 Section 4 Product Overview....................................................................................................... 7
4.1 Key Features .................................................................................................................... 7 4.2 Hardware Specification ..................................................................................................... 8
Section 5 Basic Operations........................................................................................................ 8 5.1 Keypad Commands. ......................................................................................................... 8 5.2 Set up ............................................................................................................................... 8 5.3 Make Phone Calls............................................................................................................. 9
5.3.1 Placing a call .............................................................................................................. 9 5.3.2 Other Functions Available during a Call ...................................................................... 9
5.3.3.1 Call Waiting/Flash................................................................................................. 9 5.3.3.2 Call Forward ......................................................................................................... 9
5.3.4 Send and Receive PSTN Calls ................................................................................... 9 5.3.5 PSTN Backup ............................................................................................................. 9 5.3.6 Send and Receive VoIP Calls ..................................................................................... 9
5.4 LED Light Pattern Indication ............................................................................................. 9 Section 6 Configuration Guide ..................................................................................................10
6.1 Web Browser Interface.....................................................................................................10 6.2 Web Interface Detailed Information..................................................................................11
6.2.1 System Information................................................................................................11 6.2.2 Speed Dial Settings ...........................................................................................12 6.2.3 Phone Setting ........................................................................................................12
6.2.3.1 Call Forward...................................................................................................13 6.2.3.2 SNTP Settings ...............................................................................................14 6.2.3.3 Volume Setting...............................................................................................15 6.2.3.4 Block Setting ..................................................................................................16 6.2.3.5 Caller ID.........................................................................................................17 6.2.3.6 Auto Dial Time ...............................................................................................18 6.2.3.7 Flash Time Setting .........................................................................................19 6.2.3.8 Call Waiting....................................................................................................20 6.2.3.9 T.38 Fax Setting.............................................................................................21
6.2.4 Network .................................................................................................................22 6.2.4.1 Network Status...............................................................................................22 6.2.4.2 Network Settings............................................................................................23 6.2.4.3 TCP/IP Configuration .....................................................................................23 6.2.4.4 PPPoE Configuration .....................................................................................23 6.2.4.5 Bridge ............................................................................................................23 6.2.4.6 DDNS Settings...............................................................................................24
6.2.5 SIP Settings...........................................................................................................25 6.2.5.1 Service Domain Settings................................................................................25
6.2.5.1.1 Display Name...........................................................................................25 6.2.5.1.2 User Name...............................................................................................25 6.2.5.1.3 Register Name .........................................................................................26 6.2.5.1.4 Register Password ...................................................................................26 6.2.5.1.5 Domain Server .........................................................................................26 6.2.5.1.6 Proxy Server ............................................................................................26

5
6.2.5.1.7 Outbound Proxy .......................................................................................26 6.2.5.1.8 Status.......................................................................................................26
6.2.5.2 Port Settings .................................................................................................27 6.2.5.3 Codec Settings...............................................................................................28
6.2.5.3.1 Codec Priority...........................................................................................28 6.2.5.3.2 RTP Packet Length ..................................................................................28 6.2.5.3.3 G.723 5.3K...............................................................................................28 6.2.5.3.4 Voice VAD................................................................................................28
6.2.5.4 DTMF Setting.................................................................................................29 6.2.5.5 RPORT Setting ..............................................................................................30 6.2.5.6 Other Settings ................................................................................................31
6.2.5.6.1 Hold by RFC.............................................................................................31 6.2.5.6.2 Voice QoS................................................................................................31 6.2.5.6.3 SIP Qos....................................................................................................31 6.2.5.6.4 SIP Expire Time .......................................................................................31
6.2.6 NAT Trans .............................................................................................................32 6.2.6.1 STUN Setting .................................................................................................32
6.2.7 Others....................................................................................................................33 6.2.7.1 Auto Configuration Setting .............................................................................33 6.2.7.2 ICMP Setting..................................................................................................34 6.2.7.3 PTT Setting....................................................................................................35
6.2.8 System Authorization.............................................................................................36 6.2.8.1 System Configuration.....................................................................................36
6.2.8.1.1 Administrator ............................................................................................36 6.2.8.1.2 Normal User .............................................................................................36 6.2.8.1.3 Transfer to PSTN Key ..............................................................................36

6
Section 1 Installation
The 821121-ATA-PAK is an all-in-one VoIP integrated device designed to be a total solution for networks providing VoIP services.
This ATA functions are available via a regular analog telephone.
The following photo illustrates the appearance of the 821121-ATA-PAK.
Connection Diagram for the 821121-ATA-PAK
The 821121-ATA-PAK has one PHONE port, one LINE port, one WAN port, one LAN port, and one power port.
Please follow the following steps to install an 821121-ATA-PAK:
1. Connect a standard touch-tone analog telephone to the PHONE port. 2. Insert a standard RJ11 telephone cable into the LINE port and connect the other end of the
telephone cable to a wall jack. 3. Insert an Ethernet cable into the WAN port and connect the other end of the Ethernet cable to an
uplink port (a router or a modem, etc.) 4. Connect a PC to the PC port of the ATA. 5. Insert the power adapter into the power port and connect it to a wall outlet.
7
Section 2 What is Included in the Package
The 821121-ATA-PAK package includes:
1. One 821121-ATA-PAK Unit 2. One Ethernet Cable (3m) 3. One Power Cord
Section 3 Wall Mount instructions The 821121-ATA-PAK has two wall-mount slots on its back panel. Instructions for wall mounting are given below.
1. Determine the mounting location for the 821121-ATA-PAK. 2. Drill two holes into the wall. Make sure the holes are 50 mm (2 inches) apart. 3. Insert a screw into each hole, and leave 5 mm (0.2 inches) of its head exposed. 4. Maneuver the 821121-ATA-PAK so the appropriate slots line up with the two screws. 5. Place the wall-mount slots over the screws and slide the 821121-ATA-PAK down until the screws
fit snugly into the wall-mount slots.
Section 4 Product Overview
4.1 Key Features
• Supports SIP 2.0(RFC 3261), TCP/UDP/IP, RTP/RTCP, HTTP, ICMP, ARP, DNS, DHCP , NTP, PPPoE, STUN, TFTP, etc.
• Powerful digital signal processing (DSP) to ensure superb audio quality.
• Supports various codecs including G.711 (a-law and u-law), G.723.1 (5.3K/6.3K), and G.729A/B
• Supports out-of-band DTMF via RTP (RFC2833) or SIP INFO.
• Supports Caller ID/Name display.
• Supports Call Hold, Call Waiting/Flash, Call Transfer, and Call Forward.
• Supports automated NAT traversal without manual manipulation of firewall/NAT
• Supports QoS
• Supports device configuration via built-in IVR or Web browser
• Supports firmware upgrade via FTP.

8
4.2 Hardware Specification
The table below lists the hardware specification of the 821121-ATA-PAK
WAN interface 1xRJ45 100Base-T
LAN interface 1xRJ45 100Base-T
FXS telephone port 1xRJ11
PSTN port 1xRJ11
LED VoIP/PSTN, POWER (The POWER LED is green. The VoIP/PSTN LED is bicolor yellow/green.)
Dimension 118mm (W) 74mm (D) 28mm (H)
Weight Approximately 200 g
Temperature Operating temperature 0 oC to 40 oC
Humidity Operating Humidity 10% to 95% (non-condensing)
Section 5 Basic Operations
5.1 Keypad Commands You can use an attached PSTN phone to configure the System
and find setting information. The table below gives the codes and their function.
Function Menu Choice Notes Check IP Address
#90# IP address will be spoken over the handset of the attached telephone
Factory Reset #98# All user defined settings will be lost including network and service provider data.
Switch to PSTN #99# Unit will switch to PSTN calling
Set DHCP #111# Unit will switch to DHCP
Check IP Type #121# IP Type will be spoken over the handset of the attached telephone
Check Network Mask
#123# Network Mask will be spoken over the handset of the attached telephone
Check Gateway IP Address
#124# Gateway IP Address will be spoken over the handset of the attached telephone
Check Primary DNS Server IP Address
#125# DNS Server IP Address will be spoken over the handset of the attached telephone
Check Firmware Version
#128# Firmware version will be spoken over the handset of the attached telephone
5.2 Set up
The setup of the 821121-ATA-PAK is best done built-in web pages. To access the web pages, the WAN port IP address is required. The 821121-ATA-PAK is equipped with voice prompts to read these addresses. See table above.
9
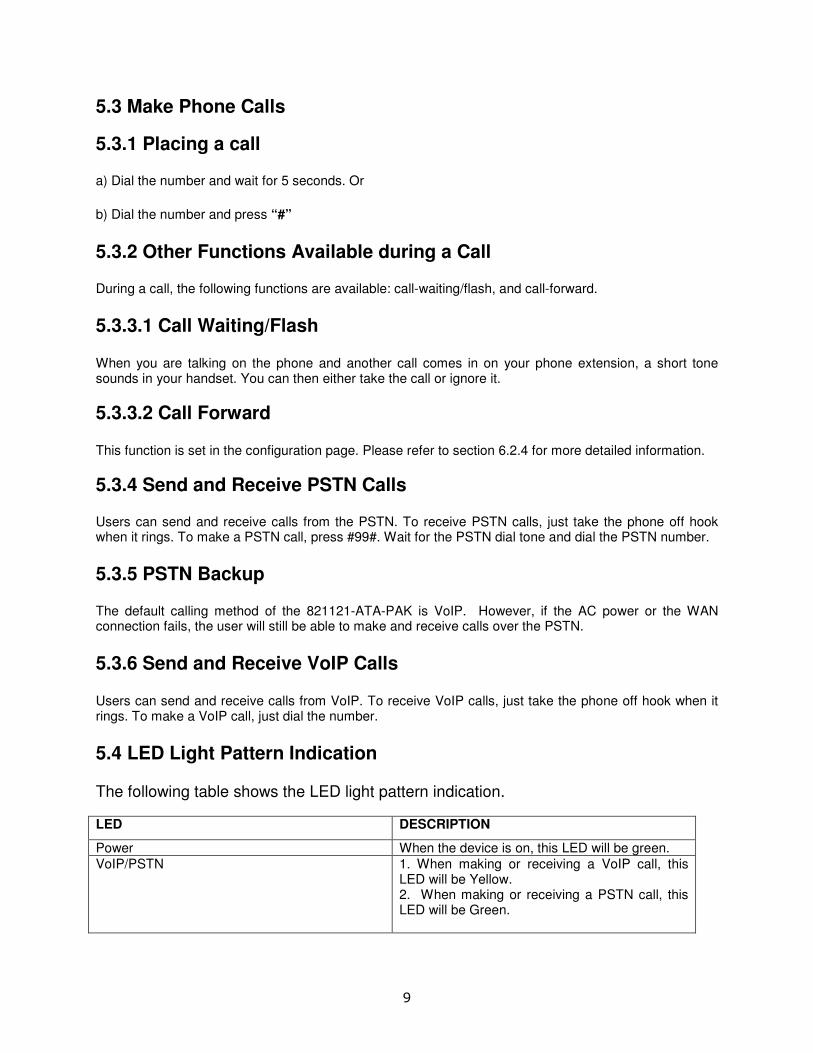
5.3 Make Phone Calls
5.3.1 Placing a call
a) Dial the number and wait for 5 seconds. Or
b) Dial the number and press “#”
5.3.2 Other Functions Available during a Call
During a call, the following functions are available: call-waiting/flash, and call-forward.
5.3.3.1 Call Waiting/Flash When you are talking on the phone and another call comes in on your phone extension, a short tone sounds in your handset. You can then either take the call or ignore it.
5.3.3.2 Call Forward This function is set in the configuration page. Please refer to section 6.2.4 for more detailed information.
5.3.4 Send and Receive PSTN Calls
Users can send and receive calls from the PSTN. To receive PSTN calls, just take the phone off hook when it rings. To make a PSTN call, press #99#. Wait for the PSTN dial tone and dial the PSTN number.
5.3.5 PSTN Backup
The default calling method of the 821121-ATA-PAK is VoIP. However, if the AC power or the WAN connection fails, the user will still be able to make and receive calls over the PSTN.
5.3.6 Send and Receive VoIP Calls Users can send and receive calls from VoIP. To receive VoIP calls, just take the phone off hook when it rings. To make a VoIP call, just dial the number.
5.4 LED Light Pattern Indication
The following table shows the LED light pattern indication. LED DESCRIPTION
Power When the device is on, this LED will be green.
VoIP/PSTN 1. When making or receiving a VoIP call, this LED will be Yellow. 2. When making or receiving a PSTN call, this LED will be Green.

10
Section 6 Configuration Guide
6.1 Web Browser Interface
The 8211 provides a built-in web server so a web browser can be used to configure it.
First input the IP address of the 8211 in the web browser address bar. The address must begin with http:// and end with the port number “:9999”. Ex: http://192.168.1.100:9999. You will then see the screen below.
Enter your username and password into the fields. The default settings are: Username: root Password: test Click the “Login” button and you will be taken to the System Information page. From this page, you can configure any feature of the 8211. If you change any settings in the Web Management interface, you must click the “Submit” button in that page. After you finish all the changes you wish to make, click the “Save Change” function on the left side of the screen, then click the Save Button. After the changes are saved, the 8211 will automatically reboot.

11
6.2 Web Interface Detailed Information
6.2.1 System Information This page displays the 8211 system current system information such as firmware version, codec version
and hardware revision level. Other functions are available on the left side of the screen.

12
6.2.2 Speed Dial Settings This page allows you to enter up to 10 phone numbers for Speed Dial access. Phone numbers must be added from the Add New Phone section at the bottom of the page. Numbers may be deleted by selecting them in the check box and then pressing the Delete button.
6.2.3 Phone Setting This page allows you to configure various parameters associated with the attached PSTN telephone.
13
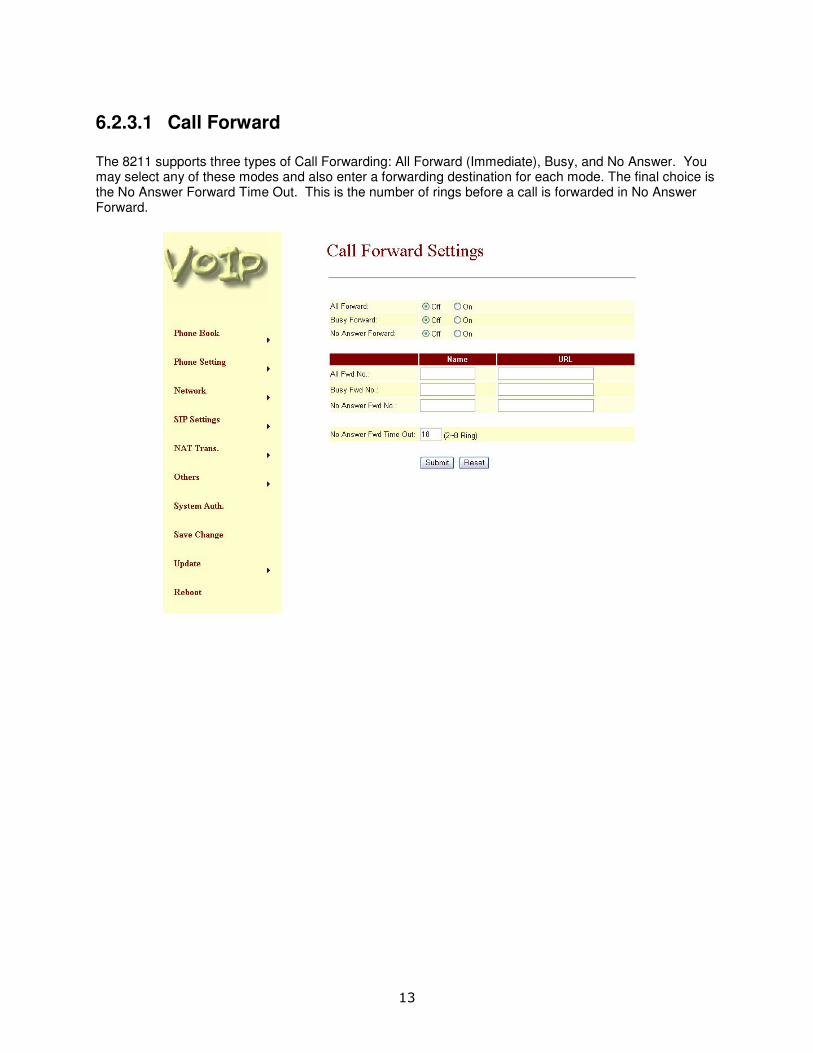
6.2.3.1 Call Forward The 8211 supports three types of Call Forwarding: All Forward (Immediate), Busy, and No Answer. You may select any of these modes and also enter a forwarding destination for each mode. The final choice is the No Answer Forward Time Out. This is the number of rings before a call is forwarded in No Answer Forward.

14
6.2.3.2 SNTP Settings Simple Network Time Protocol (SNTP) allows the 8211 to maintain an accurate time by registering with a time server. This page allows you to enter the addresses of up to two SNTP servers and also the time zone offset. You can also select the interval for synchronizing with the SNTP server.

15
6.2.3.3 Volume Setting This page allows you to adjust the volume of the handset.
16
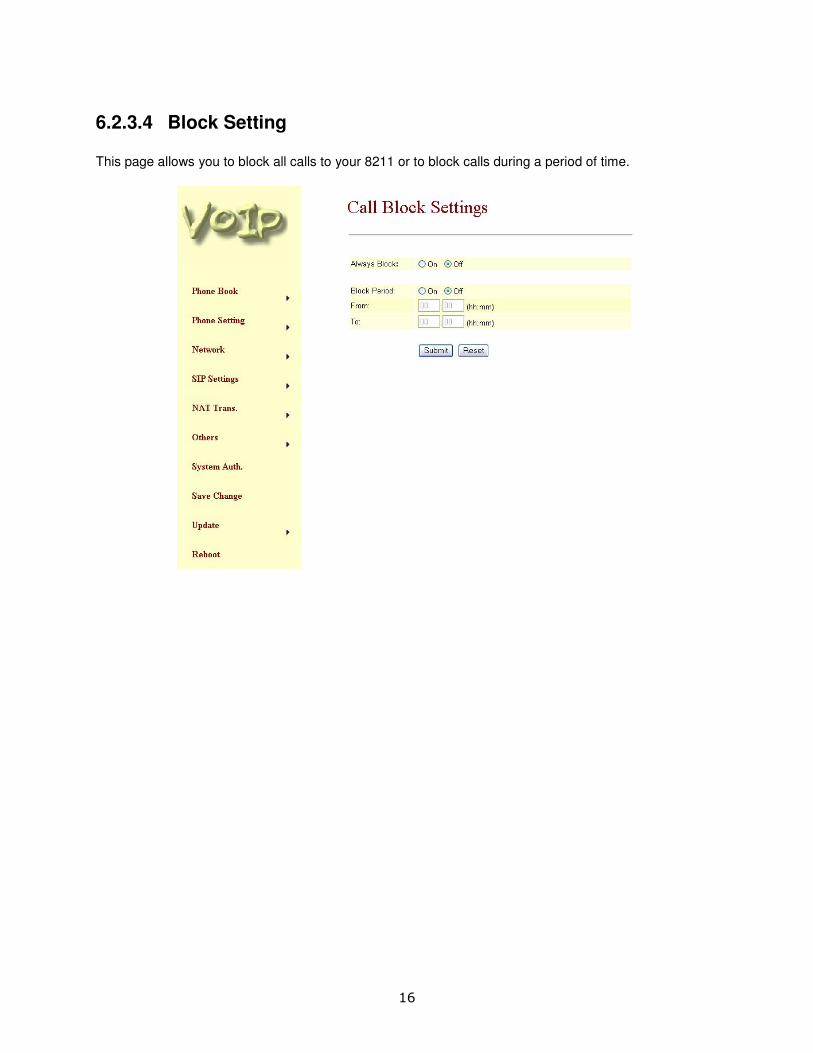
6.2.3.4 Block Setting This page allows you to block all calls to your 8211 or to block calls during a period of time.

17
6.2.3.5 Caller ID This page allows you to configure the 8211 for the type of Caller ID provided by your Central Office. You may select FSK before or after the first ring or DTMF before the first ring. You can also select Single Message Format or Caller ID without time information.

18
6.2.3.6 Auto Dial Time This is the time in seconds that the unit will wait before dialing out a number. If you wish to dial more quickly, you may enter # at the end of your number.
19
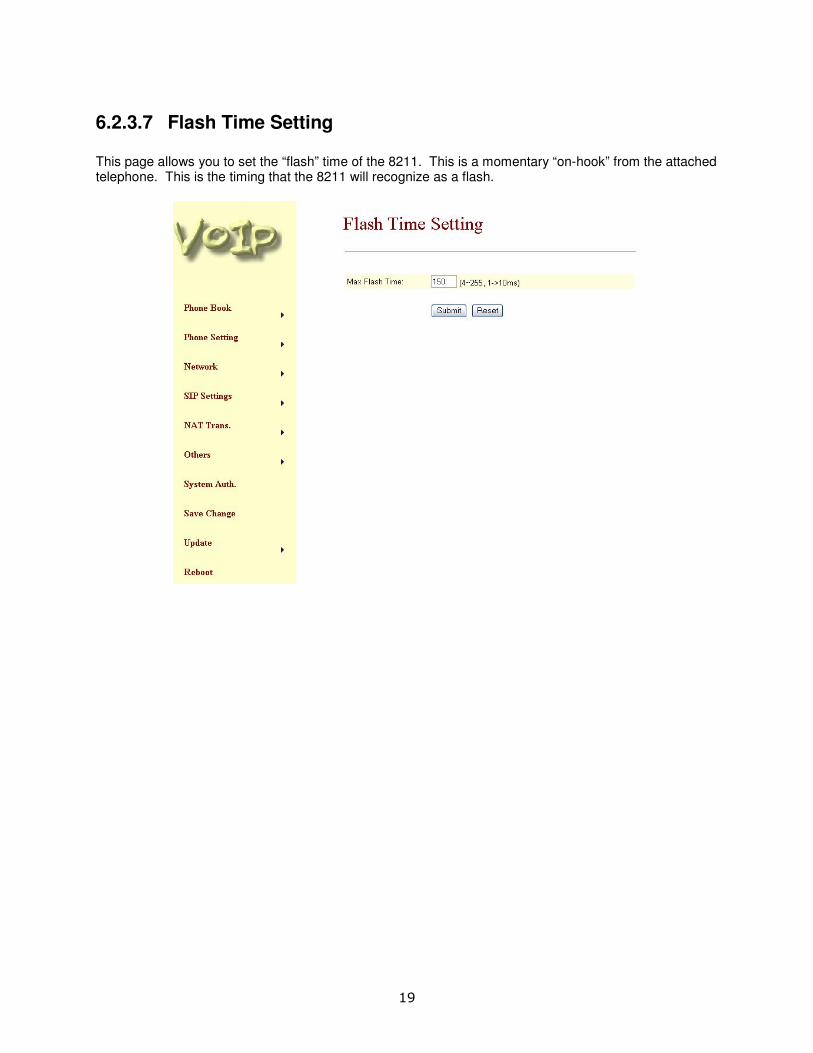
6.2.3.7 Flash Time Setting This page allows you to set the “flash” time of the 8211. This is a momentary “on-hook” from the attached telephone. This is the timing that the 8211 will recognize as a flash.

20
6.2.3.8 Call Waiting You may select whether or not the 8211 will pass Call Waiting information.
21
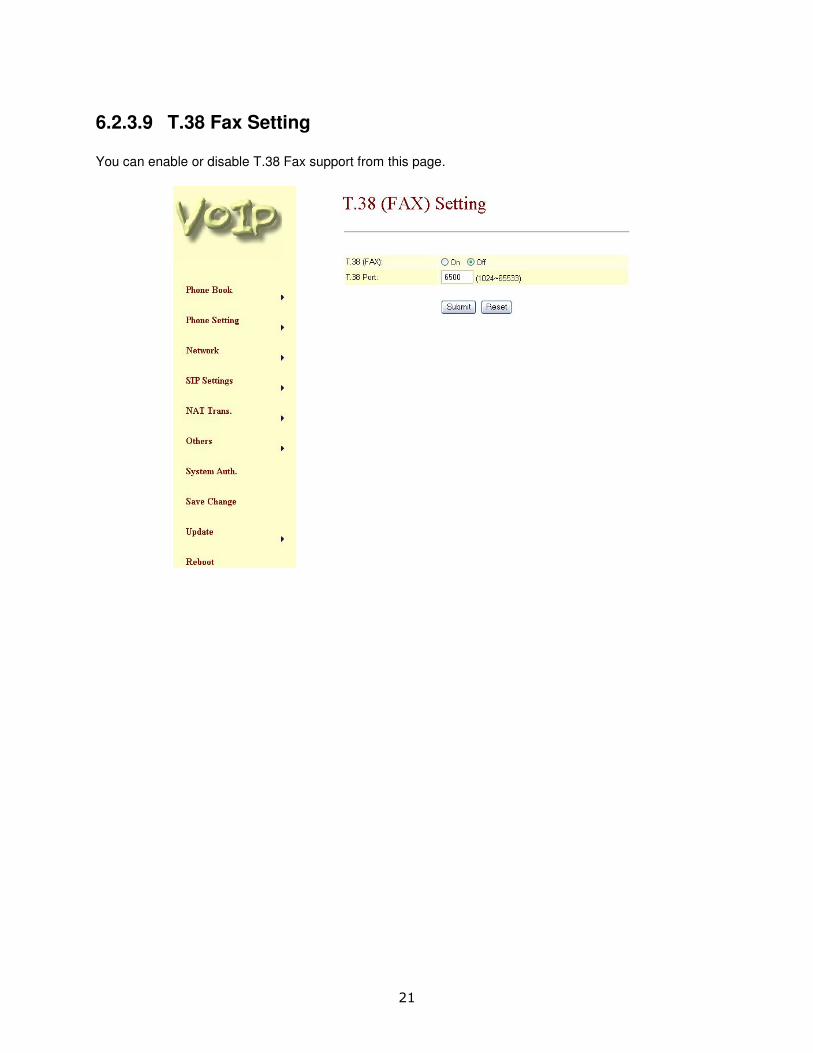
6.2.3.9 T.38 Fax Setting You can enable or disable T.38 Fax support from this page.

22
6.2.4 Network This page displays the current network interface status and allows network configuration.
6.2.4.1 Network Status This page displays the status of the network connection including the IP address and the interface type (DHCP, static, etc).

23
6.2.4.2 Network Settings This page will allow you to configure the network settings.
6.2.4.3 TCP/IP Configuration From this section of the page, you can configure the network addressing. You can select DHCP, Static or PPPoE addressing. If needed, you can then enter the appropriate values for the 8211’s IP address, gateway address, DNS server addresses and subnet mask. The MAC address is also displayed, but this is set at the factory and should not be changed.
6.2.4.4 PPPoE Configuration If you select PPPoE addressing from the TCP/IP configuration section, you can enter your login information here.
6.2.4.5 Bridge If this is set to YES, the 8211 becomes a network bridge and the device connected to the LAN port can obtain an IP address from the network DHCP server.
24
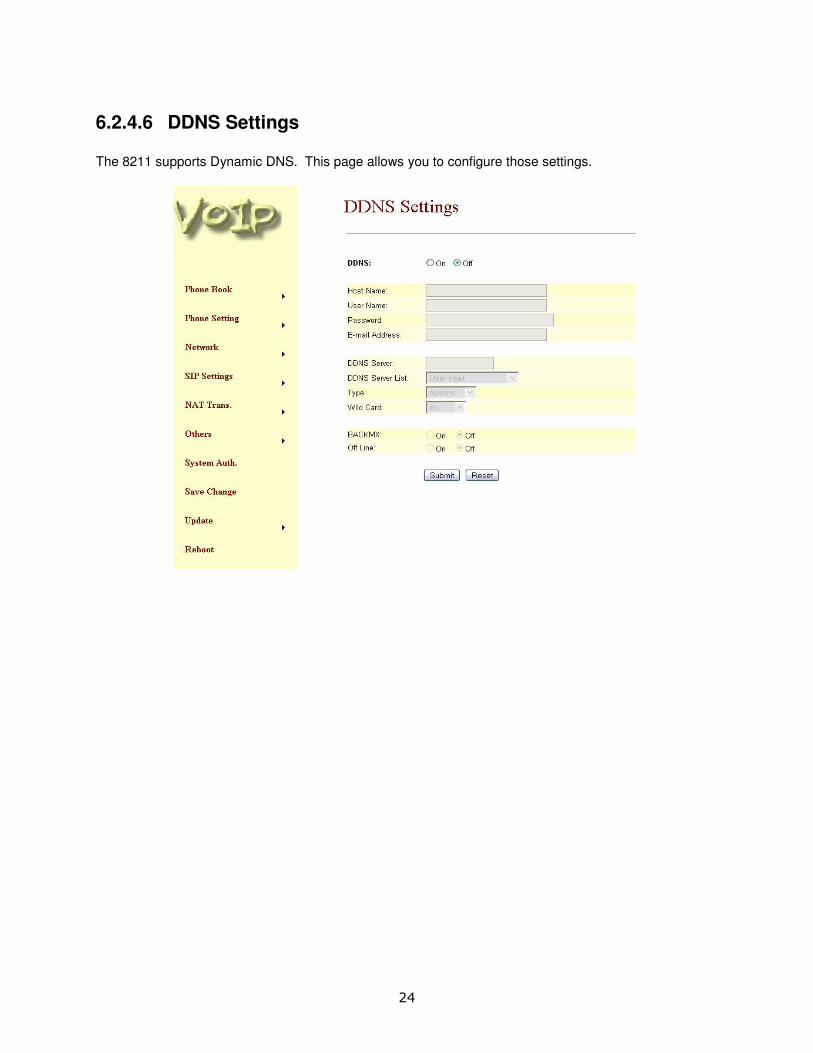
6.2.4.6 DDNS Settings The 8211 supports Dynamic DNS. This page allows you to configure those settings.
25
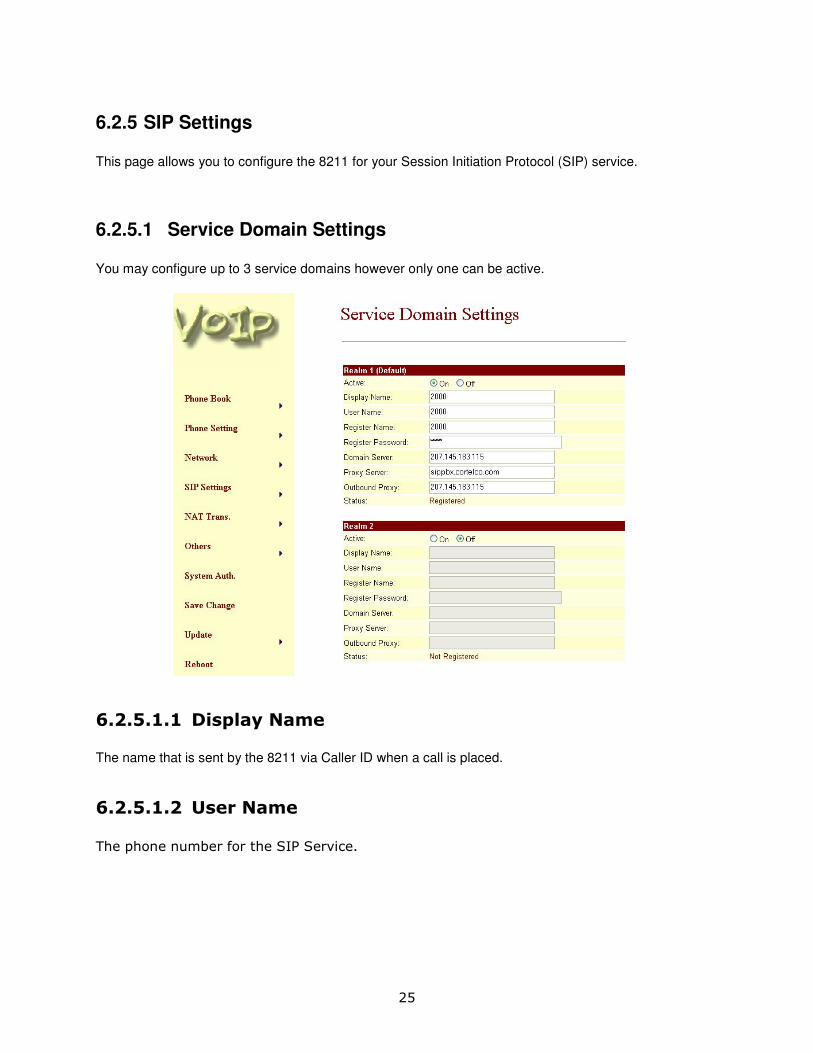
6.2.5 SIP Settings This page allows you to configure the 8211 for your Session Initiation Protocol (SIP) service.
6.2.5.1 Service Domain Settings You may configure up to 3 service domains however only one can be active.
6.2.5.1.1 Display Name
The name that is sent by the 8211 via Caller ID when a call is placed.
6.2.5.1.2 User Name
The phone number for the SIP Service.
26
6.2.5.1.3 Register Name The login name for the SIP Service
6.2.5.1.4 Register Password The password for the SIP Service
6.2.5.1.5 Domain Server
The IP address of the SIP Registrar server.
6.2.5.1.6 Proxy Server
The IP address of the SIP Proxy server.
6.2.5.1.7 Outbound Proxy
The IP address of the SIP Outbound Proxy server.
6.2.5.1.8 Status
Displays either Registered or Not Registered

27
6.2.5.2 Port Settings
You may configure the SIP Port and the RTP port here. The normal SIP port is 5060.
28
6.2.5.3 Codec Settings
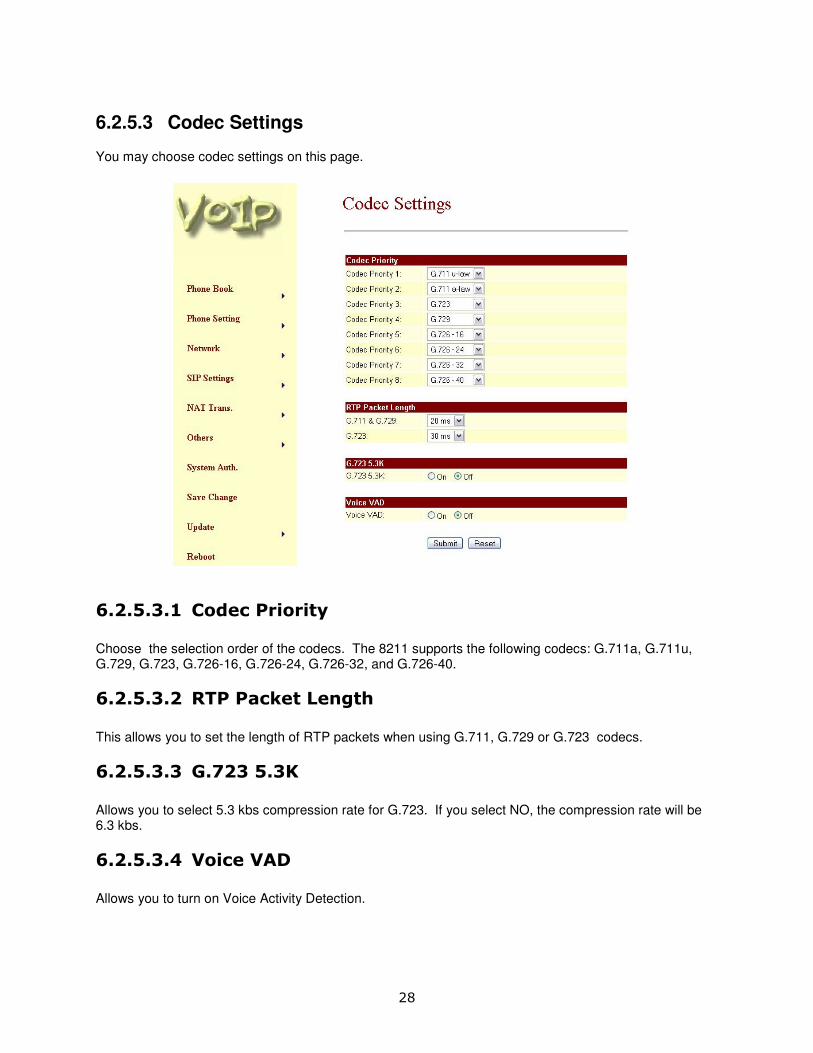
You may choose codec settings on this page.
6.2.5.3.1 Codec Priority
Choose the selection order of the codecs. The 8211 supports the following codecs: G.711a, G.711u, G.729, G.723, G.726-16, G.726-24, G.726-32, and G.726-40.
6.2.5.3.2 RTP Packet Length
This allows you to set the length of RTP packets when using G.711, G.729 or G.723 codecs.
6.2.5.3.3 G.723 5.3K
Allows you to select 5.3 kbs compression rate for G.723. If you select NO, the compression rate will be 6.3 kbs.
6.2.5.3.4 Voice VAD
Allows you to turn on Voice Activity Detection.

29
6.2.5.4 DTMF Setting The 8211 supports three methods of DTMF delivery. They are RFC2833, Inband, and SIP INFO. RFC2833 signals DTMF messages using RTP. Inband signals DTMF by encoding the tones and passing them in the same manner as speech. SIP INFO signals DTMF messages using the INFO method of the SIP protocol.

30
6.2.5.5 RPORT Setting This allows you to use the RPORT parameter which can be useful in NAT environments.

31
6.2.5.6 Other Settings
6.2.5.6.1 Hold by RFC
You can choose what method will be used to place calls on hold.
6.2.5.6.2 Voice QoS
If your network supports Voice Quality of Service (QoS) then you can adjust the packet size here.
6.2.5.6.3 SIP Qos
If your network supports SIP Quality of Service (QoS) then you can adjust the packet size here.
6.2.5.6.4 SIP Expire Time
This is the time in seconds for which a SIP connection will be maintained with no activity.

32
6.2.6 NAT Trans
6.2.6.1 STUN Setting This page allows you to use a STUN server and to specify its address and port.

33
6.2.7 Others
6.2.7.1 Auto Configuration Setting In the future, the 8211 will allow you to enter configuration settings in a text file on a server. These will then be read by the 8211 and configuration changes will be made with no additional user intervention. This feature will be implemented on a coming firmware release.
34
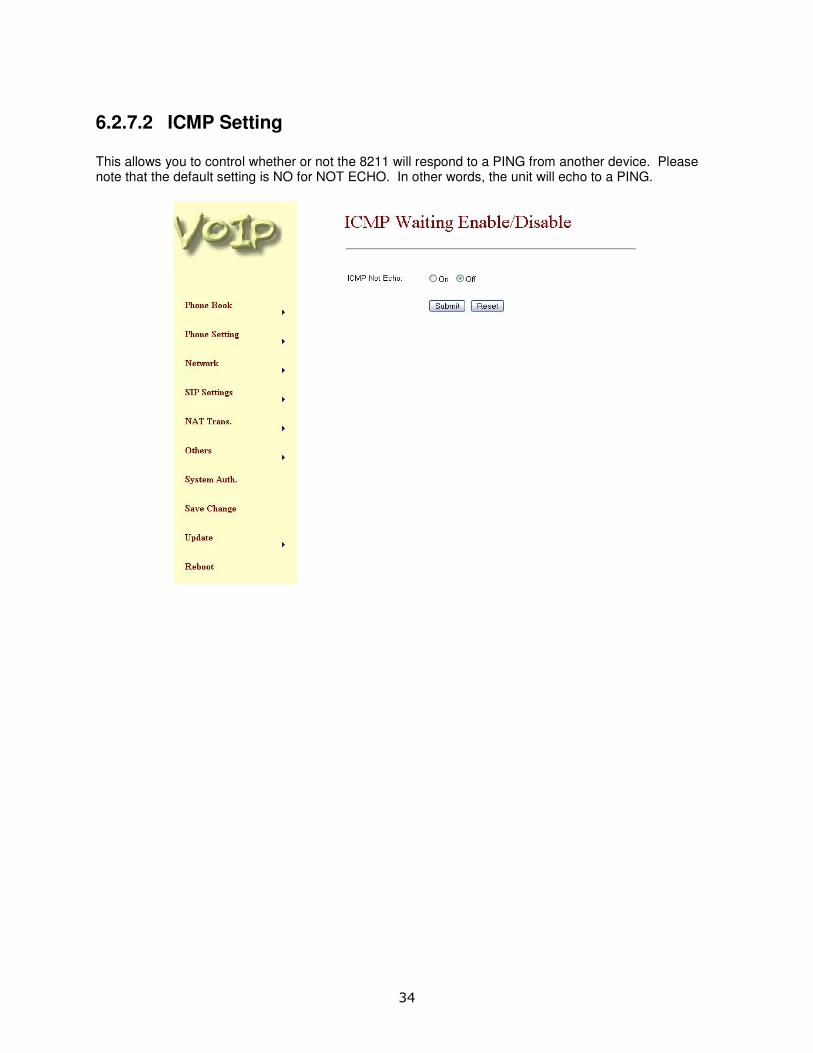
6.2.7.2 ICMP Setting This allows you to control whether or not the 8211 will respond to a PING from another device. Please note that the default setting is NO for NOT ECHO. In other words, the unit will echo to a PING.

35
6.2.7.3 PTT Setting This allows you to match the 8211 Subscriber Line Interface Circuit (SLIC) to the country in which it will be used.

36
6.2.8 System Authorization
6.2.8.1 System Configuration
6.2.8.1.1 Administrator
This page allows you to change the Administrator user name and password. The Administrator has total control over the system.
6.2.8.1.2 Normal User
This page allows you to change the Normal User user name and password. Normal users can only change basic features of the system.
6.2.8.1.3 Transfer to PSTN Key
This allows you to change the key code to switch to PSTN. The default code is #99.


