12
User’s Guide Brother Meter Read Tool ENG Version 0
User’s Guide
Brother Meter Read Tool
ENG
Version 0

Copyright
Copyright© 2017 Brother Industries, Ltd. All rights reserved.
Information in this document is subject to change without notice. The software described in this document is furnished under a license agreement. The software may be used or copied only in accordance with the terms of those agreements. No part of this publication can be reproduced in any form or by any means without prior written permission of Brother Industries, Ltd.
Trademarks
Brother is the trademark of Brother Industries, Ltd.
Any trade names and product names of companies appearing on Brother products, related documents and any other materials are all trademarks or registered trademarks of those respective companies.

Table of Contents 1. Overview 4
Usage Information Collection Methods 4
System Requirements 5
Installing the Brother Meter Read Tool 5
2. Configuration 6
Select the Devices to Monitor 6
Configure the Device Log Settings 8
Configure the Device Status Notification Settings 8
Configure the Email Address Settings 9
Test and Deploy the Meter Read Configuration 10
Export the Settings 10
3. Troubleshooting 12
4
4
Device Log Device Status
Collected periodically: daily, weekly or
monthly
Sent as CSV or XML
Can contain the following information:
Machine status
Consumables remaining life, drum count
and replace count
Paper jam count
Error history
Collected as per the collection cycle (minimum 1 minute)
Supports multiple profiles containing customisable information
Can be received when the following problems occur:
Toner/ink low or needs replacing
Consumables warnings and errors (both user-repairable
and requiring a service engineer’s visit)
Paper jam, input, and output errors
Cover open errors
Memory errors
Hardware, mechanical, and installation errors
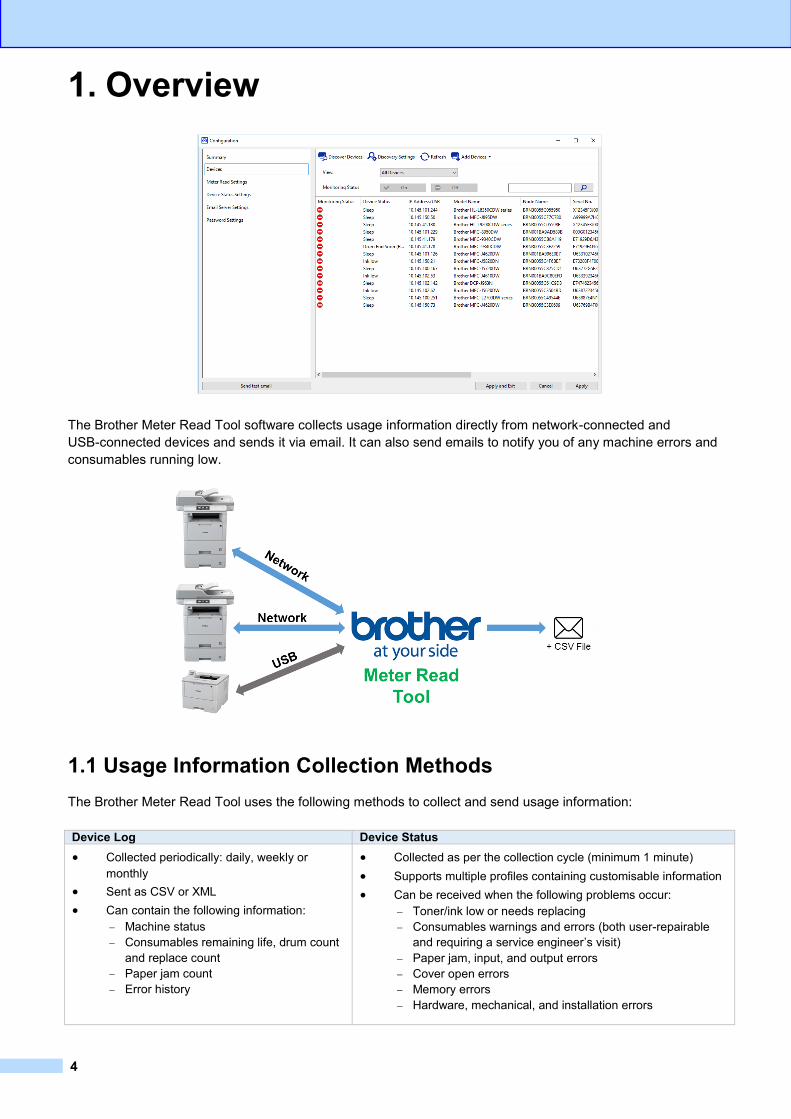
1.1 Usage Information Collection Methods
The Brother Meter Read Tool uses the following methods to collect and send usage information:
1. Overview
The Brother Meter Read Tool software collects usage information directly from network-connected and
USB-connected devices and sends it via email. It can also send emails to notify you of any machine errors and
consumables running low.

5
1.2 System Requirements
The Brother Meter Read Tool supports the following operating systems and software environments:
OS
Windows® 7, Windows® 8, Windows® 8.1, Windows® 10, Windows Server® 2008, Windows
Server® 2008 R2, Windows Server® 2012, Windows Server® 2012 R2, Windows Server® 2016
(both 32bit and 64bit)
.NET Framework 4.5.2 or later
1.3 Installing the Brother Meter Read Tool
You can install the Brother Meter Read Tool using the MSI installer or the EXE installer.
NOTE
If using the MSI installer, you must install the required version of Microsoft .NET Framework manually.
1. Double-click the installer file icon, and read and confirm the EULA.
2. Follow the on-screen instructions to select an installation folder for the tool, and then click the Yes and OK
buttons to complete the installation.
3. When the tool is installed, right-click the icon in the notification area, and click Open.
4. Click the Configure button to start configuring the meter read settings.
6
6
2. Configuration
2.1 Select the Devices to Monitor
Select the network-connected or USB-connected devices you want the Brother Meter Read Tool to monitor.
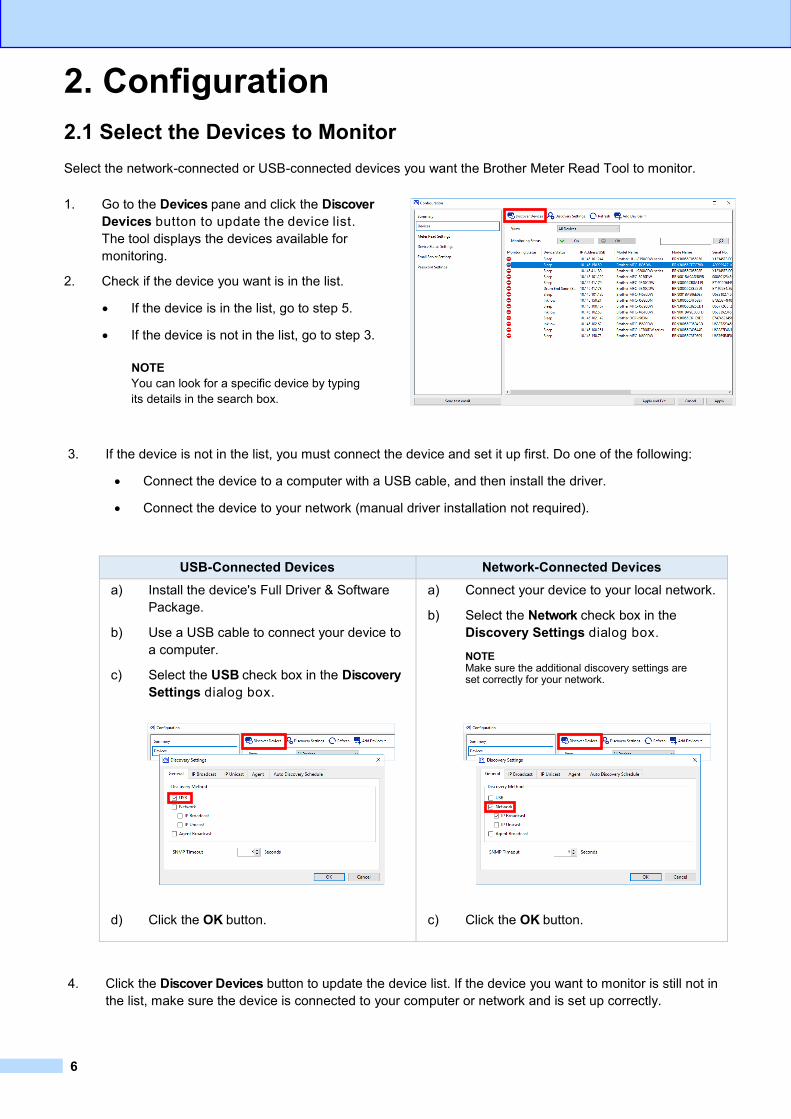
1. Go to the Devices pane and click the Discover
Devices button to update the device list.
The tool displays the devices available for
monitoring.
2. Check if the device you want is in the list.
If the device is in the list, go to step 5.
If the device is not in the list, go to step 3.
NOTE
You can look for a specific device by typing
its details in the search box.
USB-Connected Devices Network-Connected Devices
a) Install the device's Full Driver & Software
Package.
b) Use a USB cable to connect your device to
a computer.
c) Select the USB check box in the Discovery
Settings dialog box.
a) Connect your device to your local network.
b) Select the Network check box in the
Discovery Settings dialog box.
NOTE Make sure the additional discovery settings are set correctly for your network.
d) Click the OK button. c) Click the OK button.
3. If the device is not in the list, you must connect the device and set it up first. Do one of the following:
Connect the device to a computer with a USB cable, and then install the driver.
Connect the device to your network (manual driver installation not required).
4. Click the Discover Devices button to update the device list. If the device you want to monitor is still not in
the list, make sure the device is connected to your computer or network and is set up correctly.
7
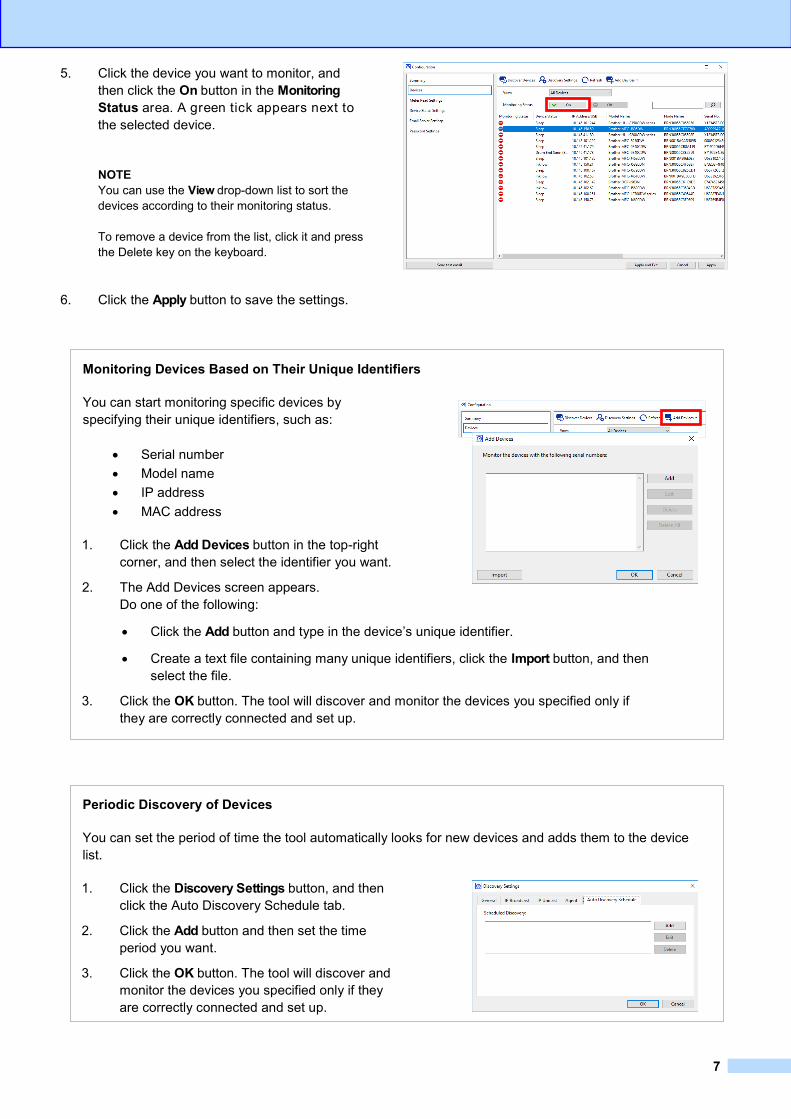
5. Click the device you want to monitor, and
then click the On button in the Monitoring
Status area. A green tick appears next to
the selected device.
NOTE
You can use the View drop-down list to sort the
devices according to their monitoring status.
To remove a device from the list, click it and press
the Delete key on the keyboard.
6. Click the Apply button to save the settings.
Monitoring Devices Based on Their Unique Identifiers
You can start monitoring specific devices by
specifying their unique identifiers, such as:
Serial number
Model name
IP address
MAC address
1. Click the Add Devices button in the top-right
corner, and then select the identifier you want.
2. The Add Devices screen appears.
Do one of the following:
Click the Add button and type in the device’s unique identifier.
Create a text file containing many unique identifiers, click the Import button, and then
select the file.
3. Click the OK button. The tool will discover and monitor the devices you specified only if
they are correctly connected and set up.
Periodic Discovery of Devices
You can set the period of time the tool automatically looks for new devices and adds them to the device
list.
1. Click the Discovery Settings button, and then
click the Auto Discovery Schedule tab.
2. Click the Add button and then set the time
period you want.
3. Click the OK button. The tool will discover and
monitor the devices you specified only if they
are correctly connected and set up.
8
8
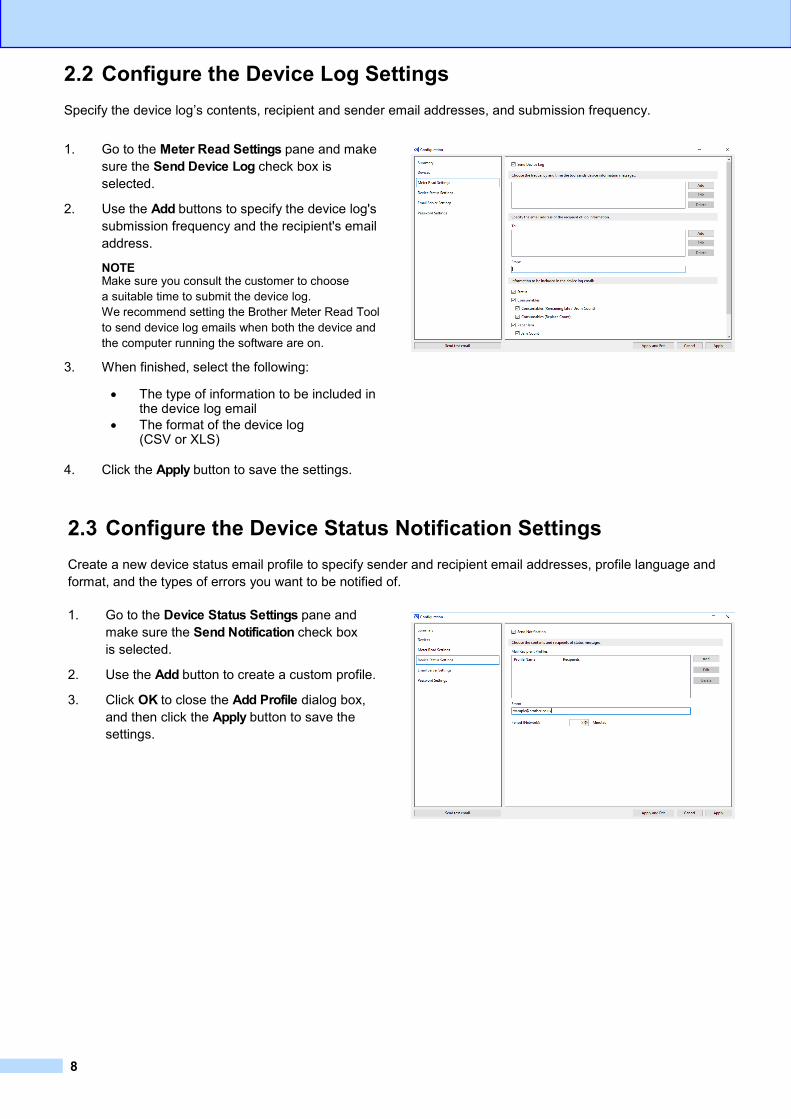
1. Go to the Meter Read Settings pane and make
sure the Send Device Log check box is
selected.
2. Use the Add buttons to specify the device log's
submission frequency and the recipient's email
address.
NOTE Make sure you consult the customer to choose
a suitable time to submit the device log.
We recommend setting the Brother Meter Read Tool
to send device log emails when both the device and
the computer running the software are on.
3. When finished, select the following:
The type of information to be included in the device log email
The format of the device log (CSV or XLS)
4. Click the Apply button to save the settings.
2.2 Configure the Device Log Settings
Specify the device log’s contents, recipient and sender email addresses, and submission frequency.
2.3 Configure the Device Status Notification Settings
Create a new device status email profile to specify sender and recipient email addresses, profile language and
format, and the types of errors you want to be notified of.
1. Go to the Device Status Settings pane and
make sure the Send Notification check box
is selected.
2. Use the Add button to create a custom profile.
3. Click OK to close the Add Profile dialog box,
and then click the Apply button to save the
settings.

9
Specify SMTP server details and authentication
information in the Email Server Settings pane.
1. Go to the Email Server Settings pane.
2. Specify your email settings.
3. Click the Apply button to save the settings.
2.4 Configure the Email Address Settings
The Brother Meter Read Tool collects the information directly from network-connected or USB-connected
devices and sends it via email. To use this feature, you must set up the email address you want to use.
You can use a customer or dealer email address or use your own customised SMTP configuration.
To set up the email address, you will need the following information:
SMTP server name
SMTP port
Authentication method
SMTP-AUTH user name
Account password
SMTP Over SSL/TLS encryption method

10
10
2.5 Test and Deploy the Meter Read Configuration
Before you deploy your configuration to monitor the customer’s devices, send a test email to make sure your
configuration is correct. During the first test, use your personal email address to test whether you can receive
usage information emails.
1. Click the Send test email button in the lower-left corner.
2. Enter the test email address and then click the OK button.
3. The tool will perform the following tests:
Collect device logs from all monitored devices
Send the device log email
Collect device status from all monitored devices
Send one status notification email 1 2
4. Check the test results:
If the test succeeded Deploy your configuration to the selected devices by using the relevant email address. The Brother Meter Read Tool will send the device log and status information to the receivers you specified.
If the test failed Click Open Test Report to see the error log. For more information, see the Troubleshooting section.
5. You can lock the tool and its settings to prevent them from
being changed. Go to the Password Settings pane, select
the Password Lock check box, and then type your
password. Click the Apply button to save the settings.
1 During the first test the tool will send an example low ink/toner notification.
2 To avoid sending many emails when multiple devices are selected, only the first device will be targeted.
2.6 Export the Settings
When you have finished deploying the configuration,
we recommend exporting the settings for later use.
1. Go to the Summary pane.
2. Select the Export INI file option.
3. When saving the file, make sure
you name it “METERREAD”.
The INI extension will be added
automatically.
4. When finished, you can open the
INI file in a text editor and make the
changes you want.

11
3. Troubleshooting If the test was unsuccessful, do the following:
Make sure the Brother device is on when the
Brother Meter Read Tool is requesting
the page count information.
If using INI files, make sure the names of INI
files are correct and are stored in the correct
location.
For example: The METERREAD.INI file should
be in the same location as the Meter Read
installation package.
If using INI files, make sure the settings in
the INI file are correct.


