30
Vantec Laptop Docking Station with Video User’s Manual Model: DSH-200U2 www.vantecusa.com Copyright © 2008 Vantec Thermal Technologies. All Rights Reserved.

Vantec Laptop Docking Station with Video
User’s Manual
Model: DSH-200U2
www.vantecusa.com
Copyright © 2008 Vantec Thermal Technologies. All Rights Reserved.

Vantec Laptop Docking Station with Video User’s Manual
SAFETY INSTRUCTIONS
Always read the safety instructions carefully:
Keep this User’s Manual for future reference
Keep this equipment away from humidity
If any of the following situations arises, get the equipment checked by a service technician:
The equipment has been exposed to moisture
The equipment has been dropped and damaged.
The equipment has obvious sign of breakage.
The equipment has not been working well or you cannot get it to work according to the User’s Manual.
Copyright Statement
No part of this publication may be reproduced in any form by any means without prior written permission.
Other trademarks or brand names mentioned herein are trademarks or registered trademarks of their
respective companies.
Disclaimer
This manual is designed for use with the Vantec Laptop Docking Station with Video. Information in this
document is subject to change without notice. The manufacturer does not make any representations or
warranties (implied or otherwise) regarding the accuracy and completeness of this document and shall in no
event be liable for any loss of profit or any commercial damage, including but not limited to special,
incidental, consequential or other damages.
i

Table of Contents
Table of Contents
1. Introduction .......................................................................................................1 Features..............................................................................................................2 Package Contents...............................................................................................2 System Requirements.........................................................................................2 Specifications......................................................................................................3 Assembly and Disassembly ................................................................................5 Front Panel .........................................................................................................6 Rear Panel..........................................................................................................7
2. Installation .........................................................................................................8 A. Installing the Ethernet Drivers.........................................................................8 B. Installing the Video Drivers .............................................................................9 C. Connecting the Docking Station to Computer............................................... 11 D. Connecting Devices to the Docking Station..................................................12
Connecting Ethernet network device.........................................................................12 Connecting VGA/DVI Monitor ....................................................................................12 Connecting USB Devices ..........................................................................................13 Connecting Microphone and Speaker/Headphones ..................................................13
3. Using the Docking Station with Video..............................................................14 USB 2.0 Ports ...................................................................................................14 Audio Ports .......................................................................................................14
Configuring Windows Audio Device...........................................................................14 Configuring Instant Messaging Software Audio Device .............................................15
Ethernet Port.....................................................................................................15 Video Port .........................................................................................................16
Display Modes ...........................................................................................................16 Adjusting Resolution, Color Depth and Refresh Rate................................................19 Disconnecting the Docking Station ............................................................................22
How Standby or Hibernate Mode Affects Devices Attached to the Docking Station...............................................................................................................22
External Monitors.......................................................................................................22 Other Devices............................................................................................................23
4. Uninstalling the Drivers ..................................................................................24 Uninstalling the Ethernet Driver ........................................................................24 Uninstalling the Video Driver.............................................................................25
5. Regulatory Compliance ..................................................................................26 FCC Conditions ................................................................................................26
ii

Vantec Laptop Docking Station with Video User’s Manual
CE.....................................................................................................................26 WEEE Information ............................................................................................26
iii

1. Introduction
The Vantec Laptop Docking Station with Video Output is a unique expansion device designed for laptops. With the ease through a single USB connection, you can access your network, additional display, storage, headset, printer, keyboard, mouse or any other additional USB peripherals. This is a convenient solution enabling you to enter and leave your workspace without having to deal with all the wires and connections. Connect all your peripherals to the Laptop Docking Station and you can have instant access to them in seconds! Simplify your workspace with the Vantec Laptop Docking Station and create an office setup without sacrificing portability.
Simplify Your Workspace!
1
Vantec Laptop Docking Station with Video User’s Manual
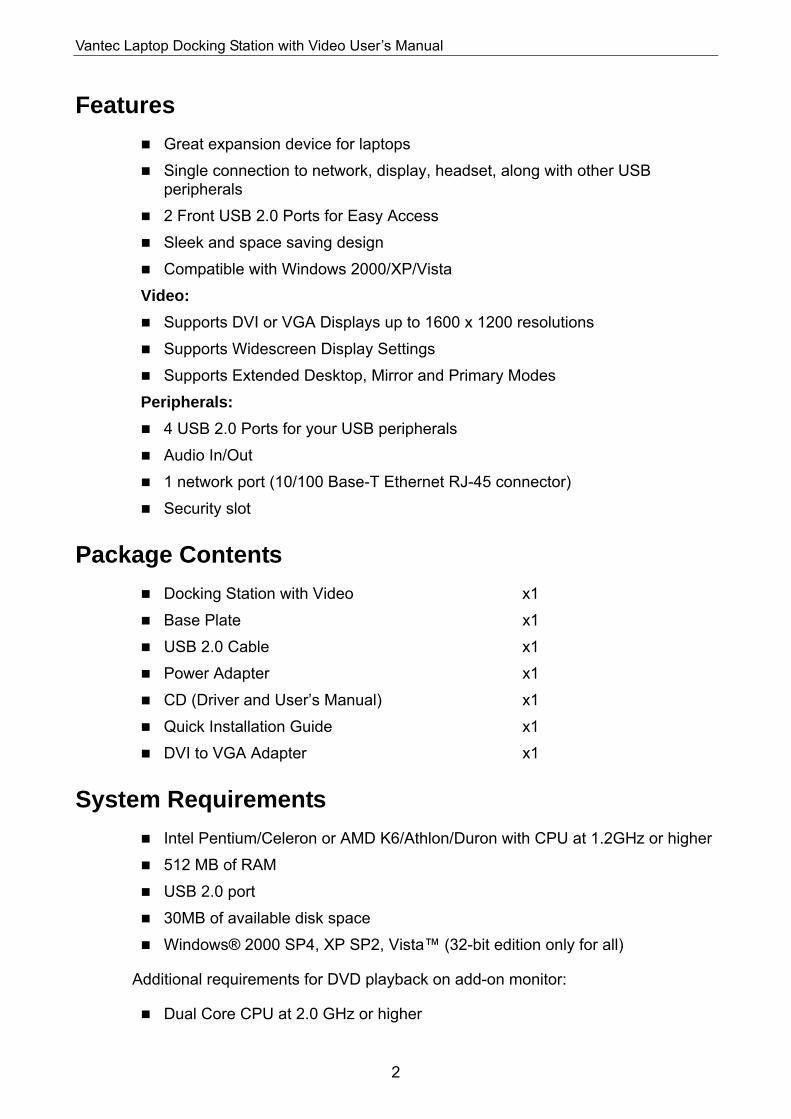
Features Great expansion device for laptops
Single connection to network, display, headset, along with other USB peripherals
2 Front USB 2.0 Ports for Easy Access
Sleek and space saving design
Compatible with Windows 2000/XP/Vista
Video: Supports DVI or VGA Displays up to 1600 x 1200 resolutions
Supports Widescreen Display Settings
Supports Extended Desktop, Mirror and Primary Modes
Peripherals: 4 USB 2.0 Ports for your USB peripherals
Audio In/Out
1 network port (10/100 Base-T Ethernet RJ-45 connector)
Security slot
Package Contents Docking Station with Video x1 Base Plate x1 USB 2.0 Cable x1
Power Adapter x1
CD (Driver and User’s Manual) x1
Quick Installation Guide x1
DVI to VGA Adapter x1
System Requirements Intel Pentium/Celeron or AMD K6/Athlon/Duron with CPU at 1.2GHz or higher
512 MB of RAM
USB 2.0 port
30MB of available disk space
Windows® 2000 SP4, XP SP2, Vista™ (32-bit edition only for all)
Additional requirements for DVD playback on add-on monitor:
Dual Core CPU at 2.0 GHz or higher
2

The add-on screen resolution must be set to 800x600 with 16bit color
Specifications Model: DSH-200U2 Host Interface: USB 2.0 I/O Port: One Upstream USB 2.0 Port (Type B Port) Four Downstream USB 2.0 (Type A Ports) One Ethernet Port (10/100 Base-T Ethernet RJ-45 Connector) One DVI-I Port (24pin + 5pin Female connector) One Microphone (3.5mm Stereo Audio In) One Headphones/Speaker (3.5mm Stereo Audio Out) Audio Component: Output: 2 CH DAC Output
DAC sampling rate from 8KHz, 16KHz, 44.1KHz to 48KHz with 16-bit resolution. Earphone buffer driving for output Input: 2 CH ADC Input ADC sampling rate from 8KHz, 16KHz, 44.1KHz to 48KHz with 16-bit resolution. Digital Linear Microphone Gain Control function (-6db~33db)
Emission: CE, FCC Power: Input: AC 100-240V, 50~60Hz Output: DC 5V / 2.5A Environments: Operating Temperature: 10°C~40°C Storage Temperature: -10°C~80°C Humidity: 90% RH (No Condensing) Support Video Modes: Extended Desktop, Mirrored Desktop, and Primary Display Resolutions, Refresh Rate and Color Depth:
Color Depth
Resolution
Refresh rates available at 16 bit color quality
Refresh rates available at 32 bit color quality
640x480 60 72 75 60 72 75
800x600 56 60 72 75 85 56 60 72 75 85
1024x768 60 75 85 60 75 85
1280x960 60 85 60 85
1280x1024 60 75 85 60 75
1360x768 60 60
1366x768 60 60
1368x768 60 60
3

Vantec Laptop Docking Station with Video User’s Manual
1400x1050 60 75 85 60 75 85
1440x900 60 60
1600x1200 60 60
1680x1050 59 60 59 60
Material: ABS (Plastic) Dimension: Main body without base: 35 (W) x 90 (D) x 153 (H) mm Main body with base: 86 (W) x 110 (D) x 160 (H) mm Weight: Approximately 204g (including base)
4

Assembly and Disassembly The docking station comes with a base plate to make it self-standing. To assemble the docking station, slide the body of the docking station firmly as shown below. Make sure a click is heard to ensure the body snaps into place.
To disassemble the docking station, hold the base with one hand and then use another hand to push the docking station firmly as shown below.
5

Vantec Laptop Docking Station with Video User’s Manual
Front Panel
Power LED: Glows when the docking station is powered.
USB Hub LED: Glows when any of the four USB downstream ports is connected to a USB device.
2 USB 2.0 downstream ports: For connection to USB peripherals.
3.5 mm stereo audio output port: For connection to stereo headphones or speakers.
3.5 mm stereo microphone input port: For connection to an external microphone for recording.
6

Rear Panel
4 USB 2.0 downstream ports (A type female connector): For connection to USB peripherals.
10/100 Mbps Ethernet port: For connection to the Ethernet network via a network cable (not provided).
DVI video output port: For connection to a DVI display. If you want to connect to a VGA monitor, please use the provided DVI to VGA adapter for connection.
USB upstream port: For connection to the USB port of the host computer.
Power jack: For connection to the provided power adapter. The Docking Station always needs external power supply for operation, as it does not take power from the USB bus.
Security lock slot: Industry-standard Kensington® security slot for connection to a security lock (not provided). Insert the lock’s locking end into the slot and turn the key to lock the docking station.
7

Vantec Laptop Docking Station with Video User’s Manual
2. Installation
The Laptop Docking Station with Video comprises of several components and some components require specific installation procedures. Please follow the steps described in this manual to install the drivers first and then make the connections. The following are the guidelines for installation procedures:
A. Installing the Ethernet drivers (for Ethernet component).
B. Installing the Video drivers (for DVI component).
C. Connect the Docking Station with Video to your computer.
A. Installing the Ethernet Drivers To install the Ethernet driver:
1. Insert the provided CD into your CD-ROM drive. Locate and double-click the Setup.exe file under x:\Driver\Ethernet where x is your disc drive letter.
2. Wait a while for the program to install the driver.
Actual strings depend on your operation system. These screen shots are from Windows Vista and may vary slightly for each operating system.
8

3. When the installation is done, click Finish. (On Windows 2000, you will need to restart your computer as prompted.)
Do not connect the docking station to your computer at this stage. Please proceed to the next section to continue with the video driver installation.
B. Installing the Video Drivers To install the video component drivers:
1. Insert the provided CD into your disc drive, locate and double-click the Setup.exe file under x:\Driver\Video where x is your disc drive letter.
For Windows Vista users: Windows Vista users will encounter a User Account Control dialog box when attempting to install a program. Enter an administrator password or click Allow to start the installation.
When prompted with Windows Security dialog box, select Install this driver software anyway.
For Windows 2000 users: If the following message appears, please download and install the required patch first and then execute the Setup.exe file on the CD.
9

Vantec Laptop Docking Station with Video User’s Manual
2. Select I accept the terms in the License Agreement and click Next.
3. Prepare to install driver.
4. For Vista only. When prompted to restart your computer, click Yes to restart or
to No to manually restart later. Note that a reboot is always needed for a successful installation. If the reboot prompt doesn’t appear, make sure manually reboot your computer.
10

C. Connecting the Docking Station to Computer 1. Assemble the docking station by sliding the main body onto the base plate to
make it self-standing.
2. Plug the power cord of the power adaptor into the Power jack on the back of the docking station and then connect the power adapter to a working electrical outlet.
The Power indicator on the front panel glows when the docking station is powered on.
3. Plug the square end of the USB cable into the USB upstream connector at the back of the docking station.
4. Plug the other end of the USB cable into an available USB 2.0 port on your computer.
Once the Docking Station is connected, your computer will automatically complete the remaining installation, including installing Windows built-in drivers for the USB hub.
A pop-up message will appear in the notification area indicating the installation status. Wait for the final message indicating the driver software installation is successful. Then the docking station is ready for use.
11

Vantec Laptop Docking Station with Video User’s Manual
D. Connecting Devices to the Docking Station Now the installation is complete. You can connect the peripherals/monitor to the appropriate ports on the Docking Station as needed. If required, you can connect and disconnect the peripherals/monitor any time without disconnecting the Docking Station from the USB port on your computer.
Connecting Ethernet network device
1. Connect an Ethernet cable to the Ethernet port on the docking station.
2. Connect the other end of the Ethernet cable to your network hub, switch or router.
Connecting DVI Monitor
The equipped DVI-I (DVI-Integrated) connector transmits both the digital and analog signals. This means it supports either of these two connection types:
It can be connected to a DVI-D (digital) monitor using a DVI cable (not provided)
Or, it can be connected to an analog VGA monitor using the privided DVI-I to VGA adapter and a VGA cable (not provided).
Upon the connection it’s normal that the screen turns black a couple of times. Once the connection is done, an extended screen will appear on the add-on monitor. Sometimes it takes time for the add-on monitor to show the video. Please wait for while.
For Windows Vista, if the add-on monitor is still blank after a while, please reboot your system again.
12
To change the display mode, see the next section for instructions.
Connecting USB Devices
Connect your USB devices to the USB ports on the docking station. As long as one USB device is connected to the port and the connection works properly, the USB LED glows green (on). When no USB device is connected to the port, the LED light will not illuminate.
If your USB device, such as a printer or optical drive, etc., came with its own AC adaptor, please make sure that it is plugged into the device and a working electrical outlet.
Connecting Microphone and Speaker/Headphones
To connect your speaker/headphones, insert the plug into the green port on the front of the docking station.
To connect a microphone, insert the plug into the pink port on the front of the docking station.
13

Vantec Laptop Docking Station with Video User’s Manual
3. Using the Docking Station with Video
USB 2.0 Ports The four USB ports on the docking station function just like the ports on a USB hub. Just connect any USB device to the docking station’s USB ports when needed.
The four USB ports provide power when the computer is either off, suspended or in hibernation. This means you can still use the docking station to charge USB devices.
The USB port supports the hot-plug feature. You may plug and unplug a USB device from the docking station at any time.
Some USB devices, e.g., printers and optical drives, require higher power to operate. To use these devices, the power adapter shipped with the device should be plugged in.
Audio Ports Prior to using the speaker/microphone connected to the docking station, you have to correctly configure your application to use USB (Multimedia) Audio Device, i.e., the audio components of the docking station.
When the docking station is connected to your computer, the audio devices named USB (Multimedia) Audio Device are automatically installed and may override Windows default audio settings. The most obvious effect is that your original music playback will be re-directed to the speaker connected to the docking station. However, it’s possible that users may want to use original sound card for music playback and use the docking station’s audio ports for chatting via instant messaging software (such as MSN messenger, Yahoo messenger or Skype). In such cases users have to manually configure required audio device for each application.
Configuring Windows Audio Device
To specify a sound device for music playback in Windows, open Control Panel and double-click the sound or audio icon. Then select a desired device in the playback
14

section. If you want to use your original sound card for music playback, make sure to select it instead of USB (Multimedia) Audio Device.
Configuring Instant Messaging Software Audio Device
To chat via instant messaging software using the headphone and microphone connected to the docking station, make sure the instant messaging software, such as MSN messenger, Yahoo messenger or Skype, are configure to use USB (Multimedia) Audio Device as the audio in and out devices.
Ethernet Port The Ethernet port supports Ethernet 10/100 Mbps function. To connect your computer to a network through the docking station, attach one end of a network cable (not provided) to the Ethernet port on the docking station and the other end to your network hub, switch or router for network access.
Aside from the physical connection, you should also properly configure the network settings according to your network environment. To configure the network settings, go to Control Panel > Network Connections. Right-click the connection icon
15

Vantec Laptop Docking Station with Video User’s Manual
which is indicated by ASIX AX88772 USB2.0 to Fast Ethernet Adapter and then click Properties to make the required settings.
Video Port
Display Modes
There are several ways you can utilize the monitor attached on the docking station. The add-on monitor can be configured to use either “mirror mode”, “extended mode” or be the primary display as described in this section.
Extend Your Windows Desktop to Add-on Monitor (Default)
In this so-called “extended mode”, your display will be spread over the add-on monitor(s). This mode allows you to perform multiple tasks more effectively providing you with more workspace on your desktop
Extended mode is the default setting. To set up the video component to use or restore extended mode, follow these steps:
16

1. Position the mouse anywhere on your computer desktop, right-click and select Personalize > Display Settings on Windows Vista, or Properties > Settings on Windows XP/2000.
2. In the Display drop-down menu, select the option with the string “DisplayLink Graphics Adapter”.
3. Check the Extend the desktop onto this monitor box on Vista or Extend my Windows desktop onto this monitor box on XP/2000.
4. Drag the icons in the window at the top of the screen to match the physical arrangement of your primary monitor and add-on monitor.
The add-on monitor connected to the docking station may be identified as either "2" or “3”, depending on your computer, although there may not be a total of 3 screens connected.
5. Click OK to close the settings screen.
c.
a.
b.
Once the setting is done, to use your extended desktop, simply drag and drop your open windows over to your second monitor. However, please note that some applications may not be able to display on the extended desktop.
Cursor disappeared ?
If you are in extended mode and the add-on monitor is not connected, the desktop still pans to the add-on monitor and it is possible that your cursor has moved to the extended desktop so that you cannot find it on the primary display. To solve the problem in this case, connect the add-on monitor to the docking station or keep moving your mouse back towards your main desktop or unplug the docking station first to restore the cursor.
17

Vantec Laptop Docking Station with Video User’s Manual
Video and DVD Playback in Extended Mode
On Windows Vista with extended mode, it is suggested that you run video or DVD playback programs on your primary monitor instead of the add-on monitor to ensure the playback performance.
Mirror Your Windows Desktop
This mode is referred to as “mirror” or “clone” mode. In this mode, your original screen (the primary display) will be mirrored to the add-on monitor.
In mirror mode, the video component will automatically select the settings (screen resolution, color quality and refresh rate) for the add-on monitor. But you can manually adjust the settings as required. However, the settings of the add-on monitor are limited by that of the primary monitor. For example, even though your add-on monitor supports a resolution of up to 1680x1050, you can only configure it to use 1280x1024 since the primary monitor only supports a resolution of up to 1280x1024.
If you change the video output to extended mode and then want to switch back to mirror mode, follow these steps:
1. Position the mouse anywhere on your computer desktop, right-click and select Personalize > Display Settings on Windows Vista, or Properties > Settings on Windows XP/2000.
2. In the Display drop-down menu, select the option with the string “DisplayLink Graphics Adapter”.
3. Uncheck the Extend the desktop onto this monitor on Vista or Extend my Windows desktop onto this monitor on XP/2000.
4. Click OK to close the settings screen.
18
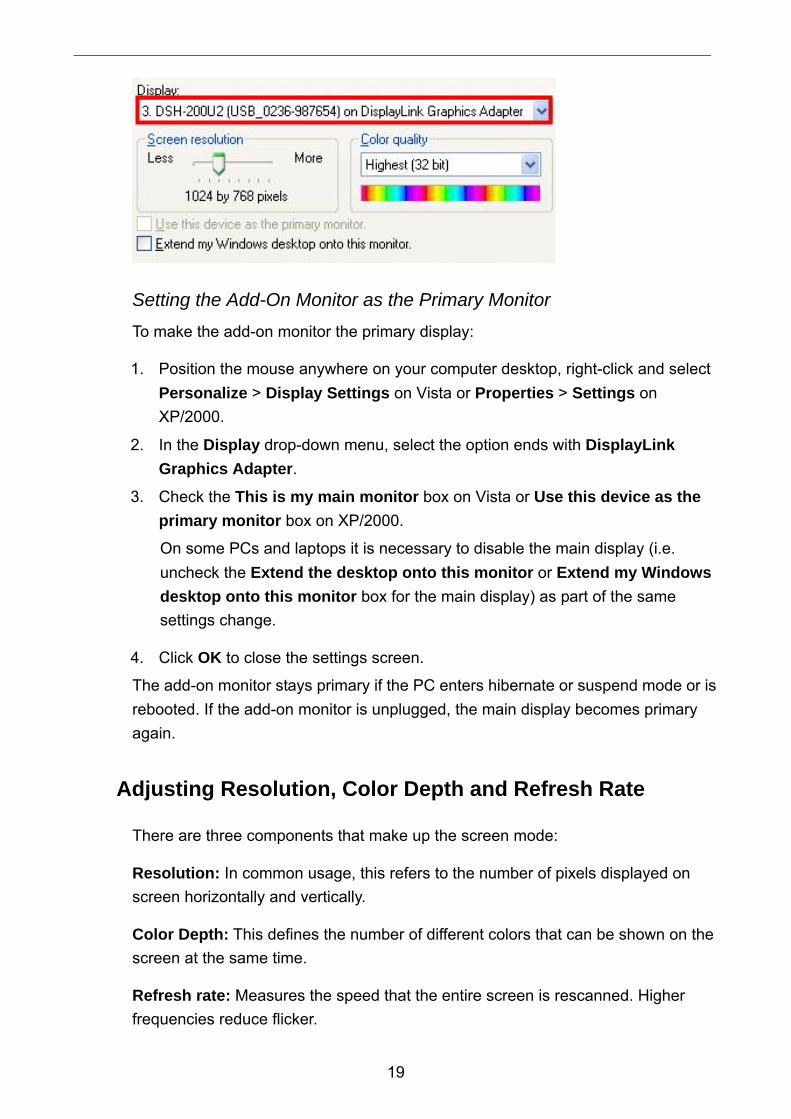
Setting the Add-On Monitor as the Primary Monitor
To make the add-on monitor the primary display:
1. Position the mouse anywhere on your computer desktop, right-click and select Personalize > Display Settings on Vista or Properties > Settings on XP/2000.
2. In the Display drop-down menu, select the option ends with DisplayLink Graphics Adapter.
3. Check the This is my main monitor box on Vista or Use this device as the primary monitor box on XP/2000.
On some PCs and laptops it is necessary to disable the main display (i.e. uncheck the Extend the desktop onto this monitor or Extend my Windows desktop onto this monitor box for the main display) as part of the same settings change.
4. Click OK to close the settings screen.
The add-on monitor stays primary if the PC enters hibernate or suspend mode or is rebooted. If the add-on monitor is unplugged, the main display becomes primary again.
Adjusting Resolution, Color Depth and Refresh Rate
There are three components that make up the screen mode:
Resolution: In common usage, this refers to the number of pixels displayed on screen horizontally and vertically.
Color Depth: This defines the number of different colors that can be shown on the screen at the same time.
Refresh rate: Measures the speed that the entire screen is rescanned. Higher frequencies reduce flicker.
19

Vantec Laptop Docking Station with Video User’s Manual
Some monitors advertise the supported modes through the video connector. If this is the case, the video component identifies the supported modes from the monitor. If the monitor does not advertise the supported modes, the video software chooses a set of common screen modes for the monitor.
The software supports the modes listed below.
Color Depth
Resolution
Refresh rates available at 16 bit color quality
Refresh rates available at 32 bit color quality
640x480 60 72 75 60 72 75
800x600 56 60 72 75 85 56 60 72 75 85
1024x768 60 75 85 60 75 85
1280x960 60 85 60 85
1280x1024 60 75 85 60 75
1360x768 60 60
1366x768 60 60
1368x768 60 60
1400x1050 60 75 85 60 75 85
1440x900 60 60
1600x1200 60 60
1680x1050 59 60 59 60
About the resolutions and refresh rates available to users
The resolutions and refresh rates available to users through Windows are determined by the support from the following elements:
■ The video component of the docking station
■ The primary monitor and the add-on monitor
■ The primary video card on your computer and installed drivers
Therefore, for example, if your monitor does not support a resolution of 1600x1200, then 1600x1200 is not possible although your docking station’s video component supports 1600x1200. This ensures that the monitor cannot be put into an unsupported mode that may result in equipment damage.
20

In mirror mode, the video component will try to use the preferred monitor mode. In some cases, this may not be the most appropriate mode for the cloned desktop. It is recommended that the primary display resolution be changed to closer match the default resolution of the add-on monitor.
To configure the three components (resolution, color depth and refresh rate) of a screen mode, follow these steps:
1. Position the mouse anywhere on your computer desktop, right-click and select Personalize > Display Settings on Vista or Properties > Settings on XP/2000.
2. In the Display drop-down menu, select the option ends with DisplayLink Graphics Adapter.
3. To change the screen resolution or color quality, select those options on the screen. Be sure to select one of the supported resolutions and color quality numbers in the table above. For an add-on monitor, you can also select any resolution or color quality supported by that monitor.
4. To change the refresh rate, click Advanced… and then click Monitor.
5. Select a refresh rate from the Screen refresh rate drop-down list and then click Apply.
6. Click OK to close the settings screen.
21

Vantec Laptop Docking Station with Video User’s Manual
Disconnecting the Docking Station
If the docking station is unplugged from the computer, the add-on monitor goes blank. All windows and icons move to the primary screen.
On reconnection of the docking station, the docking station returns to the same mode as it was before disconnection. However, windows and icons that were previously on the screen will not be moved back.
How Standby or Hibernate Mode Affects Devices Attached to the Docking Station
External Monitors
If the computer goes into standby or hibernate mode when the docking station is connected to a computer and an external monitor, the external monitor display goes blank.
When the computer returns to an active state, the external monitor display keeps the same settings it had before the computer went into standby or hibernate mode. However, if the add-on monitor was set for extended mode, windows that were previously on the external monitor will not move back to that secondary monitor. Also, if the add-on monitor is in extended mode and the computer requires a login
22

after standby or hibernate mode, the login screen appears on the primary computer monitor, not the external monitor.
If the computer is shut down, restarted and logged in, again the add-on monitor returns to the same mode as it was before shutdown.
Other Devices
If another device is connected to a port on the docking station and the computer goes into standby or hibernate mode, that device will not function. For example, if you are using the Ethernet port for high-speed network access, network access will not be available until the computer returns to an active state.
23

Vantec Laptop Docking Station with Video User’s Manual
4. Uninstalling the Drivers
Uninstalling the Ethernet Driver If for any reason you want to uninstall the Ethernet component driver, please follow these steps:
1. Open the Control Panel and double-click Programs and Features on Vista or Add or Remove Programs on Windows 2000/XP.
2. Select ASIX AX88772…and click Uninstall or Remove.
2. Click Yes to confirm the removal.
3. Click Finish when the removal is complete.
24

Uninstalling the Video Driver If for any reason you want to uninstall the video component driver, please take these steps:
1. Open the Control Panel and double-click Programs and Features on Windows Vista or Add or Remove Programs on Windows 2000/XP.
2. Select DisplayLink Early Access and click Uninstall or Remove.
0
3. Click Yes to confirm the removal.
4. When prompted for system restart, click OK.
5. Click Yes to restart your computer. You can also disconnect the video connection now.
25

Vantec Laptop Docking Station with Video User’s Manual
5. Regulatory Compliance
FCC Conditions This equipment has been tested and found to comply with Part 15 of the FCC Rules. Operation is subject to the following two conditions:
(1) This device may not cause harmful interference
(2) This device must accept any interference received which includes interference that may cause
undesired operation.
CE This equipment is in compliance with the requirements of the following regulations: EN 55 022: CLASS B
WEEE Information For EU (European Union) member users: According to the WEEE (Waste electrical and electronic equipment) Directive, do not dispose of this product as household waste or commercial waste. Waste electrical and electronic equipment should be appropriately collected and recycled as required by practices established for your country. For information on recycling this product, please contact your local authorities, your household waste disposal service or the shop where you purchased the product.
Vantec Thermal Technologies.
43951 Boscell Road
Fremont, CA 94538
Tel: (510) 668-0368
Fax: (510) 668-0367
Web: www.vantecusa.com
26


