13
Using Dipity A Timeline Web 2.0 tool How-to Manual created and updated for PLC staff and students in 2010 www.dipity.com
Using Dipity
A Timeline Web 2.0 tool
How-to Manual created and updated for PLC staff and students in 2010
www.dipity.com

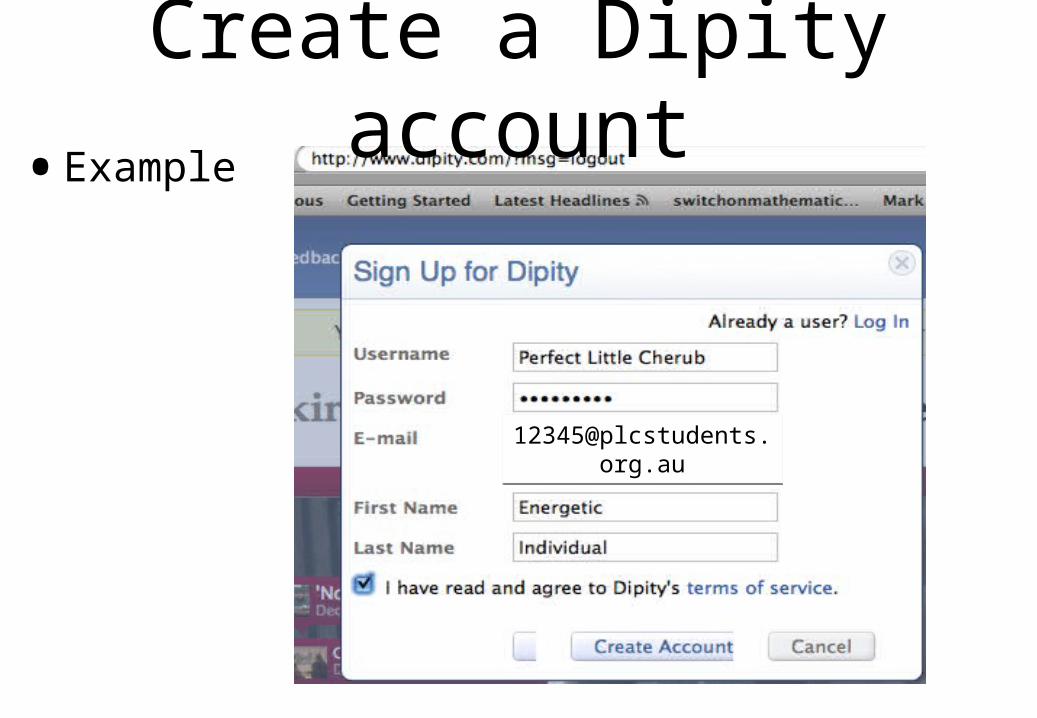
Create a Dipity account•Enter URL in Firefox or Safari www.dipity.com
•Encourage students to Sign Up using PLC Student Webmail address

Linking Dipity to other sources•Ignore this invitation dialogue box for the
moment
•Just click the link: No thanks, I’ll find them later
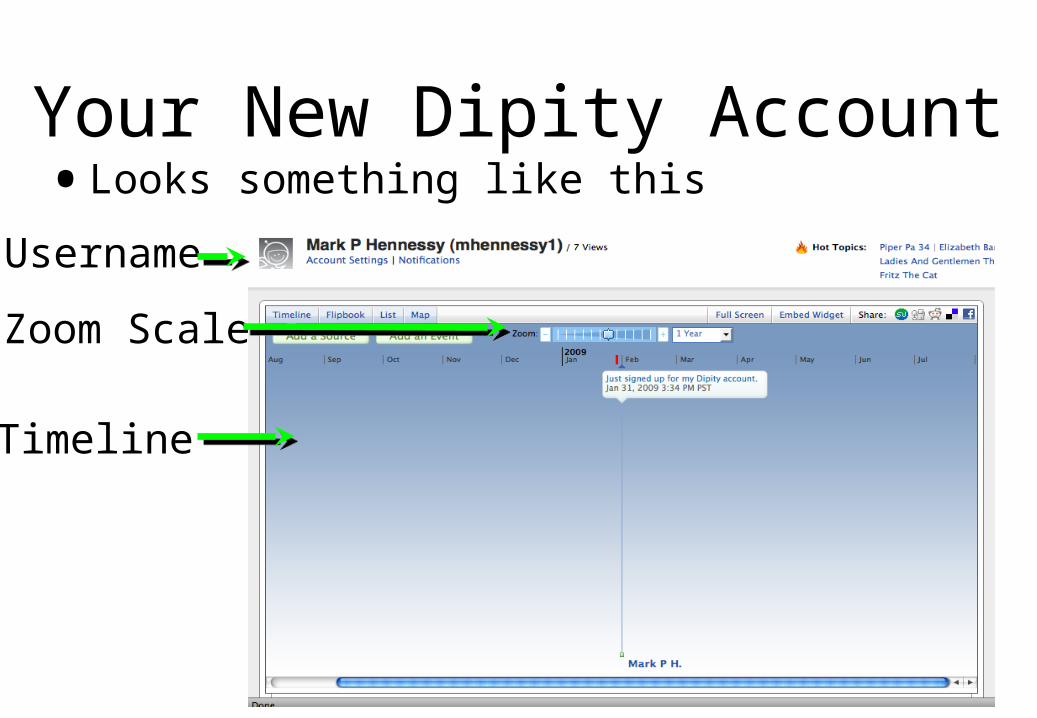
Your New Dipity Account•Looks something like this
Username
Timeline
Zoom Scale

Add a Topic•To add a topic, click Add a Topic in the
bottom RH corner of the screen
•Give your timeline a title: Australian History 09
Add a Topic
ChooseBlank
Since you will be crafting your own
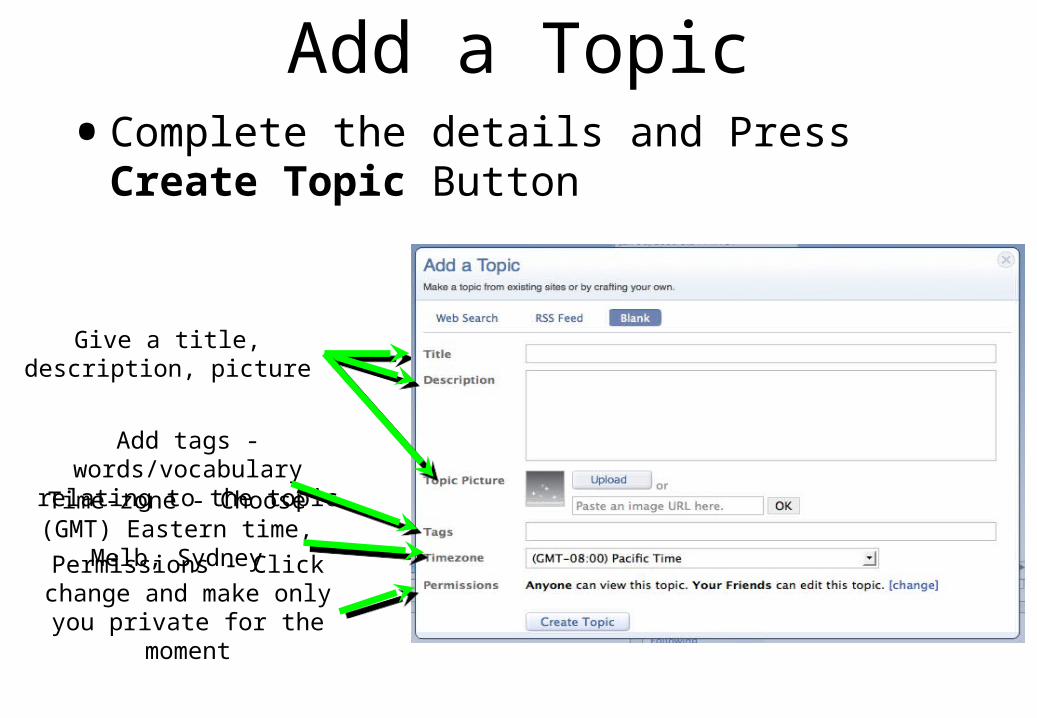
Add a Topic•Complete the details and Press Create
Topic Button
Give a title, description, picture
Add tags - words/vocabulary
relating to the topicTime-zone - Choose (GMT) Eastern time,
Melb, SydneyPermissions - Click change and make only
you private for the moment
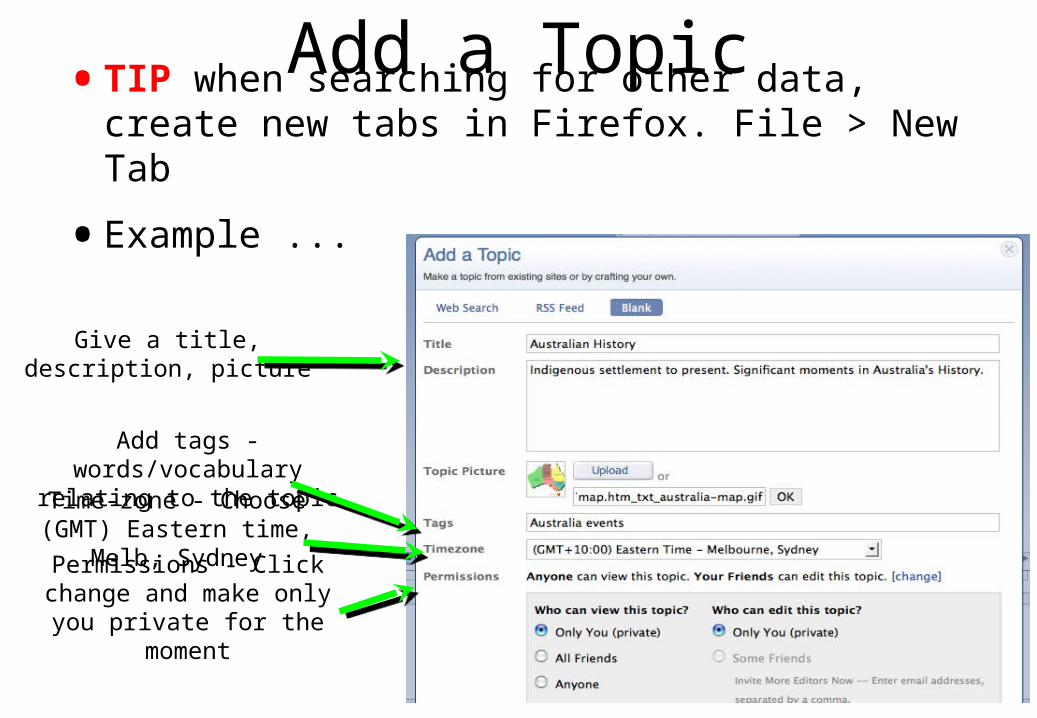
Add a Topic•TIP when searching for other data, create
new tabs in Firefox. File > New Tab
•Example ...
Give a title, description, picture
Add tags - words/vocabulary
relating to the topicTime-zone - Choose (GMT) Eastern time,
Melb, SydneyPermissions - Click change and make only
you private for the moment
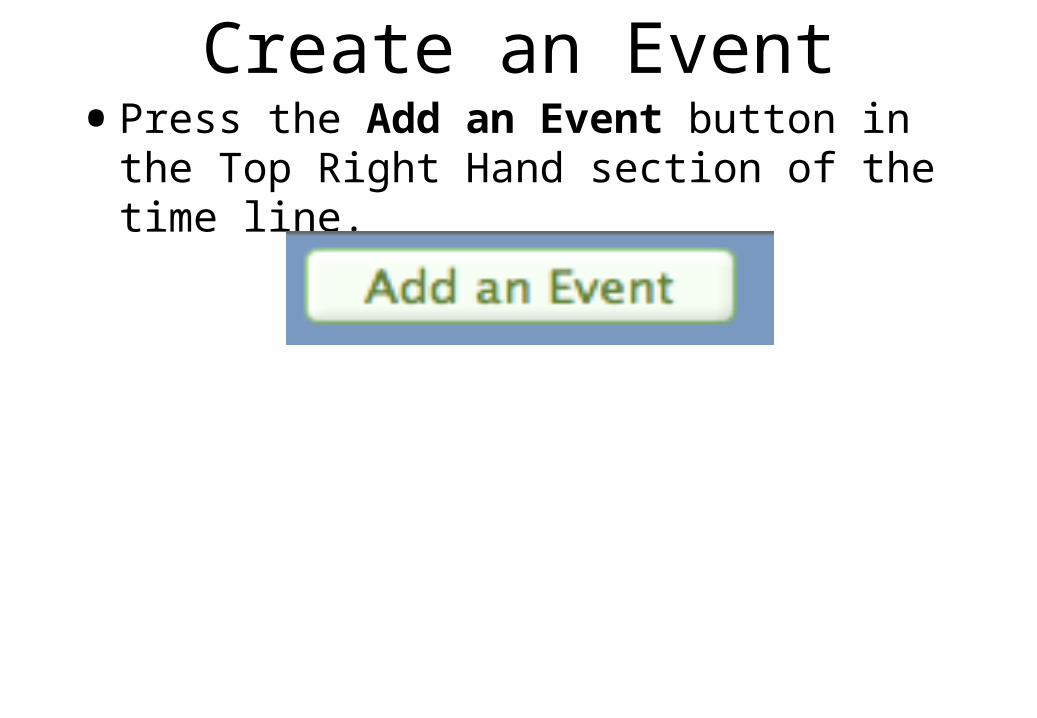
Create an Event•Press the Add an Event button in the
Top Right Hand section of the time line.
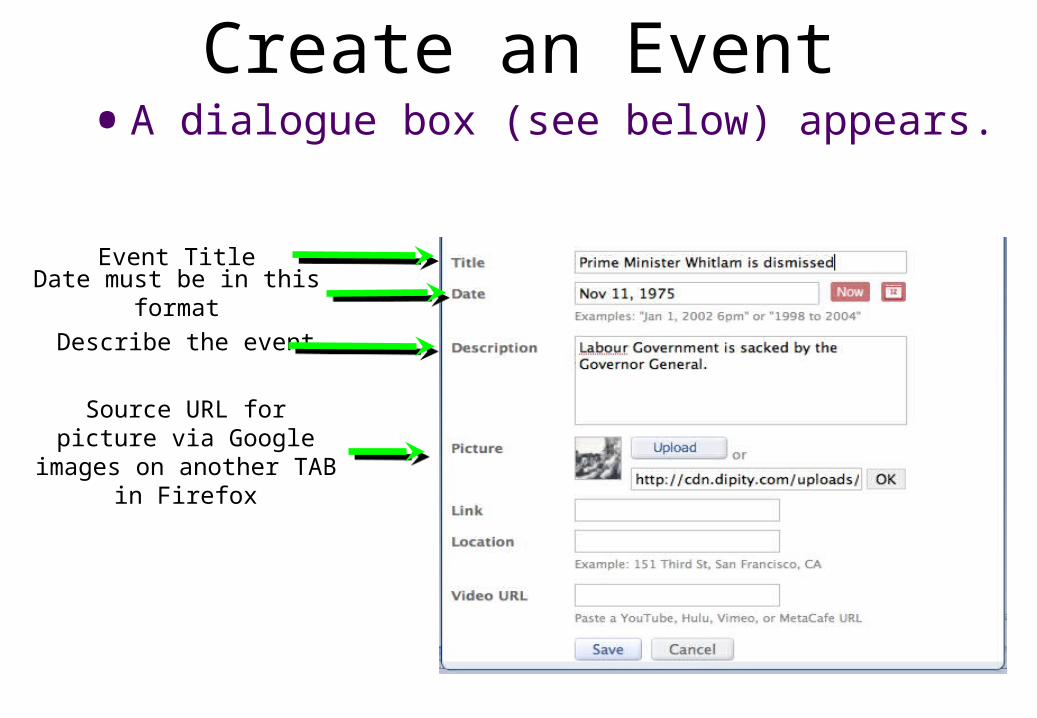
Create an Event•A dialogue box (see below) appears.
Event TitleDate must be in this
formatDescribe the event
Source URL for picture via Google images on another TAB in Firefox
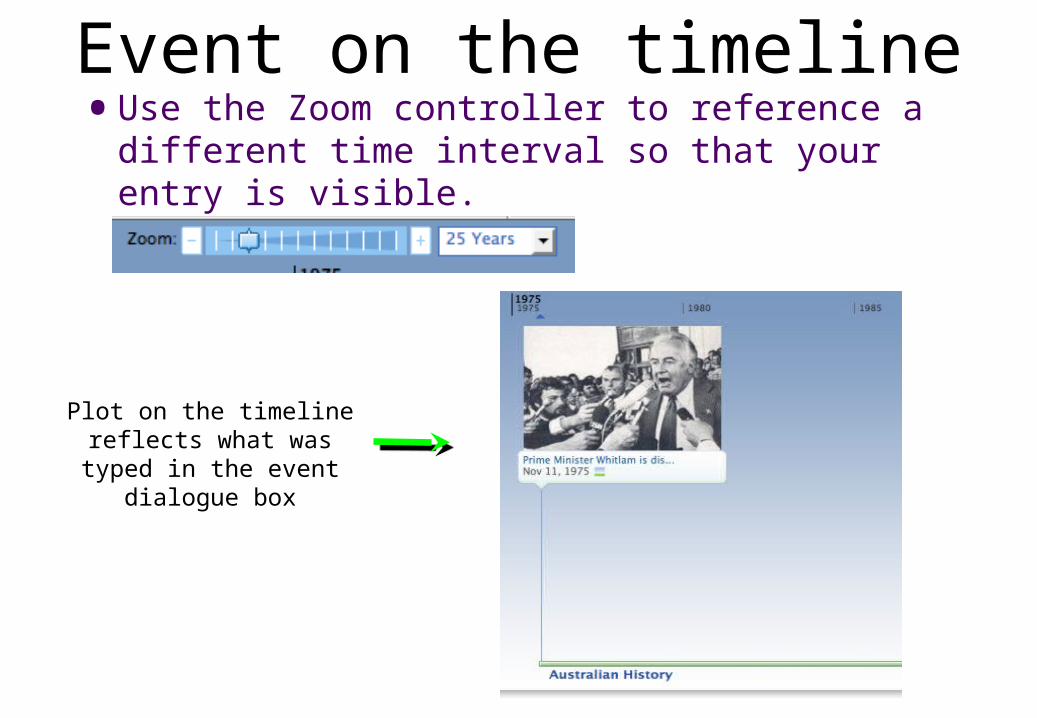
Event on the timeline•Use the Zoom controller to reference a
different time interval so that your entry is visible.
Plot on the timeline reflects what was typed
in the event dialogue box

Continue adding events to the timeline
•Experiment as you go
•Remember it is possible to edit your events at any time.
Plot on the timeline reflects what was typed
in the event dialogue box
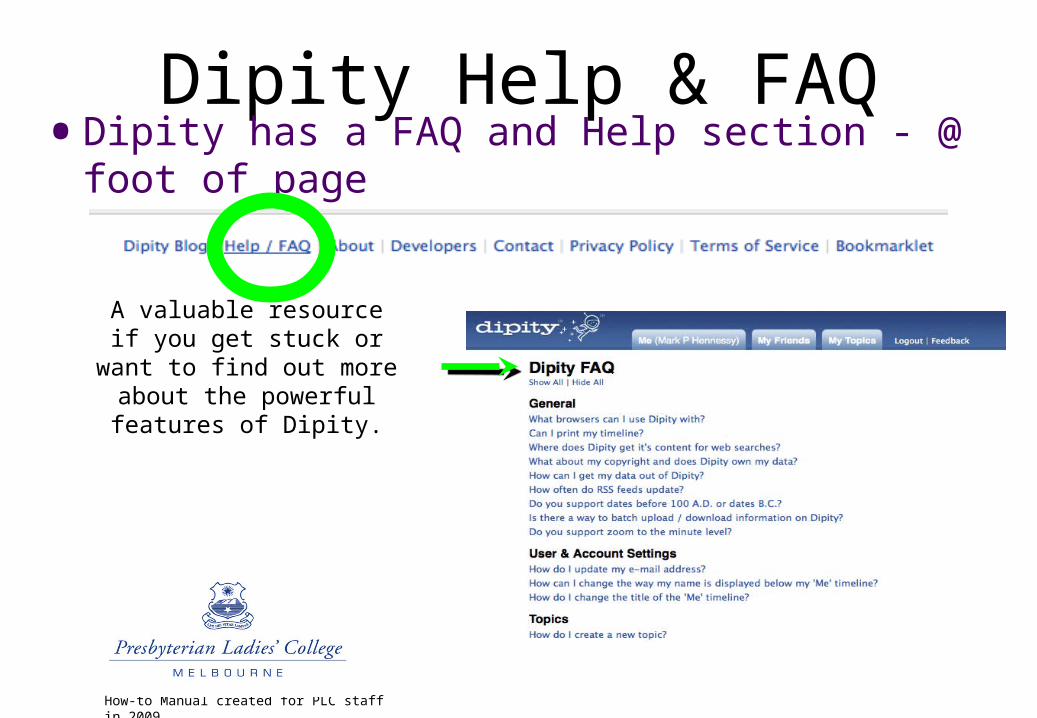
Dipity Help & FAQ•Dipity has a FAQ and Help section - @ foot
of page
A valuable resource if you get stuck or want to find out more about the
powerful features of Dipity.
How-to Manual created for PLC staff in 2009