CIS 203 – Basic JavaScript High Point University Download script.html from the Assignments page and do the following. 1. Using Google, find a web site that tells you how to enable JavaScript scripts in Internet Explorer. See if JavaScript scripts are enabled in Internet Explorer on your computer. If not, enable scripts. (Do this even if you are using Mozilla Firefox or another browser in class.) 2. Add JavaScript code to the body of the page to display an alert box that reads, “My Page is Displaying Now.” Save the changes and refresh the browser. When you refresh the page, an alert box similar to the following should appear. If not, verify that you have enabled JavaScript properly. 3. Add a head element to the web page and then move the script code from the body of the web page to the head. Save the changes and refresh the browser. 1
Transcript
CIS 203 – Basic JavaScriptHigh Point University
Download script.html from the Assignments page and do the following.
1. Using Google, find a web site that tells you how to enable JavaScript scripts in Internet Explorer. See if JavaScript scripts are enabled in Internet Explorer on your computer. If not, enable scripts. (Do this even if you are using Mozilla Firefox or another browser in class.)
2. Add JavaScript code to the body of the page to display an alert box that reads, “My Page is Displaying Now.”
Save the changes and refresh the browser. When you refresh the page, an alert box similar to the following should appear. If not, verify that you have enabled JavaScript properly.
3. Add a head element to the web page and then move the script code from the body of the web page to the head.
Save the changes and refresh the browser.
At this point, your code should look similar to the following.
1
4. Update your script code as shown below.
Line 7 defines a function called greetings. You can define many functions in a web page. Since this function is in the head of the document, it is reusable in the document. We will take advantage of this later. Lines 8 and 12 are the opening and closing curly brackets for the function.
Save the changes and refresh the browser. Your greeting still should not display because you have not called the new function yet.
2
5. Modify the body tag as shown below.
This uses the onload attribute for the body element to specify an event handler that gets called when the body’s load event occurs. Note that everything shown here after the equals sign, inside quotation marks is JavaScript code.
Save the changes and refresh the browser. Your greeting should display now.
6. Now we are going to start making things a little more reusable. Modify the greetings function to look like the following.
This defines a parameter called message that you can use to send data to the greetings function. A parameter is a variable used to pass a value to a function.
Save your changes and refresh the browser. The message box displayed should contain the word “undefined.” This is because you have not actually sent any value to the greetings function to be displayed.
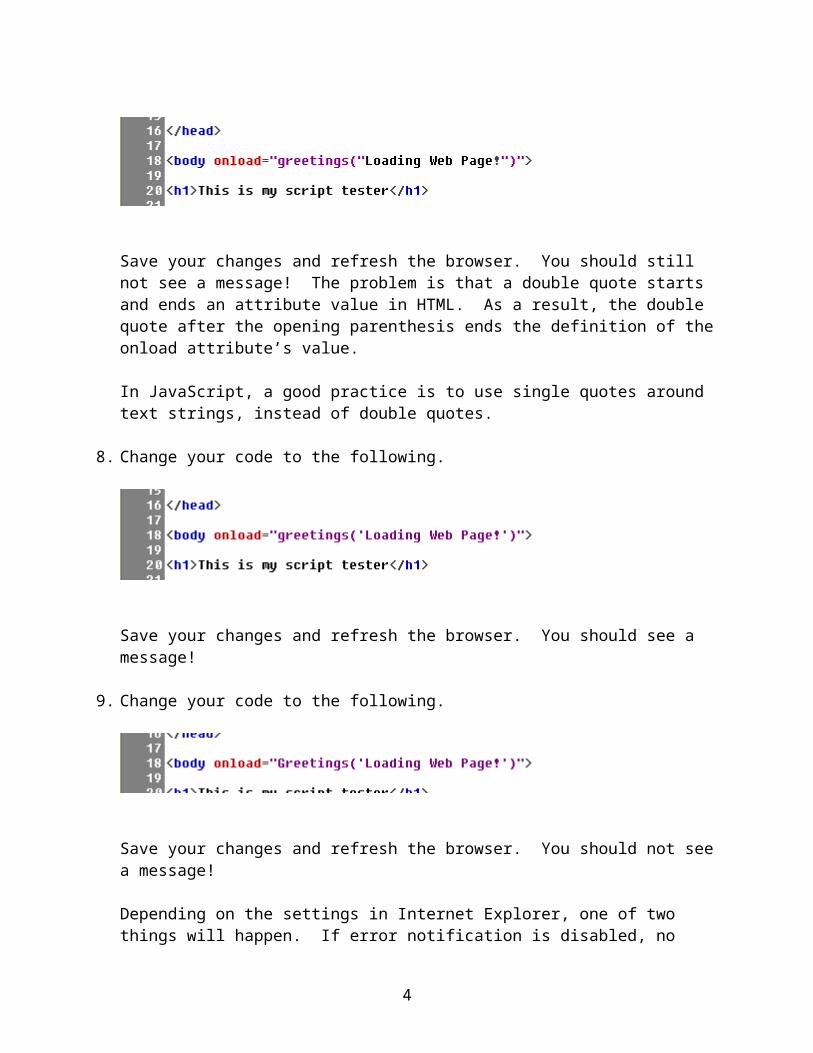
7. Modify the body tag to include a message as follows.
Save your changes and refresh the browser. You should still not see a message! The problem is that a double quote starts and ends an attribute value in HTML. As a result, the double quote after the opening parenthesis ends the definition of the onload attribute’s value.
In JavaScript, a good practice is to use single quotes around text strings, instead of double quotes.
3
8. Change your code to the following.
Save your changes and refresh the browser. You should see a message!
9. Change your code to the following.
Save your changes and refresh the browser. You should not see a message!
Depending on the settings in Internet Explorer, one of two things will happen. If error notification is disabled, no error message will appear; however, the browser will display an error indicator at the bottom, left side of the window as shown below.
If you double click the error indicator, Internet Explorer displays the error dialog box. This is the same error dialog box displayed if you have error notification enabled.
4
To enable error notification, go to Tools Internet Options Advanced and check “Display a notification about every script error.”
Error notification in Internet Explorer is useful when developing a web page because you get a very visible indication of the errors!
To see error messages in Firefox, open the JavaScript Console (Tools JavaScript Console).
5
10. Create a function called showMessage in the script section of the head. The function should accept a parameter called show and display the value of this parameter using an alert box.
Add a call to this function at the bottom of the body of the web page to display “All done.” Use the following code.
Save your changes and refresh the browser.
Pay close attention to the order of the alert boxes. Notice that the “All done” alert box appears first! This is because the load event for the body does not occur until the entire body of the web page has displayed in the browser. Since the call to showMessage is in the body, it occurs first. To demonstrate this, add a call to showMessage at the start of the body and display “Getting started.”
Save your changes and refresh the browser. The alert boxes should display in the following order: Getting started, All done, and then Loading web page!
11. Beneath “This is my script tester,” add a button to the web page similar to the one in Figure 7.11. Make the label for the button “I'm a Button.” Instead of calling the alert command directly, use your showMessage function to display “Ouch!” when the user clicks the button.
Save your changes and refresh the browser. Click the button and make sure things work.
12. Change the text passed to the function from “Ouch” to “Ouch\nThat hurt!” Save your changes and refresh the browser.
Click the button. Notice how the alert box shows the message on two lines. This is because the “\n” in the message is a special control character that stands for new line, which triggers a line break in the message. Another useful control character is \t, which stands for tab. Use these control characters to format long messages displayed in an alert box.