USING MODEL FORMS from the Grants Administration website The model forms downloadable from the Grants Administration site are templates, designed to be customised by the grant giving agency. Once customised, the forms can be: – printed and filled out by recipients as hard copies, or – sent to recipients by email and completed electronically. Following is a basic guide to using forms in Word.
Transcript
USING MODEL FORMS from the Grants Administration website
The model forms downloadable from the Grants Administration site are templates, designed to be customised by the grant giving agency.
Once customised, the forms can be:
– printed and filled out by recipients as hard copies, or
– sent to recipients by email and completed electronically.
Following is a basic guide to using forms in Word.
1. CUSTOMISING THE FORM
Customise the model form to include agency branding and program-specific items.
If necessary, remove or add fields for data. This is easiest when the Forms toolbar is visible. View > Toolbars> Forms
CUSTOMISING THE FORM (continued)
To add fields, use the Forms toolbar and choose from text fields, check boxes and drop-down lists.
Double click on the field to select options and further refine (for example, to limit the number of characters the user can enter).
CUSTOMISING THE FORM continued
To test the form, click the padlock symbol on the Forms toolbar, allowing you to enter data into the fields as a user would.
Click the padlock again to return to customising.
2. PROTECTING THE CUSTOMISED FORM
Once the form is customised, protect it in order to prevent users from changing it.
Tools > Protect Document > Protect Document for Forms
Assign a password so that authorised users can remove the protection and change the form.
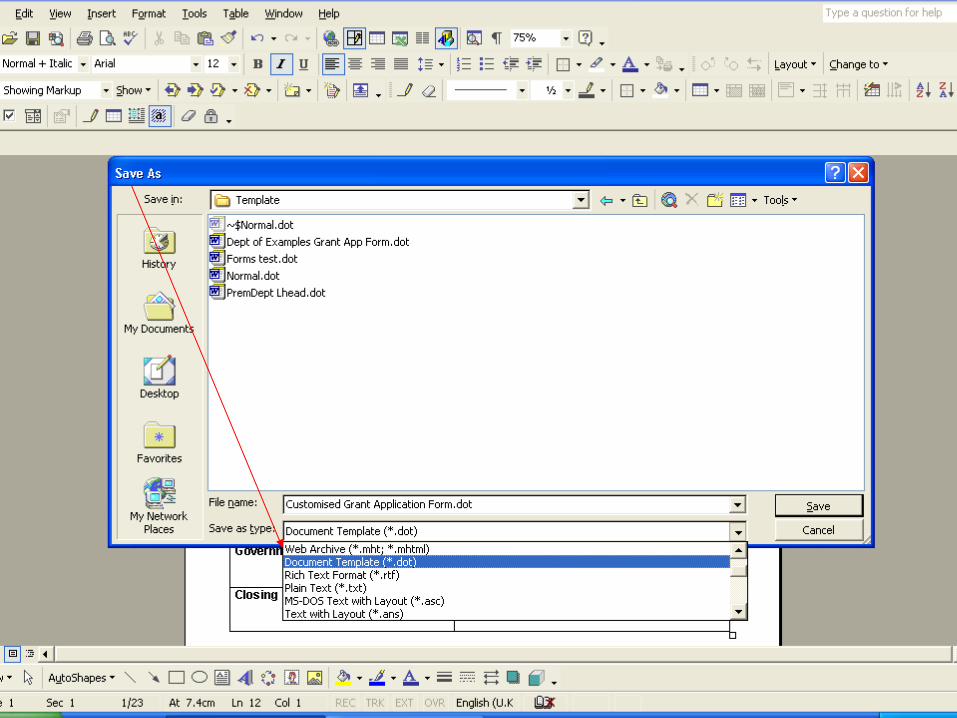
Save the form as a template. File > Save As > Document Template
3. USING THE CUSTOMISED FORM
Once it has been saved and protected in this way, the form can be sent electronically to recipients.
Recipients will only be able to enter text in the shaded fields and make selections from check boxes or drop-down lists. They will not be able to alter surrounding text.
4. CHANGING THE CUSTOMISED FORM
To change a protected form, first remove the protection using the password. Tools > Unprotect > (password)
Once changes are made, protect the form again and re-save as a template.