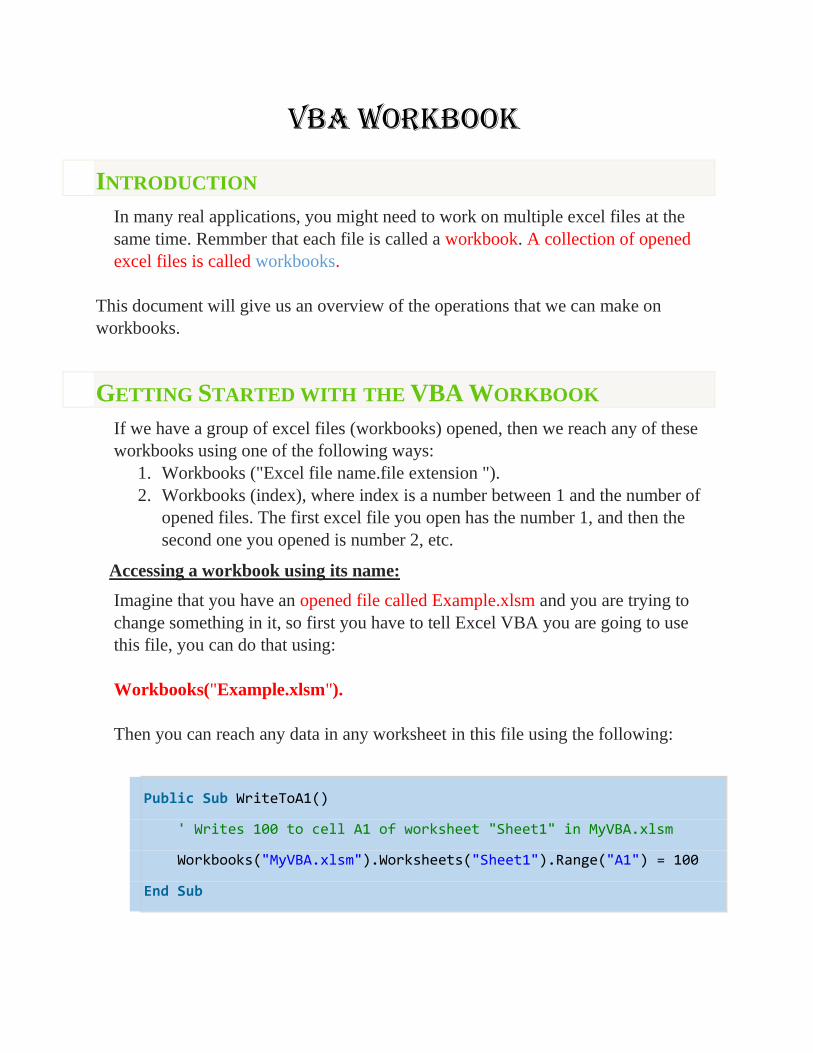
VBA Workbook
INTRODUCTION
In many real applications, you might need to work on multiple excel files at the
same time. Remmber that each file is called a workbook. A collection of opened
excel files is called workbooks.
This document will give us an overview of the operations that we can make on
workbooks.
GETTING STARTED WITH THE VBA WORKBOOK
If we have a group of excel files (workbooks) opened, then we reach any of these
workbooks using one of the following ways:
1. Workbooks ("Excel file name.file extension ").
2. Workbooks (index), where index is a number between 1 and the number of
opened files. The first excel file you open has the number 1, and then the
second one you opened is number 2, etc.
Accessing a workbook using its name:
Imagine that you have an opened file called Example.xlsm and you are trying to
change something in it, so first you have to tell Excel VBA you are going to use
this file, you can do that using:
Workbooks("Example.xlsm").
Then you can reach any data in any worksheet in this file using the following:
Public Sub WriteToA1()
' Writes 100 to cell A1 of worksheet "Sheet1" in MyVBA.xlsm
Workbooks("MyVBA.xlsm").Worksheets("Sheet1").Range("A1") = 100
End Sub
This example may look a little be confusing to a new user but it is actually quite
simple: The first part up to the decimal point is the Workbook, the second part is
the Worksheet and the third is the Range.
Here are some more examples of writing to a cell in different excel files.
Public Sub WriteToMulti() ' Writes 100 to cell A1 of worksheet "Sheet1" in MyVBA.xlsm Workbooks("MyVBA.xlsm").Worksheets("Sheet1").Range("A1") = 100 ' Writes "John" to cell B1 of worksheet "Sheet2" in MyVBA.xlsm Workbooks("MyVBA.xlsm").Worksheets("Sheet2").Range("B1") = "John" ' Writes 100 to cell A1 of worksheet "Accounts" in MyVBA.xlsm Workbooks("MyVBA.xlsm").Worksheets("Accounts").Range("A1") = 100 ' Writes the date to cell D3 of worksheet "Sheet2" in Book.xlsc Workbooks("Book.xlsx").Worksheets("Sheet2").Range("D3") ="1\1\2016" End Sub
You can see the simple pattern here. You can write to any cell in any worksheet from
any workbook. It is just a matter of changing the workbook name, worksheet name
and the range to suit your needs.
Take a look at the workbook part
Workbooks("Example.xlsx")
The Workbooks keyword refers to a collection of all open workbooks. Supplying the
workbook name to the collection gives us access to that workbook. When we have
the object we can use it to perform tasks with the workbook.
Accessing a workbook using its index:
You can also use an IndexNumber with Workbooks(indexNumber) instead of the
name. The indexNumber refers to the order the Workbook was open or created.
Workbooks (1) refers to the workbook that was opened first. Workbooks (2) refers to
the workbook that was opened second and so on.
' Print the name of the First workbook that was opened
Debug.Print Workbooks(1).Name
'' Print the name of the Third workbook that was opened
Debug.Print Workbooks(3).Name
Using the index is not useful unless you really need to know the order. For this
reason, you should avoid using it. You should use the workbook name
with Workbooks instead.
TROUBLESHOOTING THE WORKBOOKS COLLECTION
When you use the Workbooks collection to access a workbook, you may get the error
message:
Run-time Error 9: Subscript out of Range.
This means that VBA cannot find the workbook you passed as a parameter.
This can happen for the following reasons
1. The workbook is currently closed.
2. You spelled the name wrong.
3. You passed a number as Index and it is greater than the number of workbooks
open e.g. you used Workbooks(3) and only two workbooks are open.
4. You created e new workbook (e.g. Book1) and tried to access it using
Workbooks(“Book1.xlsx”). It’s name is not Book1.xlsx until it is saved for the
first time.
If you cannot resolve the error, then use either of the functions in the section Finding
all open Workbooks. These will print the names of all open workbooks to the
Immediate Window (Ctrl + G).
HOW MANY OPENED WORKBOOKS
Workbooks.Count This is the number of workbooks that are currently in the
Workbooks collection.
The following example show how many opened files you have in a message box.
Public Sub WorkbookProperties()
' Prints the number of open workbooks
MsgBox (Workbooks.Count)
' Print the name of the last workbook that was opened
Debug.Print Workbooks(Workbooks.Count).Name
End Sub
EXAMPLES OF USING THE VBA WORKBOOKS
The following examples show what you can do with the workbook.
Note: To try this example create two open workbooks called Test1.xlsx
and Test2.xlsx.
Public Sub WorkbookProperties()
' Prints the number of open workbooks
MsgBox (Workbooks.Count)
' Prints the full workbook name
MsgBox (Workbooks("Test1.xlsx").FullName)
' Displays the full workbook name in a message dialog
MsgBox (Workbooks("Test1.xlsx").FullName)
' Prints the number of worksheets in Test2.xlsx
MsgBox (Workbooks("Test2.xlsx").Worksheets.Count)
' Prints the name of currently active sheet of Test2.xlsx
MsgBox (Workbooks("Test2.xlsx").ActiveSheet.Name)
' Closes workbook called Test1.xlsx
Workbooks("Test1.xlsx").Close
' Closes workbook Test2.xlsx and saves changes
Workbooks("Test2.xlsx").Close SaveChanges:=True
End Sub
If you hate to see too many MsgBox, then you can print the values to the Immediate
Window by replacing the Msgbox by Debug.Print. To view this window, select
View->Immediate Window from the menu (Shortcut is Ctrl + G).
CREATE NEW WORKBOOK AND SAVE IT
To create a new workbook you use the Workbooks Add function. This function creates a new
blank workbook. It is the same as selecting New Workbook from the Excel File menu.
When you create a new workbook, you will generally want to Save it. The following code
shows you how to do this.
Public Sub AddWordbook()
Dim wrk As Workbook
' Create a new workbook
Set wrk = Workbooks.Add
' Save as xlsx. This is the default.
wrk.SaveAs "C:\Temp\Example.xlsx"
' Save as (A copy) a Macro enabled workbook
wrk.SaveAs "C:\Temp\Example.xlsm", xlOpenXMLWorkbookMacroEnabled
End Sub
When you create a new workbook, it normally contains one sheet. If you want to have a
different number of sheets in a new workbook then you change the property:
Application.SheetsInNewWorkbook before you create the new workbook. The property
controls the number of sheets inside the new workbook. The following example shows you how
to create a new workbook with seven sheets.
Public Sub AddWordbookMultiSheets()
' Store SheetsInNewWorkbook value so we can reset it later
Dim sheetCnt As Long
sheetCnt = Application.SheetsInNewWorkbook
' Set sheets in a new workbook to be 7
Application.SheetsInNewWorkbook = 7
' Workbook will be created with 7 sheets
Dim wrk As Workbook
Set wrk = Workbooks.Add
' Display sheet count
Debug.Print "number of sheets: " & CStr(wrk.Worksheets.Count)
' Reset to original value
Application.SheetsInNewWorkbook = sheetCnt
End Sub
CLOSE WORKBOOK
To Close a Workbook in Excel VBA is very simple. You simply call
the Close method of the workbook.
wk.Close
Normally when you close a workbook in VBA, you don’t want to see messages from
Excel asking if you want to save the file.
You can specify whether to save the workbook or not and then the Excel messages
will not appear.
' Don't save changes
wk.Close SaveChanges:= False
' Do save changes
wk.Close SaveChanges:= True
Workbooks ("Finance.xlsx").Close SaveChanges:=True
Obviously, you cannot save changes to a workbook that is currently open as read-
only.
SAVE WORKBOOK
We have just seen that you can save a workbook when you close it. If you want to
save it any other stage you can simply use the Save method
wk.Save
You can also use the SaveAs method
wk.SaveAs "C:\Backups\accounts.xlsx"
The Workbook SaveAs method comes with twelve parameters which allow you to
add a password, set the file as read-only and so on. You can see the details here
You can also use VBA to save the workbook as a copy using SaveCopyAs
wk.SaveCopyAs "C:\Docs\Copy.xlsm"
COPY WORKBOOK If the workbook is open you can use the two methods in the above section to create a
copy i.e. SaveAs and SaveCopyAs.
If you want to copy a workbook without opening it then you can use FileCopy as the
following example demonstrates
Public Sub CopyWorkbook()
FileCopy "C:\Docs\Docs.xlsm", "C:\Docs\Example_Copy.xlsm"
End Sub
CLOSE (AND SAVE CHANGES TO A NEW WORKBOOK): SAME
AS SAVE AS
Sometime before closing the file, you need to save the changes to a new file, you
can do that using the following:
ActiveWorkbook.Close savechanges:=True, Filename:="P:\CS146\Test.xlsx"
This will close the current active workbook and it will save the new changes into a new
file specified into the called Test.xlsx which is inside the folder P:\CS146\
DELETE WORKBOOK
Kill "C:\Users\xxxx\Desktop\COPY_Test.xlsm"
PROTECT A WORKBOOK
If you want to protect the file and do not want anyone to open it unless s/he input a
password, then you can do that as follow.
ActiveWorkbook.Protect Password:="BadPassword"
DECLARING A VBA WORKBOOK VARIABLE
The reason for declaring a workbook variable is to make your code easier to read and
understand. It is easier to see the advantage using an example
Public Sub OpenWrkObjects()
Dim wrk As Workbook
Set wrk = Workbooks.Open("C:\Docs\Book1.xlsm")
' Print number of sheets in each book
Debug.Print wrk.Worksheets.Count
Debug.Print wrk.Name
wrk.Close
End Sub
You can set a workbook variable with any of the access methods we have seen.
The following shows you the same code without a workbook variable
Public Sub OpenWrkNoObjects()
Workbooks.Open ("C:\Docs\Book1.xlsm")
Debug.Print Workbooks ("Book2.xlsm").Worksheets.Count
Debug.Print Workbooks ("Book2.xlsm").Name
Workbooks ("Book2.xlsm").Close
End Sub
In these examples the difference is not major. However, when you have a lot of code, using a
variable is useful particularly for worksheet and ranges where the names tend to be long
e.g. thisWorkbook.Worksheets(“Sheet1”).Range(“A1”).
You can name the workbook variable to be something like wrkRead or wrkWrite. Then at a
glance you can see what this workbook is being used for.
USING A VBA VARIABLE TO REFERRING TO A WORKBOOK
Dim wb As Workbook
Set wb = ThisWorkbook
wb.Close SaveChanges:=True
OPEN WORKBOOK
So far, we have dealt with workbooks that are already open. Of course, having to
manually open a workbook before running a Macro, defeats the purpose of
automating tasks. The Open Workbook task should be performed by VBA.
Mainly, you can open a file using one of the following:
Open a workbook and be able to modify it (change anything inside it):
o Workbooks.Open Filename:="File name (including its full path)"
Open a workbook and unable to modify it (Can’t change anything inside it):
o Workbooks.Open Filename:="File name (including its full path)",
ReadOnly:=True
In both ways, you have to make sure that the file is already there before you open it.
Here is a code that allows you to do that.
The following VBA code opens the workbook “Book1.xlsm” in
the “C:\Docs” folder
Public Sub OpenWrk()
' Open the workbook and print the number of sheets it contains
Workbooks.Open ("C:\Docs\Book1.xlsm")
Debug.Print Workbooks("Book1.xlsm").Worksheets.Count
' Close the workbook without saving
Workbooks("Book1.xlsm").Close saveChanges:=False
End Sub
It is a good idea to check a workbook actually exists before you try to open it. This
will prevent you getting errors. The Dir function allows you to easily do this.
Public Sub OpenWrkDir()
If Dir ("C:\Docs\Book1.xlsm") = "" Then
' File does not exist - inform user
MsgBox "Could not open the workbook. Please check it exists"
Else
' open workbook and do something with it
Workbooks.Open("C:\Docs\Book1.xlsm").Open
End If
End Sub
USING THE FILE DIALOG TO OPEN A WORKBOOK The previous section shows you how to open a workbook with a given name.
Sometimes you may want the user to select the workbook. You can easily use
the Windows File Dialog shown here
The Windows File Dialog
The following code opens a workbook using the File Dialog.
Public Sub TestUserSelect()
Dim wkbk As Workbook
Dim NewFile As Variant
NewFile = Application.GetOpenFilename("microsoft excel files (*.xlsm*), *.xl
sm*")
If NewFile <> False Then
Set wkbk = Workbooks.Open(NewFile)
End If
End Sub
FINDING ALL OPENED WORKBOOKS
Sometimes you may want to access all the workbooks that are open. In other words,
all the items in the Workbooks() collection.
You can do this using either the normal for loop, or the for Each loop.
Public Sub PrintWrkFileNameIdx()
' Prints out the full filename of all open workbooks
Dim i As Long
For i = 1 To Workbooks.Count
Debug.Print Workbooks(i).FullName
Next i
End Sub
OR
Public Sub PrintWrkFileName()
' Prints out the full filename of all open workbooks
Dim wrk As Workbook
For Each wrk In Workbooks
Debug.Print wrk.FullName
Next wrk
End Sub
For accessing workbooks either of these methods is fine. The For Each loop is
generally preferred when you are accessing a large number of objects. In terms of
open workbooks this is rarely an issue.
Note: Both examples read in the order of the first opened to the last opened. If you
want to read in reverse order(last to first) you can do this
Public Sub PrintWrkFileNameIdxRev()
' Prints out the full filename of all open workbooks
' in reverse order.
Dim i As Long
For i = Workbooks.Count To 1 Step -1
Debug.Print Workbooks(i).FullName
Next i
End Sub
USING THISWORKBOOK
There is an easier way to access the current workbook than using Workbooks(). You can use
the keyword ThisWorkbook. It refers to the current workbook i.e. the workbook that contains
the VBA code.
If our code is in a workbook call MyVBA.xlsm
then ThisWorkbook and Workbooks(“MyVBA.xlsm”)refer to the same workbook.
Using ThisWorkbook is more useful than using Workbooks(). With ThisWorkbook we do not
need to worry about the name of the file. This gives us two advantages:
1. Changing the filename will not affect the code
2. Copying the code to another workbook will not require a code change
These may seem like very small advantages. The reality is your filenames will change all the
time. Using ThisWorkbook means your code will still work fine.
The following example shows two lines of code. One using ThisWorkbook and one
using Workbooks(). The one using Workbooks will no longer work if the name of
MyVBA.xlsm changes.
Public Sub WriteToCellUsingThis()
' Both lines do the same thing.
Debug.Print ThisWorkbook.FullName
Debug.Print Workbooks(“MyVBA.xlsm”).FullName
End Sub
USING THE ACTIVEWORKBOOK
ActiveWorkbook refers to the workbook that is currently active. This is the one that the user
last clicked on.
This can seem useful at first. The problem is that any workbook can become active by a simple
mouse click. This means you could easily write data to the wrong workbook.
Using ActiveWorkbook also makes the code hard to read. It may not be obvious from the code
which workbook should be the active one.
I hope I made it clear that you should avoid using ActiveWorkbook unless you really have to.
In this case be very careful.
EXAMPLES OF THE ACCESSING THE WORKBOOK
We’ve looked at all the ways of accessing a workbook. The following code shows examples of
these ways
Public Sub WorkbooksUse()
' This is a workbook that is already open and called MyVBA.xlsm
Debug.Print Workbooks("MyVBA.xlsm").FullName
' The workbook that contains this code
Debug.Print ThisWorkbook.FullName
' The open workbook that was opened first
Debug.Print Workbooks(1).FullName
' The open workbook that was opened last
Debug.Print Workbooks(Workbooks.Count).FullName
' The workbook that is the currently active one
Debug.Print ActiveWorkbook.FullName
' No workbook mentioned - the active one will be used
Debug.Print Worksheets("Sheet1").Name
' A closed workbook called Book1.xlsm in folder C:\Docs
Workbooks.Open ("C:\Docs\Book1.xlsm")
Debug.Print Workbooks("Book1.xlsm").FullName
Workbooks("Book1.xlsm").Close
End Sub
THE WITH KEYWORD AND THE WORKBOOK
The With keyword makes reading and writing VBA code easier. Using With means you only
need to mention the item once. With is used with Objects. These are items such as
Workbooks, Worksheets and Ranges.
The following example has two Subs. The first is similar to code we have seen so far. The
second uses the With keyword. You can see the code is much clearer in the second Sub. The
keywords End With mark the finish of a section code using With.
' Not using the With keyword
Public Sub NoUsingWith()
Debug.Print Workbooks("Book2.xlsm").Worksheets.Count
Debug.Print Workbooks("Book2.xlsm").Name
Debug.Print Workbooks("Book2.xlsm").Worksheets(1).Range("A1")
Workbooks("Book2.xlsm").Close
End Sub
' Using With makes the code easier to read
Public Sub UsingWith()
With Workbooks("Book2.xlsm")
Debug.Print .Worksheets.Count
Debug.Print .Name
Debug.Print .Worksheets(1).Range("A1")
.Close
End With
End Sub
SUMMARY
The following is a brief summary of the main points of this post
1. To get the workbook containing the code use ThisWorkbook.
2. To get any open workbook use Workbooks(“Example.xlsx”).
3. To open a workbook use Set Wrk = Workbooks.Open(“C:\Folder\Example.xlsx”).
4. Allow the user to select a file using the UserSelectWorkbook function provided above.
5. To create a copy of an open workbook use the SaveAs property with a filename.
6. To create a copy of a workbook without opening use the FileCopy function.
7. To make your code easier to read and write use the With keyword.
8. Another way to make your code clear is to use a Workbook variables
9. To run through all open Workbooks use For Each wk in Workbooks where wk is a
workbook variable.
10. Try to avoid using ActiveWorkbook and Workbooks(Index) as their reference to a
workbook is temporary.
A QUICK GUIDE TO THE VBA WORKBOOK
The following table provides a quick how-to guide on the main VBA workbook tasks
Task How to
Access open workbook using
name
Workbooks("Example.xlsx")
Access open workbook (the one
opened first)
Workbooks(1)
Access open workbook (the one
opened last)
Workbooks(Workbooks.Count)
Task How to
Access the active workbook ActiveWorkbook
Access workbook containing
VBA code
ThisWorkbook
Declare a workbook variable Dim wk As Workbook
Assign a workbook variable Set wk = Workbooks("Example.xlsx")
Set wk = ThisWorkbook
Set wk = Workbooks(1)
Activate workbook wk.Activate
Close workbook without saving wk.Close SaveChanges:=False
Close workbook and save wk.Close SaveChanges:=True
Create new workbook Set wk = Workbooks.Add
Open workbook Set wk =Workbooks.Open
("C:\Docs\Example.xlsx")
Open workbook as read only Set wk = Workbooks.Open
("C:\Docs\Example.xlsx", ReadOnly:=True)
Check Workbook exists If Dir("C:\Docs\book1.xlsx") = "" Then
MsgBox "File does not exist."
EndIf
Check Workbook is open See Check Workbook Open section below
Task How to
List all open workbooks For Each wk In Application.Workbooks
Debug.Print wk.FullName
Next wk
Open workbook with the File
Dialog
See File Dialog section below function below
Save workbook wk.Save
Save workbook copy wk.SaveCopyAs "C:\Copy.xlsm"
Copy workbook if closed FileCopy "C:\file1.xlsx","C:\Copy.xlsx"
SaveAs workbook wk.SaveAs "Backup.xlsx"
SOURCE:
https://excelmacromastery.com/excel-macro-create/
http://www.bluepecantraining.com/working-workbooks-excel-vba/