136
Veritas Storage Foundation and High Availability Solutions Release Notes Solaris 5.1 Rolling Patch 1
| Date post: | 19-Dec-2016 |
| Category: |
Documents |
| Upload: | truongmien |
| View: | 245 times |
| Download: | 4 times |

Veritas Storage Foundationand High AvailabilitySolutions Release Notes
Solaris
5.1 Rolling Patch 1
Storage Foundation and High Availability SolutionsRelease Notes 5.1 Rolling Patch 1
The software described in this book is furnished under a license agreement andmay be usedonly in accordance with the terms of the agreement.
Product version: 5.1 RP1
Document version: 5.1RP1.0
Legal NoticeCopyright © 2010 Symantec Corporation. All rights reserved.
Symantec, the Symantec Logo, Veritas, Veritas Storage Foundation are trademarks orregistered trademarks of Symantec Corporation or its affiliates in the U.S. and othercountries. Other names may be trademarks of their respective owners.
This Symantec product may contain third party software for which Symantec is requiredto provide attribution to the third party (“Third Party Programs”). Some of the Third PartyPrograms are available under open source or free software licenses. The LicenseAgreementaccompanying the Software does not alter any rights or obligations you may have underthose open source or free software licenses. See the Third-party Legal Notices documentfor this product, which is available online or included in the base release media.
The product described in this document is distributed under licenses restricting its use,copying, distribution, and decompilation/reverse engineering. No part of this documentmay be reproduced in any form by any means without prior written authorization ofSymantec Corporation and its licensors, if any.
THEDOCUMENTATIONISPROVIDED"ASIS"ANDALLEXPRESSORIMPLIEDCONDITIONS,REPRESENTATIONS AND WARRANTIES, INCLUDING ANY IMPLIED WARRANTY OFMERCHANTABILITY, FITNESS FOR A PARTICULAR PURPOSE OR NON-INFRINGEMENT,ARE DISCLAIMED, EXCEPT TO THE EXTENT THAT SUCH DISCLAIMERS ARE HELD TOBELEGALLYINVALID.SYMANTECCORPORATIONSHALLNOTBELIABLEFORINCIDENTALOR CONSEQUENTIAL DAMAGES IN CONNECTION WITH THE FURNISHING,PERFORMANCE, OR USE OF THIS DOCUMENTATION. THE INFORMATION CONTAINEDIN THIS DOCUMENTATION IS SUBJECT TO CHANGE WITHOUT NOTICE.
The Licensed Software andDocumentation are deemed to be commercial computer softwareas defined in FAR12.212 and subject to restricted rights as defined in FARSection 52.227-19"Commercial Computer Software - Restricted Rights" and DFARS 227.7202, "Rights inCommercial Computer Software or Commercial Computer Software Documentation", asapplicable, and any successor regulations. Any use, modification, reproduction release,performance, display or disclosure of the Licensed Software andDocumentation by theU.S.Government shall be solely in accordance with the terms of this Agreement.

Symantec Corporation350 Ellis StreetMountain View, CA 94043
http://www.symantec.com

Technical SupportSymantec Technical Support maintains support centers globally. TechnicalSupport’s primary role is to respond to specific queries about product featuresand functionality. TheTechnical Support group also creates content for our onlineKnowledge Base. The Technical Support group works collaboratively with theother functional areas within Symantec to answer your questions in a timelyfashion. For example, theTechnical Support groupworkswithProductEngineeringand Symantec Security Response to provide alerting services and virus definitionupdates.
Symantec’s support offerings include the following:
■ A range of support options that give you the flexibility to select the rightamount of service for any size organization
■ Telephone and/or web-based support that provides rapid response andup-to-the-minute information
■ Upgrade assurance that delivers automatic software upgrades protection
■ Global support purchased on a regional business hours or 24 hours a day, 7days a week basis
■ Premium service offerings that include Account Management Services
For information about Symantec’s support offerings, you can visit our web siteat the following URL:
www.symantec.com/business/support/index.jsp
All support services will be delivered in accordance with your support agreementand the then-current enterprise technical support policy.
Contacting Technical SupportCustomers with a current support agreement may access Technical Supportinformation at the following URL:
www.symantec.com/business/support/contact_techsupp_static.jsp
Before contacting Technical Support, make sure you have satisfied the systemrequirements that are listed in your product documentation. Also, you should beat the computer onwhich theproblemoccurred, in case it is necessary to replicatethe problem.
When you contact Technical Support, please have the following informationavailable:
■ Product release level
■ Hardware information
■ Available memory, disk space, and NIC information
■ Operating system
■ Version and patch level
■ Network topology
■ Router, gateway, and IP address information
■ Problem description:
■ Error messages and log files
■ Troubleshooting that was performed before contacting Symantec
■ Recent software configuration changes and network changes
Licensing and registrationIf yourSymantecproduct requires registrationor a licensekey, access our technicalsupport web page at the following URL:
www.symantec.com/business/support/
Customer serviceCustomer service information is available at the following URL:
www.symantec.com/business/support/
Customer Service is available to assist with non-technical questions, such as thefollowing types of issues:
■ Questions regarding product licensing or serialization
■ Product registration updates, such as address or name changes
■ General product information (features, language availability, local dealers)
■ Latest information about product updates and upgrades
■ Information about upgrade assurance and support contracts
■ Information about the Symantec Buying Programs
■ Advice about Symantec's technical support options
■ Nontechnical presales questions
■ Issues that are related to CD-ROMs or manuals

Documentation feedbackYour feedback on product documentation is important to us. Send suggestionsfor improvements and reports on errors or omissions. Include the title anddocument version (located on the second page), and chapter and section titles ofthe text on which you are reporting. Send feedback to:
Support agreement resourcesIf youwant to contact Symantec regarding an existing support agreement, pleasecontact the support agreement administration team for your region as follows:
[email protected] and Japan
[email protected], Middle-East, and Africa
[email protected] America and Latin America
Additional enterprise servicesSymantec offers a comprehensive set of services that allow you tomaximize yourinvestment in Symantec products and to develop your knowledge, expertise, andglobal insight, which enable you to manage your business risks proactively.
Enterprise services that are available include the following:
These services remove the burdenofmanaging andmonitoring security devicesand events, ensuring rapid response to real threats.
Managed Services
Symantec Consulting Services provide on-site technical expertise fromSymantec and its trustedpartners. SymantecConsultingServices offer a varietyof prepackaged and customizable options that include assessment, design,implementation,monitoring, andmanagement capabilities. Each is focused onestablishing andmaintaining the integrity and availability of your IT resources.
Consulting Services
EducationServices provide a full array of technical training, security education,security certification, and awareness communication programs.
Education Services
To access more information about enterprise services, please visit our web siteat the following URL:
www.symantec.com/business/services/
Select your country or language from the site index.

Technical Support . . . . . . . . . . . . . . . . . . . . . . . . . . . . . . . . . . . . . . . . . . . . . . . . . . . . . . . . . . . . . . . . . . . . . . . . . . . . . . . . . . . . . . . . . . . . . . . 4
Chapter 1 Release Notes . . . . . . . . . . . . . . . . . . . . . . . . . . . . . . . . . . . . . . . . . . . . . . . . . . . . . . . . . . . . . . . . . . . . . . . 11
Introduction .... . . . . . . . . . . . . . . . . . . . . . . . . . . . . . . . . . . . . . . . . . . . . . . . . . . . . . . . . . . . . . . . . . . . . . . . . . . . . 12System Requirements ... . . . . . . . . . . . . . . . . . . . . . . . . . . . . . . . . . . . . . . . . . . . . . . . . . . . . . . . . . . . . . . . . 12
Supported Solaris operating systems .... . . . . . . . . . . . . . . . . . . . . . . . . . . . . . . . . . . . . . 12Database requirements ... . . . . . . . . . . . . . . . . . . . . . . . . . . . . . . . . . . . . . . . . . . . . . . . . . . . . . . . . 13
List of products ... . . . . . . . . . . . . . . . . . . . . . . . . . . . . . . . . . . . . . . . . . . . . . . . . . . . . . . . . . . . . . . . . . . . . . . . . . 14Fixed issues ... . . . . . . . . . . . . . . . . . . . . . . . . . . . . . . . . . . . . . . . . . . . . . . . . . . . . . . . . . . . . . . . . . . . . . . . . . . . . . 14
Veritas Volume Manager fixed issues in 5.1 RP1 release ... . . . . . . . . . . . . . 15Veritas File System fixed issues in 5.1 RP1 release ... . . . . . . . . . . . . . . . . . . . . . 16Veritas Storage Foundation fixed issues in 5.1 RP1 .... . . . . . . . . . . . . . . . . . . . 19Veritas Storage Foundation Cluster File System fixed issues in
5.1 RP1 release ... . . . . . . . . . . . . . . . . . . . . . . . . . . . . . . . . . . . . . . . . . . . . . . . . . . . . . . . . . . . . . 20Veritas Storage Foundation for Oracle RAC fixed issues in 5.1
RP1 .... . . . . . . . . . . . . . . . . . . . . . . . . . . . . . . . . . . . . . . . . . . . . . . . . . . . . . . . . . . . . . . . . . . . . . . . . . . . 20Veritas Cluster Server fixed issues in 5.1 RP1 .... . . . . . . . . . . . . . . . . . . . . . . . . . . 21Veritas Cluster Server agents forVeritasVolumeReplicator fixed
issues in 5.1 RP1 .... . . . . . . . . . . . . . . . . . . . . . . . . . . . . . . . . . . . . . . . . . . . . . . . . . . . . . . . . . . 22Storage Foundation Manager fixed issues in 5.1 RP1 .... . . . . . . . . . . . . . . . . . 23VEA fixed issues in 5.1 RP1 .... . . . . . . . . . . . . . . . . . . . . . . . . . . . . . . . . . . . . . . . . . . . . . . . . . . 25
Known issues ... . . . . . . . . . . . . . . . . . . . . . . . . . . . . . . . . . . . . . . . . . . . . . . . . . . . . . . . . . . . . . . . . . . . . . . . . . . . 26Veritas Storage Foundation known issues in 5.1 RP1
release ... . . . . . . . . . . . . . . . . . . . . . . . . . . . . . . . . . . . . . . . . . . . . . . . . . . . . . . . . . . . . . . . . . . . . . . . . 26Veritas Volume Manager known issues in 5.1 RP1 release ... . . . . . . . . . . . 28Veritas File System known issues in 5.1 RP1 release ... . . . . . . . . . . . . . . . . . . 28Veritas Storage Foundation Cluster File System known issues in
5.1 RP1 release ... . . . . . . . . . . . . . . . . . . . . . . . . . . . . . . . . . . . . . . . . . . . . . . . . . . . . . . . . . . . . . 29Veritas Storage Foundation for Oracle RAC known issues in 5.1
RP1 .... . . . . . . . . . . . . . . . . . . . . . . . . . . . . . . . . . . . . . . . . . . . . . . . . . . . . . . . . . . . . . . . . . . . . . . . . . . . 29Veritas Cluster Server known issues in 5.1 RP1 .... . . . . . . . . . . . . . . . . . . . . . . . . 30Veritas Cluster Server agents for Veritas Volume Replicator
known issues in 5.1 RP1 .... . . . . . . . . . . . . . . . . . . . . . . . . . . . . . . . . . . . . . . . . . . . . . . . . 30Software limitations .... . . . . . . . . . . . . . . . . . . . . . . . . . . . . . . . . . . . . . . . . . . . . . . . . . . . . . . . . . . . . . . . . . 30
Veritas Storage Foundation software limitations in 5.1 RP1release ... . . . . . . . . . . . . . . . . . . . . . . . . . . . . . . . . . . . . . . . . . . . . . . . . . . . . . . . . . . . . . . . . . . . . . . . . 31
Contents
Veritas Volume Manager software limitations in 5.1 RP1release ... . . . . . . . . . . . . . . . . . . . . . . . . . . . . . . . . . . . . . . . . . . . . . . . . . . . . . . . . . . . . . . . . . . . . . . . . 31
Veritas Storage Foundation for Oracle RAC software limitationsin 5.1 RP1 .... . . . . . . . . . . . . . . . . . . . . . . . . . . . . . . . . . . . . . . . . . . . . . . . . . . . . . . . . . . . . . . . . . . . 32
Changes in Storage Foundation High Availability ... . . . . . . . . . . . . . . . . . . . . . . . . . . . . 32About the new installrp script ... . . . . . . . . . . . . . . . . . . . . . . . . . . . . . . . . . . . . . . . . . . . . . . . 33CVM master node needs to assume the logowner role for VCS
managed VVR resources ... . . . . . . . . . . . . . . . . . . . . . . . . . . . . . . . . . . . . . . . . . . . . . . . . . 35Downloading the rolling patch archive ... . . . . . . . . . . . . . . . . . . . . . . . . . . . . . . . . . . . . . . . . . . 36List of patches ... . . . . . . . . . . . . . . . . . . . . . . . . . . . . . . . . . . . . . . . . . . . . . . . . . . . . . . . . . . . . . . . . . . . . . . . . . . 36Installing the Veritas software for the first time .... . . . . . . . . . . . . . . . . . . . . . . . . . . . . 38Installing with JumpStart ... . . . . . . . . . . . . . . . . . . . . . . . . . . . . . . . . . . . . . . . . . . . . . . . . . . . . . . . . . . . 40
Overview of JumpStart installation tasks ... . . . . . . . . . . . . . . . . . . . . . . . . . . . . . . . . . 41Generating the finish scripts ... . . . . . . . . . . . . . . . . . . . . . . . . . . . . . . . . . . . . . . . . . . . . . . . . . 41Preparing installation resources ... . . . . . . . . . . . . . . . . . . . . . . . . . . . . . . . . . . . . . . . . . . . . 46Adding language pack information to the finish file ... . . . . . . . . . . . . . . . . . . 47
Installing 5.1 RP1 using the web-based installer ... . . . . . . . . . . . . . . . . . . . . . . . . . . . . . . 48About the Web-based installer ... . . . . . . . . . . . . . . . . . . . . . . . . . . . . . . . . . . . . . . . . . . . . . . . 48Before using the Veritas Web-based installer ... . . . . . . . . . . . . . . . . . . . . . . . . . . . . 49Starting the Veritas Web-based installer ... . . . . . . . . . . . . . . . . . . . . . . . . . . . . . . . . . 49Obtaining a security exception on Mozilla Firefox .... . . . . . . . . . . . . . . . . . . . . 49Performing a pre-installation checkwith the VeritasWeb-based
installer ... . . . . . . . . . . . . . . . . . . . . . . . . . . . . . . . . . . . . . . . . . . . . . . . . . . . . . . . . . . . . . . . . . . . . . . 50Installing products with the Veritas Web-based installer ... . . . . . . . . . . . . 50
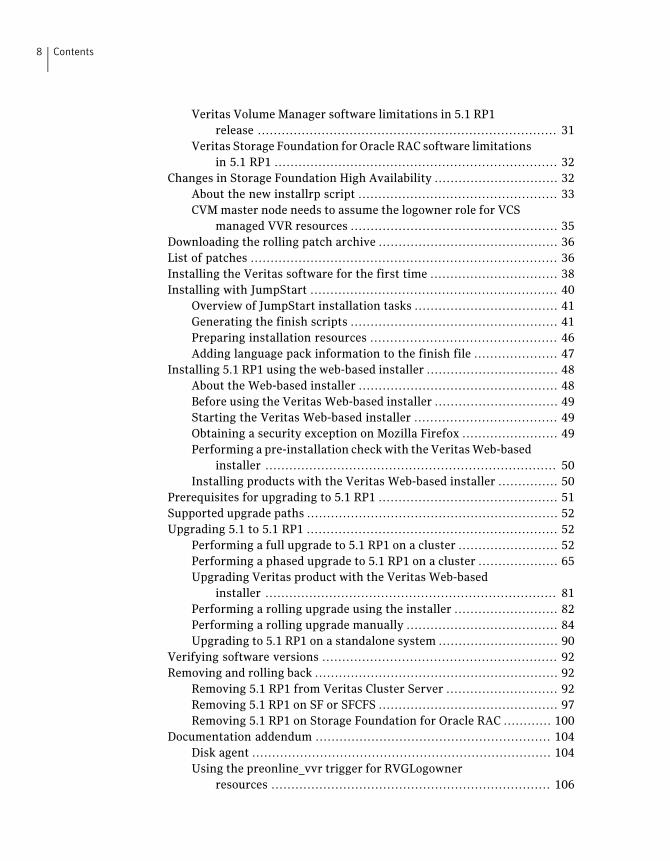
Prerequisites for upgrading to 5.1 RP1 .... . . . . . . . . . . . . . . . . . . . . . . . . . . . . . . . . . . . . . . . . . 51Supported upgrade paths .... . . . . . . . . . . . . . . . . . . . . . . . . . . . . . . . . . . . . . . . . . . . . . . . . . . . . . . . . . . . 52Upgrading 5.1 to 5.1 RP1 .... . . . . . . . . . . . . . . . . . . . . . . . . . . . . . . . . . . . . . . . . . . . . . . . . . . . . . . . . . . . 52
Performing a full upgrade to 5.1 RP1 on a cluster ... . . . . . . . . . . . . . . . . . . . . . . 52Performing a phased upgrade to 5.1 RP1 on a cluster ... . . . . . . . . . . . . . . . . . 65Upgrading Veritas product with the Veritas Web-based
installer ... . . . . . . . . . . . . . . . . . . . . . . . . . . . . . . . . . . . . . . . . . . . . . . . . . . . . . . . . . . . . . . . . . . . . . . 81Performing a rolling upgrade using the installer ... . . . . . . . . . . . . . . . . . . . . . . . 82Performing a rolling upgrade manually ... . . . . . . . . . . . . . . . . . . . . . . . . . . . . . . . . . . . 84Upgrading to 5.1 RP1 on a standalone system .... . . . . . . . . . . . . . . . . . . . . . . . . . . 90
Verifying software versions .... . . . . . . . . . . . . . . . . . . . . . . . . . . . . . . . . . . . . . . . . . . . . . . . . . . . . . . . 92Removing and rolling back .... . . . . . . . . . . . . . . . . . . . . . . . . . . . . . . . . . . . . . . . . . . . . . . . . . . . . . . . . . 92
Removing 5.1 RP1 from Veritas Cluster Server ... . . . . . . . . . . . . . . . . . . . . . . . . . 92Removing 5.1 RP1 on SF or SFCFS .... . . . . . . . . . . . . . . . . . . . . . . . . . . . . . . . . . . . . . . . . . 97Removing 5.1 RP1 on Storage Foundation for Oracle RAC .... . . . . . . . . 100
Documentation addendum .... . . . . . . . . . . . . . . . . . . . . . . . . . . . . . . . . . . . . . . . . . . . . . . . . . . . . . . . 104Disk agent ... . . . . . . . . . . . . . . . . . . . . . . . . . . . . . . . . . . . . . . . . . . . . . . . . . . . . . . . . . . . . . . . . . . . . . . . . 104Using the preonline_vvr trigger for RVGLogowner
resources ... . . . . . . . . . . . . . . . . . . . . . . . . . . . . . . . . . . . . . . . . . . . . . . . . . . . . . . . . . . . . . . . . . . . 106
Contents8

Appendix A Installing or upgrading to Oracle RAC 11g Release2 . . . . . . . . . . . . . . . . . . . . . . . . . . . . . . . . . . . . . . . . . . . . . . . . . . . . . . . . . . . . . . . . . . . . . . . . . . . . . . . . . . . . . . 107
Installing Oracle RAC 11g Release 2 .... . . . . . . . . . . . . . . . . . . . . . . . . . . . . . . . . . . . . . . . . . . . 107Preparing to install Oracle RACusing the SFOracle RAC installer
or manually ... . . . . . . . . . . . . . . . . . . . . . . . . . . . . . . . . . . . . . . . . . . . . . . . . . . . . . . . . . . . . . . . . 108Installing Oracle Grid Infrastructure using the Oracle Universal
Installer ... . . . . . . . . . . . . . . . . . . . . . . . . . . . . . . . . . . . . . . . . . . . . . . . . . . . . . . . . . . . . . . . . . . . . . 118Configuring LLT links in the GPnP profile ... . . . . . . . . . . . . . . . . . . . . . . . . . . . . . . 121Installing the Oracle RAC database using the Oracle Universal
Installer ... . . . . . . . . . . . . . . . . . . . . . . . . . . . . . . . . . . . . . . . . . . . . . . . . . . . . . . . . . . . . . . . . . . . . . 122Linking the ODM library .... . . . . . . . . . . . . . . . . . . . . . . . . . . . . . . . . . . . . . . . . . . . . . . . . . . . . 123Configuring the CSSD resource manually ... . . . . . . . . . . . . . . . . . . . . . . . . . . . . . . . 124Preventing automatic startup of Oracle Clusterware .... . . . . . . . . . . . . . . . 125Creating the Oracle RAC database .... . . . . . . . . . . . . . . . . . . . . . . . . . . . . . . . . . . . . . . . . 126Preventing automatic database startup .... . . . . . . . . . . . . . . . . . . . . . . . . . . . . . . . . 126Configuring VCS service groups for Oracle RAC .... . . . . . . . . . . . . . . . . . . . . . 127
Upgrading to Oracle RAC 11g Release 2 .... . . . . . . . . . . . . . . . . . . . . . . . . . . . . . . . . . . . . . . 133Supported upgrade paths .... . . . . . . . . . . . . . . . . . . . . . . . . . . . . . . . . . . . . . . . . . . . . . . . . . . . 133Preparing to upgrade Oracle RAC .... . . . . . . . . . . . . . . . . . . . . . . . . . . . . . . . . . . . . . . . . 134Upgrading Oracle RAC binaries ... . . . . . . . . . . . . . . . . . . . . . . . . . . . . . . . . . . . . . . . . . . . . 135Migrating the Oracle RAC database .... . . . . . . . . . . . . . . . . . . . . . . . . . . . . . . . . . . . . . . 135Performing post-upgrade tasks ... . . . . . . . . . . . . . . . . . . . . . . . . . . . . . . . . . . . . . . . . . . . . 135
9Contents

Contents10

Release Notes
This chapter includes the following topics:
■ Introduction
■ System Requirements
■ List of products
■ Fixed issues
■ Known issues
■ Software limitations
■ Changes in Storage Foundation High Availability
■ Downloading the rolling patch archive
■ List of patches
■ Installing the Veritas software for the first time
■ Installing with JumpStart
■ Installing 5.1 RP1 using the web-based installer
■ Prerequisites for upgrading to 5.1 RP1
■ Supported upgrade paths
■ Upgrading 5.1 to 5.1 RP1
■ Verifying software versions
■ Removing and rolling back
■ Documentation addendum
1Chapter

IntroductionThis document provides information about the Storage Foundation and HighAvailability Solutions 5.1 Rolling Patch 1.
For important updates regarding this release, review the Late-Breaking NewsTechNote on the Symantec Technical Support website:
http://entsupport.symantec.com/docs/334829
The hardware compatibility list contains information about supported hardwareand is updated regularly. For the latest information on supported hardware visit:
http://entsupport.symantec.com/docs/330441
Before installing or upgradingStorage Foundation andHighAvailability Solutionsproducts, review the current compatibility list to confirm the compatibility ofyour hardware and software.
System RequirementsThis section describes the system requirements for this release
Supported Solaris operating systemsThis release of theVeritas products is supported on the followingSolaris operatingsystems:
■ Solaris 9 (SPARC Platform 32-bit and 64-bit) with Update 8 or later
■ Solaris 10 (SPARC or x64 Platform 64-bit) with Update 6 or later
If necessary, upgrade Solaris before you install the Veritas products.
Install all the latest required Solaris patches listed in this Release Notes.
See “Required Solaris patches” on page 12.
For important updates regarding this release, review the Late-Breaking NewsTechNote on the Symantec Technical Support website:
http://entsupport.symantec.com/docs/334829
Required Solaris patchesBefore installing Veritas SFHA, ensure that the correct Solaris patches areinstalled.
See http://sunsolve.sun.com for the latest Solaris patch updates.
Release NotesIntroduction
12

The following patches (or a later revision of those patches) are required for SolarisSPARC:
Table 1-1 Solaris SPARC patches
Sun patch numberOperating system
114477-04122300-29 - required for Live Upgrade
Solaris 9
119254-06119042-02125731-02128306-05127111-01
Solaris 10
The following patches (or a later revision of those patches) are required for Solarisx64:
Table 1-2 Solaris x64 patches
Sun patch numberOperating system
118344-14118855-36119043-11119131-33120012-14125732-05127128-11
Solaris 10
Database requirementsThe following TechNote identifies the most current information on supporteddatabases (Oracle Single Instance, DB2, and Sybase) and operating systemcombinations:
http://entsupport.symantec.com/docs/331625
Note: SF and SFCFS support runningOracle, DB2, and Sybase onVxFS andVxVM.
SF and SFCFS do not support running SFDB tools with DB2 and Sybase.
13Release NotesSystem Requirements

List of productsApply this patch for the followingVeritasStorageFoundationandHighAvailabilityproducts:
■ Veritas Storage Foundation (SF)
■ Veritas Storage Foundation and High Availability (SFHA)
■ Veritas Storage Foundation Cluster File System (SFCFS)
■ Veritas Storage Foundation Cluster File System and High Availability(SFCFSHA)
■ Veritas Storage Foundation for Oracle RAC (SF Oracle RAC)
■ Veritas Volume Manager (VM)
■ Veritas File System (FS)
■ Veritas Cluster Server (VCS)
Fixed issuesThe following sections describe the Veritas Storage FoundationHighAvailabilityissues that were fixed in this release.
■ Veritas Storage Foundation fixed issues in 5.1 RP1
■ Veritas Volume Manager fixed issues in 5.1 RP1 release
■ Veritas File System fixed issues in 5.1 RP1 release
■ Veritas Storage Foundation Cluster File System fixed issues in 5.1 RP1 release
■ Veritas Storage Foundation for Oracle RAC fixed issues in 5.1 RP1
■ Veritas Cluster Server fixed issues in 5.1 RP1
■ Veritas Cluster Server agents for Veritas VolumeReplicator fixed issues in 5.1RP1
■ Storage Foundation Manager fixed issues in 5.1 RP1
■ VEA fixed issues in 5.1 RP1
Release NotesList of products
14

Veritas Volume Manager fixed issues in 5.1 RP1 release
Table 1-3 Veritas Volume Manager 5.1 RP1 fixed issues
DescriptionFixedissues
vxconfigd dumped core in dg_config_compare() while upgrading to 5.1.1972852,1972848
VxVM 5.0MP3RP3 patch 122058-13 disables vxfsldlic service and preventsboot multi-user mode after jumpstart
1955693
EFI: Prevent multipathing don't work for EFI disk1938484
VxVM: checkin the fmrshowmap utility1937841
I/O stuck in vxvm caused cluster node panic1915356
vxconfigd dumps core in get_prop()1935297
Corrupted Blocks in Oracle after Dynamic LUN expansion and vxconfigdcore dump
1907796
vxdg move failed silently and drops disks.1901827
[VVR] Every I/O on smartsync enabled volume under VVR leaks memory1899688
vxlustart customer is unable to do live upgrade with Solaris Zone on vxfs1889747
vxconfigd lose license information, vxesd leaking File descriptors1886007
When running iotest on volume, primary node runs out of memory1884070
VVR: Primary Panic in vol_ru_replica_sent()1881336
Layeredvolumesnot startable due toduplicate rid invxrecover global volumelist.
1872743
Dump device changed to none after boot disk encapsulation1870049
Cache Object corruption when replaying the CRECs during recovery1860892
CVM master in the VVR Primary cluster panic when rebooting the slaveduring VVR testing
1857729
vxvm vxdisk error v-5-1-8643 device 0_bpcs001_fra: resize failed:1850166
Data corruption seen on cdsdisks on Solaris-x86 in several customer cases1846165
vxrootadmdoes not update the partition tablewhile doing a grow operation1840832
15Release NotesFixed issues

Table 1-3 Veritas Volume Manager 5.1 RP1 fixed issues (continued)
DescriptionFixedissues
After adding new luns one of the nodes in 3 node CFS cluster hangs1840673
CERT : pnate test hang I/Ogreater than200 seconds during the filer giveback1835139
TP:Solaris:reclamation causes data corruption1834848
After pulling out FC cables of local site array, plex becameDETACHED/ACTIVE
1826088
Unable to initialize and use ramdisk for VxVM use1825516
Need for dmp_revive_paths( in dmp reconfiguration/restore_demon codepath.
1825270
supportability feature/messages for plex state change, DCOmap clearance,usage of fast re-sync by vxplex
1792795
VVR: VRAS: AIX: vradmind dumps core during collection of memory stats.1766452
Refreshing private region structures degrades performance during "vxdisklisttag" on a setup of more than 400 disks.
1664952
An ioctl interrupted with EINTR causes frequent vxconfigd exit()'s on4.1MP4RP3
1528160
CVR: I/O hang on slave if master (logowner) crashes with DCM active.1479735
Veritas File System fixed issues in 5.1 RP1 release
Table 1-4 Veritas File System 5.1 RP1 fixed issues (listed incidentnumber/parent number)
DescriptionFixedissues
mount usage error message is thrown while using from /opt/VRTS/bin1979429
fsadm -R returns EFAULT in certain scenarios.1978029
conform.backup test is skipped even if no local zone is available.1976287
vxdisk reclaim fails on dg version 140 works only with ver 150-Cannotreclaim space on dg/vols created on 5.0MP3 after 5.1 upgrade.
1973739
Wrong boundary for reclamation on Hitachi AMS2000 Series1973539
Release NotesFixed issues
16

Table 1-4 Veritas File System 5.1 RP1 fixed issues (listed incidentnumber/parent number) (continued)
DescriptionFixedissues
use separate structures for ioctl interfaces and CFS messages1972882
full fsck is very slow on an fs with many ilist holes.1972207
CFS-Command "vxupgrade" test failed.1969334
LM-conform test odm hits an assert of "f:fdd_advreload:2"1967027
LM.CMDS->fsck->full->scripts->fextop_12 fails1961790
CFS.Comform->revnlookuphit "vx_msgprint" via "vx_cfs_iread" on the slavenode
1960436
cfs odm stress/noise tests failed due to "bcmp error"1958198
CFS-Conformance test failed1957365
CFS-Conformance-Reconfig test hit assert "f:vx_validate_cistat:3"1957296
LM -conformance/fcl/fcl_fsetquota.3 is failing1957043
CFS cmds:fsck is failing1957035
fsqa lm vxmssnap.9 test fails1957032
cfs-cmds aborting due to fsck, mount, fsted, libtst 64-bit binaries1956926
CFS-Conformance test hit assert "f:vx_mark_fset_clean:2”1954897
LM-Command "vxedquota" test failed.1953913
LM / CFS - Cmds-> alerts test failed.1952827
LM / CFS -Cmds-> vxtunefs test failed.1952818
Fix the vxrsh and vxproxyrshd processes for cfs reconfig testing.1949962
cfs.conform.dbed hits assert "..f:vx_imap_process_inode:4a".� by"..vx_workitem_process".�
1949077
kernel-conform "sunppriv" and "getattr" tests are missing1948451
mkdstfs fails to add new volumes1947359
Due to incorrect Makefile 'make clobber' is removing mkdstfs1947356,1883938
17Release NotesFixed issues
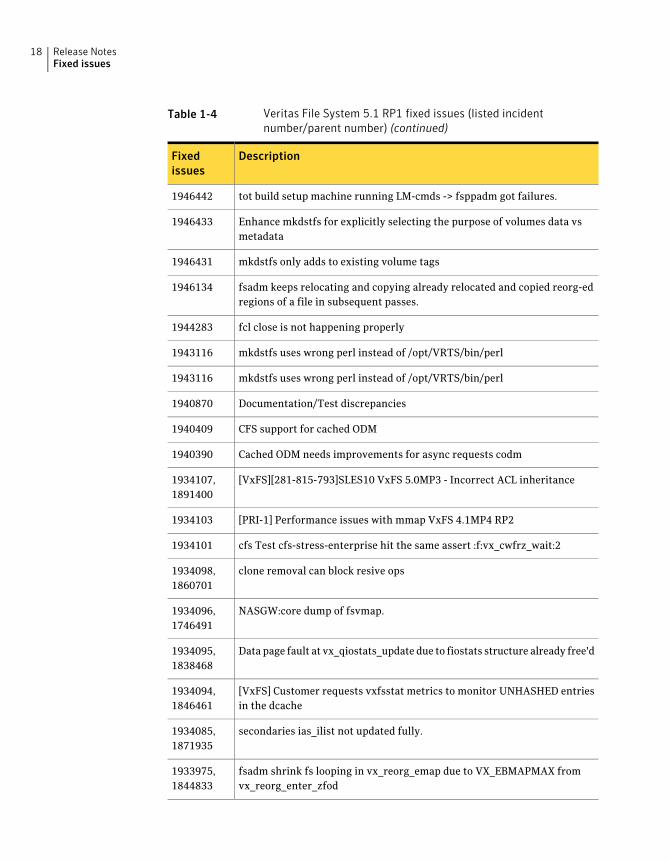
Table 1-4 Veritas File System 5.1 RP1 fixed issues (listed incidentnumber/parent number) (continued)
DescriptionFixedissues
tot build setup machine running LM-cmds -> fsppadm got failures.1946442
Enhance mkdstfs for explicitly selecting the purpose of volumes data vsmetadata
1946433
mkdstfs only adds to existing volume tags1946431
fsadm keeps relocating and copying already relocated and copied reorg-edregions of a file in subsequent passes.
1946134
fcl close is not happening properly1944283
mkdstfs uses wrong perl instead of /opt/VRTS/bin/perl1943116
mkdstfs uses wrong perl instead of /opt/VRTS/bin/perl1943116
Documentation/Test discrepancies1940870
CFS support for cached ODM1940409
Cached ODM needs improvements for async requests codm1940390
[VxFS][281-815-793]SLES10 VxFS 5.0MP3 - Incorrect ACL inheritance1934107,1891400
[PRI-1] Performance issues with mmap VxFS 4.1MP4 RP21934103
cfs Test cfs-stress-enterprise hit the same assert :f:vx_cwfrz_wait:21934101
clone removal can block resive ops1934098,1860701
NASGW:core dump of fsvmap.1934096,1746491
Data page fault at vx_qiostats_update due to fiostats structure already free'd1934095,1838468
[VxFS] Customer requests vxfsstat metrics to monitor UNHASHED entriesin the dcache
1934094,1846461
secondaries ias_ilist not updated fully.1934085,1871935
fsadm shrink fs looping in vx_reorg_emap due to VX_EBMAPMAX fromvx_reorg_enter_zfod
1933975,1844833
Release NotesFixed issues
18
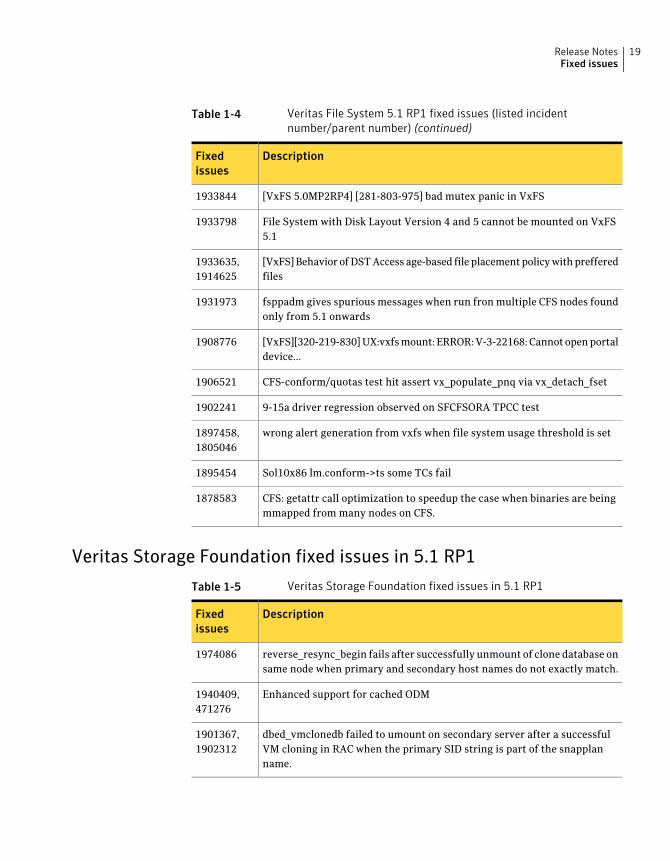
Table 1-4 Veritas File System 5.1 RP1 fixed issues (listed incidentnumber/parent number) (continued)
DescriptionFixedissues
[VxFS 5.0MP2RP4] [281-803-975] bad mutex panic in VxFS1933844
File System with Disk Layout Version 4 and 5 cannot be mounted on VxFS5.1
1933798
[VxFS]Behavior ofDSTAccess age-based file placementpolicywithprefferedfiles
1933635,1914625
fsppadm gives spurious messages when run fron multiple CFS nodes foundonly from 5.1 onwards
1931973
[VxFS][320-219-830]UX:vxfsmount: ERROR:V-3-22168: Cannot openportaldevice...
1908776
CFS-conform/quotas test hit assert vx_populate_pnq via vx_detach_fset1906521
9-15a driver regression observed on SFCFSORA TPCC test1902241
wrong alert generation from vxfs when file system usage threshold is set1897458,1805046
Sol10x86 lm.conform->ts some TCs fail1895454
CFS: getattr call optimization to speedup the case when binaries are beingmmapped from many nodes on CFS.
1878583
Veritas Storage Foundation fixed issues in 5.1 RP1
Table 1-5 Veritas Storage Foundation fixed issues in 5.1 RP1
DescriptionFixedissues
reverse_resync_begin fails after successfully unmount of clone database onsame node when primary and secondary host names do not exactly match.
1974086
Enhanced support for cached ODM1940409,471276
dbed_vmclonedb failed to umount on secondary server after a successfulVM cloning in RAC when the primary SID string is part of the snapplanname.
1901367,1902312
19Release NotesFixed issues
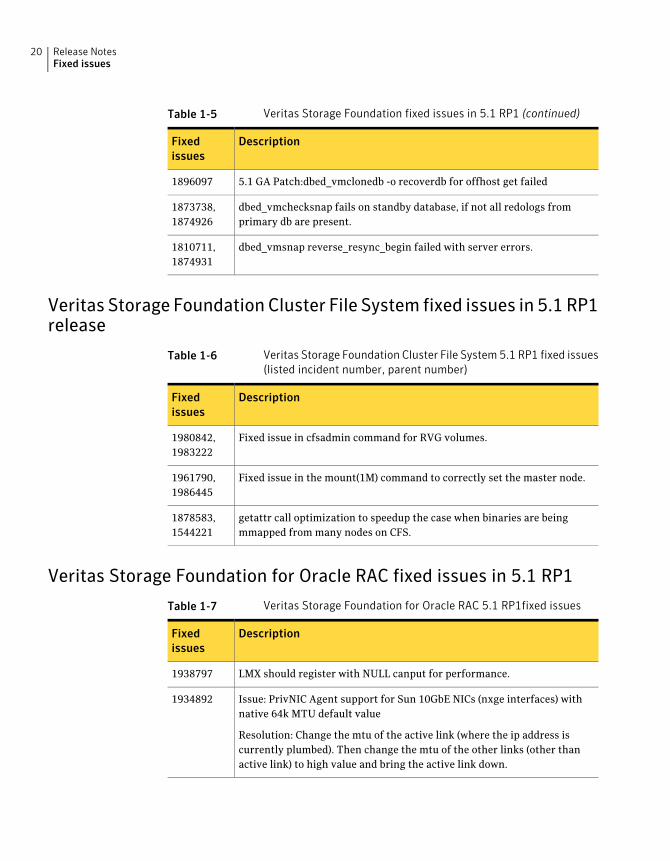
Table 1-5 Veritas Storage Foundation fixed issues in 5.1 RP1 (continued)
DescriptionFixedissues
5.1 GA Patch:dbed_vmclonedb -o recoverdb for offhost get failed1896097
dbed_vmchecksnap fails on standby database, if not all redologs fromprimary db are present.
1873738,1874926
dbed_vmsnap reverse_resync_begin failed with server errors.1810711,1874931
Veritas Storage Foundation Cluster File System fixed issues in 5.1 RP1release
Table 1-6 Veritas Storage Foundation Cluster File System 5.1 RP1 fixed issues(listed incident number, parent number)
DescriptionFixedissues
Fixed issue in cfsadmin command for RVG volumes.1980842,1983222
Fixed issue in the mount(1M) command to correctly set the master node.1961790,1986445
getattr call optimization to speedup the case when binaries are beingmmapped from many nodes on CFS.
1878583,1544221
Veritas Storage Foundation for Oracle RAC fixed issues in 5.1 RP1
Table 1-7 Veritas Storage Foundation for Oracle RAC 5.1 RP1fixed issues
DescriptionFixedissues
LMX should register with NULL canput for performance.1938797
Issue: PrivNIC Agent support for Sun 10GbE NICs (nxge interfaces) withnative 64k MTU default value
Resolution: Change the mtu of the active link (where the ip address iscurrently plumbed). Then change the mtu of the other links (other thanactive link) to high value and bring the active link down.
1934892
Release NotesFixed issues
20

Table 1-7 Veritas Storage Foundation for Oracle RAC 5.1 RP1fixed issues(continued)
DescriptionFixedissues
Issue: Remove internal name built during linking libvcsmm (for Oracle11gR2)
Resolution: Remove internal name recorded by the vcsmmbuild scriptwhilebuilding vcsmm library.
1932014
Fixed an issue in LMXwhere itmay cause panic due to reuse of a freed buffer.1908916
Issue: cssd agent support forOracle 11gR2Resolution: cssd agent ismodifiedto support 11gR2 framework. 1908916 Issue: Panic lmx buffer modifiedafter being freed
Resolution: Fix themanipulation of thework queue tail pointer/ done queuetail pointer whenever the request is removed.
1891389
Issue:MultiPrivNIC resource state change toUNKNOWNoncemembernodeshutdown
Resolution: The sumof thenumbernodes that are visible fromall the deviceswould be zero if there is no valid LLT device. The code has been changed tohandle this case.
1853839
Veritas Cluster Server fixed issues in 5.1 RP1
Table 1-8 Veritas Cluster Server 5.1 RP1 fixed issues
DescriptionFixedissues
[IPMultiNICB][410-647-713][AIG] Inazone, if there aremultiple IPMultiNICBresources on same subnet, issues with source address of IP pkts.
1975424
[VCS ASMInstAgent]ASMInstAgent Monitor problem inside a zone wherethe oracle home directory is NFS / NAS mounted inside the zone
1972789
[VCSOR]ASMInstAgent does not detect the state of the instance correctlyinside local zones.
1972770
Postpatch script throws an error while installing in the non-global zonethough llt and gab are hollow packages
1968572
ASMInstAgent dumpipng core.1962548
21Release NotesFixed issues

Table 1-8 Veritas Cluster Server 5.1 RP1 fixed issues (continued)
DescriptionFixedissues
[VCS Oracle Agent] [410-989-573] Oracle Agent Monitor problem inside azonewhere the oracle homedirectory isNFS /NASmounted inside the zone
1954723
[VCSOR] ASMDGAgent should disable and enable diskgroups in offline andonline EPs for 11g R2.
1950427
haalert CLI hangs if engine is not in running state.1941647
vxfentsthdw should detect storage arrays which interpret NULL keys asvalid for registrations/reservations
1922411
[VCSOR][240-998-619] Changes made to Oracle agent via e1722109 do nothonour ContainerName attribute
1916022
ASMagent connecting as sysdba instead of sysasm for 11gR21916004
[VCS][281-889-442] hares allows to create resources which has "." specialcharacter
1915909
group stuck at OFFLINE|STOPPING state when there is no ip to be cleanedin IPMultiNICB.
1911287
[ENGINE] Don't set MonitorOnly to 0 if ExternalStateChange does not have"OfflineGroup" value
1874267
LLT should give error if an attempt is made to configure more than 8 links(LLT_MAX_LINK) under LLT
1870424
SxRT5.1:Oakmont:IPMultiNICB:Resourcedoesnot comeonlinewhen failoverfrom paniced node
1848114
[SFW-HA 5.1 GCO] Symantec SE - GCO failover does not work when useraccount has "!" in name.
1504123
Veritas Cluster Server agents for Veritas Volume Replicator fixed issuesin 5.1 RP1
Noaddtional fixed issues exist forVeritas Cluster Server agents forVeritasVolumeReplicator in the 5.1 RP1 release.
Release NotesFixed issues
22

Storage Foundation Manager fixed issues in 5.1 RP1
Table 1-9 Storage Foundation Manager 5.1 RP1 fixed issues
DescriptionFixedissues
Configuration fails if 2.1CS is not configured anddirectly upgraded to 2.1RP1CS
1934914
Copyright year for Windows, Solaris and HP-UX patches are 20091931017
Licenses not getting discovered in case default locale is non-English1918582
when had is stopped/started vcs based monitoring should continue tofunction
1917308
Checkpoint size showing zero in Webgui1910997
LDR fails to display deployment summary1904090
Paths are not shown for one of the array ports whereas Luns informationis shown
1897156
'Refresh host' needed to populate the MHs info, after upgradingpackage/patch through sysaddon
1894441
Unable to add a host to the management server. V-39-4095-903 401Unauthorized User Error
1893699
Unable to add a host to the management server. V-39-4095-803 401Unauthorized User Error
1893244
LoP hosts get list out in 'Not Installed Hosts', when deployed the sysaddonfor Linux x86 MH
1889739
After deploying sysaddon patch the operation status pop up is not havinghost details
1888082
remove use of threads in Perl discovery1887241
vxlist core dumping after server firmware upgrade1878876
too many hareg processes seen on a machine where sfmh is installed1878266
DCLI does not properly handle 2 vdids for one OShandle1873461
prtdiag and psrinfo -v not supported in Solaris 8, causing LDRnot to displaycorrect results
1872805
Add support for DB2 9.x support1869752
23Release NotesFixed issues

Table 1-9 Storage Foundation Manager 5.1 RP1 fixed issues (continued)
DescriptionFixedissues
IPv6 address not discovered in SFM gui for AIX hosts1865225
Fix the library path for gvdid to work in case of HP 11.111861664
SFMH is uninstalled even if it was installed prior to install of SFW/SFWHA1858963
VEA/vxpal continuously generate errors 0xc1000039 in vm_vxisis.log withno apparent reason
1857468
When a VVRRVG goes offline it is reported as at risk, however when it goesonline again the state does not change in the UI
1855466
vxlist incorrectly shows nolabel flag for labeled disks1855087
db2exp process is frequently core dumping on cluster node1854459
vxship missing in VRTSsfmh for Linux1853081
DMP Connectivity Summary view slow and causes high db CPU1850797
Path type is empty on HP for SF 5.0 on 11.31-IA/PA1839795
Volume Migration fails because it cannot find a target enclosure1831711
Managing Storage Enclosure Summary reports 1 enclosure when actually3 exist
1831697
Addhost log information is off by one month1827451
dcli vdid can fail on HPUX LVM disks1826556
SFM needs vxsvc service running to administer but service is not started1826409
CS showing wrong gab port information1825858
Servlet Exception error after adding Opteron MH to CS1809918
postremove error messages on SFM uninstall1804496
SFM is reporting numerous could not set locale correctly messages inerror.log
1797382
VRTSsfmh error log reporting numerous errors from managed hosts1791528
dclisetup.sh needs to be run again after upgrade to VxVM 5.11791063
Release NotesFixed issues
24

Table 1-9 Storage Foundation Manager 5.1 RP1 fixed issues (continued)
DescriptionFixedissues
WEBUI shows MH status as "Faulted - VEA: vxsvc or StorageAgent is notrunning" though all services running
1712298
VEA fixed issues in 5.1 RP1
Table 1-10 VEA 5.1 RP1 fixed issues
DescriptionFixedissues
vmprov does not calculate disk nolabel state correctly.1961540
vxsvc running as a daemon shows stderr and stdout printf's1961519
isisd wont start, core file generated.1958763
VEA gui fails to show controller-enclosures mapping.1958351
Appropriate message should be display while creating Multiple Volumewhen size is incorrect
1954150
Not able to edit Log Settings for Alert/Task log.1954118
While launching Gui, VEA Error message thrown "creating an instance ofa class vrts.vvr.ce.REntryPoint failed"
1954101
Incorrect host version in VEA gui for 5.1RP1.1954047
vxsvc does not start after installing RP1.1953701
the replicated data size is showing with a negative value in VEA. (>TB)1925365
Finish button for Break-off Snapshot for a Vset does nothing1879928
VVR event notification sending 2 messages per event1873583
Enabling FastResync has no effect when creating a RAID-5 volume1857207
Core generated while downloading extension using client utility.1846581
Core got generated while performing Volume Set operation.1840050
Need to support volume tagging related operations of GUI inVMPROVIDER1635720
25Release NotesFixed issues

Known issuesThe following are newadditional Storage Foundation andHighAvailability knownissues in this 5.1 RP1 release.
■ Veritas Storage Foundation known issues in 5.1 RP1 release
■ Veritas Volume Manager known issues in 5.1 RP1 release
■ Veritas File System known issues in 5.1 RP1 release
■ Veritas Storage FoundationCluster File Systemknown issues in 5.1RP1 release
■ Veritas Storage Foundation for Oracle RAC known issues in 5.1 RP1
■ Veritas Cluster Server known issues in 5.1 RP1
■ Veritas Cluster Server agents for Veritas Volume Replicator known issues in5.1 RP1
Veritas Storage Foundation known issues in 5.1 RP1 releaseThe following are new additional Storage Foundation known issues in this 5.1RP1 release.
Live Upgrade may fail on Solaris 2.10 x86 (1984664)This Live Upgrade issue is specific to Solaris 2.10 x86 operating system. If yourun the VxVM vxlustart script and choose a disk for the destination bootenvironment (BE) that ismissing the fdisk "SOLARIS System" partition, the LiveUpgrade operation fails to properly setup the destination BE.
Workaround:
Run the fdisk command on the destination BE disk before performing the LiveUpgrade operation. If the fdisk table is missing or does not contain a "SOLARISSystem" partition, it must be setup.
Release NotesKnown issues
26
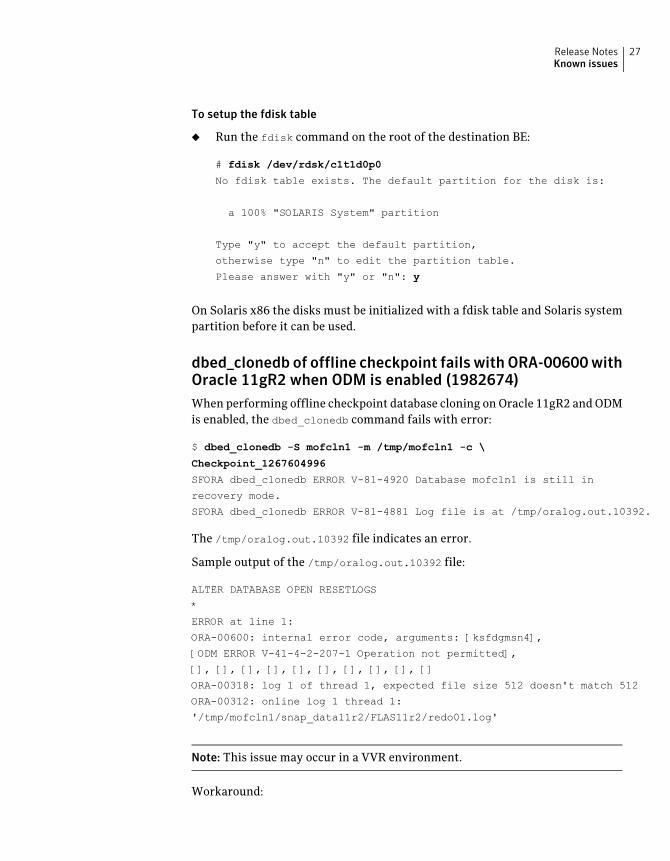
To setup the fdisk table
◆ Run the fdisk command on the root of the destination BE:
# fdisk /dev/rdsk/c1t1d0p0
No fdisk table exists. The default partition for the disk is:
a 100% "SOLARIS System" partition
Type "y" to accept the default partition,
otherwise type "n" to edit the partition table.
Please answer with "y" or "n": y
On Solaris x86 the disks must be initialized with a fdisk table and Solaris systempartition before it can be used.
dbed_clonedb of offline checkpoint fails with ORA-00600withOracle 11gR2 when ODM is enabled (1982674)When performing offline checkpoint database cloning onOracle 11gR2 andODMis enabled, the dbed_clonedb command fails with error:
$ dbed_clonedb -S mofcln1 -m /tmp/mofcln1 -c \
Checkpoint_1267604996
SFORA dbed_clonedb ERROR V-81-4920 Database mofcln1 is still in
recovery mode.
SFORA dbed_clonedb ERROR V-81-4881 Log file is at /tmp/oralog.out.10392.
The /tmp/oralog.out.10392 file indicates an error.
Sample output of the /tmp/oralog.out.10392 file:
ALTER DATABASE OPEN RESETLOGS
*
ERROR at line 1:
ORA-00600: internal error code, arguments: [ksfdgmsn4],
[ODM ERROR V-41-4-2-207-1 Operation not permitted],
[], [], [], [], [], [], [], [], [], []
ORA-00318: log 1 of thread 1, expected file size 512 doesn't match 512
ORA-00312: online log 1 thread 1:
'/tmp/mofcln1/snap_data11r2/FLAS11r2/redo01.log'
Note: This issue may occur in a VVR environment.
Workaround:
27Release NotesKnown issues

Perform the offline checkpoint cloning for 11gR2 on another ORACLE_HOMEwhereODM is disabled.
Dbed_ckptrollback fails for -F datafile option for Oracledatabase version 11gr2 (1959400)On Oracle 11gr2 database, dbed_ckptrollback fails with following error "SFORArb.file ERROR V-81-3038 Error occurred while querying Oracle Database." Theroot cause of this problem is an Oracle 11GR2 defect (8367917).
Workaround:
To manually recover the datafile
1 Take the corrupt data file offline.
2 Mount the checkpoint using dbed utilities.
3 Restore the corrupt file manually.
4 Recover the datafile.
5 Bring the datafile online.
Veritas Volume Manager known issues in 5.1 RP1 releaseThe following are new additional Veritas Volume Manager known issues in this5.1 RP1 release.
Changing naming scheme fails (1958711)Changing naming scheme fails for devices controlled by MPxIO driver on Solaris
There is no workaround at this time.
vxesd dump core when it starts (1897007)This issue happens during the casewhen the system is connected to a switchwithmore than 64 ports.
Workaround: To fix the issue, change the switch to lesser port number.
Veritas File System known issues in 5.1 RP1 releaseNo additional known issues exist for Veritas File System in the 5.1 RP1 release.
Release NotesKnown issues
28

Veritas Storage Foundation Cluster File System known issues in 5.1RP1 release
The following are new additional Veritas Storage Foundation Cluster File Systemknown issues in this 5.1 RP1 release.
NFS issues with VxFS checkpoint (1974020)NFSclientsmountingVxFS checkpoints that areNFS-exported bySFCFSorSFHAcluster nodes using a Virtual IP may receive the following error message uponVirtual IP failover:
Stale NFS file handle
This is a result of major numbers of VxFS checkpoints not necessarily being thesame on all SFCFS or SFHA cluster nodes.
There is no workaround at this time.
installrp recognizes SFCFSHA5.1RP1 as SFCFS after installingSFCFSHA 5.1RP1 using JumpStart (1991079)The installrp script recognizesSFCFSHA5.1RP1asSFCFSafter installingSFCFSHA5.1RP1 using JumpStart.
Workaround:
After you finish running JumpStart, use the installcfs -license -ha commandto license SFCFSHA. Run installrp to finish the configuration.
Veritas Storage Foundation for Oracle RAC known issues in 5.1 RP1The following are new additional Veritas Storage Foundation for Oracle RACknown issues in this 5.1 RP1 release.
Message about mmpl_reconfig_iocti in system logIf the Veritas Cluster Server Membership Module (VCSMM) calls themmpl_reconfig_iocti function of the fencingmodule (VxFEN) at the timeof systemstartup, the call fails displaying the following error message on the console andthe /var/adm/messages file:
mmpl_reconfig_iocti: dev_iocti failed, vxfen may not be configured
You may ignore this message.
29Release NotesKnown issues

Veritas Cluster Server known issues in 5.1 RP1The following are new additional Veritas Cluster Server known issues in this 5.1RP1 release.
VCSagent forOracle: Health checkmonitoring is not supportedfor Oracle database 11g R1 and 11g R2 (1985055)Health checkmonitoring is not supported for Oracle database 11g R1 and 11g R2.
Workaround:
Set MonitorOption attribute for Oracle resource to 0.
VCS agent for Oracle: Make sure that the ohasd has an entryin the init scripts (1985093)Make sure that the ohasd process has an entry in the init scripts so that when theprocess is killed or themachine is rebooted, this automatically restarts the process.
VCS agent for Oracle: Intentional Offline does not workIntentional Offline does not work for the VCS agent for Oracle.
The ASMInstAgent does not support having pfile/spfile for theASM Instance on the ASM diskgroupsThe ASMInstAgent does not support having pfile/spfile for the ASM Instance onthe ASM diskgroups.
Workaround:
Have a copy of the pfile/spfile in the default $GRID_HOME/dbs directory tomakesure that this would be picked up during the ASM Instance startup.
Veritas Cluster Server agents for Veritas Volume Replicator knownissues in 5.1 RP1
No known issues exist for Veritas Storage Foundation Cluster File System in the5.1 RP1 release.
Software limitationsThe following are additional Veritas Storage Foundation and High Availabilitysoftware limitations in this release.
Release NotesSoftware limitations
30

■ Veritas Storage Foundation software limitations in 5.1 RP1 release
■ Veritas Volume Manager software limitations in 5.1 RP1 release
■ Veritas Storage Foundation for Oracle RAC software limitations in 5.1 RP1
Veritas Storage Foundation software limitations in 5.1 RP1 releaseThe following are additional Veritas Storage Foundation software limitations inthis release.
Thin reclamation support limitationsThe thin reclamation feature has the following limitations:
■ Thin reclamation only supports VxFS file systems on VxVM volumes. Otherfile systems are not supported.
■ Thin reclamation is only supported for mounted volumes.The file system map is not available to reclaim the unused storage space onunmounted file systems.
■ Thin reclamation is not supported on raw VxVM volumes.VxVM has no knowledge of application usage on raw volumes. Therefore,VxVM cannot perform the reclamation on raw volumes. The applicationmustperform the reclamation on raw volumes.
■ Thin reclamation is not supported on the RAID-5 layout.The thin reclamation is storage dependent and the space underneath may ormay not be reclaimed fully. Thin reclamation is not supported in a RAID-5layout, because data consistency cannot be ensured.
■ Thin Reclamation is not supported on volumes with snapshots or snapshotsthemselves. Any reclamation requests on such volumes or snapshots or theircorresponding mount points will not result in any reclamation of theirunderlying storage.
Veritas Volume Manager software limitations in 5.1 RP1 releaseThe following are additional VeritasVolumeManager software limitations in thisrelease.
Cluster Volume Manager (CVM) fail back behavior fornon-Active/Active arrays (1441769)This describes the fail backbehavior fornon-Active/Active arrays in aCVMcluster.This behavior applies to A/P, A/PF, APG, A/A-A, and ALUA arrays.
31Release NotesSoftware limitations

When all of the Primary paths fail or are disabled in a non-Active/Active array ina CVM cluster, the cluster-wide failover is triggered. All hosts in the cluster startusing the Secondary path to the array. When the Primary path is enabled, thehosts fail back to the Primary path. However, suppose that one of the hosts in thecluster is shut down or brought out of the cluster while the Primary path isdisabled. If the Primary path is then enabled, it does not trigger failback. Theremaining hosts in the cluster continue to use the Secondary path. When thedisabled host is rebooted and rejoins the cluster, all of the hosts in the cluster willcontinue using the Secondary path. This is expected behavior.
ForA/P,APG,A/A-A, andALUAarrays, if the disabled host is rebooted and rejoinsthe cluster before the Primary path is enabled, enabling the path does trigger thefailback. In this case, all of the hosts in the cluster will fail back to the Primarypath.
DMP settings for NetApp storage attached environmentTo minimize the path restoration window and maximize high availability in theNetApp storage attached environment, set the DMP restore daemon cycle to 60seconds. The default value of this tunable is 300 seconds. The change is persistentacross reboots.
Issue the following command at the prompt:
# vxdmpadm settune dmp_restore_internal=60
To verify the new setting, use the following command:
# vxdmpadm gettune dmp_restore_internal
Veritas Storage Foundation for Oracle RAC software limitations in 5.1RP1
The following are additional Veritas Storage Foundation for Oracle RAC softwarelimitations in this release.
CRSResource agentCRSResource agent is not supported for Oracle 11g Release 2.
Changes in Storage Foundation High AvailabilityThe following sections describe changes in product behavior in this release.
Release NotesChanges in Storage Foundation High Availability
32

About the new installrp scriptVeritas Storage Foundation and High Availability Solutions 5.1 RP1 provides anew upgrade script. To upgrade from Veritas Storage Foundation and HighAvailability Solutions version 5.1 or later, the recommended upgrade method isto use the new upgrade script. The installrp script allows you to upgrade all thepatches associated with the packages installed and then starts all the processes.
installrp script options
Table 1-11 shows command line options for the product upgrade script
FunctionCommand Line Option
Specifies the systems on which to run theupgrade options. If not specified, thecommand prompts for a system name.
[ system1 system2... ]
The -precheck option is used to confirm thatsystems meet the products installrequirements before installing.
[ -precheck ]
The -logpath option is used to select adirectory other than/opt/VRTS/install/logsas the locationwhere installrp log files, summary file, andresponse file are saved.
[ -logpath log_path ]
The -responsefile option is used toperform automated installations oruninstallations using information stored ina file rather thanprompting for information.<response_file> is the full path of thefile that contains configuration definitions.
[ -responsefile response_file ]
The -tmppath option is used to select adirectory other than /var/tmp as theworking directory for installrp. Thisdestination is where initial logging isperformed and where filesets are copied onremote systems before installation.
[ -tmppath tmp_path ]
The-hostfileoption specifies the locationof a file containing the system names forinstaller.
[ -hostfile hostfile_path ]
33Release NotesChanges in Storage Foundation High Availability

Table 1-11 shows command line options for the product upgrade script(continued)
FunctionCommand Line Option
The -jumpstart option is used to generatefinish scripts which can be used by SolarisJumpStart Server for automated installationof all packages and patches for everyproduct, an available location to store thefinish scripts should be specified as acomplete path. The -jumpstart option issupported on Solaris only.
[ -jumpstart jumpstart_path
The-keyfile option specifies a key file forSSH. When this option is used, -i<ssh_key_file> is passed to every SSHinvocation.
[ -keyfile ssh_key_file ]
The -patchpath option is used to definethe complete path of a directory available toall install systems (usually NFS mounted)that contains all patches to be installed byinstallrp.
[ -patchpath patch_path ]
The-rootpath option is used to re-root theinstall of all packages to the given path.
On Solaris, -rootpath passes -R <root_path>to pkgadd.
[ -rootpath root_path ]
Release NotesChanges in Storage Foundation High Availability
34

Table 1-11 shows command line options for the product upgrade script(continued)
FunctionCommand Line Option
The -rsh option is used when rsh and rcpare to be forced for communication thoughssh and scp is also setup between thesystems.
The -redirect option is used to displayprogress details without showing theprogress bar.
The-listpatchesoption is used todisplayproduct patches in the correct installationorder.
The -pkginfo option is used to display thecorrect installation order of packages andpatches. This option is available with orwithout one of following options: -allpkgs,-minpkgs, and -recpkgs.
The -serial option is used to performinstallation, uninstallation, start, and stopoperations, typically performedsimultaneously on all systems, in a serialfashion.
The-upgrade_kernelpkgs option is usedfor the rolling upgrade's upgrade of kernelpackages to the latest version
The -upgrade_nonkernelpkgs option isused for the rolling upgrade's upgrade ofnon-kernel packages. In this phase, VCSpackages and other agent packages areupgraded to the latest versions. Productkernel drivers are upgraded to the latestprotocol version.
[ -rsh | -redirect | -listpatches
| -pkginfo | -serial |
-upgrade_kernelpkgs |
-upgrade_nonkernelpkgs ]
CVM master node needs to assume the logowner role for VCS managedVVR resources
If youuseVCS tomanageVVRresources in aSFCFSorSFOracleRACenvironment,Symantec strongly recommends that you perform the steps in the section “Usingthe preonline_vvr trigger for RVGLogowner resources.” These steps ensure thatthe CVMmaster node always assumes the logowner role. Not doing this can result
35Release NotesChanges in Storage Foundation High Availability

in unexpected issues. These issues are due to a CVM slave node that assumes thelogowner role.
See “Using the preonline_vvr trigger for RVGLogowner resources” on page 106.
Downloading the rolling patch archiveThe patches included in the 5.1 RP1 release are available for download from theSymantec website. After downloading the 5.1 RP1 file, use the gunzip and tar touncompress and extract.
For the 5.1 RP1 download archive and instructions, see the following TechNoteon the Symantec Technical Support website:
http://entsupport.symantec.com/docs/334829
List of patchesThis section lists the patches and packages.
Table 1-12 Patches and packages for Solaris 9 on SPARC
Patch sizeProductsaffected
5.1 packagenames
Patch ID
35912 KBFSVRTSvxfs142633-02
39 MBSF, SFHA,SFCFS,SFCFSHA, SFOracle RAC
VRTSdbed142631-02
7.1 MBSFOracle RACVRTSdbac143696-01
71 MBVMVRTSvxvm142629-02
1540 KBSF, SFCFSVRTSodm143270-02
695 KBSFCFSVRTScavf143273-02
839 KBVCSVRTSllt143260-02
812 KBVCSVRTSgab143262-02
114 KBVCSVRTSvxfen143706-02
9497 KBVCSVRTSvcs143264-02
8 KBVCSVRTSvcsag143265-02
Release NotesDownloading the rolling patch archive
36

Table 1-12 Patches and packages for Solaris 9 on SPARC(continued)
Patch sizeProductsaffected
5.1 packagenames
Patch ID
890 KBVCSVRTScps143279-02
151 KBVCSVRTSvcsea143276-02
27566 KBVEAVRTSob143687-01
9531 KBSFMHVRTSsfmh141270-02
Table 1-13 Patches and packages for Solaris 10 on SPARC
Patch sizeProductsaffected
5.1 packagenames
Patch ID
46436 KBFSVRSTvxfs142634-02
39 MBSF, SFHA,SFCFS,SFCFSHA, SFOracle RAC
VRTSdbed142631-02
5.8 MBSFOracle RACVRTSdbac143697-01
73 KBVMVRTSvxvm142629-02
1540 KBSF, SFCFSVRTSodm143271-02
697 KBSFCFSVRTScavf143274-02
723 KBVCSVRTSllt143261-02
1533 KBVCSVRTSgab143263-02
933 KBVCSVRTSvxfen143707-02
18916 KBVCSVRTSvcs143264-02
755 KBVCSVRTSvcsag143265-02
1781 KBVCSVRTScps143279-02
299 KBVCSVRTSvcsea143276-02
45.6 MBVEAVRTSob143687-01
26 MBSFMHVRTSsfmh141270-02
37Release NotesList of patches

Table 1-14 Patches and packages for Solaris 10 on x64
Patch sizeProductsaffected
5.1 packagenames
Patch ID
28663 KBFSVRTSvxfs142635-02
19 MBSF, SFHA,SFCFS,SFCFSHA, SFOracle RAC
VRTSdbed142632-02
4.98 MBSFOracle RACVRTSdbac143698-01
423 MBVMVRTSvxvm142630-02
972 KBSF, SFCFSVRTSodm143272-02
701 KBSFCFSVRTScavf143275-02
739 KBVCSVRTSllt143266-02
581 KBVCSVRTSgab143267-02
916 KBVCSVRTSvxfen143708-02
20061 KBVCSVRTSvcs143268-02
1046 KBVCSVRTSvcsag143269-02
1848 KBVCSVRTScps143280-02
4343 KBVCSVRTSvcsea143277-02
52955 KBVEAVRTSob143693-01
23552 KBSFMHVRTSsfmh141752-02
Installing the Veritas software for the first timeThis section describes how to install a Storage Foundation and High AvailabilitySolutions product for the first time on a host and install 5.1 RP1. Review the 5.1Installation Guide and Release Notes for your product.
To install the Veritas software for the first time
1 Mount the 5.1 product disc and navigate to the folder that contains theinstallation program to install 5.1 GA binaries. Choose one of the followingto start the installation:
■ For Storage Foundation:
Release NotesInstalling the Veritas software for the first time
38

# ./installsf node1 node2 ... nodeN
■ For Storage Foundation HA:
# ./installsf -ha node1 node2 ... nodeN
■ For Storage Foundation Cluster File System:
# ./installsfcfs node1 node2 ... nodeN
■ For Storage Foundation Cluster File System HA:
# ./installsfcfs -ha node1 node2 ... nodeN
■ For Storage Foundation for Oracle RAC:
# ./installsfrac node1 node2 ... nodeN
■ For Veritas Cluster Server:
# ./installvcs node1 node2 ... nodeN
2 Review the installation prerequisites for upgrading to 5.1 RP1.
See “Prerequisites for upgrading to 5.1 RP1” on page 51.
3 Mount the 5.1 RP1 product disc and navigate to the folder that contains theinstallation program.
■ If the 5.1 product is installed and configured, then run the installrpscript to install 5.1 RP1.
# ./installrp [-rsh] node1 node2 ... nodeN
See “About the new installrp script” on page 33.
■ If the 5.1 product is installed andnot configured, run the installrp scriptto install 5.1 RP1 and configure the product.
# ./installrp [-rsh] node1 node2 ... nodeN
See “About the new installrp script” on page 33.
39Release NotesInstalling the Veritas software for the first time

The installrp script will give you an option to configure the product. Ifyou choose not to configure the product at the time of the 5.1 RP1installation, then proceed to step 4.
4 Mount the 5.1 product disc and navigate to the folder that contains theinstallation program. Run the same 5.1 installation script that you used instep 1, this time specifying the -configure option to configure the software.
■ For Storage Foundation:
# ./installsf -configure node1 node2 ... nodeN
■ For Storage Foundation HA:
# ./installsf -ha -configure node1 node2 ... nodeN
■ For Storage Foundation Cluster File System:
# ./installsfcfs -configure node1 node2 ... nodeN
■ For Storage Foundation Cluster File System HA:
# ./installsfcfs -ha -configure node1 node2 ... nodeN
■ For Storage Foundation for Oracle RAC:
# ./installsfrac -configure node1 node2 ... nodeN
■ For Veritas Cluster Server:
# ./installvcs -configure node1 node2 ... nodeN
See the 5.1 Installation for your product.
Installing with JumpStartThese JumpStart instructions assume aworking knowledge of JumpStart. See theJumpStart documentation that came with your operating system for details onusing JumpStart. Only fresh installations of Veritas product are supported usingJumpStart. Upgrading is not supported. The following procedure assumes astand-alone configuration.
For the language pack, you can use JumpStart to install packages. You add thelanguage packages in the script, and put those files in the JumpStart serverdirectory.
Release NotesInstalling with JumpStart
40
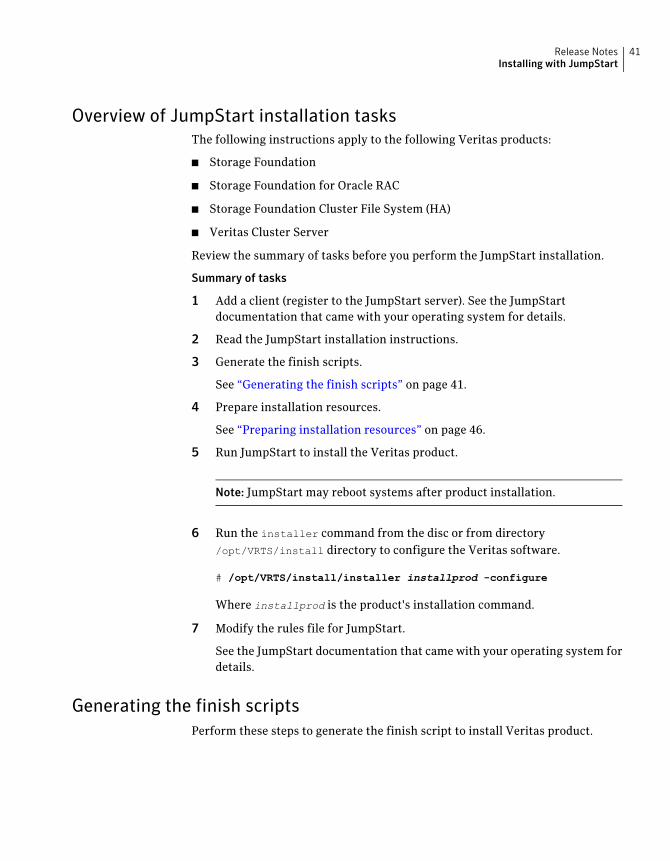
Overview of JumpStart installation tasksThe following instructions apply to the following Veritas products:
■ Storage Foundation
■ Storage Foundation for Oracle RAC
■ Storage Foundation Cluster File System (HA)
■ Veritas Cluster Server
Review the summary of tasks before you perform the JumpStart installation.
Summary of tasks
1 Add a client (register to the JumpStart server). See the JumpStartdocumentation that came with your operating system for details.
2 Read the JumpStart installation instructions.
3 Generate the finish scripts.
See “Generating the finish scripts” on page 41.
4 Prepare installation resources.
See “Preparing installation resources” on page 46.
5 Run JumpStart to install the Veritas product.
Note: JumpStart may reboot systems after product installation.
6 Run the installer command from the disc or from directory/opt/VRTS/install directory to configure the Veritas software.
# /opt/VRTS/install/installer installprod -configure
Where installprod is the product's installation command.
7 Modify the rules file for JumpStart.
See the JumpStart documentation that came with your operating system fordetails.
Generating the finish scriptsPerform these steps to generate the finish script to install Veritas product.
41Release NotesInstalling with JumpStart

To generate the script
1 Run the installrp program to generate the scripts.
# installrp -jumpstart directory_to_generate_scripts
Where thedirectory_to_generate_scripts is where youwant to put the scripts.
For example:
# ./installrp -jumpstart /js_scripts
2 When you are prompted to encapsulate the root disk automatically, chooseyes to do so. If you do not want to encapsulate it automatically, choose noand go to step 6.
3 Specify a disk group name for the root disk.
Specify the disk group name of the root disk to be encapsulated:
rootdg
4 Specify private region length.
Specify the private region length of the root disk to be
encapsulated: (65536)
5 Specify the disk's media name of the root disk to encapsulate.
Specify the disk media name of the root disk to be encapsulated:
(rootdg_01)
Release NotesInstalling with JumpStart
42

6 JumpStart finish scripts, installer scripts, uninstaller scripts of Veritasproducts, and encapsulation scripts are generated in the directory youspecified in step 1. Output resembles:
The finish scripts for AT50 is generated at
/js4/jumpstart_at50.fin
The installer script to configure AT is generated at
/js4/installat
The installer script to uninstall AT is generated at
/js4/uninstallat
The finish scripts for FS51 is generated at
/js4/jumpstart_fs51.fin
The installer script to configure FS is generated at
/js4/installfs
The installer script to uninstall FS is generated at
/js4/uninstallfs
The finish scripts for SF51 is generated at
/js4/jumpstart_sf51.fin
The installer script to configure SF is generated at
/js4/installsf
The installer script to uninstall SF is generated at
/js4/uninstallsf
The finish scripts for SFCFS51 is generated at
/js4/jumpstart_sfcfs51.fin
The installer script to configure SFCFS is generated at
/js4/installsfcfs
The installer script to uninstall SFCFS is generated at
/js4/uninstallsfcfs
The finish scripts for SFCFSHA51 is generated at
/js4/jumpstart_sfcfsha51.fin
The installer script to configure SFCFSHA is generated at
/js4/installsfcfsha
The installer script to uninstall SFCFSHA is generated at
/js4/uninstallsfcfsha
The finish scripts for SFHA51 is generated at
/js4/jumpstart_sfha51.fin
The installer script to configure SFHA is generated at
/js4/installsfha
The installer script to uninstall SFHA is generated at
/js4/uninstallsfha
The finish scripts for SFRAC51 is generated at
/js4/jumpstart_sfrac51.fin
The installer script to configure SF Oracle RAC is generated at
43Release NotesInstalling with JumpStart

/js4/installsfrac
The installer script to uninstall SF Oracle RAC is generated at
/js4/uninstallsfrac
The finish scripts for VCS51 is generated at
/js4/jumpstart_vcs51.fin
The installer script to configure VCS is generated at
/js4/installvcs
The installer script to uninstall VCS is generated at
/js4/uninstallvcs
The finish scripts for VM51 is generated at
/js4/jumpstart_vm51.fin
The installer script to configure VM is generated at
/js4/installvm
The installer script to uninstall VM is generated at
/js4/uninstallvm
The encapsulation boot disk script for VM is generated at
/js4/encap_bootdisk_vm51001000.fin
List the js_scripts directory.
# ls /js_scripts
You could select scripts according to the products. For example.
For SF:
encap_bootdisk_vm51001000.fin installsf jumpstart_sf51.fin uninstallsf
For SF Oracle RAC:
encap_bootdisk_vm51001000.fin installsfrac jumpstart_sfrac51.fin
uninstallsfrac
For SFHA:
encap_bootdisk_vm51001000.fin installsfha jumpstart_sfha51.fin
uninstallsfha
For VCS:
encap_bootdisk_vm51001000.fin jumpstart_vcs51.fin installvcs
uninstallvcs
Release NotesInstalling with JumpStart
44
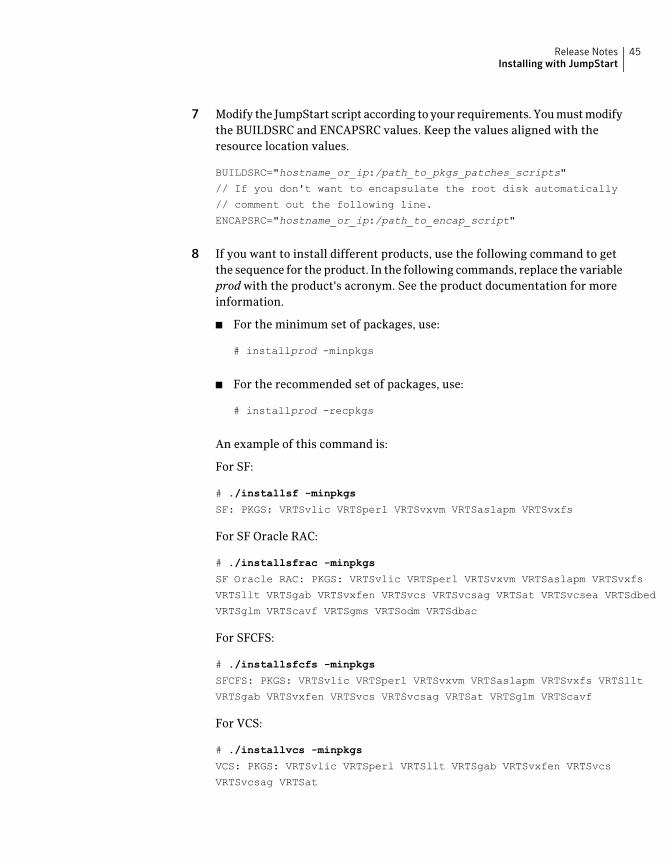
7 Modify the JumpStart script according to your requirements. Youmustmodifythe BUILDSRC and ENCAPSRC values. Keep the values aligned with theresource location values.
BUILDSRC="hostname_or_ip:/path_to_pkgs_patches_scripts"
// If you don't want to encapsulate the root disk automatically
// comment out the following line.
ENCAPSRC="hostname_or_ip:/path_to_encap_script"
8 If you want to install different products, use the following command to getthe sequence for the product. In the following commands, replace the variableprod with the product's acronym. See the product documentation for moreinformation.
■ For the minimum set of packages, use:
# installprod -minpkgs
■ For the recommended set of packages, use:
# installprod -recpkgs
An example of this command is:
For SF:
# ./installsf -minpkgs
SF: PKGS: VRTSvlic VRTSperl VRTSvxvm VRTSaslapm VRTSvxfs
For SF Oracle RAC:
# ./installsfrac -minpkgs
SF Oracle RAC: PKGS: VRTSvlic VRTSperl VRTSvxvm VRTSaslapm VRTSvxfs
VRTSllt VRTSgab VRTSvxfen VRTSvcs VRTSvcsag VRTSat VRTSvcsea VRTSdbed
VRTSglm VRTScavf VRTSgms VRTSodm VRTSdbac
For SFCFS:
# ./installsfcfs -minpkgs
SFCFS: PKGS: VRTSvlic VRTSperl VRTSvxvm VRTSaslapm VRTSvxfs VRTSllt
VRTSgab VRTSvxfen VRTSvcs VRTSvcsag VRTSat VRTSglm VRTScavf
For VCS:
# ./installvcs -minpkgs
VCS: PKGS: VRTSvlic VRTSperl VRTSllt VRTSgab VRTSvxfen VRTSvcs
VRTSvcsag VRTSat
45Release NotesInstalling with JumpStart

Use the list of packages that is generated to replace the package list in thefinish scripts.
Preparing installation resourcesPrepare resources for the JumpStart installation.
To prepare the resources
1 Copy the contents of the installation disc to the shared storage.
# cd /cdrom/cdrom0
# cp -r * BUILDSRC
Note: After you copied the patches, you must unzip and untar them.
2 Generate the response file for the package list that you found in Generatingthe finish scripts step 8. In this example the packages are:
For SF:
VRTSvlic VRTSperl VRTSspt VRTSvxvm VRTSaslapm VRTSob VRTSsfmhVRTSvxfs VRTSfssdk VRTSdbed VRTSodm VRTSat
For SF Oracle RAC:
VRTSvlic VRTSperl VRTSvxvm VRTSaslapm VRTSvxfs VRTSllt VRTSgabVRTSvxfen VRTSvcs VRTSvcsag VRTSat VRTSvcsea VRTSdbed VRTSglmVRTScavf VRTSgms VRTSodm VRTSdbac
For SFCFS:
VRTSvlic VRTSperl VRTSspt VRTSvxvm VRTSaslapm VRTSob VRTSsfmhVRTSvxfsVRTSfssdkVRTSatVRTSlltVRTSgabVRTSvxfenVRTSvcsVRTScpsVRTSvcsag VRTScutil VRTSvcsea VRTSdbed VRTSglm VRTScavf VRTSgmsVRTSodm
For VCS:
VRTSvlicVRTSperl VRTSsptVRTSatVRTSllt VRTSgabVRTSvxfenVRTSvcsVRTScps VRTSvcsag VRTScutil VRTSvcsea
# cd BUILDSRC/pkgs/
# pkgask -r package_name.response -d /BUILDSRC/pkgs/packages_name.pkg
Release NotesInstalling with JumpStart
46

3 Create the adminfile file under BUILDSRC/pkgs/ directory. The adminfilefile's contents follow:
mail=
instance=overwrite
partial=nocheck
runlevel=quit
idepend=quit
rdepend=nocheck
space=quit
setuid=nocheck
conflict=nocheck
action=nocheck
basedir=default
4 If you want to encapsulate the root disk automatically when perform theJumpStart installation, copy the scripts encap_bootdisk_vm51001000.fingenerated in Generating the finish scripts step 6 to ENCAPSRC
5 Modify the rules file as required.
For example:
any - - profile_sf jumpstart_sf51.fin
Fordetailed instructions, see theSunMicrosystems' JumpStartdocumentation.
Adding language pack information to the finish fileFor the language pack, copy the language packages from the language packinstallation disc to the shared storage.
# cd /cdrom/cdrom0/pkgs
# cp -r * BUILDSRC/pkgs
Add lines for the language packages in the finish script. If the finish file resembles:
. . .
for PKG in VRTSperl VRTSvlic VRTSicsco . . .
do
.
.
.
done
47Release NotesInstalling with JumpStart
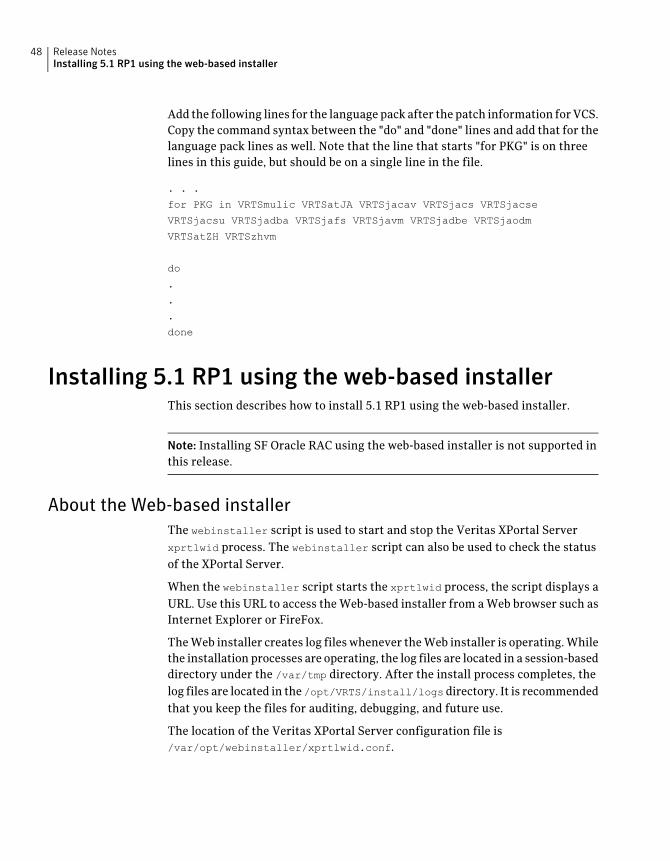
Add the following lines for the languagepack after the patch information forVCS.Copy the command syntax between the "do" and "done" lines and add that for thelanguage pack lines as well. Note that the line that starts "for PKG" is on threelines in this guide, but should be on a single line in the file.
. . .
for PKG in VRTSmulic VRTSatJA VRTSjacav VRTSjacs VRTSjacse
VRTSjacsu VRTSjadba VRTSjafs VRTSjavm VRTSjadbe VRTSjaodm
VRTSatZH VRTSzhvm
do
.
.
.
done
Installing 5.1 RP1 using the web-based installerThis section describes how to install 5.1 RP1 using the web-based installer.
Note: Installing SF Oracle RAC using the web-based installer is not supported inthis release.
About the Web-based installerThe webinstaller script is used to start and stop the Veritas XPortal Serverxprtlwid process. The webinstaller script can also be used to check the statusof the XPortal Server.
When the webinstaller script starts the xprtlwid process, the script displays aURL. Use this URL to access the Web-based installer from a Web browser such asInternet Explorer or FireFox.
TheWeb installer creates log files whenever theWeb installer is operating.Whilethe installation processes are operating, the log files are located in a session-baseddirectory under the /var/tmp directory. After the install process completes, thelog files are located in the /opt/VRTS/install/logs directory. It is recommendedthat you keep the files for auditing, debugging, and future use.
The location of the Veritas XPortal Server configuration file is/var/opt/webinstaller/xprtlwid.conf.
Release NotesInstalling 5.1 RP1 using the web-based installer
48

Before using the Veritas Web-based installerThe Veritas Web-based installer requires the following configuration.
Table 1-15 Web-based installer requirements
RequirementsFunctionSystem
Must be a supportedplatform for Veritasproduct 5.1 RP1
The system(s) where the Veritasproducts will be installed.
Target system
Must be the same OS asthe system(s) on whichto install.
The server from which to initiate theinstallation. The installationmedia ismounted and accessible from theinstallation server.
Installation server
Web browserThe systemonwhich you run thewebbrowser to perform the installation.
Administrative system
Starting the Veritas Web-based installerThis section describes starting the Veritas Web-based installer.
To start the Web-based installer
1 Start theVeritas XPortal Server process xprtlwid, on the installation server:
# ./webinstaller start
The webinstaller script displays a URL.
2 On the administrative server, start the Web browser.
3 Navigate to the URL displayed from step 1.
4 The browser may display the following message:
Secure Connection Failed
Obtain a security exception for your browser.
5 When prompted, enter root and root's password of the installation server.
Obtaining a security exception on Mozilla FirefoxYou may need to get a security exception on Mozilla Firefox.
49Release NotesInstalling 5.1 RP1 using the web-based installer

To obtain a security exception
1 Click Or you can add an exception link.
2 Click Add Exception button.
3 Click Get Certificate button.
4 Uncheck Permanently Store this exception checkbox (recommended).
5 Click Confirm Security Exception button.
6 Enter root in User Name field and root password of the web server in thePassword field.
Performing a pre-installation check with the Veritas Web-basedinstaller
This section describes performing a pre-installation check with the VeritasWeb-based installer.
To perform a pre-installation check
1 Start the Web-based installer.
See “Starting the Veritas Web-based installer” on page 49.
2 On the Select a task and a product page, select Perform a Pre-installationcheck from the Task drop-down list.
3 Indicate the systems on which to perform the precheck. Enter one or moresystem names, separated by spaces. Click Validate.
4 The installer performs the precheck and displays the results.
5 If the validation completes successfully, click Next. The installer promptsyou to begin the installation. Click Yes to install Veritas product on theselected system. Click No to install later.
6 Click Finish. The installer prompts you for another task.
Installing products with the Veritas Web-based installerThis section describes installing Veritas product with the Veritas Web-basedinstaller.
To install Veritas product
1 Perform preliminary steps.
2 Start the Web-based installer.
See “Starting the Veritas Web-based installer” on page 49.
Release NotesInstalling 5.1 RP1 using the web-based installer
50

3 On the Select a task and product page, select Install RP1 from the Taskdrop-down list.
4 Select Veritas product or Veritas product High Availability from the Productdrop-down list, and click Next.
5 On the License agreement page, select whether you accept the terms of theEnd User License Agreement (EULA). To continue, select Yes, I agree andclick Next.
6 Indicate the systems on which to install. Enter one or more system names,separated by spaces. Click Validate.
7 After the validation completes successfully, click Next to install Veritasproduct on the selected system.
8 For Storage Foundation, click Next to complete the configuration and startthe product processes.
For Storage Foundation High Availability, the installer prompts you toconfigure the cluster.
Note that you are prompted to configure only if the product is not yetconfigured.
If you select n, you can exit the installer. You must configure the productbefore you can use Veritas product.
See your Veritas product 5.1 Installation Guide to configure your product.
After the installation completes, the installer displays the location of the logand summary files. If required, view the files to confirm the installation status.
9 Select the checkbox to specify whether you want to send your installationinformation to Symantec.
Would you like to send the information about this installation
to Symantec to help improve installation in the future?
Click Finish. The installer prompts you for another task.
Prerequisites for upgrading to 5.1 RP1The following list describes prerequisites for upgrading to the 5.1 RP1 release:
■ For any product in the Storage Foundation stack, regardless of your operatingsystem, you must have the 5.1 release installed before you can upgrade thatproduct to the 5.1 RP1 release.
■ Each system must have sufficient free space to accommodate patches.
51Release NotesPrerequisites for upgrading to 5.1 RP1

Supported upgrade pathsThis section describes the supported upgrade paths for this release.
■ 5.1 to 5.1 RP1
■ 5.1 P1 to 5.1 RP1
■ 5.1 to 5.1 P1 to 5.1 RP1
Upgrading 5.1 to 5.1 RP1This section describes how to upgrade from 5.1 to 5.1 RP1 on a cluster or astandalone system.
■ Performing a full upgrade to 5.1 RP1 on a clusterUse the procedures to perform a full upgrade to 5.1 RP1 on a cluster that hasVCS, SFHA, SFCFS, or SF Oracle RAC installed and configured.
■ Performing a phased upgrade to 5.1 RP1 on a clusterUse the procedures to perform a phased upgrade to 5.1 RP1 on a cluster thathas VCS, SFHA, SFCFS, or SF Oracle RAC installed and configured.
■ Upgrading Veritas product with the Veritas Web-based installerUse the procedure to upgrade your Veritas product with the Web-basedinstaller.
■ Performing a rolling upgrade using the installerUse the procedure to upgrade your Veritas product with a rolling upgrade.
■ Performing a rolling upgrade manuallyUse the procedure to upgrade your Veritas product manually with the rollingupgrade.
■ Upgrading to 5.1 RP1 on a standalone systemUse the procedure to upgrade to 5.1 RP1 on a system that has SF and VCSinstalled.
Performing a full upgrade to 5.1 RP1 on a clusterPerforming a full upgrade on a cluster requires stopping cluster failoverfunctionality during the entire procedure. However, if you use SFCFS and ClusterVolume Manager (CVM), the SFCFS and CVM services remain available.
The following are the stages of performing a full upgrade on a cluster:
■ Freeze service group operations and stop VCS on the cluster.
■ Take the nodes offline and install the software patches.
Release NotesSupported upgrade paths
52

■ Bring the nodes online to restart cluster failover services.
Depending on your cluster’s configuration, select one of the following proceduresto upgrade to 5.1 RP1:
■ Performing a full upgrade to 5.1 RP1 for VCS
■ Performing a full upgrade to 5.1 RP1 on a SFHA cluster
■ Performing a full upgrade to 5.1 RP1 on a SFCFS cluster
■ Performing a full upgrade to 5.1 RP1 on a SF Oracle RAC cluster
Performing a full upgrade to 5.1 RP1 for VCSThe following procedure describes performing a full upgrade on a VCS cluster.
To upgrade VCS
1 Review the installation prerequisites.
See “Prerequisites for upgrading to 5.1 RP1” on page 51.
2 Check the readiness of the nodes where you plan to upgrade. Start thepre-upgrade check:
# ./installrp -precheck -rsh node1 node2 ... nodeN
See “About the new installrp script” on page 33.
3 Resolve any issues that the precheck finds.
4 Start the upgrade:
# ./installrp node1 node2 ... nodeN
5 After the upgrade, review the log files.
6 Verify the upgrade.
See “Verifying software versions” on page 92.
Performing a full upgrade to 5.1 RP1 on a SFHA clusterThe following procedure describes performing a full upgrade on a SFHA and VCScluster.
To perform a full upgrade to 5.1 RP1 on a SFHA cluster
1 Log in as superuser.
2 Verify that /opt/VRTS/bin is in your PATH so that you can execute all productcommands.
53Release NotesUpgrading 5.1 to 5.1 RP1

3 Make the VCS configuration writable on a node that is being upgraded:
# haconf -makerw
4 Freeze the HA service group operations. Enter the following command oneachnode, if you selected a group of nodes onwhich to upgrade the operatingsystem:
# hasys -freeze -persistent nodename
5 Make the VCS configuration read-only:
# haconf -dump -makero
6 Close any instance of VCS GUI that is running on the node.
7 Stop VCS:
# hastop -local
8 Stop the VCS command server:
# ps -ef | grep CmdServer
# kill -9 pid_of_CmdServer
where pid_of_CmdServer is the process ID of CmdServer.
9 Stop cluster fencing, GAB, and LLT.
# /etc/init.d/vxfen stop
# /etc/init.d/gab stop
# /etc/init.d/llt stop
10 If required, apply the OS kernel patches.
See “System Requirements” on page 12.
See SunMicrosystems’ documentation for the procedures.
11 Repeat step 7 through step 9 if the system reboots after upgrading theoperating system. You need to perform this to stop the components thatstarted by the init scripts, if any.
Release NotesUpgrading 5.1 to 5.1 RP1
54

12 Mount the 5.1 RP1 product disc and navigate to the folder that contains theinstallation program. Enter the installrp script. If ssh key authentication isconfigured then enter:
# ./installrp node1 node2
If ssh is not configured then enter:
# ./installrp -rsh node1 node2
where node1 and node2 are nodes which are to be upgraded.
13 After all of the nodes in the cluster are upgraded, shut down and reboot eachof the nodes. After the nodes come up, application failover capability isavailable.
14 Make the VCS configuration writable again from any node:
# haconf -makerw
15 Unfreeze the service group operations on each node:
# hasys -unfreeze -persistent nodename
16 Make the VCS configuration read-only:
# haconf -dump -makero
Performing a full upgrade to 5.1 RP1 on a SFCFS clusterThe following procedure describes performing a full upgrade on anSFCFS cluster.
To perform a full upgrade to 5.1 RP1 on an SFCFS cluster
1 Log in as superuser.
2 Verify that /opt/VRTS/bin and /opt/VRTSvcs/bin is in your PATH so thatyou can execute all product commands.
3 From any node in the cluster, make the VCS configuration writable:
# haconf -makerw
4 Enter the following command to freeze HA service group operations on eachnode:
# hasys -freeze -persistent nodename
55Release NotesUpgrading 5.1 to 5.1 RP1

5 Make the configuration read-only:
# haconf -dump -makero
6 On each node, enter the following command to check if any StorageCheckpoints are mounted:
# df -F vxfs
If any StorageCheckpoints aremounted, on eachnode in the cluster unmountall Storage Checkpoints.
# umount /checkpoint_name
7 Oneachnode, enter the following command to check if anyVxFS file systemsare mounted:
# df -F vxfs
■ If anyVxFS file systems are present, on each node in the cluster unmountall of the VxFS file systems:
# umount /filesystem
8 If you have created any Veritas Volume Replicator (VVR) replicated volumegroups (RVGs) on your system, perform the following steps:
■ Stop all applications that are involved in replication. For example, if adata volume contains a file system, unmount it.
■ Use the vxrvg stop command to stop each RVG individually:
# vxrvg -g diskgroup stop rvg_name
■ On the Primary node, use the vxrlink status command to verify that allRLINKs are up-to-date:
# vxrlink -g diskgroup status rlink_name
Caution: To avoid data corruption, do not proceed until all RLINKs areup-to-date.
9 Stop activity to all VxVM volumes.
For example, stop any applications such as databases that access the volumes,and unmount any file systems that have been created on the volumes.
Release NotesUpgrading 5.1 to 5.1 RP1
56

10 On each node, stop all VxVM volumes by entering the following commandfor each disk group:
# vxvol -g diskgroup stopall
Verify that no volumes remain open:
# vxprint -Aht -e v_open
11 Stop VCS:
# hastop -all
12 On each node, stop the VCS command server:
# ps -ef | grep CmdServer
# kill -9 pid_of_CmdServer
where pid_of_CmdServer is the process ID of CmdServer.
13 Oneachnode, stopODM, cluster fencing, GAB, andLLT in the following order:
■ Solaris 9:
# /etc/init.d/odm stop
# /etc/init.d/vxfen stop
# /etc/init.d/gab stop
# /etc/init.d/llt stop
■ Solaris 10:
# svcadm disable -t vxfen
# svcadm disable -t vxodm
# svcadm disable -t gab
# svcadm disable -t llt
14 If required, apply the OS kernel patches.
See “System Requirements” on page 12.
See SunMicrosystems’ documentation for the procedures.
15 On each node, check if the VEA service is running:
# /opt/VRTS/bin/vxsvcctrl status
If the VEA service is running, stop it:
# /opt/VRTS/bin/vxsvcctrl stop
57Release NotesUpgrading 5.1 to 5.1 RP1

16 Navigate to the folder that contains the installrp program and start theinstallrp program:
# ./installrp [-rsh] node1
node2 ... nodeN
Review the output.
17 Start services for LLT, GAB, cluster fencing and ODM on all upgraded nodes:
For Solaris 9:
# /etc/init.d/llt start
# /etc/init.d/gab start
# /etc/init.d/vxfen start
# /etc/init.d/odm start
For Solaris 10:
# svcadm enable llt
# svcadm enable gab
# svcadm enable vxfen
# svcadm enable vxodm
18 Start vcs on all upgraded nodes:
# /opt/VRTSvcs/bin/hastart
19 If necessary, reinstate any missing mount points in the /etc/vfstab file oneach node.
20 Make the VCS configuration writable again from any node:
# haconf -makerw
21 Enter the following command on each node to unfreeze HA service groupoperations:
# hasys -unfreeze -persistent nodename
22 Make the configuration read-only:
# haconf -dump -makero
23 Bring the CVM service group online on each node:
# hagrp -online cvm -sys nodename
Release NotesUpgrading 5.1 to 5.1 RP1
58

24 Restart all the volumes by entering the following command for each diskgroup:
# vxvol -g diskgroup startall
25 If you stopped any RVGs in step 10, restart each RVG:
# vxrvg -g diskgroup start rvg_name
26 Remount all VxFS file systems on all nodes:
# mount /filesystem
27 Remount all Storage Checkpoints on all nodes:
# mount /checkpoint_name
Performing a full upgrade to 5.1 RP1 on a SFOracle RAC clusterThe following procedure describes performing a full upgrade on an SF for OracleRAC cluster.
To upgrade to 5.1 RP1 on a SF Oracle RAC cluster
1 Log in as superuser.
2 Verify that /opt/VRTSvcs/bin is in your PATH so that you can execute allproduct commands.
3 From any node in the cluster, make the VCS configuration writable:
# haconf -makerw
4 Enter the following command to freeze HA service group operations on eachnode:
# hasys -freeze -persistent nodename
5 Make the configuration read-only:
# haconf -dump -makero
6 If CRS is not controlled by VCS, enter the following command on each nodeof the cluster to stop CRS:
# /etc/init.d/init.crs stop
59Release NotesUpgrading 5.1 to 5.1 RP1

7 Stop VCS.
# hastop -all
8 Stop the VCS command server:
# ps -ef | grep CmdServer
# kill -9 pid_of_CmdServer
where pid_of_CmdServer is the process ID of CmdServer.
9 Stop VCSMM and LMX if they are running:
For Solaris 9:
# /etc/init.d/vcsmm stop
# /etc/init.d/lmx stop
For Solaris 10:
# svcadm disable -t vcsmm
# svcadm disable -t lmx
10 Stop cluster fencing, ODM, and GAB:
For Solaris 9:
# /etc/init.d/vxfen stop
# /etc/init.d/odm stop
# /etc/init.d/gab stop
For Solaris 10:
# svcadm disable -t vxfen
# svcadm disable -t vxodm
# svcadm disable -t gab
11 On each node, unload the vxfen, LMX, GAB, VCSMM, GMS, and GLM kernelmodules if they are still loaded:
■ Verify if the vxfen kernel module is loaded. For example:
# modinfo|grep vxfen
210 7ba44000 39488 258 1 vxfen (VRTS Fence 5.1)
If the vxfen kernel module is loaded then unload it. For example:
# modunload -i 210
Release NotesUpgrading 5.1 to 5.1 RP1
60

■ Verify if the LMX kernel module is loaded. For example:
# modinfo | grep lmx
239 fffffffff1253000 13a30 236 1 lmx (LLT Mux '5.1')
If the LMX kernel module is loaded then unload it. For example:
# modunload -i 239
■ Verify if the VCSMM kernel module is loaded. For example:
# modinfo | grep vcsmm
312 78bc0000 43ae8 293 1 vcsmm (VRTSvcsmm 5.1)
If the VCSMM kernel module is loaded then unload it. For example:
# modunload -i 312
■ Verify if the GMS kernel module is loaded. For example:
# modinfo | grep gms
311 78289c91 4867 292 1 vxgms (VxGMS 5.1 (SunOS))
If the GMS kernel module is loaded then unload it. For example:
# modunload -i 311
■ Verify if the GLM kernel module is loaded. For example:
# modinfo | grep glm
310 78b68000 24268 291 1 vxglm (VxGLM 5.1 (SunOS 5.10))
If the GLM kernel module is loaded then unload it. For example:
# modunload -i 310
■ Verify if the GAB kernel module is loaded. For example:
# modinfo | grep gab
149 50cc6000 2b451 112 1 gab (GAB device 5.1)
If the GAB kernel module is loaded then unload it. For example:
# modunload -i 149
12 Stop LLT:
For Solaris 9:
61Release NotesUpgrading 5.1 to 5.1 RP1

# /etc/init.d/llt stop
For Solaris 10:
# svcadm disable -t llt
■ Verify if the LLT kernel module is loaded. For example:
# modinfo|grep llt
147 50ca4000 d6bc 110 1 llt (LLT 5.1)
If the LLT kernel module is loaded then unload it. For example:
# modunload -i 147
13 If required, apply the OS kernel patches.
See “System Requirements” on page 12.
See SunMicrosystems’ documentation for the procedures.
Note: If you are upgrading a SF Oracle RAC cluster, you must upgrade thenodes of the cluster at this stage to one of the operating system versions thatthis release supports.
14 On each node of the cluster, enter the following command to check if anyVxFS file systems are mounted:
# df -F vxfs
■ If anyVxFS file systems are present, on each node of the cluster unmountall the VxFS file systems:
# umount /filesystem
■ On each node of the cluster, verify that all file systems have been cleanlyunmounted:
# echo "8192B.p S" | fsdb -F vxfs filesystem | grep clean
flags 0 mod 0 clean clean_value
A clean_value value of 0x5a indicates the file system is clean, 0x3cindicates the file system is dirty, and 0x69 indicates the file system isdusty. A dusty file system has pending extended operations.
■ If a file system is not clean, enter the following commands for that filesystem:
Release NotesUpgrading 5.1 to 5.1 RP1
62

# fsck -F vxfs filesystem
# mount -F vxfs filesystem mountpoint
# umount mountpoint
This should complete any extended operations that were outstanding onthe file system and unmount the file system cleanly. There may be apending large fileset clone removal extended operation if the umountcommand fails with the following error:
file system device busy
Youknow for certain that an extendedoperation is pending if the followingmessage is generated on the console:
Storage Checkpoint asynchronous operation on file_system
file system still in progress.
■ If an extended operation is pending, you must leave the file systemmounted for a longer time to allow the operation to complete. Removinga very large fileset clone can take several hours.
■ Repeat the following command to verify that the unclean file system isnow clean:
# echo "8192B.p S" | fsdb -F vxfs filesystem | grep clean
flags 0 mod 0 clean clean_value
15 Stop activity to all VxVM volumes. For example, stop any applications suchas databases that access the volumes, and unmount any file systems thathave been created on the volumes.
16 On each node of the cluster, stop all VxVMvolumes by entering the followingcommand for each disk group:
# vxvol -g diskgroup stopall
Verify that no volumes remain open:
# vxprint -Aht -e v_open
17 Check if the VEA service is running:
# /opt/VRTS/bin/vxsvcctrl status
If the VEA service is running, stop it:
# /opt/VRTS/bin/vxsvcctrl stop
63Release NotesUpgrading 5.1 to 5.1 RP1

18 Mount the 5.1 RP1 product disc and navigate to the folder that contains theinstallation program. Enter the installrp script. If ssh key authenticationis configured then enter:
# ./installrp galaxy
nebula
If ssh is not configured then enter:
# ./installrp -rsh galaxy
nebula
where node1 and node2 are nodes which are to be upgraded.
19 After the entire cluster is upgraded, reboot all of the nodes of the cluster.
# /usr/sbin/shutdown -g0 -y -i6
20 If necessary, reinstate any missing mount points in the /etc/vfstab file oneach node.
21 Run the following commands to start the Storage Foundation for Oracle RACprocesses:
For Solaris 9:
# /etc/init.d/llt start
# /etc/init.d/gab start
# /etc/init.d/odm start
# /etc/init.d/vxfen start
# /etc/init.d/vcsmm start
# /etc/init.d/lmx start
# /opt/VRTSvcs/bin/hastart
For Solaris 10:
# svadm enable llt
# svadm enable gab
# svadm enable vxodm
# svadm enable vxfen
# svadm enable vcsmm
# svadm enable lmx
# /opt/VRTSvcs/bin/hastart
22 From any node in the cluster, make the VCS configuration writable:
# haconf -makerw
Release NotesUpgrading 5.1 to 5.1 RP1
64

23 Enter the following command on each node to unfreeze HA service groupoperations:
# hasys -unfreeze -persistent nodename
24 Make the configuration read-only:
# haconf -dump -makero
25 Enter the following command on each node to take service groups online:
# hagrp -online service_group -sys nodename
26 Restart all the volumes by entering the following command for each diskgroup:
# vxvol -g diskgroup startall
27 If CRS is not controlled by VCS, enter the following command on each nodeto start CRS.
# /etc/init.d/init.crs start
28 Remount all VxFS file systems on all nodes:
# mount /filesystem
29 Check if the VEA service was restarted:
# /opt/VRTS/bin/vxsvcctrl status
If the VEA service is not running, restart it:
# /opt/VRTS/bin/vxsvcctrl start
Performing a phased upgrade to 5.1 RP1 on a clusterPerforming a phased upgrade on a cluster requires stopping cluster failoverfunctionality during the entire procedure. However, if you use SFCFS and ClusterVolume Manager (CVM), the SFCFS and CVM services remain available.
The following are the stages of performing a phased upgrade on a cluster:
■ Freeze service group operations and stop VCS on the cluster.
65Release NotesUpgrading 5.1 to 5.1 RP1
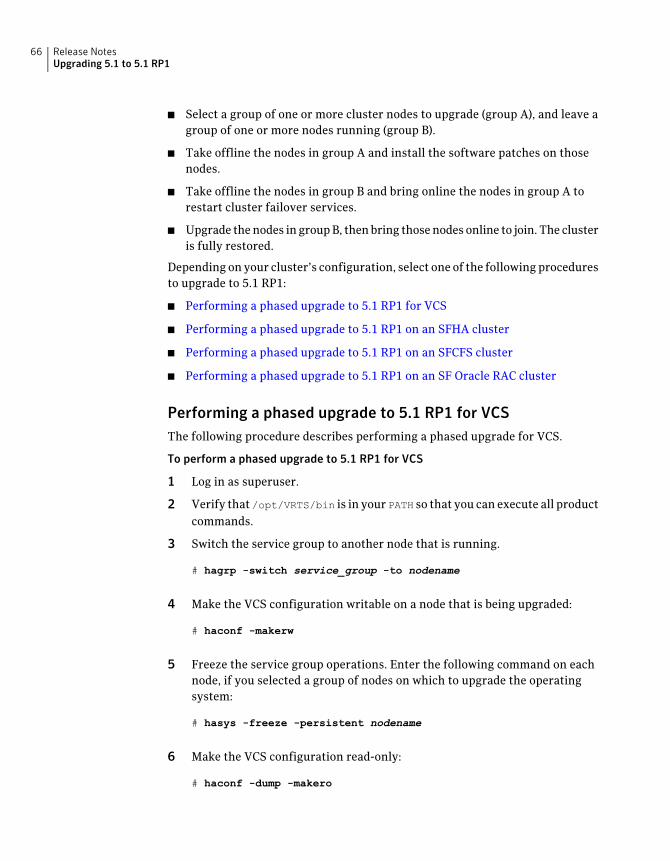
■ Select a group of one or more cluster nodes to upgrade (group A), and leave agroup of one or more nodes running (group B).
■ Take offline the nodes in group A and install the software patches on thosenodes.
■ Take offline the nodes in group B and bring online the nodes in group A torestart cluster failover services.
■ Upgrade thenodes in groupB, thenbring thosenodes online to join. The clusteris fully restored.
Depending on your cluster’s configuration, select one of the following proceduresto upgrade to 5.1 RP1:
■ Performing a phased upgrade to 5.1 RP1 for VCS
■ Performing a phased upgrade to 5.1 RP1 on an SFHA cluster
■ Performing a phased upgrade to 5.1 RP1 on an SFCFS cluster
■ Performing a phased upgrade to 5.1 RP1 on an SF Oracle RAC cluster
Performing a phased upgrade to 5.1 RP1 for VCSThe following procedure describes performing a phased upgrade for VCS.
To perform a phased upgrade to 5.1 RP1 for VCS
1 Log in as superuser.
2 Verify that /opt/VRTS/bin is in your PATH so that you can execute all productcommands.
3 Switch the service group to another node that is running.
# hagrp -switch service_group -to nodename
4 Make the VCS configuration writable on a node that is being upgraded:
# haconf -makerw
5 Freeze the service group operations. Enter the following command on eachnode, if you selected a group of nodes on which to upgrade the operatingsystem:
# hasys -freeze -persistent nodename
6 Make the VCS configuration read-only:
# haconf -dump -makero
Release NotesUpgrading 5.1 to 5.1 RP1
66

7 Close any instance of VCS GUI that is running on the node.
8 Select the group of nodes that are to be upgraded first, and follow step 9through step 19 for these nodes.
9 Stop VCS on each node in the selected group:
# hastop -local
10 Stop the VCS command server:
# ps -ef | grep CmdServer
# kill -9 pid_of_CmdServer
where pid_of_CmdServer is the process ID of CmdServer.
11 Stop cluster fencing, GAB, and LLT.
For Solaris 9:
# /etc/init.d/vxfen stop
# /etc/init.d/gab stop
# /etc/init.d/llt stop
For Solaris 10:
# svcadm disable -t vxfen
# svcadm disable -t gab
# svcadm disable -t llt
12 If required, you canupgrade the operating systemon thenodes in the selectedgroup at this stage and patch them to a supported kernel version.
See “System Requirements” on page 12.
13 Repeat step 9 through step 11 if the system reboots after upgrading theoperating system. You need to perform this to stop the components thatstarted by the init scripts, if any.
14 Mount the 5.1 RP1 product disc and navigate to the folder that contains theinstallation program. On the first sub-cluster, use installrp command toupgrade VCS to 5.1 RP1:
# ./installrp node1 node2 ...
67Release NotesUpgrading 5.1 to 5.1 RP1
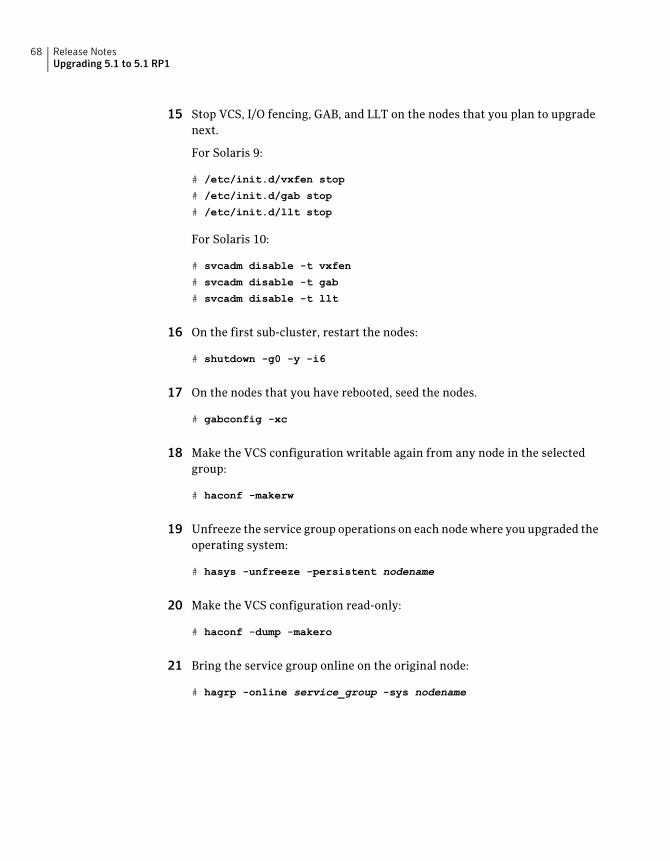
15 Stop VCS, I/O fencing, GAB, and LLT on the nodes that you plan to upgradenext.
For Solaris 9:
# /etc/init.d/vxfen stop
# /etc/init.d/gab stop
# /etc/init.d/llt stop
For Solaris 10:
# svcadm disable -t vxfen
# svcadm disable -t gab
# svcadm disable -t llt
16 On the first sub-cluster, restart the nodes:
# shutdown -g0 -y -i6
17 On the nodes that you have rebooted, seed the nodes.
# gabconfig -xc
18 Make the VCS configuration writable again from any node in the selectedgroup:
# haconf -makerw
19 Unfreeze the service group operations on each nodewhere you upgraded theoperating system:
# hasys -unfreeze -persistent nodename
20 Make the VCS configuration read-only:
# haconf -dump -makero
21 Bring the service group online on the original node:
# hagrp -online service_group -sys nodename
Release NotesUpgrading 5.1 to 5.1 RP1
68
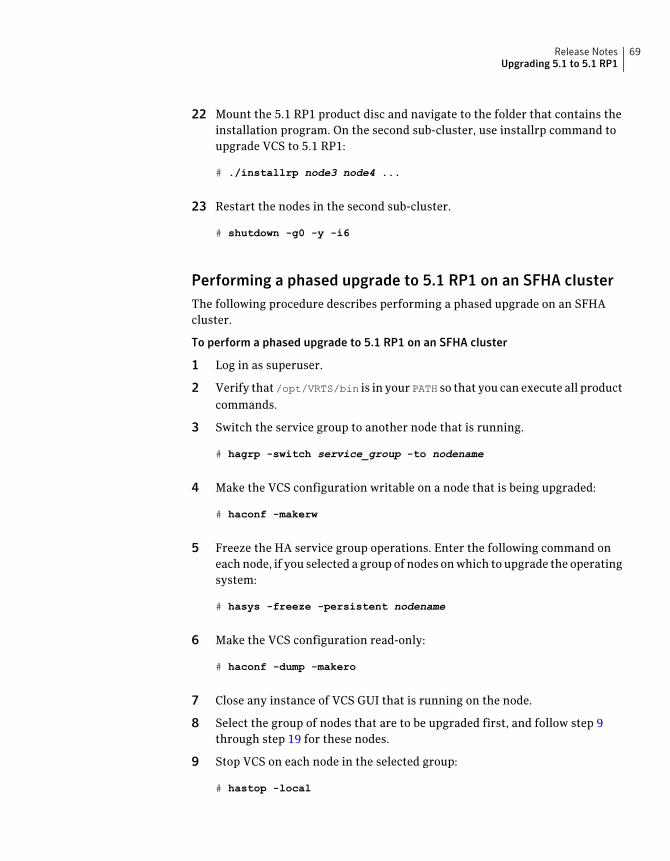
22 Mount the 5.1 RP1 product disc and navigate to the folder that contains theinstallation program. On the second sub-cluster, use installrp command toupgrade VCS to 5.1 RP1:
# ./installrp node3 node4 ...
23 Restart the nodes in the second sub-cluster.
# shutdown -g0 -y -i6
Performing a phased upgrade to 5.1 RP1 on an SFHA clusterThe following procedure describes performing a phased upgrade on an SFHAcluster.
To perform a phased upgrade to 5.1 RP1 on an SFHA cluster
1 Log in as superuser.
2 Verify that /opt/VRTS/bin is in your PATH so that you can execute all productcommands.
3 Switch the service group to another node that is running.
# hagrp -switch service_group -to nodename
4 Make the VCS configuration writable on a node that is being upgraded:
# haconf -makerw
5 Freeze the HA service group operations. Enter the following command oneachnode, if you selected a group of nodes onwhich to upgrade the operatingsystem:
# hasys -freeze -persistent nodename
6 Make the VCS configuration read-only:
# haconf -dump -makero
7 Close any instance of VCS GUI that is running on the node.
8 Select the group of nodes that are to be upgraded first, and follow step 9through step 19 for these nodes.
9 Stop VCS on each node in the selected group:
# hastop -local
69Release NotesUpgrading 5.1 to 5.1 RP1

10 Stop the VCS command server:
# ps -ef | grep CmdServer
# kill -9 pid_of_CmdServer
where pid_of_CmdServer is the process ID of CmdServer.
11 Stop cluster fencing, GAB, and LLT.
For Solaris 9:
# /etc/init.d/vxfen stop
# /etc/init.d/gab stop
# /etc/init.d/llt stop
For Solaris 10:
# svcadm disable -t vxfen
# svcadm disable -t gab
# svcadm disable -t llt
12 If required, apply the OS kernel patches on the nodes in the selected group.
See “System Requirements” on page 12.
See Sun Microsystems’ documentation for the procedures.
13 Repeat step 9 through step 11 if the system reboots after upgrading theoperating system. You need to perform this to stop the components thatstarted by the init scripts, if any.
14 Before you begin the upgrade, you can check the readiness of the nodeswhereyou plan to upgrade. The command to start the pre-upgrade check is:
# ./installrp -precheck [-rsh] node1
node2 ... nodeN
where node1 is galaxy and node2 is nebula, for example:
# ./installrp -precheck -rsh galaxy nebula
The program proceeds in a noninteractive mode to examine the systems forlicenses, filesets, disk space, system-to-system communications, etc.
15 After all of the nodes in the selected group are upgraded, shut down andreboot each of the nodes. After the nodes come up, application failovercapability is available for that group of nodes.
Release NotesUpgrading 5.1 to 5.1 RP1
70

16 Make the VCS configuration writable again from any node in the selectedgroup:
# haconf -makerw
17 Unfreeze the service group operations on each node for which you upgradedthe operating system:
# hasys -unfreeze -persistent nodename
18 Make the VCS configuration read-only:
# haconf -dump -makero
19 Switch the service group to the original node:
# hagrp -switch service_group -to nodename
20 Repeat step 9 through step 19 for the second group of nodes.
Performing a phased upgrade to 5.1 RP1 on an SFCFS clusterThe following procedure describes performing a phased upgrade on an SFCFScluster.
To perform a phased upgrade to 5.1 RP1 on an SFCFS cluster
1 Log in as superuser.
2 Verify that /opt/VRTS/bin and /opt/VRTSvcs/bin is in your PATH so thatyou can execute all product commands.
3 If you have a failover service group, switch the service group to another nodethat is running.
# hagrp -switch service_group -to nodename
4 From any node in the cluster, make the VCS configuration writable:
# haconf -makerw
5 Enter the following command to freeze HA service group operations on eachnode:
# hasys -freeze -persistent nodename
71Release NotesUpgrading 5.1 to 5.1 RP1

6 Make the configuration read-only:
# haconf -dump -makero
7 Select a group of nodes that are to be upgraded first, and follow step 8 throughstep 17 and step 23 to step 36 for these nodes.
8 On each node in the selected group, enter the following command to checkif any Storage Checkpoints are mounted:
# df -F vxfs
If any Storage Checkpoints are mounted, on each node in the selected groupunmount all Storage Checkpoints
# umount /checkpoint_name
9 On each node in the selected group, enter the following command to checkif any VxFS file systems are mounted:
# df | grep vxfs
If any VxFS file systems are present, on each node in the selected groupunmount all of the VxFS file systems:
# umount /filesystem
10 If you have created any Veritas Volume Replicator (VVR) replicated volumegroups (RVGs) on your system, perform the following steps:
■ Stop all applications that are involved in replication. For example, if adata volume contains a file system, unmount it.
■ On the Primary node, use the vxrlink status command to verify that allRLINKs are up-to-date:
# vxrlink -g diskgroup status rlink_name
Caution: To avoid data corruption, do not proceed until all RLINKs areup-to-date.
11 Stop VCS on each node in the selected group:
# hastop -local
Release NotesUpgrading 5.1 to 5.1 RP1
72

12 Stop the VCS command server:
# ps -ef | grep CmdServer
# kill -9 pid_of_CmdServer
where pid_of_CmdServer is the process ID of CmdServer.
13 Stop ODM, cluster fencing, GAB, and LLT in the following order:
■ Solaris 9:
# /etc/init.d/odm stop
# /etc/init.d/vxfen stop
# /etc/init.d/gab stop
# /etc/init.d/llt stop
■ Solaris 10:
# umount /dev/odm
# svcadm disable vxodm
# svcadm disable vxfen
# svcadm disable gab
# svcadm disable llt
14 Check if the VEA service is running:
# /opt/VRTS/bin/vxsvcctrl status
If the VEA service is running, stop it:
# /opt/VRTS/bin/vxsvcctrl stop
15 If required, apply the OS kernel patches on the nodes in the selected group.
See Sun Microsystems’ documentation for the procedures.
16 Repeat step 11 through step 14 if the system reboots after upgrading theoperating system. You need to perform this to stop the components thatstarted by the init scripts, if any.
73Release NotesUpgrading 5.1 to 5.1 RP1
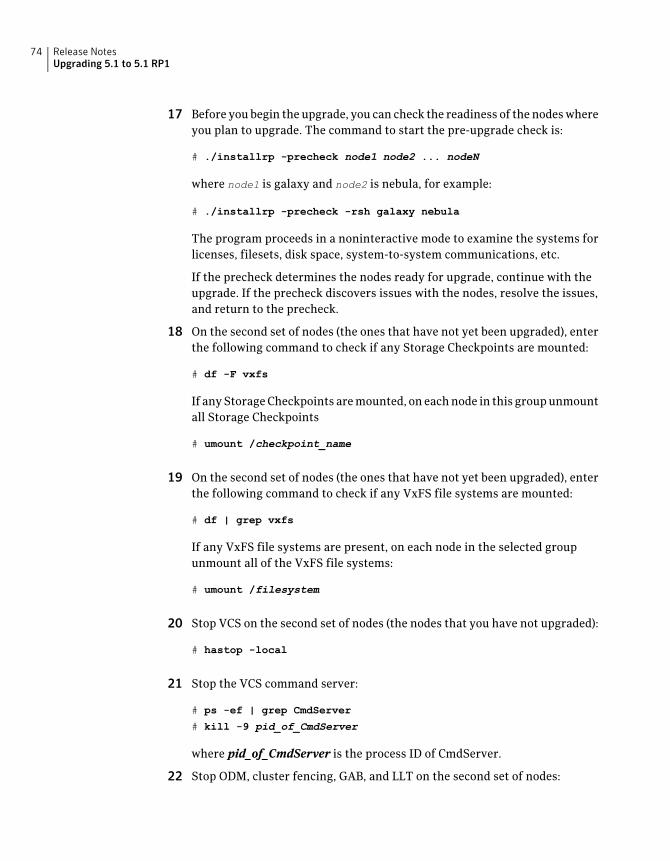
17 Before you begin the upgrade, you can check the readiness of the nodeswhereyou plan to upgrade. The command to start the pre-upgrade check is:
# ./installrp -precheck node1 node2 ... nodeN
where node1 is galaxy and node2 is nebula, for example:
# ./installrp -precheck -rsh galaxy nebula
The program proceeds in a noninteractive mode to examine the systems forlicenses, filesets, disk space, system-to-system communications, etc.
If the precheck determines the nodes ready for upgrade, continue with theupgrade. If the precheck discovers issues with the nodes, resolve the issues,and return to the precheck.
18 On the second set of nodes (the ones that have not yet been upgraded), enterthe following command to check if any Storage Checkpoints are mounted:
# df -F vxfs
If anyStorageCheckpoints aremounted, on eachnode in this groupunmountall Storage Checkpoints
# umount /checkpoint_name
19 On the second set of nodes (the ones that have not yet been upgraded), enterthe following command to check if any VxFS file systems are mounted:
# df | grep vxfs
If any VxFS file systems are present, on each node in the selected groupunmount all of the VxFS file systems:
# umount /filesystem
20 Stop VCS on the second set of nodes (the nodes that you have not upgraded):
# hastop -local
21 Stop the VCS command server:
# ps -ef | grep CmdServer
# kill -9 pid_of_CmdServer
where pid_of_CmdServer is the process ID of CmdServer.
22 Stop ODM, cluster fencing, GAB, and LLT on the second set of nodes:
Release NotesUpgrading 5.1 to 5.1 RP1
74

■ Solaris 9:
# /etc/init.d/odm stop
# /etc/init.d/vxfen stop
# /etc/init.d/gab stop
# /etc/init.d/llt stop
■ Solaris 10:
# umount /dev/odm
# svcadm disable vxodm
# svcadm disable vxfen
# svcadm disable gab
# svcadm disable llt
23 On the first set of nodes (the upgraded nodes), run the following commandsto start the Storage Foundation High Availability processes:
■ Solaris 9:
# /etc/init.d/odm start
# /etc/init.d/vxfen start
# /etc/init.d/gab start
# /etc/init.d/llt start
■ Solaris 10:
# svcadm enable llt
# svcadm enable gab
# svcadm enable vxfen
# svcadm enable vxodm
24 Start VCS on an upgraded node:
# /opt/VRTSvcs/bin/hastart
25 On the nodes that you have upgraded, seed the nodes.
# gabconfig -xc
26 If you need to re-encapsulate and mirror the root disk on each of the nodes,follow the procedures in the “Administering Disks” chapter of the VeritasVolumeManager Administrator’s Guide.
75Release NotesUpgrading 5.1 to 5.1 RP1
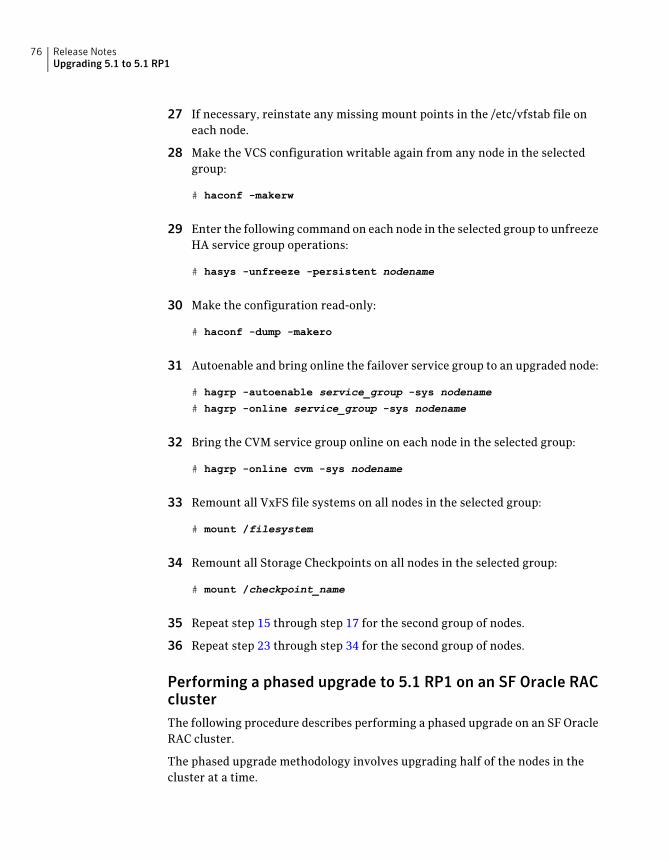
27 If necessary, reinstate any missing mount points in the /etc/vfstab file oneach node.
28 Make the VCS configuration writable again from any node in the selectedgroup:
# haconf -makerw
29 Enter the following command on each node in the selected group to unfreezeHA service group operations:
# hasys -unfreeze -persistent nodename
30 Make the configuration read-only:
# haconf -dump -makero
31 Autoenable and bring online the failover service group to an upgraded node:
# hagrp -autoenable service_group -sys nodename
# hagrp -online service_group -sys nodename
32 Bring the CVM service group online on each node in the selected group:
# hagrp -online cvm -sys nodename
33 Remount all VxFS file systems on all nodes in the selected group:
# mount /filesystem
34 Remount all Storage Checkpoints on all nodes in the selected group:
# mount /checkpoint_name
35 Repeat step 15 through step 17 for the second group of nodes.
36 Repeat step 23 through step 34 for the second group of nodes.
Performing a phased upgrade to 5.1 RP1 on an SF Oracle RACclusterThe following procedure describes performing a phased upgrade on an SF OracleRAC cluster.
The phased upgrade methodology involves upgrading half of the nodes in thecluster at a time.
Release NotesUpgrading 5.1 to 5.1 RP1
76

The examples in the procedures assume a four-node SF Oracle RAC cluster withthe nodes galaxy andnebula constituting the first half of the cluster and the nodesjupiter andmercury constituting the second half of the cluster.
Note: Before starting the upgrade on the first half of the cluster, back up theconfiguration files.
To upgrade to 5.1 RP1 on an SF Oacle RAC cluster
1 Log in as superuser.
2 Switch failover groups from the first half of the cluster from galaxy to thesecond half of the cluster to jupiter and mercury. For example:
# hagrp -switch failover_group -to jupiter
# hagrp -switch failover_group -to mercury
3 On the first half of the cluster, stopOracle database: If theOracleRAC instanceis managed by VCS:
# hagrp -offline oracle_group -sys galaxy
# hagrp -offline oracle_group -sys nebula
If the Oracle RAC instance is not managed by VCS, log in as the Oracle useron one of the nodes in the first half of the cluster and shut down the instances:
$ srvctl stop instance -d database_name -i instance_name
If CRS is not controlled by VCS, enter the following command on each nodeto stop CRS.
# /etc/init.d/init.crs stop
4 On the first half of the cluster, stop all applications that are not configuredunder VCS. Use native application commands to stop the application.
5 On the first half of the cluster, unmount the VxFS and CFS file systems thatare not managed by VCS.
Ensure that no processes are running that make use of mounted shared filesystem or shared volumes. To verify that no processes use the VxFS or CFSmount point, enter the following commands:
# mount | grep vxfs
# fuser -cu /mount_point
# umount /mount_point
77Release NotesUpgrading 5.1 to 5.1 RP1

6 On first half of the cluster stop all VxVMandCVMvolumes for eachdiskgroupthat are not managed by VCS:
# vxvol -g disk_group stopall
Verify that no volumes remain open:
# vxprint -Aht -e v_open
7 On first half of the cluster, stop VCS:
# hastop -local
8 Verify that only ports a, b, d and o are open:
# gabconfig -a
GAB Port Memberships
=======================================================
Port a gen 6b5901 membership 01
Port b gen 6b5904 membership 01
Port d gen 6b5907 membership 01
Port o gen 6b5905 membership 01
9 Mount the 5.1 RP1 product disc and navigate to the folder that contains theinstallation program. On the first half of the cluster, enter the installrpscript:
# ./installrp galaxy nebula
Note: After you complete the upgrade of the first half of the cluster, no GABportswill be showing in the outputwhenyou run thegabconfig -a command.
10 On the first half of the cluster, relink the SFOracle RAC libraries withOracle.
Refer to Veritas Storage Foundation for Oracle RAC 5.1 Installation andConfiguration Guide for more information.
11 On the first half of the cluster, restart the nodes:
# shutdown -g0 -y -i6
Note: After first half of the cluster restarts, ports a, b, d, and o formmembership with the second half of the cluster. HAD does not formmembership since it reports an engine version mismatch.
Release NotesUpgrading 5.1 to 5.1 RP1
78

12 On the second half of the cluster, stop the Oracle database:
If the Oracle RAC instance is managed by VCS:
# hagrp -offline oracle_group -sys jupiter
# hagrp -offline oracle_group -sys mercury
If the Oracle RAC instance is not managed by VCS, log in as the Oracle useron one of the nodes in the second half of the cluster and shut down theinstances:
$ srvctl stop instance -d database_name -i instance_name
If CRS is not controlled by VCS, enter the following command on each nodeto stop CRS.
# /etc/init.d/init.crs stop
Note: The downtime starts now.
13 On the secondhalf of the cluster, stop all applications that are not configuredunder VCS. Use native application commands to stop the application.
14 On the second half of the cluster, unmount the VxFS or CFS file systems thatare not managed by VCS.
Ensure that no processes are running that make use of mounted shared filesystem or shared volumes. To verify that no processes use the VxFS or CFSmount point:
# mount | grep vxfs
# fuser -cu /mount_point
# umount /mount_point
15 On the second half of the cluster, stop all VxVM and CVM volumes for eachdisk group that are not managed by VCS:
# vxvol -g disk_group stopall
Verify that no volumes remain open:
# vxprint -Aht -e v_open
16 On the second half of the cluster, stop VCS:
# hastop -local
79Release NotesUpgrading 5.1 to 5.1 RP1

17 On each node in the first half of the cluster, start VCS:
# hastart
18 On the first half of the cluster, bring the VCS service groups online: Forfailover service groups:
# hagrp -online group_name -any
Once the cvm service group comes online, the GAB ports v, w, and f comeonline; all the service groups pertaining to the CFS mounts also come onlineautomatically. The failover service groups must be brought online manuallyusing the above command.
19 On the first half of the cluster, manually mount the VxFS or CFS file systemsthat are not managed by VCS.
20 On the first half of the cluster, start all applications that are not managed byVCS. Use native application commands to start the applications.
If CRS is not controlled by VCS, enter the following command on each nodeof first of cluster to start CRS.
# /etc/init.d/init.crs start
If the Oracle RAC instance is not managed by VCS, log in as the Oracle useron one of the nodes in the first half of the cluster and start the instances:
$ srvctl start instance -d database_name -i instance_name
Note: The downtime ends here.
21 Navigate to the folder that contains the installation program. On the secondhalf of the cluster, enter the installrp script:
# ./installrp jupiter mercury
22 On the second half of the cluster, relink the SF Oracle RAC libraries withOracle.
Refer to Veritas Storage Foundation for Oracle RAC 5.1 Installation andConfiguration Guide for more information.
Release NotesUpgrading 5.1 to 5.1 RP1
80

23 Restart the nodes in the second half of the cluster.
# shutdown -g0 -y -i6
When the nodes in the second half of the cluster come up, all the GAB portsa, b, d, o, h, v, w and f will be online. All the CFS mount service groups alsocome online automatically.
24 On the second half of the cluster, manually mount the VxFS and CFS filesystems that are not managed by VCS.
If CRS is not controlled by VCS, enter the following command on each nodeof first of cluster to start CRS.
# /etc/init.d/init.crs start
If the Oracle RAC instance is not managed by VCS, log in as the Oracle useron one of the nodes in the first half of the cluster and start the instances:
$ srvctl start instance -d database_name -i instance_name
25 On the second half of the cluster, start all applications that are not managedby VCS. Use native application commands to start the applications.
Upgrading Veritas product with the Veritas Web-based installerThis section describes upgrading Veritas product with the Veritas Web-basedinstaller. The installer detects and upgrades the product that is currently installedon the specified system or systems. If you want to upgrade to a different product,you may need to perform additional steps.
Note: Upgrading SF Oracle RAC with the Web-based installer is not supported.
To upgrade Veritas product
1 Perform the required steps to save any data that you wish to preserve. Forexample, take back-ups of configuration files.
2 Start the Web-based installer.
See “Starting the Veritas Web-based installer” on page 49.
3 Select Install RP1.
The installer detects the product that is installed on the specified system.
4 Indicate the systems on which to upgrade. Enter one or more system names,separated by spaces. Click Validate.
81Release NotesUpgrading 5.1 to 5.1 RP1

5 Click Next to complete the upgrade.
After the upgrade completes, the installer displays the location of the log andsummary files. If required, view the files to confirm the installation status.
6 ClickFinish. After the upgrade, if the product is not configured, theweb-basedinstaller asks: "Do you want to configure this product?" If the product isalready configured, it will not ask any questions.
If you are upgrading from 4.x, you may need to create new VCS accounts if youused native operating system accounts.
Performing a rolling upgrade using the installerYou can use rolling upgrades to upgrade one product from a release to the nextwith minimal application downtime.
About rolling upgradesYou can use rolling upgrades to upgrade one product from a release to the next.Rolling upgrades require less downtime. Rolling upgrades are not compatiblewithphased upgrades. Donot perform "mixed" rolling upgradeswith phased upgrades.
Rolling upgrades take two discrete phases. In the first, you upgrade the kernelpackages with exception of VCS packages and agent packages. In the second, youupgrade the non-kernel packages, which are VCS packages and agents packages.
You can perform a rolling upgrade for the following products:
■ Veritas Cluster Server
■ Storage Foundation and High Availability
■ Storage Foundation Cluster File System
■ Storage Foundation Cluster File System and High Availability
■ Storage Foundation for Oracle RAC
You can perform a rolling upgrade from 5.1 to 5.1 RP1 or from 5.1 P1 to 5.1 RP1.
Prerequisites for a rolling upgradesMeet the following prerequisites before performing a rolling upgrade:
■ Make sure that the product you want to upgrade supports rolling upgrades.
■ Split upyour clusters into sub-clusters for thepurpose of upgrade.A sub-clustercan include one or more nodes. This division helps to keep service groupsrunning during the upgrade.
■ Make sure you logged in as superuser and have the media mounted.
Release NotesUpgrading 5.1 to 5.1 RP1
82

■ VCS must be running before performing the rolling upgrade.
Performing a rolling upgrade on kernel packages: phase 1Note that in the following instructions that a sub-cluster can represent one ormore nodes in a full cluster, but is represented by nodeA.
To perform the rolling upgrade on kernel packages: phase 1
1 On the first sub-cluster, start the installer for the rolling upgrade with the-upgrade_kernelpkgs option.
./installrp -upgrade_kernelpkgs nodeA
Review the EULA, if you accept its terms, enter y to proceed.
2 Note that if the boot-disk is encapsulated, then you do not need to performan unencapsulation for upgrades.
3 Note the installation log location. The installer checks systemcommunications, package versions, product versions, and completesprechecks. It then upgrades applicable kernel patches.
4 The installer further replaces kernel components. Review the output.
5 The installer starts processes and brings all the service groups online.
6 Repeat step 1 to 5 on the second subcluster.
Performing a rolling upgrade on non-kernel packages: phase2You now upgrade the non-kernel packages..
To perform the rolling upgrade on non-kernel packages: phase 2
1 Start the installer for the rolling upgradewith the -upgrade_nonkernelpkgsoption. Specify all the nodes in the cluster:
./installrp -upgrade_nonkernelpkgs nodeA nodeB nodeC...
Review the EULA, if you accept its terms, enter y to proceed.
2 Note the installation log location. The installer checks systemcommunications, package versions, product versions, and completesprechecks. It verifies completion of phase 1.
3 The installer upgrades non-kernel components. Review the output.
83Release NotesUpgrading 5.1 to 5.1 RP1

4 The installer starts processes and brings all the service groups online.
5 Manually check the cluster's status.
# hastatus -sum
Performing a rolling upgrade manuallyYou can perform a Split stack rolling upgrade—an independent upgrade ofCFS/ODM/CVM/LLT/GAB/VXFEN/LMX/VCSMM and the VCS Engine (‘had’).
Split stack rolling upgrade—an independent upgrade ofCFS/ODM/CVM/LLT/GAB/VXFEN/LMX/VCSMM and the VCSEngine (‘had’)Review the following notes:
■ It is possible to conduct Rolling Upgrade of one node at a time.
■ Recommended for clusters of any number of nodes and Service Groupdistributions, including N+1 configurations.
■ Failover ServiceGroupswill incur downtime 2 times, during failover/failback.
To perform a split stack rolling upgrade—an independent upgrade ofCFS/ODM/CVM/LLT/GAB/VXFEN/LMX/VCSMM and the VCS engine (‘had’)
1 Consider a four node SFRAC cluster. Identify sub-clusters to be upgradedtogether. A sub-cluster could even be just one of the nodes of the cluster.
2 Review cluster’s system list. Confirm that each Service Groupwill eventuallyhave a target node to run on, when sub-clusters are upgraded in a rollingfashion.
3 Verify that /opt/VRTS/bin and /opt/VRTSodm/bin are added to PATH variable.
4 Display the system list:
# hagrp -display ServiceGroup -attribute SystemList
Release NotesUpgrading 5.1 to 5.1 RP1
84
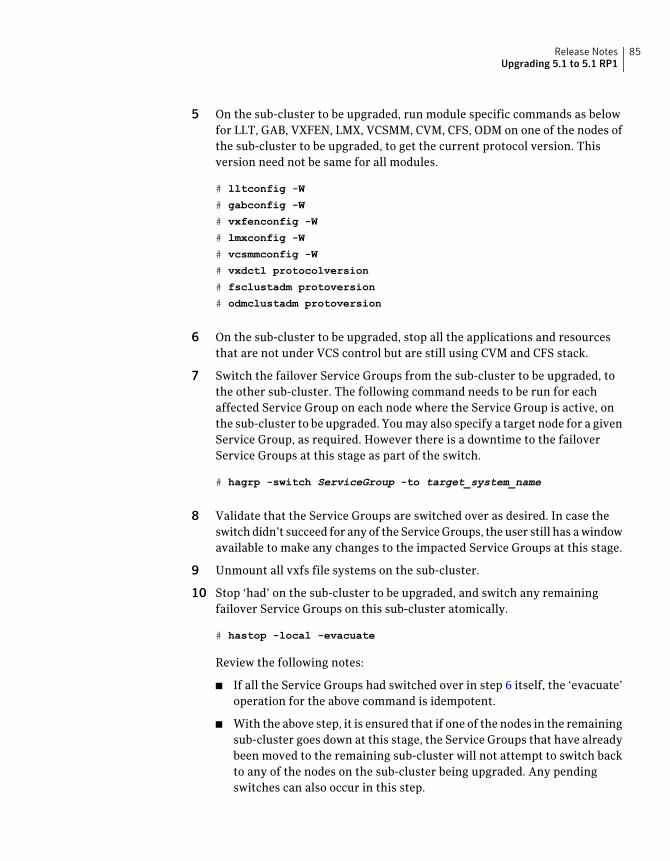
5 On the sub-cluster to be upgraded, run module specific commands as belowfor LLT, GAB, VXFEN, LMX, VCSMM, CVM, CFS, ODM on one of the nodes ofthe sub-cluster to be upgraded, to get the current protocol version. Thisversion need not be same for all modules.
# lltconfig -W
# gabconfig -W
# vxfenconfig -W
# lmxconfig -W
# vcsmmconfig -W
# vxdctl protocolversion
# fsclustadm protoversion
# odmclustadm protoversion
6 On the sub-cluster to be upgraded, stop all the applications and resourcesthat are not under VCS control but are still using CVM and CFS stack.
7 Switch the failover Service Groups from the sub-cluster to be upgraded, tothe other sub-cluster. The following command needs to be run for eachaffected Service Group on each node where the Service Group is active, onthe sub-cluster to be upgraded. Youmay also specify a target node for a givenService Group, as required. However there is a downtime to the failoverService Groups at this stage as part of the switch.
# hagrp -switch ServiceGroup -to target_system_name
8 Validate that the Service Groups are switched over as desired. In case theswitchdidn’t succeed for any of the ServiceGroups, the user still has awindowavailable to make any changes to the impacted Service Groups at this stage.
9 Unmount all vxfs file systems on the sub-cluster.
10 Stop ‘had’ on the sub-cluster to be upgraded, and switch any remainingfailover Service Groups on this sub-cluster atomically.
# hastop -local -evacuate
Review the following notes:
■ If all the Service Groups had switched over in step 6 itself, the ‘evacuate’operation for the above command is idempotent.
■ With the above step, it is ensured that if one of the nodes in the remainingsub-cluster goes down at this stage, the Service Groups that have alreadybeen moved to the remaining sub-cluster will not attempt to switch backto any of the nodes on the sub-cluster being upgraded. Any pendingswitches can also occur in this step.
85Release NotesUpgrading 5.1 to 5.1 RP1

■ Theparallel ServiceGroups on the nodes of the sub-cluster to be upgradedare brought down at this stage. They will continue to be available on theremaining sub-cluster.
■ CVM,CFSwill also be stopped byVCSon thenodes of the sub-cluster beingupgraded. Theywill continue to be available on the remaining sub-cluster.
11 Stopapplications/resources that are outsideVCScontrol anduseVxFS,VxVM.
12 Manually update the /etc/vxfenmode, /etc/gabtab, and /etc/vcsmmtab filesto indicate the protocol version that the corresponding module in the newstack should talk to that on the older stack on each of the nodes. This protocolversion is the same as the one obtained in step 5. For CVM, CFS and ODM,run the following commands on eachof thenodes, to set the protocol version.
# vxdctl setversion N
# fsclustadm protoset N
# odmclustadm protoset N
where N is the protocol version derived in step 5.
This step ensures that the sub-clusters consistently communicate at the olderprotocol version should there be any intermediate node joins/leaves until theentire cluster is explicitly rolled over to communicate at the new version.
For example, for /etc/vxfenmode:
# cat /etc/vxfenmode
#
# vxfen_mode determines in what mode VCS I/O Fencing should work.
#
# available options:
# scsi3 - use scsi3 persistent reservation disks
# customized - use script based customized fencing
# sybase - use scsi3 disks in kernel but coordinate membership
# with Sybase ASE
# disabled - run the driver but don't do any actual fencing
#
vxfen_mode=disabled
vxfen_protocol_version=10
# cat /etc/gabtab
/sbin/gabconfig -c -n4 -V33
Release NotesUpgrading 5.1 to 5.1 RP1
86

13 Stop VXFEN, ODM, VCSMM, LMX, GAB and LLT in that order, on each of thenodes of the sub-cluster to be upgraded.
14 Simultaneously upgrade of all the components except the VCS Engine (‘had’)on the sub-cluster chosen for upgrade. VCS engine and agent related packagesare not upgraded at this stage. CFS, ODM, CVM, LMX, VCSMM, GAB, LLT,VXFEN will be upgraded together.
■ Upgrade (use patchadd on Solaris) all the packages with new productversion, except VCS and agent related packages on the sub-cluster beingupgraded.Some examples of the patch names for SPARC are: VRTSsfmh141270-02,VRTSvxvm 142629-02, VRTSllt 143260-02/143261-02, VRTSgab143262-02/143263-02, VRTSvxfen 143706-02/143707-02, VRTSdbac143696-01/143697-01, VRTSob 43687-01, and VRTScps 143279-02.
■ Re-link oracle in case of SFRAC.
■ In reverse order, start the components that you previously stopped.For example, on Solaris 10:
# svcadm enable llt
# svcs -a|grep llt
online 0:22:44 svc:/system/llt:default
# svcadm enable gab
# svcs -a|grep gab
online 0:25:07 svc:/system/gab:default
# svcadm enable vxodm
# svcs -a|grep vxodm
online 0:25:20 svc:/system/vxodm:default
# svcadm enable vxfen
# svcs -a|grep vxfen
online 0:25:37 svc:/system/vxfen:default
For Solaris 9, the commands are listed under /etc/init.d to start modules.For example, to start LLT, use /etc/init.d/llt start, etc.LLT and LMX start communicating with the new version automaticallywhen they are started.Start HA.
# hastart
■ Once all the services are started, start use the hastart command to startHA.All ports should comeup successfully and cluster start communicationthe other nodes.
87Release NotesUpgrading 5.1 to 5.1 RP1

15 Upgrade the remaining sub-cluster(s) one by one, per above procedure fromstep 4 onwards.
16 After each of the nodes are upgraded to the new product version, initiate acluster-wide and across-the-stack rollover of the kernel stack to the newprotocol version.
■ LLT and LMX are already at new protocol version at the end of step 14.
■ Run gabconfig -R onone of thenodes of the cluster beingupgraded. Thiscommand will block until roll over is complete cluster wide. GAB alsoquiesces I/Os, which will result in flow control.
■ Run vxfenconfig -R on one of the nodes of the cluster being upgraded.Wait till the command returns.
■ Run vcsmmconfig -R on one of the nodes of the cluster being upgraded.Wait till the command returns.
■ Run vxdctl upgrade on the CVM master node of the cluster beingupgraded.
■ Run fsclustadm protoclear to clear the set protocol version on all thenodes in the cluster.
■ Run fsclustadm protoupgrade from any node of cluster to upgrade theprotocol version across the cluster.
■ Run odmclustadm protoclear to clear the set protocol version on allnodes.
■ Run odmclustadm protoupgrade on one of the nodes of the sub-clusterbeing upgraded.While upgrading odmcluster protocol version, you might see a messagelike:
"Protocol upgrade precheck fails:
some nodes do not support multiple protocols"
You can ignore this message. The odm module is running on the latestversion. You can verify this by using the following command on all theupgraded nodes:
# odmclustadm protoversion
Cluster Protocol Versions:
Node #PROTOCOLS CUR PREF FLAGS
local: 3 3 -
Release NotesUpgrading 5.1 to 5.1 RP1
88

■ Reverse the changes done to /etc/vxfenmode, /etc/gabtab, and/etc/vcsmmtab files in step 12 above.
17 Upgrade VCS engine (‘had’) to the new version. Perform one of the followingprocedures:
■ Force stop 'had' and install the new version.
■ Force stop ‘had’ on all the nodes. There is no HA from this pointonwards.
# hastop -all -force
■ Modify the VCS configuration to reflect version specific requirementsif any.
■ Upgrade VRTSvcs and agent-related patches (the patches on SPARC):
VRTSvcs 143264-02
VRTSvcsag 143265-02
VRTScavf 143274-02
VRTSvcsea 143276-02
■ Start VCS on all nodes. HA for the entire cluster is restored at thisstage.
■ Upgrade ‘had’ in a phasedmanner. This procedure will reduce the overallHA downtime during the upgrade.
■ Divide the cluster into two sub-clusters. Upgrade the first sub-cluster.
■ Force stop VCS on the sub-cluster. There will be no HA for thesub-cluster being upgraded, from this step onwards.
# hastop -local -force
■ Modify the VCS configuration to reflect version specific requirementsif any.
■ Upgrade VRTSvcs and agent-related patches (the patches on SPARC):
VRTSvcs 143264-02
VRTSvcsag 143265-02
VRTScavf 143274-02
VRTSvcsea 143276-02
■ Force stop VCS on the remaining sub-cluster. There is no HA for theentire cluster from this point onwards.
89Release NotesUpgrading 5.1 to 5.1 RP1

# hastop -local -force
■ Start VCS on each of the nodes of the upgraded sub-cluster. VCS willnot online the failover Service Groups at this time since they areautodisabled. Now HA is restored for the upgraded sub-cluster.
# hastart
Upgrading to 5.1 RP1 on a standalone systemYou can use this procedure to upgrade on a standalone system that runs SF.
To upgrade to 5.1 RP1 on a standalone system
1 Log in as superuser.
2 Verify that /opt/VRTS/bin is in your PATH so you can execute all productcommands.
3 If required, apply the OS kernel patches.
See “System Requirements” on page 12.
See SunMicrosystems’ documentation for the procedures.
4 Enter the following command to check if any VxFS file systems or StorageCheckpoints are mounted:
# df | grep vxfs
5 Unmount all Storage Checkpoints and file systems:
# umount /checkpoint_name
# umount /filesystem
6 If you have created any Veritas Volume Replicator (VVR) replicated volumegroups (RVGs) on your system, perform the following steps:
■ Stop all applications that are involved in replication. For example, if adata volume contains a file system, unmount it.
■ Use the vxrvg stop command to stop each RVG individually:
# vxrvg -g diskgroup stop rvg_name
■ On the Primary node, use the vxrlink status command to verify that allRLINKs are up-to-date:
Release NotesUpgrading 5.1 to 5.1 RP1
90

# vxrlink -g diskgroup status rlink_name
Caution: To avoid data corruption, do not proceed until all RLINKs areup-to-date.
7 Stop activity to all VxVM volumes. For example, stop any applications suchas databases that access the volumes, and unmount any file systems thathave been created on the volumes.
8 Stop all VxVM volumes by entering the following command for each diskgroup:
# vxvol -g diskgroup stopall
Verify that no volumes remain open:
# vxprint -Aht -e v_open
9 Check if the VEA service is running:
# /opt/VRTS/bin/vxsvcctrl status
If the VEA service is running, stop it:
# /opt/VRTS/bin/vxsvcctrl stop
10 Mount the 5.1 RP1 product disc and navigate to the folder that contains theinstallation program. Enter the installrp script:
# ./installrp nodename
11 If necessary, reinstate any missing mount points in the /etc/vfstab file.
12 Restart all the volumes by entering the following command for each diskgroup:
# vxvol -g diskgroup startall
13 If you stopped any RVGs in step 6, restart each RVG:
# vxrvg -g diskgroup start rvg_name
91Release NotesUpgrading 5.1 to 5.1 RP1

14 Remount all VxFS file systems and Storage Checkpoints:
# mount /filesystem
# mount /checkpoint_name
15 Check if the VEA service was restarted:
# /opt/VRTS/bin/vxsvcctrl status
If the VEA service is not running, restart it:
# /opt/VRTS/bin/vxsvcctrl start
Verifying software versionsTo verify if the Veritas patches are installed on your system, enter the followingcommand:
# showrev -p|grep patch_id
Removing and rolling backRoll back of the 5.1 RP1 to the release 5.1 version is not supported for certainproducts. It is recommended that you follow the steps in the following sectionsto remove all the installed Veritas software, and then perform a completereinstallation of the release 5.1 software. You can roll back 5.1 RP1 to the release5.1 version for Veritas Cluster Server.
Note: Symantec recommends using the following steps to roll back. There is nouninstallrp to roll back the patches.
■ Removing 5.1 RP1 from Veritas Cluster Server
■ Removing 5.1 RP1 on SF or SFCFS
■ Removing 5.1 RP1 on Storage Foundation for Oracle RAC
Removing 5.1 RP1 from Veritas Cluster ServerUse the following procedure to remove VCS 5.1 RP1 from your cluster manually.
Release NotesVerifying software versions
92

To remove 5.1 RP1 from VCS manually
1 List the service groups in your cluster and their status. On any node, type:
# hagrp -state
2 Take the ClusterService service group offline if it is running. On any node,type:
# hagrp -offline -force ClusterService -sys system
3 Make the VCS configuration writable. On any node, type:
# haconf -makerw
4 Freeze all service groups. On any node, type:
# hagrp -freeze service_group -persistent
where service_group is the name of the service group. Note that theClusterService group cannot be frozen.
5 Save the configuration (main.cf) file with the groups frozen. On any node,type:
# haconf -dump -makero
6 Make a backup copy of the current main.cf and all types.cf configurationfiles. For example, on one node in the cluster, type:
# cp /etc/VRTSvcs/conf/config/main.cf \
/etc/VRTSvcs/conf/main.cf.save
# cp /etc/VRTSvcs/conf/config/types.cf \
/etc/VRTSvcs/conf/types.cf.save
7 Shut down VCS. On any node, type:
# /opt/VRTSvcs/bin/hastop -all -force
8 Shut down CmdServer. On each node, type:
# /opt/VRTSvcs/bin/CmdServer -stop
93Release NotesRemoving and rolling back

9 Verify that VCS has shut down. On any node, type:
# /sbin/gabconfig -a
The output resembles: GAB Port Memberships Port a gen 23dc0001membership 01 The output shows no membership for port h.
10 For Solaris 10, on nodes that run non-global zones, check if the non-globalzones are in the running state. Boot the non-global zones that are not in therunning state.
■ Check the zone’s state. On each node, type:
# zoneadm list -icv
■ Boot the zone if it is not in the running state. On each node, type:
# zoneadm -z zone boot
where zone is the name of the non-global zone.
Note: Do not configure one or more Solaris zones to boot from the sharedstorage.
11 Unconfigure vxfen if the VCS cluster uses the fencing option. On each node,type:
# /sbin/vxfenconfig -U
12 Unload vxfen. On each node, perform the following steps:
■ Identify the vxfen kernel module, for example:
# modinfo|grep vxfen
210 7ba44000 39488 258 1 vxfen (VRTS Fence 5.0MP3RP3)
■ Unload vxfen using the module number.
# modunload -i 210
13 Unconfigure GAB. On each node, type:
# /sbin/gabconfig -U
14 Unload GAB. On each node, perform the following steps:
Release NotesRemoving and rolling back
94

■ Identify the GAB kernel module. For example:
# modinfo | grep gab
149 50cc6000 2b451 112 1 gab (GAB device 5.0MP3RP3)
■ Unload GAB using the module number:
# modunload -i 149
15 Unconfigure LLT. On each node, perform the following steps:
■ Type:
# /sbin/lltconfig -U
■ Type y on each node in response to the message.
16 Unload LLT. On each node, perform the following steps:
■ Identify the LLT kernel module. For example:
# modinfo | grep llt
147 50ca4000 d6bc 110 1 llt (LLT 5.0MP3RP3)
■ Unload LLT using the module number:
# modunload -i 147
17 Remove the VCS 5.1 RP1 patches. On each node, type:
■ For Solaris SPARC 8:
# patchrm 139356-03
■ For Solaris SPARC 9:
# patchrm 139357-03
■ For Solaris SPARC 10:
# patchrm 142607-03
# patchrm 139359-03
# patchrm 139358-03
■ For Solaris x64:
95Release NotesRemoving and rolling back

# patchrm 139361-03
# patchrm 139360-03
# patchrm 142608-03
Note: For Solaris SPARC 8, 9, 10, if you must remove the 5.1 RP1Authentication Service patch (123722-02), you must uninstall the entireVCS product stack, then reinstall VCS.
18 Verify that the patches have been removed. On each node, type:
# showrev -p | grep VRTS
19 If the LLT, GAB, or VXFENmodules cannot be stopped or unloaded followingthe patch removal, reboot all nodes in the cluster.
20 If you do not perform step 19, start the VCS components manually. On eachnode, type:
# /sbin/lltconfig -c
# /sbin/gabconfig -cx
# /sbin/vxfenconfig -c
# /opt/VRTSvcs/bin/hastart
You do not have to start vxfen unless you use the fencing option.
21 After VCS has started, perform the following steps:
■ Verify all resources have been probed. On any node, type:
# hastatus -summary
■ Unfreeze all service groups. On any node, type:
# haconf -makerw
# hagrp -unfreeze service_group -persistent
# haconf -dump -makero
where service_group is the name of the service group.
22 Bring online the ClusterService service group, if necessary. On anynode type:
# hagrp -online ClusterService -sys system
where system is the node name.
Release NotesRemoving and rolling back
96
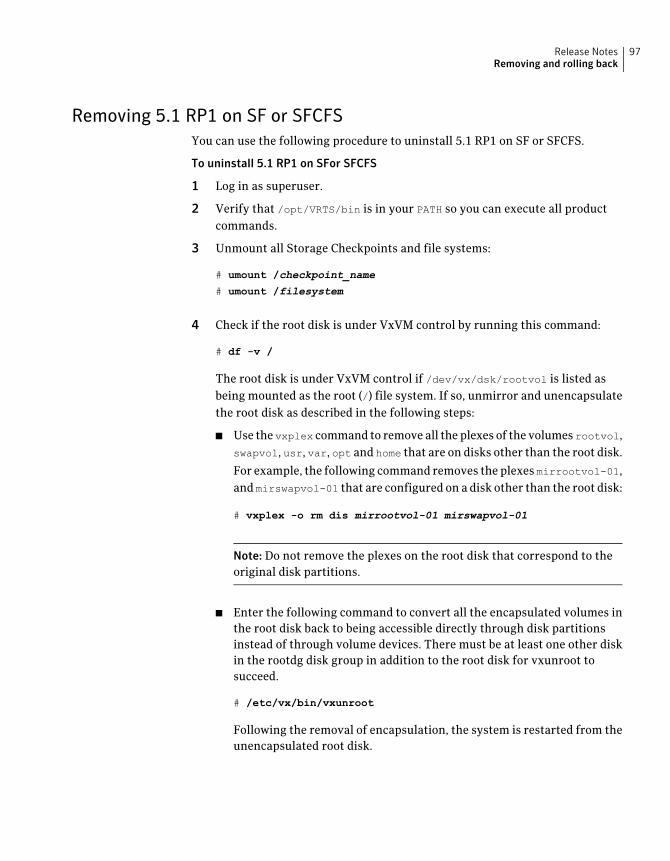
Removing 5.1 RP1 on SF or SFCFSYou can use the following procedure to uninstall 5.1 RP1 on SF or SFCFS.
To uninstall 5.1 RP1 on SFor SFCFS
1 Log in as superuser.
2 Verify that /opt/VRTS/bin is in your PATH so you can execute all productcommands.
3 Unmount all Storage Checkpoints and file systems:
# umount /checkpoint_name
# umount /filesystem
4 Check if the root disk is under VxVM control by running this command:
# df -v /
The root disk is under VxVM control if /dev/vx/dsk/rootvol is listed asbeing mounted as the root (/) file system. If so, unmirror and unencapsulatethe root disk as described in the following steps:
■ Use the vxplex command to remove all the plexes of the volumes rootvol,swapvol, usr, var, opt and home that are on disks other than the root disk.
For example, the following command removes the plexes mirrootvol-01,and mirswapvol-01 that are configured on a disk other than the root disk:
# vxplex -o rm dis mirrootvol-01 mirswapvol-01
Note: Do not remove the plexes on the root disk that correspond to theoriginal disk partitions.
■ Enter the following command to convert all the encapsulated volumes inthe root disk back to being accessible directly through disk partitionsinstead of through volume devices. There must be at least one other diskin the rootdg disk group in addition to the root disk for vxunroot tosucceed.
# /etc/vx/bin/vxunroot
Following the removal of encapsulation, the system is restarted from theunencapsulated root disk.
97Release NotesRemoving and rolling back
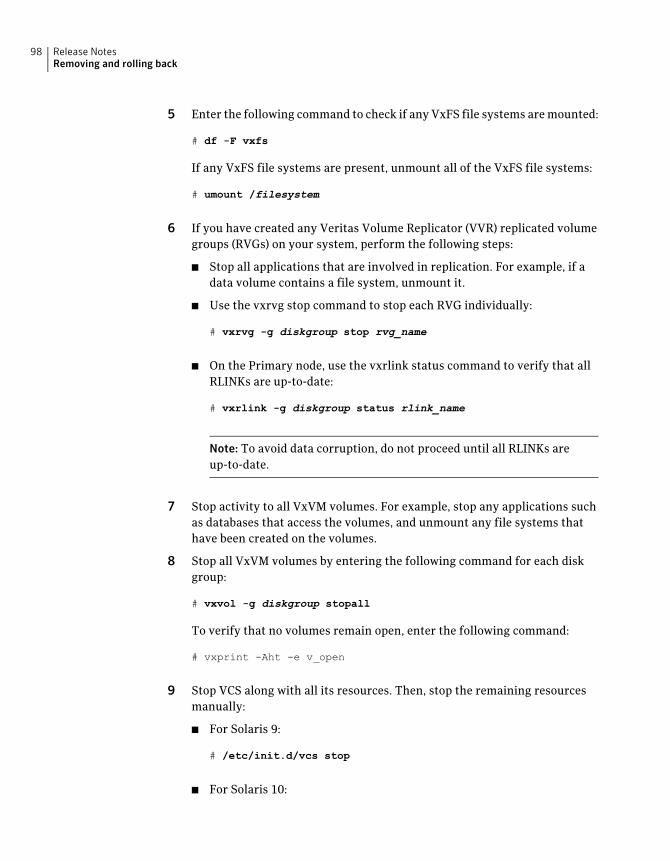
5 Enter the following command to check if any VxFS file systems aremounted:
# df -F vxfs
If any VxFS file systems are present, unmount all of the VxFS file systems:
# umount /filesystem
6 If you have created any Veritas Volume Replicator (VVR) replicated volumegroups (RVGs) on your system, perform the following steps:
■ Stop all applications that are involved in replication. For example, if adata volume contains a file system, unmount it.
■ Use the vxrvg stop command to stop each RVG individually:
# vxrvg -g diskgroup stop rvg_name
■ On the Primary node, use the vxrlink status command to verify that allRLINKs are up-to-date:
# vxrlink -g diskgroup status rlink_name
Note: To avoid data corruption, do not proceed until all RLINKs areup-to-date.
7 Stop activity to all VxVM volumes. For example, stop any applications suchas databases that access the volumes, and unmount any file systems thathave been created on the volumes.
8 Stop all VxVM volumes by entering the following command for each diskgroup:
# vxvol -g diskgroup stopall
To verify that no volumes remain open, enter the following command:
# vxprint -Aht -e v_open
9 Stop VCS along with all its resources. Then, stop the remaining resourcesmanually:
■ For Solaris 9:
# /etc/init.d/vcs stop
■ For Solaris 10:
Release NotesRemoving and rolling back
98

# svcadm disable vcs
10 If cluster fencingwasoriginally configured in enabledmode, type the followingon all the nodes:
# rm /etc/vxfenmode
11 Unmount /dev/odm:
# umount /dev/odm
12 Unload the ODM module:
# modinfo | grep odm
# modunload -i odm_mod_id
13 Unload the cluster fencing (vxfen) module:
■ For Solaris 9:
# /etc/init.d/vxfen stop
# modinfo | grep vxfen
# modunload -i vxfen_mod_id
■ For Solaris 10:
# svcadm disable vxfen
# modinfo | grep vxfen
# modunload -i vxfen_mod_id
14 Stop GAB and LLT in the following order:
For Solaris 9:
# /etc/init.d/gab stop
# /etc/init.d/llt stop
For Solaris 10:
# svcadm disable -t gab
# svcadm disable -t llt
99Release NotesRemoving and rolling back

15 Check if the VEA service is running:
# /opt/VRTS/bin/vxsvcctrl status
If the VEA service is running, stop it:
# /opt/VRTS/bin/vxsvcctrl stop
16 To shut down and remove the installedVeritas packages, use the appropriatecommand in the /opt/VRTS/install directory. For example, to uninstall theStorage Foundation orVeritas Storage FoundationCluster File System, enterthe following commands:
# cd /opt/VRTS/install
# ./uninstallsf [-rsh]
You canuse this command to remove the packages fromone ormore systems.For other products, substitute the appropriate script for uninstallsf suchas uninstallsfcfs for the Storage Foundation Cluster File System software.The -rsh option is required if you are using the remote shell (RSH) ratherthan the secure shell (SSH) touninstall the software simultaneously on severalsystems.
Note: Provided that the remote shell (RSH) or secure shell (SSH) has beenconfigured correctly, this command can be run on a single node of the clusterto install the software on all the nodes of the sub-cluster.
17 After uninstalling the Veritas software, refer to the appropriate product’s5.1 Installation Guide document to reinstall the 5.1 software.
Removing 5.1 RP1 on Storage Foundation for Oracle RACYoucanuse the followingprocedure touninstall the5.1RP1onStorageFoundationfor Oracle RAC systems.
To uninstall the 5.1 RP1 on SF Oracle RAC
1 Stop Oracle and CRS on each node of the cluster.
■ If CRS is controlled by VCS, log in as superuser on each system in thecluster and enter the following command:
# hastop -local
Release NotesRemoving and rolling back
100
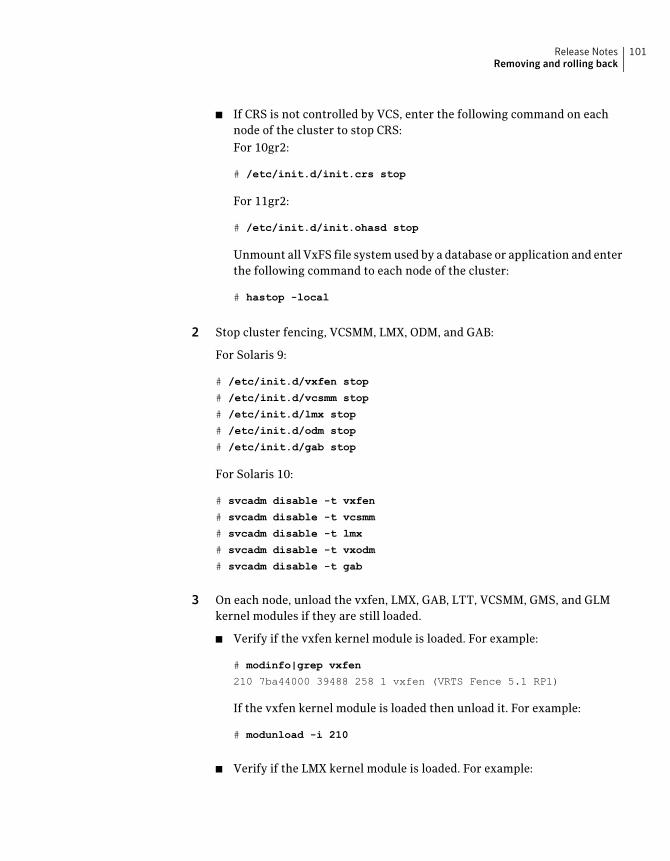
■ If CRS is not controlled by VCS, enter the following command on eachnode of the cluster to stop CRS:For 10gr2:
# /etc/init.d/init.crs stop
For 11gr2:
# /etc/init.d/init.ohasd stop
Unmount all VxFS file systemused by a database or application and enterthe following command to each node of the cluster:
# hastop -local
2 Stop cluster fencing, VCSMM, LMX, ODM, and GAB:
For Solaris 9:
# /etc/init.d/vxfen stop
# /etc/init.d/vcsmm stop
# /etc/init.d/lmx stop
# /etc/init.d/odm stop
# /etc/init.d/gab stop
For Solaris 10:
# svcadm disable -t vxfen
# svcadm disable -t vcsmm
# svcadm disable -t lmx
# svcadm disable -t vxodm
# svcadm disable -t gab
3 On each node, unload the vxfen, LMX, GAB, LTT, VCSMM, GMS, and GLMkernel modules if they are still loaded.
■ Verify if the vxfen kernel module is loaded. For example:
# modinfo|grep vxfen
210 7ba44000 39488 258 1 vxfen (VRTS Fence 5.1 RP1)
If the vxfen kernel module is loaded then unload it. For example:
# modunload -i 210
■ Verify if the LMX kernel module is loaded. For example:
101Release NotesRemoving and rolling back

# modinfo | grep lmx
257 fffffffff0444000 13f48 257 1 lmx (LLT Mux 5.1 RP1)
If the LMX kernel module is loaded then unload it. For example:
# modunload -i 257
■ Verify if the VCSMM kernel module is loaded. For example:
# modinfo | grep vcsmm
312 78bc0000 43ae8 293 1 vcsmm (VRTSvcsmm 5.1 RP1)
If the VCSMM kernel module is loaded then unload it. For example:
# modunload -i 312
■ Verify if the GMS kernel module is loaded. For example:
# modinfo | grep gms
253 fffffffff040c000 4550 244 1 vxgms
(VxGMS 5.1.0.0,REV=13Sep2009 (So))
If the GMS kernel module is loaded then unload it. For example:
# modunload -i 253
4 Verify if the GLM kernel module is loaded. For example:
# modinfo | grep glm
247 fffffefb2a000 27390 238 1 vxglm (VxGLM 5.1,REV=13Sep2009
SunOS 5)
If the GLM kernel module is loaded then unload it. For example:
# modunload -i 247
5 Verify if the GAB kernel module is loaded. For example:
# modinfo | grep gab
149 50cc6000 2b451 112 1 gab (GAB device 5.1 RP1)
If the GAB kernel module is loaded then unload it. For example:
# modunload -i 149
6 Stop LLT:
For Solaris 9:
Release NotesRemoving and rolling back
102

# /etc/init.d/llt stop
For Solaris 10:
# svcadm disable -t llt
■ Verify if the LLT kernel module is loaded. For example:
# modinfo|grep llt
147 50ca4000 d6bc 110 1 llt (LLT 5.1 RP1)
If the LLT kernel module is loaded then unload it. For example:
# modunload -i 147
7 To uninstall only 5.1 RP1 patches from SF Oracle RAC cluster, executefollowing commands on each node of the cluster:
■ For Solaris 9:
# patchrm 141270-02
# patchrm 142629-02
# patchrm 142631-02
# patchrm 142633-02
# patchrm 142634-02
# patchrm 143260-02
# patchrm 143261-02
# patchrm 143262-02
# patchrm 143263-02
# patchrm 143264-02
# patchrm 143265-02
# patchrm 143270-02
# patchrm 143271-02
# patchrm 143273-02
# patchrm 143274-02
# patchrm 143276-02
# patchrm 143279-02
# patchrm 143687-01
# patchrm 143696-01
# patchrm 143697-01
# patchrm 143706-02
# patchrm 143707-02
■ For Solaris 10:
103Release NotesRemoving and rolling back

# patchrm 141752-02
# patchrm 142630-02
# patchrm 142632-02
# patchrm 142635-02
# patchrm 143266-02
# patchrm 143267-02
# patchrm 143268-02
# patchrm 143269-02
# patchrm 143272-02
# patchrm 143275-02
# patchrm 143277-02
# patchrm 143280-02
# patchrm 143693-01
# patchrm 143698-01
# patchrm 143708-02
8 To uninstall only 5.1 RP1 patches from SF Oracle RAC cluster, executefollowing commands on each node of the cluster:
9 After uninstalling the packages, refer to the Storage Foundation for OracleRAC 5.1 Installation and Configuration Guide to reinstall the 5.1 software.
10 After removing the patches, reboot the nodes:
# /usr/sbin/shutdown -g0 -y -i6
Documentation addendumThe following sections contain additions to current documents.
Disk agentMonitors a physical disk or a partition. You can use the Disk agent to monitor aphysical disk or a slice that is exported to LDoms (available using LDoms 1.2 orlater). For LDoms with a physical disk or slice based boot image, a dependencymust exist between the guest domain and primary domain. You configure theprimary domain as the master of the guest domain.
Perform the following:
Release NotesDocumentation addendum
104

■ Set the failure-policy of primary (control) domain to stop. For example, in theprimary domain enter the following command to set the dependent domainto stop when the primary domain faults:
# ldm set-domain failure-policy=stop primary
■ Set the primary domain as the master for the guest domain.
# ldm set-domain master=primary guestldom
Figure 1-1 Sample service group that includes a Disk resource on Solaris
NIC
LDom
Disk
Agent functionsMonitor—Performs read I/Ooperations on the rawdevice to determine if a physicaldisk or a partition is accessible.
State definitionsONLINE—Indicates that the disk is working normally
FAULTED—Indicates that the disk has stopped working or is inaccessible.
UNKNOWN—Indicates that a problem exists either with the configuration or theability to determine the status of the resource.
AttributeThe Disk agent has one required attribute.
Partition—Indicateswhich partition tomonitor. Specify the partitionwith the fullpath beginning with a slash (/).
If this path is not specified, the name is assumed to reside in /dev/rdsk/.
Example: "/dev/rdsk/c2t0d0s2"
Type and dimension: string-scalar
Resource type definitionThe following is the agent's resource type definition.
105Release NotesDocumentation addendum

type Disk (
static int OfflineMonitorInterval = 60
static str ArgList[] = { Partition }
static str Operations = None
str Partition
)
Using the preonline_vvr trigger for RVGLogowner resourcesFor VCS configurations that use RVGLogowner resources, perform the followingsteps on each node of the cluster to enable VCS control of the RVGLogownerresources. For a service group that contains a RVGLogowner resource, changethe value of its PreOnline trigger to 1 to enable it.
To enable the PreOnline trigger from the command line on a service group that hasan RVGLogowner resource
◆ On each node in the cluster, perform the following command:
# hagrp -modify RVGLogowner_resource_sg PreOnline 1 -sys system
Where the service group is the service group that contains theRVGLogownerresource (RVGLogowner_resource_sg). The system is the name of the nodewhere you want to enable the trigger.
On each node in the cluster, merge the preonline_vvr trigger into the defaulttriggers directory.
To merge the preonline_vvr trigger
◆ On each node in the cluster, merge the preonline_vvr trigger to the/opt/VRTSvcs/bin/triggers directory.
# cp /opt/VRTSvcs/bin/sample_triggers/preonline_vvr \
/opt/VRTSvcs/bin/triggers
Refer to the sample configurations directory for samples of how to enablethese triggers (/opt/VRTSvcs/bin/sample_triggers.)
Release NotesDocumentation addendum
106

Installing or upgrading toOracle RAC 11g Release 2
This appendix includes the following topics:
■ Installing Oracle RAC 11g Release 2
■ Upgrading to Oracle RAC 11g Release 2
Installing Oracle RAC 11g Release 2This section provides instructions for installing Oracle RAC 11g Release 2.
Note: If you want to install Oracle RAC 10g or Oracle RAC 11g Release 1, see theVeritas Storage Foundation for Oracle RAC Installation and Configuration Guide(5.1) for instructions.
Perform the following steps to install Oracle RAC 11g Release 2:
1. Complete the preparatory tasks before starting the Oracle RAC installation.
See “Preparing to install Oracle RAC using the SF Oracle RAC installer ormanually” on page 108.
2. Install Oracle RAC 11g Release 2.
See “InstallingOracleGrid Infrastructureusing theOracleUniversal Installer”on page 118.
See “Configuring LLT links in the GPnP profile” on page 121.
See “Installing theOracle RACdatabase using theOracleUniversal Installer”on page 122.
3. Complete the following post-installation tasks:
AAppendix

■ Relink the SF Oracle RAC libraries with Oracle RAC:See “Linking the ODM library” on page 123.
■ Configure the CSSD resource.See “Configuring the CSSD resource manually” on page 124.
■ Modify the Oracle RAC configuration to prevent automatic startup ofOracle Clusterware.See “Preventing automatic startup of Oracle Clusterware” on page 125.
■ Create the Oracle RAC database.See “Creating the Oracle RAC database” on page 126.
■ Modify the Oracle RAC configuration to prevent automatic startup of theOracle database.See “Preventing automatic database startup” on page 126.
■ Configure VCS service groups for Oracle RAC.See “Configuring VCS service groups for Oracle RAC” on page 127.
Preparing to install Oracle RAC using the SF Oracle RAC installer ormanually
This section provides instructions for performing the pre-installation tasks forOracle RAC 11g Release 2.
Some preparatory steps are similar to those documented in the version 5.1 guideand are therefore not described here. Only instructions specific to Oracle RAC11g Release 2 are described in this section.
Complete the followingpreparatory tasks. For instructions, see theVeritasStorageFoundation for Oracle RAC Installation and Configuration Guide (5.1), Chapter"Before installing Oracle RAC".
■ Identify the public virtual IP addresses for use by Oracle.
■ Set the kernel parameters.
■ Verify the user "nobody" exists.
■ Create Oracle user and groups.In Oracle RAC 11g Release 2, you need to create the grid user and the userhome directory on each system in addition to the Oracle user and group.
■ Create storage for OCR and voting disk.The Oracle Clusterware files for Oracle Cluster Registry (OCR) and voting diskinOracle RAC11gRelease 2must reside in directories in the cluster file system(CFS). The Oracle Universal Installer for Oracle RAC11g Release 2 does not
Installing or upgrading to Oracle RAC 11g Release 2Installing Oracle RAC 11g Release 2
108
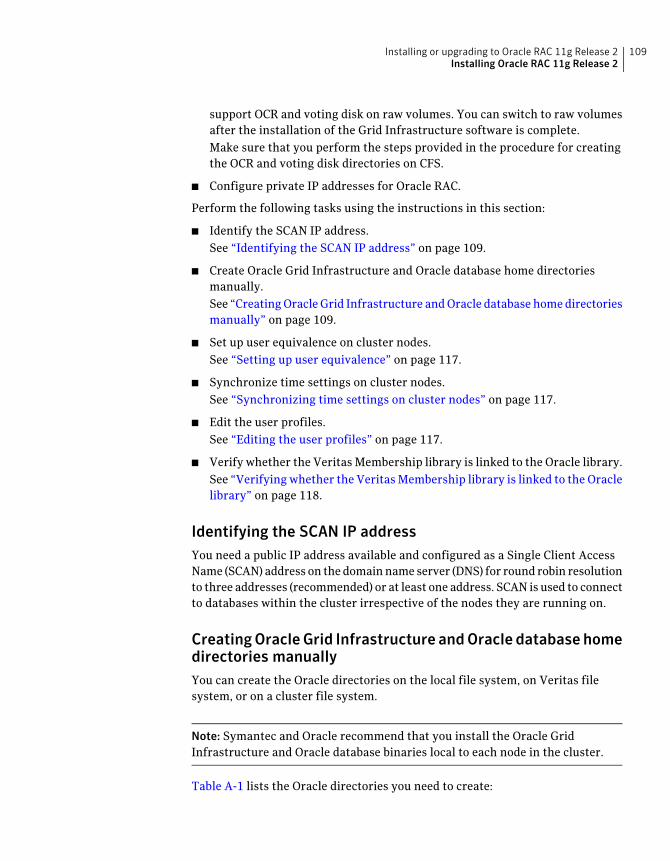
support OCR and voting disk on raw volumes. You can switch to raw volumesafter the installation of the Grid Infrastructure software is complete.Make sure that you perform the steps provided in the procedure for creatingthe OCR and voting disk directories on CFS.
■ Configure private IP addresses for Oracle RAC.
Perform the following tasks using the instructions in this section:
■ Identify the SCAN IP address.See “Identifying the SCAN IP address” on page 109.
■ Create Oracle Grid Infrastructure and Oracle database home directoriesmanually.See “CreatingOracleGrid Infrastructure andOracle database homedirectoriesmanually” on page 109.
■ Set up user equivalence on cluster nodes.See “Setting up user equivalence” on page 117.
■ Synchronize time settings on cluster nodes.See “Synchronizing time settings on cluster nodes” on page 117.
■ Edit the user profiles.See “Editing the user profiles” on page 117.
■ Verify whether the Veritas Membership library is linked to the Oracle library.See “Verifyingwhether the VeritasMembership library is linked to the Oraclelibrary” on page 118.
Identifying the SCAN IP addressYou need a public IP address available and configured as a Single Client AccessName (SCAN) address on the domainname server (DNS) for round robin resolutionto three addresses (recommended) or at least one address. SCAN is used to connectto databases within the cluster irrespective of the nodes they are running on.
CreatingOracleGrid Infrastructure andOracle database homedirectories manuallyYou can create the Oracle directories on the local file system, on Veritas filesystem, or on a cluster file system.
Note: Symantec and Oracle recommend that you install the Oracle GridInfrastructure and Oracle database binaries local to each node in the cluster.
Table A-1 lists the Oracle directories you need to create:
109Installing or upgrading to Oracle RAC 11g Release 2Installing Oracle RAC 11g Release 2

Table A-1 List of directories
DescriptionDirectory
The path to the home directory that stores the Oracle GridInfrastructure binaries. The Oracle Universal Installer (OUI)installs Oracle Clusterware and Oracle ASM into this directory,also referred to as GRID_HOME.
The directorymust be owned by the installation owner ofOracleGrid Infrastructure (oracle or grid), with the permission set to775.
The path to the Grid home directory must be the same on allnodes. As the root user, create a path compliant with OracleOptimal Flexible Architecture (OFA) guidelines, so that theOUIcan select that directory during installation.
Oracle GridInfrastructure HomeDirectory (GRID_HOME)
The base directory that contains all the Oracle installations. Ithelps to ensure that installations ofmultiple databasesmaintainan Optimal Flexible Architecture (OFA) configuration.
The path to the Oracle base directory must be the same on allnodes. The permissions on the Oracle base directorymust be atleast 750.
Oracle base directory(ORACLE_BASE)
The directory inwhich theOracle RAC software is installed. Thepath to theOracle homedirectorymust be the sameonall nodes.
You can create theOracle homedirectory on the local file systemor on a cluster file system.
Oracle home directory(ORACLE_HOME)
To create the directories on the local file system
1 Log in as the root user on each node.
2 Create the Oracle base directory (ORACLE_BASE):
# mkdir -p /u01/app/oracle
# chown -R oracle:oinstall /u01/app/oracle
# chmod -R 775 /u01/app/oracle
Installing or upgrading to Oracle RAC 11g Release 2Installing Oracle RAC 11g Release 2
110

3 Create the Oracle Grid Infrastructure home directory (GRID_HOME):
Note: Ensure the grid home directory is not a subdirectory of the Oracle basedirectory. Installing Oracle Clusterware in an Oracle base directory causesinstallation errors.
# mkdir -p /u01/grid
# chown -R grid:oinstall /u01/grid
4 Create the Oracle database home directory (ORACLE_HOME):
# mkdir -p /u01/app/oracle/product/11.2.0/dbhome_1
# chown -R oracle:oinstall /u01/app/oracle
# chmod -R 775 /u01/app/oracle
To create the file system and directories on the Veritas File system (VxFS)
The sample commands in the procedure are for node galaxy. Repeat the steps oneach node of the cluster.
1 As the root user, create a VxVM local diskgroup bindg_hostname on eachnode:
# vxdg init bindg_galaxy Disk_1
2 Create a volume binvol_hostname on each node:
# vxassist -g bindg_galaxy make binvol_galaxy 12G
3 Create a filesystem with the volume, binvol_hostname, on each node.
# mkfs -F vxfs /dev/vx/rdsk/bindg_galaxy/binvol_galaxy
4 Mount the filesystem on each node:
# mount -F vxfs /dev/vx/dsk/bindg_galaxy/binvol_galaxy
/u01
111Installing or upgrading to Oracle RAC 11g Release 2Installing Oracle RAC 11g Release 2

5 Create the following directories for Oracle RAC on each node:
GRID_HOME directory:
# mkdir -p /u01/grid
ORACLE_BASE directory:
# mkdir -p /u01/app/oracle
ORACLE_HOME directory:
# mkdir -p /u01/app/oracle/product/11.2.0/dbhome_1
6 Change the ownership and permissions on each node:
# chown -R grid:oinstall /u01/grid
# chown -R oracle:oinstall /u01/app/oracle
# chmod -R 775 /u01/app/oracle
7 Add an entry for the filesystem in the /etc/vfstab file on each node:
Edit the /etc/vfstab file, list the new file system, and specify "yes" for themount at boot column for each node:
# device device mount FS fsck mount mount
# to mount to fsck point type pass at boot options
#
.
/dev/vx/dsk/bindg_galaxy/binvol_galaxy
/dev/vx/rdsk/bindg_galaxy/binvol_galaxy \
/u01 vxfs 1 yes -
8 Repeat all the steps on each node of the cluster.
To create the file system and directories on cluster file system for Oracle GridInfrastructure and Oracle database
Perform the following steps on the CVM master node in the cluster.
Installing or upgrading to Oracle RAC 11g Release 2Installing Oracle RAC 11g Release 2
112

1 As the root user, create a VxVM shared disk group bindg:
# vxdg -s init bindg Disk_1
2 Create separate volumes for Oracle Grid Infrastructure (crsbinvol) andOracle database (orabinvol):
# vxassist -g bindg make crsbinvol 5G
# vxassist -g bindg make orabinvol 7G
3 Create the following directories for Oracle, ORACLE_BASE, GRID_HOME,
ORACLE_HOME.
The file system and directories created on shared storage in this procedureare based on the following layout:
/u01/app/oracle
/u01/app/oracle is on local storage.
$ORACLE_BASE
/u01/grid
/u01 is on local storage.
/u01/grid is on shared storage.
$GRID_HOME
/u01/app/oracle/product/11.2.0/dbhome_1
/u01/app/oracle/product/11.2.0 is on local storage.
/u01/app/oracle/product/11.2.0/dbhome_1 is on sharedstorage.
$ORACLE_HOME
# mkdir -p /u01/grid
# mkdir -p /u01/app/oracle
# mkdir -p /u01/app/oracle/product/11.2.0/dbhome_1
4 Create file systems with the volumes crsbinvol and orabinvol:
# mkfs -F vxfs /dev/vx/rdsk/bindg/crsbinvol
# mkfs -F vxfs /dev/vx/rdsk/bindg/orabinvol
5 Mount the file systems. Perform this step on each node.
# mount -F vxfs -o cluster /dev/vx/dsk/bindg/crsbinvol \
/u01/grid
# mount -F vxfs -o cluster /dev/vx/dsk/bindg/orabinvol \
/u01/app/oracle/product/11.2.0/dbhome_1
113Installing or upgrading to Oracle RAC 11g Release 2Installing Oracle RAC 11g Release 2

6 Change the ownership and permissions on all nodes of the cluster.
Note: The ownership and permissions must be changed on all nodes of thecluster because /u01/app/oraclemust be ownedby oracle:oinstall, otherwise/u01/app/oracle/oraInventory does not get created correctly on all thenodes. This can cause the Oracle Universal Installer to fail.
# chown -R grid:oinstall /u01/grid
# chown -R oracle:oinstall /u01/app/oracle
# chmod -R 775 /u01/app/oracle
# chown -R oracle:oinstall /u01/app/oracle/product/11.2.0/dbhome_1
7 Add the CVMVolDg and CFSMount resources to the VCS configuration.
See “Toadd theCFSMount andCVMVolDg resources to theVCS configurationusing CLI” on page 114.
To add the CFSMount and CVMVolDg resources to the VCS configuration using CLI
1 Change the permissions on the VCS configuration file:
# haconf -makerw
2 Configure the CVM volumes under VCS:
# hares -add crsorabin_voldg CVMVolDg cvm
# hares -modify crsorabin_voldg Critical 0
# hares -modify crsorabin_voldg CVMDiskGroup bindg
# hares -modify crsorabin_voldg CVMVolume -add crsbinvol
# hares -modify crsorabin_voldg CVMVolume -add orabinvol
# hares -modify crsorabin_voldg CVMActivation sw
Installing or upgrading to Oracle RAC 11g Release 2Installing Oracle RAC 11g Release 2
114

3 Set up the file system under VCS:
# hares -add crsbin_mnt CFSMount cvm
# hares -modify crsbin_mnt Critical 0
# hares -modify crsbin_mnt MountPoint "/u01/grid"
# hares -modify crsbin_mnt BlockDevice \
"/dev/vx/dsk/bindg/crsbinvol"
# hares -add orabin_mnt CFSMount cvm
# hares -modify orabin_mnt Critical 0
# hares -modify orabin_mnt MountPoint \
"/u01/app/oracle/product/11.2.0/dbhome_1"
# hares -modify orabin_mnt BlockDevice \
"/dev/vx/dsk/bindg/orabinvol"
4 Link the parent and child resources:
# hares -link crsorabin_voldg cvm_clus
# hares -link crsbin_mnt crsorabin_voldg
# hares -link crsbin_mnt vxfsckd
# hares -link orabin_mnt crsorabin_voldg
# hares -link orabin_mnt vxfsckd
5 Enable the resources:
# hares -modify crsorabin_voldg Enabled 1
# hares -modify crsbin_mnt Enabled 1
# hares -modify orabin_mnt Enabled 1
# haconf -dump -makero
115Installing or upgrading to Oracle RAC 11g Release 2Installing Oracle RAC 11g Release 2

6 Verify the resource configuration in the main.cf file.
CFSMount crsbin_mnt (
Critical = 0
MountPoint = "/u01/grid"
BlockDevice = "/dev/vx/dsk/bindg/crsbinvol"
)
CFSMount orabin_mnt (
Critical = 0
MountPoint = "/u01/app/oracle/product/11.2.0/dbhome_1"
BlockDevice = "/dev/vx/dsk/bindg/orabinvol"
)
CVMVolDg crsorabin_voldg (
Critical = 0
CVMDiskGroup = bindg
CVMVolume = { crsbinvol, orabinvol }
CVMActivation = sw
)
crsbin_mnt requires crsorabin_voldg
crsbin_mnt requires vxfsckd
orabin_mnt requires crsorabin_voldg
orabin_mnt requires vxfsckd
crsorabin_voldg requires cvm_clus
7 Verify that the resources are online on all systems in the cluster.
# hares -state crsorabin_voldg
# hares -state crsbin_mnt
# hares -state orabin_mnt
Note: At this point, the crsorabin_voldg resource is reported offline, and theunderlying volumes are online. Therefore, you need to manually bring theresource online on each node.
To bring the resource online manually:
# hares -online crsorabin_voldg -sys galaxy
# hares -online crsorabin_voldg -sys nebula
Installing or upgrading to Oracle RAC 11g Release 2Installing Oracle RAC 11g Release 2
116

Setting up user equivalenceYou must establish Oracle user and grid user equivalence on all nodes to allowthe Oracle Universal Installer to securely copy files and run programs on thenodes in the cluster without requiring password prompts.
Set up passwordless SSH communication between the cluster nodes for theOracleuser and the grid user.
Synchronizing time settings on cluster nodesSynchronize the time settings on all cluster nodes using NTP. For moreinformation, see the Oracle documentation.
Editing the user profilesEdit the Oracle user and grid user .profile file to set the paths to ORACLE_BASEand ORACLE_HOME on each node.
In the following sample procedure, the shell environment is ksh, the Oracle userhome directory is /home/oracle, and the Oracle grid user home directory is/home/grid.
To edit the Oracle user profile
1 As the Oracle user, set the proper environment variables on each node:
export ORACLE_BASE=/u01/app/oracle
export ORACLE_HOME=/u01/app/oracle/product/11.2.0/dbhome_1
export LD_LIBRARY_PATH=$ORACLE_HOME/lib
export PATH=$PATH:$ORACLE_HOME/bin
export CLASSPATH=$CLASSPATH:$ORACLE_HOME/jlib:\
$ORACLE_HOME/rdbms/jlib:$ORACLE_HOME/network/jlib
2 Apply the profile changes:
$ . /home/oracle/.profile
117Installing or upgrading to Oracle RAC 11g Release 2Installing Oracle RAC 11g Release 2
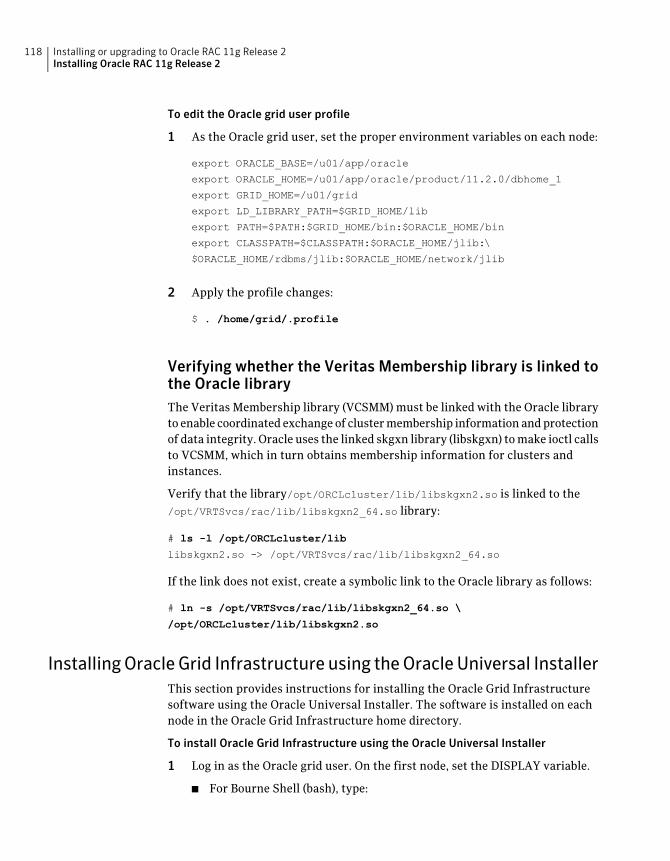
To edit the Oracle grid user profile
1 As the Oracle grid user, set the proper environment variables on each node:
export ORACLE_BASE=/u01/app/oracle
export ORACLE_HOME=/u01/app/oracle/product/11.2.0/dbhome_1
export GRID_HOME=/u01/grid
export LD_LIBRARY_PATH=$GRID_HOME/lib
export PATH=$PATH:$GRID_HOME/bin:$ORACLE_HOME/bin
export CLASSPATH=$CLASSPATH:$ORACLE_HOME/jlib:\
$ORACLE_HOME/rdbms/jlib:$ORACLE_HOME/network/jlib
2 Apply the profile changes:
$ . /home/grid/.profile
Verifying whether the Veritas Membership library is linked tothe Oracle libraryThe Veritas Membership library (VCSMM) must be linked with the Oracle libraryto enable coordinated exchangeof clustermembership information andprotectionof data integrity. Oracle uses the linked skgxn library (libskgxn) tomake ioctl callsto VCSMM, which in turn obtains membership information for clusters andinstances.
Verify that the library/opt/ORCLcluster/lib/libskgxn2.so is linked to the/opt/VRTSvcs/rac/lib/libskgxn2_64.so library:
# ls -l /opt/ORCLcluster/lib
libskgxn2.so -> /opt/VRTSvcs/rac/lib/libskgxn2_64.so
If the link does not exist, create a symbolic link to the Oracle library as follows:
# ln -s /opt/VRTSvcs/rac/lib/libskgxn2_64.so \
/opt/ORCLcluster/lib/libskgxn2.so
Installing Oracle Grid Infrastructure using the Oracle Universal InstallerThis section provides instructions for installing the Oracle Grid Infrastructuresoftware using the Oracle Universal Installer. The software is installed on eachnode in the Oracle Grid Infrastructure home directory.
To install Oracle Grid Infrastructure using the Oracle Universal Installer
1 Log in as the Oracle grid user. On the first node, set the DISPLAY variable.
■ For Bourne Shell (bash), type:
Installing or upgrading to Oracle RAC 11g Release 2Installing Oracle RAC 11g Release 2
118

$ DISPLAY=10.20.12.150:0.0;export DISPLAY
■ For C Shell (csh or tcsh), type:
$ setenv DISPLAY 10.20.12.150:0.0
2 Start the Oracle Universal Installer on the first node.
$ cd /dvd_mount
$ ./runInstaller
3 Enter the following information when prompted by the Oracle UniversalInstaller:
■ Select installation optionSelect the option InstallandConfigureGridInfrastructureforaCluster.
■ Select installation typeSelect the option Advanced Installation.
■ Specify cluster configurationEnter the SCAN name for the cluster that will be used by the databaseclients to connect to databases within the cluster.
■ Grid Plug and Play information
Provide the following information:
■ Name of the cluster
■ SCAN nameThe SCAN address on the domain name server (DNS) must resolve tothree addresses (recommended) or at least one address.
■ SCAN port
■ Specify network interface usageIdentify the planned use for each interface: Public, Private, or DoNot use.
Note: Mark the interfaces for the subnet containing the private IPaddresses managed by the PrivNIC/MultiPrivNIC agents as ‘Private’.
The interfaces that are Private are stored in GPnP profile as a'cluster_interconnect' forOracleClusterware communicationanddatabasecache fusion traffic.
■ Storage option information
119Installing or upgrading to Oracle RAC 11g Release 2Installing Oracle RAC 11g Release 2

Select the option Shared File System.
■ OCR storage optionEnter the full path of the location where you want to store the OCRinformation.For example, if you are storing the OCR information on CFS, enter:/ocrvote/ocr.
Note:Select the optionExternalRedundancy. OCRmirroring is performedby CVM.
■ Voting Disk storage optionEnter the full path of the location where youwant to store the voting diskinformation.For example, if you are storing the voting disk information on CFS, enter:/ocrvote/vote
Note: Select the option ExternalRedundancy. Voting disk redundancy isprovided by CVM.
■ Specify installation locationEnter the full path to the Oracle base directory and the Oracle GridInfrastructure home directory.
■ Create inventoryEnter the full path to the Oracle inventory directory where you want tostore the installation files.
4 Review the configuration summary presented by the Oracle UniversalInstaller. TheOracleUniversal Installer begins theOracleGrid Infrastructureinstallation.
Installing or upgrading to Oracle RAC 11g Release 2Installing Oracle RAC 11g Release 2
120

5 Run the orainstRoot.sh script as prompted by the Oracle Universal Installer.
6 Run the root.sh script on each node as prompted by the Oracle UniversalInstaller:
# cd $GRID_HOME
# ./root.sh
The Oracle Clusterware daemons are started on the node.
Note: The Oracle Cluster Verification Utility fails during the installation ofthe Oracle Grid Infrastructure software. You may ignore this error. This is aknown issue with Oracle.
Configuring LLT links in the GPnP profileUpdate the GPnP profile to include the remaining LLT links that were not addedto the profile during the Oracle Grid Infrastructure installation.
To configure the LLT links in the GPnP profile
1 View the currently configured interfaces:
# $GRID_HOME/bin/oifcfg getif
bge0 10.2.156.0 global public
bge1 192.168.12.0 global cluster_interconnect
The interfaces that are currently stored in the GPnP profile, their subnets,and their role (public or cluster_interconnect) are displayed.
2 Add the remaining LLT links to the GPnP profile:
# $GRID_HOME/bin/oifcfg setif -global \
bge2/192.168.12.0:cluster_interconnect
If you are using multiple IP addresses on different subnet for clusterinterconnect (for load balancing), add the remaining interface subnets to theGPnP profile.
# $GRID_HOME/bin/oifcfg setif -global \
bge2/192.168.12.0:cluster_interconnect
# $GRID_HOME/bin/oifcfg setif -global \
bge1/192.168.2.0:cluster_interconnect
121Installing or upgrading to Oracle RAC 11g Release 2Installing Oracle RAC 11g Release 2
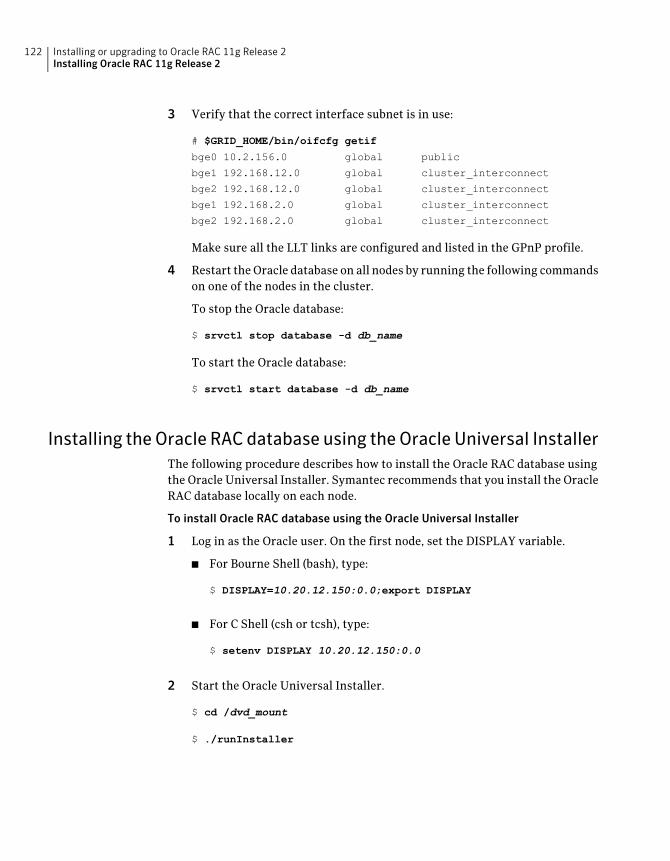
3 Verify that the correct interface subnet is in use:
# $GRID_HOME/bin/oifcfg getif
bge0 10.2.156.0 global public
bge1 192.168.12.0 global cluster_interconnect
bge2 192.168.12.0 global cluster_interconnect
bge1 192.168.2.0 global cluster_interconnect
bge2 192.168.2.0 global cluster_interconnect
Make sure all the LLT links are configured and listed in the GPnP profile.
4 Restart theOracle database on all nodes by running the following commandson one of the nodes in the cluster.
To stop the Oracle database:
$ srvctl stop database -d db_name
To start the Oracle database:
$ srvctl start database -d db_name
Installing the Oracle RAC database using the Oracle Universal InstallerThe following procedure describes how to install the Oracle RAC database usingthe Oracle Universal Installer. Symantec recommends that you install the OracleRAC database locally on each node.
To install Oracle RAC database using the Oracle Universal Installer
1 Log in as the Oracle user. On the first node, set the DISPLAY variable.
■ For Bourne Shell (bash), type:
$ DISPLAY=10.20.12.150:0.0;export DISPLAY
■ For C Shell (csh or tcsh), type:
$ setenv DISPLAY 10.20.12.150:0.0
2 Start the Oracle Universal Installer.
$ cd /dvd_mount
$ ./runInstaller
Installing or upgrading to Oracle RAC 11g Release 2Installing Oracle RAC 11g Release 2
122
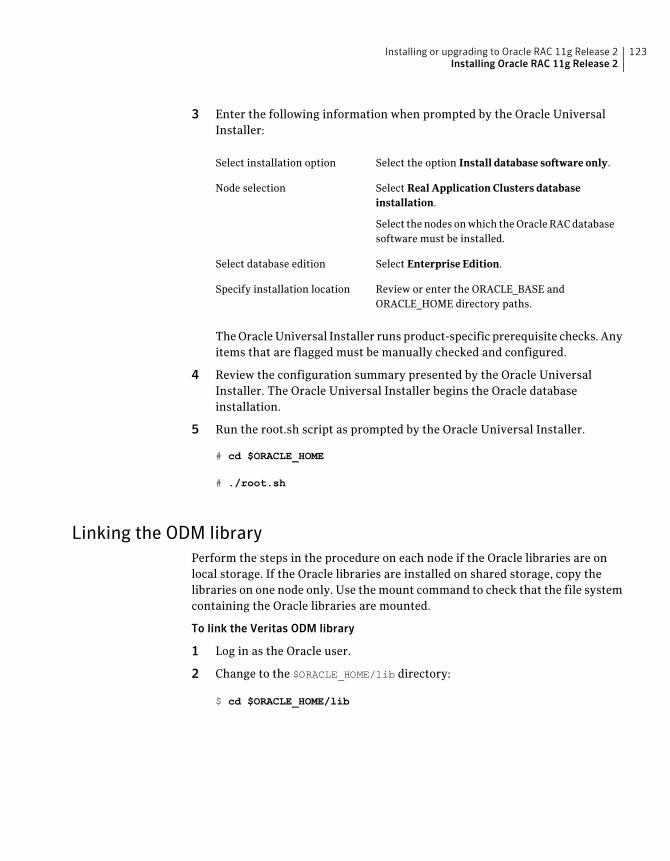
3 Enter the following information when prompted by the Oracle UniversalInstaller:
Select the option Install database software only.Select installation option
Select Real Application Clusters databaseinstallation.
Select the nodes onwhich theOracle RACdatabasesoftware must be installed.
Node selection
Select Enterprise Edition.Select database edition
Review or enter the ORACLE_BASE andORACLE_HOME directory paths.
Specify installation location
TheOracleUniversal Installer runs product-specific prerequisite checks. Anyitems that are flagged must be manually checked and configured.
4 Review the configuration summary presented by the Oracle UniversalInstaller. The Oracle Universal Installer begins the Oracle databaseinstallation.
5 Run the root.sh script as prompted by the Oracle Universal Installer.
# cd $ORACLE_HOME
# ./root.sh
Linking the ODM libraryPerform the steps in the procedure on each node if the Oracle libraries are onlocal storage. If the Oracle libraries are installed on shared storage, copy thelibraries on one node only. Use the mount command to check that the file systemcontaining the Oracle libraries are mounted.
To link the Veritas ODM library
1 Log in as the Oracle user.
2 Change to the $ORACLE_HOME/lib directory:
$ cd $ORACLE_HOME/lib
123Installing or upgrading to Oracle RAC 11g Release 2Installing Oracle RAC 11g Release 2

3 Back up Oracle's ODM library:
$ mv libodm11.so libodm11.so.oracle-`date +%m_%d_%Y-%H_%M_%S'`
4 Link the Veritas ODM library with Oracle's libodm library:
For Solaris SPARC:
$ ln -s /usr/lib/sparcv9/libodm.so libodm11.so
For Solaris x64:
$ ln -s /usr/lib/amd64/libodm.so libodm11.so
Configuring the CSSD resource manuallyAdd the cssd resource to the VCS configuration and set CSSD dependencies onthe resources that manage OCR and voting disk and the private IP addresses forOracle Clusterware.
Note: It is recommended that the OCR, voting disk, and PrivNIC/MultiPrivNICresources be configured in the same VCS group as that of the cssd resource. If theresources are not in the same group, set the appropriate dependencies betweenthe service groups.
To configure the CSSD resource
1 Change the permission on the VCS configuration file to read-write mode:
# haconf -makerw
2 Add the CSSD resource to the cvm group:
# hares -add cssd Application cvm
3 Modify the CSSD resource attributes:
# hares -modify cssd StartProgram /opt/VRTSvcs/rac/bin/cssd-online
# hares -modify cssd StopProgram /opt/VRTSvcs/rac/bin/cssd-offline
# hares -modify cssd MonitorProgram /opt/VRTSvcs/rac/bin/cssd-monitor
# hares -modify cssd CleanProgram /opt/VRTSvcs/rac/bin/cssd-clean
# hares -modify cssd Critical 0
# hares -modify cssd OnlineWaitLimit 5
Installing or upgrading to Oracle RAC 11g Release 2Installing Oracle RAC 11g Release 2
124
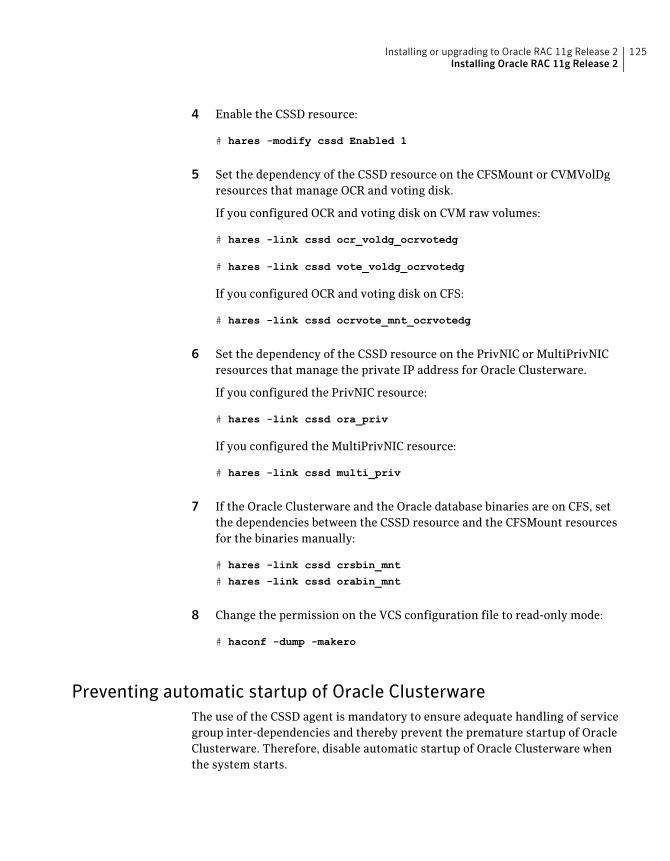
4 Enable the CSSD resource:
# hares -modify cssd Enabled 1
5 Set the dependency of the CSSD resource on the CFSMount or CVMVolDgresources that manage OCR and voting disk.
If you configured OCR and voting disk on CVM raw volumes:
# hares -link cssd ocr_voldg_ocrvotedg
# hares -link cssd vote_voldg_ocrvotedg
If you configured OCR and voting disk on CFS:
# hares -link cssd ocrvote_mnt_ocrvotedg
6 Set the dependency of the CSSD resource on the PrivNIC or MultiPrivNICresources that manage the private IP address for Oracle Clusterware.
If you configured the PrivNIC resource:
# hares -link cssd ora_priv
If you configured the MultiPrivNIC resource:
# hares -link cssd multi_priv
7 If the Oracle Clusterware and the Oracle database binaries are on CFS, setthe dependencies between the CSSD resource and the CFSMount resourcesfor the binaries manually:
# hares -link cssd crsbin_mnt
# hares -link cssd orabin_mnt
8 Change the permission on the VCS configuration file to read-only mode:
# haconf -dump -makero
Preventing automatic startup of Oracle ClusterwareThe use of the CSSD agent is mandatory to ensure adequate handling of servicegroup inter-dependencies and thereby prevent the premature startup of OracleClusterware. Therefore, disable automatic startup of Oracle Clusterware whenthe system starts.
125Installing or upgrading to Oracle RAC 11g Release 2Installing Oracle RAC 11g Release 2

To prevent automatic startup of Oracle Clusterware
1 Log in as the root user on each node in the cluster.
2 Disable automatic startup of Oracle Clusterware:
# $GRID_HOME/bin/crsctl disable crs
Where $GRID_HOME is the Oracle Grid Infrastructure home directory.
Creating the Oracle RAC databaseCreate the Oracle RAC database on shared raw volumes or cluster file systems.
To create the requisite database storage, see the instructions in theVeritas StorageFoundation for Oracle RAC Installation and Configuration Guide (5.1).
For instructions on creating the database, see the Oracle RAC documentation.
Preventing automatic database startupConfigure theOracleRACdatabase formanual startup if youwant theOracleRACdatabase to be managed by VCS using the Oracle agent. Before you configure theVCS service groups for Oracle, you need to prevent the Oracle database fromstarting automatically. The Oracle Clusterware and Oracle agent may attempt tostart the database instance at the same time if the database mount is available.To prevent theOracle database from starting automatically, youmust change themanagement policy for the database from automatic to manual using the OracleSRVCTL command. The command changes the AUTO_START attribute of theOracle database and instance resources.
To prevent automatic database startup
1 Register the database, if not already registered:
$ srvctl add database -d db-name -o oracle_home \
-p location-of-parameterfile -y manual
2 Once the database is registered, change the management policy for thedatabase to manual:
$ srvctl stop database -d db-name
$ srvctl modify database -d db-name -y manual
3 Start the database:
$ srvctl start database -d db-name
Installing or upgrading to Oracle RAC 11g Release 2Installing Oracle RAC 11g Release 2
126
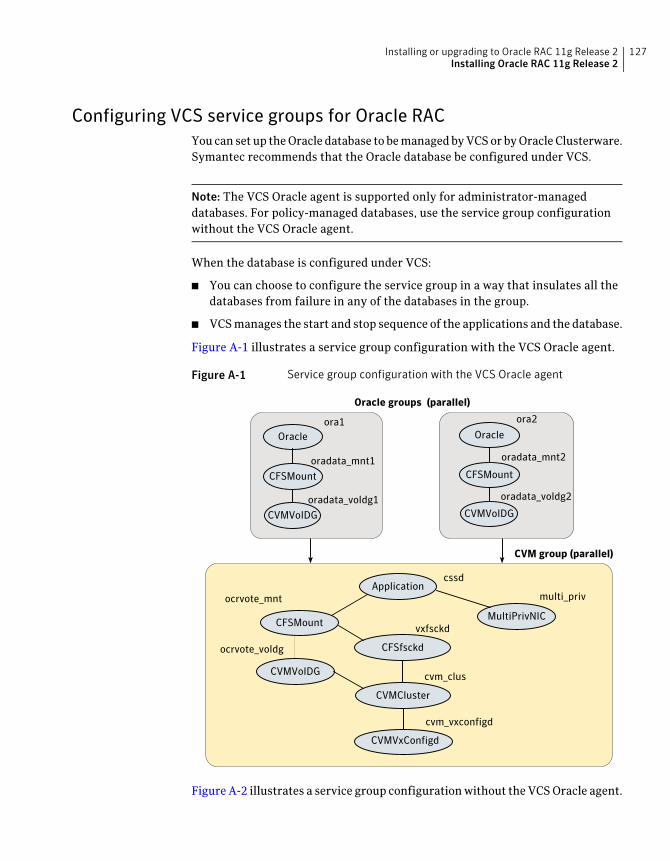
Configuring VCS service groups for Oracle RACYou can set up theOracle database to bemanagedbyVCSor byOracle Clusterware.Symantec recommends that the Oracle database be configured under VCS.
Note: The VCS Oracle agent is supported only for administrator-manageddatabases. For policy-managed databases, use the service group configurationwithout the VCS Oracle agent.
When the database is configured under VCS:
■ You can choose to configure the service group in a way that insulates all thedatabases from failure in any of the databases in the group.
■ VCSmanages the start and stop sequence of the applications and the database.
Figure A-1 illustrates a service group configuration with the VCS Oracle agent.
Figure A-1 Service group configuration with the VCS Oracle agent
Oracle groups (parallel)
CVM group (parallel)
Oracleora1
CFSMount
CVMVoIDG
oradata_mnt1
oradata_voldg1
ora2
oradata_mnt2
oradata_voldg2
Oracle
CFSMount
CVMVoIDG
CVMCluster
CFSfsckd
vxfsckd
cvm_clus
cvm_vxconfigd
CFSMount
ocrvote_mnt
ocrvote_voldg
CVMVoIDG
CVMVxConfigd
multi_priv
MultiPrivNIC
Applicationcssd
FigureA-2 illustrates a service group configurationwithout theVCSOracle agent.
127Installing or upgrading to Oracle RAC 11g Release 2Installing Oracle RAC 11g Release 2

Figure A-2 Service group configuration without the VCS Oracle agent
MultiPrivNIC
Applicationcssd
mpriv
CVMVoIDG
ocrvote_voldg
CFSMount
ocrvote_mnt
crs_grp(parallel)
cvm group (parallel)
CVMCluster
CFSfsckd
vxfsckd
cvm_clus
cvm_vxconfigd
CFSMountoradata_mnt
Critical=0
oradata_voldgCritical=0
CVMVoIDG
CVMVxConfigd
racdata_voldgCritical=0CVMVoIDG
CFSMountracdata_mntCritical=0
In a service group configurationwithout theVCSOracle agent, Oracle Clusterwarecontrols the database. An online local firm dependency exists between the OracleClusterware group and the CVM group. When the system starts, the CVM groupbrings up the volume andmount points for the databases. TheOracle Clusterwaregroup brings up the OCR and voting disk, configures the private IP address forOracle Clusterware, and starts Oracle Clusterware. Oracle Clusterware starts thedatabase and the application is brought online.
Note: In a service group configuration without the VCS Oracle agent, when thesystem starts, all volumes and mount points MUST be online for the dependentservice groups to be online.
To configure the Oracle database under VCS, create Oracle service groups afterinstalling Oracle RAC and creating a database.
You can create Oracle service groups by modifying the VCS configuration file inone of the following ways:
■ Edit the main.cf fileSee “Editing the main.cf file to configure VCS service groups for Oracle RAC”on page 129.
Installing or upgrading to Oracle RAC 11g Release 2Installing Oracle RAC 11g Release 2
128
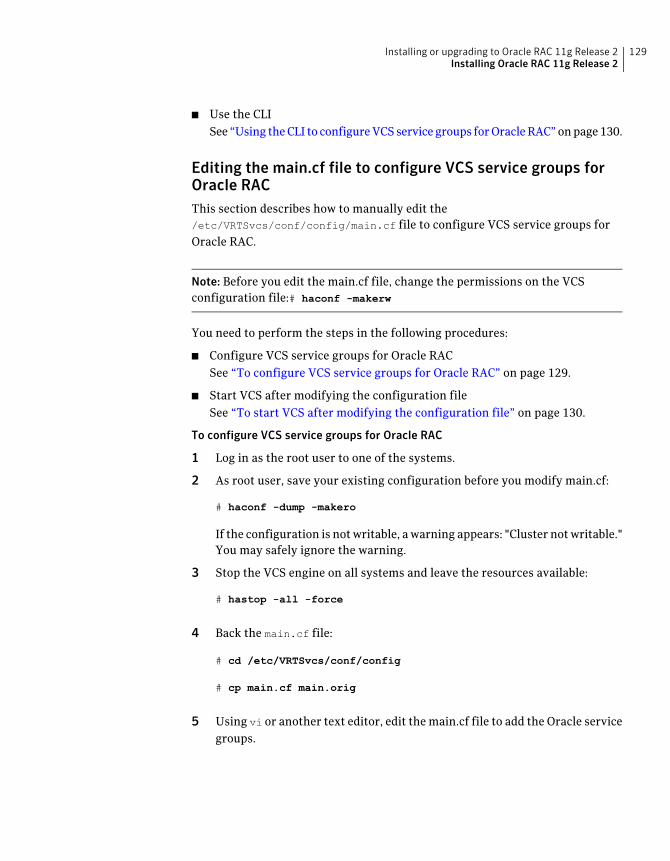
■ Use the CLISee “Using theCLI to configureVCSservice groups forOracleRAC”onpage130.
Editing the main.cf file to configure VCS service groups forOracle RACThis section describes how to manually edit the/etc/VRTSvcs/conf/config/main.cf file to configure VCS service groups forOracle RAC.
Note: Before you edit the main.cf file, change the permissions on the VCSconfiguration file:# haconf -makerw
You need to perform the steps in the following procedures:
■ Configure VCS service groups for Oracle RACSee “To configure VCS service groups for Oracle RAC” on page 129.
■ Start VCS after modifying the configuration fileSee “To start VCS after modifying the configuration file” on page 130.
To configure VCS service groups for Oracle RAC
1 Log in as the root user to one of the systems.
2 As root user, save your existing configuration before you modify main.cf:
# haconf -dump -makero
If the configuration is notwritable, awarning appears: "Cluster notwritable."You may safely ignore the warning.
3 Stop the VCS engine on all systems and leave the resources available:
# hastop -all -force
4 Back the main.cf file:
# cd /etc/VRTSvcs/conf/config
# cp main.cf main.orig
5 Using vi or another text editor, edit themain.cf file to add the Oracle servicegroups.
129Installing or upgrading to Oracle RAC 11g Release 2Installing Oracle RAC 11g Release 2

6 Save and close the main.cf file.
7 Verify the syntax of the file :
# cd /etc/VRTSvcs/conf/config
# hacf -verify .
For additional information and instructions on modifying the VCS configurationby editing the main.cf file:
See the Veritas Cluster Server User’s Guide.
Starting VCS after modifying the configuration file
You need to start VCS for the new configuration to take effect.
To start VCS after modifying the configuration file
1 Start VCS on one of the systems and check its status:
# hastart
# hastatus
2 When "LOCAL_BUILD" is listed in the message column, start VCS on the othersystems:
# hastart
3 Onone of the systems, enter the following command to verify that the servicegroups for Oracle RAC are brought online:
# hagrp -display
4 Check the status of the groups.
# hagrp -state
5 Check the status of the resources.
# hares -state
Using the CLI to configure VCS service groups for Oracle RACThis section describes how to configure the Oracle service group using the CLI.
The following procedure assumes that you have created the database.
Installing or upgrading to Oracle RAC 11g Release 2Installing Oracle RAC 11g Release 2
130

To configure the Oracle service group using the CLI
1 Change the cluster configuration to read-write mode:
# haconf -makerw
2 Add the service group to the VCS configuration:
# hagrp -add oradb1_grp
3 Modify the attributes of the service group:
# hagrp -modify oradb1_grp Parallel 1
# hagrp -modify oradb1_grp SystemList galaxy 0 nebula 1
# hagrp -modify oradb1_grp AutoStartList galaxy nebula
4 Add the CVMVolDg resource for the service group:
# hares -add oradata_voldg CVMVolDg oradb1_grp
5 Modify the attributes of the CVMVolDg resource for the service group:
# hares -modify oradata_voldg CVMDiskGroup oradatadg
# hares -modify oradata_voldg CVMActivation sw
# hares -modify oradata_voldg CVMVolume oradatavol
6 Add the CFSMount resource for the service group:
# hares -add oradata_mnt CFSMount oradb1_grp
7 Modify the attributes of the CFSMount resource for the service group:
# hares -modify oradata_mnt MountPoint "/oradata"
# hares -modify oradata_mnt BlockDevice \
"/dev/vx/dsk/oradatadg/oradatavol"
8 Add the Oracle RAC database instance to the service group:
# hares -add ora1 Oracle oradb1_grp
131Installing or upgrading to Oracle RAC 11g Release 2Installing Oracle RAC 11g Release 2

9 Modify the attributes of the Oracle resource for the service group:
# hares -modify ora1 Owner oracle
# hares -modify ora1 Home "/app/oracle/orahome"
# hares -modify ora1 StartUpOpt SRVCTLSTART
# hares -modify ora1 ShutDownOpt SRVCTLSTOP
10 Localize the Sid attribute for the Oracle resource:
# hares -local ora1 Sid
11 Set the Sid attributes for the Oracle resource on each system:
# hares -modify ora1 Sid vrts1 -sys galaxy
# hares -modify ora1 Sid vrts2 -sys nebula
12 Set the dependencies between the CFSMount resource and the CVMVolDgresource for the Oracle service group:
# hares -link oradata_mnt oradata_voldg
13 Set thedependencies between theOracle resource and theCFSMount resourcefor the Oracle service group:
# hares -link ora1 oradata_mnt
14 Create an online local firmdependency between the oradb1_grp service groupand the cvm service group:
# hagrp -link oradb1_grp cvm online local firm
15 Enable the Oracle service group:
# hagrp -enableresources oradb1_grp
16 Change the cluster configuration to the read-only mode:
# haconf -dump -makero
17 Bring the Oracle service group online on all the nodes:
# hagrp -online oradb1_grp -any
For more information and instructions on configuring the service groups usingthe CLI:
Installing or upgrading to Oracle RAC 11g Release 2Installing Oracle RAC 11g Release 2
132
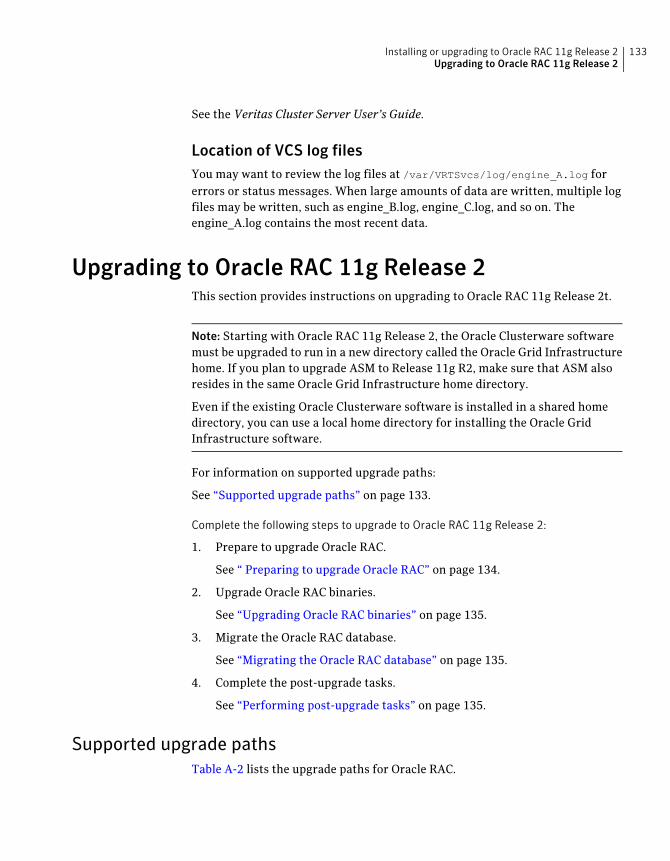
See the Veritas Cluster Server User’s Guide.
Location of VCS log filesYou may want to review the log files at /var/VRTSvcs/log/engine_A.log forerrors or status messages. When large amounts of data are written, multiple logfiles may be written, such as engine_B.log, engine_C.log, and so on. Theengine_A.log contains the most recent data.
Upgrading to Oracle RAC 11g Release 2This section provides instructions on upgrading to Oracle RAC 11g Release 2t.
Note: Starting with Oracle RAC 11g Release 2, the Oracle Clusterware softwaremust be upgraded to run in a new directory called the Oracle Grid Infrastructurehome. If you plan to upgrade ASM to Release 11g R2, make sure that ASM alsoresides in the same Oracle Grid Infrastructure home directory.
Even if the existing Oracle Clusterware software is installed in a shared homedirectory, you can use a local home directory for installing the Oracle GridInfrastructure software.
For information on supported upgrade paths:
See “Supported upgrade paths” on page 133.
Complete the following steps to upgrade to Oracle RAC 11g Release 2:
1. Prepare to upgrade Oracle RAC.
See “ Preparing to upgrade Oracle RAC” on page 134.
2. Upgrade Oracle RAC binaries.
See “Upgrading Oracle RAC binaries” on page 135.
3. Migrate the Oracle RAC database.
See “Migrating the Oracle RAC database” on page 135.
4. Complete the post-upgrade tasks.
See “Performing post-upgrade tasks” on page 135.
Supported upgrade pathsTable A-2 lists the upgrade paths for Oracle RAC.
133Installing or upgrading to Oracle RAC 11g Release 2Upgrading to Oracle RAC 11g Release 2

Table A-2 Supported upgrade paths for Oracle RAC
Upgrade toFrom current version
Oracle RAC 11g Release 2Oracle RAC 10g Release 2
Oracle RAC 11g Release 2Oracle RAC 11g Release 1
Note:When you upgrade to a different version of Oracle RAC, make sure that thefull path of the Oracle Clusterware home directory and the Oracle database homedirectory is different from the path where the existing version of Oracle RACresides.
The upgrade procedure assumes that the beginning configuration includes thefollowing components, and that these components are running on the clusternodes:
■ SF Oracle RAC 5.1 RP1
■ A supported version of the operating system
Preparing to upgrade Oracle RACPerform the following pre-upgrade tasks before upgrading Oracle RAC.
To prepare for upgrading Oracle RAC
1 Take a hot or cold backup of the existing database.
2 Back up the existing Oracle home and central inventory.
3 If the Oracle RAC database is under VCS control, freeze the Oracle servicegroups to prevent VCS from reporting the resource as faulted when OracleRAC stops and starts the database during the upgrade:
# haconf -makerw
# hagrp -freeze oracle_group -persistent
4 Freeze the cvm service group to prevent VCS from reporting the resource asfaulted when Oracle Clusterware is stopped and started during the upgrade:
# hagrp -freeze cvm_group -persistent
# haconf -dump -makero
Installing or upgrading to Oracle RAC 11g Release 2Upgrading to Oracle RAC 11g Release 2
134

Upgrading Oracle RAC binariesReviewyourOracle installationmanuals and the appropriateOracle supportWebsites before upgrading Oracle RAC.
Note:Make sure that you upgrade to Oracle RAC 11gRelease 2with the same usercredentials as that of the existing installation.
To upgrade Oracle RAC binaries
1 Upgrade Oracle Clusterware to a new directory called the Oracle gridinfrastructure home.
Note: Starting with Oracle RAC 11g Release 2, ASMmust reside in the OracleGrid Infrastructure home directory. If you plan to upgrade ASM to Release11gR2,make sure that you upgrade it to run in theOracleGrid Infrastructurehome directory.
For instructions, see the Oracle RAC documentation.
2 Make sure that Oracle Clusterware is running.
3 Install the Oracle RAC database binaries.
For instructions, see the Oracle RAC documentation.
4 Relink the SF Oracle RAC libraries with Oracle RAC.
See “Linking the ODM library” on page 123.
Migrating the Oracle RAC databaseFor instructions on migrating the existing Oracle RAC database, see the Oraclemetalink documentation.
After migrating the database, complete the post-upgrade tasks:
See “Performing post-upgrade tasks” on page 135.
Performing post-upgrade tasksPerform the steps in the following procedure to complete the upgrade.
135Installing or upgrading to Oracle RAC 11g Release 2Upgrading to Oracle RAC 11g Release 2

To perform post-upgrade tasks
1 Change the cluster configuration to read-write mode:
# haconf -makerw
2 Modify the Oracle RAC configuration to prevent automatic startup of OracleClusterware.
See “Preventing automatic startup of Oracle Clusterware” on page 125.
3 Modify theOracle RACdatabase configuration to prevent automatic databasestartup if you want the Oracle RAC database to bemanaged by VCS using theOracle agent.
See “Preventing automatic database startup” on page 126.
4 Unfreeze the VCS service groups that were frozen earlier.
As root user, enter:
# hagrp -unfreeze oracle_group -persistent
# hagrp -unfreeze cvm_group -persistent
# haconf -dump -makero
Installing or upgrading to Oracle RAC 11g Release 2Upgrading to Oracle RAC 11g Release 2
136


