98
Tivoli ® Web Services Manager and Tivoli ® Web Services Analyzer Release Notes Version 1.6 March 30, 2001
Tivoli® Web Services Manager and Tivoli® Web Services AnalyzerRelease Notes
Version 1.6March 30, 2001


Tivoli Web Services Manager and Tivoli Web Services Analyzer Release Notes (March 2001) Copyright NoticeCopyright © 2001 by IBM Corporation, including this documentation and all software. All rights reserved. May only be used pursuant to a Tivoli Systems Software License Agreement or Addendum for Tivoli Products to IBM Customer or License Agreement. No part of this publication may be reproduced, transmitted, transcribed, stored in a retrieval system, or translated into any computer language, in any form or by any means, electronic, mechanical, magnetic, optical, chemical, manual, or otherwise, without prior written permission of IBM Corporation. IBM Corporation grants you limited permission to make hardcopy or other reproductions of any machine-readable documentation for your own use, provided that each such reproduction shall carry the IBM Corporation copyright notice. No other rights under copyright are granted without prior written permission of IBM Corporation. The document is not intended for production and is furnished “as is” without warranty of any kind. All warranties on thisdocument are hereby disclaimed including the warranties of merchantability and fitness for aparticular purpose.
Note to U.S. Government Users—Documentation related to restricted rights—Use, duplication or disclosure is subject to restrictions set forth in GSA ADP Schedule Contract with IBM Corporation.
TrademarksThe following product names are trademarks of Tivoli Systems or IBM Corporation: AIX, IBM, OS/2, RS/6000, NetView, and Tivoli. Microsoft, Windows, Windows NT, and the Windows logo are either registered trademarks or trademarks of Microsoft Corporation in the United States and/or other countries.
UNIX is a registered trademark in the United States and other countries licensed exclusively through X/Open Company Limited.
ActionMedia, LANDesk, MMX, Pentium, and ProShare are trademarks or registered trademarks of Intel Corporation in the United States and other countries.
Linux is a registered trademark of Linus Torvalds.
Netscape and the Netscape N and Ship's Wheel logos are registered trademarks of Netscape Communications Corporation in the U.S. and other countries.
Red Hat and all Red Hat-based trademarks and logos are trademarks or registered trademarks of Red Hat, Inc. in the United States and other countries.
Sun, Sun Microsystems, the Sun Logo, Sun� workstation, Solaris Operating Environment� software, SPARCstation� 20 system, Java� technology, iPlanet� software, and Sun RPC are trademarks or registered trademarks of Sun Microsystems, Inc. in the United States and other countries.
This product includes software developed by the Apache Software Foundation (http://www.apache.org/). Copyright © 1999 The Apache Software Foundation.
VeriSign is a trademark of VeriSign, Inc. Copyright © 1998 VeriSign, Inc. All rights reserved.
Contains RSA technology. Copyright © 1991 RSA Laboratories, a division of RSA Data Security, Inc. All rights reserved.
Copyright © 1990, 1993, 1994, 1995, 1996. The Regents of the University of California. All rights reserved.
Other company, product, and service names mentioned in this document may be trademarks or servicemarks of others.
NoticeReferences in this publication to Tivoli Systems or IBM products, programs, or services do not imply that they will be available in all countries in which Tivoli Systems or IBM operates. Any reference to these products, programs, or services is not intended to imply that only Tivoli Systems or IBM products, programs, or services can be used. Subject to Tivoli Systems’ or IBM’s valid intellectual property or other legally protectable right, any functionally equivalent product, program, or service can be used instead of the referenced product, program, or service. The evaluation and verification of operation in conjunction with other products, except those expressly designated by Tivoli Systems or IBM, are the responsibility of the user.
Tivoli Systems or IBM may have patents or pending patent applications covering subject matter in this document. The furnishing of this document does not give you any license to these patents. You can send license inquiries, in writing, to the IBM Director of Licensing, IBM Corporation, North Castle Drive, Armonk, New York 10504-1785, U.S.A.


Tivoli Web Services Manager and Web Services Analyzer Release Notes iii
ContentsContents .................................................................................................... iii
Release Notes.....................................................................................................1
What’s New in Version 1.6 .........................................................................2
Product Features ........................................................................................3
Related Documentation ..............................................................................4
System Requirements ................................................................................5Requirements for the Internet Management Server ...............................5Requirements for Internet Management Endpoints ...............................6RDBMS Requirements...........................................................................7
DB2 Bufferpool and Pagesize..........................................................7Data Warehouse Recommendation.................................................7
Browser Requirements...........................................................................8
Defects Fixed in This Release....................................................................8
Installation Notes ........................................................................................9Version 1.6 Upgrade Instructions...........................................................9
UNIX platforms ................................................................................9Windows NT ..................................................................................10
Quality of Service .................................................................................12Same-machine Performance Boost...............................................12
Installing the Management Server on AIX forUse with an Oracle Database ..............................................................12Installing the Web Services Courier Endpoint on Red Hat...................24Installing the Quality of Service Endpoint on Red Hat .........................35Installing the Web Services Investigator Endpoint on Red Hat ............50Solaris and AIX Installation Script Location .........................................58Starting the Management Server on UNIX Platforms ..........................59Changes to Version 1.6 WSC Endpoint Uninstall ................................61
UNIX ..............................................................................................61NT ..................................................................................................61
Uninstalling the Management Server ...................................................62
Documentation Notes ...............................................................................62

iv Version 1.6
All Printed and Online Documents....................................................... 62Tivoli Web Services Manager and Web ServicesAnalyzer Installation Guide.................................................................. 62
Sample DB2 Database Configuration Procedure ......................... 66Tivoli Web Services Manager User’s Guide ........................................ 70
Configuring QoSM to Monitor Multiple Web Servers .................... 70Support for Dynamic Content in STI Playback .................................... 76Tivoli Web Services Analyzer User’s Guide ........................................ 82
Known Defects and Limitations ............................................................... 82Installation ........................................................................................... 82Graphical User Interface...................................................................... 84QoS ..................................................................................................... 85Site Investigator................................................................................... 86Synthetic Transaction Investigator ...................................................... 86Web Services Analyzer ....................................................................... 88Web Services Courier.......................................................................... 89Web Services Manager/Web Services Analyzer Applications............. 90
Contacting Support .................................................................................. 91

Tivoli Web Services Manager and Web Services Analyzer Release Notes 1
Release Notes
These release notes provide important information about Tivoli Web Services Manager and Tivoli Web Services Analyzer, Version 1.6. These notes are the most current information for the product and take precedence over all other documentation.
This chapter includes the following topics:
� What’s New in Version 1.6
� Product Features
� Related Documentation
� System Requirements
� Defects Fixed in This Version
� Known Defects and LImitations
� Support
Please review these notes thoroughly before installing or usingthese products.
2 Version 1.6
What’s New in Version 1.6Tivoli Web Services Manager and Tivoli Web Services Analyzer, Version 1.6, provide the following product improvements:
� New job configuration interface
• Scheduling a single job to run on multiple endpoints
• Job edit functionality
• Navigation tabs at the top of the workspace that allow you to easily switch between the various aspects of creating a job
� QoS and STI event drilldown
� Endpoint names appear in events forwarded to TEC
� New interface for recording transactions in Synthetic Transaction Investigator
� QoS support for multiple web servers
� The QoS Monitor installation for NT has been enhanced to allow you to set up non-SSL communication between the origin and proxy server if they are installed on the same computer, greatly increasing the speed of communication between the two. See “Quality of Service” on page 12.
� Support for Oracle on the AIX platform. See “Installing the Management Server on AIX for Use with an Oracle Database” on page 12.
� Support for running endpoints on Red Hat Linux 6.2
� Support for dynamic content in STI playback

Tivoli Web Services Manager and Web Services Analyzer Release Notes 3
Product FeaturesTivoli Web Services Manager and Tivoli Web Services Analyzer, Version 1.6, provide the following features for monitoring the availability and analyzing the performance of your web application environment:
Internet Management Server (IMS)Includes an HTTP server and a browser-based, graphical user interface (GUI) for domain administration. The management server also includes event service, scheduling, and security (authorization and authentication) core services.
Quality of Service (QoS)An application that establishes a proxy web server to monitor the performance of a targeted web server.
Site Investigator (SI)An application that “crawls” a web site to make sure that all the links are working properly.
Synthetic Transaction Investigator (STI)Two applications: one that can record a transaction in your web environment and save the session to an XML script (STIR), and one that can play back the “synthetic” transaction (STIP).
Web Services Courier (WSC)An application that collects log file data from web servers, and then formats and stores the information in the data warehouse database. The WSC supports log file collection from the following web servers:
• IIS 4.0• Netscape Enterprise 3.6+• iPlanet4.0+• Apache 1.3.12+• IBM HTTP Server 1.3.6+
TEC Event ForwardingAn optional feature used to process and format events, and

4 Version 1.6
then forward the events to the Tivoli Enterprise Console (TEC) in a format understood by the TEC.
Management RepositoryA database that stores performance information collected by Web Services Manager applications.
Data WarehouseA database that stores and formats log file information from web servers.
The features and applications of Web Services Manager and Web Services Analyzer are included in the installation packages for the Internet Management Server and for the Internet Management Endpoints.
Related DocumentationPlease refer to the following documents for complete information about installing and using Tivoli Web Services Manager and Tivoli Web Services Analyzer.
� Tivoli Web Services Manager and Web Services Analyzer Installation Guide
� Tivoli Web Services Manager User’s Guide, located on the product CD-ROM.
� Tivoli Web Services Analyzer User’s Guide, located on the product CD-ROM
All documents for Web Services Manager and Web Services Analyzer are also available on the following web site:
http://www.tivoli.com/products/websolutions
If you use Tivoli Decision Support (TDS), refer to the TDS documentation. All of the TDS 2.1 manuals and Release Notes cited in the Web Services Manager and Web Services Analyzer manuals are located on the TDS 2.1 CD-ROM (\Docs\Pdf), or in the D:\<destdir>\TDS 2.1\Docs\Pdf directory, where D is the drive letter and <destdir> is the base directory where TDS Version 2.1 is installed.

Tivoli Web Services Manager and Web Services Analyzer Release Notes 5
System RequirementsThis section lists the hardware and software required to install and run Tivoli Web Services Manager and Tivoli Web Services Analyzer. The requirements listed here take precedence over those listed in the Tivoli Web Services Manager and Web Services Analyzer Installation Guide. However, the installation guide also lists commands for determining if a system already meets the requirements. The installation guide also provides URLs for downloading a specific version of software, if needed.
Requirements for the Internet Management Server
The Internet Management Server requires the following:
What Requirement
Operating Systems
Windows NT 4.0 service pack 4 or higher, on a Pentium 333 MHz class machine (or better)
AIX 4.3.2 and 4.3.3
Solaris 2.6 or 2.7 on Sun SPARC
Java Development Kit (JDK)
For Windows NT, IBM’s JDK 1.1.7B (bundled with the product software)
For AIX, IBM’s “JDK 1.1.8 IBM Build a118_20000411 or later”
For Solaris, Sun’s JDK 1.1.7_08 (or higher in the JDK 1.1 series). For Solaris 2.6 only: Appropriate patch-level of 2.6 for your version of the JDK.
Disk Space(for Software Installation)
65 MB on all supported platforms
Disk Space (for Log Files)
Equivalent log file space required to support any other production web server. (QoS produces large log files on the management server host machine.)
Memory 256 MB on all supported platforms

6 Version 1.6
Requirements for Internet Management Endpoints
Internet Management Endpoints require the following:
What Requirement
Operating Systems
Windows NT 4.0 service pack 4 or higher
AIX 4.3.2 and 4.3.3
Solaris 2.6 or 2.7 (Solaris 2.7 is also called Solaris 7)
Red Hat Linux 6.2
Java Development Kit (JDK)
For Windows NT, IBM’s JDK 1.1.7B (bundled with the product software)
For AIX, IBM’s “JDK 1.1.8 IBM Build a118_20000411 or later”
For Solaris, Sun’s JDK 1.1.7_08 (or higher in the JDK 1.1 series). For Solaris 2.6 only: Appropriate patch-level of 2.6 for your version of the JDK.
For Red Hat, IBM Hursley JDK 1.1.8 sr5
Disk Space On all supported platforms:50 MB (QoS)15 MB (Web Services Courier—
not including the data warehouse database)15 MB (Web Services Investigator—
without the Recorder option)50 MB (Web Services Investigator—with Recorder option)
Memory 128 MB on all supported platforms

Tivoli Web Services Manager and Web Services Analyzer Release Notes 7
RDBMS Requirements
Tivoli Web Services Manager and Tivoli Web Services Analyzer require the following for the RDBMS:
DB2 Bufferpool and Pagesize
The default bufferpool and pagesize for DB2 are smaller than required for optimal performance by applications using the management repository or data warehouse database. Use the following command in DB2 to create a bufferpool of size 1000 and pagesize of 32 K:
create bufferpool bp32k size 1000 pagesize 32 k
See “Sample DB2 Database Configuration Procedure” on page 66 for more information regarding DB2 database configuration.
Data Warehouse Recommendation
For optimal performance, the temp table space and rollback segment of the data warehouse's database should be at least as large as the user space. For example, a 2 GB user space for the data warehouse corresponds to a 2 GB temp table space and a 2 GB rollback segment for the data warehouse.
What Requirement
RDBMS Oracle, versions 8.0.5, 8.0.6, 8.1.5, or 8.1.6 (thin driver only)
IBM DB2 6.1
Table Space 10 GB minimum for the Web Services Manager (management server) management repository.
20 GB minimum for the Web Services Analyzer (Web Services Courier application) data warehouse.
DB2 Bufferpool and Pagesize
Bufferpool size, at least 1000Pagesize, 32 K (the maximum pagesize allowed)

8 Version 1.6
Browser Requirements
The graphical user interface (GUI) for Tivoli Web Services Manager and Tivoli Web Services Analyzer uses a web browser. The following browsers are supported:
� Netscape Communicator Version 4.08 and above, excludingVersion 6
� Microsoft Internet Explorer Version 5.01 SP1 and above
Note: The new STI Recorder only works with Microsoft Internet Explorer.
In addition, you must turn on cookies for the browser. The GUI requires that cookies be enabled.
Defects Fixed in This ReleaseThe following list describes defects that have been fixed in the 1.6 version of the software:
1. Solaris platform: The install.sh script for endpoints sometimes returns an error message after the script has completed the installation process (CMVC-102788)
2. If the management server goes down (or is stopped) and then restarted, TEC event forwarding from Web Services Courier (WSC) endpoints is lost. (CMVC-103031)
3. Beginning an STI recording session (Synthetic Transaction Investigator->Record Transaction->Select Endpoint->Choose URL), and then clicking any other item in the Portfolio (navigation tree) before the session initiates, results in the session not being completed. (CMVC-102583)
No longer applicable for 1.6 because of redesigned recorder.
4. Unscheduling an STI playback job before it is scheduled to start kills the endpoint on which the job was scheduled to run. (CMVC-103091)
5. Cannot run several concurrent STI tasks on a single endpoint. (CMVC-103061)
Tivoli Web Services Manager and Web Services Analyzer Release Notes 9
6. The endpoint table displayed by the View All Endpoints functions displays an incorrect IP address for an endpoint that is on a host machine containing more than one network card. (CMVC-102883)
7. Multiple simultaneous users of the management server GUI are not supported. (CMVC-101627)
8. QoS real-time graphs are not available when endpoints are not displayed in Choose Endpoint drop-down list. (CMVC-102081)
Installation NotesFollow the Installation Guide for complete instructions for installing or uninstalling Tivoli Web Services Manager and Tivoli Web Services Analyzer. However, refer to these installation notes for additional steps or or changes to the installation procedures.
Version 1.6 Upgrade Instructions
There is a single executable for upgrading Internet Management Servers (IMS), endpoints, and applications. However, the IMS must be upgraded first. Also, once the upgraded, the installation cannot be downgraded back to 1.5. The upgrade may be uninstalled, but, unless it is immediately re-installed, you may have to completely remove the whole product and reinstall it from the Tivoli Web Services Manager 1.6 CD. To perform the upgrade, refer to the following procedures:
UNIX platforms
1. Stop the IMS and all of the endpoints registered to it.
2. Log in as the root user, or log in and become the root user on the machine you are upgrading.
3. Insert the product CD-ROM into the CD-ROM drive, and cd to the following directory:
<cdrom>/tws_160_upgrade/unix
where <cdrom> specifies the path to the CD-ROM.

10 Version 1.6
4. Make sure that there is at least 20 MB of free space in the temp directory.
5. Enter the following command:
/bin/sh ./upgrade.sh
6. You will be prompted to enter the location of the IMS directories of this computer. Enter the full path here.
If this is an endpoint upgrade, simply press Return.
Note: This path is extremely important for the IMS upgrade because the upgrade must be able to open a property file located in the IMS directory tree. If this path is entered incorrectly, the database will most likely NOT be upgraded to a 1.6 database schema.
7. You will then be prompted for some basic upgrade information. It will ask which type of software you would like to upgrade (it will only have options for the type of software installed on the machine you are currently upgrading). If an endpoint resides on the same machine as the IMS, Tivoli suggests that you run the upgrade only on the IMS the first time, and then run it again to upgrade the endpoint.
8. The upgrade will copy new files and make database adjustments.
9. Once the upgrade is complete, the product can be used immediately.
Note: If a UNIX-based STIR endpoint is upgraded, it will be rendered useless (because STIR now only runs on NT). However, this endpoint will NOT be unregistered from the database and will still show up in the database as a STIR endpoint, but it will not operate.
Windows NT
To upgrade an IMS or any endpoint except STIR enabled WSI endpoints*, complete the following steps:
Note: To run this upgrade on an NT endpoint, you must have a working JDK installed. You can test for an installed JDK by enteringjava -fullversion at a command prompt. Tivoli recommends a minimum JDK level of 1.1.7. A JDK installation is available on the product CD-ROM at /tws_160_upgrade/winnt/JDK117.exe.
Tivoli Web Services Manager and Web Services Analyzer Release Notes 11
1. Stop the IMS and all of the endpoints registered to it.
2. Log in as Administrator or as a user with Administrator privileges.
3. Make sure that there is at least 20 MB of free hard disk space for the temporary files that will be copied to the hard disk.
4. From Windows Explorer, open the CD-ROM and navigate to the /tws_160_upgrade/winnt directory.
5. Double-click upgrade.exe to launch the upgrade. You will be prompted to choose whether you want to upgrade a management server or an endpoint.
6. For an IMS upgrade, you will be prompted to enter the location of the IMS directories on this computer. Enter the full path here.
If this is an endpoint upgrade, you will not be prompted for a directory.
Note: This path is extremely important for the IMS upgrade because the upgrade must be able to open a property file located in the IMS directory tree. If this path is entered incorrectly, the database will most likely NOT be upgraded to a 1.6 database schema.
7. You will then be prompted for some basic upgrade information. It will ask which type of software you would like to upgrade (it will only have options for the type of software installed on the machine you are currently upgrading.) If an endpoint resides on the same machine as the IMS, Tivoli suggests that you run the upgrade only on the IMS the first time, and then run it again to upgrade the endpoint.
8. The upgrade will copy new files and make database adjustments.
9. Once the upgrade is complete, the product can be used immediately.
*Due to the processes involved in the IMS upgrade, STIR enabled WSI endpoints will be “unregistered” from the IMS. You must uninstall each STIR enabled WSI endpoint, and perform a fresh install of the STIR enabled WSI endpoint from the 1.6 CD so that the STIR enabled WSI endpoint will be registered with the IMS. (CMVC-104566)
12 Version 1.6
Quality of Service
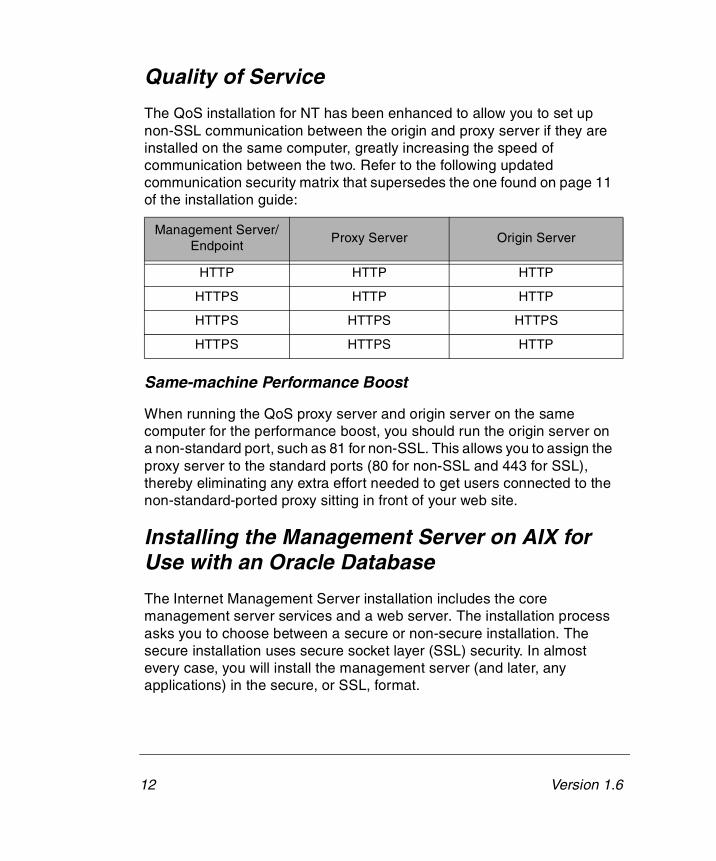
The QoS installation for NT has been enhanced to allow you to set up non-SSL communication between the origin and proxy server if they are installed on the same computer, greatly increasing the speed of communication between the two. Refer to the following updated communication security matrix that supersedes the one found on page 11 of the installation guide:
Same-machine Performance Boost
When running the QoS proxy server and origin server on the same computer for the performance boost, you should run the origin server on a non-standard port, such as 81 for non-SSL. This allows you to assign the proxy server to the standard ports (80 for non-SSL and 443 for SSL), thereby eliminating any extra effort needed to get users connected to the non-standard-ported proxy sitting in front of your web site.
Installing the Management Server on AIX forUse with an Oracle Database
The Internet Management Server installation includes the core management server services and a web server. The installation process asks you to choose between a secure or non-secure installation. The secure installation uses secure socket layer (SSL) security. In almost every case, you will install the management server (and later, any applications) in the secure, or SSL, format.
Management Server/ Endpoint
Proxy Server Origin Server
HTTP HTTP HTTP
HTTPS HTTP HTTP
HTTPS HTTPS HTTPS
HTTPS HTTPS HTTP

Tivoli Web Services Manager and Web Services Analyzer Release Notes 13
Before you install the management server, make sure you have met all the hardware and software requirements, including creating an Oracle database. This database instance becomes the management repository used by the Internet Management Server. The installation procedure prompts you for information about the database connection associated with the Oracle database instance that you created as a prerequisite to installing the Internet Management Server. The installation process checks the connection to the database, and then initializes the database for the management repository.
You must also have installed a supported version of the Java Development Kit (JDK) on the host machine for the management server. Supported versions include 1.1.8 and later versions of 1.1.x, but not Java 2.
The management server installation on AIX consists, in large part, of a series of checks or verifications to determine if the host machine environment can support the Internet Management Server program.
The installation program performs checks to verify the following:
� That a supported version of the JDK is already installed.
� That there is not an Internet Management Server currently installed on the host machine
� That there is sufficient disk space for the management server software to be installed in the specified directory
Note: You must install the software on a volume that has sufficient space. That is, you cannot create a symbolic link from a volume with insufficient space to a volume with sufficient space. For example, if you do not have enough space to install on the /usr volume and wish to install on a different volume, do not create a symbolic link from the /usr volume to a path on the other volume. Install directly on the volume you want to use.
� That there is sufficient memory for the management server to run efficiently.
� That the database for the management repository exists and that the management server can connect to the database
To install the Internet Management Server on Solaris, complete the following steps.

14 Version 1.6
1. Log in as the root user, or log in and become the root user, on the host machine for the Internet Management Server.
2. Insert the product CD-ROM into the CD-ROM drive, and cd to the following directory:
<cdrom>/aix4-r3/server
where <cdrom> specifies the path to the CD-ROM.
3. Enter the following command:
./install.sh
4. Before the installation interface runs, the script first displays the following message in the current shell:
5. Enter the name of the database type you have installed (in this case, Oracle). Note that this entry is case-sensitive.
6. The Welcome screen is displayed. Click Next to display the LicenseAgreement dialog.
7. Read the license agreement.

Tivoli Web Services Manager and Web Services Analyzer Release Notes 15
8. Click Accept to display the Prerequisite Software Check dialog:
The installation program verifies that a supported version of the JDK is already installed on the host machine. The JDK version must be at least 1.1.8, but less than Java 2. Click Next to perform the software check.
9. A confirmation dialog is displayed when the installation script verifies a supported version of the JDK.
10. Click OK to display the Existing Installation dialog.

16 Version 1.6
The installation script next verifies that there is not an existing Internet Management Server installed on the host machine. Click Next to perform this check.
11. A confirmation dialog is displayed when the installation script verifies that there is not a management server currently installed on the host machine.
12. Click OK to display the Choose Destination Location dialog.
You can choose the default installation directory or use the Browse button to choose a different directory. The default installation directory is:
/usr/Tivoli/Internet/ManagementServer/
13. After choosing an installation directory, click Next. The installation script then checks for sufficient disk space to install the management server in the specified directory. An informational message informs you that the check is in progress.

Tivoli Web Services Manager and Web Services Analyzer Release Notes 17
14. After a successful disk check, the Installed Memory Check dialog is displayed.
15. Click Next to perform the memory check. Even if the host machine has less than 256MB of memory, the install is not aborted. However, having less than the recommended amount of memory will result in slower performance. Tivoli highly recommends that you have 256MB of memory on the host machine for the management server.
16. After the results of the memory check, click Next to display the Database Connection Info dialog.
18 Version 1.6
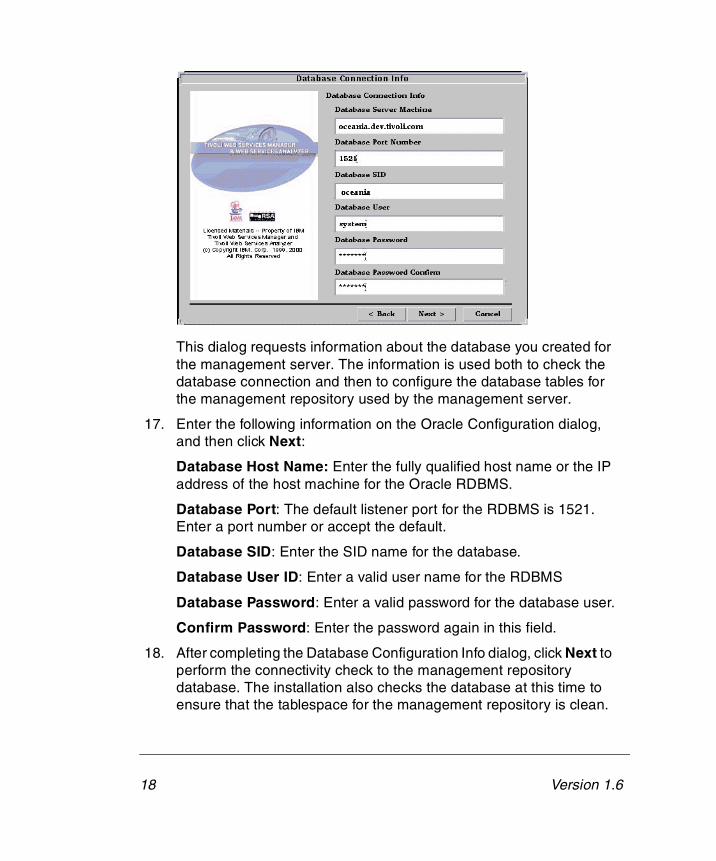
This dialog requests information about the database you created for the management server. The information is used both to check the database connection and then to configure the database tables for the management repository used by the management server.
17. Enter the following information on the Oracle Configuration dialog, and then click Next:
Database Host Name: Enter the fully qualified host name or the IP address of the host machine for the Oracle RDBMS.
Database Port: The default listener port for the RDBMS is 1521. Enter a port number or accept the default.
Database SID: Enter the SID name for the database.
Database User ID: Enter a valid user name for the RDBMS
Database Password: Enter a valid password for the database user.
Confirm Password: Enter the password again in this field.
18. After completing the Database Configuration Info dialog, click Next to perform the connectivity check to the management repository database. The installation also checks the database at this time to ensure that the tablespace for the management repository is clean.

Tivoli Web Services Manager and Web Services Analyzer Release Notes 19
19. A confirmation dialog indicates the success of the connectivity check. If you receive this dialog, click OK and proceed to step 21.
20. If, instead of a confirmation dialog, the program displays the Database Tablespace Cleanup Required dialog, then you must clean up the management repository database before you can continue the installation.
Refer to your Oracle documentation to clean up the tablespace (or to create a different tablespace). After cleaning up the database, click the Back button on the dialog to return to the Database Configuration Info dialog. If necessary, change the values in this dialog, and then click Next. The installation program again verifies the database connection and the status of the tablespace in the database. When the confirmation dialog is displayed, click OK.
21. After a successful database check, the HTTP Server Owner and Group dialog is displayed.
The owner and group you identify here is the owner and group under which the management server will run. This owner and group must already exist on the host machine.
22. Enter a valid owner name and group name in the dialog fields.
20 Version 1.6
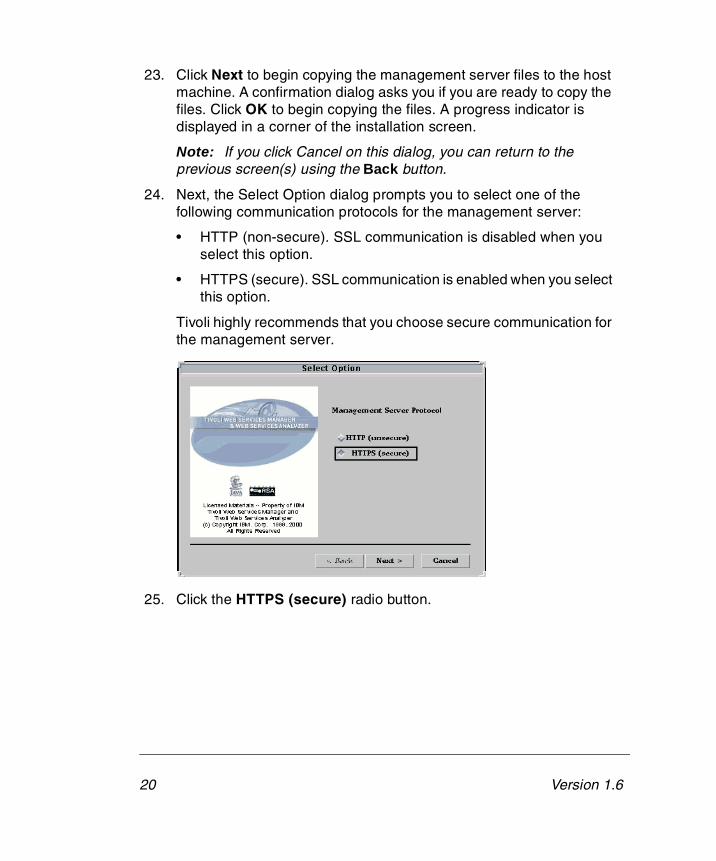
23. Click Next to begin copying the management server files to the host machine. A confirmation dialog asks you if you are ready to copy the files. Click OK to begin copying the files. A progress indicator is displayed in a corner of the installation screen.
Note: If you click Cancel on this dialog, you can return to the previous screen(s) using the Back button.
24. Next, the Select Option dialog prompts you to select one of the following communication protocols for the management server:
• HTTP (non-secure). SSL communication is disabled when you select this option.
• HTTPS (secure). SSL communication is enabled when you select this option.
Tivoli highly recommends that you choose secure communication for the management server.
25. Click the HTTPS (secure) radio button.

Tivoli Web Services Manager and Web Services Analyzer Release Notes 21
26. Click Next to display the Internet Management Server Configuration dialog.
Default values are displayed in the fields on this dialog, based on information you have already supplied to the installation program. The port number used is the default port for a secure server (443) or a non-secure server (80) depending on the protocol choice you previously made.
Normally, you should not need to change these values.
Note: The value that is entered in the Administrative Domain field must match the value for which the license key is cut. That is, you must supply a domain name when you request a license key. Whether you request a key before or after installing the management server, the domain name you entered in the Administrative Domain field on this dialog and the domain name you enter when you request a license key must be identical. In the installation guide, refer to Chapter 12, “License Management.”
27. Click Next to configure the management server based on the configuration parameters. A status dialog shows the progress of the configuration, and then the script displays the Install Database Tables dialog:

22 Version 1.6
This dialog informs you that the installation script is ready to install the management server table schema in your database.
28. Click Next to configure the management repository table schema. This process can be rather lengthy. When the process is finished, a Database Configuration Successful dialog is displayed. This dialog lists the actions that were taken during the process, and you can examine the list for any irregularities. Click Next to dismiss the confirmation dialog.
The rest of the installation for the management server differs depending on whether you installed a non-secure (HTTP) or secure (HTTPS) management server. If you installed a non-secure server, go to step 29. If you installed a secure server, go to step 30.
29. If you installed a non-secure management server, a dialog informs you that the installation program is ready to start the Internet Management Server.
Click Next to start the Internet Management Server and its associated web server.

Tivoli Web Services Manager and Web Services Analyzer Release Notes 23
30. If you installed a secure management server, the following Internet Management Server Startup dialog is displayed:
31. A management server is not started automatically because you need to either request a digital certificate from a certificate authority or create a self-signed certificate for the web server.
For installation purposes, follow the procedure outlined in “Generating a Self-Signed Certificate” on page 91 of the installation guide to create a self-signed certificate. You will then need to manually start the management server.
Click Next to dismiss the Tivoli Internet Management Server Startup dialog.
32. Click Finish on the final installation dialog, and the follow the procedure outlined in “Generating a Self-Signed Certificate” on page 91 of the installation guide.
Note: A self-signed certificate will allow you to complete and then test the installation of your management server. While you can use self-signed certificates for authentication, Tivoli highly recommends that you request one or more digital certificates from a trusted certificate authority. See Chapter 13, “All About Certificates,” in the installation guide for complete information on requesting and installing digital certificates.

24 Version 1.6
Installing the Web Services Courier Endpoint on Red Hat
The Web Services Courier endpoint is installed by means of an installation script that invokes a graphical user interface (GUI).
About the Installation Program
The endpoint installation program includes options for installing each of the Internet Management Endpoints. The installation process asks you to choose between a secure or non-secure installation. The secure installation uses secure socket layer (SSL) security. If you enabled SSL to install a secure internet management server, then you must also enable SSL for any endpoints that will be managed by that server.
The Web Services Courier (WSC) installation program installs the WSC endpoint on a host machine. This installation program does not install a web server.
Installing the Endpoint
To install the WSC Endpoint on Red Hat, complete the following steps.
1. Log in as root, or log in and become the root user, on the host machine where you want to install the WSC endpoint.
2. Insert the product CD-ROM into the CD-ROM drive, and cd to the following directory:
<cdrom>/linux-ix86/endpoint
where <cdrom> specifies the path to the CD-ROM.
3. Enter the following command:
./install.sh
4. The Welcome screen for the Internet Management Endpoint installation program is displayed.
5. Click Next to display the Internet Management Endpoint LicenseAgreement dialog. This dialog displays the software license agreement. Read the license agreement.
Tivoli Web Services Manager and Web Services Analyzer Release Notes 25
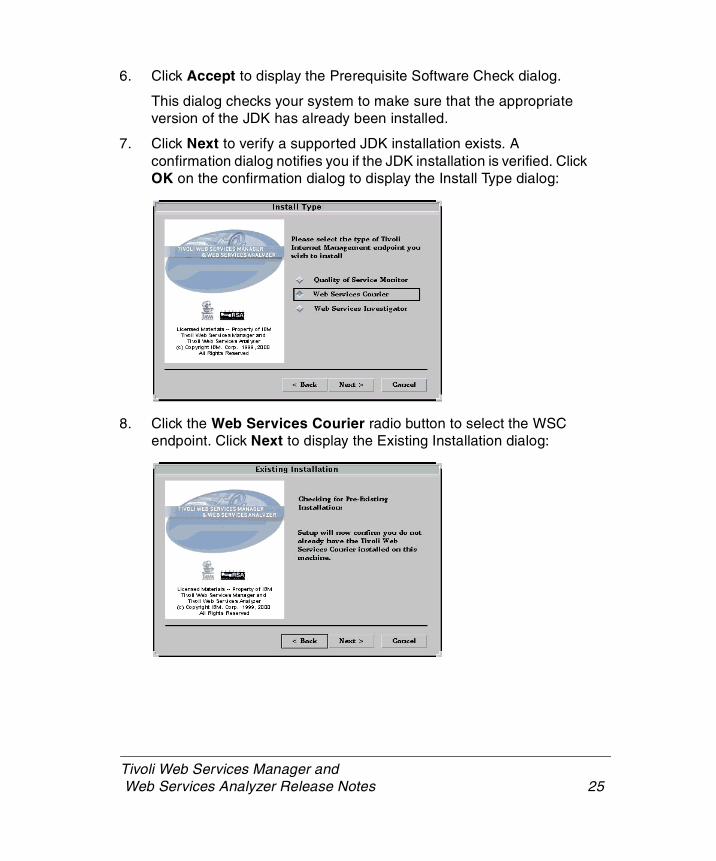
6. Click Accept to display the Prerequisite Software Check dialog.
This dialog checks your system to make sure that the appropriate version of the JDK has already been installed.
7. Click Next to verify a supported JDK installation exists. A confirmation dialog notifies you if the JDK installation is verified. Click OK on the confirmation dialog to display the Install Type dialog:
8. Click the Web Services Courier radio button to select the WSC endpoint. Click Next to display the Existing Installation dialog:

26 Version 1.6
9. This dialog checks your system for an existing WSC endpoint installation. If one exists, you will need to remove it before continuing with the installation. If no current WSC endpoint installation exists, the Existing Installation check returns a dialog confirming that there is not a current WSC installation on the host machine.
10. Click OK to display the Choose Destination Location dialog:
The default destination location on this dialog is:
/opt/Tivoli/Internet/WebServicesCourier
To specify a different installation directory, use the Browse button to navigate to the desired directory, and then click OK on the Browse dialog.
11. Click Next to specify the destination location and proceed with the installation. The installation script next verifies that there is adequate disk space to install the endpoint software in the specified location.

Tivoli Web Services Manager and Web Services Analyzer Release Notes 27
12. After disk space is verified, the Management Server Protocol dialog is displayed.
This dialog prompts you to specify the communications protocol for the management server where this endpoint will be registered. If you installed the management server as a non-secure server, click the HTTP radio button. If you installed the management server as a secure (SSL-enabled) server, click the HTTPS radio button.
Note: These procedures use the HTTPS protocol for all management server and management endpoint installation example. Tivoli highly recommends that you enable secure (HTTPS) communications between management servers and endpoints.

28 Version 1.6
13. Click Next to display the Management Server Information Dialog. This dialog provides information about the Internet Management Server so that the WSC endpoint can test the connection to the management server.
Enter the following information on this dialog:
Management Server Host Name: Enter the fully-qualified host name or the IP address of the machine where you installed the Internet Management Server.
Management Server Port Number: This item is used to specify the port number you already specified for the Internet Management Server. If the port number is other than the default, enter it in this field.
Note: The default port number for non-secure communication is 80. The default number for SSL-enabled communication is 443.

Tivoli Web Services Manager and Web Services Analyzer Release Notes 29
14. Click Next to display the Select Proxy dialog:
The NONE radio button is selected by default on this dialog.
15. Do one of the following on this dialog:
a. Accept the NONE default.
OR
b. Click either the SOCKS or HTTPS radio button to specify the type of proxy you are using.
16. Click Next to display the Management Server User Information dialog:
30 Version 1.6
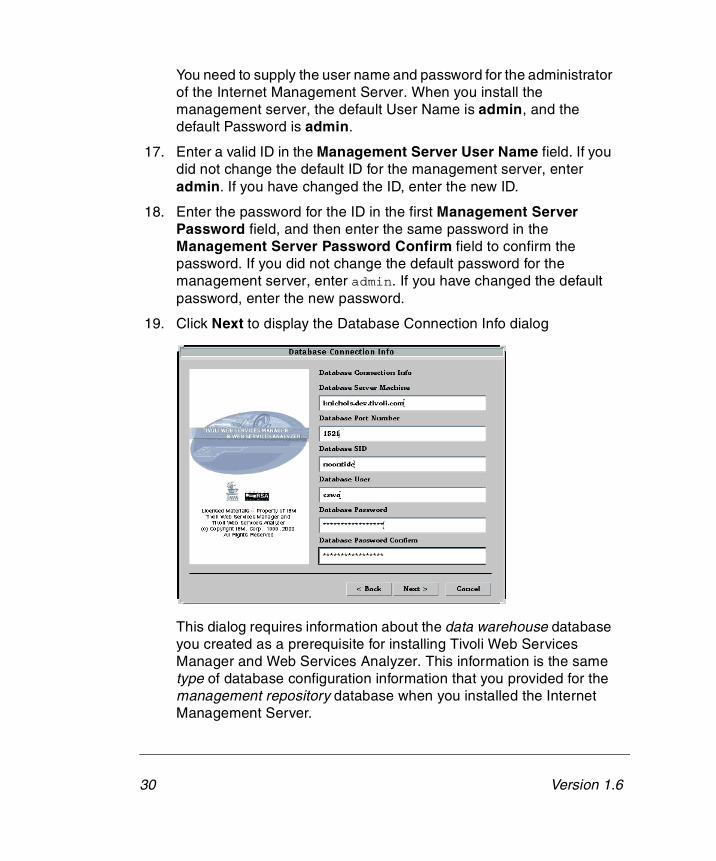
You need to supply the user name and password for the administrator of the Internet Management Server. When you install the management server, the default User Name is admin, and the default Password is admin.
17. Enter a valid ID in the Management Server User Name field. If you did not change the default ID for the management server, enter admin. If you have changed the ID, enter the new ID.
18. Enter the password for the ID in the first Management Server Password field, and then enter the same password in the Management Server Password Confirm field to confirm the password. If you did not change the default password for the management server, enter admin. If you have changed the default password, enter the new password.
19. Click Next to display the Database Connection Info dialog
This dialog requires information about the data warehouse database you created as a prerequisite for installing Tivoli Web Services Manager and Web Services Analyzer. This information is the same type of database configuration information that you provided for the management repository database when you installed the Internet Management Server.
Tivoli Web Services Manager and Web Services Analyzer Release Notes 31
The data warehouse database for the WSC endpoint is a separate Oracle instance from the management repository database. This database must be created on a machine within the enterprise (intranet). You should have created this database as part of your “pre-installation” activities, and the required information should be recorded in your “Endpoint Installation Checklist” on page 152 of the installation guide.
Enter the following information into the fields on this dialog:
Database Server Machine: Enter the fully-qualified host name or the IP address of the host machine for the data warehouse database.
Database Port Number: The default listener port for the RDBMS is 1521. Enter a port number or accept the default.
Database SID: Enter the SID name for the database you created for the data warehouse.
Database User: Enter a valid user name for the database.
Database Password: Enter a valid password for the database user.
Database Password Confirm: Enter the password again in this field.
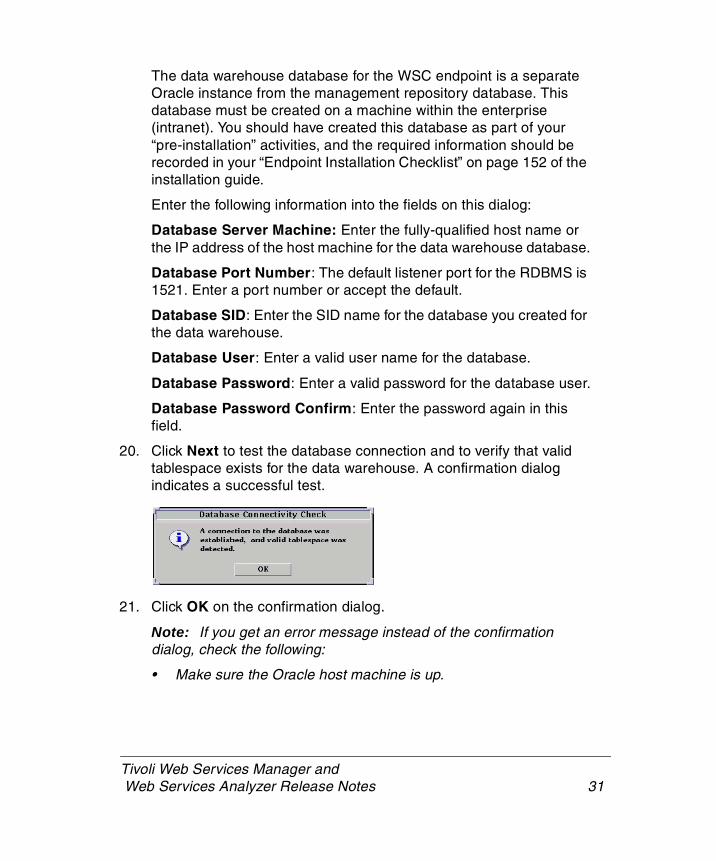
20. Click Next to test the database connection and to verify that valid tablespace exists for the data warehouse. A confirmation dialog indicates a successful test.
21. Click OK on the confirmation dialog.
Note: If you get an error message instead of the confirmation dialog, check the following:
• Make sure the Oracle host machine is up.

32 Version 1.6
• Make sure the information you entered on the Database Connection Info dialog is correct for the specified database instance.
• Make sure the listener port you entered (if not the default) is a valid port number.
You can use the Back button on the error message dialog to reset parameters, if necessary, and then retest the connection.
22. The installation script is now ready to begin copying files to your hard drive, and so indicates by displaying the following dialog:
23. Click OK to begin installing the WSC endpoint files. A status dialog in the lower right corner of the installation interface indicates the progress of the installation, and then, the Install Database Table Schema Installation dialog is displayed.
24. Click Next to begin configuring the database table schema for the data warehouse. Please note that this process can be a lengthy one.
Tivoli Web Services Manager and Web Services Analyzer Release Notes 33
25. After the database has been configured, a completion dialog indicates that the configuration was successful. This completion dialog also reports on the configuration activities and results. You have the opportunity to review the output to check for any irregularities.
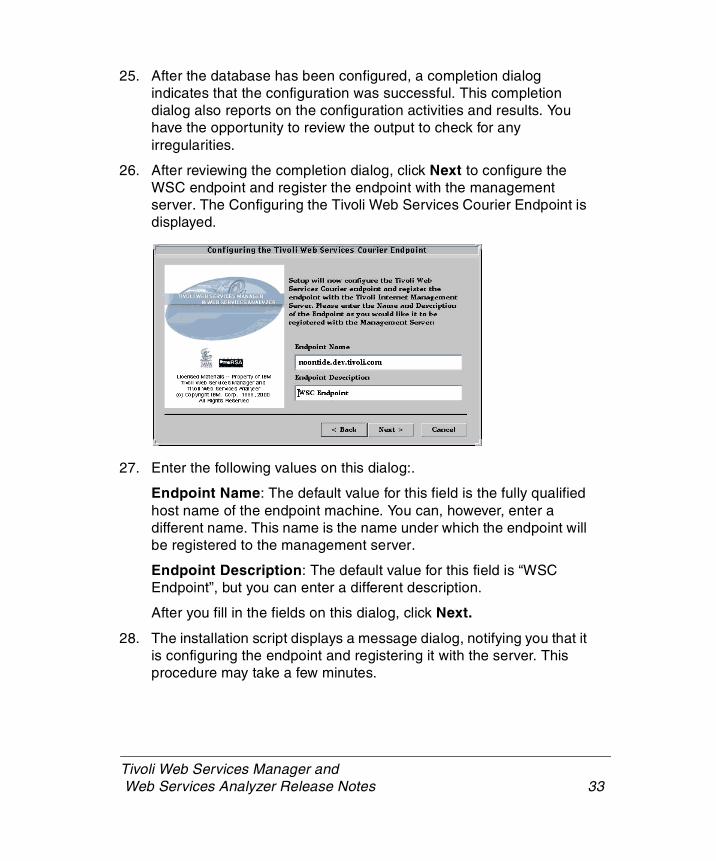
26. After reviewing the completion dialog, click Next to configure the WSC endpoint and register the endpoint with the management server. The Configuring the Tivoli Web Services Courier Endpoint is displayed.
27. Enter the following values on this dialog:.
Endpoint Name: The default value for this field is the fully qualified host name of the endpoint machine. You can, however, enter a different name. This name is the name under which the endpoint will be registered to the management server.
Endpoint Description: The default value for this field is “WSC Endpoint”, but you can enter a different description.
After you fill in the fields on this dialog, click Next.
28. The installation script displays a message dialog, notifying you that it is configuring the endpoint and registering it with the server. This procedure may take a few minutes.

34 Version 1.6
29. When the endpoint has been configured and successfully registered, a completion dialog displays the actions and results of the process. You can examine this output for any irregularities.
30. After reviewing the output on the completion dialog, click Next to display the Endpoint Startup Complete dialog. This dialog prompts you to examine the following file for any irregularities
/opt/Tivoli/Internet/WebServicesCourier/logs/endpoint.log
31. Click Next to display the Setup Complete dialog:
32. Click Finish to exit the installation interface.
Note: If you get an error message that the endpoint registration failed, the endpoint installation is canceled and all WSC endpoint files and information are uninstalled from the host machine. Before you try to re-install the endpoint:
• Make sure the Internet Management Server host machine is up.
• Make sure the Internet Management Server is running on the host machine.
• Make sure the listener port you entered (if not the default) is a valid port number.
Tivoli Web Services Manager and Web Services Analyzer Release Notes 35
Installing the Quality of Service Endpoint on Red Hat
The Quality of Service (QoS) endpoint is installed by means of an installation script that invokes a graphical user interface (GUI).
About the Installation Program
The endpoint installation program includes options for installing each of the Internet Management Endpoints. The installation process asks you to choose between a secure or non-secure installation. The secure installation uses secure socket layer (SSL) security. If you enabled SSL to install a secure management server, then you must also enable SSL for any endpoints that will be managed by that server.
The Quality of Service (QoS) installation program installs the QoS Monitor (QoSM) endpoint and a web server (the IBM HTTPServer, powered by Apache). This web server acts as the Proxy Web Server for the quality-of-service information you want to gather from a targeted web server. This targeted web server is referred to as the Origin Web Server during the setup program.
Installing the Endpoint
To install the QoSM Endpoint on Red Hat, complete the following steps.
1. Log in as root, or log in and become the root user, on the host machine where you want to install the QoSM endpoint.
2. If you are installing a secure endpoint, copy the key.kdb and key.sth files from the Internet Management Server to a directory on the endpoint machine (see the “Endpoint Installation Checklist” on page 152 of the installation guide).
3. Insert the product CD-ROM into the CD-ROM drive, and cd to the following directory:
<cdrom>/linux-ix86/endpoint
where <cdrom> specifies the path to the CD-ROM.

36 Version 1.6
4. Enter the following command:
./install.sh
5. The Welcome screen for the Internet Management Endpoint installation program is displayed.
6. Click Next to display the Internet Management Endpoint LicenseAgreement dialog. This dialog displays the software license agreement. Read the license agreement.
7. Click Accept to display the Prerequisite Software Check dialog.
This dialog checks your system to make sure that the appropriate version of the JDK has already been installed.
8. Click Next to verify a supported JDK installation exists. A confirmation dialog notifies you if the JDK installation is verified. Click OK on the confirmation dialog to display the Install Type dialog:
Tivoli Web Services Manager and Web Services Analyzer Release Notes 37
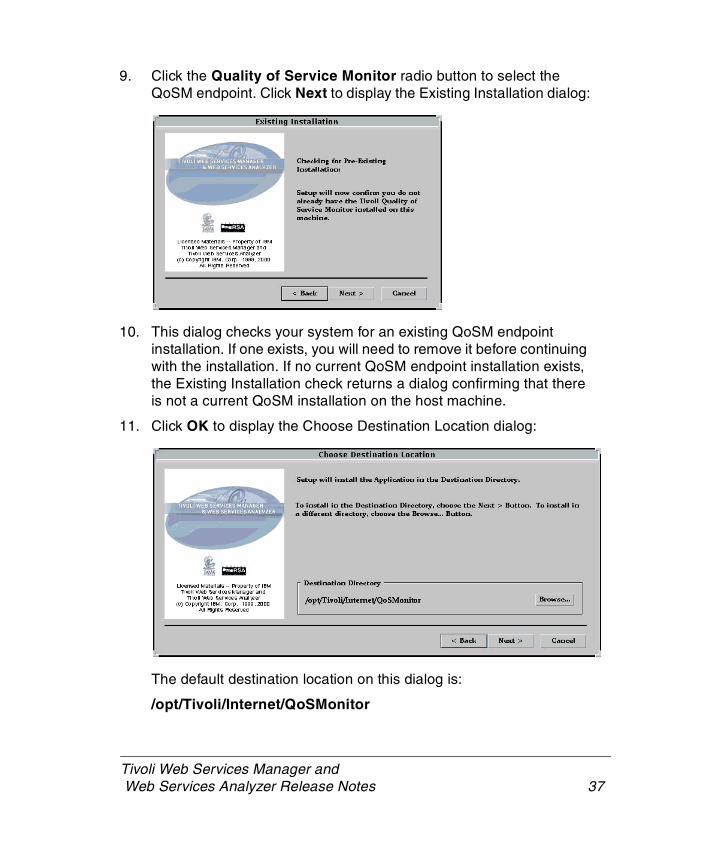
9. Click the Quality of Service Monitor radio button to select the QoSM endpoint. Click Next to display the Existing Installation dialog:
10. This dialog checks your system for an existing QoSM endpoint installation. If one exists, you will need to remove it before continuing with the installation. If no current QoSM endpoint installation exists, the Existing Installation check returns a dialog confirming that there is not a current QoSM installation on the host machine.
11. Click OK to display the Choose Destination Location dialog:
The default destination location on this dialog is:
/opt/Tivoli/Internet/QoSMonitor
38 Version 1.6
To specify a different installation directory, use the Browse button to navigate to the desired directory, and then click OK on the Browse dialog.
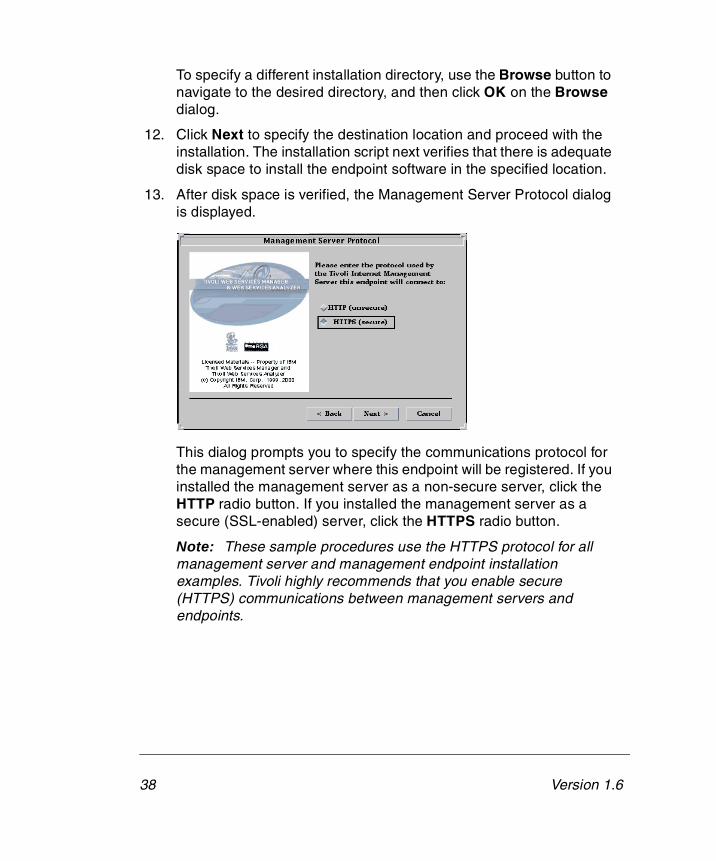
12. Click Next to specify the destination location and proceed with the installation. The installation script next verifies that there is adequate disk space to install the endpoint software in the specified location.
13. After disk space is verified, the Management Server Protocol dialog is displayed.
This dialog prompts you to specify the communications protocol for the management server where this endpoint will be registered. If you installed the management server as a non-secure server, click the HTTP radio button. If you installed the management server as a secure (SSL-enabled) server, click the HTTPS radio button.
Note: These sample procedures use the HTTPS protocol for all management server and management endpoint installation examples. Tivoli highly recommends that you enable secure (HTTPS) communications between management servers and endpoints.

Tivoli Web Services Manager and Web Services Analyzer Release Notes 39
14. Click Next to display the Management Server Information Dialog. This dialog provides information about the Internet Management Server so that the QoSM endpoint can test the connection to the management server.
Enter the following information on this dialog:
Management Server Host Name: Enter the fully-qualified host name or the IP address of the machine where you installed the Internet Management Server.
Management Server Port Number: This item is used to specify the port number you already specified for the Internet Management Server. If the port number is other than the default, enter it in this field.
Note: The default port number for non-secure communication is 80. The default number for SSL-enabled communication is 443.

40 Version 1.6
15. Click Next to display the Select Proxy dialog:
The NONE radio button is selected by default on this dialog.
16. Do one of the following on this dialog:
a. Accept the NONE default.
OR
b. Click either the SOCKS or HTTPS radio button to specify the type of proxy you are using.
17. Click Next to display the Management Server User Information dialog:

Tivoli Web Services Manager and Web Services Analyzer Release Notes 41
You need to supply the user name and password for the administrator of the Internet Management Server. When you install the management server, the default User Name is admin, and the default Password is admin.
18. Enter a valid ID in the Management Server User Name field. If you did not change the default ID for the management server, enter admin. If you have changed the ID, enter the new ID.
19. Enter the password for the ID in the first Management Server Password field, and then enter the same password in the Management Server Password Confirm field to confirm the password. If you did not change the default password for the management server, enter admin. If you have changed the default password, enter the new password.
20. Click Next to display the QoSM Web Server Protocol dialog. Use this dialog to select a communication protocol for the QoS Monitor web server. This web server will act as the proxy web server for the target or origin web server you want to monitor.
Check HTTP to select non-secure (SSL-disabled) communications, or check HTTPS to select secure (SSL-enabled) communications.
See “QoS Monitor” on page 11 to review the acceptable communication configurations allowed for the QoS Monitor proxy server.

42 Version 1.6
21. Click Next to display the QoSM Web Server Information dialog:
This dialog requests information about the QoSM Web Server that will be acting as the proxy web server for a target web server.
22. Enter the following information into the fields on this dialog:
QoSM Server Machine Host Name: Enter the fully-qualified name of the machine where the QoSM Proxy Server is installed.
QoSM Server Port: Enter the port number for the proxy web server. For secure web server communication, the default port number is 443.
23. Click Next to display the QoSM Server Owner and Group dialog:
Tivoli Web Services Manager and Web Services Analyzer Release Notes 43
The QoSM Proxy Web Server must run under a valid owner and group name on the host machine. Enter the following values on this dialog:
Owner: Enter the name of a user account that already exists on the host machine.
Group: Enter a valid group name for the user account.
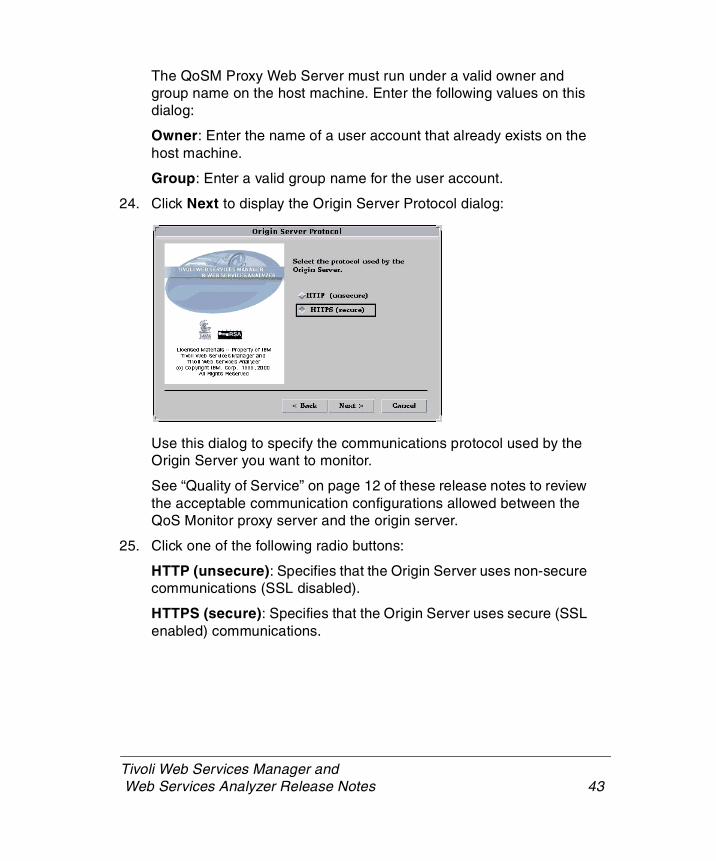
24. Click Next to display the Origin Server Protocol dialog:
Use this dialog to specify the communications protocol used by the Origin Server you want to monitor.
See “Quality of Service” on page 12 of these release notes to review the acceptable communication configurations allowed between the QoS Monitor proxy server and the origin server.
25. Click one of the following radio buttons:
HTTP (unsecure): Specifies that the Origin Server uses non-secure communications (SSL disabled).
HTTPS (secure): Specifies that the Origin Server uses secure (SSL enabled) communications.
44 Version 1.6
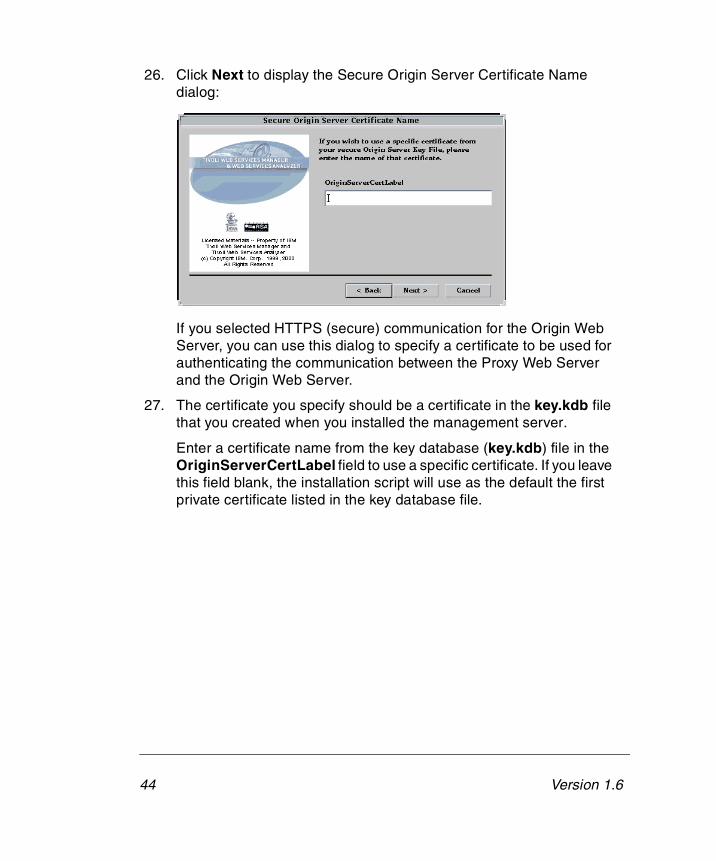
26. Click Next to display the Secure Origin Server Certificate Name dialog:
If you selected HTTPS (secure) communication for the Origin Web Server, you can use this dialog to specify a certificate to be used for authenticating the communication between the Proxy Web Server and the Origin Web Server.
27. The certificate you specify should be a certificate in the key.kdb file that you created when you installed the management server.
Enter a certificate name from the key database (key.kdb) file in the OriginServerCertLabel field to use a specific certificate. If you leave this field blank, the installation script will use as the default the first private certificate listed in the key database file.

Tivoli Web Services Manager and Web Services Analyzer Release Notes 45
28. Click Next to display the Origin Server Configuration dialog:
Use this dialog to identify the name of the host machine for the Origin Web Server (the target web server for which the QoSM web server will be acting as proxy).
29. Supply the following information on this dialog:
Origin Server Hostname: Enter the fully qualified host name for the machine where the Origin Web Server is running.
Origin Server Port: Enter the listener port number for the Origin Web Server. The default port for secure communications is 443, and the default port for unsecure communications is 80.
Click Next after you have completed this dialog.
30. The installation script is now ready to begin copying files to your hard drive, and so indicates by displaying the following dialog:
Click OK to begin copying the endpoint files. The installation script displays a progress dialog on the interface, and then a completion dialog to indicate that the files have been copied.

46 Version 1.6
31. Click OK to display the QoSM Secure Server Key File dialog:
When you are using secure QoS Monitor communications, you need to specify a path to a copy of the key.kbd file that was modified (or created) during the installation of the Internet Management Server. Methods for providing a copy of this file to the setup program were listed in the “Endpoint Installation Checklist” on page 152 of the installation guide. The key.sth (stash file for the encrypted key file password) must also reside in the same directory as the key.kdb file.
32. Enter the path to the key.kdb file in the QoSM Secure Server Key File field.
33. Click Next to display the QoSM Secure Sever Certificate Name dialog.

Tivoli Web Services Manager and Web Services Analyzer Release Notes 47
34. If you want to use a particular certificate from the key database (key.kdb) file, enter the label for the certificate in the HTTPCertLabel field. This certificate is used to authenticate the endpoint communication to the management server. If you don’t want to specify a certificate label, leave the field blank. By default, the installation program will use the first private certificate that it finds in the key database file.
35. Click Next to display the Configuring QoSM Web Server dialog:
36. Click Next to configure the QoSM Web Server. When configuration is complete, the installation script notifies you that it is ready to start the QoSM Web Server:

48 Version 1.6
37. Click Next to start the QoSM Web Server. A completion dialog is displayed when the web server has been successfully started. This dialog also reports the results of the startup process. You can review this output for any irregularities, and then click Next to continue the installation.
38. The next step in the process is to configure the QoSM endpoint and register the endpoint with the Internet Management Server. The following dialog is displayed:
39. Enter the following values on this dialog:.
Endpoint Name: The default value for this field is the fully qualified host name of the endpoint machine. You can, however, enter a different name. This name is the name under which the endpoint will be registered to the management server.
Endpoint Description: The default value for this field is “QoS Monitor”, but you can enter a different description.
After you fill in the fields on this dialog, click Next.
40. The installation script displays a message dialog, notifying you that it is configuring the endpoint and registering it with the server. This procedure may take a few minutes.
41. When the endpoint has been configured and successfully registered, a completion dialog displays the actions and results of the process. You can examine this output for any irregularities.
Tivoli Web Services Manager and Web Services Analyzer Release Notes 49
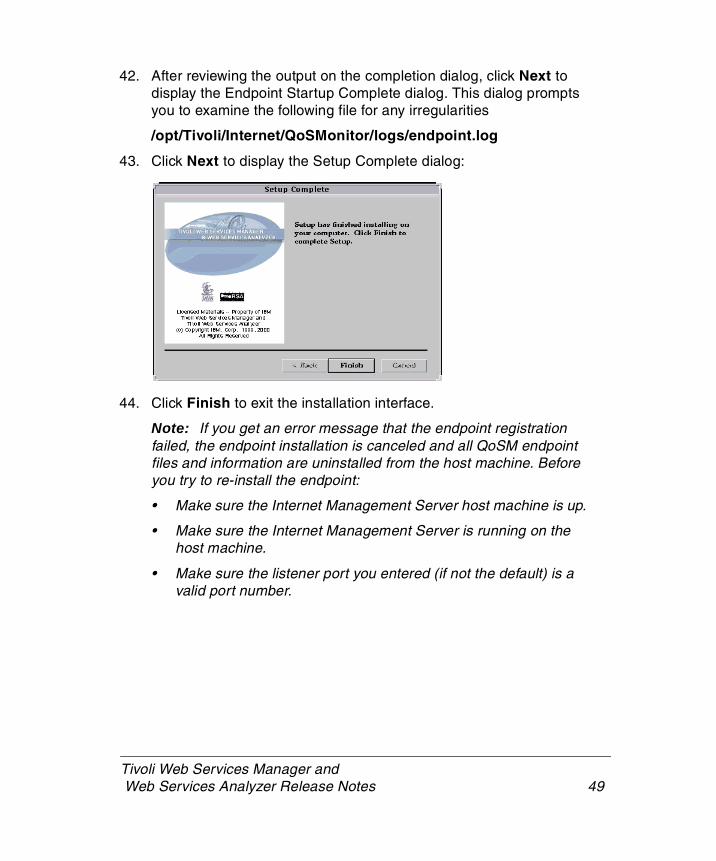
42. After reviewing the output on the completion dialog, click Next to display the Endpoint Startup Complete dialog. This dialog prompts you to examine the following file for any irregularities
/opt/Tivoli/Internet/QoSMonitor/logs/endpoint.log
43. Click Next to display the Setup Complete dialog:
44. Click Finish to exit the installation interface.
Note: If you get an error message that the endpoint registration failed, the endpoint installation is canceled and all QoSM endpoint files and information are uninstalled from the host machine. Before you try to re-install the endpoint:
• Make sure the Internet Management Server host machine is up.
• Make sure the Internet Management Server is running on the host machine.
• Make sure the listener port you entered (if not the default) is a valid port number.

50 Version 1.6
Installing the Web Services Investigator Endpoint on Red Hat
Tivoli recommends that you close all Windows applications before beginning the installation.
About the Installation Program
The endpoint setup program includes options for installing each of the Internet Management Endpoints. The setup process asks you to choose between a secure or non-secure installation. The secure installation uses secure socket layer (SSL) security. If you enabled SSL to install a secure management server, then you must also enable SSL for any endpoints that will be managed by that server.
Installing the Endpoint
To install the WSI Endpoint on Red Hat, complete the following steps.
1. Log in as root, or log in and become the root user, on the host machine where you want to install the WSI endpoint.
2. If you are installing a secure endpoint, copy the key.kdb and key.sth files from the Internet Management Server to a temporary location on the endpoint machine (see the “Endpoint Installation Checklist” on page 152) of the installation guide.
3. Insert the product CD-ROM into the CD-ROM drive, and cd to the following directory:
<cdrom>/linux-ix86/endpoint
where <cdrom> specifies the path to the CD-ROM.
4. Enter the following command:
./install.sh
5. The Welcome screen for the Internet Management Endpoint installation program is displayed.

Tivoli Web Services Manager and Web Services Analyzer Release Notes 51
6. Click Next to display the Internet Management Endpoint LicenseAgreement dialog. This dialog displays the software license agreement. Read the license agreement.
7. Click Accept to display the Prerequisite Software Check dialog.
This dialog checks your system to make sure that the appropriate version of the JDK has already been installed.
8. Click Next to verify a supported JDK installation exists. A confirmation dialog notifies you if the JDK installation is verified. Click OK on the confirmation dialog to display the Install Type dialog:
9. Click the Web Services Investigator checkbox to install the WSI endpoint. Click Next to display the Existing Installation dialog:

52 Version 1.6
10. This dialog checks your system for an existing WSI endpoint installation. If one exists, you will need to remove it before continuing with the installation. If no current WSI endpoint installation exists, the Existing Installation check returns a dialog confirming that there is not a current WSI installation on the host machine.
11. Click OK to display the Choose Destination Location dialog:
The default destination location on this dialog is:
/opt/Tivoli/Internet/WebServicesInvestigator
To specify a different installation directory, use the Browse button to navigate to the desired directory, and then click OK on the Browse dialog.
12. Click Next to specify the destination location and proceed with the installation. The installation script next verifies that there is adequate disk space to install the endpoint software in the specified location.
Tivoli Web Services Manager and Web Services Analyzer Release Notes 53
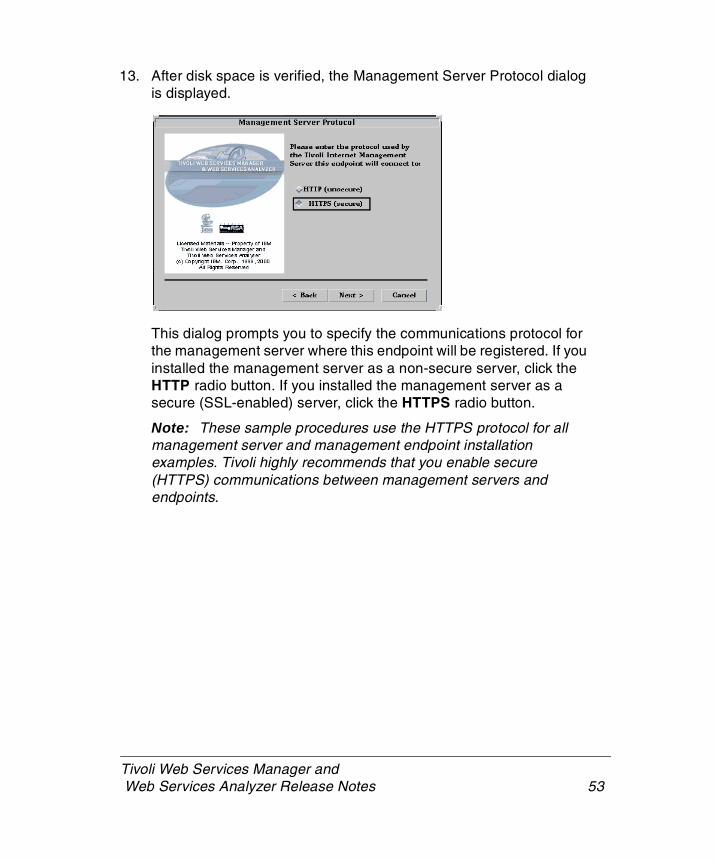
13. After disk space is verified, the Management Server Protocol dialog is displayed.
This dialog prompts you to specify the communications protocol for the management server where this endpoint will be registered. If you installed the management server as a non-secure server, click the HTTP radio button. If you installed the management server as a secure (SSL-enabled) server, click the HTTPS radio button.
Note: These sample procedures use the HTTPS protocol for all management server and management endpoint installation examples. Tivoli highly recommends that you enable secure (HTTPS) communications between management servers and endpoints.
54 Version 1.6
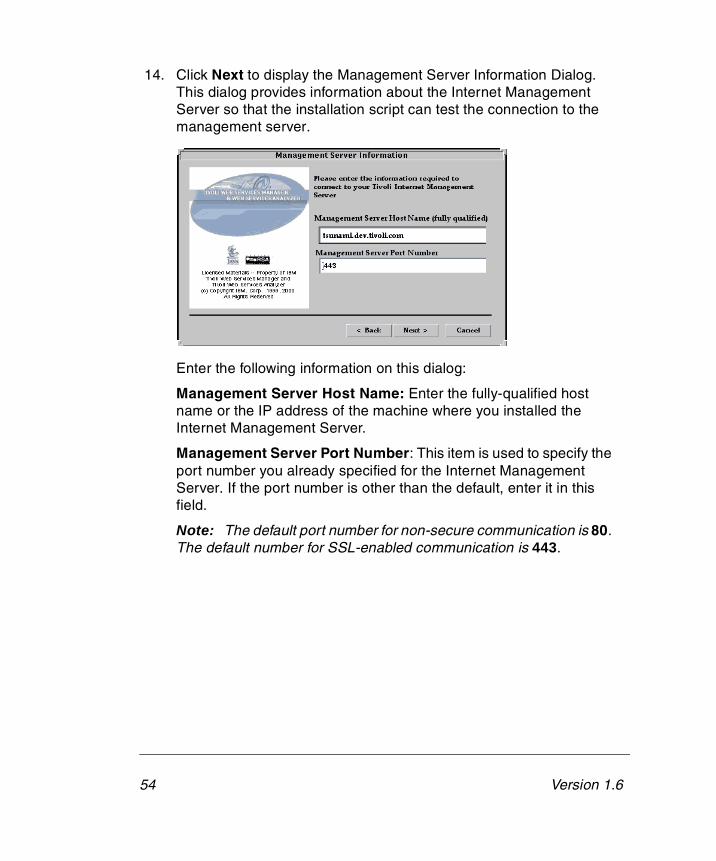
14. Click Next to display the Management Server Information Dialog. This dialog provides information about the Internet Management Server so that the installation script can test the connection to the management server.
Enter the following information on this dialog:
Management Server Host Name: Enter the fully-qualified host name or the IP address of the machine where you installed the Internet Management Server.
Management Server Port Number: This item is used to specify the port number you already specified for the Internet Management Server. If the port number is other than the default, enter it in this field.
Note: The default port number for non-secure communication is 80. The default number for SSL-enabled communication is 443.

Tivoli Web Services Manager and Web Services Analyzer Release Notes 55
15. Click Next to display the Select Proxy dialog:
The NONE radio button is selected by default on this dialog.
16. Do one of the following on this dialog:
a. Accept the NONE default.
OR
b. Click either the SOCKS or HTTPS radio button to specify the type of proxy you are using.
17. Click Next to display the Management Server User Information dialog:

56 Version 1.6
You need to supply the user name and password for the administrator of the Internet Management Server. When you install the management server, the default User Name is admin, and the default Password is admin.
18. Enter a valid ID in the Management Server User Name field. If you did not change the default ID for the management server, enter admin. If you have changed the ID, enter the new ID.
19. Enter the password for the ID in the first Management Server Password field, and then enter the same password in the Management Server Password Confirm field to confirm the password. If you did not change the default password for the management server, enter admin. If you have changed the default password, enter the new password.
20. The installation script is now ready to begin copying files to your hard drive, and so indicates by displaying the following dialog:
Click OK to begin copying the endpoint files. The installation script displays a progress dialog on the interface, and then a completion dialog to indicate that the files have been copied.
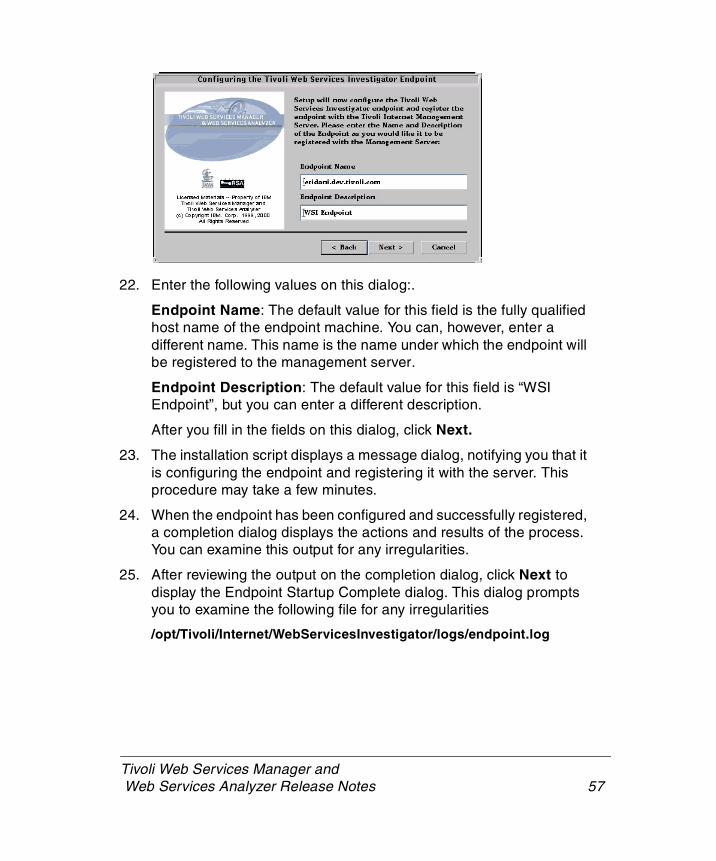
21. When configuration is complete, the program notifies you that it is ready to configure the WSI endpoint and register the endpoint with the Internet Management Server. The following dialog is displayed:
Tivoli Web Services Manager and Web Services Analyzer Release Notes 57
22. Enter the following values on this dialog:.
Endpoint Name: The default value for this field is the fully qualified host name of the endpoint machine. You can, however, enter a different name. This name is the name under which the endpoint will be registered to the management server.
Endpoint Description: The default value for this field is “WSI Endpoint”, but you can enter a different description.
After you fill in the fields on this dialog, click Next.
23. The installation script displays a message dialog, notifying you that it is configuring the endpoint and registering it with the server. This procedure may take a few minutes.
24. When the endpoint has been configured and successfully registered, a completion dialog displays the actions and results of the process. You can examine this output for any irregularities.
25. After reviewing the output on the completion dialog, click Next to display the Endpoint Startup Complete dialog. This dialog prompts you to examine the following file for any irregularities
/opt/Tivoli/Internet/WebServicesInvestigator/logs/endpoint.log

58 Version 1.6
26. Click Next to display the Setup Complete dialog:
27. Click Finish to exit the installation interface.
Note: If you get an error message that the endpoint registration failed, the endpoint installation is canceled and all WSI endpoint files and information are uninstalled from the host machine. Before you try to re-install the endpoint:
• Make sure the Internet Management Server host machine is up.
• Make sure the Internet Management Server is running on the host machine.
• Make sure the listener port you entered (if not the default) is a valid port number.
Solaris and AIX Installation Script Location
You can install the management server and endpoint packages in one of two ways:
� Run the install script directly from the product CD-ROM
� Copy the tar files on the CD-ROM to your hard drive, and then install from the directory on your hard drive.
In either case, the endpoint installation script automatically starts the endpoint program. If you install directly from the mounted CD-ROM drive,

Tivoli Web Services Manager and Web Services Analyzer Release Notes 59
the operating system may not unmount the CD-ROM once the install script has started the endpoint program.
To unmount the CD-ROM, add the following steps at the end of the endpoint’s installation procedure:
1. Change directories to the bin directory for the endpoint you just installed. This directory contains the scripts for starting and stopping the endpoint. The directory is typically:
/<destdir>/Tivoli/Internet/<endpointdir>/bin
where <destdir> is the base directory where the endpoint software is installed, and <endpointdir> is the main directory for that specific endpoint.
For example, on Solaris, the default path to the bin directory for the QoSM endpoint would be:
/opt/Tivoli/Internet/QoSMonitor/bin
The default path on AIX would be:
/usr/Tivoli/Internet/QoSMonitor/bin
2. Enter the following command to stop the endpoint program:
./stopep.sh
3. Enter the following command to restart the endpoint program:
./startep.sh
4. Once the endpoint program has stopped, unmount the CD-ROM at any time, either before or after restarting the endpoint program.
Starting the Management Server on UNIX Platforms
After installing a secure management server, you must start the management server by running the startms.sh script. Installing and starting the management server must be done by the root user. For the management server to stay up, the user must stay logged in as root,

60 Version 1.6
because the JVM is linked to the login session. However, leaving a machine unattended with the root user logged in is usually unacceptable.
Use the nohup command to uncouple the management server processes from the login command, and then log out from the root user session:
1. After completing the installation (as root), change directories to the bin directory for the management server, for example:
/<destdir>/Tivoli/Internet/ManagementServer/TIMS/bin
where <destdir> is the installation directory for the management server.
2. Enter the following command:
nohup startms.sh
3. Log out of the root login session.
If you install a non-secure management server, the install script starts the management server automatically, under the root login. To log out of the root user session and keep the management server running, you must stop and then restart the management server:
1. After completing the installation (as root), change directories to the bin directory for the management server, for example:
/<destdir>/Tivoli/Internet/ManagementServer/TIMS/bin
where <destdir> is the base directory where you installed the management server.
2. Enter the following command to stop the management server:
./stopms.sh
3. After the stopms.sh script completes, enter the following command to restart the management server:
nohup startms.sh
4. Log out of the root login session.
Tivoli Web Services Manager and Web Services Analyzer Release Notes 61
Changes to Version 1.6 WSC Endpoint Uninstall
The uninstall procedure has been changed for 1.6 endpoints. Previously, the endpoints had to be uninstalled in a certain order for proper database removal. Now, database removal is performed as a separate step using a new removal tool, so endpoints can be uninstalled in any order, so long as one endpoint remains available when the database removal tool is used.
Prior to uninstalling the last WSC endpoint, perform the following steps:
UNIX
1. Login as root, or become the root user.
2. From a bash shell, run the following command:
dbuninst.sh
3. When the uninstall is finished, log out of the root login session.
NT
1. Login as Administrator, or as a user with Administrator privileges.
2. Enter the following command in the Run dialog box:
bash tiv_rdbms_uninstall.sh
3. When the uninstall is finished, log out of the Administrator login session.
62 Version 1.6
Uninstalling the Management Server
Note: If you uninstall a management server, you must first uninstall all Internet Management Endpoints registered to that management server.
To uninstall registered endpoints before uninstalling the management server:
1. Stop all endpoint web servers (for example, all QoS or STI Recorder web servers).
2. Stop all endpoint processes.
3. Uninstall all endpoints registered to the management server.
For complete instructions on uninstalling endpoints and the management server, see Chapter 14 of the installation guide, “Uninstalling Tivoli Web Services Manager and Tivoli Web Services Analyzer.”
Documentation NotesPlease note the following updates or changes to the printed or online documentation you received with your product:
All Printed and Online Documents
All online and printed documents for Tivoli Web Services Manager and Tivoli Web Services Analyzer list a URL where you can find customer support information or contact customer support. The URL is incorrect in all documents except these release notes. The correct URL for support is:
http://www.tivoli.com/products/websolutions
Tivoli Web Services Manager and Web ServicesAnalyzer Installation Guide
The following changes have been made to complete or correct the information in the Tivoli Web Services Manager and Web Services Analyzer Installation Guide.

Tivoli Web Services Manager and Web Services Analyzer Release Notes 63
Page 72
The first two steps in the procedure for generating a self-signed certificate for a management server on a Solaris host were both labeled step “1”. In addition, the information in this step was incomplete. The second “step 1” has been changed from this:
1. To start the Key Management Utility interface, change directories to the directory that contains the ikmgui program (or add that directory to your PATH variable), and then type ikmgui on the command line.
to this:
2. Change directories to the directory that contains the ikmgui program, and then type . /ikmgui on the command line.
Alternately, add the path to the ikmgui file to your PATH environment variable, and then you can enter the ikmgui on the command line from any directory.
Subsequent step numbers in this procedure will increment by one.
Page 73
Step 4 of the procedure for generating a self-signed certificate for a management server on a Solaris host was incorrectly numbered and also contained incomplete information. The original step 4 becomes step 5 and the information has changed from this:
4. On this dialog, browse to the following directory to fill in the Location field:
/opt/Tivoli/Internet/ManagementServer/IBMHttpServer/ssl/keys
To this:
5. On this dialog, browse to the following directory to fill in the Location field:
/<destdir>/Tivoli/Internet/ManagementServer/IBMHttpServer/ssl/keys
where <destdir> is the directory where you installed the management server. The default install directory is /opt.

64 Version 1.6
Page 91
Step 2 of the procedure for generating a self-signed certificate on an AIX host was incomplete. Step 2 has been changed from this:
2. To start the Key Management Utility interface, change directories to the directory that contains the ikmgui program (or add that directory to your PATH variable), and then type ikmgui on the command line.
To this:
2. Change directories to the directory that contains the ikmgui program, and then type . /ikmgui on the command line.
Alternately, add the path to the ikmgui file to your PATH environment variable, and then you can enter ikmgui on the command line from any directory.
Page 92
Step 5 of the procedure for generating a self-signed certificate for a management server on an AIX host contained incomplete information. The information has changed from this:
5. On this dialog, browse to the following directory to fill in the Location field:
/usr/Tivoli/Internet/ManagementServer/IBMHttpServer/ssl/keys
To this:
5. On this dialog, browse to the following directory to fill in the Location field:
/<destdir>/Tivoli/Internet/ManagementServer/IBMHttpServer/ssl/keys
where <destdir> is the directory where you installed the management server. The default directory is /usr.
Page 123
Steps 12 and 13 of the instructions for installing a QoSM endpoint on NT detail how to set up alternate certificates for the endpoint. The Alternate

Tivoli Web Services Manager and Web Services Analyzer Release Notes 65
Certificate KeyRing dialog has been removed from the installation. Omit steps 12 and 13, and skip directly to step 14, “Click Next to display the User Information dialog.”
Page 138
Steps 12 and 13 of the instructions for installing a WSI endpoint on NT detail how to set up alternate certificates for the endpoint. The AlternateCertificate KeyRing dialog has been removed from the installation. Omit steps 12 and 13, and skip directly to step 14, “Click Next to display the User Information dialog.”
Page 253
Step 2 of the procedure instructs you how to run the install programs for TDS for Web Services Analyzer and Web Services Manager. The locations of the files are presented incorrectly. The following step represents how the locations should appear:
2. To install TDS for Web Services Analyzer, enter the following command in the Run dialog box:
d:\TDS_guides\TWSA\setup.exe
where d: is the drive letter for the CD-ROM. This action copies the files twsa.dgf and twsa.ini to this directory:
c:\Program Files\TDS 2.1\install
To install TDS for Web Services Manager, enter the following command in the Run dialog box:
d:\TDS_guides\TWSM\setup.exe
where d: is the drive letter for the CD-ROM. This action copies the files twsm.dgf and twsm.ini to this directory:
c:\Program Files\TDS 2.1\install
66 Version 1.6
Page 256
“Installing TDS”: There is a reference to uninstalling TDS Version 2.0, and then removing patch 1. This reference should be to Version 2.1. In addition, the text should note that if Version 2.1 is uninstalled, both patches 1 and 4 should be removed.
“Installing ODBC Drivers”: This section also references TDS Version 2.0 and ODBC drivers that are located on the 2.0 CD-ROM. All references to TDS Version 2.0 should be Version 2.1 instead. In addition, the Tivoli driver for Oracle 7 is located on the Version 2.1 CD-ROM.
The same section, “Installing ODBC Drivers” references the directory "D:\TDSLD\ODBC...". Ignore this directory name; it was a directory for a Version 2.0 TDS guide.
Sample DB2 Database Configuration Procedure
The following procedure has been added to Chapter 4, “RDBMS Requirements”. This sample procedure configures a DB2 database for use with Web Services Manager and Web Services Analyzer applications.
Creating and Implementing a Large Bufferpool
The following sample procedure creates and implements a bufferpool. This procedure is an example only; the actual commands used may differ for your environment. You should also consult the DB2 documentation for these procedures.
1. Create a large bufferpool. Make the size as large as possible without using operating system paging. For example, to create a bufferpool of size 1000, with pagesize of 32K, enter the following command in DB2:
create bufferpool bp32k size 1000 pagesize 32 k
2. To view the new bufferpool, enter the following command in DB2:
select * from syscat.bufferpools
3. List all applications currently connected to the database (since you must disconnect any applications from the database before the bufferpool can be implemented). Enter the following command:

Tivoli Web Services Manager and Web Services Analyzer Release Notes 67
db2 list applications
The display should be similar to the following:
Auth ID Appl. Appl. Application ID DB #ofName Handle Name Agents
-------- ---- ------ -------------------------- ---- ------DB2INST1 java 14 *LOCAL.db2inst1.000918161203 CSWA 1DB2INST1 java 15 *LOCAL.db2inst1.000918161204 CSWA 1
4. To implement the bufferpool, close all connections to the database. Use the following command:
db2 force application(<Application Handle #>)
5. Reconnect to the database in one of the following ways:
a. If you are logged on as the user on the database host machine, enter a command similar to the following:
db2 connect to <database name>
b. If you are not logged on as the user on the database machine, enter a command similar to the following (on a single line):
db2 connect to <database name> user <user name> using <user password>
You should see a display similar to the following:
$db2 connect to cswa
Database Connection InformationDatabase server = DB2/6000 6.1.0SQL authorization ID = DB2INST1Local database alias = CSWA

68 Version 1.6
Creating temp and user Tablespaces
The following sample procedure creates a new tablespace and associates it with the bufferpool. You must first create the temp tablespace, and then create the user tablespace. This procedure is an example only; the actual commands used may differ for your environment. You should also consult the DB2 documentation for these procedures.
1. To create the temp tablespace, enter commands similar to the following:
create temporary tablespace temp32k pagesize 32 k managed by systemusing (‘/data2/temp32k’)bufferpool bp32k
2. To create the user tablespace, enter commands similar to the following:
create tablespace user32k pagesize 32 k managed by databaseusing (‘/data2/user32k’ 1000)bufferpool bp32k
where 1000 is the size.
3. To view the changes, enter the following command:
db2 list tablespaces show detail
Optimizing DB2 Database Configurations
The following sample procedure optimizes database configuration for use with Web Services Manager and Web Services Analyzer applications by increasing the number of log primaries, and then turning on the log retain function. This procedure is an example only; the actual commands used may differ for your environment. You should also consult the DB2 documentation for these procedures.
1. List database configuration information by entering a command similar to the following:
db2 get db cfg for <database name>
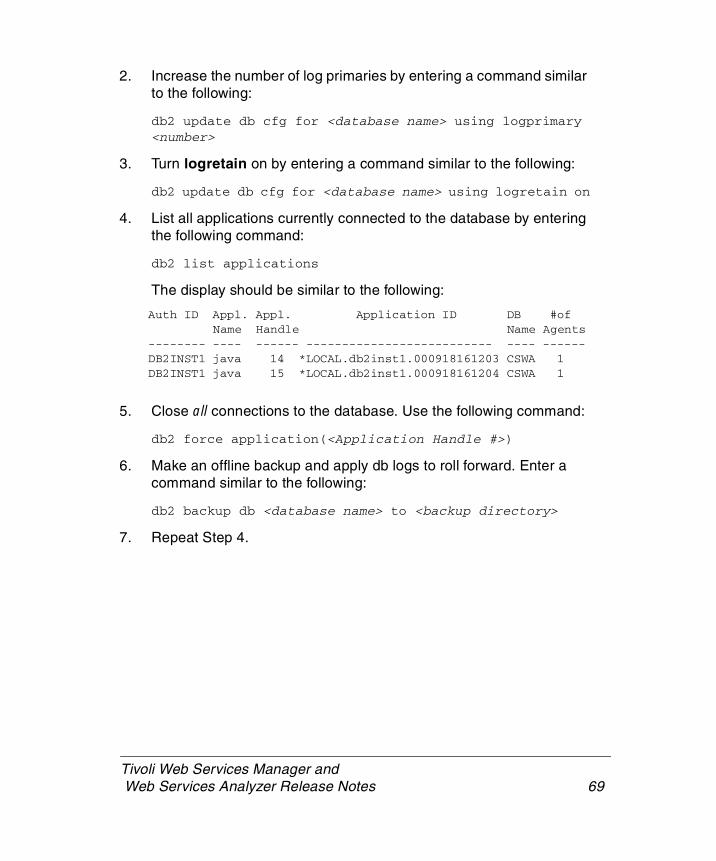
Tivoli Web Services Manager and Web Services Analyzer Release Notes 69
2. Increase the number of log primaries by entering a command similar to the following:
db2 update db cfg for <database name> using logprimary <number>
3. Turn logretain on by entering a command similar to the following:
db2 update db cfg for <database name> using logretain on
4. List all applications currently connected to the database by entering the following command:
db2 list applications
The display should be similar to the following:
Auth ID Appl. Appl. Application ID DB #ofName Handle Name Agents
-------- ---- ------ -------------------------- ---- ------DB2INST1 java 14 *LOCAL.db2inst1.000918161203 CSWA 1DB2INST1 java 15 *LOCAL.db2inst1.000918161204 CSWA 1
5. Close all connections to the database. Use the following command:
db2 force application(<Application Handle #>)
6. Make an offline backup and apply db logs to roll forward. Enter a command similar to the following:
db2 backup db <database name> to <backup directory>
7. Repeat Step 4.
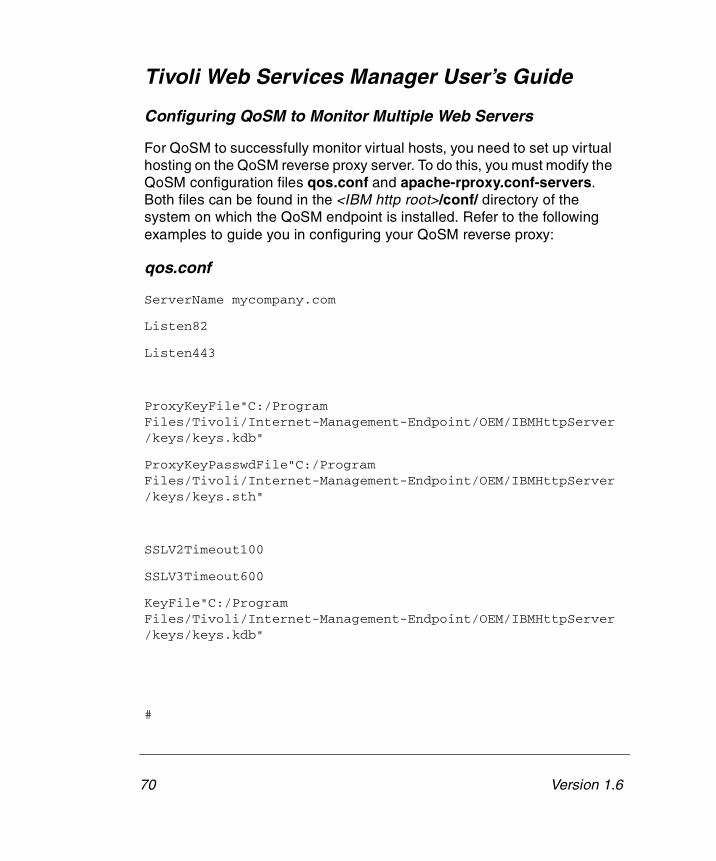
70 Version 1.6
Tivoli Web Services Manager User’s Guide
Configuring QoSM to Monitor Multiple Web Servers
For QoSM to successfully monitor virtual hosts, you need to set up virtual hosting on the QoSM reverse proxy server. To do this, you must modify the QoSM configuration files qos.conf and apache-rproxy.conf-servers. Both files can be found in the <IBM http root>/conf/ directory of the system on which the QoSM endpoint is installed. Refer to the following examples to guide you in configuring your QoSM reverse proxy:
qos.conf
ServerName mycompany.com
Listen82
Listen443
ProxyKeyFile"C:/Program Files/Tivoli/Internet-Management-Endpoint/OEM/IBMHttpServer/keys/keys.kdb"
ProxyKeyPasswdFile"C:/Program Files/Tivoli/Internet-Management-Endpoint/OEM/IBMHttpServer/keys/keys.sth"
SSLV2Timeout100
SSLV3Timeout600
KeyFile"C:/Program Files/Tivoli/Internet-Management-Endpoint/OEM/IBMHttpServer/keys/keys.kdb"
#
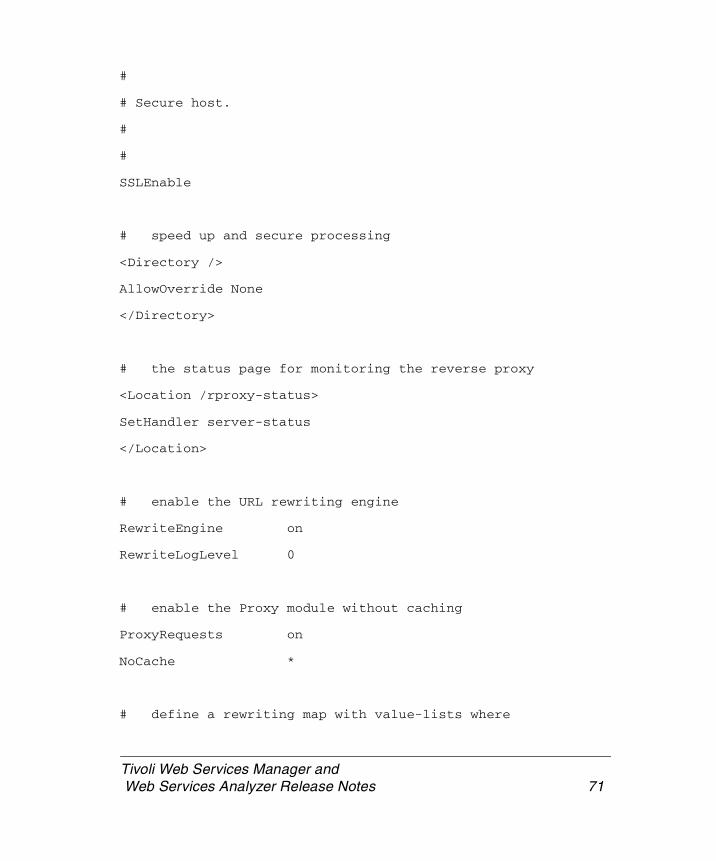
Tivoli Web Services Manager and Web Services Analyzer Release Notes 71
#
# Secure host.
#
#
SSLEnable
# speed up and secure processing
<Directory />
AllowOverride None
</Directory>
# the status page for monitoring the reverse proxy
<Location /rproxy-status>
SetHandler server-status
</Location>
# enable the URL rewriting engine
RewriteEngine on
RewriteLogLevel 0
# enable the Proxy module without caching
ProxyRequests on
NoCache *
# define a rewriting map with value-lists where

72 Version 1.6
# mod_rewrite randomly chooses a particular value
# mapname key: filename
RewriteMapserver"txt:C:\Program Files\Tivoli\Internet-Management-Endpoint\OEM\IBMHttpServer\conf\apache-rproxy.conf-servers"
# make sure the status page is handled locally
# and make sure no one uses our proxy except ourself
RewriteRule ^/apache-rproxy-status.* - [L]
RewriteRule ^(http|ftp)://.* - [F]
# now choose the possible servers for particular URL types
RewriteRule ^/(.*\.(cgi|shtml))$ to://${server:secure-dynamic}/$1 [S=1]
RewriteRule ^/(.*)$ to://${server:secure-static}/$1
# and delegate the generated URL by passing it
# through the proxy module
RewriteRule ^to://([^/]+)/(.*) https://$1/$2 [E=SERVER:$1,P,L]
# and make really sure all other stuff is forbidden
# when it should survive the above rules...
RewriteRule .* - [F]
# setup URL reverse mapping for redirect reponses

Tivoli Web Services Manager and Web Services Analyzer Release Notes 73
# This next line should specify the origin server plus the protocol and port (if non-default)
# UNCOMMENT and put the origin server name
# ProxyPassReverse / <origin server name including protocol>
ProxyPassReverse / https://mycompany.com:444/
#ProxyPassReverse / http://www2.foo.dom/
#ProxyPassReverse / http://www3.foo.dom/
#ProxyPassReverse / http://www4.foo.dom/
#ProxyPassReverse / http://www5.foo.dom/
#ProxyPassReverse / http://www6.foo.dom/
# UNCOMMENT to enable CSWA logging
# SetEnvIf Request_URI /eaa.html* eaa-command
# CustomLog d:/apache/logs/proxy.log "%h %l %u %t \"%r\" %>s %b \"%{referer}i %U\" \"%{user-agent}i\"" env=!eaa-command
#
#
# Non-secure host.
#
#
<VirtualHost mycompany.com:82>
SSLDisable

74 Version 1.6
# speed up and secure processing
<Directory />
AllowOverride None
</Directory>
# the status page for monitoring the reverse proxy
<Location /rproxy-status>
SetHandler server-status
</Location>
# enable the URL rewriting engine
RewriteEngine on
RewriteLogLevel 0
# enable the Proxy module without caching
ProxyRequests on
NoCache *
# define a rewriting map with value-lists where
# mod_rewrite randomly chooses a particular value
# mapname key: filename
RewriteMapserver"txt:C:\Program Files\Tivoli\Internet-Management-Endpoint\OEM\IBMHttpServer\conf\apache-rproxy.conf-servers"
# make sure the status page is handled locally
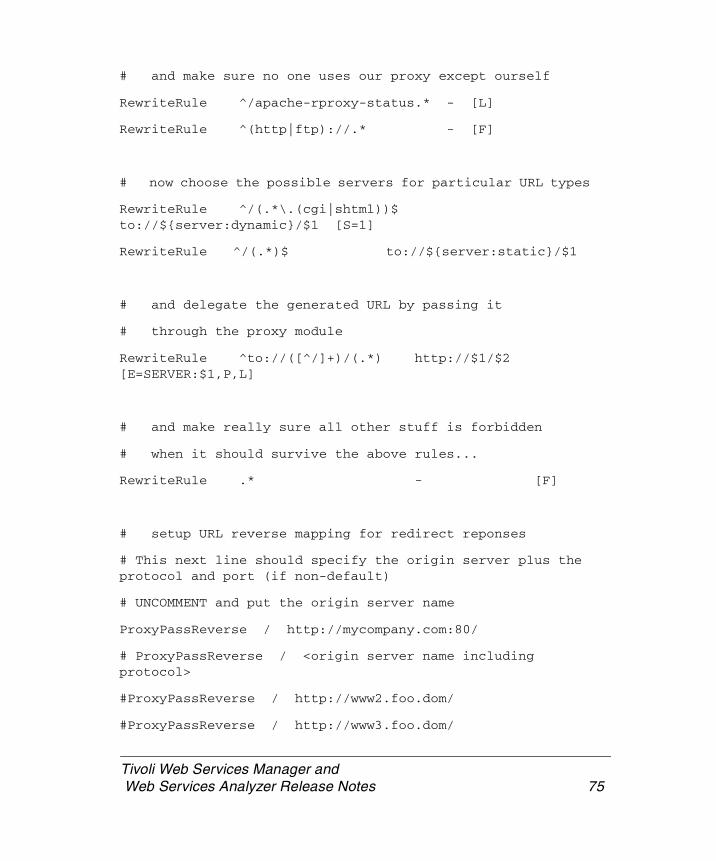
Tivoli Web Services Manager and Web Services Analyzer Release Notes 75
# and make sure no one uses our proxy except ourself
RewriteRule ^/apache-rproxy-status.* - [L]
RewriteRule ^(http|ftp)://.* - [F]
# now choose the possible servers for particular URL types
RewriteRule ^/(.*\.(cgi|shtml))$ to://${server:dynamic}/$1 [S=1]
RewriteRule ̂ /(.*)$ to://${server:static}/$1
# and delegate the generated URL by passing it
# through the proxy module
RewriteRule ^to://([^/]+)/(.*) http://$1/$2 [E=SERVER:$1,P,L]
# and make really sure all other stuff is forbidden
# when it should survive the above rules...
RewriteRule .* - [F]
# setup URL reverse mapping for redirect reponses
# This next line should specify the origin server plus the protocol and port (if non-default)
# UNCOMMENT and put the origin server name
ProxyPassReverse / http://mycompany.com:80/
# ProxyPassReverse / <origin server name including protocol>
#ProxyPassReverse / http://www2.foo.dom/
#ProxyPassReverse / http://www3.foo.dom/

76 Version 1.6
#ProxyPassReverse / http://www4.foo.dom/
#ProxyPassReverse / http://www5.foo.dom/
#ProxyPassReverse / http://www6.foo.dom/
# UNCOMMENT to enable CSWA logging
# SetEnvIf Request_URI /eaa.html* eaa-command
# CustomLog d:/apache/logs/proxy.log "%h %l %u %t \"%r\" %>s %b \"%{referer}i %U\" \"%{user-agent}i\"" env=!eaa-command
</VirtualHost>
apache-rproxy.conf-servers
static mycompany.com:80
dynamic mycompany.com:80
secure-static mycompany.com:444
secure-dynamic mycompany.com:444
Support for Dynamic Content in STI Playback
The playback component of the Synthetic Transaction Investigator provides support for dynamic content in a web transaction. Previously, a recorded transaction that contained dynamic content failed on playback because that data was no longer valid at the time of the playback. In the current release, you can configure the application to locate dynamic content and replace it during playback, thus avoiding failure. Configuration consists of creating a new properties file, then editing the stm.properties file to enable dynamic playback and point to the new file.
To configure STI to locate and replace dynamic content, create a new properties file using the following as a template:

Tivoli Web Services Manager and Web Services Analyzer Release Notes 77
<name>.properties
# Properties file for STI(P) application specific to supporting# dynamic playback functionality for <Mycompany>.
# ****** Dynamic playback parameters*****## This property controls logging of information associated with dynamic playback
dynamicPlaybackLogging = true | false
# Module definition parameters
# Generic chain module behaviormoduleChainClass =com.tivoli.xtela.availability.module.types.chain.ChainModule
# Module responsible for dynamic URI generation based on search and replace using regular expressions
moduleClass = com.tivoli.xtela.stm.stmp.modules.UrlPatternExchanger
# Language type of “moduleClass”moduleType = java
# Pattern setmodulePatterns = pattern#1, pattern#2odulePatterns = pattern#1pattern#1 = ><pattern#2 = >
1. Name the file. This name will be inserted into the Dynamic playback parameters section of the stm.properties file.
Note: The filename must contain a “properties” extension, as in mycompany.properties.

78 Version 1.6
2. Set the dynamicPlaybackLogging property to true or false. This feature is designed for debug purposes. When set true, it will collect all the traffic from the web server. This file has the potential of becoming very large. Data is saved in a file named <taskID>.dynamic in the log directory. When set to false, no dynamic log file will be created.
3. Set the parameters, moduleChainClass, moduleClass, moduleType, and shortCircuitModuleChainClass, as indicated in the example.
4. In the pattern set section, enter the pattern(s) that you want the application to search and replace during playback. Patterns should be written in Perl 5 regular expression syntax. For example,
modulePatterns = pattern#1, pattern#2pattern#1 = SessionID = .*?&pattern#2 = CustomerID = .*?\\..
These patterns will be applied to the URI in the originally recorded transaction and replaced with an updated value found in the response from a previous transaction at runtime. You can enter as many patterns as you want.

Tivoli Web Services Manager and Web Services Analyzer Release Notes 79
For the module pattern described above:
Class Module
original URI
pattern expression
response from previous transaction
modified URI

80 Version 1.6
*Assume part of the web page in the diagram contained the following sources lines:
TABLE width = “143” border = ”0” cell spacing = ”0” cell padding = ”0” <TR> <TD width = “44” a href = /books/fiction/bf_index.jsp?SessionID=abcdefg.123&CustomerID = reader.1
The example shows that the first module searches the web page for pattern#1. The search result is
SessionID = abcdefg.123&
(Input URI)
pattern#1 Module #1
Module #2
(returned fromprevious request)
pattern#2
(processed
/books/fiction/bf_index.jsp?SessionID=123456.789&CustomerID=62796.0
/books/fiction/bf_indes.jsp?SessionID=abcdefg.123&CustomerID=62796.0
/books/fiction/bf_index.jsp?SessionID=abcdefg.123&CustomerID=reader.1
URI #1)
(processedURI #2)
Web page*

Tivoli Web Services Manager and Web Services Analyzer Release Notes 81
Then, the search result is replaced with a pattern match on the input (original URI). Thus,
SessionID = 123456.789&
in the original URI is replaced with
SessionID = abcdefg.123&.
Similarly, the modified URI is then used as the input URI to the second search and replace operation, using pattern#2. In this operation,CustomerID is changed from 62796.0 to reader.1. Any pattern expression can be accommodated, provided that it is compliant with the Perl 5 regular expression syntax.
When you have completed the new properties file, save it to .../Internet-Management-Endpoint/Configuration. Next, extract the stm.properties file from the stm.jar file found in .../Internet-Management-Endpoint/lib and copy it to .../Internet-Management-Endpoint/configuration with the new properties file you just created. In the Dynamic playback parameters section of this file, ensure that dynamicPlaybackEnabled is set to true and that the last three lines of that section look like this:
# globalProperties = <name> ...means... filename is “<name>.properties”globalProperties = <name>
Additional capability for this feature is planned for an upcoming patch release of Tivoli Web Services Manager.
82 Version 1.6
Tivoli Web Services Analyzer User’s Guide
The following changes have been made to complete or correct the information in the Tivoli Web Services Analyzer User’s Guide.
Page 24
The following steps on page 24 have been corrected to read as follows:
h. From the Web Server Software drop-down list, select the type ofweb server for which this job is being created. If the web serversoftware is not included in the list, enter it into the field labeledOther next to the drop-down list.
i. Enter the logical server cluster of the web server in the LogicalServer Cluster field.
j. Enter the server cluster domain name of the web server in theServer Cluster Domain Name field.
k. In the Log File URI field, type in the URI of the web log file thatthis job is to collect. An example URI might look like the following:
https://mysite/logs/
Known Defects and LimitationsThe following problems and workarounds are known for this release:
Installation
The following problems affect the product installation process:
1. Installing the WSC endpoint on NT with a SOCKS proxy server requires the fully qualified name of the host where the data warehouse resides.
If you use a SOCKS proxy server with a Web Services Courier endpoint, you must provide the fully qualified hostname for the data warehouse when prompted during installation.

Tivoli Web Services Manager and Web Services Analyzer Release Notes 83
2. When installing an IMS to a drive other than C:\, the IBM GSK product will be installed to the drive specified, but will also be copied to the C:\ drive. Both copies will be removed during standard uninstallation, so no user action is required. (CMVC-103932)
3. Strict server-side certificate checking is supported on NT, but the QoS installation for NT no longer has a dialog that asks for an alternate KeyRing.class. (CMVC-104411)
Workaround: Create a new alternate key database (KeyRing.class) and enable strict server-side certificate checking using the util.properties file.
To create and enable this alternate key file checking:
a. From the Start menu, select Programs—> Tivoli—> Start Key Management Utility.
b. Select Key Database File from the main menu, then select Open.
c. In the Open dialog box, click on key.kdb. Click OK.
d. Change the Key Database Type to SSLight key databaseclass.
e. Using Save As, save the default key file (key.kdb) as KeyRing.class in the C:\Program Files\TIMS\lib\local directory, where C represents the drive letter where you installed the IMS.
f. Exit the Key Management Utility.
g. Restart the IMS.
h. Copy the KeyRing.class file to the configuration directory of any endpoint you want to have verify IMS certificates.
i. On each endpoint you want to have verify IMS certificates, open the file util.properties in a text editor such as Notepad, and set the following entry:
wsm.security.enforceKeyRing=true
j. Save and close util.properties.
k. Restart the IMS and any endpoints you have modified.

84 Version 1.6
4. After an installation has copied the program files and packages to the designated location, aborting the installation will not remove the files or packages from the hard disk. (CMVC-102804)
Workaround: Perform an uninstall to remove the files and packages.
Graphical User Interface
The following problems and workarounds have been identified for the GUI:
5. When configuring a STIP job, use of the browser Back button will cause an error when you subsequently use the Next button within the workspace. Using the browser Back button after a save returns you to the previous panel, but also clears the workflow from that panel.
Also, use of the browser the Back button will cause the context-sensitive help to display the wrong help information relative to what topic is displayed in the workspace of the GUI. (CMVC-104563. CMVC-104327, CMVC-104394)
Workaround: Use the job navigation tabs. Do not use the browser Back button.
6. The GUI does not detect invalid inputs in some input fields:
Also, if you save a STIP job without setting the parameters or constraints, it will cause a servlet error. (CMVC-104015, CMVC-104060, CMVC-104113)
Workaround: Do not enter decimal, alpha, or any other form of invalid values in these fields. If you cause a servlet error, simply attempt to create the job again, this time specifying a valid set of parameters and constraints.
7. Editing a job deletes previous statistical records for that job from the management repository. (CMVC-104302)
Workaround: Supply a new name for the edited job to avoid deletion of the previous statistical records for that job.
8. When an QoS or STI job has been deleted or overwritten (by editing), the event drilldown does not work for any events for that job, causing an internal servlet error. (CMVC-104365)
Tivoli Web Services Manager and Web Services Analyzer Release Notes 85
Workaround: Do not attempt drilldown on events from deleted or edited QoS and STI reports.
9. Rendering errors occur with Netscape 4.75 and IE 5.5.0.4134.0600 and intermittent rendering errors occur when screen resolution set at 1024x1280. (CMVC-104449)
Workaround: Do not use Netscape 4.75 or IE 5.5.0.4134.0600 with TWSM or TWSA. Also, while running TWSM or TWSA, avoid using a screen resolution of 1280 x 1024.
QoS
10. By default, QoS statistical records are not persisted to the management repository database upon upload. (CMVC-102646)
QoS statistical records are contained in a log file that is persisted to the data warehouse. Putting these records in both databases is unnecessary, and persisting these records to the management repository reduces management server performance.
Workaround: If special needs require custom reporting, QoS statistical records can be persisted to the management repository by putting the following key-value pair into the <destdir>/lib/properties/server.properties file on the management server:
doQOS=1
(doQOS=0 is the default value).
Note: <destdir> is the base installation directory for the management server. For example, the default base installation directory on Solaris is /opt/Tivoli/Internet/ManagementServer.
11. The QoSM endpoint cannot run simultaneous jobs. If simultaneous jobs are run, the results may not be valid. (CMVC-104503).
Workaround: Do not schedule simultaneous QoSM jobs.

86 Version 1.6
Site Investigator
12. Old reports created by Site Investigator in version 1.5 cannot be viewed after upgrading to version 1.6. (CMVC-104523)
Workaround: Delete SI reports created by version 1.5.
Synthetic Transaction Investigator
13. Errors occur when running several concurrent STI tasks on a single endpoint. (CMVC-103061)
Workaround: Running several STI tasks concurrently on the same endpoint is possible, provided the tasks do not all start at exactly the same time. Stagger the scheduled start time of each STI task on the endpoint.
14. To configure the STI Recorder to save proxy and realm authentication information, you must add the following line to the agent.ini file on the endpoint before recording:
nonsslauth=1
This causes the application to send the authentication information to each transaction each time it is requested. If you do not want the authentication information sent, you must edit the transaction before playback. In addition, you must enter the authentication information in the dialog box that is displayed before the application begins. (CMVC-103957)
15. The STI Recorder does not support multiple realm authentication or multiple proxy authentication. (CMVC-103950)
Workaround: Record separate transactions for each realm.
16. STI Recorder jobs (transactions) should not be played back until the session in which they were recorded is completed. In addition, if a recording session is aborted, the job created during the session will be listed as available for playback, but it will be empty. (CMVC-104023)

Tivoli Web Services Manager and Web Services Analyzer Release Notes 87
17. The STI Recorder does not support the use of non-http protocols, such as ftp or mailto. Use of non-http protocols results in strange behavior in the recorder. (CMVC-104061)
Workaround: Do not record through non-http links.
18. You must enter the fully qualified hostnames of web servers in the STI Recorder’s address bar. For example, http://www.go.com is fully qualified; http://go.com, is not. If you enter a hostname that is not fully qualified, the playback session might fail. (CMVC-104417)
19. When you schedule an STI Recorder job, a “Job Successfully Scheduled” message is displayed. The message does not explain that the recorder browser can only be accessed from the endpoint on which it was scheduled. Also, even when the job is scheduled on a STIR-enabled endpoint, there is a delay before the recorder browser is displayed. (CMVC-104440)
Workaround: You should only schedule a STIR job from a browser that is running on the STIR-enabled endpoint from which you want to run the job.
20. The STI Recorder does not support dynamic links in this release. If you record dynamic links during a recording session, the job will fail upon playback. This defect will be addressed in an upcoming patch release. (CMVC-104520)
21. You can record through an authenticating proxy, but the recorded proxy authentication headers will be missing the authentication type field. Also, subsequent playback of this recorded session will fail when the authenticating proxy challenges STI Playback. This defect will be addressed in an upcoming patch release.(CMVC-104549)

88 Version 1.6
Web Services Analyzer
22. UNIX platforms only: Apache web log files must be rotated, and then made available to Web Services Analyzer.
For Web Services Analyzer to be able to collect web log files from an Apache web server on a Solaris system, you must enable web log file rotation, and copy the rotated file to a directory where Web Services Analyzer can access it.
Workaround: The following procedure is an example of one way to enable web log file rotation and copy the rotated file to a valid directory:
a. Enable server web log file rotation by using the Apache utility. rotatelogs, located in this directory:
src/support/directory
b. Add the following lines to the httpd.conf file to activate log rotation:
LogFormat "%h %l %u %t \"%r\" %>s %b\"%{Referer}i\"\"%{User-Agent}i\""
TransferLog " |/path/to/rotatelogs/path/to/logs/logname time"
where:
/path/to/rotatelogs = path where rotatelogs is located
/path/to/logs/logname = full path of log file that needs to be rotated
time = time interval between log rotations, in seconds
After each rotation, the logname is saved in format logname.timestamp and a new logname is created.

Tivoli Web Services Manager and Web Services Analyzer Release Notes 89
c. The following is an example of a script that copies rotated logs to a different directory:
#! /bin/sh -xSAVE_FILE=.lastlogcopiedFILE_PATTERN=access_logSRC_DIR=.DEST_DIR=../logsoutLAST_FILE_COPIED=`cat $SAVE_FILE`for FILE in `ls $FILE_PATTERN*`do
if [[ $FILE > $LAST_FILE_COPIED ]]then
cp -p $FILE $DEST_DIRecho $FILE > $SAVE_FILE
fidone
d. Use the crontab utility to schedule this script to run automatically.
Web Services Courier
23. Using a Ctrl-C key sequence, or other Ctrl key sequences, such as Ctrl-D or Ctrl-Z, can cause endpoint interruption. (CMVC-102932)
The endpoint process stops and the following message is returned:
TaskController: java.lang.InterruptedException:operation interrupted
This problem occurs when the endpoint process was started in a Bourne shell, and then later in the same shell, a Ctrl-C or other Ctrl key sequence was entered. The Bourne shell is passing any signals it receives to its child processes, including the endpoint process, so a Ctrl-C sends a kill signal to the endpoint.
Workaround: Start the endpoint (run the startep.sh script) in a shell other than a Bourne shell, such as a C shell or Korn shell. Alternately, if you started an endpoint in a Bourne shell, open a new shell and use it for any commands, instead of the shell where the endpoint process is running.

90 Version 1.6
24. WSC running on Linux not capable of TEC forwarding. (CMVC-104270)
Workaround: Do not attempt TEC forwarding from any WSC running on Linux.
Web Services Manager/Web Services Analyzer Applications
25. Changing event severities can generate multiple identical responses. (CMVC-101800)
For any of the applications in Web Services Manager or Web Services Analyzer, you can associate specific event responses with different combinations of event type and severity. If you change the severity level at which a given event type and response have been defined, the new combination will be added to the bottom of the event table, but the original will not be removed from the table. This could result in the generation of multiple identical responses.
Workaround: To avoid identical responses, delete the original combination from the configured events table. Follow these steps:
a. In the menu tree, click System Administration, then click Configure System Events.
b. If the checkbox for Event type list should contain system event types only is checked, remove the check mark, which then displays all the application event types in the list.
c. Search through the list for the original combination you want to delete, and then select it by clicking the checkbox next to it.
d. Click the Delete Checked button at the bottom of the list.

Tivoli Web Services Manager and Web Services Analyzer Release Notes 91
Contacting SupportThe Tivoli Web Services Manager and Web Services Analyzer support team is committed to providing you with the best possible service. As a leading provider of Internet-based solutions, Tivoli believes that the Web is the ideal venue for service. Therefore, you can find answers to critical questions on our web site at the following URL:
http://www.tivoli.com/products/websolutions
This support site contains the following information:
� A list of frequently asked questions (FAQs), which provides answers to basic questions that address issues that are important, but not necessarily urgent.
� Updated versions of the Web Services Manager documentation.
� Information about licensing and updating your account.
To obtain support, click Ask Support to submit a PMR (Problem Management Record). The form can be found at the:
http://www.tivoli.com/products/websolutions/support/submit_pmr.jsp
Tivoli is very interested in hearing about your experience with Tivoli Web Services Manager and Web Services Analyzer products and documentation.
For telephone support inside the United States, contact Tivoli Support by calling 1-800-TIVOLI8. For support outside the United States, refer to the Customer Support Handbook for phone numbers for your country. The handbook is also available on-line at the following URL:
http://www.tivoli.com/products/websolutions

92 Version 1.6


![Tivoli for AS/400 (sI]$sH HQTNjz - IBMpublib.boulder.ibm.com/tividd/td/as400/GC32-0279-01/ja...OS/400 H](https://static.documents.pub/doc/80x56/60cf57e1ba8b5475ed59ad26/-tivoli-for-as400-sish-hqtnjz-os400-h.jpg)


