52
Using Your Data: A Guide for School Leaders 1

Using Your Data:A Guide for School
Leaders
Facilitator’s Guide
Comments to the Facilitator
1

A challenge to anyone who receives data on their school’s teaching conditions is what to do with the data once you have it. The survey results contain data on a wide variety of aspects of school conditions and it can often be overwhelming to know where to start and how to proceed in a manner that maximizes participants’ time. To assist with this challenge, a series of tools have been developed to provide you with a system to organize and approach the processing of your school’s data, help you reflect on those variables that contributed to your score, and ultimately engage in meaningful and safe discussion about ways you can address and ultimately improve your school’s teaching conditions.
The materials have been organized into three sections. The Facilitator’s Guide is the first of the sections. It contains the outline and scripting for a drilldown process of examination and discussion of the survey results. It includes facilitator strategies for approaching the process, descriptions of how to utilize handouts and worksheets, and written facilitator prompts to lead discussions with school staff. To further aid in the facilitation, a Facilitator’s Addendum has been included with tips for moving the meeting along smoothly.
The second section contains the Facilitator’s Handouts. This section includes all the documents referenced in the Facilitator’s Guide and tools that help participants better understand how to read and interpret the survey data. In cases where worksheets are complex, examples have been included to assist the learner development.
The final section is the Individual Item Prompts. These tools are available for participants once they have gotten to a point in their data reflection that an examination of specific survey items is required. The tools include descriptive information on many of the survey items, instructions for how to use the materials and a series of question prompts to stimulate thought and dialog around the survey item being addressed. The section is divided up into the eight survey Construct areas and each Construct area includes a Construct Item Worksheet to aid participants in the selection of which items to examine (instructions for their use are included in the Facilitator’s Guide).
In addition to these materials being available in this large text format, the three sections can also be accessed on the survey website individually. It is the hope of the writers that these tools will prove invaluable in the promotion of discussion among school staff on the conditions of their school and ways to improve them.
2
Checklist to Facilitate Discussion
A. To Do□ Computer with Digital Projector and Screen
□ Internet Access
Or
Downloaded PDF file of the survey of the specific school for discussion
□ Set computer internet or PDF file of school to Construct section
□ Chart Paper
□ Markers
□ Small Sticky Notes (yellow and blue) for all Participants (packs on each table)
□ Copies of Participant’s packet Handouts for all participants
□ (Optional) Copies of Power Point Presentation
□ (Optional) Consensogram Chart for Construct Selection
□ Norms Poster (See Facilitator’s Addendum)
□ What’s Working Poster (See Facilitator’s Addendum)
□ Enough copies of the school results to provide one copy per table group
□ Copies of each item prompt worksheet (see Item Prompts) per participant (not handed out right
away. Specific ones handed out once they determine which Construct and Item they would like to
focus on)
□ Copies of the school improvement initiative template
□ Timer
3

4

Facilitator’s GuideSchool Level Drill Down Presentation
Objectives: Become familiar with your school’s TELL data and Web site Understand the drill down process in order to analyze the data Be able to unpack, disseminate and discuss teaching conditions data to create action items for
school improvement Engage in a process to improve teaching conditions in the school for all teachers
Time CONTENT Materials
30 -60Min.
Set Up and Preparation:
Room should be set up so participants can work in small groups.
Posters: Consensogram What’s working feedback poster Meeting Norms Poster Large versions of the School Improvement Initiative poster
should be available for each table
Both the handout packet and the worksheet packet should be on tables.
Post it’s (yellow and blue) should be on the table.
**** Information in (parenthesis) is for the facilitator ONLY. Do not read aloud !
------ indicates a situation that needs to be contextualized and /or modified for your district or school. Please have these modified before presentation time.
Name tags
Power point
Participant’s packets
Copies of the summary report
Timer Chime
s Post
it’s Poster
s
25 min.total
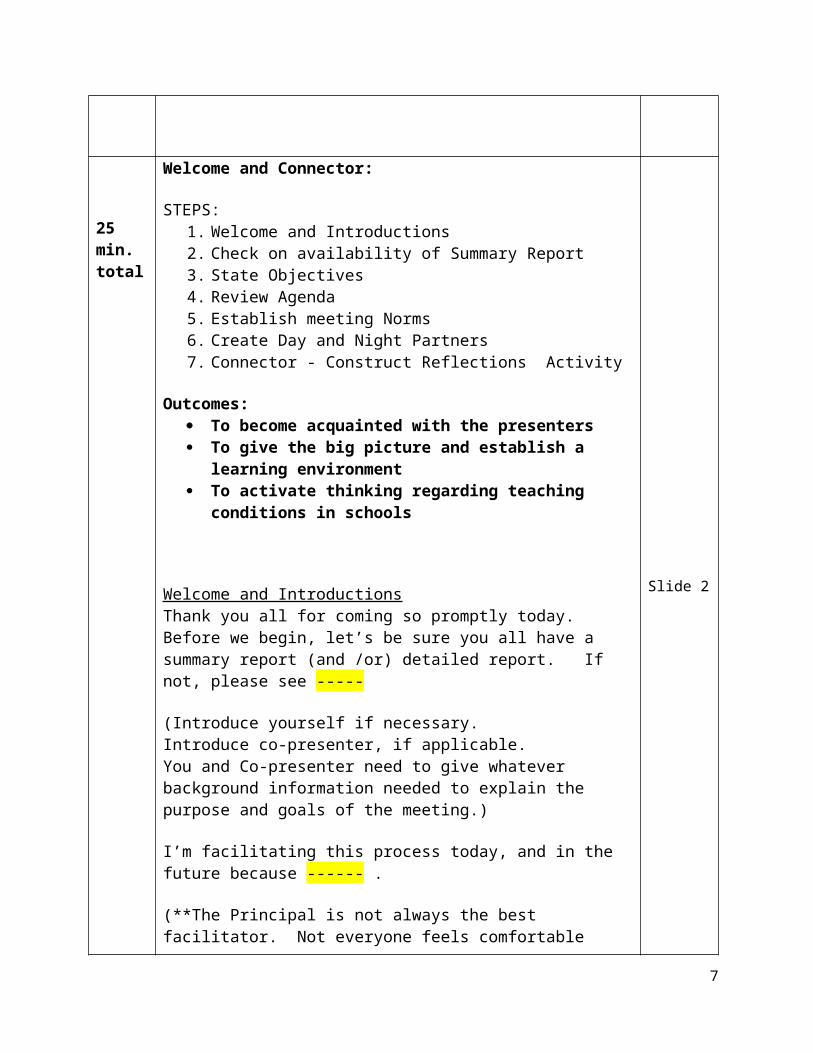
Welcome and Connector:
STEPS:1. Welcome and Introductions2. Check on availability of Summary Report3. State Objectives4. Review Agenda5. Establish meeting Norms6. Create Day and Night Partners7. Connector - Construct Reflections Activity
5

Outcomes: To become acquainted with the presenters To give the big picture and establish a learning environment To activate thinking regarding teaching conditions in schools
Welcome and IntroductionsThank you all for coming so promptly today. Before we begin, let’s be sure you all have a summary report (and /or) detailed report. If not, please see -----
(Introduce yourself if necessary.Introduce co-presenter, if applicable.You and Co-presenter need to give whatever background information needed to explain the purpose and goals of the meeting.)
I’m facilitating this process today, and in the future because ------ .
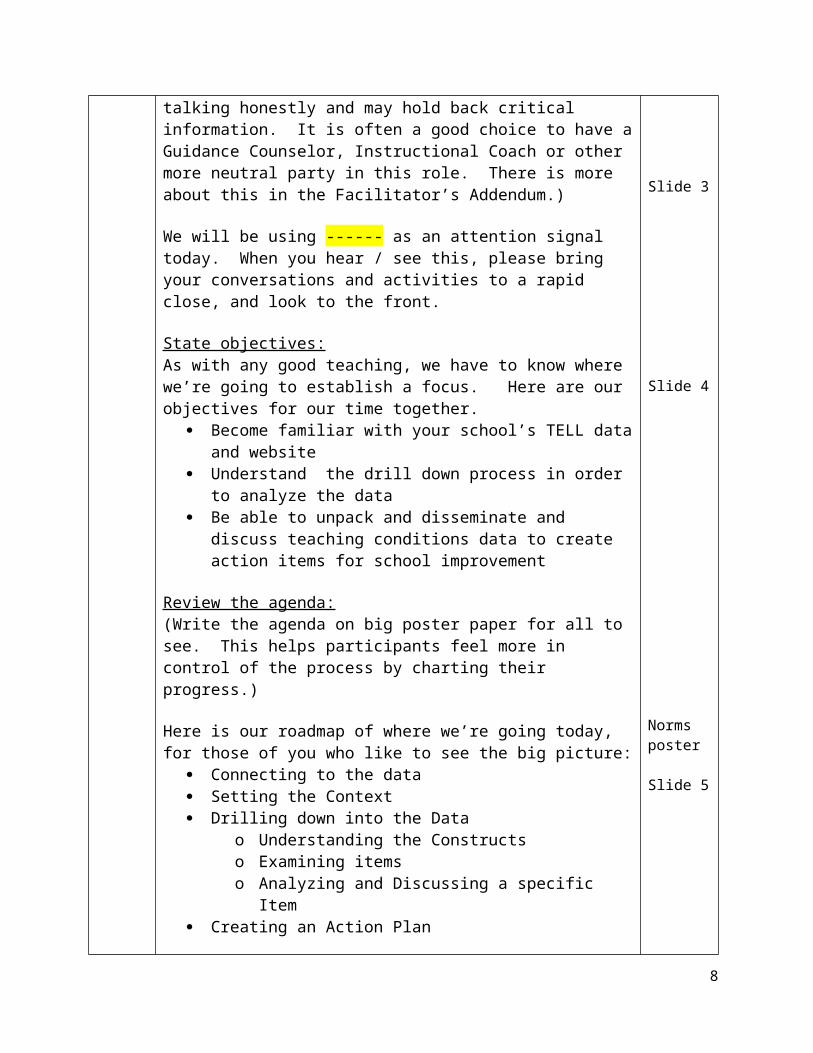
(**The Principal is not always the best facilitator. Not everyone feels comfortable talking honestly and may hold back critical information. It is often a good choice to have a Guidance Counselor, Instructional Coach or other more neutral party in this role. There is more about this in the Facilitator’s Addendum.)
We will be using ------ as an attention signal today. When you hear / see this, please bring your conversations and activities to a rapid close, and look to the front.
State objectives:As with any good teaching, we have to know where we’re going to establish a focus. Here are our objectives for our time together.
Become familiar with your school’s TELL data and website Understand the drill down process in order to analyze the data Be able to unpack and disseminate and discuss teaching
conditions data to create action items for school improvement
Review the agenda:(Write the agenda on big poster paper for all to see. This helps participants feel more in control of the process by charting their progress.)
Here is our roadmap of where we’re going today, for those of you who like to see the big picture:
Connecting to the data
Slide 2
Slide 3
Slide 4
6
Setting the Context Drilling down into the Data
o Understanding the Constructso Examining itemso Analyzing and Discussing a specific Item
Creating an Action Plan Closing
Establish Meeting Norms
(If your school has existing Meeting Norms that are similar, please use those.)
In order to be on the same page, I’d like us to establish and agree upon the following Norms.
(Read the Norm, and then ask participants what each one means to them to get all ideas out on the table. This helps level the playing field and head off difficulties down the road. Below each norm is a “cheat sheet” in case the ideas do not surface from the participants.)
Equity of Voiceo Everyone should monitor their own participation, and
avoid the traps of saying nothing or of saying everything. Staying silent does not help in the long run. Shared decision making is the most effective.
Active Listeningo Try to stop your internal monologue, the little voice in
your head, when other people are talking so that you can fully hear and understand and then respond.
Safety to Share Different Perspectiveso Remember that everyone has their own reality. Just
because a situation happens one way for you, doesn’t mean that it happens that way for every teacher.
Confidentialityo Avoid using people’s names or other qualifiers that would
identify them. Always remember that your co-workers deserve respect.
Create Day and Night PartnersWe want to give you an opportunity to have conversations with many people today. We will be working in whole group, in table groups and in several types of partnerships. Some partnerships will be structured and
Normsposter
Slide 5
Day and NightPP BSlide 6
7
some will be more open. Let’s establish your Day and Night Partners.
(Model the directions as you explain them. Challenge participants to get this done in 1 minute or less. Be careful that this does not turn into a time for conversations or an impromptu break.)
Directions:1. When I say, “go”, quickly find someone not seated at your table
who has a completely different job / content area/ subject level than you do.
2. Write their name in your Day side on the worksheet and have them write your name on their Day side in their packet.
3. Quickly move on and find a new person to partner with. This person should have a similar job / content area/ grade level as you, but should not be seated at your table.
4. Write their name on your Night side in the packet and have them write your name on their Night side on the worksheet.
5. Thank them and return to seats.
Connector - 10 minutesWe are about to begin a connector, or activator, to get you thinking about the Teaching conditions in our school.
1. Hand out Construct Reflections Connector WS
2. Read the constructs aloud
3. Let participants know that they will ALL have different ideas of what each construct means, and that is OK.
4. Read over the 1-4 rating system, noting that 4 is highest.
5. Have them reflect upon each aspect of their OWN teaching conditions regarding each construct, and rate them 1-4.
6. Jot down notes about their thinking on the worksheet, both positive and negative aspects.
7. Take 5-7 minutes to think and write.
8. Find your Day Partner and share your thoughts. = 4 minutes.
9. We mentioned earlier that educators’ perceptions are their reality and that that their reality drives their decision making. Different educators in the school building can have entirely different perceptions on the same topic, and none of their positions are
ConstructReflections Connector PP C
Slides 7,8
8

necessarily right or wrong. Because of this, it is imperative that educators are in regular communication with each other to better understand each other’s perspectives as well as find common ground.
SegueNow that we’ve thought about our own conditions, let’s take a look at WHY we’re talking about teaching conditions.
30 min.total
Set Context :STEPS:
1. Rationale-Why did you take the survey?2. What we know about Teaching Conditions3. Long term process, not a 1 shot deal4. Read and Discuss “Using the Survey Results Effectively” (pg. 9-
11)
Outcomes: To realize the importance and impact of the work To provide rationale for examining the data
Rationale1. We know sometimes we take surveys just because we were told we
have to. We don’t always realize the purpose. This time, we have a very real, immediate and relevant reason to take this survey; it gives each of us a voice to give administration, parents, community members, and district leaders information about our teaching conditions.
2. Explain how the survey was brought into the district.
3. (Give brief highlights from the Background information to explain what the purpose of the survey, to achieve buy-in from the group, and to establish the validity and value of the survey. There is more information on the survey background in the Facilitator’s Addendum)
4. *** You need to add your own reason for taking the survey and your background talking points onto a power point slide***
What we know about Teaching Conditions
1. We now know that it matters for kids.
Slide 9
Slide 10
9

Recent research (to be published June 30, 2014) finds the survey areas are significantly related to value added gains scores, particularly managing student conduct, quality of professional development, and manageable requests on time and autonomy.
The survey areas (constructs) are also linked to student engagement and students’ perceptions of teaching quality (academic press and support)
2. We know Teaching conditions matter for teacher retention Teachers with positive perceptions of teaching conditions are
much more likely to stay at their current school than are teachers with negative perceptions.
The areas of School Leadership and Teacher Leadership had the largest effect on teacher retention.
3. Principals and Teachers view teaching conditions differently Everyone sees things differently, not just Administrators and
teachers. Elective teachers have different perceptions than Core Subject teachers. Elementary teachers view conditions separately from High School teachers, and newer teachers have an outlook on their schools that differs from veterans.
There can be many different reasons for this, ranging from ownership, to empowerment, to specific skill sets.
What is critical about this point is the need to open dialogue about this issue and find common ground.
4. This may seem like common sense, but if teachers are unhappy, and are working in a hostile, or distrustful environment, it’s only logical that this will affect their teaching.
5. Our goal is to change the teaching conditions in this school for the better, so that teachers want to come to work every day, and teach ALL students to achieve at high levels.
Reform is a Long Term ProcessWe have a lot of data to examine and analyze, but this is NOT a one shot deal! This meeting is only the beginning of a continual process of school reform and improvement. According to new research by Linda Darling-Hammond, it takes 30 – 100 hours of professional development extended over a 6 – 12 month period to affect change in the classroom. Therefore, we are going to take small steps and study the results bit by bit, over most of this year so that we can internalize the process and create real, lasting changes and structures.
Slide 11
10

We will be using the Teaching Condition data as: a baseline for improvement a metric (a way to measure) for improvement a way to help us prioritize our needs to inform our school
improvement plan
“Using the Survey Results Effectively” – 15 minutes1. This article, “Using the Survey Results Effectively,” explains how to
examine your data successfully.
2. It was written for the state of Massachusetts, but applies to all states and districts. It was created after many districts had gone through the process independently, and so draws upon their wisdom and experience.
3. Read the article, taking notes /annotating key points on the article itself, or on the Reflection Sheet. 6 minutes
4. When you’re done, respond to the prompts on the sheet for your Take-away’s and thoughts. 4 minutes
5. As a group, we will discuss and chart what people thought were the most important points of the article, and what ideas we need to keep with us during the process. (Debrief the group by uncovering, or asking for 5 or 6 items participants view as most important.) 5 minutes
Slide 12
Slide 13
PP D, E,F and guided questions on PP G
20 - 30min.
About the TELL Drill Down Process:STEPS:
1. Go over the basic drill down process (graphic)2. Looking at the TELL website – types of reports
11

Outcomes: To allow participants to understand the layout of the website
and the different types of reports available to them To see the big picture in the Drill Down Process
The Drill Down Process1. Here is a graphic of the Drill Down process. It’s shaped as an
inverted pyramid to show that we start with a large mass of information that we are going to mine, or “drill down” into until we find a specific focus where we want to spend our time and energy to improve teaching conditions.
2. On the next page in your packet you’ll see a list of basic vocabulary terms we’ll be using today. Take a moment to read over the definitions:
a. TELL – Teaching, Empowering , Leading and Learningb. Teaching Conditions – the systems, relationships, resources,
environments and people in your school that affect your ability to teach (or learn) at a high level.
c. Construct – a grouping of several specific questions, all dealing with the same topic.
i. Time, Facilities and Resources, Community Support and Involvement, Managing Student Conduct, Teacher Leadership, School Leadership, Professional Development, Instructional Practices and Support, and New Teacher Support
d. Item – a specific individual questione. Individual Item Prompts – a series of questions that help
guide a group in thinking about the data associated with one specific question
f. Drill down – breaking the data into smaller pieces to analyze it for the purpose of unpacking and improving one specific teaching condition
g. Rate of Agreement – the percentage of people who said they agreed or strongly agreed that a teaching condition was in place
h. Neither Agree nor Disagree – the percentage of people who did not feel the teaching condition was or was not in place. They could be ambivalent, they may not have understood the question, or they may not have experience in that arena
3. By the end of the day, teams will have decided on a prioritized focus, and then we will look specifically at the strengths and needs of this
Slide 14
Slide 15PP H
12

construct and item to come up with an action plan that addresses the needs and moves forward.
Looking at the Web site
(Show the screen shots on the power point slides to match each step of the process.)
1. Let’s start by looking at the website,a. ex. www.fcpswcs.com
2. This is the Home screen. This page has a lot of information and links to resources.
a. Notice the black strip across the top of the page. This section has frequently asked questions, all of the tools that we will be using, parent guides, district guides, and other resources and tools.
b. Many of the tools we will be using are available under the “Tools” heading.
3. In order to get to our district and school information; click on the ‘Survey Results’ button.
a. This will take you to a screen that has a listing of all the schools in the district. From this point, you can click on your cluster to find the list of schools that are contained in each one. The example on the screen is a little different in that it has districts instead of clusters since it was taken from a state report.
b. On the screen example, the red arrow is pointing to a district and the yellow arrow is pointing at those schools contained within that district.
4. To the right of each school name are tiny graphics that look like little note pages, we will come back to those in a moment. First, let’s look at what other information is on the page.
a. Further to the right, you should see 3 columns of numbers with arrows above them.
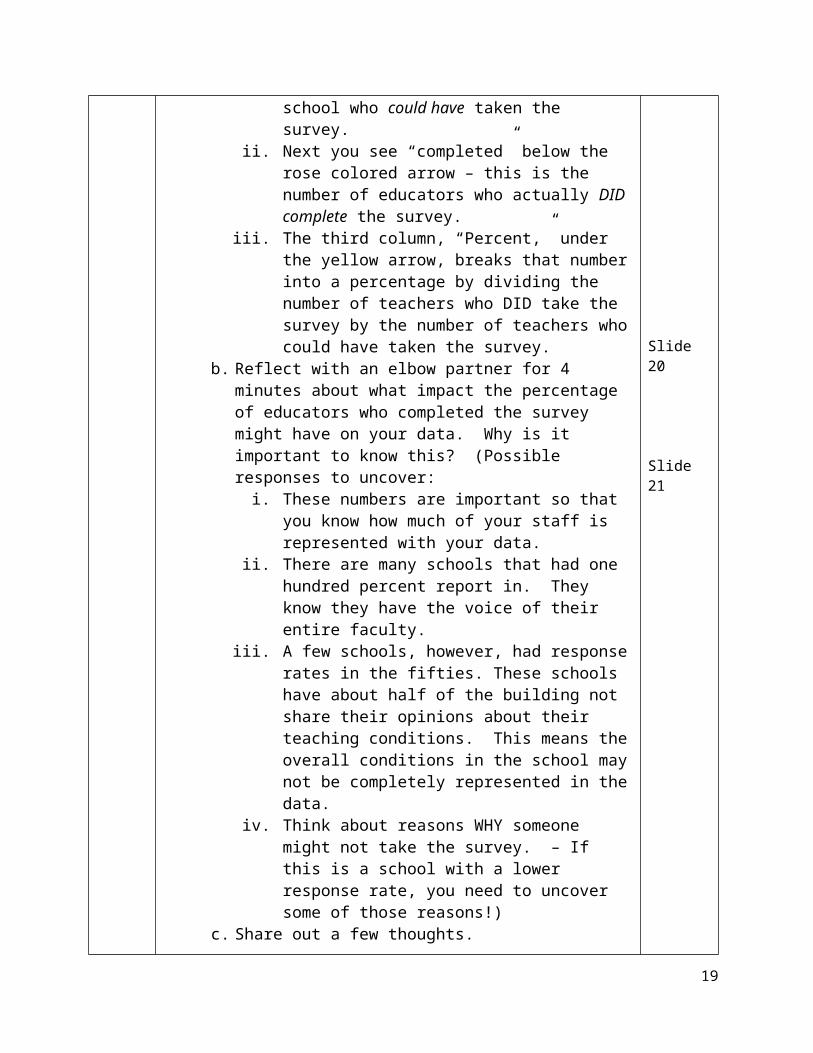
i. The first one is labeled Educators under the green arrow. This is the number of licensed educators in your school who could have taken the survey.
ii. Next you see “completed” below the rose colored arrow – this is the number of educators who actually DID complete the survey.
iii. The third column, “Percent,” under the yellow arrow, breaks that number into a percentage by dividing the
Slide 16
Slide 17To Find your School
Slide 18What do the numbers mean?
13

number of teachers who DID take the survey by the number of teachers who could have taken the survey.
b. Reflect with an elbow partner for 4 minutes about what impact the percentage of educators who completed the survey might have on your data. Why is it important to know this? (Possible responses to uncover:
i. These numbers are important so that you know how much of your staff is represented with your data.
ii. There are many schools that had one hundred percent report in. They know they have the voice of their entire faculty.
iii. A few schools, however, had response rates in the fifties. These schools have about half of the building not share their opinions about their teaching conditions. This means the overall conditions in the school may not be completely represented in the data.
iv. Think about reasons WHY someone might not take the survey. – If this is a school with a lower response rate, you need to uncover some of those reasons!)
c. Share out a few thoughts.
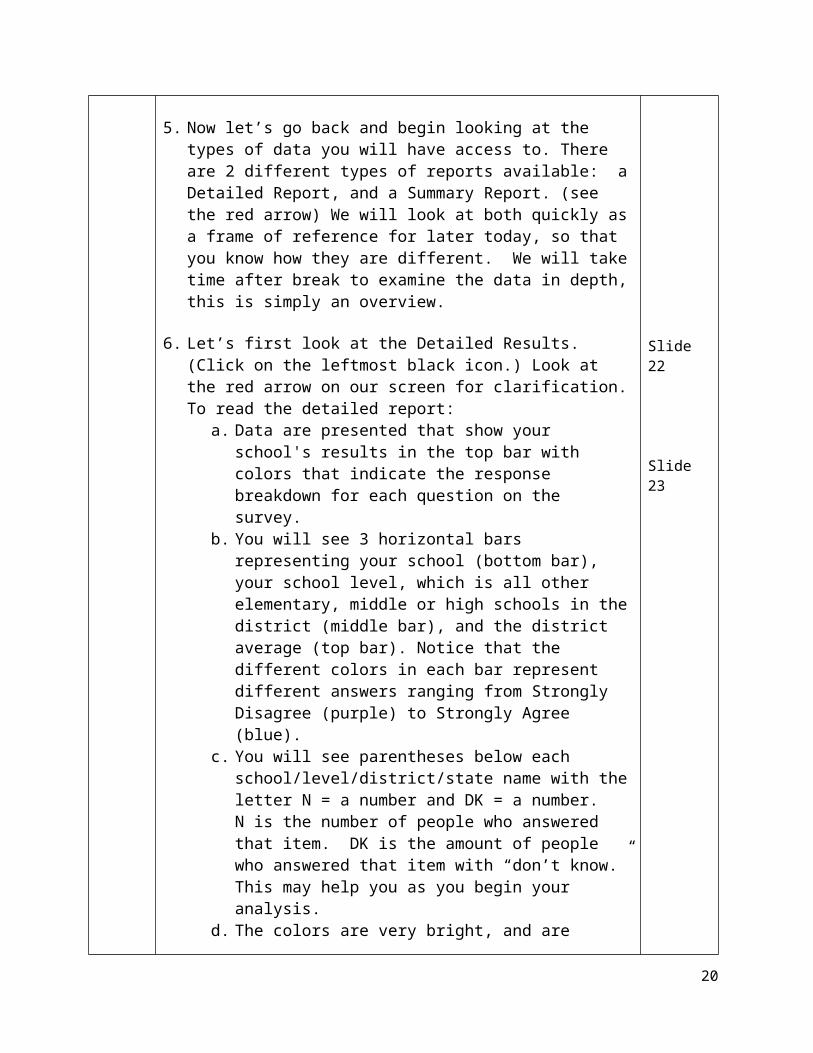
5. Now let’s go back and begin looking at the types of data you will have access to. There are 2 different types of reports available: a Detailed Report, and a Summary Report. (see the red arrow) We will look at both quickly as a frame of reference for later today, so that you know how they are different. We will take time after break to examine the data in depth, this is simply an overview.
6. Let’s first look at the Detailed Results. (Click on the leftmost black icon.) Look at the red arrow on our screen for clarification. To read the detailed report:
a. Data are presented that show your school's results in the top bar with colors that indicate the response breakdown for each question on the survey.
b. You will see 3 horizontal bars representing your school (bottom bar), your school level, which is all other elementary, middle or high schools in the district (middle bar), and the district average (top bar). Notice that the different colors in each bar represent different answers ranging from Strongly Disagree (purple) to Strongly Agree (blue).
c. You will see parentheses below each school/level/district/state name with the letter N = a number and DK = a number. N is the number of people who answered that item. DK is the amount of people who answered that item with “don’t know.” This may help you as you begin your analysis.
Slide 19
Slide 20
Slide 21
14

d. The colors are very bright, and are actually designed for people who are colorblind and for black and white copiers to be able to differentiate colors in printing.
e. The area indicated by the red arrow provides users tools to get around the site efficiently, converting the webpage to pdf for easy printing, or returning back to the results or school summary pages.
f. Be sure to examine the answer descriptors for each item, as they can change from question to question, with indicators of ‘Strongly agree to strongly disagree” as in this example, to the degree of role played, to questions of amounts of time. These descriptors can drastically change the interpretation of the item, so please read carefully.
g. While percentages for each answer option are presented, you can also mouse over the bar and learn how many responded to each answer type for further clarity
7. The next report is called the Summary Results. This gives an overview for each Construct and Item that were answered with the descriptors “Strongly Agree” to “Strongly Disagree.” To access this report, click on the blue note icon in the center –see red arrow on screen for clarity.
8. Let’s examine a summary report and see how this data is different from the Detailed Report:
a. Here, the data reveals a snapshot, or summary, of each construct (group of questions) and item (specific question.)
b. This section only shows items (questions) that were answered with the indicators of “strongly agree” to “strongly disagree.”
c. This report shows only “percent agreement,” which includes the consolidation of both “agree” and “strongly agree,” responses. You might immediately assume that if this percentage of educators agrees, then the rest of the educators who responded would have to disagree, but be a bit careful here. Many could have answered, “Don’t know.” You will have to look back at the Detailed Report to be sure.
d. The comparison data shows your results in a vertical chart. Your school results are in the far right column (under the blue arrow.) The second column from the right shows data for all schools of a similar level (yellow arrow). The third column from the right displays results of all participating schools in your district (pink arrow).
9. Now that you have had a brief look at the web site and have some working knowledge of how to navigate to our school’s data, let’s get started looking at our own data and begin narrowing the scope of our
Slide 22
Slide 23
15

work.
***BREAK HERE IF DOING THE ALL DAY SESSION*** Slide 24
20 min.Determine a Construct:STEPS:
1. Use indicator questions to see the big picture2. Prioritize Constructs3. Choose 1 to examine in depth
Outcomes: To prioritize constructs To determine a starting point for the process
Use Indicator questions to see the big picture1. We’ve already reflected on the Constructs at our school by using the
Construct Reflection Sheet earlier. Now let’s look at the data and see a little more about where our needs are reflected in the data.
2. (Hand out Construct Indicator Questions Worksheet) Here are the Construct Indicator Worksheets.
3. Each construct has one question that is very representative of the rate of agreement for the construct (group of questions) as a whole. That means this question will give you a quick picture of the construct overall. Those questions are listed on the worksheet below. Examining these questions will give us an overview of each construct, or a place to start, without having to analyze and compare each individual item question.
4. The set-up of the worksheet has several sections (use the PP slide as a guide):
a. The boxes on the left side (under the word question and the red arrow) have the construct and the indicator questions written inside them.
b. The boxes to the right of the question, in the middle of the page, (under the words School, Level, and District) is where you will record your school, level, and district data for comparison (yellow arrow).
c. All the way on the right is a blank box labeled Priority. For now, ignore this box. We will come back to it shortly.
5. You will be using your summary data results that can be acquired from the website. On your SCHOOL’S summary data report, find the Time construct, question d., which says, “The non-instructional time provided for teachers in my school is sufficient. (red arrow)
Slide numbers may differ if you are not facilitating an all-day session or if you did not take a break
Construct Indicator WS PP ISlide 25
Slide 25
Slide 26
16

Find the percentage for your school. Here, the example shows 55.2%. (show slide with red and yellow arrows. Remind them that what is on the screen is an example and their numbers will differ.)
6. Transfer this number from your school’s data to the first, top left box of the Construct Indicator Worksheet on the chart in the center of the page, labeled School 2014. ( Show ex. Slide and ex. Data)
7. Do the same thing again, but this time find the School Level data for the same question and move that number into the chart under the word “School Level, SL.”
8. Now, go back to the Summary Report and find the District data.
9. Record the data in the top, third box from the left in the chart labeled “District, D.”
10. For this next part, you may want to use a calculator. Most cell phones have one included. In the middle row, first grey box, you should see the label S-SL, this stands for School minus School Level. We are going to subtract the School Level agreement number from the School agreement number. In this example we have 55.2 – 67.3. When we do the calculation, we see that comes out to a NEGATIVE 12.1. Mark this in the empty box below the grey box labeled S-SL.
11. This may end up being a positive or negative number. If it is a positive number, your school has a higher rate of agreement than the other schools in the same Level in your district. That means that more people at your school agree this construct is in place than in the rest of the other elementary schools (or middle or high schools, depending on your level) in your district. If the result is a negative, then the School Level has a higher agreement rate than your school. In this example we have ‘-12.1,’ which means this school has a lower rate of agreement about non-instructional time in their school than the rest of the schools on this grade level across the district.
12. Repeat the process in the next box to the right labeled S-D, to find out the District comparison. In our example we get -11.7. That means that when compared to all the schools across the district averaged together, the example school is reporting below the agreement rate than schools across the entire district about non-instructional time in their schools.
13. Repeat the same process for the remaining Construct Indicator Questions.
Slide 27
Slide 28Slide 29
Slide 30
Slide 31
Slide 32
Slide 33
17

Prioritize Constructs1. Now that you have done the math for each construct indicator
questions, it’s time to prioritize our strengths and needs for the school.
2. These numbers are not meant to be measures of good or bad. They simply tell us where we stand as a faculty. We look at comparisons with the district and level data as a gauge, or as a comparison, but there are no right or wrong answers here. What these data do not provide is school context. Survey results represent just a starting point to begin conversations about the presence and quality of teaching conditions.
3. Individually, take 3 minutes to look at the positive and negative numbers, and then based on your personal experience AND the construct indicator questions, prioritize the 8 constructs from HIGHEST NEED to LOWEST NEED and record those on the Priority boxes on the Construct Indicator worksheet. #1 should be the area of HIGHEST NEED, in which we MOST need to improve, and #8 is the area of LOWEST NEED, the area we consider our greatest strength. You may want to consult your predictions worksheet that we used earlier.
4. It may be easier to identify your 2 greatest strengths (#s 7 and 8) and your two greatest needs (#’s 1 and 2) first, and then arrange the remaining 4 constructs between them.
5. Compare your prioritized list with your table group. (7 minutes) Have a conversation and try to come to consensus for a team prioritized list. Record the Construct you all feel is your greatest strength on a yellow post-it note, and write the Construct you all believe is your greatest NEED on a blue post-it note.
Choose 1 Construct to examine in depth
1. Use the Consensogram Poster to show the groups’ ideas about the school’s greatest strengths and needs. (Model this process as you explain it. See “How to make / Use a Consensogram sample in the addendum if you need more instruction).
a. Give each table a yellow and a blue colored post –it note.
Slide 34
Slide 35
Slide 36
18
b. Yellow is for recording the greatest strength.c. Blue (or any other color) is for the school’s biggest need.d. Have 1 person from each table come put their post-its above
the corresponding construct number on the Consensogram. (model this)
e. Example – If my table thought Time was the biggest need, ONE PERSON would put the blue post-it above the word Time. If our biggest strength was Professional Development, we would place our yellow post-it above the word PD on the poster.
f. The next person, if their table also agreed Time was the biggest issue, should place their post it above the first blue post-it to make a two-story high bar graph. However, if they felt the biggest strength was Community Support, they would put their post-it at the bottom of the poster above the words Community Support.
g. One person per table come place your post-its.
2. Take a moment and examine the findings. We need to come to consensus about our school’s greatest need. (You may want to read over the pages titled “Decisions by Consensus” and “Conflict Resolution Method” included in the addendum.)
3. What patterns are you seeing? What appears to be our strengths? Do any Constructs stand out as a need? Which Constructs are sparsely posted? What do these findings tell us about how we perceive our school’s teaching conditions?
4. ---------- Construct has the most blue post-its, so we will take the next hour to examine these questions further.
5. (The blue post-its may be evenly divided, or it may be difficult to come to consensus. If this happens, you will have to be ready to take the lead and suggest one Construct that you and the school leadership know is a serious issue for the school. Another option is to break the faculty into multiple groups and work in parallel structures, so that one group may be working on the Time construct while another group is working on the School Leadership construct.)
6. (You either need to have multiple copies of each item work sheet available, OR you may want to consider going to break at this point to give yourself time to run enough copies of the chosen Construct Item Worksheet.)
7. Looking at the optical illusion, which picture do you see? Remember, this exercise is all about how we perceive things, and we all see our
Slide 37
Slide 38
Slide 39
19
teaching conditions differently. It’s not better, or worse, just different. And that makes sense. A music teacher will have a very different teaching experience than a math teacher. A special education teacher who has few students but travels from room to room will see things differently from the gym teacher who stays in one place but sees hundreds of students a day. Everyone’s perception is their own reality.
30Min.
Examine Items within the Construct:STEPS:
1. Examine each item within your chosen construct.a. Explain the table.b. Explain the item work sheet.
2. Walk through the Detailed Report.
Outcomes: Be able to narrow down to a single focus question Find and understand additional information in the detailed
report
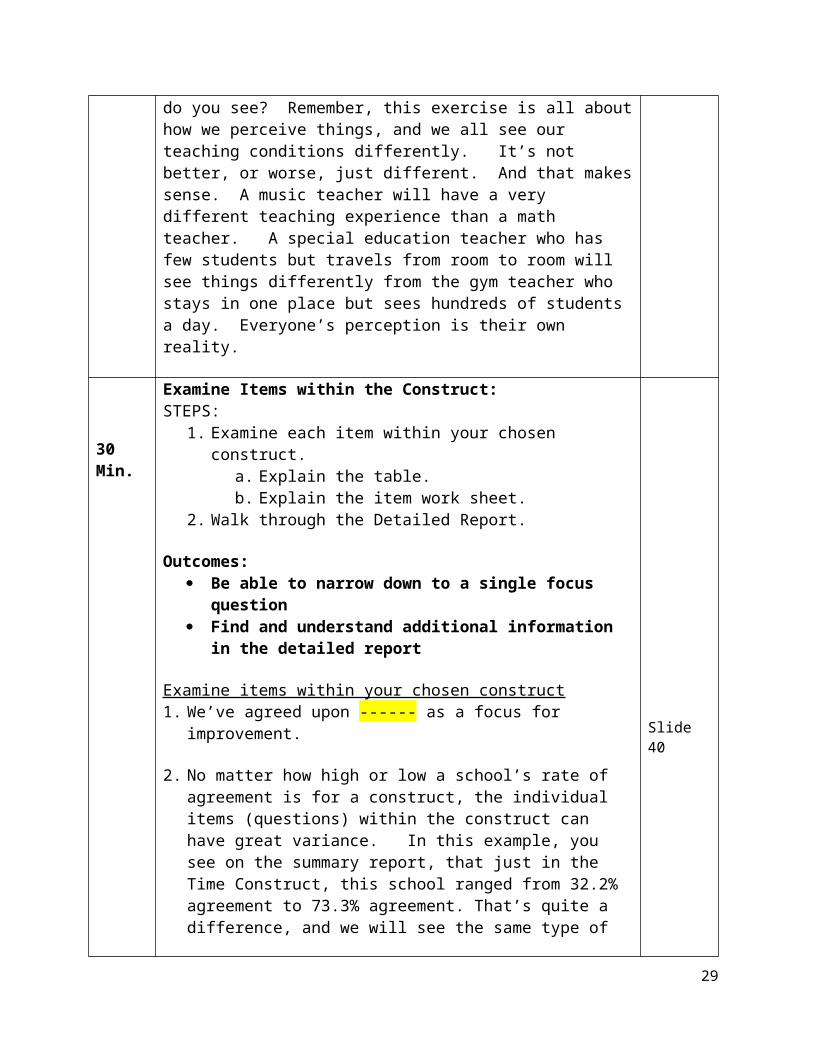
Examine items within your chosen construct1. We’ve agreed upon ------ as a focus for improvement.
2. No matter how high or low a school’s rate of agreement is for a construct, the individual items (questions) within the construct can have great variance. In this example, you see on the summary report, that just in the Time Construct, this school ranged from 32.2% agreement to 73.3% agreement. That’s quite a difference, and we will see the same type of differences in our own data.
3. Consider the overall item distribution, as it can reveal interesting trends in teacher perception.
a. In this example, we see this particular school scored lower than the District, and School Level on some Time related questions, but exceeded the comparison groups in others.
4. Looking at your time results more closely, these numbers can be interpreted in a number of ways.
a. At first glance, you may have agreement rates where six or seven out of 10 educators at your school agree that they have certain conditions in place and can be interpreted is a good thing. On the other hand, this also means that three or four out of 10 teachers DO NOT AGREE. This is a very interesting idea. The majority of the school agrees with this statement, but about 1 in 3 teachers do NOT agree, which may indicate a need to examine this area further.
Slide 40
You may
20

b. Consider why some teachers believe a condition is in place, yet others do not? Are conditions the same for special subject teachers as core subject teachers? What ideas can you come up with that might explain why educators may have very different opinions of the conditions they teach in?
5. We’re going to do an exercise very similar to the one we just did so that we can narrow our focus even further.
6. Looking at the sample Work Sheet on the screen, the construct item worksheets look almost identical to the Construct Indicator sheet we filled out previously. The individual questions for this Construct are listed in the boxes on the left. The comparison chart is in the center, and the priority boxes are on the far right.
7. Again, we chose ------ as our Construct. (Pass out the Construct item Work sheet for this construct ONLY, or use the blank construct sheet provided in PP L)
8. Go to your Summary Report and fill in the rates of agreement for your school, but ONLY for this one Construct. Once again, also write down the School Level and District rates of agreement for each item.
9. Calculate the differences between your school and the other data sources as we did in the previous exercise.
10. As you examine your own data, reflect on what aspects of your school could be contributing to these results.
11. Once you have completed the Construct Item worksheet and have thought carefully about each item within your chosen construct, you need to narrow your focus once again by prioritizing the Items.
a. Your item of focus does NOT have to be your lowest item score.
b. You and your faculty know the context of your school. Use that knowledge to choose an item of greatest impact to explore further.
12. We need to get consensus once again before moving forward, so we will use the consensogram one more time. (As facilitator, you need to change the bottom of the consensogram from Constructs -Time, Facilities and Resources, etc. - to Items -2.1A-class size- You can have a whole different Consensogram poster, or you can affix large post-its at the bottom to cover the previous indicators)
a. This time, put your table’s first choice of question to examine
want to have all construct item ws.s available to be able to pull the one chosen construct Time is available to all in PP J and blanks are on K
Slide 41
Item construct work sheets
Slide 42
Slide 43
21

further on a Yellow post-it note.b. Write your table’s second choice on a Blue post-it note.c. Have one person come to the front and place your post-its
above their appropriate item number. (Allow time for everyone to post. Direct participants back to their seats unless you are scheduling a break here. This can easily turn into a social time.)
13. What can we see on our Item Consensogram? Which Items are most populated? Which Items can we rule out? What does this tell us about our current needs?
14. It appears that most of you would like to look at item ------ more closely. Let’s start by looking at the Detailed Report to see if we can gather more information about this question. (If you have 2 items that have equivalent votes you will have to decide whether to try to gain consensus or to break the staff into two parts, each working parallel to the other.)
Walk through the Detailed Report
1. The Detailed Report gives us more specific information about HOW STRONGLY people feel about a particular Teaching Condition.
2. Specific Item Data is made up of 4 segments, moving from left to right: Strongly Disagree- purple, Disagree- red, Agree- green and Strongly Agree- blue.
3. Here, we see the same data as before, but with more detail. We get to see the percentage of Strongly Agree and Agree as separate entries, as well as Strongly Disagree and Disagree as opposed to the more general category of “% Agree.” This can potentially give you a clearer picture of your school data.
4. Notice the colors are portions of a horizontal line. The categories will not stack up in a line, so be careful about looking at percentages for comparison. It will give you a quick visual of which indicator had the highest percent agreement.
5. For the example on the PowerPoint slide, looking at Item A, “Class Sizes are reasonable …,” shows that 12% strongly disagree, 59% disagree, 27% agree and 2% strongly agree. That means that approximately 71 percent disagree and 29 percent agree. (remember that sometimes rounding can account for an extra percent)
Slide 44
Slide 45
Slide 46
22

6. The N, or number of people who answered that question, is 41. No one responded “I Don’t know” , DK. Often, not everyone will answer a question, so the N will change.
7. You may want to consider why someone would either not answer, or mark the category, “Don’t Know.” Did they not have an opinion one way or the other? Did they decline to answer because they felt intimidated? Did they feel that the issue did not apply to them?
8. You can break the percentages into numbers of people in each category by multiplying N, the number of respondents (here N=41), times the percentage in the specific category. This can be helpful in making the numbers seem real, and equating the data to actual people. (Remember, when multiplying a percentage, move the decimal 2 places to the left.)
a. Here in item 2.1A, the equation would be: 41 (N) x .12 (strongly disagree) = 4.92. So about 5 of the 41 people who took the survey strongly disagreed that their class sizes are reasonable.
b. Take 2 minutes now to review the Detailed Report data for our focus question.
c. What conclusions can you draw from this information?
9. Identifying pockets of agreement or disagreement can be helpful when moving forward and thinking about your action plan. While it is useful to think about these findings as actual people instead of percentages, it is also potentially hazardous if this process leads you to making assumptions as to who specifically may have responded. Remember that this is an anonymous survey. We have gone to great lengths to ensure anonymity. You can NOT be sure who your respondents are, and asking people to identify themselves can break the trust and your ability to gather accurate data.
10. We also need to look at N. N is the total number of respondents, or people who took the survey.
a. Does N match the number of teachers at your school? This is an important consideration!
b. If N =41, but there are 80 teachers at your school, then almost half of the school has not answered the question. This could be quite different than looking at data where 41 of 44 teachers responded.
i. What does that mean as you interpret the data? Are
Slide 47
Slide 48
23

you looking at a majority of faculty, or only a fraction? Are the results indicative of the whole school?
11. Sometimes we may see a heavy response in both the positive and the negative areas. This bi-modal distribution would suggest that teachers are split on their perception. This is significantly different from the traditional bell curve. In other words, some of the school might think this area is in good condition and the other half does not.
a. Occasionally we see a serious difference in answers, with a large portion of the staff answering “Strongly Disagree” and the other half answering “Strongly Agree.” This shows a huge difference in staff perceptions. This may indicate a need to explore an item further.
b. Think about what the distribution looks like for your school for each item.
Segue: Now that we’ve looked at all the data, let’s start thinking about how we can improve this specific teaching condition.
60Min.
Item Analysis:STEPS:
1. Process for Analyzing an Item overview2. What’s working / what’s not explanation and example3. Participant fill in chart4. What’s Ideal / Challenges – explanation and example5. Participants fill in Graffiti wall
Outcomes: To explore the issues involved in a specific teaching condition To create a plan for improving a specific item’s teaching
condition
Intro - Process for Analyzing an Item – overview graphic1. We are going to look at 2 ways to analyze this question. One way is
more linear, with graphic organizers. The other way involves conversation prompts for reflective conversations. They can be used separately or together since there are complementary to each other. Today, we are going to use both methods to give everyone a chance
Slide 49
24

to experience them. In the future, use the method that is more comfortable for you and your community.
2. This slide indicates the basic process we will use the 4 boxes that make up the process: What’s Working?/ What’s Not Working?/ What is the Ideal?/ and What are the Challenges to the Ideal?
3. We need to take an in-depth look at the reality of this item as seen in our school. We need to know where we stand before we can move forward. So we’re going to think about the following 4 ideas for the next several minutes.
4. Just as in your classrooms, we need to assess so we know where to start, and we need a goal, or exemplar to keep in mind as we move forward.
What’s Working / What’s Not? Explanation, Example and Work Time1. Let’s start by examining the graphic organizer. On the far left we
have, “Item to Examine.” This is the question we wish to explore further.
a. Ex. – Our example school’s teachers felt like they had limited non-instructional time to collaborate with their colleagues.
b. We chose ------, so write that in the left- most box on your worksheet.
2. Then we have Positive Factors. These are all of the good things we can think about dealing with this issue. Even though we may not have scored well here, and perceive this as a need for our school, there are still things that are working for people and we are doing some aspects of it well.
a. In school A…(read over the 3 example positive factors.)b. Take 3 minutes as a table group and write in 3 pieces of
evidence that ----- item is in place in our school, even on a small scale.
c. Share out 1 Positive factor per table.
3. Now contemplate how these positives affect your teaching, or the effect it has on the school as a whole.
a. read through the examples in the handoutb. Again as a group, discuss and record POSITIVE effects of
----- for yourself and our school. Take 3-5 minutes.
4. Finally, thinking of “Moving Forward,” how do we take what we have and make it bigger and better? Think of how you can take the positive factors from micro to macro and extend the influence.
a. School A expanded their PLC from the school level to a
Slide 50Process for Analyzing graphic
Slide 51 and examples on 52
Point out the What’s Working worksheets PP L, M
25

bigger, more influential district -wide PLC times several times a year. (continue with examples)
b. Bring it back to our issue of -----, how do we take our positives and expand our influence, or make it bigger and better?
c. Work for 4-6 minutes with your groups. Be CREATIVE and think out of the box!
d. Have 2 tables share out the whole row – Positive, Effect, and Step Forward
5. Let’s move to the bottom half of the graphic organizer. We chose this item for a reason. Clearly some things in this area aren’t working as well as we’d like them to. As we just saw when looking at the positives, we do have points of light, but now we need to start thinking of what specifically is broken.
a. For school A… (read the 3 examples)b. Take 2 minutes to individually think of our area of need, and
pinpoint what the actual issues are.c. Discuss as a table group and write at least 3 challenges, the
effects they have on your teaching. 7 minutes
6. This time, instead of taking the issue and making it bigger, let’s minimize it, or trouble shoot it.
a. School A found ways to take back precious non-instructional planning time by … (read the 3 examples)
b. Let’s give this section a little more time for discussion. Again, be creative and comprehensive. It could be easy to dismiss people’s ideas and say, ‘that won’t work here.” Instead, try to focus on the CAN DO’s instead of the CAN’Ts. Remember, strategies work differently depending on age, personality, subject matter or other factors. There is no guarantee that because it works for one person, it can work for all people, so be tolerant and open minded. 7 – 10 minutes.
What’s Ideal / Challenges – explanation and example
1. We’ve just analyzed strengths and needs for our item, and soon we’ll begin making an action plan, but before we do so, we need to decide where we’re going. We need to set a clear path for everyone to see and follow.
Slides 53 and 54
26

2. What do we really want? What is the ideal? I know this may be an interesting concept for some of us. How do we know what the ideal is if we’ve never seen it? But this is the time to think big and DREAM! If a magical fairy came down and granted your every scholastic desire, what would ----- look like HERE, at this school, with the same kids, parents, teachers and administrators.
3. Let’s explore School A’s ideals, challenges and how they wanted to overcome those challenges and get to their ideal state. (review the examples on the handout)
Participants fill in chart
1. Let’s focus in on our ideals. When we think about -----, what do we really dream about seeing? Why can’t we have it? And how do we go about getting it?
2. Find your NIGHT partner, and then join together with another set of night partners who you have not interacted with today, so you are a new group of 4. Brainstorm a list of IDEAL situations for this item.
3. What did you come up with? I’m going to record each “ideal” on a poster. (Have each quartet call out their best Ideal. Record these “ideal situations” on the top of a big piece of poster paper. One idea per poster. Place the posters around the room to create a Graffiti wall. If several tables have the same or similar ideal, combine into one poster.)
4. (Graffiti wall directions for the facilitator - This activity mimics the “What’s Ideal” worksheet. If you are short on time, you could have participants simply fill in the graphic organizer, but that cuts down on the collaborative process. You will NOT get a consensus here about ideal situations. That will happen during the goal setting process.
a. (Put each Ideal on a poster at the top, turned horizontally (wide as opposed to long). Below it, create 3 or 4 columns. -See Construct Item Ideal Worksheet and create a model poster that all other groups can copy.)
i. Challenge 1, 2 and 3 are at the top.ii. Ways to Overcome are below this.
b. To section off the group, you can place each quartet at a poster, or you can remix everyone by counting off by the number of “ideal” poster topics. So if you had 6 ideal situations surface during the debrief, you need to count off by 6’s and have 6 separate posters, each with an Ideal Situation at the top.
c. Have each group go to their assigned poster and write in their
Point out the What’s Ideal worksheets PP N, O
Slide 55
Slide 56PP P
27

Ideal situation (show slide and point out the red arrow)d. Record as many challenges and ways to overcome as possible
in 8-10 minutes.e. Call time and have each group rotate clockwisef. Take 2 minutes to read what was already written, then take an
additional 3 minutes to add any additional ideas they have.g. Repeat the process until each group has been to each poster.h. Have 1 more round so each group ends up at the poster where
they began in order to read any additional comments.i. Return to seats
5. Debrief by pop-corning out 1 interesting idea they saw that stimulated new thinking or insights.
Slide 57
45 min.
Individual Item Prompts:STEPS:
1. Explain prompt pages for each item2. Choose groupings3. Choose facilitator, reporter , recorder4. Work time5. Share out about the PROCESS
Outcomes: To give faculty an alternate method for analyzing a school’s
strengths and needs for specific item data
Explain the rationale and set up for the prompt pages for each item
1. Some of our topics are very complex and may require more discussion than the “What’s Ideal” work sheet allows. We know that the best teaching incorporates choice and addresses multiple learning
Slide 58
28
styles, so we want to give you options for thinking about the teaching conditions in our school.
2. The Individual Item Prompts are a series of reflective questions for almost every survey item. They are designed to guide collaborative conversations about specific school conditions and to provoke lines of thinking that may not be immediately apparent to everyone. They are not an exhaustive list, but instead are a starting point for dialogue.
3. (These prompts may be used before or after thinking about “what’s working / what’s Ideal”, or they can be used as stand -alone prompts. The two methods tend to elicit different types of thinking and appeal to different learning and processing styles.)
4. Looking at Item Prompt 2.1d, “The non-instructional time…”, let’s explore the formatting of these 2 pages.
a. (Show the sample slides.)b. Page 1 has the question stated at the top and underlined.c. Below this is a summary statement that shows several
different perspectives and directions for the Table Group Activity.
d. Page 2 and subsequent pages are the Reflection Tool pages. The rounded boxes in the center of the page house a more general reflective question and more specific and related questions listed underneath it.
Choose groupings
1. For these discussions we would like many different types of disciplines and grade levels represented in each group to gain a broad perspective. We are going to regroup by ------.
a. (You need to design a method for grouping. We recommend that you have one representative from each grade level and/or department, plus an elective teacher and an administrator in each discussion team.
b. You could put colored dots on name tags or agendas to indicate teams.
c. You could line up by department and number off.d. You could ask them to arrange themselves so that no one who
teaches the same thing is in the same group.e. Keep in mind that purposeful groupings tend to work better
here.f. You also may want to think about whether it’s best for all
groups to be working on the same Item Prompts or not. Groups could also be working on a single general reflective
Slide 59
Slide 60
29

question with its specific questions all within one Item Prompt).
Table Group Activity Directions
1. Now that you are in groups, we need to assign a facilitator, reporter and a recorder. (You may ask for volunteers, or use the quick fix in parenthesis below.)
a. The facilitator (person with the longest hair) should watch time limits and encourage equity of voice.
b. The Recorder (person who has the longest last name) will summarize the primary questions and discussion points during the conversation. This is difficult, but the Reporter should also take part in the discussions. There is no need to record specific names of people attached to their ideas, or keep a running record of back and forth dialogue.
c. The Reporter (person who travels the farthest to work) will verbalize the key findings during the debrief. They will be responsible for sharing out:
i. Key discussion pointsii. Primary debate issues
iii. Consensus pointsiv. Ideas to move forward
2. Let’s all take a moment to remember our Norms.
3. Read the assigned Item Prompt questions and begin discussions as a group. Please really consider the norm of Equity of Voice. We want participation from all members, and a variety or perspectives. Try to be aware of “sticky” issues throughout the discussion.
4. Be as transparent as possible within your discussion groups without naming names or attacking any group or individual. You may want to develop a signal (for ex. The Time out sign) to indicate that the discussion is getting too heated or too personal.
5. Remember to record the main thoughts and questions that were discussed, especially when the group comes to consensus or vehemently disagrees. You may want to use the Item Prompt Discussion Record template, or you can use the “What’s Working…” page we used before to record positive and challenging aspects of the discussion. You could also record thoughts in outline or in web formats. Please find a style that meets the needs of the group and documents thinking. (The administration may want one uniform style to compile all ideas. If that is the case, please give only that
Slide 61
Slide 62
PP Q
30

option.)
6. You will have 30 minutes of work time. You will receive a 5 minute warning near the end, and a 2 minute warning for the group to help the recorders accurately summarize. (Use 30 minutes if they are doing the entire Item Prompt. If you’ve broken the section into smaller chunks, please adjust the time accordingly. )
Share out about the Discussion and the PROCESS
1. Give the Reporter from each table 2 minutes to report out:a. Key discussion pointsb. Primary debate issuesc. Consensus pointsd. Ideas to move forward
2. Record similar ideas and themes on a poster. (The poster can look just like the note taking sheet if you choose).
3. After every group has shared out, popcorn out ideas about the discussion PROCESS.
a. What ideas /buzz words / topics hindered discussion?b. What processes helped groups come to consensus?
45 min.Action Plan:STEPS:
1. Explain action plan worksheet2. Create 1 action item3. Work time4. Share out
Outcomes: To create a plan that effectively improves one specific
teaching condition
Creating an objective:1. We’ve spent a lot of time considering one area that we perceive as
our greatest limitation. Now it’s time to turn this around. We need to start by creating a concrete goal.
2. Let’s look at our Action Plan Template. (It can also be called a
Slide 63
Slide 64 and 65 Action planPP R, S
31

School Improvement Initiative or any other befitting title. If you have an existing template, please use that.)
3. Remember, goals should be SMART -a. Specificb. Measurable and Observablec. Attainabled. Realistice. Timely
(Elaborate on these concepts as needed for your staff.)
4. Review the list of “Ideals” your teams came up with on the Graffiti Wall. Many of them may be similar, and should be able to be clustered together under one goal.
a. Ex. School A had 4 idealsi. Teachers never have to cover other teacher’s classes.
ii. Teachers are never asked to a last minute meetingiii. Meetings are efficient, pertinent and everyone
contributes equally.iv. There is a set time and place for all meetings.
b. Notice that Ideal 1 and 2 both deal with planning time being taken up, whereas Ideal 3 talks about the quality of meeting time and Ideal 4 talks about the logistics of time and space.
5. As a group, looking at the Graffiti wall, decide which ideals can cluster together. 6 minutes
6. Now we need to change this ideal into an objective.a. School A changed their first 2 ideals into one objective,
“Teacher’s planning time is held sacred for PLC work.”b. This objective is fairly broad, but they gave it specificity
within the framework of the Improvement plan.
7. Create your own Objectives at your table using the “Change an Ideal Situation into an Objective” page . 5 min.
8. Call out and chart all objectives, round robin style.
9. Come to consensus about a single objective by combining similarly worded objectives from the list or by crafting a new one that incorporates the dominant ideas.
a. Place a Check by key words-nouns- that are repeatedi. Ex. Time, Planning, Meeting
b. Underline key verbs/adverbs that are repeated
Slide 66 –Smart Goals
Back up to slide 57
Slide 67
Slide 68PP T
32

i. Ex. Efficiently, Listening,
10. Remember that any objective / goal must be phrased in the positive and it must ultimately support student achievement.
11. Record your objective on the Action plan in the “objective” box.
Spell out Success1. Your objective states what you want, but what does that look like?
a. School A wanted no covering classes, no last minute meetings and no student interruptions during their meeting times
b. Turn to an elbow partner behind you, someone NOT at your table, and describe your image of success with this objective. 4 minutes. Thank your partner and Return to tables.
2. Call out ideas of success and chart them on a poster. What do you want success to look like, smell like, act like… This is HOW you will know that you have been successful, and will incorporate many of the other elements in the SMART goal.
3. We will use the same process of underlining key verbs and checking off key nouns for consensus that we used on the last chart. (come to consensus.)
4. Record this sentence on the Action Plan.
Decide on Specific Steps1. Most objectives are complex and multi-faceted. Take a moment and
look at the rest of the page. You see Steps Needed, What is Included, What is Included in those Steps, How will Success be Measured, Resources needed, and By When? With Whom. Let’s examine School A’s plan before we jump into our own.
a. School A had 3 indicators of success. Read over
2. We’re going to do this final step together.a. What discrete events need to happen to achieve our goal?b. Take 2 silent minutes to think about this on your own.c. We’re going to do a 2+2=4
i. Think of 1 step that is critical for our success. Write it in the top space on the 2+2=4 sheet.
ii. Get up and share that with someone else across the room.
iii. Take their idea and write it in the second box on the 2+2=4 sheet.
iv. Now you have 2 ideas.v. Go to someone NEW across the room and get their 2
Slide 69
Slide 70
Slide 71 and 722+2=4PP U
33

ideas and add them to the sheet. You should have 4 ideas.
vi. If the second person you see has the same 2 ideas that you had, keep meeting different people until you have 4 separate ideas listed.
vii. Return to seats.
3. Popcorn out ideas about Critical Steps to Achieve our Goal, and chart them. If you have more than 5 (or 4 or 3, it depends on you and your staff) steps, you may want to narrow this down. If a step is too unwieldy, it will be difficult to track and achieve. Use the 3 fingers voting method to narrow the field.
a. Everyone gets 3 votes. You can use all 3 fingers to vote for one answer you feel strongly about, or use 1 vote to count for 3 different choices. Or you can vote, 2 fingers for choice one, and 1finger for choice two, etc…
b. Vote for indicators of success. Have 2 counters to be sure the votes are accurate. The top 3 (or 4 or 5) votes win.
c. Fill in the chart for Steps Needed.
4. Divide the room into 3 sections (or 4 or 5 – one for each Step. You may want to consider having multiple groups work on the same step, and then having several indicators for each step.) With your groups, fill in the remainder of the Action Plan on big chart paper at your table.
a. What must be included?b. How will we know we succeeded?c. What resources are needed?d. By Whom? / By When?
5. Reporters ONLY, stand and report out.i. Go Round Robin, row by row (step by step).
ii. Combine the common ideas if you’re using multiple groups per step.
iii. Be sure the success indicators are measurable and observable!
6. Together, decide what needs to be done to maintain this success. Make a “pledge” or a commitment to this goal. (You may even wish to have all members sign the paper as a gesture of dedication.)
7. Stand and applaud! You did it! You all came together and created a plan that is good for teachers, administrators and students! Congratulations
Chart out Critical Steps to Achieve the Goal
Slide 73
Slide 74
34

10 min.
300 min. total =
5 hrs.
Closure:STEPS:
1. Final remarks2. Evaluation
Final Remarks
We just went through a process that was vital to the improvement of our school. We started with a few pages of data and turned it into a real, concrete, workable action plan that is focused on real issues for our teachers and ultimately for our students.
But it was just a first step. If we consider that we are done NOW, we are done. Finished with growth that is. This has to be a constant, continual process for all of us. We need to continue to go back to the data, find what is working and make it better, and identify areas of need to fill.
We all deserve it. Our students deserve it.
Thank you for your hard work and dedication. We’ll continue this process on ----------- (set a time and date).
Evaluation
I’d like to know how the process went for you. Please fill in your evaluation and leave it ----------.
Thank you ALL !!
Slide 75
Slide 76- EvaluationPP V
35
![[Facilitator’s Name] [Date]](https://static.documents.pub/doc/80x56/56815d4a550346895dcb5375/facilitators-name-date.jpg)


![[Facilitator’s Name] [Date] [Facilitator’s Affiliation] [Facilitator’s Email Address] Heat & Health in Detroit: A Workshop for Community Leaders.](https://static.documents.pub/doc/80x56/56649ce45503460f949b0fd0/facilitators-name-date-facilitators-affiliation-facilitators.jpg)
