Photographic guide to fixing water pumps in the field with text in Arabic and English. دليل آيفية تصليح المضخة أجي في الريف
35
دﻟﻴﻞ اﻟﻤﻀﺨﺔ ﺗﺼﻠﻴﺢ آﻴﻔﻴﺔ أﺟﻲ ﻓ اﻟﺮﻳﻒ ﻲwww.ngotech.ch 2009 ﻓﺎﻟﺲ ﺳﺘﻮرت ﻣﺤﺘﻮى اﻟﻤﻠﺨﺺ ﺗﻤﻬﻴﺪ: ﻳﺤﺘﺎج ﻣﺎذا اﻟﻌﻤﻞ و اﻟﻤﻀﺨﺔ ﺁﺟﺰاء ﺁﺳﻤﺎء اﻷول اﻟﺠﺰء: ﺗ ﻔﻜ وﺣﺪة ﻴﻚ اﻟﺮأس اﻟﺜﺎﻧﻰ اﻟﺠﺰء: اﺳﺘﺨﺮاج ﻏﻮاﺻﺔ وﺣﺪة اﻟ ﻤﻀﺨﺔ اﻟﺜﺎﻟﺚ اﻟﺠﺰء: ﻓ ﺘ ﺢ وﺣﺪة ﻏﻮاﺻﺔ وﻓﺤﺺ اﻟﻤﻀ ﺨ ﺔ اﻟﺮاﺑﻊ اﻟﺠﺰء: ﺗ ﺠﻤ ﻴ ﻊ واﻋﺎدة وﺣﺪة ﻏﻮاﺻﺔ اﻟﻤﻀﺨﺔ اﻟﺠﺰء اﻟﺨﺎﻣﺲ: ﺗ ﺠﻤ ﻴ وﺣﺪة ﻊ اﻟﺮأ سContents Introduction: Personnel, Pump parts and materials §1 Disassembly of the head unit §2 Extraction of the submersible pump unit §3 Checking the submersible pump unit §4 Reassembly and reinsertion of the submersible pump unit. §5 Reassembly of the head unit A guide to fixing Ajay water pumps in the field. www.ngotech.ch 2009 Stuart Vallis
الملخصمحتوىآسماء آجزاء المضخة و العملماذا يحتاج :تمهيد
الرأسيك وحدةفكت :الجزء األولمضخة الوحدةغواصة استخراج:الجزء الثانى ةخ المض وفحص غواصة وحدةحتف: الجزء الثالث المضخة غواصة وحدة واعادة عيجمت :الجزء الرابع
س الرأع وحدةيجمت: الخامس الجزء Contents Introduction: Personnel, Pump parts and materials §1 Disassembly of the head unit §2 Extraction of the submersible pump unit §3 Checking the submersible pump unit §4 Reassembly and reinsertion of the submersible pump unit. §5 Reassembly of the head unit
A guide to fixing Ajay water pumps in the field. www.ngotech.ch 2009 Stuart Vallis
2
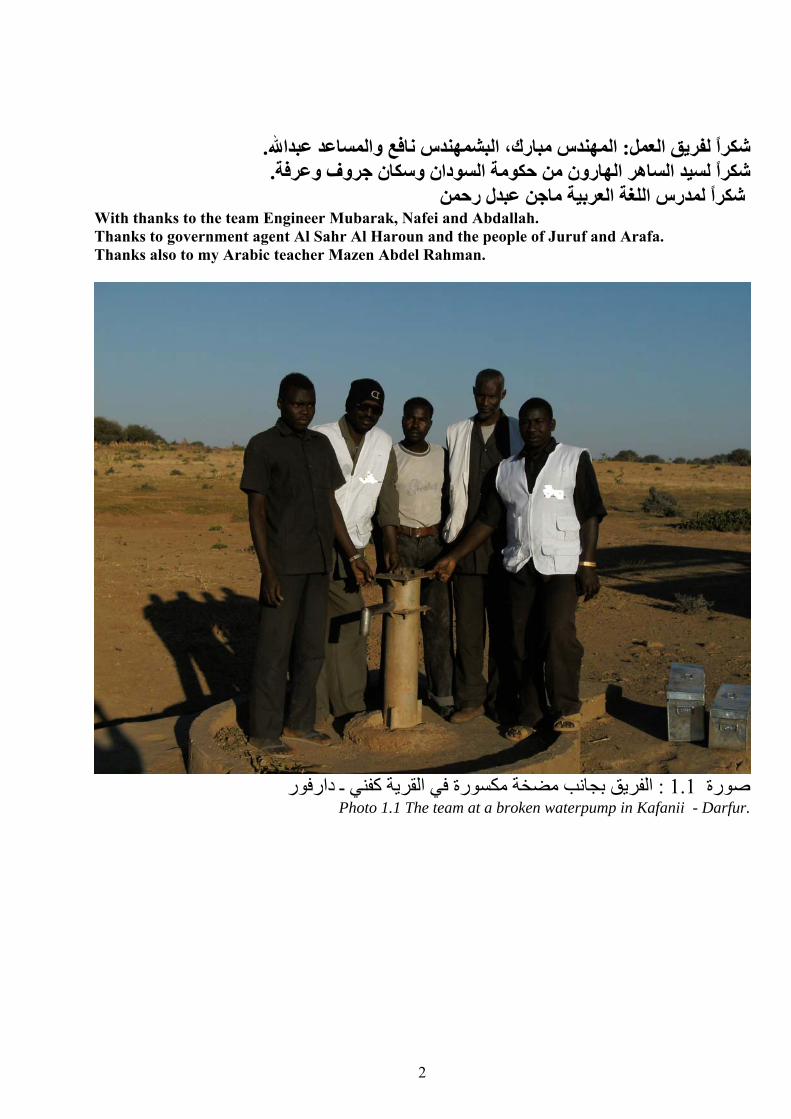
. عبداهللا مساعدال وفعاشمهندس نبال ،كرامهندس مب ال:لعمليق الفرًا رشك .رفةوف وعكان جروسسودان شكرًا لسيد الساهر الهارون من حكومة ال
مدرس اللغة العربية ماجن عبدل رحمن شكرًا ل With thanks to the team Engineer Mubarak, Nafei and Abdallah. Thanks to government agent Al Sahr Al Haroun and the people of Juruf and Arafa. Thanks also to my Arabic teacher Mazen Abdel Rahman.
دارفور ـقرية آفني بجانب مضخة مكسورة في اليق الفر: 1.1 صورة
Photo 1.1 The team at a broken waterpump in Kafanii - Darfur.
3
آسماء آجزاء المضخة و العملماذا يحتاج :تمهيد Introduction: Personnel, Pump-parts and materials
العملماذا يحتاجيجب أن يكون هناك مهندس وثالثة أشخاص أقوياء لرفع . 1
شخص واحد ليشرح العمل للفالحين . المضخة 1.1عدة االصالح من أجي هي صندوقين آما في صورة . 2
بوصة آل مضخة 15 حد أقص ماسورة وقضيب معدني ومقبضوحدة الرأس ، وحدة المضخةغواصة. 3عدة رافعة لماسورة المكسورة من البير. 4 شيكارة أسمنت 4. 5
What you need
1. You need a good strong team, one engineer plus 3 strong workers to do the lifting. One additional person to explain what you are doing to the local villagers is also useful.
2. Repairs kits, these are in the two boxes on the ground in photo 1.1, plus 15 pipes and rods for each well to be repaired.
3. Spare submersible pump unit, head unit and handle. 4. A length of metal bar with a turn in the end to retrieve broken pipes. This can be made by a
length of rebar threaded at the end to fit onto the central metal bar – you can retrieve broken pipes from any depth. In Sudan the device is known locally as a “Murfa`in”.
5. 4 bags of cement to repair the base and soakaway channel.
4
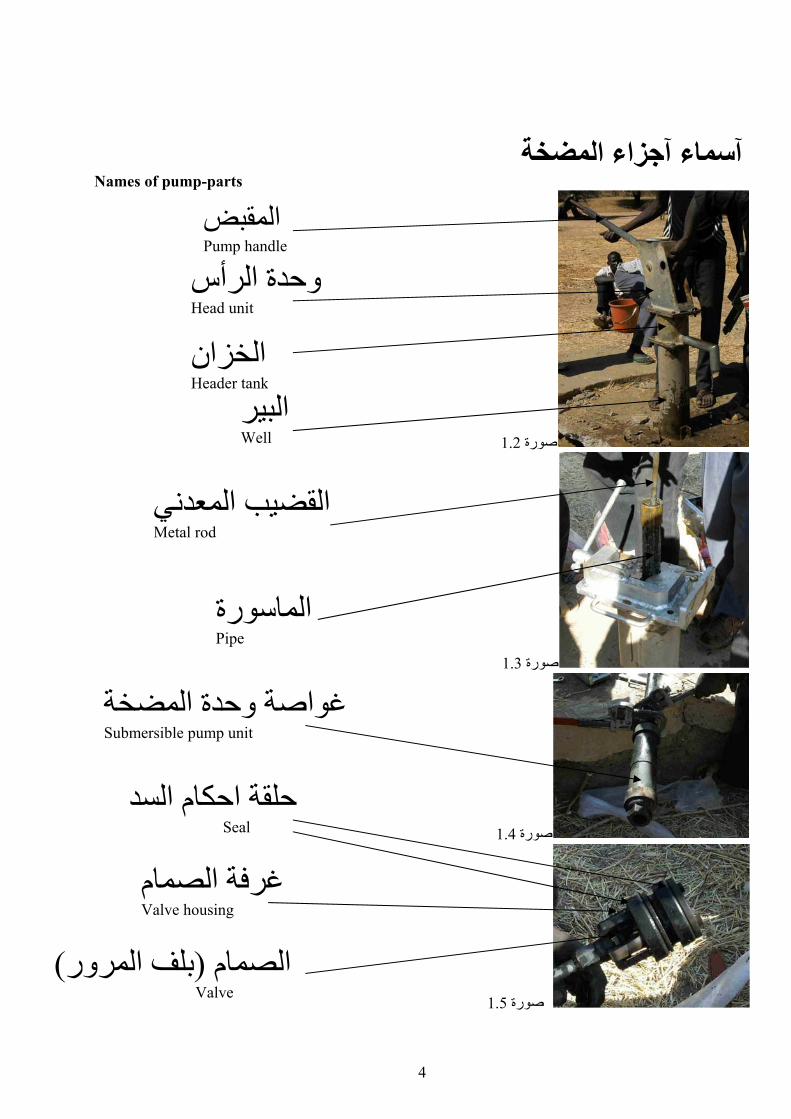
آسماء آجزاء المضخة Names of pump-parts
1.2صورة
1.3صورة
1.4صورة
1.5صورة
ضمقبال Pump handle
وحدة الرأسHead unit
الخزانHeader tank
البيرWell
القضيب المعدنيMetal rod
الماسورةPipe
غواصة وحدة المضخةSubmersible pump unit
حلقة احكام السدSeal
غرفة الصمامValve housing
) المروربلف(الصمام Valve
5
تفكيك وحدة الرأس: الجزء األول §1 Disassembly of the head unit
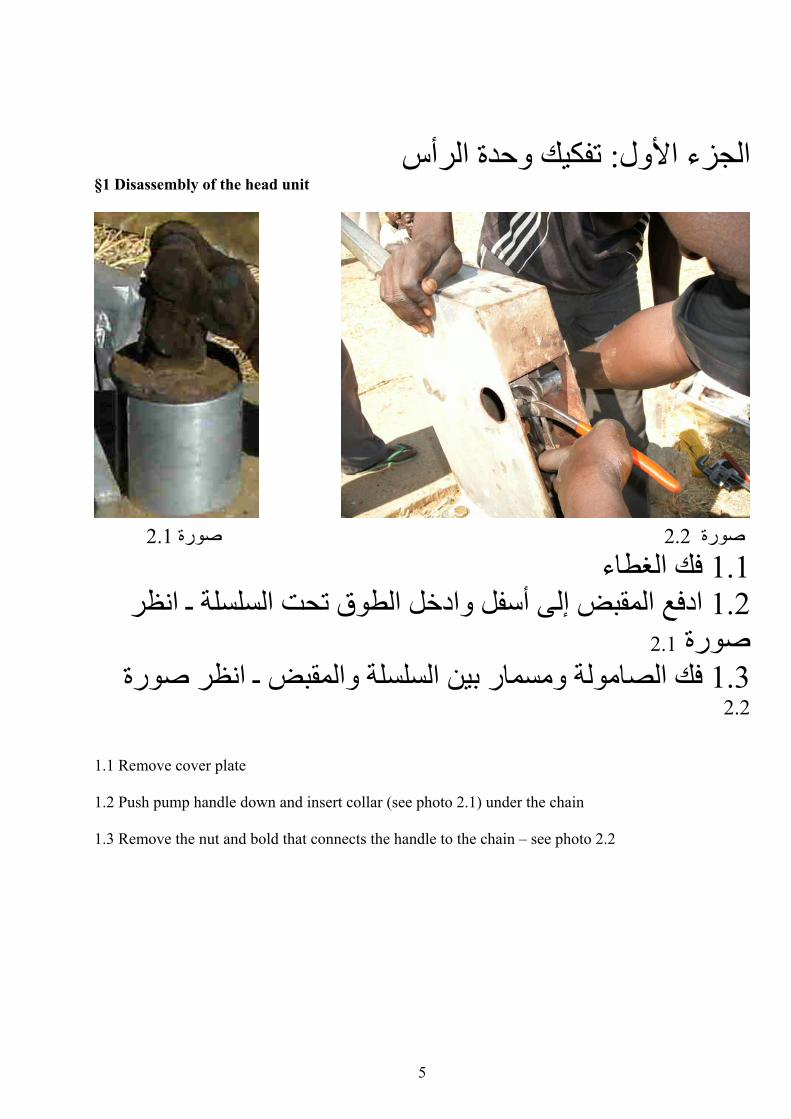
2.1صورة 2.2 صورة غطاء ال فك1.1 ـ انظر تحت السلسلةل الطوق دخاوإلى أسفل مقبض الدفع ا 1.2
2.1صورة
ـ انظر صورة مقبضال بين السلسلة و ومسمار الصامولة فك1.32.2
1.1 Remove cover plate 1.2 Push pump handle down and insert collar (see photo 2.1) under the chain 1.3 Remove the nut and bold that connects the handle to the chain – see photo 2.2
6
3صورة
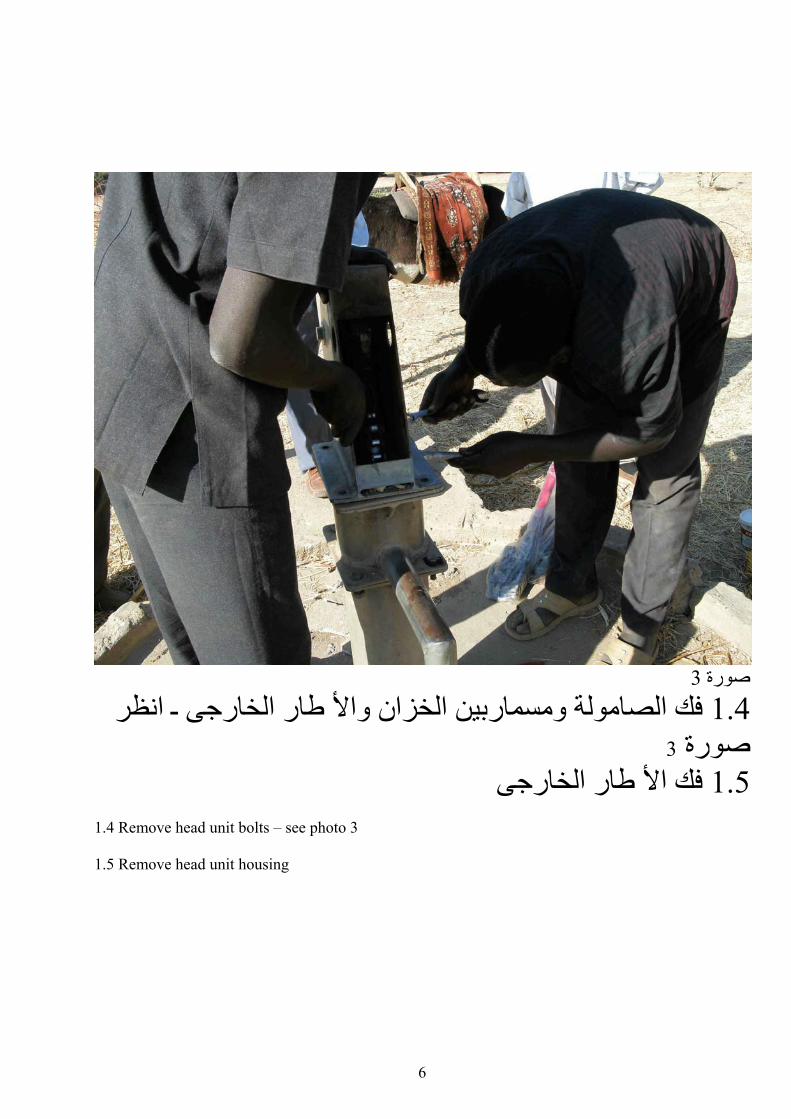
ـ انظر األ طار الخارجىبين الخزان و الصامولة ومسمار فك1.4 3ورة ص
األ طار الخارجى فك1.5 1.4 Remove head unit bolts – see photo 3 1.5 Remove head unit housing
7
4صورة
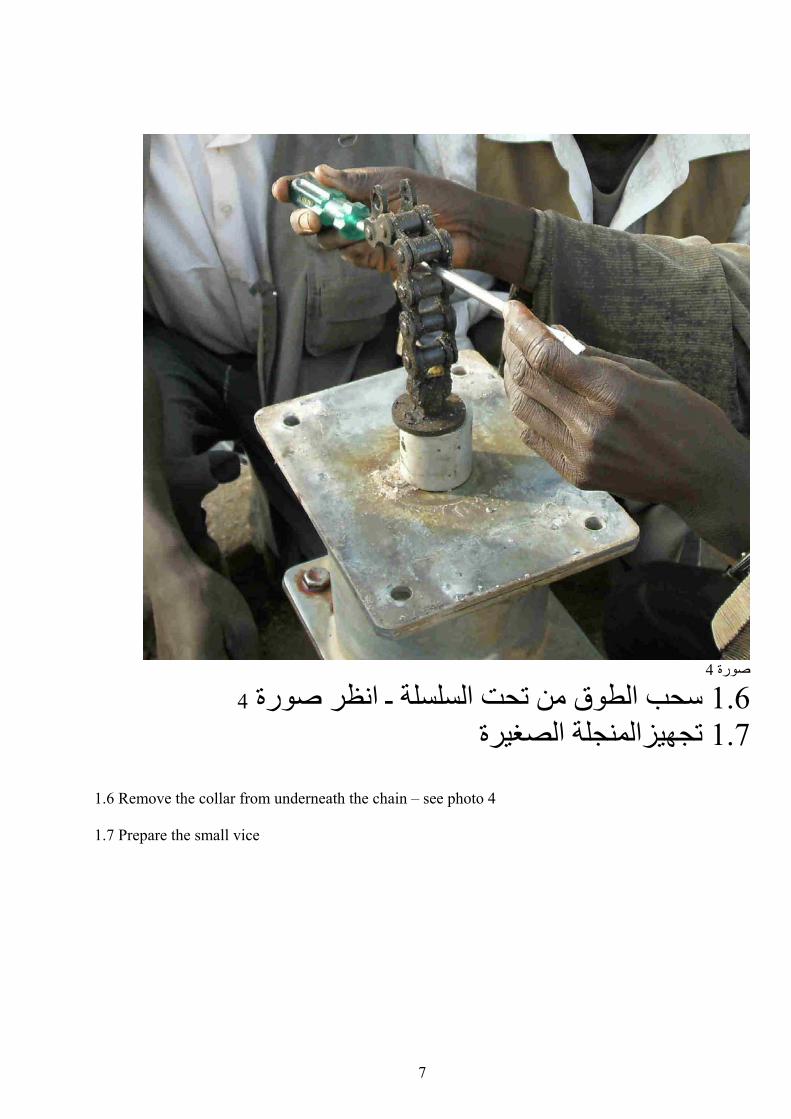
4 ـ انظر صورة تحت السلسلة منالطوق سحب1.6 ةالصغيرلة جالمنتجهيز 1.7
1.6 Remove the collar from underneath the chain – see photo 4 1.7 Prepare the small vice
8
5صورة
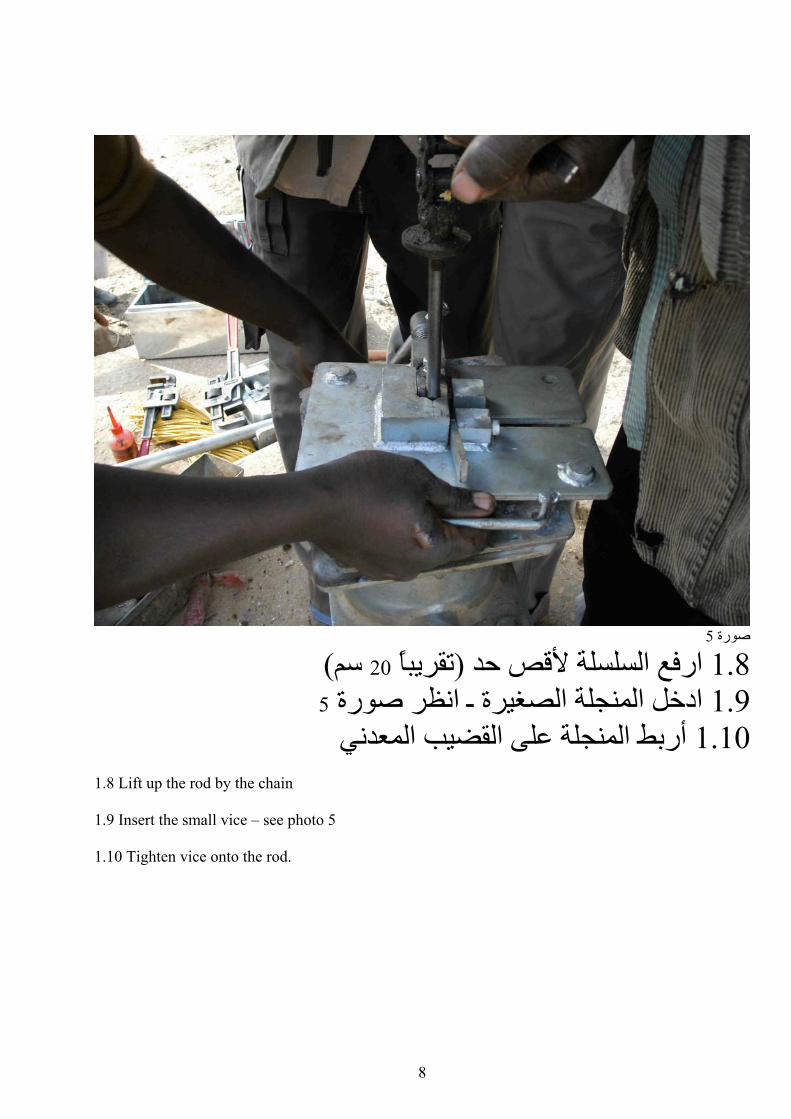
) سم20 تقريبًا( ألقص حد لسلسلةارفع ا 1.85ـ انظر صورة ة دخل المنجلة الصغيرا 1.9
معدنيال المنجلة على القضيب أربط 1.10 1.8 Lift up the rod by the chain 1.9 Insert the small vice – see photo 5 1.10 Tighten vice onto the rod.
9
6صورة
6 انظر صورة ـمعدنيالالقضيب من فك السلسلة1.11 فتح المنجلة ا 1.12 ضيب المعدنى عند فتع المنجلة سوف يسقط الق1.13 نقل المنجلة الصغيرة ا 1.14
1.11 Remove the chain assembly – see photo 6 1.12 Open the vice 1.13 Let the inner rod drop down through the hole 1.14 Remove the small vice
10
وحدة المضخة غواصةاستخراج: الجزء الثانى§2 Extraction of the submersible pump unit
7صورة
تجهيزالمنجلة الكبيرة ـ انظر ون الخزانالخزان م غطاءنقل 2.17صورة
2.1 Remove the header tank cover plate and prepare the large vice – see photo 7
11
8صورة
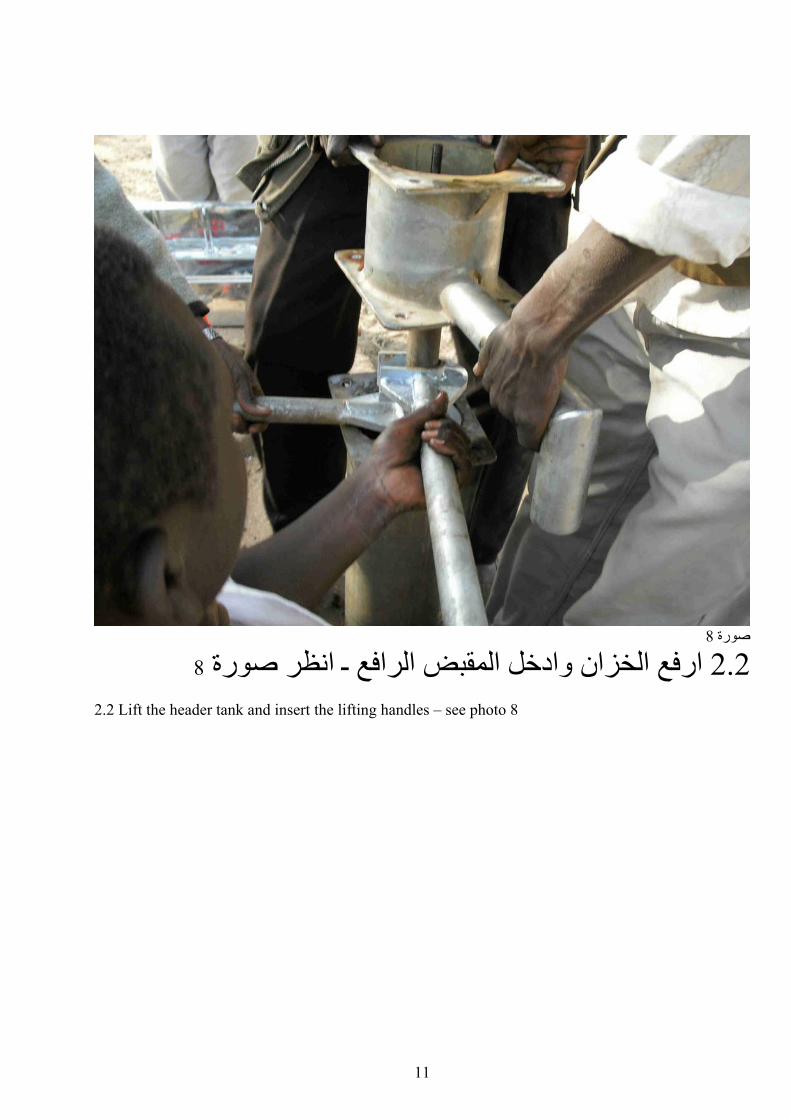
8 ـ انظر صورة رفع الخزان وادخل المقبض الرافعا 2.2
2.2 Lift the header tank and insert the lifting handles – see photo 8
12
9صورة
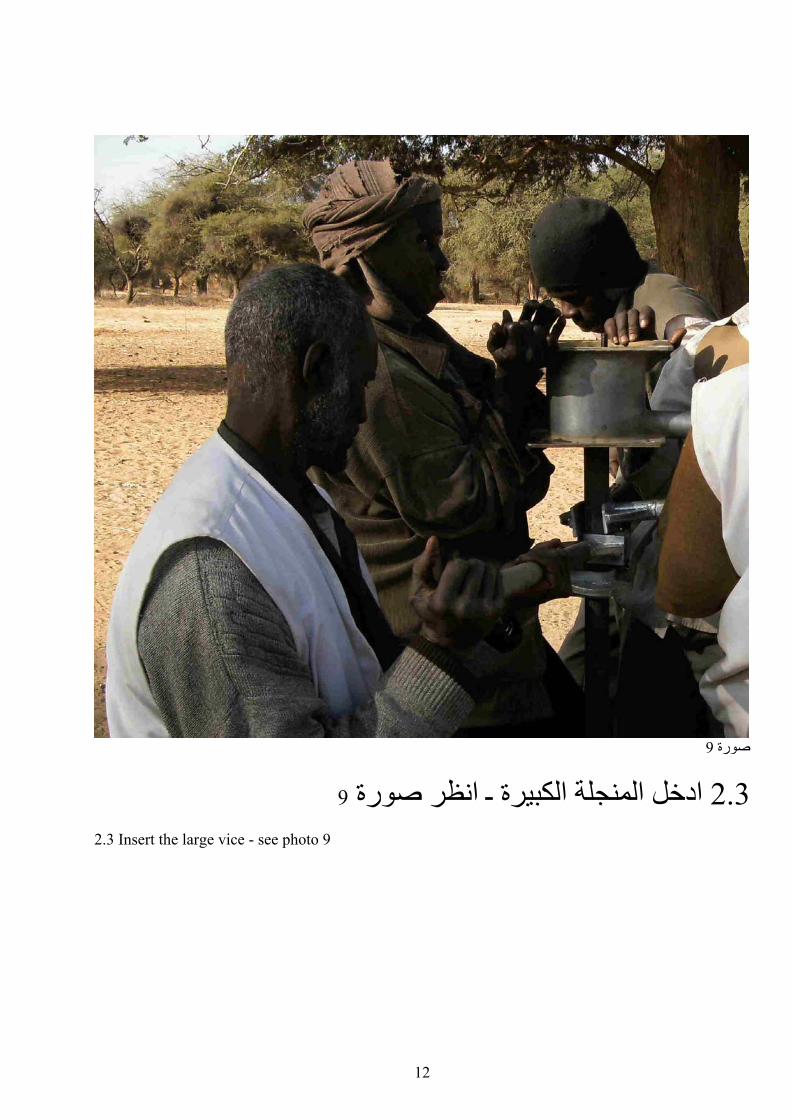
9 ـ انظر صورة دخل المنجلة الكبيرةا 2.3
2.3 Insert the large vice - see photo 9
13
10صورة
سورةاربط المنجلة الكبيرة على الما 2.4 ـ انظر مسمار المع الصامولة و فالنش البيرو منجلةربطا 2.5
10صورة
2.4 Tighten the vice onto the pipe 2.5 Secure the vice onto the well flange with the bolts and nuts – see photo 10 .
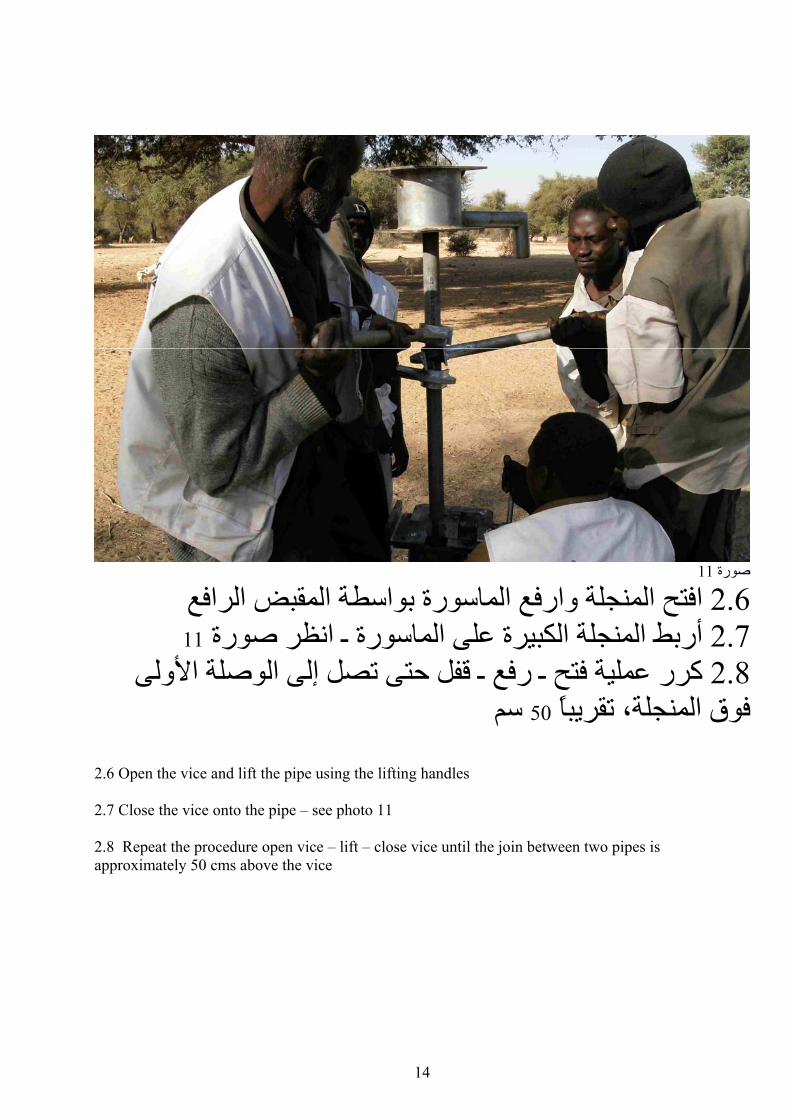
11سورة ـ انظر صورة ا أربط المنجلة الكبيرة على الم2.7 تصل إلى الوصلة األولى حتىرفع ـ قفل آرر عملية فتح ـ 2.8
سم50 تقريبًا، فوق المنجلة
2.6 Open the vice and lift the pipe using the lifting handles 2.7 Close the vice onto the pipe – see photo 11 2.8 Repeat the procedure open vice – lift – close vice until the join between two pipes is approximately 50 cms above the vice
15
12صورة
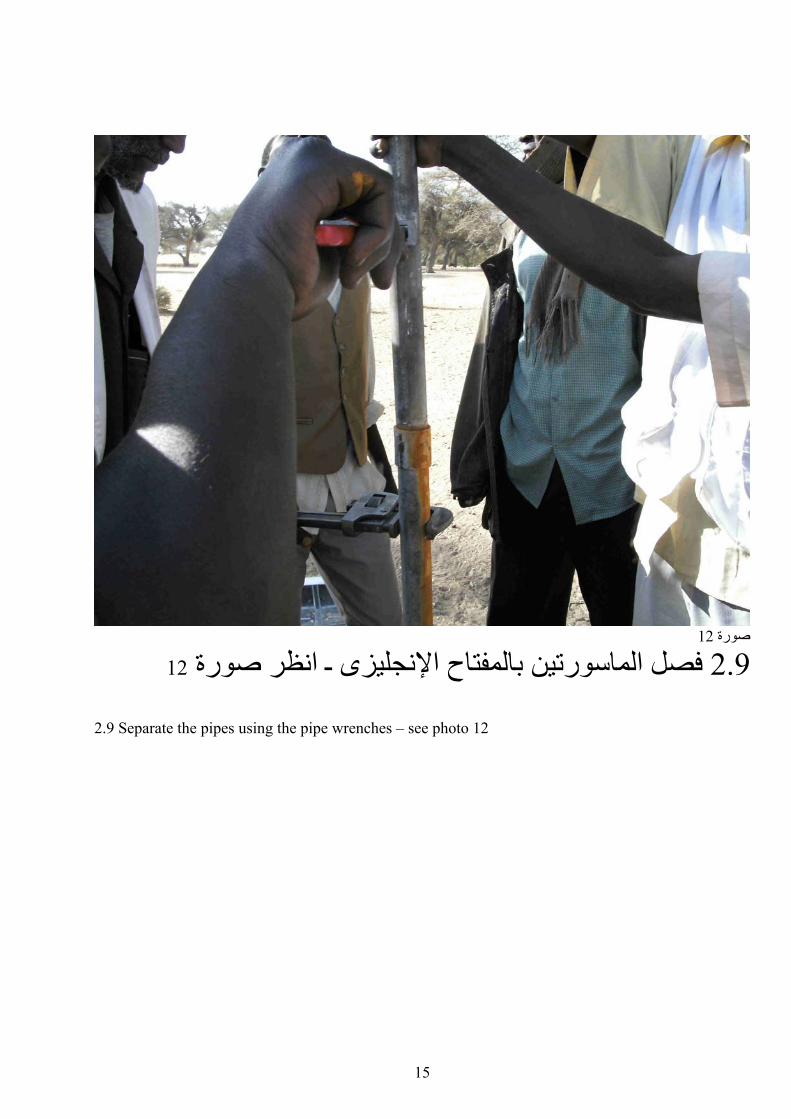
12 ـ انظر صورة رتين بالمفتاح اإلنجليزىواسمفصل ال 2.9 2.9 Separate the pipes using the pipe wrenches – see photo 12
16
13صورة
13 ـ انظر صورة ربطمفتاح ب ينبيفصل القضا 2.10 لكل ماسورة 2.10:2.6 السابقة من الخطوات آرر2.11
2.10 Separate the rods using the spanners – see photo 13 2.11 Repeat the steps 2.6 – 2.10 for all lengths of pipe
17
14صورة
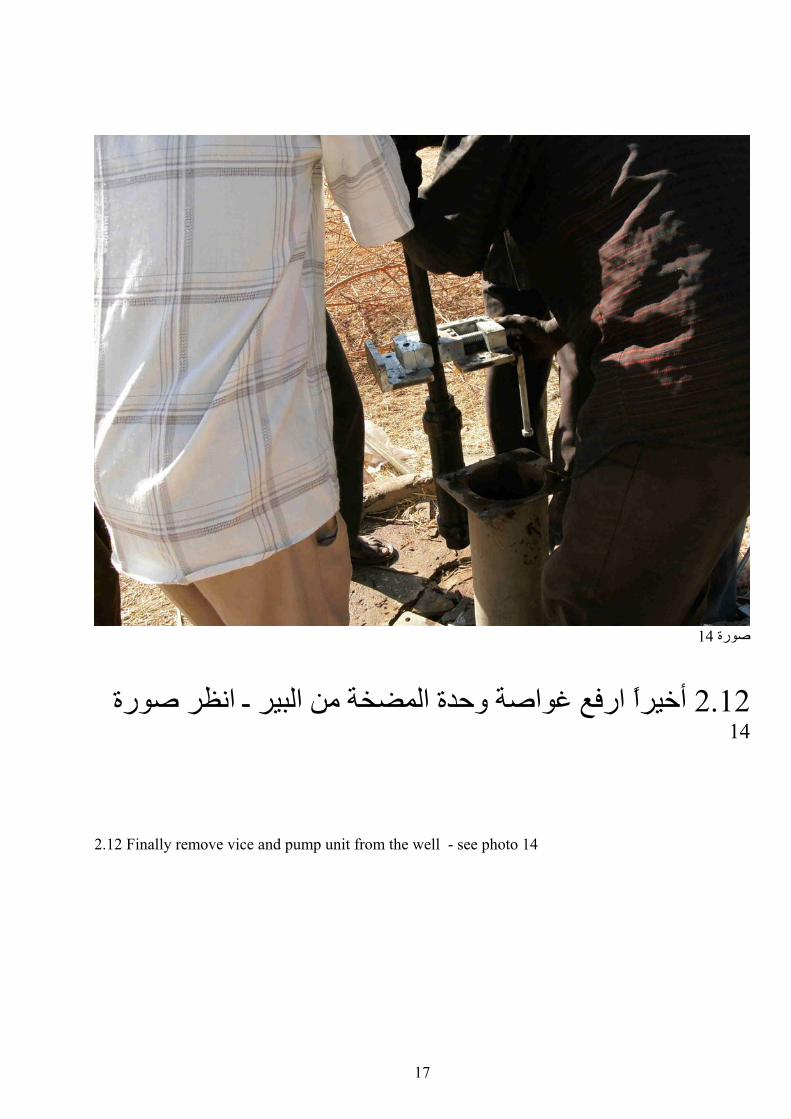
ـ انظر صورة المضخة من البير غواصة وحدة أخيرًا ارفع2.1214
2.12 Finally remove vice and pump unit from the well - see photo 14
18
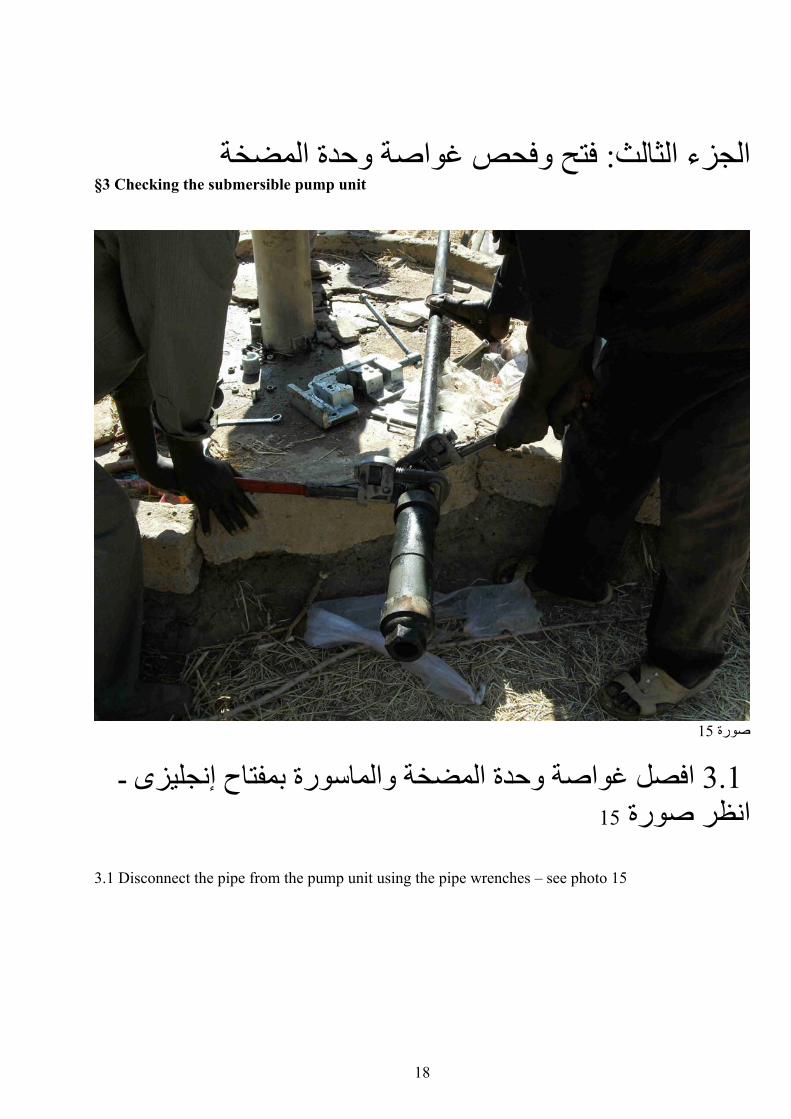
ح وفحص غواصة وحدة المضخةفت: الجزء الثالث §3 Checking the submersible pump unit
15صورة
بمفتاح إنجليزى ـ سورة الماوحدة المضخة وغواصة فصل ا 3.1 15انظر صورة
3.1 Disconnect the pipe from the pump unit using the pipe wrenches – see photo 15
19
16صورة
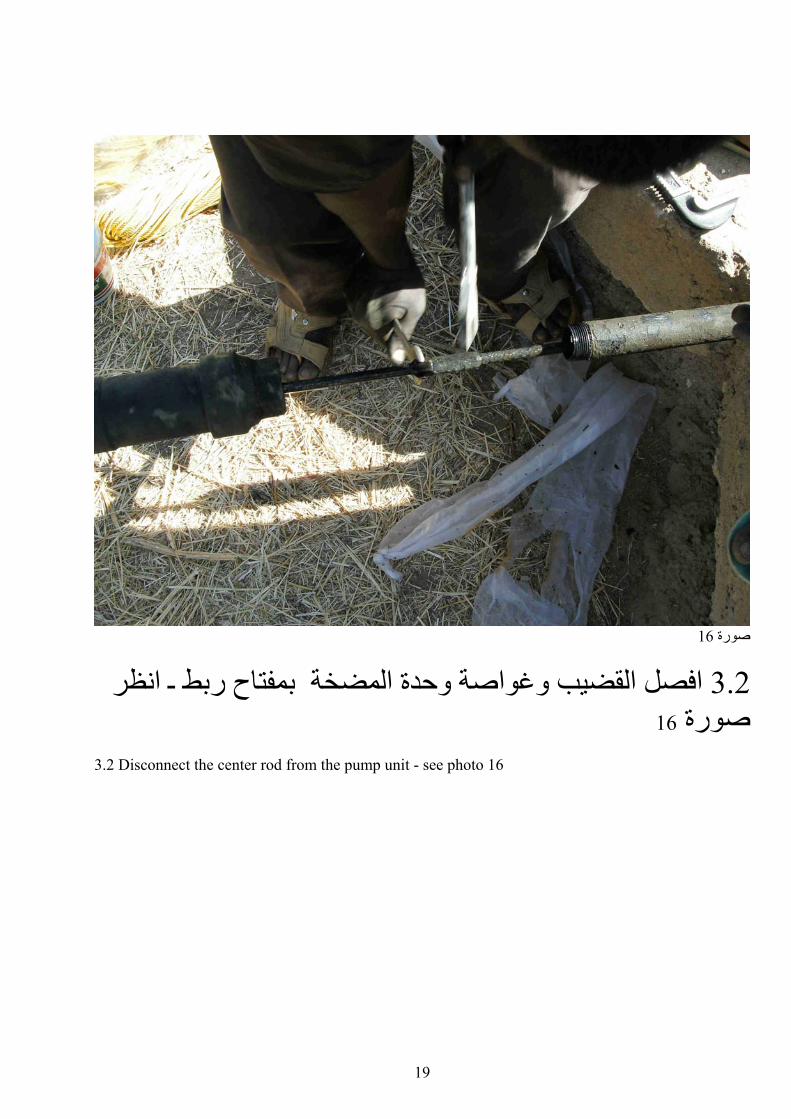
مفتاح ربط ـ انظر بفصل القضيب وغواصة وحدة المضخة ا 3.216صورة
3.2 Disconnect the center rod from the pump unit - see photo 16
17انظر صورة المضخة ـ 3.3 Open the submersible pump unit using the pipe wrenches 3.4 Remove the valve unit – see photo 17
21
18صورة
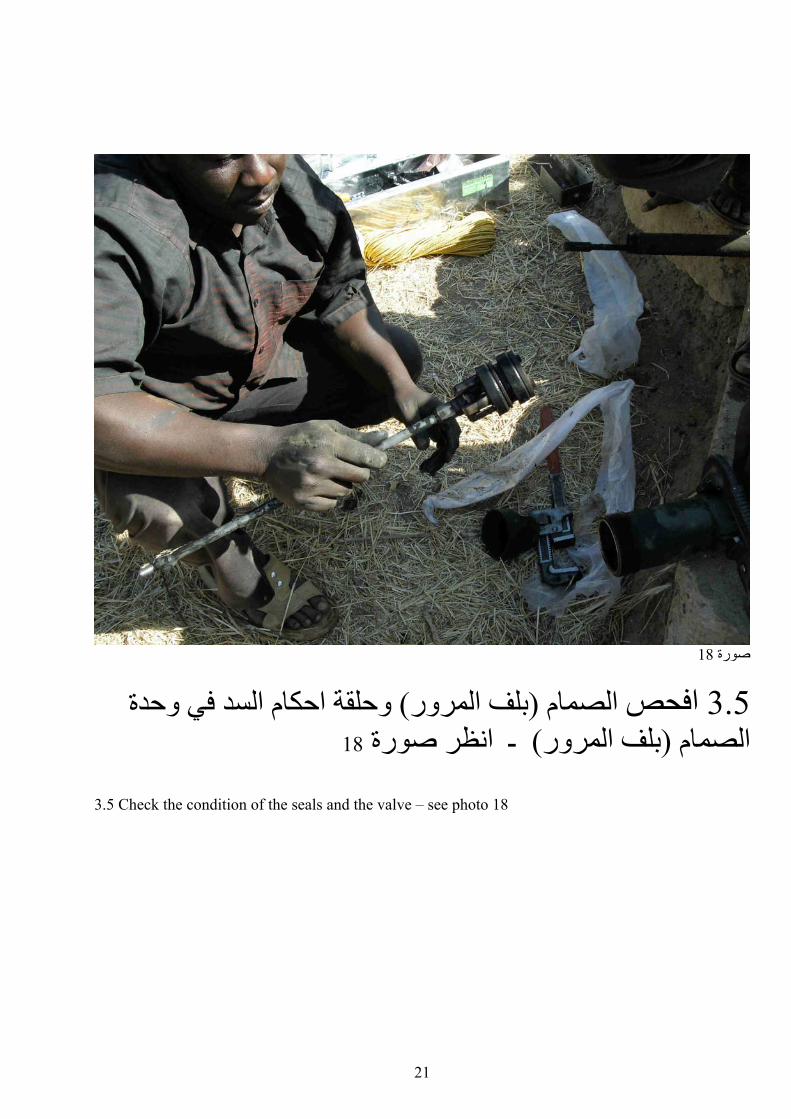
ةوحدحلقة احكام السد في و) المروربلف ( الصمامفحصا 3.518ـ انظر صورة ) مرورالبلف (الصمام
3.5 Check the condition of the seals and the valve – see photo 18
22
19.1صورة
ـ انظر مكسور)مرورالبلف (الصمام : مثال عيب عادي3.619.1 صورة
3.6 Photo 19.1 shows a common fault, the inlet valve is broken
غرفة الجديد في مام صع ال ض3.7 الصمام
ـ حلقة احكام السد شحم علىضع 3.819.2انظر صورة
3.7 Replace the valve in the valve housing
19.2صورة 3.8 Put some grease on the inlet seals (see photo 19.2) before reinsertion in the valve housing
23
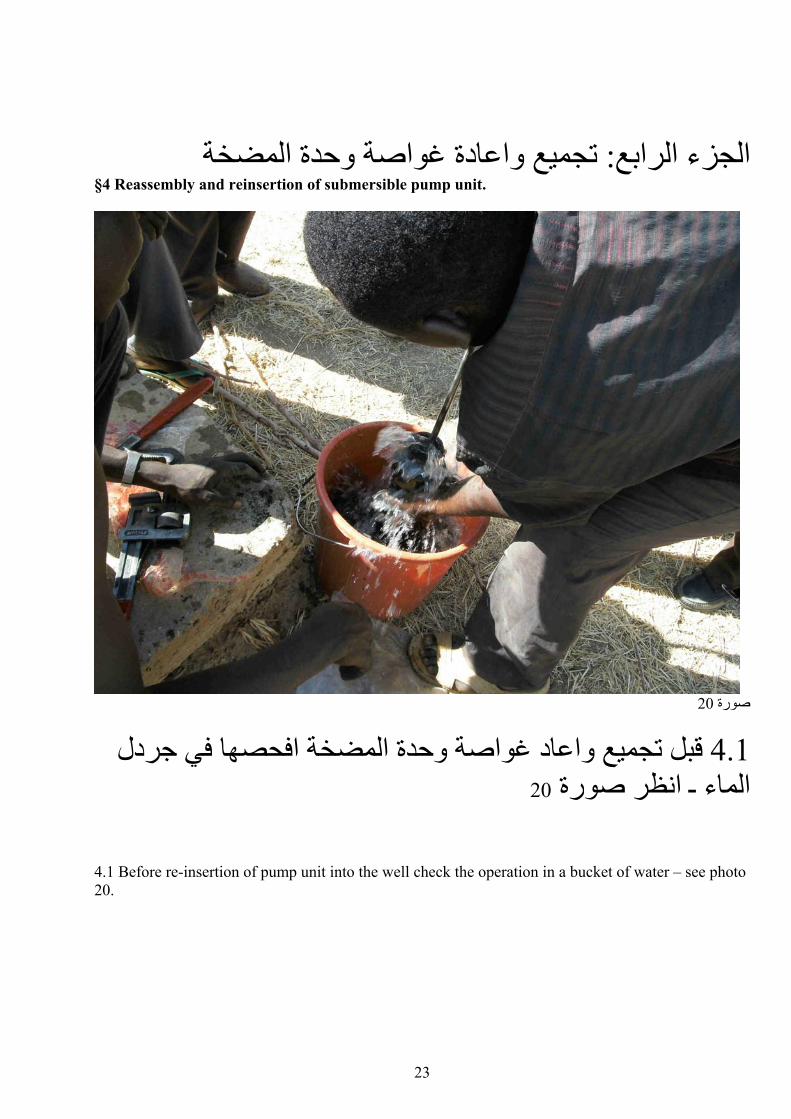
المضخة غواصة وحدةتجميع واعادة: الجزء الرابع§4 Reassembly and reinsertion of submersible pump unit.
20صورة
جردل فيهاافحص المضخةغواصة وحدة قبل تجميع واعاد 4.120 انظر صورة ـالماء
4.1 Before re-insertion of pump unit into the well check the operation in a bucket of water – see photo 20.
24
21رة صو
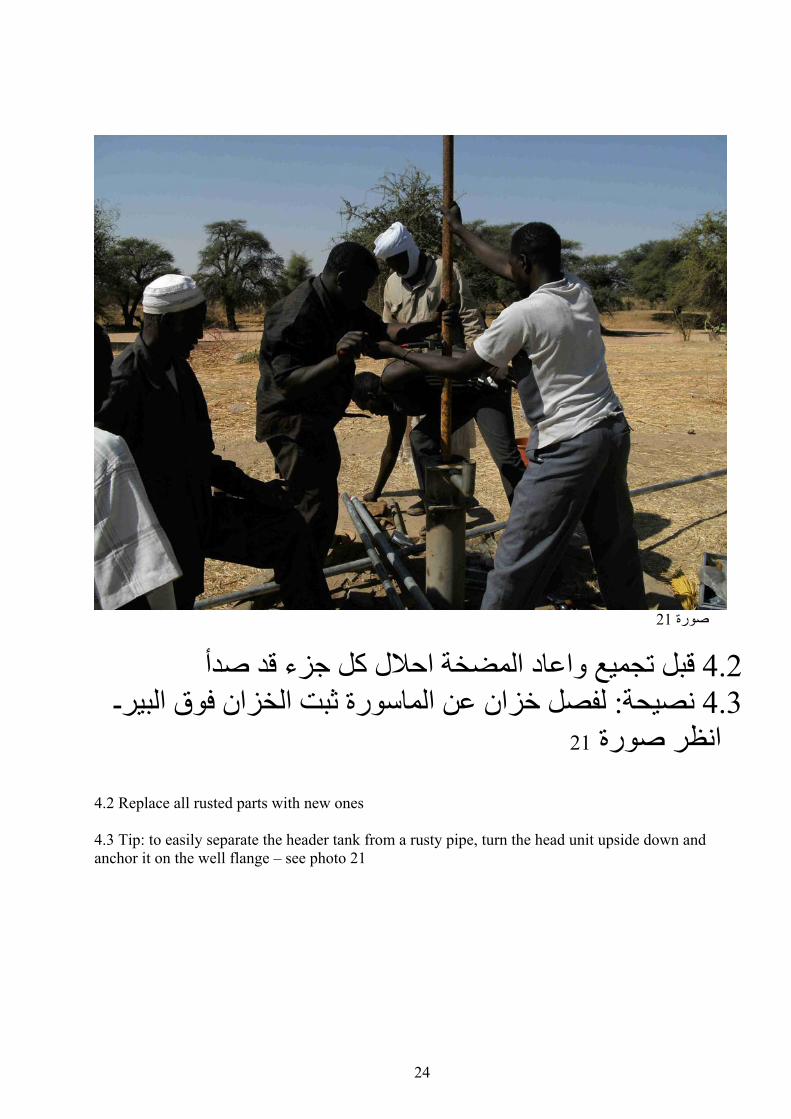
صدأ قدقبل تجميع واعاد المضخة احالل آل جزء 4.2 ـ ثبت الخزان فوق البيرالماسورة عن خزانلفصل : نصيحة 4.3
21انظر صورة 4.2 Replace all rusted parts with new ones 4.3 Tip: to easily separate the header tank from a rusty pipe, turn the head unit upside down and anchor it on the well flange – see photo 21
25
22صورة
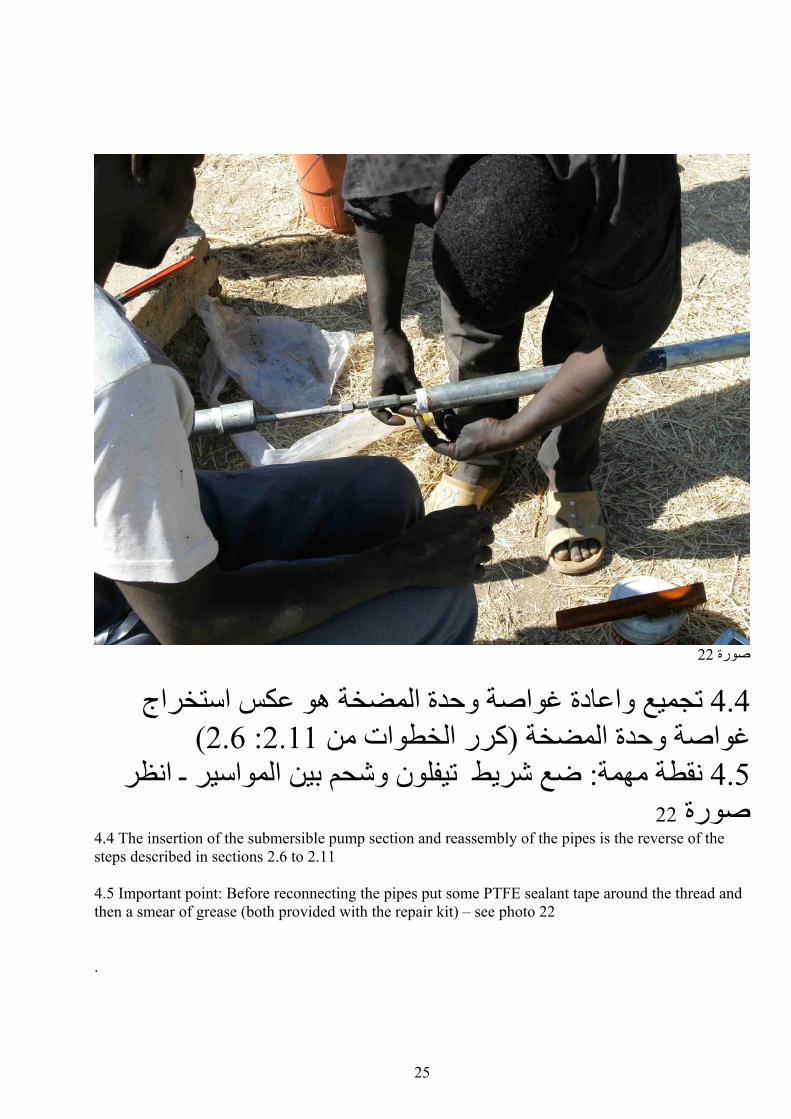
راج استخ المضخة هو عكس غواصة وحدةتجميع واعادة 4.4 )2.6: 2.11آرر الخطوات من (وحدة المضخة غواصة
ـ انظر شريط تيفلون وشحم بين المواسيرعض: نقطة مهمة 4.522صورة
4.4 The insertion of the submersible pump section and reassembly of the pipes is the reverse of the steps described in sections 2.6 to 2.11 4.5 Important point: Before reconnecting the pipes put some PTFE sealant tape around the thread and then a smear of grease (both provided with the repair kit) – see photo 22
.
26
23صورة
ـ )سوا(مع بعضهم اعادتهم و والخزانالماسورة االخيرًا ربط 4.6 23انظر صورة
4.6 Connect the last pipe and the header tank together, before inserting the combination into the well – see photo 23
27
24صورة
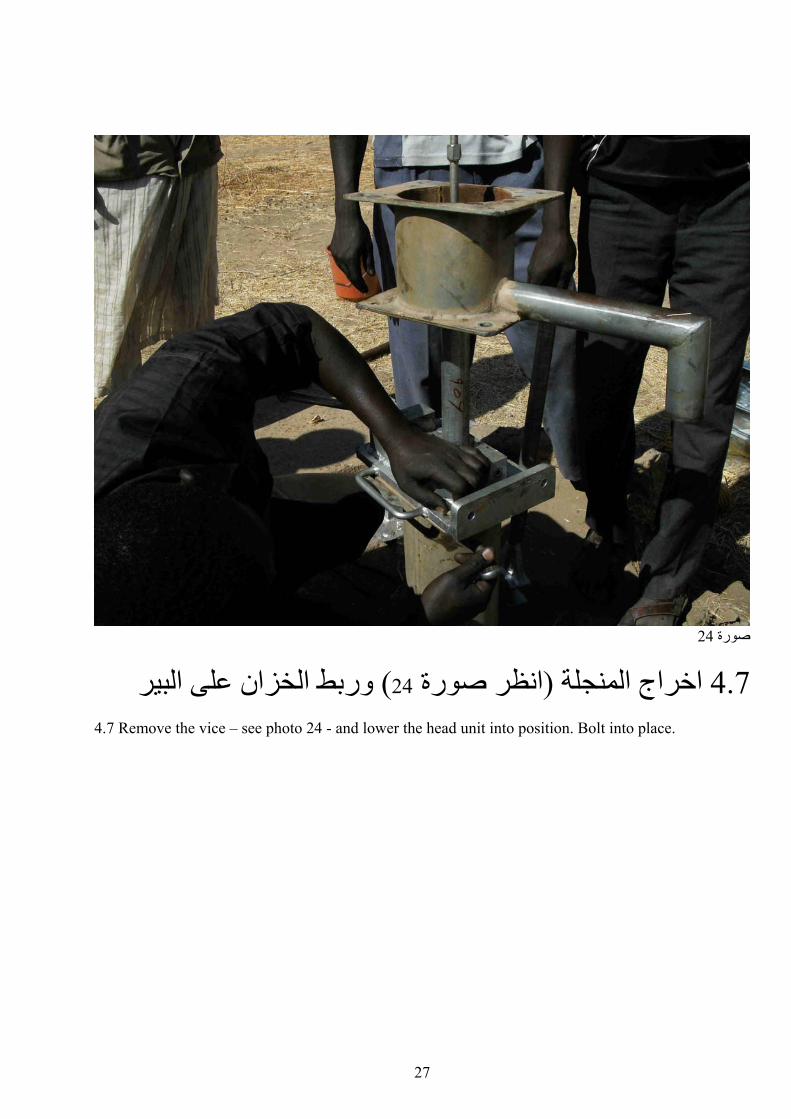
الخزان على البير وربط)24انظر صورة (اخراج المنجلة 4.7 4.7 Remove the vice – see photo 24 - and lower the head unit into position. Bolt into place.
28
تجميع وحدة الرأس: الجزء الخامس §5 Reassembly of the head unit
25صورة
جديدالمعدني الاس وقطع القضيب يق يجب 5.1 على القضيب )25االخضر في صورة اللون ( عمل عالمة5.2 بحيث يكون متساوى مع فالنش الخزان معدني ال
5.1 The center rod must be measured and cut to the correct length 5.2 Make a mark (the green mark on the center rod in figure 25) where the rod is level with the header tank flange
29
26صورة
ادخل المنجلة الصغيرة 5.3 ارفع القضيب المعدني 5.4 دنيعاربط المنجلة على القضيب الم 5.5 26 ـ انظر صورة العالمة بالضبط عنددنيعقطع القضيب الما 5.6
5.3 Insert the small vice 5.4 Pull up the inner rod 5.5 Tighten the vice on the rod 5.6 Cut the rod at the mark – see photo 26
30
27صورة
دني ـ انظر صورة عجديد على القضيب المال سن اللولب ضع 5.727
5.7 Thread the rod with the die – see photo 27
31
28صورة
28ى الخزان ـ انظور صورة علانالخز غطاءضع 5.8 ـ انظور صورة دني عالقضيب المضع صمولة السلسلة على 5.9
28 5.8 Place the header tank cover over the rod see photo 28 5.9 Put the chain securing bolt onto the center rod
32
29صورة
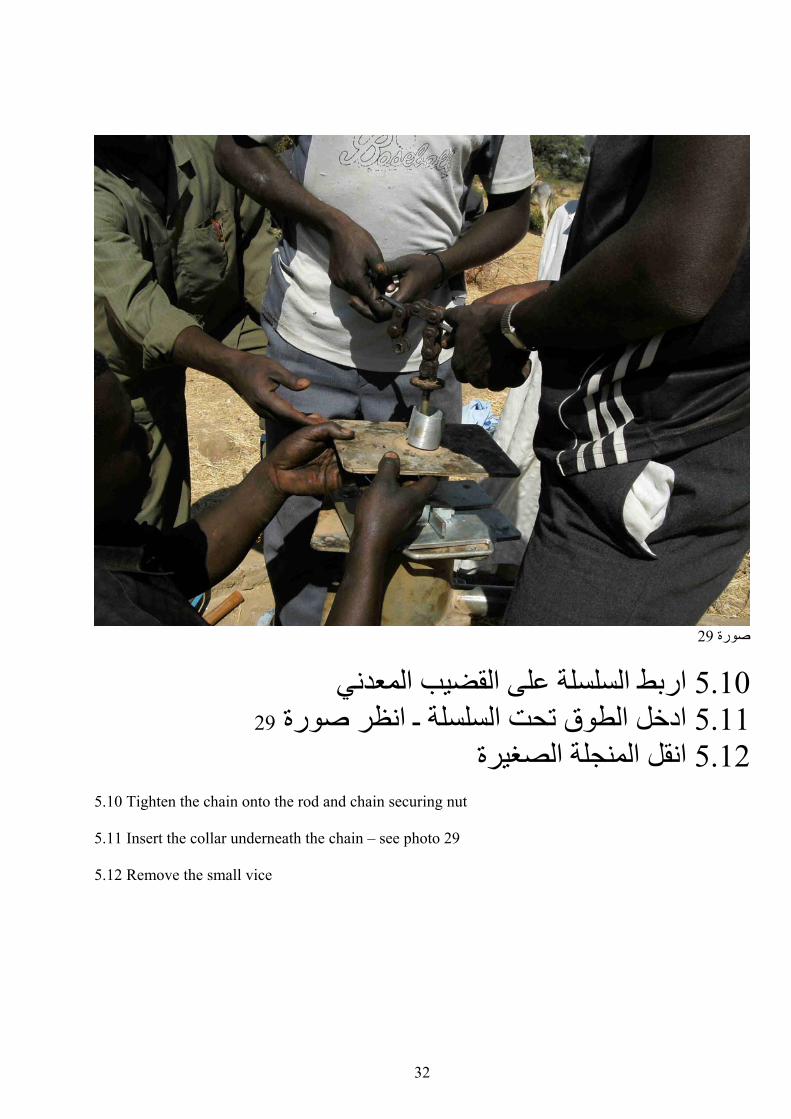
اربط السلسلة على القضيب المعدني 5.10 29ق تحت السلسلة ـ انظر صورة ادخل الطو 5.11 نقل المنجلة الصغيرةا 5.12
5.10 Tighten the chain onto the rod and chain securing nut 5.11 Insert the collar underneath the chain – see photo 29 5.12 Remove the small vice
33
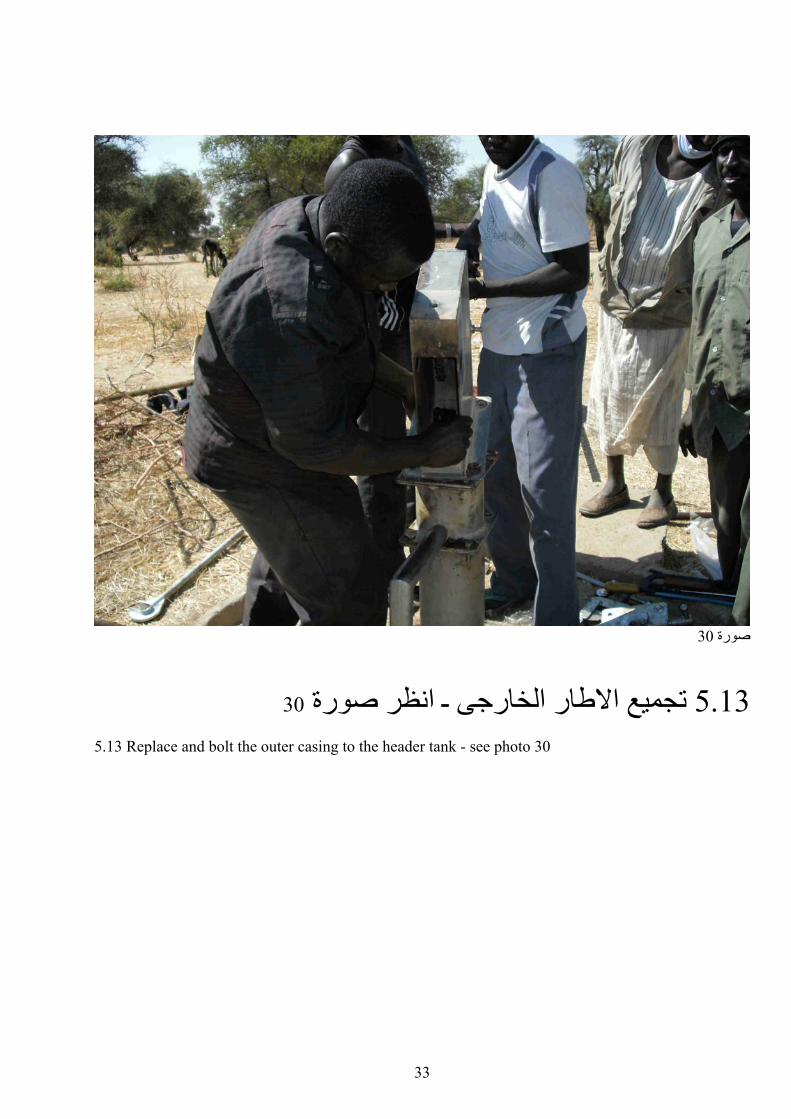
30صورة
30تجميع االطار الخارجى ـ انظر صورة 5.13 5.13 Replace and bolt the outer casing to the header tank - see photo 30
34
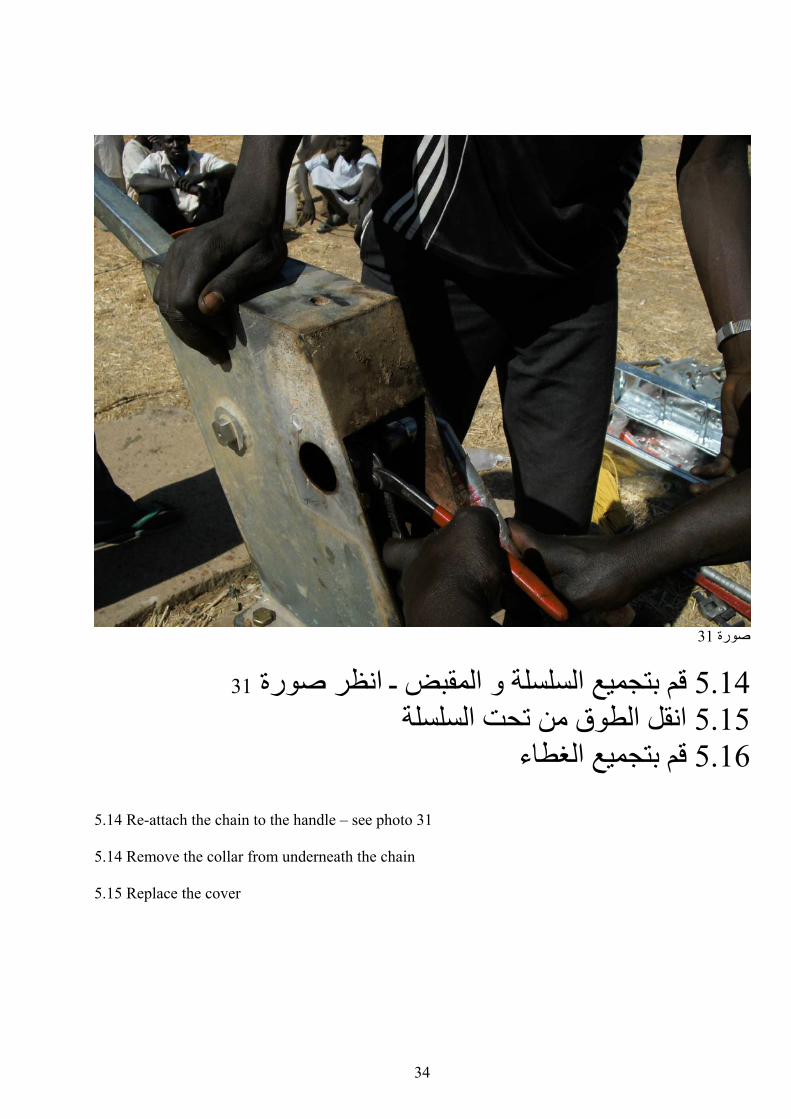
31صورة
31 السلسلة و المقبض ـ انظر صورة تجميعقم ب 5.14نقل الطوق من تحت السلسلةا 5.15 الغطاءتجميعقم ب 5.16
5.14 Re-attach the chain to the handle – see photo 31 5.14 Remove the collar from underneath the chain 5.15 Replace the cover
35
32صورة
حتى تشرب منهمن البيرـ لكن ال آثير ماء اول يوم ضخ 5.17م الثانى والي
حول لبير األسمنت لتجنب تلوث البيريجب بناء طابق من5.18
5.17 On the first day pump out the well as much as possible – but do not drink the water until the second day 5.18 To avoid contamination of the well from surface water re-construct the base and the soak-away/trough according to the designs in the Ajay handbook