Wordpress Blogs Ms. Vangelista /Social Studies 8 Start Up Guide(September 2018) Digital Citizenship What does it mean to be a good digital citizen? A good digital citizen demonstrates and practices safe, responsible, and legal use of technology. The digital content we create online leaves a footprint. That footprint represents you, so make it positive. 1. Logging into your Wordpress Blog Your blog has the following path: http://bbysec.com/mtn/[studentID] e.g. http://bbysec.com/mtn/test01-03 BEFORE YOU POST… THINK T – is it true? H – is it I N – is it K – is it kind? – is it illegal?
Transcript
Wordpress BlogsMs. Vangelista/Social Studies 8
Start Up Guide(September 2018)
Digital Citizenship
What does it mean to be a good digital citizen?
A good digital citizen demonstrates and practices safe, responsible, and legal use of technology. The digital content we create online leaves a footprint. That footprint represents you, so make it positive.
1. Logging into your Wordpress Blog
Your blog has the following path:
http://bbysec.com/mtn/[studentID] e.g. http://bbysec.com/mtn/test01-03
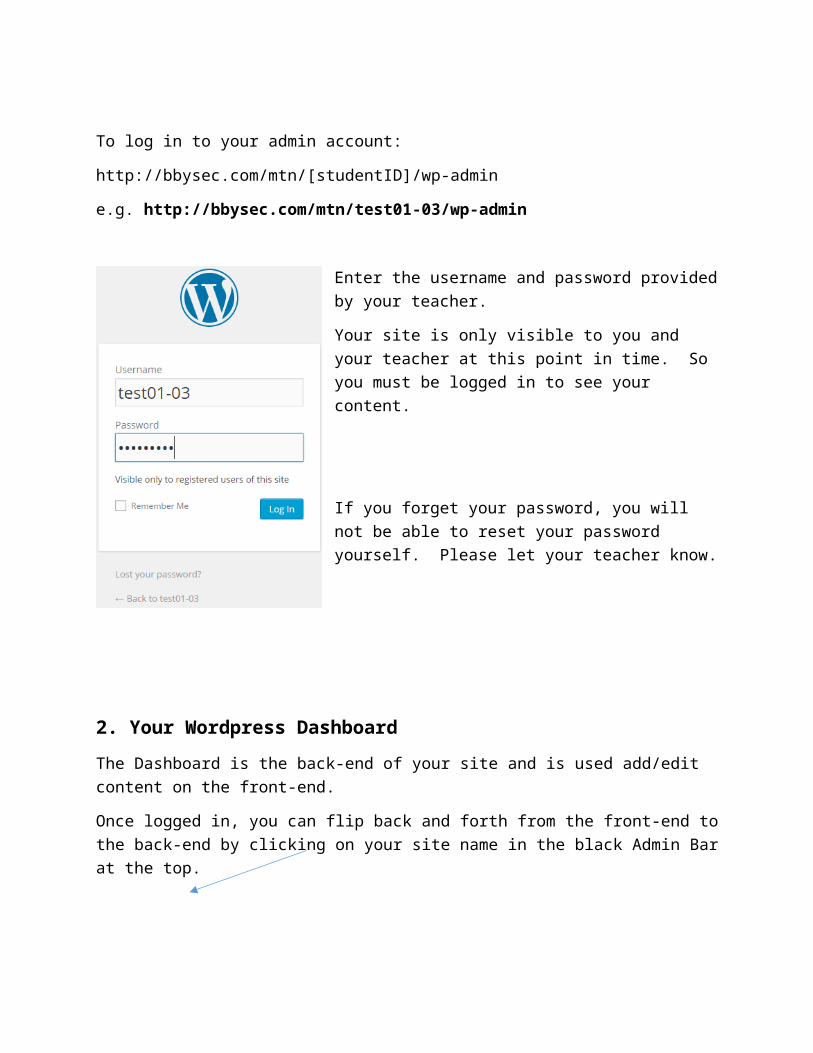
To log in to your admin account:
http://bbysec.com/mtn/[studentID]/wp-admin
e.g. http://bbysec.com/mtn/test01-03/wp-admin
BEFORE YOU POST… THINKT – is it true?
H – is it harmful?I N – is it necessary?K – is it kind?
– is it illegal?
Enter the username and password provided by your teacher.
Your site is only visible to you and your teacher at this point in time. So you must be logged in to see your content.
If you forget your password, you will not be able to reset your password yourself. Please let your teacher know.
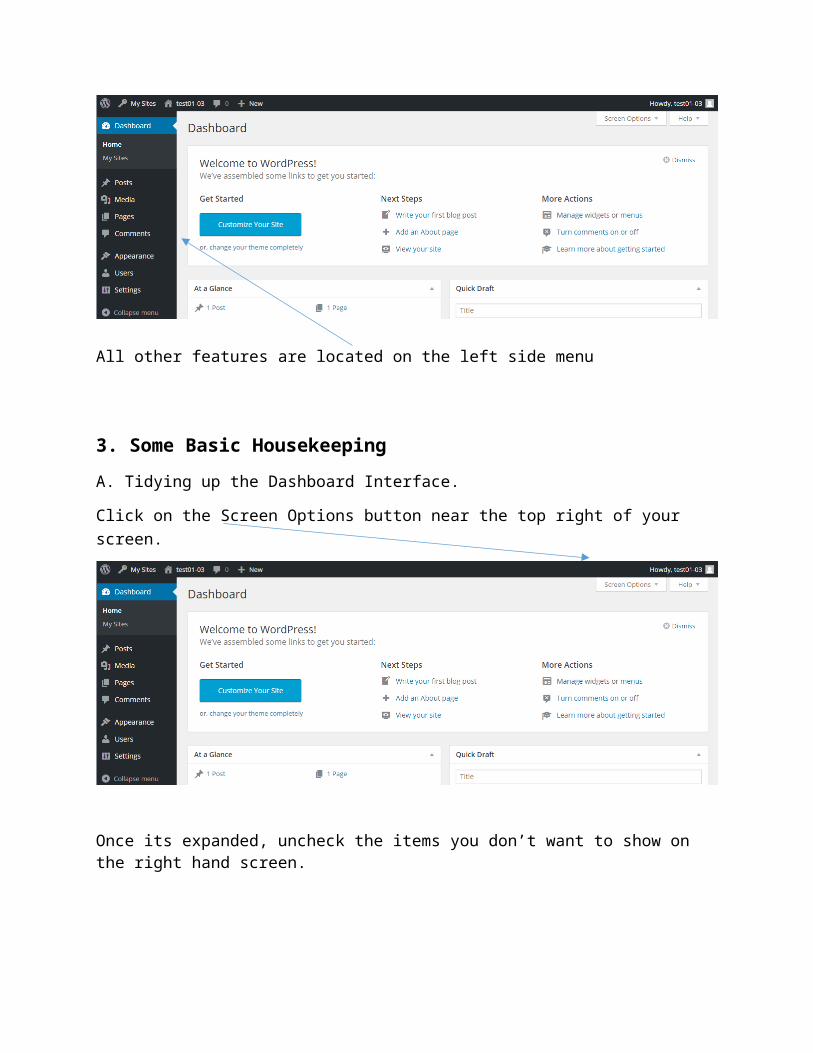
2. Your Wordpress Dashboard
The Dashboard is the back-end of your site and is used add/edit content on the front-end.
Once logged in, you can flip back and forth from the front-end to the back-end by clicking on your site name in the black Admin Bar at the top.
All other features are located on the left side menu
3. Some Basic Housekeeping
A. Tidying up the Dashboard Interface.
Click on the Screen Options button near the top right of your screen.
Once its expanded, uncheck the items you don’t want to show on the right hand screen.
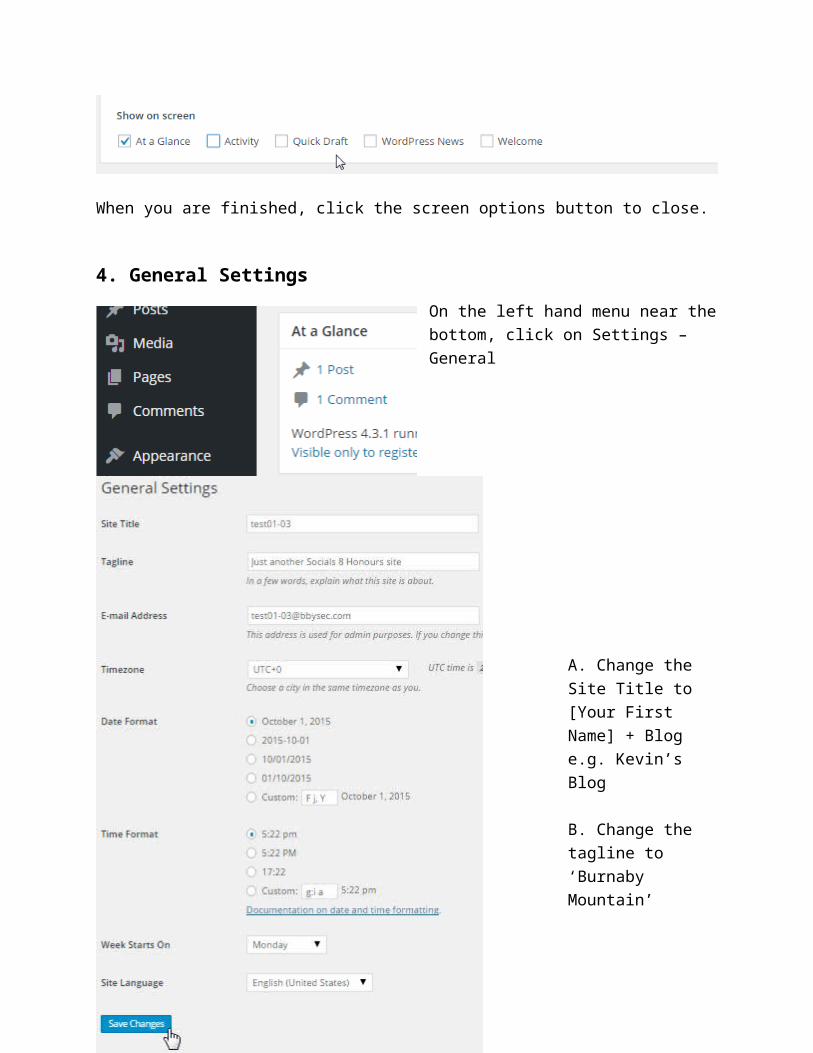
When you are finished, click the screen options button to close.
4. General Settings
On the left hand menu near the bottom, click on Settings – General
A. Change the Site Title to [Your First Name] + Bloge.g. Kevin’s Blog
B. Change the tagline to ‘Burnaby Mountain’
C. DO NOT CHANGE THE EMAIL
D. Change the timezone to Vancouver
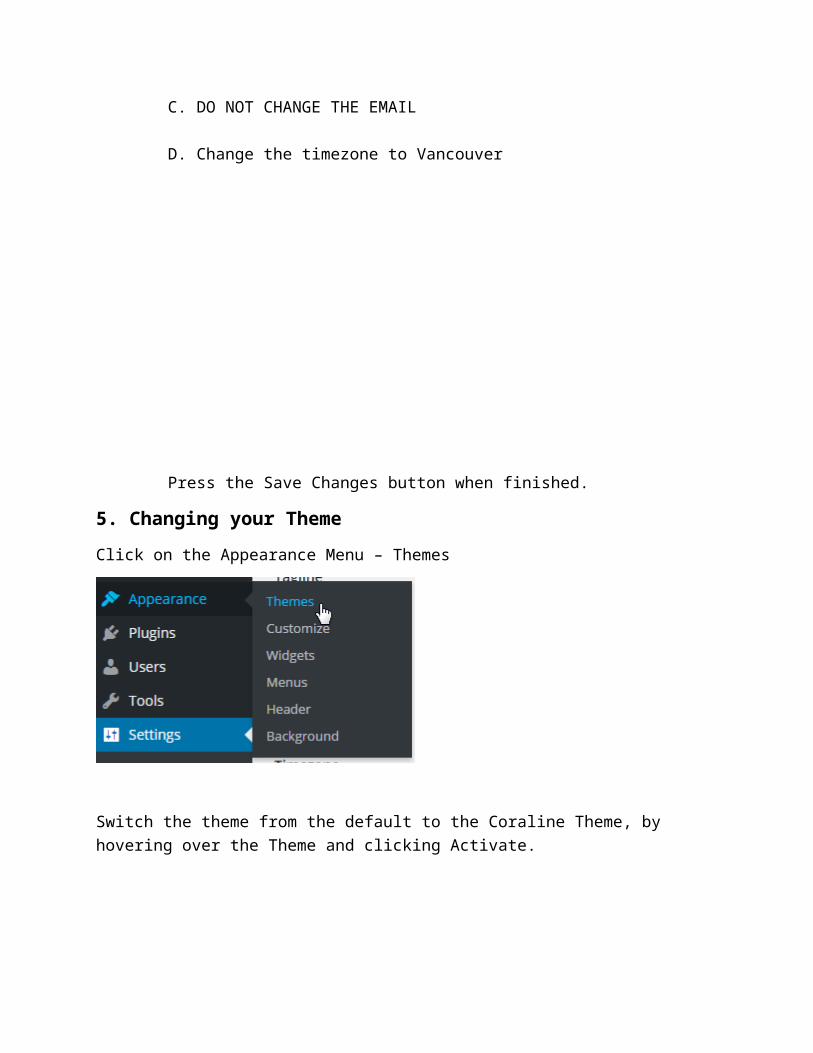
Press the Save Changes button when finished.
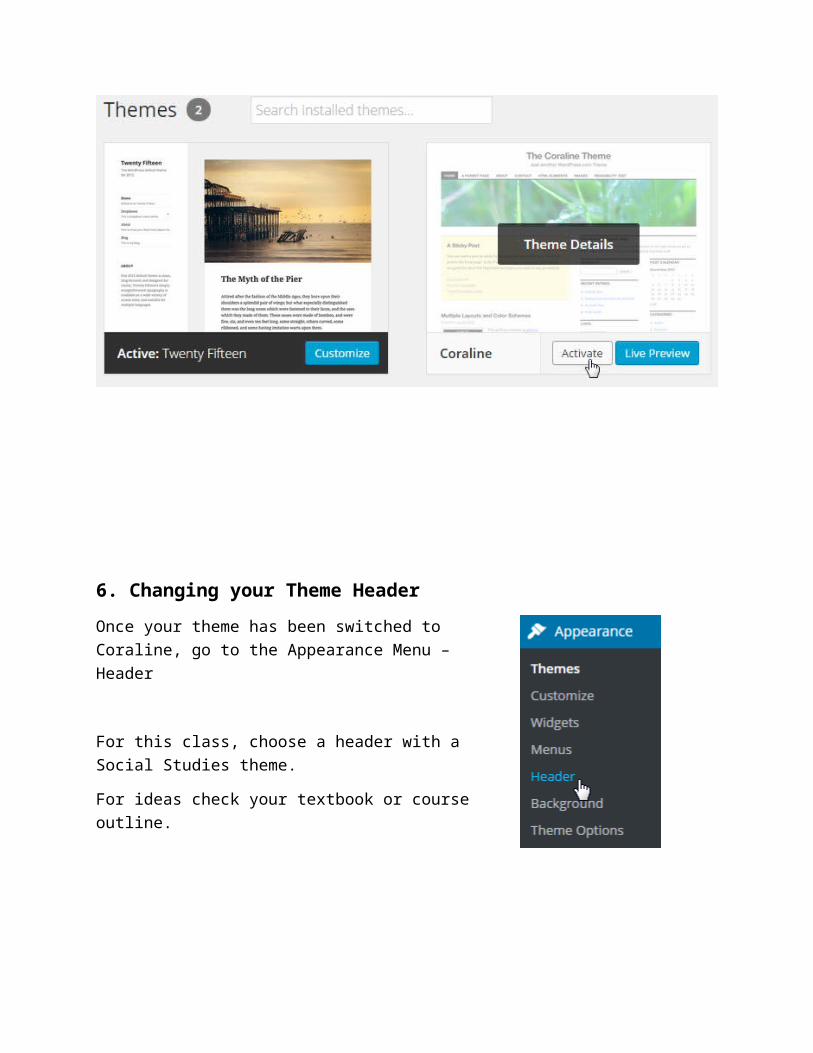
5. Changing your Theme
Click on the Appearance Menu – Themes
Switch the theme from the default to the Coraline Theme, by hovering over the Theme and clicking Activate.
6. Changing your Theme Header
Once your theme has been switched to Coraline, go to the Appearance Menu – Header
For this class, choose a header with a Social Studies theme.
For ideas check your textbook or course outline.
Add your own header, by clicking on Add New Image. Make sure the picture is at least 990px wide.
Click on Select Files
Select and Crop the image. Try to make it into more of strip, so don’t increase the height.
Click Crop Image, when ready.
Make sure to Save & Publish the work when you are done.
7. Making your First Post
Click on the Posts Menu
Hover over the ‘Hello World’ post and TRASH it.
Click the “Add New” Button at the top, next to the Posts title
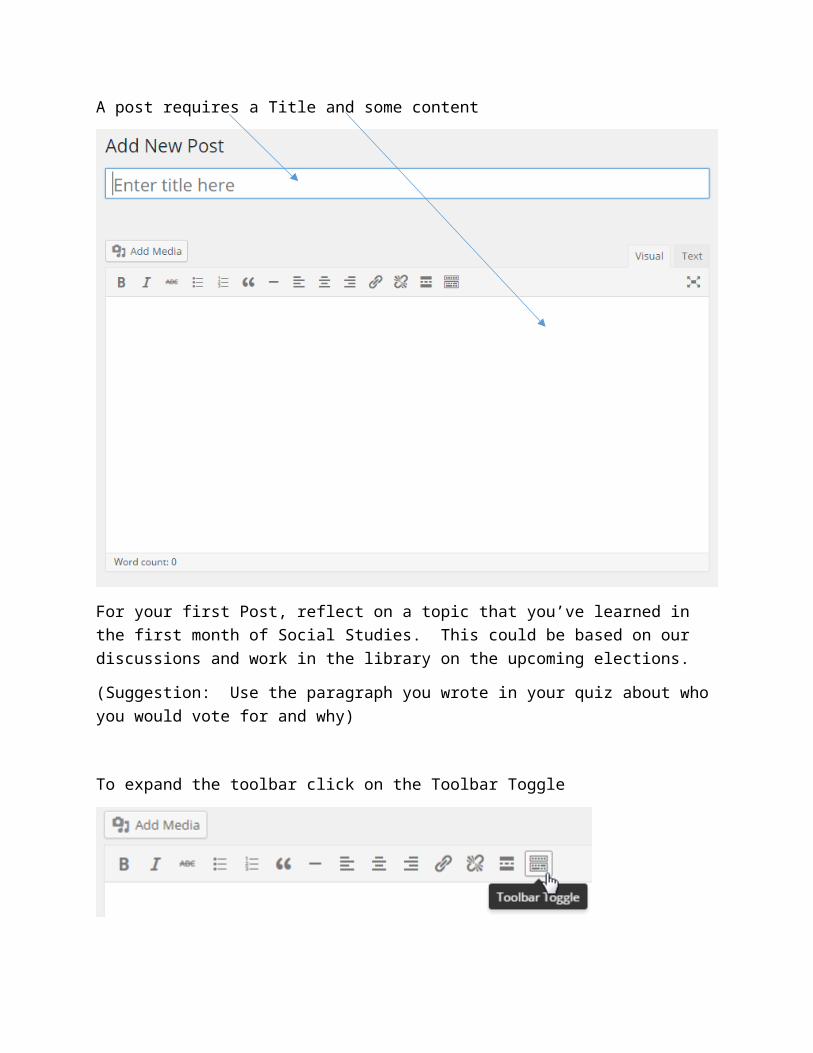
A post requires a Title and some content
For your first Post, reflect on a topic that you’ve learned in the first month of Social Studies. This could be based on our discussions and work in the library on the upcoming elections.
(Suggestion: Use the paragraph you wrote in your quiz about who you would vote for and why)
To expand the toolbar click on the Toolbar Toggle
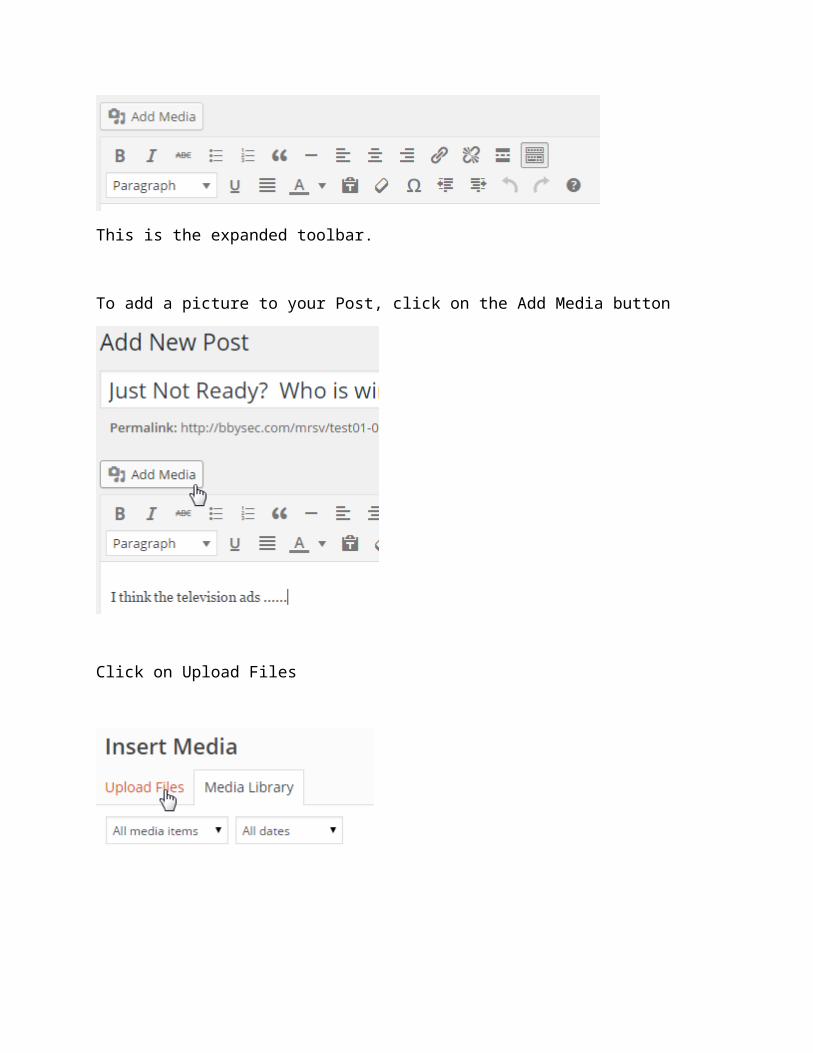
This is the expanded toolbar.
To add a picture to your Post, click on the Add Media button
Click on Upload Files
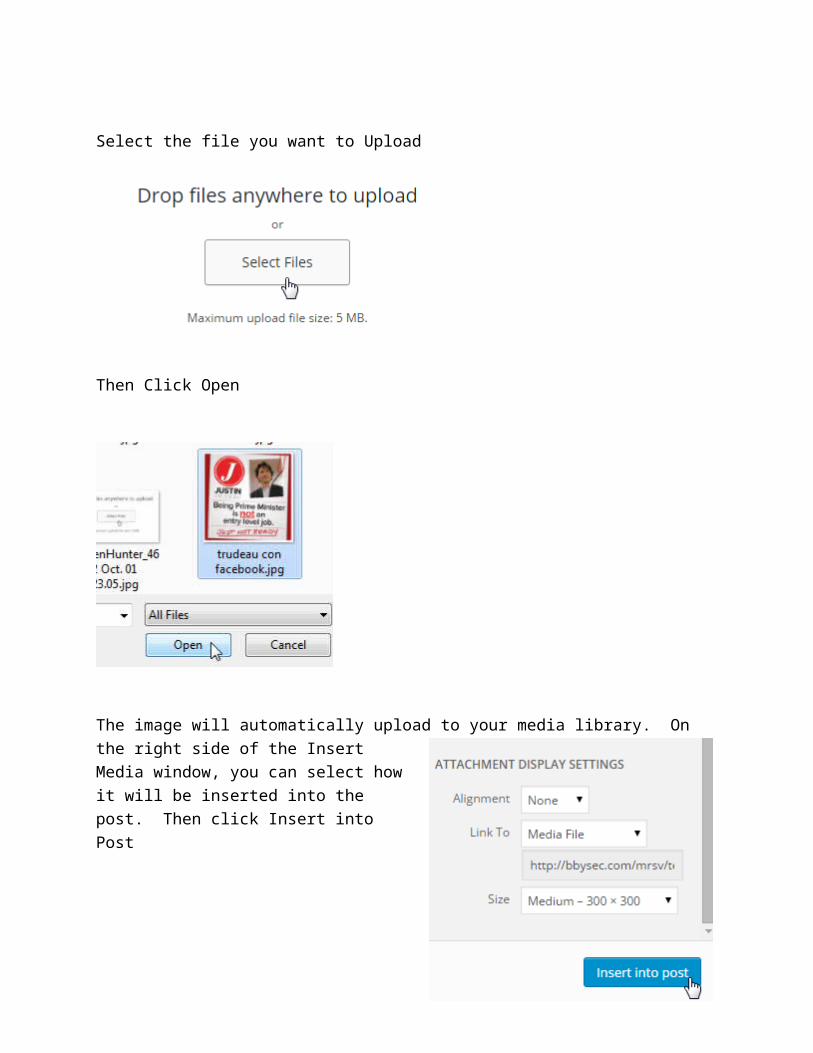
Select the file you want to Upload
Then Click Open
The image will automatically upload to your media library. On the right side of the Insert Media window, you can select how it will be inserted into the post. Then click Insert into Post
When you are finished, click the Publish button on the right
Click on your Site Name at the top to look at the Front-End of your site and see the post.