Intro to Robotics Programming Open EasyC v4 for Vex and start a new standalone project. You will be prompted if you want to start a project that will use a joystick controller or autonomous. This just means, do you want to control your robot by controller or do you want it to move on its own. Choose autonomous.
Transcript
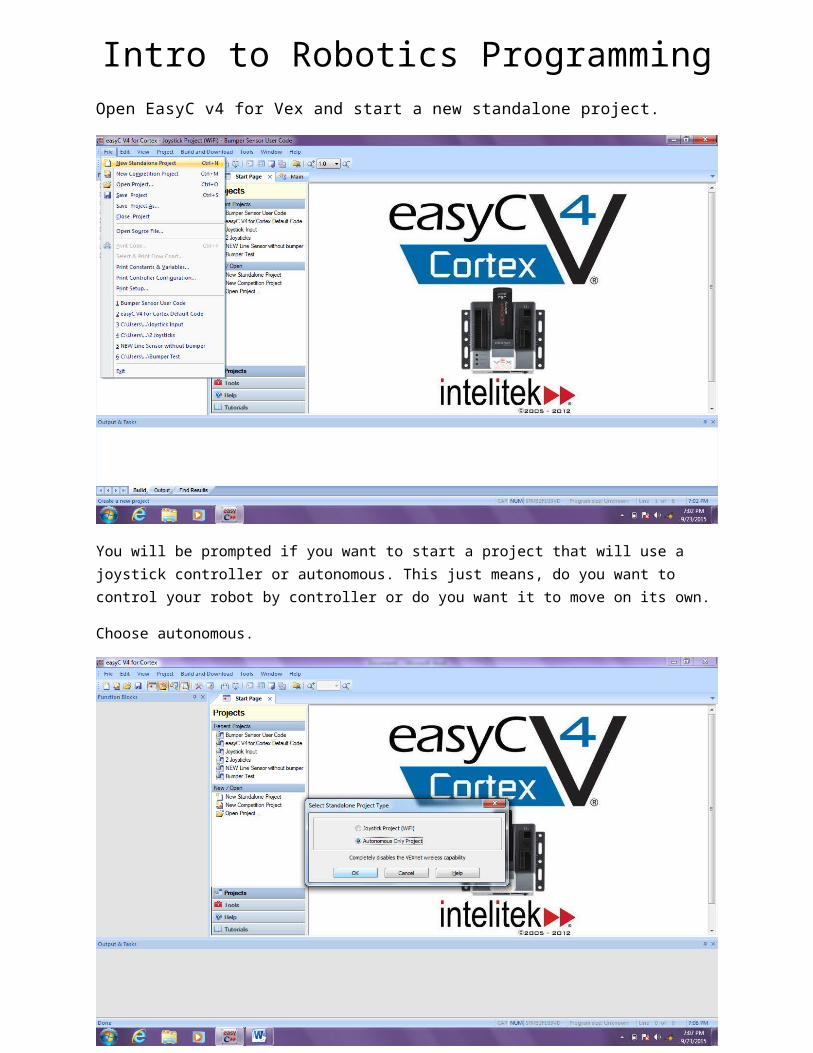
Intro to Robotics ProgrammingOpen EasyC v4 for Vex and start a new standalone project.
You will be prompted if you want to start a project that will use a joystick controller or autonomous. This just means, do you want to control your robot by controller or do you want it to move on its own.
Choose autonomous.
You will be setup with a main method, which is in essence a function that we will make do something. You will notice a few pictures on the right, which is similar to a flow chart. Your program will complete each task starting from the top and working its way to the bottom.
We want our robot to move, so we are going to program the motors to move. Click on the output link on the left shown above and drag and drop the “motor module” on the flow chart to the right.
You will notice it asks which direction you want your motor to turn – clockwise is +127, counter-clockwise is -127 and stopping your motor is 0.
If you click on the motor number dropdown menu, it shows you options 1-10. This is because the Cortex (robot brain) has 10 motor plugins. I have my left motor plugged into input 1 and my right motor in input 10.
Choose the input your left motor is in – for me this is 1. At the bottom you can add a comment stating that this makes your left motor turn forward/clockwise.
Repeat the last step, except, change the motor number to your right motor. For me, it is motor 10. You will need to change the direction of the motor to -127. You can also include a comment stating that this allows your right motor to go forward.
Next we will add a “wait” function in the program. This tells the robot to wait a period of time before going on to the next task.
We will now tell the robot to stop after waiting 2 seconds.
The full program should look like the picture below
The program sets two motors to turn forward, making the robot drive straight. It then drives for 2 seconds and shuts off all motors.
The final steps you will need to do are to compile, build and download your program. First you will compile the program. This just checks to see if there are any errors in your code. If there are, then it will yell at you and not allow you to download your program onto your robot. You will need an orange usb to usb cable.
Once the build is successful, you can unplug the usb cord and turn on your robot in order to run your installed program.
Play around with the different functions and see what else you can get the robot to do.
Challenge 1:
1. Drive your robot for 5 seconds2. Make it turn around (360 deg)3. Drive for another 2 seconds 4. Turn around (180 deg)5. Drive back to its starting point6. Stop driving when it arrives at its starting point.
Challenge 2:
1. Create a new program with joystick functions.2. Use the arcade or tank function (2 or 4 motors depending on the robot)3. See if you can drive the robot using the controller.