12
Download Documents at teachergeek.com/learn Start by building the example racer, then turn into your own unique design. TRUE
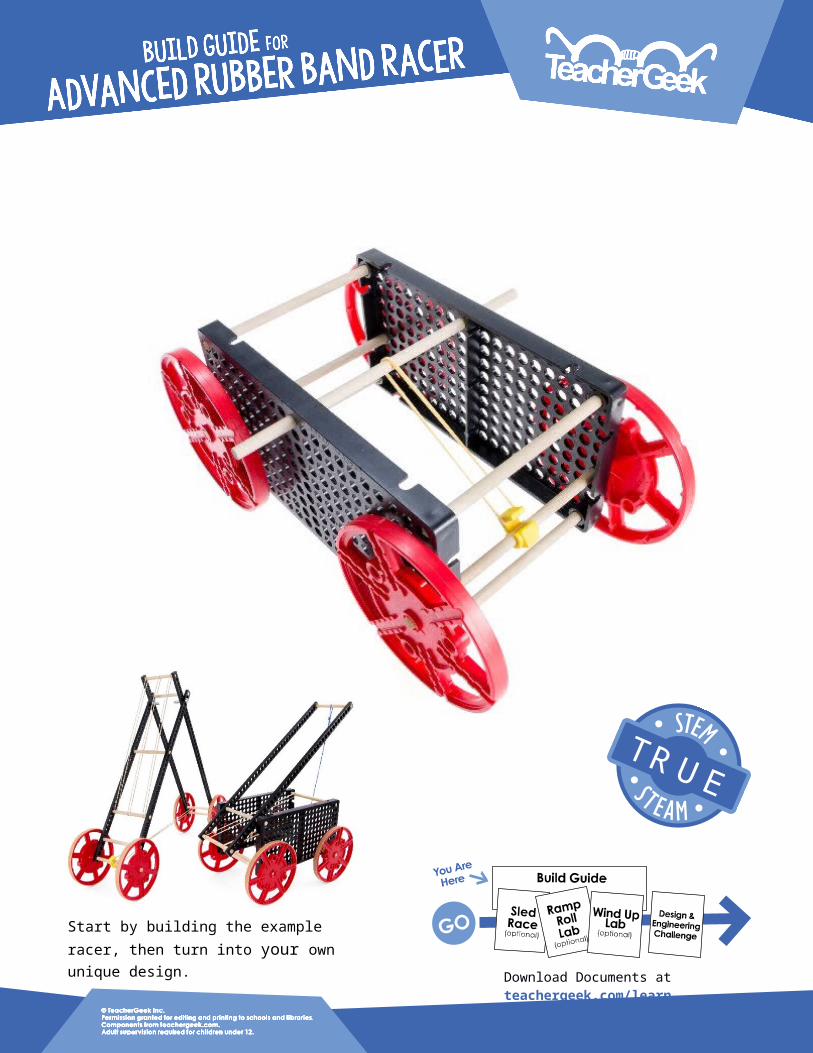
Download Documents at teachergeek.com/learn
Start by building the example racer, then turn into your own unique design.
TR UE
Page 2
Gather components to build the example racer, and then turn it into your own amazing design.
6 - Connector
Strips
8 - Dowels300mm (12″)
2 - Hole Plates
4 - Wheels 2 - Stretch Tires
4 - Screws#10 1″
4 - Nuts#10
1 - Slide Stop
75mm (3″)
1 - Stop Clip
10 - Rubber Bands
This isn’t a kit. You’re going to really build (cut, ream, screw) your Racer. Here are tools you’ll need to get started. They can be shared by up to 4 groups at a time.
TeacherGeek Reamer TeacherGeek Multi-Cutter Tapping Block -Optional Small Hammer Pliers -Optional Philips Screwdriver
TeacherGeek Tools
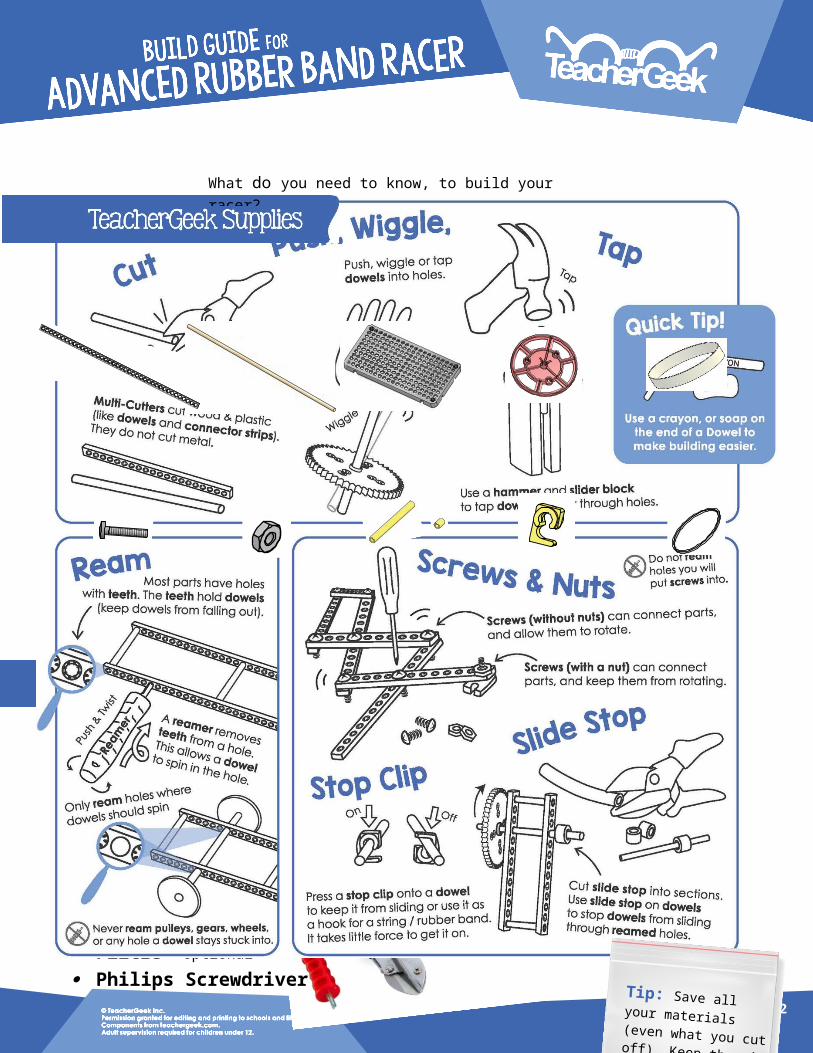
What do you need to know, to build your racer?
Tip: Save all your materials (even what you cut off). Keep them in a bag. They can be used later.

Cut
Page 3
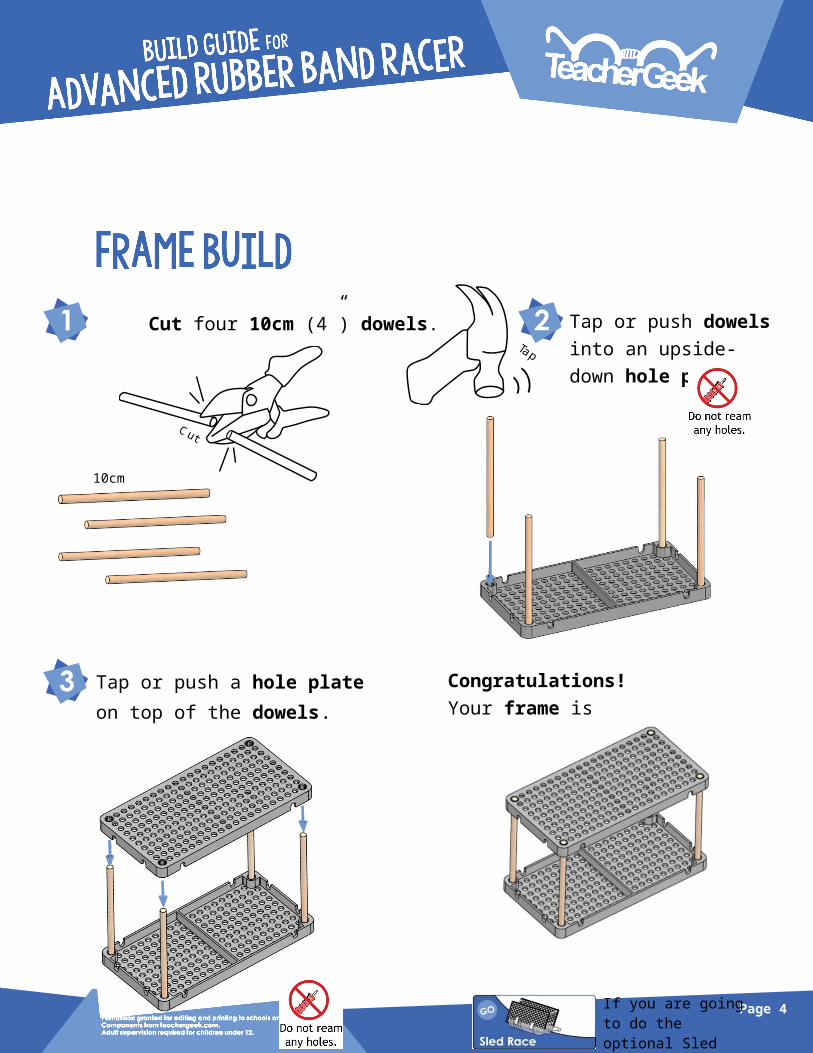
Cut four 10cm (4”) dowels. Tap
10cm (4in)
Tap or push dowels into an upside-down hole plate.
Tap or push a hole plate on top of the dowels.
Congratulations!Your frame is done.
If you are going to do the optional Sled Race, it’s now time.
Documents at teachergeek.com/learn
Page 4
Tap
Push or tap the two axles into wheels.
Place the axles through the frame, three holes up from the bottom.
Push or tap two wheels onto the other side of the axles.
13cm (5in)
Cut two 13cm (5.1”) dowels. These will become axles for the wheels.

Page 5
You’re ready to roll!
Set it down and let it go. Play and experiment with it.
Snap on the stop clip to one of the wheel axles.
If you are going to do the optional Ramp Roll Lab, it’s now time.Documents at teachergeek.com/learn
Cut one 13cm (5.1”) dowel.
13cm (5in)
It takes a lot of force to snap a stop clip on. An adult may need to help.
Place the 13cm dowel through the frame, with a rubber band, as shown.
Cut two 1cm sections of slide stop. Use them to keep this dowel from falling out.
Hook the rubber band around the stop clip. Wind up the rubber band by turning the wheels.
?

Page 6
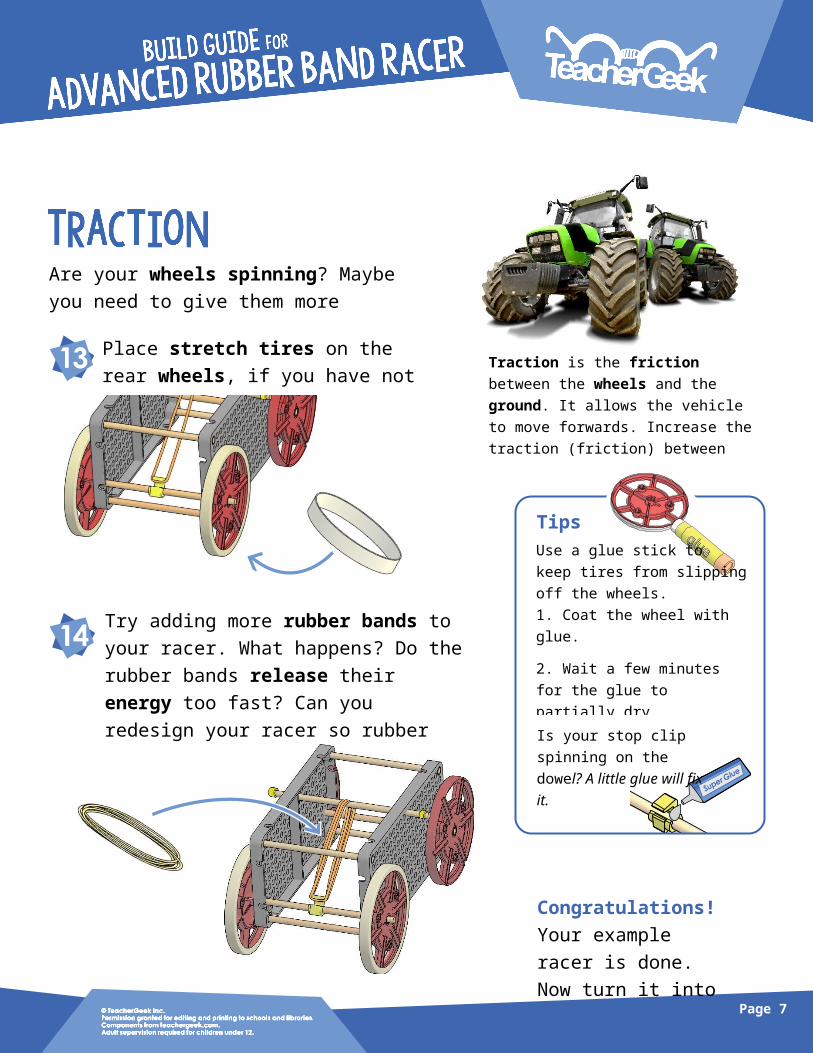
Place stretch tires on the rear wheels, if you have not already. done so.
Is your stop clip spinning on the dowel? A little glue will fix it.
Are your wheels spinning? Maybe you need to give them more traction.
Try adding more rubber bands to your racer. What happens? Do the rubber bands release their energy too fast? Can you redesign your racer so rubber bands release energy slower?
Congratulations!Your example racer is done. Now turn it into your own design.
Tips
Traction is the friction between the wheels and the ground. It allows the vehicle to move forwards. Increase the traction (friction) between your wheels and the ground by adding tires.
Use a glue stick to keep tires from slipping off the wheels. 1. Coat the wheel with glue. 2. Wait a few minutes for the glue to partially dry. 3. Then put the stretch tire on.
Page 7
Make your racer go farther, faster, or stop on a target. The step-by-step instructions end here, but you’re just getting started. It’s time to redesign your racer for these engineering challenges.
Redesign your racer to break a speed record or win a race.
Redesign your racer to stop on a target.
Redesign your racer to go really far.
Sprint
Long Shot
Target
The next pages will give you tips to help you redesign your racer.
Download the Engineering Challenge documents at teachergeek.com/learn

Page 8
How does your racer turn potential (stored) energy from the rubber bands into kinetic (moving) energy? Create a mechanism to release the energy over more rotations (turns) of the wheels. Adjust it for the different challenges.
Parallel or SeriesRubber bands can be connected in series (forming a thin, long band) or in parallel (forming a short, thick band).
Use PulleysPulleys can be used to change the direction of a rubber band or string. Dowels, that can spin, can be used as pulleys.
Change the FrameUse more parts to change the frame.
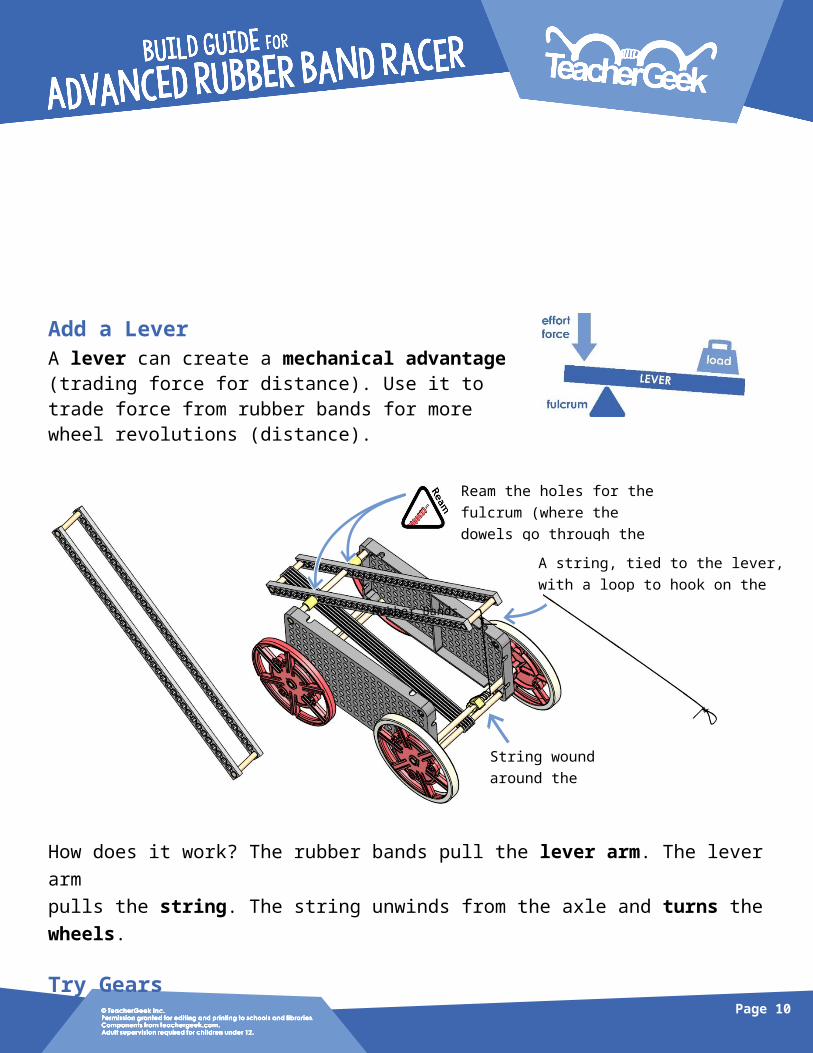
Add a Lever
SeriesParallel
Ream holes for the lever to pivot

Page 9
A lever can create a mechanical advantage (trading force for distance). Use it to trade force from rubber bands for more wheel revolutions (distance).
How does it work? The rubber bands pull the lever arm. The lever arm pulls the string. The string unwinds from the axle and turns the wheels.
Try GearsGears can be used to create a mechanical advantage (like a lever).
Trouble Shooting
Will not go straight
Rubber Bands
Ream the holes for the fulcrum (where the dowels go through the lever)
A string, tied to the lever, with a loop to hook on the stop clip
String wound around the axle
This gear turns five times for every time the large gear turns once.
Page 10
To turn your racer into your own design, you are going to need more materials. Try using…
Extra TeacherGeek parts Recycled materials (food packaging,
containers, bottles, cardboard, etc.)
What often makes a racer turn?
How can you make your racer go straight?
The frame is not straight or square
The axles are loose, or not symmetrical with the frame
The frame and axles are symmetrical
Slide stop can be placed on the axles to help “steer” the racer. It can keep the axles symmetrical with the racer frame, or offset (making the racer turn, or correct for a turning problem)


