71
WebIntelligence Creating Documents
| Date post: | 02-Jan-2016 |
| Category: |
Documents |
| Upload: | raul-thomas |
| View: | 30 times |
| Download: | 2 times |

WebIntelligence
Creating Documents

WebIntelligence
WIC110904 2
This page is intentionally left blank.
WebIntelligence
WIC110904 3
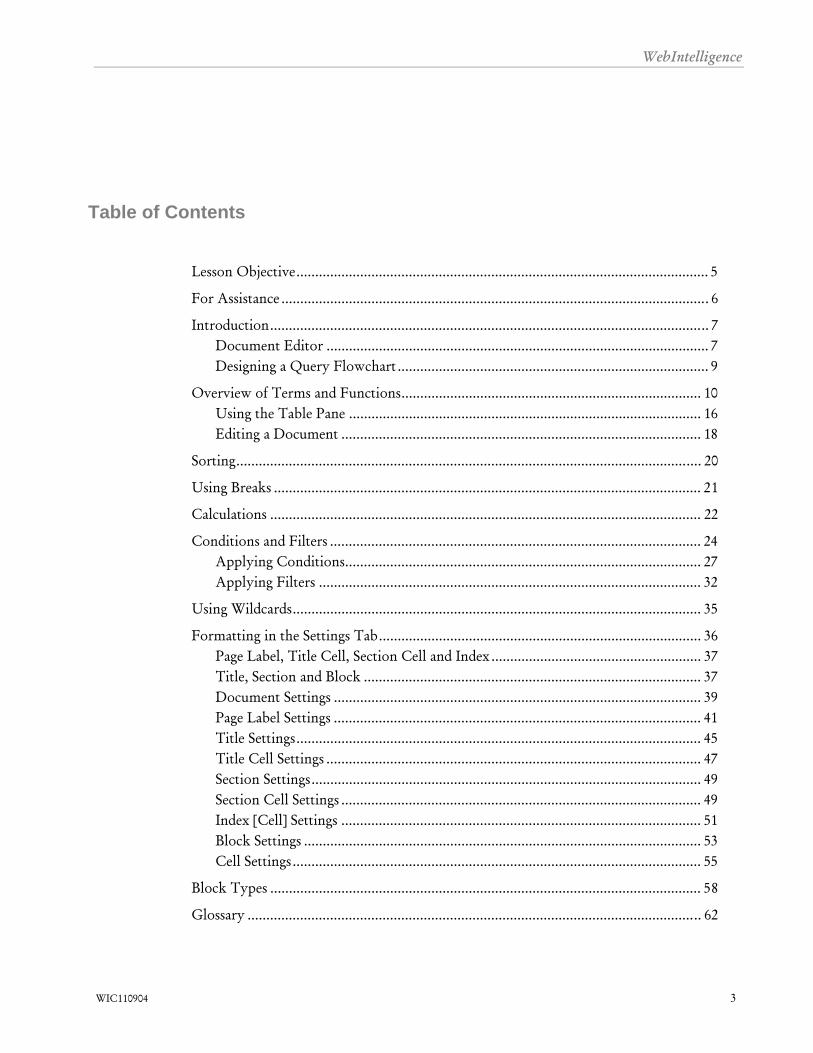
Table of Contents
Lesson Objective.............................................................................................................. 5
For Assistance .................................................................................................................. 6
Introduction..................................................................................................................... 7 Document Editor ...................................................................................................... 7 Designing a Query Flowchart................................................................................... 9
Overview of Terms and Functions................................................................................ 10 Using the Table Pane .............................................................................................. 16 Editing a Document ................................................................................................ 18
Sorting............................................................................................................................ 20
Using Breaks .................................................................................................................. 21
Calculations ................................................................................................................... 22
Conditions and Filters ................................................................................................... 24 Applying Conditions............................................................................................... 27 Applying Filters ...................................................................................................... 32
Using Wildcards............................................................................................................. 35
Formatting in the Settings Tab...................................................................................... 36 Page Label, Title Cell, Section Cell and Index ........................................................ 37 Title, Section and Block .......................................................................................... 37 Document Settings .................................................................................................. 39 Page Label Settings .................................................................................................. 41 Title Settings............................................................................................................ 45 Title Cell Settings .................................................................................................... 47 Section Settings........................................................................................................ 49 Section Cell Settings ................................................................................................ 49 Index [Cell] Settings ................................................................................................ 51 Block Settings .......................................................................................................... 53 Cell Settings............................................................................................................. 55
Block Types ................................................................................................................... 58
Glossary ......................................................................................................................... 62

WebIntelligence
WIC110904 4
This page is intentionally left blank.

WebIntelligence
WIC110904 5
Lesson Objective To create reports using BusinessObjects’ WebIntelligence and become familiar with its features in order to edit reports.
WebIntelligence
WIC110904 6
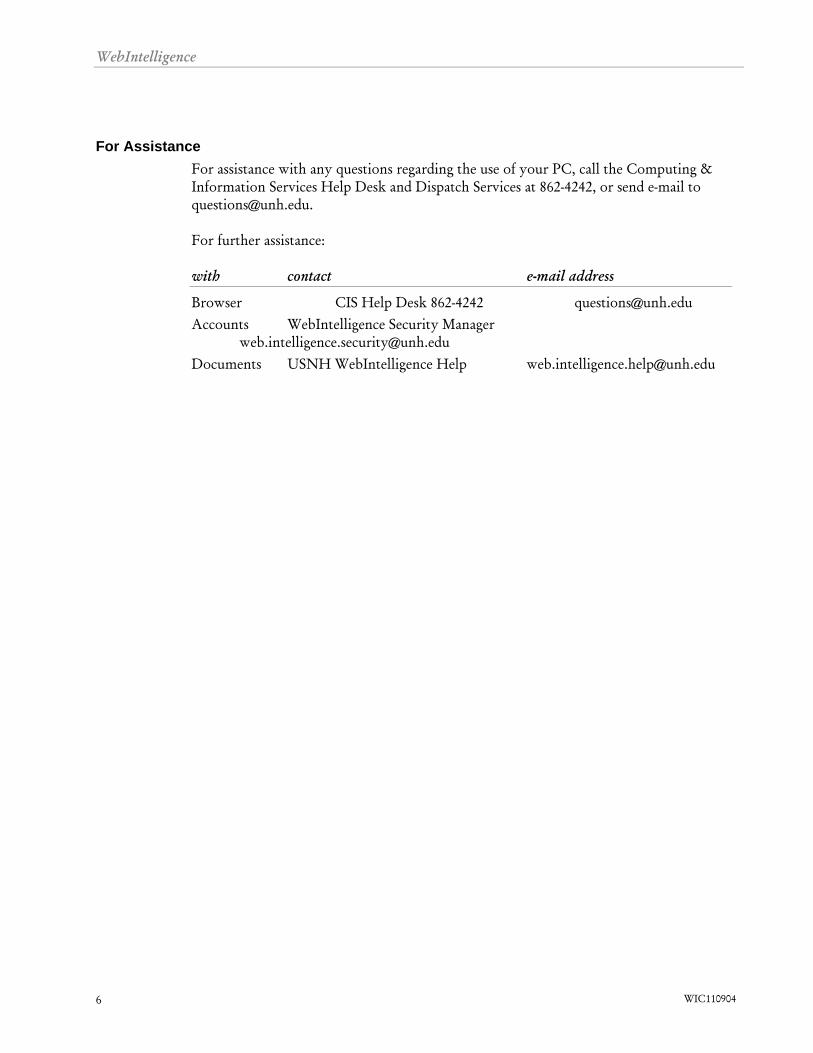
For Assistance For assistance with any questions regarding the use of your PC, call the Computing & Information Services Help Desk and Dispatch Services at 862-4242, or send e-mail to [email protected]. For further assistance: with contact e-mail address
Browser CIS Help Desk 862-4242 [email protected] Accounts WebIntelligence Security Manager [email protected] Documents USNH WebIntelligence Help [email protected]

WebIntelligence
Selecting the Document Editor There are four options for creating WebIntelligence documents:
1. Full Java applet 2. Light Java applet 3. ActiveX control 4. Optimized for my browser (This selection uses the option best suited for your
browser. ActiveX will be selected for Internet Explorer and Full Java will be selected for all other browsers.)
Full Java applet is recommended. These instructions are based on using this option. To select a document editor:
What you do... Comments/Prompts
1. Click OPTIONS in the navigation bar. The Options page will open.
2. Click the CREATE AND EDIT DOCUMENTS tab.
3. Select WEBINTELLIGENCE.
4. Select FULL JAVA APPLET. Full Java is recommended and is used exclusively throughout this document.
5. Click APPLY ALL CHANGES.
WIC110904 7
WebIntelligence
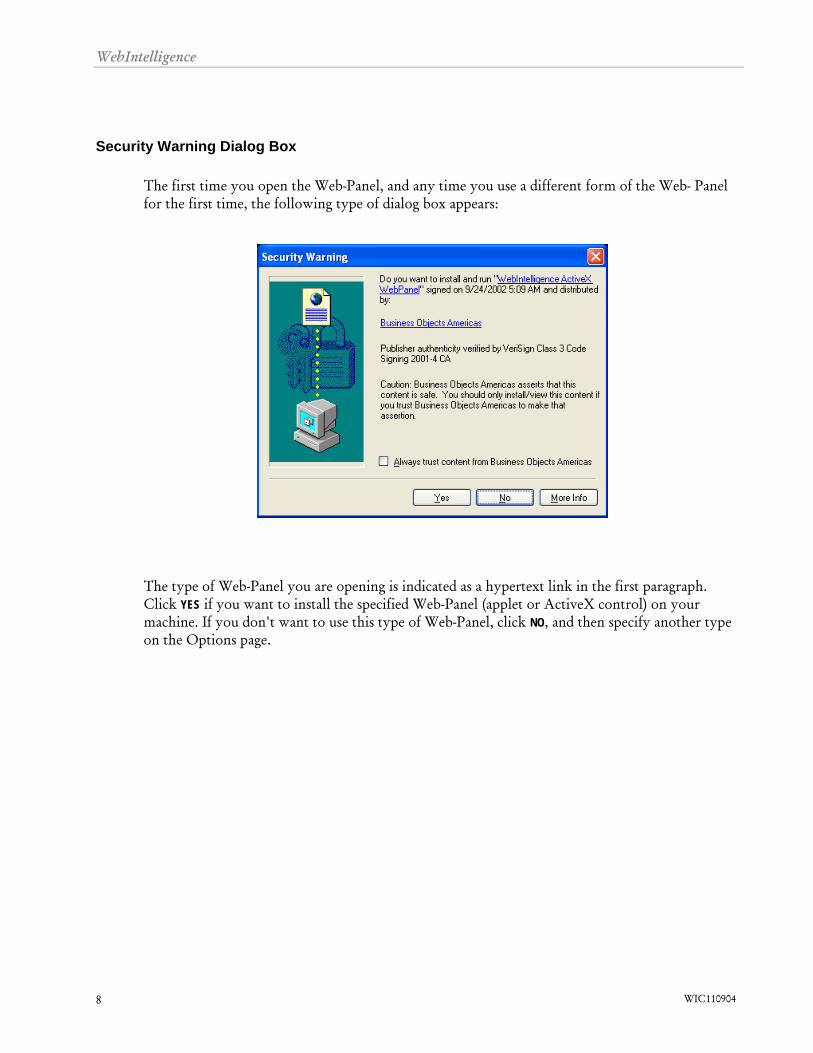
Security Warning Dialog Box The first time you open the Web-Panel, and any time you use a different form of the Web- Panel for the first time, the following type of dialog box appears:
The type of Web-Panel you are opening is indicated as a hypertext link in the first paragraph. Click YES if you want to install the specified Web-Panel (applet or ActiveX control) on your machine. If you don't want to use this type of Web-Panel, click NO, and then specify another type on the Options page.
WIC110904 8
WebIntelligence
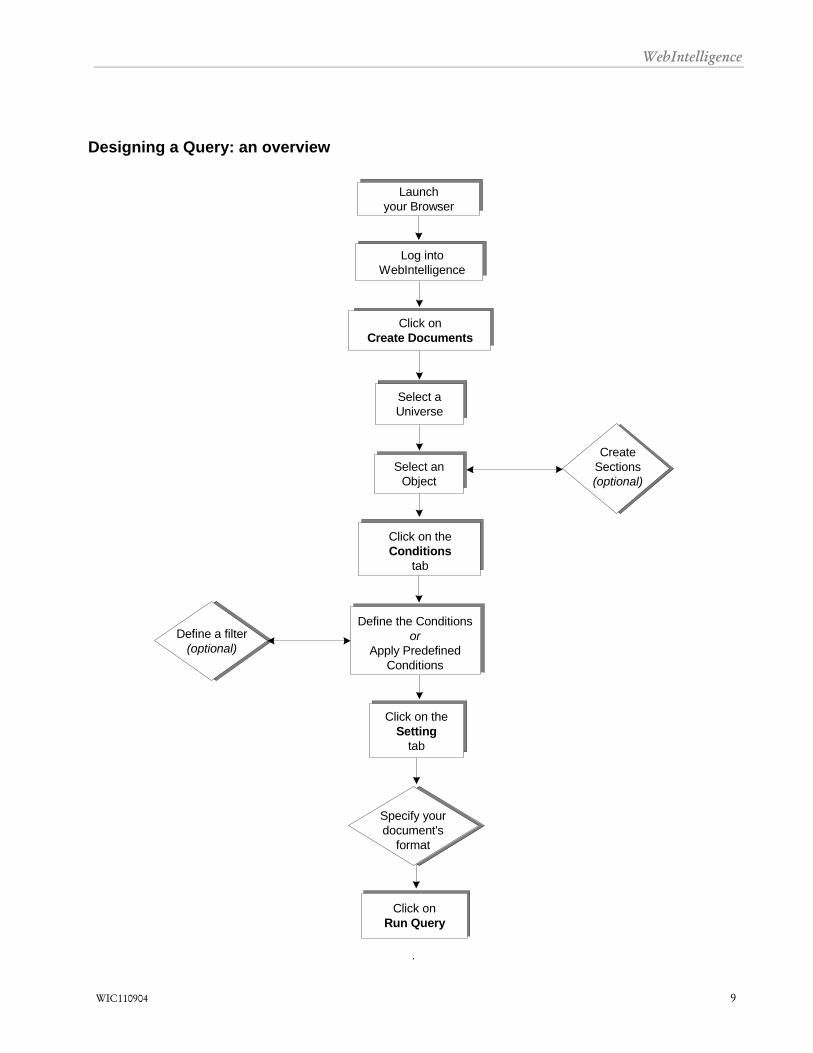
Designing a Query: an overview
Specify yourdocument's
format
Define the Conditionsor
Apply PredefinedConditions
Define a filter(optional)
Log intoWebIntelligence
Click onCreate Documents
Click on theConditions
tab
Select aUniverse
Click on theSetting
tab
Click onRun Query
Launchyour Browser
CreateSections(optional)
Select anObject
. WIC110904 9
WebIntelligence
Overview of Terms and Functions
Concept In order to create documents, it is important to understand how WebIntelligence organizes data. The two primary data mechanisms upon which WebIntelligence relies are Universes and Queries.
A Universe is:
• A database containing Classes (tables) of logically grouped data • A complete set of data and data operations, which can be accessed using everyday
terms. You do not have to write computer programs, such as S1032, SQL, or RDBMS, in order to query the database.
The Universe for the USNH Financial Data was designed by the MR2 Team. This Universe provides web access for USNH WebIntelligence users to the financial data.
What you do... Comments/Prompts
1. Launch VPN and browser.
2. Log into WebIntelligence.
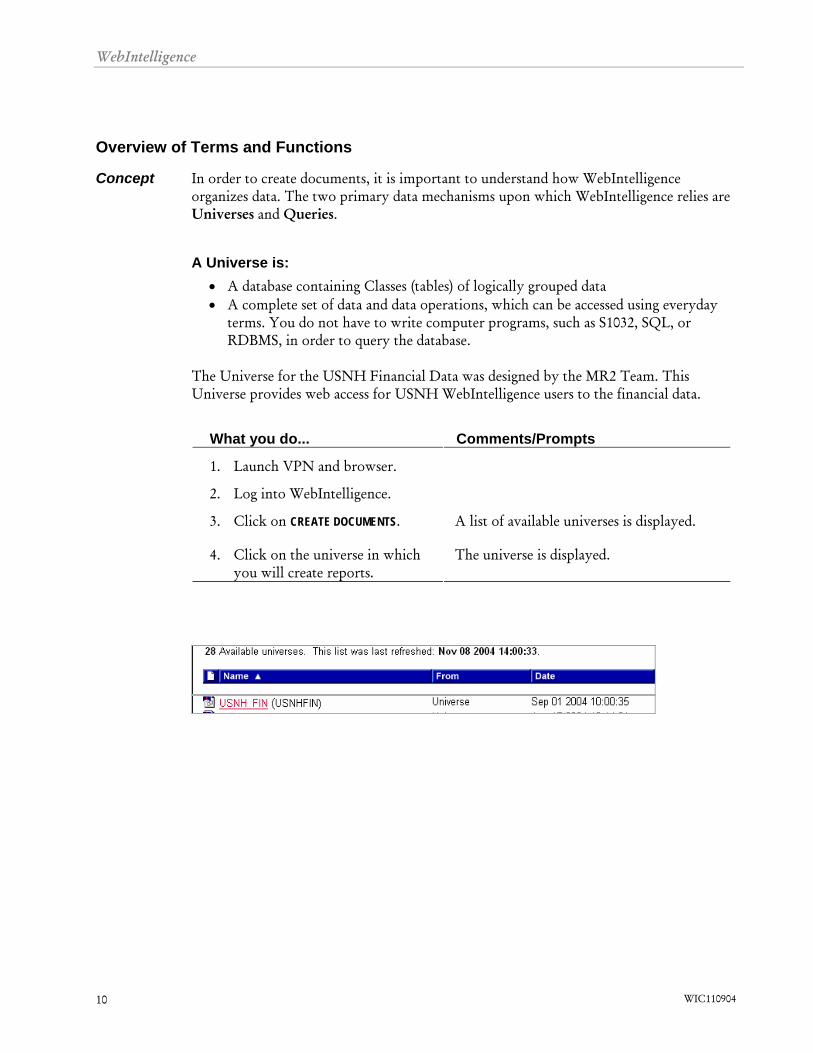
3. Click on CREATE DOCUMENTS. A list of available universes is displayed.
4. Click on the universe in which you will create reports.
The universe is displayed.
WIC110904 10
WebIntelligence
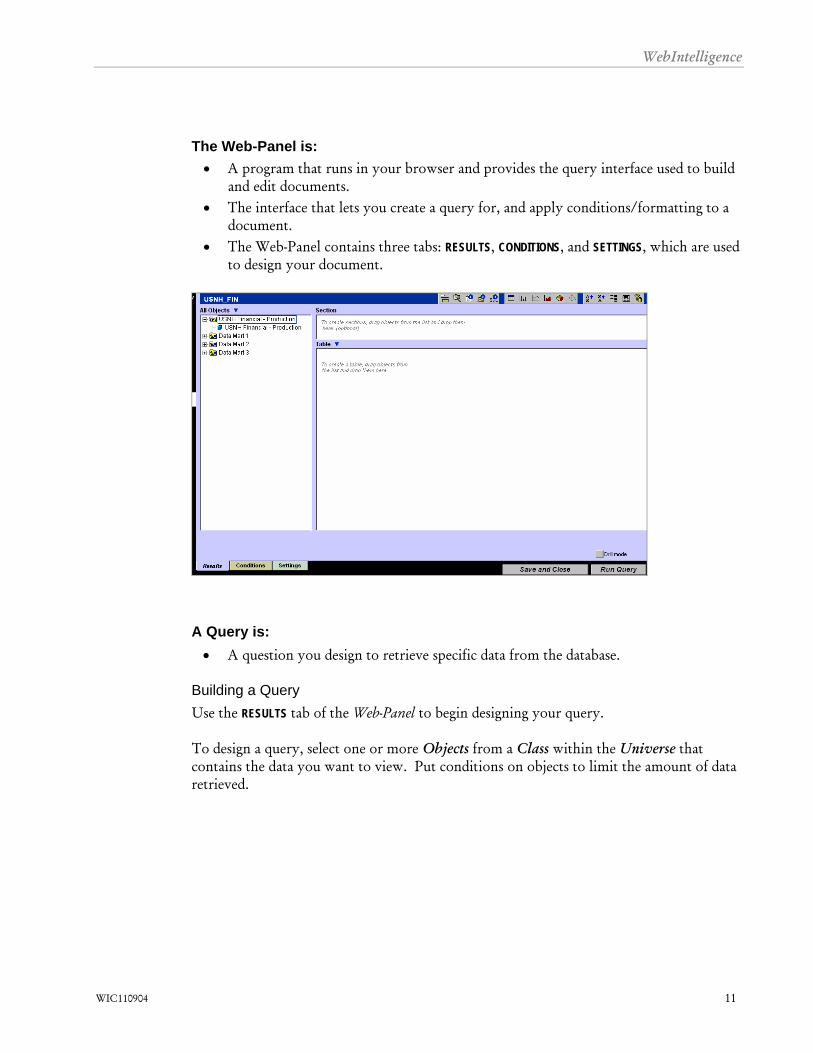
The Web-Panel is: • A program that runs in your browser and provides the query interface used to build
and edit documents. • The interface that lets you create a query for, and apply conditions/formatting to a
document. • The Web-Panel contains three tabs: RESULTS, CONDITIONS, and SETTINGS, which are used
to design your document.
A Query is: • A question you design to retrieve specific data from the database.
Building a Query Use the RESULTS tab of the Web-Panel to begin designing your query.
To design a query, select one or more Objects from a Class within the Universe that contains the data you want to view. Put conditions on objects to limit the amount of data retrieved.
WIC110904 11
WebIntelligence
A Class is: • A table in a database. • A logical grouping of Objects (fields).
In the Web-Panel, a Class is indicated by the icon:
Examples of Classes in the USNH Financial Universe include: • Time Dimensions • Operating Ledger • General Ledger • Encumbrance Ledger
An Object is: • A field in a table in a database. • A pointer to data in the database that enables you to retrieve data for your
documents. To Expand or Compact the list of Objects displayed within a class: • Click the plus sign [+] next to a Class’ icon to expand the list of Objects (fields) in
the Class. • Click the minus sign [-] next to a Class’ icon to compact the list of Objects (fields) in
the Class.
There are three (3) types of Objects: Dimension, Detail and Measure.
A Dimension Object is • A key field on which you are likely to base a query. • A field, which typically retrieves character-type data or dates.
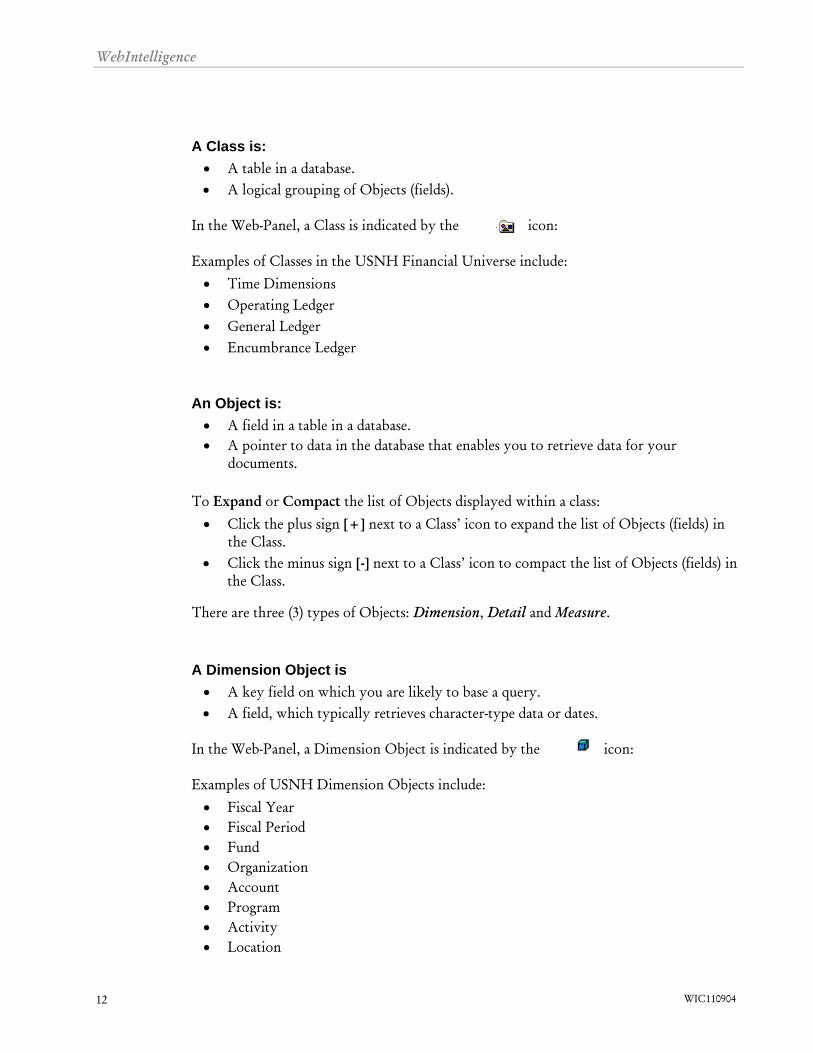
In the Web-Panel, a Dimension Object is indicated by the icon: Examples of USNH Dimension Objects include: • Fiscal Year • Fiscal Period • Fund • Organization • Account • Program • Activity • Location
WIC110904 12
WebIntelligence
A Detail Object is: • A descriptive field which provides more specific information about a particular
Dimension Object. • To expand a list of objects to include Detail Objects, click the [+] next to a
Dimension Object
In the Web-Panel, a Detail Object is indicated by the icon: Examples of USNH Detail Objects include:
• Fund Title • Organization Title • Account Title
A Measure Object is: • A field which displays numeric data whose values change based upon the Objects
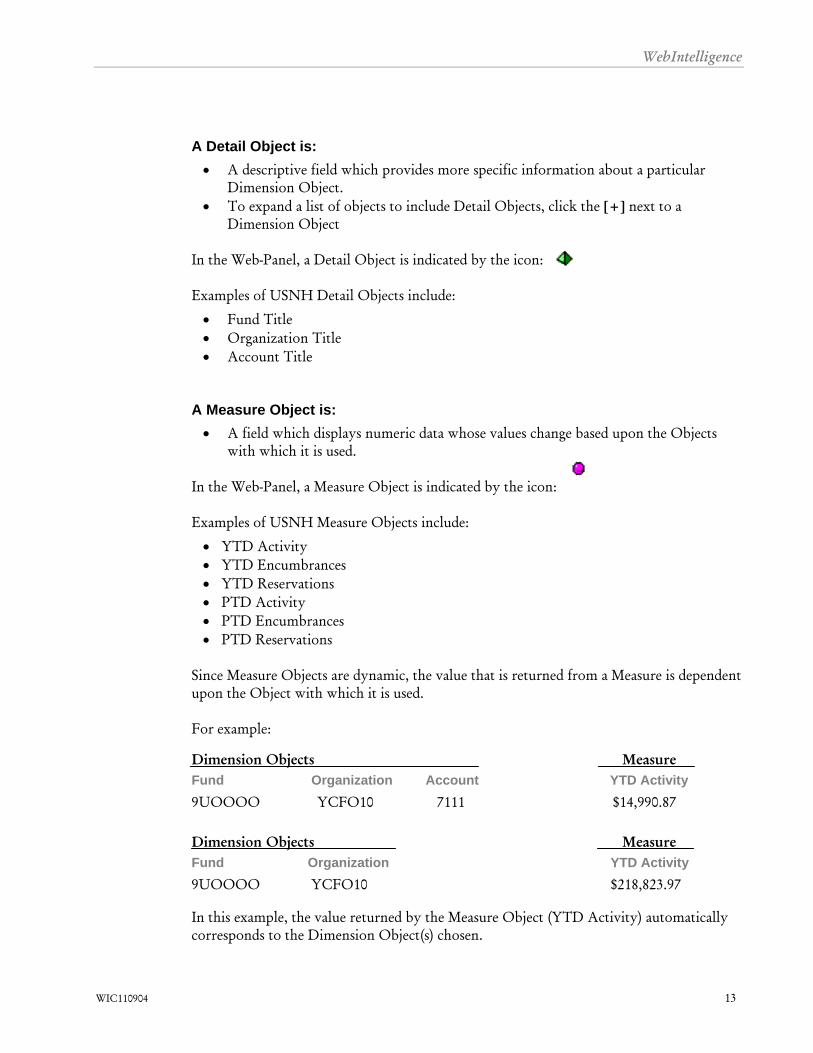
with which it is used. In the Web-Panel, a Measure Object is indicated by the icon:
Examples of USNH Measure Objects include:
• YTD Activity • YTD Encumbrances • YTD Reservations • PTD Activity • PTD Encumbrances • PTD Reservations
Since Measure Objects are dynamic, the value that is returned from a Measure is dependent upon the Object with which it is used. For example:
Dimension Objects Measure Fund Organization Account YTD Activity 9UOOOO YCFO10 7111 $14,990.87
Dimension Objects Measure
Fund Organization YTD Activity 9UOOOO YCFO10 $218,823.97
In this example, the value returned by the Measure Object (YTD Activity) automatically corresponds to the Dimension Object(s) chosen.
WIC110904 13
WebIntelligence
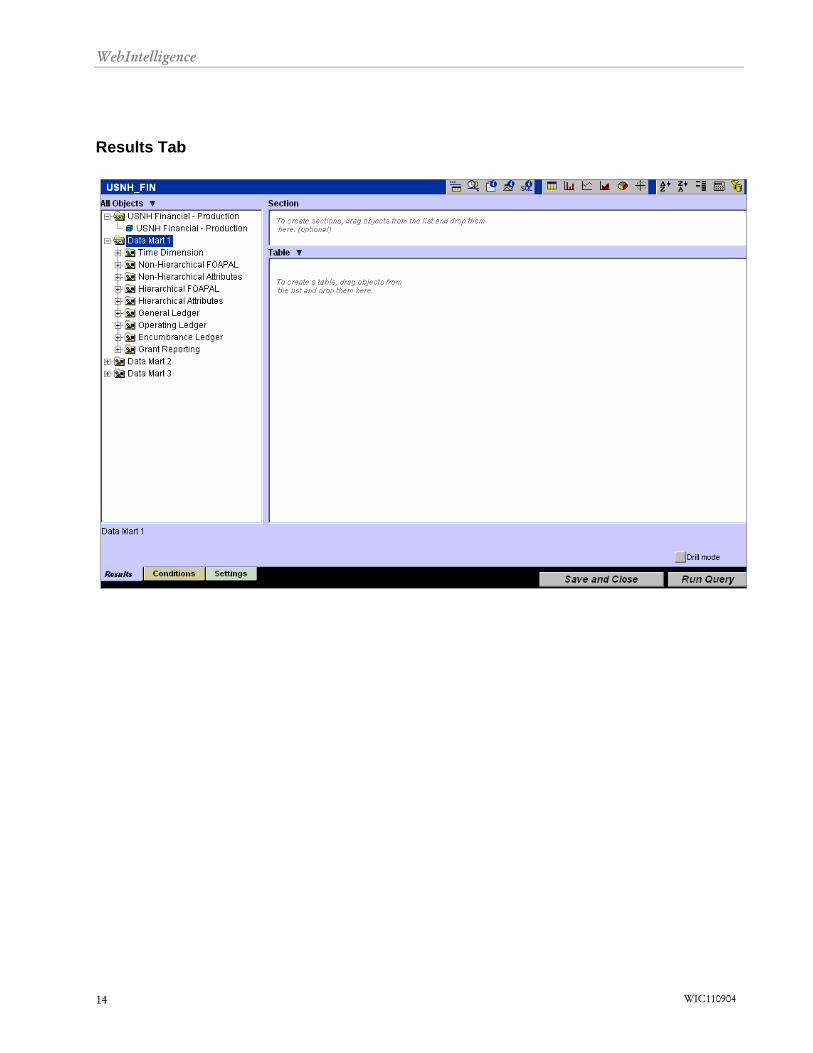
Results Tab
WIC110904 14
WebIntelligence
WIC110904 15
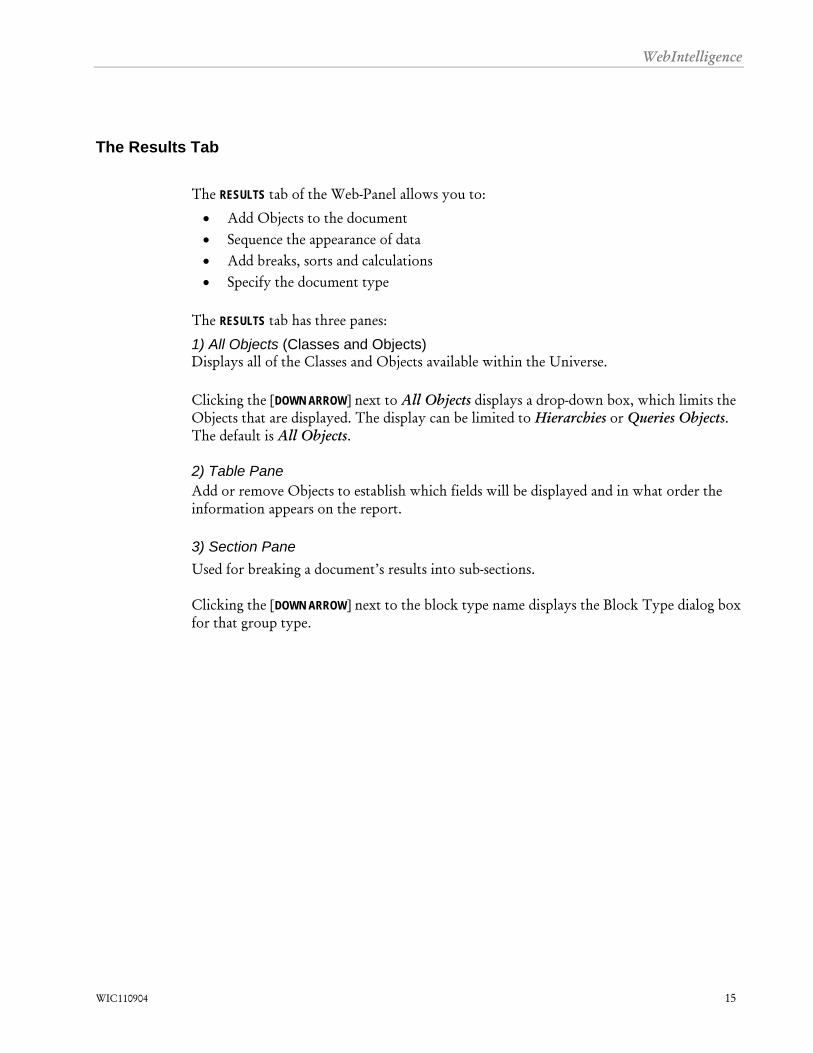
The Results Tab
The RESULTS tab of the Web-Panel allows you to:
• Add Objects to the document • Sequence the appearance of data • Add breaks, sorts and calculations • Specify the document type
The RESULTS tab has three panes:
1) All Objects (Classes and Objects) Displays all of the Classes and Objects available within the Universe. Clicking the [DOWN ARROW] next to All Objects displays a drop-down box, which limits the Objects that are displayed. The display can be limited to Hierarchies or Queries Objects. The default is All Objects. 2) Table Pane Add or remove Objects to establish which fields will be displayed and in what order the information appears on the report.
3) Section Pane Used for breaking a document’s results into sub-sections. Clicking the [DOWN ARROW] next to the block type name displays the Block Type dialog box for that group type.

WebIntelligence
Using the Table Pane to Select Objects for a Query
Concept When you run a query, WebIntelligence contacts the database and retrieves data which
meets your criteria, and displays that data in your browser.
What you do... Comments/Prompts
1. Drag and drop Objects from the All Objects pane,
OR Double click on the desired Objects.
Selected Objects will appear in the Table pane.
2. To rearrange Objects: Drag and drop Objects in the Table pane to change their order.
The order in which you place Objects in the Table pane determines the order in which columns of data will be displayed.
3. To remove Objects: Drag and drop unwanted Objects to the All Objects pane,
OR Select the unwanted Object and press the DELETE key.
If available, a description of the selected Object will display on the bottom left side of the page above the selection tabs.
4. Click on RUN QUERY on the bottom right corner.
WebIntelligence builds a SQL statement to access the database and returns the data you requested.
NOTE: By default, the order of the Objects determines the order in which results are sorted. Therefore, data is sorted by the first Object in the Table pane, followed by the second Object, then the third, etc. NOTE: If the query was too general, i.e. requested too much data, WebIntelligence displays the alert icon (seen at left) on the toolbar. This icon indicates that only partial data was returned. NOTE: Cancel a query at any time by clicking CANCEL QUERY at the bottom right of the page.
WIC110904 16

WebIntelligence
WIC110904 17
WebIntelligence
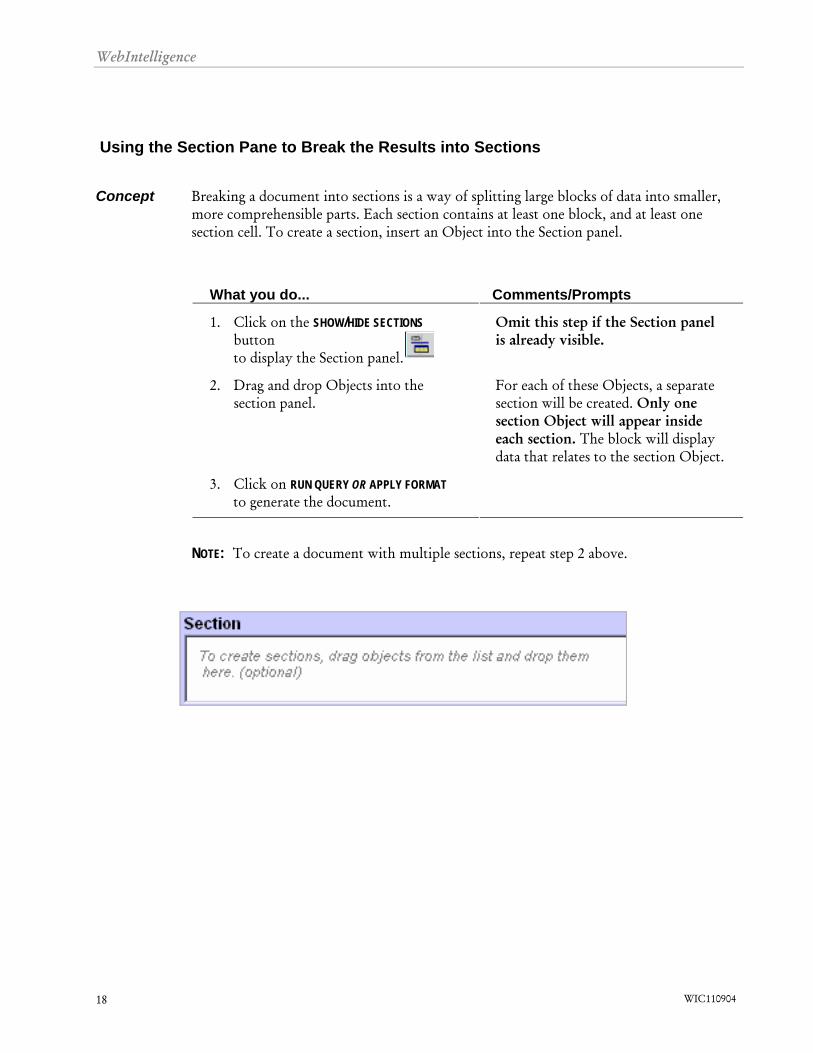
Using the Section Pane to Break the Results into Sections
Concept Breaking a document into sections is a way of splitting large blocks of data into smaller,
more comprehensible parts. Each section contains at least one block, and at least one section cell. To create a section, insert an Object into the Section panel.
What you do... Comments/Prompts
1. Click on the SHOW/HIDE SECTIONS button to display the Section panel.
Omit this step if the Section panel is already visible.
2. Drag and drop Objects into the section panel.
For each of these Objects, a separate section will be created. Only one section Object will appear inside each section. The block will display data that relates to the section Object.
3. Click on RUN QUERY OR APPLY FORMAT to generate the document.
NOTE: To create a document with multiple sections, repeat step 2 above.
WIC110904 18
WebIntelligence
WIC110904 19
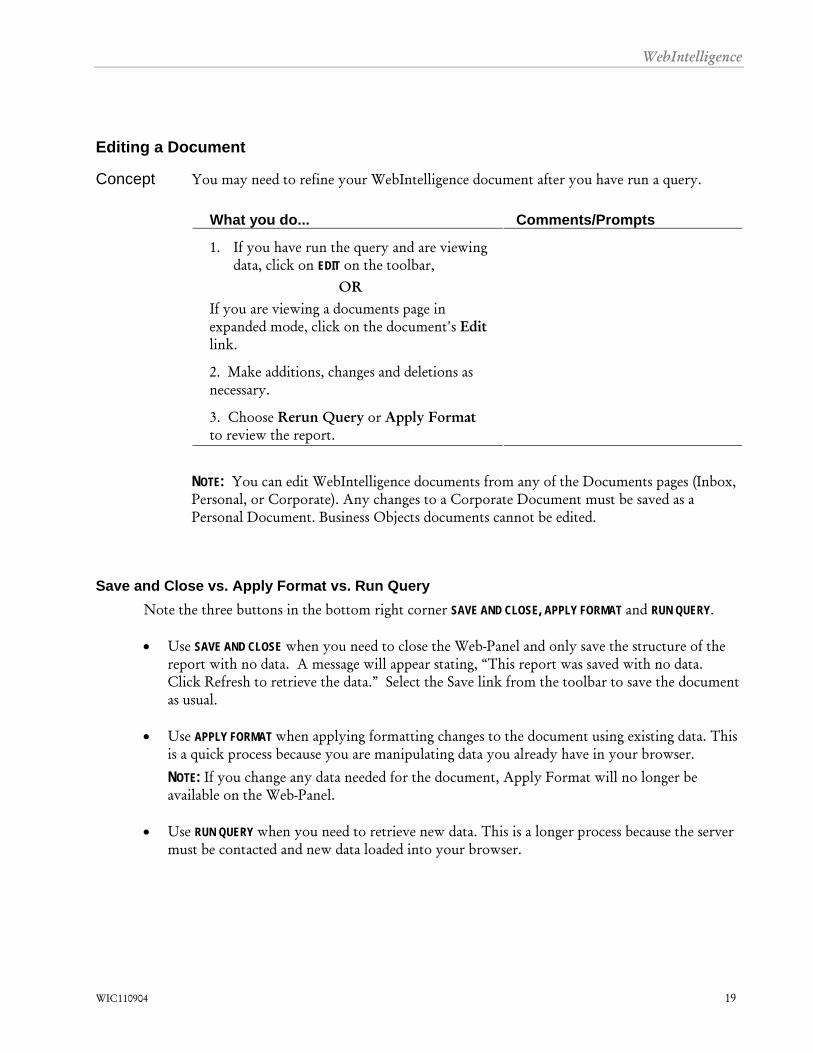
Editing a Document
Concept You may need to refine your WebIntelligence document after you have run a query.
What you do... Comments/Prompts
1. If you have run the query and are viewing data, click on EDIT on the toolbar,
OR If you are viewing a documents page in expanded mode, click on the document's Edit link.
2. Make additions, changes and deletions as necessary.
3. Choose Rerun Query or Apply Format to review the report.
NOTE: You can edit WebIntelligence documents from any of the Documents pages (Inbox, Personal, or Corporate). Any changes to a Corporate Document must be saved as a Personal Document. Business Objects documents cannot be edited.
Save and Close vs. Apply Format vs. Run Query
Note the three buttons in the bottom right corner SAVE AND CLOSE, APPLY FORMAT and RUN QUERY. • Use SAVE AND CLOSE when you need to close the Web-Panel and only save the structure of the
report with no data. A message will appear stating, “This report was saved with no data. Click Refresh to retrieve the data.” Select the Save link from the toolbar to save the document as usual.
• Use APPLY FORMAT when applying formatting changes to the document using existing data. This
is a quick process because you are manipulating data you already have in your browser.
NOTE: If you change any data needed for the document, Apply Format will no longer be available on the Web-Panel.
• Use RUN QUERY when you need to retrieve new data. This is a longer process because the server
must be contacted and new data loaded into your browser.
WebIntelligence
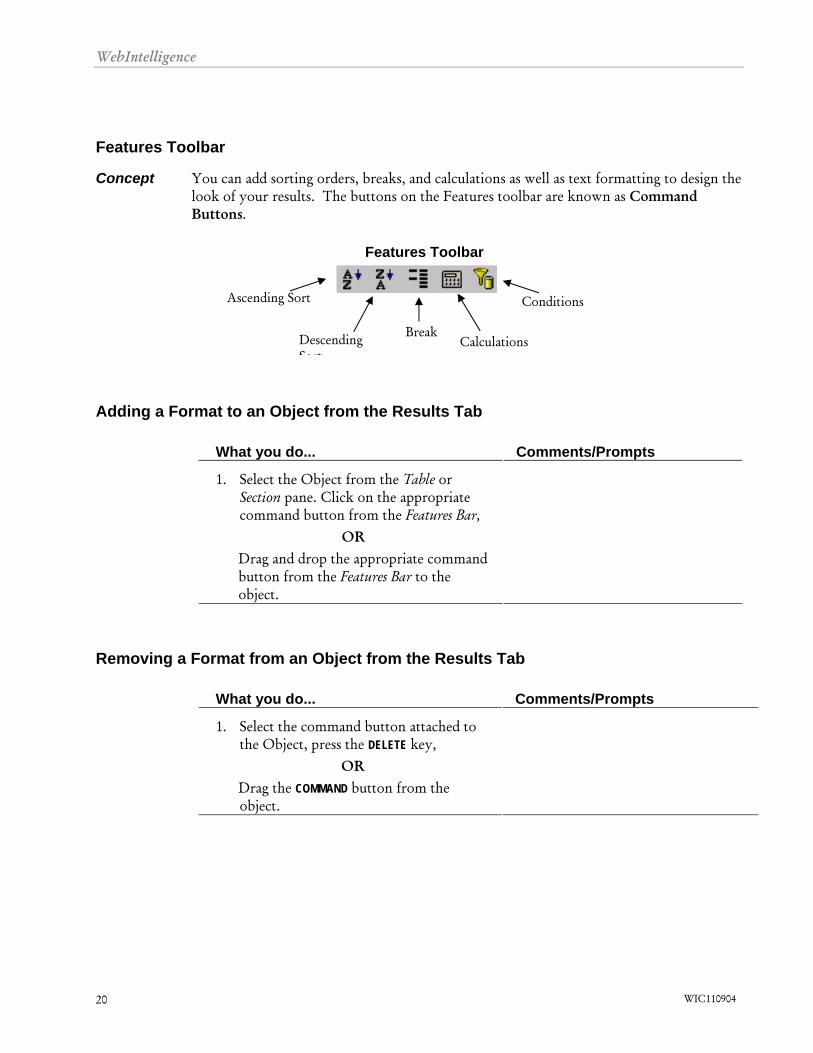
Features Toolbar
Concept You can add sorting orders, breaks, and calculations as well as text formatting to design the look of your results. The buttons on the Features toolbar are known as Command Buttons.
Features Toolbar
WIC110904 20
Ascending Sort
Descending Sort
Break
Conditions
Calculations
Adding a Format to an Object from the Results Tab
What you do... Comments/Prompts
1. Select the Object from the Table or Section pane. Click on the appropriate command button from the Features Bar,
OR Drag and drop the appropriate command button from the Features Bar to the object.
Removing a Format from an Object from the Results Tab
What you do... Comments/Prompts
1. Select the command button attached to the Object, press the DELETE key,
OR Drag the COMMAND button from the object.
WebIntelligence
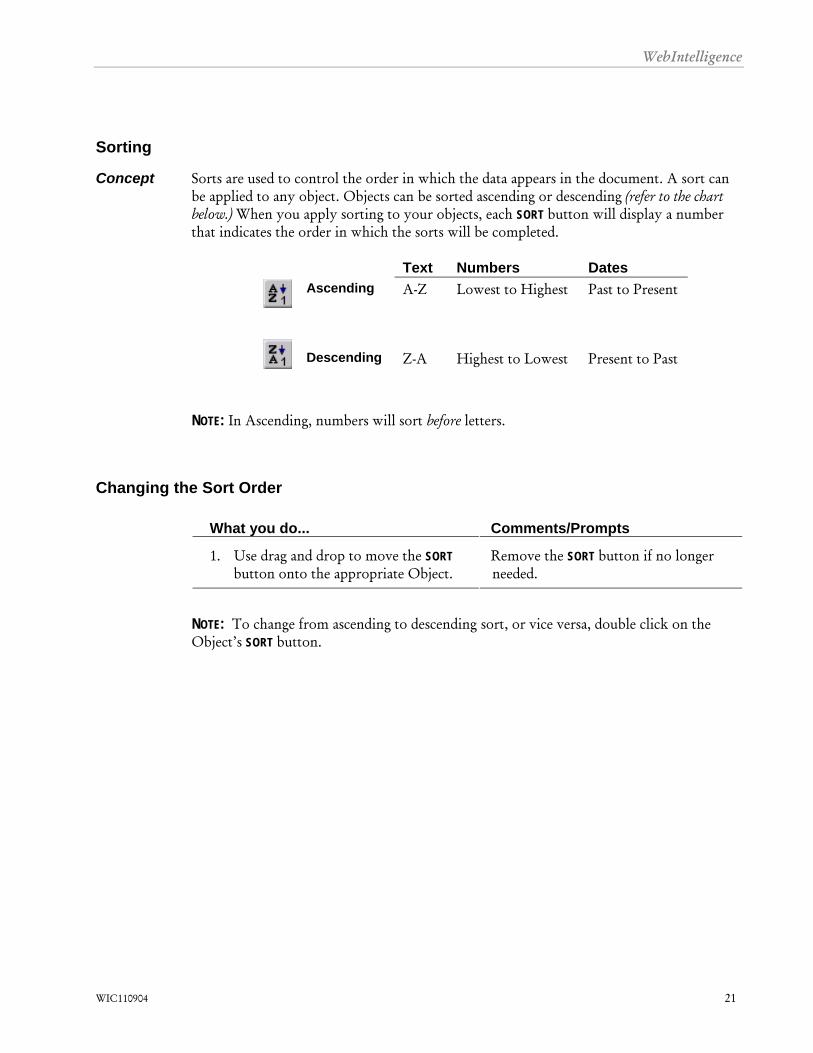
Sorting
Concept Sorts are used to control the order in which the data appears in the document. A sort can be applied to any object. Objects can be sorted ascending or descending (refer to the chart below.) When you apply sorting to your objects, each SORT button will display a number that indicates the order in which the sorts will be completed.
Text Numbers Dates Ascending A-Z Lowest to Highest Past to Present
Descending Z-A Highest to Lowest Present to Past
NOTE: In Ascending, numbers will sort before letters.
Changing the Sort Order
What you do... Comments/Prompts
1. Use drag and drop to move the SORT button onto the appropriate Object.
Remove the SORT button if no longer needed.
NOTE: To change from ascending to descending sort, or vice versa, double click on the Object’s SORT button.
WIC110904 21
WebIntelligence
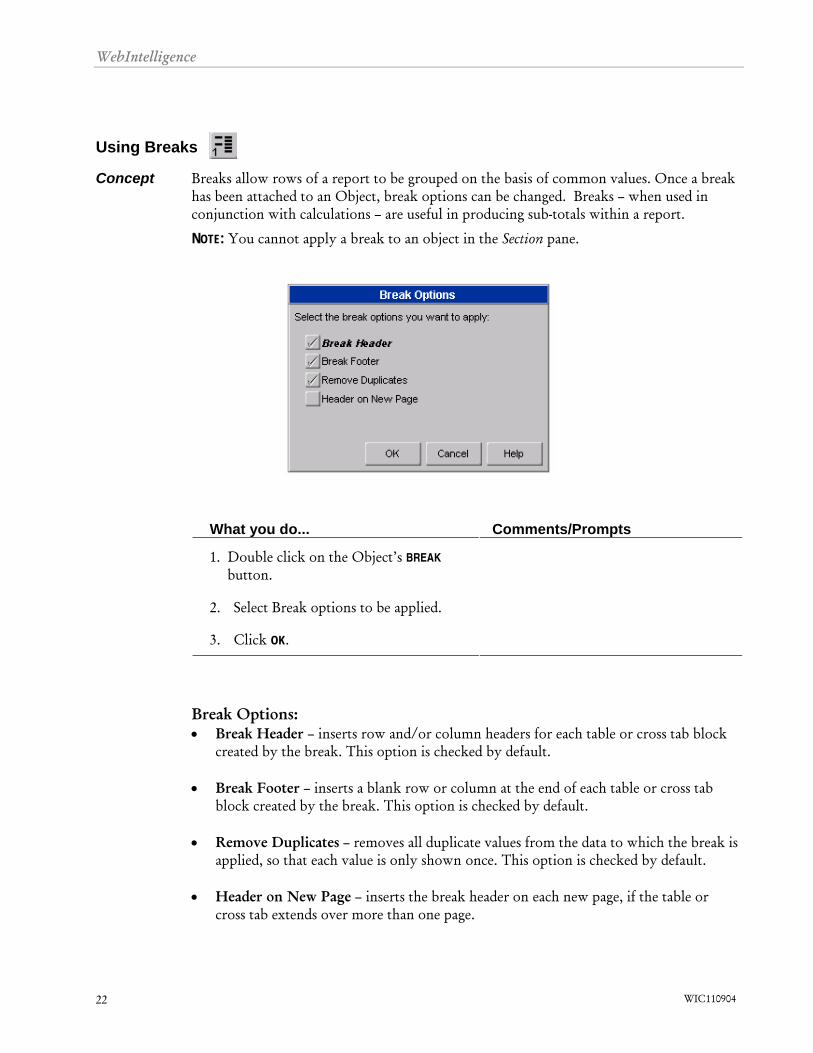
Using Breaks
Concept Breaks allow rows of a report to be grouped on the basis of common values. Once a break has been attached to an Object, break options can be changed. Breaks – when used in conjunction with calculations – are useful in producing sub-totals within a report.
NOTE: You cannot apply a break to an object in the Section pane.
What you do... Comments/Prompts
1. Double click on the Object’s BREAK
button.
2. Select Break options to be applied.
3. Click OK.
Break Options: • Break Header – inserts row and/or column headers for each table or cross tab block
created by the break. This option is checked by default.
• Break Footer – inserts a blank row or column at the end of each table or cross tab block created by the break. This option is checked by default.
• Remove Duplicates – removes all duplicate values from the data to which the break is
applied, so that each value is only shown once. This option is checked by default.
• Header on New Page – inserts the break header on each new page, if the table or cross tab extends over more than one page.
WIC110904 22
WebIntelligence
You can apply breaks to more than one Object. When you add breaks to multiple Objects, you will have primary level breaks, secondary level breaks, etc., indicated by a subscript on the BREAK button.
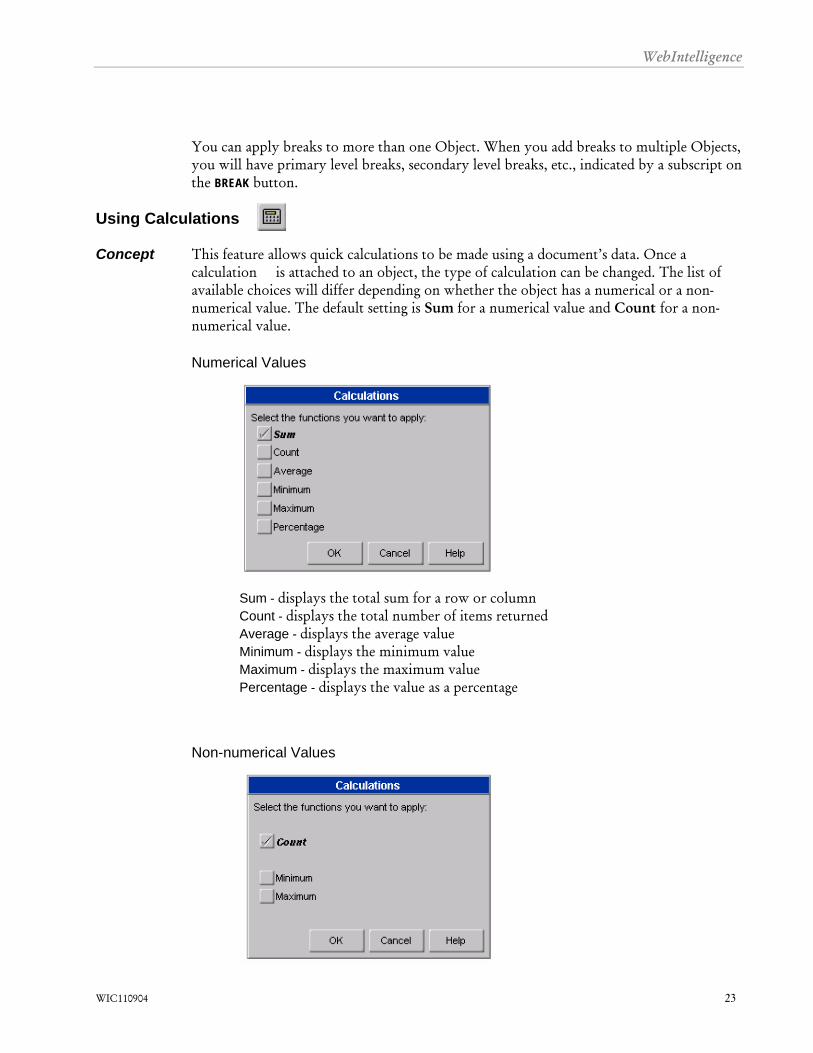
Using Calculations Concept This feature allows quick calculations to be made using a document’s data. Once a
calculation is attached to an object, the type of calculation can be changed. The list of available choices will differ depending on whether the object has a numerical or a non-numerical value. The default setting is Sum for a numerical value and Count for a non-numerical value. Numerical Values
Sum - displays the total sum for a row or column Count - displays the total number of items returned Average - displays the average value Minimum - displays the minimum value Maximum - displays the maximum value Percentage - displays the value as a percentage
Non-numerical Values
WIC110904 23

WebIntelligence
WIC110904 24
Count – displays the total number of items returned Minimum – displays the minimum value alphabetically Maximum – displays the maximum value alphabetically
WebIntelligence
WIC110904 25
Formatting the Type of Calculation to be Performed
What you do… Comments/Prompts
1. Double-click on the object’s CALCULATION button.
2. Select function to be applied.
3. Click OK.
NOTE: You cannot make a calculation on objects in the Section pane.
WebIntelligence
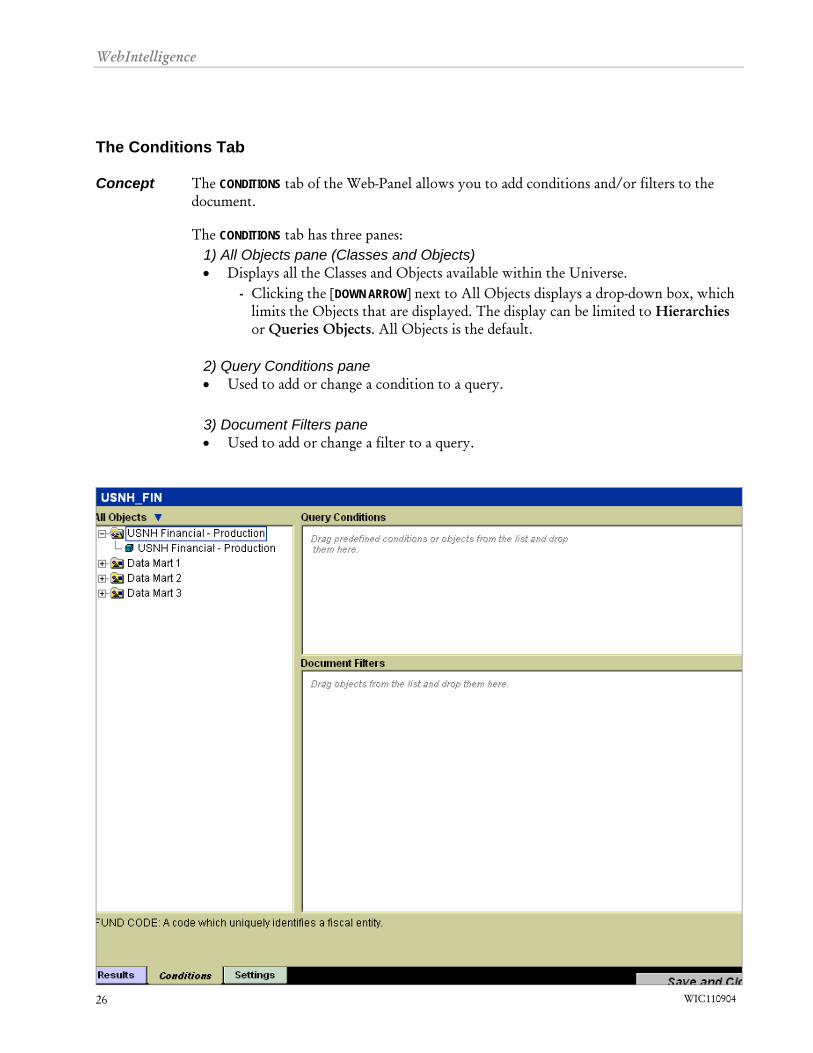
The Conditions Tab Concept The CONDITIONS tab of the Web-Panel allows you to add conditions and/or filters to the
document.
The CONDITIONS tab has three panes: 1) All Objects pane (Classes and Objects) • Displays all the Classes and Objects available within the Universe.
- Clicking the [DOWN ARROW] next to All Objects displays a drop-down box, which limits the Objects that are displayed. The display can be limited to Hierarchies or Queries Objects. All Objects is the default.
2) Query Conditions pane • Used to add or change a condition to a query.
3) Document Filters pane • Used to add or change a filter to a query.
WIC110904 26
WebIntelligence
WIC110904 27
Conditions vs. Filters The CONDITIONS tab has three sections: All Objects, Query Conditions, and Document Filters. Applying conditions or filters to a query allows only the desired data to be included. Instead of viewing a document with a large quantity of data, only the information needed is selected for display. Applying conditions and filters to a report can impact on calculations. Although conditions and filters are added to a document in the same way, functionally they restrict data differently.
Condition A condition is applied to a query to limit the data retrieved from the database. All data from the query is displayed with no restrictions. A condition restricts future users to only be able to work with data that is originally retrieved with the document. If the document is sent to another user, it will limit the information that can be viewed.
Filter A filter is applied to data returned when the document is opened. You may not want to display all of the data returned and want to focus on only a portion, which is difficult to do if there is a large amount of data on the screen.
A filter allows you to hide data you do not want to view behind the scenes and display only the data you need at that time. Only users with the ability to create reports can add a filter to a report.
IN ORDER TO: USE: Restrict the data retrieved from the database when a query is run
A Condition
Restrict the data displayed in the document A Filter NOTE: When entering data for conditions and filters, enter values in the same case (upper or lower) as they are stored in Banner.
Applying Pre-defined Conditions
Concept A pre-defined condition is a condition that was written by the MR2 Team for your use. Pre-defined conditions are conditions that are frequently used. When available, pre-defined conditions are displayed in the All Objects panel on the CONDITIONS tab of the Web-Panel. You cannot modify a pre-defined condition. If it does not provide the data you require, you will need to create your own condition.
Using a Pre-defined Condition
What you do... Comments/Prompts
1. Drag and drop the Condition Object from the All Object panel to the Query Conditions or Document Filter panel,
WebIntelligence
WIC110904 28
OR Double-click the Condition Object in the All Object panel to add it to the Query Conditions panel.
2. Click on RUN QUERY.
WebIntelligence
WIC110904 29
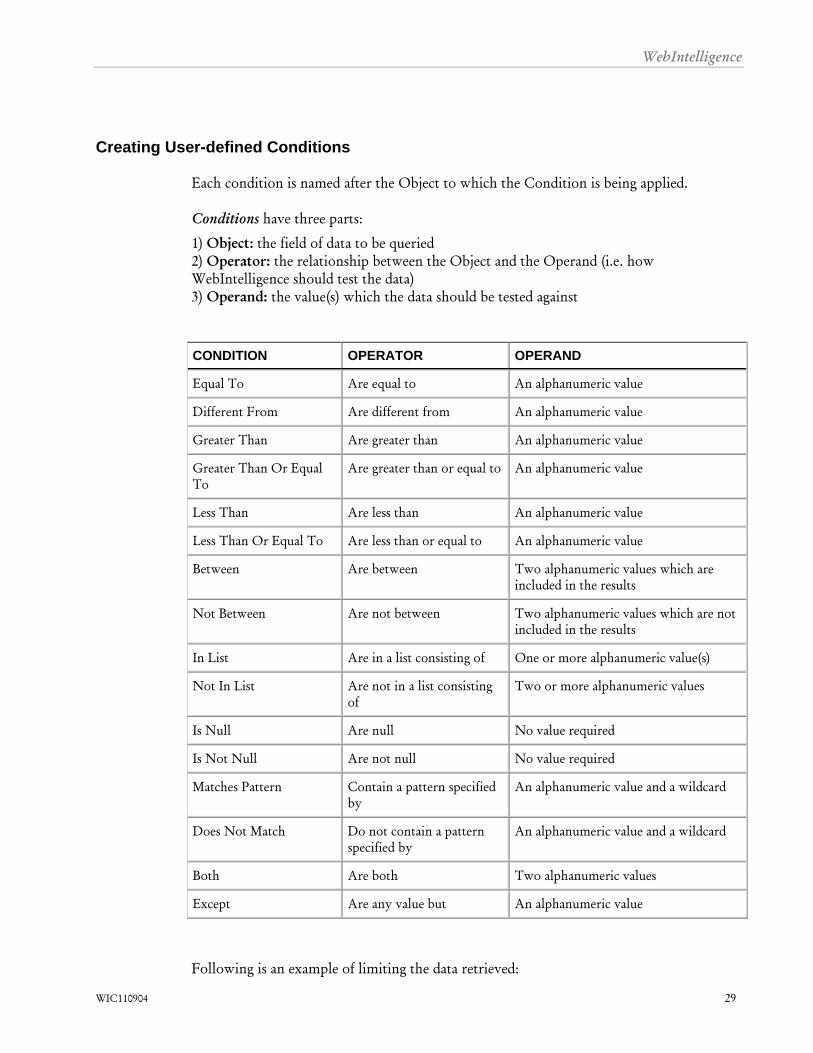
Creating User-defined Conditions
Each condition is named after the Object to which the Condition is being applied.
Conditions have three parts:
1) Object: the field of data to be queried 2) Operator: the relationship between the Object and the Operand (i.e. how WebIntelligence should test the data)
3) Operand: the value(s) which the data should be tested against
CONDITION OPERATOR OPERAND
Equal To Are equal to An alphanumeric value
Different From Are different from An alphanumeric value
Greater Than Are greater than An alphanumeric value
Greater Than Or Equal To
Are greater than or equal to An alphanumeric value
Less Than Are less than An alphanumeric value
Less Than Or Equal To Are less than or equal to An alphanumeric value
Between Are between Two alphanumeric values which are included in the results
Not Between Are not between Two alphanumeric values which are not included in the results
In List Are in a list consisting of One or more alphanumeric value(s)
Not In List Are not in a list consisting of
Two or more alphanumeric values
Is Null Are null No value required
Is Not Null Are not null No value required
Matches Pattern Contain a pattern specified by
An alphanumeric value and a wildcard
Does Not Match Do not contain a pattern specified by
An alphanumeric value and a wildcard
Both Are both Two alphanumeric values
Except Are any value but An alphanumeric value
Following is an example of limiting the data retrieved:

WebIntelligence
WIC110904 30
[Object] [Operator] [Operand] Fiscal Year is equal to 2002
WebIntelligence
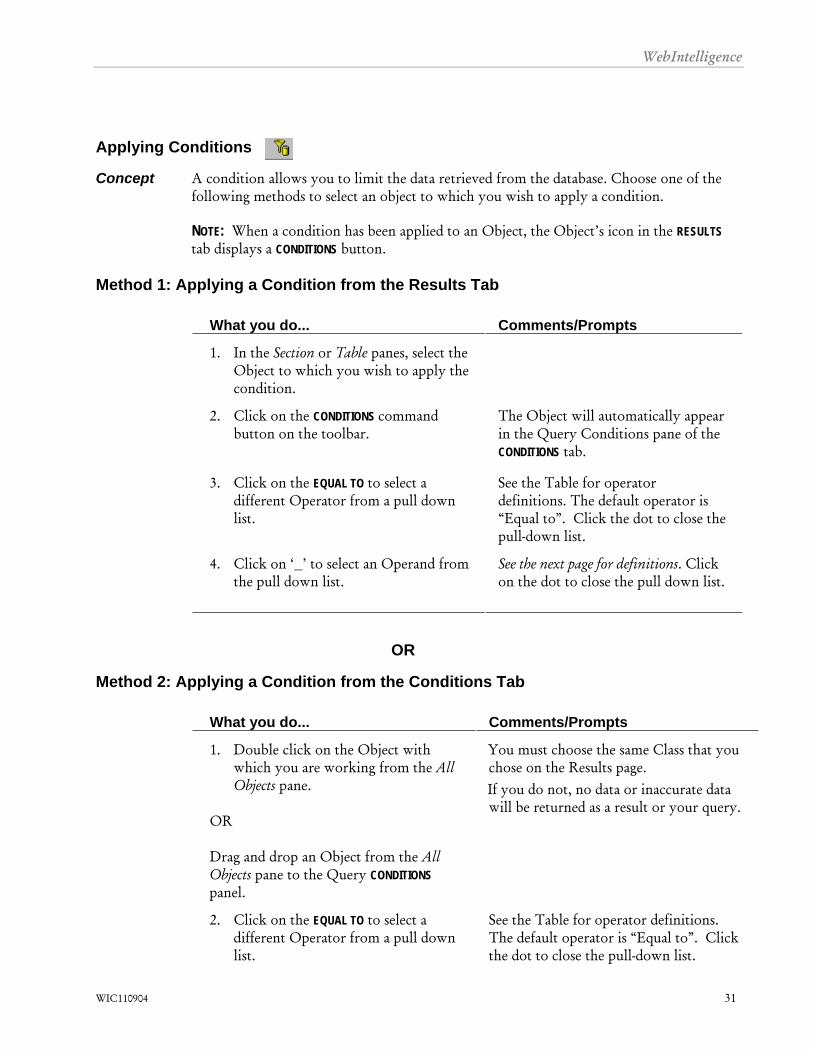
Applying Conditions
Concept A condition allows you to limit the data retrieved from the database. Choose one of the following methods to select an object to which you wish to apply a condition. NOTE: When a condition has been applied to an Object, the Object’s icon in the RESULTS tab displays a CONDITIONS button.
Method 1: Applying a Condition from the Results Tab
What you do... Comments/Prompts
1. In the Section or Table panes, select the Object to which you wish to apply the condition.
2. Click on the CONDITIONS command button on the toolbar.
The Object will automatically appear in the Query Conditions pane of the CONDITIONS tab.
3. Click on the EQUAL TO to select a different Operator from a pull down list.
See the Table for operator definitions. The default operator is “Equal to”. Click the dot to close the pull-down list.
4. Click on ‘_’ to select an Operand from the pull down list.
See the next page for definitions. Click on the dot to close the pull down list.
OR
Method 2: Applying a Condition from the Conditions Tab
What you do... Comments/Prompts
1. Double click on the Object with which you are working from the All Objects pane.
OR Drag and drop an Object from the All Objects pane to the Query CONDITIONS panel.
You must choose the same Class that you chose on the Results page. If you do not, no data or inaccurate data will be returned as a result or your query.
2. Click on the EQUAL TO to select a different Operator from a pull down list.
See the Table for operator definitions. The default operator is “Equal to”. Click the dot to close the pull-down list.
WIC110904 31

WebIntelligence
WIC110904 32
3. Click on ‘_’ to select an Operand from the pull down list.
See the next page for definitions. Click on the dot to close the pull down list.
WebIntelligence
WIC110904 33
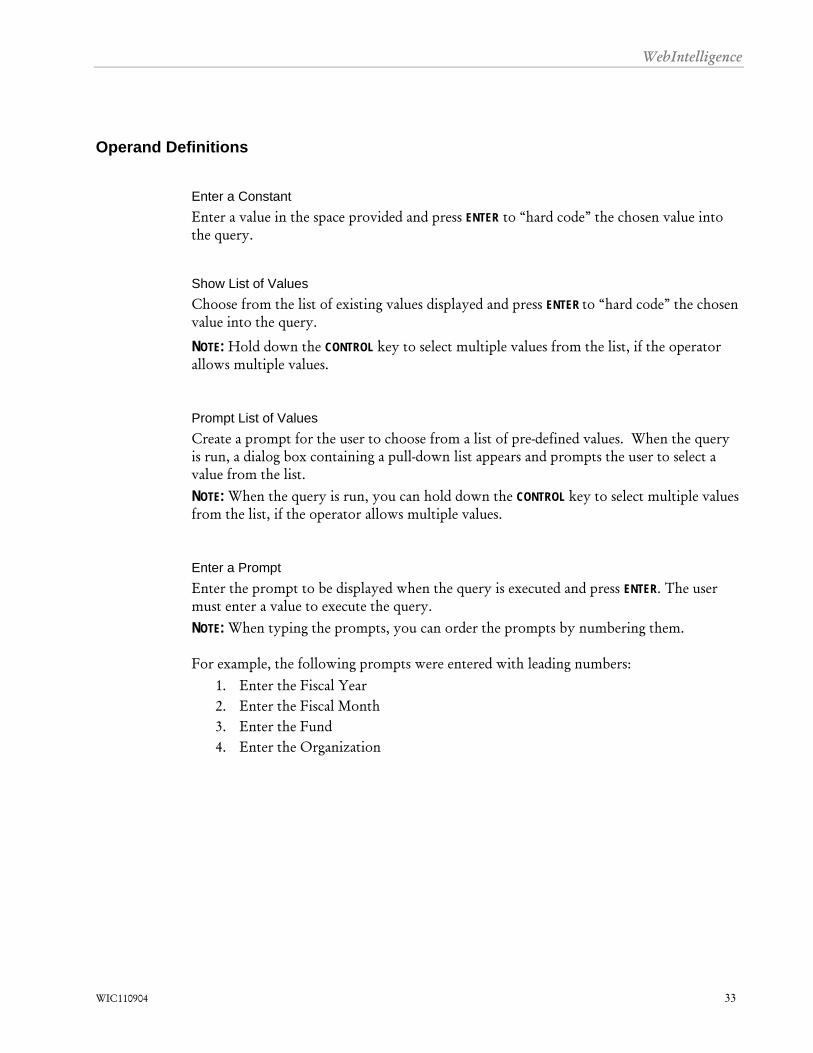
Operand Definitions
Enter a Constant Enter a value in the space provided and press ENTER to “hard code” the chosen value into the query. Show List of Values Choose from the list of existing values displayed and press ENTER to “hard code” the chosen value into the query.
NOTE: Hold down the CONTROL key to select multiple values from the list, if the operator allows multiple values. Prompt List of Values Create a prompt for the user to choose from a list of pre-defined values. When the query is run, a dialog box containing a pull-down list appears and prompts the user to select a value from the list. NOTE: When the query is run, you can hold down the CONTROL key to select multiple values from the list, if the operator allows multiple values. Enter a Prompt Enter the prompt to be displayed when the query is executed and press ENTER. The user must enter a value to execute the query. NOTE: When typing the prompts, you can order the prompts by numbering them. For example, the following prompts were entered with leading numbers:
1. Enter the Fiscal Year 2. Enter the Fiscal Month 3. Enter the Fund 4. Enter the Organization
WebIntelligence
WIC110904 34
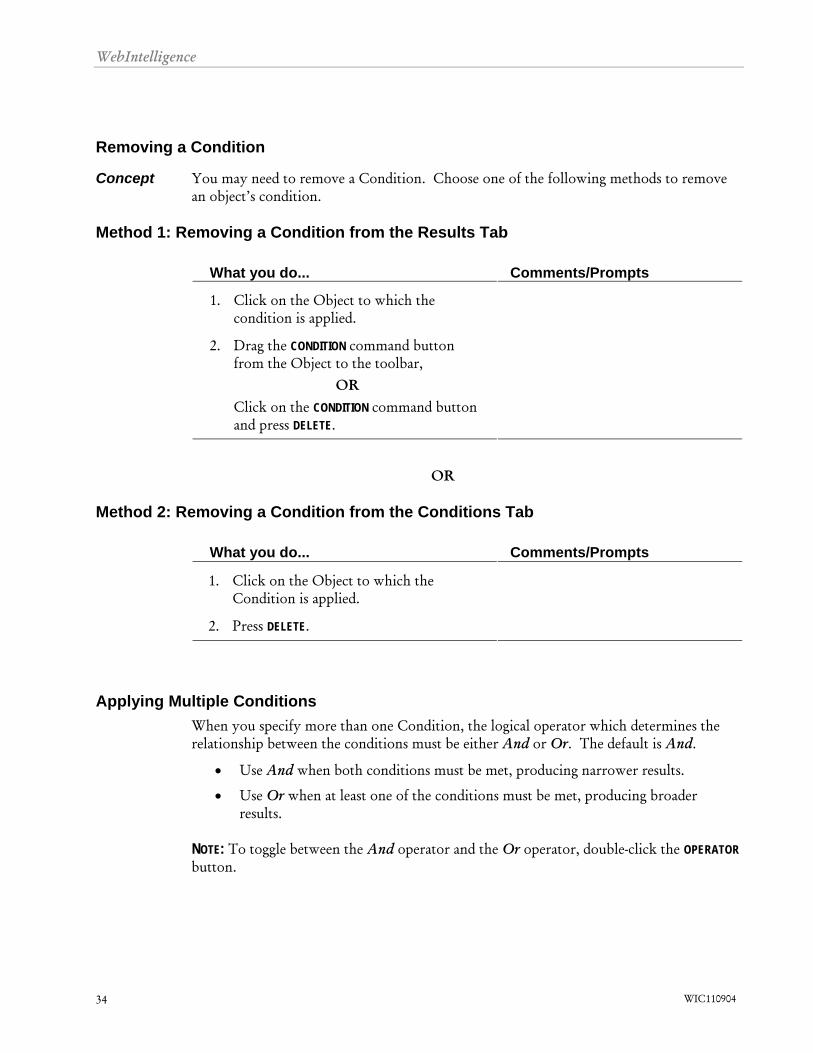
Removing a Condition
Concept You may need to remove a Condition. Choose one of the following methods to remove an object’s condition.
Method 1: Removing a Condition from the Results Tab
What you do... Comments/Prompts
1. Click on the Object to which the condition is applied.
2. Drag the CONDITION command button from the Object to the toolbar,
OR Click on the CONDITION command button and press DELETE.
OR
Method 2: Removing a Condition from the Conditions Tab
What you do... Comments/Prompts
1. Click on the Object to which the Condition is applied.
2. Press DELETE.
Applying Multiple Conditions When you specify more than one Condition, the logical operator which determines the relationship between the conditions must be either And or Or. The default is And.
• Use And when both conditions must be met, producing narrower results.
• Use Or when at least one of the conditions must be met, producing broader results.
NOTE: To toggle between the And operator and the Or operator, double-click the OPERATOR button.
WebIntelligence
WIC110904 35
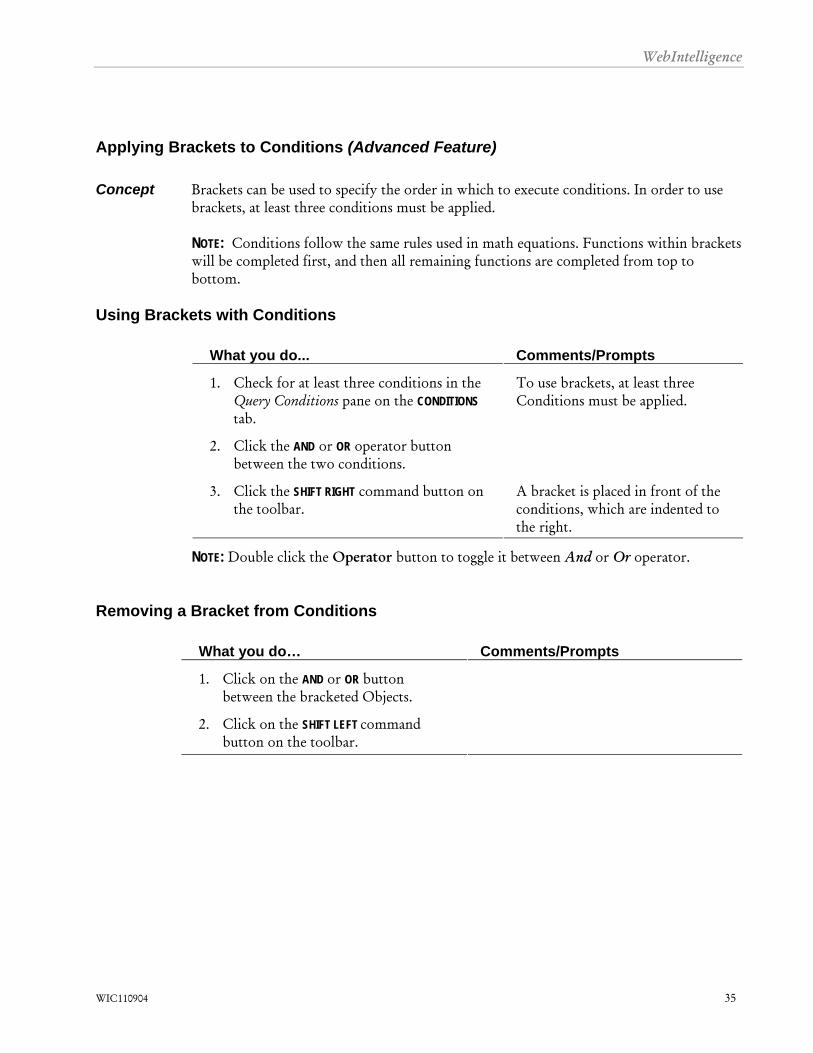
Applying Brackets to Conditions (Advanced Feature)
Concept Brackets can be used to specify the order in which to execute conditions. In order to use brackets, at least three conditions must be applied.
NOTE: Conditions follow the same rules used in math equations. Functions within brackets will be completed first, and then all remaining functions are completed from top to bottom.
Using Brackets with Conditions
What you do... Comments/Prompts
1. Check for at least three conditions in the Query Conditions pane on the CONDITIONS tab.
To use brackets, at least three Conditions must be applied.
2. Click the AND or OR operator button between the two conditions.
3. Click the SHIFT RIGHT command button on the toolbar.
A bracket is placed in front of the conditions, which are indented to the right.
NOTE: Double click the Operator button to toggle it between And or Or operator.
Removing a Bracket from Conditions
What you do… Comments/Prompts
1. Click on the AND or OR button between the bracketed Objects.
2. Click on the SHIFT LEFT command button on the toolbar.
WebIntelligence
WIC110904 36
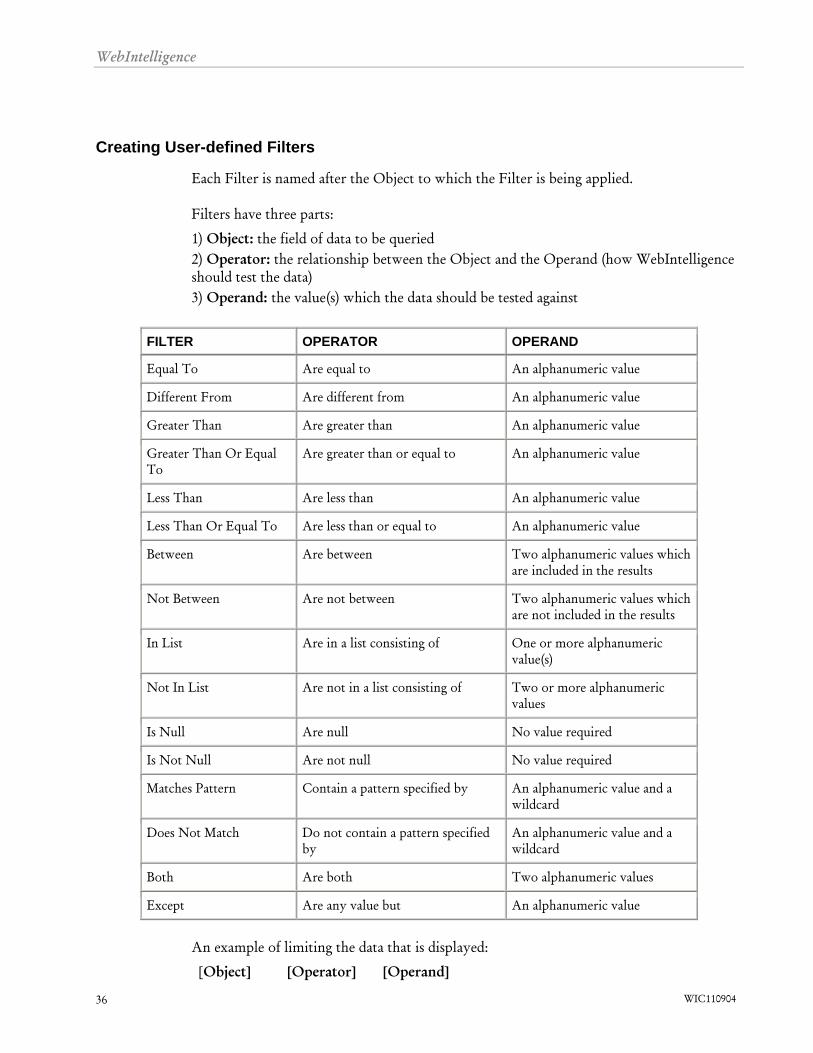
Creating User-defined Filters
Each Filter is named after the Object to which the Filter is being applied. Filters have three parts:
1) Object: the field of data to be queried 2) Operator: the relationship between the Object and the Operand (how WebIntelligence
should test the data) 3) Operand: the value(s) which the data should be tested against
FILTER OPERATOR OPERAND
Equal To Are equal to An alphanumeric value
Different From Are different from An alphanumeric value
Greater Than Are greater than An alphanumeric value
Greater Than Or Equal To
Are greater than or equal to An alphanumeric value
Less Than Are less than An alphanumeric value
Less Than Or Equal To Are less than or equal to An alphanumeric value
Between Are between Two alphanumeric values which are included in the results
Not Between Are not between Two alphanumeric values which are not included in the results
In List Are in a list consisting of One or more alphanumeric value(s)
Not In List Are not in a list consisting of Two or more alphanumeric values
Is Null Are null No value required
Is Not Null Are not null No value required
Matches Pattern Contain a pattern specified by An alphanumeric value and a wildcard
Does Not Match Do not contain a pattern specified by
An alphanumeric value and a wildcard
Both Are both Two alphanumeric values
Except Are any value but An alphanumeric value
An example of limiting the data that is displayed:
[Object] [Operator] [Operand]
WebIntelligence
WIC110904 37
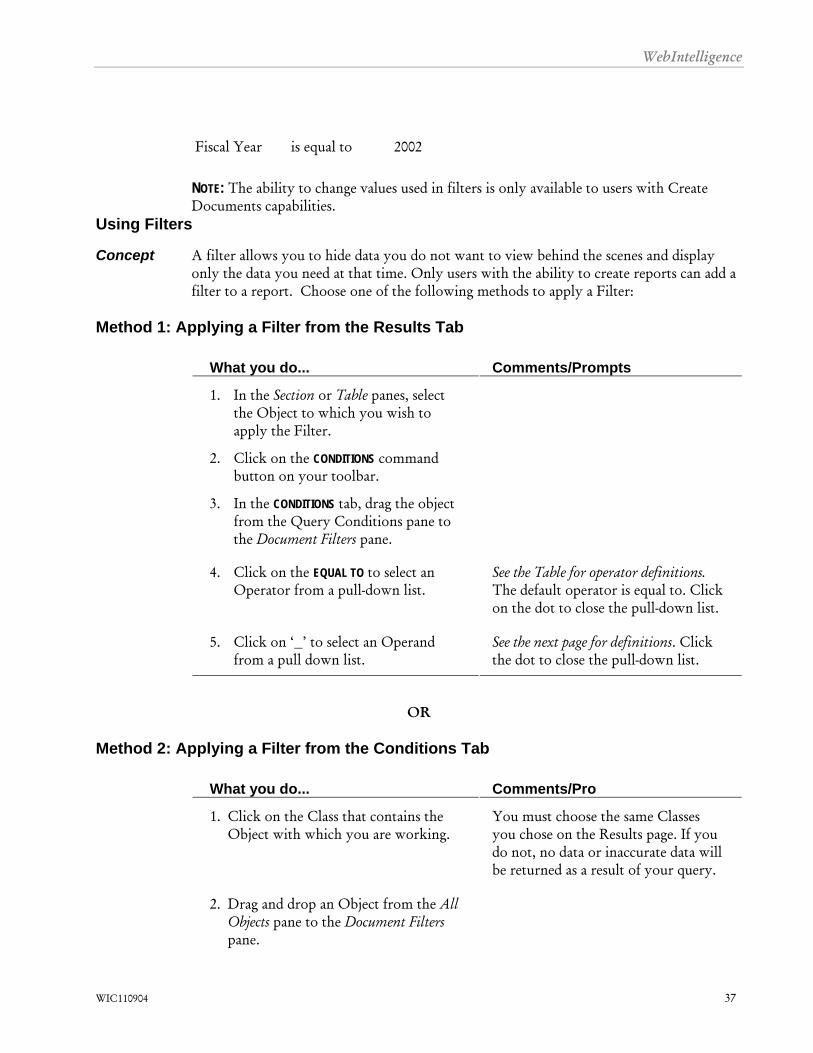
Fiscal Year is equal to 2002
NOTE: The ability to change values used in filters is only available to users with Create Documents capabilities.
Using Filters
Concept A filter allows you to hide data you do not want to view behind the scenes and display only the data you need at that time. Only users with the ability to create reports can add a filter to a report. Choose one of the following methods to apply a Filter:
Method 1: Applying a Filter from the Results Tab
What you do... Comments/Prompts
1. In the Section or Table panes, select the Object to which you wish to apply the Filter.
2. Click on the CONDITIONS command button on your toolbar.
3. In the CONDITIONS tab, drag the object from the Query Conditions pane to the Document Filters pane.
4. Click on the EQUAL TO to select an Operator from a pull-down list.
See the Table for operator definitions. The default operator is equal to. Click on the dot to close the pull-down list.
5. Click on ‘_’ to select an Operand from a pull down list.
See the next page for definitions. Click the dot to close the pull-down list.
OR
Method 2: Applying a Filter from the Conditions Tab
What you do... Comments/Pro
1. Click on the Class that contains the Object with which you are working.
You must choose the same Classes you chose on the Results page. If you do not, no data or inaccurate data will be returned as a result of your query.
2. Drag and drop an Object from the All Objects pane to the Document Filters pane.

WebIntelligence
WIC110904 38
3. Click on the EQUAL TO to select an Operator from a pull-down list.
See the Table for operator definitions. The default operator is equal to. Click on the dot to close the pull-down list.
4. Click on ‘_’ to select an Operand from a pull down list.
See the next page for definitions. Click the dot to close the pull-down list.
Operand Definitions
Enter a Constant
Enter a value in the space provided and press ENTER to “hard code” the chosen value into the query. Show list of values Choose from the list of existing values displayed and press ENTER to “hard code” the chosen value into the query.
Removing a Filter from the Conditions Tab
Concept You may need to remove a filter.
What you do... Comments/Prompts
1. Click on the Object to which the Filter is applied.
2. Press DELETE.
Applying Multiple Filters
When you specify more than one Filter, the logical operator which determines the relationship between the filters must be either And or Or. The default is And.
• Use And when both filters must be met, resulting in narrower results.
• Use Or when at least one of the filters must be met, resulting in broader results.
NOTE: To toggle between the And operator and the Or operator, double-click the OPERATOR button.
WebIntelligence
WIC110904 39
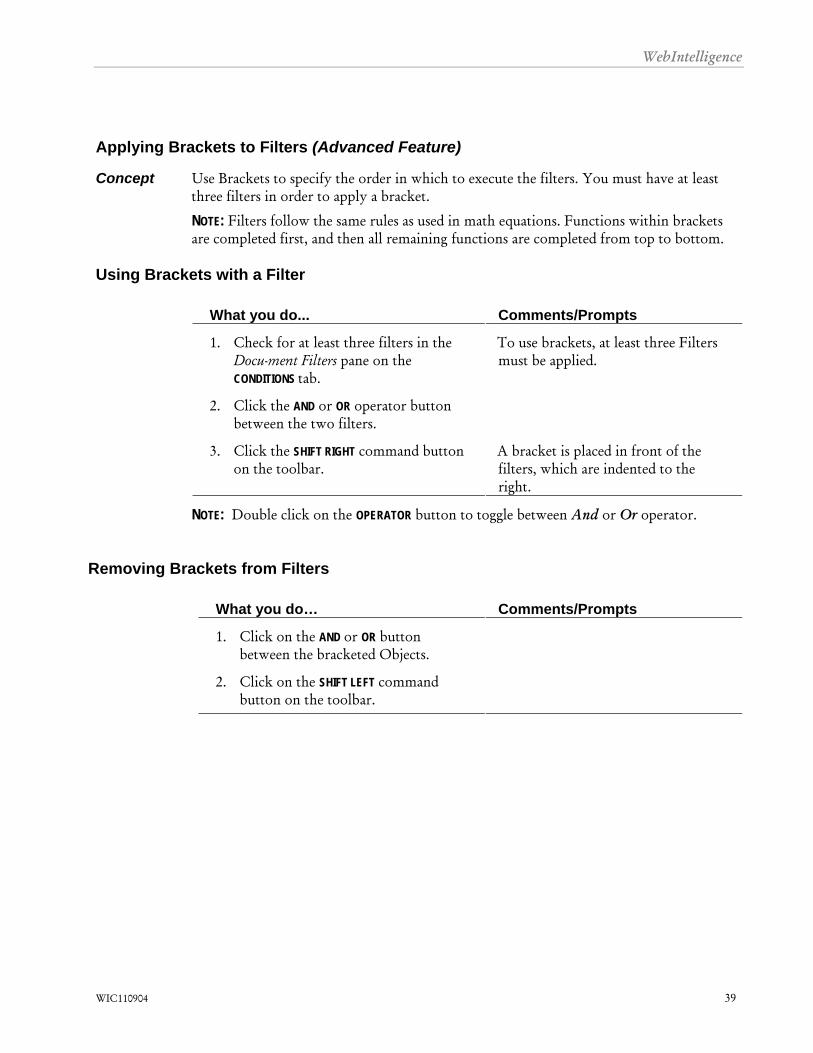
Applying Brackets to Filters (Advanced Feature)
Concept Use Brackets to specify the order in which to execute the filters. You must have at least three filters in order to apply a bracket.
NOTE: Filters follow the same rules as used in math equations. Functions within brackets are completed first, and then all remaining functions are completed from top to bottom.
Using Brackets with a Filter
What you do... Comments/Prompts
1. Check for at least three filters in the Docu-ment Filters pane on the CONDITIONS tab.
To use brackets, at least three Filters must be applied.
2. Click the AND or OR operator button between the two filters.
3. Click the SHIFT RIGHT command button on the toolbar.
A bracket is placed in front of the filters, which are indented to the right.
NOTE: Double click on the OPERATOR button to toggle between And or Or operator.
Removing Brackets from Filters
What you do… Comments/Prompts
1. Click on the AND or OR button between the bracketed Objects.
2. Click on the SHIFT LEFT command button on the toolbar.

WebIntelligence
WIC110904 40
Using Wildcards
Concept Wildcards are special characters that are used to denote “any single unknown character” or “any number of unknown characters”. Wildcards can only be used with the: Operator:
Matches Pattern or Does Not Match
And Operand:
Enter a Constant or Enter a New Prompt
_ [underscore] = any single unknown character
% [percent] = any number of unknown characters (including none)
NOTE: Users must narrow a query prior to using a leading % [percent]. Otherwise, this could slow the query and return partial results.
Calculations
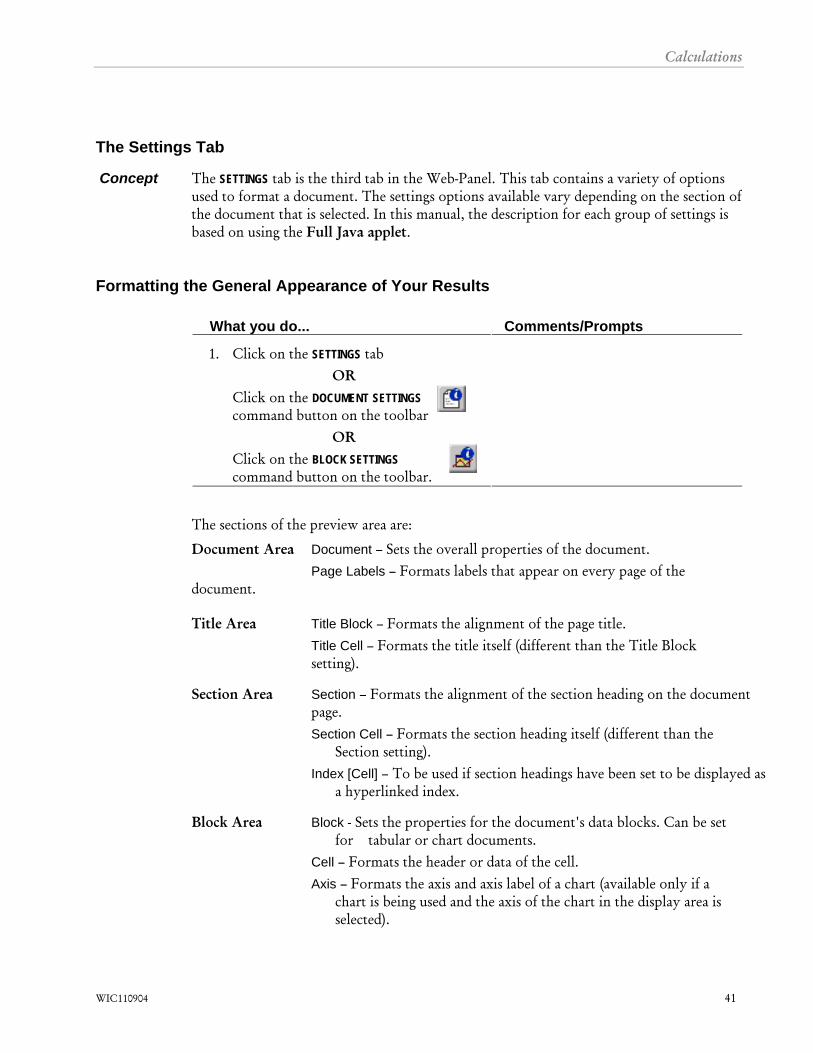
The Settings Tab
Concept The SETTINGS tab is the third tab in the Web-Panel. This tab contains a variety of options used to format a document. The settings options available vary depending on the section of the document that is selected. In this manual, the description for each group of settings is based on using the Full Java applet.
Formatting the General Appearance of Your Results
What you do... Comments/Prompts
1. Click on the SETTINGS tab OR
Click on the DOCUMENT SETTINGS command button on the toolbar
OR Click on the BLOCK SETTINGS command button on the toolbar.
The sections of the preview area are:
Document Area Document – Sets the overall properties of the document. Page Labels – Formats labels that appear on every page of the document.
Title Area Title Block – Formats the alignment of the page title. Title Cell – Formats the title itself (different than the Title Block setting).
Section Area Section – Formats the alignment of the section heading on the document page. Section Cell – Formats the section heading itself (different than the
Section setting). Index [Cell] – To be used if section headings have been set to be displayed as
a hyperlinked index.
Block Area Block - Sets the properties for the document's data blocks. Can be set for tabular or chart documents.
Cell – Formats the header or data of the cell. Axis – Formats the axis and axis label of a chart (available only if a
chart is being used and the axis of the chart in the display area is selected).
WIC110904 41
WebIntelligence
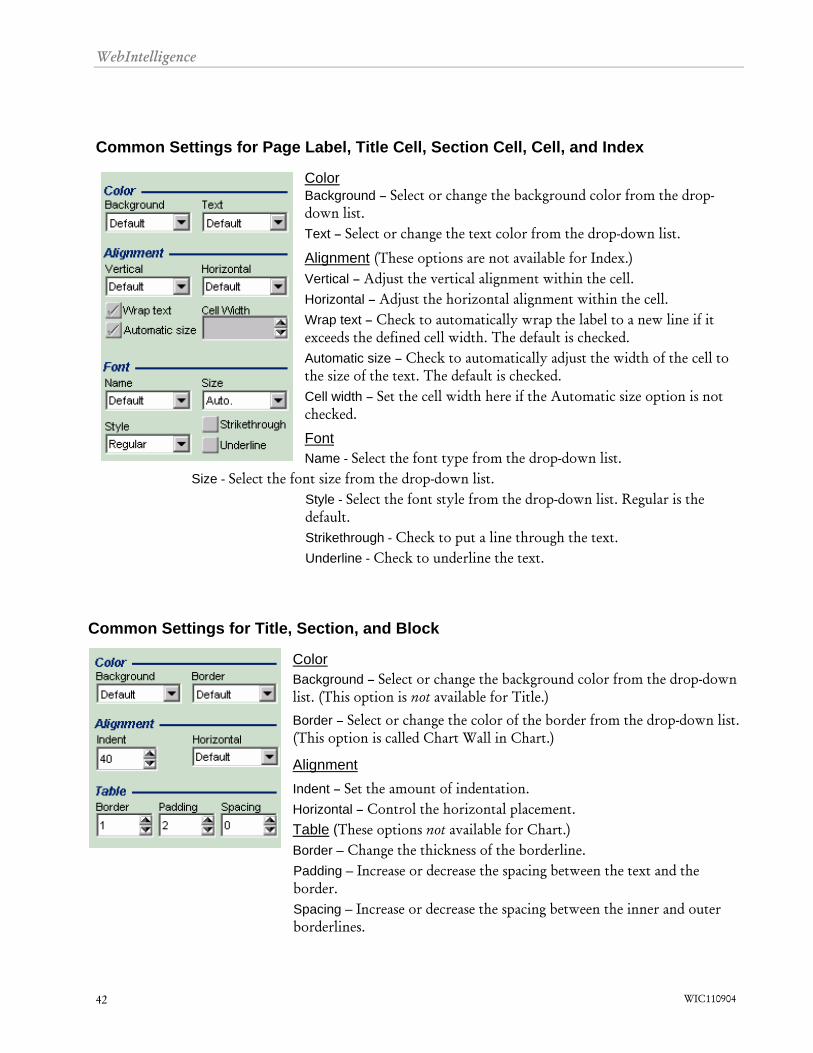
Common Settings for Page Label, Title Cell, Section Cell, Cell, and Index
Color Background – Select or change the background color from the drop-down list. Text – Select or change the text color from the drop-down list.
Alignment (These options are not available for Index.) Vertical – Adjust the vertical alignment within the cell. Horizontal – Adjust the horizontal alignment within the cell. Wrap text – Check to automatically wrap the label to a new line if it exceeds the defined cell width. The default is checked. Automatic size – Check to automatically adjust the width of the cell to the size of the text. The default is checked. Cell width – Set the cell width here if the Automatic size option is not checked.
Font Name - Select the font type from the drop-down list.
Size - Select the font size from the drop-down list. Style - Select the font style from the drop-down list. Regular is the default. Strikethrough - Check to put a line through the text. Underline - Check to underline the text.
Common Settings for Title, Section, and Block
Color Background – Select or change the background color from the drop-down list. (This option is not available for Title.)
Border – Select or change the color of the border from the drop-down list. (This option is called Chart Wall in Chart.)
Alignment Indent – Set the amount of indentation. Horizontal – Control the horizontal placement. Table (These options not available for Chart.) Border – Change the thickness of the borderline. Padding – Increase or decrease the spacing between the text and the border. Spacing – Increase or decrease the spacing between the inner and outer borderlines.
WIC110904 42
WebIntelligence
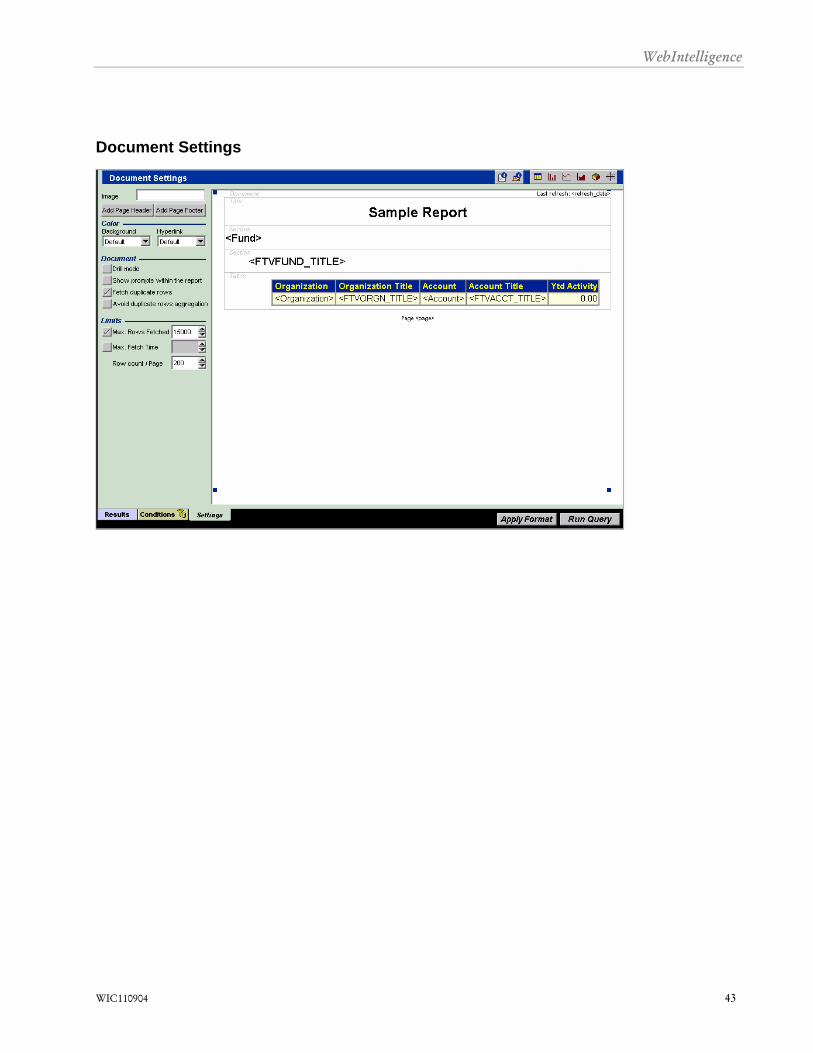
Document Settings
WIC110904 43

WebIntelligence
Document Settings
Concept When you click the SETTINGS tab, document settings are displayed by default on the left side of the tab. This sets the overall properties of the document. If another settings group is selected, you can switch back to document settings by clicking the area outside other document elements in the preview area.
Changing the Document Settings
What you do... Comments/Prompts
1. Click on DOCUMENT on the right side of the Settings panel,
OR Click on the area outside of the report on the right side of the Settings panel,
OR Click on the SHOW DOCUMENT SETTINGS command button on the toolbar.
2. Choose the format options from the left side of the Settings panel.
3. Press APPLY FORMAT to apply/view settings without re-running the query.
Additional Setting Options: Image – Display an image file on the document. Not recommended.
Add Page Header or Add Page Footer – Clicking this will display the page label settings.
Background – Select or change the background color for the entire document.
Hyperlink – Select or change the background color for the Hyperlink text.
Drill mode – Check to make the document drillable.
Show prompts within the document – Check to display all the prompts in a frame at the top of the document.
Fetch duplicate rows – Check to display records with duplicate values. The default is checked.
Avoid duplicate rows aggregation – Check to make sure that duplicate rows of data are not displayed.
Max. Rows Fetched – Limit the maximum number of rows to be fetched, check the option and enter a number. The default is checked with 15000 rows.
Max. Fetch Time – Limit the maximum number of seconds used to fetch the data, check the option and enter a number.
WIC110904 44
WebIntelligence
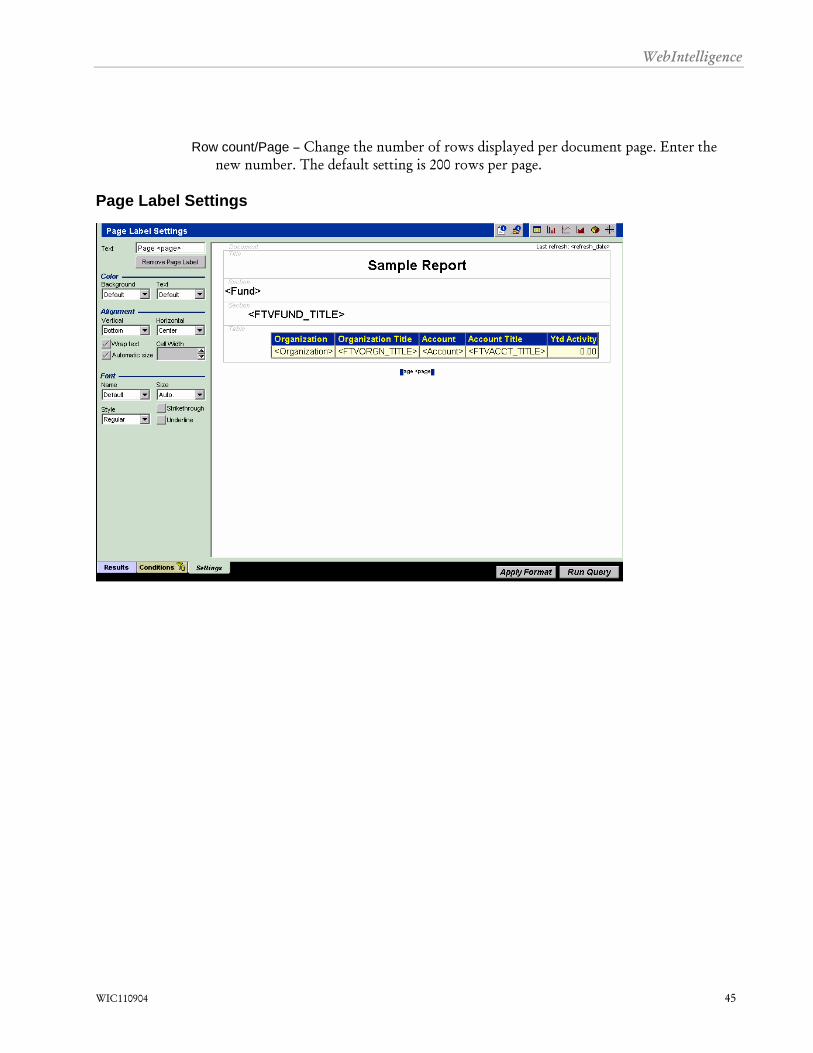
Row count/Page – Change the number of rows displayed per document page. Enter the new number. The default setting is 200 rows per page.
Page Label Settings
WIC110904 45
WebIntelligence
WIC110904 46
Page Label Settings
Concept You may want to alter the page label settings. This formats a label’s color, alignment and font.
Adding a Page Label
What you do... Comments/Prompts
1. Click on the page label in the document preview area.
2. Click on the ADD PAGE HEADER or ADD PAGE FOOTER button from the left side of the Settings panel.
3. Choose the format options from the left side of the Settings panel.
4. Press APPLY FORMAT to apply/view settings without re-running the query.
Changing Page Label Settings
What you do.... Comments/Prompts
1. Click on the page label in the document preview area.
2. Click on the label to change on the right side of the Settings panel.
3. Choose the format options from the left side of the Settings panel.
4. Press APPLY FORMAT to apply/view settings without re-running the query.
WebIntelligence
WIC110904 47
Removing a Page Label
What you do... Comments/Prompts
1. Click on the label to delete on the right side of the Settings panel.
2. Click on the REMOVE PAGE from the left side of the Settings panel.
3. Press APPLY FORMAT to apply/view settings without re-running the query.
NOTE: The default is to have the page numbering in the center footer and last refreshes date/time in the right-side header.
Additional Setting Options: Text – Enter the text to be used as the page label.
Remove Page Label – Click this button to delete the page label.

WebIntelligence
WIC110904 48
This page is intentionally left blank.
WebIntelligence
Title Settings
WIC110904 49
WebIntelligence
WIC110904 50
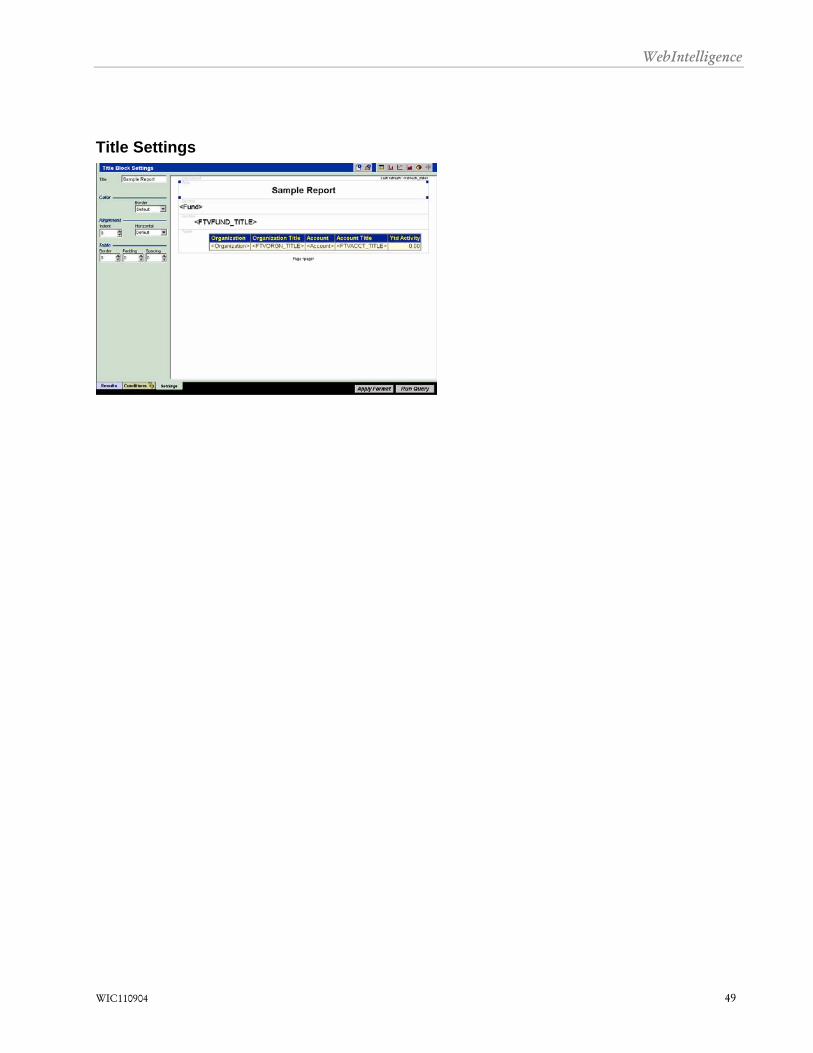
Title Settings
Concept You may need to customize the Title settings. Options include changing the Title’s location on the document page, changing the background color, and adding a border to the Title heading.
Changing the Title Settings
What you do... Comments/Prompts
1. Click on TITLE on the right side of the Settings panel.
2. Choose format options from the left side of the Settings panel.
3. Press APPLY FORMAT to apply/view settings without re-running the query.
Additional Setting Options Title – Enter the text to be used as the Title.
Adding a Title
What you do... Comments/Prompts
1. Click on TITLE on the right side of the Settings panel.
2. Type the text into the textbox on the left side of the Settings panel.
3. Press APPLY FORMAT to apply/view settings without re-running the query.
WebIntelligence
Title Cell Settings
WIC110904 51

WebIntelligence
WIC110904 52
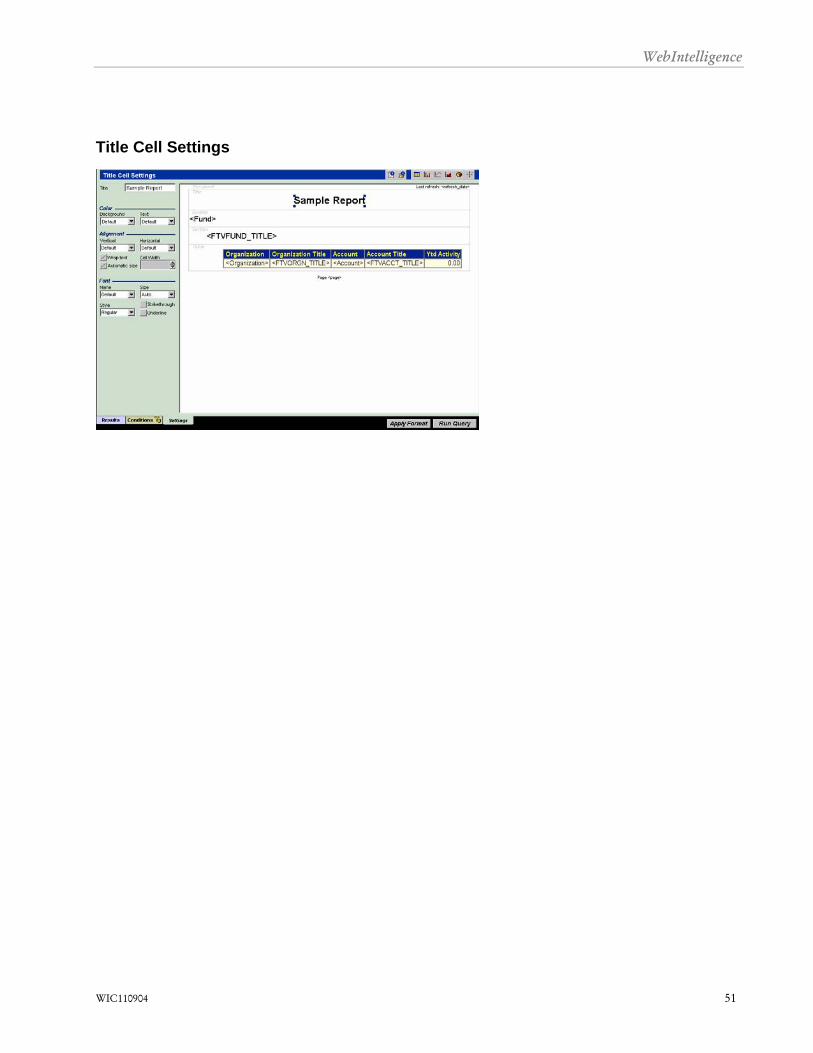
Title Cell Settings Concept You may need to customize the Title Cell settings. This formats the title itself, plus the
back-ground color, alignment within the cell, and font settings. This is different than the Title setting options described above.
Changing the Title Cell settings
What you do... Comments/Prompts
1. Click the actual title in the preview area to change the title cell settings.
2. Choose format options from the left side of the Settings panel.
3. Press APPLY FORMAT to apply/view settings without re-running the query.
NOTE: Click in the Title area to return to title block settings.
Additional Setting Options Title – Displays the Title text; can be modified.
WebIntelligence
Section Settings
Section Cell Settings
WIC110904 53
WebIntelligence
WIC110904 54
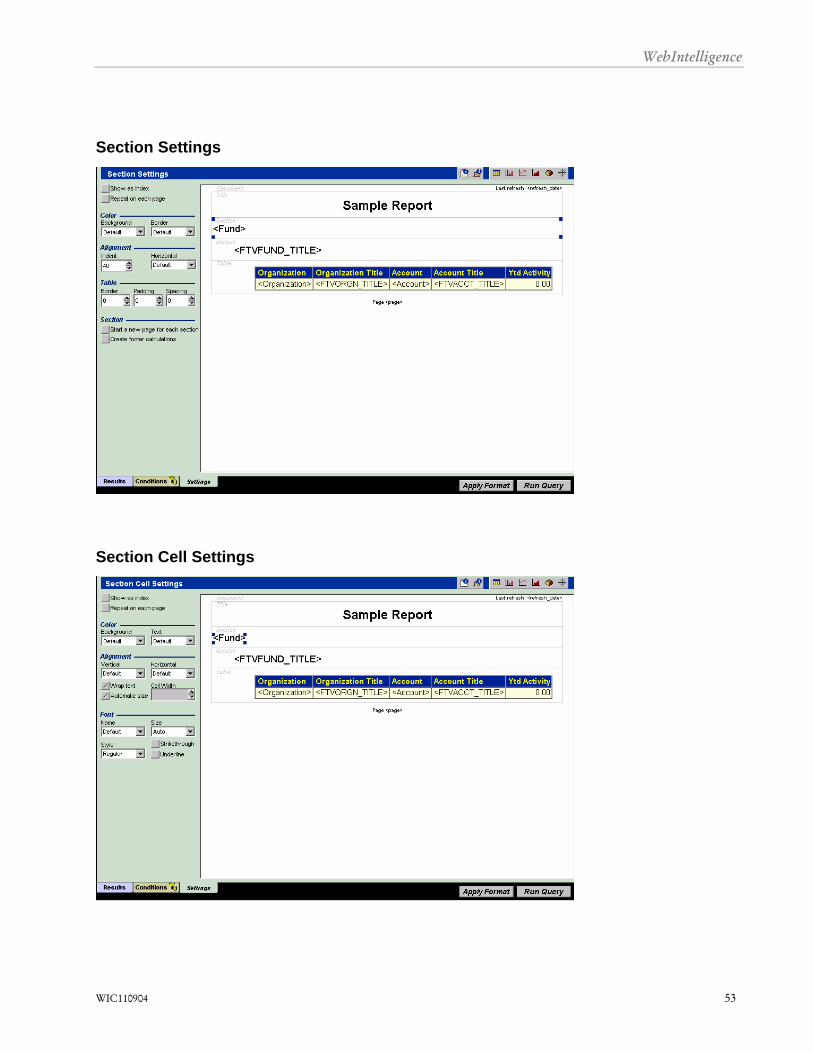
Section Settings
Concept You may want to alter the section settings. Options include formatting the Section’s placement on the document page and the background color. You can also add a border to the section.
NOTE: Different formatting options can be applied to individual section headings.
Changing the Section Settings
What you do... Comments/Prompts
1. Click on SECTION on the right side of the Settings panel.
2. Choose format options from the left side of the panel.
3. Press APPLY FORMAT to apply/view settings without re-running the query.
Additional Setting Options: Show as index – Check this option to display the section headings as a hyperlinked index
to the left of the block. Repeat on each page – Select this option to display the section header title on each page. Start a new page for each section – Check this option to display each section on a separate
page. Create footer calculations – Check this option to add a calculation footer to the bottom of
the table.
Section Cell Settings
Concept You may want to alter the section cell settings. Options include formatting the section heading, background color, alignment within the cell, and font settings. This is different than the Section settings described above.
NOTE: Different formatting options can be applied to individual section headings. Changing the Sections settings
What you do... Comments/Prompts
1. Click on section header (enclosed in <>) on the right side of the Settings panel.
2. Choose format options from the left side of the Settings panel.

WebIntelligence
WIC110904 55
3. Press APPLY FORMAT to apply/view settings without re-running the query.
WebIntelligence
Index Settings
WIC110904 56
WebIntelligence
WIC110904 57
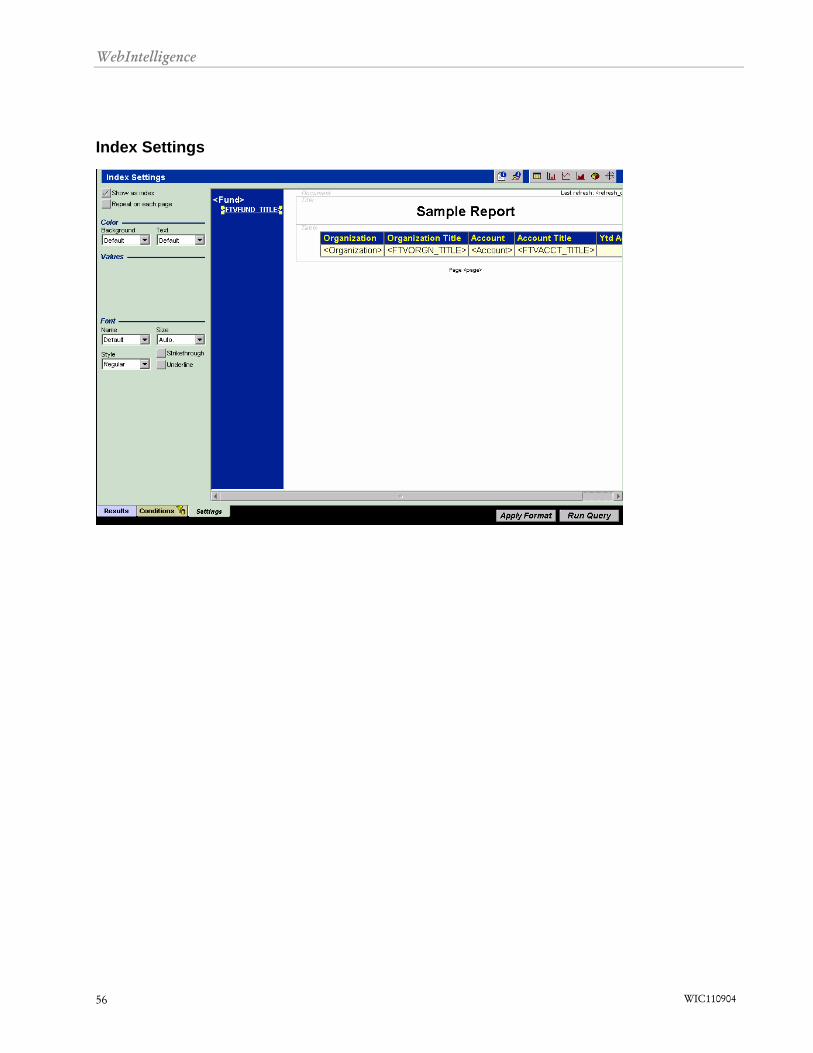
Index [Cell] Settings
Concept If the section headings are set to display as a hyperlinked index, this formats the font, style and color of the text, and its background color.
Changing the Index [Cell] settings
What you do... Comments/Prompts
1. Click on INDEX SECTION (enclosed in <>) in the column to the left of the preview block on the right side of the Settings panel.
2. Choose format options from the left side of the Settings panel.
3. Press APPLY FORMAT to apply/view settings without re-running the query.
WebIntelligence
Block Settings
Chart Settings
WIC110904 58
WebIntelligence
WIC110904 59
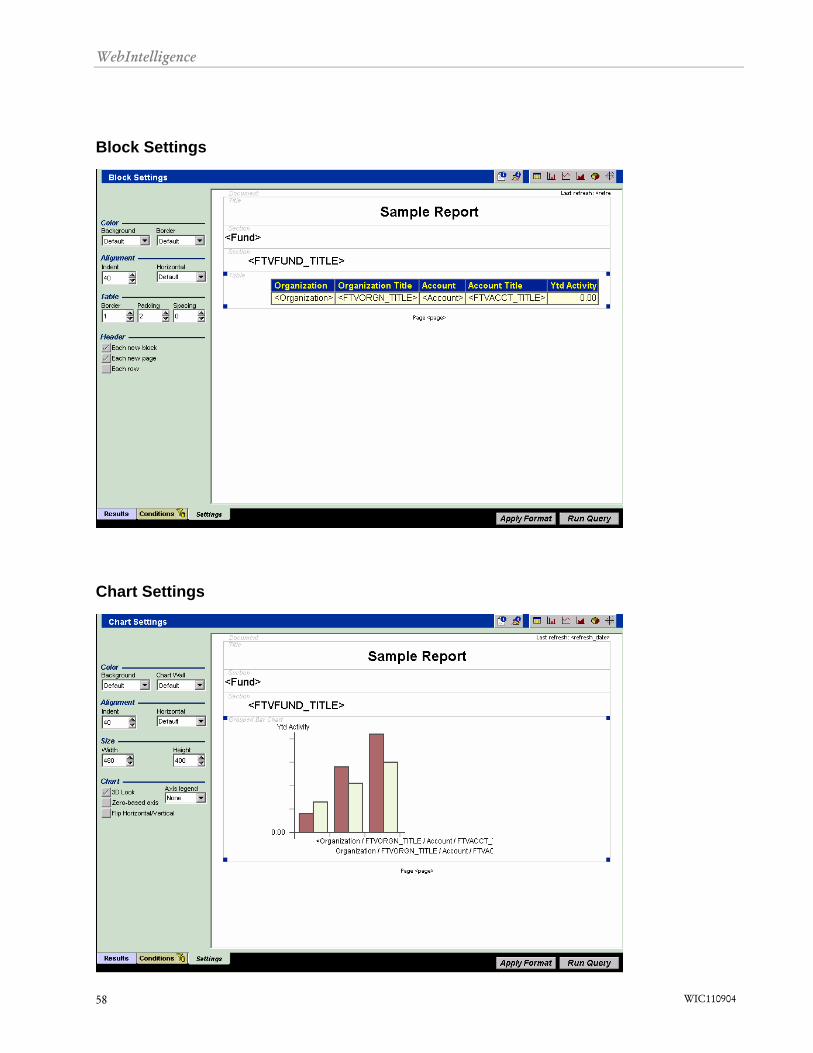
Block Settings
Concept Block Settings sets the properties for the document's data blocks and the cells within a particular block. They can be set for tabular or chart documents. Many block settings depend on the type of document being formatted. Therefore, the options described below will not all be seen at the same time.
If formatting a table, the preview area is labeled Table, and the block settings area contains
table header options. However, if formatting a chart, the block settings area contains options for displaying walls or a floor with the bar.
Changing the Block Settings
What you do... Comments/Prompts
1. Click on BLOCK NAME on the right side of the Settings panel
OR Click on the BLOCK SETTINGS command button on the toolbar.
Settings change to block settings or chart settings. This group of options formats the placement of the body of the data (which can be a table or chart) on the document page, the background color and a border.
2. Choose format options from the left side of the Settings panel.
3. Press APPLY FORMAT to apply/view settings without re-running the query.
Additional Setting Options: Block settings for tabular documents (Table, Financial, Form or Cross tab)
Each new block - Displays the header only at the top of each new block (not available for Form.) Each row – Displays the header above each row of data in the document (not available for Form or Cross tab.)
Block settings for chart documents
Width – Changes the width of the chart. Height – Changes the height of the chart. Chart options (available for non-3 dimensional charts only):
3D Look – Gives the chart a 3D look. Zero-based Axis – Forces the axis to start at zero (not available for pie, doughnut,
polar, and scatter charts.) Flip horizontal/vertical – Flips the horizontal and vertical axes (not available for pie,
doughnut, polar, and scatter charts.) Axis Legend – Displays the legend box. Default setting is none, except for pie and
doughnut, which is vertical (available for 3 dimensional charts only.)
WebIntelligence
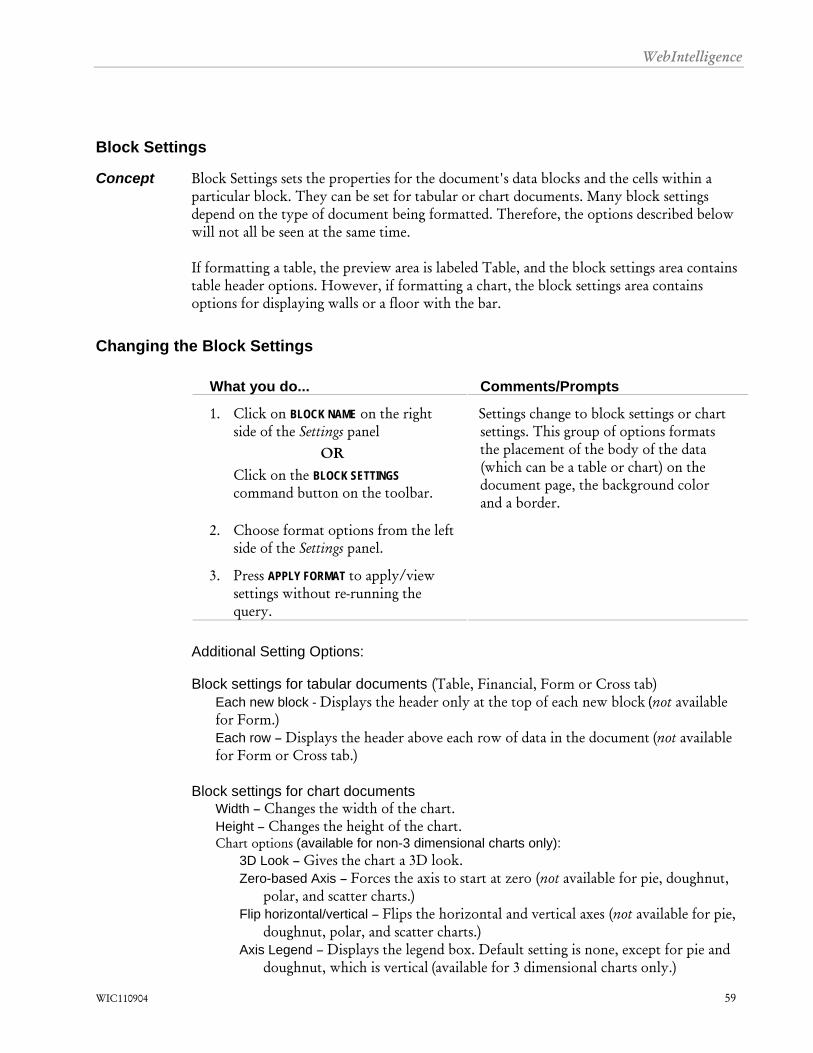
Show floor – Displays the chart floor; selected by default. Show left wall – Displays a left wall with the chart; selected by default. Show right wall – Displays a right wall with the chart; selected by default.
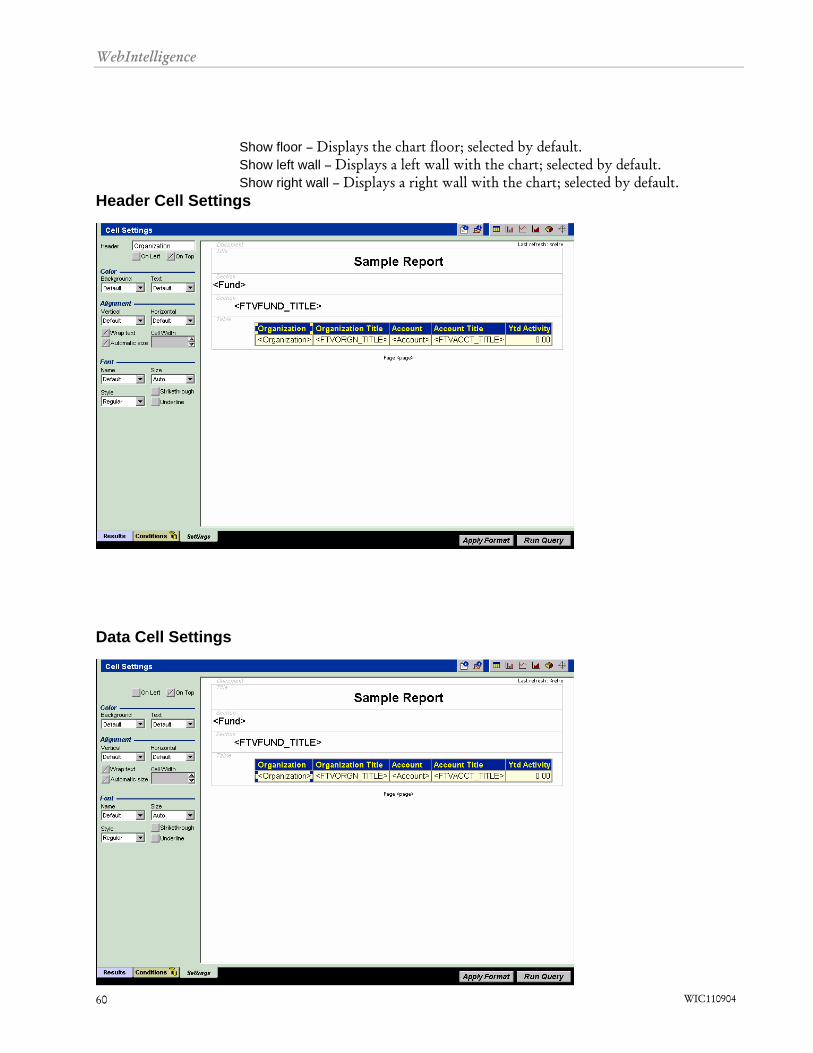
Header Cell Settings
Data Cell Settings
WIC110904 60

WebIntelligence
WIC110904 61

WebIntelligence
WIC110904 62
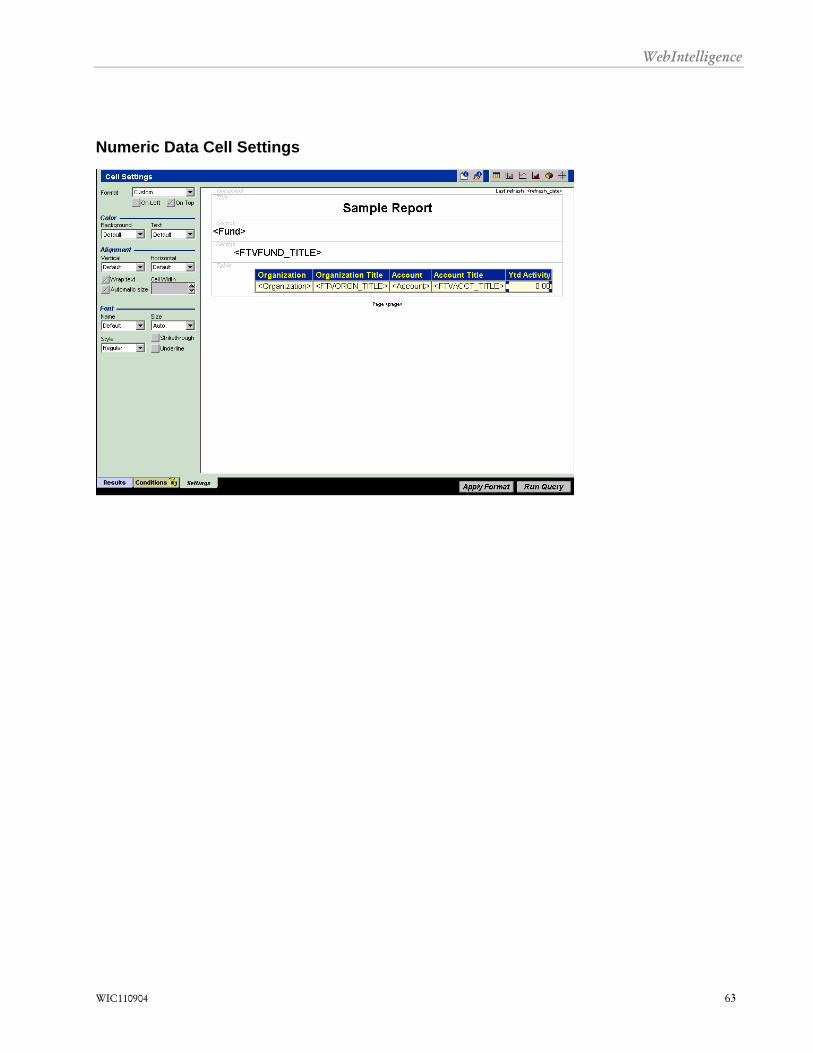
Cell Settings
Concept You may want to change the Cell settings. Options include formatting the background color, cell alignment, and font settings.
Changing a Header Cell Setting
What you do... Comments/Prompts
1. Click on HEADER CELL on the right side of the Settings panel.
2. Choose format options from the left side of the Settings panel.
3. Press APPLY FORMAT to apply/view settings without re-running the query.
NOTE: The header box appears only when a header cell is selected. A new name can be typed in the header box to change the existing header.
Changing a Text Data Cell Setting
What you do... Comments/Prompts
1. Click on DATA CELL (enclosed in <>) on the right side of the Settings panel.
2. Choose format options from the left side of the Settings panel.
3. Press APPLY FORMAT to apply/view settings without re-running the query.
WebIntelligence
Numeric Data Cell Settings
WIC110904 63
WebIntelligence
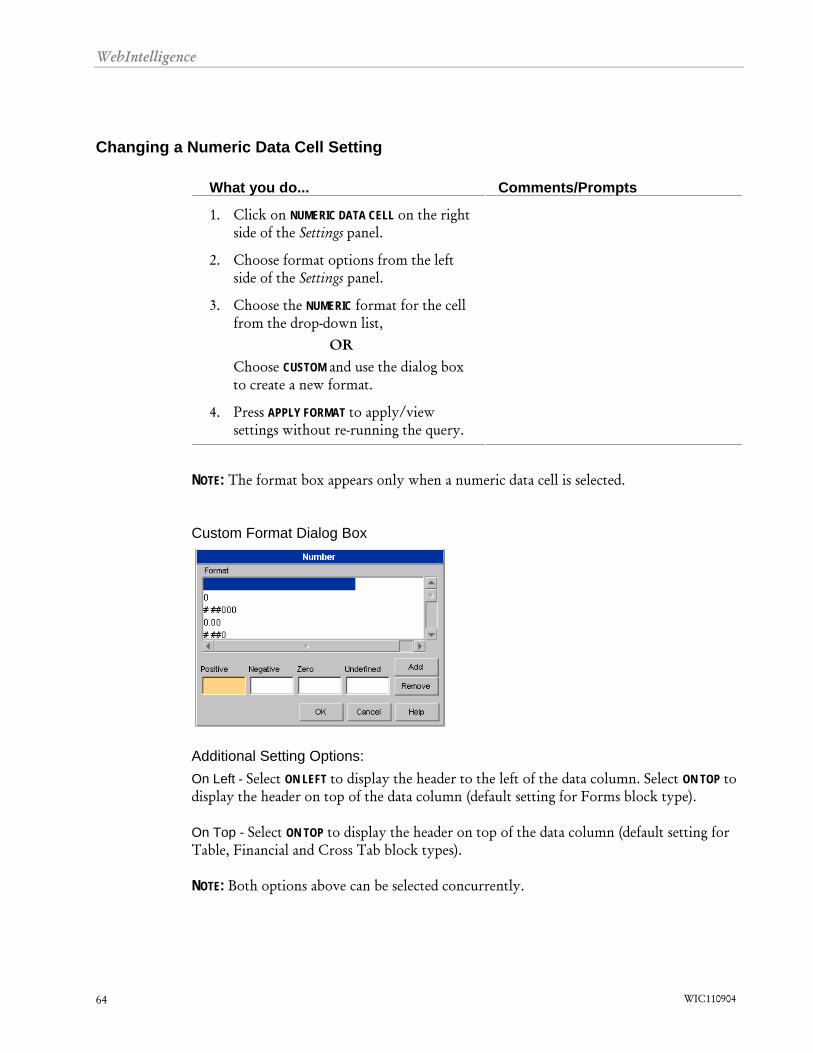
Changing a Numeric Data Cell Setting
What you do... Comments/Prompts
1. Click on NUMERIC DATA CELL on the right side of the Settings panel.
2. Choose format options from the left side of the Settings panel.
3. Choose the NUMERIC format for the cell from the drop-down list,
OR Choose CUSTOM and use the dialog box to create a new format.
4. Press APPLY FORMAT to apply/view settings without re-running the query.
NOTE: The format box appears only when a numeric data cell is selected. Custom Format Dialog Box
Additional Setting Options: On Left - Select ON LEFT to display the header to the left of the data column. Select ON TOP to display the header on top of the data column (default setting for Forms block type).
On Top - Select ON TOP to display the header on top of the data column (default setting for Table, Financial and Cross Tab block types). NOTE: Both options above can be selected concurrently.
WIC110904 64
WebIntelligence
Block Type
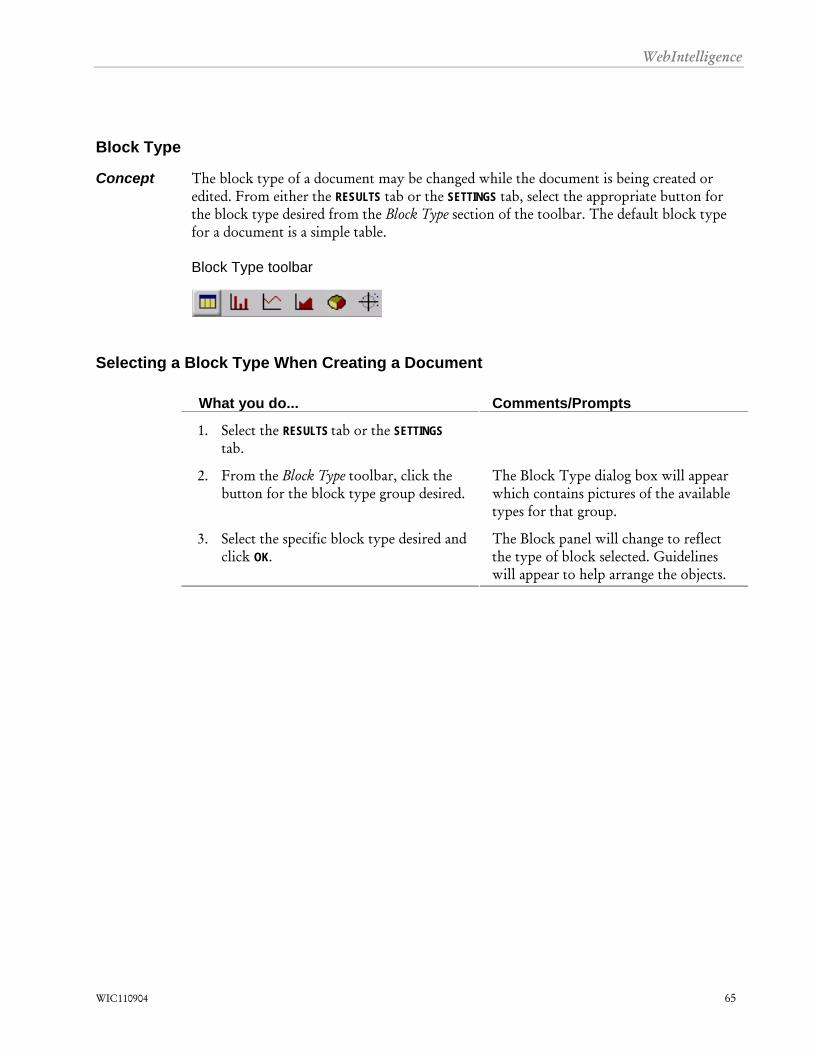
Concept The block type of a document may be changed while the document is being created or edited. From either the RESULTS tab or the SETTINGS tab, select the appropriate button for the block type desired from the Block Type section of the toolbar. The default block type for a document is a simple table.
Block Type toolbar
Selecting a Block Type When Creating a Document
What you do... Comments/Prompts
1. Select the RESULTS tab or the SETTINGS tab.
2. From the Block Type toolbar, click the button for the block type group desired.
The Block Type dialog box will appear which contains pictures of the available types for that group.
3. Select the specific block type desired and click OK.
The Block panel will change to reflect the type of block selected. Guidelines will appear to help arrange the objects.
WIC110904 65
WebIntelligence
WIC110904 66
Changing a Block Type
Concept Once a block type has been selected, it can be changed at any time.
Changing a Block Type while Editing a Document
What you do... Comments/Prompts
1. Select the RESULTS or SETTINGS tab.
2. Choose a group type from the Block Type toolbar.
3. From the dialog box, select the new block type desired. Click OK.
The data will be displayed using the new Block Type.
OR
Changing a Block Type while Viewing a WebIntelligence Document
What you do... Comments/Prompts
1. To display the Block Type buttons, click on the < arrow at the upper right-hand corner of the page. Toggling the arrow will show or hide the toolbar.
2. Click one of the Block Type buttons displayed on the right side of the page.
The data will be displayed using the new Block Type.
NOTE: This feature is not available in BusinessObjects documents.

WebIntelligence
Block Type Dialog Boxes
Table
Grouped Bar Chart
Mixed Line Chart
Area Chart
Pie Chart
Radar Line Chart
WIC110904 67
WebIntelligence
Block Types
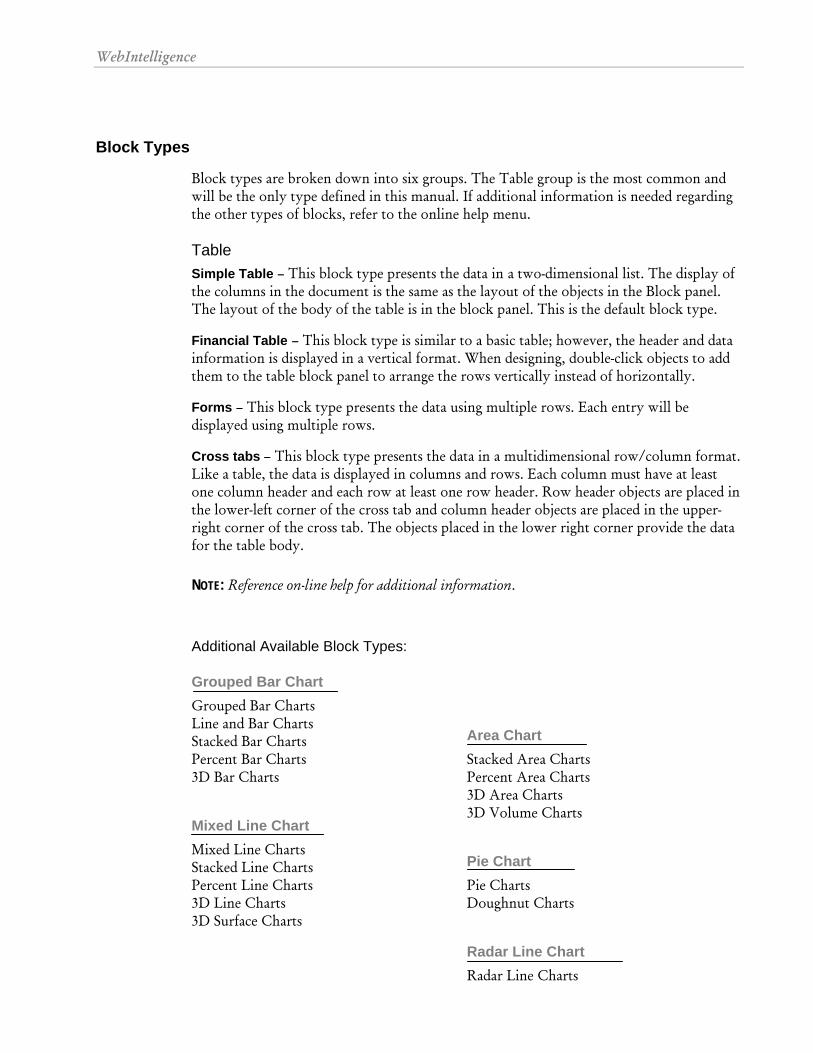
Block types are broken down into six groups. The Table group is the most common and will be the only type defined in this manual. If additional information is needed regarding the other types of blocks, refer to the online help menu.
Table Simple Table – This block type presents the data in a two-dimensional list. The display of the columns in the document is the same as the layout of the objects in the Block panel. The layout of the body of the table is in the block panel. This is the default block type.
Financial Table – This block type is similar to a basic table; however, the header and data information is displayed in a vertical format. When designing, double-click objects to add them to the table block panel to arrange the rows vertically instead of horizontally.
Forms – This block type presents the data using multiple rows. Each entry will be displayed using multiple rows.
Cross tabs – This block type presents the data in a multidimensional row/column format. Like a table, the data is displayed in columns and rows. Each column must have at least one column header and each row at least one row header. Row header objects are placed in the lower-left corner of the cross tab and column header objects are placed in the upper-right corner of the cross tab. The objects placed in the lower right corner provide the data for the table body.
NOTE: Reference on-line help for additional information. Additional Available Block Types:
Grouped Bar Chart Grouped Bar Charts Line and Bar Charts Stacked Bar Charts Percent Bar Charts 3D Bar Charts
Mixed Line Chart Mixed Line Charts Stacked Line Charts Percent Line Charts 3D Line Charts 3D Surface Charts
Area Chart Stacked Area Charts Percent Area Charts 3D Area Charts 3D Volume Charts
Pie Chart Pie Charts Doughnut Charts
Radar Line Chart Radar Line Charts
WIC110904 68

WebIntelligence
WIC110904 69
Stacked Radar Area Charts Polar Charts Simple Scatter Charts
WebIntelligence
WIC110904 70
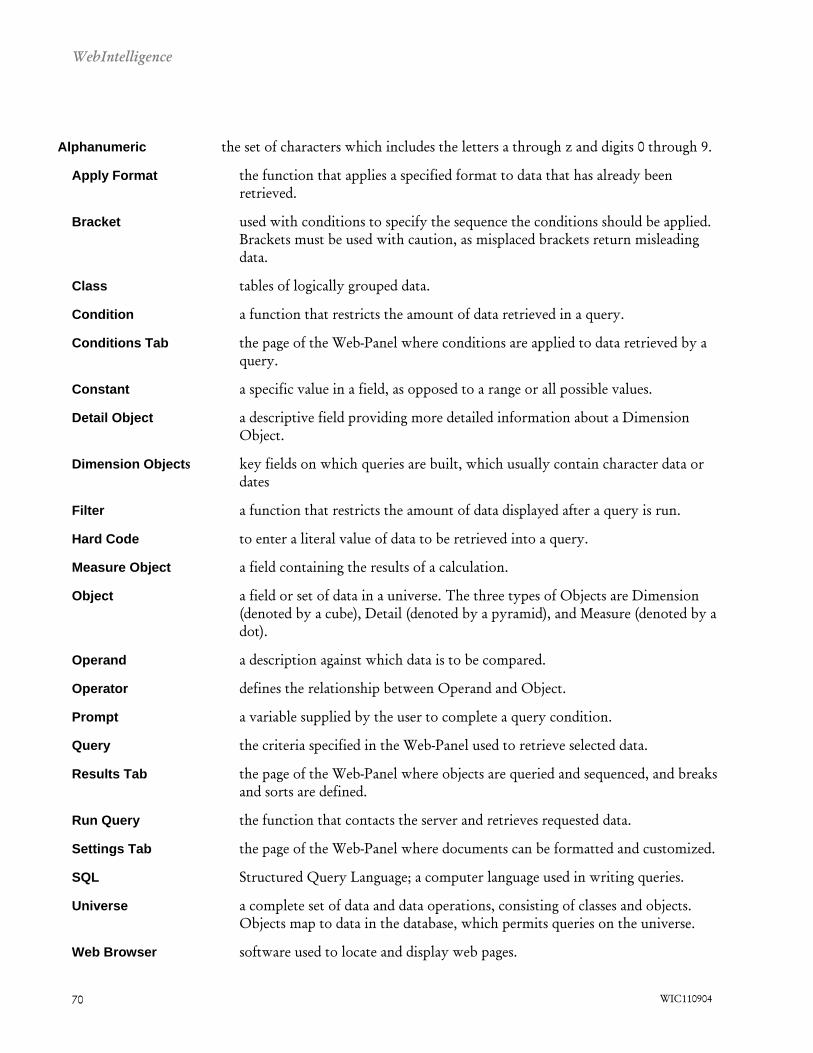
Alphanumeric the set of characters which includes the letters a through z and digits 0 through 9.
Apply Format the function that applies a specified format to data that has already been retrieved.
Bracket used with conditions to specify the sequence the conditions should be applied. Brackets must be used with caution, as misplaced brackets return misleading data.
Class tables of logically grouped data.
Condition a function that restricts the amount of data retrieved in a query.
Conditions Tab the page of the Web-Panel where conditions are applied to data retrieved by a query.
Constant a specific value in a field, as opposed to a range or all possible values.
Detail Object a descriptive field providing more detailed information about a Dimension Object.
Dimension Objects key fields on which queries are built, which usually contain character data or dates
Filter a function that restricts the amount of data displayed after a query is run.
Hard Code to enter a literal value of data to be retrieved into a query.
Measure Object a field containing the results of a calculation.
Object a field or set of data in a universe. The three types of Objects are Dimension (denoted by a cube), Detail (denoted by a pyramid), and Measure (denoted by a dot).
Operand a description against which data is to be compared.
Operator defines the relationship between Operand and Object.
Prompt a variable supplied by the user to complete a query condition.
Query the criteria specified in the Web-Panel used to retrieve selected data.
Results Tab the page of the Web-Panel where objects are queried and sequenced, and breaks and sorts are defined.
Run Query the function that contacts the server and retrieves requested data.
Settings Tab the page of the Web-Panel where documents can be formatted and customized.
SQL Structured Query Language; a computer language used in writing queries.
Universe a complete set of data and data operations, consisting of classes and objects. Objects map to data in the database, which permits queries on the universe.
Web Browser software used to locate and display web pages.

WebIntelligence
WIC110904 71
Web-Panel the interface used to build queries (RESULTS tab), apply conditions (CONDITIONS tab), and format the resulting documents (SETTINGS tab).
Wildcards symbols representing one (_) or more (%) unknown characters, enabling selection of multiple values with a single specification.


