34
Weblogic Server 12c Installation Guide Prepared by: Rajavardhan Reddy
| Date post: | 14-Jul-2015 |
| Category: |
Education |
| Upload: | rajavardhan-reddy |
| View: | 499 times |
| Download: | 2 times |

Weblogic Server 12c
Installation Guide
Prepared by:Rajavardhan Reddy

Index
1.Installation Overview
2.Preparing for installation
a)Type of installers
b)Product Distribution
c)Installation Prerequisites
d) Selecting Directories for Installation
3.Installation Modes
a)GUI Mode Installation
b)Console Mode Installation
c)Silent Mode Installation
4.Post-Installation Tasks
5.Uninstalling the software

Installation Overview
S No Task Description
1Obtain the appropriate installation file depending on the platform Can be obtained through DVD or downloaded file.
2 Determine System Requirements Hard Disk,RAM,Processor,TEMP need to checked.
3 Determine Mode of Installation Can be installed through GUI, Console or Silent modes
4 Determine Installation type Custom or typical installation types can be chosen.
5 Install the softwareRun the installation program in the desired installation mode.
(Note: In each installation mode, we have the option to create a detailed installation log.)
6 Create a Weblogic domainCan be created through fusion middleware config wizard,WLST or unpack command.

Preparing for installation
• Type of installers
Installation Type Description
OS-specific Package installer
This type of installer is a standalone version of the installation programthat includes the JDKs for the selected platform. The installer may beeither an .exe file or a .bin file, depending on the selected platform
Note: Silent mode installation is supported only for Package installers.
Generic Package installer
This type of installer is a .jar file. It does not include the JRockit SDK andSun JDK. We can use this type of installer to install the product on anysupported platform on which Java is already installed.
Upgrade installerUpgrade installers allow us to upgrade an existing WebLogic Serverinstallation to the current patch release.
Since WebLogic Server 12.1.1 is a new major release, there is no upgrade installer for this release.
Development-only and supplemental installers
The development-only installer is a ZIP file that we extract to aMiddleware home directory to create a WebLogic Server installation. Itcontains a WebLogic Server installation that includes all of the artifactsneeded for development.
We must not use this for WebLogic Server installation for production. This is also available to provide additional features, such as server examples, for a development-only installation.

Product Distribution
The WebLogic Server installers are distributed in the following ways:
WebLogic Server installation DVD
Download from the Oracle Software Delivery Cloud website at http://edelivery.oracle.com/.
Only the OS-specific Package installers and Generic Package installers are available from this site; Upgrade installers are not available here. These files are downloaded as ZIP files.
Download from the Oracle Technology Network Web site.
The OS-specific Package and Generic Package installers are available from this site; Upgrade installers are not available here. The downloaded file is a .bin, .jar, or .exe file, depending on your platform.

Installation Prerequisites
System Requirements
WebLogic Server Installation User
Before we start the Installation program
Temporary Disk Space Requirements
Administrator Privileges
About Installing Node Manager as a Windows Service.

System Requirements
Component Requirement
Processor 1-GHz CPU
Hard disk drive
A complete installation (including SDKs) requires approximately 3.9 GB of disk space.This includes temporary disk space that is needed during installation. Depending on thecomponents you choose to install, and the installer that you are using, less disk spacemay be needed.
Memory A minimum of 1 GB RAM, although Oracle recommends 2 GB of RAM.
Color bit depth displayFor graphical-mode installation, 8-bit color depth (256 colors) is required. For console-mode and silent-mode installation, there is no color bit depth requirement.
JDK
The installation program requires a JRE to run. A JRE is bundled in the Windows 32-bitand Linux x86 installation programs, as well as in some UNIX installation programs(those with file names ending in .bin).For other platforms, the installation programdoes not install a JDK. File names for these installation programs end in .jar. To run the.jar installation programs, we must have the appropriate version of the JDK installed onour system, and include the bin directory of the JDK at the beginning of the PATHvariable definition.
Note: It is important that we use a JDK because the installation process assigns values to JAVA_HOME and relatedvariables to point to the JDK directory. All scripts installed by the installation program use this JDK by default,including scripts to start sample applications, the Configuration Wizard, and other development tools.

WebLogic Server Installation User
If we are using the Generic Package installer or the Linux 64-bit installer, Oracle recommends that to set umask to 027 on our system prior to installation. This ensures that WebLogic Server file permissions will be set properly during installation. We can use the following command:
umask 027
We must enter this command in the same terminal window from which you plan to run the WebLogic Server installer.
When installing WebLogic Server on a UNIX or Linux operating system, do not run the installation program as the root user.
When using a WebLogic Server(WLS) Upgrade installer to upgrade an existing WLS installation on Linux or UNIX operating systems, we must run the Upgrade installer using the same user ID as was used to perform the initial WLS installation.
On Windows systems, if we want the option to create the Start menu shortcuts in the All Users folder, or in the Local User's Start menu folder, we must use an account that has administrator privileges when you log in to the target system.

Before We Start the Installation Program
Before we start installation If we are using the Generic Package installer or the Linux 64-bit installer, Oracle recommends thatto set umask to 027 on our system prior to installation. This ensures that WebLogic Server file permissions will be set properlyduring installation. We can use the following command:
umask 027
If we are installing the software in graphical mode on a UNIX or Linux machine, we must set the DISPLAY environment variable before running the installer.
If we want to use WebLogic Server with JDK 7, we must make sure to implement the changes that supports WLS installation.
If we are using a .jar installer, replace JAVA_HOME with the installation location of the supported JDK we installed for our platform.
Make sure that we are installing our product on a supported hardware or software configuration.
We cannot reinstall a product on top of a previously installed version of the same product, either in the same Middleware home directory or in the same file location.
We can, however, add products and product components to an existing installation and can also install patches to an existing installation using an Upgrade installer or Smart Update.
If we are adding components to an existing installation of WebLogic Server, we should shut down any running servers before starting the installation.

Temporary Disk Space Requirements
The installation program uses a temporary directory into which it extracts the files that are needed to install the software on the target system. During the installation process, our temporary directory must contain sufficient space to accommodate the compressed JRE bundled with the installation program.
By default, the installation program uses the following temporary directories:
Windows platforms—directory referenced by the TMP system variable
UNIX platforms—system-dependent temporary directory
Note: If we do not have enough temporary space to run the installation program, we are prompted to specify an alternate directory or exit the installation program.
Setting Up the Temporary Directory
Platform Procedure
Windows
Do one of the following:1) Set the TMP system variable to a directory of your choice.2) If you run the installation program from the command line, include the-Djava.io.tmpdir=tmpdirpath option, replacing tmpdirpath with the full path of the directory youwant to designate as a temporary storage area for the installation program.
Eg : wls1036_win32.exe -mode=console -Djava.io.tmpdir=C:\Temp
UNIXEnter the following option on the command line when we start the installation :-Djava.io.tmpdir=tmpdirpath
Here, tmpdirpath is the full path of the directory we want to designate as a temporary storage area for theinstallation program.

Administrator Privileges
• On Windows systems, if we want the option to create the Start menu shortcuts in the All Users folder, or in the Local User's Start menu folder, we must use an account that has administrator privileges when you log in to the target system.
Available Shortcut Options
If a user without administrator privileges installs the software, the Start menu entries are created in the user's local Start menu folder.
Option Behavior
All Users
All users registered on the machine are provided with access to the installed software. Subsequently, if users without administrator privileges use the Configuration Wizard from this installation to create WebLogic domains, Start menu shortcuts to the domains are not created. In this case, users can manually create shortcuts in their local Start menu folders, if desired.
Local UserOther users registered on this machine do not have access to the Start menu entries for this
installation

About Installing Node Manager as a Windows Service
When installing your software on a Windows platform, we can optionally install WebLogic Server Node Manager as a Windows service.
The WebLogic Server Node Manager is used to:
Start and stop server instances—both Administration Servers and Managed Servers—remotely.
Monitor the self-reported health of servers and automatically kill server instances whose health state is FAILED.
Migrate servers in a WebLogic Server cluster.
Automatically restart servers that have the "failed" health state, or have shut down unexpectedly due to a system crash or reboot.
In a multi-machine environment, we must install Node Manager on each machine that hosts Managed Server and Administration Server instances of WebLogic Server.
To install the Node Manager Windows Service during an initial installation, we must select a Custom installation.
• Note: When installing in silent mode, we do not specify a Custom installation. Set the INSTALL_NODE_MANAGER_SERVICE data-value to yes to install the service.
If we do not install the service during the initial installation, we can install it after installation using the installNodeMgrSvc.cmd command. We can also uninstall it at any time using the uninstallNodeMgrSvc.cmd command.

Selecting Directories for Installation
During the installation process, we must specify locations for the following home directories:
Oracle Fusion Middleware
WebLogic Server, Coherence (if applicable)
The user_projects directory is not present until we create our first WebLogic domain.

Middleware Home Directory-Considerations
• When we are installing WebLogic Server, we are prompted to choose an existing Middleware home(MW_HOME) directory or specify a path to create a new Middleware home directory.
• MW_HOME directory servers as a repository (central support directory )for common files that are used by multiple Fusion Middleware products installed on the same machine.
• The files in the Middleware home directory are essential to ensuring that WebLogic Server operates correctly on your system. They facilitate checking of cross-product dependencies during installation.
Middleware Home Considerations
Do not include spaces in the name of your Middleware home directory. CLASSPATH may not be resolved if the name of the directory contains spaces.
We can install only one instance of each version of a WebLogic Server product in a single Middleware home directory.
If we need to maintain separate versions of WLS on the same machine, each version must be in its own Middleware home directory.
The directories in the Middleware home directory vary depending on the installer that we are using and the products we selected for installation.

Multiple Home Directories Scenarios
We may need to maintain multiple Middleware home directories in the following situations:
We may prefer to maintain separate development and production environments, with a separate product stack for each. With two directories, we can update our development environment without modifying the production environment until we are ready to do so.
We may want to maintain two different versions of WebLogic Server at the same time.
Note: We do not have to create a second Middleware home directory when using an Upgrade installer to upgrade an existing WebLogic Server installation to the current patch release.
The registry.xml file in our WebLogic Server installation is corrupted.
After installation, the shared modules directory would contain multiple versions of one or more of the same third-party products.

Installation Modes
Graphical mode
Graphical-mode installation is an interactive, GUI-based method for installing our software. It can be run on both Windows and UNIX systems.
Console mode
Console-mode installation is an interactive, text-based method for installing our software from the command line, on either a UNIX system or a Windows system.
Silent mode
Silent-mode installation is a non-interactive method of installing software. We must use an XML properties file to specify the installation options. We can run silent-mode installation from either a script or from the command line. Silent-mode installation allows us to define the installation configuration only once, and then use that configuration to duplicate the installation on many machines.
Type of Installation
When performing a graphical mode or console mode installation, the installation program provides two types of installation
1. Typical
2. Custom
Typical
In a Typical installation, most of the components that are included in the installation program are installed.
Custom
In a Custom installation, we can choose the software components you want to install on our system.
Sample domains preconfigured to use the Derby database are created only for the installed components.
On Windows and Linux systems, two JDKs are installed:
JRockit 1.6.0 JDK
Sun JDK 1.6.0

Generating a Verbose Installation Log
If we launch the installation from the command line or from a script, we can specify the -log option to generate a verbose installation log. The installation log stores messages (informational, warning, error, and fatal) about events that occur during the installation process. This type of file can be especially useful for silent installations.
Unless a fatal (irrecoverable) error occurs, the installation program completes the installation successfully.
To create a verbose log file during installation, include the -log=full_path_to_log file option in the command line.
For example, to create a verbose log file for the WebLogic Server Package installer for Windows, enter:
wls1034_win32.exe -log=C:\logs\server_install.log
The path must specify a file. We cannot create a folder simply by including a name for it in a pathname; our path should specify only existing folders.

GUI Mode InstallationIn order to run the installation program in graphical mode, the console attached to the machine on which we are installing the software must support a Java-based GUI. All consoles for Windows systems support Java-based GUIs, but not all consoles for UNIX systems do. If we attempt to start the installation program in graphical mode on a system that cannot support graphical display, the installation program automatically starts in console mode.
Starting the Installation Program in Graphical Mode on Windows
1. Log in to the Windows system.
2. Go to the directory that contains the installation program
3. Double-click the installation file.
Starting .bin Installation Programs in Graphical Mode on UNIX Machines
1.Log in to the target UNIX system.
2.Go to the directory that contains the installation program.
3.Launch the installation by entering the following commands:
chmod a+x file_name.bin
./file_name.bin
If we plan to install the Server Examples, you must include the following parameter in the installation command. Otherwise, the installation may take longer than expected.
-Djava.security.egd=file:/dev/./urandom

Continued…
Starting .jar installation Programs in Graphical Mode
1.Log in to the target system.
2.Add the directory of the appropriate JDK to the PATH variable definition on the target system. For example, on UNIX or Linux systems, add the bin directory to the beginning of the PATH variable:
PATH=$JAVA_HOME/bin:$PATH; export PATH
3. Go to the directory where you downloaded the installation program
4. Launch the installation program by entering the following command (this example shows the Generic installer):
java -jar wls1036_generic.jar ( -mode=console (for console mode))

Continued…
Installing WebLogic Server on 64-Bit Platforms Using a 64-Bit JDK
If we are installing WebLogic Server on a 64-bit platform using a .jar installation program:
Add the directory of the appropriate JDK to the PATH variable definition on the target system. For example, on UNIX, add the bin directory of the appropriate 64-bit JDK to the beginning of the PATH variable definition on the target system:
JAVA_HOME=path_to_64-bit_JDK; export JAVA_HOME
PATH=$JAVA_HOME/bin:$PATH; export PATH
(UNIX or Linux only) Include the -d64 flag in the installation command when using a 32/64-bit hybrid JDK (such as for the HP-PA, HPIA, and Solaris64 platforms). For example, if installing in graphical mode using the Package installer:
java -d64 -jar wlsversion_generic.jar ( -mode=console (for console mode))
Run the java -version command (or java -d64 -version command on UNIX or Linux platforms using a 32/64-bit hybrid JDK) to ensure that your JAVA_HOME refers to a 64-bit JDK.
If we are using the Sun 64-bit JDK, use the following command to install WebLogic Server:
java -Xmx1024m -jar wlsversion_generic.jar ( -mode=console (for console mode))

Console Mode Installation
When installing WebLogic Server in console mode, respond to the prompts in each section by entering the number associated with your choice or by pressing Enter to accept the default. To exit the installation process, enter exit (or x) in response to any prompt. To review or change your selection, enter previous (or p) at the prompt. To proceed to the following window, enter next (or n).
Starting the Installation Program in Console Mode on Windows
1. Log in to the target Windows system.
2. Open a command prompt window.
3. Go to the directory that contains the installation program.
4. Launch the installation by entering the name of the installation program. For example, to start the WebLogic Server Package installer for Windows in console mode, enter
wls1036_win32.exe -mode=console
Starting .bin Installation Programs in Console Mode
1. Log in to the target UNIX system.
2. Go to the directory that contains the installation program.
3. Launch the installation by entering the following commands:
chmod a+x file_name.bin
./file_name.bin -mode=console

Silent-Mode Installation
Silent-mode installation allows us to define an installation configuration only once and then use the configuration to duplicate the installation on many machines. During installation in silent mode, the installation program reads the settings for our configuration from an XML file that we create before beginning the installation. The installation program does not display any configuration options during the installation process. Silent-mode installation works on both Windows and UNIX systems.
Overview of Silent-Mode Installation Steps
The silent-mode installation process has two primary steps:
1. Create a silent.xml file that defines the installation configuration that you would normally enter during an interactive installation process, such as graphical-mode or console-mode installation. For example, in silent.xml, we can supply the values for the Middleware home directory, the product directory, and the components to be installed.
2. Start the silent-mode installation that is appropriate for below situations:
Starting the Installation Program in Silent Mode on Windows
Starting .bin Installation Programs in Silent Mode
Starting .jar installation programs in Silent Mode

Considerations for Silent-Mode Installation
• Silent-mode installation requires the same amount of temporary disk space and uses the same temporary storage directories as a standard installation. The installation program does not alert us if there is not enough space in the temporary directory.
• A silent-mode installation takes the same amount of time as a standard installation.
• At the beginning of a silent-mode installation, an initial installation program window or message is displayed briefly, indicating that the installation has started. No messages are displayed to indicate that the installation is in progress or has completed successfully.
• Incorrect entries in the silent.xml file can cause installation failures. To help us determine the cause of a failure, Oraclerecommends that you create a log file when we start the installation.
• The XML definition (<?xml version="1.0" encoding="UTF-8"?>) must be at the very beginning of the silent.xml file. Do not enter a space or line breaks before the XML definition.
• We cannot reinstall any WebLogic product on top of a previously installed version of the same product—in the same Middleware home directory or in the same file location. To reinstall the same version of a product, you must first uninstall the previously installed instance of it or install the new instance in another location.
• However we can add products and product components to an existing installation

Creating a silent.xml File for Silent-Mode Installation
• Before you can run the installation program in silent mode, you must first create a silent.xml file. Since, the installation program uses an XML file (silent.xml) to determine which installation options should be implemented.
To create a silent.xml file:
1. Copy the sample code provided and paste the code in an XML file.
2. Save the file, with the name silent.xml, in the same directory that contains the installation program.
3. In the silent.xml file that we saved on your system, edit the values for the data-value names to reflect our configuration.
We must follow XML guidelines for characters when modifying values. So, we cannot use characters reserved for use in XML, such as <, >, [, and ].

Starting Silent Mode Installation
Starting the Installation Program in Silent Mode on Windows
1) Log in to the Windows system
2) Create a silent.xml file that defines the configuration settings
3) Open a command prompt window
4) Go to the directory that contains the installation program
5) Start the installer
For example, to launch the WebLogic Server Package installer on Windows 32-bit platforms, enter:
wls1036_win32.exe -mode=silent -silent_xml=path_to_silent.xml
(Here, path_to_silent.xml is the full path of the silent.xml file.)
An Oracle Installer window is displayed, indicating that the files are being extracted. No other prompt or text is displayed.

Continued…
Starting .bin Installation Programs in Silent Mode
1. Log in to the target UNIX system.
2. Create a silent.xml file that defines the configuration settings
3. Go to the directory that contains the installation program.
4. Launch the installation program by entering the following commands:
chmod a+x file_name.bin
./file_name.bin -mode=silent -silent_xml=path_to_silent.xml
In this command, file_name.bin is the name of the installation file and path_to_silent.xml is the full path of the silent.xml file.

Continued..
Starting .jar installation programs in Silent Mode
1.Log in to the target system.
2. Create a silent.xml file that defines the configuration settings.
3. Add the directory of the appropriate JDK to the PATH variable definition on the target system. For example, on UNIX or Linux systems, add the bin directory to the beginning of the PATH variable:
PATH=$JAVA_HOME/bin:$PATH; export PATH
4. Go to the directory that contains the installation file.
5. Launch the installation by entering the following command:
java -jar file_name.jar -mode=silent -silent_xml=path_to_silent.xml
In this command, file_name.jar is the name of the installation file and path_to_silent.xml is the full path to the silent.xml file.
An Installer window is displayed, indicating that the files are being extracted.

Exit Codes for Silent Mode Installation
When run in silent mode, the installation program generates exit codes that indicate the success or failure of the installation.
If we launch the silent-mode installation process from a script, we can choose to have these exit codes displayed on the console.
Exit Code Description
0 Installation completed successfully
-1 Installation failed due to a fatal error
1 Installation failed due to an internal XML parsing error

Post-Installation Tasks
Below are the list of common post-installation tasks
Launching QuickStart application
Determining Which JDK Version You Are Using
Creating a WebLogic Domain
Installing and Uninstalling the Node Manager Service
Understanding the Windows Shortcuts
Upgrading WebLogic Server
Installing Patches
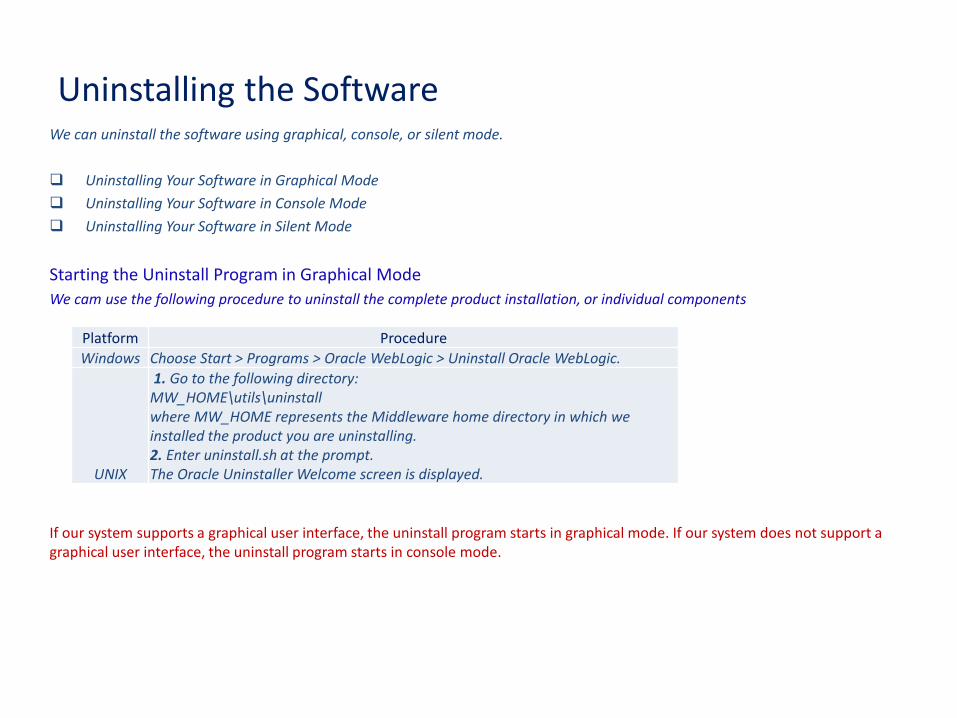
Uninstalling the SoftwareWe can uninstall the software using graphical, console, or silent mode.
Uninstalling Your Software in Graphical Mode
Uninstalling Your Software in Console Mode
Uninstalling Your Software in Silent Mode
Starting the Uninstall Program in Graphical Mode
We cam use the following procedure to uninstall the complete product installation, or individual components
If our system supports a graphical user interface, the uninstall program starts in graphical mode. If our system does not support a graphical user interface, the uninstall program starts in console mode.
Platform Procedure
Windows Choose Start > Programs > Oracle WebLogic > Uninstall Oracle WebLogic.
UNIX
1. Go to the following directory:MW_HOME\utils\uninstallwhere MW_HOME represents the Middleware home directory in which weinstalled the product you are uninstalling.2. Enter uninstall.sh at the prompt.The Oracle Uninstaller Welcome screen is displayed.

Continued…
Starting the Uninstall Program in Console Mode
We cam use the following procedure to uninstall the complete product installation, or individual components
Platform Procedure
Windows
1. Open a command prompt window and go to the following directory:MW_HOME\utils\uninstallwhere MW_HOME represents the Middleware home directory in which we installed WebLogic Server.2. Enter the following command at the prompt:uninstall -mode=consoleThe Welcome text is displayed.
UNIX
1. Go to the following directory:MW_HOME/utils/uninstallwhere MW_HOME represents the Middleware home directory in which we installed WebLogic Server.2. At the prompt, enter the following command:sh uninstall.sh -mode=consoleThe Welcome text is displayed.

Continued…
Starting the Uninstallation Program in Silent Mode
When we uninstall the software in silent mode, the complete software installation is uninstalled. We cannot uninstall individual components
Platform Procedure
Windows
1. Open a command prompt window and go to the following directory:MW_HOME\utils\uninstallHere MW_HOME represents the Middleware home directory in which we installed the software.2. Enter the following command at the prompt:uninstall -mode=silent
UNIX
1. Go to the following directory:MW_HOME\utils\uninstallHere MW_HOME represents the Middleware home directory in which youinstalled the software.2. At the prompt, enter the following command:sh uninstall.sh -mode=silent

.
Thank you


