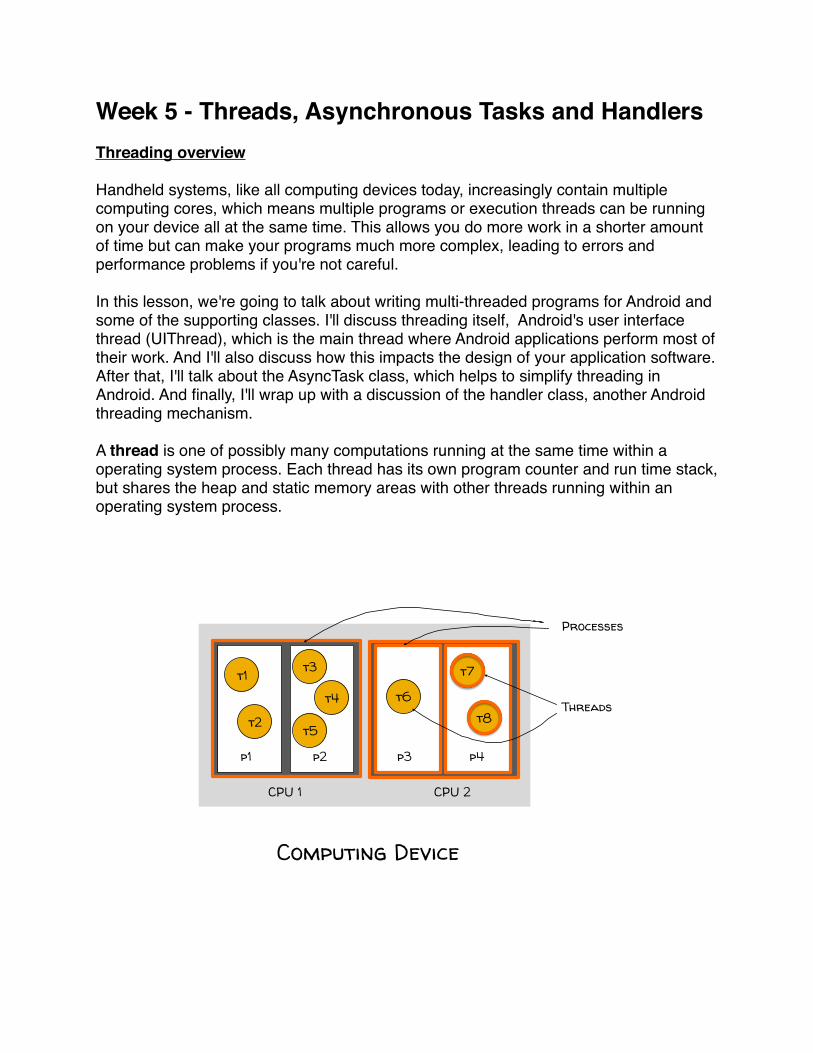
Week 5 - Threads, Asynchronous Tasks and Handlers Threading overview Handheld systems, like all computing devices today, increasingly contain multiple computing cores, which means multiple programs or execution threads can be running on your device all at the same time. This allows you do more work in a shorter amount of time but can make your programs much more complex, leading to errors and performance problems if you're not careful. In this lesson, we're going to talk about writing multi-threaded programs for Android and some of the supporting classes. I'll discuss threading itself, Android's user interface thread (UIThread), which is the main thread where Android applications perform most of their work. And I'll also discuss how this impacts the design of your application software. After that, I'll talk about the AsyncTask class, which helps to simplify threading in Android. And finally, I'll wrap up with a discussion of the handler class, another Android threading mechanism. A thread is one of possibly many computations running at the same time within a operating system process. Each thread has its own program counter and run time stack, but shares the heap and static memory areas with other threads running within an operating system process. CPU 1 CPU 2 p3 p1 p2 p4 t1 t2 t3 t4 t5 t6 t7 t8 Processes Threads Computing Device
Transcript
Week 5 - Threads, Asynchronous Tasks and HandlersThreading overview
Handheld systems, like all computing devices today, increasingly contain multiple computing cores, which means multiple programs or execution threads can be running on your device all at the same time. This allows you do more work in a shorter amount of time but can make your programs much more complex, leading to errors and performance problems if you're not careful.
In this lesson, we're going to talk about writing multi-threaded programs for Android and some of the supporting classes. I'll discuss threading itself, Android's user interface thread (UIThread), which is the main thread where Android applications perform most of their work. And I'll also discuss how this impacts the design of your application software. After that, I'll talk about the AsyncTask class, which helps to simplify threading in Android. And finally, I'll wrap up with a discussion of the handler class, another Android threading mechanism.
A thread is one of possibly many computations running at the same time within a operating system process. Each thread has its own program counter and run time stack, but shares the heap and static memory areas with other threads running within an operating system process.
CPU 1 CPU 2
p3 p1 p2 p4
t1
t2
t3
t4
t5
t6
t7
t8
Processes
Threads
Computing Device
The above graphic depicts a hypothetical device with two CPUs. On CPU 2, there are two processes running, p3 and p4. One way to think about processes is that they are self-contained execution environments. They have resources such as memory, open files, network connections, and other things that they manage and keep separate from other processes. Within one of these processes, P4, I'm showing two running threads, T7 and T8. Each of these threads is a sequentially executing stream of instructions with its own call stack. But since they're within the same process, they can each access shared process resources, including heap memory and static variables.
int x; foo() { …x… }
int x; foo() { …x… }
Processes typically don’t share memory
int x;
foo() { …x… }
foo() { …x…
}
Threads within a process can share memory
In Java, threads are represented by an object of type Thread in the Java.lang package. Java threads implement the Runnable interface, which means that they must have a public method, void run(), that takes no arguments and has no return value. For this course, I'm assuming that you've already learned about Java threads, and that you know how to use them. However, if you need a refresher please take a look at the concurrency tutorial at the following URL: http://docs.oracle.com/javase/tutorial/essential/concurrency/threads.html
Some of the thread methods that we'll see in this lesson include:
void start() //Starts the Threadvoid sleep(long time) //Sleeps for the given period by
temporarily suspending a thread
Some object methods that you may when you're using threads include:
void wait() // Current thread waits until another thread invokes notify()or notifyAll()on this object
void notify() // Wakes up a single thread that is waiting on this object
To use a thread, you normally do the following things: first, you create the thread, e.g. by using the newThread command. Threads don't automatically start when you create them - you need to invoke the thread's start method. Doing this eventually leads to the thread's run method being called, and the thread continues executing until that run method terminates.
This graphic helps to show this behavior:
app thread
start()
run()
new
1. A running application issues a new command to create a new Thread object.2. When this call finishes, the application continues.3. Later, the Thread's start method is called, which starts the Thread's run method4. The program continues with two Threads executing.
You can do the above multiple times, creating and executing as many Threads as you want.
Lets look at an application in which threading would be helpful called Threading No Threading, which displays a simple user interface with two buttons. The first button is labeled “Load Icon”. When the user clicks on this button, the application opens and reads a file containing a bitmap and displays it. Observe that the above operation takes a noticeable amount of time. Some operations take a relatively long time to execute and you, as a developer, must understand and deal with that.
The second button is labeled “Other Button”, when the user clicks on this button a toast message pops up displaying some text. The idea here is that if you see the text, then you know the button is working - if you cannot click the button, or see the text, then something is wrong. In particular, the user should be able to click either of the buttons, at any time, and the system should work.
If we run the ThreadingNoThreading application what do you think will happen? Will I be able to press both buttons whenever I want? Letʼs find out.
Pressing the “Other Button”, you can see displays the promised message. Now I'm going to do press the “Load Icon” button, which will start the time consuming operation of reading in the bitmap from a file and displaying it. Right after I press the Load Icon button, I'm going to press the Other Button again.
So what's going on here? The Other Button seems to be stuck. Why is that? Well, the answer is that when I was trying to press the Other Button, Android was still loading the icon for back when I pressed the Load Icon button. And that first operation was preventing the second operation from taking place.
An incorrect solution to this problem would be to go to the listener that's attached to the “Load Icon” button and create a new thread that loads the bitmap and then displays it. I've implemented this approach in an application called Threading Simple. Lets take a look at its code:
private void loadIcon() { new Thread(new Runnable() { @Override public void run() { try { Thread.sleep(mDelay); } catch (InterruptedException e) { Log.e(TAG, e.toString()); } mBitmap = BitmapFactory.decodeResource (getResources(), R.drawable.painter); // This doesn't work in Android mIView.setImageBitmap(mBitmap); } }).start(); }}
The button listener for the “Load Icon” button calls the loadIcon method, which is listed at the bottom. This code creates a new Thread, which takes a while to load the bitmap and then tries to set the bitmap on an image view that's part of the layout.
Let's run this code. I'll press the Load Icon button and then I'll press the Other Button and I see that it responds - loading the icon doesn't appear to block pressing the Other Button. That's good, we've made some progress. However, you can see that we've got a bigger problem now: we've crashed the application!
If we investigate the LogCat output, we see that there's a message: Only the original thread that created a view hierarchy can touch its views. Android won't allow threads to start messing around with views that were created by other threads.
In other words, the new thread can load the bitmap but cannot add it to the display.
Androidʼs UI Thread
Which thread created this application's view hierarchy? Well, all Android applications have a main thread, which is also called the UI thread. Application components that run in the same process, which they do by default, all use the same UI thread. All those life cycle methods that we've been talking about, OnCreate, OnStart, etc, are handled in the UI thread. Furthermore, the UI toolkit itself is not thread safe.
Applications have a main thread (the UI thread) Application components in the same process use the same UI thread User interaction, system callbacks & lifecycle methods handled in the UI thread In addition, UI toolkit is not thread-safe
What all this means is that if you block the UI thread with some long-running operation, then you're going to prevent your application from responding to other things that the user is doing. In fact, we saw that in the ThreadingNoThreading application. Long-running operations need to be put in background threads, but we cannot access the UI toolkit from a non-UI thread, which is what got us into trouble with the ThreadingSimple application.
We need to do work in a background thread, but when that work is done we need to do the UI updates back in the UI thread. Fortunately, Android, provides several methods that are guaranteed to run on the UI thread. Two of those methods are the View.post method, and the Activity.runOnUiThread. Both of these methods take a Runnable parameter:
This Runnable would, for example, contain the code that updates the display in our recent examples.
To use these methods, we can load the bitmap in a background thread and when that operation completes, we can use one of these methods to execute a Runnable that sets the bitmap on the display.
Let's see that in action: I'll start up the Threading ViewPost application. I'll press the Load Icon button. And immediately, I'll press the Other Button. I expect to see that the otherButton operation is not blocked by the loadIcon operation, and I expect to see that the icon actually loads without crashing the application. OK, I see the text from the Other Button, and finally, there's the bitmap.
Let's take a look at the source code:package course.examples.Threading.ThreadingViewPost;
Looking at the loadIcon method, which gets called when the user presses the Load Icon button, the code creates a new thread and then loads the bitmap. But after the bitmap loads, you see that we now have a call to View.post, passing in a Runnable, whose code actually calls the View.setImageBitmap method to set the just loaded bitmap on that image view.
The AsyncTask class
The next threading support class that we'll discuss is the AsyncTask class. This class provides a general framework for managing tasks, as in our previous examples, that share work between a background thread and the UI thread. When using an Async task, work is divided between a background thread and the UI thread.
“AsyncTask enables proper and easy use of the UI thread. This class allows to perform background operations and publish results on the UI thread without having to manipulate threads and/or handlers. AsyncTasks are designed for relatively short term background operations (lasting a few seconds at most), not for longer-running operations.”
See http://developer.android.com/reference/android/os/AsyncTask.html for more info.
The background thread performs the long-running operation(s) and can optionally report its progress. The UI Thread is responsible for setting up of the long-running operation and is responsible for publishing intermediate progress information reported by the background thread. It is also responsible for completing the operation after the background thread has done its work.
AsyncTask is a generic class that takes three type of parameters, Params, Progress, and Result. Params is the type of the parameters that are input to the AsyncTask. Progress is the type of any intermediate progress reports, and result is the type of the result that is computed by the Async task.
Generic class class AsyncTask<Params, Progress, Result> { … }
Generic type parameters Params – Type used in background work Progress – Type used when indicating progress Result – Type of result
void onPreExecute() Runs in UI Thread before doInBackground()
Result � doInBackground (Params…params)
Performs work in background Thread May call �void publishProgress(Progress... values)
void � onProgressUpdate (Progress... values)
Invoked in response to publishProgress() void onPostExecute (Result result)
Runs after doInBackground()
Let's look at a version of our icon loading application Threading Async Task. It looks similar to the previous examples, but I've added a new UI element, a progress bar that represents how much of the bitmap loading has been done already. Pressing the “Load Icon” button, a small progress bar appears and gradually fills in. Pressing the “Other Button” the familiar text pops up, and finally the bitmap appears.
Let's look at the source code for this application:
public class AsyncTaskActivity extends Activity { private final static String TAG = "ThreadingAsyncTask"; private ImageView mImageView; private ProgressBar mProgressBar; private int mDelay = 500; @Override
public void onCreate(Bundle savedInstanceState) { super.onCreate(savedInstanceState); setContentView(R.layout.main);
The code for the listener for the “Load Icon” button creates a new instance of the LoadIconTask, and then calls its execute method, passing in the icon's resource ID as a parameter.
LoadIconTask is a subclass of AsyncTask and its type parameters are integer for params, integer for progress, and Bitmap for the result.
The method onPreExecute is executed in the UI thread - it's purpose is to make a progress bar visible on the display. The method doInBackground receives an integer as a parameter, which is the resource ID of the bitmap that was passed in to the LoadIconTask.execute method. The doInBbackground method loads the bitmap, periodically calling publishProgress, passing in an integer that represents the percentage of the loading that's been done so far. This example would have been more realistic if we were downloading an image from the internet, or maybe waiting for the result from a database query, both of which usually take longer to complete, but it provides taste of how Async tasks work.
The next method is onProgressUpdate, which runs in the UI thread and receives the integer that was passed into publishProgress and sets the progress bar to reflect the percentage of work done.
Finally, the last method is onPostExecute, which also runs in the UI thread and receives the just-loaded bitmap as a parameter. It first makes the progress bar invisible, since it is no longer needed, and then sets the loaded bitmap on the image view.
See http://developer.android.com/reference/android/os/AsyncTask.html for more info.
The last thing I want to talk about in this lesson is the Handler class. Like the Async task, the Handler class is designed for handing-off work between threads. The Handler class is more flexible in that it will work for any two threads, not just for a background thread and the UI thread.
A Handler is associated with a specific thread. One thread can hand off work to another thread by sending Messages or by posting Runnables to a Handler that's associated with a particular thread. First, let's discuss Messages and Runnables, and then we'll get into the architecture of the Handler class itself.
You already know about Runnables. You use these when the sender knows exactly what work steps it wants performed, but it wants that work performed on the Handler's thread.
A Message, on the other hand, is a class that can contain data such as a message code, an arbitrary data object, and some integer values. You use messages when the sender thread wants to indicate an operation that should be done in another thread, but it leaves the implementation of that operation to the Handler itself.
Runnable
Contains an instance of the Runnable
interface
Sender implements response
Message
Can contain a message code, an object &
integer arguments
Handler implements response
Let's talk about how Handlers use these Messages and Runnables. Each Android thread is associated with a MessageQueue and a Looper. The MessageQueue is a data structure. It holds Messages and Runnables. The Looper takes these Messages and Runnables from the MessageQueue and dispatches them as appropriate.
Each Android Thread is associated with a messageQueue & a Looper A MessageQueue holds Messages and Runnables to be dispatched by the Looper
Loop
er Message
Runnable
Runnable
Message
Message
Message Queue!
The following graphic depicts a Thread A, that has created a Runnable and has used a Handler object to post that Runnable to the Handler's thread. When Thread A does this, a Runnable is placed on the MessageQueue of the thread associated with the Handler.
Add Runnables to
MessageQueue by
calling Handler’s
post() method Lo
oper
Message
Runnable
Runnable
Message
Message
Message Queue!
Runnable
Handler
Background Thread A
handler.post( new Runnable(!))
Something similar happens with messages. The following graphic depicts a Thread B that has created a message, and has used a Handler's, sendMessage method to send that message to the Handler's thread.
When thread B does this, the message is placed on the MessageQueue associated with that Handler. Now, while all this is going on, the Looper object is sitting there, just waiting for work to appear on the MessageQueue. When that work appears, the Looper reacts in one of two ways, depending on the kind of work that has just arrived.
If that work is a message, the Looper will handle the message by calling the Handler's handleMessage method, and passing in the message itself. If instead, that work is a Runnable, then the Looper will handle it by simply calling that Runnable's run method.
Loop
er
Message
Runnable
Runnable
Message
Message
Message Queue!
Runnable
Message
Background Thread B
Handler
handler. sendMessage(msg)
Add Messages to
MessageQueue by
calling Handler’s
sendMessage() method
Here are some of the methods that you use when posting Runnables to a Handler:
boolean post(Runnable r) Add Runnable to the MessageQueue
boolean� postAtTime(Runnable r, long uptimeMillis)
Add Runnable to the MessageQueue. Run at a specific time (based on SystemClock.upTimeMillis())
boolean � postDelayed(Runnable r, long delayMillis)
Add Runnable to the message queue. Run after the specified amount of time elapses
We've already seen the post method, there are a number of other methods that allow you to schedule work for execution at different times. For instance, you can use the postAtTime method to add a runnable to the MessageQueue, but to run it at a specific time. There is also a postDelayed method, and that allows you to add a runnable to the MessageQueue, but to run it after a specified delay.
If you want to send messages, you first need to create the message. One way to do that is to use the Handler's ObtainMessage method, which gives you a message with the Handler already set. You can also use the message class's obtain method. And once you have the message, you'll want to set the data for the message. There are a number of variations for doing this so please check out the documentation.
As with runnables, there are a number of methods that you can use to send the message.
sendMessage() Queue Message now
sendMessageAtFrontOfQueue() Insert Message now at front of queue
sendMessageAtTime() Queue Message at the stated time
sendMessageDelayed() Queue Message after delay
There is the sendMessage method that we just talked about. There's also a version that allows you to put the message at the front of the MessageQueue to have it execute as soon as possible. There's a sendMessageAtTime method to queue the message according to the specified time. There's also a sendMessageDelayed method that queues the message at the current time plus the specified delay.
Let's look at the source code for versions of our running example that were implemented using Handlers, the ThreadingHandlerRunnable application.
In this application's main activity you first see that this code is creating a new Handler. This Handler will be created by the main UI thread. The runnables that this Handler receives will be executed in the UI thread.
Next is the button listener for the “Load Icon” button. When the user presses it this code creates and starts a new thread, whose run method is defined by the runnable loadIcon task.
Let's look at the loadIcon class. The run method begins by posting a new runnable that, when executed, will make the progress bar visible. It continues by loading the bitmap. While it's doing that, it periodically publishes its progress by posting another runnable that calls setProgress on the progress bar. It then posts a runnable that sets the newly loaded bitmap on the display. It finishes by posting a last runnable, then makes the progress bar invisible.
Let's also look at a second version of this application that send messages, instead of posting runnables the ThreadingHandlerMessages application:
public class HandlerMessagesActivity extends Activity { private final static int SET_PROGRESS_BAR_VISIBILITY = 0; private final static int PROGRESS_UPDATE = 1;
In this application's main activity, first the code creates a new Handler. And again, this Handler will be created by the main UI thread. The work that this Handler performs will be executed in the UI thread. As you can see, this Handler has a handleMessage method, in which it implements the various kinds of work. The handleMessage method starts by checking the message code that's in the message. Then, it takes the appropriate action for that message code.
For instance, if the code is set_progress_bar_visibility, then this code sets the visibility status of the progress bar. If the code is instead progress_update, then this code sets the progress state on the progress bar. If the code is set_bitmap, then the code sets the bitmap on the display.
Letʼs look at the button listener for the “Load Icon” button. Same as before, when the user presses the button, this code creates and starts a new thread whose run method is defined by the Runnable loadIcon task. This run method begins by obtaining a message with the code set to set_progress_bar_visibility, with an argument indicating that the progress bar should be made visible. It sends that message to the Handler, which will handle it and make the progress bar visible. It continues by loading the bitmap. While it's doing that, it periodically publishes progress by obtaining and sending a message with the code progress_update, and with an argument that indicates the percent, the percentage of work done.
This will result in the Handler calling setProgress on the progress bar. It then obtains and sends a message to set the newly loaded bitmap on the display. And finally, it sends a last message to make the progress bar invisible.
Important review points:• The thread that a Handler will execute its handleMessage() method is the
Thread in which the Handler was created or associated with when it was constructed.
• If you have two Handlers running in the same Thread and your code sends a Message to the Thread's MessageQueue, the Messageʼs target field specifies the Handler that should handle it.
Nice Explanation from : http://developer.android.com/guide/components/processes-and-threads.html
Threads
When an application is launched, the system creates a thread of execution for the application, called "main." This thread is very important because it is in charge of dispatching events to the appropriate user interface widgets, including drawing events. It is also the thread in which your application interacts with components from the Android UI toolkit (components from the
android.widget and android.view packages). As such, the main thread is also sometimes called the UI thread.
The system does not create a separate thread for each instance of a component. All components that run in the same process are instantiated in the UI thread, and system calls to each component are dispatched from that thread. Consequently, methods that respond to system callbacks (such as onKeyDown() to report user actions or a lifecycle callback method) always run in the UI thread of the process.
For instance, when the user touches a button on the screen, your app's UI thread dispatches the touch event to the widget, which in turn sets its pressed state and posts an invalidate request to the event queue. The UI thread dequeues the request and notifies the widget that it should redraw itself.
When your app performs intensive work in response to user interaction, this single thread model can yield poor performance unless you implement your application properly. Specifically, if everything is happening in the UI thread, performing long operations such as network access or database queries will block the whole UI. When the thread is blocked, no events can be dispatched, including drawing events. From the user's perspective, the application appears to hang. Even worse, if the UI thread is blocked for more than a few seconds (about 5 seconds currently) the user is presented with the infamous "application not responding" (ANR) dialog. The user might then decide to quit your application and uninstall it if they are unhappy.
Additionally, the Andoid UI toolkit is not thread-safe. So, you must not manipulate your UI from a worker thread—you must do all manipulation to your user interface from the UI thread. Thus, there are simply two rules to Android's single thread model:
1. Do not block the UI thread2. Do not access the Android UI toolkit from outside the UI thread
Worker threads
Because of the single thread model described above, it's vital to the responsiveness of your application's UI that you do not block the UI thread. If you have operations to perform that are not instantaneous, you should make sure to do them in separate threads ("background" or "worker" threads).
For example, below is some code for a click listener that downloads an image from a separate thread and displays it in an ImageView:
public void onClick(View v) { new Thread(new Runnable() { public void run() { Bitmap b = loadImageFromNetwork("http://example.com/image.png"); mImageView.setImageBitmap(b); } }).start();}
At first, this seems to work fine, because it creates a new thread to handle the network operation. However, it violates the second rule of the single-threaded model: do not access the Android UI toolkit from outside the UI thread—this sample modifies the ImageView from the worker thread instead of the UI thread. This can result in undefined and unexpected behavior, which can be difficult and time-consuming to track down.
To fix this problem, Android offers several ways to access the UI thread from other threads. Here is a list of methods that can help:
For example, you can fix the above code by using the View.post(Runnable) method:
public void onClick(View v) { new Thread(new Runnable() { public void run() { final Bitmap bitmap = loadImageFromNetwork("http://example.com/image.png"); mImageView.post(new Runnable() { public void run() { mImageView.setImageBitmap(bitmap); } }); } }).start();}
Now this implementation is thread-safe: the network operation is done from a separate thread while the ImageView is manipulated from the UI thread.
However, as the complexity of the operation grows, this kind of code can get complicated and difficult to maintain. To handle more complex interactions with a worker thread, you might
consider using a Handler in your worker thread, to process messages delivered from the UI thread. Perhaps the best solution, though, is to extend the AsyncTask class, which simplifies the execution of worker thread tasks that need to interact with the UI.
Using AsyncTask
AsyncTask allows you to perform asynchronous work on your user interface. It performs the blocking operations in a worker thread and then publishes the results on the UI thread, without requiring you to handle threads and/or handlers yourself.
To use it, you must subclass AsyncTask and implement the doInBackground() callback method, which runs in a pool of background threads. To update your UI, you should implement onPostExecute(), which delivers the result from doInBackground() and runs in the UI thread, so you can safely update your UI. You can then run the task by calling execute() from the UI thread.
For example, you can implement the previous example using AsyncTask this way:
public void onClick(View v) { new DownloadImageTask().execute("http://example.com/image.png");}
private class DownloadImageTask extends AsyncTask<String, Void, Bitmap> { /** The system calls this to perform work in a worker thread " * and delivers it the parameters given to "" * AsyncTask.execute() */
protected Bitmap doInBackground(String... urls) { return loadImageFromNetwork(urls[0]); } /** The system calls this to perform work in the UI thread " * and delivers the result from doInBackground() " */
Now the UI is safe and the code is simpler, because it separates the work into the part that should be done on a worker thread and the part that should be done on the UI thread.
You should read the AsyncTask reference for a full understanding on how to use this class, but here is a quick overview of how it works:
• You can specify the type of the parameters, the progress values, and the final value of the task, using generics
• The method doInBackground() executes automatically on a worker thread• onPreExecute(), onPostExecute(), and onProgressUpdate() are all
invoked on the UI thread• The value returned by doInBackground() is sent to onPostExecute()• You can call publishProgress() at anytime in doInBackground() to execute
onProgressUpdate() on the UI thread• You can cancel the task at any time, from any thread
Caution: Another problem you might encounter when using a worker thread is unexpected restarts in your activity due to a runtime configuration change (such as when the user changes the screen orientation), which may destroy your worker thread. To see how you can persist your task during one of these restarts and how to properly cancel the task when the activity is destroyed, see the source code for the Shelves sample application.
Thread-safe methods
In some situations, the methods you implement might be called from more than one thread, and therefore must be written to be thread-safe.
This is primarily true for methods that can be called remotely—such as methods in a bound service. When a call on a method implemented in an IBinder originates in the same process in which the IBinder is running, the method is executed in the caller's thread. However, when the call originates in another process, the method is executed in a thread chosen from a pool of threads that the system maintains in the same process as the IBinder (it's not executed in the UI thread of the process). For example, whereas a service's onBind() method would be called from the UI thread of the service's process, methods implemented in the object that onBind() returns (for example, a subclass that implements RPC methods) would be called from threads in the pool. Because a service can have more than one client, more than one pool thread can engage the same IBinder method at the same time. IBinder methods must, therefore, be implemented to be thread-safe.
Similarly, a content provider can receive data requests that originate in other processes. Although the ContentResolver and ContentProvider classes hide the details of how the interprocess communication is managed, ContentProvider methods that respond to those requests—the methods query(), insert(), delete(), update(), and getType()—are called from a pool of threads in the content provider's process, not the UI thread for the process. Because these methods might be called from any number of threads at the same time, they too must be implemented to be thread-safe.
Android offers a mechanism for interprocess communication (IPC) using remote procedure calls (RPCs), in which a method is called by an activity or other application component, but executed remotely (in another process), with any result returned back to the caller. This entails decomposing a method call and its data to a level the operating system can understand, transmitting it from the local process and address space to the remote process and address space, then reassembling and reenacting the call there. Return values are then transmitted in the opposite direction. Android provides all the code to perform these IPC transactions, so you can focus on defining and implementing the RPC programming interface.
To perform IPC, your application must bind to a service, using bindService(). For more information, see the Services developer guide.
**********************************************************************That's all for this lesson on threads, Async tasks, and Handlers. Please join me next time when we'll talk about alarms.
Week 6 - 2D Graphics and AnimationToday's handheld devices come with powerful CPUs and bright, high density displays, and applications can use these capabilities to present rich graphical elements to the user, and to animate those elements to give the user a fluid and dynamic visual experience. In this lesson, we'll talk about how applications do this through the careful use of two dimensional graphics and animation.
2D Graphics: ImageView
I'll start this lesson by discussing Android support for two dimensional, or 2D, graphics. I'll talk about how applications can draw both static and dynamically changing elements to their displays using the ImageView class and using the Canvas class. Next, I'll talk about the various ways with which you an easily animate views to provide simple effects like changing a view size and position, and fading a view in and out. And lastly, I'll finish up with a more general discussion of property animation, which gives applications a general framework for animating not only simple view properties, but essentially any other properties as well.
Draw to a View Simple graphics, little or no updating
Draw to a Canvas More complex graphics, with regular updates
When your application wants to put 2D graphics on the display, it can do that in different ways. In particular, it can draw the graphic to a view, or it can draw to a canvas. Drawing to a view is simpler, but less flexible. You'll use this option when the graphics you want to draw are simple, and when you don't plan to update them too often, if at all. Drawing to a canvas is more complicated, but also more powerful and more flexible. And you'll go this route when the graphics you want to draw are more complex and when you
expect to update those graphics fairly frequently. There are many ways to draw with views. But in this lesson I'll focus on drawing using the drawable class.
A drawable represents something that can be drawn. Things like bitmaps, colors, shapes, and much more. Some simple drawables include the ShapeDrawable class, which represents a shape such as a rectangle or an oval. The BitmapDrawable class, which represents a matrix of pixels. And the ColorDrawable class, which represents a solid color. In our example applications for this lesson, we'll often create a drawable object and attach it to an image view, and then we'll let the image view handle all the actual drawing for us. As with Android user interface features we've already seen, you can do this via XML files, or you can do it via explicit program instructions.
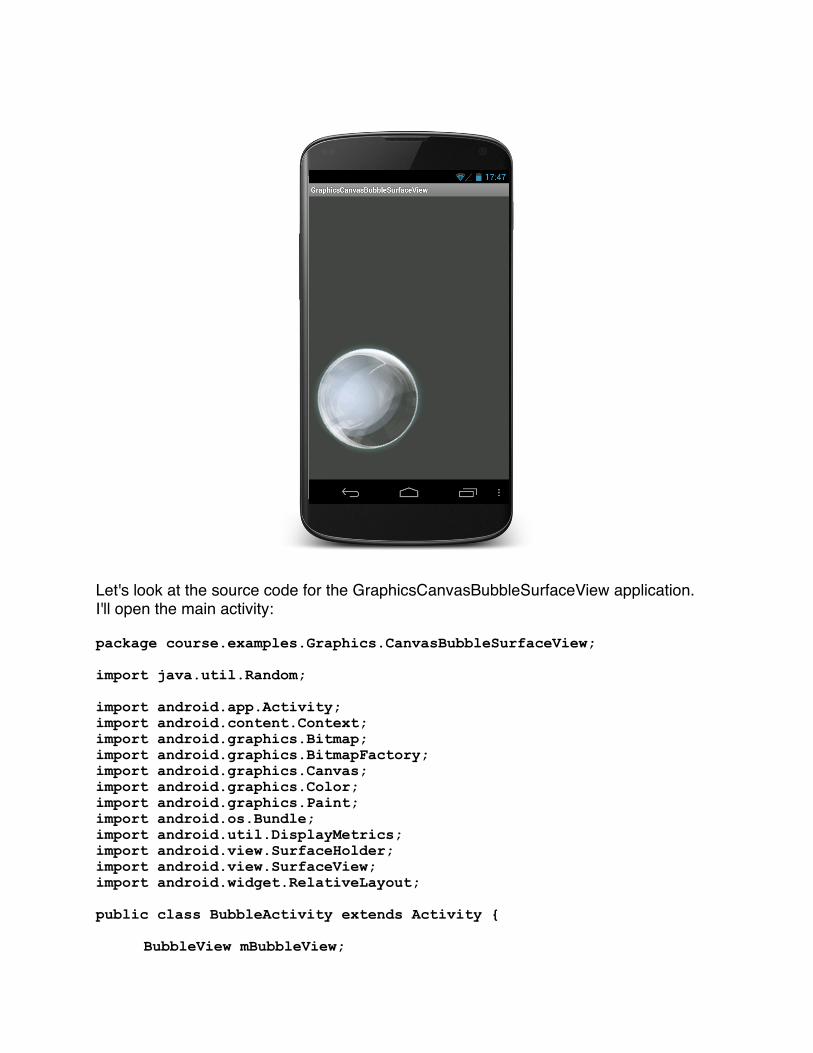
Our first example applications are called GraphicsBubble XML and GraphicsBubble Program. These simple applications both display a single image view, and that image view holds a bitmap image of a soap bubble. Let's take a look.
So here's my device. Now, I'll start one of the applications, GraphicsBubbleXML. And there you can see the simple bubble image.
Okay, so let's look at the source code for both of these applications starting with the code for GraphicsBubbleXML.
So here's the application open in the IDE. I'll now open the main activity for this application.
It specifies that the entire layout is a relative layout. And nested inside the relative layout is an image view. This image view has a layout width and a layout height of 250 density independent pixels, or DP. The image view is also centered inside its parent, the relative layout. And finally, the actual bitmap for the bubble is in one of the drawable directories and it's called B128.
Let's also look at an application that does the same thing but that builds its user interface programmatically. So here's the GraphicsBubbleProgram application open in the IDE. I'll now open the main activity for this application.
public class BubbleActivity extends Activity { @Override public void onCreate(Bundle savedInstanceState) { super.onCreate(savedInstanceState); setContentView(R.layout.main);
RelativeLayout relativeLayout = (RelativeLayout) findViewById(R.id.frame); ImageView bubbleView = new ImageView(getApplicationContext ()); bubbleView.setImageDrawable(getResources(). getDrawable(R.drawable.b128)); int width = (int) getResources().getDimension (R.dimen.image_width); int height = (int) getResources().getDimension (R.dimen.image_height); RelativeLayout.LayoutParams params = new RelativeLayout.LayoutParams(width, height); params.addRule(RelativeLayout.CENTER_IN_PARENT); bubbleView.setLayoutParams(params); relativeLayout.addView(bubbleView); }}
And this application also calls setContentView using the main.XML layout file. But in this case, that layout includes only the outermost relative layout with nothing inside it. Let's open that file.
So here's the XML file, and like I said it just specifies that the entire layout is a relative layout, but it doesn't have any child views inside of it.
Going back to the main activity, this code continues by creating an image view. Next, it sets the b128 bitmap as the image drawable for the image view. After that, the code continues by setting all the layout properties that we saw before in the XML version.
First, it sets the height and width of the image view. These values are stored in another file called dimens.xml that's stored in the res\values directory. Next, the code creates a RelativeLayout.LayoutParams object with the correct height and width. After that the code adds a rule to the LayoutParams object which tells Android to center this image view inside the relative layout parent. Then the code sets these layout parameters or layout properties on the image view. And finally, it adds the image view as a child of the relative layout.
Let's talk about some other kinds of drawables. One kind of drawable is the shape drawable. Shape drawables are used for drawing simple shapes. Different shapes are
represented by different subclasses of the shape class, including PathShape for line segments and curves, RectShape for rectangles, and OvalShape for ovals and rings.
Used for drawing primitive shapes
Shape represented by a Shape class
PathShape - lines
RectShape - rectangles
OvalShape - ovals & rings
Our next example applications are called GraphicsShapeDrawXML, and GraphicsShapeDrawProgram. These applications display two ovals within a relative layout. The two shapes have different colors, partially overlap each other, and are semitransparent. Let's run those applications.
Here's my device, and now I'll start one of the applications, GraphicsShapeDrawXML.
And there you can see the two ovals. The one on the left is cyan colored. And the one on the right is magenta colored. As you can also see, the ovals overlap each other. And where they overlap, their colors have mixed to form a kind of violet color.
Let's look at the source code for these applications.
Here's the GraphicsShapeDrawXML application open in the IDE. I'll now open the main activity for this application.
public class ShapeDrawActivity extends Activity { @Override public void onCreate(Bundle savedInstanceState) { super.onCreate(savedInstanceState); setContentView(R.layout.main); }}
Again the application only calls setContentView using the main.XML layout file. Let's open that file.
The XML file specifies that the entire layout is a relative layout. And nested inside that relative layout are two image views. Both image views have layout widths and layout heights of 250 DP. Both add some space, or padding, around their contents. And both are centered vertically inside the parent relative layout. The first image view, however, is aligned to the left side of the parent while the second image view is aligned to the right.
And finally, the actual image view content is defined using the android:source attribute. For the first image view, that source refers to a drawable called cyan_shape. Let's open that file. It's in the res\drawable directory:
This file specifies that this drawable is a shape, that its specific shape is an oval, and that its color is given by this hexadecimal value. Of course, there's a similar file for the magenta shape.
As before, we can do the exact same things programmatically. Let's take a look at the GraphicsShapeDrawProgram application, which I've also got open in the IDE. I'll now open the main activity for this application:
// Put Cyan Shape into an ImageView ImageView cyanView = new ImageView(getApplicationContext ()); cyanView.setImageDrawable(cyanShape); cyanView.setPadding(padding, padding, padding, padding);
// Specify placement of ImageView within RelativeLayout RelativeLayout.LayoutParams cyanViewLayoutParams = new RelativeLayout.LayoutParams(height, width); cyanViewLayoutParams.addRule(RelativeLayout. CENTER_VERTICAL); cyanViewLayoutParams.addRule(RelativeLayout. ALIGN_PARENT_LEFT); cyanView.setLayoutParams(cyanViewLayoutParams); rl.addView(cyanView);
// Put Magenta Shape into an ImageView ImageView magentaView = new ImageView(getApplicationContext()); magentaView.setImageDrawable(magentaShape); magentaView.setPadding(padding, padding, padding, padding);
// Specify placement of ImageView within RelativeLayout RelativeLayout.LayoutParams magentaViewLayoutParams = new RelativeLayout.LayoutParams(height, width); magentaViewLayoutParams.addRule (RelativeLayout.CENTER_VERTICAL); magentaViewLayoutParams.addRule (RelativeLayout.ALIGN_PARENT_RIGHT); magentaView.setLayoutParams(magentaViewLayoutParams); rl.addView(magentaView); }}
Again, the application only calls setContentView using the main.XML layout file. That file just specifies that the entire layout is a relative layout. Now, the code finds the layout widths, layout heights, and padding. Next, the code gets a reference to the parent relative layout, and after that, it creates a new shape drawable that has an oval shape. It continues by setting the shape's color, its height and width, and its transparency. Next, the code creates an image view and puts the new shape into it. It also sets the padding on the image view. In continuing on, the code sets some layout parameters for the image view. Specifically, it centers the image view vertically in the relative layout, and it aligns this image view to the left side of the parent. The code then finishes up by doing similar things for the magenta view.
2D Graphics: Canvas
If you want to do more complex drawing, you can also draw with a canvas. And to do this, you need four things: a bitmap, which is essentially the matrix of pixels that you want to draw on; a canvas, which hosts the drawing calls that will update the underlying bitmap; a drawing primitive, which represents the specific drawing operation that you want to issue; and a paint object, which allows you to set various colors and styles for the draw operation you want to do.
A Bitmap (a matrix of Pixels) A Canvas for drawing to the underlying Bitmap A Drawing Primitive (e.g. Rect, Path, Text, Bitmap) A paint object (for setting drawing colors & styles)
We'll go into more details about the Canvas class in just a bit, but canvases provide a variety of drawing methods. For example, you can draw text, points, colors, ovals, and bitmaps using these methods.
Canvas supports multiple drawing
methods
drawText()
drawPoints()
drawColor()
drawOval()
drawBitmap()
When you draw, you can use the Paint class to set style parameters. For instance, you can specify things like the thickness of lines, the size of text, the color of what you're drawing, and whether or not to apply various optimizations such as antialiasing, which is used to smooth out an image's jagged edges.
Let's look at a simple application that draws several boxes, each of which hold some text. But it does so using different paint settings for each of the boxes. So here's my device. Now I'll start the GraphicsPaint application. The application starts up and displays four rectangles laid out one on top of the next. Each of these rectangles has some text, each of which is of a different size and style. Each rectangle also has a different border width, and border style, and has a different background color.
Let's look at the source code for these applications. We'll pick out a few of these style parameters and see how they're specified.
Here's the GraphicsPaint application open in the IDE:
public class GraphicsPaintActivity extends Activity { @Override public void onCreate(Bundle savedInstanceState) { super.onCreate(savedInstanceState); setContentView(R.layout.main); }}
Like some of those we saw before, this application's onCreate method only calls setContentView, passing in a reference to a main.XML layout file. Let's open up that file:
The XML file specifies that the entire layout is a linear layout, and that linear layout has four children, each of which is a text view. If we look at the first of these text views, we can see that it sets several text style attributes. For instance, this one sets its text color to this hexadecimal value. The text size to 32 scale independent pixels, or SP. It's styled to bold and italic, and its typeface to normal. If you look at the other text views, you'll see that they make different stylistic choices. This text view also specifies a background, which is in a file called SQ1.xml, which is the res\drawable directory. Let's open that file:
Above is the SQ1.xml file, and as you can see, this file defines a shape. That shape is a rectangle, and it has a solid color. In this case, a white color, which happens to be defined by Android. And finally, the shape has a border with a three pixel width, and it has a background color. Which in this case is a fully opaque black.
Drawing with a Canvas
If you want to draw more complex graphics and you want to update those graphics frequently, then you can do your drawing with a canvas. Now as I said earlier, a canvas is a kind of context or mechanism for drawing to an underlying bitmap. And you can access a canvas either through a generic view object or through a special view subclass called SurfaceView. Usually, you'll draw through a generic view when your updates are less frequent, and if you take this approach, your application should create a custom view subclass. And then the system will provide the canvas to your view through a call to its onDraw method. If, instead, your application needs to frequently update its graphics, then you might consider drawing through a SurfaceView. With this approach, the application creates a custom, SurfaceView subclass. And it will also create a secondary thread with which drawing operations on that SurfaceView, will be performed.
At run time, the application can then acquire its own canvas, And therefore, exercise more control over how and when drawing occurs. This next example application is called GraphicsCanvasBubble. And the idea behind this application is that it will draw a view and then update that view. But the updates are somewhat infrequent, about every second or so. So this application has an internal thread that wakes up once every second or so, and moves the view. And then uses a canvas as it redraws the view in its new location.
Let's see that in action. So here's my device. And now, I'll start up the GraphicsCanvasBubble application:
The application starts up with a bubble drawn at a randomly selected location. And every second or so, you can see that the bubble is erased, moved and then redrawn in it's new location.
Let's look at the source code for this application. So here's the GraphicsCanvasBubble application open in the IDE. Now, I'll open the main activity:
public class BubbleActivity extends Activity { protected static final String TAG = "BubbleActivity";
@Override public void onCreate(Bundle savedInstanceState) { super.onCreate(savedInstanceState); setContentView(R.layout.main);
final RelativeLayout frame = (RelativeLayout) findViewById (R.id.frame); final Bitmap bitmap = BitmapFactory.decodeResource (getResources(), R.drawable.b128); final BubbleView bubbleView = new BubbleView (getApplicationContext(), bitmap); frame.addView(bubbleView);
new Thread(new Runnable() { @Override public void run() { while (bubbleView.move()) { bubbleView.postInvalidate(); try { Thread.sleep(1000); } catch (InterruptedException e) { Log.i(TAG, "InterruptedException"); }
} }
}).start(); }
private class BubbleView extends View {
private static final int STEP = 100; final private Bitmap mBitmap; private Coords mCurrent; final private Coords mDxDy;
final private DisplayMetrics mDisplayMetrics; final private int mDisplayWidth; final private int mDisplayHeight; final private int mBitmapWidthAndHeight, mBitmapWidthAndHeightAdj; final private Paint mPainter = new Paint();
public BubbleView(Context context, Bitmap bitmap) { super(context);
Here you can see that the application loads a bitmap from the resources directory. And then it uses that bitmap to create an instance of a custom view class called the BubbleView. Next, the code adds the BubbleView instance to the layout. And then it creates and starts a new thread. And that thread goes into a loop and on each iteration, it calls the BubbleView's move method.
As we'll see in a second, this method changes the BubbleViews location, and then returns true or false depending on whether the BubbleViews new location is or is not still visible on the display. Next the code calls the view classes postInvalidate method. This message tells android to redraw this view. After that, the thread goes to sleep for a second before waking up and starting the process one more time.
I'll skip over most of the details of how the BubbleView moves itself and focus instead on how it gets redrawn. When the drawing thread calls the postInvalidate method, this tells Android that the BubbleView thinks it needs to be redrawn. If so, then Android will eventually call BubbleViews onDraw method, passing in the canvas, with which the BubbleView is drawn.
As you can see, the BubbleViews onDraw method takes the canvas passed into it and calls its DrawBitmap method, passing in the bitmap to draw, passing in the top and left coordinates of the position at which to draw the bit map, finally passing in a paint object that defines style parameters for this drawing operation.
If we'd like to really increase the frequency with which we're redrawing the bubble to make it more smoothly glide across the display, then, we might want to use both a
canvas and a SurfaceView. And as I mentioned earlier, SurfaceViews need a separate, non-UI thread in which to do their work so their operations won't interfere with UI thread.
Let's talk more about the SurfaceView class. A SurfaceView manages a low-level drawing area called a Surface. And this Surface is a dedicated drawing area, that is positioned within the applications view hierarchy. To define a SurfaceView, you need to create a custom class, which is a subclass of SurfaceView. And this custom class must, must also implement the SurfaceHolder.Callback interface.
To use this new SurfaceView, you need to do two things. One, you need to setup the SurfaceView. And two, you need to draw to the SurfaceView that you just setup. Let's talk about each of those steps, one at a time. To set up the SurfaceView, you first use the SurfaceViews getHolder method to acquire the SurfaceView's SurfaceHolder. Next, you register the SurfaceView for SurfaceHolder callbacks. By calling the SurfaceHolder's addCallback method.
Now these methods are:• surfaceCreated - called when the SurfaceView's surface has been created. Until
this method is called you can't draw on the surface. It's not ready. • surfaceChanged - called whenever structural changes, such as changing the
surface's size, occurs.• surfaceDestroyed - called right before a surface is destroyed. Once this method
returns, you can no longer call operations that will draw on the surface.
The last setup step is to create the thread that will be used for executing drawing operations on this SurfaceView. And remember, that the SurfaceHolder callback methods will usually be called from the main thread not from the SurfaceView's thread, so you'll have to make sure that you synchronize access to any data that is needed by both threads. Once you've setup the SurfaceView you can start drawing on it.
To draw, you'll first acquire a lock on the canvas by calling the lockCanvas method. Next, you do whatever drawing operations that you want to do on the canvas, for example, calling a canvas method such as drawBitmap. And last, you unlock the canvas, allowing Android to update the display, by calling the SurfaceHolder's unlockCanvasAndPost method.
So let's look at a different implementation of our last example application, called GraphicsBubbleCanvas Surface View. The application will start up and draw the bubble at a randomly selected location on the display, but this time instead of updating every second or so, this application will try to do as many updates as it can. The application will also rotate the bubble view to give the appearance that the bubble is twirling through space.
Here goes... as you can see, the bubble is smoothly animating both moving and rotating as it floats along.
Let's look at the source code for the GraphicsCanvasBubbleSurfaceView application.I'll open the main activity:
@Override public void onCreate(Bundle savedInstanceState) { super.onCreate(savedInstanceState); setContentView(R.layout.main);
RelativeLayout relativeLayout = (RelativeLayout) findViewById(R.id.frame); final BubbleView bubbleView = new BubbleView (getApplicationContext(), BitmapFactory.decodeResource(getResources(), R.drawable.b128));
relativeLayout.addView(bubbleView); }
private class BubbleView extends SurfaceView implements SurfaceHolder.Callback {
private final Bitmap mBitmap; private final int mBitmapHeightAndWidth, mBitmapHeightAndWidthAdj; private final DisplayMetrics mDisplay; private final int mDisplayWidth, mDisplayHeight; private float mX, mY, mDx, mDy, mRotation; private final SurfaceHolder mSurfaceHolder; private final Paint mPainter = new Paint(); private Thread mDrawingThread;
private static final int MOVE_STEP = 1; private static final float ROT_STEP = 1.0f;
public BubbleView(Context context, Bitmap bitmap) { super(context);
@Override public void surfaceChanged(SurfaceHolder holder, int format, int width, int height) { }
@Override public void surfaceCreated(SurfaceHolder holder) { mDrawingThread = new Thread(new Runnable() { public void run() { Canvas canvas = null; while (!Thread.currentThread(). isInterrupted() && move()) { canvas = mSurfaceHolder. lockCanvas(); if (null != canvas) { drawBubble(canvas); mSurfaceHolder.unlockCanvasAndPost (canvas); }
} } }); mDrawingThread.start(); }
@Override public void surfaceDestroyed(SurfaceHolder holder) { if (null != mDrawingThread) mDrawingThread.interrupt(); }
}}
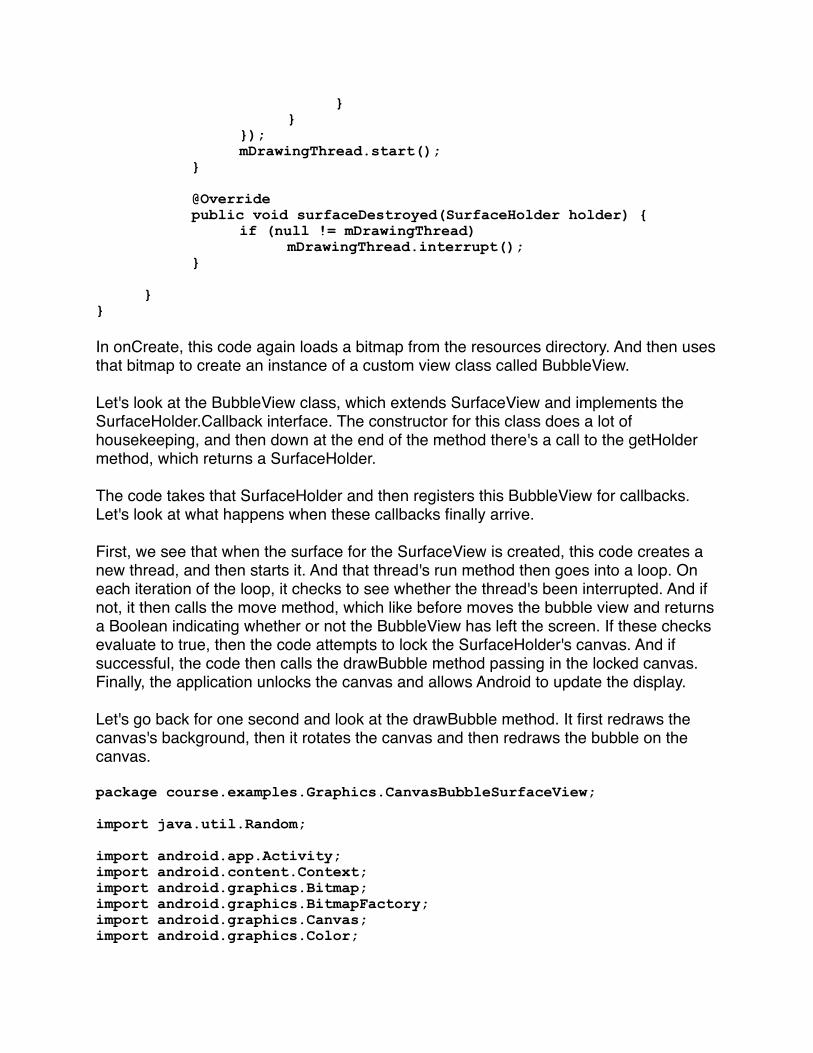
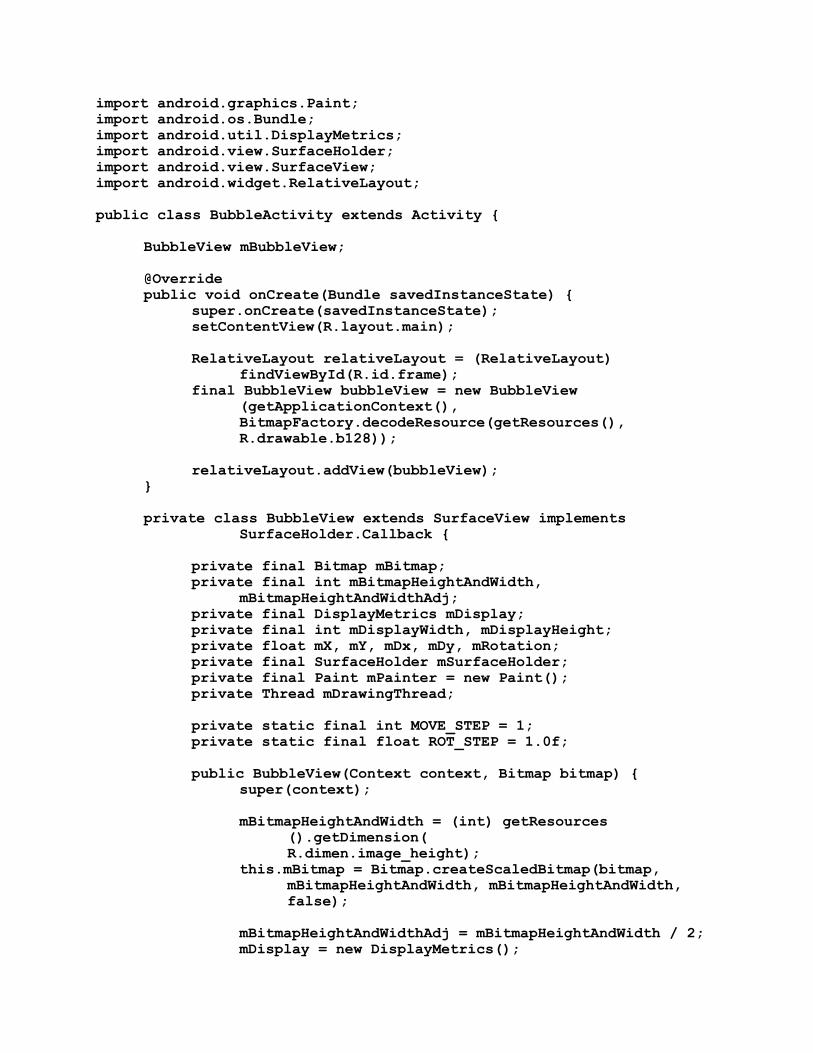
In onCreate, this code again loads a bitmap from the resources directory. And then uses that bitmap to create an instance of a custom view class called BubbleView.
Let's look at the BubbleView class, which extends SurfaceView and implements the SurfaceHolder.Callback interface. The constructor for this class does a lot of housekeeping, and then down at the end of the method there's a call to the getHolder method, which returns a SurfaceHolder.
The code takes that SurfaceHolder and then registers this BubbleView for callbacks. Let's look at what happens when these callbacks finally arrive.
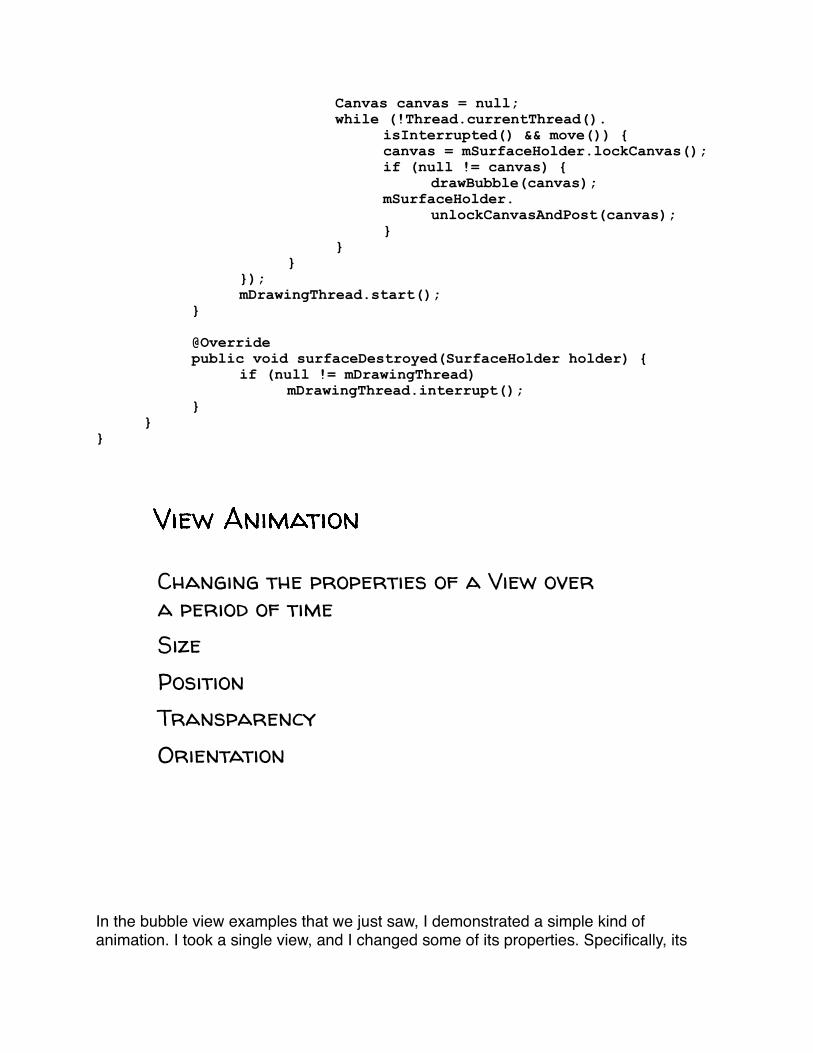
First, we see that when the surface for the SurfaceView is created, this code creates a new thread, and then starts it. And that thread's run method then goes into a loop. On each iteration of the loop, it checks to see whether the thread's been interrupted. And if not, it then calls the move method, which like before moves the bubble view and returns a Boolean indicating whether or not the BubbleView has left the screen. If these checks evaluate to true, then the code attempts to lock the SurfaceHolder's canvas. And if successful, the code then calls the drawBubble method passing in the locked canvas. Finally, the application unlocks the canvas and allows Android to update the display.
Let's go back for one second and look at the drawBubble method. It first redraws the canvas's background, then it rotates the canvas and then redraws the bubble on the canvas.
@Override public void onCreate(Bundle savedInstanceState) { super.onCreate(savedInstanceState); setContentView(R.layout.main);
RelativeLayout relativeLayout = (RelativeLayout) findViewById(R.id.frame); final BubbleView bubbleView = new BubbleView (getApplicationContext(), BitmapFactory.decodeResource(getResources(), R.drawable.b128));
relativeLayout.addView(bubbleView); }
private class BubbleView extends SurfaceView implements SurfaceHolder.Callback {
private final Bitmap mBitmap; private final int mBitmapHeightAndWidth, mBitmapHeightAndWidthAdj; private final DisplayMetrics mDisplay; private final int mDisplayWidth, mDisplayHeight; private float mX, mY, mDx, mDy, mRotation; private final SurfaceHolder mSurfaceHolder; private final Paint mPainter = new Paint(); private Thread mDrawingThread;
private static final int MOVE_STEP = 1; private static final float ROT_STEP = 1.0f;
public BubbleView(Context context, Bitmap bitmap) { super(context);
@Override public void surfaceDestroyed(SurfaceHolder holder) { if (null != mDrawingThread) mDrawingThread.interrupt(); } }}
Changing the properties of a View over
a period of time
Size
Position
Transparency
Orientation
In the bubble view examples that we just saw, I demonstrated a simple kind of animation. I took a single view, and I changed some of its properties. Specifically, its
location, and orientation, and I did this over a period of time. Animations like this are fairly common. Applications often animate changes to the properties of a view such as its size, position, transparency, orientation and more.
To make animation easier Android provides several different view animation support classes. Three that we'll talk about now are the TransitionDrawable class for animating a transition between two views, the AnimationDrawable for creating frame-by-frame animations, and the Animation class for creating tween animations, where you specify certain frames or moments in the animation and Android interpolates or fills in the points in between.
Let's look at each of these classes one at a time. The first animation class we'll discuss is the Transition Drawable. This class specifies a two layer drawable, and when it's displayed, the user sees the first layer, and then a bit later, sees the second layer. Our example application is called Graphics Transition Drawable, and this application takes us back to the Graphics Shape Draw applications that we saw earlier. But this time, instead displaying both shapes at the same time, this application first displays the leftmost cyan colored shape, which then fades into a display of the rightmost magenta colored shape.
Let's see how that works. So here's my device, and when I start up the Graphics Transition Drawable application you'll see the first shape fading into the second.
Here we go. Here's the first shape, and here's the second.
Let's take a look at the source code. Here's the Graphics Transition Drawable applicationʼs main activity:
public class TransitionDrawableActivity extends Activity { @Override public void onCreate(Bundle savedInstanceState) { super.onCreate(savedInstanceState);
This file defines a transition resource. Resources of this type can have up to two item tags, and each item tag describes one drawable. In this case, the drawables are our familiar cyan and magenta shapes.
Now, back in the main activity, the code calls set crossfade enabled with the parameter true, and this causes the first drawable to visually fade into the second drawable. Next, the code sets the transition, as the drawable for the image view, by calling set image drawable, and then finally, it calls start on the transition, passing in a value of 5000 for the animation's duration.
The next kind of animation that we'll talk about is the AnimationDrawable. This drawable animates a series of other drawables, showing each one for some period of time.
Our next example application is called Graphics Frame Animation. This application uses an AnimationDrawable to display a kind of splash screen, which itself presents a series of images counting down to the start of the main application.
Let's see what this does. When I start up the Graphics Frame Animation application, you'll see a series of images, counting down to a final image. Okay, let's get started. Nine, eight, seven, six, five, four, three, two, one, and finally, the image we've all been waiting for.
Let's go to the source code for this application. Here's the Graphics Frame Animation applicationʼ s main activity:
@Override public void onWindowFocusChanged(boolean hasFocus) { super.onWindowFocusChanged(hasFocus); if (hasFocus) { mAnim.start(); } }}
In Oncreate this application loads an AnimationDrawable from a file called view_animation.xml. And then it sets that AnimationDrawable as the background on an image view. This code then stores that drawable in a variable called mAnim.
Before we go forward, let's take a look at the view_animation.xml file, which defines an animation list resource:
This resource contains a list of item tags, where each tag represents a drawable, and in this case, the first drawable is just a black screen, and that displays for one second, and this is followed by nine other images, each of which is displayed also for one second.
Now back in the main activity, the code waits until the on window focus changed method is called, and this method is called when the applications window gains or loses focus. In this method the code first checks whether the window is currently gaining focus and if it is it then starts the animation.
The Animation class is used to create animations in which transformations are applied to the contents of a view. Applications can play with the timing of these transformations to sequence and combine different transformations to make more complex animations. The graphics Tween Animation application demonstrates the use of the animation class.
When this application runs, it displays a bubble view and then proceeds to animate a number of changes to that bubble. Let's see it in action.
When I start up the Graphics Tween Animation application you'll see the bubble, and then you'll see a series of transformations applied to that bubble. You'll see it fade in, rotate, move, change its size, and finally, fade out, and you'll also see that the timing of these transformations is not always linear. That is, some transformations will happen at a uniform pace, some will start slow and build up speed, some will start fast and then reduce their speed, some will both speed up and slow down at different points in the animation.
Now, I'll slow down the video here a little bit, so you can see these effects more clearly. Here we go, first the bubble fades in and next the bubble rotates twice, getting faster as it goes. Now the bubble will move, overshoot its final position and then pull back a bit. After that, the bubble will shrink a bit before quickly doubling its size, and finally the bubble fades out of view, quickly at first, and then more slowly near the end.
Let's take a look at the source code for this application. Here's the Graphics Tween Animation applicationʼs main activity:
@Override public void onWindowFocusChanged(boolean hasFocus) { super.onWindowFocusChanged(hasFocus); if (hasFocus) { mImageView.startAnimation(mAnim); } }}
This application sets the, calls setContentView, passing in the main.xml file. And then it finds an image view in that layout. And after that it reads an animation from the view_animation.xml file which is stored in the res/Anim directory.
Nested within the set tag there are several other tags, each of which indicates a specific transformation to be applied to the view.
The first is an alpha transformation, the duration of the animation is three seconds. It goes from an alpha of zero, or completely transparent, to an alpha of one, completely opaque. The transformation also uses the linear interpolator, so the effect is applied uniformly throughout the animation.
The next tag is a rotate transformation. The duration is set to four seconds, but it's also set to start only after three seconds have passed. So, the first transformation will occur and finish, and then this one will start up. This animation goes from 0 to 720 degrees, or two full turns, and its interpolator accelerates, or speeds, up as the animation proceeds and you can look at all the other tags on your own when we take a break.
Going back now to the main activity, let's go to the onWindowFocusChanged method. Again, this code checks to see if the window is currently gaining focus, and if so, it starts the animation.
Property Animation
The previous examples showed classes that are designed to animate a set of simple property changes on views. But sometimes, you want to animate more than just those things and, to support that, Android has developed a system for changing general properties of generic objects over a given period of time. This system of Property Animation has several components.
ValueAnimator – Timing engine TimeInterpolator – defines how values change as a function of time AnimatorUpdateListener – called back at every animation frame change TypeEvaluator – Calculates a property’s value at a given point in time
First, there is a Value Animator, and this is the main class that controls the animation. The Value Animator contains a time interpolator which determines how values change as a function of time. For instance, over time do the changes happen uniformly, do they speed up, slow down, or use some combination of the two?
Value Animator also defines a listener interface called Animator Update Listener, and this interface defines the on animation update method which gets called each time a new animation frame is created.
And lastly, while Android knows how to animate the values of common types, like imagers or floats, it doesn't know how to animate custom types that you create. So if you need to animate your own types, or animate existing types in new ways you can implement the Type Evaluator Interface.
This interface defines an Evaluate method that gets called to set the animation values at a particular point in the animation.
The last piece of property animation is the Animator Set Class, which allows you to combine animator objects, like the value animator we just discussed, into more complex animations.
Let's look at some example applications that make use of property animation. The first of these applications is called Graphics Value Animator, and this application uses a value animator to animate a change in the background color of an image view. Let's watch this application. So here's my device. I'll now start up the graphics value animator application.
As you can see it presents a single button labeled Animate. When I press that button, a red rectangle will appear in the middle of the display, and over a period of about ten seconds, that rectangle will change color until it's finally blue.
I'll press the button now. There's the red rectangle. And now let's watch as it slowly turns blue.
Let's open the source code and see how we did that. Here's the Graphics Value Animator applicationʼs main activity:
This application starts by setting two integer values, which represent the starting and ending points for the animation. The first value is the integer representation of the color red. The second value is the integer representation of the color blue.
In onCreate, the code creates a button that will start the animation, and as you see here, when the button is clicked, the start animation method is run.
Let's look at that method. Here, the start animation method creates a value animated object called anim, and it created that object by calling the value animators of object
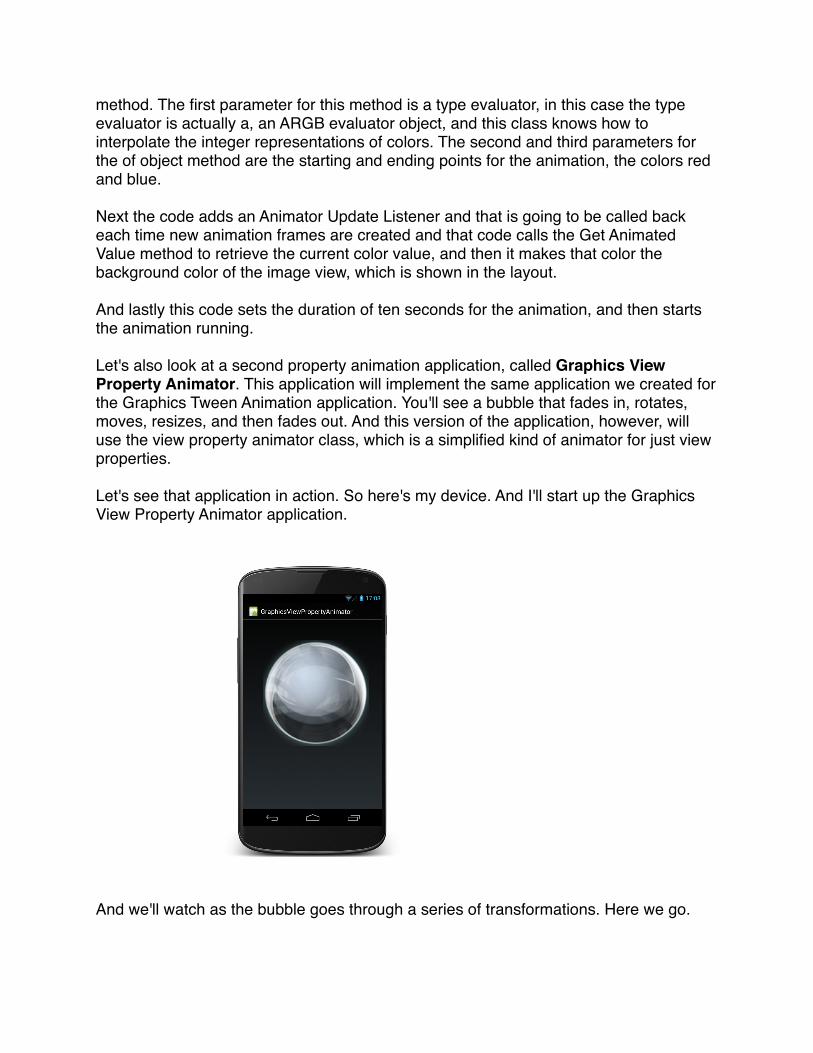
method. The first parameter for this method is a type evaluator, in this case the type evaluator is actually a, an ARGB evaluator object, and this class knows how to interpolate the integer representations of colors. The second and third parameters for the of object method are the starting and ending points for the animation, the colors red and blue.
Next the code adds an Animator Update Listener and that is going to be called back each time new animation frames are created and that code calls the Get Animated Value method to retrieve the current color value, and then it makes that color the background color of the image view, which is shown in the layout.
And lastly this code sets the duration of ten seconds for the animation, and then starts the animation running.
Let's also look at a second property animation application, called Graphics View Property Animator. This application will implement the same application we created for the Graphics Tween Animation application. You'll see a bubble that fades in, rotates, moves, resizes, and then fades out. And this version of the application, however, will use the view property animator class, which is a simplified kind of animator for just view properties.
Let's see that application in action. So here's my device. And I'll start up the Graphics View Property Animator application.
And we'll watch as the bubble goes through a series of transformations. Here we go.
Let's open up the source code for this application. So here's the Graphics View Property Animator applicationʼs main activity. And let's scroll over to the on window focus changed method:
Runnable scale = new Runnable() { public void run() { mImageView.animate().setDuration(3000) .setInterpolator(new AnticipateInterpolator()) .scaleXBy(1.0f).scaleYBy(1.0f).withEndAction(fadeOut); } };
Runnable fadeOut = new Runnable() { public void run() { mImageView.animate().setDuration(2000) .setInterpolator(new DecelerateInterpolator()).alpha (0.0f); } };
}
When this method is called, the application insures that the activity window is gaining focus and if so, calls the run method of the fadeIn object, and which is a runnable. Now inside its run method, its code calls animate on the image view, which returns a view property animator object. This object, or this class, uses a fluent interface, like what we saw with the notification area notifications, so you can build an animation by tacking on various method calls.
In this case, the next call is set duration to three seconds, then set interpolator to the linear interpolater, then a call to the alpha method to change the transparency to fully opaque and then a final call which tells the View Property Animator that when this animation ends it should invoke the run method of another runnable called rotate. And, as you can probably guess, this rotate runnable creates the rotation step of the animation, and then it ends by calling the movement step of the animation, and this continues until all of the steps have been completed.
So that's all for our lesson on graphics and animation. See you next time for a lesson on multi-touch and gestures.
Week 6 - MultimediaMultimedia Support Classes
Handheld devices allow users to create and consume large amounts of rich multimedia content. This content includes audio content, e.g. when you listen to music or record voice notes, image content, e.g. when you take and view photos, and video content, e.g when you take and view movies. In this lesson, we'll talk about the multimedia classes that Android provides, and we'll walk through the APIs and example applications that play audio, watch video, record audio and use the camera to capture images.
Android provides a number of classes and capabilities to support the encoding and decoding of common media formats. Your application can use these to play and record audio, still images, and video, including AudioManager and SoundPool classes, which allow applications to play sound effects and audio files, and to control a device's audio-related hardware, such as its speakers and wireless headset. We'll also talk about the RingtoneManager and Ringtones, which are the sounds that you often hear when a phone call arrives, when a notification is received, and when alarms go off, and the MediaPlayer, which lets applications play audio and video files. The MediaRecorder allows applications to record audio and video. We'll finish up by looking at the Camera class, which lets applications control hardware cameras on a device.
AudioManager & SoundPool RingtoneManager & Ringtone MediaPlayer MediaRecorder Camera
Playing Audio
The AudioManager class manages audio capabilities such as manipulating the device's volume, playing system sound effects, and changing the device's ringer mode. Applications get a reference to the AudioManager by calling Context.getSystemService, and passing in the value Context.AUDIO_SERVICE. The reference lets the application load and play sounds, adjust the volume, and control device hardware, e.g. muting the microphone, or turning on the Bluetooth headset.
An object from the SoundPool class represents a collection of audio samples or streams. You can also mix together and play multiple samples at the same time. Let's take a look at a sample application called AudioVideoAudioManager that presents two buttons labeled Up and Down to increase and decrease the volume. The application also displays a button labeled Play that plays a bubble popping sound at the current volume level.
I'll start up the AudioVideoAudioManager application.
It addition to the three buttons, Up, down, and Play, it also shows the current volume level on a scale from zero to ten. Right now, the volume level is set to six.
Let me press the play button, so you can hear the bubble popping sound. Here goes. [SOUND] And now, I'll press the up button a few times, to go to maximum volume. And now I'll press the play button again. [SOUND] Now, I'll press the down button, and play button a few times, and you should hear the bubble pop at increasingly lower volumes. Here goes. [SOUND]
Let's look at the source code for the AudioVideoAudioManager applicationʼs Main Activity:
// Decrease the volume final Button downButton = (Button) findViewById (R.id.button1); downButton.setOnClickListener(new OnClickListener() { @Override public void onClick(View v) {
// Play key click sound mAudioManager.playSoundEffect (AudioManager.FX_KEY_CLICK);
if (mVolume > mVolumeMin) { mVolume -= 2; tv.setText(String.valueOf(mVolume)); }
} });
// Disable the Play Button final Button playButton = (Button) findViewById (R.id.button3); playButton.setEnabled(false);
// Create a SoundPool mSoundPool = new SoundPool(1, AudioManager.STREAM_MUSIC, 0);
// Load the sound mSoundId = mSoundPool.load(this, R.raw.slow_whoop_bubble_pop, 1);
// Set an OnLoadCompleteListener on the SoundPool mSoundPool.setOnLoadCompleteListener(new OnLoadCompleteListener() { @Override public void onLoadComplete(SoundPool soundPool, int sampleId, int status) { if (0 == status) { playButton.setEnabled(true); } } });
// Listen for Audio focus changes OnAudioFocusChangeListener afChangeListener = new OnAudioFocusChangeListener() { public void onAudioFocusChange(int focusChange) { if (focusChange == AudioManager.AUDIOFOCUS_LOSS) { mAudioManager.abandonAudioFocus (afChangeListener); mCanPlayAudio = false; } } };
}
The onCreate method gets a reference to the AudioManager and begins to set up its user interface. First, there's the textView for displaying the current volume level. Next, there's the Up button. When clicked, the code plays a key clicking sound, and then tries to increase the volume level and update the level display. The down button is almost the same but it decreases rather than increases the volume level.
The code gets a reference to the play button, and disables the button for now. Then the code creates a SoundPool object, which it will use to play the bubble popping sound. The parameters for this SoundPool object indicate that it will have only one audio stream, and that the stream is played on the audio music stream. The code loads the bubble pop sound, which is an asynchronous operation, so the code sets an onLoadComplete listener, which will be called when the sound is finally loaded. When the onLoadComplete method is called, the code checks whether the operation was successful. If so, it enables the Play button, which had been disabled until the sound was properly loaded.
Next, the code sets a Listener on the Play button, whcih when pressed plays the bubble popping sound at the current volume level. After that, the code requests audio focus, which essentially means that it wants to be in charge of the audio being played by the device.
There's also some code in the onResume and onPause methods. The onResume method turns on the device's speakerphone and then loads the system's sound effects, including the key click that we used above. The onPause method begins by unloading the SoundPool and releasing it's resources. And then it turns off the device's speakerphone, and unloads the system sound effects.
RingtoneManager Class
The RingtoneManager class provides access to the audio clips that you hear, e.g., when a phone call or email message arrives, or when an alarm goes off. Using the RingtoneManager, applications can get, set, play and stop playing various ringtones.
Let's see an example that uses the RingtoneManager, AudioVideoRingtoneManager. This application presents three buttons, respectively labeled Ringtone, Notification, and Alarm. Pressing one of these buttons causes the associated default ringtone to play. Let's give it a try:
As you can see, it displays the three buttons: Ringtone, Notification, and Alarm. Let me press some of these buttons. First, let's listen to the default ringtone as I press the ringtone button. [SOUND] Now, let's try the default notification ringtone. [SOUND] And finally, let's try the default alarm ringtone. [SOUND] After this segment is over, try downloading, installing, and running this application on your device, and then go to your
settings application and change your default ringtones. When you then re-run this application, you should see that it plays your new ringtones, not your old ones.
Let's look at the source code for this application:
public class AudioVideoRingtoneManagerActivity extends Activity { private Ringtone mCurrentRingtone;
@Override public void onCreate(Bundle savedInstanceState) { super.onCreate(savedInstanceState); setContentView(R.layout.main);
// Get the default Phone Ringer RingTone and play it. final Button ringtoneButton = (Button) findViewById (R.id.button1); ringtoneButton.setOnClickListener(new OnClickListener() {
@Override public void onClick(View v) { Uri ringtoneUri = RingtoneManager .getDefaultUri (RingtoneManager.TYPE_RINGTONE); playRingtone(RingtoneManager.getRingtone( getApplicationContext(), ringtoneUri)); } });
// Get the default Notification RingTone and play it. final Button notifButton = (Button) findViewById\ (R.id.button2); notifButton.setOnClickListener(new OnClickListener() { @Override public void onClick(View v) {
// Get the default Alarm RingTone and play it. final Button alarmButton = (Button) findViewById (R.id.button3); alarmButton.setOnClickListener(new OnClickListener() { @Override public void onClick(View v) {
In the AudioVideoRingtoneManager applicationʼs main activity the onCreate method code creates three buttons.
Let's look at the ringtone button as an example. Now here, we see that when this button is clicked, the code uses the RingtoneManager to get the URI for the default phone ringer ringtone. Next, the code gets the ringtone associated with that URI by calling the ringtoneManager.getRingtone method, passing in the URI. The result of all this is then passed into a method called playRingtone.
The playRingtone method checks whether a ringtone is currently playing. And if one is, then that ringtone is stopped by calling the ringtone class's stop method. A current ringtone is then set in the mCurrentRingtone variable, and if the current ringtone is not null then the code will start playing it.
MediaPlayer Class
The MediaPlayer class controls the playback of audio and video streams and allow applications and users control that playback. This class operates according to a complex state machine, which I won't go over here in this lesson, so please take a look at the following website for more information: http://developer.android.com/reference/android/media/MediaPlayer.html
Some of the methods in the MediaPlayer class include:• setDataSource - tells the media player which streams to play.• prepare - initializes the Media player and loads the necessary streams. This
method is synchronous, and you'll normally use it when the media content is stored in a file on the device. There's also an asynchronous version, which can be used, for example, when the media is streamed from the internet.
• start - to start or resume playback. • pause - to stop playing temporarily.• seekTo - to move to a particular position in the stream. A
• stop - to stop playing the media• release - which releases the resources used by the current media player.
Another class that can be used to view video content is the VideoView class, which is a sub-class of SurfaceView. Internally, it uses of the mediaPlayer. The VideoView class can load video content from different sources, and it includes a number of methods and controls to make it easier to view video content.
The next example application is called AudioVideoVideoPlay, which displays a simple view with video playback controls, allowing the user to play a video file. In this case, the film is a clip from the 1902 film, A Trip to the Moon. Let's take a look.
I'll start up the AudioVideoVideoPlay application. If I now touch the display, a set of playback controls appear. Hitting the single triangle the video begins playing.
Let's take a look at the source code for this application:
public class AudioVideoVideoPlayActivity extends Activity { VideoView mVideoView = null;
@Override public void onCreate(Bundle savedInstanceState) { super.onCreate(savedInstanceState); setContentView(R.layout.main);
// Get a reference to the VideoView mVideoView = (VideoView) findViewById(R.id.videoViewer);
// Add a Media controller to allow forward/reverse/pause/resume final MediaController mMediaController = new MediaController( AudioVideoVideoPlayActivity.this, true); mMediaController.setEnabled(false);
mVideoView.setMediaController(mMediaController); mVideoView .setVideoURI(Uri .parse("android.resource://course.examples.AudioVideo.VideoPlay/raw/moon")); // Add an OnPreparedListener to enable the MediaController once the video is ready mVideoView.setOnPreparedListener(new OnPreparedListener() {
@Override public void onPrepared(MediaPlayer mp) { mMediaController.setEnabled(true); } }); } // Clean up and release resources @Override protected void onPause() {
In the main activity, onCreate gets a reference to a VideoView that's in this activity's layout. Next, it creates a media controller, which is a view that contains controls for
controlling the media player. The code continues by disabling the media controls, and then by attaching this media controller to the video view, with a call to the video view's setMediaController method.
Next, the code identifies the media file to play, passing in a URI that points to a file stored in the res/raw directory. Then the code sets an OnPreparedListener on the video view. This code will be called once the media is loaded and ready to play. When that happens the code will enable the media controller so the user can start the film playing. Finally, down in the onPause method, the code shuts down the video view.
MediaRecorder Class
The MediaRecorder class can be used to record both audio and video. The class operates in accordance with a state machine, which you can read more about, at this URL: http://developer.android.com/reference/android/media/MediaRecorder.html
MediaRecorder methods include:setAudioSource() - sets the source of the input, such as the microphone.setVideoSource() - sets the source of the input, such as the camerasetOutputFormat() - sets the output format for the recording, e.g. mp4. prepare() - readies the recorder to begin capturing and encoding data.start() - starts the actual recording process. stop() - stops the recording processrelease() - releases the resources held by this MediaRecorder.
The next example application is AudioVideoAudioRecording, which records and plays back audio. I'll start up the AudioVideoAudioRecording application.
It displays two toggle buttons, one labeled Start Recording and one labeled Start Playback. When I press the Start Recording button the application will begin recording. The button's label will change to Stop Recording, and the play back button will be disabled.
When I press the start recording button again, the recording will stop. The button's label will change back, and the playback button will be enabled again. Let's try it out. Now I'll press the Start Recording button.
“Testing, testing, one, two, three, testing. “
And now that I've pressed the button again, the recording is finished, and saved, and the Start Playback button is now enabled. Let me press that one now.
[device plays back] “Testing, testing, one, two, three, testing.”
And now I'll press that button again. And we're back to where we started.
Let's look at the source code for the AudioVideoAudioRecording applicationʼs main activity:
In onCreate the code first gets references to the two toggle buttons. Next it sets up an onCheckChangeListener, on each of the toggle buttons. This code is called when the check state of a toggle button changes.
Let's look at the first toggle button which is the recording button. When this button's checked state changes, say from off to on, this code will first disable the play button, and then will call the onRecordPressed method. The playback button does something similar. It first changes the enabled state of the recording button, disabling it if the user wants to start playback. Or enabling it, if the user wants to stop playback. After that, it then calls the onPlayPressed method.
Let's look at the onRecordPressed method first. As you can see, this method takes a Boolean as a parameter called shouldStartRecording. If shouldStartRecording is true, then the code calls the startRecording method. Otherwise, it calls the stopRecording method. The start recording method first creates a new MediaRecorder and then sets its source as the microphone. Then it sets the output format, and then the output file where the recording will be saved. Next it sets the encoder for the audio file.
Continuing on, the code calls the prepare method to get the recorder ready, and then calls the start method to begin recording. The stop recording method stops the media recorder and then releases its resources.
If the user had pressed the playback button, then onPlayPressed would have been called. If the button was checked then the parameter shouldStartPlaying would be true. If so, the start playing method is called, otherwise the stop playing method is called. The start playing method creates a MediaPlayer, then sets its data source, then calls
prepare and then calls the start method. The stop playing method will stop the media player, and release the media player's resources.
Camera class
The camera class allows applications to use the camera service to manage settings for capturing images, to start and stop a preview function, which allows you to use the devices display as a camera view finder, and to take pictures and video.
First, you'll need, at least, the camera Permission, and so you must include a uses-feature tag in your Android manifest .xml file that specifies the need for a camera. You also may need to specify that your application requires sub-features, such as autofocus or a flash.
You can easily use the built-in camera application to take pictures, or you might want to add some features to a traditional camera application, or you might want to use the camera for other purposes, in which case you can follow the following steps.
First, get a camera instance. Next, set any camera parameters that you might need. Then, setup the preview display if a viewfinder is needed. Next, start the preview, and
keep it running until the user takes a picture. And once the user takes a picture, your application will receive and process the picture image. And then eventually, your application will release the camera so that other applications can have access to it.
Get Camera instance Set Camera parameters as necessary Setup preview display Start the preview Take a picture & process image data Release the Camera when not in use
The example application for this lesson is called AudioVideoCamera. It takes still photos and uses the device's display as the camera's viewfinder. Let's give it a try.
As you can see, the application displays the image currently visible through the camera's lens. And if you move the camera, the image changes. If the user is satisfied with the image, then he or she can simply touch the screen to take a picture. And when he or she does so, the camera will take the picture, and then freeze the preview window for about two seconds, so the user can see the picture they just snapped.
Let me do that: I'll touch the display, to snap the picture, and now the preview freezes for about two seconds. And now the camera is ready to take another photo.
Let's look at the source code for this application. Here's the AudioVideoCamera applicationʼs main activity.
public class AudioVideoCameraActivity extends Activity {
private static final int PREVIEW_PAUSE = 2000; private static final String TAG = "AudioVideoCameraActivity"; private Camera mCamera; private LinearLayout mFrame; private SurfaceHolder mSurfaceHolder;
// Get camera instance private Camera getCamera() {
try { // Returns first back-facing camera // May take a long time to complete // Consider moving this to an AsyncTask mCamera = Camera.open(); } catch (RuntimeException e) { Log.e(TAG, "Failed to acquire camera"); } return mCamera; }
SurfaceHolder.Callback mSurfaceHolderCallback = new SurfaceHolder.Callback() {
@Override public void surfaceDestroyed(SurfaceHolder holder) { // Do Nothing
} };
// System Shutter Sound Camera.ShutterCallback mShutterCallback = new Camera.ShutterCallback() { @Override public void onShutter() { mPreviewState = PreviewState.STOPPED; } };
// Freeze the Preview for a few seconds and then restart the // preview Camera.PictureCallback mPictureCallback = new Camera.PictureCallback() { @Override public void onPictureTaken(byte[] data, Camera camera) { try { // Give the user some time to view the image Thread.sleep(PREVIEW_PAUSE); } catch (InterruptedException e) { e.printStackTrace(); }
// Would normally save the image here // Restart the preview try { mCamera.startPreview(); mPreviewState = PreviewState.RUNNING; } catch (Exception e) { Log.e(TAG, "Failed to start preview"); } } };
// Release camera so other applications can use it. mFrame.setEnabled(false); if (null != mCamera) { if (mPreviewState == PreviewState.RUNNING) { try { mCamera.stopPreview(); mPreviewState = PreviewState.STOPPED; } catch (Exception e) { Log.e(TAG, "Failed to start preview"); } } mCamera.release(); mCamera = null; }
} @Override protected void onResume() { super.onResume(); if (null == mCamera) mCamera = getCamera(); if (null == mCamera) finish(); }
// Determine the right size for the preview private Camera.Size findBestSize(Camera.Parameters parameters, int width, int height) {
Let's scroll down to the onCreate method. One of the things we see here is the code calls the getCamera method to get a reference to the camera object. Let's scroll down to that method. This method calls the camera classes open method, which returns a reference, to the first back facing camera on this device. If your device has several cameras, you can use other versions of the open method to get particular cameras.
Scrolling back up to onCreate, the code now sets up a TouchListener on the main view. When the user touches the screen, this listener's onTouch method will be called. This method will call the camera's takePicture method to take a picture. We'll come back to this method in a few seconds.
Next, the code sets up a SurfaceView that is used to display the preview, which shows the user what the camera is currently seeing. These steps are just what we talked about in our previous lesson on graphics.
First, the code gets the surface holder for the surface view, and then it adds a callback object to the surface holder. And that callback object is defined below.
Let's scroll down to it. Recall that the SurfaceHolder.Callback interface defines three methods. SurfaceCreated, surfaceChanged, and surfaceDestroyed. The surfaceCreated method starts by setting the surface holder on which the camera will show its preview. After that, the code starts the camera's preview.
When the surface changes its structure or format, the surfaceChanged method is called, which disables touches on the layout, and then stops the camera preview. Then the code changes the camera parameters. In this case, it finds an appropriate size for the camera preview, sets the preview size, and then passes the updated parameters object back to the camera.
Now that the parameters are set, the code restarts the preview, by calling the startPreview method. And last, the code re-enables touches on the layout.
So now that we've gone over setting up and managing the preview display, let's go back and look at taking the actual picture. Scrolling back up to the onTouchListener, when the user touches the display, the takePicture method is called. In that method, the code passes in two CameraCallback objects. One is the ShutterCallback, and the other is the CameraCallback.
The ShutterCallback is called when the user takes the picture, basically to let the user know that the camera is taking a picture. The CameraCallback used here is called after the picture has been taken, when the compressed image is available. When this happens, the CameraCallback's onPictureTaken method is called. In this example, the code simply sleeps for two seconds, and then restarts the preview.
Observe that this particular application doesn't actually save the image. But of course, you'd normally would want to do that, and if so, you'd typically do it right here in this method.
The last method I'll talk about is onPause. Here, the code disables touches on the display, shuts down the preview, and then releases the camera so that other applications can use it.
That's all for our lesson on multimedia. Please join me next time, when we'll talk about sensors.
Week 6 - Touch and GesturesIf you use common applications that display maps or web pages, then you've probably used gestures like swiping to scroll a view, or pinching and un-pinching your thumb and index finger to zoom in or zoom out. In this lesson, I'll start by discussing MotionEvents. Android uses this class to represent the movement in various input devices. Things like a mouse, a trackball, and most common of all, your finger. Next I'll discuss how Android takes these motion events and delivers them to views and other objects, so that your application can respond to them. And finally, I'll finish up with a discussion of how Android recognizes complex movement patterns or gestures, things like the pinch to zoom that I mentioned earlier.
MotionEvents
Android uses the MotionEvent class to represent movements in an input device, such as a pen, a trackball, a mouse or your finger. An individual movement event contains several pieces of information. It has an action code, which indicates the kind of motion that has occurred. It also contains a variety of data associated with that motion. For instance, it has information about the time at which the event occurred, which device the event came from, the event's location and, if appropriate, how hard the device was pressed, etc.
This information will vary depending on the kind of input device involved. In the rest of this lesson, I'll focus particularly on finger touch events that are read by pressing a touch screen. Many touch screen devices today are multi touch devices. That means that they can register and track multiple touches all the same time In Android, multi touch devices emit one movement trace per touch source. And each of these touch sources is referred to as a pointer. When Android encounters a new pointer, it generates a unique ID that will remain constant for as long as that pointer is active.
In some cases, Android will group multiple pointers within a single motion event. And in that case, each pointer within the motion event can be accessed by its index. But be aware, that that index is not the same as the pointer's ID. The pointer ID is constant for as long as the pointer is active. The index in which a pointer's data is stored however may not be.
Let's talk about Motion Events action codes. When a gesture begins, motion events will be created, and they will contain some of the following action codes:
• ACTION_DOWN - indicates that a first finger has been, has started touching the screen.
• ACTION_POINTER_DOWN - means that we've already had an ACTION_DOWN, and now we have another finger that has started touching the screen.
• ACTION_POINTER_UP - we've had an ACTION_POINTER followed by an ACTION_POINTER_DOWN but now one of the fingers has stopped touching the screen.
• ACTION_MOVE - some of the fingers that are touching the screen have changed their position.
• ACTION_UP - the last of the fingers that was touching the screen has now stopped touching it.
• ACTION_CANCEL - something has prematurely canceled the current gesture.
While a gesture is playing out Android will try to ensure that it's motion events obey the following rules (but applications should be tolerant to inconsistency in this).
• Touches will go down one at a time.• Touches will move as a group - so a single motion event can refer to multiple
pointers• Touches will come up one at a time or be cancelled.
When you need to process motion events, you can use some of the following methods:
• getActionMasked() - returns the action code associated with the motion event.• getActionIndex () - returns the index of the pointer associated with this action
code. For example, if the action is ACTION_POINTER_DOWN then you can use this method to find the index of the particular pointer that is just touched down.
• getPointerId(int pointerIndex) - given an index, returns the stable ID of the pointer.
• getPointerCount () - returns the number of pointers associated with the motion event.
• getX(int pointerIndex) - given an index, returns the x coordinate of the pointer. • getY(int pointerIndex) - given an index, returns the y coordinate of the pointer. • findPointerIndex(int pointerId) - returns the index associated with a given pointer
ID.
Touch
When a touch occurs on a view, Android generates a motion event, and then attempts to deliver that event to various objects, one of which is the view itself. Android delivers the motion event through the View.onTouchEvent(MotionEvent event) method. This method can process the motion event, and ends by returning true if the motion event has been consumed, false if not.
Objects interested in receiving motion events that occur on a given view, can register to receive those events by implementing the View.onTouchListener interface, and by registering the object with the View.setOnTouchListener method. The listener's onTouch method will then be called when an event such as pressing, releasing, or dragging,
occurs. This method will be called before the touch event is delivered to the touched View. And again, onTouch should return true if it consumes the motion event, or false if it doesn't.
In the simplest case, you can process each touch event independently. But applications often need to process multiple touches that are part of a more complex gesture. To do this, your code will need to identify and process particular combinations of touches, e.g. a double-touch will involve an ACTION_DOWN, an ACTION_UP, another ACTION_DOWN and finally an ACTION_UP, all in quick succession.
To give some examples, suppose you start a gesture by placing one finger down on the screen. That will generate an ACTION_DOWN event. And might assign a pointer ID of zero for that pointer. If you keep that finger down and move it on the screen, you might get several ACTION_MOVE events associated with pointer ID zero. Suppose now that you put a second finger down. In that case you'll get an ACTION_POINTER_DOWN event, and this new pointer might get an ID, say of one. If you keep those fingers down and you move them, you might get then several ACTION_MOVE events associated with the pointer IDs zero and one. If you now lift the first finger, then you'll get an ACTION_POINTER_UP event, associated with pointer zero. And then, when you finally lift the last finger, you'll get an ACTION_UP event associated with pointer ID 1.
In the next example, we'll start as before, putting down the first finger. Moving it, putting down a second finger, and then moving those fingers again. But this time, however, we'll lift the second finger first. In this case, we get an ACTION_POINTER_UP action
associated with pointer ID 1. And then finally, when we lift the last finger, we get the ACTION_UP action associated with the pointer ID 0.
For a last example, we'll use three fingers. We'll put down the first finger, then the second, and then a third. And then we'll move the fingers, and then we'll lift them up. First lifting the second finger, then the first finger, and then finally lifting the third finger.
Our first example application in this lesson is called TouchIndicateTouchLocation. And this application draws a circle wherever the user touches the screen. The circle's color is randomly selected, and the application also then redraws the circle, following the user's finger, if it moves across the screen. And finally, when the user touches the screen in multiple locations, the size of the circles that are drawn will change to reflect the number of currently active touches.
Lets take a look at this application in action:
When it starts, the screen is blank because I'm not touching the screen right. Now I'll place one finger on the screen and that causes a single circle to be drawn at the place where I've touched the screen. As I slide my finger along the screen, you can see that the circle is redrawn, to track my finger movements. Now, I'll place a second finger on the screen. And that causes the second circle to be drawn under that finger. And as you can see, the size of the two circles, is now about half of what you saw when there was only a single circle. Now, here I'll take away the second finger, and the first circle goes back to its original size. Now, I'll put the second finger back, and again the two circles appear at half size. And, I can drag these two fingers around the screen, and the circles will follow my movements, and finally here I'll put down more fingers four, six, eight, ten. I'm out of fingers now. So now I'll move them around, and now I'll start to take away some fingers. Eight, six, four, two, one.
Let's take a look at the source code for this applicationʼs main activity:
public class IndicateTouchLocationActivity extends Activity {
private static final int MIN_DXDY = 2; // Assume no more than 20 simultaneous touches final private static int MAX_TOUCHES = 20;
// Pool of MarkerViews final private static LinkedList<MarkerView> mInactiveMarkers = new LinkedList<MarkerView>();
// Set of MarkerViews currently visible on the display @SuppressLint("UseSparseArrays") final private static Map<Integer, MarkerView> mActiveMarkers = new HashMap<Integer, MarkerView>();
protected static final String TAG = "IndicateTouchLocationActivity"; private FrameLayout mFrame;
@Override public void onCreate(Bundle savedInstanceState) { super.onCreate(savedInstanceState); setContentView(R.layout.main);
mFrame = (FrameLayout) findViewById(R.id.frame);
// Initialize pool of View. initViews();
// Create and set on touch listener mFrame.setOnTouchListener(new OnTouchListener() { @Override public boolean onTouch(View v, MotionEvent event) {
switch (event.getActionMasked()) {
// Show new MarkerView case MotionEvent.ACTION_DOWN: case MotionEvent.ACTION_POINTER_DOWN: {
int pointerIndex = event.getActionIndex(); int pointerID = event.getPointerId (pointerIndex);
if (null != marker) { mInactiveMarkers.add(marker); updateTouches(mActiveMarkers.size()); mFrame.removeView(marker); } break; } // Move all currently active MarkerViews case MotionEvent.ACTION_MOVE: {
for (int idx = 0; idx < event.getPointerCount(); idx++) {
int ID = event.getPointerId(idx); MarkerView marker = mActiveMarkers.get (ID); if (null != marker) { // Redraw only if finger has travel ed a minimum distance if (Math.abs(marker.getXLoc() - event.getX(idx)) > MIN_DXDY || Math.abs(marker.getYLoc () - event.getY(idx)) MIN_DXDY) { // Set new location marker.setXLoc(event.getX (idx)); marker.setYLoc(event.getY (idx)); // Request re-draw marker.invalidate(); } } }
break; }
default:
Log.i(TAG, "unhandled action"); }
return true; }
// update number of touches on each active MarkerView private void updateTouches(int numActive) { for (MarkerView marker : mActiveMarkers.values()) { marker.setTouches(numActive); } } }); }
This code first creates a pool of custom views called marker views. Marker views will be used to mark the location of a single touch. Next, the code defines a set that holds the MarkerViews that are currently visible on the display. Down in onCreate, the code gets the FrameLayout that represents the main view of this activity. And then it creates an OnTouchListener and sets this as the recipient of that listener's OnTouch callback.
Let's look at that method. When the user touches the screen, this listener's OnTouch method is called, and that method begins by checking the action code for the new motion event. If the action code is ACTION_DOWN or ACTION_POINTER_DOWN, then there's been a new touch. So the code creates and displays a new marker view. The code does this by recording the pointer ID, and pointer index for this event. It then takes a marker view from the inactive list. And it then adds that marker view to the active set, using its pointer ID as the key for this view.
Next, it sets the location of this marker view, and then it updates the total number of touches for each currently visible marker view. And then it adds the marker view to the activity's main view.
If instead the action code was ACTION_UP, or ACTION_POINTER_UP, then a finger has been lifted off the screen, so the code essentially undoes what we just finished talking about. As before, it begins by recording the pointer ID and pointer index for this event. It then removes the marker view that was associated with the finger that was just lifted from the active set. It then adds that marker view back to the inactive list.
Next, it updates the total number of touches for each currently visible marker view, and then it removes the marker view from the activity's main view. Lastly, if the action code is ACTION_MOVE, the code adjusts the location of the affected marker views and initiates their redrawing, by looping over the pointers in the motion event. For each one, it gets the marker view for that pointer checks whether the pointer's traveled some minimum distance. If so, it sets a new location for that marker view, and then calls invalidate on the MarkerView which indicates that the MarkerView wants to be redrawn.
Handling Gestures
Android provides a class called Gesture Detector, that applications can use to recognize common touch gestures. This class can recognize gestures, such as a confirmed single tap, a double tap. Which is essentially two single taps in rapid succession. And a fling. Which is a press, followed by a drag, and release motion that has a reasonably high velocity. To use a gesture detector, your activity will have to create an instance of the GestureDetector class and will have to give it an object that implements the GestureDetector.OnGestureListener interface. And then the activity will need to override it's onTouchEvent method, which is the method that gets called when the activity receives a touch event. And this method will then delegate the motion event to the gesture detectors onTouchEvent method.
Let's look at an example application that uses a gesture detector to recognize a fling gesture. This application is called TouchGestureViewFlipper and when it starts, it presents a text view that displays a number. If the user performs a right to left fling gesture, then the text view will scroll off the left side of the screen. And while it does it, a new text view, displaying a new number will scroll in behind it, from the right.
Let's see that application in action:
When it starts up, the screen shows a text view displaying the number zero. Now, if I perform a fling gesture that is if I press and hold the view. And then quickly swipe towards the left side of the screen and finally lift my finger off the screen. Then we'll see the animation that I mentioned earlier. Let me do that now. And as you can see the text view with the number zero slid off the screen. Going towards the left, and the new text view, displaying the number 1, slid into the screen from the right. Let me do that a few more times. And notice that this gesture only works if I swipe from right to left. If I try it in the other direction, nothing will happen.
Let's take a look at the source code for the TouchGestureViewFlipper applicationʼs main activity.
First of all, this application uses the view flipper class to handle the animations. Now I won't go into that much here, but feel free to study the code, after we finish the segment.
For now, let's focus on how this application detects the fling gesture. So, in onCreate, you can see that the code creates a new GestureDetector. And in the constructor for this object, the code passes in a new SimpleOnGestureListener. And this object defines an onFling method. When a GestureDetector detects a fling gesture, this method will be called. We'll come back to that, to this method in a few seconds.
Right now, let's look at the OnTouchEvent method for this activity. This method gets called when a touch event occurs but no view in the activity handles it. When this method is called, it will simply delegate the call, to the gesture detector. If the gesture detector eventually decides that it has seen a complete fling gesture, the above onFling method will be called.
The onFling method receives a parameter - in this case it's called velocityX, that tells how fast, and in which direction the swipe gesture was performed. In this example, if the swipe was moving from right to left, at a speed of more than ten pixels per second, then the code invokes a method called switchLayoutStateTo, which causes the animation of the text views to start. If the velocity does not meet the criteria, for instance, if it's a slow drag instead of a fling, or if it's traveling in the wrong direction, then the fling gesture is ignored.
Gesture Builder
To recognize more complex gestures, you can use Android's Gesture Builder application to create and then save custom gestures. This application comes bundled with the SDK. At runtime, you can use the gesture libraries class to load your custom gestures and to recognize when a user performs one of those gestures.
To make this work, you include a GestureOverlayView in your application. And this view essentially intercepts user gestures. And then, it invokes your application code to handle those gestures.
Here's a screenshot of the gesture builder application:
As you can see, I've created four custom gestures. Next, which is a horizontal swipe, from left to right, no, which looks a bit like an, an X that you make using a single stroke. Prev, or previous, which is a horizontal swipe from right to left, and yes, which looks like a check mark.
On the emulator, GestureBuilder saves your custom gestures to a file called /mnt/sdcard/gestures. To use these gestures you'll need to copy this file into your applications /res/raw directory.
Let's look at the TouchGestures application. This application displays a small view with a candidate color for the entire applications background. The background color for the whole application is initially set to gray, and the user can use these four custom gestures that I showed earlier to interact with this application. For example, if the user performs the next gesture the background color will cycle forward. If the user performs the previous gesture, the background color cycles back. If the user performs the yes gesture, the application sets the whole application's background to the current color. And if the user performs the no gesture, the application's background color is reset to gray.
Let's see the running TouchGestures application. When it starts up, the application's background is generally gray. But there's a colored square in the middle of the screen. If I swipe the screen from left to right. The color of that square in the middle changes. And if I do it again, the color changes again. And I can go back to the previous color, by swiping, this time, from right to left, instead of left to right. If I decide that I like the current color, I can perform the yes gesture. Like so:
As you see the whole application now has a background of that color, but if I change my mind I can perform the no gesture, like so. And as you can see, the application's background goes back to its initial grey. The color square reappears in the middle of the layout and I can keep this issuing gestures to look at new candidate colors.
Let's take a look at the source code for the TouchGestures applicationʼs main activity:
mLibrary = GestureLibraries.fromRawResource(this, R.raw.gestures); if (!mLibrary.load()) { finish(); }
// Make this the target of gesture detection callbacks GestureOverlayView gestureView = (GestureOverlayView) findViewById(R.id.gestures_overlay); gestureView.addOnGesturePerformedListener(this);
}
public void onGesturePerformed(GestureOverlayView overlay, Gesture gesture) {
// Get gesture predictions ArrayList<Prediction> predictions = mLibrary.recognize (gesture);
// Get highest-ranked prediction if (predictions.size() > 0) { Prediction prediction = predictions.get(0);
// Ignore weak predictions
if (prediction.score > 2.0) { if (prediction.name.equals(PREV)) {
And you notice that this activity implements the on gesture performed listener interface, which means that it provides an on gesture performed method. In on create, the code gets a reference to the frame layout, which it stores in a variable called m frame. And this is where the candidate background colors appear. The code also gets a reference
to a relative layout, which it stores in a variable called m layout. And this is the layout for the entire application.
There's also the code that reads the gestures file from the res/ raw directory. Using the gesture libraries from raw resource method. This method returns a gesture library object, and the code then goes on to call the load method for the gesture library. After that, the code finds the gesture overlay view, which is in the layout, and adds the current activity as a listener for gestures that are intercepted by the gesture overlay view.
When the gesture overlay view detects a gesture, it calls the onGesturePerformed method. This method first calls the recognize method, which analyzes the detected gesture, and then scores each custom gesture as to how much the detected gesture resembles the custom gestures recorded in the gesture file.
Next the code gets the highest ranked prediction, and if that prediction has a high enough score the code carries out the action that is associated with that gesture. For example, if the gesture was the yes gesture, then the code sets the layout's background color to the current candidate color.
That's all for our lesson on multi-touch, and gestures. Please join me next time, when we'll discuss multimedia.