185
Hiring Manager User Guide November 2013 Page 2 of 185
WELCOME TO IRECRUITMENT As a Hiring Manager you will use iRecruitment to manage the appointment, recruitment and contract renewal process online.
Use this guide to help you as you navigate your way through the iRecruitment system.
Note:
There are a few appointments that, at this stage, cannot be made through the system. These types of appoints will continue to be using the paper based
forms available on the HR website.
Casual Academic appointments or renewals
Exam Supervisors appointments or renewals
Secondments
Variations to contracts
Promotions
Honoraries
Relieving Appointment

Hiring Manager User Guide November 2013 Page 3 of 185
CONTENTS:
Create a Vacancy (position number known) 4
Create a Vacancy (no position number) 29
Duplicate a Vacancy 55
Update a Vacancy 68
Attach a candidate (appointment by invitation and contract extensions) 79
View and Rate Applicants 87
Create an interview 111
Record Interview Outcome and Feed 122
Create an Offer 133
Send an Offer 156
Update Applicant Status 168
Update Applicant Status to Rejected 177

Hiring Manager User Guide November 2013 Page 4 of 185
CREATE A VACANCY REQUEST - EXISTING POSITION Description This topic demonstrates how to create a Vacancy Request for an existing position in iRecruitment. In this scenario you will create a new Vacancy Request for an existing position in iRecruitment. Prerequisites - The Vacancy has been discussed with the relevant Manager, Hiring Manager and/or Approver - The budget, cost centres, position number recruiting against, salary value and type of role are established (if appropriate). Results At completion of this topic you will be able to submit a Vacancy Request for approval to the relevant Approving Managers.

Hiring Manager User Guide November 2013 Page 5 of 185
Step Action
1. Begin on the Oracle Applications Home Page. Navigate to the iRecruitment: Home page.

Hiring Manager User Guide November 2013 Page 6 of 185
Step Action
2. Click the UTS Hiring Manager link.
3. The iRecruitment: Home page displays. Use this page to view your Notifications, My Recent Vacancies, Interviews and Recent Offers. Also, use this page to Create Vacancy Requests and to Manage or Attach Applicants. For this example, Create a Vacancy Request.

Hiring Manager User Guide November 2013 Page 7 of 185
Step Action
4. Click the 1. Create Vacancy Request link.

Hiring Manager User Guide November 2013 Page 8 of 185
Step Action
5. The iRecruitment: Create Vacancy: Enter Primary Details page displays. There are four steps to Create a Vacancy: - Enter primary details - Enter selection panel - Job information - Review Use this page to enter the primary details of the Vacancy.
6. Use the buttons at the top of the page to Cancel, Save For Later or move to the Next page of the Vacancy Request. If you Cancel at this point, no information will be saved. Use Save For Later if you wish to complete the Vacancy Request at a later point.
7. A Reference Number is automatically generated when creating a new Vacancy Request.
8. The Manager field automatically completes with the user's name. When creating a Vacancy on behalf of another Manager, update this field to reflect the responsible Manager.
9. The Organization field automatically completes based upon the Manager's organization.
10. Next, enter in the Position (if Existing) for the Vacancy Request.
Hiring Manager User Guide November 2013 Page 9 of 185
Step Action
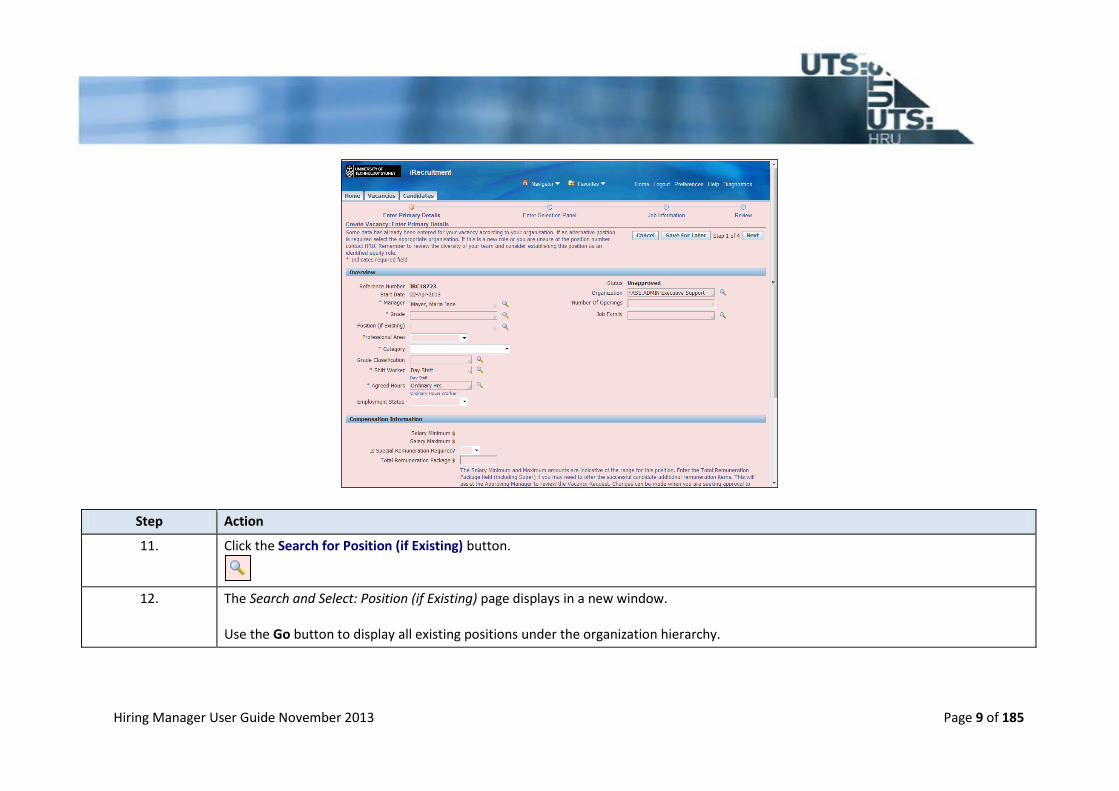
11. Click the Search for Position (if Existing) button.
12. The Search and Select: Position (if Existing) page displays in a new window. Use the Go button to display all existing positions under the organization hierarchy.

Hiring Manager User Guide November 2013 Page 10 of 185
Step Action
13. All available positions display. Identify the position relevant to this Vacancy.

Hiring Manager User Guide November 2013 Page 11 of 185
Step Action
14. Click the Quick Select button.
15. The Position is now selected. The Grade and Job Family fields automatically completes based on the Position.
16. Next, enter the Number Of Openings for the Vacancy. You can change the number of openings from one if you wil be appointing multiple times against this position.

Hiring Manager User Guide November 2013 Page 12 of 185
Step Action
17. Click the Professional Area list.
18. Enter the Professional Area for the Vacancy, if required. This categorizes the Vacancy by area, and ensures the position can be easily searched for. This is particularly important when recruiting externally.
19. Click the Category list.
20. Select the relevant Category for the position. Note: - Candidate Pool is for HR use only. - Casual Support is not used for Academic appointments.
21. Click the Activity list.
22. Select the relevant Activity type.
23. Note: An Appointment by Invitation occurs when no competitive recruitment process has been run, such as: - A Casual Support appointment - An appointment supported by submission of a business case.
24. Click the Identified Equity Position? list.

Hiring Manager User Guide November 2013 Page 13 of 185
Step Action
25. Specify if this Vacancy is an Identified Equity Position. Note: For more information on Equity Positions, refer to Staff Connect, or talk to Client Services.
26. Click the New/Existing list.
27. Specify if the position is New or Existing.
28. Enter the Incumbent Name or Position Title.
29. Enter the Appointment Duration in Months.
30. Enter the FTE for the position.
31. Click the Working with children (< 18 yrs)? list.
32. Specify if the position involves Working with children (< 18 yrs). This information is required in order to determine whether a Working with Children Check will need to be completed. If Yes, Client Services will initiate the relevant external background checks when a successful candidate has been identified.
Click the Additional Background Checks Required? list.
33. Specify if additional background checks are required. Note: Additional checks can be carried out for specific positions. These will incur additional costs as they are facilitated through an external agency.

Hiring Manager User Guide November 2013 Page 14 of 185
Step Action
34. Click the Drivers Licence list.
35. Specify whether a Driver’s License is required for the Vacancy.
36. Next, if the Vacancy is Fixed Term, select the reason why. Note: This field is only required when selecting Fixed Term in the Category field.
37. Click the Search for Reason For Fixed Term button.
38. The Search and Select: Reason For Fixed Term page displays in a new window.
Use the Go button to display all relevant reasons.
39. All reasons for selecting Fixed Term displays. Locate the desired reason.
40. Click the Next 10 link to see more options.
41. Identify the correct option and click the Quick Select button.
42. Enter any Additional Fixed Term Details. This is a mandatory field. If you have no additional details simply write "none".
43. Click the Funding list.
44. Specify if the Funding is External or Internal.
45. Next select the Grade Classification for the Vacancy.

Hiring Manager User Guide November 2013 Page 15 of 185
Step Action
46. Click the Search for Grade Classification button.
47. The Search and Select: Grade Classification page displays in a new window.
Use the Go button to display all grade classifications.
48. All relevant Grade Classifications for the Vacancy display. Locate the desired classification.
49. Click the Quick Select button to select your preferred option.
50. Next, specify what type of Shift Work relevant for the Vacancy.
51. Next, specify the Agreed Hours. Note: This field is only relevant for Casual Support staff.
52. Click the Employment Status list.
53. Specify the Employment Status of the Vacancy.
54. Next, complete the Compensation Information section. The Salary Minimum and Salary Maximum fields automatically populate if the information is available in the system. Otherwise a default figure will show eg $9999999.
55. Click the Is Special Remuneration Required? list.
Hiring Manager User Guide November 2013 Page 16 of 185
Step Action
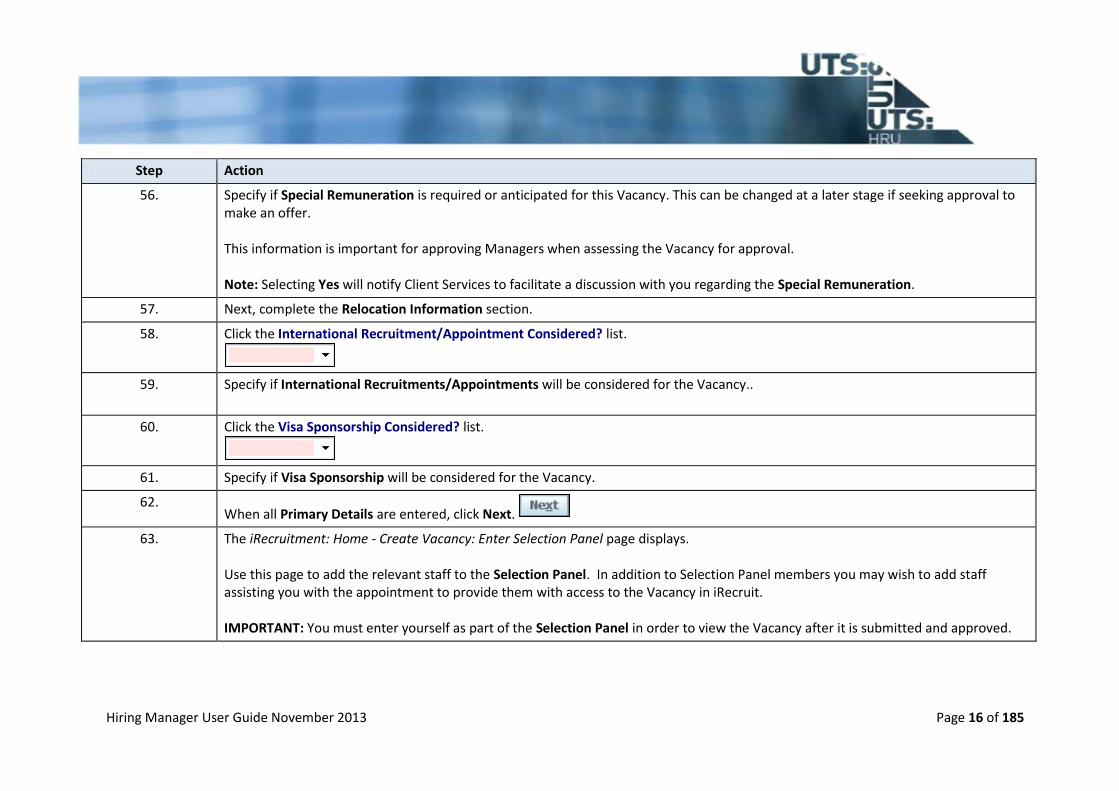
56. Specify if Special Remuneration is required or anticipated for this Vacancy. This can be changed at a later stage if seeking approval to make an offer. This information is important for approving Managers when assessing the Vacancy for approval. Note: Selecting Yes will notify Client Services to facilitate a discussion with you regarding the Special Remuneration.
57. Next, complete the Relocation Information section.
58. Click the International Recruitment/Appointment Considered? list.
59. Specify if International Recruitments/Appointments will be considered for the Vacancy..
60. Click the Visa Sponsorship Considered? list.
61. Specify if Visa Sponsorship will be considered for the Vacancy.
62. When all Primary Details are entered, click Next.
63. The iRecruitment: Home - Create Vacancy: Enter Selection Panel page displays. Use this page to add the relevant staff to the Selection Panel. In addition to Selection Panel members you may wish to add staff assisting you with the appointment to provide them with access to the Vacancy in iRecruit. IMPORTANT: You must enter yourself as part of the Selection Panel in order to view the Vacancy after it is submitted and approved.

Hiring Manager User Guide November 2013 Page 17 of 185
Step Action
64. Click the Add Another Row button.
65. Click the Search for Name button.

Hiring Manager User Guide November 2013 Page 18 of 185
Step Action
66. The Search and Select: Name page displays in a new window. Search for the desired staff member or yourself by name to add them to the Selection Panel.
67. Enter the desired information into the Search Term field and click the Go button.
68. The search results display, select the desired staff member.
69. Click the Quick Select button.
70. The staff member is now selected.
71. Click the Security Access list.
72. Next, select the Security Access for the Selection Panel staff members. Note: Panel Members should only be assigned View Only (Read Only) access.
73. Click the Update/Delete list item.
74. When all the Selection Panel staff members are entered, click Next.
75. Click the Next button.
76. The iRecruitment: Home - Create Vacancy: Job Information page displays. Use this page to enter all Job Information for the Vacancy.

Hiring Manager User Guide November 2013 Page 19 of 185
Step Action
77. Note: The Position Key Accountabilities field is only for roles less than 12 months. If your role is a Continuing or FT greater than 12 month appointment you will be asked to attach a PD or Duty Statement on the next screen.
78. Specify the correct Costing Organisation Unit and Costing Activity numbers for the Vacancy. This informs the Approver where the position is being funded from.

Hiring Manager User Guide November 2013 Page 20 of 185
Step Action
79. Enter the desired information into the Costing Organisation Unit field.
80. Enter the desired information into the Costing Activity field.
81. Next, enter in any Split Costing Information as required. This information is important when there is split costing across faculties or portfolios.
82. Enter in any Advertising Costing Information as required. For more information refer to your local Finance Officer.
83. When all the Job Information is entered, click Next.
84. Click the Next button.
85. The iRecruitment: Home - Create Vacancy: Review page displays. Use this page to review the Vacancy information you have entered, attach any documents and add comments for the Approver. Scroll down to review all the entered information.

Hiring Manager User Guide November 2013 Page 21 of 185
Step Action
86. The Approvals process is built according to the Council's Standing Delegation Of Authority. Refer to the Governance Support Unit's website for more information on delegations.
87. Adhoc Approvers may be required to accommodate local area Approvals. Adhoc Approvers can also be added to the Vacancy Request.

Hiring Manager User Guide November 2013 Page 22 of 185
Step Action
88. Click the Expand button.
89. Select the Approver and Insertion Point as required for the Adhoc Approver.
90. Click the Add Documents button to upload any relevant documents such as the Position Description or Business Case.
91. The Add Attachment page displays. Use this page to attach relevant documents. Note: External Documents will be viewable by both internal and external iRecruitment users, while Internal Documents can only be viewed by internal iRecruitment users. - Fixed term roles Greater than 12mths and Continuing positions require the Position Description, Organisation Chart, and Selection Criteria document (as one document) to be attached. - Appointments by Invitation for fixed term roles Greater than 12mths and Continuing positions require a Business Case document to be attached.

Hiring Manager User Guide November 2013 Page 23 of 185
Step Action
92. Click the Add Attachment button.
93. Enter the Title and Description of the attachment.
94. Next, attach the document from a URL or by using the Browse... button.

Hiring Manager User Guide November 2013 Page 24 of 185
95. If you need to add more documents, use the Add Another button.

Hiring Manager User Guide November 2013 Page 25 of 185
Step Action
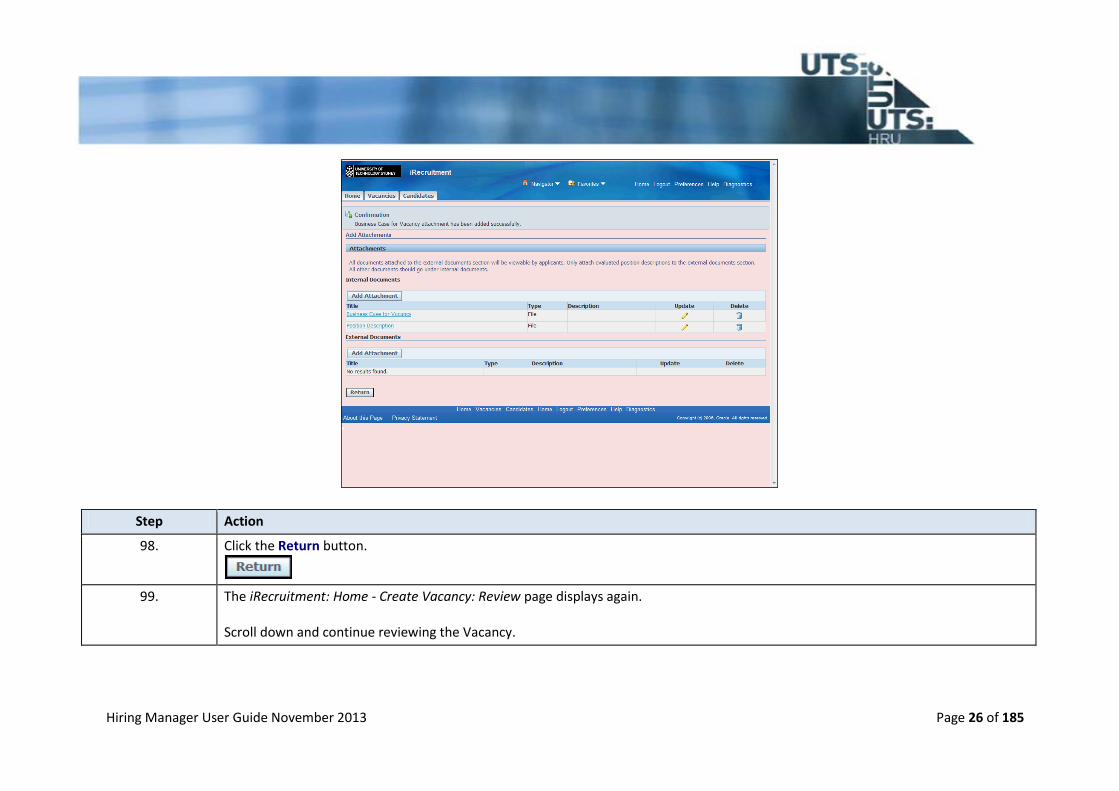
96. Click the Apply button.
97. The desired documents are now attached.
Hiring Manager User Guide November 2013 Page 26 of 185
Step Action
98. Click the Return button.
99. The iRecruitment: Home - Create Vacancy: Review page displays again. Scroll down and continue reviewing the Vacancy.

Hiring Manager User Guide November 2013 Page 27 of 185
Step Action
100. Enter in any comments to the Approver. Ensure you have had any urgent or important conversations about this role first.
101. When the Review is complete and all relevant documents attached, click the Submit button to send the Vacancy Request for approval.
102. The iRecruitment: Home page displays again. The Vacancy has been submitted for approval.
Hiring Manager User Guide November 2013 Page 28 of 185
Step Action
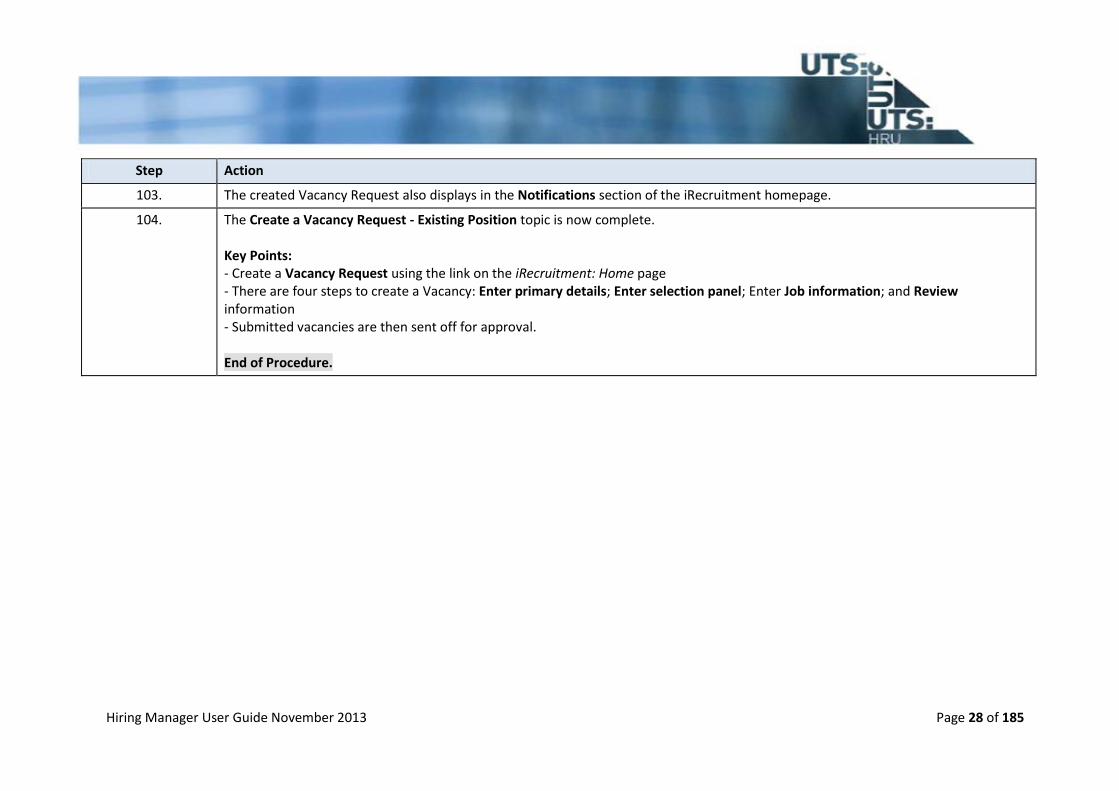
103. The created Vacancy Request also displays in the Notifications section of the iRecruitment homepage.
104. The Create a Vacancy Request - Existing Position topic is now complete. Key Points: - Create a Vacancy Request using the link on the iRecruitment: Home page - There are four steps to create a Vacancy: Enter primary details; Enter selection panel; Enter Job information; and Review information - Submitted vacancies are then sent off for approval. End of Procedure.

Hiring Manager User Guide November 2013 Page 29 of 185
CREATE A VACANCY REQUEST - UNKNOWN POSITION Description This topic demonstrates how to Create a Vacancy Request when there is no existing position (or the position number is not known) in iRecruitment. Pre requisites - The Vacancy has been discussed with the relevant Manager, Hiring Manager and/or Approver - The budget, cost centres, salary value and type of role are established (if appropriate). Results At completion of this topic you will be able to submit a Vacancy Request for approval to the relevant Approving Managers.

Hiring Manager User Guide November 2013 Page 30 of 185
Step Action
1. Begin on the Oracle Applications Home Page. Navigate to the iRecruitment: Home page.

Hiring Manager User Guide November 2013 Page 31 of 185
Step Action
2. Click the UTS Hiring Manager link.
3. The iRecruitment: Home page displays. Use this page to view your Notifications, My Recent Vacancies, Interviews and Recent Offers. Also, use this page to Create Vacancy Requests and to Manage or Attach Applicants.

Hiring Manager User Guide November 2013 Page 32 of 185
Step Action
4. Click the 1. Create Vacancy Request link.

Hiring Manager User Guide November 2013 Page 33 of 185
Step Action
5. The iRecruitment: Create Vacancy: Enter Primary Details page displays. There are four steps to create a Vacancy: - Enter primary details - Enter selection panel - Job information - Review Use this page to enter the primary details of the Vacancy.
6. Use the buttons at the top of the page to Cancel, Save For Later or move to the Next page of the Vacancy Request. If you Cancel at this point, no information will be saved. Use Save For Later if you wish to complete the Vacancy Request at a later point.
7. A Reference Number is generated when creating a new Vacancy Request.
8. The Manager field automatically completes with the user's name. When creating a Vacancy on behalf of another Manager, update this field to reflect the responsible Manager.
9. The Organization field automatically completes based upon the Manager's organization.
10. In this example, the Position Number does not exist, or is not known.
11. If there is no existing Position (or the number is not known) for the Vacancy Request, then the Grade will not be available. Estimate the Grade for the Vacancy Request - this will be corrected when the Position is entered later in the process.

Hiring Manager User Guide November 2013 Page 34 of 185
Step Action
12. Click the Search for Grade button.
Hiring Manager User Guide November 2013 Page 35 of 185
Step Action
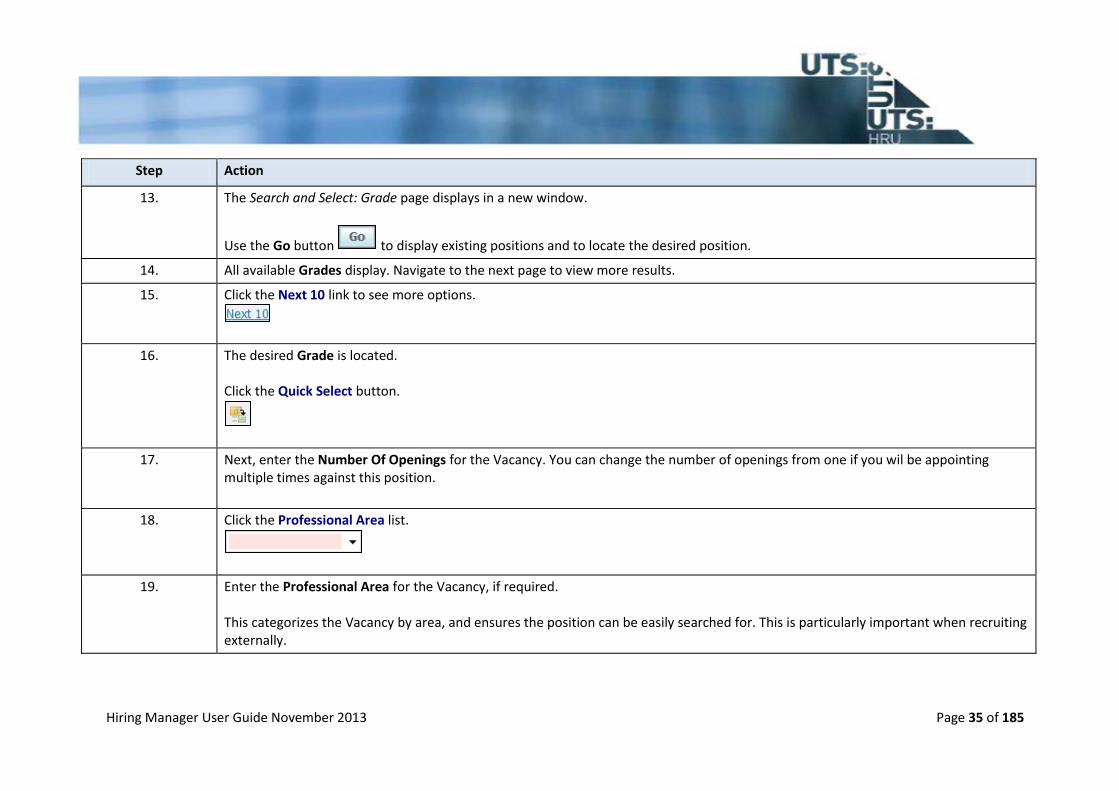
13. The Search and Select: Grade page displays in a new window.
Use the Go button to display existing positions and to locate the desired position.
14. All available Grades display. Navigate to the next page to view more results.
15. Click the Next 10 link to see more options.
16. The desired Grade is located. Click the Quick Select button.
17. Next, enter the Number Of Openings for the Vacancy. You can change the number of openings from one if you wil be appointing multiple times against this position.
18. Click the Professional Area list.
19. Enter the Professional Area for the Vacancy, if required. This categorizes the Vacancy by area, and ensures the position can be easily searched for. This is particularly important when recruiting externally.

Hiring Manager User Guide November 2013 Page 36 of 185
Step Action
20. Click the Category list.
21. Select the relevant Category for the position. Note: - Candidate Pool is for HR use only. - Casual Support is not used for Academic appointments.
22. Click the Activity list.
23. Select the relevant Activity type.
24. Click the Identified Equity Position? list.
25. Specify if this Vacancy is an Identified Equity Position. Note: For more information on Equity Positions, refer to the intranet, or talk to Client Services.
26. Click the New/Existing list.
27. Specify if the position is New or Existing.
28. Enter the Incumbent Name or Position Title.

Hiring Manager User Guide November 2013 Page 37 of 185
Step Action
29. Enter the Appointment Duration in Months.
30. Enter the FTE for the position.
31. Click the Working with children (< 18 yrs)? list.
32. Specify if the position involves Working with children (< 18 yrs). This information is required in order to determine whether a Working with Children Check will need to be completed. If Yes, Client Services will initiate the relevant external background checks for position candidates.
33. Click the Additional Background Checks Required? list.
34. Specify if additional background checks are required. Note: Additional checks can be carried out for specific positions. These will incur additional costs as they are facilitated through an external agency.
35. Click the Drivers License list.
36. Specify whether a Drivers License is required for the Vacancy.
37. Next, if the Vacancy is for a Fixed Term, select the reason why. Note: This field is only required when selecting Fixed Term in the Category field.

Hiring Manager User Guide November 2013 Page 38 of 185
Step Action
38. Click the Search for Reason For Fixed Term button.
39. The Search and Select: Reason For Fixed Term page displays in a new window.
Use the Go button to display all relevant reasons.
40. All reasons for selecting Fixed Term displays. Navigate to the next page to view more results.
41. Click the Next 10 link to see more options.
42. The desired reason is located. Click the Quick Select button.
43. The Reason For Fixed Term is now selected.
44. Enter any Additional Fixed Term Details. This is a mandatory field. If you have no additional details simply write "none".

Hiring Manager User Guide November 2013 Page 39 of 185
Step Action
45. Click the Funding list.
46. Specify if the Funding is External or Internal.
47. Next select the Grade Classification for the Vacancy.
48. Click the Search for Grade Classification button.
49. The Search and Select: Grade Classification page displays in a new window.
Use the Go button to display all grade classifications.
50. All relevant Grade Classifications for the Vacancy display. Locate the desired classification.
51. Click the Quick Select button.
52. The Grade Classification is now selected.
53. Next, specify what type of Shift Work relevant for this vacancy.
54. Next, specify the Agreed Hours. Note: This field is only relevant for Casual Support staff.
Hiring Manager User Guide November 2013 Page 40 of 185
Step Action
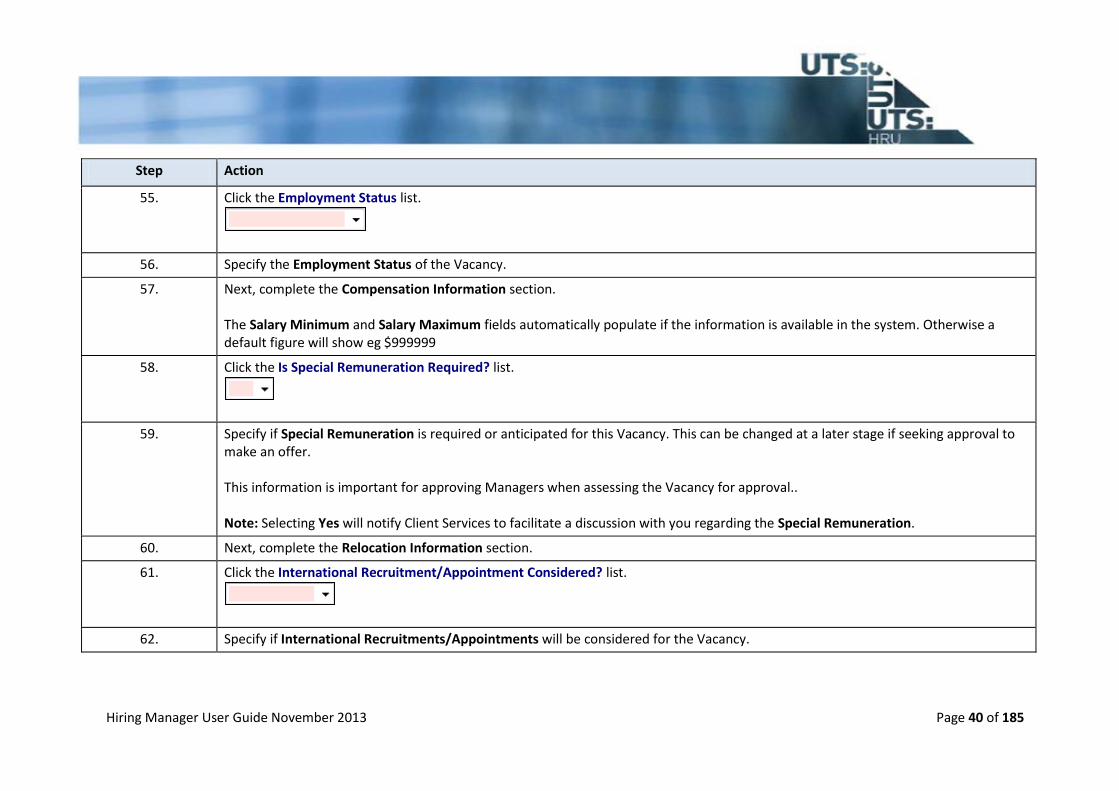
55. Click the Employment Status list.
56. Specify the Employment Status of the Vacancy.
57. Next, complete the Compensation Information section. The Salary Minimum and Salary Maximum fields automatically populate if the information is available in the system. Otherwise a default figure will show eg $999999
58. Click the Is Special Remuneration Required? list.
59. Specify if Special Remuneration is required or anticipated for this Vacancy. This can be changed at a later stage if seeking approval to make an offer. This information is important for approving Managers when assessing the Vacancy for approval.. Note: Selecting Yes will notify Client Services to facilitate a discussion with you regarding the Special Remuneration.
60. Next, complete the Relocation Information section.
61. Click the International Recruitment/Appointment Considered? list.
62. Specify if International Recruitments/Appointments will be considered for the Vacancy.

Hiring Manager User Guide November 2013 Page 41 of 185
Step Action
63. Click the Visa Sponsorship Considered? list.
64. Specify if Visa Sponsorship will be considered for the Vacancy.
65. When all Primary Details are entered, click Next button.
66. The iRecruitment: Home - Create Vacancy: Enter Selection Panel page displays. Use this page to add the relevant staff to the Selection Panel. In addition to Selection Panel members you may wish to add staff assisting you with the appointment to provide them with access to the Vacancy in iRecruit. Note: You must enter yourself as part of the Selection Panel.

Hiring Manager User Guide November 2013 Page 42 of 185
Step Action
67. Click the Add Another Row button.
68. Enter or search for the relevant staff member.

Hiring Manager User Guide November 2013 Page 43 of 185
Step Action
69. Click the Security Access list.
70. Next, select the Security Access for the Selection Panel staff members. Note: Panel Members should only be assigned View Only (Read Only) access.
71. Click the Update/Delete list item.
72. When all the Selection Panel staff members are entered, click Next button.
73. The iRecruitment: Home - Create Vacancy: Job Information page displays. Use this page to enter all Job Information for the Vacancy.
74. Note: The Position Key Accountabilities field is only for roles less than 12mths.
75. Specify the correct Costing Organisation Unit and Costing Activity numbers for the Vacancy. This informs the Approver where the position is being funded from.

Hiring Manager User Guide November 2013 Page 44 of 185
Step Action
76. Enter the desired information into the Costing Organisation Unit field.
77. Enter the desired information into the Costing Activity field.
78. Next, enter in any Split Costing Information as required. This information is important, such as when there is split costing across faculties, or portfolios.

Hiring Manager User Guide November 2013 Page 45 of 185
Step Action
79. Enter in any Advertising Costing Information as required. For more information refer to your local Finance Officer.
80. When all the Job Information is entered, click Next button.
81. The iRecruitment: Home - Create Vacancy: Review page displays. Use this page to review the Vacancy information you have entered, attach any documents and add comments to the Approver. Scroll down to review all the entered information.

Hiring Manager User Guide November 2013 Page 46 of 185
Step Action
82. The Approvals process is built according to the Council's Standing Delegation Of Authority. Refer to the Governance Support Unit's website for more information on delegations.
83. Adhoc Approvers may be required to accommodate local area approvals. Adhoc Approvers can also be added to the Vacancy Request.

Hiring Manager User Guide November 2013 Page 47 of 185
Step Action
84. Next, attach any relevant documents, such as the Position Description. Click the Add Documents button.
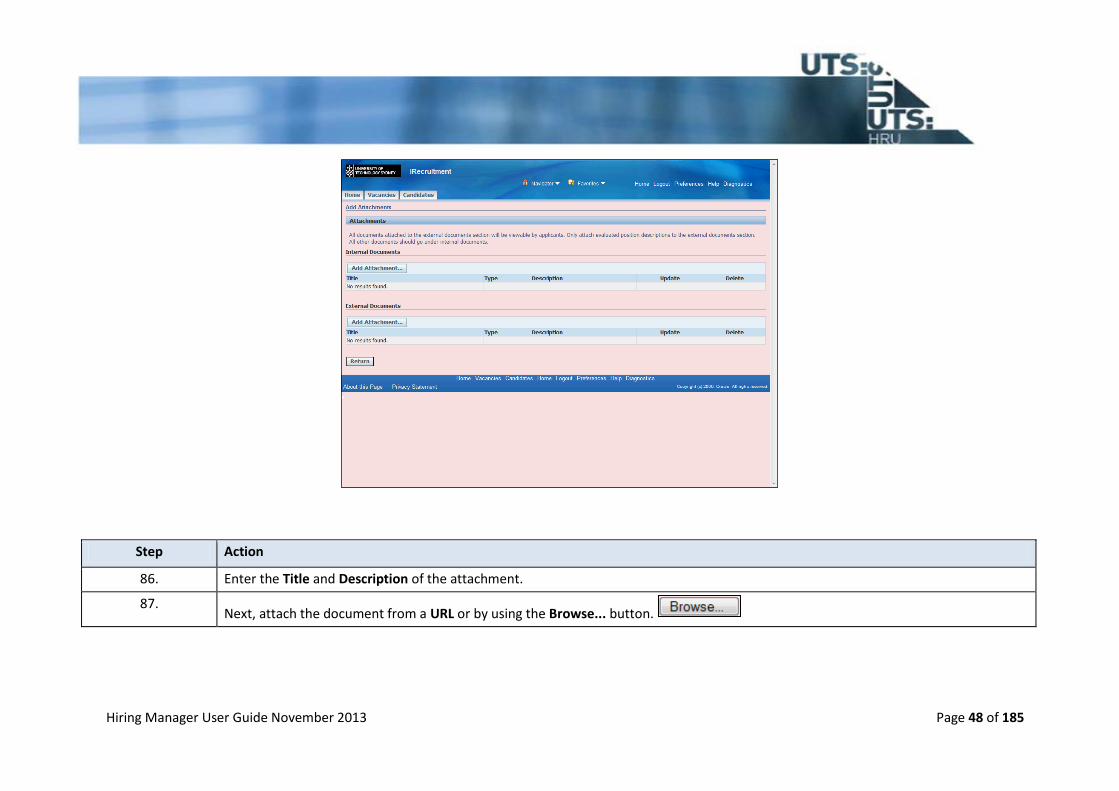
85. The Add Attachment page displays. Click the Add Attachment... button.
Use this page to attach relevant documents. Note: - External Documents will be viewable by both internal and external applicants, while Internal Documents can only be viewed by internal applicants. - Fixed term roles Greater than 12mths and Continuing require the Position Description, Organisation Chart, and Selection Criteria document (one document) be attached. - Appointments by Invitation for fixed term roles Greater than 12mths and Continuing require the Business Case document be attached.
Hiring Manager User Guide November 2013 Page 48 of 185
Step Action
86. Enter the Title and Description of the attachment.
87. Next, attach the document from a URL or by using the Browse... button.

Hiring Manager User Guide November 2013 Page 49 of 185
Choose the desired document. If you need to add more documents, use the Add Another button.

Hiring Manager User Guide November 2013 Page 50 of 185
Step Action
88. Click the Apply button.
89. The desired documents are now attached.

Hiring Manager User Guide November 2013 Page 51 of 185
Step Action
90. Click the Return button.
91. The iRecruitment: Home - Create Vacancy: Review page displays again. Scroll down and continue reviewing the Vacancy.

Hiring Manager User Guide November 2013 Page 52 of 185
Step Action
92. Enter in any comments to the Approver.
93. When the Review is complete and all relevant documents attached, click the Submit button to send the Vacancy Request for approval.

Hiring Manager User Guide November 2013 Page 53 of 185
Step Action
94. The iRecruitment: Home page displays again. The Vacancy has been submitted to HR in order to confirm the position details, and to create/identify the Position Number. If required, HR may also provide further help developing or evaluating a Position Description (PD).
95. Once HR has reviewed the request, and created/identified the Position Number you will receive an automated email, and a notification on the Oracle Applications Home Page. This notification will return the Vacancy Request for Correction and include the Position Number.
96. Navigate to the Oracle Applications Home Page. The Return for Correction notification from HR displays.
97. Click the New Vacancy for Your, Name (IRCXXXXX) is Returned for Correction link.
98. Use the Continue Action link at the bottom of the page to add this number to the Vacancy Request.
99. The iRecruitment: Create Vacancy: Enter Primary Details page displays again. Enter the Position Number sent to you in the notification into the Position (if Existing) field.
Hiring Manager User Guide November 2013 Page 54 of 185
Step Action
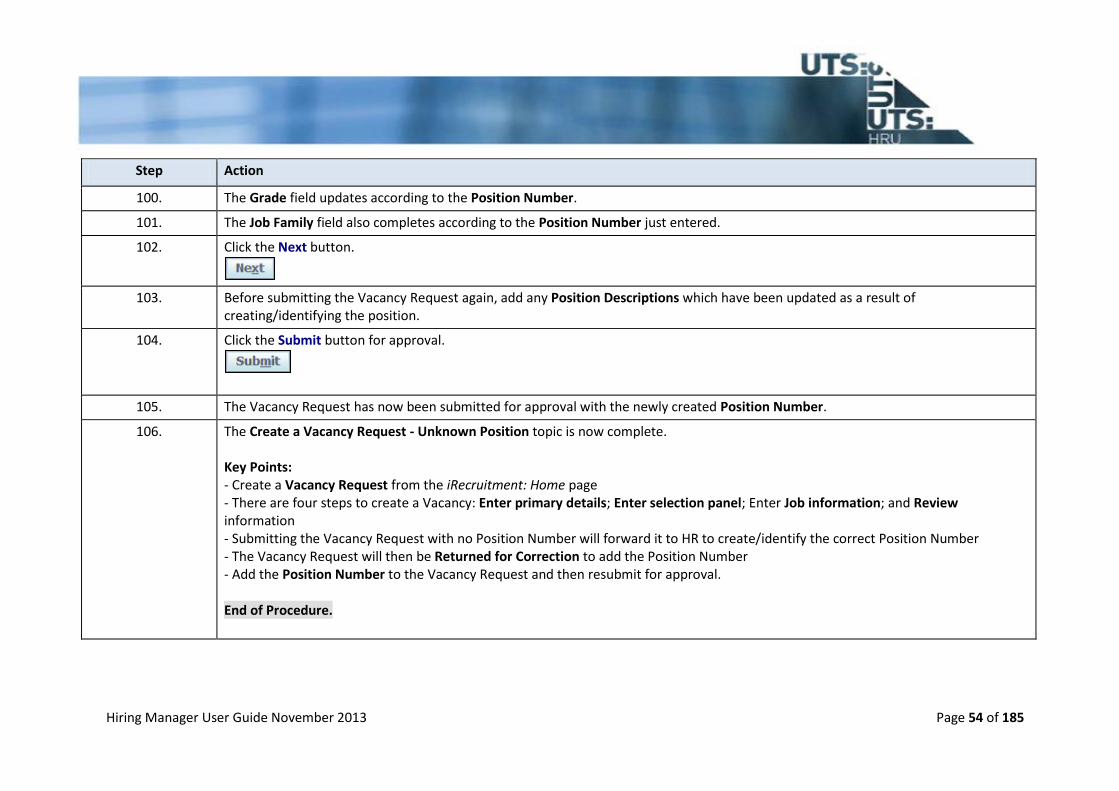
100. The Grade field updates according to the Position Number.
101. The Job Family field also completes according to the Position Number just entered.
102. Click the Next button.
103. Before submitting the Vacancy Request again, add any Position Descriptions which have been updated as a result of creating/identifying the position.
104. Click the Submit button for approval.
105. The Vacancy Request has now been submitted for approval with the newly created Position Number.
106. The Create a Vacancy Request - Unknown Position topic is now complete. Key Points: - Create a Vacancy Request from the iRecruitment: Home page - There are four steps to create a Vacancy: Enter primary details; Enter selection panel; Enter Job information; and Review information - Submitting the Vacancy Request with no Position Number will forward it to HR to create/identify the correct Position Number - The Vacancy Request will then be Returned for Correction to add the Position Number - Add the Position Number to the Vacancy Request and then resubmit for approval. End of Procedure.

Hiring Manager User Guide November 2013 Page 55 of 185
DUPLICATE A VACANCY REQUEST
Description This topic demonstrates how to duplicate a Vacancy Request using a previously approved Vacancy in iRecruitment. In this scenario you will navigate to the Vacancies tab, search for a recently approved Vacancy Request and duplicate this Vacancy Request. Pre requisites - The Vacancy has been discussed with the relevant Manager, Hiring Manager and/or Approver - The budget and salary value of role are established (if appropriate). - The IRC Reference Number for the position to be duplicated (or can search by Hiring Manager name) - The Vacancy to be duplicated has been approved. Results At completion of this topic you will be able to submit a Vacancy Request for approval to the relevant Approving Managers.
Step Action
1. Begin on the iRecruitment: Home page. Use this page to view your Notifications, My Recent Vacancies, Interviews and Recent Offers. You can also use this page to Create Vacancy Requests and to Manage or Attach Applicants.

Hiring Manager User Guide November 2013 Page 56 of 185
Step Action
2. Click the Vacancies tab.
Hiring Manager User Guide November 2013 Page 57 of 185
Step Action
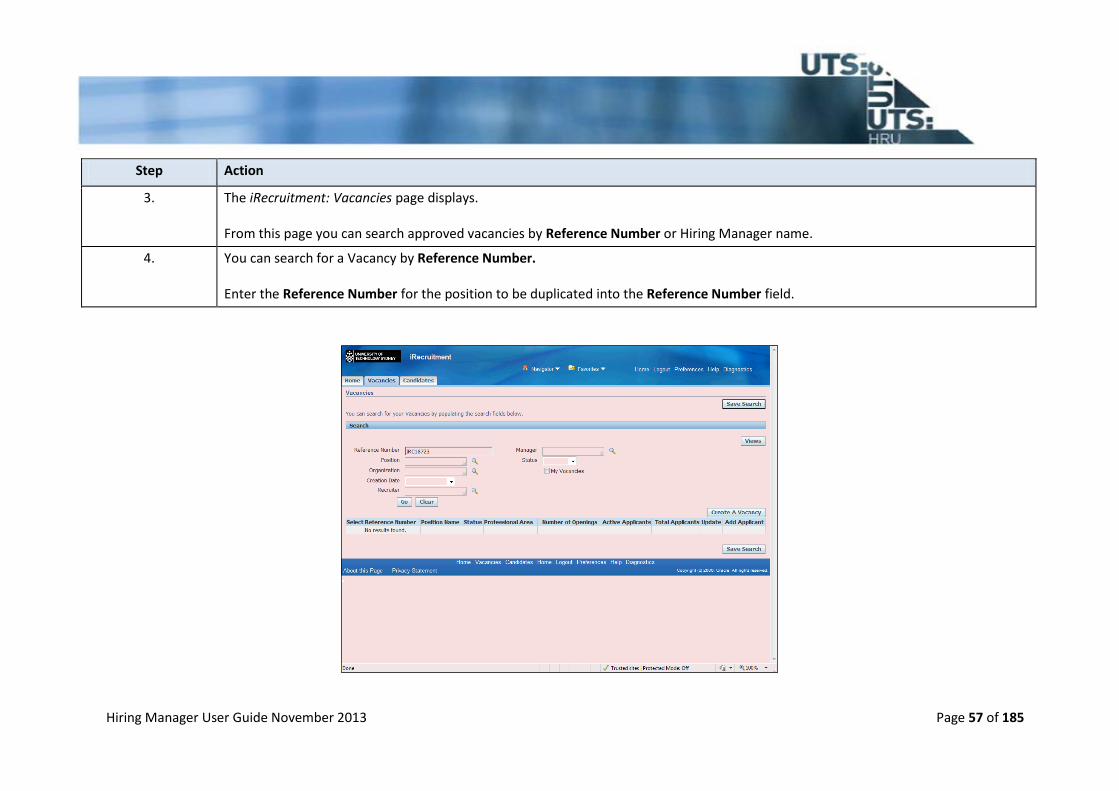
3. The iRecruitment: Vacancies page displays. From this page you can search approved vacancies by Reference Number or Hiring Manager name.
4. You can search for a Vacancy by Reference Number. Enter the Reference Number for the position to be duplicated into the Reference Number field.

Hiring Manager User Guide November 2013 Page 58 of 185
Step Action
5. Click the Go button.
6. The details for the Reference Number entered are now displayed. Select this Reference Number to duplicate this Vacancy Request using the radio button.
7. Click the Duplicate Vacancy button.
8. The iRecruitment: Create Vacancy: Enter Primary Details page displays. A new Vacancy Request is created. This page is pre-populated with details of the original Vacancy Request. Fields on this screen should be checked for accuracy and updated appropriately for the new Vacancy Request.
9. A new Reference Number has been generated for the new Vacancy Request.
10. Update the fields to reflect the new Vacancy Request requirements.

Hiring Manager User Guide November 2013 Page 59 of 185
Step Action
11. Click the scrollbar to review and update further fields.
12. Continue to review and update the fields to reflect the new Vacancy Request requirements.
13. The fields on this screen have now been reviewed and updated.

Hiring Manager User Guide November 2013 Page 60 of 185
Step Action
14. Move to the next screen to continue reviewing and updating the Vacancy details. Click the Next button.
15. The iRecruitment: Home - Create Vacancy: Enter Selection Panel page displays. Details of Selection Panel members for original Vacancy have pre-populated. Use this page to review, add and/or remove the relevant staff to the Selection Panel, including any staff that may need access to the vacancy in iRecruitment to assist you with any processing work. IMPORTANT: You must enter yourself as part of the Selection Panel.
16. An additional member will be added to the Selection Panel using the Add Another Row button.

Hiring Manager User Guide November 2013 Page 61 of 185
Step Action
17. Click the Next button to review and update further fields.

Hiring Manager User Guide November 2013 Page 62 of 185
Step Action
18. The iRecruitment: Home - Create Vacancy: Job Information page displays. This page has pre-populated with details from the original Vacancy Request. Use this page review and update all Job Information for the Vacancy.
19. Check the correct Advertising Costing Information is completed.

Hiring Manager User Guide November 2013 Page 63 of 185
Step Action
20. Click the Next button.
21. The iRecruitment: Home - Create Vacancy: Review page displays. Use this page to review the Vacancy information you have entered, attach any documents and add comments to the Approver. Scroll down to review all the entered information.

Hiring Manager User Guide November 2013 Page 64 of 185
Step Action
22. Next, check (and if necessary attach) any relevant documents, such as the Position Description.
23. Click the Add Documents button.

Hiring Manager User Guide November 2013 Page 65 of 185
Step Action
24. The documents from the original Vacancy Request are attached. These can be updated, for example if a new position description exits.

Hiring Manager User Guide November 2013 Page 66 of 185
Step Action
25. Click the Return button.
26. The iRecruitment: Home - Create Vacancy: Review page displays again. Scroll down and continue reviewing the Vacancy.

Hiring Manager User Guide November 2013 Page 67 of 185
Step Action
27. Enter in any comments to the Approver.
28. When the Review is complete and all relevant documents attached, click the Submit document to send the Vacancy Request for approval.
29. The iRecruitment: Home page displays along with Confirmation the Vacancy has been submitted for approval.
30. The created Vacancy Request also displays in the Notifications section of the iRecruitment homepage.
31. The Duplicate a Vacancy Request topic is now complete. Key Points: - Duplicate a Vacancy Request from the iRecruitment: Home page. - Search for approved Vacancies using the Reference Number. - Duplicate the Vacancy and generate a new Reference Number. - Review and update the pre-populated details. - Submitted vacancies are then sent off for approval. End of Procedure.

Hiring Manager User Guide November 2013 Page 68 of 185
UPDATE A VACANCY Description This topic demonstrates how to update the Selection Panel and Adhoc Approvers for a vacancy in iRecruitment. It is relevant to Hiring Managers with an approved vacancy. In this scenario you will update a vacancy by adding a new Selection Panel member and an Adhoc Approver. Pre requisites - An approved vacancy - Details of the individual(s) to add or remove from the Selection Panel - Details of the individual(s) to add as an Adhoc Approver (if required) Results At completion of this topic Hiring Managers will be able to: - Update a vacancy to add or delete members of the Selection Panel - Update a vacancy to add Adhoc Approvers if required.

Hiring Manager User Guide November 2013 Page 69 of 185
Step Action
1. Begin on the Oracle Applications Home Page. Navigate to the iRecruitment: Home page.

Hiring Manager User Guide November 2013 Page 70 of 185
Step Action
2. Click the UTS Hiring Manager link.

Hiring Manager User Guide November 2013 Page 71 of 185
Step Action
3. The iRecruitment: Home page displays. Use this page to view a list of your vacancies in the My Recent Vacancies field. Click the + button.
4. Your recent vacancies display. If you are unable to find the desired vacancy, update the number of days to broaden the listing.
5. Click the Update Vacancy button to update the desired vacancy.
6. The Update Vacancy: Enter Primary Details screen displays. Use this page to view an overview of the vacancy.

Hiring Manager User Guide November 2013 Page 72 of 185
Step Action
7. Click the Next button.
8. The Update Vacancy: Enter Team Members screen displays. Use this screen to add or remove Selection Panel members and update members' Security Access.

Hiring Manager User Guide November 2013 Page 73 of 185
Step Action
9. Click the Add Another Row button.
10. Enter or search for the desired member.
11. Enter the desired information into the Name field.
Hiring Manager User Guide November 2013 Page 74 of 185
Step Action
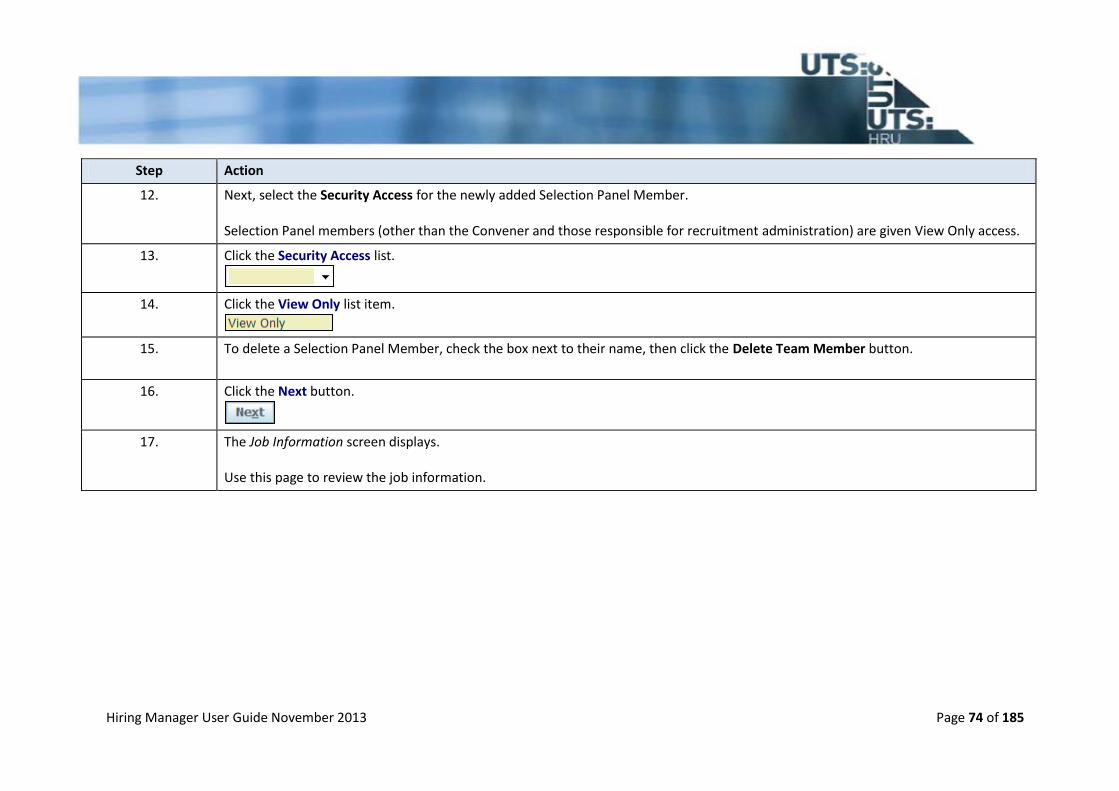
12. Next, select the Security Access for the newly added Selection Panel Member. Selection Panel members (other than the Convener and those responsible for recruitment administration) are given View Only access.
13. Click the Security Access list.
14. Click the View Only list item.
15. To delete a Selection Panel Member, check the box next to their name, then click the Delete Team Member button.
16. Click the Next button.
17. The Job Information screen displays. Use this page to review the job information.

Hiring Manager User Guide November 2013 Page 75 of 185
Step Action
18. Click the Next button.
19. The Update Vacancy: Review screen displays. Use this page to review the updated vacancy information and add any Adhoc approvers.

Hiring Manager User Guide November 2013 Page 76 of 185
Step Action
20. Click the scrollbar.
21. Click the scrollbar.
22. The Selection Panel section shows all members who have been added to the vacancy. When you add new members they will be listed under the Proposed column, and a blue dot will appear next to their name.

Hiring Manager User Guide November 2013 Page 77 of 185
Step Action
23. The Approvers section shows the list of approvers for the vacancy. Use this section to add approvers if needed.
24. Click the + button to add an Adhoc Approver.
25. Enter or search for the Approver you would like to add to the vacancy.
26. Enter the desired information into the Approver field. For this example, enter "Margulis, Lynn".
27. Click the Add button.
28. The Approvers section is now updated with the new Adhoc Approver. Once the vacancy is submitted, it will be sent for approval to the new Adhoc Approver.
29. Click the scrollbar.
30. When all updates have been entered click the Submit button to finish updating the vacancy.
31. The vacancy updates have been submitted. If you have added an Adhoc Approver, the vacancy will be sent to that approver.

Hiring Manager User Guide November 2013 Page 78 of 185
Step Action
32. The Update a Vacancy (Hiring Manager) topic is now complete. Key Points: - Update a vacancy to amend Selection Panel members or Adhoc Approvers - Selection Panel members (other than the Convener and those responsible for recruitment administration) are given View Only access - Adhoc Approvers may be added during this process if required End of Procedure.

Hiring Manager User Guide November 2013 Page 79 of 185
ATTACH AN APPLICANT Description This topic demonstrates how to attach an applicant to a Vacancy in iRecruitment. This is required when a vacancy is not advertised and requires a Hiring Manager to attach the applicant to the vacancy eg Appointment by Invitation or contract extension. Pre requisites - An approved vacancy - The preferred candidate has a registered or activated account in iRecruitment Results At completion of this topic, the preferred applicant is attached to the Vacancy. A request can then be created to offer the position to the applicant.

Hiring Manager User Guide November 2013 Page 80 of 185
Step Action
1. Begin on the Oracle Applications Home Page. Navigate to the iRecruitment: Home page.

Hiring Manager User Guide November 2013 Page 81 of 185
Step Action
2. Click the UTS Hiring Manager link.
3. The iRecruitment: Home page displays. Use this page to view your Notifications, My Recent Vacancies, Interviews and Recent Offers. Expand the My Recent Vacancies section to view your approved vacancies.
Hiring Manager User Guide November 2013 Page 82 of 185
Step Action
4. Click the Expand button.
5. This section shows the details and status of your approved vacancies, such as the Number of Openings, Active Applicants, Total Applicants, and Filled fields.
6. Use the Add Applicant button to attach an applicant.
7. Click the Add Applicant button.
8. The iRecruitment: Apply for Job: Select Candidate page displays. There are four pages to navigate through in order to attach an applicant to a vacancy. They are: - Select Candidate - Candidate Details - Additional Information - Application Review
9. Use this page to search for and select the desired applicant.

Hiring Manager User Guide November 2013 Page 83 of 185
Step Action
10. Search for the desired applicant using the Last Name field.
11. Click the Go button.
12. The search results display. Select the candidate to be attached to the vacancy. The following screens will show you how to Select the applicant, and click the Next button to continue.

Hiring Manager User Guide November 2013 Page 84 of 185
Step Action
13. Note: In the event that you are unable to locate your applicant please contact the Recruitment Team.
14. Click the Select option.
15. Click the Next button.
16. The iRecruitment: Apply for Job: Candidate Details page displays. Review the Personal Details on this page.
17. Click the Next button.
18. The iRecruitment: Apply for Job: Additional Information page displays. If the candidate is external and identified the Source through which they became aware of the vacancy when they registered eg SEEK then this will be automatically displayed in the Posting Source. This page is for information only. You are not required to enter any details on this page.
19. Click the Next button.
20. The iRecruitment: Application Review page for the selected applicant displays. Review the Personal Details on this page - you will then be required to click Finish to attach the applicant.
21. Click the Finish button.

Hiring Manager User Guide November 2013 Page 85 of 185
Step Action
22. The iRecruitment: Home page displays again. A banner message displays confirmation that the applicant has been attached to the vacancy.
23. The vacancy's Active Applicants and Total Applicants fields now display that an applicant has been attached. Click the Total Applicants link to view all attached applicants.

Hiring Manager User Guide November 2013 Page 86 of 185
Step Action
24. Click the Total Applicants link.
25. The iRecruitment: Home - View Applicants page displays. The recently attached applicant, Marie Curie, displays.
26. The Attach an Applicant topic is now complete. Key Points: - Attach an applicant through the My Recent Vacancies section on the iRecruitment: Home page - Search for and select the desired applicant - Review the applicant's details before submitting the applicant for attachment. End of Procedure.

Hiring Manager User Guide November 2013 Page 87 of 185
VIEW AND RATE APPLICANTS Description This topic demonstrates how to view and rate applicants in iRecruitment. Pre requisites - The Hiring Manager has a copy of both the Position Description and Select Criteria - The Applicant's application has been received in iRecruitment. Results At completion of this topic, the Hiring Manager produces a final Applicant Details Report and distributes this to the Selection Panel for the vacancy.
Hiring Manager User Guide November 2013 Page 88 of 185
Step Action
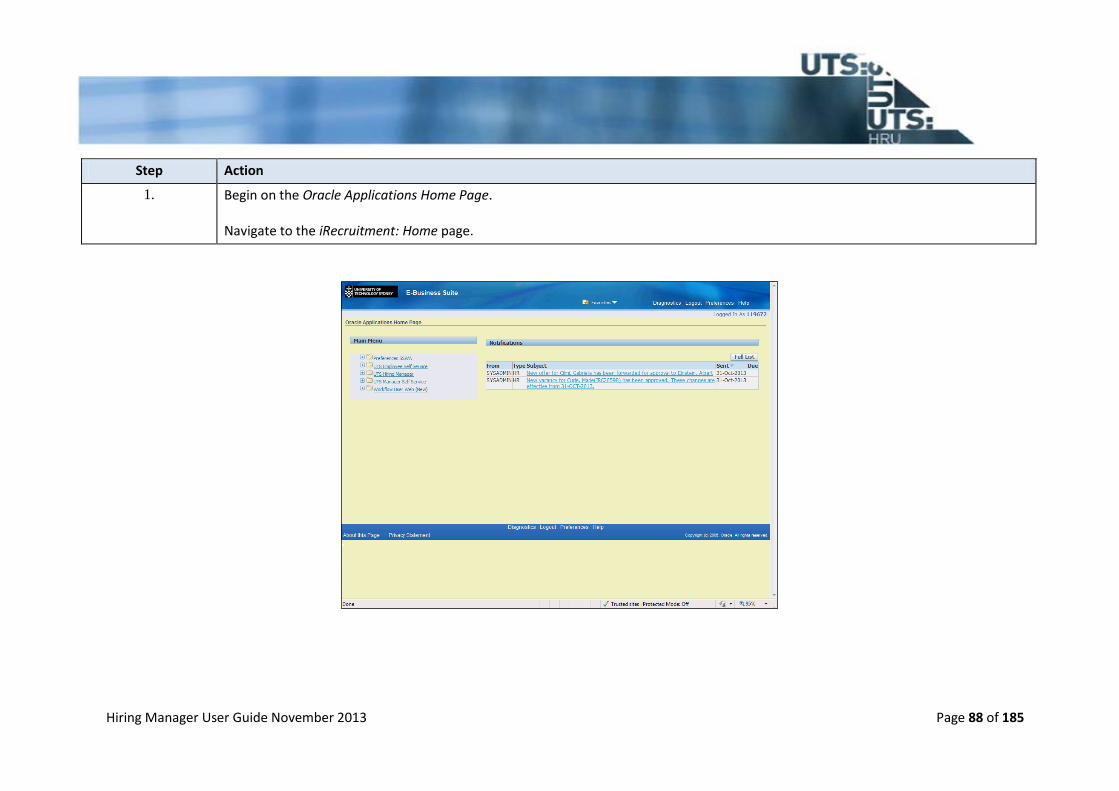
1. Begin on the Oracle Applications Home Page. Navigate to the iRecruitment: Home page.

Hiring Manager User Guide November 2013 Page 89 of 185
Step Action
2. Click the UTS Hiring Manager link.

Hiring Manager User Guide November 2013 Page 90 of 185
Step Action
3. The iRecruitment: Home page displays. Use this page to view a list of your vacancies in the My Recent Vacancies field. Click the + button.
4. Your recent vacancies display. If you are unable to find the desired vacancy, increase the number of days to broaden the listing.
5. All active vacancies created in the last 7 days are now displayed.
6. Click on the number in the Total Applicants field to view the applicants for the vacancy.
7. The View Applicants screen displays. Click on an Applicant's Name to view their application.

Hiring Manager User Guide November 2013 Page 91 of 185
Step Action
8. The Candidate Profile screen is displayed. Use this screen to view the details of the candidate and their application. Scroll down to view the rest of the application.

Hiring Manager User Guide November 2013 Page 92 of 185
Step Action
9. The Candidate Details section shows the candidate's qualifications and employment history. This information is fixed and cannot be changed.
10. The Application Details section displays all the details that are managed by UTS that relate to the Applicant's application.
11. In the Application Details and Resume section you can view the documents submitted by the applicant during their application. Click the More link.
Hiring Manager User Guide November 2013 Page 93 of 185
Step Action
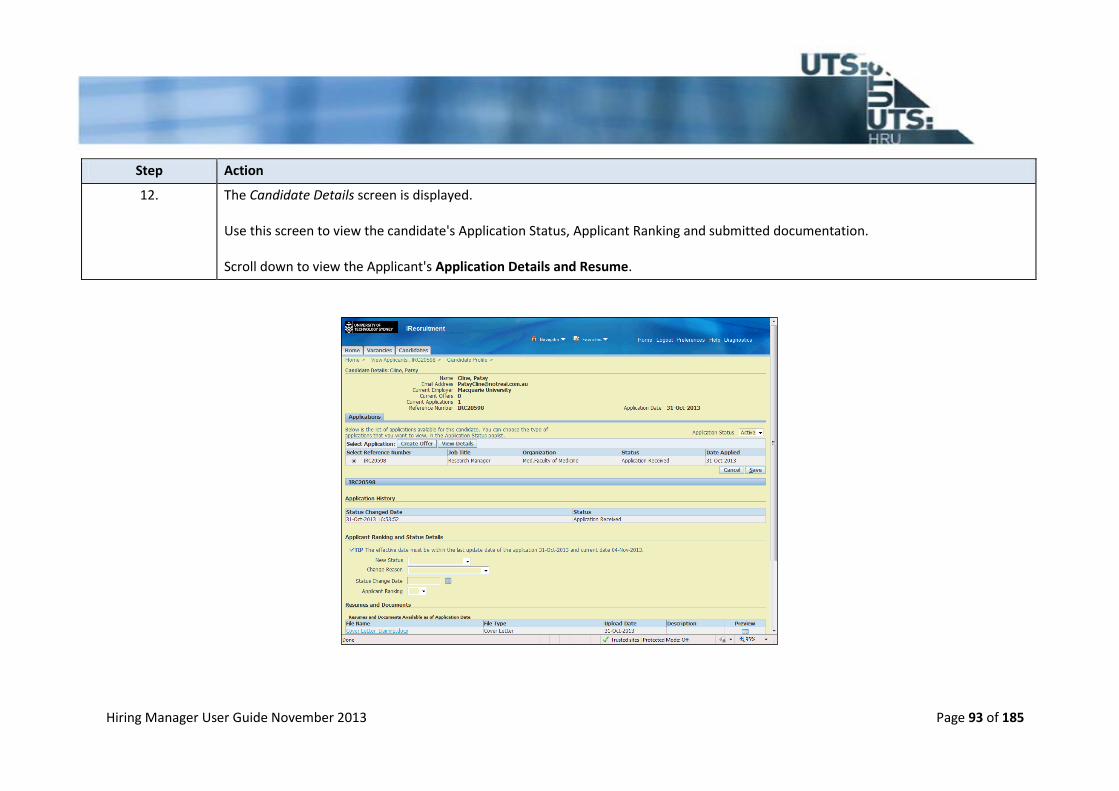
12. The Candidate Details screen is displayed. Use this screen to view the candidate's Application Status, Applicant Ranking and submitted documentation. Scroll down to view the Applicant's Application Details and Resume.
Hiring Manager User Guide November 2013 Page 94 of 185
Step Action
13. All documents that were made available by the applicant at the time of the application will display here. Note: In the event that an applicant has applied to UTS on a number of separate occasions they may have submitted multiple documents during the course of these applications. If this is the case, and prior to submission the applicant has not deleted those documents that relate to other vacancies, these documents may appear in this section. Review the documents available here to ensure you identify those that relate to this specific vacancy. Note these and add a comment to the Applicant's application with the relevant information. This will ensure that the Selection Panel members will assess the same documents during their screening process.
14. Click on a document's File Name to open and review it.

Hiring Manager User Guide November 2013 Page 95 of 185
Step Action
15. Click the Open button.

Hiring Manager User Guide November 2013 Page 96 of 185
Step Action
16. The selected document opens in a new window. Close the document and return to the application.

Hiring Manager User Guide November 2013 Page 97 of 185
Step Action
17. Click the Return To Candidate Profile link.

Hiring Manager User Guide November 2013 Page 98 of 185
Step Action
18. Click the scrollbar.
19. Next, review the Applicant's Qualifications and Employment History.
20. Click the More link to view additional information for a specific section.

Hiring Manager User Guide November 2013 Page 99 of 185
Step Action
21. The Candidate Details screen is displayed. The Applicant's Qualifications and Employment History details display. Review these as required.

Hiring Manager User Guide November 2013 Page 100 of 185
Step Action
22. Click the Return To Candidate Profile link.
Step Action
23. Click the scrollbar.
24. After reviewing all documentation, qualifications and employment history, you are able to return to the View Applicants screen.

Hiring Manager User Guide November 2013 Page 101 of 185
Step Action
25. Click the Return To Search link.
26. The View Applicants screen is displayed. Next, leave a comment on the merits of the application, specifically against the Selection Criteria. This comment should indicate whether the applicant is recommended for an interview.

Hiring Manager User Guide November 2013 Page 102 of 185
Step Action
27. In the Application Notes field click the Add button.
28. The Add Attachment screen displays. Use this screen to add comments - these comments will be reproduced in the Applicant Details Report generated at the conclusion of the applicant review process. Note: Comments that are included in a file attachment will not flow through to the Applicant Details Report - comments can only be added as text.
29. Enter the title and description of your comment. Hiring Managers should include both the date and their initials in the Title section, and a short Description as appropriate.

Hiring Manager User Guide November 2013 Page 103 of 185
Step Action
30. Enter the desired information into the Title field. For example, "MC04112013".
31. Enter the desired information into the Description field. For example, "Hiring Manager Application Feedback".
32. Click the Text option.

Hiring Manager User Guide November 2013 Page 104 of 185
Step Action
33. Next, enter a comment to indicate the suitability of the applicant and whether an interview is recommended. Comments should relate specifically to the merit of the application against the Selection Criteria. Comments should be non-discriminatory. Under legislation, applicants are entitled to request access to information held on them, including these comments.
34. Click the Apply button.

Hiring Manager User Guide November 2013 Page 105 of 185
Step Action
35. The comments have been attached. Click the View icon to confirm that your comments have been entered.
36. The Title of your recently added comments displays. Clicking on this title will allow you to review your comments. Additional comments that are entered will also display here.

Hiring Manager User Guide November 2013 Page 106 of 185
Step Action
37. Click the Return to View Applicants: IRCXXX link.
38. After your review of the application is complete and your comment has been entered, update the Applicant Rating with your selected ranking for the applicant.

Hiring Manager User Guide November 2013 Page 107 of 185
Step Action
39. Click the Applicant Rating list.

Hiring Manager User Guide November 2013 Page 108 of 185
Step Action
40. Rate the applicant based on your review of their application against the selection criteria. Yes - meets selection criteria and recommended for interview. No - does not meet selection criteria. Maybe (blank) - Applicant meets some of the selection criteria and may be considered for an interview.

Hiring Manager User Guide November 2013 Page 109 of 185
Step Action
41. Click the Save button to update the Applicant Rating.
42. The applicant's record has been updated successfully. Review any remaining applications as required and provide an Applicant Rating to indicate their suitability against the select criteria.

Hiring Manager User Guide November 2013 Page 110 of 185
Step Action
43. The View and Rate Applicants topic is now complete. Key Points: - Review the applicant's uploaded documentation, qualifications and employment history against the selection criteria - Add a comment to the application relating to the applicant's suitability and indicating whether an interview is recommended - Update the Applicant Rating to indicate the applicant's suitability for interview based on the merit of their application against the selection criteria. End of Procedure.

Hiring Manager User Guide November 2013 Page 111 of 185
CREATE AN INTERVIEW
Description This topic demonstrates how to create an interview for an applicant in iRecruitment. Pre requisites - The screening process has been completed, and the applicant has an Applicant Rating of Yes - Comments have been left on the applicant record confirming they have been selected for an interview - The applicant has been contacted to organise an interview time Results At completion of this topic, the applicant can be interviewed.

Hiring Manager User Guide November 2013 Page 112 of 185
Step Action
1. Begin on the Oracle Applications Home Page. Navigate to the iRecruitment: Home page.

Hiring Manager User Guide November 2013 Page 113 of 185
Step Action
2. Click the UTS Hiring Manager link.
Hiring Manager User Guide November 2013 Page 114 of 185
Step Action
3. The iRecruitment: Home page displays. Use this page to view a list of your vacancies in the My Recent Vacancies field. Click the + button to expand your view.
4. Your recent vacancies display. If you are unable to find the desired vacancy, increase the number of days to broaden the listing.
5. Click on the number in the Total Applicants field to view the applicants for the desired vacancy.
6. The View Applicants screen displays. Click on an Applicant's Name to view their application.

Hiring Manager User Guide November 2013 Page 115 of 185
Step Action
7. The Candidate Profile screen is displayed. Navigate to the Interviews section to create an interview.

Hiring Manager User Guide November 2013 Page 116 of 185
Step Action
8. Click the scrollbar.
9. Under the Interviews section click the Select an Action list.
10. Click the Create Interview list item.

Hiring Manager User Guide November 2013 Page 117 of 185
Step Action
11. Click the Go button.
12. The Create Interview screen displays. Use this screen to enter the interview details.

Hiring Manager User Guide November 2013 Page 118 of 185
Step Action
13. Select what type of interview you are creating. The default type is Assessment. Click the Interview Type list.
14. Select your Interview Type. For this example, click the First Interview list item.
15. Next, select the status of the interview. The default status is Planned. Click the Interview Status list.
16. Select your Interview Status. For this example, click the Confirmed list item.
17. Next, enter the Date, Start Time, End Time, and Interview Location details. Ensure this information is correct before continuing.
18. Enter the Convenor's Name and Number.
19. Next, enter the Selection Committee members. In most cases you will have multiple members. Make sure you add all the required members to the Committee.
20. Click the Add Selection Committee Member button.

Hiring Manager User Guide November 2013 Page 119 of 185
Step Action
21. Search for or enter the name of the Selection Committee member.
22. Next, identify if the Selection Committee member is the Convenor. Click the Convenor list.
23. For this example, click the Yes list item.
24. Repeat the Add Selection Committee Member action for all Selection Committee members to be added. After the Interview Details and the Selection Committee members have been added, save the interview.
25. Click the Save button.
26. The interview has been saved. Scroll down to view the interview you have created.

Hiring Manager User Guide November 2013 Page 120 of 185
Step Action
27. Details of the recently created interview display.

Hiring Manager User Guide November 2013 Page 121 of 185
Step Action
28. The Create an Interview topic is now complete. Key Points: - Applicants must have had their applications reviewed, have Application Notes added and have an appropriate Applicant Rating before an interview can be created - Enter the interview details to indicate the type, date, and location of the interview - Enter the Selection Committee members – remember to identify the Convenor. End of Procedure.

Hiring Manager User Guide November 2013 Page 122 of 185
RECORD INTERVIEW OUTCOME AND FEEDBACK Description This topic demonstrates how to record the outcome and provide feedback for an interview in iRecruitment. Pre requisites - The applicant interview has taken place - Feedback has been collated, and all Selection Panel Members have reached an agreed decision on the outcome of the interview. Results The interview is completed, and if successful the applicant moves to the next interview stage. If all interviews are complete, the Applicant Status is then updated.

Hiring Manager User Guide November 2013 Page 123 of 185
Step Action
1. Begin on the Oracle Applications Home Page. Navigate to the iRecruitment: Home page.

Hiring Manager User Guide November 2013 Page 124 of 185
Step Action
2. Click the UTS Hiring Manager link.

Hiring Manager User Guide November 2013 Page 125 of 185
Step Action
3. The iRecruitment: Home page displays. Use this page to view a list of your vacancies in the My Recent Vacancies field. Click the + button.
4. Your recent vacancies display. If you are unable to find the desired vacancy, increase the number of days to broaden the listing.
5. Click on the number in the Total Applicants section to view the applicants for the vacancy.
6. The View Applicants screen displays. Click on an Applicant's Name to view their application.

Hiring Manager User Guide November 2013 Page 126 of 185
Step Action
7. For this example, click the Cline, Patsy link.
8. The Candidate Profile screen is displayed. Navigate to the Interviews section to update an existing interview.

Hiring Manager User Guide November 2013 Page 127 of 185
Step Action
9. Click the scrollbar.
10. The Interviews section displays all interviews for this applicant for this vacancy. Click the Update button.

Hiring Manager User Guide November 2013 Page 128 of 185
Step Action
11. The Update Interview screen displays. Use this screen to update the interview details.

Hiring Manager User Guide November 2013 Page 129 of 185
Step Action
12. First, update the interview status to Completed. Click the Interview Status list.
13. Click the Completed list item.
14. After the Interview Status has been updated to Completed, the Interview Result field is now displayed. Update the Interview Result to reflect the outcome of the interview. Click the Interview Result list.
15. Indicate what the result of the interview is from the following: Unsuccessful - the applicant failed to demonstrate their suitability for the role at interview and will not be progressed further. Eligibility List - the applicant has not been successful for this role and will not be progressed, but may be considered as an applicant on future appointments. Successful - the applicant has been successful in demonstrating their suitability and will be progressed to the next stage of the recruitment process.
16. For this example, the Interview Result is successful. Click the Successful list item.

Hiring Manager User Guide November 2013 Page 130 of 185
Step Action
17. Next, enter the Interview Feedback. The Interview Feedback field appears when the Interview Status is changed to Completed. Enter the comments from the Selection Panel members. Where possible each comment should begin with the initials of the relevant Selection Panel member.
18. Note: Comments should relate specifically to the merit of the application against the Selection Criteria and be non-discriminatory. Under legislation, applicants are entitled to request access to information held on them, including these comments.
19. After the interview outcome and feedback is recorded, save the updates. Click the Save button.
20. The interview update has been saved. Scroll down to view the updated interview.
Hiring Manager User Guide November 2013 Page 131 of 185
Step Action
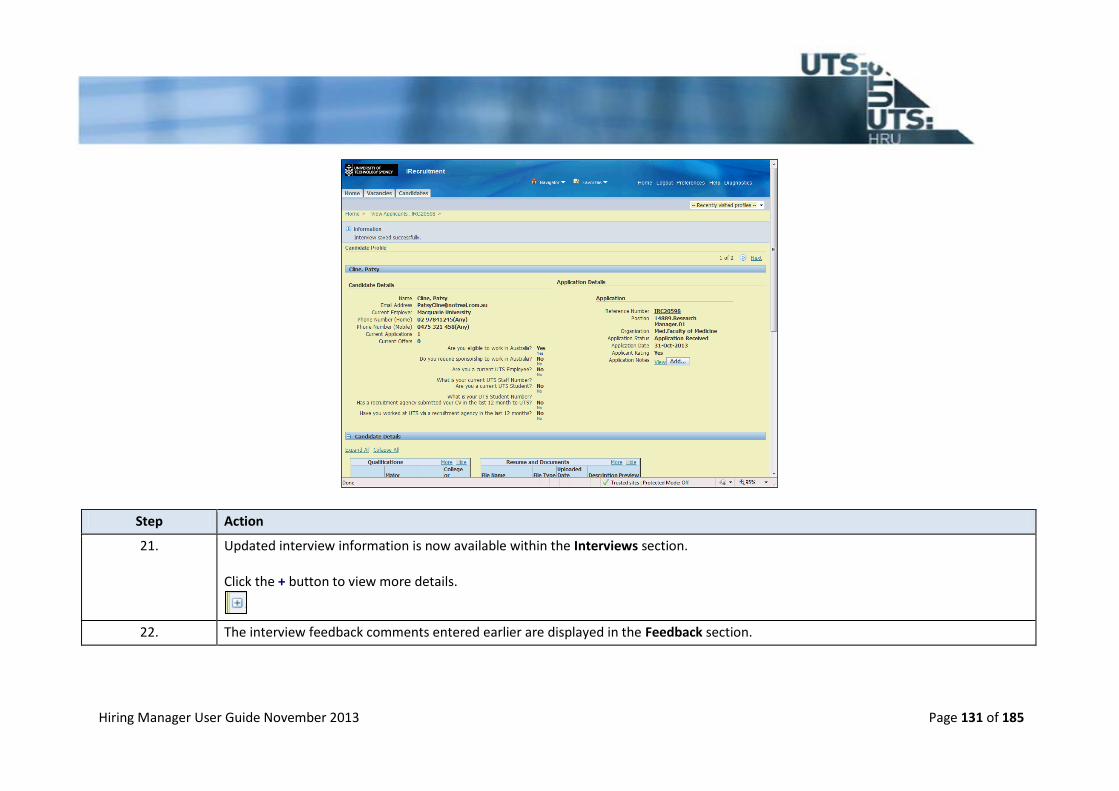
21. Updated interview information is now available within the Interviews section. Click the + button to view more details.
22. The interview feedback comments entered earlier are displayed in the Feedback section.

Hiring Manager User Guide November 2013 Page 132 of 185
Step Action
23. The Record Interview Outcome and Feedback topic is now complete. Key Points: - The interview must have been completed before the interview outcome and feedback can be recorded - Update the Interview Result to reflect whether the applicant has been Successful or Unsuccessful at interview, or is to be placed on the Eligibility List - Enter feedback from the Selection Panel on the applicant's performance in the interview. End of Procedure.

Hiring Manager User Guide November 2013 Page 133 of 185
CREATE AN OFFER REQUEST Description This topic demonstrates how to create an Offer Request. Pre requisites - An approved Vacancy Request - An applicant has been attached to the Vacancy Request - The successful applicant has been identified - The Vacancy details are correct as of the time the Offer Request is created Results At completion of this topic, the Offer Request will be sent for approval. Upon successful approval, the offer can be submitted to the applicant.

Hiring Manager User Guide November 2013 Page 134 of 185
Step Action
1. Begin on the Oracle Applications Home Page. Navigate to the iRecruitment: Home page.
2. The iRecruitment: Home page displays. Use this page to view your Notifications, My Recent Vacancies, Interviews and Recent Offers. Expand the My Recent Vacancies section to view your approved vacancies.

Hiring Manager User Guide November 2013 Page 135 of 185
Step Action
3. Click the Expand button.
4. This section shows the details and status of your approved vacancies, such as the Number of Openings, Active Applicants, Total Applicants, and Filled fields.
5. Click the Total Applicants link.
6. The iRecruitment: Home - View Applicants page displays. Select the applicant to create an offer.

Hiring Manager User Guide November 2013 Page 136 of 185
Step Action
7. Click the Select option.

Hiring Manager User Guide November 2013 Page 137 of 185
Step Action
8. Click the Create Offer button.
9. The iRecruitment: Create Offer: Enter Basic Details page displays. There are three steps to create an offer request: - Enter Basic Details - Enter Compensation - Review Use this page to enter the Basic Details of the offer request.
10. Use the buttons at the top of the page to Cancel, Save For Later or move to the Next page of the Vacancy Request. If you Cancel at this point, no information will be saved. Use Save For Later if you wish to complete the Offer Request at a later point.
11. Many fields, such as the Position, and Manager/Supervisor will automatically complete with information from the original Vacancy Request. Complete the remaining required fields before moving on to the next step.
12. Next, enter the Work hours per week for the offer. This will have been established when the Vacancy was created.

Hiring Manager User Guide November 2013 Page 138 of 185
Step Action
13. Specify the correct Work hours per week.
14. Note: After entering some fields, an Error may appear. This indicates that required fields have not been completed. Continue entering the Offer's Basic Details before moving to the next step.
15. Next, specify the Proposed Start Date for the position.
Hiring Manager User Guide November 2013 Page 139 of 185
Step Action
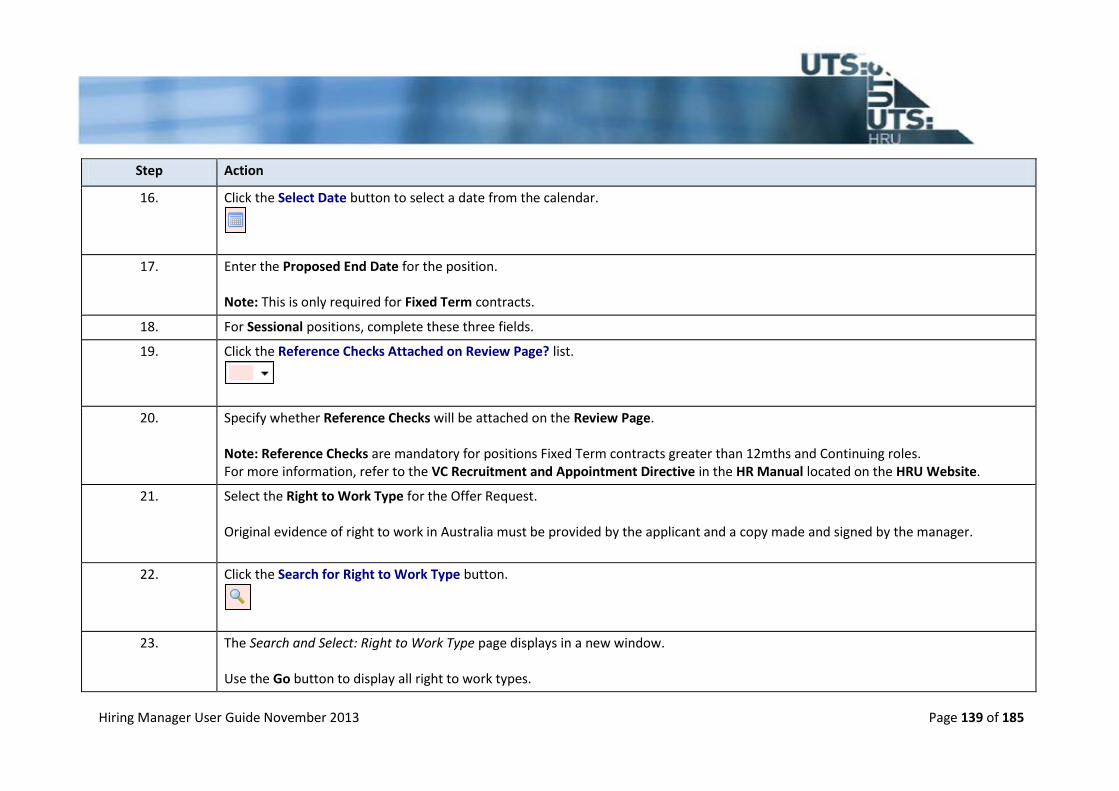
16. Click the Select Date button to select a date from the calendar.
17. Enter the Proposed End Date for the position. Note: This is only required for Fixed Term contracts.
18. For Sessional positions, complete these three fields.
19. Click the Reference Checks Attached on Review Page? list.
20. Specify whether Reference Checks will be attached on the Review Page. Note: Reference Checks are mandatory for positions Fixed Term contracts greater than 12mths and Continuing roles. For more information, refer to the VC Recruitment and Appointment Directive in the HR Manual located on the HRU Website.
21. Select the Right to Work Type for the Offer Request. Original evidence of right to work in Australia must be provided by the applicant and a copy made and signed by the manager.
22. Click the Search for Right to Work Type button.
23. The Search and Select: Right to Work Type page displays in a new window. Use the Go button to display all right to work types.

Hiring Manager User Guide November 2013 Page 140 of 185
Step Action
24. Click the Go button.
25. All relevant Right to Work Types for the offer display. Select the relevant work type.
26. Click the Quick Select button.
27. Specify whether the Restraint of Trade clause is Required.
28. Next, enter the Grade Step if relevant to the position.
29. Click the Probation Period in Months list.
30. Select the Probation Period in Months for the position. Note: This field is not relevant for Casual and Extension contracts.
31. Enter any Probation Reasons for the position, if required.
32. Next, select whether the Appointment is conditional on a PhD being awarded.
33. Enter the Amount provided for Relocation expenses if offered for the position.
Hiring Manager User Guide November 2013 Page 141 of 185
Step Action
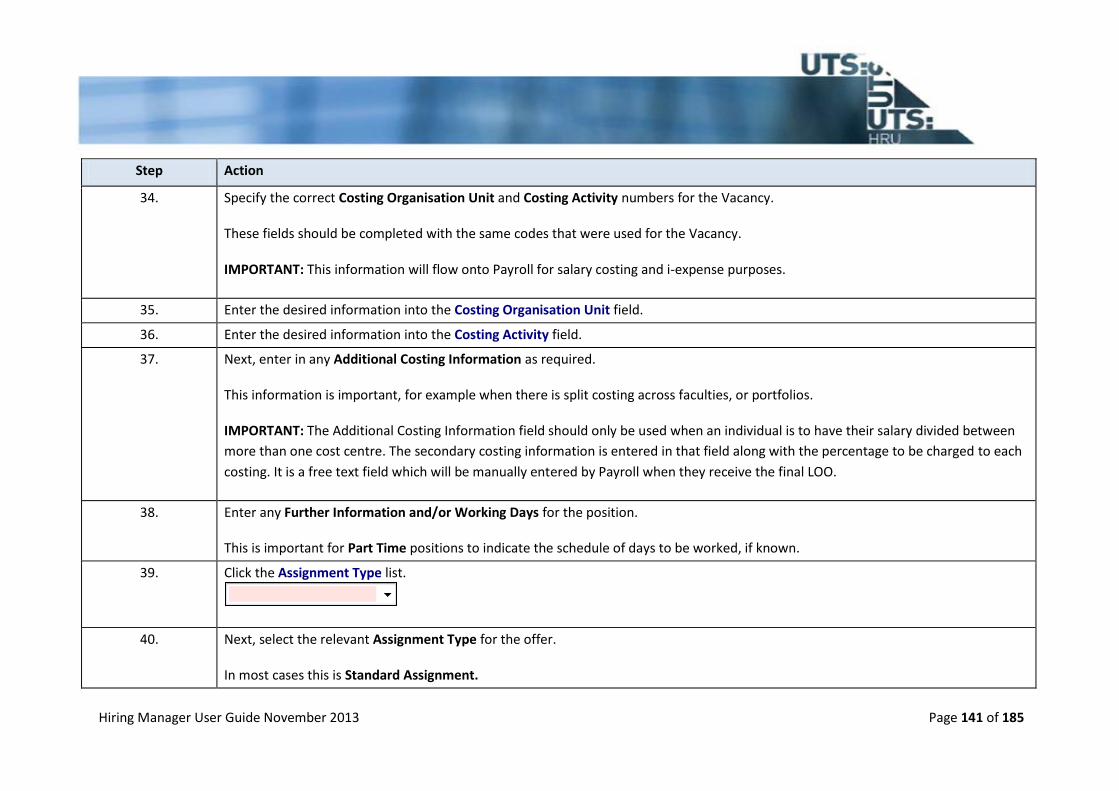
34. Specify the correct Costing Organisation Unit and Costing Activity numbers for the Vacancy. These fields should be completed with the same codes that were used for the Vacancy. IMPORTANT: This information will flow onto Payroll for salary costing and i-expense purposes.
35. Enter the desired information into the Costing Organisation Unit field.
36. Enter the desired information into the Costing Activity field.
37. Next, enter in any Additional Costing Information as required. This information is important, for example when there is split costing across faculties, or portfolios. IMPORTANT: The Additional Costing Information field should only be used when an individual is to have their salary divided between
more than one cost centre. The secondary costing information is entered in that field along with the percentage to be charged to each
costing. It is a free text field which will be manually entered by Payroll when they receive the final LOO.
38. Enter any Further Information and/or Working Days for the position. This is important for Part Time positions to indicate the schedule of days to be worked, if known.
39. Click the Assignment Type list.
40. Next, select the relevant Assignment Type for the offer. In most cases this is Standard Assignment.
Hiring Manager User Guide November 2013 Page 142 of 185
Step Action
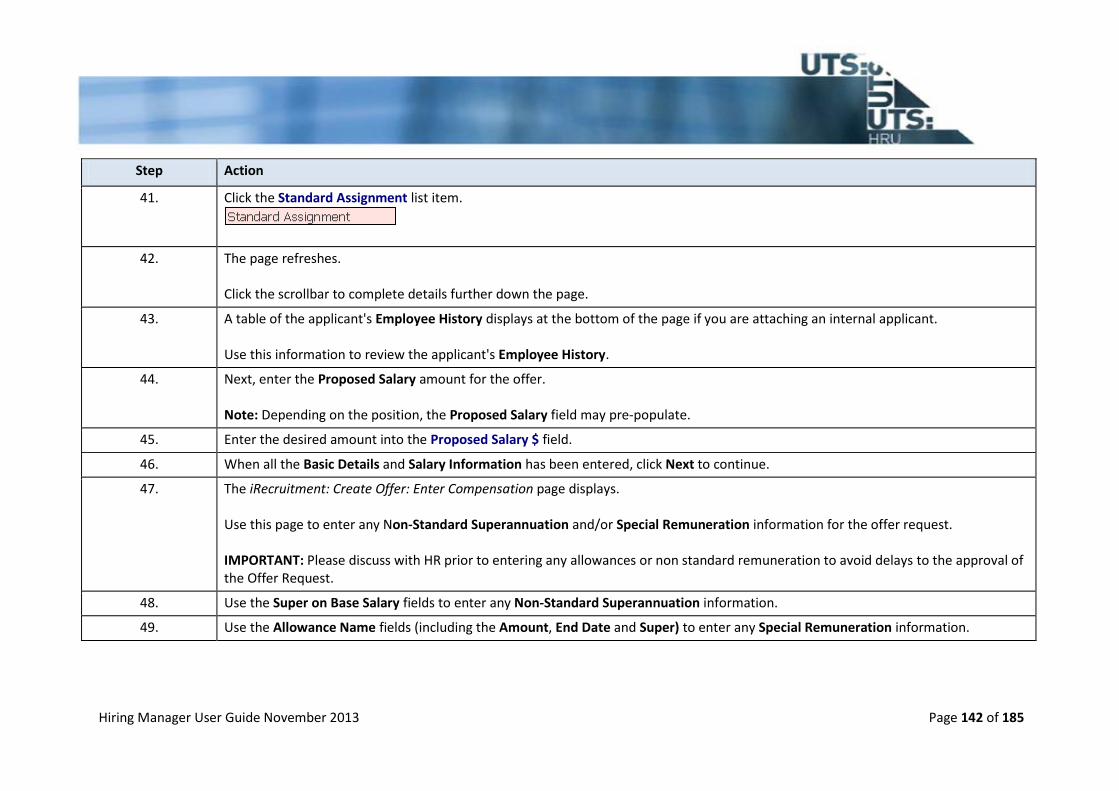
41. Click the Standard Assignment list item.
42. The page refreshes. Click the scrollbar to complete details further down the page.
43. A table of the applicant's Employee History displays at the bottom of the page if you are attaching an internal applicant. Use this information to review the applicant's Employee History.
44. Next, enter the Proposed Salary amount for the offer. Note: Depending on the position, the Proposed Salary field may pre-populate.
45. Enter the desired amount into the Proposed Salary $ field.
46. When all the Basic Details and Salary Information has been entered, click Next to continue.
47. The iRecruitment: Create Offer: Enter Compensation page displays. Use this page to enter any Non-Standard Superannuation and/or Special Remuneration information for the offer request. IMPORTANT: Please discuss with HR prior to entering any allowances or non standard remuneration to avoid delays to the approval of the Offer Request.
48. Use the Super on Base Salary fields to enter any Non-Standard Superannuation information.
49. Use the Allowance Name fields (including the Amount, End Date and Super) to enter any Special Remuneration information.
Hiring Manager User Guide November 2013 Page 143 of 185
Step Action
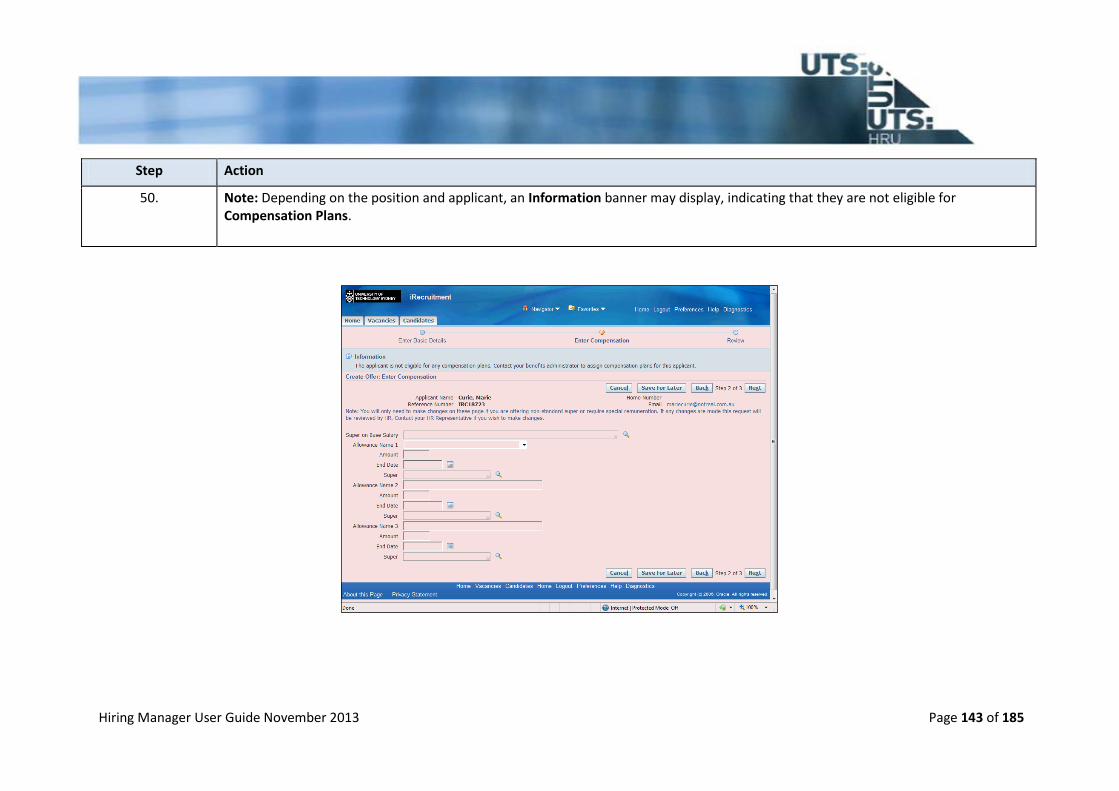
50. Note: Depending on the position and applicant, an Information banner may display, indicating that they are not eligible for Compensation Plans.

Hiring Manager User Guide November 2013 Page 144 of 185
Step Action
51. Click the Next button.
52. The iRecruitment: Create Offer: Review page displays. Use this page to review the offer request information you have entered, attach any documents and add comments to the Approver. Scroll down to review all the entered information.

Hiring Manager User Guide November 2013 Page 145 of 185
Step Action
53. Next, attach any relevant documents, such as Reference Checks and the Business Case for the position.
54. Click the Add Documents button.
55. The Add Attachment page displays. Use this page to attach relevant documents. External Documents will be viewable by both internal and external applicants, while Internal Documents can only be viewed by internal applicants. When creating an Offer Request, attach all documentation as Internal Documents.
56. • Attached two transcripts of verbal reference checks attached (mandatory for roles Continuing or greater than 12 months) • Attached a business case for Continuing and Fixed Term roles greater than 12 months to be Appointed by Invitation or requiring Special Remuneration (mandatory)

Hiring Manager User Guide November 2013 Page 146 of 185
Step Action
57. Click the Add Attachment button.
58. The Add Attachment page displays. Include any Reference Checks documents.

Hiring Manager User Guide November 2013 Page 147 of 185
Step Action
59. Enter the title and description of the document into the Title and Description field as required. For this example, this will be completed for you.
60. Next, attach the document from a URL or by using the Browse... button.

Hiring Manager User Guide November 2013 Page 148 of 185
Step Action
61. Click the Browse... button.

Hiring Manager User Guide November 2013 Page 149 of 185
Step Action
62. Click the Reference Checks Outcome list item.
63. Click the Open button.
64. The desired document has been selected. If you need to add more documents, use the Add Another button.

Hiring Manager User Guide November 2013 Page 150 of 185
Step Action
65. Click the Apply button.
66. The desired documents are now attached.

Hiring Manager User Guide November 2013 Page 151 of 185
Step Action
67. Click the Return button.
68. The iRecruitment: Create Offer: Review page displays again. Scroll down and continue reviewing the offer request.

Hiring Manager User Guide November 2013 Page 152 of 185
Step Action
69. Enter in any comments to the Approver.
70. The Approvers section automatically completes with the required approval chain for the Offer Request to be Approved.
71. Adhoc Approvers can also be added to the Offer Request as required.

Hiring Manager User Guide November 2013 Page 153 of 185
Step Action
72. When the Review is complete and all relevant documents attached, click the Submit document to send the Offer Request for approval.
73. Click the Submit button.
74. The iRecruitment: Home page displays. The Offer Request has now been submitted for approval.
75. Expand the Recent Offers section to view your recently submitted Offer Request.

Hiring Manager User Guide November 2013 Page 154 of 185
Step Action
76. Click the Expand button.
77. The Offer Request for the applicant displays.

Hiring Manager User Guide November 2013 Page 155 of 185
Step Action
78. The Create an Offer Request topic is now complete. Key Points: - Create an Offer Request after selecting the desired applicant on the iRecruitment: Home - View Applicants page - There are three steps to create an Offer Request: Enter Basic Details; Enter Compensation; and Review - Review the Offer Request details before submitting the offer for approval. End of Procedure.

Hiring Manager User Guide November 2013 Page 156 of 185
SEND AN OFFER OF EMPLOYMENT (ROLES LESS THAN 12 MONTHS AND CASUAL SUPPORT) Description This topic demonstrates how to send an offer of employment to your preferred applicant when the role is: 1) fixed term and less than twelve months OR 2) a casual support 3) role is not SSG In this scenario you will navigate to UTS Hiring Manager, open Your Recent Offers, view the offer of employment and send the e-offer of employment to the applicant. Pre requisites - An approved Offered Request for a Fixed term role less than 12 months or a Casual Support appointment (excluding SSG appointments) Results - An e-offer will be generated and sent by email to the identified staff member or external candidate. Note: Offers for continuing roles and fixed term roles greater than 12 months and SSG appointments are sent to the candidate from HRU following
appropriate approvals.
Hiring Manager User Guide November 2013 Page 157 of 185
Step Action
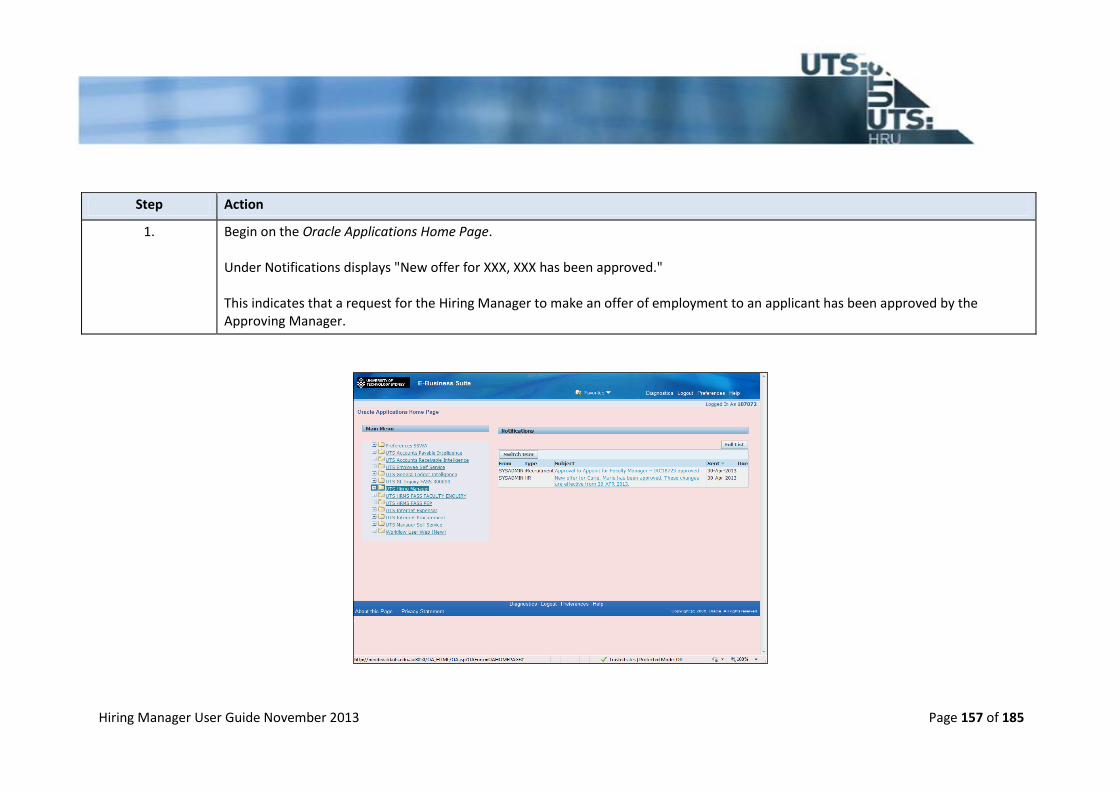
1. Begin on the Oracle Applications Home Page. Under Notifications displays "New offer for XXX, XXX has been approved." This indicates that a request for the Hiring Manager to make an offer of employment to an applicant has been approved by the Approving Manager.

Hiring Manager User Guide November 2013 Page 158 of 185
Step Action
2. Click the UTS Hiring Manager link.
3. The iRecruitment: Home page displays.
4. To view the details of your Recent Offers click the Recent Offers link.
5. The details of Recent Offers requests and their approval status displays.
6. Before the Letter of Offer of Employment is sent to the applicant the Letter of Offer should be viewed and checked carefully by the Hiring Manager. This can be done by clicking the Offer Letter icon. IMPORTANT: If there are any errors in the letter of offer contact HRU.
7. Click the Offer Letter button.
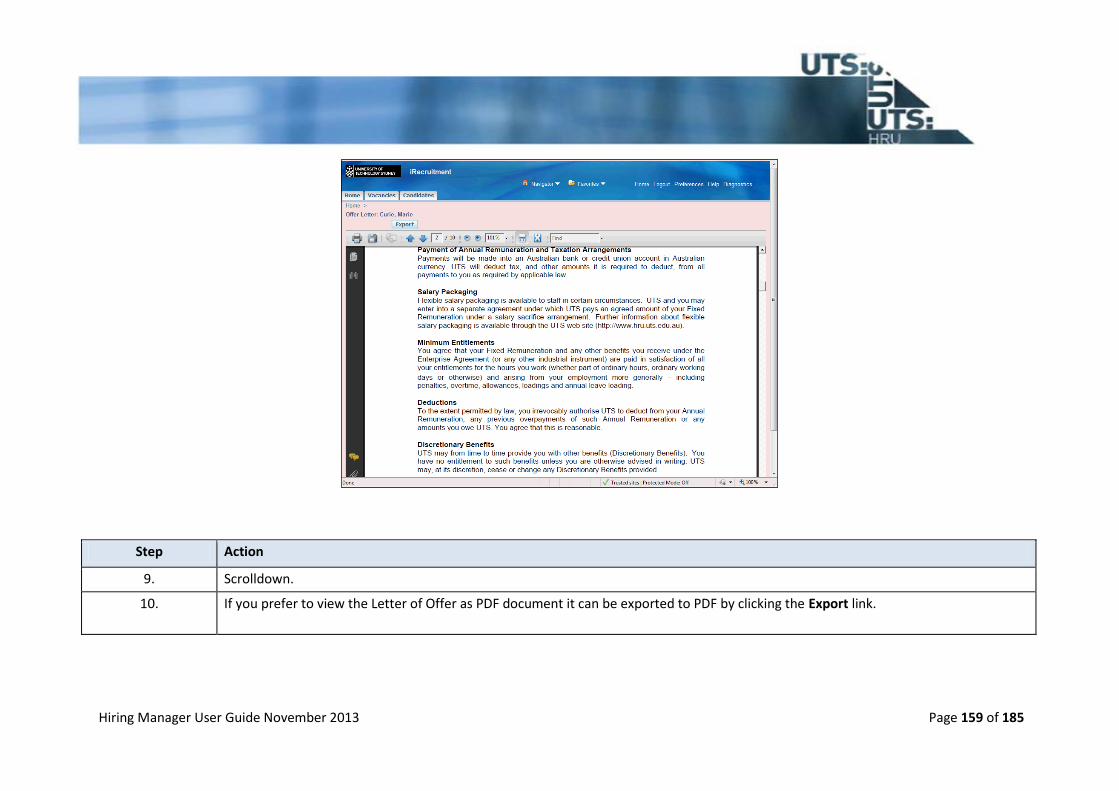
8. The Letter of Offer will open as a PDF document from within iRecruitment. This can be reviewed by using the scroll bar.
Hiring Manager User Guide November 2013 Page 159 of 185
Step Action
9. Scrolldown.
10. If you prefer to view the Letter of Offer as PDF document it can be exported to PDF by clicking the Export link.

Hiring Manager User Guide November 2013 Page 160 of 185
Step Action
11. Return to the iRecruitment: Home page by clicking the Home link.
12. The iRecruitment: Home page displays.
13. To commence the process of sending the applicant a letter of offer click the Applicant Name link.

Hiring Manager User Guide November 2013 Page 161 of 185
Step Action
14. Click on Applicant Name.
15. The Candidate Profile displays. Check the applicant details before sending the offer of employment.

Hiring Manager User Guide November 2013 Page 162 of 185
Step Action
16. Click the scroll bar to view all the candidate details.
17. Select an Action from the drop down menu to Send Offer.

Hiring Manager User Guide November 2013 Page 163 of 185
Step Action
18. Click the Send Offer list item.

Hiring Manager User Guide November 2013 Page 164 of 185
Step Action
19. Click the Go button.
20. The Candidate Profile page appears with the link to Send the applicant the letter of offer.
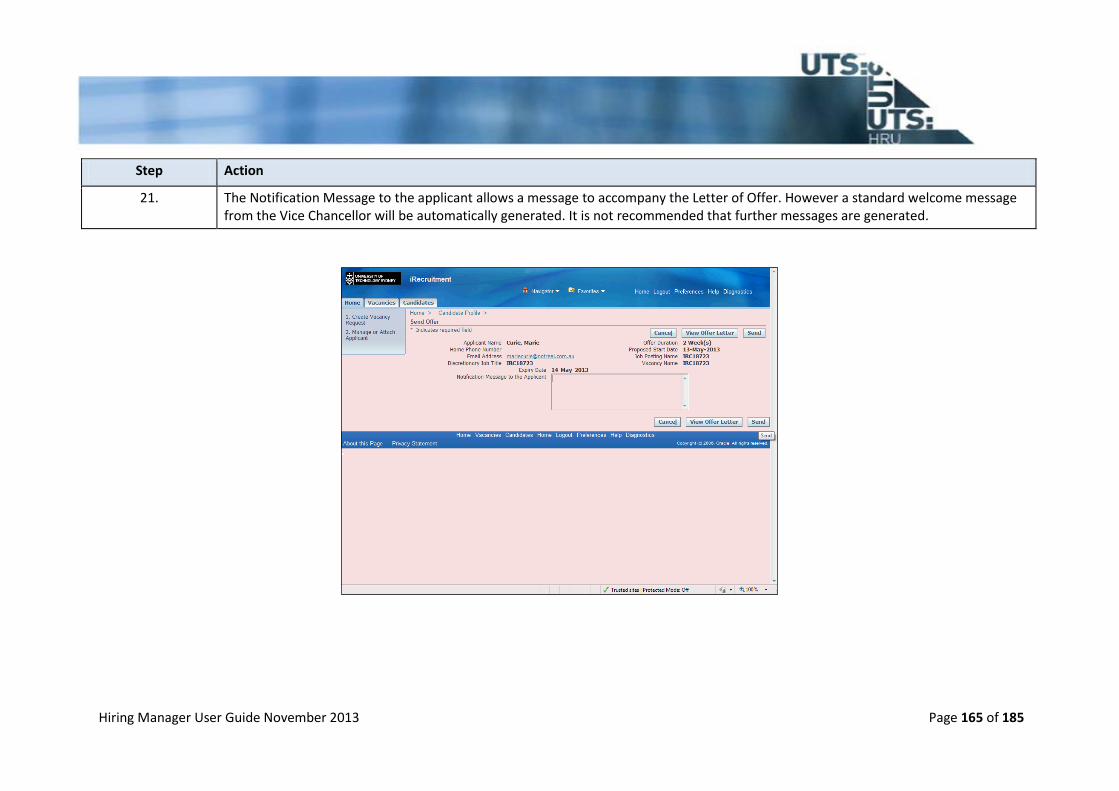
Hiring Manager User Guide November 2013 Page 165 of 185
Step Action
21. The Notification Message to the applicant allows a message to accompany the Letter of Offer. However a standard welcome message from the Vice Chancellor will be automatically generated. It is not recommended that further messages are generated.
Hiring Manager User Guide November 2013 Page 166 of 185
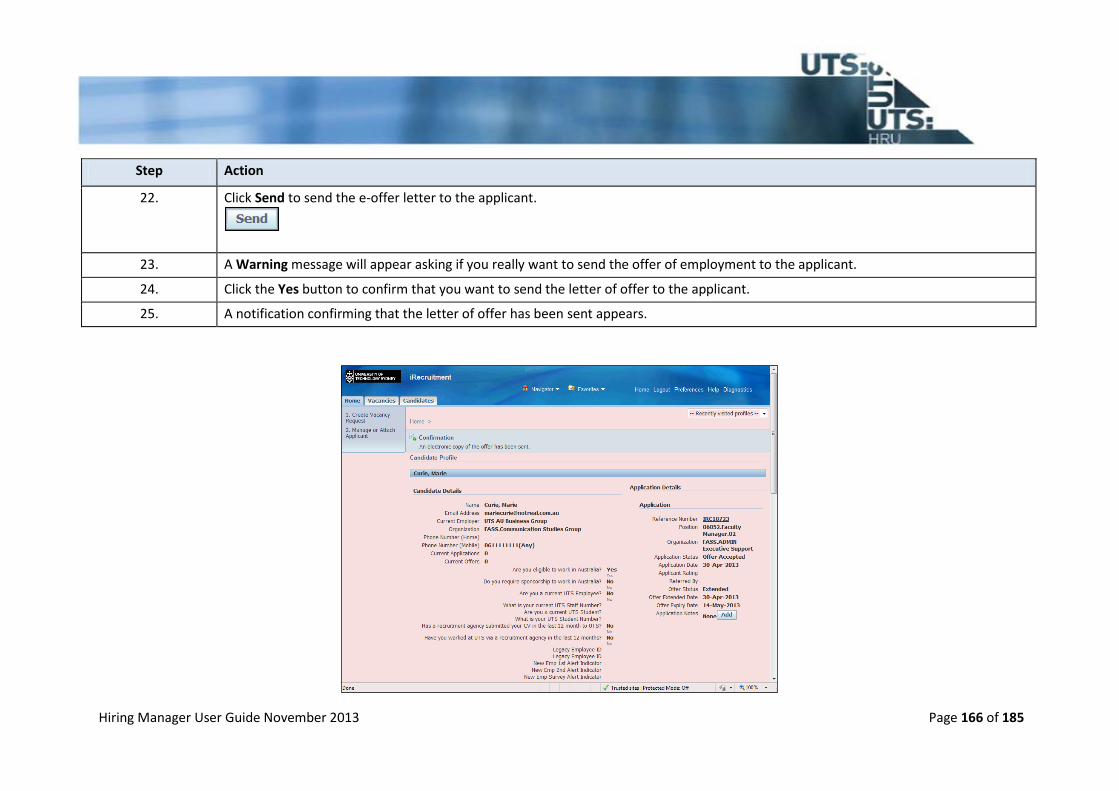
Step Action
22. Click Send to send the e-offer letter to the applicant.
23. A Warning message will appear asking if you really want to send the offer of employment to the applicant.
24. Click the Yes button to confirm that you want to send the letter of offer to the applicant.
25. A notification confirming that the letter of offer has been sent appears.

Hiring Manager User Guide November 2013 Page 167 of 185
Step Action
26. To return to the iRecruitment Home Page. Click the Home link.
27. The iRecruitment: Home page displays. A notification confirming the Letter of Offer has been sent appears. The applicant will receive a notification on their iRecruitment Home page and an e-mail congratulating them and advising that they have receive an e-offer.
28. The Send an Offer of Employment (for roles less than 12 months and casual support roles) topic is now complete. Key Points: - Hiring Managers can only send offers for roles that are fixed term less than 12 months and casual support - View the Letter of Offer as a PDF and check details before sending to the applicant. - Check applicant details are correct before sending Letter of Offer. - If the letter of offer contains errors contact HRU. End of Procedure.
Hiring Manager User Guide November 2013 Page 168 of 185
UPDATE APPLICANT STATUS Description This topic demonstrates how to update the Applicant Status in iRecruitment. Pre requisites The Applicant Status must be updated in the following cases: - Offer is extended to an Applicant - Candidate declines an offer - Applicant is rejected - Application is withdrawn - Candidate accepts an offer Results The Applicant Status is updated.

Hiring Manager User Guide November 2013 Page 169 of 185
Step Action
1. Begin on the Oracle Applications Home Page. Navigate to the iRecruitment: Home page.

Hiring Manager User Guide November 2013 Page 170 of 185
Step Action
2. Click the UTS Hiring Manager link.

Hiring Manager User Guide November 2013 Page 171 of 185
Step Action
3. The iRecruitment: Home page displays. Use this page to view a list of your vacancies in the My Recent Vacancies field. Click the + button.
4. Your recent vacancies display. If you are unable to find the desired vacancy, increase the number of days to broaden the listing.
5. Click on the number in the Total Applicants section to view the applicants for the vacancy.
6. The View Applicants screen displays. Select the desired applicant by checking the box in the Select column.

Hiring Manager User Guide November 2013 Page 172 of 185
Step Action
7. Click the Update Status button.
8. The Applicants: Mass Update screen displays. Use this screen to update the applicant status.

Hiring Manager User Guide November 2013 Page 173 of 185
Step Action
9. Click the New Status list.
10. Select the desired new status.
11. Click the Change Reason list.

Hiring Manager User Guide November 2013 Page 174 of 185
Step Action
12. Select the reason for updating the applicant status. For example,
13. Select the date the update occurred. Click the Status Change Date button and select date.
14. Next, enter any comments explaining the status update in more detail. .
15. When the applicant status has been updated, click the Submit button.
16. In some cases, a warning screen will appear to indicate there are active interviews associated with the application. Confirm if you would like to proceed with the status update, and withdraw the application.

Hiring Manager User Guide November 2013 Page 175 of 185
Step Action
17. Click the Yes button.
18. The Applicant Status is now updated and a confirmation message is displayed.

Hiring Manager User Guide November 2013 Page 176 of 185
Step Action
19. The Update Applicant Status topic is now complete. Key Points: - Update the Applicant Status from the View Applicants screen - Provide a reason for the updating the status and leave comments as required - Review the changes before submitting the Applicant Status update. End of Procedure.
Hiring Manager User Guide November 2013 Page 177 of 185
UPDATE APPLICANT STATUS TO REJECTED - MULTIPLE APPLICANTS DESCRIPTION This topic demonstrates how to update the Applicant Status for multiple applicants to Rejected. Pre requisites - The screening process has been completed for each applicant - Comments have been added to each application indicating the reason for rejection - The Applicant Rating for each applicant is a No or Maybe - Applicants to be rejected have been identified Results All selected applicants have been rejected.

Hiring Manager User Guide November 2013 Page 178 of 185
Step Action
1. Begin on the Oracle Applications Home Page. Navigate to the iRecruitment: Home page.

Hiring Manager User Guide November 2013 Page 179 of 185
Step Action
2. Click the UTS Hiring Manager link.

Hiring Manager User Guide November 2013 Page 180 of 185
Step Action
3. The iRecruitment: Home page displays. Use this page to view a list of your vacancies in the My Recent Vacancies field. Click the + button.
4. Your recent vacancies display. If you are unable to find the desired vacancy, increase the number of days to broaden the listing.
5. Click on the number in the Total Applicants section to view the applicants for the vacancy.
6. The View Applicants screen displays. Select the desired applicants for rejection.

Hiring Manager User Guide November 2013 Page 181 of 185
Step Action
7. Click the Update Status button.
8. The Applicants: Mass Update screen displays. Use this screen to update the status for all applicants at once.

Hiring Manager User Guide November 2013 Page 182 of 185
Step Action
9. Click the New Status list.
10. Select the Applicant Rejected status.
11. Click the Change Reason list.

Hiring Manager User Guide November 2013 Page 183 of 185
Step Action
12. Select the reason for updating the applicant status. In this example click the Unsuccessful list item.
13. Select the date of the status change. Click the Status Change Date button and select the date.
14. Next, enter any comments. Note: Comments for each individual applicant should have been entered during the applicant screening process. At this point it is sufficient to indicate the selected applicants did not meet the selection criteria, or that other applicants met the selection criteria more closely.
15. When the applicant status has been updated, click the Submit button.
16. In some cases, a warning screen will appear to indicate there are active interviews associated with the application. Confirm if you would like to proceed with the status update, and withdraw the application.

Hiring Manager User Guide November 2013 Page 184 of 185
Step Action
17. Click the Yes button.
18. The Applicant Status is now updated for the selected applicants. The status for each applicant is now Application Rejected.

Hiring Manager User Guide November 2013 Page 185 of 185
Step Action
19. The Update Applicant Status to Rejected - Multiple Applicants topic is now complete. Key Points: - Ensure the selected applicants have been screened, comments left on their individual applications, and their Application Rating updated to No - Update the Applicant Status for all applicants to Applicant Rejected - Enter any relevant comments and Submit the update to reject the selected applicants. End of Procedure.


