181


What readers are saying about Agile Retrospectives
Esther Derby and Diana Larsen have written the definitive book on
agile retrospectives. You don’t have to be an agile team to take advan-
tage of their book; you only have to want to improve. Follow their
advice and your teams will be more successful.
Johanna Rothman
Author, speaker and consultant, Rothman Consulting Group,
Inc.
Two of the software industry’s leading facilitators have taken their
many years of retrospective experience and distilled them into an
approachable reference for agile team leaders. For all of the self-made
facilitators out there who have been winging it, this book will pro-
vide a solid foundation to improve the effectiveness of your iteration,
release, and project retrospectives.
Dave Hoover
Lead Consultant, Agile Practices, Obtiva Corp.
This book is a wonderful compendium of ways to keep retrospectives
fresh and teams learning.
Mike Cohn
Author of Agile Estimating and Planning
This book is a must-read for all team leads, facilitators and everyone
interested in driving improvements in the ways teams reflect, learn
and function.
Sheila O’Connor, Ph.D.
Six Sigma Software Black Belt, LSI Logic, Engenio Storage
Group

Whatever you call it: retrospective, post-mortem, post-partum, post-
project review. Your work can be better by stopping at regular inter-
vals and asking, “What worked well that we don’t want to forget?
What should be done differently?” It’s almost like free consulting with
two of the best: Esther Derby and Diana Larsen. I facilitate retrospec-
tives for a living and, believe me, I’m going to read my copy cover to
cover—more than once!
Linda Rising
Co-author of Fearless Change: Patterns for Introducing New
Ideas

Agile RetrospectivesMaking Good Teams Great
Esther Derby
Diana Larsen
The Pragmatic BookshelfRaleigh, North Carolina Dallas, Texas

Many of the designations used by manufacturers and sellers to distinguish their products
are claimed as trademarks. Where those designations appear in this book, and The
Pragmatic Programmers, LLC was aware of a trademark claim, the designations have
been printed in initial capital letters or in all capitals. The Pragmatic Starter Kit, The
Pragmatic Programmer, Pragmatic Programming, Pragmatic Bookshelf and the linking g
device are trademarks of The Pragmatic Programmers, LLC.
Every precaution was taken in the preparation of this book. However, the publisher
assumes no responsibility for errors or omissions, or for damages that may result from
the use of information (including program listings) contained herein.
Our Pragmatic courses, workshops, and other products can help you and your team
create better software and have more fun. For more information, as well as the latest
Pragmatic titles, please visit us at
http://www.pragmaticprogrammer.com
Copyright © 2006 Esther Derby and Diana Larsen.
All rights reserved.
No part of this publication may be reproduced, stored in a retrieval system, or transmit-
ted, in any form, or by any means, electronic, mechanical, photocopying, recording, or
otherwise, without the prior consent of the publisher.
Printed in the United States of America.
ISBN 0-9776166-4-9
Printed on acid-free paper with 85% recycled, 30% post-consumer content.
First printing, July 2006
Version: 2006-7-14

Esther:
For my husband, Jeff Lee, who has demonstrated his support
in many ways through two books now. Let’s go for three.
And for all my friends who help me with a retrospective each year
around my birthday.
Diana:
To Marny, Patty Jo and Marilyn Morningstar;
three goddesses who continue to teach me, believe in me,
and encourage me to reach for the possible,
To Abby, Andy and Willem, who bring me new ideas
from the next generation,
To Alex, who introduced me to a new way of sharing
in family and relationships,
With Love and Appreciation.

ContentsForeword xi
Preface xiii
Introduction xvi
1 Helping Your Team Inspect and Adapt 1
1.1 Set the Stage . . . . . . . . . . . . . . . . . . . . . . . . . 5
1.2 Gather Data . . . . . . . . . . . . . . . . . . . . . . . . . . 8
1.3 Generate Insights . . . . . . . . . . . . . . . . . . . . . . 11
1.4 Decide What to Do . . . . . . . . . . . . . . . . . . . . . . 11
1.5 Close the Retrospective . . . . . . . . . . . . . . . . . . . 13
2 A Retrospective Custom-Fit to Your Team 15
2.1 Learning About the History and Environment . . . . . . 15
2.2 Shaping the Goal for the Retrospective . . . . . . . . . . 16
2.3 Determining Duration . . . . . . . . . . . . . . . . . . . . 17
2.4 Structuring a Retrospective . . . . . . . . . . . . . . . . . 19
2.5 Selecting Activities . . . . . . . . . . . . . . . . . . . . . . 22
3 Leading Retrospectives 28
3.1 Managing Activities . . . . . . . . . . . . . . . . . . . . . 29
3.2 Managing Group Dynamics . . . . . . . . . . . . . . . . . 31
3.3 Managing Time . . . . . . . . . . . . . . . . . . . . . . . . 36
3.4 Managing You . . . . . . . . . . . . . . . . . . . . . . . . . 37
3.5 Taking Your Skills to the Next Level . . . . . . . . . . . . 38
4 Activities to Set the Stage 40
4.1 Check-In . . . . . . . . . . . . . . . . . . . . . . . . . . . . 41
4.2 Focus On/Focus Off . . . . . . . . . . . . . . . . . . . . . 43
4.3 ESVP . . . . . . . . . . . . . . . . . . . . . . . . . . . . . . 45
4.4 Working Agreements . . . . . . . . . . . . . . . . . . . . . 48

CONTENTS ix
5 Activities to Gather Data 50
5.1 Timeline . . . . . . . . . . . . . . . . . . . . . . . . . . . . 51
5.2 Triple Nickels . . . . . . . . . . . . . . . . . . . . . . . . . 56
5.3 Color Code Dots . . . . . . . . . . . . . . . . . . . . . . . 59
5.4 Mad Sad Glad . . . . . . . . . . . . . . . . . . . . . . . . . 61
5.5 Locate Strengths . . . . . . . . . . . . . . . . . . . . . . . 63
5.6 Satisfaction Histogram . . . . . . . . . . . . . . . . . . . 66
5.7 Team Radar . . . . . . . . . . . . . . . . . . . . . . . . . . 71
5.8 Like to Like . . . . . . . . . . . . . . . . . . . . . . . . . . 74
6 Activities to Generate Insights 77
6.1 Brainstorming/Filtering . . . . . . . . . . . . . . . . . . . 78
6.2 Force Field Analysis . . . . . . . . . . . . . . . . . . . . . 81
6.3 Five Whys . . . . . . . . . . . . . . . . . . . . . . . . . . . 85
6.4 Fishbone . . . . . . . . . . . . . . . . . . . . . . . . . . . . 87
6.5 Patterns and Shifts . . . . . . . . . . . . . . . . . . . . . 90
6.6 Prioritize with Dots . . . . . . . . . . . . . . . . . . . . . . 92
6.7 Report Out with Synthesis . . . . . . . . . . . . . . . . . 95
6.8 Identify Themes . . . . . . . . . . . . . . . . . . . . . . . . 97
6.9 Learning Matrix . . . . . . . . . . . . . . . . . . . . . . . 99
7 Activities to Decide What to Do 102
7.1 Retrospective Planning Game . . . . . . . . . . . . . . . . 103
7.2 SMART Goals . . . . . . . . . . . . . . . . . . . . . . . . 107
7.3 Circle of Questions . . . . . . . . . . . . . . . . . . . . . . 109
7.4 Short Subjects . . . . . . . . . . . . . . . . . . . . . . . . 111
8 Activities to Close the Retrospective 113
8.1 +/Delta . . . . . . . . . . . . . . . . . . . . . . . . . . . . 114
8.2 Appreciations . . . . . . . . . . . . . . . . . . . . . . . . . 117
8.3 Temperature Reading . . . . . . . . . . . . . . . . . . . . 119
8.4 Helped, Hindered, Hypothesis . . . . . . . . . . . . . . . 122
8.5 Return on Time Invested (ROTI) . . . . . . . . . . . . . . 124
9 Releases and Project Retrospectives 127
9.1 Preparing for Release and Project Retrospectives . . . . 128
9.2 Including Cross-Organizational Perspectives . . . . . . . 133
9.3 Leading Release and Project Retrospectives . . . . . . . 135
9.4 A Retrospective at Every Ending . . . . . . . . . . . . . . 141

CONTENTS x
10 Make It So 142
10.1 Provide Support . . . . . . . . . . . . . . . . . . . . . . . 143
10.2 Share Responsibility for Making Changes . . . . . . . . 145
10.3 Supporting Larger Changes . . . . . . . . . . . . . . . . . 145
A Facilitation Supplies 149
B Debriefing Activities 152
C Activities Quick Reference Matrix 154
D Resources for Learning Facilitation Skills 156
E Bibliography 157
ForewordOn my birthdays, I look back and reflect on my life. How have things
gone? Where did I think I would be thirty years ago, ten years ago, one
year ago? Where am I now? How could I do things better, and what
things that I rue should I just resolve so I can get past them? Am I the
type of person I hoped to be, and is the impact I have on others what
I would hope for? If not, what might I do differently in the upcoming
year(s)? Have I used the strength and intelligence that I have wisely?
This is my retrospective. I look back and assess. I consider. Taking
everything into account, I try to set a better course for the upcoming
year. I’m really glad that nobody is keeping score, even me, because I
don’t know how well I’m doing overall. I guess it depends on philoso-
phies that keep changing and on circumstances that bring more vari-
ability than I ever expected. Who could have predicted what my chil-
dren would be like?
Maybe if I had clearer goals and more frequent birthdays, the retro-
spectives would work better. I’ll bet that if I had Esther and Diana at
my more frequent birthdays, things would work out better. An outside
facilitator with techniques like they spell out in this book would provide
new insights and help formulate more concrete next steps.
I’ve been using iterative, incremental (a.k.a. Agile) processes formally
for eleven years; my drink of choice is called Scrum. The goals are
very clear in Scrum. They are established for a project and then reset
for every iteration. Since these iterations are every thirty days, there
isn’t a lot of wandering. Since the domain is building software, not
just life in general, it is also easier to tell whether progress is in the
right direction or needs adjusting. Because Scrum is a team activity,
the group reflection is particularly helpful. Everyone chips in, and the
surprises are manifold.

FOREWORD xii
Edward Yourdon described the long, terrible progress through a project
in Death March (Prentice Hall, 1997). A problem with these projects
is that there are no birthdays and no regular points for reflection and
readjustment.
The natural rhythm of the iterative delivery of software in Agile projects
provides such a break point. These are chances for the team to improve
what it is doing and how they feel about what they are doing. What an
opportunity. Read Esther and Diana’s book and see how it works.
Ken Schwaber
Scrum Author and Evangelist
Scrum Alliance

PrefaceWhen we say retrospective, here’s what we have in mind: a special
meeting where the team gathers after completing an increment of work
to inspect and adapt their methods and teamwork. Retrospectives
enable whole-team learning, act as catalysts for change, and gener-
ate action. Retrospectives go beyond checklist project audits or per-
functory project closeouts. And, in contrast to traditional postmortems
or project reviews, retrospectives focus not only on the development
process, but on the team and team issues. And team issues are as
challenging as technical issues—if not more so.
We have been leading retrospectives and teaching others to lead ret-
rospectives for a combined twenty years. In fact, in 2003, we were
bestowed with the title Retrospective Goddesses at the annual Retro-
spective Facilitators Gathering in Baden, Austria. It’s not every day
you get to read a book written by a pair of goddesses! Although we
don’t really claim divinity, we do know lots about helping teams learn
together in retrospectives.
We’ve talked to people who claim that retrospectives are a waste of
time. When we probe for details, the process they describe doesn’t
resemble what we would call a retrospective. However, when people
follow a process similar to what we describe in this book, we’ve seen
solid, bottom-line results.
Our clients and colleagues tell us that they see benefits from retrospec-
tives, too. Here’s some of what we’ve seen and heard. In each case the
team identified improvements during their retrospective and applied
new practices in the next iteration.
Improved Productivity A team in California reduced rework at the
end of their next release by improving their unit testing. They added
more tests and tested more frequently. Because they were finding
errors earlier, they didn’t have to scramble at the end of the release.

PREFACE xiv
Improved Capability A team in Florida used their retrospective to
devise a solution to a long-standing problem. Only one person on the
team knew how to integrate client data with the corporate database.
The team established a pairing schedule that enabled other team mem-
bers to learn about the database and eliminated the bottleneck.
Improved Quality A team in Minnesota observed a clear connection
between lack of customer contact during their iterations and missed
requirements. They increased customer involvement during subse-
quent iterations to reduce misunderstandings and rework on features.
As collaboration with the customer increased, the team spent less time
re-hashing and more time preventing defects and refactoring.
Increased Capacity A team in New York examined how they priori-
tized features and moved from yearly to quarterly releases by focusing
on delivering smaller high-value feature sets.
Along with bottom line benefits, retrospectives have a way of increasing
empowerment and enjoyment for teams.
After performing iteration retrospectives for a year, a team in Lon-
don reported that retrospectives had changed their lives for the better.
Another team called in a social worker when they faced an especially
tough problem. After observing the team, the social worker pointed out
that the team had better skills for navigating conflict than most of the
professional social workers he knew [Mac03]. The team knew how to
have the uncomfortable—but necessary—conversations to resolve dis-
agreements before they escalated into conflict or resentment.
We can’t predict the results you’ll achieve, but the evidence shows that
retrospectives can improve teamwork, methods, work satisfaction, and
results.
We want to thank our reviewers for their invaluable help. This book
wouldn’t be what it is without them: Tim Bacon, Raj Balasubramanian,
Nicole Belilos, Johannes Brodwall, Brandon Campbell, Mike Cohn, Ra-
chel Davies, Dale Emery, Marc Evers, Pat Eyler, Caton Gates, David
Greenfield, Daniel Grenner, Elisabeth Hendrickson, Darcy Hitchcock,
Dave Hoover, Stephen Jenkins, Bil Kleb, Willem Larsen, Anthony Lau-
der, Sunil Menda, Sheila O’Connor, David Pickett, Wes Reisz, Linda
Rising, Johanna Rothman, Matt Secoske, Guerry Semones, Dave W.
Smith, Michael Stok, and Bas Vodde.
PREFACE xv
We would be remiss if we didn’t thank Norm Kerth. Norm is the elder
statesman of retrospectives and has worked to make retrospectives
common practice. We’ve both known Norm for years, and in fact, he’s
the one who introduced us to each other. We found common ground
with Norm in work that each of us was doing independently and, out of
that common ground, started the Retrospective Facilitators Gathering
in 2001.
We want to thank the members of the Retrospective Facilitators Gath-
ering. Each year we meet with people who are doing amazing work
with retrospectives. At the first gathering in Oregon, four countries
were represented (Austria, Denmark, the Netherlands and the USA).
The 2006 gathering, held in Germany, brought together people from
eleven countries. The people of the gathering are generous with their
insights, experiences, and activities.
Finally, we want to thank Andy Hunt, Dave Thomas, and Steve Peter at
the Pragmatic Bookshelf. We couldn’t have done it without you.
IntroductionSuppose you are a member of a software development team. You’re
doing good work, but not great work. You’re starting to see signs of
interpersonal friction on the team, and some people you would like to
retain on the team are dusting off their résumés. You know you need to
adapt your practices and ease the interpersonal tension before things
get worse. You want to introduce retrospectives to your team.
Maybe you are a team lead, and you’ve heard about retrospectives but
have never tried one. You’ve heard retrospectives can help teams per-
form better, but you’re not sure where to start.
Maybe you’ve been holding retrospectives for months, and your team
isn’t coming up with any new ideas. You need a way revitalize your
retrospectives so the team doesn’t lose the gains they’ve made.
Whatever the reason you’ve picked up this book, we assume you think
retrospectives might help your team. Whether you’re a coach, a team
member, or a project manager and whether you’re expected to lead
retrospectives after every iteration or are initiating retrospectives for
the first time, you’ll find ideas and techniques that you can apply to
your situation.
Our main focus in this book is short retrospectives—retrospectives that
occur after one week to one month of work. Whether you are using Agile
methods or more traditional incremental or iterative development, your
team has an opportunity to reflect at the end of every increment and
identify changes and improvements that will increase the quality of the
product and the work life of team members.
Retrospectives are a natural fit in an Agile work environment—Scrum
and Crystal explicitly include “inspect and adapt” cycles for the meth-
ods and teamwork along with mechanisms to examine and improve the
product. While continuous builds, automated unit tests, and frequent

INTRODUCTION xvii
demonstrations of working code are all ways to focus attention on the
product and allow the team to make adjustments, retrospectives focus
attention on how the team does their work and interacts.
Retrospectives are also a natural fit in a team environment—where
membership in the team is less than ten and the work is interdepen-
dent. Retrospectives help people improve practices, handle issues, and
surface obstacles on a regular basis.
Iteration retrospectives focus on real problems that affect teams. Dur-
ing retrospectives, teams discover real solutions that they can imple-
ment without waiting for management’s permission. Since experiments
and changes are chosen, not imposed from above, people are more
invested in their success.
When we started leading retrospectives more than a decade ago, most
retrospectives looked at whole projects that had run for a year or more.
In the past ten years, there has been a shift. More and more teams are
working in shorter iterations and releasing software more frequently.
These teams no longer wait until the end of a long project to inspect
and adapt. They look for ways to improve at the end of every iteration.
Team coaches, team leads, and team members now lead their own ret-
rospectives.
Even if your team isn’t using Agile methods, you can adapt the advice
in this book to inspect and adapt your processes and teamwork before
the end of a project: hold a retrospective every month or so or at project
milestones.
You may need to convince your managers that this is a good use of your
time and company dollars. A growing body of data—both financial and
empirical—shows that consistent retrospectives result in real savings
and improvements.
In this book, we’ll introduce a structure for retrospectives and walk
through the process of planning, designing, and leading a retrospective.
We’ll supply activities and guidance on how to use them, and we’ll share
stories from real retrospectives.
We’ve also included a chapter on the role of the retrospective leader. We
believe that most people can lead retrospectives with confidence and
competence—and help the team achieve results—with a good structure
and the right tools.

INTRODUCTION xviii
And, we’ve included examples of how you can adjust the basic retro-
spective structure for a three-month release or a yearlong project—and
anything in between. Even if the team disbands after the release or
project, the organization can learn from a retrospective, and individu-
als will take the learning with them.

Chapter 1
Helping Your Team Inspect andAdapt
Retrospectives help teams—even great ones—keep improving. In this
chapter, we’ll start with an example of an hour-long iteration retro-
spective. We’ll watch what the retrospective leader does, and then we’ll
analyze the example so you can apply the process to your retrospec-
tives.
Let’s peek in on a team who writes financial software as they hold their
retrospective at the end of a two-week iteration. This team rotates lead-
ership of the retrospective, and this week, it’s Dana’s turn to lead.
After all the team members are seated in a semicircle facing a large
white board with several posters at one end, Dana starts the retrospec-
tive.
“Here we are again, taking time to examine our work in the last itera-
tion. We have an hour blocked to focus on our teamwork and methods.
It’s 4 PM now; we should be finished by 5. This time, we’re going to
focus on our development processes, because we’ve noticed the num-
ber of defects is increasing.”
“Before we look at the data, let’s do a quick check-in: in a word or two,
what’s going on for you as we start this retrospective?”
Each of the six team members gave a short response. “I’m puzzled,”
said the first.

CHAPTER 1. HELPING YOUR TEAM INSPECT AND ADAPT 2
“Curious,” said the second.
“Bummed about the defects,” answered the third.
“Hey, that’s more than a word or two!” said the first team member and
gave the wordy team member a poke in the arm.
“OK. Bummed,” he corrected.
The last two gave their responses, and Dana moved on.
“Do we need any amendments to our usual working agreements for this
meeting?” Dana asked, gesturing to the working agreements posted on
the wall. After all agreed the working agreements were sufficient, Dana
outlined the process for the meeting.
“First we’ll look at our data and then brainstorm and cluster possible
causes. After that, we’ll generate some ideas to approach the problem
in our next iteration, choose one, and design an experiment. Sound
OK?”
When all agreed, Dana moved to the next step.
“Let’s look at our defect data,” Dana said, pointing to a large chart
that showed each feature they’d worked on and the number of defects
they’d found in their own testing. “What was going on here?” she asked.
“Give me a read on what was going on as you worked on each of these
features.” She handed out small, colored sticky notes. “Let’s look at
what was going on during the iteration—post the events you remember.
Then put an orange sticky note where there was frustration.”
“Hmm,” a team member mused as she put the last orange sticky note
on the wall. “I’m surprised that the frustration isn’t clustered with the
defects. I wonder what that’s about.”
“Let’s see whether we can answer that. Take five minutes to write down
everything we know and then see what patterns we can discern.” Dana
handed out larger sticky notes and markers.
One team member wrote furiously. Another stared at the chart for a
minute and then started jotting down notes. Two others talked quietly
and compared ideas as they started writing.
At the end of five minutes, team members walked to the white board
and stuck their sticky notes on it.
“Which of these seem like they might have a similar cause?” Dana
asked. Team members moved the sticky notes around, putting two or
CHAPTER 1. HELPING YOUR TEAM INSPECT AND ADAPT 3
three close together and then moving them apart as they talked about
what was written on each sticky note.
At the end of ten minutes, there were four distinct clusters, which the
team labeled as follows: inconsistent pairing, too rushed to do test-
driven development, code smells, and legacy code.
“What do you see here?” Dana asked, starting a discussion of the con-
tributing factors.
“Which one of these causes is causing most of the defects?” Dana
asked.
The answer was unanimous: legacy code. “Let’s take a minute to brain-
storm experiments we can do in the next iteration to bring the defect
rates down.”
The team quickly identified five different approaches.
“Dot vote,” Dana commanded. “Two dots per person; use them any way
you want.”
In two minutes they had a top choice.
“Now let’s design our experiment,” Dana prompted.
The team worked for fifteen minutes identifying the action steps requi-
red for the experiment:
• Schedule a walk-through with Sally from the Support group (she
worked with this code for years).
• Write unit tests for the area of legacy code we’re touching.
• Enlist Sally to pair with us one or two mornings a week.
Dana looked at her watch. They had five minutes left. “What about the
pairing? We agreed we’d pair four hours a day.”
“That’s right, Dana,” a team member responded. “We need to do better
on that. I’ll put up a pairing dashboard so we remind ourselves.”
“OK, time to wrap up. How will we know we’re succeeding with our
legacy code experiment?” Dana asked.
“We’ll see fewer defects in this area of the code base,” one team member
offered, and the others agreed. “Yep, that’s the acid test.”

CHAPTER 1. HELPING YOUR TEAM INSPECT AND ADAPT 4
“We’ll check that at our next retrospective,” Dana said. “Whose turn
is it to lead next time?” A hand went up. “You’ll bring the new data,
right?”
“Thanks for your hard work,” Dana said. “We’ll take these action steps
into our planning meeting—which is tomorrow morning at 9 AM.”
Let’s review what Dana did in this retrospective.
Dana let the group know the purpose, focus, and time allowed for the
retrospective. She told them how they would spend their time. She
used a brief check-in to allow everyone to speak and reviewed the team’s
already established working agreements.
Dana reviewed the team’s defect data and then asked about events and
areas of frustration. She did this so everyone was considering the same
data, rather than only the data each individual knew about. She asked
the team to examine facts—the defect data—and feelings—the areas of
frustration.
Dana led the group to interpret the data and discern patterns.
Dana helped the group identify approaches, choose an approach, and
plan to achieve a goal related to the focus of the retrospective.
Dana ended the session decisively. She confirmed with the group how
they would assess progress, and thanked them for their participation.
Dana followed a specific structure:
1. Set the stage.
2. Gather data.
3. Generate insights.
4. Decide what to do.
5. Close the retrospective.
Every year at the Retrospective Facilitators Gathering, we learn about
new ways and new twists on old ways to lead retrospectives. And we
return to this structure because it works for us—and it can work for
you. This structure can fit into an hour or expand to three days.
You can add variety by adding new activities, but stick to this basic
outline—this structure does what a retrospective needs to do.
SET THE STAGE 5
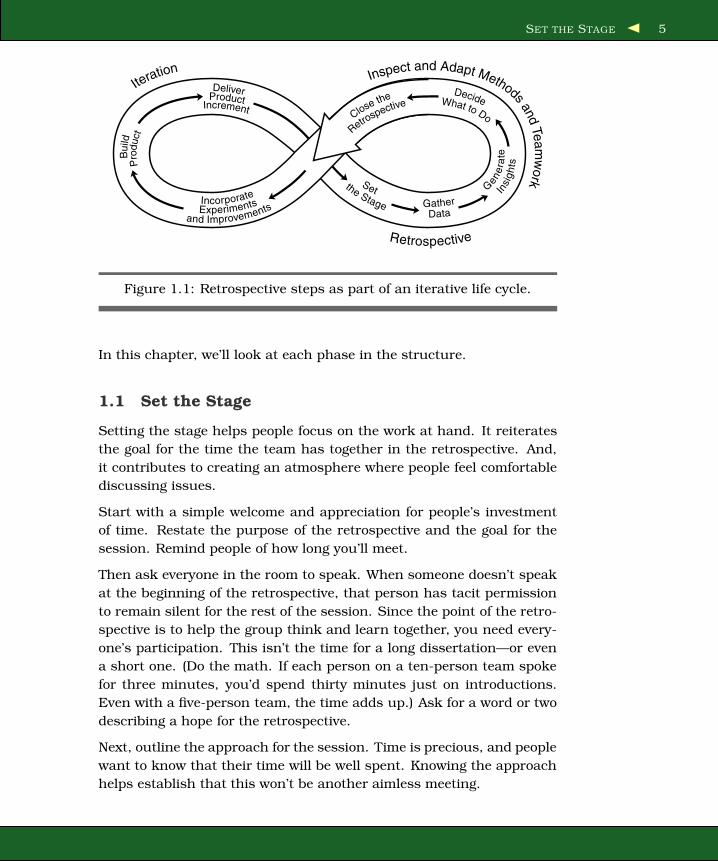
Figure 1.1: Retrospective steps as part of an iterative life cycle.
In this chapter, we’ll look at each phase in the structure.
1.1 Set the Stage
Setting the stage helps people focus on the work at hand. It reiterates
the goal for the time the team has together in the retrospective. And,
it contributes to creating an atmosphere where people feel comfortable
discussing issues.
Start with a simple welcome and appreciation for people’s investment
of time. Restate the purpose of the retrospective and the goal for the
session. Remind people of how long you’ll meet.
Then ask everyone in the room to speak. When someone doesn’t speak
at the beginning of the retrospective, that person has tacit permission
to remain silent for the rest of the session. Since the point of the retro-
spective is to help the group think and learn together, you need every-
one’s participation. This isn’t the time for a long dissertation—or even
a short one. (Do the math. If each person on a ten-person team spoke
for three minutes, you’d spend thirty minutes just on introductions.
Even with a five-person team, the time adds up.) Ask for a word or two
describing a hope for the retrospective.
Next, outline the approach for the session. Time is precious, and people
want to know that their time will be well spent. Knowing the approach
helps establish that this won’t be another aimless meeting.

SET THE STAGE 6
Every Voice
At the end of one retrospective, Brenda piped up. “I’m sur-prised I talked so much.”
Others nodded in agreement. “Yeah, Brenda usually keepsquiet. I’m really glad she talked so much this time. She hada lot to say.”
“How did you persuade me to talk?” Brenda asked.
The answer was simple: the retrospective leader asked her tosay her name within the first five minutes.
This sounds too simple to be true, yet it works.
After you’ve established the timebox, goal, and approach, work to estab-
lish an environment where people can bring up difficult topics and have
challenging conversations. Team values and working agreements are
both types of social contracts that describe acceptable behavior and
interactions. We’re not talking about abstract, high-falutin’ statements
such as “We value all people equally” (even though you might). We’re
talking about working agreements that do real work to help people talk
about tough issues, bring up emotional topics, or deliver unwelcome
news.
If your team has a set of values, use them. Remind them that their
values also hold for the retrospective. The team may need to adapt
some values so they fit the retrospective.
An XP team had named quality, simplicity, teamwork, and courage as
their values. A team member asked how the value of simplicity applied
to a retrospective. Their coach suggested that simplicity might mean
finding the simplest improvement actions that could possibly work.
Others supplied ideas on what quality, teamwork, and courage would
look like in the retrospective.
Likewise, if your team has working agreements, post them and review
them. Adjust the working agreements as needed to apply in the retro-
spective.
A game development team’s first working agreement was “The job of
every programming pair is to make sure the code is ready for the next
pair.” For the retrospective, the team reinterpreted this as “The job of

SET THE STAGE 7
every subteam is to have their work ready for the entire retrospective
group.”
If your team doesn’t have working agreements, develop them now—
before proceeding. It’s impossible to anticipate every situation; most
groups can address the majority of situations with five working agree-
ments. If you need more than the fingers on both hands to count your
working agreements, you have too many.
Here’s an example of why you need working agreements at the start
of the retrospective: Fran’s cell phone starts ringing just as the group
broaches a sensitive topic. At this point, it’s awkward to say, “Don’t
answer that phone!” And it feels capricious to people when they learn
what the rules are only after they’ve been broken. If your team has
a working agreement that says “Mobile phones on silent during meet-
ings,” it’s less disruptive to point to the agreement and end the inter-
ruption. It also feels more fair to the people in the retrospective. The
last thing you want is to look like a petty tyrant when you are leading
a retrospective.
You get another benefit: working agreements make everyone responsi-
ble for civil behavior and collaboration, not just the retrospective leader
[Der05].
The first time your team develops working agreements in a retrospec-
tive, they might spend ten to fifteen minutes on them—but the agree-
ments are reusable in future retrospectives and in daily work.
TIP: Working Agreements Belong to the Team
Ask your team to monitor their working agreements during
the retrospective. When your team takes responsibility for
their interactions, you can focus on facilitating.
As the team develops or adjusts their working agreements, notice what
comes up. Working agreements are often a clue to what people are
worried about.
Here’s a story: as Chris, a tech lead from outside the team, helped
establish working agreements with a team who wrote chemical analy-
sis software, the group identified “Everyone participates” as a working
agreement.
GATHER DATA 8
As they started the first activity, Chris realized that the group had been
worried about Dave, their “star” performer. In the first group discus-
sion, Dave went on and on giving his perspective. When other team
members attempted to join the conversation, Dave dismissed them
with a wave and kept talking. Chris supported the team in holding
their agreement by recording Dave’s comments and saying “Thank you,
Dave; now let’s hear from someone else.” After that, team members
were more assertive with Dave. Dave still had a great deal to say, but
he didn’t dominate the discussion.
The first welcome through reviewing working agreements can take as
little as five minutes. Inexperienced retrospective leaders like to skip
setting the stage and plow ahead into the “meat” of a retrospective. We
never regret spending time setting the stage—and neither should you.
“Saving” time by skipping this part costs time later. When people don’t
speak early, they may not contribute at all—and may not buy into the
team’s insights and decisions. When they don’t know the approach,
people have trouble focusing and may take the group on a tangent.
Team values and working agreements help keep the conversations and
interactions productive.
So, don’t skip setting the stage, and don’t skimp on it either.
1.2 Gather Data
It may seem silly to gather data for an iteration that lasted a week
or two. But when someone misses one day in a weeklong iteration,
they’ve missed 20% of the events and interactions. Even when people
are present, they don’t see everything, and different people have differ-
ent perspectives on the same event. Gathering data creates a shared
picture of what happened. Without a common picture, individuals tend
to verify their own opinions and beliefs. Gathering data expands every-
one’s perspective.
Start with the hard data: events, metrics, features or stories com-
pleted, and so forth. Events can include meetings, decision points,
changes in team membership, milestones, celebrations, adopting new
technologies—any event that had meaning to someone on the team.
Metrics include burndown charts, velocity, defect counts, number of
stories completed, amount of code refactored, effort data, and so forth.
Encourage people to refer to team calendars and other artifacts—docu-
ments, emails, charts—to add to the picture.

GATHER DATA 9
Figure 1.2: Carly’s event card with nine green dots, indicating this event
was a high point, and one blue dot, showing it as a low point.
For an hour-long retrospective, you can ask people to report verbally
on data and events or use the team’s task board and big visible charts.
When your team looks back more than a week or two, create a visual
record using a timeline or data charts. A visual depiction of data and
events makes it easier for people to see patterns and make connections.
Hard facts are only part of the data. Feelings are at least half the story.
Feelings tell what’s important to people about the facts and about the
team.
Here’s a story about a time when looking at feelings helped a team
understand the consequence of keeping their concerns to themselves:
Pat’s team created a timeline by posting cards to represent what hap-
pened during their thirty-day iteration. They put green dots on events
that were high points and blue dots on low points. When all the dots
were in place, one card stood out as shown in Figure 1.2 .
The card had nine green dots and one blue dot.

GATHER DATA 10
The F Word
OK, we’re working with engineers here. They may not want totalk about their feelings. So in retrospectives, we usually don’task people how they feel.
But we have our ways.
Rather than ask directly how people feel, try asking the ques-tion a different way:
When were you excited to come to work? When was comingto work “just a job”? When did you dread coming to work?
What were the high points? What were the low points?
How was it to be on this iteration?
When were you [fill in an emotion word—mad, sad, sur-prised...]?
Questions like these let people talk about how they experi-enced the iteration without using the F word (“feelings”).
Carly confessed that the card and the blue dot were hers. “I felt like
I had hijacked the planning session. I can’t believe anybody thought
that was good.”
“Carly, we knew you were upset, but it wasn’t until you spoke up that
we were able to fix the problem.”
Several team members revealed they had concerns similar to Carly’s.
But because no one was talking about it, no one could solve the issue.
Carly’s “outburst” was the key to solving an ongoing problem.
Without consciously looking for feelings, this conversation wouldn’t
have happened.
Creating a structured way for people to talk about feelings makes it
more comfortable to raise topics that have an emotional charge. When
people avoid emotional content, it doesn’t go away; it goes underground
and saps energy and motivation. Or the emotion may come out in a
flare of anger, and a flame war won’t help your retrospective.

GENERATE INSIGHTS 11
Before proceeding to the next phase, do a quick review of the data with
the entire team. Ask the team to scan the data you’ve gathered and
comment on patterns, shifts, and surprises.
Thorough data gathering, and including both facts and feelings, leads
to better thinking and action in the rest of the retrospective. Without
a shared picture, people are working from a narrow set of data—their
own. When people look only at their own data, the team is less likely to
commit to changes and experiments. Without feelings data, the team
may not address the topics that are most important to them.
1.3 Generate Insights
Now is the time to ask “Why?” and begin thinking about what to do
differently. When generating insights, the team considers the data to
identify strengths and issues from the previous iteration.
Lead the team to examine the conditions, interactions, and patterns
that contributed to their success. Investigate breakdowns and defi-
ciencies. Look for risks and unexpected events or outcomes.
It’s easy for people to jump to solutions once problems emerge. First
solutions may be correct, but often they’re not. The work of this phase
is to consider additional possibilities, look at causes and effects, and
think about them analytically. It’s also a time for the team to think
together.
These insights help the team see how to work more effectively—which
is the ultimate goal of any retrospective.
Generating insights allows the team to step back, see the big picture,
and delve into root causes.
When you skip generating insights, your team may not understand how
events, behaviors, and circumstances affect their ability to develop soft-
ware. Time spent generating insights helps ensure that when your team
plans an improvement, it’s one that will make a positive difference.
1.4 Decide What to Do
At this point, the team has a list of potential experiments and improve-
ments. Now is the time to pick the top items (usually no more than
one or two for an iteration) and plan what to do. Your primary job is to

DECIDE WHAT TO DO 12
Reusable Skills
The activities and skills teams use to generate insights and ana-lyze the problems in a retrospective apply outside the retro-spective, too.
Teams can use these analytical tools to understand technicalproblems, prioritize stories or requirements, plan a strategy, ordrive innovation.
For example, a web development team learned a mind-mapping technique during a retrospective. Later, when theyexperienced friction with their customer, mind mapping helpedthe team explore options to approach the problem.
provide structure and guidance for your team to plan experiments and
actions.
Sometimes teams come up with long lists of candidate improvements;
but too many initiatives can overwhelm you ability to change. Pick one
or two experiments for the next iteration. Help your team choose items
that they can commit to and that will have a positive effect. If your
team is recovering from a change that was stressful, help them choose
something less complex this time.
Taking action during the retrospective builds momentum. Mike’s team
created a new working agreement, “Everyone will pair at least four
hours a day,” to address inconsistent pair programming. Jan’s team
redesigned their lab and created new check-in procedures.
One way to plan for experiments and changes is to create story cards or
backlog items. This makes it easier to incorporate improvement plans
into the work plan for the next iteration. Holding your retrospective
right before iteration planning is ideal. Plan a break—even if it’s only
lunch—between the retrospective and the planning session.
Whether you finish planning in the retrospective or incorporate actions
into iteration plans, be sure that people sign up and commit to tasks.
Without individual commitment, people assume that “the team” will do
the task, and no one does it.

CLOSE THE RETROSPECTIVE 13
Avoiding the Do-Nothing Retrospective
Teams who identify external groups as the source of their ills andwant those people to change end up frustrated. Waiting forother people to change is an exercise in futility. The most pow-erful place to start change is within the team. Even when yourteam doesn’t have direct control, your team can take actionto influence or change their own response.
Change happens in the course of normal work. Teams whobelieve their retrospectives are a waste of time often keep theirimprovement plans completely separate from their daily workplans. When the plans are separate, no one finds time to dothe “extra” work.
1.5 Close the Retrospective
All good things come to an end, even retrospectives. End the retrospec-
tive decisively: don’t let people (and their energy) dribble away. Decide
how to document the experience and plan for follow-up.
Help your team decide how they’ll retain what they’ve learned from the
retrospective. Track new practices with posters or big visible charts.
Use a digital camera or hit the Print button on that printing white board
to create a visual record. The learnings belong to the team, and team
members: not the coach, not the team lead, and not you as the retro-
spective leader. The team needs to own them.
Close the retrospective with an appreciation for the hard work everyone
did both during the iteration and during the retrospective.
Before you end, take a few minutes to perform a retrospective on the
retrospective. Look at what went well and what you could do differently
in the next retrospective. “Inspect and adapt” applies to retrospectives,
too.
Using this structure—Set the Stage, Gather Data, Generate Insights,
Decide What to Do and Close the Retrospective—will help your team do
the following:

CLOSE THE RETROSPECTIVE 14
• Understand different points of view.
• Follow a natural order of thinking.
• Take a comprehensive view of the team’s current methods and
practices.
• Allow the discussion to go where it needs to go, rather than pre-
determining the outcome.
• Leave the retrospective with concrete action and experiments for
the next iteration.
The structure gives you, as the retrospective leader, a tried-and-true
process to help your team inspect and adapt. In the next chapter, we’ll
proceed step-by-step through using this structure to create a retrospec-
tive that will work for your team.
Chapter 2
A Retrospective Custom-Fit toYour Team
When we first started leading retrospectives, outside facilitators con-
ferred with the project sponsor and project manager to determine the
goal and approach for an end-of-project retrospective. But if you’re a
coach or team lead doing iterative development, you’re probably leading
your own retrospectives after each iteration. You may even be rotating
the role among team members. In any case, if you are planning and
leading a retrospective, you’ll make a series of decisions about the goal,
the logistics, and the flow of the session. But before you make deci-
sions, investigate.
2.1 Learning About the History and Environment
If you’re leading retrospectives for your own team, you probably already
know the history and context. Even so, take a second look. Check your
assumptions about the team’s history and morale and about the state
of the project.
If you’re working with a team other than your own, study their context.
Scan the team’s work space. Look at the cartoons, white boards, and
other artifacts. Notice what artifacts are available and which are miss-
ing. Talk to formal and informal team leaders. The information you
gather will help you work with the team to choose an appropriate goal.
What you observe will give you clues about what questions to ask and
what problems the team may be facing.
SHAPING THE GOAL FOR THE RETROSPECTIVE 16
When you talk to people on the team, find out about topics such as
these:
• What did this iteration produce? What was the team aiming for?
How did the result meet (or not meet) expectations?
• What’s going on elsewhere in the organization that affects the team
as they go into the retrospective? For example, are there rumors
of layoffs? Has there been a recent merger? A canceled product?
• What is the history of previous project reviews? What happened,
and what was the follow-up?
• What are the relationships between team members—how is their
work interdependent? What are their personal connections and
working relationships?
• What are team members feeling? What are their concerns or anx-
ieties? What are they excited about?
• What kind of outcome will achieve value for the time invested—
both for the retrospective sponsor and the team?
• How has the team worked with facilitators before?
The information you glean by exploring these topics will help you for-
mulate a possible goal for the retrospective. It will also help you under-
stand the dynamics of the team, and help you establish relationships if
you don’t already know people.
2.2 Shaping the Goal for the Retrospective
A useful goal helps answer the question, what will achieve value for the
time invested?
A useful goal provides a sense of why people are investing their time,
without predetermining what actions or direction the team will take
after the retrospective. A restrictive goal acts as a blinder. Choose
a broad goal that leaves open possibilities for your team to think cre-
atively about their experiences and discover the insights that are impor-
tant to them. Unlike more general goals, here you want to avoid goals
that define a specific measurable outcome. A goal such as “Determine
how to persuade HR to eliminate performance appraisals” blocks con-
sideration of other channels for action or other big issues facing your
team.
DETERMINING DURATION 17
Here’s a goal that’s broader but still inappropriate: “Determine what
went wrong with testing.” A goal like this may send your team in the
wrong direction or may open the door for blame.
Useful goals for retrospectives include the following:
• Find ways to improve our practices.
• Discover what we were doing well.
• Understand reasons behind missed targets.
• Find ways to improve our responsiveness to customers.
• Rebuild damaged relationships.
These are just examples. Consider your context, and work with your
team to discover a goal that will help your team.
“Continuous process improvement” may work for a couple of iterations.
After that, it’s stale. Switch to a different goal. After you’ve considered
the context, propose a goal to the team. If the team doesn’t buy into the
goal, ask the team to describe a goal.
2.3 Determining Duration
How long should your retrospective be?
It depends.
Fifteen minutes can be enough—or not. There’s no set formula. Base
the length of the retrospective on four factors:
• Length of the iteration
• Complexity (of the technology, relationships with external depart-
ments, organization of the team)
• Size of the team
• Level of conflict or controversy
An hour-long retrospective can be enough for a one-week iteration; a
half day may be enough for thirty days worth of work. Shortcutting time
means cheating results. (Release and end-of-project retrospectives last
longer: at least one day and up to four days in some cases.)

DETERMINING DURATION 18
How Long Does it Take to Prepare for a Retrospective?
The first time you attempt a retrospective that goes beyond ask-ing “What went well?” and “What should we do differently?” itwill take time to prepare.
How much time? The first time, it may take as much time asthe planned duration of the retrospective. You’ll need time todetermine the goal, decide on logistics, select activities, andprepare to lead the retrospective. For an hour-long retrospec-tive, you may spend one hour preparing.
Each time after that, you’ll need less time to prepare. You’llnever get to zero preparation time—that would mean you’renot thinking about it at all. But with practice and a collectionof activities you feel comfortable with, you’ll be able to preparequickly.
Likewise, preparing for the first full-day retrospective after arelease or at the end of the project will need a substantial timeinvestment. This makes sense. If you’re going to ask five totwenty people to spend a day learning together, you want tomake sure you have a session that will make good use of theirtime and achieve the desired result.
Complexity can be about the technical environment, or it can be about
relationships. Add more time when there’s bound to be lots of discus-
sion.
Add more time for more people. When more than 15 people are in the
room everything takes longer.
Projects that fail and projects beset by politics generate controversy on
the team and outside the team. Plan on more time for venting by team
members.
You can always end the retrospective early if people identify mean-
ingful improvements and finish their plans before the planned end
time. There’s no point prolonging the retrospective once the team has
achieved the goal. But too much time usually isn’t the problem. If your
team produces only superficial insights and shallow plans, it may be
that they need more time.
STRUCTURING A RETROSPECTIVE 19
2.4 Structuring a Retrospective
In Chapter 1, Helping Your Team Inspect and Adapt, on page 1, we laid
out a structure: Set the Stage, Gather Data, Generate Insights, Decide
What to Do and Close the Retrospective. This structure brings in per-
spectives from all team members, follows a natural order for processing
information, and moves the group toward committed action.
You’ve decided how much time you need to achieve the retrospective
goal; now what do you do with that time?
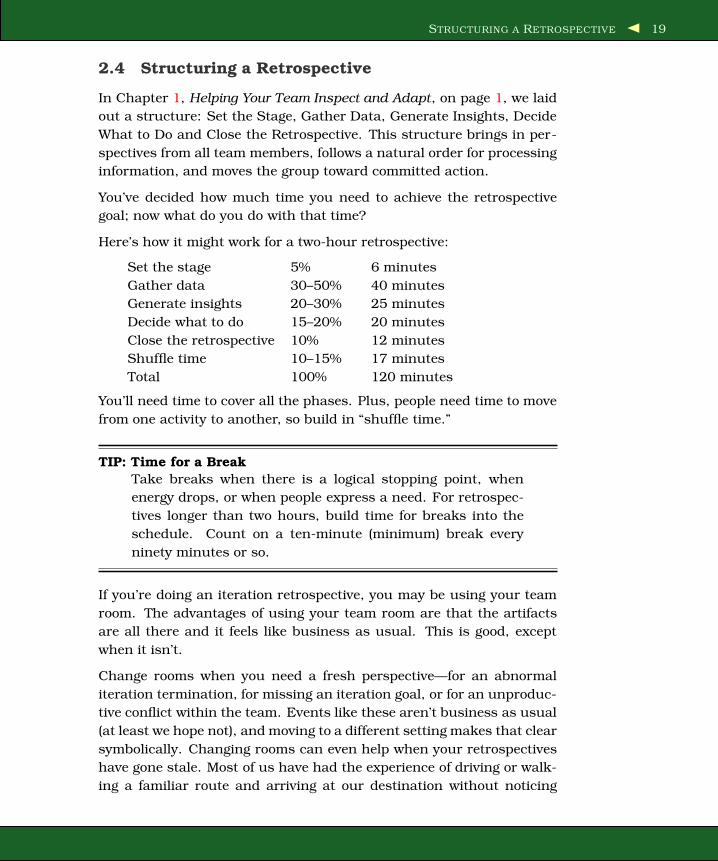
Here’s how it might work for a two-hour retrospective:
Set the stage 5% 6 minutes
Gather data 30–50% 40 minutes
Generate insights 20–30% 25 minutes
Decide what to do 15–20% 20 minutes
Close the retrospective 10% 12 minutes
Shuffle time 10–15% 17 minutes
Total 100% 120 minutes
You’ll need time to cover all the phases. Plus, people need time to move
from one activity to another, so build in “shuffle time.”
TIP: Time for a Break
Take breaks when there is a logical stopping point, when
energy drops, or when people express a need. For retrospec-
tives longer than two hours, build time for breaks into the
schedule. Count on a ten-minute (minimum) break every
ninety minutes or so.
If you’re doing an iteration retrospective, you may be using your team
room. The advantages of using your team room are that the artifacts
are all there and it feels like business as usual. This is good, except
when it isn’t.
Change rooms when you need a fresh perspective—for an abnormal
iteration termination, for missing an iteration goal, or for an unproduc-
tive conflict within the team. Events like these aren’t business as usual
(at least we hope not), and moving to a different setting makes that clear
symbolically. Changing rooms can even help when your retrospectives
have gone stale. Most of us have had the experience of driving or walk-
ing a familiar route and arriving at our destination without noticing
STRUCTURING A RETROSPECTIVE 20
anything along the way. The same process can happen when teams
always meet in the same room. Moving to a different room can help
people notice different things.
Find a room large enough to accommodate your team without crowding.
One way to judge the room size is to look at the occupancy rating. Most
conference rooms in corporate buildings (and hotel meeting facilities)
have one. Ask the facilities person, and choose a room rated for three
to four times the number of people you expect to attend if you are in the
United States. (Room ratings are different in other parts of the world.)
You want enough space so people can move comfortably—they won’t be
seated in rows the whole time (we hope they won’t be in rows at all).
A circle or semicircle of chairs encourages participation because people
can see each other. Classroom or theater-style arrangements stifle par-
ticipation. Staring at the back of someone else’s head isn’t conducive to
conversation. Tables can be a physical barrier that becomes a psycho-
logical barrier. Avoid rooms with an immovable conference table in the
middle. That big ol’ table will inhibit creative collaboration. This isn’t a
board meeting, after all.
Tables arranged in a U-shape with a big gulf in the middle create dis-
tance and make it hard to move around. If you have to have tables,
make sure you can move them.
The key is to move people closer together rather than farther apart and
to make it easy for people to see data charts, flip charts, and other
information posted during the retrospective.
In addition, facilities folks twitch when you start taping over expensive
artwork. Whatever furniture arrangement you choose, find a room that
has one long blank wall to post timelines, charts, and flip chart pages.
If you can’t find a room with a blank wall, look for alternate ways to
hang flip charts: two options are to turn tables [Dav05] on their sides
or hang a clothesline [Hin05]. You can also use the open floor spaces
to spread out flip pages so people can walk by and view them. When
there’s nowhere else to hang paper, tape it to the windows (but don’t
use invisible plastic tape; it’s really hard to remove).
Portable white boards are great for capturing small amounts of infor-
mation. The downside is that once the white board is full, it’s erased.
That’s fine for transient information, but if the team needs the infor-
mation for the remainder of the retrospective, use a flip chart.

STRUCTURING A RETROSPECTIVE 21
Here’s how one retrospective leader thought about a retrospective for
his team. The scenario: The team is using some XP practices, though
they haven’t been pair programming or holding regular retrospectives.
The team is in their sixth two-week iteration. This iteration, they met
the iteration goal but only by working overtime—violating their agree-
ment to work at a sustainable pace. On top of that, their build system
broke during the second week of the iteration.
Given how the iteration went, one of the team members suggested that
they’d benefit from examining what happened and making changes in
the next iteration. The rest of the team agreed. They want to use
their first retrospective to learn from the mishaps and mistakes of the
iteration.
Decision: What is the goal?
Learn from mishaps on the previous iteration, uncover root causes of
those problems.
Decision: Who will attend?
The team.
Decision: How long?
Two-and-a-half hours. The first retrospective may take longer because
we’re unfamiliar with this style of discussion. Also, we’ve been working
for twelve weeks and for these issues, we’ll need to look back further
than the our previous two-week iteration.
Decision: Where do we hold the retrospective?
A conference room that can comfortably hold twenty people. People
need to be able to move around for small group work.
Decision: How will we set up the room?
Move the tables to the side of the room. Start seated in a semicircle
facing the long wall and then move to the corners of the room for small
group work. We don’t want people seated around a conference table.
The semicircle will allow everyone to see each other for the initial dis-
cussion. We’ll need variety and space for people to move around.

SELECTING ACTIVITIES 22
By now, you should have answers to these questions:
• What is the context surrounding the retrospective?
• What is the goal for this retrospective?
• How long will the retrospective be?
• Where will we hold the retrospective?
• What’s the basic structure?
2.5 Selecting Activities
After you have the bare bones of the retrospective—the goal, duration,
attendees, room, and setup—it’s time to think about activities. Activ-
ities are timeboxed processes that help the team move through the
phases of the retrospective. Activities provide structure to help your
team think together and have several advantages over freewheeling dis-
cussion.
Activities do the following:
Encourage Equal Participation With more than five people it’s hard
for everyone to participate in a conversation. Working in smaller groups
makes it more likely that people will hear and be heard.
Focus the Conversation Activities have a particular goal that frames
the conversation. That reduces (but does not eliminate) the chance of
tangential drift.
Encourage New Perspectives Activities bring people outside their
day-to-day modes of thinking and can encourage new ideas. Activities
don’t have to be elaborate or involved to be effective. Examples of activi-
ties that are useful in retrospectives include Brainstorming, Voting with
Dots, doing Check-Ins, and performing Pair Interviews.
Choose activities that support the goal of the retrospective. If there’s no
way to discuss the activity that makes a connection between the activ-
ity and the work, omit it. We’re not against games and simulations—in
fact we use them often—when they serve a purpose and move the retro-
spective forward. Icebreakers, energizers, and games that don’t relate
to the work don’t fit in retrospectives. There’s only so much time, so
don’t waste it with activities that are “just for fun.” Have fun, but have
a purpose.
SELECTING ACTIVITIES 23
J. M. Keller, an expert in motivation and learning, developed criteria for
evaluating instructional designs. The criteria are Attention, Relevance,
Confidence/Competence, Satisfaction—ARCS for short [Kel87]. While
you aren’t developing instructional material, you are creating an envi-
ronment for learning. The same criteria apply. If you did interviews as
up-front work, you may have some clues about which will be relevant
to your team.
Choose activities that help people stay engaged so they don’t drift off
(Attention) and that are relevant to the goal (Relevance). You want activ-
ities that people can accomplish successfully (Confident/Competence).
Avoid activities that are designed to make people feel stupid, inept, or
set up. People usually become angry when they feel set up and become
defensive if they feel they’re looking or acting like dummies. That’s not
what you want in a retrospective. Finally, make sure activities fit into
the overall design so people think the retrospective is a good use of their
time (Satisfaction).
Vary activities to keep your team engaged. Follow a pair activity with
one that involves a small group or the whole group. Alternate sedentary
activities with ones where people move.
After a while, the same old activities lose their zest. If you’re bored with
an activity, chances are your team is, too. Find new activities to keep
your team (and yourself) interested. When people are interested, they’re
less likely to fall into habitual thinking—and you don’t want habitual
thinking. You want creative thinking. After you’ve been leading retro-
spectives for a while, you’ll start making up your own activities. Many
activities for generating ideas, analyzing problems, or identifying novel
solutions can be adapted for retrospectives. In the meanwhile, we’ve
included activities for each phase of the retrospective with step-by-step
guidelines (see the “Activities” chapters).
TIP: Have a Backup
Choose two activities for each stage—one short and one long.
Substitute the shorter activity if time is tight.
Now, we’ll look at selecting activities for each phase. We’ll pick up
the scenario of the XP team who has been working over time to meet
goals and whose build system broke down. (Each of these activities is
described in detail in the “Activities” chapters that follow.)
SELECTING ACTIVITIES 24
Phase: Set the Stage
Activity: Focus On/Focus Off
Why? After the opening (review goal, schedule, and working agree-
ments), this activity will help establish a mind-set of looking at the
issues without assigning blame. We want to foster open discussion.
Phase: Gather the Data
Activity: Timeline with Color Code Dots
Why? The team is looking at a fairly long period of time and this will
help them remember what happened in earlier iterations. It will help
people see connections between events. Color coding will help us see
facts and feeling and will be an efficient use of time.
Phase: Generate Insights
Activity: Patterns and Shifts
Why? I’ll guide the group to recognize and name patterns and signifi-
cant events contributing to our current problems.
Activity: Fishbone
Why? After looking at the patterns, we need to determine root causes.
We’ll analyze significant events and factors behind the problems.
Activity: Report Out and Synthesis
Why? We need to share the work from small groups and look for com-
mon treads and common causes.
Phase: Decide What to Do
Activity: Prioritize with Dots
Why? We need to identify the top two to three root causes to work on
starting in the next iteration. We can’t absorb a long list of changes; we
need to work on the things that will make the biggest difference.
The next step depends on what the team identifies as the most impor-
tant thing to work on.
Option 1: Write story cards (Retrospective Planning Game).
Why? We can take the story card items into our next iteration planning
meeting and incorporate them into the rest of our work.
SELECTING ACTIVITIES 25
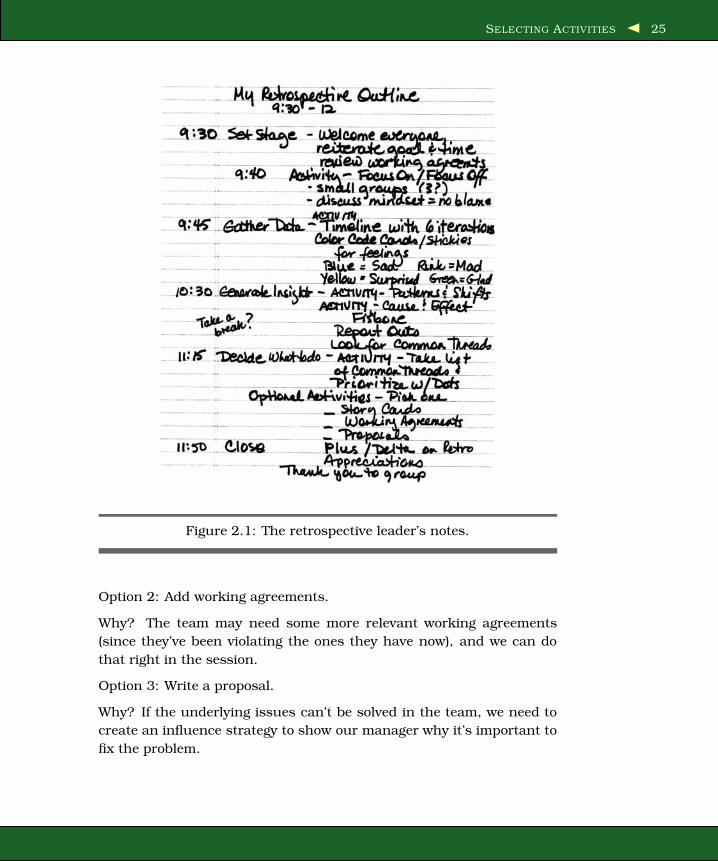
Figure 2.1: The retrospective leader’s notes.
Option 2: Add working agreements.
Why? The team may need some more relevant working agreements
(since they’ve been violating the ones they have now), and we can do
that right in the session.
Option 3: Write a proposal.
Why? If the underlying issues can’t be solved in the team, we need to
create an influence strategy to show our manager why it’s important to
fix the problem.

SELECTING ACTIVITIES 26
Figure 2.2: Retrospective agenda. The items cover all five phases of a
retrospective.
Phase: Close the Retrospective
Activity: +/Delta
Why? Improve the retrospective.
Activity: Appreciations
Why? Provide an opportunity for people to acknowledge contributions.
We need a lift after a tough iteration and hard work in the retrospective.
Note to self: remember to thank the team for their hard work.
Figure 2.1, on the preceding page shows the retrospective leader’s notes
for the session. Figure 2.2 shows the agenda poster for the retrospec-
tive.
SELECTING ACTIVITIES 27
Suppose this design was for your retrospective.
You know the goal for the retrospective, how long it will be, where the
session will be, who will attend, and the activities you’ll use to help the
group think and solve problems together.
Now all you have to do is stand up and lead the group.

Chapter 3
Leading RetrospectivesThis chapter is about the role and skills of a retrospective leader. You
don’t need to be a professional facilitator to lead an iteration retrospec-
tive, but you do need basic facilitation skills. To learn the skills, you
need to understand the role, practice, and seek feedback.
As a retrospective facilitator you may follow the content, but your pri-
mary responsibility is the process. When facilitators talk about pro-
cess, they aren’t talking about a heavyweight methodology. Process
means managing activities, managing group dynamics, and managing
time [Sch94]. Retrospective leaders focus on the process and struc-
ture of the retrospective. They attend to the needs and dynamics of the
group and help the group reach a goal. Retrospective leaders remain
neutral in discussions, even when they have strong opinions.
When the content involves your own team, it’s easy to get caught up
in the discussion. It’s tempting to jump into an engaging conversation,
especially when you care about the topic. But, if you’re immersed in
the content, you can’t pay full attention to the process. Wait a beat to
determine whether your thoughts are necessary. Most often, your team
will do nicely without your input. The risk of giving input is that when
the leader jumps in too often, it quashes group discussion.
Participants, on the other hand, focus on the content, discuss, some-
times disagree (though not disagreeably), and make decisions. Par-
ticipants aim toward a goal and manage their own thoughts, feelings,
and responses so they contribute positively to the conversations and
outcome.

MANAGING ACTIVITIES 29
TIP: When to Offer Content Expertise
You may have important content to offer that no one else
in the group has. When that happens, tell the team you are
leaving the retrospective leader role temporarily to contribute
to the discussion. Hand your marker to another team mem-
ber to symbolize that you are not in the facilitator role while
you participate. (Just make sure you get the marker—and
your role—back.)
3.1 Managing Activities
Every retrospective design includes activities—such as creating work-
ing agreements, building a timeline, brainstorming, and prioritizing—
to help the team think together. You’ll need to introduce each activity,
monitor the room during the activity, and debrief the activity when it’s
done.
Most people want to know something about the purpose of an activity
before they begin. Give a broad sense of the territory the team will
explore without revealing the details of what will happen or specifying
what the team will learn.
TIP: Introducing Activities
The first time you use an activity, write a script so that you
remember what to say and don’t garble the instructions or
leave something out.
Once you have your script, practice saying it aloud. Saying
the words is different reading them or thinking them. As you
hear yourself give the instruction, you’ll notice where you
stumble and where even you can’t follow the instructions.
Then you can refine your script and practice again.
You may not follow the script in the end, but preparing and
practicing will help you describe the activity clearly and con-
cisely.
Here’s an introduction for an activity to re-create the timeline of a
release: “To understand our iteration we need to tell the whole story
from everyone’s perspective. We’ll create a timeline that shows events

MANAGING ACTIVITIES 30
that happened during the project. After we have a timeline as com-
plete as it can be for now, we’ll look for interesting patterns and explore
puzzles.”
This tells you about the territory of “understand our iteration,” and
lists the steps at a high level: “create the timeline,” “look for interesting
patterns,” and “explore puzzles.” It doesn’t tell your team exactly what
the outcome will be. That’s for the team to create.
Most people (even really smart people) can’t absorb detailed instruc-
tions for a multipart activity. Give the details for each part, just in
time. For the timeline the details of the first steps are as follows:
“Let’s get into groups of two or three. In your group, brainstorm all
the events that took place during the release. An event doesn’t have to
be a milestone—it can be anything that happened on the project.” After
giving the instructions, ask for questions about the task. Pause. Count
to ten. Someone will have a question—wait for it.
As the retrospective leader, you have two tasks during an activity: be
available to answer questions about the activity, and monitor the room.
While the group is working on an activity, listen to the noise level. Lots
of conversation is an indication of good energy. It’s also a clue that
people are done with a quiet activity or need more time for a discussion
activity. For an activity that involves writing or individual work, conver-
sational buzz indicates that people are done and have started talking
to their neighbor. If it sounds like there’s still lively conversation at the
end of a discussion activity, check to see whether people need more
time. Of course, the sound of lively conversation may mean that people
have finished the task and are talking about the latest movie.
Debrief every activity. A debrief helps your team examine their expe-
rience and extract insights. They’ll make conscious connections and
form new ideas. Debriefing each activity builds toward the insights and
decisions of the retrospective.
So, it’s important to debrief. Now how do you do it?
Here’s a simple, four-step method to debrief almost any activity [Sta97]:
1. Start by asking for observable events and sensory input. “What
did you see and hear?”
2. Ask how people responded to those events and inputs. “What
surprised you? Where were you challenged?”

MANAGING GROUP DYNAMICS 31
3. Ask for insights and analysis with questions, like “What insight do
you have about this?” followed by “What does this tell you about
our project?” These questions help people formulate their ideas
and connect the activity to the project.
4. After you’ve established the link between the activity and the pro-
ject, complete the learning cycle by asking group members how
they will apply their insights: “What’s one thing you might do
differently?”
Notice anything familiar about this? If follows the same flow as the
retrospective structure (gather data, both facts and feelings; generate
insights; and decide what to do).
There are lots of other ways to debrief (see Appendix B, on page 152 for
additional ideas). This is a good place to start.
For a five- to twenty-minute activity, spend 50–100% as much time on
debriefing as on the activity. So for a ten-minute activity, allow five to
ten minutes for debriefing.
3.2 Managing Group Dynamics
Most of the time managing group dynamics in a retrospective means
managing participation: making sure people who have something to
say have the chance and making sure people who have a lot to say
don’t dominate. Watch out for people who are talking more (or much
less) than others. Make an opening for the quieter team members by
asking to hear other opinions. Notice when someone looks as though
he or she was about to speak but was cut off. Ask whether he or she
has something to say. Create an opportunity without putting people on
the spot or demanding an answer [Der03a].
To draw out quieter people, try saying something like “We haven’t heard
Leigh and Venkat yet. What would you add?” Be willing to accept a
pass.
If someone just won’t shut up, be direct (in private). If you’ve observed
the pattern, talk to the person before the retrospective. Describe your
observations, and describe the impact on the team—other people have
stopped participating. Ask him or her to hold back. If the private
conversation doesn’t work, be direct in the retrospective. When one
team member is first to speak on every question, hold up a hand and
say, “We’ve heard from you on every question; let’s hear from some
MANAGING GROUP DYNAMICS 32
other people.” Keep your tone neutral. An emphatic delivery—“We’ve
HEARD from YOU on EVERY question”—conveys blame and won’t help
the retrospective.
Managers won’t be in every retrospective, but when they are, they are
particularly prone to dominating the conversation. It’s not always their
fault—if team members hold back when a manager is in the room (for
whatever reason), the manager tends to fill the dead air. Meet with
managers before the retrospective. Coach them on appropriate partici-
pation. Ask them to let others talk first, acknowledge the contributions
others make, and be careful how they disagree. “I see it differently”
preserves participation. Statements like “You’re wrong,” “You just don’t
understand,” “You’re not listening to me,” and “I disagree” quash par-
ticipation or lead to confrontation. Neither one is good.
Here’s how one retrospective leader handled a talkative manager: Rajiv,
a project manager was a high-energy, verbal guy. And he was excited
about the project. Jess met with him before the retrospective to discuss
participation. Rajiv worried he’d forget to wait for others to speak first.
Jess and Rajiv agreed on a signal: if he spoke out of turn, Jess would
walk over and stand next to him. They never used the signal. Just
knowing it was there was enough to help Rajiv wait.
TIP: Strategies for Helping Your Team Move Forward
Sometimes teams become stuck. When that happens, you
have options as a retrospective leader.
You can help restore their creative juices by asking questions
such as these:
• What have we tried before? What happened? What
would you like to happen differently?
• If we had that, what would we gain?
• Have you ever tried this a different way? What hap-
pened?
You can ask for more opinions, especially from people who
have been thinking more than talking.
You can suggest additional research before committing to a
solution.
MANAGING GROUP DYNAMICS 33
You can take off the retrospective leader hat and offer content
knowledge from personal experience.
You could tell the team what to do, but only if you want to
cheat their learning.
After managing participation, the next most common issues are violat-
ing working agreements and blaming. Both have negative effects, so
you don’t want to let them pass unnoticed.
Sooner or later, a team member will violate a working agreement. Hu-
mans have good intentions but fall back into old patterns. When they
do, remind your team of their working agreements. If you allow vio-
lations to continue without comment, team members get the message
that working agreements are optional. Optional working agreements
have no value. It’s everyone’s job to monitor working agreements.
Blame starts a downward spiral of defensiveness and counterblame
that will torpedo a retrospective. Listen for “you” language (“You broke
the build!”) and labeling statements (“You’re immature!”). Both signal
blame. Blame hurts the retrospective by distracting attention from real
problems.
Encourage “I” language. “I” language centers on the speaker’s observa-
tion and experience, rather than labeling the other person. When you
hear blame or personal criticism, intervene and redirect the discussion
to the content.
Here’s how one retrospective leader handled a blame: during the plat-
form expansion retrospective, one team member blamed another for
breaking the build. “We’d have met our target if it weren’t for you!”
“Hold on!” the retrospective leader said, “can you say that using ‘I’?
language?” The team member thought for a while and then said, “I am
angry that we missed our target because we had so much trouble fixing
the build.” Then the team was able to look at bigger issues with the
build without blaming one individual.
Describe what you’ve seen and heard: “I’m hearing labels and ‘you’ lan-
guage.” Describing the behavior causes people to pause and consider
what they’re doing.
Group dynamics include team member interactions and emotions. You
aren’t responsible for other people’s emotions, but as retrospective lea-
der, you are responsible for keeping the session productive. And that

MANAGING GROUP DYNAMICS 34
means you need to be prepared to handle emotional interactions and
situations.
Most interactions and emotions help the group move forward. Some
don’t. Here are some challenging group dynamics and interactions to
watch out for—and what to do about them. With any luck you won’t
encounter all of these in one retrospective ;-). If outbursts are the rule
on your team, something else is happening. Retrospectives can’t solve
every problem; if the issue is deeper than normal team friction, contact
your HR representative for resources and guidance.
When people have been bottling up their emotions, they come out in
funny ways: people cry, shout, stomp out of the room, laugh hysteri-
cally, or clown when the topic is serious.
Before you jump in to fix things, notice your own response. It’s easy
to focus on comforting one person and lose track of the goal and the
needs of the team. In a retrospective, your primary responsibility is to
the interactions of the team as a whole, not to individuals. That doesn’t
mean ignoring what’s going on with individual emotions; it means deal-
ing with emotions in a way that is helpful and respectful to the team
and the individual.
Here are some strategies that have worked for us and can work for you.
Having a mental picture of how you’ll respond gives you more options
in the moment. So, think of the outburst that scares you the most, and
mentally rehearse using one of these strategies. Outbursts are unset-
tling, but they don’t have to derail the process. If you think you could
never do something like this, remember that one of the Retrospective
Goddesses started out as a programmer.
Tears Offer a box of tissues. When the person is able to speak, ask,
“What is happening for you? Can you share it with the group?” Pause.
Given time, the person often shares something heartfelt (and usually
relevant) about the topic under discussion.
Shouting In most places, when someone starts shouting, the rest of
the people in the room stop participating. And that makes it unproduc-
tive for everyone. Intervene immediately. Hold up one hand as a stop
sign, and say calmly but forcefully, “Hold it.” Then say, “I want to hear
what you have to say, and I can’t when you’re shouting. Can you tell
us why without shouting?” Don’t be surprised if the person responds,
“I’m not shouting!” When someone is upset or excited, he or she may

MANAGING GROUP DYNAMICS 35
not be aware of the rising vocal volume. There’s no need to say “Yes,
you are.” Calling attention to the yelling is usually enough to stop it.
If your team member continues to blame or yell, call a break, and talk to
the person privately. Let him or her know how the behavior is affecting
the group. Ask for agreement to express emotion in a nonthreatening
way. If the person is unwilling, ask (don’t tell) him or her to leave and
return when he or she has more self-control.
Stomping Out When a team member stomps out, let him or her go.
Ask the team, “What just happened?” They will have an idea. Ask
whether it is possible to continue without the person who left. Most of
the time, they’ll say they can continue, though they may need to talk
about the departure.
If this happens more than once, another issue is at play. Talk to the
individual outside the retrospective.
Inappropriate Laughter and Clowning It is great to have fun in a
retrospective. And people may use laughter and humor to deflect from a
sensitive topic. When the laughter has an edge or your team repeatedly
avoids a topic, it’s time to step in. Make an observation, and ask a
question: “I’ve noticed that every time we get near this topic, someone
tells a joke. What’s happening?” They’ll tell you and engage the topic.
Also watch for two other types of situations. They aren’t outbursts, but
they are worth noticing.
Uncharacteristic Silence When a team that has been voluble goes
quiet, something is going on. Again, step in with an observation and a
question: “It seems to me that the group is being awfully quiet. There
was a lot of energy and conversation earlier. What’s going on now?”
Your team may just be tired and need a break. Or they may be unsure
how to approach a topic. Once you ask the question, someone will
figure out how to broach the topic, and the proverbial dam will burst.
Of course, the fact that a team goes quiet may not mean anything.
They may be thinking, tired, or simply a quiet group. When the silence
is sudden or out of character, it’s a clue worth following.
Currents Beneath the Surface Fidgeting and intense side conversa-
tions may indicate something going on just beneath the surface. Again,
ask the group what is going on. They will tell you.
Here’s how one retrospective leader handled a sudden disturbance in a
retrospective: During an off-site release retrospective for a team build-

MANAGING TIME 36
ing network infrastructure, Lindsey noticed the manager take a call on
his cell phone, even though the working agreements prohibited calls.
He left. When he came back in the room, he had a quiet side con-
versation with one person, then another. Laptops opened. Everyone
was still trying to track the discussion in the room, but something was
distracting them. Lindsey stopped the discussion and asked, “What’s
happening?” A team member explained that there was a crisis back at
the office and the sales manager wanted them to come back and fix it.
They wanted to stay in the session but were distracted by his request
and perceived urgency for the customer. Lindsey and the team dis-
cussed their options: stop the retrospective and reschedule it, ignore
the request, or try to do something from where they were. The team set
a timebox for immediate problem solving in the room and then resumed
the retrospective.
Lindsey didn’t blame anyone for not following the agreements. In most
cases, naming the behavior, commenting on it, and asking the group
what’s happening will diffuse the situation and shift the dynamic.
Whew! After all that, managing time will be easy!
3.3 Managing Time
Here’s the rub: when you’re leading a retrospective, you should respond
to the needs of the group, and you need to pay attention to time and
stay within the timebox all at once. It’s a dilemma.
Bring a timepiece that will allow you to time activities. We sometimes
lose track of time, so we’ll often jot down the start time so we know
when to end an activity. Or you can use a stopwatch to time activities.
If you’re working with a group much larger than eight people, you’ll
need a way to cue people that it’s time to move to another step. Use a
bell, chime, or some other not-too-obnoxious sound when it’s time to
come together as a group, debrief, or provide additional instructions for
an activity. Yelling over the group isn’t effective and sends the wrong
message. Whistling works to gain attention, but not always with the
desired effect. Duck calls, cow sounds, and other animal sounds work
in groups of less than ten (the sound doesn’t carry in larger groups), but
well... they don’t add to your dignity (if you care about such things).
When the discussion still has energy yet the time you’ve planned has
run out, ask the group what they want to do: “I’m concerned that if

MANAGING YOU 37
we continue this discussion we won’t meet our end goal. What do you
want to do?” The group will refocus and move ahead, or they will tell
you this conversation is more important than the original goal. Put the
decision in the hands of the group.
Usually it’s pretty clear. When it’s not, look for a compromise such as
timeboxing the discussion or agreeing to revisit the topic later (in the
retrospective or afterward).
Be prepared to swap to a shorter activity if time is running short.
You still have the responsibility to meet the goal of the retrospective—
identify and plan for experiments and improvements.
3.4 Managing You
In addition to managing activities, group dynamics, and time, you need
to manage you.
Staying aware of all these team and interpersonal dynamics may seem
overwhelming. The key to managing group dynamics is not technique
(although it helps to have strategies) but in understanding and man-
aging your own emotional state and responses. If you aren’t managing
your own state, no technique or strategy will help. When emotions
are high, your team needs someone to stay outside the turmoil. That
someone is you, the retrospective leader.
If you feel your anxiety or tension rising, take a deep breath. Call a
break if you need to do so. Your anxiety is a clue that you need to sort
out what to do next to serve the group. Remember, you didn’t cause
the emotions in the room, and you don’t have responsibility to make
everything and everyone happy and nice.
During the break, take a moment to shake out your hands and feet
to release tension and get your blood flowing again. Take three deep
breaths. This may seem like superfluous advice; but when people are
tense and anxious, it reduces blood flow to the brain... which reduces
the ability to think clearly, which contributes to anxiety and tension.
You see the picture. Oxygen to the brain is a good thing. It helps you
think. Once your brain is oxygenated, ask yourself these questions:
• “What just happened?”
• “How much was inside me, and how much was outside me?”
• “How did the group get here?”

TAKING YOUR SKILLS TO THE NEXT LEVEL 38
• “Where does the group need to go next?”
• “What are three options I have for next steps?”
• “What will I offer the group?”
These questions will help you re-center. And then you can use one of
the strategies for managing group dynamics. As long as you have a
strategy, you won’t have to stand there frozen, not knowing what to do.
Over time, your comfort in dealing with charged emotional situations
will grow. Find a mentor whom you have seen manage emotions in
groups. Work with your mentor to gain confidence and learn more
options for handling emotional situations. And remember to breathe.
3.5 Taking Your Skills to the Next Level
If you enjoy helping groups think together, increase your skills as a
facilitator and augment your toolbox. Consider deepening your skills in
these areas:
• Working with activities. There’s an art to developing, introducing,
and debriefing activities and simulations to help people think and
learn together. In addition to using activities in retrospectives,
using activities and simulations is helpful if coaching, teaching,
or training is part of your job.
• Helping groups reach decisions. There’s a huge body of knowledge
related to how people really make decisions (it’s not entirely by
logic, by the way). You can improve the quality of decision making
in your group by knowing what decision process fits the situation
and how to help the group converge on a decision.
• Understanding and managing group dynamics. Learning about
people and people in groups is a lifelong study. Your skills in this
area will help you build and nurture high-performing groups as
well as run a darn good retrospective.
• Increasing self-awareness. Self-awareness is the foundation of
personal effectiveness. You can’t go wrong learning more about
yourself and learning how you respond under stress. Gaining
awareness of habitual patterns is the first step to being able to
choose an appropriate response rather than simply reacting.
• Creating and using flip charts. Don’t use any more of those scrib-
bled flip charts that no one can read from more than a foot away!
TAKING YOUR SKILLS TO THE NEXT LEVEL 39
If you work with groups, learning how to present information visu-
ally helps the group process information quickly and efficiently.
These skills apply in many situations, not just retrospectives. Your
understanding of group process and your ability to help groups succeed
will help you succeed, too.
Practice facilitating other kinds of meetings. If you belong to a volun-
teer group or some other organization outside of work, offer to facilitate
a meeting or subcommittee. It’s low risk and will give you experience.
Practice in managing the dynamics of any meeting will pay off in man-
aging the dynamics in a retrospective.
Observe other people who are effective at leading meetings and work-
ing with groups. Watch how they interact with people and how they
respond when a session isn’t going smoothly. You may not want to
use someone else’s exact words, but you can analyze what you see and
adapt it to fit your own style.
Practice with feedback is the best way to learn facilitation skills [Der02].
Ask someone you trust (and who has some facilitation awareness) to
observe as you facilitate. If you have a specific area you want to learn
about, ask your observer to pay special attention to that aspect of your
facilitation. Or you may ask your trusted observer to look for areas
where he or she senses you have habits you aren’t aware of.
For resources on increasing your facilitation skills, see Appendix D, on
page 156.
You are probably an expert at what you do now. Facilitation draws on
different skills than most of us develop working in software. Facilitation
also requires a different perspective. It takes time and practice to feel
comfortable with new skills. Give yourself time, manage your expec-
tations, and find mentors. You’ll inspect and adapt your facilitation,
too.

Chapter 4
Activities to Set the StageSetting the stage prepares the team for the work they’ll do in the ret-
rospective. Setting the stage can be as simple as reviewing the goal,
reviewing the agenda, checking in, and reviewing working agreements.
When the group needs to do more work to be ready to work, use these
activities.
Also see the Temperature Reading activity on page 119 and Figure 8.2,
on page 120.

CHECK-IN 41
4.1 Activity: Check-In
Use this to set the stage in an iteration retrospective.
Purpose
Help people put aside other concerns and focus on the retrospective.
Help people articulate what they want from the retrospective.
Time needed
Five to ten minutes, depending on the size of the group.
Description
After welcoming the participants and reviewing the goal and agenda,
the retrospective leader asks one brief question. Each person answers
in round-robin fashion.
Steps
1. Ask one question that each person can answer with a word or
short phrase.
Here are possible questions:
What is one word that describes what you need for yourself from
this session?
In one or two words, what is happening for you right now?
In a word or two, what are your hopes for the retrospective?
What is one thing that’s on your mind?
Note: If you use this question, also ask what each person needs to
do to set the concern aside. Sometimes writing the concern down
and putting it in a book or pocket—literally setting it aside—helps
people set the concern aside mentally.
Coming into this retrospective, if you were a car, what kind of car
would you be?
Note: you can use many different metaphors with this question—
type of animal, hardware, flavor. But be careful not to use a
metaphor that will seem frivolous or silly to your team.
It’s OK for people to say “I pass” on any question. Even saying “I
pass” will make sure their voice is heard in the room.

CHECK-IN 42
2. Go around the room listening to each person’s answer. You may
thank each person (be sure to thank every person if you do).
Refrain from offering evaluative comments such as “good” or “won-
derful.”
Materials and preparation
Prepare and choose a question ahead of time.
Examples
Some teams identify four to five emotions words, for example happy,
angry, apprehensive, sad, and hopeful. Each team member checks in
by reporting his or her emotional state using one of these words. Using
this type of check-in is helpful when there has been been conflict or
failure—because it makes it OK to have strong feelings related to the
events of the iteration.

FOCUS ON/FOCUS OFF 43
4.2 Activity: Focus On/Focus Off
Use this to set the stage in an iteration retrospective.
Purpose
Help establish a mind-set for productive communication. Help par-
ticipants set aside blaming and judgment—and fear of blaming and
judgment.
Time needed
Eight to twelve minutes, depending on the size of the group.
Description
After welcoming the participants and reviewing the goal and agenda,
the retrospective leader describes productive and unproductive com-
munication patterns. After describing those patterns, the participants
discuss what they mean for the retrospective.
Steps
1. Draw attention to the Focus On/Focus Off poster (see Figure 4.1,
on the following page) and briefly read through it.
2. Form small groups, with no more than four people per group. Ask
each group to take one pair of words to define and describe. If
there are more than four pairs/groups, it’s OK if more than one
group has the same pair of words.
3. Ask each group to discuss what their two words mean and what
behaviors they represent. Have them describe the impact each
would have on the team and the retrospective.
4. Each group reports on their discussion to the whole team.
5. Ask people whether they are willing to stay in the left column
(Focus On descriptions).
Materials and Preparation
Prepare a flip chart with the Focus On/Focus Off terms ahead of time.

FOCUS ON/FOCUS OFF 44
Figure 4.1: This is a great activity to focus attention on behaviors and
how they affect the people on the team.
Examples
For a release or project retrospective, use this activity as a lead-in to
establish working agreements for the retrospective. Many teams carry
forward the Focus On behaviors as working agreements to improve day-
to-day communication.

ESVP 45
4.3 Activity: ESVP
Use this to set the stage in a longer iteration, release, or project retro-
spective.
Purpose
Focus people on the work of the retrospective. Understand people’s
attitudes to the retrospective.
Time needed
Ten to fifteen minutes.
Description
Each participant reports (anonymously) his or her attitude toward the
retrospective as an Explorer, Shopper, Vacationer, or Prisoner (ESVP).
The retrospective leader collects the results and creates a histogram to
show the data, and then guides a discussion about what the results
mean for the group.
Steps
1. Explain that you are taking a poll to learn about how people view
their participation in the retrospective.
2. Show the flip chart and define the terms:
• Explorers are eager to discover new ideas and insights. They
want to learn everything they can about the iteration/release/
project.
• Shoppers will look over all the available information, and will
be happy to go home with one useful new idea.
• Vacationers aren’t interested in the work of the retrospective,
but are happy to be away from the daily grind. They may pay
attention some of the time, but they are mostly glad to be out
of the office.
• Prisoners feel that they’ve been forced to attend and would
rather be doing something else.
3. Distribute slips of paper or small index cards for people to record
their attitude toward learning in the retrospective today. Instruct
people to fold their paper in half for privacy.

ESVP 46
4. As people finish writing and folding, collect the slips and shuffle
them.
5. Ask one of the participants to make tick marks on the histogram
as you read the slips. After you read each slip, put them in your
pocket. When you’ve read all the slips, tear them up and throw
them away. Be conspicuous about this so people know that no one
will try to identify who responded with what from the handwriting.
6. Ask the group, “What do you make of this data?” Then lead a
brief discussion about how the attitudes in the room will affect
the retrospective.
7. Debrief by asking “How are these categories like our attitudes
toward daily work?”
Materials and Preparation
Voting slips or index cards and pencils or pens.
A flip chart prepared for the histogram.
Examples
If the majority of the people in the room are Vacationers, that’s interest-
ing information about how people feel about their work environment.
You may want turn on a dime and make that the major topic of discus-
sion for the retrospective!
In the example in Figure 4.2, on the next page, no one feels like a
Prisoner. If you do have Prisoners in the room, suggest that they can
choose how they will spend their time... they can engage or not. If they
don’t engage, the group will be the poorer for it.
If you plan to take a break in your retrospective, suggest that if peo-
ple choose to return after the break, they are choosing to attend the
retrospective—they aren’t Prisoners anymore.
If you’ve done your homework, chances are you won’t be surprised by
finding a room full of Prisoners. As in the situation with many Vaca-
tioners, if the majority of the group feels they are Prisoners, that’s what
you need to deal with: you won’t get anywhere in the retrospective if
you don’t.

ESVP 47
Figure 4.2: Here’s a completed histogram from an iteration retrospec-
tive. Most of the team is interested in learning from the retrospective
(Explorers and Shoppers). There’s one Vacationer—and that’s OK.

WORKING AGREEMENTS 48
4.4 Activity: Working Agreements
Use this to set the stage in an iteration, release, or project retrospective.
Purpose
Establish a set of behaviors that will support the team in having pro-
ductive discussions. Establish that team members are responsible for
monitoring their interactions. Provide candidates for day-to-day work-
ing agreements if the team doesn’t already have them.
Time needed
Ten to thirty minutes, depending on the size of the group.
Description
Team members work together to generate ideas for effective behaviors
at work then choose five to seven agreements to guide team interactions
or processes.
Steps
After the retrospective leader welcomes the participants and reviews
the goal and agenda, the team works in pairs or small groups (no more
than four in a group) to develop candidate working agreements. Going
around the room, each group reports their most important proposed
working agreement. When all the unique proposed working agreements
are collected, the retrospective leader helps the group make needed
amendments and select three to seven working agreements that will
set the standard for behavior during the retrospective.
1. Explain the activity: “We’ll develop a set of working agreements for
the retrospective so that everyone will know our expectations for
working together. It will be each team member’s responsibility to
follow the agreements and the job of the whole team to notice and
bring it to the team’s attention when an agreement is violated. The
purpose of the agreements is to help us have the discussions we
need to have during the retrospective.”
2. Form pairs or small groups, no more than four per group.
3. Ask each group to develop three to five working agreements that, if
followed, would help the team have productive discussions during
the retrospective. Remind the group that these aren’t for business
WORKING AGREEMENTS 49
as usual—they should be new behaviors or ones that aren’t yet
normal behavior for the group.
4. In round-robin fashion, ask each group to report their most impor-
tant agreement, and write it on a flip chart page. Write down the
exact words used by the team member. Continue until you’ve cap-
tured all the unique proposed agreements.
5. Explain that for the retrospective, the group should choose three
to seven agreements. Having more than seven is too hard to
remember and follow.
6. If there are fewer than three proposed agreements, ask for clari-
fying questions for each agreement. When everyone understands,
use a consensus “thumb vote” for each agreement. Thumb up =
I agree. Thumb sideways = I will support the will of the group.
Thumb down = I veto.
7. If there are more than seven proposed agreements, use dot voting
to prioritize. Give each team member three color dots to vote with.
Each person can put one dot on three separate items, or all dots
on one. Use a consensus thumb vote to ratify the top five to seven
vote getters.
Materials and Preparation
Flip chart, markers, sticky dots.
Examples
We’re often asked for examples of typical working agreements. But
we don’t see a pattern of agreements. Each team develops working
agreements that reflect their unique concerns.

Chapter 5
Activities to Gather DataGathering data creates a shared picture of what happened during the
iteration, release, or project. Without data, the team is speculating on
what changes and improvements to make. These activities help the
team view and integrate different types of data.

TIMELINE 51
5.1 Activity: Timeline
Use this to gather data in a longer iteration, release, or project retro-
spective.
Purpose
Stimulate memories of what happened during the increment of work.
Create a picture of the work from many perspectives. Examine assump-
tions about who did what when. See patterns or when energy levels
changed. Use this for “just the facts” or facts and feelings.
Time Needed
Thirty to ninety minutes, depending on the size of the group and the
length of the increment of work.
Description
Group members write cards to represent memorable, personally mean-
ingful, or otherwise significant events during the iteration, release, or
project and then post them in (roughly) chronological order. The retro-
spective leader supports the team to discuss the events to understand
facts and feelings during the iteration, release, or project.
Steps
1. Set up the activity by saying “We’ll fill in a timeline to create a
fuller picture of this iteration/release/project. We want to see it
from many perspectives.”
2. Divide the team into small groups, with no more than five in a
group. Keep people who worked closely with each other together
(affinity groups). It’s better to have two small groups representing
one affinity than one big group.
Hand out markers and index cards or sticky notes.
Make sure each person has a marker. Although it sounds school-
marmish, you do need to remind people to write legibly, so people
can read the cards.
3. Describe the process.
TIMELINE 52
Ask people to think back over the iteration/release/project and
remember all the memorable, personally meaningful, or signifi-
cant events and write them down, one per card or sticky note.
Remind the group that the point is to see many perspectives—so
they don’t arrive at a consensus of what was memorable, mean-
ingful, or significant. If it was any of those to one person, that’s
enough.
Tell them they have ten minutes for this activity.
If you are color coding (see “Variations”) explain what the colors
mean and post a legend.
Remind people to write legibly.
4. Monitor the level of activity as people start talking about events
and writing cards. If people haven’t started writing cards after
half the time has elapsed, remind them to start writing. When the
groups have a stack of cards, invite people to start posting them
(see Figure 5.1, on page 54).
5. When all the cards are posted, invite the team to walk by the
timeline and see what others have posted. It’s OK for people to
add new cards at this point as they remember more events.
6. Allow a break or take lunch before analyzing the timeline.
Variations
We have collected several variations on the timeline activity. We use
index cards, sticky notes, markers and dots in a number of ways to
pull out both fact and feelings data. For example: For example:
Color Coding Feelings To gather both facts and feelings, use colors
to represent emotional states. For example:
• Blue = sad, mad, bad
• Red = challenged, stalled
• Green = satisfied, successful, energetic
• Yellow = cautious, confused
• Purple = fun, surprise, humor
• Salmon = fatigued, stressed

TIMELINE 53
Color Coding Events Use colors to represent types of events. For
example:
• Yellow = technical or technology related
• Pink = people or team related
• Green = organization related
Color Coding Functions Use colors to represent functions. For
example:
• Blue = developers
• Pink = customers
• Green = QA and testing
• Yellow = technical writers
Color Coding Themes If the team wants to focus on particular mat-
ters, use colors to identify events related to specific themes. For exam-
ple:
• Yellow = team communication
• Blue = equipment usage
• Pink = relationships with customers
• Green = engineering practices
You can pick your own color scheme based on the cards and sticky
notes available to you.
Functional Swim Lanes Draw rows lengthwise along the backdrop
for the timeline (assuming you aren’t planning to post cards directly on
the wall—then use ribbon or tape to demarcate the rows). Make a row
for each department or function. That group will place their cards only
in that swim lane.
In/Out Swim Lanes Draw one line that divides the backdrop in half
lengthwise. Use one half for cards for team events and the other half
for participants who were involved in the project but weren’t part of the
core team.
On/Off Use some special shape to represent the people on the pro-
ject—stars or people-shaped cutouts are good. Ask people to represent
when they started on the project by posting a star/people cutout on
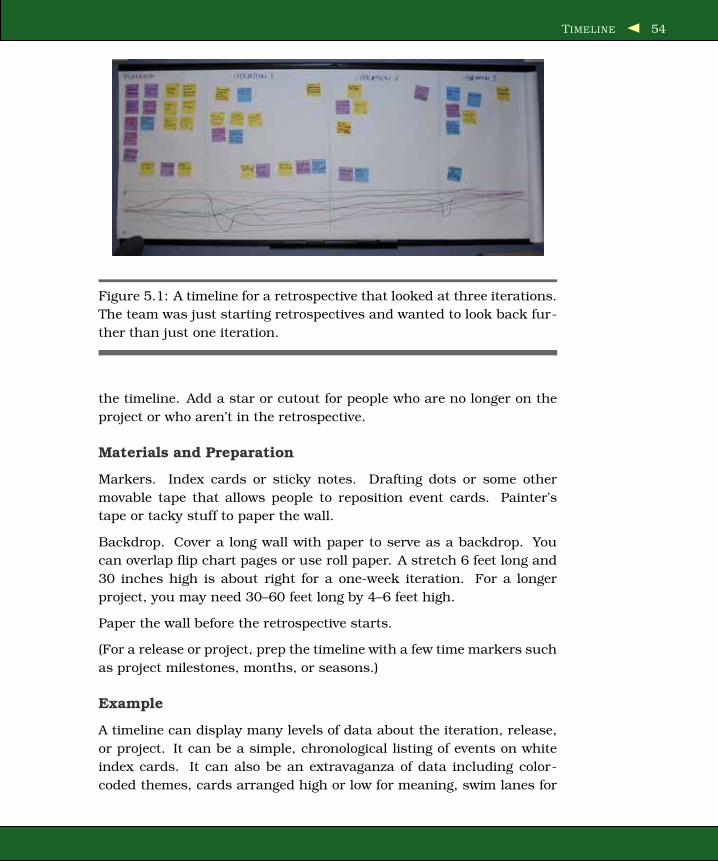
TIMELINE 54
Figure 5.1: A timeline for a retrospective that looked at three iterations.
The team was just starting retrospectives and wanted to look back fur-
ther than just one iteration.
the timeline. Add a star or cutout for people who are no longer on the
project or who aren’t in the retrospective.
Materials and Preparation
Markers. Index cards or sticky notes. Drafting dots or some other
movable tape that allows people to reposition event cards. Painter’s
tape or tacky stuff to paper the wall.
Backdrop. Cover a long wall with paper to serve as a backdrop. You
can overlap flip chart pages or use roll paper. A stretch 6 feet long and
30 inches high is about right for a one-week iteration. For a longer
project, you may need 30–60 feet long by 4–6 feet high.
Paper the wall before the retrospective starts.
(For a release or project, prep the timeline with a few time markers such
as project milestones, months, or seasons.)
Example
A timeline can display many levels of data about the iteration, release,
or project. It can be a simple, chronological listing of events on white
index cards. It can also be an extravaganza of data including color-
coded themes, cards arranged high or low for meaning, swim lanes for

TIMELINE 55
different functional areas, dots to show positive and negative events,
and a space at the bottom with a graph for the ongoing emotional ups
and downs. It’s easy to get carried away with the possible variations
and ask teams to create a timeline with more data than they have time
or mental energy to discuss.
When you have only an hour or so for the entire retrospective session,
choose a timeline variation that will help to display just enough data.
Include both facts and feelings, for sure, but no more than one kind of
each. Consult the retrospective goal as a guide for what’s most impor-
tant this time. Keep it simple.

TRIPLE NICKELS 56
5.2 Activity: Triple Nickels
Use this to gather data or as part of the Decide What to Do phase in an
iteration, release, or project retrospective.
Purpose
Generate ideas for actions or recommendations. Uncover important
topics about the project history.
Time Needed
Thirty to sixty minutes, depending on the size of the group.
Description
Form small groups. In the groups, each person has five minutes to
brainstorm and write down ideas individually. At the end of five min-
utes, each person passes the paper to the person on his or her right.
That person has five minutes to write down ideas that build on the
ideas already written on the paper. Repeat until the paper returns to
the original writer.
Steps
1. Set up the activity by saying “In this activity, our goal is to gen-
erate as many ideas as we can about [topic].” Then explain the
process (see the brief description earlier).
2. Divide the team into small groups, with no more than five in a
group. Hand out paper for people to write on. Make sure each
person has a pen or pencil. Remind people to write legibly so the
next person can read the ideas.
3. Describe the process: In the first round, each person will have
five minutes to write down ideas related to the topic. Aim for at
least five ideas. In subsequent rounds, each person writes ideas
that are sparked by the already written ideas or builds on them in
some way.
4. Time the group. After five minutes, ring a chime and tell the group
to pass the paper to the right.
5. Ask each person to read the ideas listed on the paper.
6. Debrief using these questions:
TRIPLE NICKELS 57
• What did you notice while you wrote ideas?
• What surprised you? What met your expectations? How?
• What is missing from these lists?
• What ideas and topics should we examine further?
Segue into the next activity where the team will use the ideas generated.
Materials and Preparation:
Paper. Pens or pencils.
Variations
If there are seven or fewer people in the group, don’t divide into small
groups; do the activity as whole group. Pass the paper only five times.
Examples
With a team of mostly reticent developers and one or two outspoken
individuals, an activity like Triple Nickels can allow team members time
to think privately yet participate in a process that develops whole-team
understanding. It also prevents the few people who are comfortable
talking in a group from dominating the discussion. In Triple Nickels,
everyone gets the chance to contribute equally to developing the data
set, and by the time the data is out, even the more reticent folks usually
have something to say about what they wrote or read.
To help the five members of an internal business applications team
gather data about their iteration, Aswaria, the retrospective leader,
introduced the Triple Nickels activity. She divided the ten people on
the team into two groups and passed out paper tablets and pens.
“I’ll give you each five minutes to write down five important events that
happened during our iteration. Record things you saw or heard during
the past fifteen days. Write legibly; make sure someone else can read
it.”
At the end of five minutes, she said, “Now pass your papers to the
right. Read what you get. You have five minutes to add detail to the
items there or add new, related events.”
TRIPLE NICKELS 58
The team kept passing the papers until each member received their
original paper back to read. Some team members laughed at com-
ments; others were shaking their heads. To maintain the theme of
“fives,” Aswaria debriefed with questions such as the following: “What
five things stand out for you about what you’ve read?” “What five events
produced the strongest reactions?” “What are the five most significant
events?”
After they finished the discussion, she handed out sticky drafting dots
and invited people to post the papers on an area of the wall that she
had labeled “Iteration History.”
COLOR CODE DOTS 59
5.3 Activity: Color Code Dots
Use this in conjunction with a timeline to gather data about feelings in
a longer iteration, release, or project retrospective.
Purpose
Show how people experienced events on the timeline.
Time Needed
Five to twenty minutes.
Description
Team members use sticky dots to show events on the timeline where
emotions ran high or low.
Steps
After all the events are on the timeline and the team has done a quick
review, individuals use colored dots to show where their energy was
high or low (see Figure 5.2, on the next page).
1. Set up the activity by saying “Now that we’ve seen the facts, let’s
see how it was to be doing this work.”
2. Provide each individual with dots in two colors. Start with seven
to ten dots per person but have more available. Explain which
color indicates high energy and which indicates low energy.
3. Ask each person to use the dots to show where energy was high
and where energy was stalled, flagging, or at low ebb.
Materials and Preparation
Sticky dots 1/2 to 3/4 inches in diameter in two colors.
Decide which color will indicate high energy and which will indicate low
energy.
Variations
Instead of using dots to indicate high or low energy, use dots to indicate
positive or negative events.

COLOR CODE DOTS 60
Figure 5.2: A timeline with color-coded dots.
Examples
When you have limited time, this technique filters topics for discussion:
1. Investigate events that have many high energy or positive dots to
learn what factors create that state.
2. Investigate low energy/negative events to learn what precipitated
the event, and how the team resolved the situation.
3. Look at areas where there’s a split (as with Carly’s card in Chapter
1) to learn about the different perspectives.
MAD SAD GLAD 61
5.4 Activity: Mad Sad Glad
Use this to gather data about feelings in an iteration, release, or project
retrospective.
Purpose
Get the feeling facts out on the table.
Time needed
Twenty to thirty minutes, depending on the size of the group.
Description
Individuals use colored cards or sticky notes to describe times during
the project where they were mad, sad, or glad.
Steps
Introduce the activity by saying “Let’s look at how we were feeling dur-
ing this iteration/release/project and discover whether we can track
down some of the sources of both satisfying and dissatifying times.”
1. Draw attention to three posters labeled “Mad”, “Sad”, “Glad” and
sample color-coded cards. Put out colored cards/sticky notes
where everyone can reach them. Provide markers.
2. Describe the process, and give the time limit.
“Take __ minutes to write down the times/events on this iteration/
release/project where you were mad, sad, or glad. Write one event
or incident per card. Write legibly.”
3. Give notice when time is up, and invite people to post their cards
on the appropriate poster. It’s OK to add more cards as people
remember more events.
4. Cluster the cards on each poster. Go to the first poster, pick one
card, and read it. Then hold it next to another card and ask, “Are
these cards about the same thing?” The group will tell you which
other card it is like. Continue this until all the cards are clustered
on each poster.
5. Ask the group to name each cluster. Use another card to write
the title. Differentiate the title by drawing a box around the outer
edge of the card or using a different color card.
MAD SAD GLAD 62
6. Debrief using these questions:
• What stands out for you as you look at these cards?
• What is unexpected about these cards? What was difficult
about this task? What parts felt positive?
• What patterns do you see in the clusters? What do those
patterns mean for us as a team?
• What does this suggest for us as next steps?
Materials and Preparation
Flip chart pages or some other surface for the posters. Three posters,
labeled “Mad”, “Sad”, and “Glad”. If your group has more than ten
people, you may need two flip chart pages for each category poster.
Three colors of index cards or sticky notes. Make a sample card for
each color so people can see the color-coding scheme. You can do this
with one color of card, but the visual impact is greater with different
colors.
Markers.
Variations
Rather than use the emotion words, make one poster labeled “Prouds”
and another labeled “Sorries.” Ask team members to write cards that
represent events and interactions from the iteration that they feel proud
about and events and interactions they feel sorry about.
Examples
This activity uncovers the emotional content of the retrospective. It’s
somehow easier to write down a “Mad” card about an event than say
the words “I was angry when so-and-so happened.”
Shift to “Prouds” and “Sorries” when there has been hurt feelings or
conflicts. It’s easier to write a card that indicates a person is sorry
about an event than to articulate a direct apology or admit fault. But
somehow writing the card communicates the intention of regret without
assigning blame or admitting wrongdoing... and works better for group
relationships in the long run.
LOCATE STRENGTHS 63
5.5 Activity: Locate Strengths
Use this to gather data about facts and feelings on longer iteration,
release, and project retrospectives. Follow with the Identify Themes
activity to generate insights.
Purpose
Identify strengths so the team can build on them in the next iteration.
Provide balance when an iteration, release, or project hasn’t gone well.
Time Needed
Fifteen to forty minutes for the Locate Strengths activity, depending on
the number of questions in the interview. Allow twenty to forty more
to identify themes. The total for the two activities is thirty to ninety
minutes.
Description
Team members interview each other about high points on the project.
The goal is to understand the sources and circumstances that created
those high point [WM01].
Steps
Introduce the activity by saying “We learn by asking questions. We
learn the most about the things we ask the most questions about. Since
we want to learn about having successful iterations (release/projects),
let’s take time to ask each other questions about high points.”
1. Form pairs. If it’s possible, pair people who don’t know each
other’s job well or don’t work together often. If there’s an odd
number, have one trio. Hand out the interview questions.
2. Explain the interview process:
• Stay curious.
• Give the speaker your full attention.
• Take notes to remember key points.
• Listen for stories and quotes to share.
• This isn’t a conversation—the interviewer asks questions and
listens without interjecting his or her own story.

LOCATE STRENGTHS 64
When the first interview is finished, switch roles.
3. Have the pairs choose who will interview first. Monitor the time,
and ring a chime or make an announcement when half the time
has elapsed. Say, “If you haven’t started your second interview,
start it soon.”
4. At the end of the interviews, segue to the Identify Themes activity.
Materials and Preparation
Prepare questions ahead of time, and make enough copies for each
person to have one.
Questions follow this format:
• Ask about what attracted the person to his or her profession or to
the company.
• Ask about a high point on the iteration/release/project where the
person was at his or her best.
• Ask what made it a high point.
• Ask who else was present and what the circumstances were.
• Ask about wishes for future projects.
Examples
Here’s an example of an interview:
“Tell me about what attracted you to this company.”
“In every release (iteration or project), there are high points when things
just click. Think back over our last release. (Pause.) Tell me a story
about one of your highlight moments.”
“What were the circumstances?”
“Who else contributed?”
“If you had three wishes to make our next [iteration, release, project]
better, what would they be?”
A short interview like this one will take about fifteen minutes per per-
son. Adding more questions adds to the interview time. If you do
add questions, follow the same general outline, probing for more detail
about the high point situation.

LOCATE STRENGTHS 65
This is a good activity when people are feeling downtrodden. It helps
them remember that even dismal iterations have good moments. Focus-
ing on high points helps people become conscious about re-creating the
circumstances behind them. The problems will still come out, but they
come out with less depression and rancor.
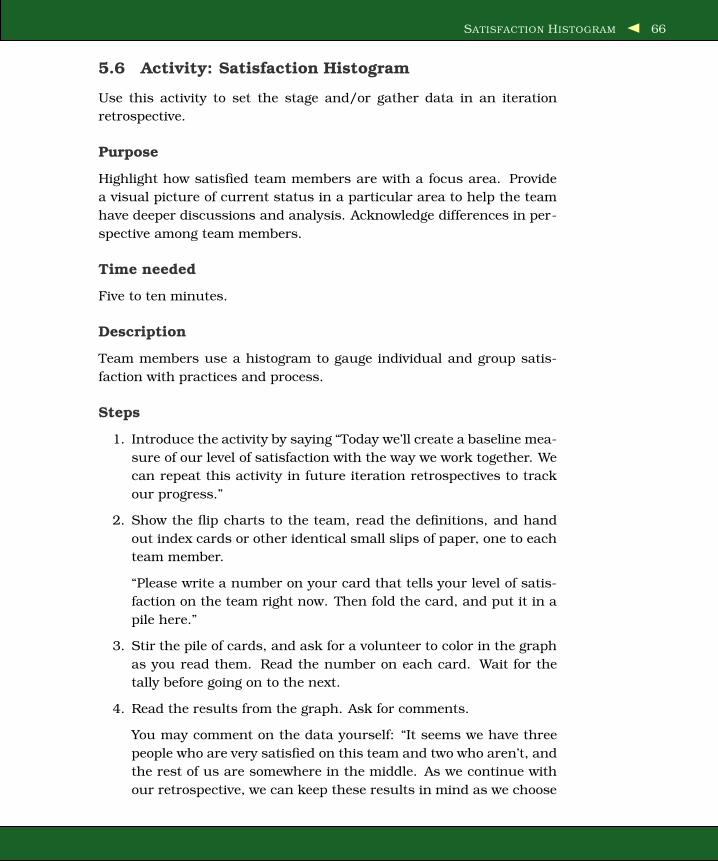
SATISFACTION HISTOGRAM 66
5.6 Activity: Satisfaction Histogram
Use this activity to set the stage and/or gather data in an iteration
retrospective.
Purpose
Highlight how satisfied team members are with a focus area. Provide
a visual picture of current status in a particular area to help the team
have deeper discussions and analysis. Acknowledge differences in per-
spective among team members.
Time needed
Five to ten minutes.
Description
Team members use a histogram to gauge individual and group satis-
faction with practices and process.
Steps
1. Introduce the activity by saying “Today we’ll create a baseline mea-
sure of our level of satisfaction with the way we work together. We
can repeat this activity in future iteration retrospectives to track
our progress.”
2. Show the flip charts to the team, read the definitions, and hand
out index cards or other identical small slips of paper, one to each
team member.
“Please write a number on your card that tells your level of satis-
faction on the team right now. Then fold the card, and put it in a
pile here.”
3. Stir the pile of cards, and ask for a volunteer to color in the graph
as you read them. Read the number on each card. Wait for the
tally before going on to the next.
4. Read the results from the graph. Ask for comments.
You may comment on the data yourself: “It seems we have three
people who are very satisfied on this team and two who aren’t, and
the rest of us are somewhere in the middle. As we continue with
our retrospective, we can keep these results in mind as we choose

SATISFACTION HISTOGRAM 67
experiments for the next iteration. We’ll check back to remeasure
in a few iterations.”
Materials and Preparation
Prepare two flip charts. On one flip chart write numbers 1 through 5 in
descending order with the following definitions, or your own variations
(see Figure 5.3, on the following page). On the other flip chart, write
numbers one through five down the left margin with rows of boxes to
fill in as you tally the votes (see Figure 5.4, on page 69).
Variations
Process is just one possibility for a satisfaction histogram. Some other
possibilities are quality of the product, interactions outside the team,
or engineering practices.
Where We’re At Variation Use this variation to set the stage for a ret-
rospective. Change the five definitions to ask about the overall level of
satisfaction with the iteration or ask about team member’s satisfaction
with how the day has started.
For example:
• “5 = The way this day has started, it may be the best day of my
life. I’m extremely satisfied.”
• “4 = I’ve had a good start to the day. I’m quite satisfied with it so
far.”
• “3 = This day has started okay. I’m moderately satisfied with it.”
• “2 = This day started slightly worse than most days. I’m only a
little satisfied with it.”
• “1 = I got up on the wrong side of the bed and nothing has gone
right yet. I am not satisfied with how the day has started.”
Examples
This activity is a quick and painless way to uncover emotional data
without the F word. It can be interesting to use two histograms on
different factors, such as satisfaction with the product and satisfaction
with process. One group we worked with was highly satisfied with their
process but not satisfied with the resulting product. Another team was

SATISFACTION HISTOGRAM 68
Figure 5.3: Post the definitions for the satisfaction rating.
the opposite: satisfied with the product but unsatisfied with the way
they achieved a good result with the product.
In the first case, team members had been hiding their dissatisfaction
with the product to avoid hurting feelings. After seeing the histogram,
the team had frank discussions about how they avoided conflict. Over
the next few iterations, they were more direct with each other. When
the team rechecked their satisfaction two months later, they were more
satisfied on both measures.
The second team (satisfied with product, dissatisfied with process) ex-
amined their engineering practices and how they contributed to defects
and extra work. They identified experiments to improve engineering
practices.

SATISFACTION HISTOGRAM 69
Figure 5.4: The data shown on this histogram creates an opportunity
for the team to discuss different perceptions of how well they are work-
ing together.

SATISFACTION HISTOGRAM 70
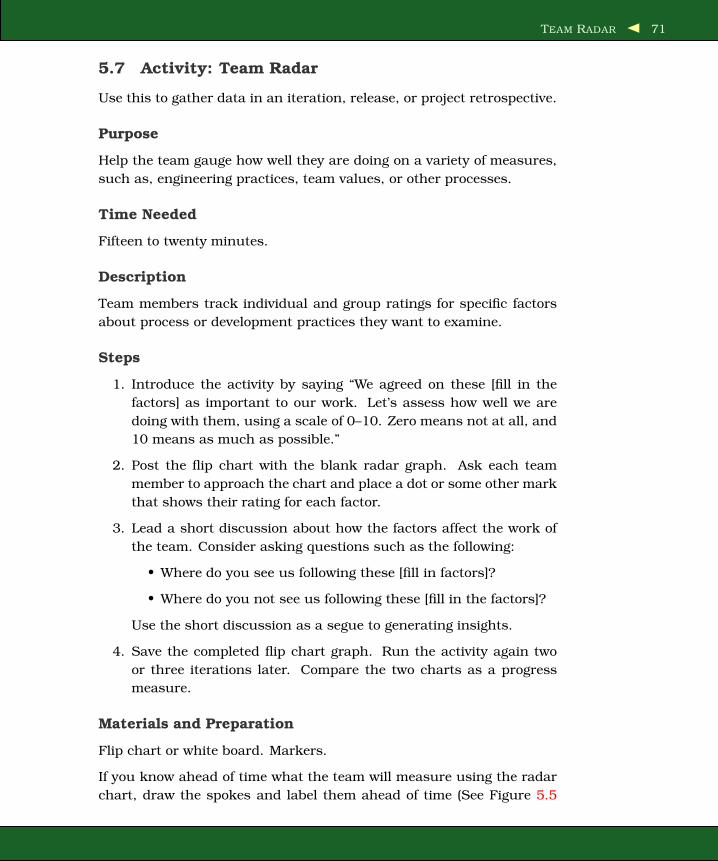
TEAM RADAR 71
5.7 Activity: Team Radar
Use this to gather data in an iteration, release, or project retrospective.
Purpose
Help the team gauge how well they are doing on a variety of measures,
such as, engineering practices, team values, or other processes.
Time Needed
Fifteen to twenty minutes.
Description
Team members track individual and group ratings for specific factors
about process or development practices they want to examine.
Steps
1. Introduce the activity by saying “We agreed on these [fill in the
factors] as important to our work. Let’s assess how well we are
doing with them, using a scale of 0–10. Zero means not at all, and
10 means as much as possible.”
2. Post the flip chart with the blank radar graph. Ask each team
member to approach the chart and place a dot or some other mark
that shows their rating for each factor.
3. Lead a short discussion about how the factors affect the work of
the team. Consider asking questions such as the following:
• Where do you see us following these [fill in factors]?
• Where do you not see us following these [fill in the factors]?
Use the short discussion as a segue to generating insights.
4. Save the completed flip chart graph. Run the activity again two
or three iterations later. Compare the two charts as a progress
measure.
Materials and Preparation
Flip chart or white board. Markers.
If you know ahead of time what the team will measure using the radar
chart, draw the spokes and label them ahead of time (See Figure 5.5

TEAM RADAR 72
Figure 5.5: This team used the Group Average Radar to gauge how
much they were following their team values.
). If the team will brainstorm the measures during the retrospective,
draw the radar chart during the retrospective.
Variations
You can use this activity to measure many different factors, such as,
engineering practices, team values, working agreements, methods, and
so forth.
Group Average Radar This variation is an ongoing measure of pro-
gress on a particular measure. Use the radar chart but instead of
collecting individual responses, calculate the group average for each
measure.
Hand each team member a set of colored cards, one for each factor
measured. Ask each person to rate each factor from 0–10 and hand the
TEAM RADAR 73
card to you. Shuffle the cards (within colors) as you receive them so it’s
not clear which card came from a particular team member.
Recruit a team member to help with calculating averages. Post the
averages on the radar arms. Connect the dots, and color in the area
under the line (optional).
Prepare a set of index cards in different colors for each team member.
Write the name of one measure on all the cards of a single color. So if
you are measuring team values (as in Figure 5.5, on the page before),
all the green cards would have “Communication” written on one side,
all the blue cards would have “Courage”, and so on. Each team member
receives a set of cards that includes each factor measured.
Examples
Team Radar is a subjective measure that’s intended to generate discus-
sion. This is especially useful when you suspect there’s no common
definition or criteria to measure against.
For example, one team used a radar to examine how team members
perceived their use of a number of engineering practices, including
refactoring. One team member rated their refactoring 8; another rated
it at 3. During the discussion that followed, it became clear that each
had different ideas on when to refactor. Further, the team member
who rated her refactoring low was upset with the team member who
rated his refactoring high because he was “slacking off by not refac-
toring enough.” By the end of the retrospective, the team arrived at a
common definition. Over the next few iterations, the team was more
consistent in when they refactored, and resentment faded.

LIKE TO LIKE 74
5.8 Activity: Like to Like
Use to gather data during an iteration, release, or project retrospective.
Purpose
Help team members recall their experiences during the iteration (re-
lease or project), and hear that others may have perceived it differently.
Time Needed
Thirty to forty minutes.
Description
Team members take turns judging which events or factors about their
iteration are the best fits for quality cards. As the cards are evaluated,
team members learn about each other’s perspective on the same events
or conditions.
Steps
1. Ask each team member to write at least nine index cards for play-
ing the Like to Like game: three or more cards with things to stop
doing three or more cards with things to keep doing and three or
more things to start doing. While team members are writing, shuf-
fle the deck of colored “quality” cards and lay the pile face down
on a table.
2. When the game cards are ready, invite the team to stand around
the table. Choose one person to start as “judge.” The “judge” turns
over a “quality” card from the pile and puts it face up on the table.
All other team members look in their game cards for the one that
most closely matches the “quality” card and place their cards face
down. The last card down is disqualified and returns to its owner’s
hand. This keeps the game moving.
3. The “judge” stirs the players’ cards, turns them over one at a time,
and reads them. He or she chooses the card that makes the best
match with the “quality” card. The author of that card wins the
“quality” card.

LIKE TO LIKE 75
4. The role of “judge” passes left to the next person, and another
“quality” card is turned over. After six to nine rounds (or whenever
everyone runs out of cards), the game ends. The person with the
most “quality” cards wins.
5. Debrief the activity with the four-step method.
Materials and Preparation
Buy or borrow an Apples to Apples game, and play it with your friends
or family to get the idea of Like to Like.
Blank index cards for the participants (at least nine for every person).
Prepare a set of approximately twenty “quality” cards on yellow (or other
color) index cards. Write one word on each card. These cards have the
words Fun, On Time, Clear, Meaningful, Affordable, Integrated, Educa-
tional, Talented, Smooth, Cool, Speedy, Collaborative, Awesome, Trust-
worthy, Dangerous, Frustrating, Creepy, Nasty or others. Include some
“serious” words like on time, and some “fun” words like cool or nasty. It
keeps the game less predictable, more insightful and more enjoyable.
Variations
For XP projects, combine this game with the Industrial Logic1 XP cards.
Deal the XP cards, and let people play them instead of writing their
own cards, in the sense of “The way we did X embodies this quality”
(so a team member might play “Planning Game” on “Frustrating” if that
week’s session went poorly, but wouldn’t play “Integrations take too
long” if they didn’t.)
Example
A storage solutions software team played the Like to Like game in their
release retrospective. Team members discovered that game cards about
communication and lab procedures were consistently matched with
undesirable quality cards. As the “judges” considered their choices and
team member advocated for game cards, they told stories about how
decisions got made and communicated.
In planning action items for the next release, team members listed their
top three priorities: improve communication with the core team about
1www.industriallogic.com

LIKE TO LIKE 76
expectations, increase contact with internal customers, and bring new
team members up to speed more quickly. They also made a recommen-
dation to their managers to start new distributed project teams with an
initial face-to-face meeting.
Chapter 6
Activities to Generate InsightsGenerating insights makes time for the team to evaluate their data and
make meaningful information from it. These activities help the team
interpret the data, analyze it, generate insights, and uncover the impli-
cations for change.
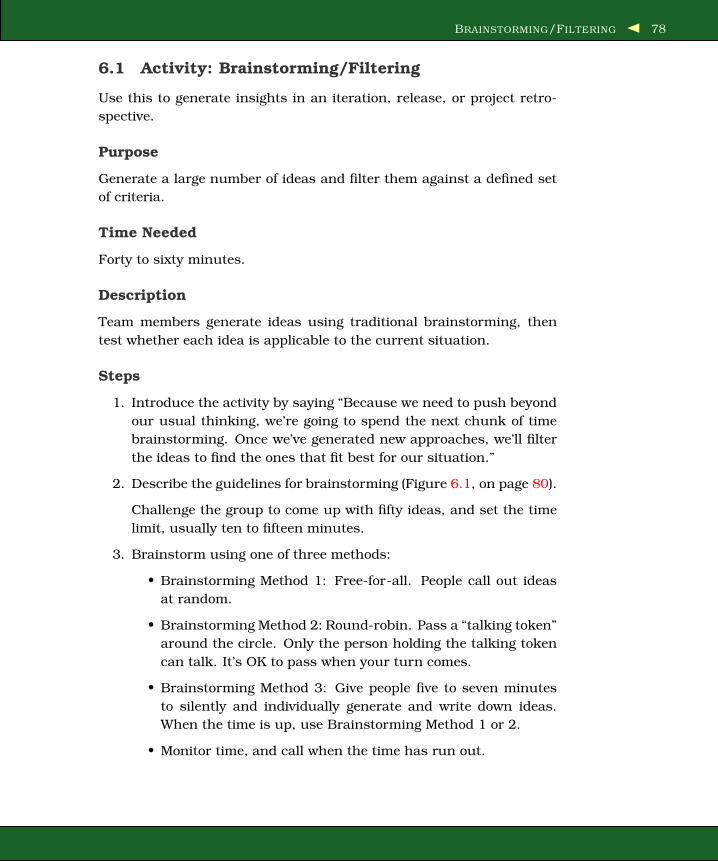
BRAINSTORMING/FILTERING 78
6.1 Activity: Brainstorming/Filtering
Use this to generate insights in an iteration, release, or project retro-
spective.
Purpose
Generate a large number of ideas and filter them against a defined set
of criteria.
Time Needed
Forty to sixty minutes.
Description
Team members generate ideas using traditional brainstorming, then
test whether each idea is applicable to the current situation.
Steps
1. Introduce the activity by saying “Because we need to push beyond
our usual thinking, we’re going to spend the next chunk of time
brainstorming. Once we’ve generated new approaches, we’ll filter
the ideas to find the ones that fit best for our situation.”
2. Describe the guidelines for brainstorming (Figure 6.1, on page 80).
Challenge the group to come up with fifty ideas, and set the time
limit, usually ten to fifteen minutes.
3. Brainstorm using one of three methods:
• Brainstorming Method 1: Free-for-all. People call out ideas
at random.
• Brainstorming Method 2: Round-robin. Pass a “talking token”
around the circle. Only the person holding the talking token
can talk. It’s OK to pass when your turn comes.
• Brainstorming Method 3: Give people five to seven minutes
to silently and individually generate and write down ideas.
When the time is up, use Brainstorming Method 1 or 2.
• Monitor time, and call when the time has run out.

BRAINSTORMING/FILTERING 79
4. Ask the group what filters they should apply to the ideas. Accept
four to eight suggestions, discuss, and then vote using a show of
hands on the top four. Write the four selected filters on a separate
flip chart page or on the white board.
5. Apply the filters one at a time to the ideas on the brainstorm lists.
Cross out items that don’t pass the filters. Mark ideas that pass
each filter. Use a different color for each filter.
6. Look for ideas that pass all four filters.
7. Ask for comments on the ideas. Ask the group which ideas they
want to carry forward. Ask whether anyone feels strongly about
taking responsibility for any of the ideas. If someone feels strongly,
it’s a good bet to carry forward. Otherwise, use the simple majority
vote.
8. Carry the selected ideas into the next phase, Decide What to Do.
Materials and Preparation
Flip chart with brainstorming guidelines. Blank flip chart pages or
white board for capturing ideas. Markers.
Examples of possible filters.
Choose ahead of time which method of brainstorming will work best
with your team.
Examples
Brainstorming has been around for years, and many people have heard
of it. The problem with traditional brainstorming (Brainstorming Meth-
od 1) is that it favors people who are comfortable thinking aloud. It
also favors people who are comfortable shouting out their thoughts in
a group. That leaves out many smart, creative people.
Brainstorming Method 2 helps people who aren’t comfortable shouting
out in a group participate and leaves an escape (saying “pass”) to people
who haven’t thought of anything... yet.
Brainstorming Method 3 helps people who need time to gather their
thoughts (like Esther) time to do that, and then they’re ready to partic-
ipate in Brainstorming Method 1 or 2.
A fourth variation on the activity is to take the ideas generated in
Brainstorming Method 3 and write them on cards. After Brainstorming

BRAINSTORMING/FILTERING 80
Figure 6.1: Typical guidelines for brainstorming.
Method 3, people write their ideas on cards and then hand them to the
retrospective leader, who posts them and reads them. Even the quietest
person can write his or her idea on a card for someone else to read.

FORCE FIELD ANALYSIS 81
6.2 Activity: Force Field Analysis
Use this in conjunction with an activity that suggests possible changes
while generating insights for a release or project retrospective. Use this
as part of a planning exercise while deciding what to do.
Purpose
To examine what factors in the organization will support a proposed
change and which will inhibit the change.
Time Needed
Forty-five to sixty minutes depending on the complexity of the issue
and the size of the group.
Description
The team defines a desired state they want to achieve. Small groups
work to identify the factors that could either restrain or drive the change
they want. The factors are listed on a poster; then the group assesses
the strength of each supporting factor relative to the other support-
ing factors and repeats the process for inhibiting factors. The team
discusses which factors they can influence—either by increasing the
strength of a supporting factor or by reducing the strength of an inhibit-
ing factor.
Steps
1. Introduce the activity by saying “If we want this change to succeed,
we need to understand more about the factors that will support or
inhibit the change.”
2. Describe the process.
Break into small groups (no more than four).
“Each group works for __ minutes to identify factors that will drive
or support the change.”
“We’ll do a round-robin report of what you discover and post the
results. Then we’ll repeat the process for restraining or inhibiting
factors.”

FORCE FIELD ANALYSIS 82
“After we’ve listed both sets of factors, we’ll assess their relative
strength and discuss what course of action would be most helpful
for implementing the change we want.”
3. Monitor time and the activity level.
While the groups are working, prepare a flip chart like the one
pictured in Figure 6.2, on the next page (but don’t fill in the factors
yet).
4. When the group is finished with the first task (identifying sup-
porting or driving factors) collect the information the small groups
have generated in round-robin fashion, asking for one factor at a
time. There’s no need to repeat duplicates; collect only the unique
factors.
5. Repeat for restraining or inhibiting factors.
6. Bring the whole group back together, and examine each factor
and gauge its strength relative to the other factors. Draw a line
toward the center arrow indicating relative strength. Do this first
for driving and then for restraining factors.
7. Examine the factors for most effective actions:
• Ask the group how they can strengthen driving factors or mit-
igate restraining factors.
• Ask the group whether enhancing driving factors or reducing
restraining factors is more likely to achieve the desired state.
Materials and Preparation
Flip chart paper or a white board. Markers.
Identify an issue to analyze, perhaps from a list of proposed improve-
ments or another generating insights activity, such as Five Whys or
Fishbone.
Example
Force Field Analysis is another tool to ensure that the changes your
team identifies in their retrospective actually happen. Combine creat-
ing the Force Field Analysis graph with a discussion of influence and
control. What can the team directly control to make a change? What
can’t they control, and where are their points of influence in the situ-
ation? Most teams have more ability to influence conditions than they

FORCE FIELD ANALYSIS 83
Figure 6.2: Force Field analysis helps the team look at factors affecting
a proposed change.
realize; however, a team needs to think about the most effective ways
and times to use their influence. Force Field Analysis can help them
discern points of greatest leverage and, sometimes, help them see that
changing a situation may require more effort than the outcome they
desire will be worth. Other times, they may see the forces allied against
them and decide to tackle the issue anyway.
One team came into their retrospective wanting to change the way they
interacted with the product owner. They were dissatisfied with the lim-
ited contact and communication that occurred during the iteration. The
product owner answered questions, but only after several days had
passed.

FORCE FIELD ANALYSIS 84
Before they analyzed the situation by drawing a Force Field Analysis
poster, they understood that the product owner’s travel schedule and
times of availability were outside their control. Afterward, they also saw
they could exert influence best by explaining their concerns to the VP
of Marketing, another person with a crazy travel schedule.
They decided that tracking down the VP would take more team effort
than they could afford. Instead, they made plans to get the most out of
the few product owner contacts available to them.

FIVE WHYS 85
6.3 Activity: Five Whys
Use this to generate insights in an iteration, release, or project retro-
spective.
Purpose
Discover underlying conditions that contribute to an issue.
Time Needed
Fifteen to twenty minutes.
Description
Team members work in pairs or small groups to look at issues. They
ask “Why?” five times to get beyond habitual thinking.
Steps
Introduce the activity by saying “Now that we know what’s happened,
let’s look at why it happened.”
1. Review the issues and themes that the team has already identified.
2. Divide the team into pairs or small groups (no more than four to a
group). And explain the process.
“One person asks the other(s) why an event or problem occurred.”
“In response to the answer, the questioner asks why that hap-
pened.”
“Record the responses that come out of the fourth or fifth ‘Why?’ ”
3. Monitor the time, and ring a chime or otherwise announce when
the time is up.
4. Have the groups report what they discovered.
5. Use this information as input into the next phase, Decide What to
Do.
Materials and Preparation
Use this in conjunction with an activity that generates themes or a list
of potential problems, for example Patterns and Shifts.
FIVE WHYS 86
Examples
Here’s an example. Say the issue is that the iteration review meeting
never starts on time.
Q1: Why did we start our review meeting late on Thursday?
A: The room wasn’t available.
Q2: Why wasn’t the room available?
A: We forgot to put it on the meeting schedule.
Q3: Why did we forget to put it on the meeting schedule?
A: Charlie was out sick, and he always schedules the room.
Q4: Why does just Charlie schedule the room?
A: Because we didn’t think it would matter.
Q5: Why didn’t we think having the room scheduled mattered?
A: We didn’t understand how much of our time it would waste. But we
understand now. We could add it to our review preparation checklist.

FISHBONE 87
6.4 Activity: Fishbone
Use this to generate insights in a longer iteration, release, or project
retrospective.
Purpose
Look past symptoms to identify root causes related to an issue. Look
for reasons behind problems and breakdowns.
Time Needed
Thirty to sixty minutes.
Description
The team identifies factors that are causing or affecting a problem situ-
ation and then looks for the most likely causes. After they’ve identified
the most likely causes, they look for ways they can make changes or
influence those factors.
Steps
1. Draw a fishbone diagram (see Figure 6.3, on the following page)
and write the problem or issue at the fish’s head. Include the five
W’s—What, Who, When, Where, and Why. Label the “bones” of
the fish with categories.
Typical categories are as follows:
• Methods, Machines, Materials, Staffing (formerly known as
Manpower)
• Place, Procedure, People, Policies
• Surroundings, Suppliers, Systems, Skills
You can use these in any combination, or the team can identify
their own categories.
2. Brainstorm factors within each category. Prompt by asking “What
are the [fill in a category name here] issues causing or affecting
[fill in the problem here.]” Repeat this for each category. Write the
issues along the bones, or have people write them on small sticky
notes and stick them to the fishbone diagram.
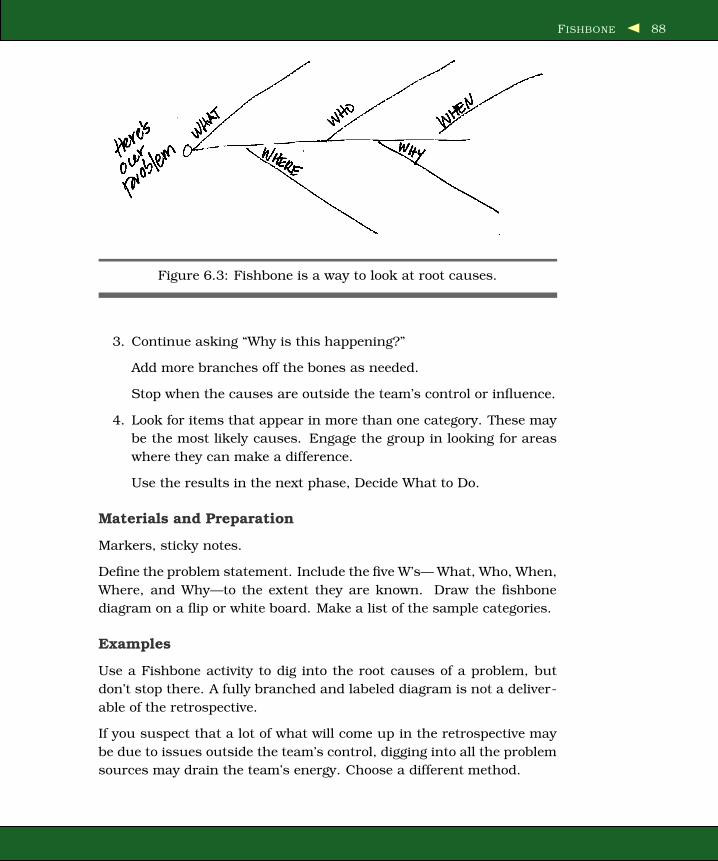
FISHBONE 88
Figure 6.3: Fishbone is a way to look at root causes.
3. Continue asking “Why is this happening?”
Add more branches off the bones as needed.
Stop when the causes are outside the team’s control or influence.
4. Look for items that appear in more than one category. These may
be the most likely causes. Engage the group in looking for areas
where they can make a difference.
Use the results in the next phase, Decide What to Do.
Materials and Preparation
Markers, sticky notes.
Define the problem statement. Include the five W’s— What, Who, When,
Where, and Why—to the extent they are known. Draw the fishbone
diagram on a flip or white board. Make a list of the sample categories.
Examples
Use a Fishbone activity to dig into the root causes of a problem, but
don’t stop there. A fully branched and labeled diagram is not a deliver-
able of the retrospective.
If you suspect that a lot of what will come up in the retrospective may
be due to issues outside the team’s control, digging into all the problem
sources may drain the team’s energy. Choose a different method.

FISHBONE 89
When the issues are more local to the team and under their direct
control, the team may be energized by tackling the fishbones.
For example, during a two-week iteration, the build broke five times.
The retrospective leader knew the team was frustrated by it, and the
broken build would be a prominent topic in the retrospective. He in-
troduced the Fishbone activity with bones labeled “Skills”, “Systems”,
“Surroundings”, and “Staffing”.
Two or three team members worked in small groups to focus on writing
sticky notes for each bone. They covered the “fish” with scales of notes.
When they stepped back to read the notes, they saw two root causes—
inexperienced team members working alone (showed up in both Skills
and Staffing) and writing new code while waiting for the build to compile
(showed up in both Systems and Surroundings). Everyone immediately
agreed on a commitment to mentor and pair with newer team members.
They identified the second cause as needing more attention and decided
to include it as a topic of action planning.

PATTERNS AND SHIFTS 90
6.5 Activity: Patterns and Shifts
Use this in conjunction with a visual data-gathering activity (e.g., Time-
line or Mad, Sad, Glad) to generate insights in an iteration, release, or
project retrospective.
Purpose
Look for links and connection between facts and feelings. Analyze the
data about the iteration/release/project. Guide the group in recogniz-
ing and naming patterns that contribute to current issues.
Time Needed
Fifteen to sixty minutes, depending on the size of the group and the
amount of data.
Description
After gathering data, facilitate a discussion to analyze the data, looking
for patterns of events, behaviors, or feelings. Also look for times when
there has been a shift; for example, everything was going smoothly, and
then the energy dropped. Capture insights on flip charts or, if you’re
using a timeline, right on the timeline.
Steps
1. Introduce the activity by saying “Now that we’ve created a picture
of our iteration/release project, let’s see what patterns and infor-
mation we can find in our data.”
2. Invite the group to examine the display, if they haven’t already.
3. Focus on section at a time, and ask the group what they notice
about the data. Write notes about what they say on the display or
on a separate flip chart. Go through section by section.
4. Now look at the entire display. Ask the group:
• Where do you see connections and links between events?
• Where do you see a pattern? What would you name that
pattern?
• Where do shifts occur? What would you name the shifts?
Again, make notes on the display or on a separate flip chart.
PATTERNS AND SHIFTS 91
5. Review the patterns and shifts. Ask the group the following ques-
tions:
• How do these patterns contribute to our current issues?
• What do these shifts tell us about our current issues?
6. Ask which ones are most important to address in the next phase
of the retrospective, Decide What to Do.
Materials and Preparation
Markers and flip chart paper or cards.
Use this after a visual data gathering exercise such as Timeline or Mad,
Sad, Glad.

PRIORITIZE WITH DOTS 92
6.6 Activity: Prioritize with Dots
Use this in the Generate Insights or Decide What to Do phase in an
iteration release or project retrospective.
Purpose
To gauge how the group prioritizes a long list of candidate changes,
proposals, etc.
Time Needed
Five to twenty minutes depending on the number of options and the
size of the group.
Description
Team members prioritize the top issues, ideas, or proposals.
Steps
Introduce the activity by saying “We have a great list; we can’t pursue
all of the items, so let’s see what the group views as the top priorities.”
1. Give each team member ten 1/2" or 3/4" colored sticky dots. Post
a legend allocating the dots as follows:
• #1 priority receives four dots.
• #2 priority receives three dots.
• #3 priority receives two dots.
• #4 priority receives one dot.
Read the dot allocation scheme. Review the items under consid-
eration.
2. Allow a few minutes for people to place their dots next to the items
under consideration (see Figure 6.4, on page 94).
3. Count the number of dot on each item. Write the number next to
the item.
4. When there are clear winners, ask the group whether they want
to proceed with these items.
When there’s a tie at the top (four or more items receive the same
number of dots) and it’s not feasible to pursue all the top issues,

PRIORITIZE WITH DOTS 93
ask the group to discuss why they see each one as a top priority,
and then revote (preferably with a different colored dots).
Variations
Rather than provide ten dots per person with an allocation scheme, give
each team member a number of dots roughly equal to 1/3 to 1/2 the
total number of items. Team members can allocate their dots as they
choose—all dots on one item, one dot per item, or anything in between.
To constrain the selection, offer fewer dots.
Materials and Preparation
Sticky dots—1/2"–3/4" in diameter. Have two colors in case you need
to revote.
You can have people put check marks by the items, but dots are more
fun and easier to count.
Example
Dot voting is not scientific. Don’t try to make it scientific. It’s a way to
winnow down a long list of possibilities.
We’ve found that we get very different results depending on how we
phrase a question. Here are some variations to consider:
• Which is the most important to work on?
• Which will have the greatest impact?
• Which do you want to work on most?
If no one wants to work on the “most important” or “greatest impact”
items, it’s a moot point. People can think an item is important and
still not want to work on it. Go with the energy. You want action and
decisions the group will support. The best choice is the one the team
will do something about.
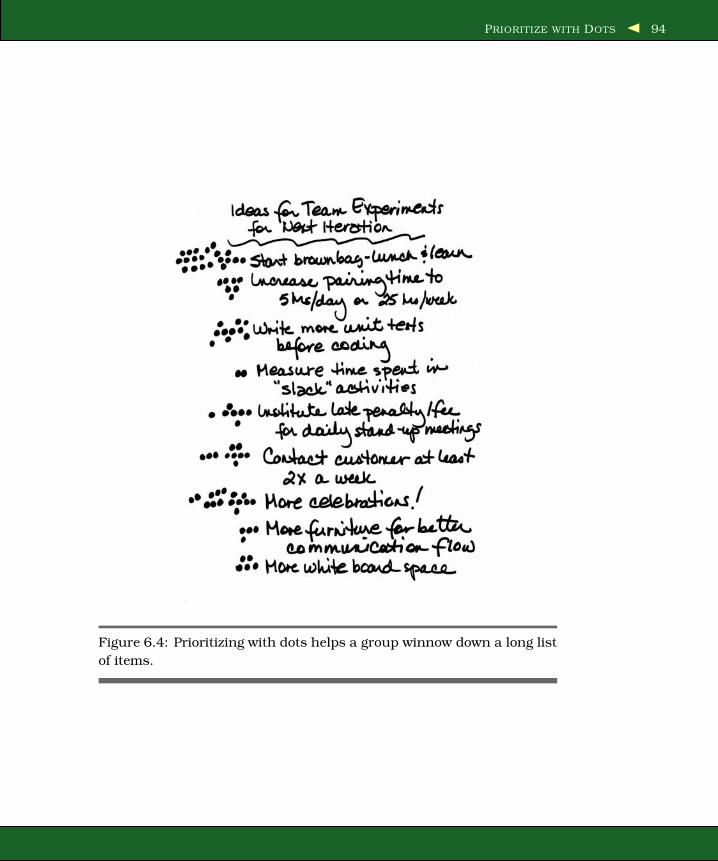
PRIORITIZE WITH DOTS 94
Figure 6.4: Prioritizing with dots helps a group winnow down a long list
of items.

REPORT OUT WITH SYNTHESIS 95
6.7 Activity: Report Out with Synthesis
Use this in conjunction with a small group analysis activity to generate
insights in an iteration, release, or project retrospective.
Purpose
Share thinking and ideas from small groups with the whole group. Find
common threads, and look for ideas that energize the whole group.
Time Needed
Twenty to sixty minutes, depending on the number of small groups and
the amount of time allowed for reports.
Description
Each small group shares the result of their work with the whole group.
The retrospective leader keeps a progress bar to help the reporter stay
within time. After the final report, the group looks for common threads
and themes and identifies those they want to work on.
Steps
1. Introduce the activity by saying “It’s time for the teams to report
their findings to the whole group. In order to hear from everyone,
we can allow each group n minutes. I’ll help you stay on track
by keeping a progress bar. I’ll mark off each minute, and when
you see n–1 bars, you’ll know it’s time to wrap up. We’ll have n
minutes for questions after each report. I’ll keep a progress bar
for that, too.”
2. Time carefully. Monitor time, and make a bar for each minute that
passes. If someone is going over, at n minutes announce, “Time is
up. Please take a minute to conclude.”
3. After the last group report, ask the group to review any flip chart,
or think back over what they’ve heard. Ask for common threads.
Write those ideas on a flip chart.
4. After the group has identified common threads, ask these ques-
tions:
• Which ideas to you have energy to tackle?
• What is it about those items that you have energy for?

REPORT OUT WITH SYNTHESIS 96
Figure 6.5: A visible progress bar helps the person reporting keep it
brief.
• Which ideas have the greatest chance of success?
• What’s your overall impression of these ideas?
• Which ideas do you want to take on in the next iteration?
5. Take the prioritized ideas into the next phase, Decide What to Do.
Materials and Preparation
Flip chart page prepared to track progress bars for all groups (see Fig-
ure 6.5 ). A marker, but not a black marker. People have too many
bad associations with having a black mark next to their name or team
name. This is one time we like to use dark pink or orange markers.
Examples
Some people do go on. We’ve found that helping people monitor their
own time helps them stay on track, stay on point, and finish on time.
Actually, when people know they’ll be timed, they tend to organize their
thoughts more and often say what they need to say with time left over.

IDENTIFY THEMES 97
6.8 Activity: Identify Themes
Use this after locating strengths to generate insights in a longer itera-
tion, release, or project retrospective.
Purpose
Find common threads from Locate Strengths interviews. Discern com-
pelling ideas for experiments, changes, and recommendations.
Time needed
One to two hours.
Description
After Locate Strengths interviews, the interview pairs form groups and
report what each learned as they interviewed the other person. As they
report the high points, team members listen for common themes and
compelling ideas. After the identifying themes, the group clusters all
the cards. Small groups self-select to further define the ideas contained
in the cluster.
Steps
1. After the interviews are complete, put two or three interview pairs
together to form a group of four or six. Keep interview pairs
together.
2. Explain the process.
“Each interviewer will report on what he or she heard during the
interview. Don’t worry about reporting the interview verbatim or
covering all the points. Report on memorable themes, stories, and
quotes heard in the interview.”
“After all the stories have been recounted, discuss the common
themes that came up in more than one interview. Make a note of
compelling ideas—even if they came up in only one report.”
“Write each idea on a large index card. Write legibly so others can
read the card. One idea per card.”
3. Each group reports on the themes they heard and posts their
cards on a wall or spreads them out on the floor.
IDENTIFY THEMES 98
4. After all the groups have reported, the entire group sorts the cards
in like clusters.
5. Ask people to select a cluster that they want to work on refining.
It’s if no one chooses some of the clusters.
6. Small groups work on further defining steps for building on the
strength themes.
7. Groups report on their work, which will become candidates for fur-
ther planning, experiments, and recommendations in the Decide
What to Do phase.
Materials and Preparation
This activity follows the Locate Strengths interview activity.
Large index cards and markers. Repositionable tape or tacky stuff to
do the sorting on the wall.
Examples
A while back, we worked with a large group who were looking at how to
make changes in their organization. One part of the group insisted that
the best approach was to list all the problems and then identify solu-
tions. Rather than fight with them, we let them go their way and worked
with the rest of the group using interviews and identifying themes.
After two hours, the problem-solving group was drained, depressed,
and ready to give up the whole enterprise.
Our group was energized and hopeful.
Coincidence? You decide.
LEARNING MATRIX 99
6.9 Activity: Learning Matrix
Use this to generate insights in an iteration retrospective.
Purpose
Help team members find what’s significant in their data.
Time Needed
Twenty to twenty-five minutes.
Description
Team members look at four perspectives on their data to brainstorm a
list of issues quickly.
Steps
1. After discussing the data, show the flip chart (see Figure 6.6, on
page 101). Tell the team they can fill out the quarters in any order
as thoughts come to them.
2. As team members think of ideas to add to the chart, write them
in the corresponding section. Stick to writing the words they use
as closely as possible. If you need to shorten a statement, ask
the team member to paraphrase, “Could you please say that again
using fewer words, so I can get it on the chart?”
Variation: Give every team member a stack of sticky notes to write
their ideas, one per sticky note. Each team member puts his or
her notes in the appropriate quarter of the chart. The retrospective
leader reads all the notes and sorts them into natural clusters.
3. When the flow of ideas slows down, review the comments on the
chart. Ask the group, “Is there anything missing from this list?
What haven’t we written down that will be important to going for-
ward?” Lead a brief discussion, and make additions, if needed.
4. Hand out strips of six to ten dots. “Place your dots to vote for the
items that you believe have the highest priority to get attention
during the next iteration.” (Or you can use the honor system and
give each person a marker to make a limited number of check
marks.)

LEARNING MATRIX 100
5. Use the prioritized list as an outcome to segue into your Decide
What to Do phase.
Materials and Preparation
Prepare a flip chart (see Figure 6.6, on the following page) in quarters
with icons for the four sections: a “smiley” for, what did we do well that
we want to continue? a “frowny” for, what would we like to change? a
“light bulb” for, what new ideas have come up? and a “bouquet” for,
who do we want to appreciate?
Prepare strips of dots, six to ten, depending on what’s easy to cut from
the page. (Variation: Substitute other kinds of stickers for dots. Chil-
dren’s stores, stationery, scrapbooking, and office-supply stores carry
a variety of styles and kinds.)
Examples
We introduce the Learning Matrix whenever we are pressed for time
to generate insights. This can happen in sixty to ninety-minute retro-
spectives where the data gathering turns into a longer discussion than
we expected. We still want a rich discussion, but we have to get it as
efficiently as possible.
The lines demarcating the four quadrants of the poster tend to serve
as natural “brakes” on the discussion for each section. People fill up
all the quadrants and stop offering ideas when they get to the lines or
the bottom of the flip chart sheet. Then, ask, “What one additional idea
about [what went well] should we include?” and write it around the title
area. This ensures that the best ideas are not lost and you can stick to
the timebox.
In the same way, when we are short of time, we use the Learning Matrix
to gather feedback on the retrospective in the Close the Retrospective
phase. Focus the four quadrants on the team’s experiences during the
retrospective—what went well, what do we want to do differently, new
ideas, and appreciations.

LEARNING MATRIX 101
Figure 6.6: Learning Matrix is a quick way to capture insights.

Chapter 7
Activities to Decide What to DoDeciding What to Do moves the team’s focus to the next iteration. In
these activities the team members develop proposals for action, identify
the highest priority actions, create detailed plans for experiments, and
set measurable goals to achieve the results.
You can also use Triple Nickels on page 56 to generate ideas for action.

RETROSPECTIVE PLANNING GAME 103
7.1 Activity: Retrospective Planning Game
Use this to develop action plans in Deciding What to Do in a release, or
project retrospective.
Purpose
Develop detailed plans for experiments or proposals.
Time needed
Forty to seventy-five minutes depending on the number of experiments
and the size of the group.
Description
Team members work individually or in pairs to brainstorm all the tasks
necessary to complete an experiment, improvement, or recommenda-
tion. After brainstorming, team members eliminate redundant tasks
and fill in gaps. The task are arranged in order, and team members
sign up for tasks they will complete.
Steps
1. Introduce the activity by saying, “We’re going to work on gener-
ating all the tasks needed to have our experiment/improvement/
recommendation succeed.” Then recap the experiment (improve-
ment, or recommendation).
2. Describe the process:
Work individually or in pairs to generate all the tasks.
Form pairs of pairs to compare tasks, eliminate duplicates and fill
gaps.
Cluster the tasks and again check for duplicates and gaps.
Order the tasks.
3. Form pairs (or not, if there are fewer than eight people do this
individually). Hand out sticky notes or index cards and markers.
Ask the group to write one task per card or sticky, leaving the
bottom half blank. Show an example (see one below).

RETROSPECTIVE PLANNING GAME 104
4. Form pairs of pairs (or pairs if the previous step was done individ-
ually). Reiterate the instruction: Compare tasks, eliminate dupli-
cates and write any new tasks you realize are missing. It’s okay to
re-write or consolidate as needed.
If the group is larger than 16, have the groups of four form groups
of eight and do another round of comparing, adding, and eliminat-
ing duplicates before proceeding to the next step.
5. Invite the group to post and cluster the tasks on a whiteboard or
wall. If they’ve used cards, they can cluster them using a table.
Once again, compare, look for duplicates, and add any new tasks
that the team realizes are missing.
Leave room on the left side of the wall or whiteboard. The team
will use this in the next step when they order the tasks.
6. Order the cards. Start by asking: “Which task must be done first?”
Move that task to the extreme left of the working surface. Then
ask, “Are there any tasks that can be done simultaneously with
this task?” Place those above or below the first task.
Ask which task needs to be done next. Place that to the right of
the first task.
7. Invite team members to sign up for tasks by writing their names
on the bottom half of the task cards. Or if it’s more appropriate,
bring the tasks into the next iteration planning meeting.
Materials and preparation
Sticky notes or index cards. Markers. A wall, whiteboard, or other flat
working surface.
If your team hasn’t done this kind of planning before, prepare an exam-
ple of a task card.
Example
The Retrospective Planning Game activity helps teams take vaguely
stated goals for improvement and turn them into concrete tasks and
action steps.
In the retrospective for their second release, a team developing software
for scanners decided to work on new ideas for reviewing their 1400
automated tests. Their current approach was too slow and stalling

RETROSPECTIVE PLANNING GAME 105
Figure 7.1: Task cards for the Retrospective Planning Game
team progress. They brainstormed and determined a few possible ap-
proaches. The retrospective leader invited team members to choose
which approach interested them the most. Groups of two or three inter-
ested volunteers worked to identify action steps and wrote one action
each on several large sticky notes.
They put the sticky notes on the wall for sorting. The retrospective
leader asked them to look for duplications or missing steps or tasks.
When the whole team agreed the right set of actions were on the wall,
they began to look for dependencies between tasks. They used lengths
cut from a ball of yarn and bits of tape to make a visual link between
dependent tasks.

RETROSPECTIVE PLANNING GAME 106
They discussed which actions were the best fit with their next iteration
plan, which would make the most difference and what risks they could
anticipate.
The team left the retrospective with a clear idea about what tasks to
include in planning the next release. They had created manageable
actions out of a huge improvement goal and knew what they had to do
to reduce the risks.
SMART GOALS 107
7.2 Activity: SMART Goals
Use this to Decide What to Do in an iteration, release, or project retro-
spective.
Purpose
Translate ideas into priorities and action plans. Develop specific mea-
surable actions.
Time needed
Twenty to sixty minutes depending on the size of the group.
Description
Focus the team’s attention on developing goals that are Specific, Mea-
surable, Attainable, Relevant, and Timely. Goals that have these char-
acteristics are more likely to reach fruition.
Steps
1. Introduce the activity by leading a short discussion on the impor-
tance SMART goals. Point out that goals that aren’t specific, mea-
surable, relevant, and timely tend to fizzle.
2. Point to the SMART characteristics written on a white board or
flip chart. Offer an example of a SMART goal: “Our goal is to pair
program at least 5 hours a day starting next Monday. We’ll rotate
pairs daily. We’ll create a chart with the pairing schedule, and
review it at our next retrospective.” Contrast a non-SMART goal:
“We should pair more.” Note: choose an example that isn’t related
to the experiments or improvements the team is working on.
3. Form groups around the items that the team prioritized to work
on. Ask each group to develop a SMART goal for the initiative, and
identify 1–5 action steps to accomplish the goal. Monitor activity.
4. Ask each group to report their goal and plan. After each report,
confirm with the rest of the group that the goals are, in fact,
SMART. Invite the group to offer refinements.
Materials and preparation
Flip chart paper or a white board. Markers. A flip chart listing the
characteristics of SMART goals (see below).

SMART GOALS 108
Figure 7.2: List the characteristic of SMART goals. Goals that don’t
meet these criteria don’t get done.
Example
Time and time again, we see the difference between groups who have
only a vague idea of what they want to accomplish and those who have
detailed goals. The groups that formulate goals to meet these criteria
accomplish their goal (at least most of the time). The other groups
don’t. Sometimes the other groups don’t even start because the goal is
too vague to generate forward momentum.

CIRCLE OF QUESTIONS 109
7.3 Activity: Circle of Questions
Use to Decide What to Do in an iteration, release or end of project
retrospective.
Purpose
Help team choose an experiment or action steps for the next iteration,
particularly when team members need to listen to one another.
Time needed
Thirty+ minutes, depending on team size.
Description
Team members engage in a question asking and answering process to
reach consensus on next steps.
Steps
1. Invite team members to sit in a circle. Introduce the activity.
“Sometimes the best way to find answers is to ask questions. We’ll
ask questions to find what we want to do as a result of what we’ve
learned in this retrospective. We’ll go around the circle until we
are satisfied with our answers or until at least [timebox] minutes
have passed.”
2. Turn to the person on your left and ask a question. You might
start with “From your perspective, what is the highest priority for
us to try in the next iteration?” The team member answers, from
his or her perspective, to the best of his or her knowledge and
ability. Then that team member becomes the questioner, turning
to the person on his or her left to ask a question that extends the
previous discussion or starts a new one.
The new respondent answers and, then in turn, asks a question
and so on around the circle until the group is satisfied that their
questions about the topic have been heard and considered, and a
consensus for action has emerged.
Materials and preparation
Set chairs in a circle with no table in the middle. Have a flip chart
nearby for recording outcomes.

CIRCLE OF QUESTIONS 110
Examples
When leading Circle of Questions in a team, we stop the activity only
at a point when the whole circle has been completed at least twice.
Whether you go around two, three, four (or more) times, continue until
each person has had the chance to ask and answer a question. Stop-
ping short of completing the circle sends a message that some folks’
views are more important than others.
Powerful insights and direction for action emerge from this activity. En-
courage everyone to pause for a few seconds before asking or answering
a question. The experience of focused attentive listening, and being
listened to by the team, provokes team members’ best ideas.
Trust is an important factor on self-organizing, Agile teams. The Circle
of Questions activity can be one of the few times that a team devotes
equal attention to each of its members. Honoring each other’s words
this way helps to build trust in team working relationships.

SHORT SUBJECTS 111
7.4 Activity: Short Subjects
Use to Decide What to Do in an iteration retrospective.
Purpose
Help to discover differing perspectives on how the team is doing and
provide variety in very short retrospectives.
Time Needed
Twenty to thirty minutes.
Description
The team brainstorms lists of ideas for action, in response to prompts
on the 2–3 flip charts. Titles may include:
• What Worked Well/Do Differently Next Time, a.k.a. as WWWDD
• Keep/Drop/Add
• Stop Doing/Start Doing/Keep Doing (a.k.a. StoStaKee)
• Start/Stop/Stay
• Smiley/Frowny
• Mads/Sads/Glads
• Prouds/Sorries
• Plus/Delta (on the iteration)
Steps
1. Post the flip charts. Give team members 3-5 minutes to reflect
privately on the iteration and write notes.
2. Lead a brainstorming and record ideas. Keep going until all the
comments team members think are important have been posted
on the charts. Remember to wait through one or two silences for
the next burst of comments.
3. Ask the team to identify the top 20% of the items-those items they
believe have the potential for the greatest benefit. Lead a short
open discussion, then vote with dots. (See Priority Dots.)
4. If there are more than 2–3 high priority items, reduce the remain-
ing number of issues for action to a manageable few.

SHORT SUBJECTS 112
5. Keep the brainstormed lists for historical review at subsequent
iteration retrospectives to help identify areas of persistent issues.
Materials and Preparation
Prepare a flip charts with titles for discussion, changing the titles from
iteration to iteration. As the team becomes over-familiar with one for-
mat, move on to another.
Variations
Use any of these in Closing to reflect on the retrospective processes and
outcomes.
Give sticky notes to team members to fill out and stick on the corre-
sponding chart instead of brainstorming lists. Sort notes into clusters
of like ideas and name the clusters.
Examples
Teams have an unfortunate tendency to: a) choose one of these schemes
and use that activity as the only activity in their retrospectives, or b)
choose one and use it time after time. It’s a fine activity in its place, but
doesn’t provide rich ideas when used as a stand alone retrospective.
We’ve heard iteration retrospectives referred to as “heartbeat” retro-
spectives—part of the regular rhythm and lifeblood of the project team.
Listening to a heartbeat or taking a pulse gives indicators about the
health of a person, and iteration retrospectives diagnose the health of
the team. That said, listening to heartbeats, even our own, can become
monotonous.
When you’re holding retrospectives iteration after iteration, particularly
when the iterations are short, one or two week increments, teams get
bored when the same activities or approaches to discussion show up
week after week.
Use the variety provided by Short Subjects to change the perspective
on discussions. Add your own flavor. Make up categories that fit for
the team. (Continue, Integrate, Refactor?)

Chapter 8
Activities to Close theRetrospective
Closing the retrospective provides moments for continuous improve-
ment, for reflecting on what happened during the retrospective, and
for expressing appreciation. Activities from other chapters (Satisfac-
tion Histogram, Team Radar, Learning Matrix, and Short Subjects), the
four-step debriefing method, and other suggestions from the appendix
on debriefing can be adapted for use in closing, as well as the activities
listed in this chapter.

+/DELTA 114
8.1 Activity: +/Delta
Use this to close an iteration, release, or project retrospective.
Purpose
To retrospect on the retrospective and identify strengths and improve-
ments.
Time Needed
Ten to twenty minutes, depending on the size of the group.
Description
The team identifies strengths (do more of) and changes for the next
retrospective.
Steps
1. Introduce the activity by saying, “Before we finish, let’s identify
what we want to keep and what we want to change for our next
retrospective.”
2. Draw a T on a piece of flip chart paper (cf. Figure 8.1, on the
following page). Announce the timebox (five to fifteen minutes).
3. Ask the group to shout out strengths and changes. Capture them
verbatim. Stop when the ideas stop flowing, or at the end of the
timebox. Wait a few seconds. Often the best ideas come after the
silence.
4. Thank the group for their candid feedback. Compare the list to
those from (recent) previous retrospectives to see whether there
are patterns.
Materials and Preparation
Flip chart paper or a white board. Markers.
Example
As retrospective leaders we seek to improve our own methods and skills
at leading retrospectives. So we ask for feedback from the group. Two
thoughts:
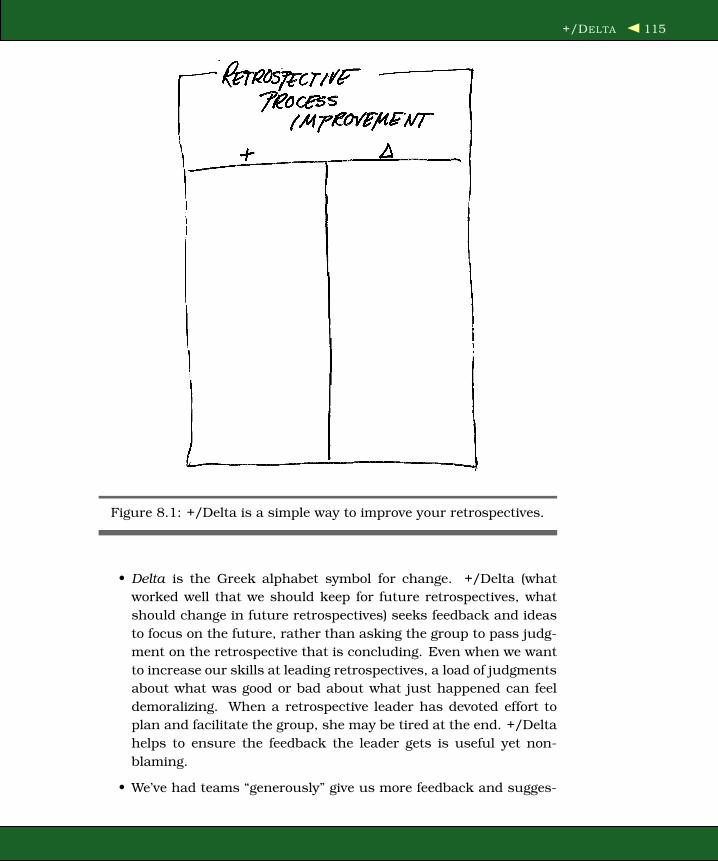
+/DELTA 115
Figure 8.1: +/Delta is a simple way to improve your retrospectives.
• Delta is the Greek alphabet symbol for change. +/Delta (what
worked well that we should keep for future retrospectives, what
should change in future retrospectives) seeks feedback and ideas
to focus on the future, rather than asking the group to pass judg-
ment on the retrospective that is concluding. Even when we want
to increase our skills at leading retrospectives, a load of judgments
about what was good or bad about what just happened can feel
demoralizing. When a retrospective leader has devoted effort to
plan and facilitate the group, she may be tired at the end. +/Delta
helps to ensure the feedback the leader gets is useful yet non-
blaming.
• We’ve had teams “generously” give us more feedback and sugges-
+/DELTA 116
tions for change than we could use. Just as our teams need to
focus on only one or two experiments for the next iteration, we
need a way to keep from being overwhelmed with too many sug-
gestions for improving our retrospectives.
The one flip chart, the T-structure of +/Delta, helps to limit the amount
of feedback from any one retrospective. When you get to the bottom of
the page on either side of the T, you’re done. Thank the team sincerely
for their feedback and help, and close the retrospective. If there’s more
to say, a team member will seek you out later, or the thought will come
up again next time.

APPRECIATIONS 117
8.2 Activity: Appreciations
Use this to close an iteration, release, or project retrospective.
Purpose
To allow team members to notice and appreciate each other. End the
retrospective on a positive note.
Time Needed
Five to thirty minutes, depending on the size of the group.
Description
Team members appreciate other team members for helping them, con-
tributing, to the team, solving a problem, etc. Offering an appreciation
is optional [S+91].
Steps
1. Introduce the activity by saying, “As we end, let’s take this oppor-
tunity to notice and appreciate how others have contributed dur-
ing this session and during the iteration/release/project.”
2. Demonstrate the form with a team member. Even though it’s a
demonstration, choose a person that you can speak to sincerely.
Say the name and then say, “I appreciate you for__________.” Fill
in the blank with something about the person or something he or
she did. You can briefly describe the impact on you.
Here’s an example: “Jody, I appreciate you for helping me learn
the X feature. You really helped me get up to speed.”
3. Sit down. Wait. Someone will offer an appreciation. When the
appreciations slow down, wait. Allow silence. Some people need
time to work up to this.
Close when a minute or so has passed with no one speaking up.
Materials and Preparation
None. You may want to write the form on a flip chart or white board.

APPRECIATIONS 118
Example
One time when we explained this activity in a retrospective workshop, a
manager said, “Our developers will never go for that! They’re engineers.
Anyway, they know we appreciate them.” The manager never noticed
the engineers shaking their heads in disagreement.
It is true that many people shy away from this activity. That’s too
bad; every time we use this activity, people make genuine and heartfelt
appreciations. And you can see people light up when they receive an
appreciation.
One group we worked with told us later that they’d done only one thing
as a result of their retrospective. “What did you do?” we asked. “We
started using appreciations at our weekly meeting, and that’s changed
the way we relate to each other. We don’t have fights anymore. We still
disagree, but now we know that we really do value each other. And that
makes the tough times easier.”
Enough said.
TEMPERATURE READING 119
8.3 Activity: Temperature Reading
Use this while setting the stage or closing an iteration retrospective.
Purpose
Check on “where we’re at.” A practical way to process what is happen-
ing for the group [Sch90].
Time needed
Ten to thirty minutes, depending on the size of the group.
Description
Team members report on what’s happening for them and what they
want.
Steps
1. Introduce the activity by saying “Let’s look at what’s happening in
our group. You can contribute in any of the sections, but partic-
ipation is voluntary. The aim is to hear from others, so no com-
menting on another’s contribution.”
2. Point to the poster (see Figure 8.2, on the next page) with the parts
of the Temperature Reading. Comment on each of the five sections
and then allow time for people to comment.
Appreciations are an opportunity to notice how others have con-
tributed and what they bring to the team. Demonstrate the form
by offering a sincere appreciation to someone in the group. The
form is “[Name of person], I appreciate you for_______________.”
Add a brief statement of the impact on you.
New information is a time to share information that may be rele-
vant to the group.
Puzzles are things we don’t understand, but we’re curious about.
Puzzles don’t always have answers.
Complaints with recommendations allow people to point out what
they’d like to be different.
Hopes and wishes let us say what we hope for (for the retrospective
or after the retrospective).
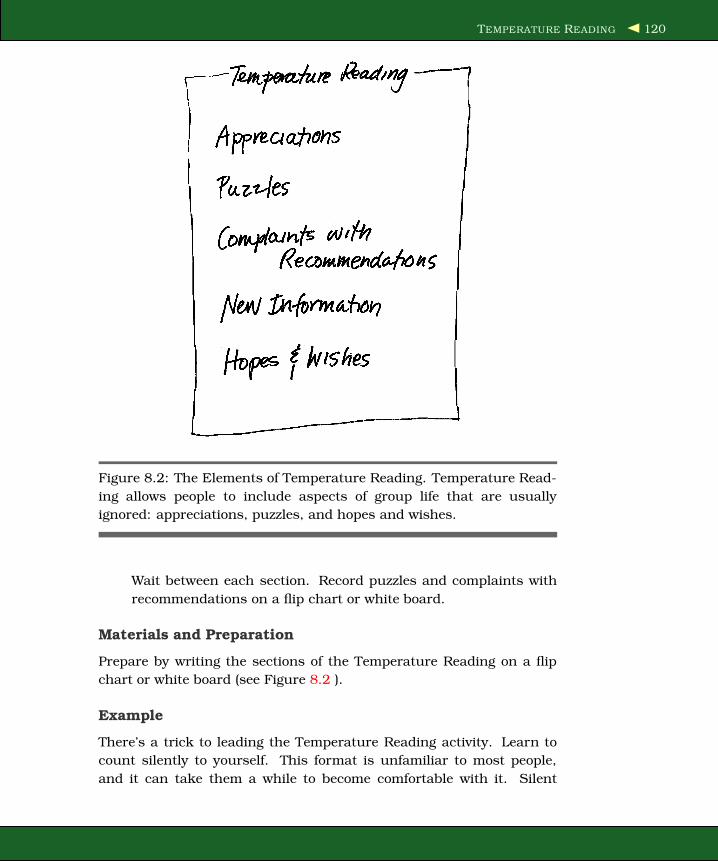
TEMPERATURE READING 120
Figure 8.2: The Elements of Temperature Reading. Temperature Read-
ing allows people to include aspects of group life that are usually
ignored: appreciations, puzzles, and hopes and wishes.
Wait between each section. Record puzzles and complaints with
recommendations on a flip chart or white board.
Materials and Preparation
Prepare by writing the sections of the Temperature Reading on a flip
chart or white board (see Figure 8.2 ).
Example
There’s a trick to leading the Temperature Reading activity. Learn to
count silently to yourself. This format is unfamiliar to most people,
and it can take them a while to become comfortable with it. Silent
TEMPERATURE READING 121
counting gives the retrospective leader something to do while waiting,
and ensures that people have time to gather their thoughts.
After demonstrating how to give an appreciation, start counting to your-
self. Look around the room with an inviting expression as you count.
Stay with appreciations until you’ve counted to 75. Well before then,
someone will step forward. If they don’t, move on.
One person giving an appreciation usually gets the group going. When
the appreciations slow down, count to 20 after the last one. Then move
on to puzzles.
Describe puzzles, and start counting to 20. Afterward, use a count of
20 to help wait through each pause.
Once a team has become used to Temperature Readings, they jump
right in. You won’t get to count.
The Temperature Reading format serves many purposes. We’ve used it
to organize status meetings for a team that met monthly for project
planning. The team members stayed energized and focused on the
meetings all year. They ended the year with strong working relation-
ships.

HELPED, HINDERED, HYPOTHESIS 122
8.4 Activity: Helped, Hindered, Hypothesis
Use when closing iteration or release retrospectives.
Purpose
Help the retrospective leader get feedback to improve skills and pro-
cesses.
Time Needed
Five to ten minutes.
Description
Retrospective leader gathers feedback from team members to discover
what helped team members work and learn together during the session,
find out what hindered them, and get ideas about what else to try in
future retrospectives.
Steps
1. Show the three flip charts, and hand out sticky notes to the team
members. “Please help me to become a better retrospective leader.
Give me feedback on this retrospective. These three charts repre-
sent things about this retrospective that helped you to think as a
group and learn about the iteration, things that hindered or got
in the way of your thinking or learning, and what hypothesis you
might have about things I could do differently to improve our next
retrospective.”
2. “Use the sticky notes to write your feedback. When you are done
please put your initials on each note, and stick them on the appro-
priate flip chart.”
3. End by thanking the team for helping you to improve. Ask whether
you may contact team members later if you need clarification or
have questions about what they’ve written.
Materials and Preparation
Prepare three blank flip charts with titles at the top: “Helped,” “Hin-
dered,” “Hypothesis.”

HELPED, HINDERED, HYPOTHESIS 123
Examples
The Helped, Hindered, Hypothesis (HHH) activity highlights team learn-
ing and encourages team members to think about how and what they
learn best. As teams focus on whole-team learning, they get better at
it.
When a team ended its retrospective with HHH, they noticed that about
half the team wanted more individually focused activities and the other
half of the team wanted more pair and small group activities. As team
members discussed this split and what it could mean for future ret-
rospectives, they realized these differences had implications for their
daily work as well. The discussion alerted retrospective leaders to pay
attention to what activities they chose for their designs. The team
also changed their midweek, hour-long, free-for-all status meetings to
fifteen-minute, focused, daily stand-up meetings that better suited the
needs of both groups.
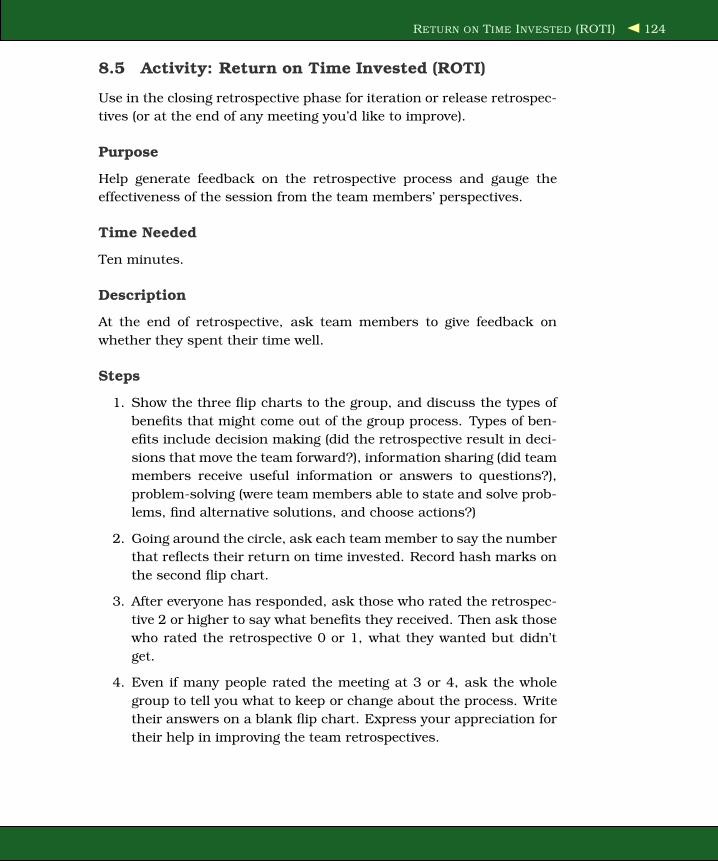
RETURN ON TIME INVESTED (ROTI) 124
8.5 Activity: Return on Time Invested (ROTI)
Use in the closing retrospective phase for iteration or release retrospec-
tives (or at the end of any meeting you’d like to improve).
Purpose
Help generate feedback on the retrospective process and gauge the
effectiveness of the session from the team members’ perspectives.
Time Needed
Ten minutes.
Description
At the end of retrospective, ask team members to give feedback on
whether they spent their time well.
Steps
1. Show the three flip charts to the group, and discuss the types of
benefits that might come out of the group process. Types of ben-
efits include decision making (did the retrospective result in deci-
sions that move the team forward?), information sharing (did team
members receive useful information or answers to questions?),
problem-solving (were team members able to state and solve prob-
lems, find alternative solutions, and choose actions?)
2. Going around the circle, ask each team member to say the number
that reflects their return on time invested. Record hash marks on
the second flip chart.
3. After everyone has responded, ask those who rated the retrospec-
tive 2 or higher to say what benefits they received. Then ask those
who rated the retrospective 0 or 1, what they wanted but didn’t
get.
4. Even if many people rated the meeting at 3 or 4, ask the whole
group to tell you what to keep or change about the process. Write
their answers on a blank flip chart. Express your appreciation for
their help in improving the team retrospectives.

RETURN ON TIME INVESTED (ROTI) 125
Figure 8.3: An example of an ROTI chart. Examining the return on their
time invested in retrospectives helps the team make wiser decisions
about how they allocate time.
Materials and Preparation
Prepare two flip charts. (See Figure 8.3 and Figure 8.4, on the following
page.)
Examples
We’re happy if most team members feel the meeting was at least a
break-even investment. There’s always room for improvement, and it’s
still worthwhile to ask the follow-up questions. One team who gave high

RETURN ON TIME INVESTED (ROTI) 126
Figure 8.4: A sample tally for the ROTI activity. This team finds the
retrospectives worthwhile.
ratings to the retrospective found a better meeting room after thinking
about what could change.
Don’t assume that a rating of 0 means you did a bad job as the retro-
spective leader. A 0 rating may simply mean the person was distracted
by outside circumstances or conditions in the room. Ask questions to
discover the thoughts and feelings behind the ratings [Der03b].
Chapter 9
Releases and ProjectRetrospectives
Even if your team is performing a retrospective after every iteration,
there’s reason to have a retrospective after your release and at the end
of the project. While iteration retrospectives focus on your team and
their issues, release and project retrospectives bring a wider perspec-
tive. Release and project retrospectives include people from across the
organization—people involved in beta testing, shipping, and supporting
the product (among others).
Release and project retrospectives bring together people who must co-
ordinate their work to achieve a goal—deploying software—but may
have very different points of view, different missions, and different
measures. When groups that cross organizational boundaries come
together in a retrospective, there’s a chance for organizational learning.
It’s one thing for a team to identify obstacles—policies, procedures, and
practices that inhibit their progress; it’s another for the well-intentioned
people behind those obstacles to see how they affect the business of
building products.
In this chapter, we’ll examine how a release or project retrospective is
different from an iteration retrospective—from extending the invitation
to closing the session. And we’ll look at how it’s different for the retro-
spective leader.
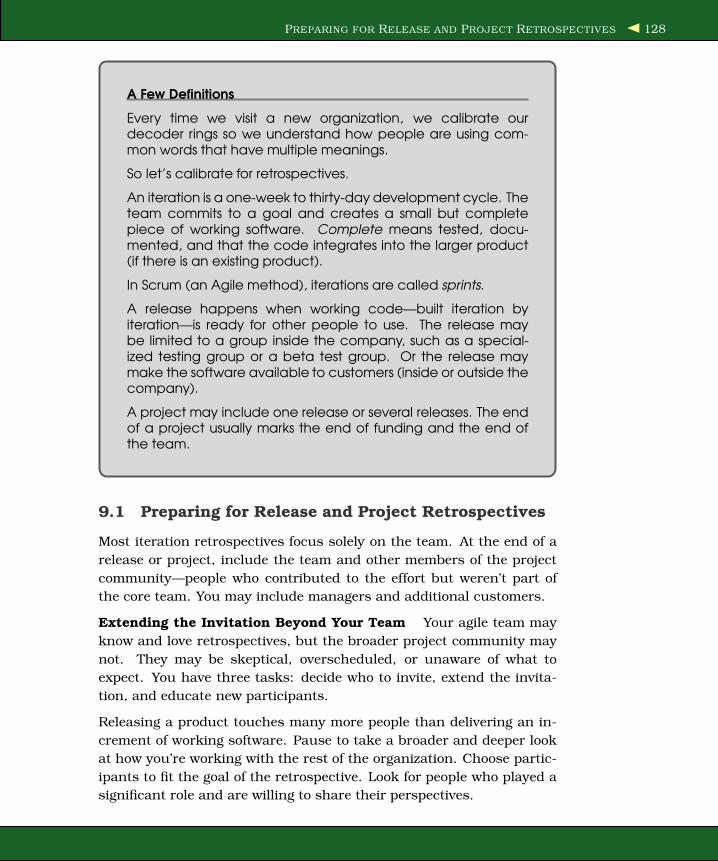
PREPARING FOR RELEASE AND PROJECT RETROSPECTIVES 128
A Few Definitions
Every time we visit a new organization, we calibrate ourdecoder rings so we understand how people are using com-mon words that have multiple meanings.
So let’s calibrate for retrospectives.
An iteration is a one-week to thirty-day development cycle. Theteam commits to a goal and creates a small but completepiece of working software. Complete means tested, docu-mented, and that the code integrates into the larger product(if there is an existing product).
In Scrum (an Agile method), iterations are called sprints.
A release happens when working code—built iteration byiteration—is ready for other people to use. The release maybe limited to a group inside the company, such as a special-ized testing group or a beta test group. Or the release maymake the software available to customers (inside or outside thecompany).
A project may include one release or several releases. The endof a project usually marks the end of funding and the end ofthe team.
9.1 Preparing for Release and Project Retrospectives
Most iteration retrospectives focus solely on the team. At the end of a
release or project, include the team and other members of the project
community—people who contributed to the effort but weren’t part of
the core team. You may include managers and additional customers.
Extending the Invitation Beyond Your Team Your agile team may
know and love retrospectives, but the broader project community may
not. They may be skeptical, overscheduled, or unaware of what to
expect. You have three tasks: decide who to invite, extend the invita-
tion, and educate new participants.
Releasing a product touches many more people than delivering an in-
crement of working software. Pause to take a broader and deeper look
at how you’re working with the rest of the organization. Choose partic-
ipants to fit the goal of the retrospective. Look for people who played a
significant role and are willing to share their perspectives.

PREPARING FOR RELEASE AND PROJECT RETROSPECTIVES 129
For one release retrospective, the leader invited Pat and Ron, represen-
tatives from Human Resources and Facilities. During the retrospec-
tive, Pat and Ron learned how their standard policies had impeded the
project. Ron gained an understanding of the urgency behind requests
to move machines in the team room. Pat realized that asking for a
26-page performance review for every team member in the middle of
a release took the coach out of action for a month. The team heard
Ron’s point of view and agreed to provide longer lead times for hard-
ware moves. The team learned they needed to enlist the supporting
functions early.
As you decide whom to invite, consider how the team interacted with
other parts of the organization. Look for areas of friction or support.
Invite representatives to learn from both points of view [Ker01]. When
it’s impractical to involve everyone in the project community, include
as many perspectives as possible by selecting a cross-section.
For a release retrospective consider inviting folks who represent admin
support, on-site customers, product owners, the deployment team, the
testing group, marketing, technical support, help desk, operations,
beta testers, and the project manager.
At the end of project, invite all of the above, the project sponsor, and
other management stakeholders (e.g., product development engineering
management, program management).
Cross-departmental and other large retrospectives need to strike a bal-
ance between inclusion and meaningful results. Helping 50 or 100
people think together requires a different approach than helping 10 or
20 people think together. It’s possible to achieve consensus on orga-
nizational changes with a very large group; but it requires a different
process than a retrospective.
On the other hand, if the project involved 200 people only 20 attend
the retrospective, diffusing insights and gaining agreement for improve-
ments is a project in itself.
Given the choice between a large cross-department retrospective with
a dubious chance of making real improvement and a retrospective that
focuses on the team, go with the team.
An invitation signals that the retrospective is an important event. Don’t
rely on a standard meeting notice. When you invite people, include the
the goal for the particular retrospective, date, time, and any preparation

PREPARING FOR RELEASE AND PROJECT RETROSPECTIVES 130
people need to do prior to the session. Provide a contact to answer any
questions.
From: Robbie
Subject: Invitation
To: Team Members
We’ve completed our first release, and it’s time to discover what we’ve learned about
organizing our development work.
We’ve scheduled a release retrospective for April 5th, from 8:30–4:00. We will serve lunch.
We’ll be following a specific structure, and each part will build to the next. Please plan to
attend for the entire day.
We’ll focus primarily on improving our cross-department communication and coordination.
Please think back over the last three months and bring any items that will help us remember
what happened during the release.
If you have questions, call Robbie at extension 1234.
Best regards,
Robbie
TIP: Full-Time Attendance
People push back against full-day meetings. They feel pres-
sured to accomplish daily work and may want to drop by the
retrospective when they don’t have a another meeting sched-
uled. Even with the best intentions, drop-ins slow down the
process; at worst they derail it. Dropouts send a different,
often puzzling, message.
Set the expectation for full-time attendance by explaining
that the retrospective follows a structure and that each part
builds on the next.
Emphasize that the goals of the retrospective are learning, improve-
ment, and action. Make sure people know it’s an invitation [Ker01].
When people feel pressured to attend, they don’t arrive in a collabora-
tive, cooperative mood.
PREPARING FOR RELEASE AND PROJECT RETROSPECTIVES 131
TIP: Coach Managers Prior to the Retrospective
Differences in power and status influence interactions within
a retrospective. People who have responsibility for evaluating
or appraising the performance of team members—functional
managers, project managers, directors, development mana-
gers—hold a form of power, and people may defer to them.
Meet with each manager before the retrospective to consider
his or her roles in discussions. Ask each manager to hold
back and create signals to help communicate when a man-
ager is being too assertive.
Up-Front Work In Chapter 2, A Retrospective Custom-Fit to Your Team,
on page 15, we describe the preparation you might make for an iteration
retrospective, learning about the context and history of the team. For
a release or project retrospective, dig deeper. Learn more about how
people experienced the project. Your perception counts, of course. And
you’ll design a better approach with a fuller picture.
Use interviews or a brief questionnaire to learn how people perceive the
project. The benefits of up-front preparation are fourfold:
• It starts people reflecting on the project. The questions in an inter-
view or questionnaire start people thinking back about their expe-
rience.
• It provides useful background. You will learn more about the con-
text and understand more about the project. You’ll learn some-
thing about the people involved and how they view the release or
project.
• It sets the tone. The way you phrase questions in an interview or
questionnaire tells people something about how the retrospective
will be. If your questions are open and curious, you’ll convey that
mind-set for the retrospective. On the other hand, if your ques-
tions are closed and seeking fault, you’ll condition people to expect
blame and narrow thinking in the retrospective.
• It helps you tailor the design. If you know there are certain prob-
lems or conflicts, you can select activities that will help the group
talk about them effectively. For example, when one retrospec-
tive leader interviewed the extended team for a release retrospec-
tive, the recurring theme was distrust between developers and

PREPARING FOR RELEASE AND PROJECT RETROSPECTIVES 132
management. The retrospective leader included an activity to help
the developers express their concerns to their managers.
If the group is small, interview the individuals in person or on the
phone. For a larger group, develop a short questionnaire and email
it. Specify an early return date if you really want it back.
Choose five or six questions from the following list. Arrange them to
flow and make logical sense for your interview or questionnaire. Test
the questions by answering them yourself before you try them with the
project community. You may not know the content of the answer; the
point is to make sure the questions are not so ambiguous that no one
will be able to answer them.
• What are the three to five topics that you think you must raise at
this retrospective?
• What is the best possible outcome you can imagine for this retro-
spective? For yourself? For future releases? For the organization?
• What would have to happen during or after the retrospective to
achieve those outcomes?
• When you look back over this release, what do you consider to be
the one or two high points or most energized times? Why did you
choose those experiences? What made them memorable?
• What do you value most about your contribution on this release?
What do you value most about the contributions of others?
• What puzzles you about the retrospective?
• What else should I ask, and how would you respond?
TIP: Who Owns the Issues?
Beware: some participants believe that once they’ve writ-
ten the issue down or mentioned it in a conversation, it’s
no longer their job to bring it up. Make it clear that issues
belong to the people who have them, and you are relying on
them to raise topics in the retrospective.
If you discover that the group has a tough issue, pay extra attention to
supporting the team. Your job is to create an environment so that the
group can bring up tough topics. Put special emphasis on setting the

INCLUDING CROSS-ORGANIZATIONAL PERSPECTIVES 133
stage, and be prepared to handle emotional situations. (See “Managing
Group Dynamics” in Chapter 3, “Leading Retrospectives”.)
Explain that you’ll use the information that you gather to design the
approach. Assure people that the information is confidential, and keep
it that way. If you do plan to summarize and share the information
with the group during the retrospective, say so. Take care to protect
individual identities.
9.2 Including Cross-Organizational Perspectives
Iteration retrospectives emphasize the team, its methods, and its inter-
actions. Release and project retrospectives include the broader orga-
nizational perspective. While organizational issues may come up in
an iteration retrospective, in a release or project retrospective cross-
organizational issues are the main focus.
Setting the Stage Setting the stage works the same for most retro-
spectives. Cover the same bases as for an iteration retrospective. Even
if your team has working agreements, work with the entire group to
establish the agreements that this group will abide by for this retro-
spective. Pay special attention to reminding people that the goal of the
retrospective is learning, and fixing problems, not blaming.
Gathering Data Make sure the data-gathering activities explicitly
include perspectives outside the team. One way to do this is to name
categories of data such as technology and tools, people and teams,
process, and organizational systems. Another is to create an event
time-line that specifies each organization present in the retrospective.
See variations on Timeline in Chapter 5, Activities to Gather Data, on
page 50.
Generating Insights Because people are in different parts of the
organization, they see things differently. Their interests—what’s impor-
tant to them—are different. Being aware of these differences helps peo-
ple work more effectively in the organization. Listen for surprises and
contradictory interpretations. Pay attention to forming small groups
that focus cross-functional perspectives.
Deciding What to Do In an iteration retrospective, the team takes
action on issues that are within their control. But releases usually
involve people from other teams and departments. The problems iden-
tified often cross organizational boundaries—they’re system problems.
INCLUDING CROSS-ORGANIZATIONAL PERSPECTIVES 134
The people in the room may not be able to fix system problems, but
they can influence and make proposals. People have control when they
can directly change the situation on their own. For example, the team’s
daily technical decisions and working agreements are within their con-
trol. Teams have influence where they have access to someone who has
control and can educate and persuade that person or group. For exam-
ple, a team may not control facilities and furniture, but they can edu-
cate the Facilities department about their need for team rooms. They
can help managers see the true cost of policies. Analyzing spheres of
influence and control help make proposals realistic.
Effective proposals don’t just tell other people what they “ought” to do.
They describe the issue, pose potential solutions, offer participation in
solutions, and invite joint problem solving. If you want another group
to help your team or change their ways, help them see what’s in it for
them, not only what’s in it for your team.
It’s still important to create action plans for individual development and
team improvements. People need to walk out of the retrospective with
concrete actions they can accomplish.
Choose an action—even a small one—that people in the room can com-
plete before the retrospective is over. Action begets action.
TIP: The Team Owns the Report
The person paying for a large retrospective may want a writ-
ten report. The report should come from the team, not the
retrospective leader. As part of the closing, decide who will
create the report. When a retrospective leader writes the
report, it reduces the team’s ownership.
Closing the Retrospective For an iteration retrospective, the team
can follow up on themselves. In a larger retrospective, assign follow-up
responsibility for proposals and cross-organizational plans. Most often,
managers, team leads, or coaches sign up for these tasks.
Choose a closing activity that helps people reflect on their experience,
solidify personal insights, and acknowledge each other’s contributions.

LEADING RELEASE AND PROJECT RETROSPECTIVES 135
Guidelines for Action Plans
Every action step needs a verb. Without a verb, it’s not anaction.
Every action needs someone to own it—one person who com-mits to carrying the action forward.
Small steps lead to quicker action. Aim for action steps that oneperson can finish in a week or less.
Due dates drive action. An end date leads to comple-tion. Open-ended tasks tend to stay that way—open and notended.
Check that actions are Specific, Measurable, Achievable, Rel-evant, and Timely—SMART.
Define what “done” means for each action and how it will becommunicated to the team.
An action plan needs to meet all these criteria.
9.3 Leading Release and Project Retrospectives
Coaches and team leads may lead iteration retrospectives. But when
it comes to the release or project retrospective, all team members have
part of the story and need to participate, not lead. Enlist a lead or coach
from another team or bring in a facilitator from outside the team. If
you’ve led iteration retrospectives, other teams may call on you to lead
their release retrospectives.
If leading a large retrospective is a one-time event for you, find a mentor.
Collaborate on the design, and seek advice on managing a larger group
for a longer time. If you plan to do more than one large retrospective,
invest in training for yourself.
Here are some differences to consider:
Managing Activities Many activities that work for iteration retro-
spectives will work in release or project retrospectives. The trick is
to use small groups so that people can actually converse rather than
attempting discussions with the entire group.
Managing Dynamics People are people. You’ll see the same behav-
iors in a large group as in a small group. But the effects are more
LEADING RELEASE AND PROJECT RETROSPECTIVES 136
pronounced. When things go awry, they go bad faster and with more
explosive power. The retrospective leader must attend to the process
and dynamics. Stay on top of working agreements, and be prepared to
name disruptive behavior.
Watch for side conversations in large groups. Side conversations may
indicate hidden information, factions, or that someone is undermining
the session. Refer to working agreements that touch on full partici-
pation or interruptions. Suggest creating a new working agreement to
address side conversations, or ask the group how best to handle the
behavior.
Of course, most side conversations are not sinister. But side conver-
sations distract and signal disrespect for the current speaker and the
process.
Here’s how one retrospective leader handled a side conversation that
disrupted the retrospective: When Charley and Ron snickered as Fran
gave her subgroup report, Sidney paused the report and asked Charley
and Ron, “I notice you’re having a conversation. Is this information the
rest of the group needs to know?” Charley admitted sheepishly that
he’d been telling Ron a joke. Sidney admitted he’d been distracted and
asked whether that was true for others in the group. When several
people nodded, he asked for a working agreement about side conversa-
tions. Intervening like this usually solves the problem.
Or, you could say, “One conversation, please.”
In either case, don’t bring up grade-school memories by demanding to
hear the joke, see the note, or share what they’ve been saying with the
group.
Managing Time In a longer retrospective, everything takes longer.
Debriefing, moving between activities, taking breaks, and small group
reports all take more time. The structure remains the same, but you’ll
deal with more people and more complex issues. Especially when there
has been conflict, controversy, or an utter failure, allow more time, and
consider bringing in an experienced facilitator.
Plan on formal breaks every ninety minutes to two hours. People will
still get up to break if they really need to, but this reduces the constant
leaving-and-returning movement in the group. Take breaks at natural
pause points rather than setting a schedule by the clock. Announce at

LEADING RELEASE AND PROJECT RETROSPECTIVES 137
the beginning that you’ll break every ninety minutes or so, and then
ask the group to tell you when they need a respite.
Here’s an example of a project retrospective.
The team just finished their twenty-fourth one-week iteration. The team
delivered the product ahead of schedule and they received a bonus! The
team has been doing regular iteration retrospectives and now wants
to look back over the project to study what worked and spread the
word. Since the team tried several new methods during the project,
they want to maintain momentum, even though some of the team will
be reassigned to new projects.
The team wants to invite the extended team to learn more about engag-
ing the rest of the organization. The retrospective leader goes through
the following thought process while jotting down notes (see Figure 9.1,
on the next page) and creating an agenda (see Figure 9.2, on page 140).
Decision: What is the goal?
We want to learn from perspectives outside the core team and build on
success. We also want to maintain momentum.
Decision: Who will attend?
Team, customer, external testing group, operations support, and tech
writers. The total number of people in the retrospective will be twenty.
Why? We want to obtain feedback from outside the team and let other
people see how we worked and solved problems.
Decision: How long?
A full day.
Why? We’ll need time to explore multiple perspectives.
Decision: Where will we hold the retrospective?
Large training room in the corporate training facility. The occupancy
rating is fifty. All furniture is movable. We’ll need a large enough space
to accommodate twenty people and allow people to move and work in
small groups.

LEADING RELEASE AND PROJECT RETROSPECTIVES 138
Figure 9.1: Retrospective leader’s notes for a full-day retrospective.
Decision: How will we set up the room?
Chairs in a circle. A circle will allow everyone to see each other to start
the session. Later move into small group work.
Phase: Set the Stage
Activity: Focus On/Focus Off
Why? Help the group establish a mind-set of looking at the issues
without assigning blame. Fosters open discussion. Reassures people
who haven’t been to retrospectives before.
Activity: Working Agreements

LEADING RELEASE AND PROJECT RETROSPECTIVES 139
Why? After the opening (review goal, schedule) establish working agree-
ments, because people haven’t done this kind of work together before
and not all the groups have their own working agreements.
Phase: Gather the Data
Activity: Timeline with Swim Lanes
Why? To re-create the chronology and events of the release and show
how the release looked to different departments
Activity: Color Code Dots
Why? Reveal how people experienced the different events in the time-
line.
Phase: Generate Insights
Activity: Patterns and Shifts
Why? We want to understand when energy/morale shifted and identify
points that stand out (high energy, low energy, or mixed). This should
help us see what changes had the most effect and where we overcame
obstacles.
Activity: Locate Strengths
Why? We want to build on what worked in high points and focus on
how different areas worked together.
Activity: Identify Themes
Why? After the interviews, we’ll look for common threads and discern
the best ideas.
Phase: Decide What to Do
Activity: Retrospective Planning Game
Why? Hear everyone’s ideas about what stories they should tell and
converge on most significant practices/interactions to carry forward.
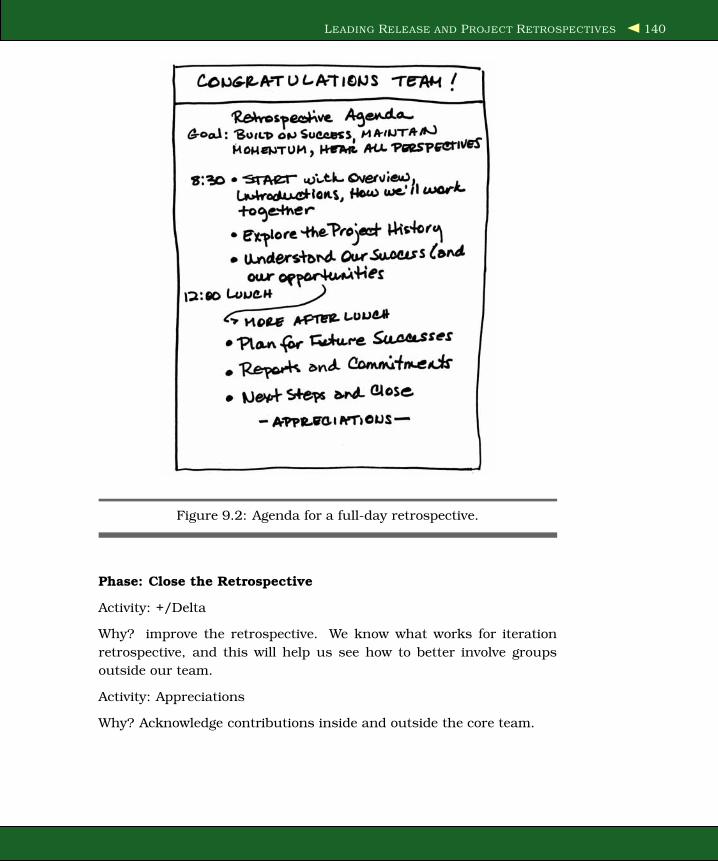
LEADING RELEASE AND PROJECT RETROSPECTIVES 140
Figure 9.2: Agenda for a full-day retrospective.
Phase: Close the Retrospective
Activity: +/Delta
Why? improve the retrospective. We know what works for iteration
retrospective, and this will help us see how to better involve groups
outside our team.
Activity: Appreciations
Why? Acknowledge contributions inside and outside the core team.
A RETROSPECTIVE AT EVERY ENDING 141
9.4 A Retrospective at Every Ending
Since this book is focused on short retrospectives that follow every
iteration, we haven’t covered the release and project retrospectives in
depth. We’ve simply pointed out some of the major differences. If
you want to learn more about end-of-project retrospectives, we recom-
mend Norm Kerth’s book Project Retrospectives: A Handbook for Team
Reviews [Ker01]. You can also join the email-based retrospective dis-
cussion group. And you can always contact us for resources and rec-
ommendations.
Even if you’ve been doing iteration retrospectives, it’s still worth the
time and energy to have an end-of-release or project retrospective. Peo-
ple look at different issues and learn different lessons when they take a
longer, broader view. Even when the team doesn’t stay together, people
take that learning with them to benefit other teams and other projects.
Release and project retrospectives uncover organizational factors, poli-
cies, and procedures that get in the way of the team—and these require
coordination across areas to solve. Without the broader view, problems
remain hidden or are attributed to the wrong source.
So, hold a retrospective at every ending point. Your teams and your
organization will learn and improve as they step back and reflect. Help
your team manage their actions, and support them through change.
We’ll tell you how in the next chapter.
Chapter 10
Make It SoProductive teams judge retrospectives by their results.
It would be lovely if we could just say “Make it so” for every change,
like Captain Jean-Luc Picard on the Starship Enterprise. But “Make
it so” isn’t enough. Action plans set the stage for results. Incorpo-
rating experiments into iteration work plans makes sure they receive
attention. And sometimes it’s still not enough.
If you’ve ever tried to change a personal habit (nail biting, for example)
you know that it’s virtually impossible unless you have something else
to replace the old behavior. It’s easier to add a new behavior than
extinguish an old one. The same is true for teams and organizations.
At their retrospective, Lynn’s team resolved to stop jumping into coding
without a plan. But at the next iteration planning meeting, two team
members popped open their laptops to share the code they’d worked on
over the weekend. They believed they were giving the team a head start.
Lynn reminded everyone about their agreement and shared several
ideas for planning that he’d read on an Agile discussion group. The
team agreed to stick to their resolution and try Lynn’s ideas for plan-
ning. As the team began talking through the work they needed to do,
the team realized that the code written over the weekend didn’t con-
tribute to the team’s goal for the iteration— it was wasted effort.
Without a replacement (planning ideas, in this case), the team had no
alternative but to fall back on their old behaviors.
Any new behavior feels awkward at first. People develop ease through
practice—whether learning a new tennis serve or learning coding in a

PROVIDE SUPPORT 143
new language. Provide support and reassurance that it’s okay to make
mistakes as people try new skills.
10.1 Provide Support
The work of creating a change isn’t done when the retrospective is
over. Even small changes need to be nurtured and supported. Support
comes in different forms: reinforcement, empathy, learning opportuni-
ties, practice opportunities, and reminders. Certain kinds of support
can come from the team—empathy and reminders, for example. But
other support requires resources and a budget. Team leads, coaches,
and managers have responsibility for obtaining support that involves
expenditure.
Reinforcement Change is difficult. Support your team (and yourself)
by noticing progress. Give encouragement on what is going well: “Our
new unit tests are helping us keep the build clean—way to go!” When
you encourage your team, you acknowledge the challenges and boost
morale.
Provide information on what’s going well to help your team recognize
that they are making progress. Be sure the feedback describes behavior
and states the impact: “I noticed that yesterday we stayed on track in
our stand-up meeting. We agreed to stick to our four questions, and we
did. That really helped me see what the obstacles were.”
Empathy Acknowledge that people’s feelings of loss or frustration are
valid. Here’s how Fred, a team lead, mishandled the situation when a
team member came to talk to him about a change. Fred listened as
Katie explained how she felt about giving up her private cubicle when
the team decided to move into an open work space. “I’ve thought about
it,” Fred responded, “and there’s no reason for you to feel that way.”
This is not empathy. Acknowledge the other’s point of view and feelings
(without agreeing to fix the situation). Simply saying “I hear you” can
be enough.
Learning Opportunities Demonstrate support for exploration and
learning. Your team may need to learn new skills to succeed with
the experiments they’ve chosen in their action plans. Organize brown-
bag lunches and sharing sessions where team members can learn from
each other. Provide lists of web resources and articles for team mem-
bers to investigate new ideas. Look for informal mentors inside and
PROVIDE SUPPORT 144
outside the team. Encourage pair programming to learn new coding
languages and techniques. You can do all this without a budget.
Be willing to spend money to support the change. Not every skill can
be learned from website or an article. Invest in training to build a
foundation for new skills. Build a library so your team has ready access
to resources.
Practice Opportunities People need practice to gain proficiency. One
way is to turn the team loose on the product to try something new.
Another option is to make a formal practice space using a short-short
project, a practice area, or a Hello World program.
Create a short-short project—one lasting a day or two, or even less—to
explore possible solutions or try a new method. If your team is having
trouble timeboxing, starting with something small like a short-short
project can serve double duty. The time limit on the short-short project
creates an explicit checkpoint where the team can assess their learning
and decisions about the experiment.
A practice area is a place where the team can try something new with-
out affecting the real product. The practice area can be a special test
or development area that’s not used for current product development.
Encourage the team to try Hello World programs. Hello World pro-
grams are simple—typically they do nothing more than print or display
“Hello World.” But they can test development environments and config-
urations and find problems quickly (or confirm that the basic concept
works).
Reminders Big visible charts and check-ins are reminders that help
your team focus on changes. For example, Terry’s team decided to
they needed to refactor more often. They created a large chart where
each team member posted a green dot when they finished a refactoring
task. At the end of each day, they reviewed the chart and discussed the
results. The chart kept refactoring conspicuous.
A check-in lets the team report on what they’re doing with a particular
change. Keep the questions and answers short: “In a word or two, how
are we doing on estimation?” Use the responses as a gauge of how the
new practice is going.

SHARE RESPONSIBILITY FOR MAKING CHANGES 145
10.2 Share Responsibility for Making Changes
When one person consistently grabs responsibility for action items,
three problems emerge:
• Your team may come to look upon one team member as a heroic
rescuer. The rescuer may rely on the heroic role for emotional
reasons—to the detriment of the team. Whether the team relies
on a rescuer or a rescuer seeks the role, the dynamic kills collab-
oration and shared ownership.
• When a formal or informal leader consistently takes responsibility
(except for system problems outside the team), that person teaches
the team to be helpless victims. Collaborating to make improve-
ments strengthens the team. Taking away that responsibility crip-
ples them.
• When a team consistently assigns responsibility for problem reso-
lution to a subgroup within the team, it creates a perception that
the subgroup is the source of all problems. Scapegoating breaks
the team. Share responsibility, and rotate change leadership.
10.3 Supporting Larger Changes
Iteration retrospectives usually generate compact changes—changes
that the team can accomplish in the next iteration or stepwise over
a few iterations. Larger retrospectives can generate broader changes
that take longer to implement. Broader changes require more support
and more attention to how people respond to change.
People experience predictable transitions as they let go of the old and
take on the new, even when they’ve chosen and planned the change
[S+91], [Bri03]. When a change is perceived as small, people adapt
without external support. For larger changes, the transition takes
longer and happens at different rates for different people. Understand-
ing the four phases of change will help you support your team.
Four Transitional Phases in a Change
These are the four phases:
Loss Starting something new always begins with letting go of the
old. People experience loss—loss of competence, territory, relation-
ships, certainty. Excitement about the new may pull them through

SUPPORTING LARGER CHANGES 146
this phase quickly, or they may take longer to adjust. Either way, they
can’t, and won’t, move forward until they let go.
Chaos Letting go of the old doesn’t mean we fully understand the
new. People feel confused and strive to reorient themselves during a
time of change. They explore how things will change and what this
new way will mean for them. Along with confusion, chaos may spark
innovation and creativity. People may invent new approaches because
the rules aren’t settled yet.
Transforming Idea Eventually, people see or experience how this
new way will work for them. Experiments and exploration lead them to
a fresh understanding. An outside influence may bring a new perspec-
tive. Team members begin to try new behaviors and ideas.
Practice and Integration An idea is not enough. People need to
practice to learn a new skill or adapt to a new structure. Performance
may drop initially but will improve with practice.
As people move through the stages of change, help them by attending
to these three areas:
What People Value Identify what team members valued in the old
way. Look for ways to carry the value forward while leaving behind what
isn’t working. By acknowledging what was valuable in the old way, you
recognize that people were not stupid or wrong. At some time, someone
thought it was a good idea, and it was, then. People move forward
more easily when they believe that changing doesn’t imply they’ve been
stupid.
For example, during their release retrospective, Lakshmi and her team
realized they needed to increase their team size by 50% to keep up
demand for their product. They were excited that their products were
so successful, but they also felt the loss of their small, cohesive team.
As they brought in new people, the team lead worked to clarify the
team’s values and the practices they wanted to keep. The original team
prioritized what was most important to carry forward as they grew into
a larger team.
Temporary Structures Temporary structures help people navigate
the chaotic phase between the old way and the new way. Temporary
structures can be plans, roles, meetings, methods—any mechanism
that bridges the current state and the goal state.

SUPPORTING LARGER CHANGES 147
Here’s how one team created a temporary structure: Franz and his
team worked on high-tech medical devices. During the retrospective
after a long, painful project, the team decided to manage risk by mov-
ing toward iterative incremental development using XP. They hired a
coach and attended immersion training. The business, on the other
hand, was skeptical of throwing away their requirements documents
and relying on stories written on index cards—with reason. They were
heavily regulated.
Rather than give up on XP or resent the business for not trying stories,
the team devised a temporary structure. They gratefully accepted the
business’s requirements document and then turned the requirements
into stories, one iteration at a time. At the end of every iteration, they
showed the business the software they’d written and explained how the
stories related to the requirements. After several iterations, the busi-
nesspeople began to see the value of writing requirements as stories
and devised a way to trace stories for regulatory purposes.
The temporary structure—translating requirements into stories—en-
abled the team to move forward toward a desired goal.
Information and Rumor Control When something changes, people
hunger for information about how the change will affect them. When
people lack information, they fill in the gaps with their worst fears.
Rumors start even on small teams.
Establish a regular mechanism to control rumors during the course of
change. Offer new information, assuage fears, uncover rumors, and
provide facts.
One team created a Rumor Control Bulletin Board. Whenever a team
member heard a rumor, that person wrote it on a card and posted it on
the board. Everyone could read the latest rumors and take responsibil-
ity for tracking down the facts. Once the facts were known, they were
posted too, keeping the rumor mill under control.
In addition, the Rumor Control Bulletin Board telegraphed that much
of what people were hearing simply wasn’t true. People stopped over-
reacting to the latest gossip and checked out the facts before passing
anything along.

SUPPORTING LARGER CHANGES 148
Retrospectives can be a powerful catalyst for change. A major transfor-
mation can start from a single retrospective. Incremental improvement
is important, too. Celebrate it. It’s more than many teams ever achieve.

Appendix A
Facilitation SuppliesHaving the right tools makes leading a retrospective easier and more
fun. Here are tips about the tools of the trade.
If you facilitate more than a few times a year—and if your team is hold-
ing a retrospective after every iteration, you are—assemble a kit that
you can pick up and take with you without having to remember and
collect everything you’ll need.
For iteration retrospectives, bring sticky notes, markers, painters’ tape,
and dots. Throw these tools in a spare box or tote bag, and you’re ready
to go.
Here’s what’s we put in a our kit for longer retrospectives:
• Painters’ tape—the kind designed to be on the wall for a week or
more without pulling the paint off
• Water-based markers in a variety of dark colors
• Sticky notes—small, medium, and large
• Index cards, 3×5 and larger
• Glue sticks
• Post-it correction tape
• Scissors
• Pocketknife
• Chime, bell, or gong
• Sticky color dots
• Timer
• Calculator
APPENDIX A. FACILITATION SUPPLIES 150
Store it all in a plastic bin, a rolling suitcase, or a cardboard box. What-
ever you choose, make it easy to store, find, and transport to the retro-
spective.
Using cards, sticky notes, markers, and dots helps people see ideas,
group ideas, and vote on priorities. Carry scissors or a pocketknife to
cut paper to size and open boxes. Bring tape to stick stuff on walls.
Glue sticks and correction tape come in handy when you make a mis-
take on a flip chart. Use a timer to keep track of time. If you’re working
with a large group, a chime works much better than yelling to get peo-
ple’s attention. Keep a calculator in the box—and hand it to a partici-
pant when you need some calculating done.
You’ll discover other things that work for you—but this is a good start.
Resources for Supplies Local office-supply stores stock most of
these items. When you want to get fancy, check out these sites:
http://www.artsuppliesonline.com—Buy markers in the colors you
use most, without having to get a package with colors that you don’t
want.
http://www.neuland.biz—Refillable makers and other high-end facil-
itation supplies with a European flair.
http://www.vis-it.com—Special shapes and sizes of sticky notes.
Tips About Markers Bring your own markers. Don’t rely on what
you find in conference rooms or conference centers. Those markers are
likely to be white board markers or, worse, dried out and useless.
White board and permanent markers are toxic and can give both you
and your team members a headache. Some people are allergic to the
chemicals in these markers and actually get sick from them.
Bring markers in dark colors—black, dark blue, dark green, purple,
and brown. Lighter colors are fun for highlighting, but yellow is impos-
sible to see from more than a few feet away. Red looks dark but is
difficult to read from a distance. Water-based markers are nontoxic
and (mostly) washable.
Look for markers with chisel tips, not points. Pointy markers make a
line that’s too thin to read from across the room.
Capturing a Record Use a digital camera to take pictures of signifi-
cant flip charts. If team members are willing, take pictures of them as

APPENDIX A. FACILITATION SUPPLIES 151
they work, too. A visual reminder of the retrospective means more than
a typed-up report.
While these tools and tips are important, you are your most important
tool. No gadget will be more important than your ability to provide a
process, manage the flow of ideas, and guide the group to discover their
wisdom.

Appendix B
Debriefing ActivitiesThe four-step debriefing method describe in Chapter 3, Leading Ret-
rospectives, on page 28 works in almost every situation. But just as
activities wear out, so do debriefs. After a while, your team will recog-
nize the order of the questions. They may even groan. So here are four
other ways to debrief activities.
The One-Question Debrief Ask, “What’s the first thing you want to
say about this activity?”
Journal Debrief If people on your team keep journals (which is a
good idea for anyone who wants to become a better leader or team
member), develop two or three questions, and give seven to ten minutes
for people to answer the questions in their journals. When time is up,
ask whether anyone has an insight he or she would share with the
group. Depending on the topic, people may or may not choose to reveal
what they’ve written.
Journal questions work for debriefing when the goal is personal reflec-
tion:
• “How would an outsider say you contribute to this situation?”
• “What’s one thing you personally can do to improve this situa-
tion?”
• “What’s one thing you will do differently in our next iteration?”
• “What is one change you can commit to in the next iteration?”
Question Pairs Pick a pair of questions to encourage team members
to talk about the activity. Question pairs might be as follows:
APPENDIX B. DEBRIEFING ACTIVITIES 153
• What interesting things happened during this activity? What did
you learn about yourself or your teammates?
• How was your experience in the activity like other things that
have happened in the team (or during the iteration)? What team
strengths showed up?
• How has your thinking changed after this activity? If you could go
back and change only one thing, what would it be?
What If Encourage the team to think in new ways. Ask “what if...?”
questions.
• What if the timeline had been ordered from present to past instead
of from past to present?
• What if you had twice as much time for brainstorming?
• What if different people had been in the small groups?
• What if we started the activity over right now?
Appendix C
Activities Quick Reference MatrixWondering when to use which activities? Here’s a quick reference. The
table on the next page lists all the activities described in this book by
retrospective phase and by the type of retrospective where the activity
is useful.

APPENDIX C. ACTIVITIES QUICK REFERENCE MATRIX 155
Figure C.1: Activities by Retrospective Phase and Type of Retrospective

Appendix D
Resources for LearningFacilitation Skills
Three organizations that offer facilitation training:
• Technology of Participation, Group Facilitation Methods Course:
http://www.ica-usa.org/top/courses/crsgfm.html
• Community at Work, Group Facilitation Skills:
http://www.communityatwork.com/groupfac.html
• The Grove Consultants International for workshops on facilitation
and graphic recording: http://www.grove.com
To supplement training, practice, and observation, here are three excel-
lent books:
• The Facilitator’s Guide to Participatory Decision-Making by Kaner,
Lind, Toldi, Fisk, and Berger (New Society Publishers, 1996)
• The Skilled Facilitator (revised edition) by Roger Schwartz (Jossey-
Bass, 2002)
• The Art of Focused Conversation: 100 Ways to Access Group Wis-
dom in the Workplace edited by R. Brian Stanfield (New Society
Publishers, 2000)

Appendix E
Bibliography[Bec00] Kent Beck. Extreme Programming Explained: Embrace
Change. Addison-Wesley, Reading, MA, 2000.
[Bri03] William Bridges. Managing Transitions: Making the Most of
Change. Da Capo Press, Cambridge, 2003.
[Dav05] Rachel Davies. Improvising Space for a Timeline. Email,
2005.
[Der02] Esther Derby. Climbing the learning curve: Practice with
feedback. Insights, 2002. Fall.
[Der03a] Esther Derby. How to Improve Meetings When You’re Not in
Charge. stickyminds.com, 2003.
[Der03b] Esther Derby. The Roti Method for Gauging Meeting Effec-
tiveness. stickyminds.com, 2003.
[Der05] Esther Derby. Helping Your Team Weather the Storm. stick-
yminds.com, 2005.
[Der06] Esther Derby. 7 Ways to Revitalize Your Sprint Retrospec-
tives. Scrum Alliance, 2006.
[Hin05] Siegi Hinger. Re: Improvising Space for a Timeline. Email,
2005.
[Kan96] Sam Kaner. The Facilitator’s Guide to Participatory Decision-
Making. New Society Publishers, Gabriola Island, BC, 1996.
[Kel87] J. M. Keller. Strategies for Stimulating the Motivation to
Learn. Performance and Instruction, 26(8):1–7, 1987.
APPENDIX E. BIBLIOGRAPHY 158
[Ker01] Norman L. Kerth. Project Retrospectives: A Handbook for
Team Reviews. Dorset House Publishers, New York, 2001.
[Lam06] Marilyn Lamoreux. The Need for Reflective Leadership in
Organizations. Unpublished, 2006.
[Lar03] Diana Larsen. Embracing Change: A Retrospective. Cutter
IT Journal, 16(2), 2003.
[Lar05a] Diana Larsen. Set the Stage for Future Results: Employ Ret-
rospectives to Improve and Sustain Software Quality. Cut-
ter IT Email Advisors: Agile Project Management, November
2005.
[Lar05b] Diana Larsen. The Problem of Team Decision-Making. Cut-
ter IT Email Advisors: Agile Project Management, March
2005.
[Lar05c] Diana Larsen. Using the Retrospective for Positive Change.
Cutter Executive Updates: Agile Project Management, Jan-
uary 2005.
[Mac03] Tim MacKinnon. XP—Call in the Social Workers.
http://www.macta.f2s.com/Thoughts/Papers/XP%20Call%20In%20the%20social%20
2003.
[MR05] Mary Lynn Manns, Ph.D. and Linda Rising, Ph.D. Fear-
less Change: Patterns for Introducing New Ideas. Addison-
Wesley, Boston, 2005.
[RD03] Linda Rising and Esther Derby. Singing the Songs of Project
Experience: Patterns and Retrospectives. Cutter IT Journal,
16(9):27–33, 2003.
[S+91] Virginia Satir et al. The Satir Model: Family Therapy and
Beyond. Science and Behavior Books, Palo Alto, 1991.
[Sch90] Johanna Schwab. A Resource Handbook for Satir Concepts.
Science and Behavior Books, Palo Alto, 1990.
[Sch94] Roger Schwartz. The Skilled Facilitator. Jossey-Bass Pub-
lishers, San Francisco, 1994.
[Sch04] Ken Schwaber. Agile Project Management with Scrum.
Microsoft Press, Redmond, WA, 2004.
[Smi00] Steven M. Smith. The Satir Change Model. stevenm-
smith.com, 2000.

APPENDIX E. BIBLIOGRAPHY 159
[Sta97] R. Brian Standield, editor. The Art of Focused Conversation:
100 Ways to Access Group Wisdom in the Workplace. The
Canadian Institute of Cultural Affairs, Toronto, 1997.
[Tab06] Jean Tabaka. Collaboration Explained: Facilitation Skills
for Software Project Leaders. Addison-Wesley, Upper Sad-
dle River, NJ, 2006.
[WM01] Jane Magruder Watkins and Bernard J. Mohr. Apprecia-
tive Inquiry: Change at the Speed of Imagination. Jossey-
Boss/Pfeiffer, San Francisco, 2001.
IndexSymbols+/Delta, 115f, 114–116
AAction plans, 135, 142
see also Decision making
Activities
for closing, 114–126
debriefing, 30–31, 152–153
for decision making, 102–112
for gathering data, 50–76
for generating insights, 78–100
managing, 29–31
selecting, 22–27
for setting the stage, 40–49, 119–121
Appreciations, 117–118
ARCS criteria, 22, 23
Attendance, 130
BBackground for retrospectives, 15–16
Blame, 33
Brainstorming, 111
Brainstorming/Filtering, 80f, 78–80
Breaks, 19, 35, 137
CChanges, 145–147
Check-in activity, 40–42
Circle of questions, 109–110
Closing retrospectives, 13
appreciations, 117–118
for cross-organizational
retrospectives, 134
helped, hindered, hypothesis,
122–123
plus/Delta, 115f, 114–116
ROTI, 125f, 126f, 124–126
temperature reading, 120f, 119–121
Color coded dots activity, 60f, 59–60
Cross-organizational retrospectives,
133–134
DData gathering, 8–11
color coded dots activity, 60f, 59–60
for cross-organizational
retrospectives, 133
facts, 8
feelings, 9–10
like to like activity, 74–76
locate strengths activity, 63–65
mad, sad, glad activity, 61–62
satisfaction histogram, 68f, 66–68,
69f
team radar activity, 72f, 71–73
timeline activity, 54f, 50–55
triple nickels activity, 56–58
Debriefing, 30–31, 152–153
Decision making, 12
circle of questions, 109–110
for cross-organizational
retrospectives, 133
retrospective planning game, 105f,
103–106
short subjects, 111–112
SMART goals, 108f, 107–108
triple nickels activity, 56–58
see also Force field analysis
Delta activity, 115f, 114–116
Dots, prioritizing with, 92–93, 94f
Duration, 17–18
EEmotions, see Feelings
Empathy, 143
ESVP activity, 45–46, 47f

FACILITATORS 161 OWNERSHIP
FFacilitators, see Leaders
Facts, 8
Feelings, 9–10, 34–36, 68
see also Data gathering
Fishbone, 88f, 87–89
Five Whys, 85–86
Focus on/Focus off activity, 44f, 43–44
Force Field analysis, 83f
Force field analysis, 81–84
GGathering data, see Data gathering
Goals, retrospective, 16–17
see also SMART goals, Decision
making
Group dynamics, managing, 31–36,
133, 136
HHelped, hindered, hypothesis, 122–123
History and environment, 15–16
IIdentify themes, 97–98
see also Locate strengths activity
Identify themes activity
see also Locate strengths activity
Improvements, 12, 145–147
Insights, generating, 11
Brainstorming/Filtering, 80f, 78–80
for cross-organizational
retrospectives, 133
fishbone, 88f, 87–89
five whys, 85–86
force field analysis, 83f, 81–84
identify themes, 97–98
learning matrix, 99–100, 101f
patterns and shifts, 90–91
prioritize with dots, 92–93, 94f
report out with synthesis, 96f, 95–96
Interviews, 131–132
Introductions, see Set the stage
Invitations, 130
Issues, see Group dynamics
Iteration retrospectives
activities for data gathering, 51–65,
76
closing activities, 113–126
decision making activities, 107–112
defined, 128
insight generating activities, 78–80,
85–100
vs project and release, 127
setting the stage, 41–46, 48–49
KKeller, J.M., 22
Kerth, Norm, 141
LLeaders
activities, managing, 29–31
activities, selecting, 22–27
context, importance of knowing,
15–16
duration, determining, 17–18
feedback, 124–126
feelings, techniques for discussing,
10
group dynamics, managing, 31–36,
136
location considerations, 20
preparation, 18, 19, 21, 25, 26f,
131–132, 138f, 140f
of release and project retrospectives,
138f, 140f, 135–140
responsibilities, 30
self-management, 37–38
set the stage, importance of, 8
skills for, 38–156
support role of, 143–144
time management, 36–37, 136
see also Activities
Learning matrix, 99–100, 101f
Learning opportunities, 144
Like to like, 74–76
Locate strengths activity, 63–65
see also Identify themes activity, see
also Identify themes
Location, 20
MMad, Sad, Glad activity, 61–62
Managers, 32, 131
see also Leaders
Materials and supplies, 149–151
Matrix, 99–100, 101f
OOwnership, 132, 145

PARTICIPATION 162 SUPPORT
PParticipation, 31–32, 57, 128–129
see also Invitations
Patterns and Shifts, 90–91
see also Five whys
Planning, see Preparation, Time
management
Plus/Delta, 115f, 114–116
Practice, 144, 146
Preparation, 25, 26f
forretrospectives, 128–133
time, 18
Prioritize with dots, 92–93, 94f
Progress bar, 96f
Project Retrospectives: A Handbook for
Team Reviews (Kerth), 141
Project retrospectives, 127–141
activities for data gathering, 51–65,
74–76
closing activities, 113–118
cross-organizational, 133–134
decision making activities, 103–110
defined, 128
example of, 137–140
insight generating activities, 78–98
preparation for, 128–133
setting the stage, 45–46, 48–49
RRadar activity, 72f, 71–73
Reinforcement, 143
Release retrospectives, 127–141
activities for data gathering, 51–65,
74–76
closing activities, 113–118, 122–126
cross-organizational, 133–134
decision making activities, 103–110
defined, 128
insight generating activities, 78–98
preparation for, 128–133
setting the stage, 45–46, 48–49
Reminders, 144
Report out with synthesis, 96f, 95–96
Reports, 134
Responsibility, 145
Retrospective planning game, 105f,
103–106
Retrospectives
activities, selecting, 22–27
benefits of, 13
cross-organizational, 133–134
and daily work, 13
duration of, 17–18
example of, 1–4, 21
location for, 20
materials and supplies for, 149–151
reports, 134
selecting participants for, 128–129
structure of, 4, 13
structuring, 19–22
tools for, 20
when to hold, 12
Return on time invested, 125f, 126f,
124–126
ROTI, 125f, 126f, 124–126
Rumors, control of, 147
SSatisfaction histogram, 68f, 66–68, 69f
Scripts, 29
Set the stage, 5–8
check-in activity, 40–42
for cross-organizational
retrospectives, 133
ESVP activity, 45–46, 47f
focus on/Focus off activity, 44f,
43–44
satisfaction histogram, 66–68
temperature reading, 119–121
working agreements activity, 48–49
Short subjects, 111–112
Skills
acquired from retrospectives, 12
facilitation, 28
for leaders, 38
practicing, 144
SMART actions, 135
SMART goals, 108f, 107–108
Sprints, see Iterations
Structure, of retrospectives, 4
benefits of, 13
closing, 13
decision making, 12
example of, 24–26
gathering data, 8–11
generate insights, 11
set the stage, 5–8
time for, 19–22
Supplies, 149–151
Support, 143–144
TASK CARDS 163 WORKING AGREEMENTS
TTask cards, 105f
Team radar, 72f, 71–73
Teams
background of, 15–16
and changes, 146–147
ownership, 134
support, 143–144
values of, 6
working agreement for, 6–8
Temperature reading, 120f, 119–121
Time management, 19, 36–37, 96f, 136
Timeline
see also Color coded dots activity
Timeline activity, 54f, 50–55
Tools, 20
Training, 156
Transitional phases, 146–147
Triple Nickels activity, 56–58
VValues, 6
WWorking agreements, 6–8
activity, 48–49
violations of, 33


