Page 1
The Education Program at the New Jersey Sea Grant Consortium 22 Magruder Road Fort Hancock, NJ 07732 732‐872‐1300
www.njseagrant.org
_
WHY DUNES ARE IMPORTANT
OVERVIEW Using modeling techniques, students discover how coastal dunes form and how they
can protect coastal areas from erosion and flooding during storms and harsh weather
events. Students will make predictions and observations, then come to their own
conclusions about the importance of dunes and how they can make coastal areas more
resilient against storms.
OBJECTIVES Following completion of this lesson, students will be able to:
Construct a model of a beach and compare what happens when beaches have or
do not have properly built sand dunes.
Demonstrate how dunes protect coastal areas from the affects of storms, storm
surges and the future affects of sea level rise.
Demonstrate how plants on a sand dune hold sand together and prevent
beaches from eroding.
Demonstrate how the volume of sand is important to a beach.
GRADE LEVELS Grades 5th - 12th
NJCCCS 5.1 Science Practices: A, B, C, D. 5.3 Life Science: C. 5.4 Earth Systems Science: C, F,
G. 6.1 US History: America in the World B, C. 8.1 Educational Technology: E, F. 21st
Century Life and Careers: 9.1, 9.4.
BACKGROUND Unlike rocks or heavy soil, sand is small-grained, light in weight, and easily moved by
water and wind. On beaches, the combined powers of the ocean and weather
constantly keep sand in motion. As a result, beaches are constantly changing in shape
and size. Fortunately, there is a natural feature of sandy beaches that can hold onto
sand and help stabilize the shape and size of a beach. That natural feature is known as
a sand dune.
Dunes are formed by sand that becomes trapped on the beach behind or around an
object, such as a rock, pile of seaweed, plants or even storm fencing installed by people
to encourage dune growth. As winds blow over the beach, sand moves, gets trapped
and accumulates, eventually forming a mound. If the mound is far enough above the
Acknowledgments: The development of this lesson plan was made possible by the generous support of the TD Bank Charitable Foundation and the Jersey Shore Partnership.
Page 2
high tide lines and not constantly inundated with water, the mound grows and plants are
able to take hold, grow and spread. Most of the species of plants that grow in dunes
grow by means of a specialized root system know as a rhizome. The rhizomes act as
huge nets growing underground to help hold sand in place. As sand blows over the
plants, more sand becomes trapped around the plants. The plants continue to grow
upwards, and as they grow taller they trap more sand until a sand dune is formed.
During storms, healthy, well vegetated dunes as act flexible barriers, becoming the first
line of protection for inland areas. When ocean waves and storm surges crash high
upon a beach, dunes act like a cushion, absorbing the force or energy of the waves.
Dunes also help prevent the movement of ocean water to inland areas and can lessen or
prevent flooding and damage, especially to nearby homes and other structures.
Native dune plants and their rhizomes are vital to a dune, since they help trap and hold
the sand in place. After a storm, as waves and water recede, sand that was transported
can be trapped in a dune plant so sand does not wash back out to sea. Dunes can also
lower the impact of beach erosion by acting as a “sand storage” area, “donating” sand
back to the ocean side beach to help it maintain or replenish itself. A proper volume of
sand on the beach in front (ocean side) of a dune is very important. Even though a dune
can provide protection, without sand on the beach the dune will be struck frequently by
waves and will quickly erode away. During times of high wind, dune grasses also protect
inland areas by trapping sand and preventing sand from blowing upon and accumulating
in areas where it is not wanted, such as on roadways. Without plants, a dune offers
almost no protection against storm waves and wind. It is important to note that, even
though well-vegetated dunes are the best natural long term defense a beach or coastal
area could have against a storm, they can fail and be washed over and away by
powerful storms.
With 130 miles of treasured beaches the need for healthy dunes in New Jersey is
becoming more evident than ever to coastal towns who want to become more resilient to
coastal storms. As observed after Superstorm Sandy in 2012, beach towns with large,
healthy dunes often suffered much less destruction than towns with no, small or un-
vegetated dunes. As towns rebuild and beaches are replenished with sand that is being
pumped from offshore, it is important for everyone to realize the value of sand dunes.
With a change in the earth’s climate scientists predict a change in frequency and
intensity of coastal storms along the Atlantic coast, along with a rise in sea level. With a
rise in sea level storms and storm surges become more frequent and severe, with more
areas prone to flooding and erosion, dunes will lessen the impact storms will have on our
beaches, will help protect inland areas and prevent destruction making coastal areas
more storm resilient.
MATERIALS Long clear plastic storage containers for each group of 2-4 students, at least the size of
a pencil storage container but the longer the better.
Sand
Water
Toothpicks
Page 3
Monopoly houses or other small objects to represent structures such as houses or
buildings
4 dry erase markers (different colors)
Student Worksheets (included in this module
Use moderately wet sand for each activity. Dry sand will not work because it will absorb
all the water that is poured into the container. The volume of sand will vary with the size
of your container, so have enough sand available for each group to build a beach that
reaches half way across the length of the container.
PROCEDURE Activity #1: Storm waves along a beach without a dune
Step 1: On one side of the container, have students sculpt a model of a very gently
sloping beach; do not allow the beach to reach more than half way across the length of
the container. Even though the beach has a gentle slope, have students make sure the
sand in their container is even across the width of the container. They should not make
one side higher or have small holes or mounds, especially along the edges.
Have students place monopoly houses close to the inside edge of the container; this will
represent a “coastal town” with structures such as houses or businesses located inland
from the beach.
Step 2: On the side with no sand, have students fill the container with water 1.5-2 cm
deep; this may depend on the size of the container and beach. The water should just
touch the sandy beach. This will represent the ocean. Be sure water is poured gently so
sand is not washed away from the sculpted beach. Students should try to keep the
water level at a constant; they may add more water if the water level becomes lower
during the activity to keep the water level at the 1.5 or 2cm mark.
Step 3: At the end of the container with “coastal town” using a dry erase marker, have
students make three marks near the sand on the side of the container parallel to the
water, one mark near the right edge, another on the left edge and a third mark in the
middle. These marks will be the group’s three benchmarks.
Step 4: Using a ruler in centimeters, have students place the ruler in a straight
perpendicular line from a benchmark down to where the sand and water meet to
measure the length of the beach. Students need to get a measurement at each of the
three benchmarks and then average the 3 measurements. They should record the
measurements and average on the student worksheet.
Step 5: Using a dry erase marker, on the outside of the container students trace the line
of sand they see along the side of the clear container, going along the back of the
container then along both sides of the container from the “coastal town” down to the
water.
Step 6: Using the student worksheet, each group should make a sketch of the beach
inside the area labeled “Before the Storm.”
Step 7: By gently lifting the edge of the container with the water, students then should
create waves that do not go beyond half the length of the beach, this will represent a
Page 4
relatively moderate storm or a typical coastal storm that might happen during mid-
summer. Using a timer, have students make moderate waves for 45 seconds; then have
them observe what happens to their beach.
Step 8: After 45 seconds of a moderate storm waves, students should measure the
“new” of their beach at the three benchmarks and average and record data on the
student worksheet. Using a different color dry erase marker, students should trace the
new line their beach has made along the side of the container noting the differences. On
the student worksheet, students should make a sketch of the newly formed beach in the
box labeled “After the “Moderate Storm” and answer the questions on student
worksheet.
Step 9: Next, have students re-sculpt their beach back to how it was before the
moderate storm waves. To do this, they should use the first line drawn on the sides of
the container and their “Before the Storm” sketch.
Step 10: Next students will create severe storm waves for 45 seconds by lifting and
lowering the container a little higher and faster than before but not so severe that the
water washes over their “coastal town” at least at first. This may happen due to erosion
near the end of the 45 seconds. At no time should water splash out of the container.
This will represent a coastal storm such as during a big Nor’easter in the winter or a
tropical storm in late summer or fall. After 45 seconds of severe storm waves, students
should observe what happened to their beach, make the three benchmark
measurements again, and trace the new line their beach has made along the sides of
the container using a third different color dry erase marker.
Step 11: On the worksheet, students should make a sketch of the newly formed beach
in the box labeled “After the Severe Storm”, make beach length measurements, and
answer the questions on student worksheet.
Activity #2: Storm waves with increased volume of sand, no dune
Have students re-sculpt the original beach they created in Activity #1 “Before the Storm”
and adding about a cup or more of sand to the beach but not the coastal town. The
sand should be smoothed out flat, with a gentle slope into the water. Sand should not be
placed into piles, and the beach may extend a bit further into the water than in Activity
#1.
Repeat Steps 4-11 of Activity #1 and have students complete the student worksheet
labeled “Storm Waves with the Addition of Sand.” Have students create moderate and
severe storm waves as they did in Activity #1.
Activity #3: Storms Waves with a Un-vegetated dune
Using the sand added to the beach in Activity #2, have students pile the sand in the
container into a shape of a dune. 1/3rd of the sand in the container should be the coastal
town, 1/3rd a dune, 1/3rd a beach on the ocean side of the dune. The dune should be a
few inches high and a few inches wide. Have students make sure the sand is even
along the top of the dune, with a gentle slope going down on each side of the dune.
They should not make a steep beach face on the dune and should be sure their dune
extends the entire width of the container, with no holes or openings.
Page 5
Repeat steps 4-11 of Activity #1 and have students complete the worksheet labeled
“Storm Waves with an Un-vegetated Dune.” The moderate storm waves should just
reach the base of the dune and may go slightly up the face but students should try to not
to let water go over the dune (unless the sand erodes). When first starting to create
severe storm waves, they may reach the top of the dune but students should not start by
splashing water over the dune, into the “coastal town” and should not let water splash
out of the container.
Activity #4: Storms Waves with a Vegetated Dune
Have students re-sculpt the beach they created in Activity #3, building the coastal town,
dune and beach exactly the same height, length and general shape as before. Students
should use the lines on the side of the container and their sketches to assist them. Next,
they should add toothpicks to represent dune grass, using about 60-100+ toothpicks
(depending on how large of a container they are using). About half the toothpicks should
go vertically into the sand, in a random pattern spread equally across the top of the
dune, leaving just a small tip above the sand. They should be no more than 1cm apart.
Because dune grasses have roots that also grow horizontally and diagonally, students
should also push toothpicks into the side of the dune in a crisscross pattern, horizontally
and diagonally across the width of the dune, making sure the toothpick is inserted as far
into the dune as possible and entirely covered with sand. Explain that they are imitating
the net like pattern rhizomes create underneath a sand dune.
Have students repeat Steps 4-11 of Activity #1 and complete the student worksheet
labeled “Storm Waves with Vegetated Dune.” The moderate storm waves created
should reach the base of the dune and may go slightly up the face of the dune, but
should not go over the dune. When first starting to create severe storm waves, they may
go up the face of the dune and reach up to or just over the dune, but students should not
start out splashing water into the “coastal town” and should not let water splash out of
the container.
Activity #5: Sea Level Rise and Dunes
Have students repeat Activities 1-4 or only Activities 1 and 4, this time adding another 1
cm of water to the container to represent high storm tides or sea level rise which will
shrink their beach. Have students observe the affects of higher water levels and record
their observations on the student worksheet.
EXTENSIONS Have students use Microsoft Excel to create column charts, line graphs and/or bar
graphs to compare beach length measurements for each activity.
Make a model of non-native beach grasses by placing toothpicks just halfway into or less
on top of the dunes.
Repeat Activity #3 and/or #4 but place a solid piece of plastic or metal into back of the
dune that expands the entire width of the container. This represents a revetment wall.
Place just enough sand over the wall to cover it. Create waves to just go up onto the
face of the dune but not over the top. Observe where some of the sand travels to when
there is no wall versus having a wall in place. What are the pros and cons to having a
Page 6
solid wall built into the dune? Do the pros outweigh the cons or vice versa? Why? You
may also build a wall of stones inside the dune, cover with sand and compare as well.
Repeat Activities #2 and/or #3 but create a small “beach access” from the coastal town
to the beach, sculpt a small perpendicular path about a 1/2cm wide through the dune,
level with the beach. Create waves to just reach up the face of the dune. Observe
where the water and sand travels to. Then create a path at a 45 degree angle through
the dune. Compare to the perpendicular path. If creating a beach access should the
path be at a 90 or 45 degree angle through the dune? Why?
VOCABULARY Erosion- The process by which the surface of the earth is worn away by the action of
water, glaciers, winds, waves, and currents.
Rhizome- A thick horizontal stalk that grows underground and has shoots and roots
growing from it.
Storm Surge- A rising of the sea as a result of atmospheric pressure changes and wind
associated with a storm. High winds push on the ocean’s surface causing the water to
pile up higher than the ordinary sea level.
Revetment Wall- A wall constructed often parallel to the sea to preserve the existing
uses of the shoreline and to protect the slope, as defense against erosion.
REFERENCES Wootton, Louise, PhD. (February 2014). Dune it Right. Georgian Court University.
Retrieved from: gcuonline.georgian.edu/wootton/duneitright.pdf
Page 7
The Education Program at the New Jersey Sea Grant Consortium 22 Magruder Road Fort Hancock, NJ 07732 732‐872‐1300
www.njseagrant.org
WHY DUNES ARE IMPORTANT
Student Worksheet #1
Activity #1: Storm waves along a beach without a dune
Create a smooth gently sloping beach inside a container; add about 2 cm of water, the water should just touch
the sandy beach. Add a few monopoly houses to represent a coastal town. Make a sketch of your town and
beach, and shade in areas where the sand is located before and after the storms. Shade areas with deep
sand dark and areas with little sand very lightly.
NO DUNE- Before Storm After a Moderate Storm After a Severe Storm
Benchmark Measurements – Length of Beach, No Dune
Before the storm:
Left side_______cm Right side_______cm Middle_______cm Average_______cm
After the moderate storm:
Left side_______cm Right side_______cm Middle_______cm Average_______cm
After the severe storm:
Left side_______cm Right side_______cm Middle_______cm Average_______cm
Page 8
The Education Program at the New Jersey Sea Grant Consortium 22 Magruder Road Fort Hancock, NJ 07732 732‐872‐1300
www.njseagrant.org
WHY DUNES ARE IMPORTANT Discussion Questions, Activity #1
No Dunes, after the moderate storm:
1. How much did the beach shorten or lengthen after the storm? Where did the sand grains move to?
2. If sand eroded off the beach into the water, did the sand move just off the beach or far off into the water?
3. Did the sand spread evenly or did the sand accumulate in a pile or piles?
4. Did any sand move further up the beach?
5. How was the coastal town you created affected by the moderate storm?
No Dunes, after the severe storm:
1. How much did the beach shorten or lengthen after the storm? Where did the sand grains move to?
1. If sand eroded off the beach into the water, did the sand move just off the beach or far off into the water?
2. How did the amount of erosion compare to after the moderate storm?
3. Did any sand move further up the beach?
4. How was the coastal town you created affected by the storm?
Page 9
The Education Program at the New Jersey Sea Grant Consortium 22 Magruder Road Fort Hancock, NJ 07732 732‐872‐1300 njseagrant.org
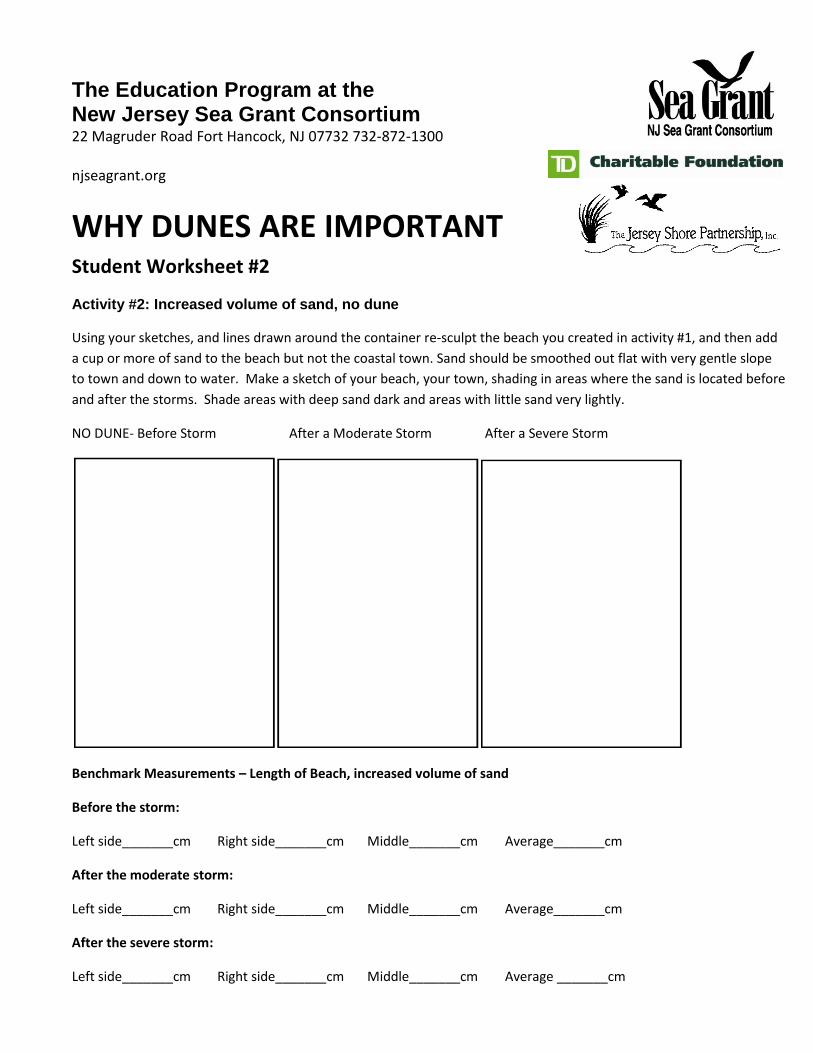
WHY DUNES ARE IMPORTANT Student Worksheet #2
Activity #2: Increased volume of sand, no dune
Using your sketches, and lines drawn around the container re-sculpt the beach you created in activity #1, and then add
a cup or more of sand to the beach but not the coastal town. Sand should be smoothed out flat with very gentle slope
to town and down to water. Make a sketch of your beach, your town, shading in areas where the sand is located before
and after the storms. Shade areas with deep sand dark and areas with little sand very lightly.
NO DUNE- Before Storm After a Moderate Storm After a Severe Storm
Benchmark Measurements – Length of Beach, increased volume of sand
Before the storm:
Left side_______cm Right side_______cm Middle_______cm Average_______cm
After the moderate storm:
Left side_______cm Right side_______cm Middle_______cm Average_______cm
After the severe storm:
Left side_______cm Right side_______cm Middle_______cm Average _______cm
Page 10
The Education Program at the New Jersey Sea Grant Consortium 22 Magruder Road Fort Hancock, NJ 07732 732‐872‐1300 njseagrant.org
WHY DUNES ARE IMPORTANT Activity #2: Discussion Questions
Increased volume of sand, moderate storm
1. Using your measurements of the length of beach compared to activity #1 did your beach erode more
or less with increased volume of sand during a moderate storm?
2. Explain the differences you observed with the increased volume of sand compared to activity #1, did
increasing the volume of sand help lessen the severity or the amount of time it took for the beach to erode?
3. Did any sand move further up the beach?
4. How was the coastal town affected by the storm?
5. Do you feel adding sand to the beach was worthwhile in trying to prevent erosion of a beach during a
moderate storm?
Increased volume of sand, severe storm
1. Using your measurements of the length of beach, compared to activity #1 did your beach erode
more or less with increased volume of sand during a moderate storm?
2. Explain the differences you observed with the increased volume of sand, compared to activity #1
with a severe storm, did the increased volume of sand help lessen the severity or the amount of
time it took for the beach to erode?
3. Did any sand move further up the beach?
4. How was the coastal town affected compared to Activity #1 during a severe storm?
5. Do you feel adding sand to the beach was worthwhile in trying to prevent erosion of a beach
during a severe storm?
Page 11
The Education Program at the New Jersey Sea Grant Consortium 22 Magruder Road Fort Hancock, NJ 07732 732‐872‐1300 njseagrant.org
WHY DUNES ARE IMPORTANT Student Worksheet #3
Activity #3: Unvegetated Dune
Re-sculpt the sand in your container to create a dune; the dune should be a few inches high and few inches wide. 1/3rd
of the sand should be the coastal town, 1//3rd a pile in the shape of a dune, 1/3rd a beach on ocean side of dune, the
dunes should have a moderate, not steep slope on both sides. Make a sketch of your town and beach, shading in areas
where the sand is located before and after the storms. Shade areas with deep sand dark and areas with little sand very
lightly.
NO DUNE- Before Storm After a Moderate Storm After a Severe Storm
Benchmark Measurements – Length of Beach, Un-vegetated Dune
Before the storm:
Left side_______cm Right side_______cm Middle_______cm Average_______cm
After the moderate storm:
Left side_______cm Right side_______cm Middle_______cm Average_______cm
After the severe storm:
Left side_______cm Right side_______cm Middle_______cm Average _______cm
Page 12
The Education Program at the New Jersey Sea Grant Consortium 22 Magruder Road Fort Hancock, NJ 07732 732‐872‐1300 njseagrant.org
WHY DUNES ARE IMPORTANT Activity #3: Discussion Questions
Un-Vegetated Dunes after the moderate storm
1. Did the dune stay mostly intact during the moderate storm?
2. If your dune became eroded where was the sand transported to in the container? The beach? The water?
Further up the beach to the coastal town? A little of each? Please explain.
3. Using your measurements of the length of beach, compared to activity #1 and #2 did your beach erode more or
less with an un-vegetated dune during a moderate storm?
4. Using your observations, compared to activity #1 with no dune, moderate storm do you think the adding the
sand in a large mound helped prevent a significant amount of erosion or cut down the time it took for the
beach to erode?
5. Using your observations, compared to activity #2, do you think piling up the sand in a tall mound had a different
affect than smoothing out the sand? Did it change amount of erosion and/or flooding, or cut down the time it
took for the beach to erode?
6. How was the coastal town affected by the storm?
Un-Vegetated Dunes, after the severe storm
1. Did the dune stay mostly intact during the severe storm?
2. Were there any breakthroughs of water through the dune? Did the severe storm shorten the time it took for
the dunes to be broken through and eroded?
3. If your dune became eroded where was the sand transported to in the container? The beach? The water?
Further up the beach to the coastal town? A little of each? Please explain.
4. Using your measurements of the length of beach, compared to activity #1 and #2 did your beach erode more or
less with an un-vegetated dune during a severe storm?
Page 13
5. Using measurements from the length of beach and your observations, compared to activity #1 with no dune
and severe storm, do you think the adding the sand helped prevent a significant amount of erosion and/or
flooding, or cut down the time it took for the beach to erode?
6. Using measurements from the length of beach and your observations, compared to activity #2, do you think
piling up the sand in a tall mound had a different affect on the model? Did it change amount of erosion and/or
flooding, or cut down the time it took for the beach to erode?
7. How was the coastal town affected by the storm?
Page 14
The Education Program at the New Jersey Sea Grant Consortium 22 Magruder Road Fort Hancock, NJ 07732 732‐872‐1300 njseagrant.org
WHY DUNES ARE IMPORTANT Activity #4: Vegetated Dunes
Using the sketches and lines drawn around the container re-sculpt the beach created in activity #3. To represent dune
grass add 60+ toothpicks to the dune, about half the of the toothpicks can go in vertically with just tips sticking above
the sand, the other half should go horizontally and diagonally in a random pattern to represent the dune grass’s roots
and rhizomes, the toothpicks should be inserted as far into the dune as possible. Make a sketch of your town and
beach, shading in areas where the sand is located before and after the storms. Shade areas with deep sand dark and
areas with little sand very lightly.
NO DUNE- Before Storm After a Moderate Storm After a Severe Storm
Benchmark Measurements – Length of Beach, increased volume of sand
Before the storm:
Left side_______cm Right side_______cm Middle_______cm Average_______cm
After the moderate storm:
Left side_______cm Right side_______cm Middle_______cm Average_______cm
After the severe storm:
Left side_______cm Right side_______cm Middle_______cm Average _______cm
Page 16
The Education Program at the New Jersey Sea Grant Consortium 22 Magruder Road Fort Hancock, NJ 07732 732‐872‐1300 njseagrant.org
WHY DUNES ARE IMPORTANT Activity #4: Discussion Questions
Vegetated Dunes, after the moderate storm
1. Did your dune stay relatively intact during the moderate storm?
2. If your dune became eroded where was the sand transported to in the container? The beach? The water?
Further up the beach to the coastal town? A little of each? Please explain.
3. Compared to activities #1 and #2 and comparing measurements of the length of the beach and observations,
was there less or more erosion?
4. Compared to activity #3, comparing measurements from the length of beach and your observations, do you
think a vegetated dune had a different affect? Did it change amount of erosion and/or flooding, or cut down
the time it took for the beach to erode?
5. From your observations do you believe the dune plants assisted in holding the sand in place?
6. How was your coastal town affected by the moderate storm?
7. If you had to rebuild a man-made dune, from this activity, do you feel adding dune plants would be
worthwhile?
Vegetated Dunes, after the severe storm
1. Did your dune stay relatively intact during the severe storm?
2. Were there any breakthroughs of water through the dune? Did the severe storm shorten the time it took for
the dunes to be broken through and eroded?
Page 17
3. If your dune became eroded where was the sand transported to in the container? The beach? The water?
Further up the beach to the coastal town? A little of each? Please explain.
4. Compared to activities #1 and #2 and comparing measurements of the length of the beach and observations,
was there less or more erosion during a severe storm?
5. Compared to activity #3, comparing measurements from the length of beach and your observations, do you
think a vegetated dune had a different affect? Did it change amount of erosion and/or flooding, or cut down
the time it took for the beach to erode?
6. From your observations do you believe the dune plants assisted in holding the sand in place during a severe
storm?
7. How was your coastal town affected by the moderate storm?
8. If you had to rebuild a man-made dune, from this activity, do you feel adding dune plants would be
worthwhile?
Page 18
The Education Program at the New Jersey Sea Grant Consortium 22 Magruder Road Fort Hancock, NJ 07732 732‐872‐1300 njseagrant.org
WHY DUNES ARE IMPORTANT Measure the length of the beach in three locations the left, right and middle. Starting from the end of the container
perpendicular to the water, measure from the inner edge of the container where your coastal town is located down to
where the sand and water meet. Average Length of Beach (measured in cm)
Before Storm Length
After Moderate Storm
After Severe Storm
No Dune
Addition of sand
Un-vegetated Dune
Vegetated Dune
Sea Level Rise