Windows XP Home Network Setup: Step-by-Step Before we begin, please uninstall any and all firewall software. Software firewalls such as Norton Internet Security, Zone Alarm, Black Ice, McAfee Firewall, Sygate, Zero Knowledge Freedom, PC-Cillan, Cisco VPN Client and other firewall software can wreck havoc with configuring a home network. Simply disabling many of these programs in many cases does not completely disable them,which is why an uninstall is recommended. Consider installing (or reinstalling) a software firewall once you have your network configured and running correctly. Failure to do this may make the instructions that follow an exercise in futility. The following instructions are click-by-click. Please do not click Apply or OK until instructed to do so. Right-click on your Local Area Connection and select Properties.
Transcript
Windows XP Home Network Setup: Step-by-Step
Before we begin, please uninstall any and all firewall software. Software firewalls such
as Norton Internet Security, Zone Alarm, Black Ice, McAfee Firewall, Sygate, Zero
Knowledge Freedom, PC-Cillan, Cisco VPN Client and other firewall software can
wreck havoc with configuring a home network.
Simply disabling many of these programs in many cases does not completely disable
them,which is why an uninstall is recommended. Consider installing (or reinstalling) a
software firewall once you have your network configured and running correctly.
Failure to do this may make the instructions that follow an exercise in futility.
The following instructions are click-by-click. Please do not click Apply or OK until
instructed to do so.
Right-click on your Local Area Connection and select
Properties.
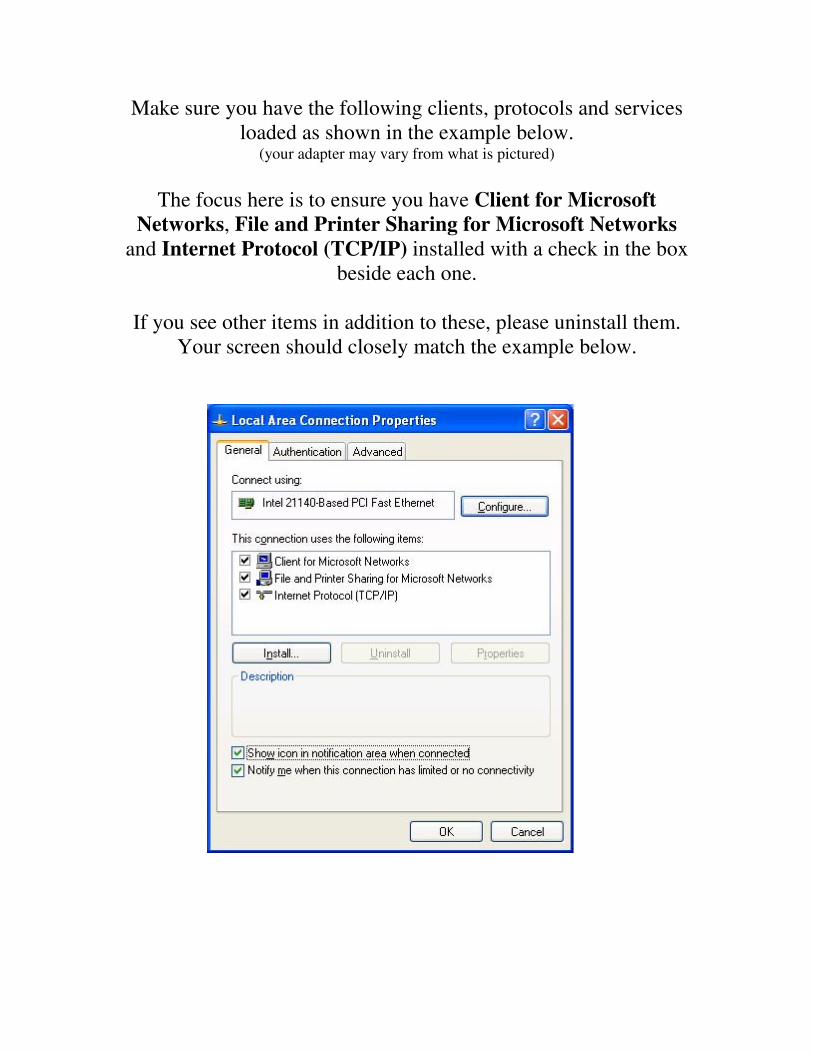
Make sure you have the following clients, protocols and services
loaded as shown in the example below. (your adapter may vary from what is pictured)
The focus here is to ensure you have Client for Microsoft
Networks, File and Printer Sharing for Microsoft Networks
and Internet Protocol (TCP/IP) installed with a check in the box
beside each one.
If you see other items in addition to these, please uninstall them.
Your screen should closely match the example below.
Double-click Internet Protocol (TCP/IP)
Ensure Obtain an IP address automatically and Obtain DNS
server address automatically are selected.
Click the Advanced button, and ensure your screen matches the
example below.
Click the DNS tab, and ensure your screen matches the example
below.
Click the WINS tab, and ensure Enable NetBios over TCP/IP is
selected.
Ensure your screen matches the example below.
Click the Options tab, and ensure your screen matches the
example below.
Click the Properties button, and ensure your screen matches the
example below.
Finally, click OK, click OK and click OK once more.
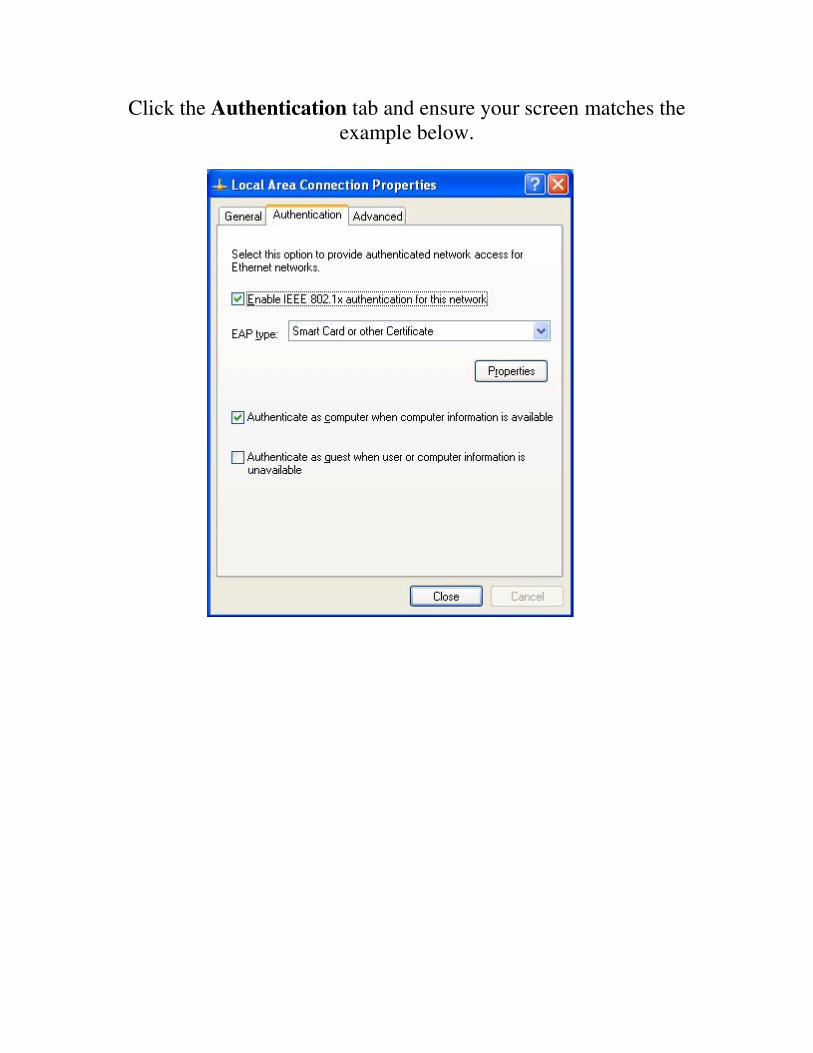
Click the Authentication tab and ensure your screen matches the
example below.
Click the Advanced tab and click the Settings... button.
Note: If your screen looks differently than what is pictured, you do not have
Service Pack 2 installed.
Please install SP-2 before continuing.
On the General tab, ensure your screen matches the example
below.
Note: If your screen looks differently than what is pictured, you do not have
Service Pack 2 installed.
Please install SP-2 before continuing.
On the Exceptions tab, ensure File and Printer Sharing is listed
and has a check beside it.
Note: If your screen looks differently than what is pictured, you do not have
Service Pack 2 installed.
Please install SP-2 before continuing.
On the Advanced tab, ensure Local Area Connection is listed and
has a check beside it.
Note: If you have more than one item listed and are unsure which to select,
select them all.
Click OK, then click OK.
Note: If your screen looks differently than what is pictured, you do not have
Service Pack 2 installed.
Please install SP-2 before continuing.
Back in the Network Connections window, click Advanced and
click Advanced Settings...
Ensure bindings are enabled for your network connection, as
shown in the example below.
Then click OK.
Back in the Network Connections window, click Advanced and
click Network Identification...
Next, click the Change... button.
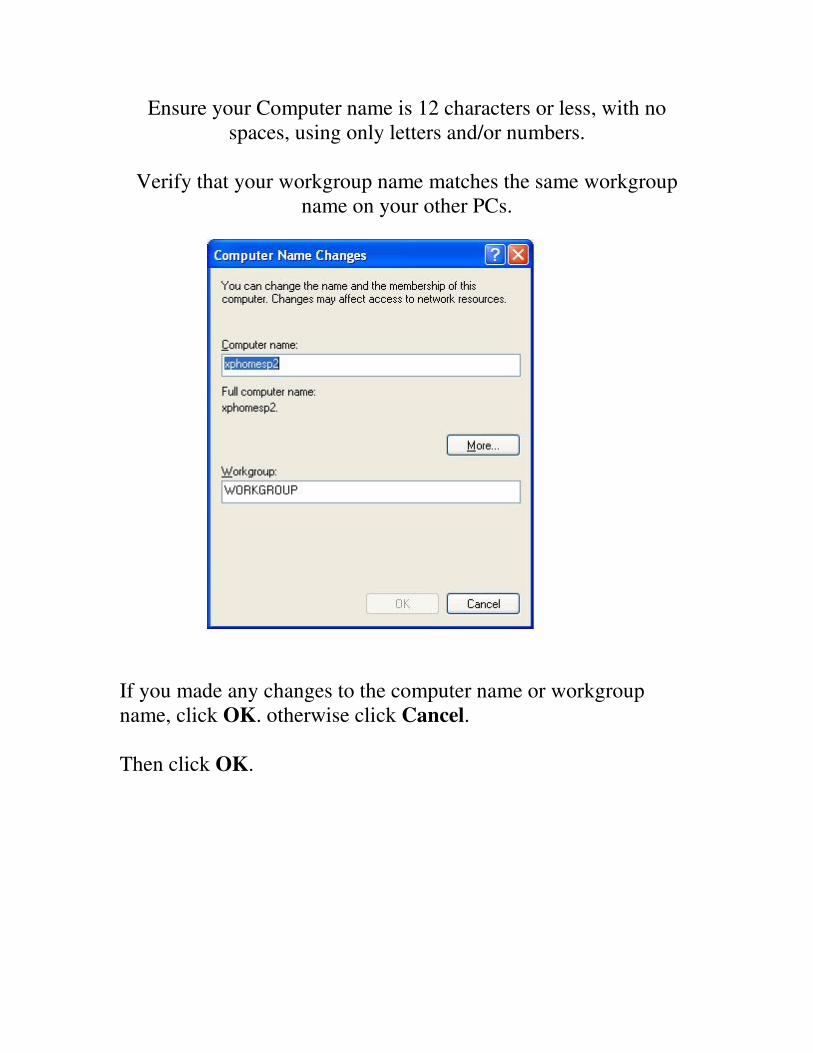
Ensure your Computer name is 12 characters or less, with no
spaces, using only letters and/or numbers.
Verify that your workgroup name matches the same workgroup
name on your other PCs.
If you made any changes to the computer name or workgroup
name, click OK. otherwise click Cancel.
Then click OK.
Click Start, click Run, type: net user guest /active:yes (and hit
enter)
Then, click Start, click Run, type: control userpasswords2 (and
hit enter)
Click once on the Guest account and click the Reset Password...
button, as shown in the example below.
Leave the password dialog boxes blank , and click OK.
Then click OK.
Download and install this registry patch on all XP PCs.
Finally, if you are running XP Pro, click Tools and click Folder
Options...
Click the View tab and ensure Use simple file sharing
(Recommended) is selected.
Congratulations! You're all done! Re-boot the PC for changes to