The content of this document is furnished for informational use only, is subject to change without notice, and should not be construed as a commitment by Scalable Software. Scalable Software assumes no responsibility or liability for any errors or inaccuracies that may appear in the informational content contained in this document.
No part of the documentation materials accompanying this product may be reproduced, transmitted, transcribed, or translated into any language, in any form by any means, without the written permission of Scalable Software. The content of this document is protected under copyright law even if it is not distributed with software that includes an end user license agreement.
Scalable Software, the Scalable Software logo, and WinINSTALL are registered trademarks of Scalable Software, in the USA and other countries. All other trademarks, trade names, or company names referenced herein are used for identification only and are the property of their respective owners.
Scalable Software, Inc.14100 Southwest Freeway, suite 400Sugar Land, Texas 77478USA+1.713.316.4900http://www.scalable.com
efore you set up WinINSTALL, make sure you that have the required hardware and that you have a basic understanding of the software components, data flow, and account access requirements.
I N T H I S C H A P T E R• “Requirements” on page 2 lists the hardware, administrative permissions, and
knowledge required to deploy WinINSTALL.
• “WinINSTALL Software Components” on page 10 describes the functionality of the WinINSTALL components.
• “WinINSTALL Data Flow” on page 11 describes how the WinINSTALL components work together to send and receive data.
• “Access Requirements for the WinINSTALL Accounts” on page 12 defines the requirements for accessing the WinINSTALL Console and agent accounts.
B
I N T R O D U C T I O NRequirements
2 WinINSTALL Desktop Management Suite and Desktop Availability Suite
1
. . . . . . . . . . . . . . . . . . . . . . . . . . . . . . . . . . . . . . . . . . . . . . . . . . . . R E Q U I R E M E N T S
HARDWARE REQUIREMENTSMake sure you have the following hardware.
Administrator Workstation WinINSTALL Display: 1024 X 768 or higher resolution and at least16-bit color
Operating system: 32bit Windows 2000 SP4, XP, 2003 Server, 2003 Server R2
NOTE: For Oracle databases, client software must be installed before you run the Console or initialize your WinINSTALL database.
Database Server Adequate disk space for the databaseSoftware for any of the following databases:• Microsoft SQL Server 2000 SP4, SQL Server 2005• Microsoft SQL Server 2005 Express Edition• Microsoft SQL Express 2005• Oracle 9i
NOTE: Smaller installations that use the SQL Server 2005 Express Edition database do not require a dedicated database server. This database can run on the administrator workstation desktop.
Windows File Server for WinINSTALL Share
Disk space: 235 MB (for the network components of WinINSTALL) plus adequate disk space to store application packages and optional client reset templates
Operating system: Any UNC accessible share regardless of platform. A dedicated server is not required.
. . .
. .I N T R O D U C T I O NRequirements
December, 2008 Installation Guide 3
SOFTWARE REQUIREMENTSThe minimum software requirements for installing WinINSTALL are listed below for each WinINSTALL component:
W I N I N S T A L L D A T A B A S EThe WinINSTALL database can be any of the following:
• Microsoft® SQL Server 2005 Express Edition
• Microsoft® SQL Server 2000
• Oracle 9i or later
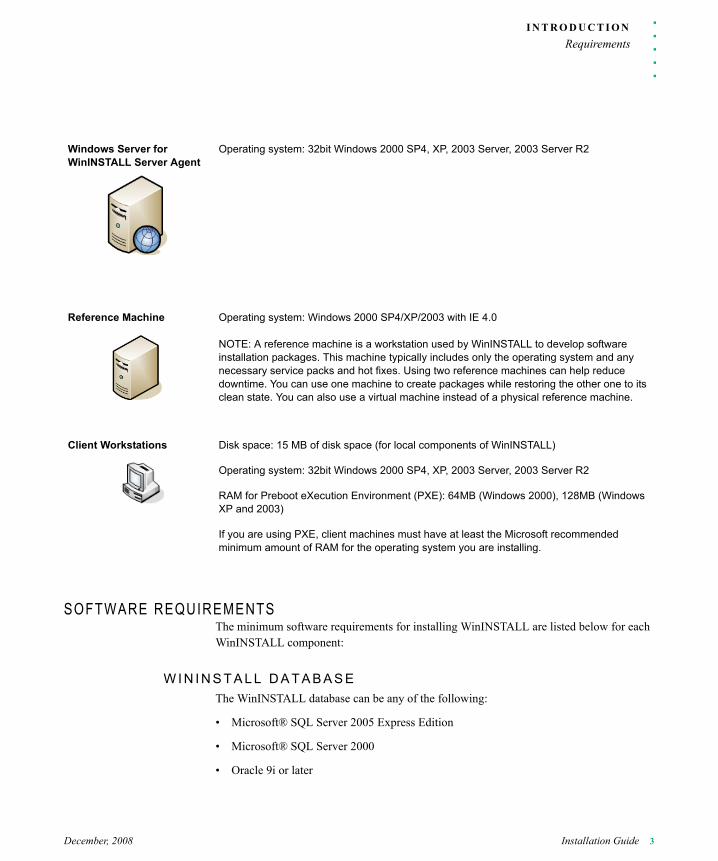
Windows Server for WinINSTALL Server Agent
Operating system: 32bit Windows 2000 SP4, XP, 2003 Server, 2003 Server R2
Reference Machine Operating system: Windows 2000 SP4/XP/2003 with IE 4.0
NOTE: A reference machine is a workstation used by WinINSTALL to develop software installation packages. This machine typically includes only the operating system and any necessary service packs and hot fixes. Using two reference machines can help reduce downtime. You can use one machine to create packages while restoring the other one to its clean state. You can also use a virtual machine instead of a physical reference machine.
Client Workstations Disk space: 15 MB of disk space (for local components of WinINSTALL)
Operating system: 32bit Windows 2000 SP4, XP, 2003 Server, 2003 Server R2
RAM for Preboot eXecution Environment (PXE): 64MB (Windows 2000), 128MB (Windows XP and 2003)
If you are using PXE, client machines must have at least the Microsoft recommended minimum amount of RAM for the operating system you are installing.
I N T R O D U C T I O NRequirements
4 WinINSTALL Desktop Management Suite and Desktop Availability Suite
1
W I N I N S T A L L S E R V E R
O P E R A T I N G S Y S T E MRecommended: Windows XP / Windows 2000 / 2003 Server
Alternate: Windows NT 4.0 with sp 6a and IE 6 installed
M I C R O S O F T W I N D O W S I N S T A L L E R 3 . 1 O N W I N D O W S 2 0 0 0 A N D A B O V E , W I N D O W S I N S T A L L E R 2 . 0 O N W I N D O W S N TWindows Installer is included with Windows XP/2000 but must be separately installed with Windows NT. Deploying the WinINSTALL Agent will automatically install or upgrade Windows Installer as necessary.
M I C R O S O F T D A T A A C C E S S C O M P O N E N T S ( M D A C ) 2 . 7 1
O R A C L E C L I E N T S O F T W A R EIf you are using Oracle® as your database, you must first manually install the client software in order to have database connectivity. Database connectivity is required for you to run the Console or use the Database Creation Wizard to initialize your WinINSTALL database.
W I N I N S T A L L S H A R E
O P E R A T I N G S Y S T E MThe WinINSTALL share is a shared hierarchy of folders and files. As a result, the WinINSTALL share machine can be running any operating system.
The machine running setup must be running Windows 2000 or greater. The WinINSTALL share setup allows installing the share to a network drive.
WARNING: .If it is necessary to upgrade to or install Windows Installer 3.1 during the WinINSTALL agent deployment, the server will reboot at the end of the installation.
WARNING: .If an earlier version of MDAC is already installed on the server at the time when the WinINSTALL server agent is deployed, the MDAC upgrade is liable to cause the server to reboot.
. . .
. .I N T R O D U C T I O NRequirements
December, 2008 Installation Guide 5
M I C R O S O F T W I N D O W S I N S T A L L E R 3 . 1Setup requires Microsoft Windows Installer 3.1or greater. WinINSTALL checks for the presence of this program during setup and will automatically install or upgrade it as required.
W I N I N S T A L L C O N S O L E• Windows XP / Windows 2000 / 2003
• Microsoft Windows Installer 3.1
This file is included with Windows 2000 and later, but may not necessarily be the correct version. Deploying the WinINSTALL console will install or upgrade to Windows Installer 3.1 as necessary.
• Microsoft Data Access Components (MDAC) 2.71
The Microsoft SQL Server client software must be installed in order for you to use the Database Creation Wizard to create and initialize the WinINSTALL database. Except for the web-based installation, all other installation methods offer the option of installing the client software.
• Oracle Client Software
If you are using Oracle® as your database, you must first manually install the client software in order to have database connectivity. Database connectivity is required for you to run the Console or use the Database Creation Wizard to initialize your WinINSTALL database.
WARNING: .If it is necessary to upgrade to or install Windows Installer 3.1, the machine will reboot at the end of the installation.
WARNING: .If it is necessary to upgrade to or install Windows Installer 3.1 as part of the console setup, a reboot will be required.
WARNING: .If an earlier version of MDAC is already installed at the time when the WinINSTALL console is installed, the MDAC upgrade is liable to cause the machine to reboot.
I N T R O D U C T I O NRequirements
6 WinINSTALL Desktop Management Suite and Desktop Availability Suite
1
D I S P L A Y• Resolution: 1024 X 768 or higher
• Color: 16-bit or better
W I N I N S T A L L R E F E R E N C E M A C H I N E ( C L E A N C L I E N T M A C H I N E O N W H I C H P A C K A G E S A R E D I S C O V E R E D )
• Windows XP / Windows 2000 / 2003 / 98 with IE 6 / 95 with IE 5.5 and WinSock 2 / Windows NT 4.0 with sp 6a and IE 6
NOTE: A package must be created on the same operating system as the client workstation on which the package will be installed.
• Microsoft Windows Installer 3.1 on Windows 2000 and above, Windows Installer 2.0 on Windows NT and Windows 95/98
NOTE: This file is required only if you are building Windows Installer packages. It is included with Windows XP/2000 but must be separately installed with Windows NT. When Windows 9x is installed on the Reference Machine, you cannot create an .MSI package directly with Discover. You must first create an .NAI package and then convert it to .MSI.
W I N I N S T A L L W O R K S T A T I O N S • Windows XP / Windows 2000 / 98 with IE 6 / 95 with IE 5.5 and WinSock 2 / Windows
NT 4.0 with sp 6a and IE 6
NOTE: Any package being installed must have been built on a machine with the same operating system as the client workstation.
• Microsoft Windows Installer 3.1 on Windows 2000 and above, Windows Installer 2.0 on Windows NT and Windows 95/98
Windows Installer is included with Windows XP/2000 but may not necessarily be the correct version. Windows Installer must be separately installed with Windows NT or Windows 95/98. Deploying the WinINSTALL Agent will automatically install or upgrade Windows Installer as necessary.
WARNING: .If it is necessary to upgrade to or install Windows Installer 3.1 during the WinINSTALL agent deployment, the machine will reboot at the end of the installation.
. . .
. .I N T R O D U C T I O NRequirements
December, 2008 Installation Guide 7
PREBOOT EXECUTION REQUIREMENTSThe Preboot eXecution Environment (PXE) is used to boot computers using a network interface card without relying on available data storage devices (like hard disks) or installed operating systems.
B A S I C P X E R E Q U I R E M E N T SThere are several requirements for a client machine to be booted with PXE:
• The machine basic input/output system (BIOS) must support “Network” as a boot device.
• The machine network interface card (NIC) must support the PXE standard (first introduced in the PC98 specification). Optionally the NIC can contain the PXE boot read-only memory (ROM). NICs that contain the ROM are often called “managed NICs” or “NICs for managed PCs.” If the NIC supports PXE but does not contain the ROM image, a network boot is only possible by booting the system with a floppy disk containing the ROM image. Almost all PCs sold after 1998 support “Network” boot in the BIOS and most NICs support PXE.
There are two distinct versions of PXE:
• Dynamic Host Configuration Protocol (DHCP) PXE is used across most network environments.
• Remote Program Load (RPL) PXE is most often used in NetWare environments.
PXE-capable NICs support either DHCP-based, RPL-based, or both. A PXE-capable NIC that supports only RPL does not work in a Windows environment.
The PXE requirement of DHCP imposes additional restrictions on the network setup. First, use of PXE is not possible in a static IP environment. Second, since DHCP does not typically cross subnets, each subnet containing a DHCP server must also contain a PXE server. For example, a company with offices in Los Angeles and New York City would typically have a DHCP server at each site. Such a setup would also require a PXE server at each site. Client machines in Los Angeles could not connect to a PXE server in New York.
W I N I N S T A L L P X E C L I E N T R E S E T R E Q U I R E M E N T SWinINSTALL PXE Client Reset requires the following components, over and above those for the rest of the WinINSTALL product:
DHCP Server
The network must be configured to use DHCP. Starting in WinINSTALL v10, you do not need to add options 66 and 67 to your existing DHCP servers. WinINSTALL PXE will work without configuring your DHCP servers, including "home" DHCP router/servers from companies like LinkSys, NetGear, D-Link, and SonicWall.
I N T R O D U C T I O NRequirements
8 WinINSTALL Desktop Management Suite and Desktop Availability Suite
1
There are two exceptions to this:
• If you are an existing WinINSTALL customer upgrading to version 10, you will need to modify your DHCP servers to remove options 66 and 67.
• If you install a PXE server agent onto a Windows machine, which is also a primary DHCP server, you will have to manually set options 66 and 67. This is because the primary DHCP server has ownership of the ports necessary for the proxy DHCP server. The proxy DHCP server is a small dedicated DHCP server that functions in conjunction with existing DHCP servers. Installing a PXE server agent onto a primary DHCP server is discouraged.
The proxy DHCP server offers the following benefits:
• No need to add options 66 and 67 to your existing DHCP servers.
• WinINSTALL PXE works with all DHCP servers.
• Less configuration, the wizard and property pages to configure the DHCP options for PXE have been removed.
• Set up multiple proxy DHCP servers per subnet (if you desire) for redundancy.
Windows Install Set
Operating system installation files must be provided for installation on client machines. These files are provided via the PXE client reset (CR) Server property sheet; each PXE server will have its own copy of these files, but the user must use that server’s property sheet to install the files. Windows 2000, Windows XP, and Windows 2003 can be installed in this fashion.
PXE-Capable Client
Every client machine must be PXE-capable. This means the BIOS must support Network as a boot device and the NIC must be DHCP-PXE-capable.
ADMINISTRATOR REQUIREMENTSYou must have administrative rights for all of the required hardware. To use WinINSTALL in a production deployment, you should also have:
• An in-depth understanding of your company network and security policies.
• The security rights or permissions required to access network resources.
• A solid understanding of all the Windows platforms in use on the network.
• A working knowledge of the Windows registry. (When WinINSTALL discovers an application, you may need to modify a registry entry to fit your network needs. An understanding of the Windows registry can be invaluable
. . .
. .I N T R O D U C T I O NRequirements
December, 2008 Installation Guide 9
when building packages. You should familiarize yourself with the use of REGEDIT.EXE and REGEDT32.EXE, and the differences between these two registry editors. These two utilities can be found in the \Windows (or \Winnt) and \Windows\System32 or (\Winnt\System32) directories, respectively.
• An understanding of the Microsoft Windows installer (MSI) and MSI technology. (When working with MSI applications, knowledge of the MSI technology and terminology is helpful. You should have a solid understanding of the registry, MSI table relationships, and MSI properties.)
For certain complex situations, some users prefer to create scripts. WinINSTALL includes support for user-written scripts to execute Console operations and to modify and extend Installer functionality for WinINSTALL (.NAI) packages.
I N T R O D U C T I O NWinINSTALL Software Components
10 WinINSTALL Desktop Management Suite and Desktop Availability Suite
1
. . . . . . . . . . . . . . . . . . . . . . . . . . . . . . . . . . . . . . . . . . . . . . . . . . . . W I N I N S T A L L S O F T W A R E C O M P O N E N T SWinINSTALL is a distributed application with several components that are typically installed on different computers. These components must be installed properly so that they can work together to transport data and requests.
The WinINSTALL components include the Console, share, database, and agents. These components are described below:
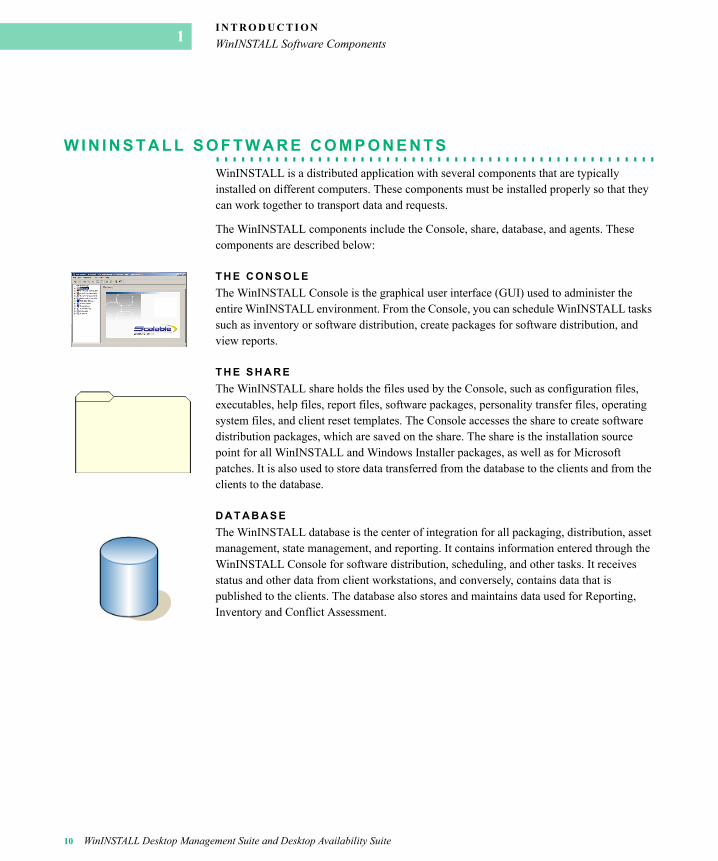
T H E C O N S O L EThe WinINSTALL Console is the graphical user interface (GUI) used to administer the entire WinINSTALL environment. From the Console, you can schedule WinINSTALL tasks such as inventory or software distribution, create packages for software distribution, and view reports.
T H E S H A R EThe WinINSTALL share holds the files used by the Console, such as configuration files, executables, help files, report files, software packages, personality transfer files, operating system files, and client reset templates. The Console accesses the share to create software distribution packages, which are saved on the share. The share is the installation source point for all WinINSTALL and Windows Installer packages, as well as for Microsoft patches. It is also used to store data transferred from the database to the clients and from the clients to the database.
D A T A B A S EThe WinINSTALL database is the center of integration for all packaging, distribution, asset management, state management, and reporting. It contains information entered through the WinINSTALL Console for software distribution, scheduling, and other tasks. It receives status and other data from client workstations, and conversely, contains data that is published to the clients. The database also stores and maintains data used for Reporting, Inventory and Conflict Assessment.
. . .
. .I N T R O D U C T I O NWinINSTALL Data Flow
December, 2008 Installation Guide 11
S E R V E R A G E N TThe Server Agent moves data back and forth between the WinINSTALL database and the WinINSTALL share. It gathers data on the share that is sent by the client workstations, and then merges that data into the database. Conversely, the WinINSTALL Agent publishes data from the database to the share, where it is delivered to the appropriate workstations. Each WinINSTALL server is associated with a specific WinINSTALL share.
C L I E N T A G E N TEach workstation managed by WinINSTALL has a client agent that controls the movement of data between the client workstation and the WinINSTALL share. The client agent also controls desktop management functions on the workstation, including scheduling and software distribution.
Each client agent is assigned to a specific WinINSTALL server agent.
. . . . . . . . . . . . . . . . . . . . . . . . . . . . . . . . . . . . . . . . . . . . . . . . . . . . W I N I N S T A L L D A T A F L O WThe following diagram shows how the WinINSTALL components work together to send data and requests through the system.
Server Agent
ClientAgent
ShareConsole
Database
I N T R O D U C T I O NAccess Requirements for the WinINSTALL Accounts
12 WinINSTALL Desktop Management Suite and Desktop Availability Suite
1
D A T A F L O W F R O M T H E C O N S O L E T O T H E W O R K S T A T I O N SWinINSTALL tasks such as software distribution and inventory are initiated at the WinINSTALL Console. From the Console, the administrator accesses the share to create software distribution packages. The administrator also uses the Console to enter information in the database that controls software distribution, inventory requests, and other tasks.
The Server agent forwards information from the database to a folder on the share that is monitored by client agents. The client agents pull this information from the share and execute the requests. They also pull data (for example, software packages) required for each request from the share.
D A T A F L O W F R O M T H E C L I E N T W O R K S T A T I O N S T O T H E C O N S O L EAs the clients execute requests, they send status data to special folders on the WinINSTALL share. They also gather data (for example, inventory data) from their local machines and move that data to the share.
The server agent then merges the data on the share into the database. This data is then sent to the Console in the form of reports and status messages.
. . . . . . . . . . . . . . . . . . . . . . . . . . . . . . . . . . . . . . . . . . . . . . . . . . . . A C C E S S R E Q U I R E M E N T S F O R T H E W I N I N S T A L L A C C O U N T SThere are three types of WinINSTALL accounts: the Console user, the client agent, and the server agent.
The Console user account is the domain account assigned to the user who logs on to the Console.
WinINSTALL server and client agent accounts are assigned when agents are deployed. They can be changed at any time after deployment. WinINSTALL agents can be assigned a domain account, or they can be configured to run under the Local System account.
CONSOLE USER ACCOUNTThe account used to log on to the Console must have the following permissions:
• Administrative rights on every machine managed by WinINSTALL.
• Full access to the entire share.
• Database read/write access. If you use Windows authentication for the database, this account must have database write permissions so that you can change agent settings. (If you use SQL authentication, you can use the SQL user credentials.)
. . .
. .I N T R O D U C T I O NAccess Requirements for the WinINSTALL Accounts
• Read access to the entire WinINSTALL share, plus Full (read/write) access to the \CFGFiles and \TxFiles folders. For Personality Transfer operations, client agents also require full access to the \Migration\Repository folder and its subfolders.
• Administrative rights on every client machine managed by WinINSTALL.
SERVER AGENT ACCOUNTSServer agent accounts require full access to the entire share.
If you use Windows authentication for the database, the Server agent account must have database write permissions so that you can change agent settings. (If you use SQL authentication, you can use the SQL user credentials.)
ABOUT SHARE AND FOLDER PERMISSIONSThe WinINSTALL share is installed with Full access for Everyone. Share permissions are typically manually adjusted after the share is installed.
When you modify share permissions, you need to verify that the desired settings have propagated to the share sub folders. You might need to set the sub folder permissions manually.
NOTE: For information about local accounts, see LocalSystem Account on the Microsoft Developer Network.
I N T R O D U C T I O NAccess Requirements for the WinINSTALL Accounts
14 WinINSTALL Desktop Management Suite and Desktop Availability Suite
inINSTALL installations vary in size and complexity. Implementations can range from an installation that manages a few hundred workstations or less at a single site to large enterprise implementations that manage thousands of
workstations in various geographical locations. The approach you use to deploy and configure WinINSTALL will depend on your organization’s scale, geographical dispersion, and business policies.
I n t h i s c h a p t e r• “Best Practices” on page 16 lists proven practices that ensure the best WinINSTALL
performance.
• “Set Up a Primary Site” on page 16 shows how to set up a basic primary site that can handle a large number of workstations at a single location. (You will need to set up a primary site for most WinINSTALL deployments.)
• “Add a Console” on page 30 provides instructions on adding a Console to a site, so that you can manage WinINSTALL from more than one workstation.
• “Add a Secondary Share” on page 31 describes how to add a share to a site to improve performance and provide failover support.
• “Create a Secondary Site” on page 34 provides instructions for creating a secondary site to manage branch offices in other geographical locations or to handle a large number of workstations.
• “Other Ways to Manage Machines and Install Agents” on page 37 offers a list of common tasks, and where you can find additional information on how to acommplish each in the WinINSTALL Admininstrator’s Guide.
W
I N S T A L L I N G A N D D E P L O Y I N G W I N I N S TA L LBest Practices
16 WinINSTALL Desktop Management Suite and Desktop Availability Suite
2
. . . . . . . . . . . . . . . . . . . . . . . . . . . . . . . . . . . . . . . . . . . . . . . . . . . . B E S T P R A C T I C E S
Use the following best practices for any WinINSTALL installation.
. . . . . . . . . . . . . . . . . . . . . . . . . . . . . . . . . . . . . . . . . . . . . . . . . . . . S E T U P A P R I M A R Y S I T E
You will use a primary installation site, or variations of it, for any WinINSTALL deployment.
At a minimum, a primary site includes a single share, Console, database, and server agent. It also includes client workstations with a client agent on each workstation. The share and server can be installed on different computers or on the same computer.
A basic primary site is shown in the following Primary Site diagram.
NOTE: In large environments, the database resides on a database server, as shown in the Primary Site diagram. In small environments (or evaluation installations), the database typically resides on the administrator workstation.
Use one database for the entire WinINSTALL enterprise implementation.
Schedule regular database backups to maintain a fast database connection. Without regular backups, the transaction log file size increases and causes your database performance to degrade.
When setting up a secondary site for a branch office in another location, set up a server and a share at the branch location.
Do not assign the same primary share to more than one server. Each server should have its own primary share.
. . .
. .I N S T A L L I N G A N D D E P L O Y I N G W I N I N S TA L LSet Up a Primary Site
December, 2008 Installation Guide 17
WHAT YOU NEED TO DO TO SET UP A PRIMARY S ITEUse the following process to set up a primary site.
Install the WinINSTALL Console and share.
Set up the WinINSTALL database.
Specify the share and database for the Console.
Add the server computer and deploy the server agent.
Add the client workstations, deploy the client agents, and associate them with the server agent.
Primary Site
Server Agent
DatabaseShareConsole
Client Agents
1
2
4
5
3
1
2
3
4
5
I N S T A L L I N G A N D D E P L O Y I N G W I N I N S TA L LSet Up a Primary Site
18 WinINSTALL Desktop Management Suite and Desktop Availability Suite
2
B e f o r e y o u s t a r t• Determine which computers to use for the server agent, the share, and the Console.
Make sure you have administrative access to these computers and all of the client machines you plan to manage.
• Make sure you have a clean reference machine or access to a virtual machine.
• Make sure that you understand the access rights required for the WinINSTALL Console user and the agent accounts. (See “Access Requirements for the WinINSTALL Accounts” on page 12.)
• Decide which of the following databases to use and make sure you have performed the following preliminary steps for your database:
INSTALL THE WININSTALL CONSOLE AND SHARE1 Double-click the downloaded WinINSTALL file (for example, wininstalldas-10-
eval-w32-SQLE.exe).
2 Follow the instructions on the WinINSTALL setup wizard.
The wizard checks the version of the Windows Installer on the workstation and upgrades it if necessary. If it finds a prior installation of WinINSTALL, it aborts the installation and prompts you to uninstall the earlier version. If Windows Installer 3.1 is upgraded or installed as part of the Console setup, the workstation must be rebooted.
3 When prompted, select the following options:
• Install the WinINSTALL Share
• Install the WinINSTALL Console
For Do this
Microsoft SQL Server 2005 Express Edition
• No preliminary steps are required; no special hardware is required.
NOTE: SQL Server 2005 Express Edition supports smaller installations.
Microsoft SQL Server 2000
• Make sure you have administrative access to the database and know the database server name.
Oracle 9i 1. Use Oracle tools to create the database. Make sure that you have administrative access to the database and know the database service name.
2. Install client software on the administrator workstation on which you are installing WinINSTALL.
. . .
. .I N S T A L L I N G A N D D E P L O Y I N G W I N I N S TA L LSet Up a Primary Site
December, 2008 Installation Guide 19
4 Select database options as follows:
For this database Do this
Microsoft SQL Server 2005 Express Edition
1. Select Install SQL Server 2005 Express Edition.
2. Select Show advanced SQL Server 2005 Express Edition properties, and then specify whether to use Windows integrated security (default) or SQL security, and whether to enable network access.
3. Select Open the Database Wizard to use the database wizard to create your database (recommended).
4. When the installation is complete, follow the instructions to “Configure a database with the database setup wizard” on page 20.
Microsoft SQL Server or Oracle
1. Choose not to install SQL Server 2005 Express Edition and then select which database to use.
2. If you want to run the database wizard from your console machine, select Open the Database Wizard.
CAUTION: If you are using Microsoft SQL Server and your console machine does not have the Microsoft SQL Server client software, do not select Open the Database Wizard. (This wizard requires the database client software.) You can run the database wizard on the SQL Server machine (from the WinINSTALL share) later to set up the database.
3. When the installation is complete, follow the instructions to “Configure a database with the database setup wizard” on page 20.
I N S T A L L I N G A N D D E P L O Y I N G W I N I N S TA L LSet Up a Primary Site
20 WinINSTALL Desktop Management Suite and Desktop Availability Suite
2
SET UP THE WININSTALL DATABASEBefore starting the Console, use the following instructions to create and configure the WinINSTALL database. You can set up the WinINSTALL database in either of two ways: automatically, using the WinINSTALL Database Setup Wizard, or from a command line. Each method is explained in detail.
NOTE: The database schemas for Microsoft databases and Oracle databases are slightly different. A complete listing of all tables in the WinINSTALL database is included in the file DBSchema.htm. On the WinINSTALL share, this file is in the \Bin\Help folder. On Console machines, it is in the \Program Files\OnDemand\WinINSTALL\Help folder.
This schema information is helpful when using third-party database mining or reporting tools such as Crystal Designer to create custom queries and reports. WinINSTALL also includes two .DDL files, which can be used to initialize a WinINSTALL database without the Database Setup Wizard. These files, also located in the WinINSTALL Share \Bin directory, are named WINSTALL.DB.DDL (for Microsoft databases) and WINSTALL.DB_ORC.DDL (for Oracle databases).
C o n f i g u r e a d a t a b a s e w i t h t h e d a t a b a s e s e t u p w i z a r dThe WinINSTALL Database Setup Wizard either creates and initializes a Microsoft SQL Server or SQL Server 2005 Express Edition database, or initializes an existing Oracle 9i database.
NOTES:• If you are using an Oracle database, you must create the WinINSTALL data-
base before initializing it with the WinINSTALL Database Setup Wizard.
• When you install WinINSTALL, you have theoption of running the Database Setup Wizard at the end of setup. Alternatively, after you have installed Win-INSTALL, you can open the database wizard in the WinINSTALL share bin directory as shown in the following instructions.
. . .
. .I N S T A L L I N G A N D D E P L O Y I N G W I N I N S TA L LSet Up a Primary Site
December, 2008 Installation Guide 21
1 If you are using SQL Server 2005 Express Edition and the database service is not running, start it. (The SQL Server 2005 Express Edition database is running when the database service icon appears in the system tray with the green arrow on.)
2 If the WinINSTALL Database Setup wizard is not open, browse to the WinINSTALL share, and in the Bin folder, double-click WIDBSetup.exe.
3 When prompted:
TIP: If the database server name is not on the list, you can type it in.
For Do this
Microsoft SQL 1. Specify the server name.
2. Choose Windows Authentication or enter the credentials (username and password) required to access the database server.
NOTE: See “Access Requirements for the WinINSTALL Accounts” on page 12.
3. Click Next and then click Create.
Oracle 1. Specify the service name and enter the credentials (username and password) required to access the database server.
2. Click Next and then click Initialize.
Database Service Icon
I N S T A L L I N G A N D D E P L O Y I N G W I N I N S TA L LSet Up a Primary Site
22 WinINSTALL Desktop Management Suite and Desktop Availability Suite
2
C o n f i g u r e a M i c r o s o f t D a t a b a s e f r o m a c o m m a n d l i n e1 Open a command-line window and do one of the following:
• If you accepted the defaults during installation or if you want to use Windows authentication, create the database by entering:
C:\>OSQL –E -Q “create database mydataBase”
where mydataBase is the database name.
• If you did not accept the defaults during installation, or if you want to use SQL Server authentication, create the database by entering:
C:\>OSQL -U sa -P <password> -Q “create database mydataBase”
where mydataBase is the database name.
2 To create the tables needed by WinINSTALL, use one of the following commands (change the database name as needed).
• If you accepted the defaults during installation or are using Windows authentication, create the tables using the following command:
• If you did not accept the defaults during installation or are using SQL Server authentication, create the tables using the following command:
C:\>OSQL -U sa -P <p/w> -d mydataBase -I -i \\server\WIShare\Bin\WINSTALL.DB.DDL
As the tables are created and populated, numbers are displayed. After the database is created, a command prompt is displayed.
. . .
. .I N S T A L L I N G A N D D E P L O Y I N G W I N I N S TA L LSet Up a Primary Site
December, 2008 Installation Guide 23
C o n f i g u r e a n O r a c l e d a t a b a s e f r o m a c o m m a n d l i n e
NOTE: Before you can configure an Oracle database for WinINSTALL, the database must be created and its service name must be available. The service name mappings are found in the file TNSNAMES.ORA in the \Oracle\ora90\network\admin directory.
1 To initialize the WinINSTALL database, run the oracle utility SQLPLUS, found in the Oracle \bin directory (for example, C:\Oracle\ora90\bin). This utility processes the supplied DDL script WINSTALL.DB_ORC.DDL, located in the WinINSTALL Share \bin directory.
2 After you have verified that the Oracle database is created, open a command prompt window to execute sqlplus.exe.
3 To use SQLPLUS to execute the DDL script, enter the following command:
This command line instructs sqlplus to login as the user SYSTEM, with a password of password, to the database indicated by MYDBSERVICENAME and to execute the DDL file C:\WINSTALL.DB_ORC.DDL.
If you do not supply a service name after the password, SQLPLUS connects to the default (local) database.
NOTE: When creating a Japanese-language Oracle database, the following language specifications are recommended: Database Character Set: JA16SJIS National Character Set: AL16UTF16
I N S T A L L I N G A N D D E P L O Y I N G W I N I N S TA L LSet Up a Primary Site
24 WinINSTALL Desktop Management Suite and Desktop Availability Suite
2
SPECIFY THE WININSTALL SHARE AND DATABASE FOR THE CONSOLEThe first time you open the WinINSTALL Console, the WinINSTALL Default Settings wizard opens. Use this wizard to configure WinINSTALL as shown in the following instructions.
1 From the Start menu, choose All Programs | Scalable WinINSTALL | WinINSTALL Console.
2 On the WinINSTALL Default Settings wizard, verify the WinINSTALL share path for the WinINSTALL Console and click Next.
3 Click Choose Database.
4 On the Data Link Properties dialog box, on the Provider Tab, select the type of database you are using and click Next. (If using SQL Server 2005 Express Edition or Microsoft SQL Server 2000, select Microsoft OLE DB Provider for SQL Server.)
5 On the Connection Tab, select the name of the system the database is running on.
6 If you set up the database to use Windows authentication, select that option. If not, choose to use a specific user name and password.
7 On the Select the Database on the server list, select the name of the database.
8 Click Test Connection.
If the connection is successful, the “Test Connection Succeeded” message is displayed.
9 After the connection test succeeds, click OK.
. . .
. .I N S T A L L I N G A N D D E P L O Y I N G W I N I N S TA L LSet Up a Primary Site
December, 2008 Installation Guide 25
The WinINSTALL Console is displayed.
The Console window has two major panes:
The Tree pane is the left pane in the Console. The top-level nodes in the Tree pane represent major functional areas of the product. Selecting a node in the Tree pane displays context sensitive information in the Data pane (on the right of the window). Selecting sub-nodes displays nested functionality.
The Data pane is the right pane of the Console. Detailed context-sensitive information displays in a tabbed format, with the appearance and content determined by the node that is selected in the Tree pane. In the Data pane, you can modify detailed information about the selected node or sub-node.
Tree Pane
Data Pane
I N S T A L L I N G A N D D E P L O Y I N G W I N I N S TA L LSet Up a Primary Site
26 WinINSTALL Desktop Management Suite and Desktop Availability Suite
2
ADD MACHINES AND DEPLOY AGENTSAfter you have set up the Console, share, and database, you must add the WinINSTALL server and the client workstations you plan to manage to the database and deploy WinINSTALL agents to these machines.
The following instructions show how to use the Add Machines Wizard to add these machines and deploy the agents. You can also use the Console interface, a script, or a package. (See “Other Ways to Manage Machines and Install Agents” on page 37.)
The Add Machines Wizard is the simplest method of adding machines to the Console. With this wizard, you can add single or multiple machines, either by browsing the network or by entering the machine information manually. Automatically importing machines from the network is the easiest way to add machines to the Console. However, at times, you may want to enter a machine’s information manually. For example, if you have added a machine to the network, but that information has not yet propagated throughout the network directory, you can add the machine manually rather than waiting for it to appear in the list.
A d d t h e s e r v e r a n d d e p l o y t h e s e r v e r a g e n t
CAUTION: Do not add more than one server at a time. Adding multiple servers at once assigns them all the same primary share. Each server should be assigned its own primary share.
1 From the WinINSTALL Console tree view, expand the Machines list and then select All Machines.
2 On the Machines menu, choose Add Machines Wizard.
TIP: You can also open the Add Machines Wizard by clicking Add on the Data View (the right pane of the Window) or by clicking on the toolbar.
3 On the Welcome to the Add Machines Wizard panel, select Add one or more servers and then select Browse the network to add machines.
4 On the Add Server from Network panel, click Add and browse to the machine you want to add.
CAUTION: Do not select Add machines even if duplicate names exist in the WinINSTALL database unless you have a specific reason to do so. Duplicate machine entries in the database can cause problems.
5 On the Specify Server Settings panel, verify the share path.
. . .
. .I N S T A L L I N G A N D D E P L O Y I N G W I N I N S TA L LSet Up a Primary Site
December, 2008 Installation Guide 27
6 On the Completing the Add Machines Wizard panel, select Deploy WinINSTALL agent to the machines and then click Finish.
7 On the Deploy WinINSTALL Agent dialog box, under Service Credentials, set the credentials for the WinINSTALL agent by selecting one of the following options:
When the machine is added to the database, the machine name is displayed in the Data view pane. When the server is deployed, the status of the server in the Data View pane changes to running.
NOTE: For information about agent service credentials, see “Access Requirements for the WinINSTALL Accounts” on page 12.
To Do this
Use the local system account
1. Select Use the Local System Account.
2. Make sure the agent has access to the WinINSTALL database.
3. If you are using a workgroup environment, configure the WinINSTALL share as a null session share and make sure the machine account has full access privileges on the share. (You can do this by explicitly granting appropriate access to that machine or by granting such access to a group that includes that machine, such as Domain Computers or Everyone.)
NOTES:• For local system accounts in an Active Directory environment, the agent
authenticates to the share using the machine account. • You can use local system accounts only for Active Directory or
workgroup environments. A local system account has the following advantages:• It has access only to the local machine, so it cannot cause problems
on other machines if it is exposed to attackers.• Because it does not require a password, it is simpler to maintain than
a service account.• It isn’t subject to login failures due to network problems, permissions
issues, and UAC constraints in Vista.
Set up a service account for the agent
1. Select Use this account.
2. In the User name box, enter the domain qualified account name (for example, DOMAIN\username). Then, in the password box, enter the password for the account.
3. Make sure the agent account has the full access privileges on the share. (As with any domain user, access privileges can be assigned directly to a specific user or to a group that includes the user, such as Everyone.)
I N S T A L L I N G A N D D E P L O Y I N G W I N I N S TA L LSet Up a Primary Site
28 WinINSTALL Desktop Management Suite and Desktop Availability Suite
2
A d d c l i e n t s a n d d e p l o y c l i e n t a g e n t s
NOTE: Before you add clients, you must add a server and server agent.
1 From the WinINSTALL Console tree view, expand the Machines list and then select All Machines.
2 On the Machines menu, choose Add Machines Wizard.
3 On the Welcome to the Add Machines Wizard panel, select Add one or more workstations and then choose Browse the network to add machines.
4 On the Select Server panel, select which server to assign to the client agent. (Client agents must be assigned to a WinINSTALL server.)
5 On the Add Workstations from Network Panel, click Add and browse to the machines to add.
CAUTION: Do not select Add machines even if duplicate names exist in the WinINSTALL database unless you have a specific reason to do so. Duplicate machine entries in the database can cause problems.
6 On the Completing the Add Machines Wizard panel, select Deploy WinINSTALL agent to the machines and click Finish.
. . .
. .I N S T A L L I N G A N D D E P L O Y I N G W I N I N S TA L LSet Up a Primary Site
December, 2008 Installation Guide 29
7 On the Deploy WinINSTALL Agent dialog box, under Service Credentials, do one of the following:
The workstations are added to the WinINSTALL Console machine list. When the agents are deployed, their status in the list changes to running.
To Do this
Use the local system account
1. Select Use the Local System Account.
2. If you are using a workgroup environment, configure the WinINSTALL share as a null session share and make sure the machine account has full access privileges on the share. (You can do this by explicitly granting appropriate access to that machine or by granting such access to a group that includes that machine, such as Domain Computers or Everyone.)
NOTES:• For local system accounts in an Active Directory environment, the agent
authenticates to the share using the machine account.• You can use local system accounts only for Active Directory or
workgroup environments.
Set up a service account for the agent
1. Select Use this account.
2. In the User name box, enter the domain qualified account name (for example, DOMAIN\username). Then, in the password box, enter the password for the account.
3. Make sure the agent account has the full access privileges on the share. (As with any domain user, access privileges can be assigned directly to a specific user or to a group that includes the user, such as Everyone.)
I N S T A L L I N G A N D D E P L O Y I N G W I N I N S TA L LAdd a Console
30 WinINSTALL Desktop Management Suite and Desktop Availability Suite
2
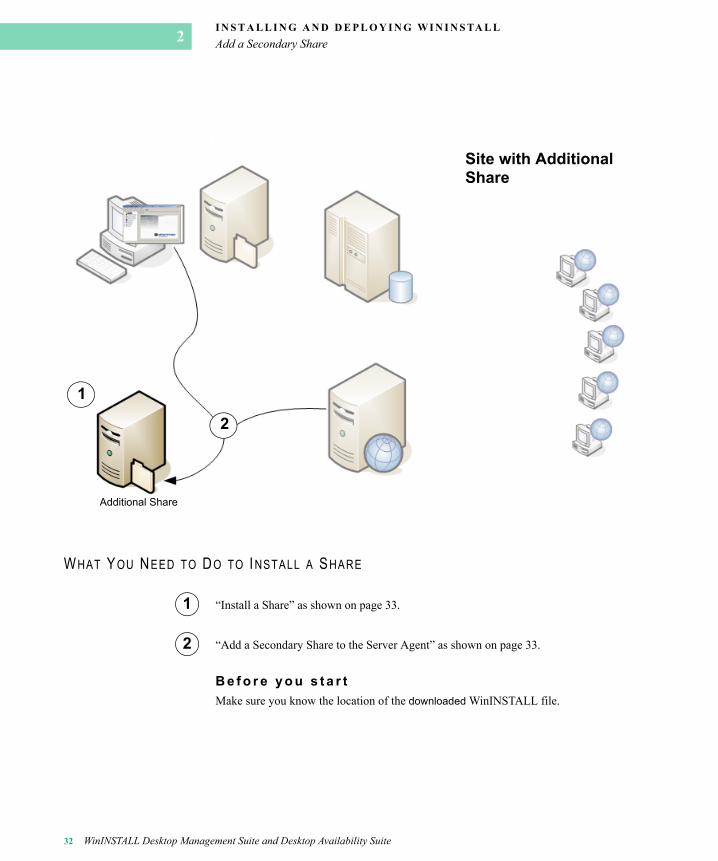
. . . . . . . . . . . . . . . . . . . . . . . . . . . . . . . . . . . . . . . . . . . . . . . . . . . . A D D A C O N S O L E If you want to manage WinINSTALL from more than one computer, you will need to install an additional Console.
WHAT YOU NEED TO DO TO I NSTALL A CONSOLE
B e f o r e y o u s t a r tMake sure you know the location of the primary WinINSTALL share.
• “Install the WinINSTALL Console” as shown on page 31.
Site with Additional Console
Additional Console
. . .
. .I N S T A L L I N G A N D D E P L O Y I N G W I N I N S TA L LAdd a Secondary Share
December, 2008 Installation Guide 31
INSTALL THE WININSTALL CONSOLE1 From the workstation that you want to use for the new Console, navigate to the primary
WinINSTALL share.
2 In the Bin folder, double-click the file WIConsole.msi and then follow the instructions on the Scalable WinINSTALL Console Setup Wizard.
TIP: On the Custom Setup panel, you can specify the folder in which to install the Console.
. . . . . . . . . . . . . . . . . . . . . . . . . . . . . . . . . . . . . . . . . . . . . . . . . . . . A D D A S E C O N D A R Y S H A R E
You can provide failover insurance and improve WinINSTALL performance of larger sites by adding a secondary share.
Consider adding a secondary share to improve performance when:
• You have clients at a remote site with limited connectivity to the share at the local site.
• You need to load balance the network traffic generated by the agents.
I N S T A L L I N G A N D D E P L O Y I N G W I N I N S TA L LAdd a Secondary Share
32 WinINSTALL Desktop Management Suite and Desktop Availability Suite
2
.
WHAT YOU NEED TO DO TO I NSTALL A SHARE
“Install a Share” as shown on page 33.
“Add a Secondary Share to the Server Agent” as shown on page 33.
B e f o r e y o u s t a r tMake sure you know the location of the downloaded WinINSTALL file.
2
1
2
Site with Additional Share
Additional Share
1
2
. . .
. .I N S T A L L I N G A N D D E P L O Y I N G W I N I N S TA L LAdd a Secondary Share
December, 2008 Installation Guide 33
INSTALL A SHARE1 From the server on which you want to install the share, navigate to the downloaded
WinINSTALL file (for example, wininstalldas-10-eval-w32-SQLE.exe).
2 Double-click the downloaded file and follow the setup instructions.
3 On the Customer information panel, select the version of the product and enter the CD key.
4 Accept or browse for the share location. The default location (c:\WinINSTALL) is generally appropriate.
5 On the Selecting WinINSTALL Share panel, select Install the WinINSTALL Share, and then in Share Name, enter the name of the share (for example, MYSHARE).
6 When prompted, choose not to install the Console, SQL Server 2005 Express Edition, or the database setup.
ADD A SECONDARY SHARE TO THE SERVER AGENT1 From the Start menu, choose All Programs | Scalable WinINSTALL | WinINSTALL Console.
2 On the Console tree view, in the Machines list, select All Machines.
3 In the Data pane, right click on the row that has the server agent you want to assign to the share and select Properties.
4 In the Machine Properties dialog box, under Server Settings, click .
5 In the Add Share dialog box, in the Specify a share path box, enter a share path (for example, \\myServerName\MyNewShareName).
6 Under Database processing, select the server name.
The new share is displayed in the Machine Properties dialog box, under WinINSTALL Shares for workstations assigned to this server.
I N S T A L L I N G A N D D E P L O Y I N G W I N I N S TA L LCreate a Secondary Site
34 WinINSTALL Desktop Management Suite and Desktop Availability Suite
2
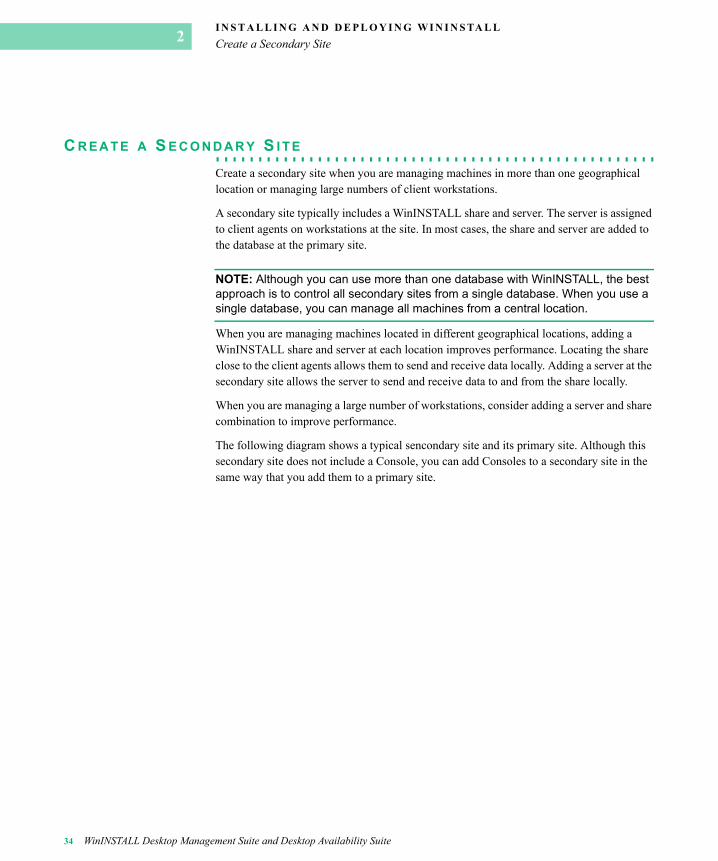
. . . . . . . . . . . . . . . . . . . . . . . . . . . . . . . . . . . . . . . . . . . . . . . . . . . . C R E A T E A S E C O N D A R Y S I T E
Create a secondary site when you are managing machines in more than one geographical location or managing large numbers of client workstations.
A secondary site typically includes a WinINSTALL share and server. The server is assigned to client agents on workstations at the site. In most cases, the share and server are added to the database at the primary site.
NOTE: Although you can use more than one database with WinINSTALL, the best approach is to control all secondary sites from a single database. When you use a single database, you can manage all machines from a central location.
When you are managing machines located in different geographical locations, adding a WinINSTALL share and server at each location improves performance. Locating the share close to the client agents allows them to send and receive data locally. Adding a server at the secondary site allows the server to send and receive data to and from the share locally.
When you are managing a large number of workstations, consider adding a server and share combination to improve performance.
The following diagram shows a typical sencondary site and its primary site. Although this secondary site does not include a Console, you can add Consoles to a secondary site in the same way that you add them to a primary site.
. . .
. .I N S T A L L I N G A N D D E P L O Y I N G W I N I N S TA L LCreate a Secondary Site
December, 2008 Installation Guide 35
WHAT YOU NEED TO DO TO CREATE A SECONDARY S ITE
“Install a Share” as shown on page 33 on a machine at the secondary site.
“Add a Second Server” as shown on page 36 to add the server machine and server agent at the secondary site.
“Add clients and deploy client agents” as shown on page 28 to the new server.
To add a Console at the secondary site, install the Console from the share at the secondary site as shown in “Add a Console” on page 30.
1
2
3
Secondary Site
Additional Server Agent
Additional Share
Client Agents
Primary Database
1
2
3
I N S T A L L I N G A N D D E P L O Y I N G W I N I N S TA L LCreate a Secondary Site
36 WinINSTALL Desktop Management Suite and Desktop Availability Suite
2
B e f o r e y o u s t a r tDetermine on which machines to install the server and share, and make sure you know the network names of those machines.
ADD A SECOND SERVER 1 On a machine at the primary site, open the WinINSTALL Console.
2 From the WinINSTALL Console Machines menu, choose Add Manually.
3 On the Add Machine dialog box, in the Machine name box, enter the name of the machine to install the server on.
4 In the Machine role list, select Server.
5 Under WinINSTALL Shares for the workstation assigned to this server list, select and remove each existing share by clicking .
6 Click .
7 On the Add Share dialog box, under Specify a share path, enter or browse to the new share you created for the secondary site.
8 Under Database processing, in the Server that owns this share list, select the name of the new server.
9 On the WinINSTALL Console All Machines data view, on the Machines tab, right click on the new server and select Deploy Agent.
. . .
. .I N S T A L L I N G A N D D E P L O Y I N G W I N I N S TA L LOther Ways to Manage Machines and Install Agents
December, 2008 Installation Guide 37
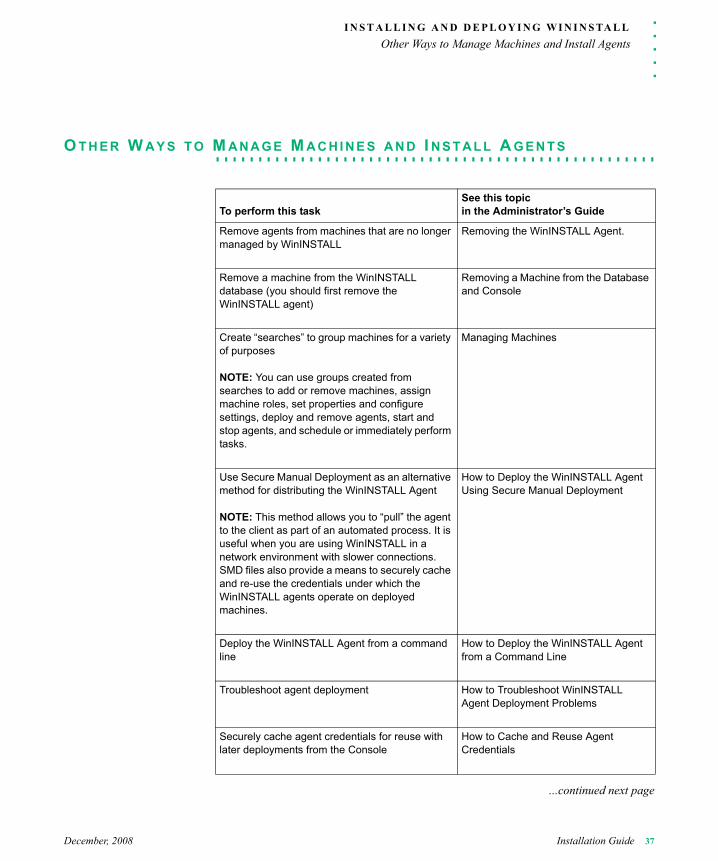
. . . . . . . . . . . . . . . . . . . . . . . . . . . . . . . . . . . . . . . . . . . . . . . . . . . . O T H E R W A Y S T O M A N A G E M A C H I N E S A N D I N S T A L L A G E N T S
...continued next page
To perform this taskSee this topic in the Administrator’s Guide
Remove agents from machines that are no longer managed by WinINSTALL
Removing the WinINSTALL Agent.
Remove a machine from the WinINSTALL database (you should first remove the WinINSTALL agent)
Removing a Machine from the Database and Console
Create “searches” to group machines for a variety of purposes
NOTE: You can use groups created from searches to add or remove machines, assign machine roles, set properties and configure settings, deploy and remove agents, start and stop agents, and schedule or immediately perform tasks.
Managing Machines
Use Secure Manual Deployment as an alternative method for distributing the WinINSTALL Agent
NOTE: This method allows you to “pull” the agent to the client as part of an automated process. It is useful when you are using WinINSTALL in a network environment with slower connections. SMD files also provide a means to securely cache and re-use the credentials under which the WinINSTALL agents operate on deployed machines.
How to Deploy the WinINSTALL Agent Using Secure Manual Deployment
Deploy the WinINSTALL Agent from a command line
How to Deploy the WinINSTALL Agent from a Command Line
Troubleshoot agent deployment How to Troubleshoot WinINSTALL Agent Deployment Problems
Securely cache agent credentials for reuse with later deployments from the Console
How to Cache and Reuse Agent Credentials
I N S T A L L I N G A N D D E P L O Y I N G W I N I N S TA L LOther Ways to Manage Machines and Install Agents
38 WinINSTALL Desktop Management Suite and Desktop Availability Suite
2
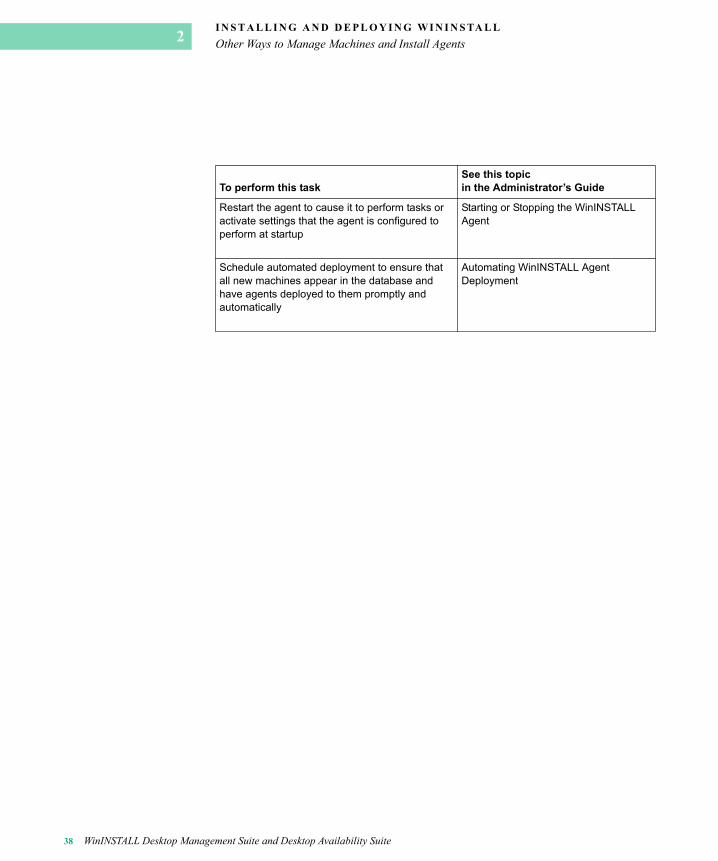
To perform this taskSee this topic in the Administrator’s Guide
Restart the agent to cause it to perform tasks or activate settings that the agent is configured to perform at startup
Starting or Stopping the WinINSTALL Agent
Schedule automated deployment to ensure that all new machines appear in the database and have agents deployed to them promptly and automatically