21
Word 2016 for Mac Basics Training Deck Microsoft
| Date post: | 29-Dec-2015 |
| Category: |
Documents |
| Upload: | kristina-stephens |
| View: | 221 times |
| Download: | 1 times |
Word 2016 for Mac BasicsTraining DeckMicrosoft
2
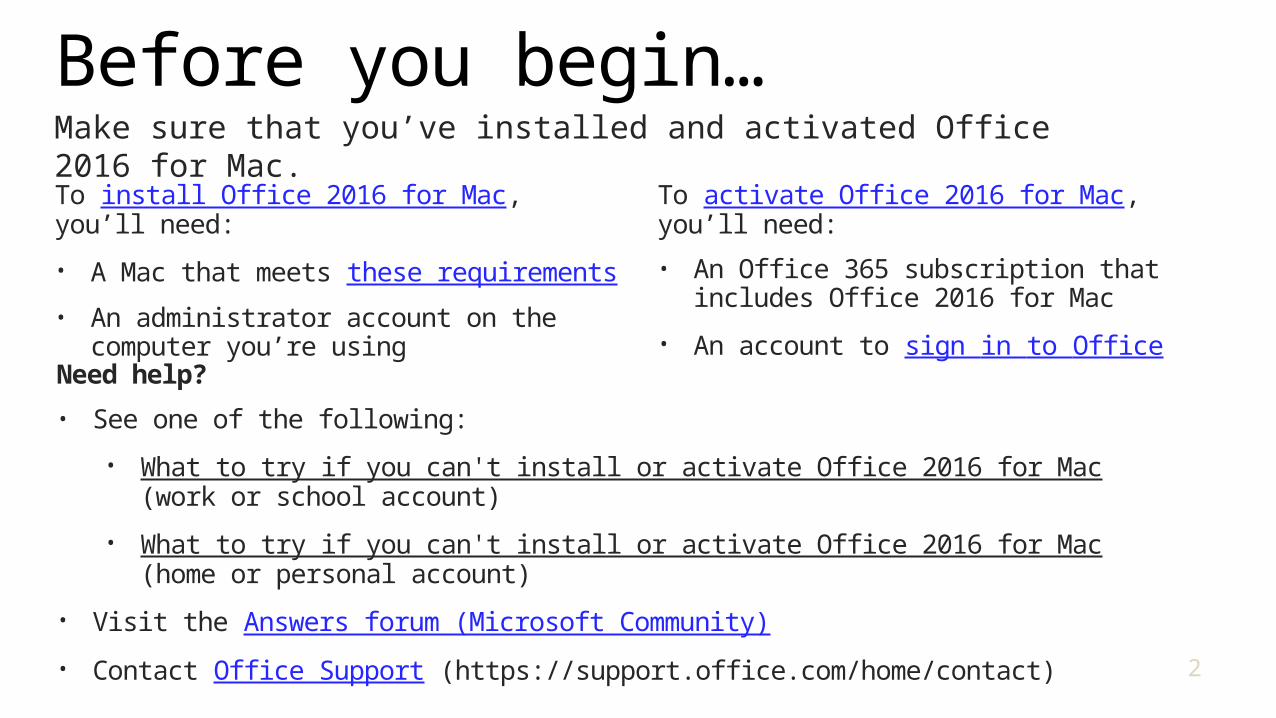
Before you begin…Make sure that you’ve installed and activated Office 2016 for Mac.To install Office 2016 for Mac, you’ll need:
• A Mac that meets these requirements
• An administrator account on the computer you’re using
To activate Office 2016 for Mac, you’ll need:
• An Office 365 subscription that includes Office 2016 for Mac
• An account to sign in to Office
Need help?
• See one of the following:
• What to try if you can't install or activate Office 2016 for Mac (work or school account)
• What to try if you can't install or activate Office 2016 for Mac (home or personal account)
• Visit the Answers forum (Microsoft Community)
• Contact Office Support (https://support.office.com/home/contact)
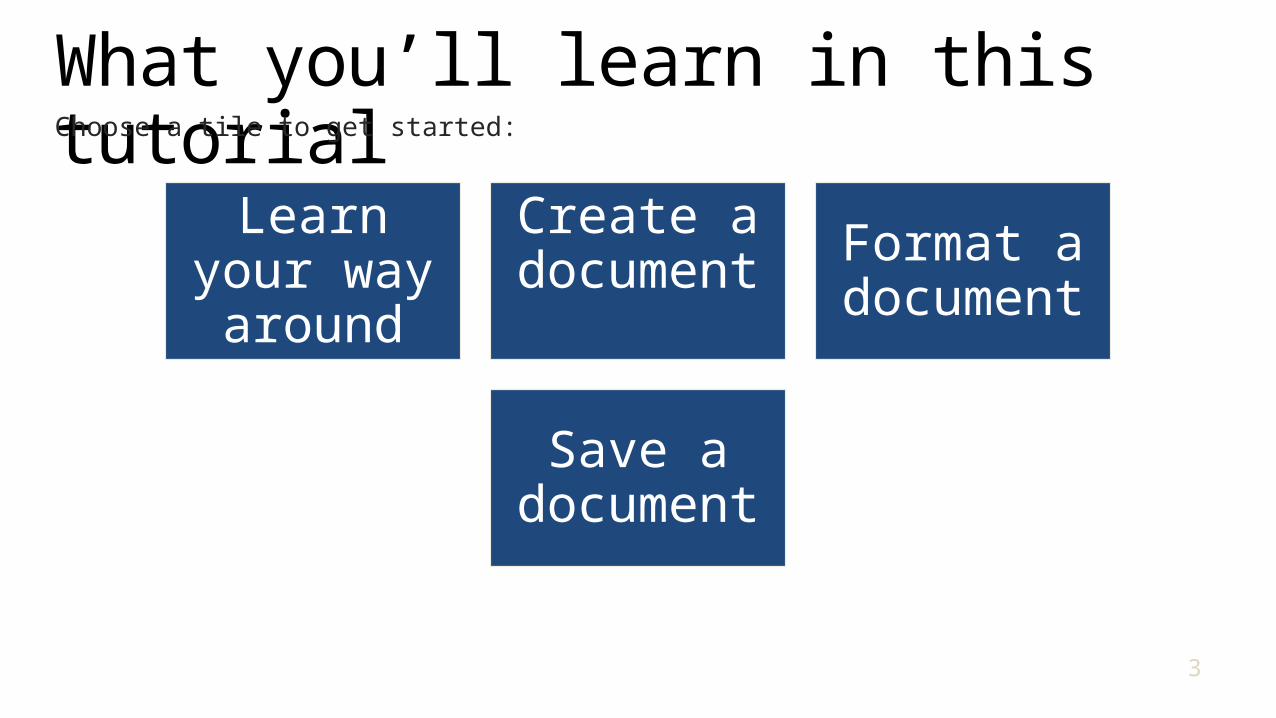
What you’ll learn in this tutorial
Learn your way around
Create a document
Format a document
Save a document
Choose a tile to get started:
3
4
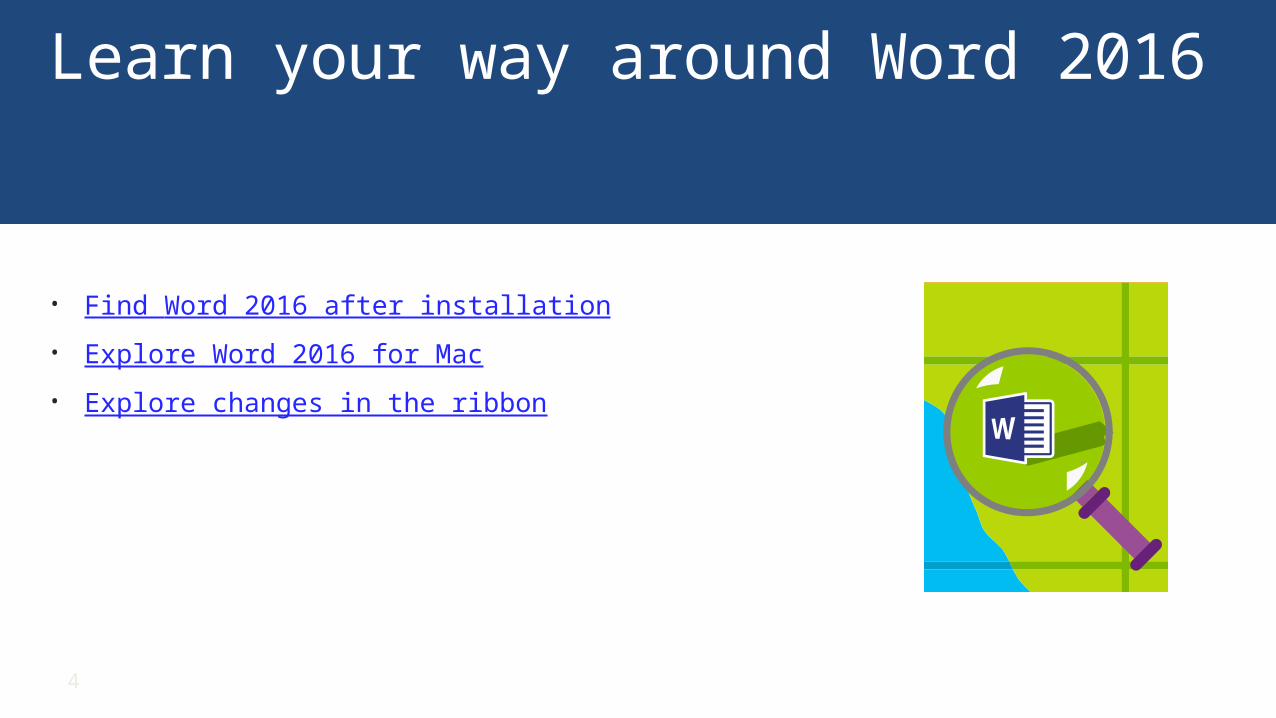
Learn your way around Word 2016
• Find Word 2016 after installation
• Explore Word 2016 for Mac
• Explore changes in the ribbon
5
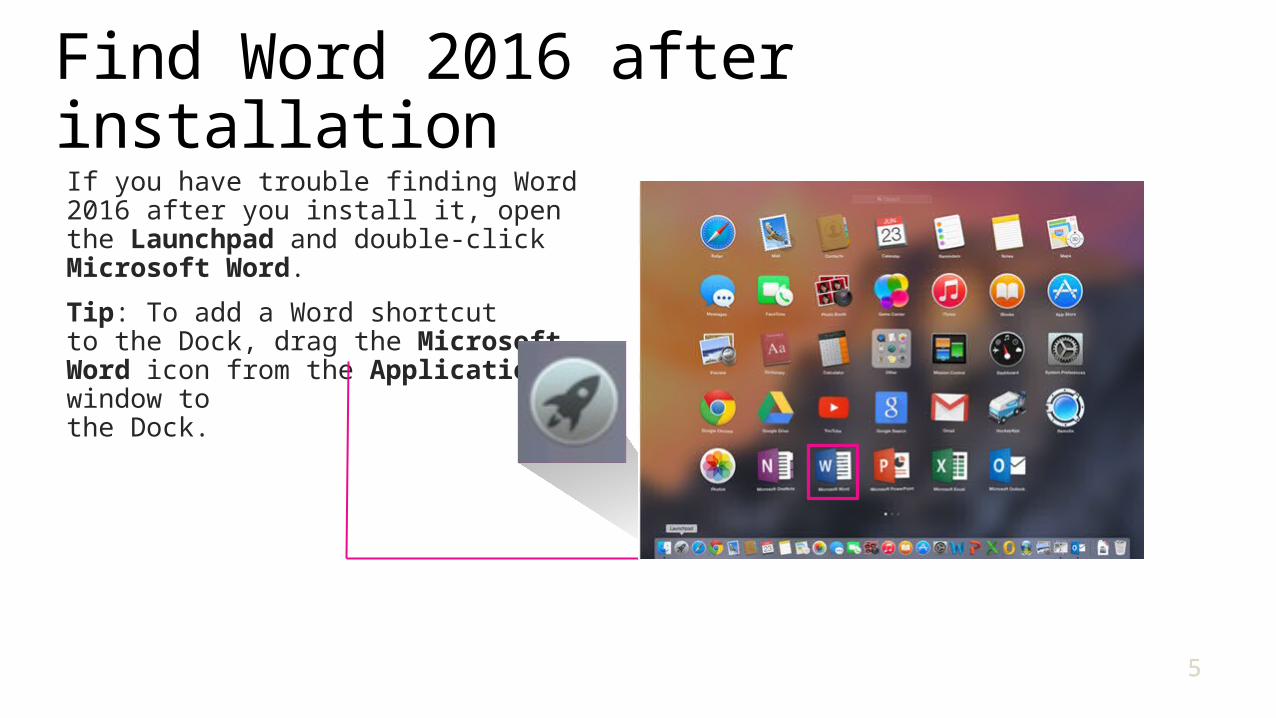
Find Word 2016 after installation
5
If you have trouble finding Word 2016 after you install it, open the Launchpad and double-click Microsoft Word.
Tip: To add a Word shortcut to the Dock, drag the Microsoft Word icon from the Applications window to the Dock.

6
Explore Word 2016 for MacMenu barQuick
Access Toolbar
Help
Status bar
Document window
Document Gallery (documents and templates)
Download the Word for Mac Quick Start Guide.
7
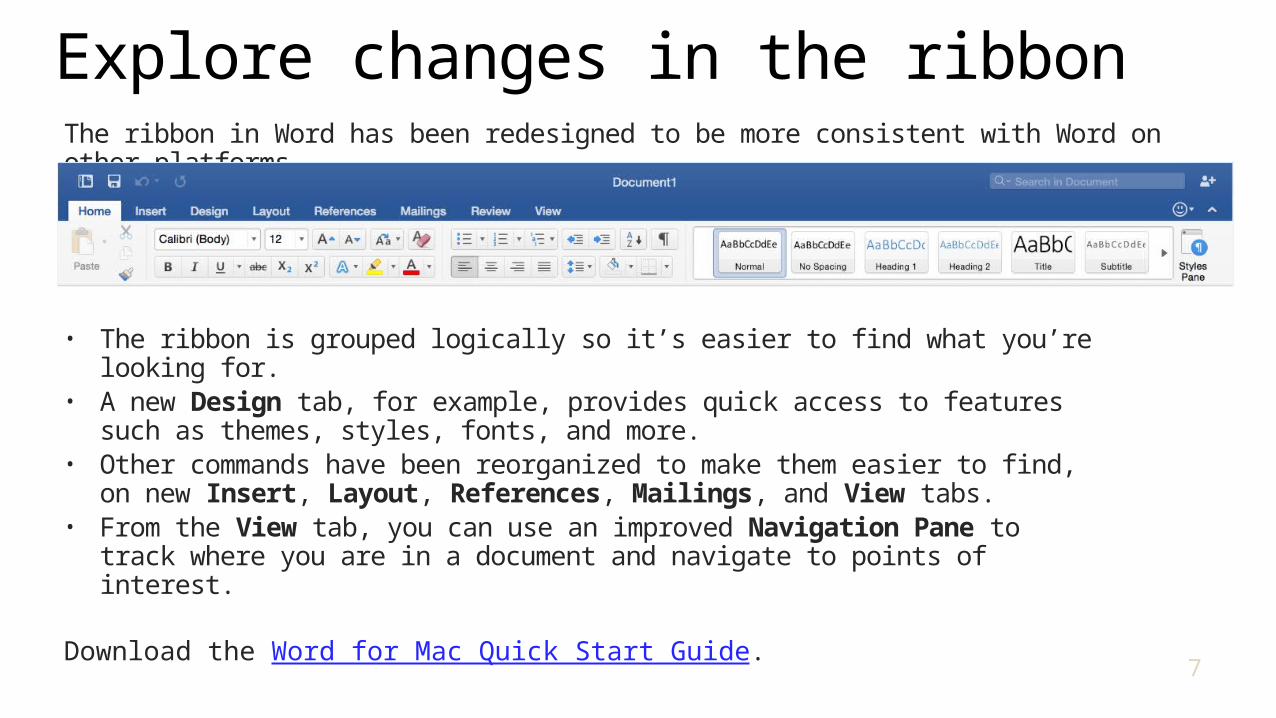
Explore changes in the ribbonThe ribbon in Word has been redesigned to be more consistent with Word on other platforms.
• The ribbon is grouped logically so it’s easier to find what you’re looking for. • A new Design tab, for example, provides quick access to features such as
themes, styles, fonts, and more.• Other commands have been reorganized to make them easier to find, on new
Insert, Layout, References, Mailings, and View tabs.• From the View tab, you can use an improved Navigation Pane to track where
you are in a document and navigate to points of interest.
Download the Word for Mac Quick Start Guide.
8
Create a document
Next, learn how to:
• Create a document using a template
9
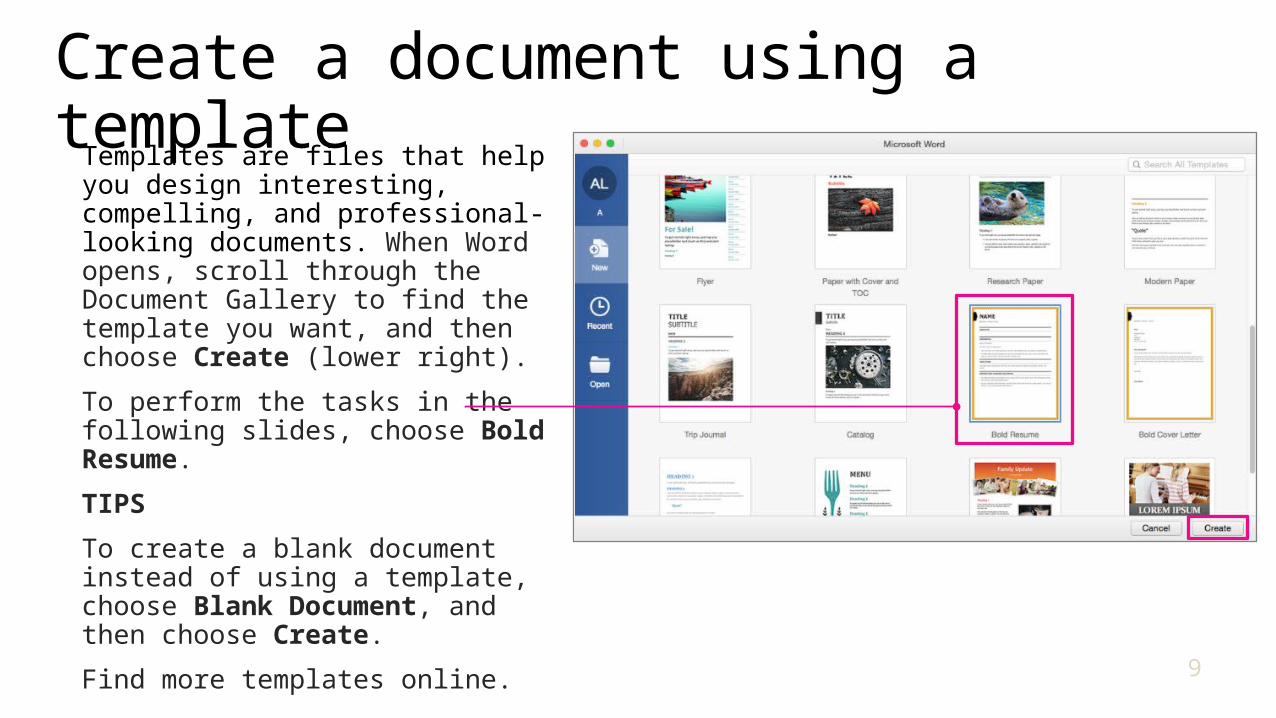
Create a document using a templateTemplates are files that help you design interesting, compelling, and professional-looking documents. When Word opens, scroll through the Document Gallery to find the template you want, and then choose Create (lower right).
To perform the tasks in the following slides, choose Bold Resume.
TIPS
To create a blank document instead of using a template, choose Blank Document, and then choose Create.
Find more templates online.
10
Format a document
Next, learn how to:
• Select and replace text
• Format text by using styles
• Add page numbers using headers and footers
• Add page numbers to an existing header or footer
11
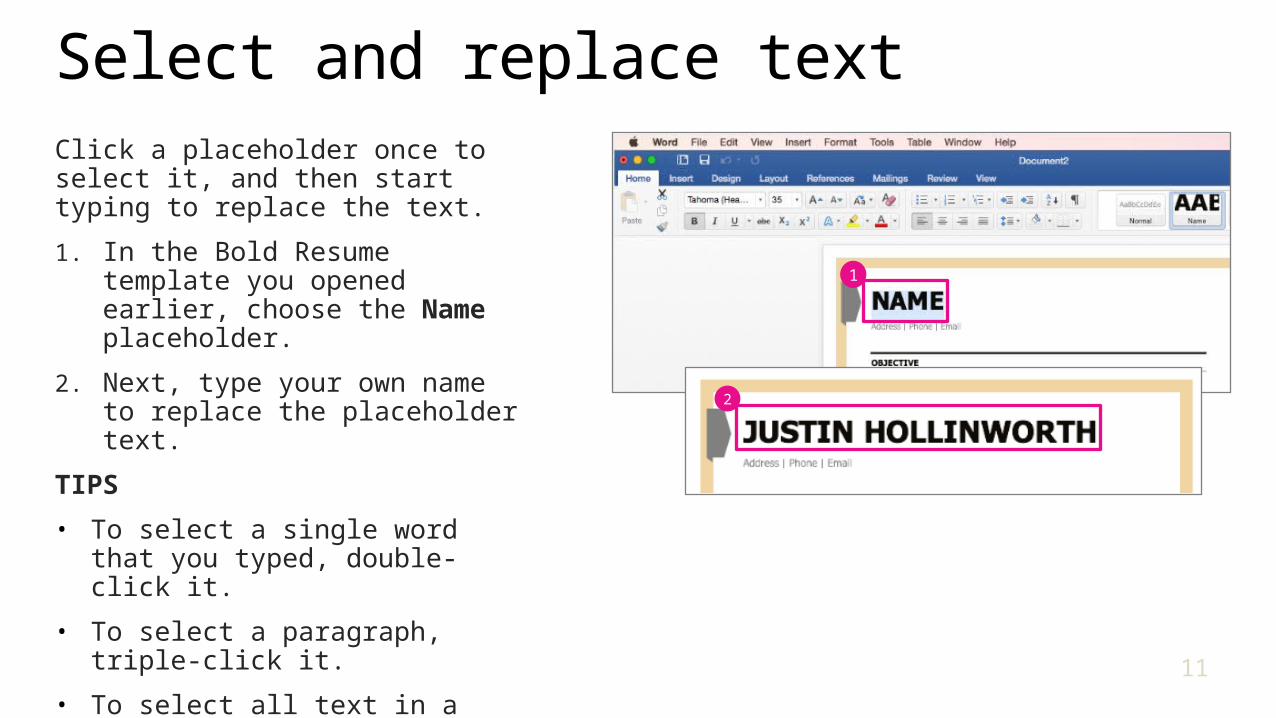
Select and replace textClick a placeholder once to select it, and then start typing to replace the text.
1. In the Bold Resume template you opened earlier, choose the Name placeholder.
2. Next, type your own name to replace the placeholder text.
TIPS
• To select a single word that you typed, double-click it.
• To select a paragraph, triple-click it.
• To select all text in a document, press Command (⌘) + A.
1
2
12
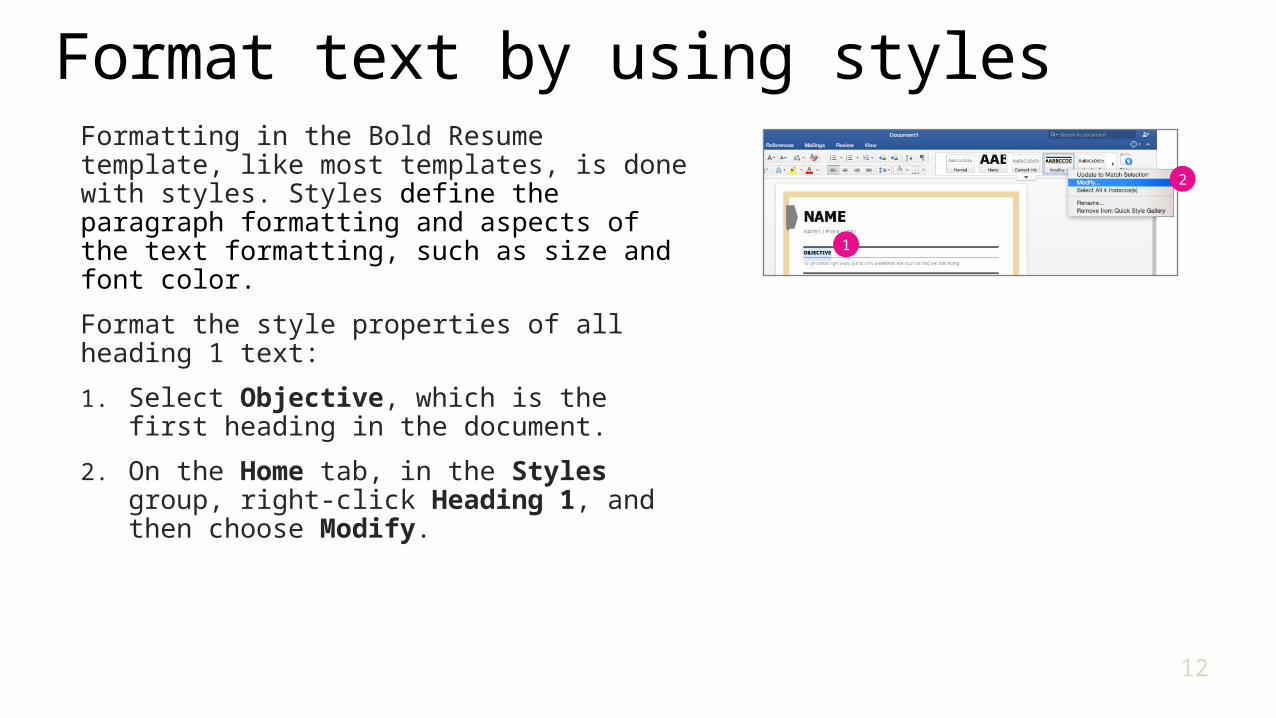
Format text by using styles Formatting in the Bold Resume template, like most templates, is done with styles. Styles define the paragraph formatting and aspects of the text formatting, such as size and font color.
Format the style properties of all heading 1 text:
1. Select Objective, which is the first heading in the document.
2. On the Home tab, in the Styles group, right-click Heading 1, and then choose Modify.
1
2

13
Format text by using styles (continued)
3. In the Modify Style dialog box, choose the Font menu, and then choose Arial Rounded MT Bold.
4. On the Font Size menu, choose 11.
5. On the Font Color menu, choose Black, Text 1, Lighter 50%.
Note the new font color and size.
3
4
14
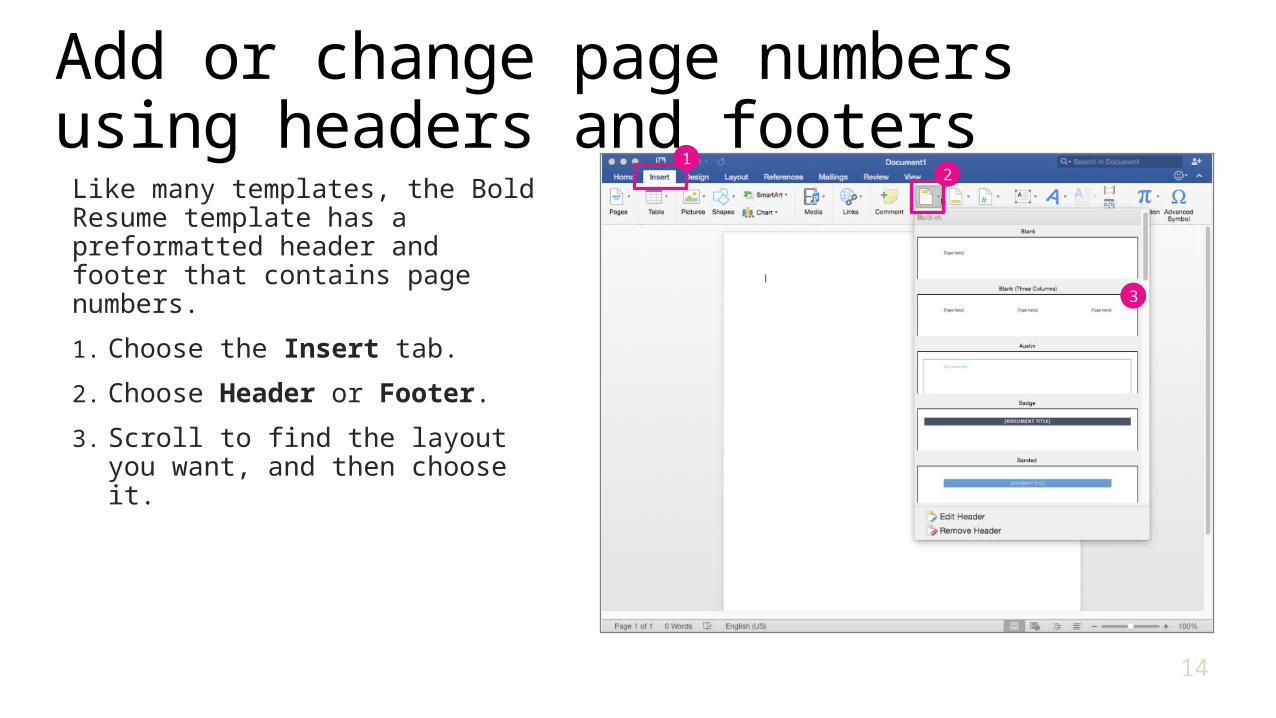
Add or change page numbers using headers and footers
Like many templates, the Bold Resume template has a preformatted header and footer that contains page numbers.
1. Choose the Insert tab.
2. Choose Header or Footer.
3. Scroll to find the layout you want, and then choose it.
3
21
15
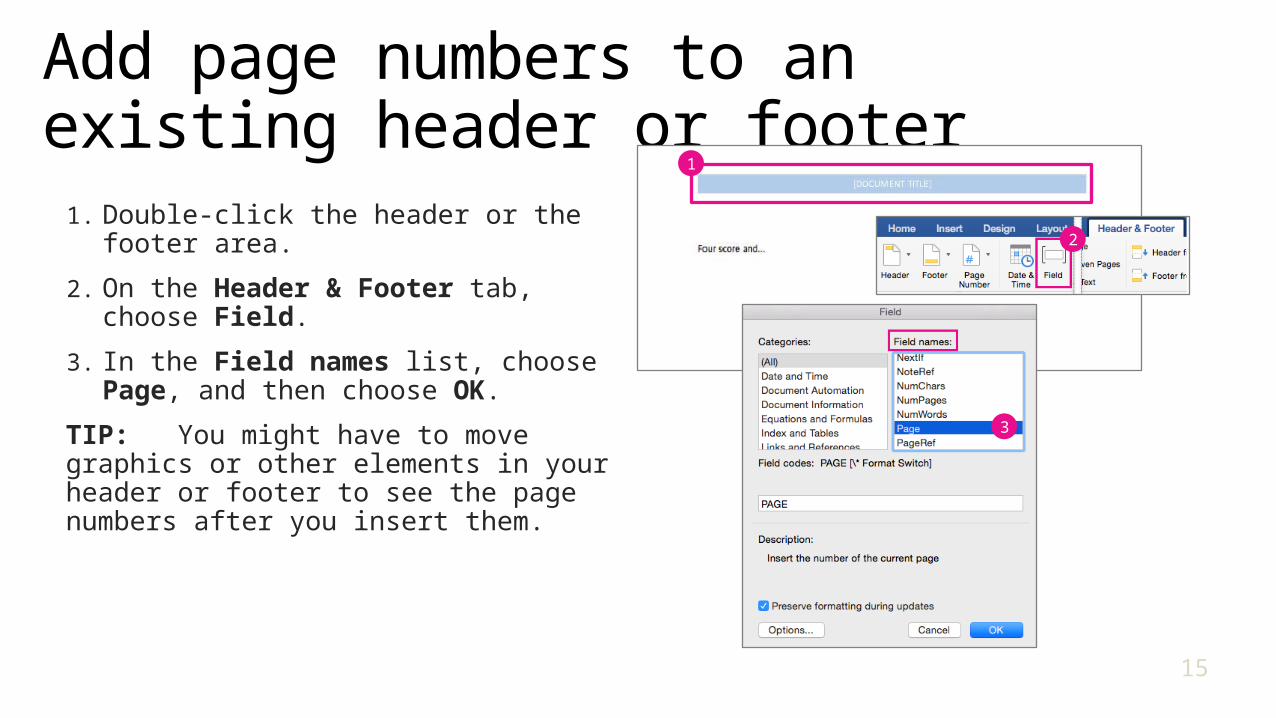
Add page numbers to an existing header or footer
1. Double-click the header or the footer area.
2. On the Header & Footer tab, choose Field.
3. In the Field names list, choose Page, and then choose OK.
TIP: You might have to move graphics or other elements in your header or footer to see the page numbers after you insert them.
2
3
1
16
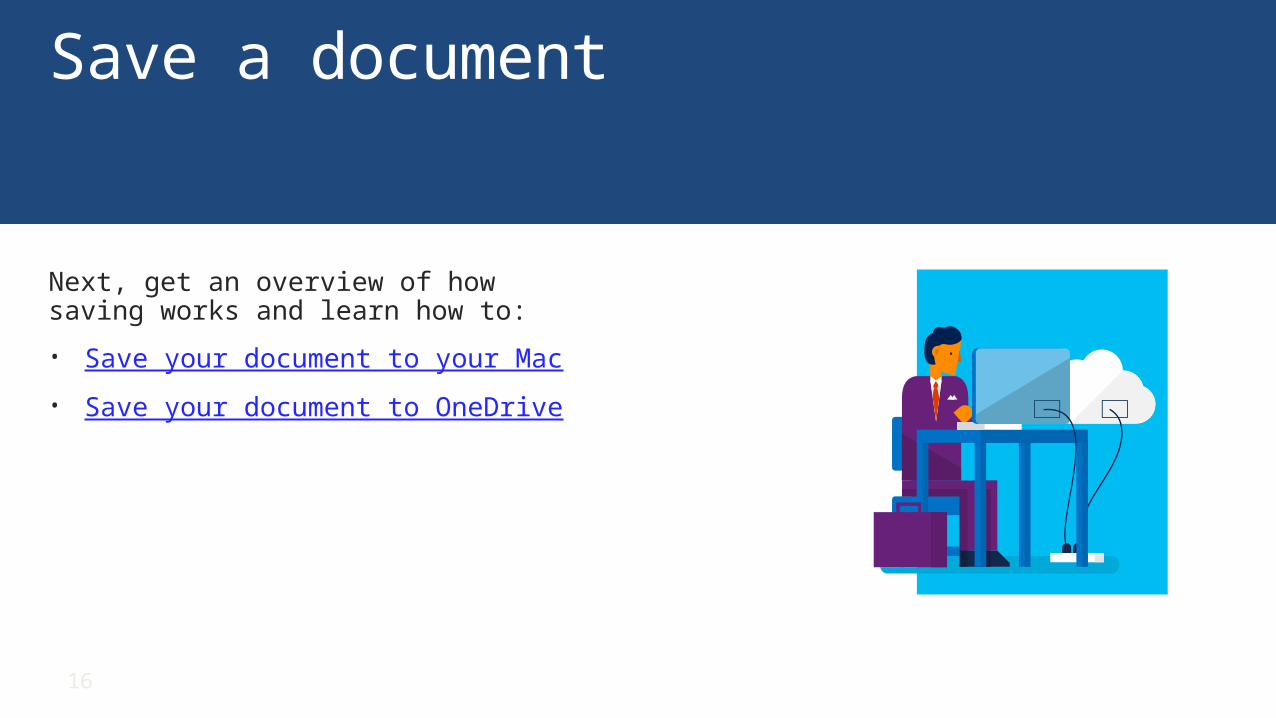
Save a document
Next, get an overview of how saving works and learn how to:
• Save your document to your Mac
• Save your document to OneDrive
17
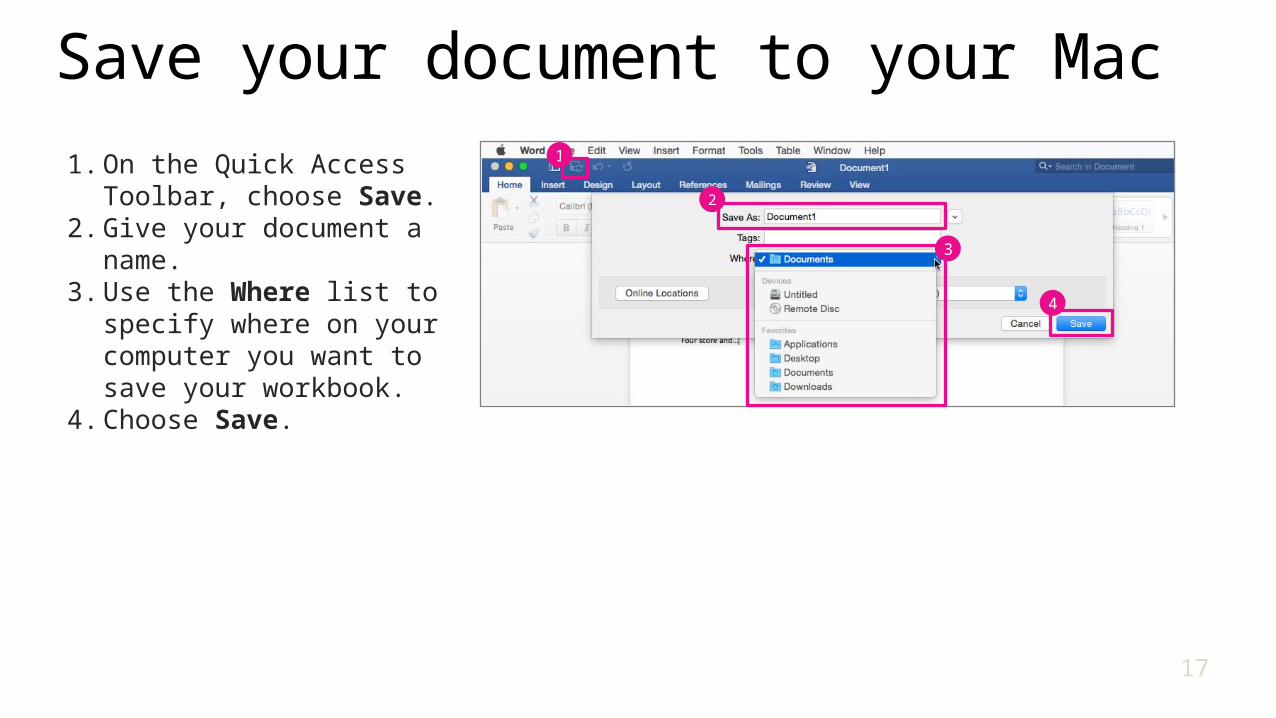
Save your document to your Mac
1. On the Quick Access Toolbar, choose Save.
2. Give your document a name.
3. Use the Where list to specify where on your computer you want to save your workbook.
4. Choose Save.
1
2
4
3
18
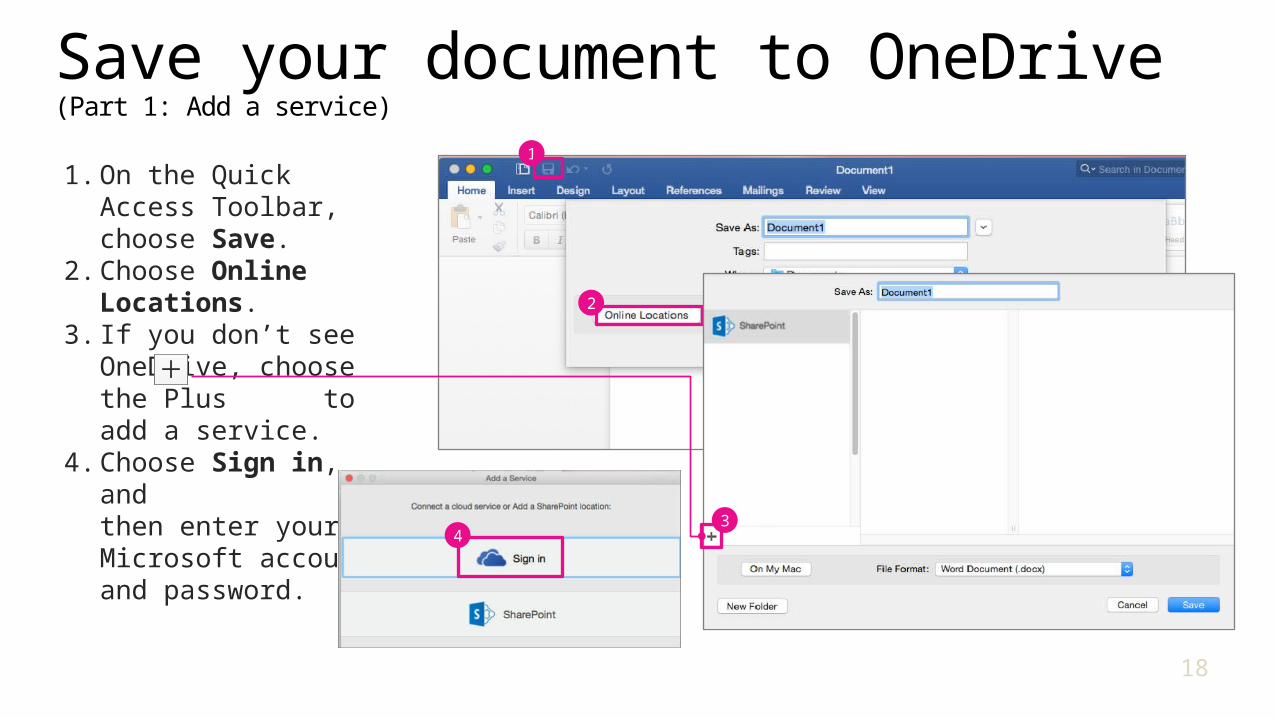
Save your document to OneDrive (Part 1: Add a service)
1. On the Quick Access Toolbar, choose Save.
2. Choose Online Locations.
3. If you don’t see OneDrive, choose the Plus to add a service.
4. Choose Sign in, and
then enter your Microsoft account and password.
1
2
43
19
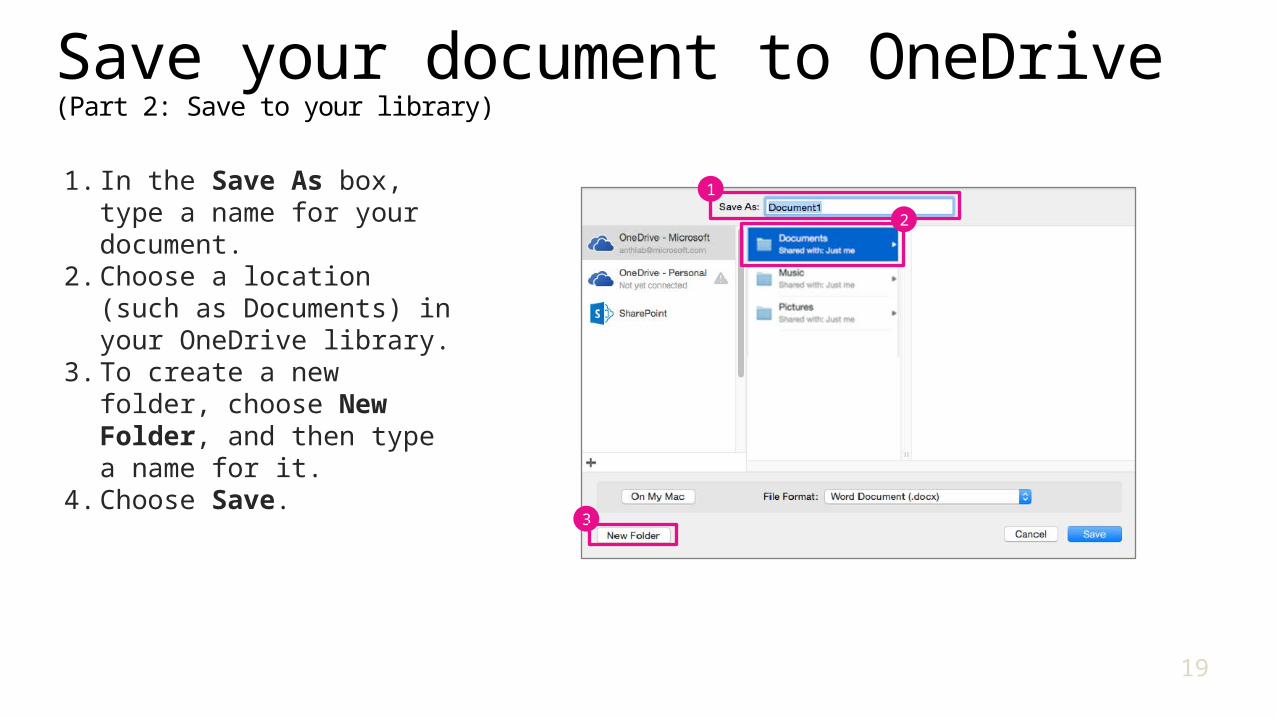
Save your document to OneDrive (Part 2: Save to your library)
1. In the Save As box, type a name for your document.
2. Choose a location (such as Documents) in your OneDrive library.
3. To create a new folder, choose New Folder, and then type a name for it.
4. Choose Save.
1
2
3
20
Additional resourcesWord 2016 for Mac training
Discover Word
Word 2016 for Mac Help
Compare Word for Mac 2011 with Word 2016 for Mac
Office 2016 for Mac Quick Start Guides
Office training and tutorials

© 2015 Microsoft Corporation. All rights reserved. Microsoft, Windows, and other product names are or may be registered trademarks and/or trademarks in the U.S. and/or other countries.The information herein is for informational purposes only and represents the current view of Microsoft Corporation as of the date of this presentation. Because Microsoft must respond to changing market conditions, it should not be interpreted to be a commitment on the part of Microsoft, and Microsoft cannot guarantee the accuracy of any information provided after the date of this presentation. MICROSOFT MAKES NO WARRANTIES, EXPRESS, IMPLIED OR STATUTORY, AS TO THE INFORMATION IN THIS PRESENTATION.


