WordPress Training – ePortfolio For more information visit: mcblogs.montgomerycollege.edu/eportfolio 1 Setting up a WordPress.com Profile/Domain: 1. TBD https://wordpress.com/start/design-type-with-store Downloading/Installing Themes: Montgomery College Approved Theme 1. TBD Download link and instructions 2. Note, this theme is protected by Creative Commons License, it is unlawful to sell or distribute this theme in any way Free and for purchase themes 1. Free, https://wordpress.com/themes/free 2. For purchase, https://www.google.com/aclk?sa=l&ai=DChcSEwiDutbXwuDTAhUXI4EKHSBSCy4YAB AAGgJ5dw&sig=AOD64_1TQM34U0nyLW3bjWwZwfYaKLXSiw&q=&ved=0ahUKEwit- M7XwuDTAhVKKyYKHWLjC_YQ0QwIIQ&adurl= Login/General Info (NEED TO MODIFY SO IT’S WORDPRESS SPECIFIC): Login URL: http://www.yourdomain.com/wp-login.php Accessing Your User Profile 1. Login to access the WordPress Dashboard http://mcblogs.montgomerycollege.edu/thehub/wp-login.php 2. Click on Profile in the left menu a. In your profile you can add a profile image, include links to your social media sites, add a bio, and modify other general information about yourself.
Transcript
WordPress Training – ePortfolio For more information visit: mcblogs.montgomerycollege.edu/eportfolio
1
Setting up a WordPress.com Profile/Domain: 1. TBD https://wordpress.com/start/design-type-with-store
Downloading/Installing Themes: Montgomery College Approved Theme
1. TBD Download link and instructions 2. Note, this theme is protected by Creative Commons License, it is unlawful to sell or
distribute this theme in any way
Free and for purchase themes
1. Free, https://wordpress.com/themes/free 2. For purchase,
Login/General Info (NEED TO MODIFY SO IT’S WORDPRESS SPECIFIC): Login URL: http://www.yourdomain.com/wp-login.php
Accessing Your User Profile
1. Login to access the WordPress Dashboard http://mcblogs.montgomerycollege.edu/thehub/wp-login.php
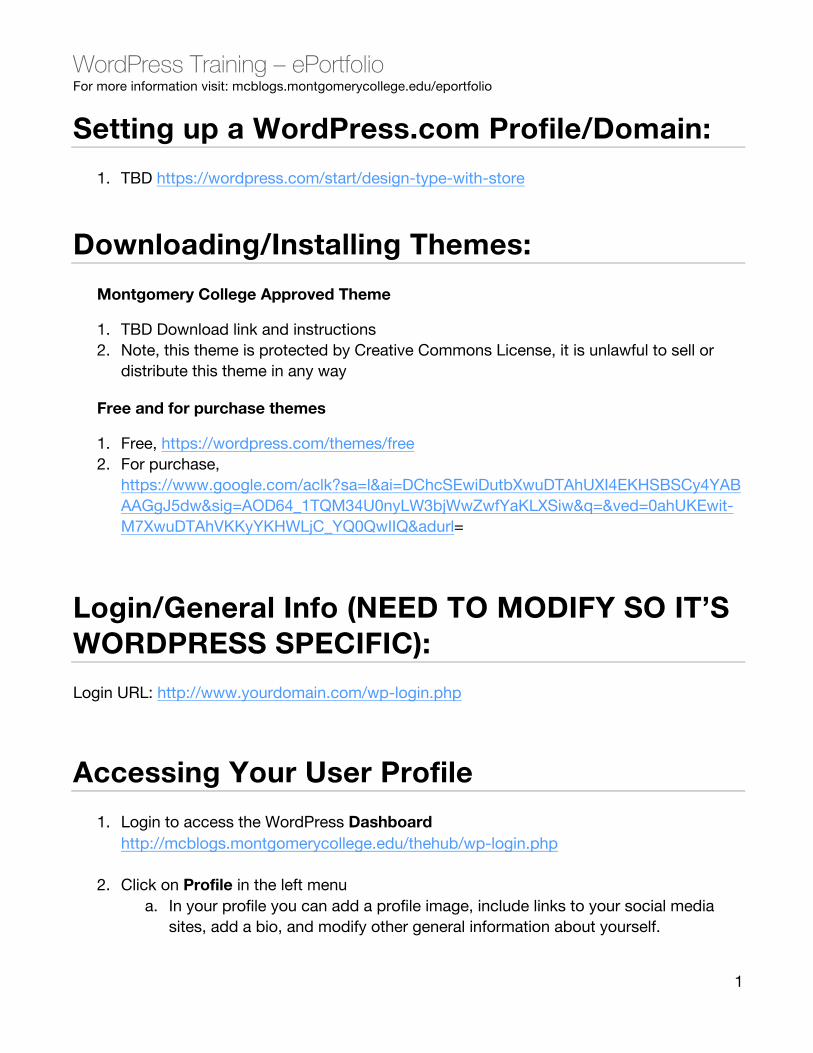
2. Click on Profile in the left menu a. In your profile you can add a profile image, include links to your social media
sites, add a bio, and modify other general information about yourself.
WordPress Training – ePortfolio For more information visit: mcblogs.montgomerycollege.edu/eportfolio
2
b. Your profile information will display on your Author’s page (note: depending on the site, the author’s page may not be used)
Changing homepage cover image 1. It’s recommended that the image size be 2000px by 1200px with the lower right of
the photo being dark enough for the title text to show over top of it (void of too much texture and light areas)
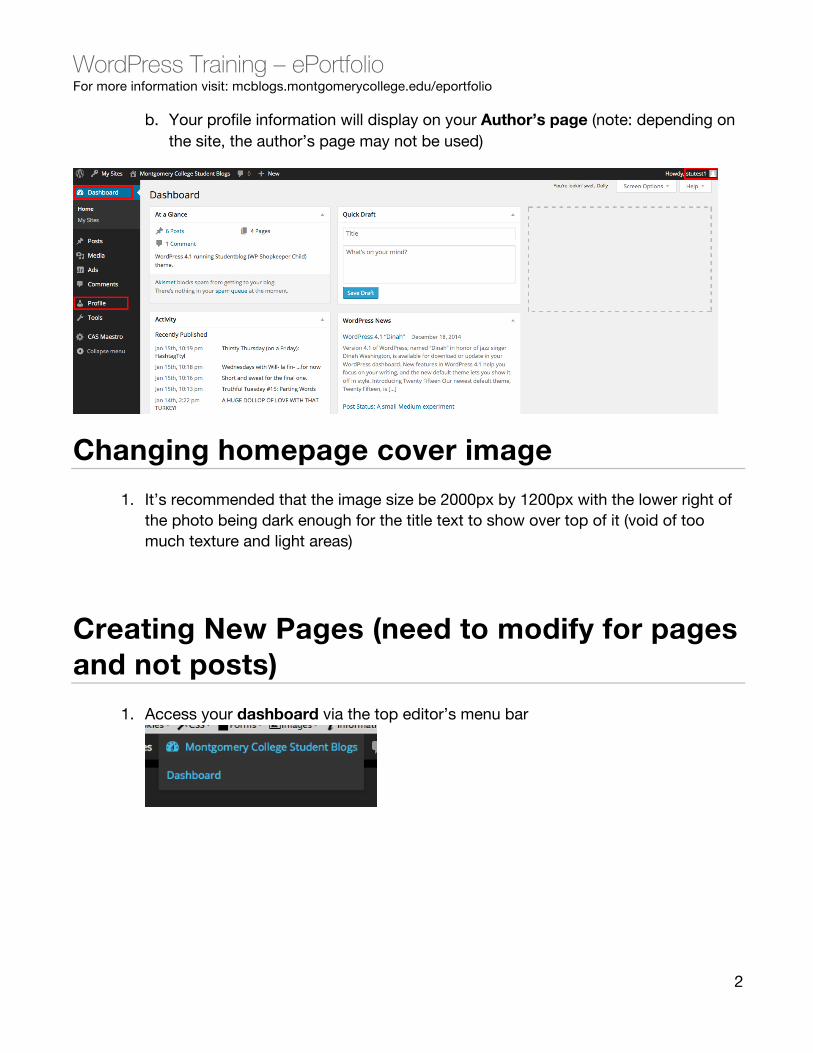
Creating New Pages (need to modify for pages and not posts)
1. Access your dashboard via the top editor’s menu bar
WordPress Training – ePortfolio For more information visit: mcblogs.montgomerycollege.edu/eportfolio
3
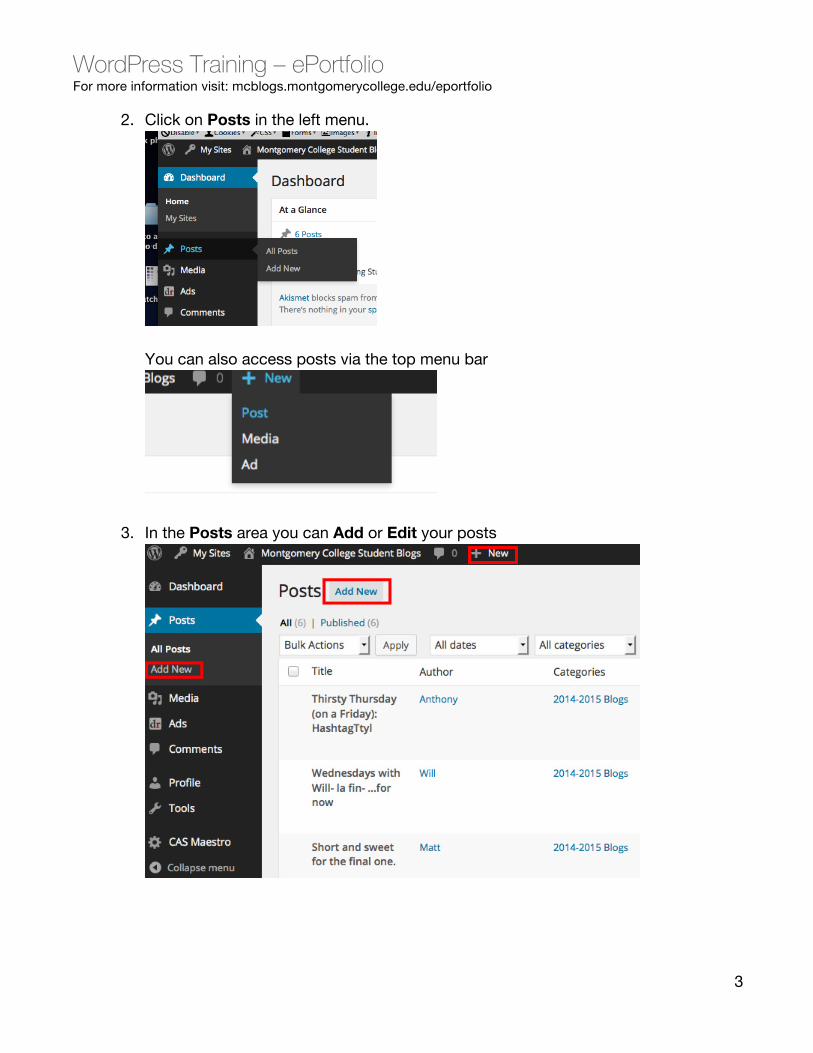
2. Click on Posts in the left menu.
You can also access posts via the top menu bar
3. In the Posts area you can Add or Edit your posts
WordPress Training – ePortfolio For more information visit: mcblogs.montgomerycollege.edu/eportfolio
4
4. To Edit your post roll over the title and more options will appear
5. You can use the Quick Edit option to edit the Title, Date, Author, Categories and other features directly from the Posts view.
6. Several functions are available when creating/editing posts. The screenshot below shows the options you will primarily use.
7. When you are done creating/editing your post click the Update button. Your newly created post(s) will automatically get added to the homepage and to your Author’s page. If you want to preview your post before publishing click the Preview Changes button.
WordPress Training – ePortfolio For more information visit: mcblogs.montgomerycollege.edu/eportfolio
5
Editing Menus
8. TBD Access your dashboard via the top editor’s menu bar
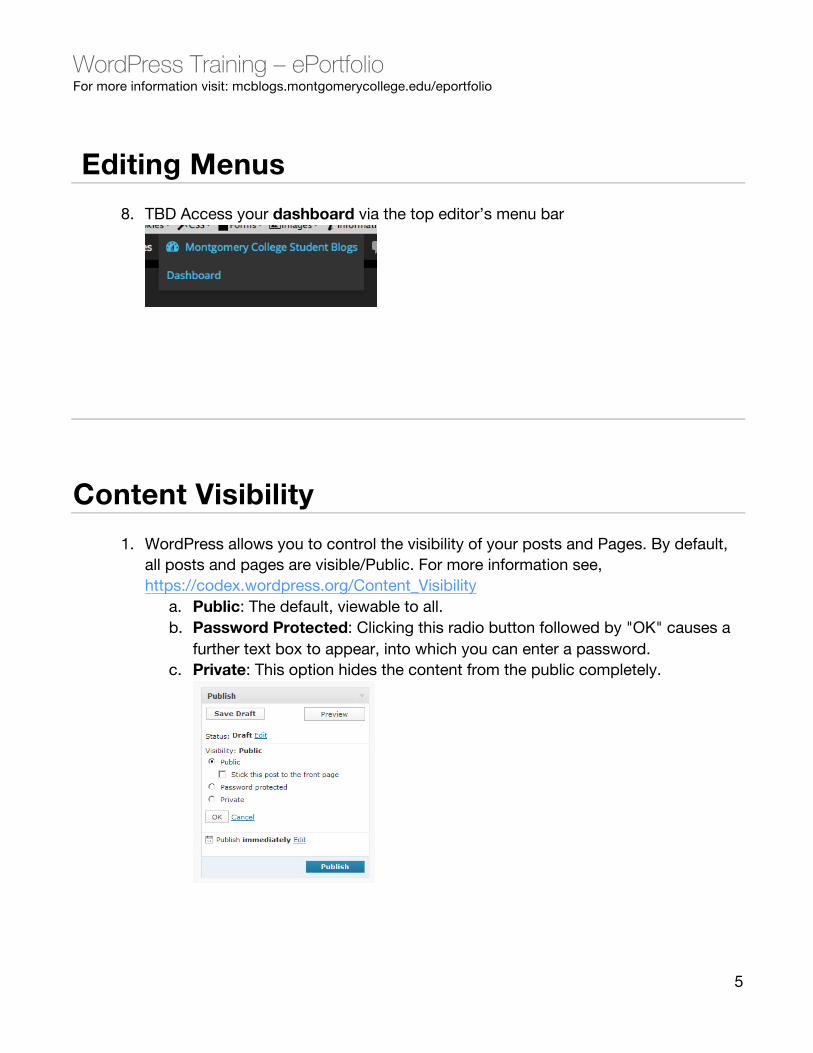
Content Visibility 1. WordPress allows you to control the visibility of your posts and Pages. By default,
all posts and pages are visible/Public. For more information see, https://codex.wordpress.org/Content_Visibility
a. Public: The default, viewable to all. b. Password Protected: Clicking this radio button followed by "OK" causes a
further text box to appear, into which you can enter a password. c. Private: This option hides the content from the public completely.
WordPress Training – ePortfolio For more information visit: mcblogs.montgomerycollege.edu/eportfolio
6
Creating Links to Assets 1. Standard linking to an internal/external page is relatively straight forward; highlight
the text and click the insert/edit link
2. To create a link to an uploaded asset (PDF/Doc/Image) you must first get the URL from your Media > Library and add that URL in the field after clicking the insert/edit link button
a. You can also insert a link to a PDF or Doc via the Add Media button
Adding Media to Your Page’s Content Adding a photo:
WordPress Training – ePortfolio For more information visit: mcblogs.montgomerycollege.edu/eportfolio
7
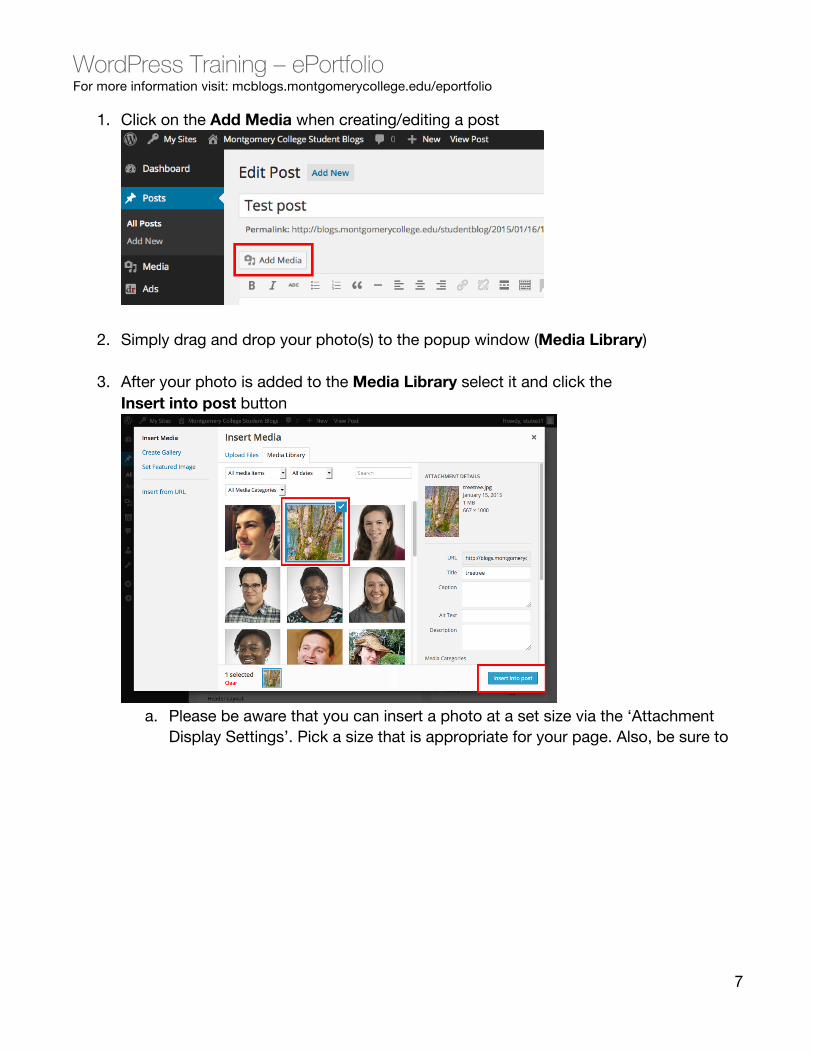
1. Click on the Add Media when creating/editing a post
2. Simply drag and drop your photo(s) to the popup window (Media Library)
3. After your photo is added to the Media Library select it and click the Insert into post button
a. Please be aware that you can insert a photo at a set size via the ‘Attachment
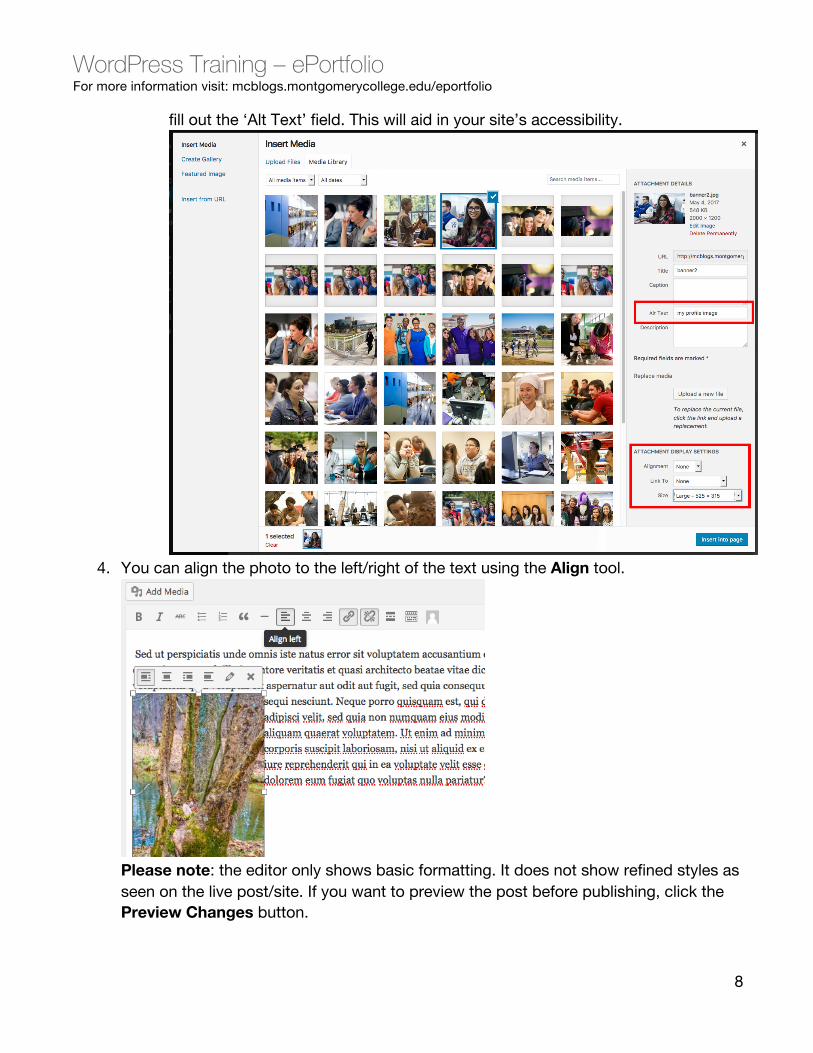
Display Settings’. Pick a size that is appropriate for your page. Also, be sure to
WordPress Training – ePortfolio For more information visit: mcblogs.montgomerycollege.edu/eportfolio
8
fill out the ‘Alt Text’ field. This will aid in your site’s accessibility.
4. You can align the photo to the left/right of the text using the Align tool.
Please note: the editor only shows basic formatting. It does not show refined styles as seen on the live post/site. If you want to preview the post before publishing, click the Preview Changes button.