25
WOVEN BUTTERFLY RING WIRE & JEWELRY MAKING TUTORIAL SERIES T88 COPYRIGHT Copyrights DIY Beading Club 2013

WOVEN BUTTERFLY RING
WIRE & JEW ELRY MAKING TUTORIAL SERIES T88
COPYRIGHT
Copyrights DIY Beading Club 2013
Published By DIY Beading Club
INTRODUCTION
This design is based on the theme of butterfly. This tutorial shows you how to make these butterflies through detailed step by step pictorial guide. Just like real Butterflies, you can apply the techniques to come up with many variations of species, color, mood and look. I encourage you to explore
and discover from this wonderful tutorial!
The tutorial is catered for intermediate or anyone who loves to learn this wirework technique. It has in-depth instructions and ultra-clear, close-up photos at each step.
Additionally, you can ask me question you have on the tutorial. No more getting stuck and frustrated on a confusing or just plain inaccurate pattern.
MATERIALS AND TOOLS NEEDED:
Materials Needed
18 gauge copper wires (Thick wire) 26 gauge copper wires (Thin wire) 3-5 small wooden beads Tools Needed
Round nose pliers Flat nose pliers Wire cutter
STEP BY STEP INSTRUCTIONS
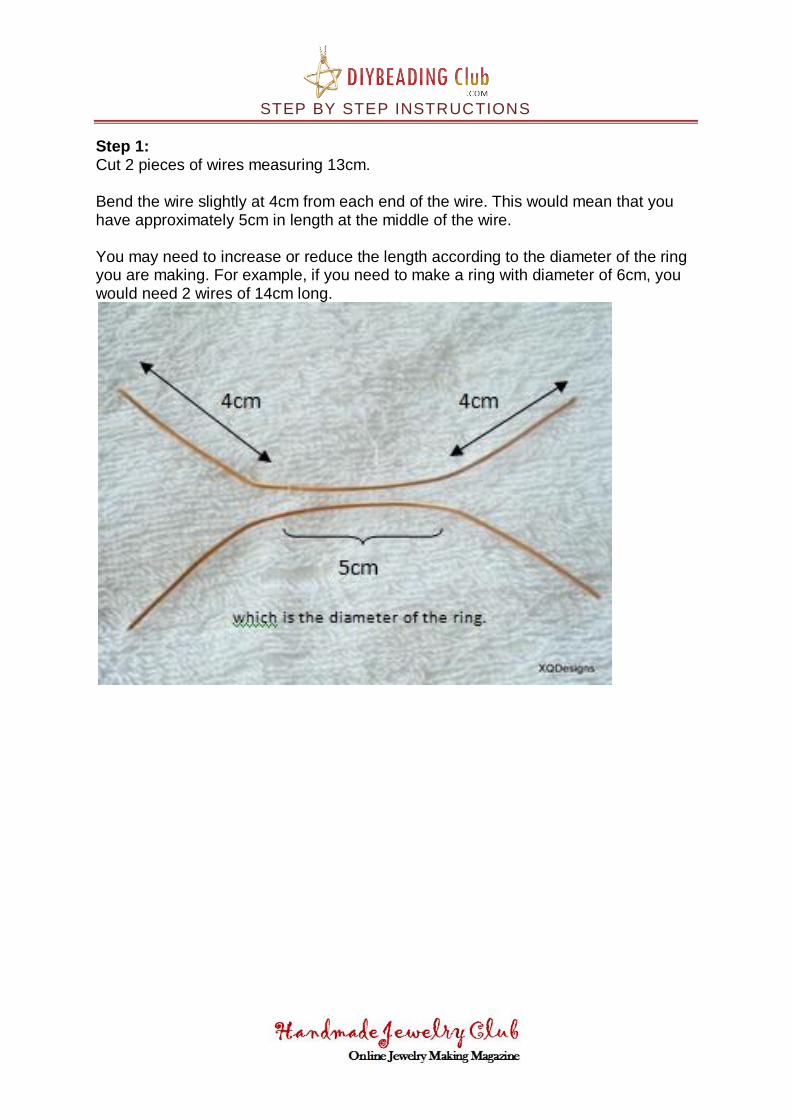
Step 1: Cut 2 pieces of wires measuring 13cm. Bend the wire slightly at 4cm from each end of the wire. This would mean that you have approximately 5cm in length at the middle of the wire. You may need to increase or reduce the length according to the diameter of the ring you are making. For example, if you need to make a ring with diameter of 6cm, you would need 2 wires of 14cm long.

Step 2:
Cut approximately 90cm length of 26ga wire. Attach 1 end to the thick 18ga wires. Leave approximately 2cm at the end so that that you can hold it with your left hand/ thumbs to fix the position while your wrap the wires.

Wrap around the thick wires by pulling the thin wires from top to bottom at the back of the thick wires and pull it up again from the front of the think wires.
Repeat for 2 more wraps.

Step 3:
Place the second wire on top of the thin wire.
Pull the think wire to the front and to the back. You notice from the picture, the thin wire is behind the thick wire at the bottom.

Pull it upward to make a full wrap.
Make 2 more wraps. At the end of the wraps, ensure you place the thin wires at the back of the thick wire.

Step 4:
Continue to wrap the thick wire at the bottom by repeating step 2.

You will repeat step 2 and 3 until you reach the diameter of the ring. You will notice that the weave is basically a pattern of figure 8. You notice, the space between the 2 thick wires is getting smaller and it will consistent from approximately 0.8cm of the weave.

Towards the end of the weave, you need to ensure the space between the 2 thick wires get slightly apart (0.6cm).
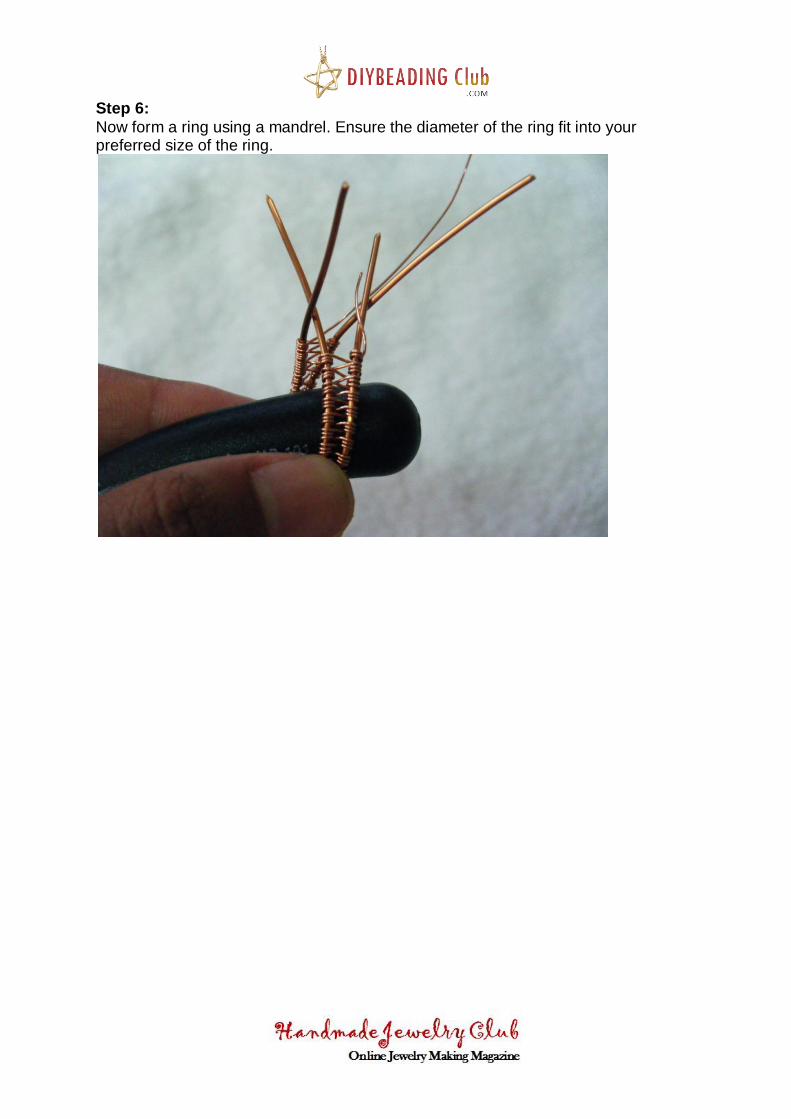
Step 6:
Now form a ring using a mandrel. Ensure the diameter of the ring fit into your preferred size of the ring.

Step 7:
With the remaining 4 thick wires. We need to form spirals. Cut off excess thin wires.
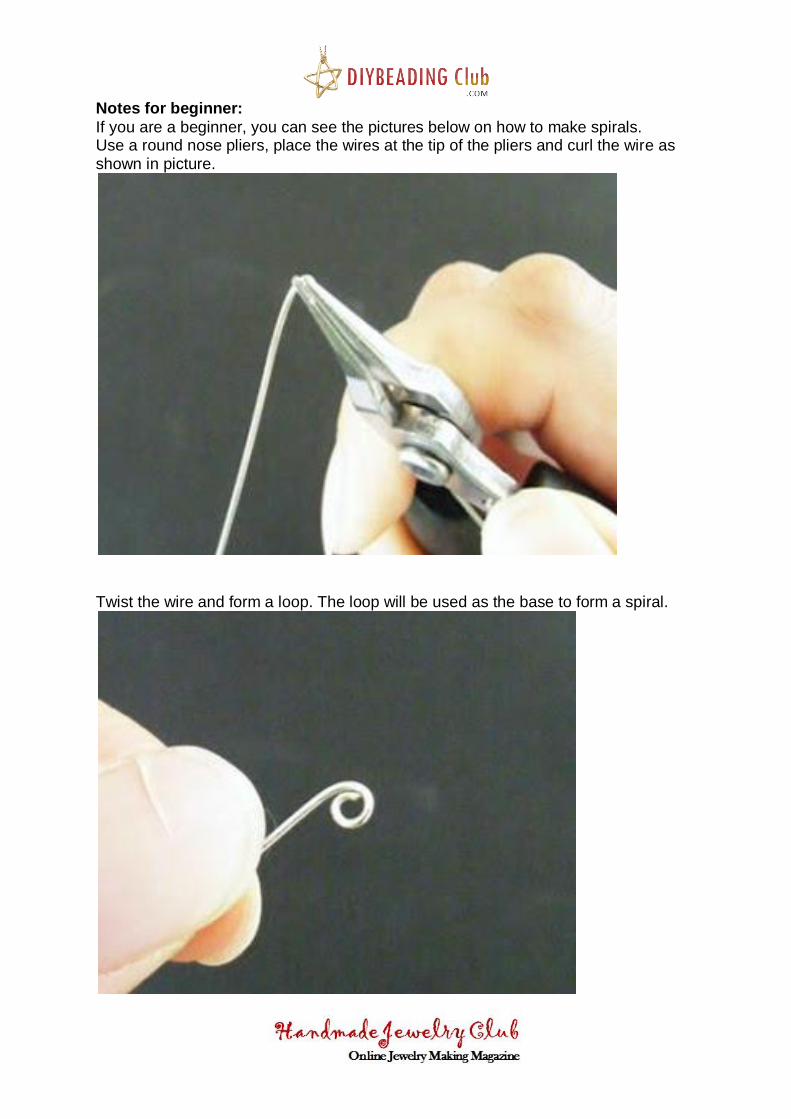
Notes for beginner:
If you are a beginner, you can see the pictures below on how to make spirals. Use a round nose pliers, place the wires at the tip of the pliers and curl the wire as shown in picture.
Twist the wire and form a loop. The loop will be used as the base to form a spiral.

Hold the wire with your round nose pliers. Begin to bend by turning the wrist of your right hand downward to form the coil. This is coordinated with your left hand that pulls the wire downward. You may hold the spiral at different angle to help shape the spiral.

Step 8:
Now cut a thin wire (26ga) measuring 5 inch in length. Thread in a wooden bean and pull in to the middle of the wire. Place the thin wire under the spiral as shown in the picture.

Step 9:
Bend the wires to 90 degree right under the spirals.
Step 10:
Pull the wire closer to each other.

Step 11:
Now thread in 3 wooden beads.
Step 12:
To secure the position of the beads, tie the two thin wires against the spirals next to them respectively.

Step 13:
Now cross the wires as shown in the picture.
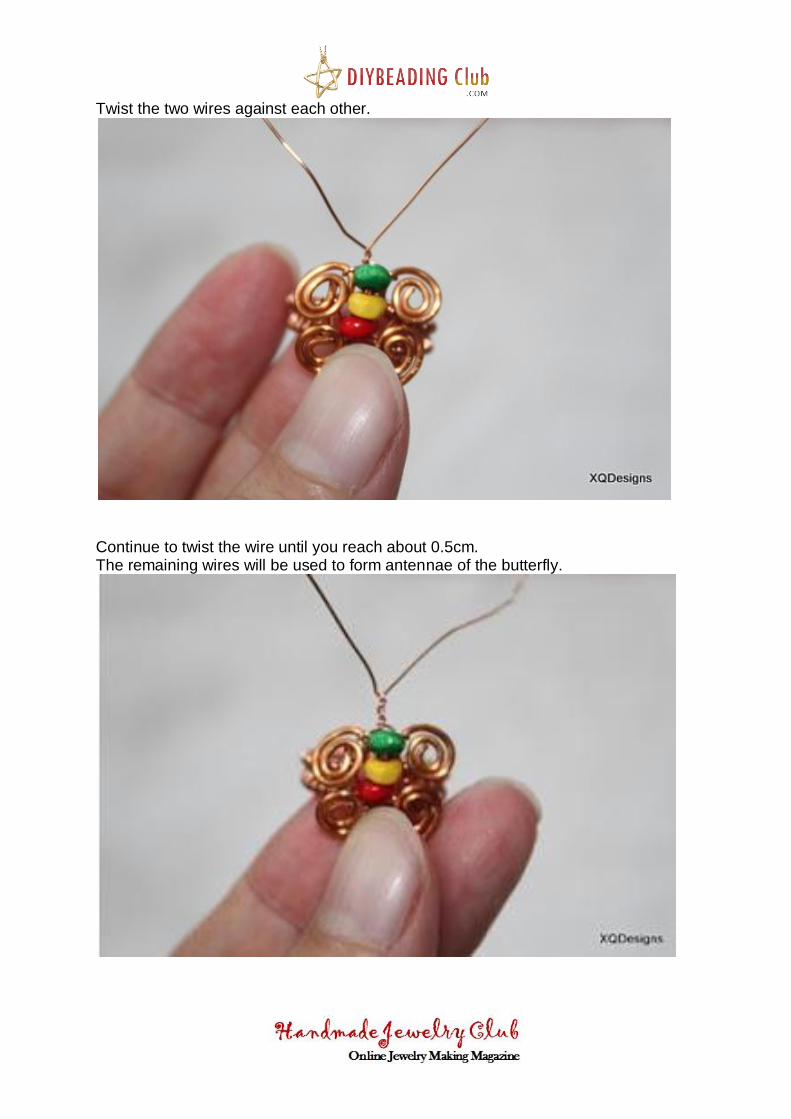
Twist the two wires against each other.
Continue to twist the wire until you reach about 0.5cm. The remaining wires will be used to form antennae of the butterfly.

Step 14:
To form the antennae of the butterfly, form spirals for both remaining wires.

You have completed the cross pendant. Remember, there are many variations you can play around with it. Explore and discover.. you will be able to do it! Hope you like the tutorial!

CONTACT US
I hope you have enjoyed making the jewelry. If you have any query or feedback for
the tutorial, please contact us at [email protected].
SPECIAL OFFER FOR READERS
We are giving special discount to our existing readers who purchase any jewelry
making membership package at DIY Beading Club. Just use this coupon code
C8E005B8 to claim for 10% discount on any of our membership package at DIY
Beading Club
ABOUT THE AUTHOR
Started as a hobby, I have then addicted into sharing my knowledge through tutorial
writing. I publish my knowledge and research through my websites. I also work with
other jewelry artists to develop tutorials and publish their works. I hope you will
browse through all our creations and hope you will like them.

Do join me at

Browse our monthly lessons plan at www.diybeadingclub.com:


