69
Writing Good Reports Using Word to Present Research Findings & Program Outcomes
| Date post: | 14-Dec-2015 |
| Category: |
Documents |
| Upload: | tyler-payne |
| View: | 215 times |
| Download: | 0 times |

Writing Good ReportsUsing Word to Present Research Findings &
Program Outcomes

Writing Good Reports
Be organized and logical in your presentation Use clear & meaningful Headings Use subheadings where appropriate
Create an Outline Use the outline to guide your headings
and subheadings

Writing Good Reports Use Easy to Understand Tables & Graphs
Don’t put too much information in one table Don’t “overcomplicate” your charts and graphs
Present the information at the level and language appropriate to the audience Only use “jargon” with appropriate audiences Write in a clear, direct style that’s easy to follow

Writing Good Reports
Spell Check
Grammar Check
Cite all references appropriately

Writing Good Reports
Make it look nice Headings & subheadings should be
appropriately sized and not overpowering Major Headings at 14-point Subheadings at 12-point (bold or underlined)
Use a true type, readily accepted font – usually Times New Roman
Body text should be 12-point, and unless otherwise noted, double-spaced
Appropriately size and space paragraphs

MS Word 2003Using Word Processing Effectively
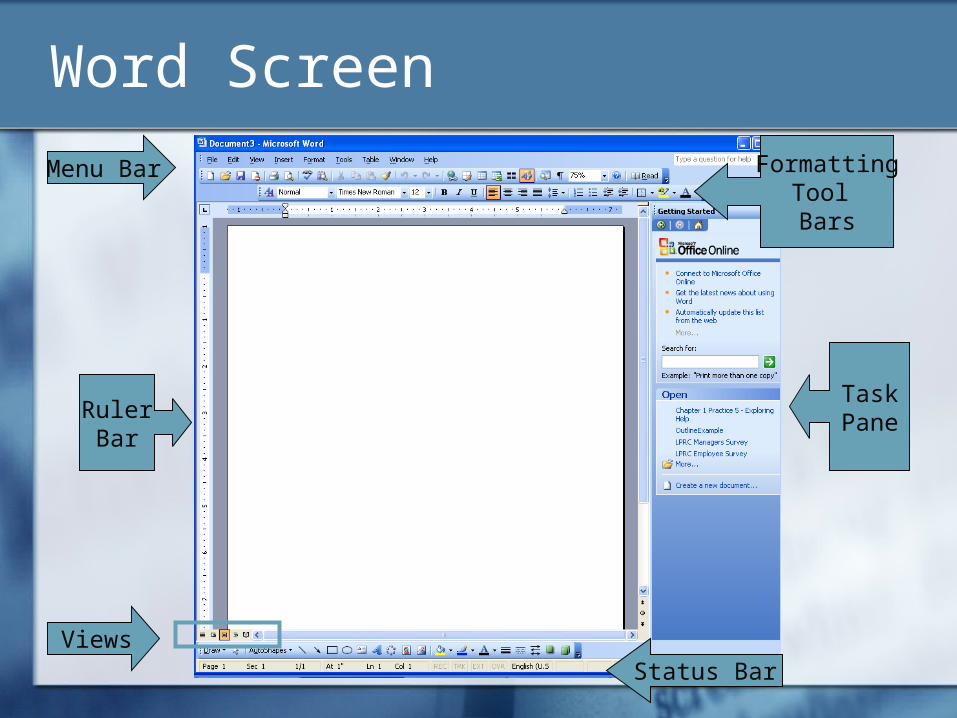
Word Screen
RulerBar
TaskPane
ViewsStatus Bar
FormattingTool Bars
Menu Bar

Viewing Documents Different ‘views’ in
Word are useful for different tasks
View Menu or Toolbar at bottom of page to change view
Most people view a document in “Normal” or “Print Layout” when constructing

Normal vs. Print Layout
Margins

Outline The outline view is
sometimes a useful starting point for a report
This view lets you organize your document by creating headings & subheadings
Can be used to create: Table of Contents Power Point Slides

Outline View
In outline view, type your headings & press enter
Outline view has its own toolbar To go to the next level, you can hit the Tab
key, or use the “promote” & “demote” keys You can move items up or down in the outline
& add & delete items If you’d rather view the outline without
formatting, toggle the Formatting Button

Modifying Your Outline
Task Pane

Modifying Your Outline
Headings & subheadings should be appropriately sized and not overpowering Major Headings at 14-point Subheadings at 12-point (bold or
underlined)
Use a true type, readily accepted font – usually Times New Roman or Arial Body text should be 12-point, and unless
otherwise noted

Using Outlines Once you have an
outline, you can switch to Normal or Page Layout View to add your text, tables, etc.
You can also use your outline to create Power Point slides File Menu Send To MSOffice Power Point

Hands-on Exercise 1
Open a new document in MS Word 2003
Change to “Outline” ViewView Menu OutlineOr, Outline Icon

Hands-on Exercise 1
Create a basic outline with the following elements:
Introduction Background
Organization Issue
Literature Review Research Question
or Project Goal
Methodology Data Methods Analysis
Results Limitations Recommendations
Current process Future Research

Hands-on Exercise 1 Modify Your Outline:
Change the font to Times New Roman 14-point for major headings 12-point, bold for minor headings 12-point for regular text
Try moving the elements of your outline using the icons to the left of each entry & then the toolbar
Change to Print Layout View, then back to Outline
Send your outline to Power Point
Formatting & Editing Documents

Basic Formatting
Bold
Different Colors
Border
Underline
Highlight
Paragraph Spacing
Italics

Typography: Terms to Know
Mono-spaced typeface
Proportional typeface
Font Type size Point size Format Font
command
Typography Typeface
Times New Roman ArialCourier New
Serif typeface Sans serif
typeface

Format Font Command
Type size
Font color
Preview pane
Type style
Special effects
Typeface

Page Setup - Margins
Select Orientation
Margin settings
Margin tab
Preview box

Page Setup - Layout
Settings
Layout tab
Preview box
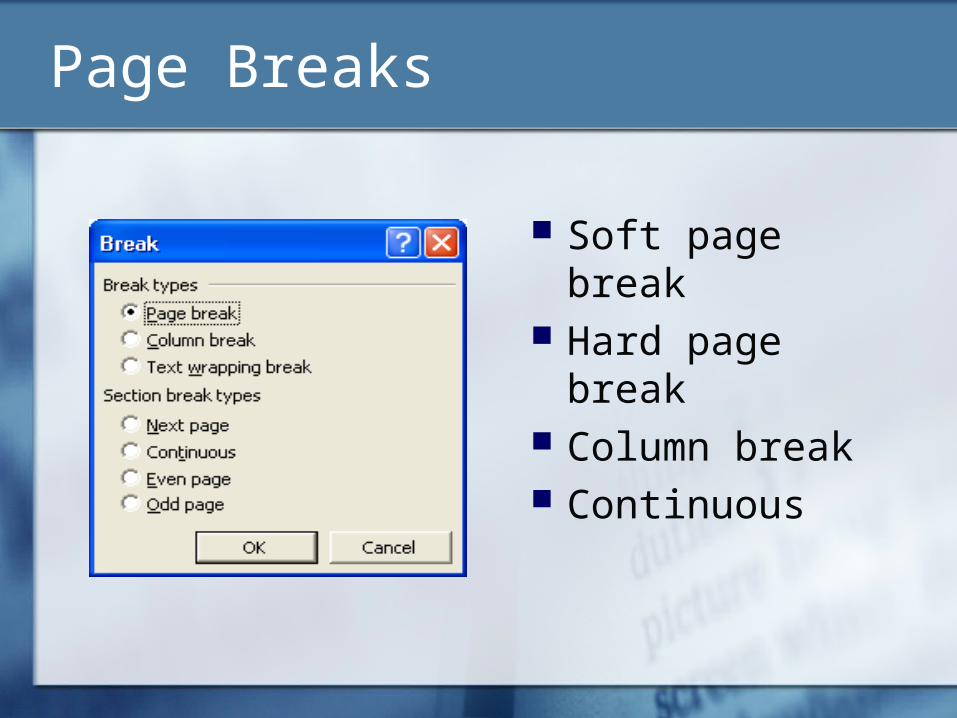
Page Breaks
Soft page break Hard page break Column break Continuous

Paragraph Formatting
Spacing
Indents
Alignment
Line Spacing
Preview box
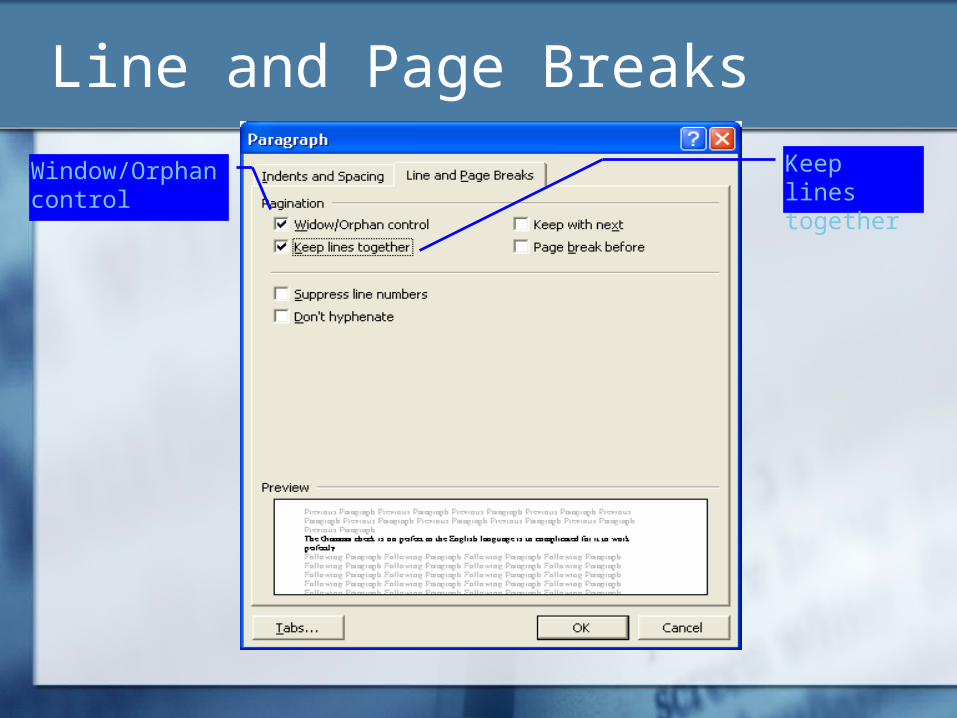
Line and Page BreaksKeep lines together
Window/Orphan control
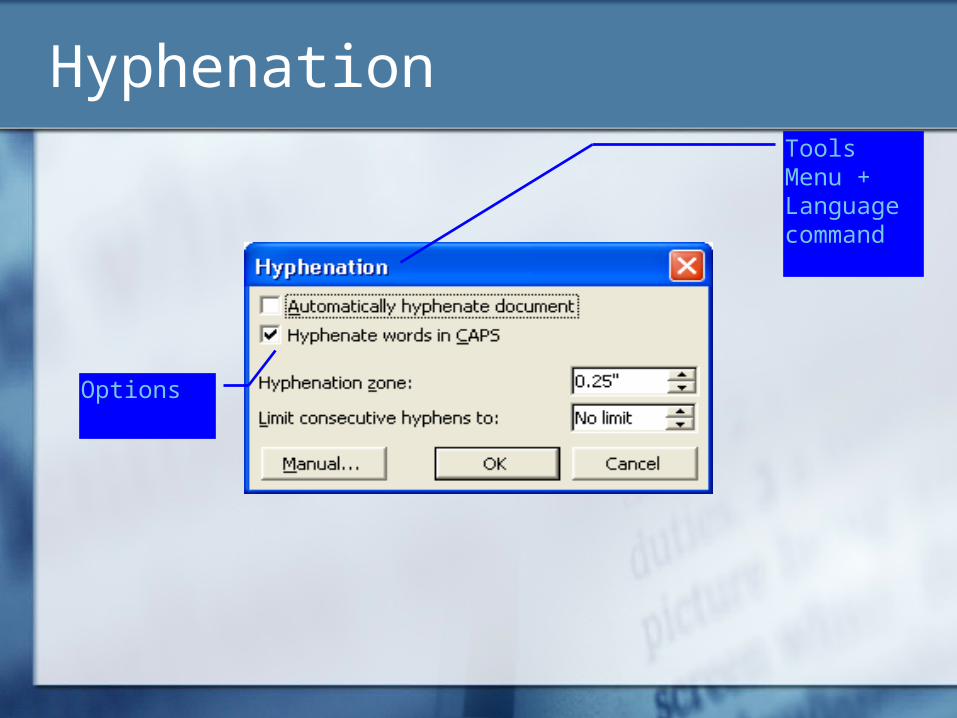
HyphenationTools Menu + Language command
Options

Tabs
Alignment
Leader character
Position of tab stop

Borders and ShadingBorders tab
Additional line styles
Line colorLine style
Line widthClick for bottom border only
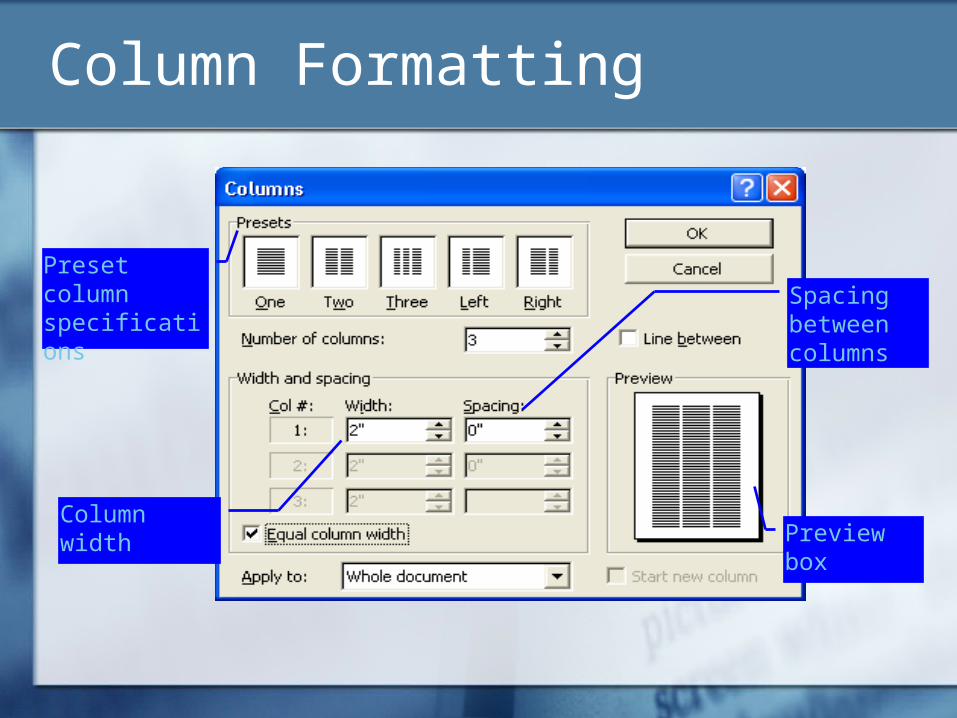
Column Formatting
Preview boxColumn width
Preset column specifications Spacing
between columns

Moving and Copying Text: Terms
Cut Copy Paste Windows
Clipboard
Paste Special command
Office clipboard Undo Redo

Find Command
Case sensitive
Search text
Whole words only

Replace Command
Automaticreplacement
Search text
Selective replacement
Replacement text

Go To CommandGo to what
Enter page number
Click Go To

The View Menu & Zoom Command
Zoom box
Print Layout View button
Two page display

Enhancing Documents

Bullets
Customize options
Choose style
Click OK to choose

Lists
Customize options
Choose style
Click OK to choose

Page NumbersInsert menu
Alignment
Position
Format options
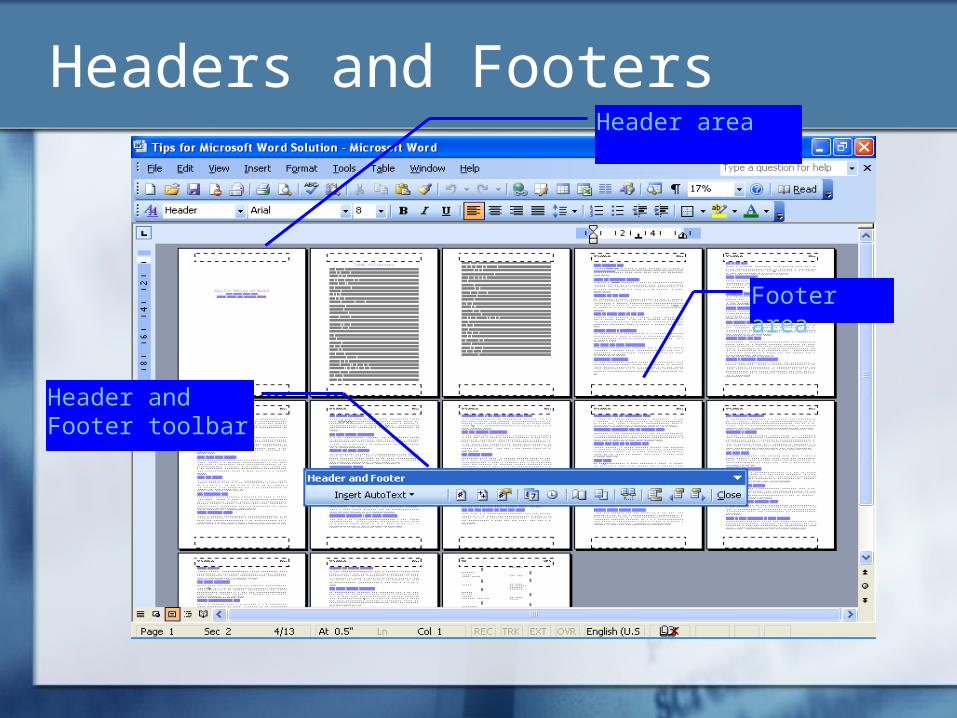
Headers and FootersHeader area
Footer area
Header and Footer toolbar

Sections Break Types
Page break Column break Text wrapping break
Section Types Next Page Continuous Even page Odd page

Table of ContentsTable of Contents tab
Preview pane
TOC features

The Microsoft Clip Organizer
Insert Picture
Insert Picture + Clip Art
Insert clip art button
Enter keyword to search for clips
Pictures found

The Insert Symbol Command
Choose insert
Select font type
Select symbol

Microsoft Word and the Internet Embed Hyperlinks
Insert Menu Hyperlink Add the URL Descriptive name
HTML Save As Web Page
command

Useful Tools

Spell CheckWord not found in dictionary
Suggested change
Change button
AutoCorrect button
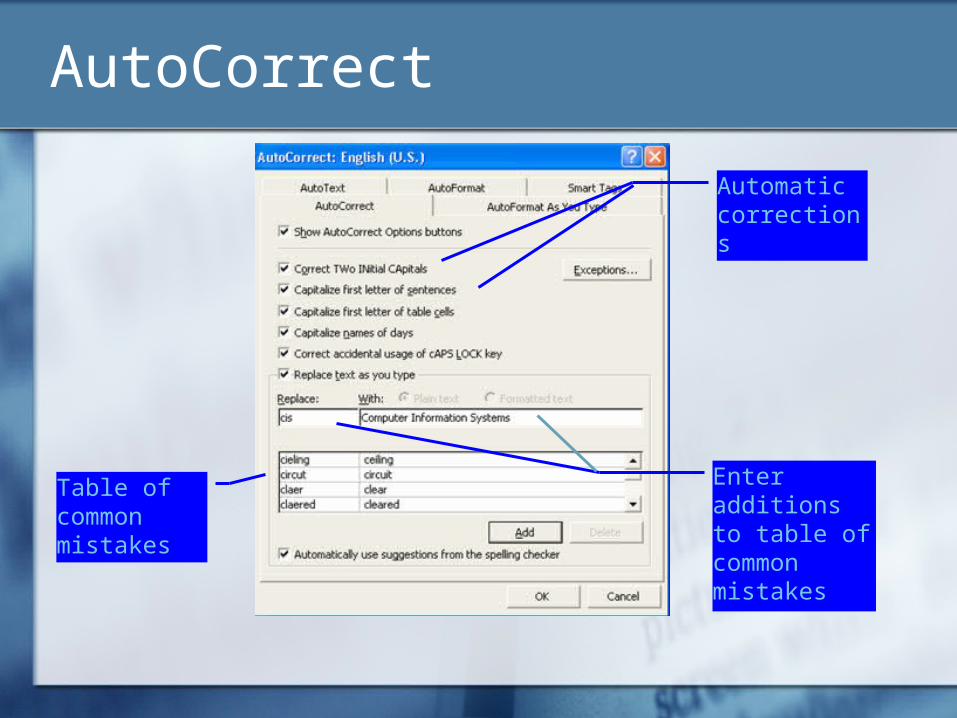
AutoCorrect
Automatic corrections
Table of common mistakes
Enter additions to table of common mistakes

AutoText
Preview
Predefined AutoText entries
Name of AutoText Entry
Thesaurus
Tools Menu Language
Command Thesaurus
Look Up Meanings Replace Cancel
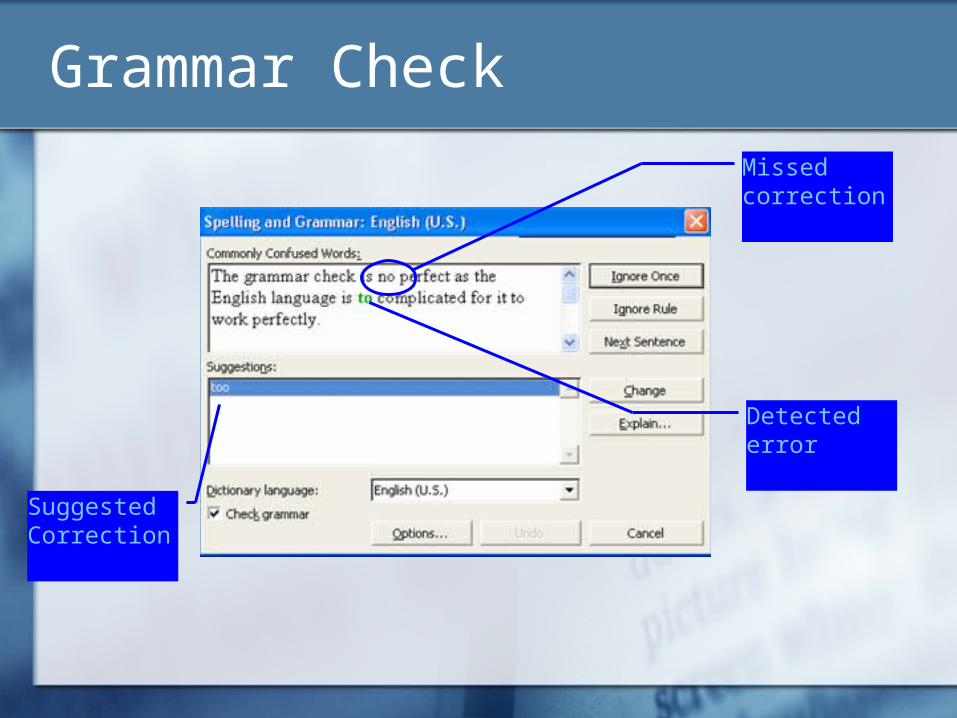
Grammar Check
Missed correction
Detected error
Suggested Correction

Hands-on Exercise
Since I’m very particular about spelling & grammar (and about tools that make life easier) – lets complete the exercise related to this topic: Hands-on Exercise 3 in your book Page 103 Uses the “Language Tools” document Complete steps 2 through 6

Templates & Wizards

Templates & Wizards Rather than moving you through each
point, a template is pre-constructed
Point & Click to change/add/delete elements
For things you do often, create your own custom templates Wizards allow you to create custom
templates Also found in the template window

Mail Merge Concepts
Main Document Standardized text
Merge FieldsPlace holders for
address list
Address List Information that
varies from letter to letter

Mail Merge Go to the “Tools” Menu Choose “Letters and Mailings”
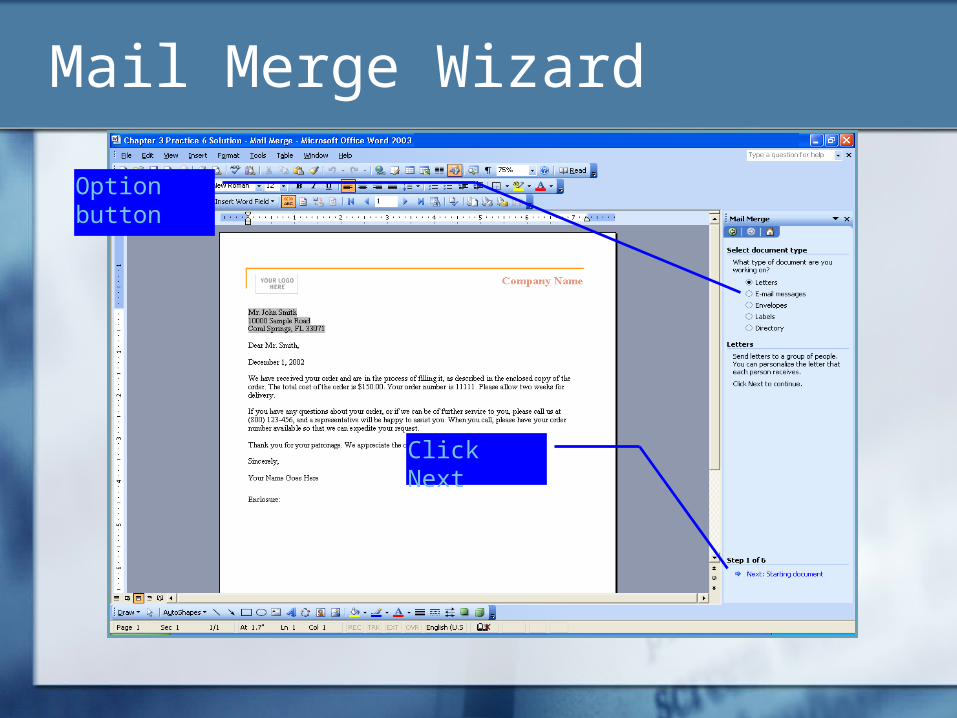
Mail Merge Wizard
Option button
Click Next

Mail Merge Wizard

Mail Merge Wizard
Enter data
Click to write letter
New Entry button

Mail Merge Wizard

Mail Merge Wizard Click link to address block
Preview of greeting line
Click link to greeting line
Address block field
Click to preview letters

Mail Merge Wizard
Click to preview letters
Merge to printer

Copyright Protection Copyright Infringement of a
Copyright Public domain Fair use Footnote Endnote Insert Footnote
command

Footnotes & Endnotes Used to cite or
clarify Insert Menu
Reference Footnote
Footnote or Endnote Location Numbering scheme
For academic work, see journal for format instructions

Presenting Research & Outcomes
Choose the Correct Style

Presenting Your Research
You should modify your report style to suit your audience
There are typical formats for business reports and for academic research Differ slightly Can be overlapped / modified Be clear with your client on the style / info
they prefer
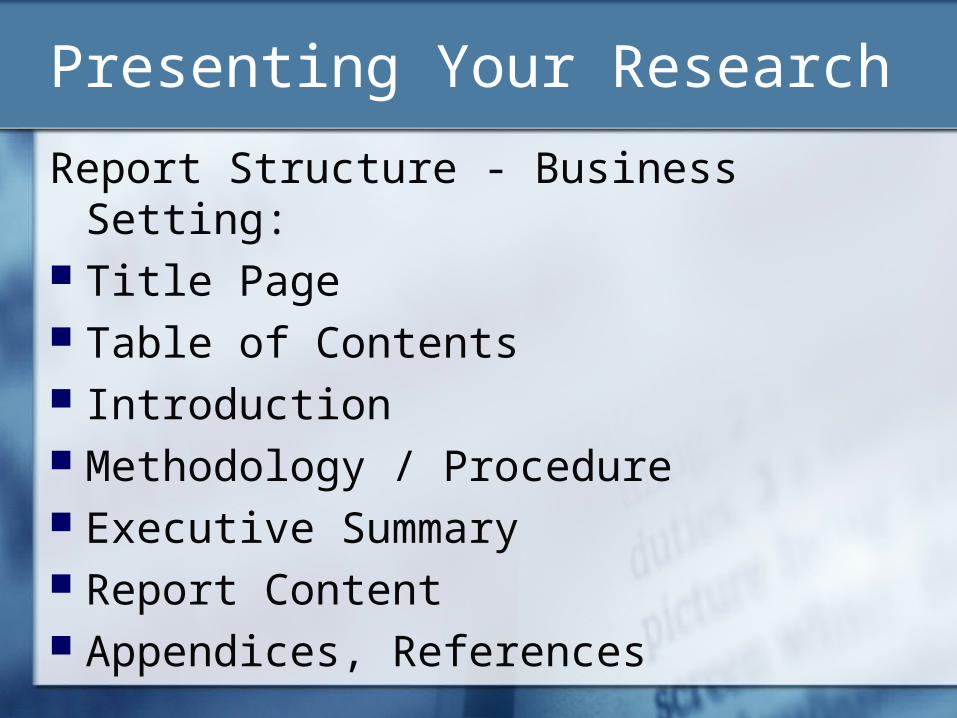
Presenting Your Research
Report Structure - Business Setting: Title Page Table of Contents Introduction Methodology / Procedure Executive Summary Report Content Appendices, References

Presenting Your ResearchReport Structure - Academic Setting: Title & Abstract Background / Introduction Literature Review Research Question Data & Methodology Results & Discussion Conclusions Appendices, End Notes, References

Questions?


