14
XMAS installation instructions Windows Version: 1.0 4/22/2008
| Date post: | 21-Dec-2015 |
| Category: |
Documents |
| View: | 219 times |
| Download: | 1 times |

XMAS installation instructions
Windows Version: 1.0
4/22/2008

Overview
1. Install Java JDK
2. Install Apache Tomcat• Test Java/Tomcat Installation
3. Install MySQL• Configure MySQL• Configuration Screen Shots
4. Install XMAS

1. Install Java JDK
• Download and begin installation:– Download the Java Development Kit (JDK)
• Version 6, upgrade 6• From: http://java.sun.com/javase/downloads/index.jsp
– Double click the downloaded file to begin the installation
Download
Doubleclick
Installation

1. Install Java JDK• Install Java, noting the installation path
Note
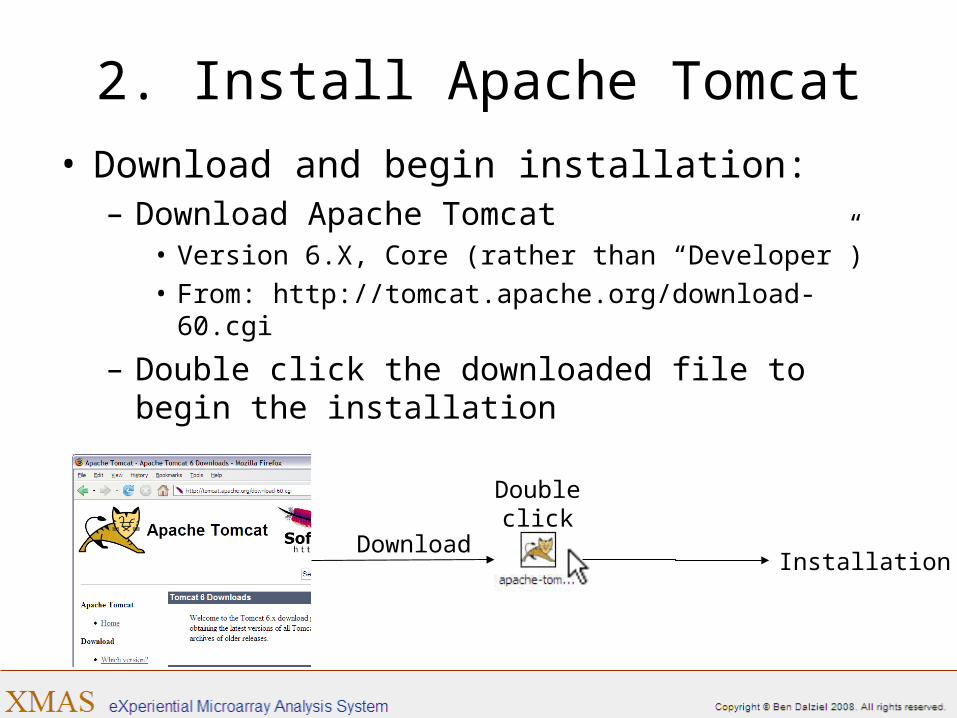
2. Install Apache Tomcat
• Download and begin installation:– Download Apache Tomcat
• Version 6.X, Core (rather than “Developer”)• From: http://tomcat.apache.org/download-60.cgi
– Double click the downloaded file to begin the installation
Download
Doubleclick
Installation

2. Install Apache Tomcat
• Installation 1– In step three, be sure to include the “Examples” in the
installation– this allows you to test the environment

2. Install Apache Tomcat
• Installation 21. Specify a user name and password (note port no.)
2. Enter the location of your java installation

Test Java/Tomcat installation
• Ensure Tomcat is running:– http://127.0.0.1:8080/ or http://localhost:8080/
• Where 8080 is the port number specified during install
• Ensure Java is working with Tomcat:– Click the “JSP Samples” link– Locate and click the “Date” example– You should see a page similar to this:

3. Install MySQL
• Download and begin installation:– Download MySQL
• Version 5.0• http://dev.mysql.com/downloads/mysql/5.0.html
– Double click the downloaded file to begin the installation

3. Install MySQL

Configure MySQL1. Detailed Configuration2. Developer Machine3. Multifunctional Database4. Decision Support5. Disable TCP/IP Networking, enable Strict6. Standard Char set7. Install as windows service named MySQL58. Modify Security Settings
• Password: “xmas”
9. Execute

Configuration Screen Shots

4. Install XMAS• Download and begin installation:
– Download XMAS• http://cose-stor.sfsu.edu/~huiyang/xmas_website/xmas_download.html
– Install XMAS:• Locate the downloaded file and move to the Tomcat webapps dir’
• Restart Tomcat – A new folder will have been created:

Test installation• Point your browser at:
– http://localhost:8080/xmas/index.jsp• (Remembering to use your own port number)
• The XMAS home page will load• Refer to the user guide to begin your XMAS
experience


