30
New Perspectives on Microsoft Office FrontPage 2003 Tutorial 6 1 XP Microsoft Office FrontPage 2003 Tutorial 6 – Publishing a Web Site
| Date post: | 30-Dec-2015 |
| Category: |
Documents |
| Upload: | donna-carroll |
| View: | 221 times |
| Download: | 0 times |
New Perspectives on Microsoft Office FrontPage 2003 Tutorial 6
1
XP
Microsoft Office FrontPage 2003
Tutorial 6 – Publishing a Web Site
New Perspectives on Microsoft Office FrontPage 2003 Tutorial 6
2
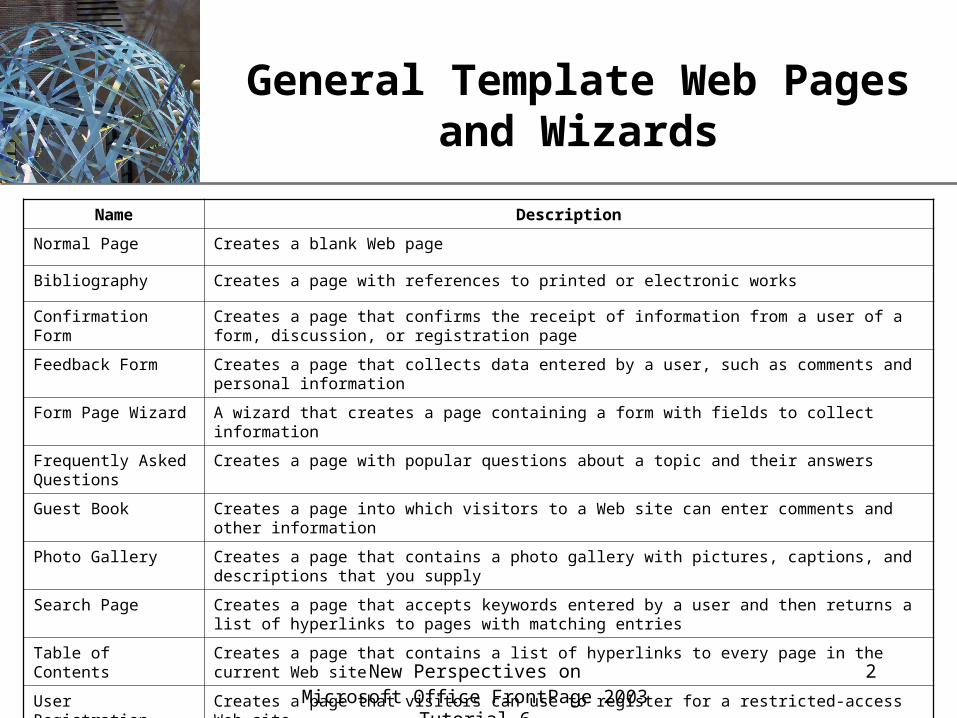
XPGeneral Template Web Pages and Wizards
Name Description
Normal Page Creates a blank Web page
Bibliography Creates a page with references to printed or electronic works
Confirmation Form Creates a page that confirms the receipt of information from a user of a form, discussion, or registration page
Feedback Form Creates a page that collects data entered by a user, such as comments and personal information
Form Page Wizard A wizard that creates a page containing a form with fields to collect information
Frequently Asked Questions
Creates a page with popular questions about a topic and their answers
Guest Book Creates a page into which visitors to a Web site can enter comments and other information
Photo Gallery Creates a page that contains a photo gallery with pictures, captions, and descriptions that you supply
Search Page Creates a page that accepts keywords entered by a user and then returns a list of hyperlinks to pages with matching entries
Table of Contents Creates a page that contains a list of hyperlinks to every page in the current Web site
User Registration Creates a page that visitors can use to register for a restricted-access Web site
New Perspectives on Microsoft Office FrontPage 2003 Tutorial 6
3
XPCreating a Page that Contains a Form
• A form is a collection of form fields in a Web page.
• A form field is a data-entry field in a form, such as a text box, option button, check box, or drop-down menu.
• A form handler is program that collects and processes the form’s data in a predetermined manner.
New Perspectives on Microsoft Office FrontPage 2003 Tutorial 6
4
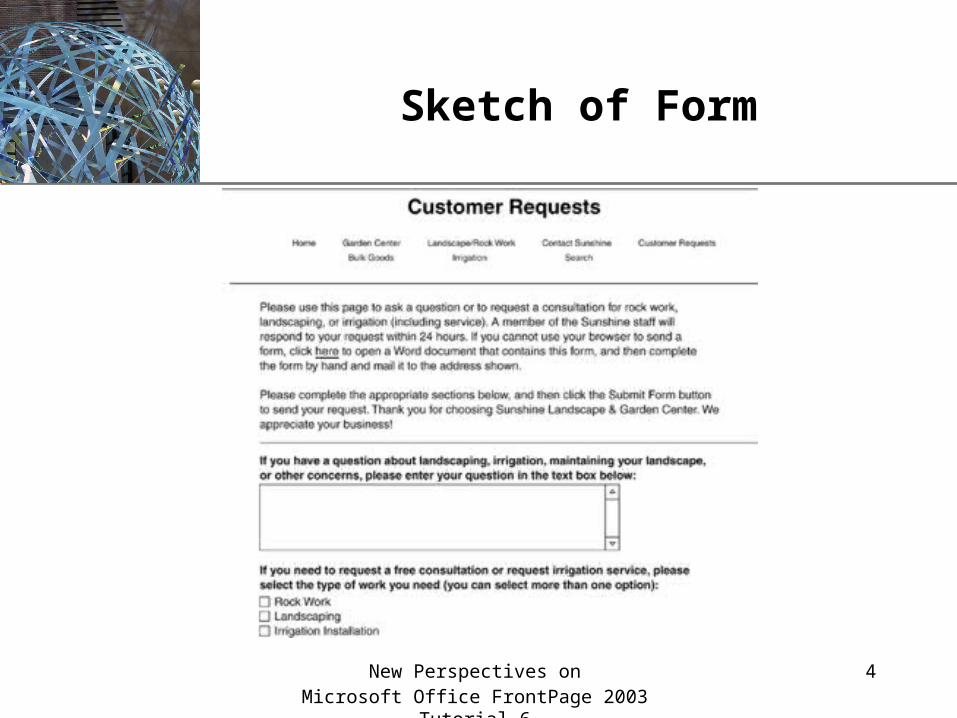
XPSketch of Form
New Perspectives on Microsoft Office FrontPage 2003 Tutorial 6
5
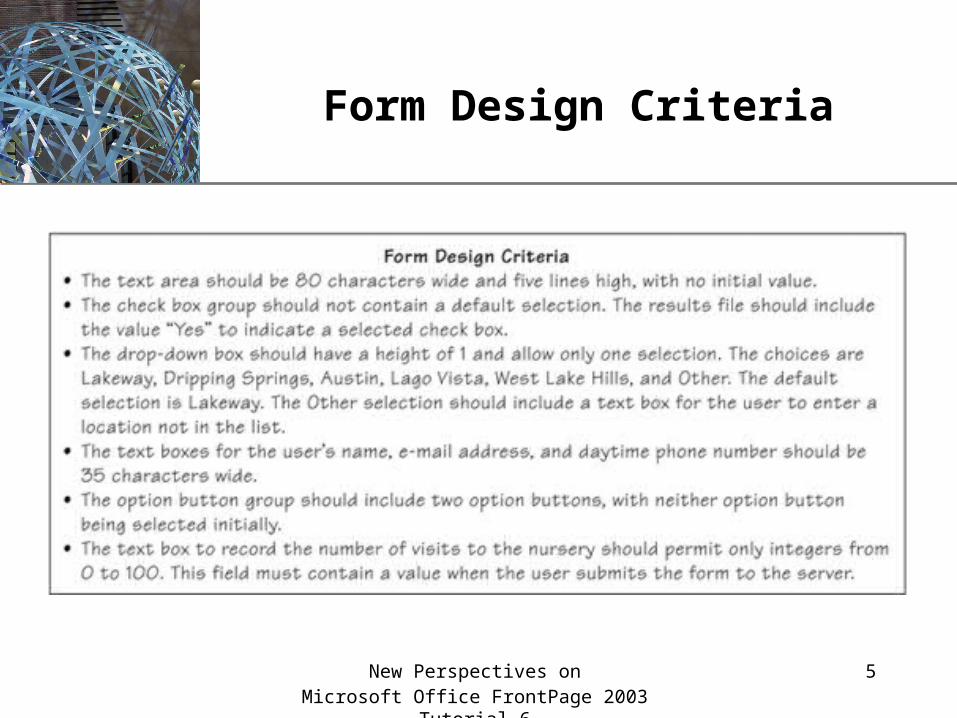
XPForm Design Criteria
New Perspectives on Microsoft Office FrontPage 2003 Tutorial 6
6
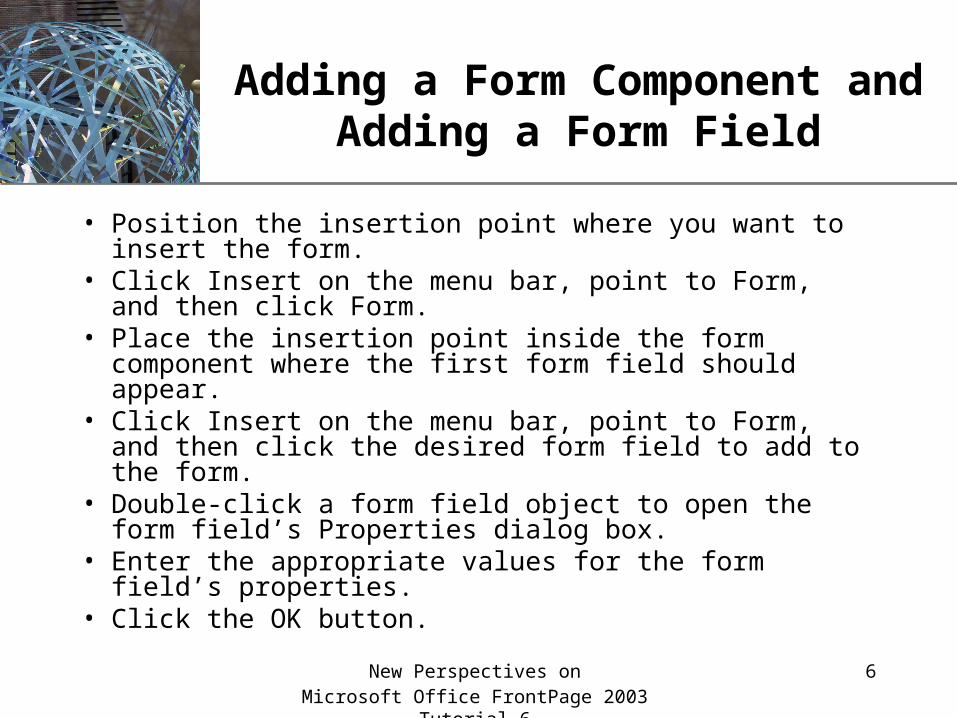
XPAdding a Form Component and Adding a Form Field
• Position the insertion point where you want to insert the form.
• Click Insert on the menu bar, point to Form, and then click Form.
• Place the insertion point inside the form component where the first form field should appear.
• Click Insert on the menu bar, point to Form, and then click the desired form field to add to the form.
• Double-click a form field object to open the form field’s Properties dialog box.
• Enter the appropriate values for the form field’s properties.• Click the OK button.
New Perspectives on Microsoft Office FrontPage 2003 Tutorial 6
7
XPOption Buttons
• Option buttons (also called radio buttons) are usually arranged in groups in a form.
• An option button group name identifies a set of related option buttons. Within a group of option buttons, only one button can be selected at a time.– Use option buttons when you want to limit the user to
selecting one of a few related and mutually exclusive choices.
– The minimum number of option buttons in a group is two, and the recommended maximum is seven.
New Perspectives on Microsoft Office FrontPage 2003 Tutorial 6
8
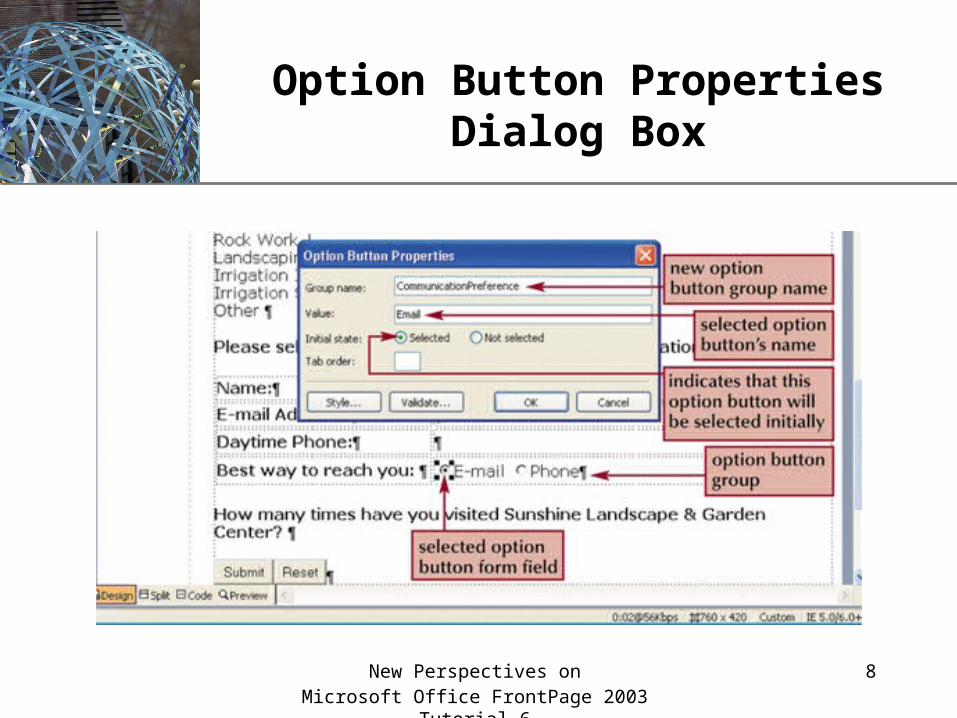
XPOption Button Properties Dialog Box
New Perspectives on Microsoft Office FrontPage 2003 Tutorial 6
9
XPDrop-Down Boxes
• Use a drop-down box when you want the user to select a choice from a list.
• Drop-down boxes should contain a minimum of three choices.
• Arrange items in the list so that the most commonly selected entries appear first, or arrange items in ascending order alphabetically, numerically, or chronologically.
• The default selection in a drop-down box should be either the most used choice or the first choice in the list.

New Perspectives on Microsoft Office FrontPage 2003 Tutorial 6
10
XPDrop-Down Box Properties Dialog Box
New Perspectives on Microsoft Office FrontPage 2003 Tutorial 6
11
XPText Boxes
• A text box accepts typed information that you can limit to some maximum number of characters.
• Use a text box when you want the user to enter unique or uncommon information that is limited to a single line.
• A text box can be set to limit the number of characters that a user can enter and see at one time.
• A text box can be used as a password field.
New Perspectives on Microsoft Office FrontPage 2003 Tutorial 6
12
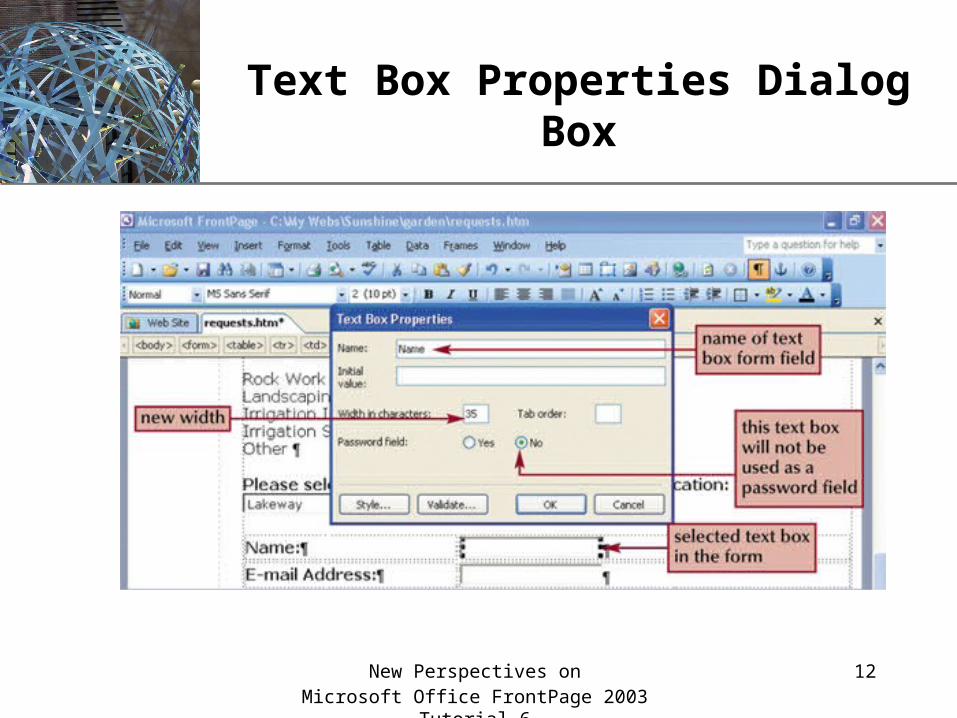
XPText Box Properties Dialog Box

New Perspectives on Microsoft Office FrontPage 2003 Tutorial 6
13
XPText Areas
• A text area, also called a scrolling text box, has the same basic characteristics as a text box, except that it displays multiple lines of text and cannot be used as a password field.
• Use a text area when you want a user to supply information that might include more than one line.
• A text area can be set to display multiple lines of text entered by the user. The size of the text area should be large enough to display several lines of text at a time.
New Perspectives on Microsoft Office FrontPage 2003 Tutorial 6
14
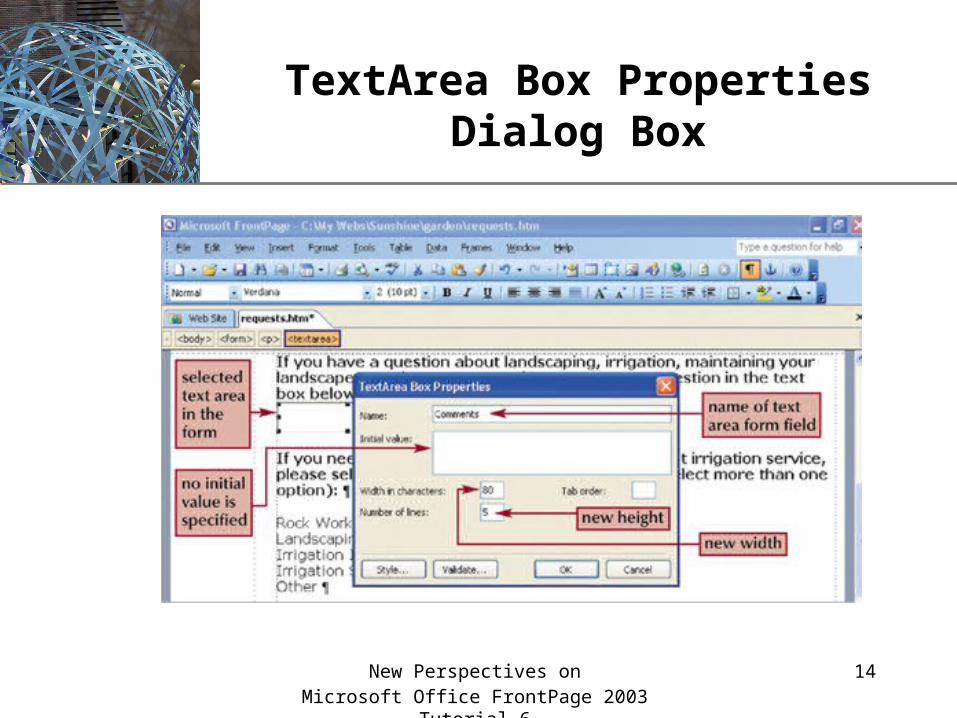
XPTextArea Box Properties Dialog Box
New Perspectives on Microsoft Office FrontPage 2003 Tutorial 6
15
XPValidating a Form Field
• Validation is the process of checking the information entered by a user into one or more form fields to verify that the information is acceptable and valid.
• If the data entered by a user fails the validation test, then the user must change it before the browser will send the form to the server for processing.
• Access the Validation dialog box by double-clicking the control you wish to validate and then clicking the Validation button.
New Perspectives on Microsoft Office FrontPage 2003 Tutorial 6
16
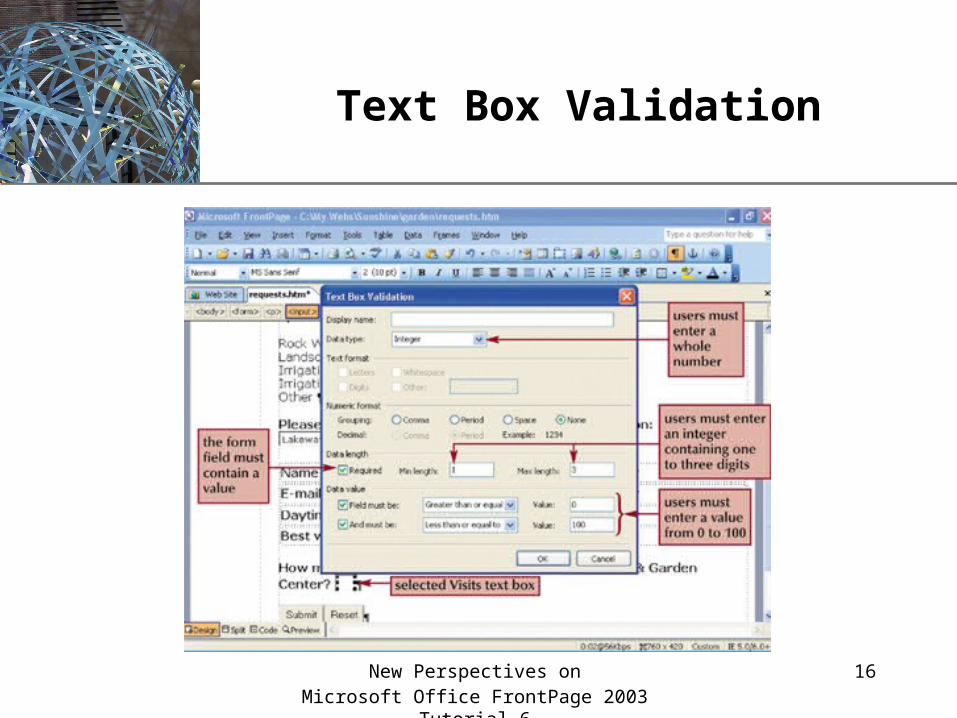
XPText Box Validation
New Perspectives on Microsoft Office FrontPage 2003 Tutorial 6
17
XPCheck Boxes
• A check box collects a yes/no response to a question, or you can use check boxes in a group to let users answer yes or no for several options.
• Use check boxes when you want a user to select from a group of one or more independent and nonexclusive choices.
• Set the default selection to the most frequently occurring selection.
• Clearly label each check box in a group.• When necessary, use a heading or text to identify the
subject of the check box group.
New Perspectives on Microsoft Office FrontPage 2003 Tutorial 6
18
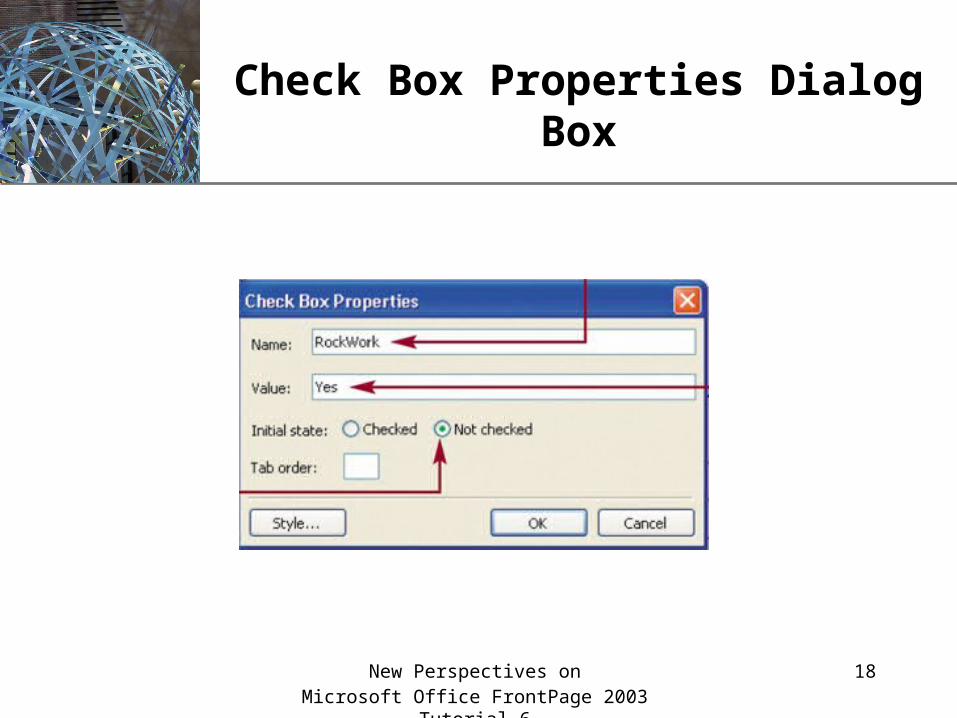
XPCheck Box Properties Dialog Box
New Perspectives on Microsoft Office FrontPage 2003 Tutorial 6
19
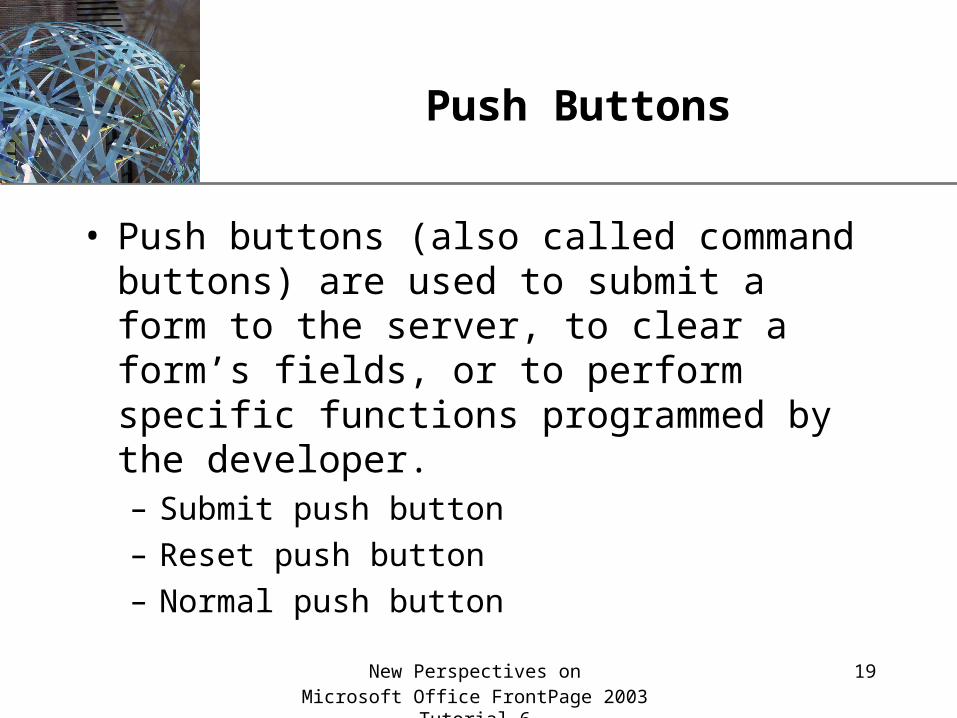
XPPush Buttons
• Push buttons (also called command buttons) are used to submit a form to the server, to clear a form’s fields, or to perform specific functions programmed by the developer.– Submit push button
– Reset push button
– Normal push button
New Perspectives on Microsoft Office FrontPage 2003 Tutorial 6
20
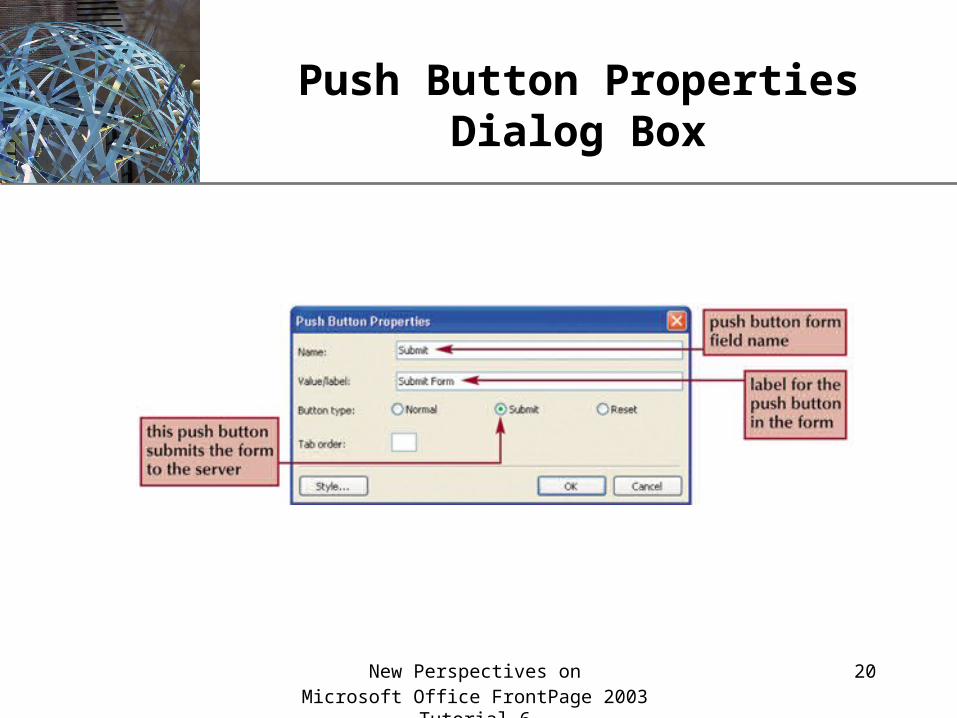
XPPush Button Properties Dialog Box
New Perspectives on Microsoft Office FrontPage 2003 Tutorial 6
21
XPUsing a Web Server
• To function as a Web server, a computer must have special software that works with the computer’s operating system to receive and execute requests for Web pages.
• Microsoft Internet Information Services (IIS)
New Perspectives on Microsoft Office FrontPage 2003 Tutorial 6
22
XPPublishing a Web Site
• Open the Web site in FrontPage, and then change to Remote Web Site view.
• Click the Remote Web Site Properties button on the Contents pane to open the Remote Web Site Properties dialog box.
• Click the option button in the Remote Web server type section to select the type of server you are using.
• Click the Remote Web site location list box, and then type http://localhost/ (or your server’s name) and the name of the folder in which to store the Web site’s files and folders.
• Click the OK button.
New Perspectives on Microsoft Office FrontPage 2003 Tutorial 6
23
XPPublishing Changers to a Server-Based Web Site
• In Design view, open the Web page that you need to edit, make the changes, and then save the page.
• Edit and save other Web pages, as necessary.
• Click the Publish Site button on the Standard toolbar.
New Perspectives on Microsoft Office FrontPage 2003 Tutorial 6
24
XPUsing a Hit Counter
• A hit counter is a component that counts the number of times a page in a Web site has been opened or refreshed using a Web browser.
• Click the location in the page where you want to insert the hit counter.
• Click the Web Component button on the Standard toolbar.
• In the Component type list box, click Hit Counter.
New Perspectives on Microsoft Office FrontPage 2003 Tutorial 6
25
XPUsing a Hit Counter
• In the Choose a counter style list box, click the desired hit counter style, and then click the Finish button.
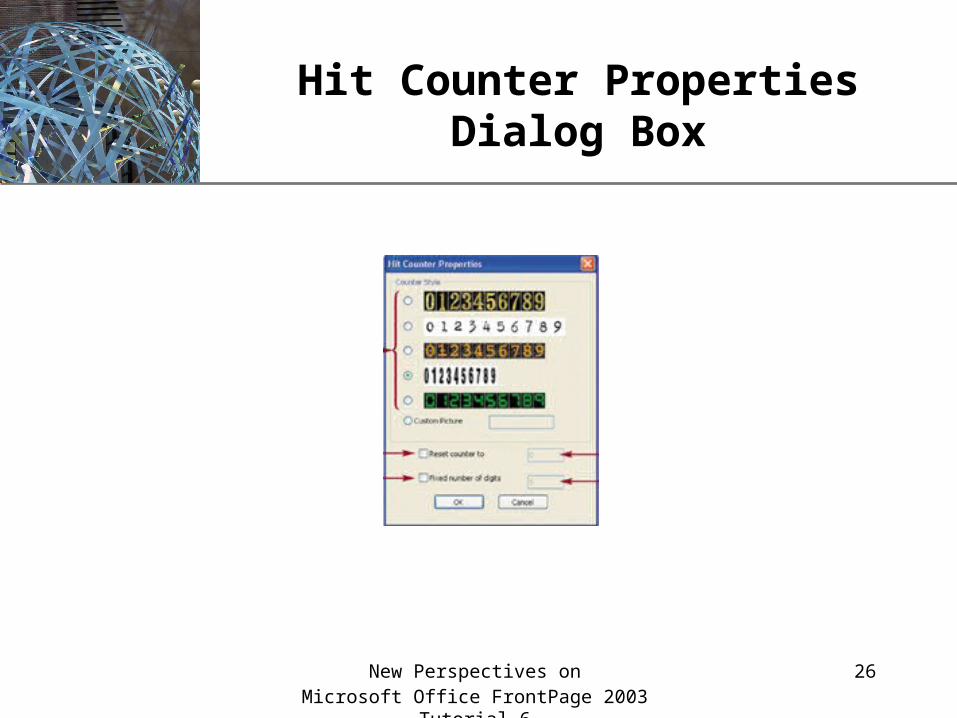
• In the Hit Counter Properties dialog box, set the options to reset the counter or to display a fixed number of digits as needed.
• Click the OK button.
New Perspectives on Microsoft Office FrontPage 2003 Tutorial 6
26
XPHit Counter Properties Dialog Box
New Perspectives on Microsoft Office FrontPage 2003 Tutorial 6
27
XPSetting Permissions for a Web Site
• Permissions allow a Web site developer to control who can browse, author, or administer a Web site after it has been published.
• Open the server-based Web site in FrontPage.• Click Tools on the menu bar, point to Server, and then
click Administration Home. The Administration page opens in a browser.
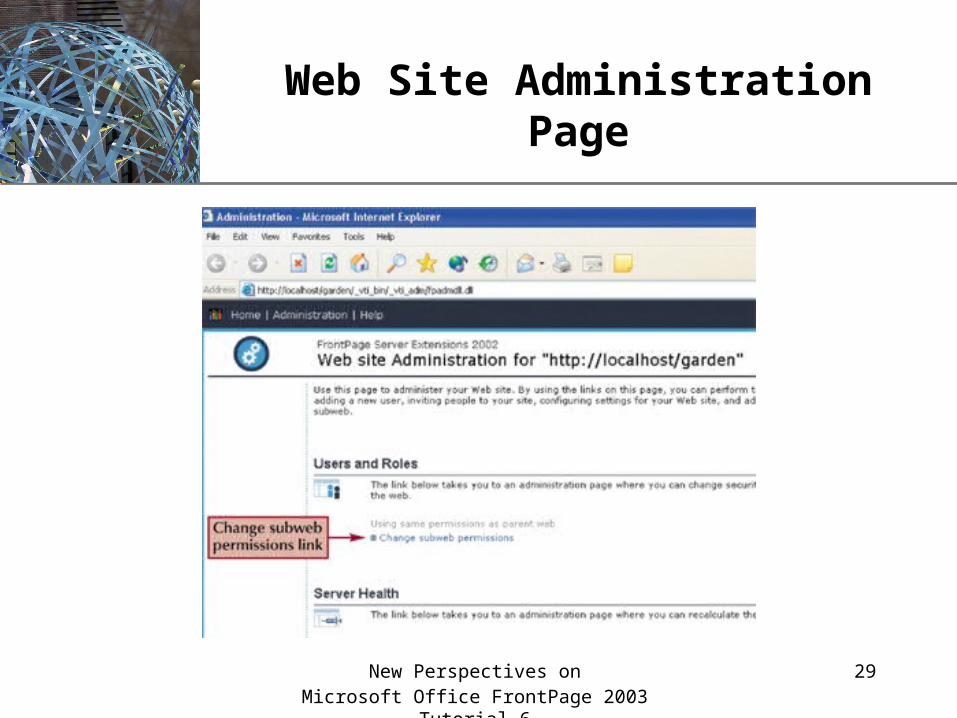
• Click the Change subweb permissions link.• Choose the Use unique permissions for this Web site
option button, and then click the Submit button.• Click the Administration link at the top of the page.

New Perspectives on Microsoft Office FrontPage 2003 Tutorial 6
28
XPSetting Permissions for a Web Site
• Click the Change anonymous access settings link, use the page that opens to turn anonymous access off or on and to assign users to a role (Administrator, Advanced author, Author, Contributor, or Browser), and then click the Submit button.
• Click the Manage users link, and then click the Add a user link. Use the Configure Web User page to add a user and to select a role for the user, and then click the Add User button.
• Close the browser.
New Perspectives on Microsoft Office FrontPage 2003 Tutorial 6
29
XPWeb Site Administration Page
New Perspectives on Microsoft Office FrontPage 2003 Tutorial 6
30
XPProject Six Completed
Good Luck
H. Zamanzadeh


