66
Xubuntu Desktop Guideby Xubuntu Dev Team
Copyright © 2004, 2005, 2006 Canonical Ltd. and members of the Ubuntu Documentation Project
Abstract
The Xubuntu Desktop Guide aims to explain to the reader how to configure and use the Xubuntu desktop.
Credits and License
The following Xubuntu Team members maintain this document:
• Luzi Thöny
The following people have contributed to this document:
• -
Credits go to everyone involved in writing the Ubuntu Desktop Guide, the Kubuntu Desktop Guide and the Ubuntu Wiki, since many pieces
of this guide have been adopted from one of these sources.
This document is made available under a dual license strategy that includes the GNU Free Documentation License (GFDL) and the Creative
Commons ShareAlike 2.0 License (CC-BY-SA).
You are free to modify, extend, and improve the Ubuntu documentation source code under the terms of these licenses. All derivative works
must be released under either or both of these licenses.
This documentation is distributed in the hope that it will be useful, but WITHOUT ANY WARRANTY; without even the implied warranty
of MERCHANTABILITY or FITNESS FOR A PARTICULAR PURPOSE AS DESCRIBED IN THE DISCLAIMER.
Copies of these licenses are available in the appendices section of this book. Online versions can be found at the following URLs:
• GNU Free Documentation License [http://www.gnu.org/copyleft/fdl.html]
• Attribution-ShareAlike 2.0 [http://creativecommons.org/licenses/by-sa/2.0/]
Disclaimer
Every effort has been made to ensure that the information compiled in this publication is accurate and correct. However, this does not
guarantee complete accuracy. Neither Canonical Ltd., the authors, nor translators shall be held liable for possible errors or the consequences
thereof.
Some of the software and hardware descriptions cited in this publication may be registered trademarks and may thus fall under copyright
restrictions and trade protection laws. In no way do the authors make claim to any such names.
THIS DOCUMENTATION IS PROVIDED BY THE AUTHORS "AS IS" AND ANY EXPRESS OR IMPLIED WARRANTIES,
INCLUDING, BUT NOT LIMITED TO, THE IMPLIED WARRANTIES OF MERCHANTABILITY AND FITNESS FOR A
PARTICULAR PURPOSE ARE DISCLAIMED. IN NO EVENT SHALL THE AUTHORS BE LIABLE FOR ANY DIRECT,
INDIRECT, INCIDENTAL, SPECIAL, EXEMPLARY, OR CONSEQUENTIAL DAMAGES (INCLUDING, BUT NOT LIMITED TO,
PROCUREMENT OF SUBSTITUTE GOODS OR SERVICES; LOSS OF USE, DATA, OR PROFITS; OR BUSINESS INTERRUPTION)
HOWEVER CAUSED AND ON ANY THEORY OF LIABILITY, WHETHER IN CONTRACT, STRICT LIABILITY, OR TORT
(INCLUDING NEGLIGENCE OR OTHERWISE) ARISING IN ANY WAY OUT OF THE USE OF THIS SOFTWARE, EVEN IF
ADVISED OF THE POSSIBILITY OF SUCH DAMAGE.

iii
Table of Contents
About This Guide .............................................................................................................. iv
1. Conventions ........................................................................................................... v
2. Contributing and Feedback ..................................................................................... vi
1. Introduction ................................................................................................................... 7
1. About Xubuntu ...................................................................................................... 8
2. Linux Basics .......................................................................................................... 9
2. Guided Tour .................................................................................................................. 14
1. Desktop ................................................................................................................. 15
2. Browse the Files on your Computer ........................................................................ 17
3. Surfing the Internet ................................................................................................ 20
4. Writing Emails ....................................................................................................... 21
5. Instant Messaging / Chatting ................................................................................... 22
6. Writing Text Documents ........................................................................................ 23
7. Spreadsheet calculations with Gnumeric .................................................................. 25
8. Adding, Removing and Updating Applications ......................................................... 26
9. Calendar ................................................................................................................ 29
10. Play Music ........................................................................................................... 30
11. Watch a Movie ..................................................................................................... 31
12. Manipulate a Picture ............................................................................................. 32
13. Browse Pictures .................................................................................................... 33
14. Burn a CD ........................................................................................................... 34
15. The Settings Manager ........................................................................................... 35
16. Finding the Right Program .................................................................................... 36
3. Common Tasks .............................................................................................................. 38
1. Desktop ................................................................................................................. 39
2. Get Multimedia support .......................................................................................... 42
3. Switching the keyboard layout ................................................................................ 43
4. Printer configuration ............................................................................................... 44
5. Managing Users and Groups ................................................................................... 46
6. Networking ............................................................................................................ 47
7. System Tasks ......................................................................................................... 50
8. Setting up Hardware ............................................................................................... 51
4. Questions and Answers .................................................................................................. 52
5. Getting More Help ......................................................................................................... 53
A. Creative Commons by Attribution-ShareAlike 2.0 ........................................................... 54
B. GNU Free Documentation License ................................................................................. 59
iv
About This Guide

About This Guide
v
1. Conventions
The following notes will be used throughout the book:
A note presents interesting, sometimes technical, pieces of information related to the
surrounding discussion.
A tip offers advice or an easier way of doing something.
A caution alerts the reader to potential problems and helps avoid them.
A warning advises the reader of a hazard that may arise in a given scenario.
Cross-reference conventions for print will be displayed as follows:
• Links to other documents or websites will look like this [http://www.ubuntu.com].
PDF, HTML, and XHTML versions of this document will use hyperlinks to handle
cross-referencing.
Type conventions will be displayed as follows:
• File names or paths to directories will be shown in monospace.
• Commands that you type at a Terminal command prompt will be shown as:
command to type
• Options that you click, select, or choose in a user interface will be shown in monospace type.
Menu selections, mouse actions, and keyboard short-cuts:
• A sequence of menu selections will be displayed as follows: File → Open
• Mouse actions shall assume a right-handed mouse configuration. The terms “click” and
“double-click” refer to using the left mouse button. The term “right-click” refers to using the right
mouse button. The term “middle-click” refers to using the middle mouse button, pressing down on
the scroll wheel, or pressing both the left and right buttons simultaneously, based on the design of
your mouse.
• Keyboard shortcut combinations will be displayed as follows: Ctrl-N .Where the conventions for
“Control”, “Shift,” and “Alternate” keys will be Ctrl, Shift, and Alt, respectively, and shall mean
the first key is to be held down while pressing the second key.

About This Guide
vi
2. Contributing and Feedback
This book is developed by the Ubuntu Documentation Team
[https://wiki.ubuntu.com/DocumentationTeam]. You can contribute to this document by sending
ideas or comments to the Ubuntu Documentation Team mailing list. Information about the
team, its mailing lists, projects, etc. can be found on the Ubuntu Documentation Team Website
[https://wiki.ubuntu.com/DocumentationTeam].
If you see a problem with this document, or would like to make a suggestion, you can simply file a
bug report at the Ubuntu Bugtracker [https://launchpad.net/products/ubuntu-doc/+bugs]. Your help is
vital to the success of our documentation!
Many thanks,
-Your Ubuntu Documentation Team

7
Chapter 1. Introduction

Introduction
8
1. About Xubuntu
Welcome to Xubuntu 6.06.1 LTS.
Xubuntu is a flavor of the Ubuntu Linux Distribution centered around the Xfce Desktop. Xfce is a
modern Desktop environment that is simple, fast, and elegant. You may want to think of Xfce as the
BMW MINI [http://en.wikipedia.org/wiki/MINI_%28BMW%29] of Linux Desktops. Combining it
with Ubuntu gives you the full power and ease of use that Ubuntu is known for, while providing a
snappy desktop even for those using older hardware.
The key advantages of Xubuntu are:
• Simplicity. Xubuntu will not give you all the bells and whistles of its siblings Ubuntu
[http://www.ubuntu.com] (Gnome Desktop) and Kubuntu [http://www.kubuntu.org] (KDE
Desktop), but will instead focus on basic functionality and a clean user interface.
• Speed. With Xubuntu you will instantly feel the speed of the Xfce Desktop Environment, which has
been built with low system requirements in mind. Don't worry if your hardware is not the latest and
greatest - your computer will most likely feel quite fast with Xubuntu.
• Elegance. Xubuntu comes with a modern, clean Look&Feel. Of course, the Desktop is completly
customizable - you may choose among many sets of icons, window borders, color sets, and so on.
Xubuntu shares the same package sources as Ubuntu and Kubuntu. This has the following
advantages:
• All of the thousands of programs in the Ubuntu Software Archive are easily installable on Xubuntu.
• Turn a Ubuntu into a Xubuntu System - or vice versa - by simply installing some additional
packages.
Technically, Xubuntu tries to avoid dependencies to Gnome and KDE libraries by using GTK+ 2 only
applications wherever possible.
1.1. About the name
The name Xubuntu indicates the combination of the Xfce Desktop Environment with Ubuntu. Xfce
used to stand for "XForms Common Environment", but since it's not based on XForms anymore, does
not mean anything today. Ubuntu means approximately "humanity towards others" in the languages
of Zulu and Xhosa. Combined, it does not really mean anything.
1.2. About Ubuntu
Ubuntu is an entirely open source operating system built around the Linux kernel. You can read all
about the Ubuntu Philosophy [http://www.ubuntu.com/ubuntu/philosophy] on the Ubuntu website.
The Ubuntu project is entirely committed to the principles of open source software development;
people are encouraged to use open source software, improve it, and pass it on. This means that
Ubuntu is and will always be free of charge.
Introduction
9
2. Linux Basics
Linux is inspired by the Unix operating system which first appeared in 1969, and has been in
continous use and development ever since. Many of the design conventions behind Unix also exist in
Linux and are central to understanding the basics of the system.
Unix was primarily oriented towards the command line interface, and that legacy is carried on in
Linux. Thus, the graphical user interface with its windows, icons and menus are built on top of a basic
command line interface. Furthermore, this means that the Linux file system is structured to be easily
manageable and accessible from the command line.
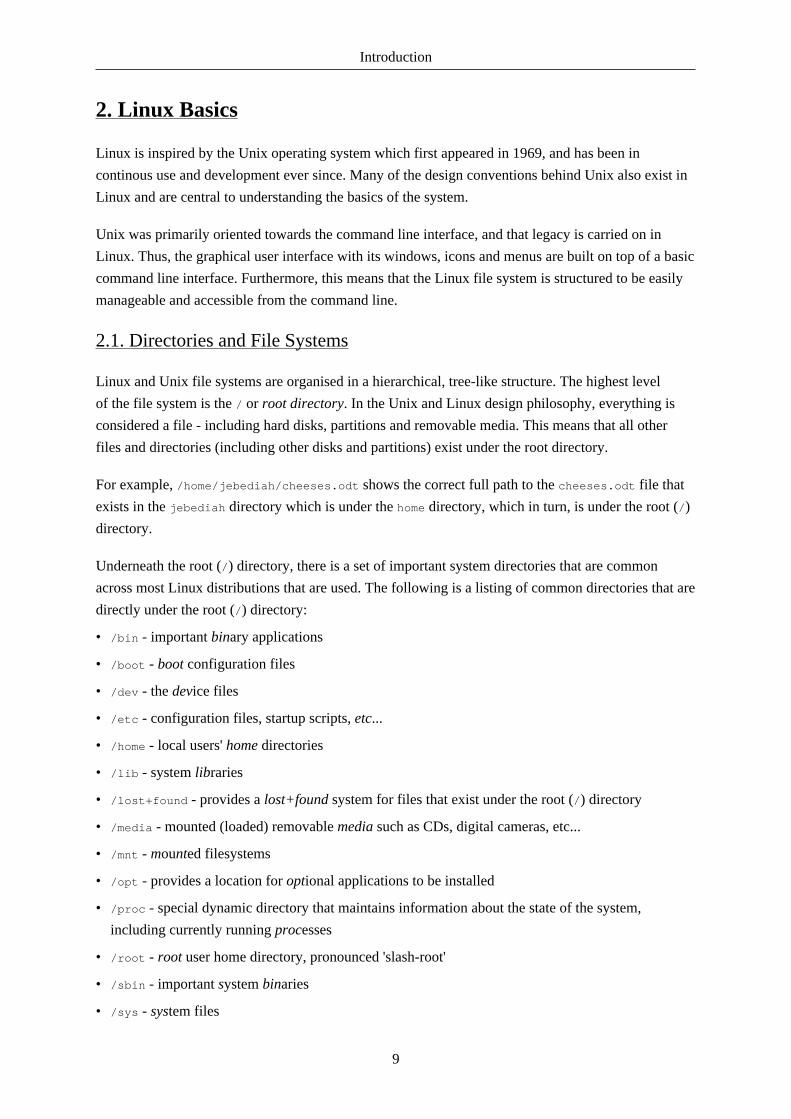
2.1. Directories and File Systems
Linux and Unix file systems are organised in a hierarchical, tree-like structure. The highest level
of the file system is the / or root directory. In the Unix and Linux design philosophy, everything is
considered a file - including hard disks, partitions and removable media. This means that all other
files and directories (including other disks and partitions) exist under the root directory.
For example, /home/jebediah/cheeses.odt shows the correct full path to the cheeses.odt file that
exists in the jebediah directory which is under the home directory, which in turn, is under the root (/)
directory.
Underneath the root (/) directory, there is a set of important system directories that are common
across most Linux distributions that are used. The following is a listing of common directories that are
directly under the root (/) directory:
• /bin - important binary applications
• /boot - boot configuration files
• /dev - the device files
• /etc - configuration files, startup scripts, etc...
• /home - local users' home directories
• /lib - system libraries
• /lost+found - provides a lost+found system for files that exist under the root (/) directory
• /media - mounted (loaded) removable media such as CDs, digital cameras, etc...
• /mnt - mounted filesystems
• /opt - provides a location for optional applications to be installed
• /proc - special dynamic directory that maintains information about the state of the system,
including currently running processes
• /root - root user home directory, pronounced 'slash-root'
• /sbin - important system binaries
• /sys - system files
Introduction
10
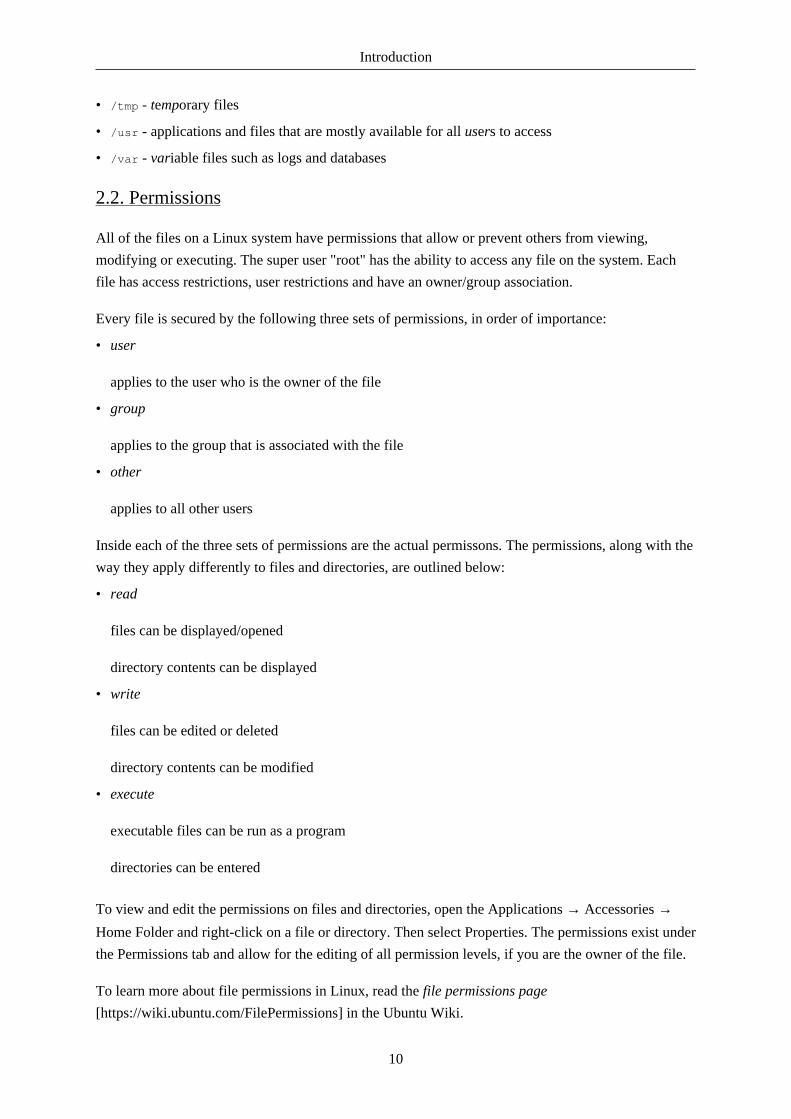
• /tmp - temporary files
• /usr - applications and files that are mostly available for all users to access
• /var - variable files such as logs and databases
2.2. Permissions
All of the files on a Linux system have permissions that allow or prevent others from viewing,
modifying or executing. The super user "root" has the ability to access any file on the system. Each
file has access restrictions, user restrictions and have an owner/group association.
Every file is secured by the following three sets of permissions, in order of importance:
• user
applies to the user who is the owner of the file
• group
applies to the group that is associated with the file
• other
applies to all other users
Inside each of the three sets of permissions are the actual permissons. The permissions, along with the
way they apply differently to files and directories, are outlined below:
• read
files can be displayed/opened
directory contents can be displayed
• write
files can be edited or deleted
directory contents can be modified
• execute
executable files can be run as a program
directories can be entered
To view and edit the permissions on files and directories, open the Applications → Accessories →Home Folder and right-click on a file or directory. Then select Properties. The permissions exist under
the Permissions tab and allow for the editing of all permission levels, if you are the owner of the file.
To learn more about file permissions in Linux, read the file permissions page
[https://wiki.ubuntu.com/FilePermissions] in the Ubuntu Wiki.

Introduction
11
2.3. Terminals
Working at the command line is not as daunting a task as you would think. There is no special
knowledge needed to know how to use the command line, it is a program like everything else. Most
things in Linux can be done using the command line, although there are graphical tools for most
programs, sometimes they are just not enough. This is where the command line comes in handy.
The Terminal is located in Applications → Terminal . The terminal is often called the command
prompt or the shell. In days gone by, this was the way the user interacted with the computer, however
Linux users have found that the use of the shell can be quicker than a graphical method and still holds
some merit today. Here you will learn how to use the terminal.
The original use of the terminal was a file browser and indeed it is still used as a file browser, in the
event of the graphical environment failing. You can use the terminal as a file browser to navigate your
files and undo the changes that have been made.
2.3.1. Common Commands
View Directories: - ls
The ls (LiSt) lists files in different colors with full formatted text
Create Directories: - mkdir (directory name)
The mkdir (MaKeDIRectory) command will create a directory.
Change Directories: - cd (/directory/location)
The cd (ChangeDirectory) command will change from your current directory to any directory you
specify.
Copy Files/Directories: - cp (file or directory name) (to directory or filename)
The cp (CoPy) command will copy any files you specify. The cp -r command will copy any
directories you specify.
Remove Files/Directories: - rm (file or directory name)
The rm (ReMove) command will delete any filename you specify. The rm -rf command will
remove any directory you specify.
Rename Files/Directories: - mv (file or directory name)
The mv (MoVe) command will rename/move any file or directory you specify.
Find Files/Directories: - locate (file or directory name)
The locate command will search your computer for any filename you specify. It uses an index of
the files on your system to work quickly: to update this index run the command updatedb. This
command is run automatically each day, if you leave your computer on. It needs to be run with
administrative privileges (see Section 2.5, “Root And Sudo” [p. 12] ).
You can also use wildcards to match one or more files, such as "*" (for all files) or "?" (to match one
character).
For a more thorough introduction to the Linux command line, please read the command line
introduction [https://wiki.ubuntu.com/BasicCommands] on the Ubuntu wiki.
Introduction
12
2.4. Text Editing
All of the configurations and settings in Linux are saved in text files. Even though you most often
can edit configurations through the graphical interface, you may occasionally have to edit them by
hand. Mousepad is the default Xubuntu text editor, which you can launch by clicking Applications →
Accessories → Mousepad on the desktop menu system.
At times in this guide, Mousepad is run from the command line using gksudo, which runs Mousepad
with administrative privileges, in order to modify configuration files.
If you need to use a text editor from the command line, you can use nano, which is a simple to use
text editor. When running it from the command line, always use the following command, which
ensures that the editor will not introduce line breaks:
nano -w
For more information about how to use nano, refer to the guide on the wiki
[https://wiki.ubuntu.com/NanoHowto].
There are also quite a few other terminal-based editors available in Ubuntu, popular ones include
VIM and Emacs (the pros and cons of each are cause for much friendly debate within the Linux
community). These are often more complex to use than nano, but are also more powerful.
2.5. Root And Sudo
The root user in GNU/Linux is the user which has administrative access to your system. Normal users
do not have this access for security reasons. However, Ubuntu does not include the root user. Instead,
administrative access is given to individual users, who may use the "sudo" application to perform
administrative tasks. The first user account you created on your system during installation will, by
default, have access to sudo. You can restrict and enable sudo access to users with the Users and
Groups application (see Section 5, “Managing Users and Groups” [p. 46] for more information).
When you run an application that requires root privileges, sudo will ask you to input your normal user
password. This ensures that rogue applications cannot damage your system, and serves as a reminder
that you are about to perform administrative actions which require you to be careful!
To use sudo when using the command line, simply type "sudo" before the command you wish to run.
Sudo will then prompt you for your password.
Sudo will remember your password for a set amount of time. This feature was designed to allow users
to perform multiple administrative tasks without being asked for a password each time.
Be careful when doing administrative tasks, you might damage your system!
Some other tips to using sudo include:

Introduction
13
• To use a "root" terminal, type "sudo -i" at the command line.
• The entire group of default graphical configuration tools in Ubuntu already use sudo, so they will
prompt you for your password if needed.
• When starting graphical tools with "sudo", run it with "gksudo" instead. This will open a small
graphical window that prompts the user for his password. "gksudo" is convenient if you want to set
up a launcher for Synaptic on your panel, or something similar, where you would normaly not have
the possiblity to enter your password.
• For more information on the sudo program and the absence of a root user in Ubuntu, read the sudo
page [https://wiki.ubuntu.com/RootSudo] on the Ubuntu wiki.
2.6. More Help
An incredible amount of information about Linux is available on the Internet. To get
started, I recommend the excellent and comprehensive tutorial Getting Started with Linux
[http://www.linux.org/lessons/beginner/index.html].
For people who already know the basics, the tutorial Intermediate Level User Linux Course
[http://www.linux.org/lessons/interm/index.html] is a good read.

14
Chapter 2. Guided TourWelcome to the Guided Tour around the Xubuntu Desktop. This guide will take you on a trip around
your new desktop, show you the most important places, introduce you to some of the included
programs, and explain how to achieve basic tasks. It is recommended to have an actual Xubuntu
system ready and to try out the stuff described while reading this document.
The readers are generally assumed to have access to the Internet, since this guide will often just
provide links to wiki pages and to other documentation on the web.

Guided Tour
15
1. Desktop
When your computer has finished booting up, and after entering your login data, you will arrive at the
Xubuntu desktop. It comes with many features that make your life easy, and it is well worth the time
to get to know your way around it.
As you can see, your desktop has two panels: one on top, and one on the bottom of the screen.
1.1. Top Panel
The top panel is mainly used for starting applications and navigating to different places on your
computer. It also comes with a logout button, system tray and a clock.
Clicking on Applications will open the system menu, offering you many choices of applications to
start. Note that you can also access your Settings, Help, and a logout dialog from the Applications
menu.
Clicking on the logout button (looks like a power-off button) will bring up a menu with choices for
logging out, shutting down, rebooting, and, depending on your hardware, suspending or hibernating
your computer.
Use the checkbox Save session for future logins to have all the currently running
programs auto-started at the time of your next login.
Next to the clock is a small area called the system tray. Some programs will show up as a small
icon in the system tray while they are running in the background. The system tray is also used for
informing you about updates to your system. If such an update becomes available, you will see a
small speech bubble pop up and giving you the necessary information to keep your system up to date
and secure.
Besides that, the top panel is quite empty. It has lots of additional room to add items besides the
browser launcher. You may want to go ahead and add some custom items to it. Right-click on the
panel, and choose Add New Item. Choose one of the many panel plugins available, or create a custom
program launcher. The item will be permanently attached to your panel. Anything you add here will
be reachable with just a single click, directly from your panel.
1.2. Bottom Panel
This panel contains a show-desktop button, a tasklist, and a pager.
The show-desktop button will minimise all applications to clear your view onto the desktop. This is
very helpful in case you are trying to access icons on the desktop and need to get all the windows out
of the way.
The taskbar will have an entry for every window that is currently open. Use it to quickly change
between running applications.

Guided Tour
16
The pager allows you to navigate between the different desks you use. Note that small icons on the
pager give an indication about the current windows on the different desks.
1.3. Desktop
The default behaviour of the desktop is to show you minimized application icons.
Many people are used to having files and launchers on their desktops instead of minimized
applications. To find out how to enable this, have a look at Section 1.2, “Application icons
on the Desktop (CDE style)” [p. 39] .
To change the desktop background image, launch Applications → Settings → Settings Manager,
and choose Desktop. In the lower part, where it says Image, click on the Browse icon and choose a
different picture.
The desktop offers a bunch of features that are real time-savers in everyday tasks:
• Right-clicking it will open the system menu just as clicking on Applications does.
• Using the scroll-bar on your mouse (if it has one) will allow you to switch between the different
desks. This does the same thing as clicking on the pager in the lower panel, but is usually quicker,
since you (probably) do not have to move the mouse.
• Pressing Alt-Tab will allow you to rotate between the currently open windows. This allows for
lightning-fast switching between applications without taking the hands of the keyboard.

Guided Tour
17
2. Browse the Files on your Computer
Xubuntu comes with Xfce's brand new file manager called Thunar. For simplicity's sake, we will just
refer to it as the File Manager. Load it by clicking Applications → File Manager (thunar).
2.1. Navigation
The File Manager's default view consists of a shortcut pane on the left side, the main area on the right,
and a pathbar above the main area.
The shortcut pane provides shortcuts to different folders on your system. The first shortcut will lead
to your home directory, the directory you store all your personal data, and will therefore have the
name of the current user. That directory will probably be empty. The second shortcut will take you to
the root of your filesystem - you may want to explore it a bit, even though it will be confusing to you
if you are new to Linux. Just click on the different folders and see what's inside. When you're done,
return to your home directory by clicking on the top shortcut.
Add your own shortcuts by simply dragging folders to the shortcut pane. This will allow you
to access important folders instantly!

Guided Tour
18
The main area will always display the contents of the current folder. Double click on folders to enter
them, and right click on files/folders to get a pop-up window offering you some choices of what to do
with it. Select multiple files by dragging a rectangle over them with the mouse. Alternatively, select
one file, hold down the Shift key, and increase / decrease the selection using the arrows.
The pathbar will always show you the path you took to get to the place you are currently at. You can
click on any pathbar icon to change to the directory it represents. Note that right-clicking on pathbar
icons will also bring up a pop-up window with some options.
2.2. Creating and Deleting Files
To create a new document, right-click on some empty space in your home directory and select Create
New Document → Empty File from the pop-up menu. The File Manager will prompt you for a name -
just go with the suggested name for now. After this, you will see the new file in your home directory.
Right-click on it to have a menu pop up - choose Properties. This will show you some details about
the file:
Right click on the file once more, and choose Delete to remove it.
Please be aware that Xubuntu does not currently feature a trash bin. Deleted files can not be
restored.

Guided Tour
19
To create a new folder, right click on the empty space, and choose Create Folder.... You will be
asked for a name. Type something and hit Enter. You will see this new folder in you home directory.
Double click on it to enter it.
To rename or remove the folder, right-click on it and choose the appropriate option from the pop-up
menu.
2.3. Copying and Moving Files
To copy and move files on your computer, just click and drag files and folders to other folders. As a
default, the files will always be copied. If you want them to be moved instead, right click and drag
files to folder: This will offer you some options instead of just copying.
2.4. Removable Devices
When inserting CDs, floppys, or similar into your computer, or hooking up removable media like a
musicplayer or a USB-stick, it will be set up automatically by your system. After inserting a CD into
your CD Drive, you will see a new shortcut in the left pane of the File Manager, representing the CD.
Clicking on it will open the contents of the CD in the main area, just like clicking on a regular folder.
To remove the CD, right-click on the shortcut, and choose eject. The same applies for any other
removable media.
Please note that pressing the eject button on your CD drive may not work. This may
be surprising to some users, but it is in fact the expected behaviour. Before the CD can
be ejected, it needs to be properly "released" by the system. To remove a CD, always
right-click on its shortcut and choose Eject Volume.
2.5. Customizing the File Manager
There are many ways to customize the File Manager. In case you do not like the way the icons
are displayed, choose View → View as Detailed List to have the contents of the current directory
displayed as a list.
You can have the File Manager display a location bar instead of the pathbar by selecting View →
Location Selector → Toolbar Style.
In case you prefer a treeview in the left pane, choose View → Side Pane → Tree.

Guided Tour
20
3. Surfing the Internet
Before surfing the Internet, you need to make sure you have a working Internet connection. In case
you are not connected yet, consult Section 6.2, “Connect to the Internet” [p. 47] .
Xubuntu comes with the popular Firefox Webbrowser preinstalled. Firefox is well-known for its
outstanding security, standards compliance, extensibility, usability, and speed. Launch it from
Applications → Network → Firefox Web Browser .
If you are new to Firefox, I recommend An introduction to Firefox
[http://opensourcearticles.com/articles/firefox_15/english/part_01]. More help is available
from http://www.mozilla.org/support/firefox/.

Guided Tour
21
4. Writing Emails
Thunderbird is the default mail client of Xubuntu. It comes with all desired features, including junk
filtering, thread-display, POP/IMAP support, security features, themes, an extension mechanism, and
more. Before you start, make sure you have a working internet connection (See Section 6.2, “Connect
to the Internet” [p. 47] ).
Launch Thunderbird from Applications → Network → Thunderbird Mail.
After this, the Thunderbird Account Wizard will guide you through the process of entering your
Account Data.
If you are new to Thunderbird, I recommend An introduction to Thunderbird
[http://opensourcearticles.com/articles/thunderbird_15/english/part_01]. More help is
available from http://www.mozilla.org/support/thunderbird/.

Guided Tour
22
5. Instant Messaging / Chatting
Use Gaim for chatting and instant messaging. Launch it from Applications → Network → Gaim
Internet Messenger. Before you start, make sure you have a working internet connection (See
Section 6.2, “Connect to the Internet” [p. 47] ).
Please consult the Gaim Online Documentation Webpage
[http://gaim.sourceforge.net/documentation.php] for further information.

Guided Tour
23
6. Writing Text Documents
6.1. Editing Textfiles with Mousepad
Launch Applications → Accessories → Mousepad. This will open up Mousepad - a simple, fast text
editor. This is what it looks like:
Use Mousepad for viewing/editing simple text files, such as configuration or log files. Mousepad is,
however, not suited for creating formatted text files. For this, check the following section.
6.2. Word Processing with Abiword
For regular Word Processing, AbiWord is the program to use. AbiWord is a state of the art word
processor that reads and writes both OpenDocument (OpenOffice) and Microsoft Word documents,
and is very fast. It features everything you need for standard word processing: tables, lists, images,
footnotes, styles, spell-checking. It also has good internationalization and is easy to use. Start it with
Applications → Office → AbiWord Word Processor
Please consult the AbiWord Manual [http://www.abisource.com/support/manual/] on the
project's website for detailed information on how to use AbiWord.

Guided Tour
24
In case you need more features or better Microsoft Word compatibility, you may want
to install OpenOffice. It is readily available for installation from the Ubuntu software
repositories (refer to Section 8, “Adding, Removing and Updating Applications” [p.
26] ). Just be warned that it is a lot bigger and slower than AbiWord!

Guided Tour
25
7. Spreadsheet calculations with Gnumeric
Gnumeric is the Gnome Project [http://www.gnome.org]'s Spreadsheet program, and it is the
recommended application for working with spreadsheets on Xubuntu. It is - in its own words - "free,
fast and accurate". Start it with Applications → Office → Gnumeric Spreadsheet.
A Quick Guide [http://www.gnome.org/projects/gnumeric/doc/chapter-quick-start.html] and
the full User Manual [http://www.gnome.org/projects/gnumeric/doc/] are available from the
project's website.
In case you need more features or better Microsoft Excel compatibility, you may want
to install OpenOffice. It is readily available for installation from the Ubuntu software
repositories (refer to Section 8, “Adding, Removing and Updating Applications” [p.
26] ). Just be warned that it is a lot bigger and slower than Gnumeric!

Guided Tour
26
8. Adding, Removing and Updating Applications
8.1. Synaptic Package Manager
Sooner or later, you will have the need to install additional programs on your computer. Ubuntu
comes with a special tool called Synaptic that will help you with this task. Synaptic is an advanced
package management application that can install and remove every package available to your system.
It gives you complete control over the package management of your system.
To launch Synaptic, choose Applications → System → Synaptic Package Manager on the desktop
menu system.
Running Synaptic requires administrative privileges (see Section 2.5, “Root And Sudo” [p.
12]).
The Synaptic screen is divided up into four sections, the two most important being the package
categories on the left side, and the packages on the right.
If you know the name of the package, the quickest way to install it is to click on the Search tool bar
button, enter the name in the search text field and click the Search button. Synaptic will now show
you a short list from which to select your application for installation. This is usually much easier than
having to look through the very long list of applications in the category section. Now right click on
it and choose "Mark this package for installation". Once you are satisfied with your selections click
Apply on the top button bar. Synaptic will then download and install the required packages from the
online repositories and/or from your Ubuntu installation CD.
In case you do not know the name of the package, choose section in the lower left part of the window,
choose the appropriate category, and find the package name in the list.
When the installation process has finished, you should have a new option for the program you
installed available in the menu.
8.2. Extra Repositories
Many software packages you might need are not in the Main repository, so let us learn how to add
extra repositories.
8.2.1. What are Repositories?
There are thousands of programs available to install on Ubuntu. These programs are stored in
software archives (repositories) and are made freely available for installation over the Internet. This
makes it very easy to install new programs in Linux, and it is also very secure, because each program
you install is built specially for Ubuntu and checked before it is installed. To organise the software,
Ubuntu repositories are categorised into four groups: Main, Restricted, Universe, and Multiverse.
The rationale used to determine which software goes into which category is based on two factors:

Guided Tour
27
• The level of support software development teams provide for a program.
• The level of compliance the program has to the Free Software Philosophy
[http://www.ubuntu.com/ubuntu/philosophy].
You can find more information about the Repositories available on the website
[http://www.ubuntu.com/ubuntu/components].
The standard Ubuntu Install CD contains some software from the Main and Restricted categories.
Once your system is made aware of the Internet-based locations for these repositories, many more
software programs are made available for installation. Using the software package management tools
already installed on your system, you can search for, install and update any piece of software directly
over the Internet, without the need for the CD.
8.2.2. Adding Extra Repositories
To enable the extra repositories:
1. Open Applications → System → Software Properties.
2. Select Add
3. To enable the Universe repository, check the Community Maintained (Universe) button.
Adding this repository will mean that the majority of the Free Software universe will be
available to install on your system. This software is supported by a carefully selected
group of volunteers within the Ubuntu Community, but is not supported by the core
Ubuntu development team and may not include security updates.
4. To enable the Multiverse repository, check the Non-free (Multiverse) button.
Adding this repository will mean that software which has been classified as non-free
will be available to install on your system. This software may not be permitted in some
jurisdictions. When installing each package from this repository, you should verify
that the laws of your country permit you to use it. Again, this software may not include
security updates.
5. Click Close to save your changes and exit.
8.3. Updates
Sometimes the Ubuntu developers release feature and security updates for applications and packages
within the Ubuntu system.
The Update Manager program will list the available updates. You will find it at Applications →
System → Update Manager. To download and install available updates click Install Updates. Ubuntu
will then download and install the available updates from the Internet.
When Update Manager has finished updating your system, close Update Manager to finish updating
your system.

Guided Tour
28
After installing some important updates, it may be necessary to restart your computer.
Please note that Xubuntu does not by default run the update-notifier known from Ubuntu.

Guided Tour
29
9. Calendar
Orage is Xfce's calendar application. You will find it at Applications → Office → Orage. Use it to
manage your appointments, set weekly reminders, schedule alarms, and more.

Guided Tour
30
10. Play Music
Launch Applications → Multimedia → Xfmedia for playing audio files. Xfmedia is a simple,
easy-to-use media player based on the xine engine.
Please note that Xubuntu comes with very limited multimedia support out-of-the-box. Please
read Section 2, “Get Multimedia support” [p. 42] for an explanation, and what you can
do about it.
Guided Tour
31
11. Watch a Movie
Xfmedia is the default program to watch movies. Launch it from Applications → Multimedia →Xfmedia.
Please note that Xubuntu comes with very limited multimedia support out-of-the-box.
Playback of DVDs, for example, is not supported by default. Please read Section 2, “Get
Multimedia support” [p. 42] for an explanation, and what you can do about it.
Guided Tour
32
12. Manipulate a Picture
Xubuntu ships with the GIMP - the GNU Image Manipulation Program. It can be used for things like
photo retouching, image composition and image authoring. Start it from Applications → Graphics →GIMP Image Editor.
Extensive documentation on using the GIMP may be found here:
http://www.gimp.org/docs/.

Guided Tour
33
13. Browse Pictures
For browsing picture archives, you will find the application GQview convenient. To launch it, click
Applications → Graphics → GQView.
You will find a file browsing area on the left side that lets you navigate to the pictures on your
harddrive. The pictures will subsequently be shown in the main area of GQview.
Please refer to the online manual: http://gqview.sourceforge.net/docs/index.html.

Guided Tour
34
14. Burn a CD
For burning CDs, use Xfburn. To launch it, click Applications → Accessories → Xfburn.
The tool has the usual options of erasing CD RW disks, burning ISO images, copying CDs, or making
Data CDs from files on your PC.

Guided Tour
35
15. The Settings Manager
The Settings Manager is located at Applications → Settings → Settings Manager. This is the central
place for customizing your desktop. Among the things you can do with the Settings Manager are:
• Change the desktop background image in the section Desktop.
• Change the GTK theme and the icon theme in User Interface.
• Choose a different screensaver in Screensaver.
• Choose a different audio device in Sound.
• Add new keyboard shortcuts in Keyboard, tab Shortcuts.
• Lots more...
Please note that these settings control the look and behaviour of your desktop only. It is
important to know that it is not a settings manager for your system, and therefore does not
let you configure printers, set up your networking configuration, switch keyboard layouts,
or similar. To accomplish these tasks, read Section 4, “Printer configuration” [p. 44] ,
Section 6, “Networking” [p. 47] and Section 3, “Switching the keyboard layout” [p.
43] .

Guided Tour
36
16. Finding the Right Program
The wealth of software offered on an Ubuntu system is enormous, so that finding the right tool for the
right job can be difficult at times. The following table may help you with this. It is showing programs
which are installed on Xubuntu by default, some which are recommended to be added by you, and
other programs available in the software archives, grouped by tasks. Please note that you may have to
enable restricted repositories to install some of the listed programs.
Task Installed Program Recommended
Program
Other
Webbrowser Firefox Epiphany (Gnome),
Konqueror (KDE), Dillo
Email Client Thunderbird Sylpheed-Claws
File Manager Thunar Nautilus (Gnome),
Konqueror (KDE),
Xffm (old Xfce
Filemanager),
ROX-Filer
Text Editor Mousepad Gedit (Gnome), Kate
(KDE), Gvim, XEmacs,
Nedit, Nano
Word Processing Abiword OpenOffice, KOffice
(KDE), LaTeX
Spreadsheet Calculation Gnumeric-gtk OpenOffice, KOffice
(KDE)
Multimedia Playback
(Audio/Video)
Xfmedia XMMS, Beep Media
Player, Xine, Mplayer,
Totem (Gnome),
Rhythmbox (Gnome)
Image Manipulation Gimp Krita (KDE, part of
KOffice)
Picture Browsing GQview gThumbview (Gnome),
KView (KDE)
Chat / Instant
Messanger
Gaim XChat
PDF Viewer Evince-gtk Acroread
Calendar Orage
Package Management Synaptic

Guided Tour
37
Task Installed Program Recommended
Program
Other
Software Telephone Ekiga (Gnome)
Archiving Tool Xarchiver Thunar Archive Plugin
CD/DVD Burning Xfburn GnomeBaker (Gnome),
K3b (KDE)
FTP Client Nautilus (Gnome),
Konqueror (KDE)
Printer Administration CUPS Web
Administration
Gnome Cups Manager
(Gnome)
P2P aMule
Vector Graphics Inkscape
Desktop Publishing
(DTP)
Scribus

38
Chapter 3. Common Tasks

Common Tasks
39
1. Desktop
1.1. Change the desktop background image
If you want to set up a different background image, do:
1. Launch Applications → Settings → Settings Manager.
2. Choose Desktop.
3. In the section Image, click on the file icon. This will bring up up a open file dialog, where you
can choose an alternative image.
1.2. Application icons on the Desktop (CDE style)
To have minimized application icons instead of file/launcher icons displayed on your desktop, do this:
1. Launch Applications → Settings → Settings Manager.
2. Choose Desktop, and then the tab Behaviour.
3. Change the Desktop Icons entry from File/launcher icons to Minimized Application
Icons.
1.3. Add Panel Plugins
Here is a list of available Plugins for your Xfce Panel:
You will need super-user privileges to install the non-default plugins. See Section 2.5, “Root
And Sudo” [p. 12].
Xfce XKB Plugin
Displays your current keyboard layout and allows to easily switch between multiple layouts. (For
configuring layouts, see Section 3, “Switching the keyboard layout” [p. 43] ). Installation:
Installed by default.
Xfce Weather Plugin
The weather plugin displays information about the current weather according your timezone and
settings. It allows to search weather location code in the same plugin and displays weather status
in little icons. Installation: Installed by default.
Xfce Wavelan Plugin
The WaveLAN plugin displays information of a WaveLAN device. Installation:
sudo apt-get install xfce4-wavelan-plugin
Xfce Verve Plugin
The plugin displays a mini-command line on the Xfce panel. Installation: Installed by default.
Xfce Systemload Plugin
This plugin displays the current CPU load, the memory in use, the swap space. Installation:
Installed by default.

Common Tasks
40
Xfce Screenshoter Plugin
Xfce4-screenshooter-plugin is a simple plugin to take screenshots of your desktop. Installation:
Installed by default.
Xfce Quicklauncher Plugin
Application launcher plugin for the Xfce panel. Supports multline launchers, zoom effect, and
more. Installation: Installed by Default.
Xfce Netload Plugin
This plugin displays the current load of the network interfaces of your choice. Installation:
Installed by default.
Xfce Mount Plugin
This plugin for Xfce displays a list of the various devices available, giving the opportunity to
mount/umount them. Note that most removable media is mounted automatically by the File
Manager in Xubuntu. Installation:
sudo apt-get install xfce4-mount-plugin
Xfce Mailwatch Plugin
Mail checker panel plugin with support for local, POP3, IMAP, and Gmail accounts. Installation:
Installed by default.
Xfce Generic Monitor Plugin
This plugin repeatedly spawns the indicated script/program, displaying its output as a string in the
panel. It is useful for periodic status monitoring. Installation:
sudo apt-get install xfce4-genmon-plugin
Xfce Filesystem Guard Plugin
The fsguard plugin checks free space on a chosen mountpoint frequently and displays an alarm if
free space is less than given alarm limit. Installation: Installed by default.
Xfce CPU Graph Plugin
The CPU graph plugin displays a graph of your current system load. Installation: Installed by
default.
Xfce Clipman Plugin
Store and recall sequential X clipboard selections in Xfce4 with this plugin. Installation:
sudo apt-get install xfce4-clipman-plugin
Xfce Battery Plugin
A battery monitor panel plugin for Xfce4 compatible with APM and ACPI. Installation: Installed
by default.
1.4. Add new Window Manager Style
When you download new window manager styles, they usually come in a .tar or .zip archive. Extract
the contents, and do:
sudo cp -r folder-with-new-theme /usr/share/themes/
Common Tasks
41
You will need super-user privileges to do this. See Section 2.5, “Root And Sudo” [p. 12].

Common Tasks
42
2. Get Multimedia support
Please note that Xubuntu comes with very limited multi-media support. The reason for this is
that many popular multimedia formats are not free: They are protected either by patent or license
restrictions. To prevent problems, Xubuntu ships without support of these formats. Please consider
using and supporting open and free multimedia formats such as Ogg Vorbis [ http://www.vorbis.com/]
(Audio) and Ogg Theora [http://theora.org/] (Video).
If, however, you still want to use restricted multimedia formats, you will need to enable the Universe
and Multiverse repositories (see Section 8.2, “Extra Repositories” [p. 26]). You will want to install at
least the following packages:
gstreamer0.10-plugins-ugly
gstreamer0.10-ffmpeg
gstreamer0.10-gl
gstreamer0.10-plugins-base
gstreamer0.10-plugins-good
gstreamer0.10-plugins-ugly-multiverse
libxine-extracodecs
ffmpeg
lame
faad
sox
mjpegtools
libxine-main1
With these packages installed, you should be able to play many multimedia formats. Please refer to
https://wiki.ubuntu.com/RestrictedFormats for detailed information on getting even more formats to
play.

Common Tasks
43
3. Switching the keyboard layout
There is currently no graphical tool to switch the keyboard layout in Xubuntu. To do this, you will
need to edit the file /etc/X11/xorg.conf.
Be warned that this is an important file for the system and you should be careful with it. You
will need administrative privileges to edit it (Cf. Section 2.5, “Root And Sudo” [p. 12]). It is
recommended to make a backup of this file before editing it:
sudo cp /etc/X11/xorg.conf /etc/X11/xorg.conf.BACKUP
Find the section that looks like this:
Section "InputDevice"
Identifier "Generic Keyboard"
Driver "keyboard"
Option "CoreKeyboard"
Option "XkbRules" "xorg"
Option "XkbModel" "pc104"
Option "XkbLayout" "us"
EndSection
Change "us" to whatever language code you prefer. Next, type this from a terminal:
setxkbmap <language_code>
That's it.
If you enter more than one language code, e.g. "us,de" for US-American and German layout,
you can easily switch between these two with the the XKB Layout Switcher Plugin panel
plugin.

Common Tasks
44
4. Printer configuration
Getting your printer to work on Xubuntu may require some work. Most likely, your printer will be
auto-detected by Xubuntu. However, you will still need to configure it by hand. You can either do this
in your browser, or in a terminal:
You will need super-user privileges to configure a printer. See Section 2.5, “Root And
Sudo” [p. 12].
4.1. Printer Configuration with the Browser
First, you will need to enable the web administration interface of CUPS (Common UNIX Printing
System).
1. Launch Applications → System → Users and Groups, click on the tab Groups, and check Show
all users and groups
2. Select the group shadow and click Properties.
3. Add the user cupsys to the group.
4. Restart CUPS with this command:
$sudo /etc/init.d/cupsys restart
Next, visit the web interface by entering http://localhost:631/admin in your browser's location bar.
Once there, you will be able to see, install, and configure the detected printers on your system.
4.2. Printer Configuration with the Terminal (Advanced Users)
To manage printers in the terminal, CUPS provides the commands lpadmin, lpinfo, lpoptions.
Please refer to the CUPS online manual Managing Printers from the Command-Line
[http://www.cups.org/doc-1.1/sam.html#4_3] for detailed information on how to use these commands.
To check if your printer has been detected correctly, do:
lpinfo -v
To add a printer, do something similar to:
lpadmin -p DeskJet -E -v parallel:/dev/lp1 -m deskjet.ppd
If you experience problems getting your printer to work, you may consider installing
gnome-cups-manager. It is available by the usual manner described in Section 8, “Adding,
Removing and Updating Applications” [p. 26] and will offer a nice graphical tool to set up
your printer. WARNING: installing gnome-cups-manager will bring in many dependencies
to the Gnome desktop, thus increasing the size of your system, while making it slower. It

Common Tasks
45
is therefore not recommended to install gnome-cups-manager on Xubuntu. In some cases,
however, it may be worth the trade-off to get your printer working.

Common Tasks
46
5. Managing Users and Groups
To add users or groups to your system, you can use the Users And Groups application located in
Applications → System → Users and Groups.
You will need super-user privileges to launch the Users and Groups tool. See Section 2.5,
“Root And Sudo” [p. 12].
To add a new user, click on Add user, fill-in the data fields then click OK. To edit the properties of
each user, click the Properties button located in the main Users window.
To add a new group, select the Groups tab and click Add group. Choose a name for the new group
and, if you want, change the default value for the Group ID. If you try to allocate a Group ID that is in
use, the system will warn you.
You can add users to the newly created group by selecting a user from the left menu and clicking on
the Add button. Removing a user is as simple as adding one: select a user from the right menu then
click Remove. When you are ready, click OK and the new group with its users, if inserted, will be
created.
To edit the properties of a group, from within the Groups main window, choose a group name and
click on the Properties button.
To remove a user or a group from the system, select the user or group you want to delete and click
Delete.

Common Tasks
47
6. Networking
6.1. Configure Networking
Xubuntu comes with a graphical networking utility. Launch it with Applications → System →Networking.
This tool will allow you to configure all aspects of your network connection - setting up DHCP, static
IP addresses, configuring modem dial-up, and more. It will also allow you to set up different profiles
for use with a laptop. This is very convenient if you need location-dependent networking setups.
You will need super-user privileges to run the Networking utility. See Section 2.5, “Root
And Sudo” [p. 12].
6.2. Connect to the Internet
This task is usually very simple, however it requires a minimum of involvement on your part. Of
course, you will need to have subscribed to an Internet Service Provider, and that your Internet
connection be installed and functional.
There are several ways to connect to the Internet, depending on what type of connection you have,
you could have broadband (i.e. ADSL), dialup (i.e. a 56 kbit/s modem) or access to Internet directly
via your Local Area Network for instance.
Go to the following section corresponding to your type of connection.
6.2.1. Broadband
If you have an ADSL or cable modem there are several possibilities, depending on the type of
modem.
6.2.1.1. Ethernet Modem (pppoe)
If your modem connects to your PC with an ethernet network cable you probably want to setup a
pppoe connection. However, nowadays many modems also integrate a router, in this case you should
follow the instructions provided by the manufacturer, you may find extra help in the Local Area
Network section below (if you configure the device via a web interface, it probably has an integrated
router).
6.2.1.1.1. ADSLPPPoE
Prerequisites are:
• A DSL account with an Internet Service Provider (ISP).
• Username and password for that account.
• A DSL modem to which you connect using an Ethernet network card.

Common Tasks
48
• Your Ubuntu box with its Ethernet card enabled for DHCP.
• Possible knowledge of installing packages with synaptic.
Make sure that your ADSL connection has been activated by your ISP before starting
this procedure. Generally there is a "dsl" light on your modem that is lit showing your
connection should be activated.
Ubuntu by default installs the "pppoeconf" package. If you are not sure if you have it you can check
by typing this in a terminal window :
dpkg -s pppoeconf
If it is not installed yet, do it by yourself, following the hints in Section 8, “Adding, Removing and
Updating Applications” [p. 26].
Once you are sure that you have the package installed its time to configure your connection. Type in a
terminal:
sudo pppoeconf
A text-based installer will take you through the setup. To manually connect using your configured
setup, type:
pon dsl-provider
6.2.1.2. USB modem
This is probably the most demanding type of modem to set up, USB is far from the ideal medium for
network access. If you have a modem that can connect both via USB and ethernet it will be best to use
the ethernet connection.
If you have a USB modem, you should refer to https://wiki.ubuntu.com/UsbAdslModem
More support for installing a USB modem can be found at:
• http://ubuntuforums.org/showthread.php?p=189972#post189972
• http://forum.eagle-usb.org/
• http://eciadsl.flashtux.org/
6.2.2. Dialup
If you have a dialup connection, a 56 kbit/s or slower modem, you should refer to
https://wiki.ubuntu.com/DialupModemHowto.
6.2.3. Local Area Network
If you connect to the Internet via a Local Area Network (ethernet or wireless for example), the
configuration depends entirely on your network.
Configuration information should be provided by your network administrator.

Common Tasks
49
If you connect via a router on a home network, you should read the router's documentation.
You may have to configure the interface through which you connect to use DHCP (dynamic
configuration, usually the default) or specify an IP address, default gateway and DNS server.
6.3. Change the Computer's Name
You will need super-user privileges for this task. See Section 2.5, “Root And Sudo” [p. 12].
1. Applications → System → Networking
2. Select the General tab. Enter the name of the computer in the Hostname field.
3. Click OK, close all open applications and reboot.
Common Tasks
50
7. System Tasks
7.1. Check disk space usage and view the partition table
You will need super-user privileges for this task. See Section 2.5, “Root And Sudo” [p. 12].
1. Launch Applications → System → Disks
2. Select Hard Disk, then the Partitions tab
3. Each partition will be listed under Partition List, with disk space and mount point.
7.2. List devices
1. To list mounted devices, run the following command in a terminal:
mount
The listing shows the device (such as a hard disk partition), the mount point (where you access
the files), the filesystem type and the mount options.
This example shows the hda2 hard disk partition mounted as '/', with the filesystem type ext3.
The partition is mounted with two options, one to allow the device to be read from and wrote to
and the other to remount the device as read only in the event of any errors.
/dev/hda2 on / type ext3 (rw,errors=remount-ro)
2. To list PCI devices:
lspci
3. To list USB devices:
lsusb
7.3. Mount/unmount CD/DVD-ROMs manually
You will need super-user privileges for this task. See Section 2.5, “Root And Sudo” [p. 12].
1. Assuming that /media/cdrom0/ is the location of CD/DVD-ROM
2. To mount CD/DVD-ROM:
sudo mount /media/cdrom0/ -o unhide
3. To unmount CD/DVD-ROM:
sudo umount /media/cdrom0/

Common Tasks
51
8. Setting up Hardware
8.1. Set up Wireless Cards
Many wireless cards are automatically detected by Ubuntu during installation. A
complete listing of wireless cards which work with Ubuntu can be found on Ubuntu Wiki
[https://wiki.ubuntu.com/HardwareSupportComponentsWirelessNetworkCards]. Please add your
wireless card to the list if it works with Ubuntu.
Some cards may not work automatically with Ubuntu. If this is the case, please look at the Wireless
Troubleshooting Guide [https://wiki.ubuntu.com/WirelessTroubleshootingGuide] on the Ubuntu Wiki
which is an excellent resource for troubleshooting wireless cards.
All information regarding wireless networking on Ubuntu is collected at Wireless Networking Central
[https://wiki.ubuntu.com/WifiDocs] on the Ubuntu Wiki.
8.2. Set up Modems
8.2.1. Winmodems
Most winmodems are not supported by Ubuntu, but drivers can be found that will enable the use of
such modems. First you need to identify what chipset your winmodem is using:
wget -c http://linmodems.technion.ac.il/packages/scanModem.gz
gunzip -c scanModem.gz > scanModem
chmod +x scanModem
sudo ./scanModem
mousepad Modem/ModemData.txt
Read this file, it should list what modem chipset you have. Once you are aware of the chipset you
have, see http://www.linmodems.org/ and follow the directions for your modem. More infomation can
be found at SettingUpModems [https://wiki.ubuntu.com/SettingUpModems] on the Ubuntu Wiki.
8.2.2. ADSL Modems
All PPPOE and router-style ADSL modems are supported by Ubuntu (that use ethernet for the
connections), and some USB ADSL modems are supported too. For router-style ADSL modems, just
connect it up, configure the modem as per your ISPs instructions and configure networking in Ubuntu.
For information on PPPOE modems see this guide [https://wiki.ubuntu.com/ADSLPPPoE] on the
Ubuntu wiki.

52
Chapter 4. Questions and AnswersQ: Where is the trash bin?
A: Xubuntu doesn't feature a trash bin at the moment. Please note that the File Manager will
always ask you whether you want to permanently delete files when you click on "delete". There
is currently no way to bring back your deleted files.
Q: How can I move my old panel configuration from Xfce 4.2 over to Xfce 4.4?
A: You can't. The panel has been rewritten and can not use the old configuration files anymore.
Q: How do I start a program manually?
A: Sometimes it can be useful to start a program manually, for example when the program does not
have an entry in the menu. This is easy to do with the Run Program dialog.
1. Open the Run Program dialog by typing:#Alt-F2
2. Enter the name of the program you wish to run, and press Enter.
Q: What can I do if Xfmedia crashes when playing restricted formats?
A: Please make sure you have all the appropriate libraries for the restricted formats installed.
Consult the Wiki Page on Restricted Formats [https://wiki.ubuntu.com/RestrictedFormats].
Some people have reported that installing libxine-extracodecs fixed this issue.
Q: Where can I get more Xfce related Artwork?
A: Check http://www.xfce-look.org//. There should be something there for every taste.
Q: Are there any other goodies available besides the ones in the Ubuntu archives?
A: Check http://xfce-goodies.berlios.de/, the official home of Xfce goodies.
Q: Something is going wrong on my system, where can I obtain more information?
A: Check https://wiki.ubuntu.com/LinuxLogFiles for a list of log files on your system and how to
read them.
Q: How do I connect to a remote machine from the File Manager (Thunar)?
A: The File Manager (Thunar) does not allow you to connect to remote machines yet. These
features are planned for a future release of Thunar.

53
Chapter 5. Getting More HelpThere are a number of places from which you can obtain help with your Ubuntu desktop system, these
include:
• The Ubuntu Documentation Website [http://help.ubuntu.com] - this contains this guide, and other
guides produced by the Ubuntu Documentation Team for Ubuntu and Kubuntu.
• The Ubuntu Wiki [https://wiki.ubuntu.com/UserDocumentation] - this contains many guides
contributed by the community.
• Web Forums [http://www.ubuntu.com/community/forums] - here you can ask questions on a forum
and receive answers from the forum community.
• Mailing Lists [http://lists.ubuntu.com] - here you can ask questions by email, and receive answers
from the mailing list community.
• IRC chat: irc.freenode.net channel xubuntu - chat in realtime with the irc community.
For more information, visit the How to Get Help [https://wiki.ubuntu.com/HowToGetHelp] wiki
page.

54
Appendix A. Creative Commons by
Attribution-ShareAlike 2.0CREATIVE COMMONS CORPORATION IS NOT A LAW FIRM AND DOES NOT
PROVIDE LEGAL SERVICES. DISTRIBUTION OF THIS LICENSE DOES NOT CREATE
AN ATTORNEY-CLIENT RELATIONSHIP. CREATIVE COMMONS PROVIDES THIS
INFORMATION ON AN "AS-IS" BASIS. CREATIVE COMMONS MAKES NO WARRANTIES
REGARDING THE INFORMATION PROVIDED, AND DISCLAIMS LIABILITY FOR
DAMAGES RESULTING FROM ITS USE.
License
THE WORK (AS DEFINED BELOW) IS PROVIDED UNDER THE TERMS OF THIS CREATIVE
COMMONS PUBLIC LICENSE ("CCPL" OR "LICENSE"). THE WORK IS PROTECTED BY
COPYRIGHT AND/OR OTHER APPLICABLE LAW. ANY USE OF THE WORK OTHER THAN
AS AUTHORIZED UNDER THIS LICENSE OR COPYRIGHT LAW IS PROHIBITED.
BY EXERCISING ANY RIGHTS TO THE WORK PROVIDED HERE, YOU ACCEPT AND
AGREE TO BE BOUND BY THE TERMS OF THIS LICENSE. THE LICENSOR GRANTS YOU
THE RIGHTS CONTAINED HERE IN CONSIDERATION OF YOUR ACCEPTANCE OF SUCH
TERMS AND CONDITIONS.
1. Definitions.
a. "Collective Work" means a work, such as a periodical issue, anthology or encyclopedia, in
which the Work in its entirety in unmodified form, along with a number of other contributions,
constituting separate and independent works in themselves, are assembled into a collective
whole. A work that constitutes a Collective Work will not be considered a Derivative Work (as
defined below) for the purposes of this License.
b. "Derivative Work" means a work based upon the Work or upon the Work and other
pre-existing works, such as a translation, musical arrangement, dramatization, fictionalization,
motion picture version, sound recording, art reproduction, abridgment, condensation, or any
other form in which the Work may be recast, transformed, or adapted, except that a work that
constitutes a Collective Work will not be considered a Derivative Work for the purpose of
this License. For the avoidance of doubt, where the Work is a musical composition or sound
recording, the synchronization of the Work in timed-relation with a moving image ("synching")
will be considered a Derivative Work for the purpose of this License.
c. "Licensor" means the individual or entity that offers the Work under the terms of this License.
d. "Original Author" means the individual or entity who created the Work.
e. "Work" means the copyrightable work of authorship offered under the terms of this License.
f. "You" means an individual or entity exercising rights under this License who has not
previously violated the terms of this License with respect to the Work, or who has received

Creative Commons by Attribution-ShareAlike 2.0
55
express permission from the Licensor to exercise rights under this License despite a previous
violation.
g. "License Elements" means the following high-level license attributes as selected by Licensor
and indicated in the title of this License: Attribution, ShareAlike.
2. Fair Use Rights. Nothing in this license is intended to reduce, limit, or restrict any rights arising
from fair use, first sale or other limitations on the exclusive rights of the copyright owner under
copyright law or other applicable laws.
3. License Grant. Subject to the terms and conditions of this License, Licensor hereby grants You
a worldwide, royalty-free, non-exclusive, perpetual (for the duration of the applicable copyright)
license to exercise the rights in the Work as stated below:
a. to reproduce the Work, to incorporate the Work into one or more Collective Works, and to
reproduce the Work as incorporated in the Collective Works;
b. to create and reproduce Derivative Works;
c. to distribute copies or phonorecords of, display publicly, perform publicly, and perform publicly
by means of a digital audio transmission the Work including as incorporated in Collective
Works;
d. to distribute copies or phonorecords of, display publicly, perform publicly, and perform publicly
by means of a digital audio transmission Derivative Works.
e. For the avoidance of doubt, where the work is a musical composition:
i. "Performance Royalties Under Blanket Licenses." Licensor waives the exclusive right
to collect, whether individually or via a performance rights society (e.g. ASCAP, BMI,
SESAC), royalties for the public performance or public digital performance (e.g. webcast) of
the Work.
ii. "Mechanical Rights and Statutory Royalties." Licensor waives the exclusive right to
collect, whether individually or via a music rights society or designated agent (e.g. Harry
Fox Agency), royalties for any phonorecord You create from the Work ("cover version")
and distribute, subject to the compulsory license created by 17 USC Section 115 of the US
Copyright Act (or the equivalent in other jurisdictions).
f. "Webcasting Rights and Statutory Royalties." For the avoidance of doubt, where the Work
is a sound recording, Licensor waives the exclusive right to collect, whether individually or via
a performance-rights society (e.g. SoundExchange), royalties for the public digital performance
(e.g. webcast) of the Work, subject to the compulsory license created by 17 USC Section 114 of
the US Copyright Act (or the equivalent in other jurisdictions).
The above rights may be exercised in all media and formats whether now known or hereafter
devised. The above rights include the right to make such modifications as are technically necessary
to exercise the rights in other media and formats. All rights not expressly granted by Licensor are
hereby reserved.
4. Restrictions. The license granted in Section 3 above is expressly made subject to and limited by
the following restrictions:

Creative Commons by Attribution-ShareAlike 2.0
56
a. You may distribute, publicly display, publicly perform, or publicly digitally perform the Work
only under the terms of this License, and You must include a copy of, or the Uniform Resource
Identifier for, this License with every copy or phonorecord of the Work You distribute, publicly
display, publicly perform, or publicly digitally perform. You may not offer or impose any terms
on the Work that alter or restrict the terms of this License or the recipients' exercise of the
rights granted hereunder. You may not sublicense the Work. You must keep intact all notices
that refer to this License and to the disclaimer of warranties. You may not distribute, publicly
display, publicly perform, or publicly digitally perform the Work with any technological
measures that control access or use of the Work in a manner inconsistent with the terms of this
License Agreement. The above applies to the Work as incorporated in a Collective Work, but
this does not require the Collective Work apart from the Work itself to be made subject to the
terms of this License. If You create a Collective Work, upon notice from any Licensor You
must, to the extent practicable, remove from the Collective Work any reference to such Licensor
or the Original Author, as requested. If You create a Derivative Work, upon notice from any
Licensor You must, to the extent practicable, remove from the Derivative Work any reference to
such Licensor or the Original Author, as requested.
b. You may distribute, publicly display, publicly perform, or publicly digitally perform a
Derivative Work only under the terms of this License, a later version of this License with
the same License Elements as this License, or a Creative Commons iCommons license that
contains the same License Elements as this License (e.g. Attribution-ShareAlike 2.0 Japan).
You must include a copy of, or the Uniform Resource Identifier for, this License or other
license specified in the previous sentence with every copy or phonorecord of each Derivative
Work You distribute, publicly display, publicly perform, or publicly digitally perform. You
may not offer or impose any terms on the Derivative Works that alter or restrict the terms of this
License or the recipients' exercise of the rights granted hereunder, and You must keep intact all
notices that refer to this License and to the disclaimer of warranties. You may not distribute,
publicly display, publicly perform, or publicly digitally perform the Derivative Work with any
technological measures that control access or use of the Work in a manner inconsistent with the
terms of this License Agreement. The above applies to the Derivative Work as incorporated in a
Collective Work, but this does not require the Collective Work apart from the Derivative Work
itself to be made subject to the terms of this License.
c. If you distribute, publicly display, publicly perform, or publicly digitally perform the Work or
any Derivative Works or Collective Works, You must keep intact all copyright notices for the
Work and give the Original Author credit reasonable to the medium or means You are utilizing
by conveying the name (or pseudonym if applicable) of the Original Author if supplied; the title
of the Work if supplied; to the extent reasonably practicable, the Uniform Resource Identifier,
if any, that Licensor specifies to be associated with the Work, unless such URI does not refer
to the copyright notice or licensing information for the Work; and in the case of a Derivative
Work, a credit identifying the use of the Work in the Derivative Work (e.g., "French translation
of the Work by Original Author," or "Screenplay based on original Work by Original Author").
Such credit may be implemented in any reasonable manner; provided, however, that in the case

Creative Commons by Attribution-ShareAlike 2.0
57
of a Derivative Work or Collective Work, at a minimum such credit will appear where any
other comparable authorship credit appears and in a manner at least as prominent as such other
comparable authorship credit.
5. Representations, Warranties and Disclaimer
UNLESS OTHERWISE AGREED TO BY THE PARTIES IN WRITING, LICENSOR OFFERS
THE WORK AS-IS AND MAKES NO REPRESENTATIONS OR WARRANTIES OF
ANY KIND CONCERNING THE MATERIALS, EXPRESS, IMPLIED, STATUTORY
OR OTHERWISE, INCLUDING, WITHOUT LIMITATION, WARRANTIES OF TITLE,
MERCHANTIBILITY, FITNESS FOR A PARTICULAR PURPOSE, NONINFRINGEMENT,
OR THE ABSENCE OF LATENT OR OTHER DEFECTS, ACCURACY, OR THE PRESENCE
OF ABSENCE OF ERRORS, WHETHER OR NOT DISCOVERABLE. SOME JURISDICTIONS
DO NOT ALLOW THE EXCLUSION OF IMPLIED WARRANTIES, SO SUCH EXCLUSION
MAY NOT APPLY TO YOU.
6. Limitation on Liability. EXCEPT TO THE EXTENT REQUIRED BY APPLICABLE LAW, IN
NO EVENT WILL LICENSOR BE LIABLE TO YOU ON ANY LEGAL THEORY FOR ANY
SPECIAL, INCIDENTAL, CONSEQUENTIAL, PUNITIVE OR EXEMPLARY DAMAGES
ARISING OUT OF THIS LICENSE OR THE USE OF THE WORK, EVEN IF LICENSOR HAS
BEEN ADVISED OF THE POSSIBILITY OF SUCH DAMAGES.
7. Termination
a. This License and the rights granted hereunder will terminate automatically upon any breach by
You of the terms of this License. Individuals or entities who have received Derivative Works or
Collective Works from You under this License, however, will not have their licenses terminated
provided such individuals or entities remain in full compliance with those licenses. Sections 1,
2, 5, 6, 7, and 8 will survive any termination of this License.
b. Subject to the above terms and conditions, the license granted here is perpetual (for the duration
of the applicable copyright in the Work). Notwithstanding the above, Licensor reserves the right
to release the Work under different license terms or to stop distributing the Work at any time;
provided, however that any such election will not serve to withdraw this License (or any other
license that has been, or is required to be, granted under the terms of this License), and this
License will continue in full force and effect unless terminated as stated above.
8. Miscellaneous
a. Each time You distribute or publicly digitally perform the Work or a Collective Work, the
Licensor offers to the recipient a license to the Work on the same terms and conditions as the
license granted to You under this License.
b. Each time You distribute or publicly digitally perform a Derivative Work, Licensor offers to the
recipient a license to the original Work on the same terms and conditions as the license granted
to You under this License.
c. If any provision of this License is invalid or unenforceable under applicable law, it shall not
affect the validity or enforceability of the remainder of the terms of this License, and without

Creative Commons by Attribution-ShareAlike 2.0
58
further action by the parties to this agreement, such provision shall be reformed to the minimum
extent necessary to make such provision valid and enforceable.
d. No term or provision of this License shall be deemed waived and no breach consented to unless
such waiver or consent shall be in writing and signed by the party to be charged with such
waiver or consent.
e. This License constitutes the entire agreement between the parties with respect to the Work
licensed here. There are no understandings, agreements or representations with respect to the
Work not specified here. Licensor shall not be bound by any additional provisions that may
appear in any communication from You. This License may not be modified without the mutual
written agreement of the Licensor and You.
Creative Commons is not a party to this License, and makes no warranty whatsoever in connection
with the Work. Creative Commons will not be liable to You or any party on any legal theory for any
damages whatsoever, including without limitation any general, special, incidental or consequential
damages arising in connection to this license. Notwithstanding the foregoing two (2) sentences, if
Creative Commons has expressly identified itself as the Licensor hereunder, it shall have all rights
and obligations of Licensor.
Except for the limited purpose of indicating to the public that the Work is licensed under the CCPL,
neither party will use the trademark "Creative Commons" or any related trademark or logo of Creative
Commons without the prior written consent of Creative Commons. Any permitted use will be in
compliance with Creative Commons' then-current trademark usage guidelines, as may be published
on its website or otherwise made available upon request from time to time.
Creative Commons may be contacted at http://creativecommons.org/.
59
Appendix B. GNU Free Documentation
LicenseVersion 1.2, November 2002
Copyright © 2000,2001,2002 Free Software Foundation, Inc.
Free Software Foundation, Inc.
51 Franklin St, Fifth Floor,
Boston,
MA
02110-1301
USA
Everyone is permitted to copy and distribute verbatim copies of this license document, but changing it
is not allowed.
Version 1.2, November 2002
PREAMBLE
The purpose of this License is to make a manual, textbook, or other functional and useful document
"free" in the sense of freedom: to assure everyone the effective freedom to copy and redistribute it,
with or without modifying it, either commercially or noncommercially. Secondarily, this License
preserves for the author and publisher a way to get credit for their work, while not being considered
responsible for modifications made by others.
This License is a kind of "copyleft", which means that derivative works of the document must
themselves be free in the same sense. It complements the GNU General Public License, which is a
copyleft license designed for free software.
We have designed this License in order to use it for manuals for free software, because free software
needs free documentation: a free program should come with manuals providing the same freedoms
that the software does. But this License is not limited to software manuals; it can be used for any
textual work, regardless of subject matter or whether it is published as a printed book. We recommend
this License principally for works whose purpose is instruction or reference.
APPLICABILITY AND DEFINITIONS
This License applies to any manual or other work, in any medium, that contains a notice placed by the
copyright holder saying it can be distributed under the terms of this License. Such a notice grants a
world-wide, royalty-free license, unlimited in duration, to use that work under the conditions stated
herein. The "Document", below, refers to any such manual or work. Any member of the public is a
licensee, and is addressed as "you". You accept the license if you copy, modify or distribute the work
in a way requiring permission under copyright law.

GNU Free Documentation License
60
A "Modified Version" of the Document means any work containing the Document or a portion of it,
either copied verbatim, or with modifications and/or translated into another language.
A "Secondary Section" is a named appendix or a front-matter section of the Document that deals
exclusively with the relationship of the publishers or authors of the Document to the Document's
overall subject (or to related matters) and contains nothing that could fall directly within that overall
subject. (Thus, if the Document is in part a textbook of mathematics, a Secondary Section may not
explain any mathematics.) The relationship could be a matter of historical connection with the subject
or with related matters, or of legal, commercial, philosophical, ethical or political position regarding
them.
The "Invariant Sections" are certain Secondary Sections whose titles are designated, as being those of
Invariant Sections, in the notice that says that the Document is released under this License. If a section
does not fit the above definition of Secondary then it is not allowed to be designated as Invariant.
The Document may contain zero Invariant Sections. If the Document does not identify any Invariant
Sections then there are none.
The "Cover Texts" are certain short passages of text that are listed, as Front-Cover Texts or
Back-Cover Texts, in the notice that says that the Document is released under this License. A
Front-Cover Text may be at most 5 words, and a Back-Cover Text may be at most 25 words.
A "Transparent" copy of the Document means a machine-readable copy, represented in a format
whose specification is available to the general public, that is suitable for revising the document
straightforwardly with generic text editors or (for images composed of pixels) generic paint programs
or (for drawings) some widely available drawing editor, and that is suitable for input to text formatters
or for automatic translation to a variety of formats suitable for input to text formatters. A copy made
in an otherwise Transparent file format whose markup, or absence of markup, has been arranged
to thwart or discourage subsequent modification by readers is not Transparent. An image format is
not Transparent if used for any substantial amount of text. A copy that is not "Transparent" is called
"Opaque".
Examples of suitable formats for Transparent copies include plain ASCII without markup,
Texinfo input format, LaTeX input format, SGML or XML using a publicly available DTD, and
standard-conforming simple HTML, PostScript or PDF designed for human modification. Examples
of transparent image formats include PNG, XCF and JPG. Opaque formats include proprietary
formats that can be read and edited only by proprietary word processors, SGML or XML for which
the DTD and/or processing tools are not generally available, and the machine-generated HTML,
PostScript or PDF produced by some word processors for output purposes only.
The "Title Page" means, for a printed book, the title page itself, plus such following pages as are
needed to hold, legibly, the material this License requires to appear in the title page. For works in
formats which do not have any title page as such, "Title Page" means the text near the most prominent
appearance of the work's title, preceding the beginning of the body of the text.

GNU Free Documentation License
61
A section "Entitled XYZ" means a named subunit of the Document whose title either is precisely
XYZ or contains XYZ in parentheses following text that translates XYZ in another language.
(Here XYZ stands for a specific section name mentioned below, such as "Acknowledgements",
"Dedications", "Endorsements", or "History".) To "Preserve the Title" of such a section when you
modify the Document means that it remains a section "Entitled XYZ" according to this definition.
The Document may include Warranty Disclaimers next to the notice which states that this License
applies to the Document. These Warranty Disclaimers are considered to be included by reference in
this License, but only as regards disclaiming warranties: any other implication that these Warranty
Disclaimers may have is void and has no effect on the meaning of this License.
VERBATIM COPYING
You may copy and distribute the Document in any medium, either commercially or noncommercially,
provided that this License, the copyright notices, and the license notice saying this License applies
to the Document are reproduced in all copies, and that you add no other conditions whatsoever to
those of this License. You may not use technical measures to obstruct or control the reading or further
copying of the copies you make or distribute. However, you may accept compensation in exchange
for copies. If you distribute a large enough number of copies you must also follow the conditions in
section 3.
You may also lend copies, under the same conditions stated above, and you may publicly display
copies.
COPYING IN QUANTITY
If you publish printed copies (or copies in media that commonly have printed covers) of the
Document, numbering more than 100, and the Document's license notice requires Cover Texts, you
must enclose the copies in covers that carry, clearly and legibly, all these Cover Texts: Front-Cover
Texts on the front cover, and Back-Cover Texts on the back cover. Both covers must also clearly
and legibly identify you as the publisher of these copies. The front cover must present the full title
with all words of the title equally prominent and visible. You may add other material on the covers
in addition. Copying with changes limited to the covers, as long as they preserve the title of the
Document and satisfy these conditions, can be treated as verbatim copying in other respects.
If the required texts for either cover are too voluminous to fit legibly, you should put the first ones
listed (as many as fit reasonably) on the actual cover, and continue the rest onto adjacent pages.
If you publish or distribute Opaque copies of the Document numbering more than 100, you must
either include a machine-readable Transparent copy along with each Opaque copy, or state in or
with each Opaque copy a computer-network location from which the general network-using public
has access to download using public-standard network protocols a complete Transparent copy of
the Document, free of added material. If you use the latter option, you must take reasonably prudent
steps, when you begin distribution of Opaque copies in quantity, to ensure that this Transparent

GNU Free Documentation License
62
copy will remain thus accessible at the stated location until at least one year after the last time you
distribute an Opaque copy (directly or through your agents or retailers) of that edition to the public.
It is requested, but not required, that you contact the authors of the Document well before
redistributing any large number of copies, to give them a chance to provide you with an updated
version of the Document.
MODIFICATIONS
You may copy and distribute a Modified Version of the Document under the conditions of sections
2 and 3 above, provided that you release the Modified Version under precisely this License, with the
Modified Version filling the role of the Document, thus licensing distribution and modification of
the Modified Version to whoever possesses a copy of it. In addition, you must do these things in the
Modified Version:
GNU FDL Modification Conditions
A. Use in the Title Page (and on the covers, if any) a title distinct from that of the Document, and
from those of previous versions (which should, if there were any, be listed in the History section
of the Document). You may use the same title as a previous version if the original publisher of that
version gives permission.
B. List on the Title Page, as authors, one or more persons or entities responsible for authorship of the
modifications in the Modified Version, together with at least five of the principal authors of the
Document (all of its principal authors, if it has fewer than five), unless they release you from this
requirement.
C. State on the Title page the name of the publisher of the Modified Version, as the publisher.
D. Preserve all the copyright notices of the Document.
E. Add an appropriate copyright notice for your modifications adjacent to the other copyright notices.
F. Include, immediately after the copyright notices, a license notice giving the public permission to
use the Modified Version under the terms of this License, in the form shown in the Addendum [p.
65] below.
G. Preserve in that license notice the full lists of Invariant Sections and required Cover Texts given in
the Document's license notice.
H. Include an unaltered copy of this License.
I. Preserve the section Entitled "History", Preserve its Title, and add to it an item stating at least the
title, year, new authors, and publisher of the Modified Version as given on the Title Page. If there
is no section Entitled "History" in the Document, create one stating the title, year, authors, and
publisher of the Document as given on its Title Page, then add an item describing the Modified
Version as stated in the previous sentence.
J. Preserve the network location, if any, given in the Document for public access to a Transparent
copy of the Document, and likewise the network locations given in the Document for previous
versions it was based on. These may be placed in the "History" section. You may omit a network

GNU Free Documentation License
63
location for a work that was published at least four years before the Document itself, or if the
original publisher of the version it refers to gives permission.
K. For any section Entitled "Acknowledgements" or "Dedications", Preserve the Title of the section,
and preserve in the section all the substance and tone of each of the contributor acknowledgements
and/or dedications given therein.
L. Preserve all the Invariant Sections of the Document, unaltered in their text and in their titles.
Section numbers or the equivalent are not considered part of the section titles.
M.Delete any section Entitled "Endorsements". Such a section may not be included in the Modified
Version.
N. Do not retitle any existing section to be Entitled "Endorsements" or to conflict in title with any
Invariant Section.
O. Preserve any Warranty Disclaimers.
If the Modified Version includes new front-matter sections or appendices that qualify as Secondary
Sections and contain no material copied from the Document, you may at your option designate some
or all of these sections as invariant. To do this, add their titles to the list of Invariant Sections in the
Modified Version's license notice. These titles must be distinct from any other section titles.
You may add a section Entitled "Endorsements", provided it contains nothing but endorsements of
your Modified Version by various parties--for example, statements of peer review or that the text has
been approved by an organization as the authoritative definition of a standard.
You may add a passage of up to five words as a Front-Cover Text, and a passage of up to 25 words as
a Back-Cover Text, to the end of the list of Cover Texts in the Modified Version. Only one passage of
Front-Cover Text and one of Back-Cover Text may be added by (or through arrangements made by)
any one entity. If the Document already includes a cover text for the same cover, previously added by
you or by arrangement made by the same entity you are acting on behalf of, you may not add another;
but you may replace the old one, on explicit permission from the previous publisher that added the old
one.
The author(s) and publisher(s) of the Document do not by this License give permission to use their
names for publicity for or to assert or imply endorsement of any Modified Version.
COMBINING DOCUMENTS
You may combine the Document with other documents released under this License, under the
terms defined in section 4 [p. 62] above for modified versions, provided that you include in the
combination all of the Invariant Sections of all of the original documents, unmodified, and list them
all as Invariant Sections of your combined work in its license notice, and that you preserve all their
Warranty Disclaimers.
The combined work need only contain one copy of this License, and multiple identical Invariant
Sections may be replaced with a single copy. If there are multiple Invariant Sections with the same
name but different contents, make the title of each such section unique by adding at the end of it, in

GNU Free Documentation License
64
parentheses, the name of the original author or publisher of that section if known, or else a unique
number. Make the same adjustment to the section titles in the list of Invariant Sections in the license
notice of the combined work.
In the combination, you must combine any sections Entitled "History" in the various original
documents, forming one section Entitled "History"; likewise combine any sections Entitled
"Acknowledgements", and any sections Entitled "Dedications". You must delete all sections Entitled
"Endorsements".
COLLECTIONS OF DOCUMENTS
You may make a collection consisting of the Document and other documents released under this
License, and replace the individual copies of this License in the various documents with a single
copy that is included in the collection, provided that you follow the rules of this License for verbatim
copying of each of the documents in all other respects.
You may extract a single document from such a collection, and distribute it individually under this
License, provided you insert a copy of this License into the extracted document, and follow this
License in all other respects regarding verbatim copying of that document.
AGGREGATION WITH INDEPENDENT WORKS
A compilation of the Document or its derivatives with other separate and independent documents or
works, in or on a volume of a storage or distribution medium, is called an "aggregate" if the copyright
resulting from the compilation is not used to limit the legal rights of the compilation's users beyond
what the individual works permit. When the Document is included in an aggregate, this License
does not apply to the other works in the aggregate which are not themselves derivative works of the
Document.
If the Cover Text requirement of section 3 is applicable to these copies of the Document, then if the
Document is less than one half of the entire aggregate, the Document's Cover Texts may be placed on
covers that bracket the Document within the aggregate, or the electronic equivalent of covers if the
Document is in electronic form. Otherwise they must appear on printed covers that bracket the whole
aggregate.
TRANSLATION
Translation is considered a kind of modification, so you may distribute translations of the Document
under the terms of section 4. Replacing Invariant Sections with translations requires special
permission from their copyright holders, but you may include translations of some or all Invariant
Sections in addition to the original versions of these Invariant Sections. You may include a translation
of this License, and all the license notices in the Document, and any Warranty Disclaimers, provided
that you also include the original English version of this License and the original versions of those
notices and disclaimers. In case of a disagreement between the translation and the original version of
this License or a notice or disclaimer, the original version will prevail.

GNU Free Documentation License
65
If a section in the Document is Entitled "Acknowledgements", "Dedications", or "History", the
requirement (section 4) to Preserve its Title (section 1) will typically require changing the actual title.
TERMINATION
You may not copy, modify, sublicense, or distribute the Document except as expressly provided for
under this License. Any other attempt to copy, modify, sublicense or distribute the Document is void,
and will automatically terminate your rights under this License. However, parties who have received
copies, or rights, from you under this License will not have their licenses terminated so long as such
parties remain in full compliance.
FUTURE REVISIONS OF THIS LICENSE
The Free Software Foundation may publish new, revised versions of the GNU Free Documentation
License from time to time. Such new versions will be similar in spirit to the present version, but may
differ in detail to address new problems or concerns. See http://www.gnu.org/copyleft/.
Each version of the License is given a distinguishing version number. If the Document specifies that
a particular numbered version of this License "or any later version" applies to it, you have the option
of following the terms and conditions either of that specified version or of any later version that has
been published (not as a draft) by the Free Software Foundation. If the Document does not specify
a version number of this License, you may choose any version ever published (not as a draft) by the
Free Software Foundation.
ADDENDUM: How to use this License for your documents
To use this License in a document you have written, include a copy of the License in the document
and put the following copyright and license notices just after the title page:
Sample Invariant Sections list
Copyright (c) YEAR YOUR NAME. Permission is granted to copy, distribute and/or
modify this document under the terms of the GNU Free Documentation License,
Version 1.2 or any later version published by the Free Software Foundation; with no
Invariant Sections, no Front-Cover Texts, and no Back-Cover Texts. A copy of the
license is included in the section entitled "GNU Free Documentation License".
If you have Invariant Sections, Front-Cover Texts and Back-Cover Texts, replace the "with...Texts."
line with this:
Sample Invariant Sections list
with the Invariant Sections being LIST THEIR TITLES, with the Front-Cover Texts
being LIST, and with the Back-Cover Texts being LIST.
If you have Invariant Sections without Cover Texts, or some other combination of the three, merge
those two alternatives to suit the situation.

GNU Free Documentation License
66
If your document contains nontrivial examples of program code, we recommend releasing these
examples in parallel under your choice of free software license, such as the GNU General Public
License, to permit their use in free software.


