Music with Deaf Students Warm up activity Foundation activity Main activity Routine Inclusion Relationship between movement & language Executive functions Proprioception & motor skills What is the communication style? Minimal language Visual aids Duration of the activity Singing Using instruments Areas of learning Things to consider Communication This Toolkit is a free resource for music practitioners and teachers working with deaf children. It has been designed following a 3 year Creative Futures project called ‘Sounding Out’, funded by the National Foundation for Youth Music, which involved working with deaf children in both primary and secondary schools. Through this Toolkit we hope to inspire music practitioners and teachers to be bold in their music delivery with deaf children, and to ensure that deaf children have as much access to music and music-making as other children and young people. SUPPORT AND TRAINING If you would be interested in receiving any training or professional development linked to this Toolkit, in order to support you or your staff in the delivery of music-making for deaf children, please contact us and we will be happy to discuss a bespoke training package for you. “Our data suggests that the Sounding Out programme has been a success musically, with clear evidence of virtually all pupils achieving more advanced musical behaviours as their academic year progressed. This is very commendable and provides a solid evidential foundation from which to argue that all deaf pupils should have access to appropriate music education provision, whether in Primary or Secondary schools to support learning in and through music.” (Professor Graham Welch & Dr Jo Saunders, UCL Institute of Education, 2018) Sounding Out A toolkit for music practitioners working with deaf students Dr. Kathryn Mason Tiziana Pozzo
Transcript
Music withDeaf Students
Warm up activity
Foundation activity
Main activity
Routine
Inclusion
Relationship betweenmovement & language
Executive functions
Proprioception & motor skills
What is thecommunication style?
Minimal language
Visual aids
Duration of the activity
Singing
Using instruments
Areas oflearning
Things to consider
Communication
This Toolkit is a free resource for music practitioners and teachers working with deaf children. It has been designed following a 3 year Creative Futures project called ‘Sounding Out’, funded by the National Foundation for Youth Music, which involved working with deaf children in both primary and secondary schools.
Through this Toolkit we hope to inspire music practitioners and teachers to be bold in their music delivery with deaf children, and to ensure that deaf children have as much access to music and music-making as other children and young people.
SUPPORT AND TRAININGIf you would be interested in receiving any training or professional development linked to this Toolkit, in order to support you or your sta� in the delivery of music-making for deaf children, please contact us and we will be happy to discuss a bespoke training package for you.
“Our data suggests that the Sounding Out programme has been a success musically, with clear evidence of virtually all pupils achieving more advanced musical behaviours as their academic year progressed. This is very commendable and provides a solid evidential foundation from which to argue that all deaf pupils should have access to appropriate music education provision, whether in Primary or Secondary schools to support learning in and through music.”
(Professor Graham Welch & Dr Jo Saunders, UCL Institute of Education, 2018)
Sounding OutA toolkit for music practitioners working with deaf students
Sounding OutA toolkit for music practitioners working with deaf students
Dr. Kathryn MasonTiziana Pozzo
There are many deaf people who play musical instruments and take part in music activities on aregular basis, including many extremely accomplished professional deaf musicians. As with all young people, participating in music activities has many bene�ts for deaf children.
The experience of musical vibrations as well as the visual aspects and value of performance can help increase their con�dence, ability to collaborate creatively with others, develop a wide range of cognitive skills, and provide artistic variety and satisfaction.
Like their hearing peers, deaf children and young people are in�uenced by experiences of music in their home and social environment. Each child’s experience of music is unique and depends on their level of deafness (mild, moderate, severe or profound), the hearing technology they use (e.g. hearing aids or cochlear implants), and their previous experience of music. A young person who has lost their hearing may have memory of early musical experiences, and therefore may approach the class in a di�erent way from a child who was born deaf. It is important to remember that some deaf children can use a lot of their residual hearing with the support of hearing aids, or cochlear implants and others may be deaf in just one ear. This means that musical enjoyment in many cases is not only about vibration and being visual, but also hearing and exploring a variety of di�erent sounds.
The Sounding Out Toolkit is designed for use by music practitioners and teachers who may either be working with deaf children for the �rst time, or are new to creating music with deaf children. It is a guide to help foster ideas as you plan your classes and draws on the experiences of musicians who took part in the Sounding Out programme. It should also be noted that the activities included in this Toolkit are suitable for use with all children (hearing and deaf), but have been speci�cally designed with the various needs of deaf children in mind, in order to be accessible.
CommunicationIn some circumstances where children use sign language as their main mode of communication, you may be working with a communication support worker (CSW) or quali�ed teaching assistant. If this is the case, it is useful to be aware of some key points which will help communication run smoothly:
1. Let the interpreter know as far in advance as possible what the activities will be. This enables time to prepare and explain the activities to children in the clearest way possible.
Introduction
KEY TO ABBREVIATIONS USED IN THE TOOLKIT
CI = Cochlear Implant HA = Hearing Aid EF = Executive Function
Sounding OutA toolkit for music practitioners working with deaf students
Dr. Kathryn MasonTiziana Pozzo
Sounding Out Toolkit Introduction Page 03
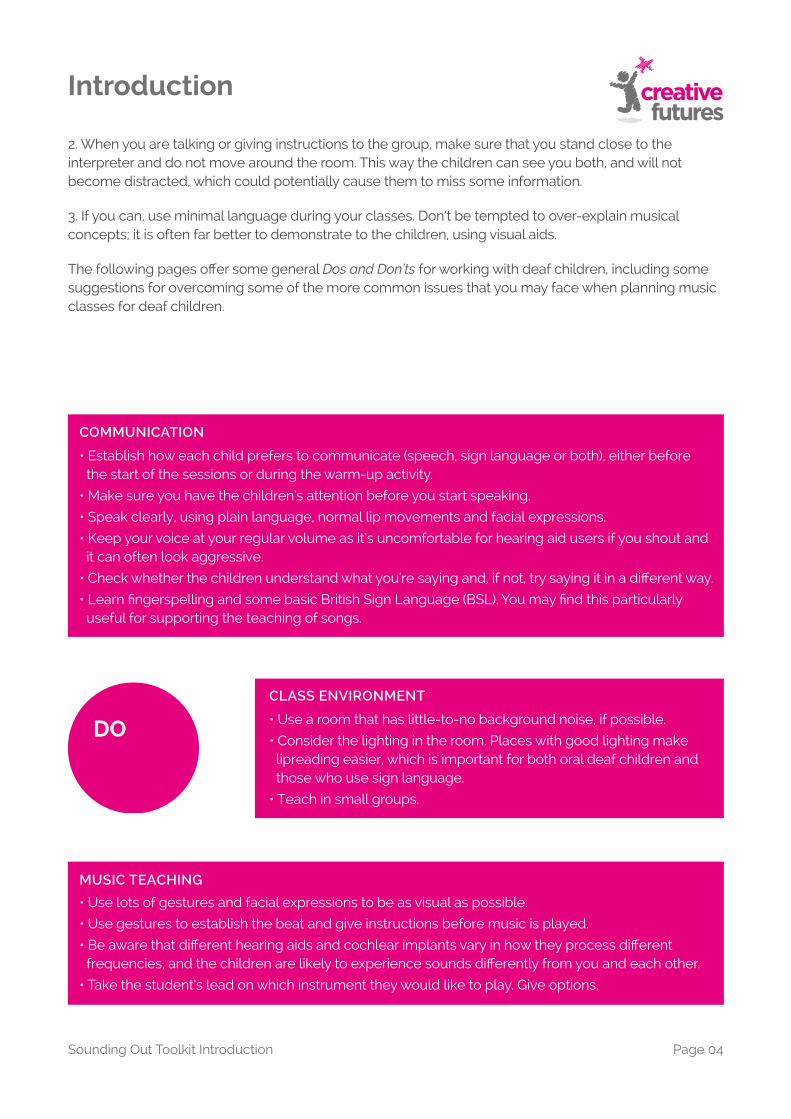
• Establish how each child prefers to communicate (speech, sign language or both), either before the start of the sessions or during the warm-up activity.
• Make sure you have the children’s attention before you start speaking.
• Speak clearly, using plain language, normal lip movements and facial expressions.
• Keep your voice at your regular volume as it’s uncomfortable for hearing aid users if you shout and it can often look aggressive.
• Check whether the children understand what you're saying and, if not, try saying it in a di erent way.
• Learn �ngerspelling and some basic British Sign Language (BSL). You may �nd this particularly useful for supporting the teaching of songs.
COMMUNICATION
• Use lots of gestures and facial expressions to be as visual as possible.
• Use gestures to establish the beat and give instructions before music is played.
• Be aware that di erent hearing aids and cochlear implants vary in how they process di erent frequencies, and the children are likely to experience sounds di erently from you and each other.
• Take the student’s lead on which instrument they would like to play. Give options.
MUSIC TEACHING
• Use a room that has little-to-no background noise, if possible.
• Consider the lighting in the room. Places with good lighting make lipreading easier, which is important for both oral deaf children and those who use sign language.
• Teach in small groups.
CLASS ENVIRONMENT
DO
2. When you are talking or giving instructions to the group, make sure that you stand close to theinterpreter and do not move around the room. This way the children can see you both, and will not become distracted, which could potentially cause them to miss some information.
3. If you can, use minimal language during your classes. Don’t be tempted to over-explain musical concepts; it is often far better to demonstrate to the children, using visual aids.
The following pages o�er some general Dos and Don’ts for working with deaf children, including some suggestions for overcoming some of the more common issues that you may face when planning music classes for deaf children.
Sounding Out Toolkit Introduction Page 04
Introduction
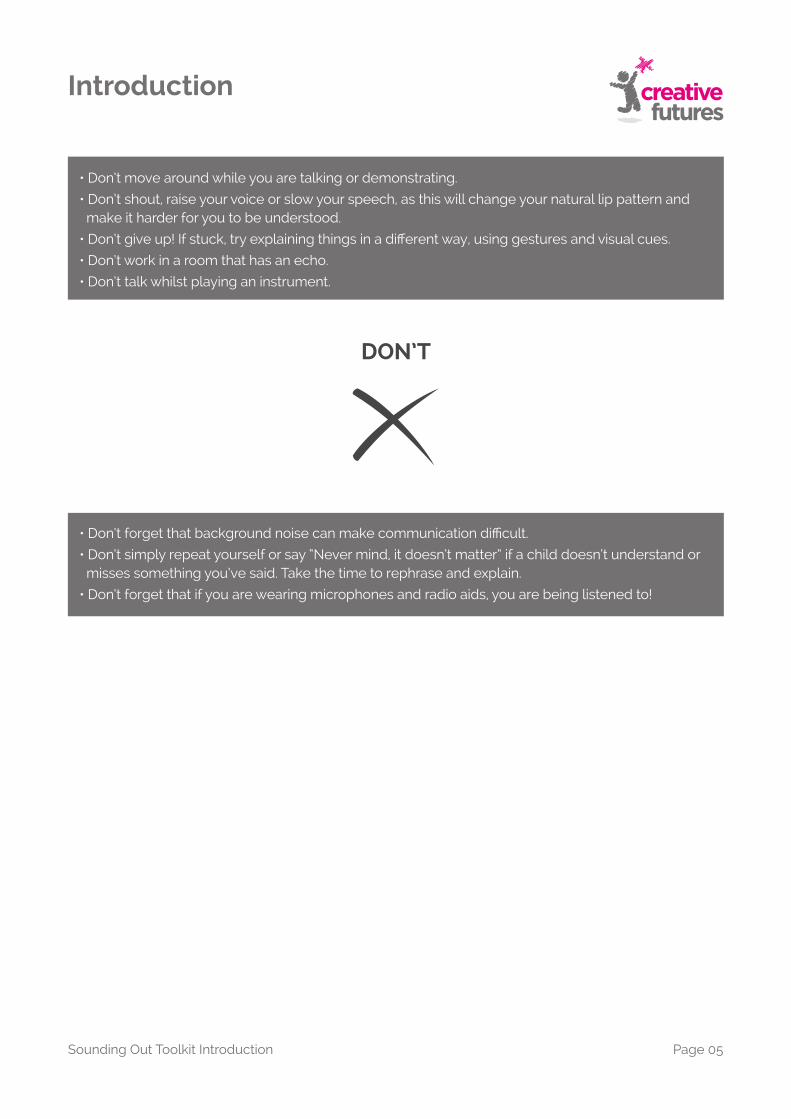
• Don’t move around while you are talking or demonstrating.
• Don’t shout, raise your voice or slow your speech, as this will change your natural lip pattern and make it harder for you to be understood.
• Don’t give up! If stuck, try explaining things in a di�erent way, using gestures and visual cues.
• Don’t work in a room that has an echo.
• Don’t talk whilst playing an instrument.
DON’T
• Don’t forget that background noise can make communication di�cult.
• Don’t simply repeat yourself or say “Never mind, it doesn’t matter” if a child doesn’t understand or misses something you’ve said. Take the time to rephrase and explain.
• Don’t forget that if you are wearing microphones and radio aids, you are being listened to!
Introduction
Sounding Out Toolkit Introduction Page 05
POTENTIAL DIFFICULTIES WHAT CAN YOU DO TO HELP?
Playing in a poor acoustic environment. Keep background noise to a minimum.
Use rooms with soft furnishings and curtains.
Keep doors and windows closed if possible.
A child is often distracted, has poor attention and di�culty listening and learning.
Face the children when you are talking to them.
Give them time to process information before demonstrating.
Never talk whilst music is being played.
Use gestures and demonstrate to help make your explanations clearer.
Be aware that a deaf child may get tired earlier than their hearing peers, as they are using extra focus to follow what is going on.
A child has di�culty following conversationbetween other children or adults.
Be clear from the start that one person should talk at a time and that no one should play music while discussions are taking place.
Seat everyone in a U shape for ease of communication.
Noises may be too loud and uncomfortable with a hearing aid or cochlear implant.
Check with the child where they are most comfortably positioned within the group.
See if they can arrange to see their audiologist; simple tweaks may be needed to assist them to hear music comfortably.
When introducing instruments, remember that it may take time for some children to adjust to the new sound.
A child is struggling to grasp the rhythm or melody.
Ensure that the child has the chance to learn and practice in advance of the rest of the group – di�erentiation.
Do not single out a deaf child in front of other group members when they’re struggling.
Go back to basics: ask them to repeat the rhythm by copying you clapping to the beat.
Sounding Out Toolkit Introduction Page 06
Introduction
Duration of the ActivitiesClassrooms can be noisy, busy places. Deaf children have to focus particularly hard in order to follow conversations and instructions. Dividing their focus between activities and other things going on in the room can be distracting.
Due to extra demands on their concentration, deaf children tend to tire more quickly than hearing children do - particularly towards the end of the school day, or during longer, more complex activities. Therefore, we advise you to keep activities as fun, engaging and short as possible to avoid distraction and fatigue. Plan short breaks within your sessions if necessary.
SingingAs with all children, some deaf children will enjoy singing while others will be more reluctant. You may �nd that many of the children don't want to sing at all. Some deaf children are not used to using their voice, therefore singing may initially be uncomfortable for them, so remember to make any songs you incorporate into your classes as inclusive as possible. It is essential that you never force your students to sing. If they would like to sing, they will do so once they feel ready and comfortable to join in.
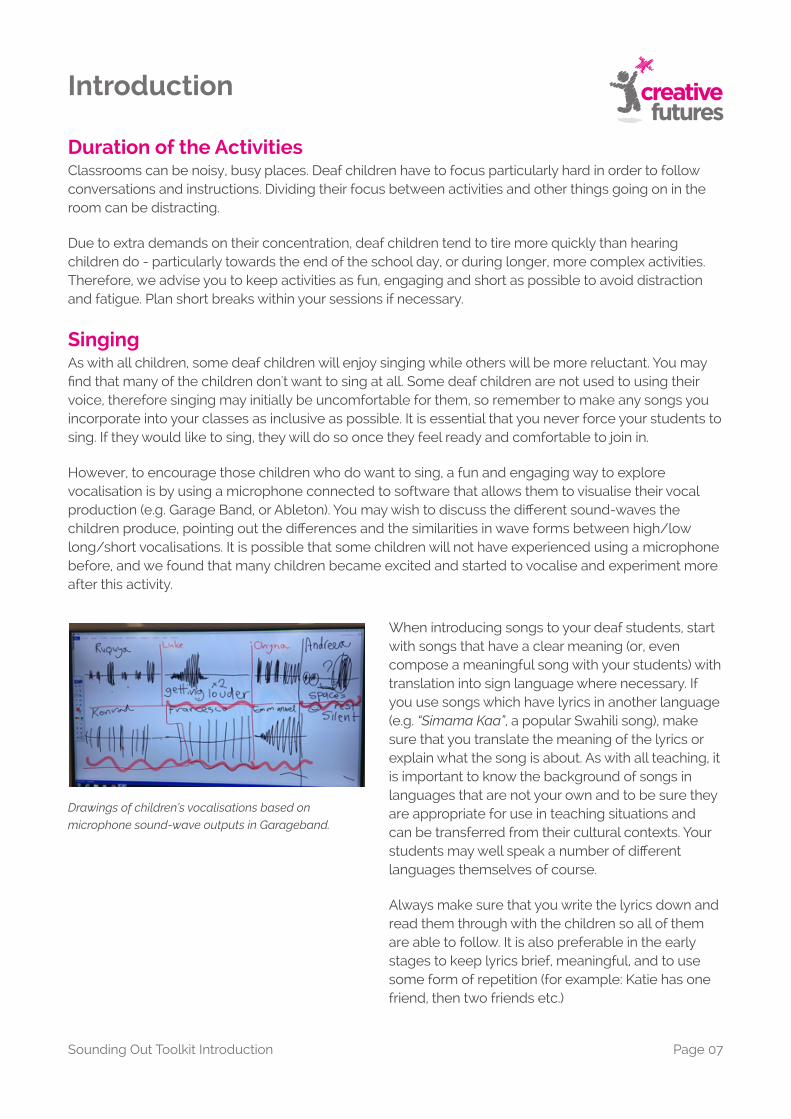
However, to encourage those children who do want to sing, a fun and engaging way to explore vocalisation is by using a microphone connected to software that allows them to visualise their vocal production (e.g. Garage Band, or Ableton). You may wish to discuss the di�erent sound-waves the children produce, pointing out the di�erences and the similarities in wave forms between high/low long/short vocalisations. It is possible that some children will not have experienced using a microphone before, and we found that many children became excited and started to vocalise and experiment more after this activity.
When introducing songs to your deaf students, start with songs that have a clear meaning (or, even compose a meaningful song with your students) with translation into sign language where necessary. If you use songs which have lyrics in another language (e.g. “Simama Kaa”, a popular Swahili song), make sure that you translate the meaning of the lyrics or explain what the song is about. As with all teaching, it is important to know the background of songs in languages that are not your own and to be sure they are appropriate for use in teaching situations and can be transferred from their cultural contexts. Your students may well speak a number of di�erent languages themselves of course.
Always make sure that you write the lyrics down and read them through with the children so all of them are able to follow. It is also preferable in the early stages to keep lyrics brief, meaningful, and to use some form of repetition (for example: Katie has one friend, then two friends etc.)
Drawings of children’s vocalisations based on microphone sound-wave outputs in Garageband.
Introduction
Sounding Out Toolkit Introduction Page 07
Start all songs very slowly, making sure that every (oral) child can pronounce the syllables: the rhythm of the song can be very helpful in supporting pronunciation and language production. Once the children have internalised the meaning and the rhythm of the lyrics, introduce the melody. We advise introducing each musical element one at a time, this way you can make sure that the whole class has access to the material that you are presenting.
Some children may �nd it hard to pitch the melody accurately. You can use a variety of approaches to help them through this process, such as:
• Focusing �rst on the di�erence between high and low pitches,
• Allowing them to feel the vibrations physically (e.g. using a microphone) while you're making big gestures moving up and down.
• Signing the notes of the melody (e.g. using Kodaly’s signs):
• Drawing a line on a piece of paper which rises and falls with the melodic line, and asking the children to follow using their whole bodies, moving up and down.
Attaching the syllables of lyrics to the rhythm of a song may also be a challenge for some deaf children. Whereas lots of song lyrics reinforce rhythm, in some instances they can be misleading or confusing. For example, the song ‘Twinkle Twinkle Little Star’ was di�cult for one child who found it hard to segment the word “li-ttle”, singing “twinkle, twinkle, little little star” instead of “Twin-kle, twin-kle, li - ttle star.” Working with her on the rhythm of the song, meant that eventually she was able to associate the syllables of words with corresponding beats, and she was visibly happy and proud when she got it right!
Using InstrumentsDeaf children are very diverse and have a wide range of residual hearing. Some children may be able to hear higher frequencies (e.g. those produced by vocals, guitars, glockenspiels etc.) but not lower frequencies (such as drums or bass) or vice versa. Therefore, it is a good idea to let children experiment and play around with instruments, allowing them to explore di�erent sounds, many of which may be new to them. Be aware that some sounds will be experienced di�erently by the children, particularly when processed through a cochlear implant or hearing aid. Very loud sounds (e.g. those produced when a class of children are drumming) may be uncomfortable for some children, so make sure you take care to minimise any discomfort that may occur by frequently checking this with the children.
You may also �nd that some children are more concerned about the quality of their musical production than others and will want to make sure that they are playing the “right” way. Conversely, other children may not be as aware of the variety of sounds they are able to produce (for example, in terms of volume and timbre).
Soundpainting (described in more detail below), is an excellent way to demonstrate these musicalparameters visually and can help the children discover the variety of di�erent sounds that can be produced by their chosen instrument.
Introduction
Sounding Out Toolkit Introduction Page 08
USING THE SOUNDING OUT TOOLKITThis Toolkit provides ideas for each phase of a music session - warm up exercises, foundation activities that focus on skills development, and main activities. Links to video examples are provided for some of the activities. Musical aspects are broken down and listed next to each exercise. Places where children will enhance their key areas of cognitive development (Executive Function) have been indicated, including: memory, inhibitory skills (resisting the urge to act impulsively) and �exibility (the ability to switch attention and focus between activities). We have also outlined opportunities to develop proprioception and motor skills.
Areas of LearningINCLUSION
Deaf children are a very heterogeneous group, and it is likely that within one class of children you will encounter a wide range of musical abilities, strengths, weaknesses and interests. Di�erentiation of roles within activities may be essential.
All children in the group should be involved in each of the activities. Most of the activities described in this Toolkit provide each child with the opportunity to play in unison with the group and also individually. Providing children with the opportunity to conduct the rest of the group (for example), will help them to develop con�dence in their abilities, as well as foster musical creativity.
We also discovered that the activities provided a lot of opportunities for peer learning and support. By demonstrating and helping each other, deaf children can explore new instruments and discover new sensations and sounds together. Be sure to give them the space to explore and discover thingsindependently, being mindful that each child may be experiencing the activity di�erently.
RELATIONSHIP BETWEEN MUSIC AND MOVEMENT
Movement is integral in supporting the interpretation of music and is even more important when working with deaf children. Using gestures and full-body movement to emphasise the beat helps to make music embodied, visual and reinforces rhythm. For example, when teaching a song, gesture and sign language can be used to support the meaning and aid understanding.
Example Song - “Katie Has One Friend”
SOUNDPAINTING
Created by composer Walter Thompson in New York, 1974, Soundpainting is a live composing gestural language designed for use by musicians, actors, dancers, and visual artists. It currently includes more than 1500 gestures and hand signals that are used by the Soundpainter (composer) to indicate the type of musical response required of the performers (e.g. crescendo, diminuendo, tutti etc.). It covers all aspects of musical performance, including who, what, how, and when performers play.
Soundpainting was introduced to children during the Sounding Out project, and was particularlysuccessful for enabling profoundly deaf children to communicate musical ideas. For example,Soundpainting transformed the experience of music class for one boy in particular, who was profoundly deaf and had additional behavioural and attentional problems. He initially found the music classes challenging to access. Soundpainting helped him to focus, understand and experience sounds in an
accessible, visual way and communicate musically with his classmates. It allowed him to use his own creativity and provided a common musical language, levelling the communication �eld between the deaf students and hearing teachers.
EXECUTIVE FUNCTIONS
‘Executive Functions’ (EFs) are the top-down cognitive processes that we all use in order to remember, plan, evaluate and switch between our actions. We begin acquiring these skills in infancy, and they continue to develop well into adulthood. While EF is a broad term, it is generally used to refer to three key cognitive skills - working memory, inhibition and cognitive �exibility. Particular activities which we believe may develop some or all of these key EFs are highlighted in the Toolkit. We all use ‘working memory’ to temporarily store and process new information that we need at the present time - for example, when we hold an address in our mind whilst searching for a pen to write it down, or work out simple arithmetic in our head. Several activities included in this Toolkit have the capacity to strengthen working memory skills (particularly in children who may have problems with memory), as children are required to remember changing rules to games and remember when it is their turn to play on cue.
‘Inhibition’ is the ability to prevent yourself from performing an automatic or desired behaviour. Inhibition is a feature in many of the Toolkit activities, where children are required, for example, to prevent themselves from hitting a drum at the ‘wrong’ time and instead to hit it in time with a pulse. Turn-taking and group roles are also a frequent feature in the activities, and these can also challenge and develop children’s patience and inhibitory skills in a fun, musical way.
‘Cognitive �exibility’ is our ability to switch from one way of doing something to a new way (and back again) - it is sometimes known as �exible thinking. Children with autism are commonly noted to have di�culties with cognitive �exibility, and �nd comfort and reassurance in repetitive routines, perhaps becoming distressed or unsettled if (for example) their regular route to school had to be changed due to a road closure. The activities in this Toolkit are all broken down into steps as a way to gradually build and develop musical skills in relation to cognitive �exibility. As you move from one step to the next, the ‘rules’ for the games change and develop, becoming increasingly complex. By designing the activities in this way, children’s cognitive �exibility skills will be strengthened, as they are encouraged to accept new game rules to replace those of a previous step.
PROPRIOCEPTION AND MOTOR SKILLS
‘Proprioception’ is the sense through which we perceive the position and movement of our body. Many of the activities in the Toolkit use body percussion as a way of introducing and reinforcing rhythms with the children. By using their bodies to produce sounds and rhythms, the children physically experience the beat, providing an additional avenue for connection with the music. Basic body percussion such as clapping, stomping, tapping on thighs, tapping on the chest etc., also helps to develop gross and �ne motor skills. This may be particularly bene�cial for children with minor physical di�culties. Many of the early steps in the activities involve body percussion before instruments are introduced. Anticipating the beat, and consciously preparing to tap a drum at the correct time along with a pulse also encourages the children to use their bodies in a mindful, musical way.
We hope that you �nd the warm-ups, foundation and main activities included in the Toolkit to be a helpful guide and inspiration for creative music making with deaf children.
Introduction
Sounding Out Toolkit Introduction Page 09
USING THE SOUNDING OUT TOOLKITThis Toolkit provides ideas for each phase of a music session - warm up exercises, foundation activities that focus on skills development, and main activities. Links to video examples are provided for some of the activities. Musical aspects are broken down and listed next to each exercise. Places where children will enhance their key areas of cognitive development (Executive Function) have been indicated, including: memory, inhibitory skills (resisting the urge to act impulsively) and �exibility (the ability to switch attention and focus between activities). We have also outlined opportunities to develop proprioception and motor skills.
Areas of LearningINCLUSION
Deaf children are a very heterogeneous group, and it is likely that within one class of children you will encounter a wide range of musical abilities, strengths, weaknesses and interests. Di�erentiation of roles within activities may be essential.
All children in the group should be involved in each of the activities. Most of the activities described in this Toolkit provide each child with the opportunity to play in unison with the group and also individually. Providing children with the opportunity to conduct the rest of the group (for example), will help them to develop con�dence in their abilities, as well as foster musical creativity.
We also discovered that the activities provided a lot of opportunities for peer learning and support. By demonstrating and helping each other, deaf children can explore new instruments and discover new sensations and sounds together. Be sure to give them the space to explore and discover thingsindependently, being mindful that each child may be experiencing the activity di�erently.
RELATIONSHIP BETWEEN MUSIC AND MOVEMENT
Movement is integral in supporting the interpretation of music and is even more important when working with deaf children. Using gestures and full-body movement to emphasise the beat helps to make music embodied, visual and reinforces rhythm. For example, when teaching a song, gesture and sign language can be used to support the meaning and aid understanding.
Example Song - “Katie Has One Friend”
SOUNDPAINTING
Created by composer Walter Thompson in New York, 1974, Soundpainting is a live composing gestural language designed for use by musicians, actors, dancers, and visual artists. It currently includes more than 1500 gestures and hand signals that are used by the Soundpainter (composer) to indicate the type of musical response required of the performers (e.g. crescendo, diminuendo, tutti etc.). It covers all aspects of musical performance, including who, what, how, and when performers play.
Soundpainting was introduced to children during the Sounding Out project, and was particularlysuccessful for enabling profoundly deaf children to communicate musical ideas. For example,Soundpainting transformed the experience of music class for one boy in particular, who was profoundly deaf and had additional behavioural and attentional problems. He initially found the music classes challenging to access. Soundpainting helped him to focus, understand and experience sounds in an
accessible, visual way and communicate musically with his classmates. It allowed him to use his own creativity and provided a common musical language, levelling the communication �eld between the deaf students and hearing teachers.
EXECUTIVE FUNCTIONS
‘Executive Functions’ (EFs) are the top-down cognitive processes that we all use in order to remember, plan, evaluate and switch between our actions. We begin acquiring these skills in infancy, and they continue to develop well into adulthood. While EF is a broad term, it is generally used to refer to three key cognitive skills - working memory, inhibition and cognitive �exibility. Particular activities which we believe may develop some or all of these key EFs are highlighted in the Toolkit. We all use ‘working memory’ to temporarily store and process new information that we need at the present time - for example, when we hold an address in our mind whilst searching for a pen to write it down, or work out simple arithmetic in our head. Several activities included in this Toolkit have the capacity to strengthen working memory skills (particularly in children who may have problems with memory), as children are required to remember changing rules to games and remember when it is their turn to play on cue.
‘Inhibition’ is the ability to prevent yourself from performing an automatic or desired behaviour. Inhibition is a feature in many of the Toolkit activities, where children are required, for example, to prevent themselves from hitting a drum at the ‘wrong’ time and instead to hit it in time with a pulse. Turn-taking and group roles are also a frequent feature in the activities, and these can also challenge and develop children’s patience and inhibitory skills in a fun, musical way.
‘Cognitive �exibility’ is our ability to switch from one way of doing something to a new way (and back again) - it is sometimes known as �exible thinking. Children with autism are commonly noted to have di�culties with cognitive �exibility, and �nd comfort and reassurance in repetitive routines, perhaps becoming distressed or unsettled if (for example) their regular route to school had to be changed due to a road closure. The activities in this Toolkit are all broken down into steps as a way to gradually build and develop musical skills in relation to cognitive �exibility. As you move from one step to the next, the ‘rules’ for the games change and develop, becoming increasingly complex. By designing the activities in this way, children’s cognitive �exibility skills will be strengthened, as they are encouraged to accept new game rules to replace those of a previous step.
PROPRIOCEPTION AND MOTOR SKILLS
‘Proprioception’ is the sense through which we perceive the position and movement of our body. Many of the activities in the Toolkit use body percussion as a way of introducing and reinforcing rhythms with the children. By using their bodies to produce sounds and rhythms, the children physically experience the beat, providing an additional avenue for connection with the music. Basic body percussion such as clapping, stomping, tapping on thighs, tapping on the chest etc., also helps to develop gross and �ne motor skills. This may be particularly bene�cial for children with minor physical di�culties. Many of the early steps in the activities involve body percussion before instruments are introduced. Anticipating the beat, and consciously preparing to tap a drum at the correct time along with a pulse also encourages the children to use their bodies in a mindful, musical way.
We hope that you �nd the warm-ups, foundation and main activities included in the Toolkit to be a helpful guide and inspiration for creative music making with deaf children.
Introduction
Sounding Out Toolkit Introduction Page 10
Interesting and Useful Videos
Introduction
Sounding Out Toolkit Introduction Page 11
Christine Sun Kim - Deaf American sound artist describes her experience of musichttps://www.youtube.com/watch?v=2Euof4PnjDk
Music interpretation in American Sign Language with excellent examples of using signlanguage to convey musical timbrehttps://www.youtube.com/watch?v=EuD2iNVMS_4
The National Deaf Children’s Society has examples of basic signs in British Sign Language, including signs for di�erent musical instructions and instrumentshttps://www.youtube.com/user/ndcswebteam/videos
Music withDeaf Students
Warm up activityFoundation activity
Main activity
Routine
Inclusion
Relationship betweenmovement & language
Executive functions
Proprioception & motor skills
What is thecommunication style?
Minimal language
Visual aids
Duration of the activity
Singing
Using instruments
Areas oflearning
Things to consider
Communication
Clap on 5
Sounding OutA toolkit for music practitioners working with deaf students
Dr. Kathryn MasonTiziana Pozzo
Sounding Out Toolkit Section 1 Page 12
Step 1. Voice – Gestures
STEP DESCRIPTION MUSIC
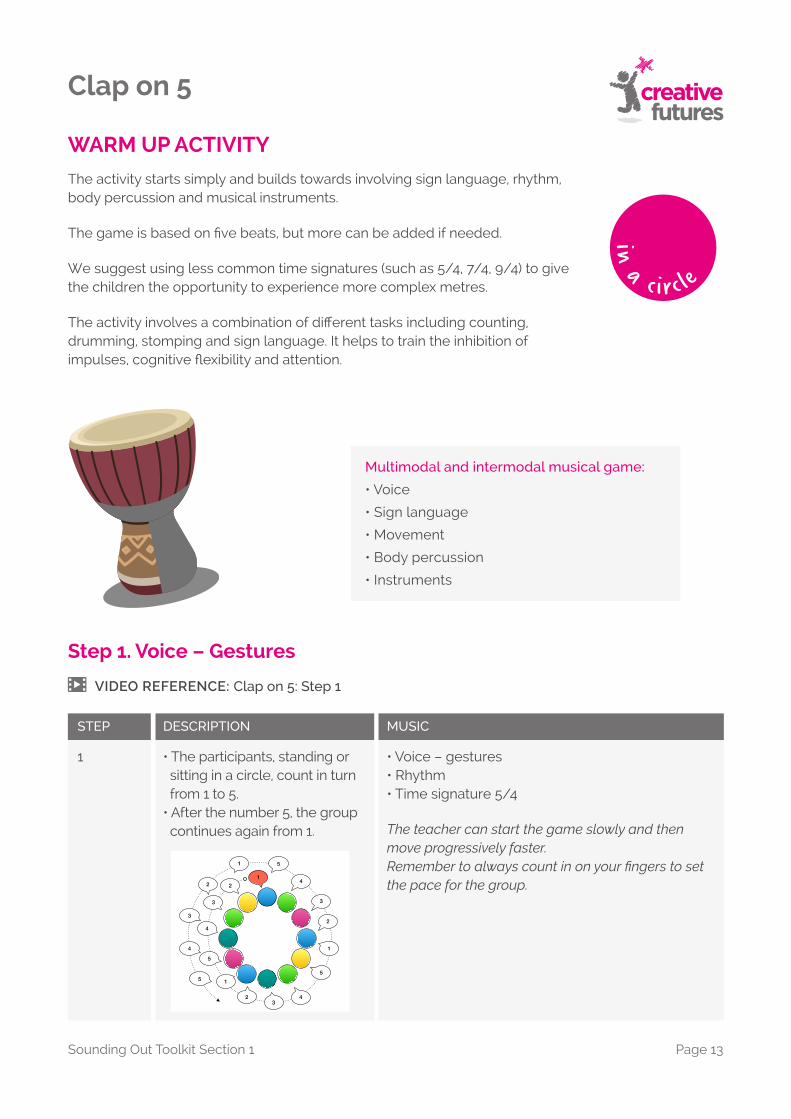
1 • The participants, standing or sitting in a circle, count in turn from 1 to 5.• After the number 5, the group continues again from 1.
• Voice – gestures• Rhythm• Time signature 5/4
The teacher can start the game slowly and then move progressively faster.Remember to always count in on your fingers to set the pace for the group.4
3
2
12
3
4
5
1
23
4
5
1
51
2
3
4
5
WARM UP ACTIVITY
The activity starts simply and builds towards involving sign language, rhythm, body percussion and musical instruments.
The game is based on �ve beats, but more can be added if needed.
We suggest using less common time signatures (such as 5/4, 7/4, 9/4) to give the children the opportunity to experience more complex metres.
The activity involves a combination of di�erent tasks including counting, drumming, stomping and sign language. It helps to train the inhibition of impulses, cognitive �exibility and attention.
Multimodal and intermodal musical game:
• Voice
• Sign language
• Movement
• Body percussion
• Instruments
in a c i rc le
VIDEO REFERENCE: Clap on 5: Step 1
Sounding Out Toolkit Section 1 Page 13
Clap on 5
STEP DESCRIPTION MUSIC
• Voice / gestures• Rhythm• Body percussion
• The participants will add a clap on the number 5.
You can substitute the clap with another movement if needed.
2
WHAT WE OBSERVEDOften, after the number 5, children may continue counting upwards. It helped to write the sequence of numbers on a big board, repeated several times as shown below. Children with severe learning di�culties or developmental disabilities found this useful.
IMPORTANTAlways count in the beats on your ngers. Keep the pulse with your whole body.
IMPORTANTAlways count in the beats on your ngers. Keep the pulse with your whole body.
VIDEO REFERENCE: Clap on 5: Step 2
Clap on 5
Sounding Out Toolkit Section 1 Page 14
STEP DESCRIPTION MUSIC
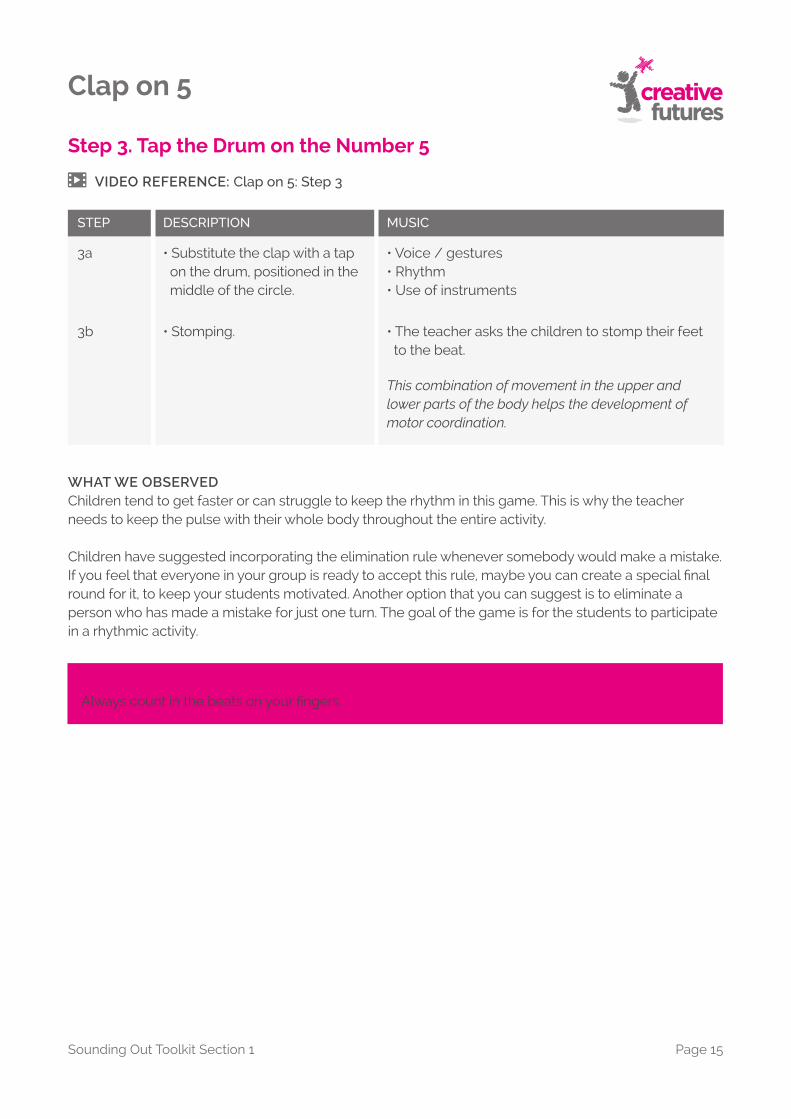
3a • Substitute the clap with a tap on the drum, positioned in the middle of the circle.
• Voice / gestures• Rhythm• Use of instruments
3b • Stomping. • The teacher asks the children to stomp their feet to the beat.
This combination of movement in the upper and lower parts of the body helps the development of motor coordination.
Step 3. Tap the Drum on the Number 5
WHAT WE OBSERVEDChildren tend to get faster or can struggle to keep the rhythm in this game. This is why the teacher needs to keep the pulse with their whole body throughout the entire activity.
Children have suggested incorporating the elimination rule whenever somebody would make a mistake. If you feel that everyone in your group is ready to accept this rule, maybe you can create a special �nal round for it, to keep your students motivated. Another option that you can suggest is to eliminate a person who has made a mistake for just one turn. The goal of the game is for the students to participate in a rhythmic activity.
IMPORTANTAlways count in the beats on your �ngers.
VIDEO REFERENCE: Clap on 5: Step 3
Sounding Out Toolkit Section 1 Page 15
Clap on 5
STEP DESCRIPTION MUSIC
• Voice / gestures• Rhythm• Use of instruments
• The teacher asks the children to stomp their feet to the beat.
This combination of movement in the upper and lower parts of the body helps the development of motor coordination.
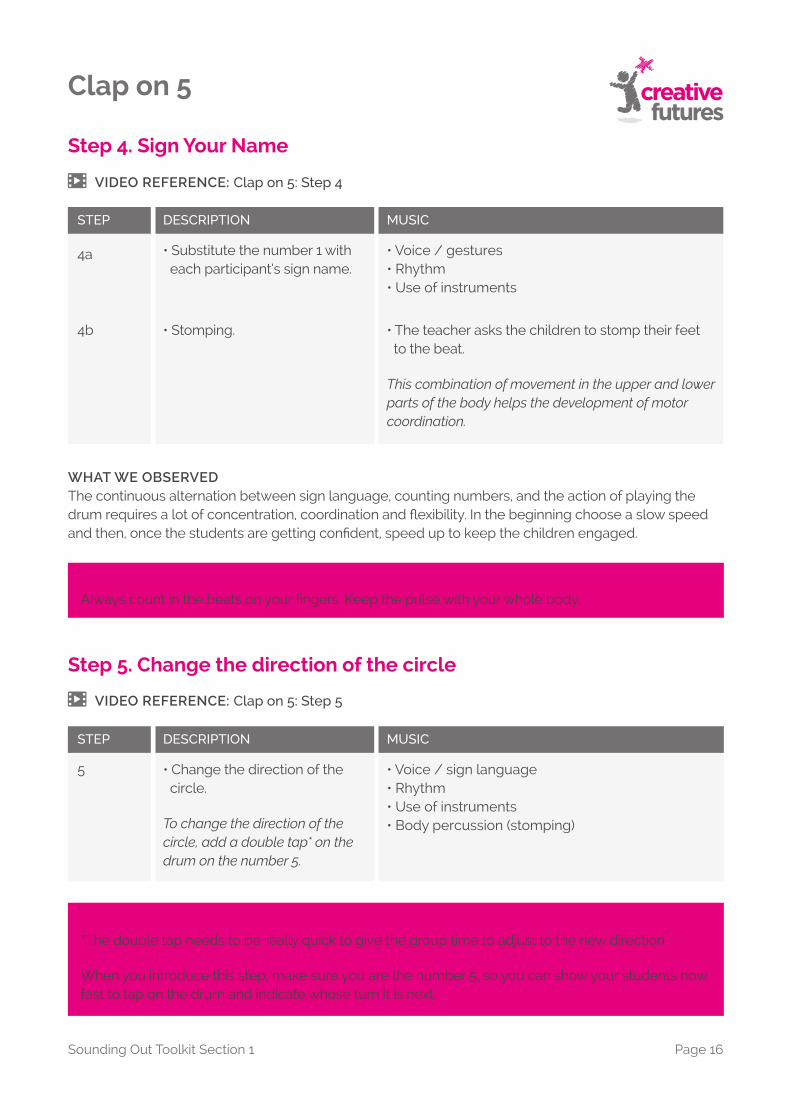
• Substitute the number 1 with each participant’s sign name.
• Stomping.4b
WHAT WE OBSERVEDThe continuous alternation between sign language, counting numbers, and the action of playing the drum requires a lot of concentration, coordination and �exibility. In the beginning choose a slow speed and then, once the students are getting condent, speed up to keep the children engaged.
IMPORTANTAlways count in the beats on your �ngers. Keep the pulse with your whole body.
STEP DESCRIPTION MUSIC
5 • Change the direction of the circle.
To change the direction of the circle, add a double tap* on the drum on the number 5.
• Voice / sign language• Rhythm• Use of instruments• Body percussion (stomping)
Step 5. Change the direction of the circle
Step 4. Sign Your Name
4a
IMPORTANT*The double tap needs to be really quick to give the group time to adjust to the new direction.
When you introduce this step, make sure you are the number 5, so you can show your students how fast to tap on the drum and indicate whose turn it is next.
VIDEO REFERENCE: Clap on 5: Step 4
VIDEO REFERENCE: Clap on 5: Step 5
Clap on 5
Sounding Out Toolkit Section 1 Page 16
Sounding OutA toolkit for music practitioners working with deaf students
Dr. Kathryn MasonTiziana Pozzo
My Favourite Food Is...
Music withDeaf Students
Warm up activityFoundation activity
Main activity
Routine
Inclusion
Relationship betweenmovement & language
Executive functions
Proprioception & motor skills
What is thecommunication style?
Minimal language
Visual aids
Duration of the activity
Singing
Using instruments
Areas oflearning
Things to consider
Communication
Sounding Out Toolkit Section 2 Page 17
WARM UP ACTIVITY
This activity allows the children to build and memorise a rhythmic sequence using sign language, body percussion and drums.
Some deaf children may feel apprehensive about the idea of making music, so it is really important to start with something that can make everyone feel comfortable. A simple conversation in which everyone says their names and their favourite food is a great ice breaker and way to learn something about each student, before embarking on a music program with them.
in a c i rc le
Multimodal and intermodal musical game:
• Voice
• Sign language
• Body percussion
• Drum circle and other instruments
• Songwriting
Supporting the development of proprioception.
Improvement of memory skills, �exibility and inhibition of impulses.
Bene�ts
Sequence of names and food signs created during the first session of Sounding Out at Blanche Nevile secondary school.
Sounding Out Toolkit Section 2 Page 18
My Favourite Food Is...
STEP DESCRIPTION MUSIC
The teacher introducesthemselves and tells the class what their favourite food is.
Introducing the concept of unison - tutti.
Example:Teacher: ‘Hello, my name is Katie. My favourite food is cherries. What is the sign forcherries?’The group signs cherries.
Teacher: ‘Great! Shall we all sign cherries together? On my count: 1-2-3-4 CHERRIES!’Everybody signs together.
1b The teacher asks the group to sign all together.
Step 1. Voice and Sign Language
1a
WHAT WE OBSERVEDWe paid attention to the musical reaction of the students as an indicator of how much experience they might have had of working together in a coordinated musical action.
Some of the children might use their voice whilst signing their favourite food, others may not.
IMPORTANTAlways count in the beats on your �ngers. Keep the pulse with your whole body.
44
24
44
One Two Three Four Cherries!Voice
Etc.
Walking to the next drum
‘Cherries’(Sign for food)
VIDEO REFERENCE: My Favourite Food Is: Step 1
1c Speed – Tempo.
Example:Teacher: ‘Shall we do it faster?’ / ‘Now slower!’
WHAT WE OBSERVEDWe monitored the children’s understanding of changing speed.
IMPORTANTUse signs or gestures to represent fast and slow.
The teacher introduces the concept of tempo and changing speed.
My Favourite Food Is...
Sounding Out Toolkit Section 2 Page 19
1d The teacher asks if one of the children would like to lead the group.
Development of basic conducting skills.Improvement of children’s ability to adjust to a new tempo.
Example:Teacher: ‘Would somebody like to be the teacher and count the beats in for the rest of the group?’‘Can you lead the group faster/slower?’
WHAT WE OBSERVEDThe children’s ability to communicate with the group using movements.Whether they could maintain a constant pulse, or if they changed it without realising.If the children counted in with the same speed as modelled by teachers before (internalisation of rhythm and pulsation).
IMPORTANTBe prepared to support the child who decides to lead in this stage, conducting with them.
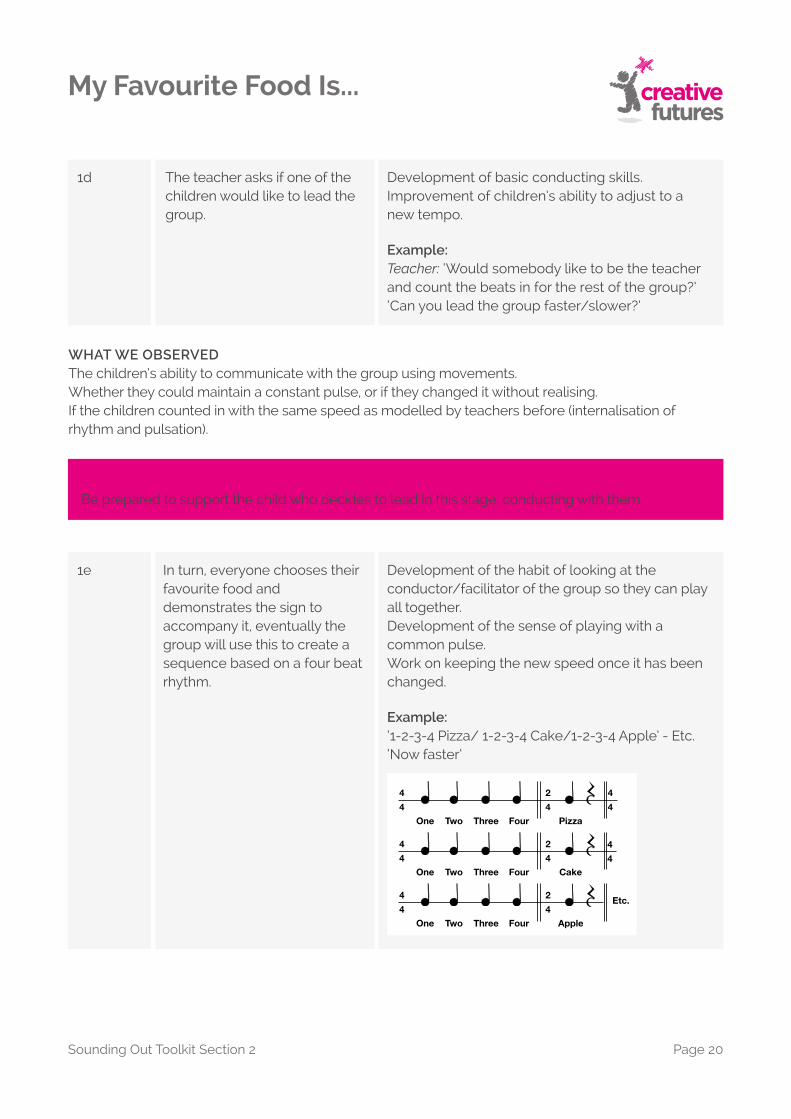
1e In turn, everyone chooses their favourite food and demonstrates the sign to accompany it, eventually the group will use this to create a sequence based on a four beat rhythm.
Development of the habit of looking at the conductor/facilitator of the group so they can play all together.Development of the sense of playing with a common pulse.Work on keeping the new speed once it has been changed.
WHAT WE OBSERVEDSome children might be very keen to sign the name of the food they are most excited about (eg. ice-cream/pizza), but they must wait until the circle reaches that person. This helps improve their inhibition skills (EF).
This step gives you an opportunity to discover the communication preferences of the children (whether they are completely non verbal or if they also use spoken language in addition to sign language).
Note the reaction and creativity of the children when they are given the chance to choose their favourite food.
IMPORTANTSome of the children might want to go through the whole sequence of signs in front of the rest of the group. Try to gently encourage this as this is a great opportunity to help develop their self-esteem.
STEP DESCRIPTION MUSIC
Now the teacher substitutes counting the beats on their �ngers for hand claps.
The clapping can be changed to stomping, snapping �ngers or other movements of body percussion.
Make sure that you still count in with your �ngers in order toestablish the beat.
Introducing the �rst movements that produce sound.
Example:‘Let’s clap our hands four times before signing cherries. Ready?’‘1-2-3-4 Clap clap clap clap Cherries/ clap clap clap clap Cake/ clap clap clap clap Apple etc.’
2a
Step 2. Body Percussion
WHAT WE OBSERVEDThe reaction of the children when their attention has been moved explicitly to the musical aspects of the game, for the �rst time in the lesson.
44
24
44
Etc.44
24
44
Clap
One Two Three Four Cherries!Voice
VIDEO REFERENCE: My Favourite Food Is: Step 2
My Favourite Food Is...
Sounding Out Toolkit Section 2 Page 21
WHAT WE OBSERVEDThe quality of the movements and the quality sound that the children produce.
IMPORTANTBe aware that the di�erence between loud and soft may be dicult for some of the children who might not know how to change the volume of their clapping. You might need to explain and show the di�erence between loud and soft, using big gestures, facial expressions and sign language to support the musical concepts.
2b The teacher introduces the concept of volume.
Volume – Dynamics
Example:Teacher: ‘Shall we clap loud?’ / ‘Now soft’
IMPORTANTThe alternation between clapping rhythmically, the movements of the signs, and the use of voice helps children to develop their coordination.
STEP DESCRIPTION MUSIC
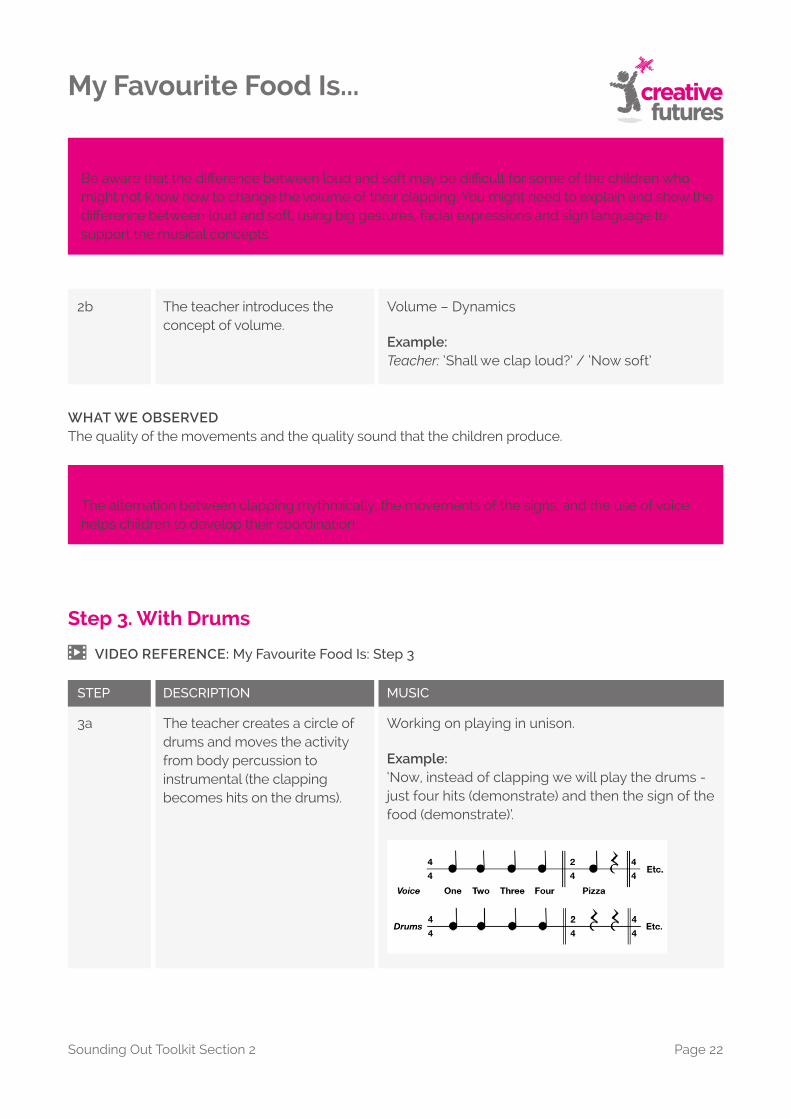
The teacher creates a circle of drums and moves the activity from body percussion toinstrumental (the clapping becomes hits on the drums).
Working on playing in unison.
Example:‘Now, instead of clapping we will play the drums - just four hits (demonstrate) and then the sign of the food (demonstrate)’.
3a
Step 3. With Drums
VIDEO REFERENCE: My Favourite Food Is: Step 3
My Favourite Food Is...
Sounding Out Toolkit Section 2 Page 22
IMPORTANTRemember to indicate the direction in which the group will march before starting the activity.Keep the pulse by indicating the beats using your �ngers and emphasise the beat with your whole body as you move to the next drum.
STEP DESCRIPTION MUSIC
For this next part all of thechildren stand up and get ready to march around the circle. The teacher counts four beats as the children march around the drums. After these four beats the group play four more counts on the drums, followed by the food sign.
Working on playing in unison.In this stage the children will have to switch from one task to another:• reaching the next drum in time, supporting the development of proprioception• marching to the beat• playing the drums• recalling the sequence;• paying attention to the teacher who is facilitating.
4a
Step 4. Moving Around the Circle
VIDEO REFERENCE: My Favourite Food Is: Step 4
WHAT WE OBSERVEDStanding up and marching around the drums will help refocus the children's attention after they have been sitting during the �rst part of the session.
IMPORTANTSometimes children with HA react to new sounds saying ‘it’s too loud’ or ‘it hurts’.It’s always important to ask for the children’s feedback when introducing new musical instruments, helping them to recognise the source of any discomfort, checking the volume of their HA or suggesting they move a little further away from the origin of the sound (see Introduction - Using instruments).
The alternation between drums and sign language requires a lot of concentration and �exibility (EF).
44
24
Hit the drum
Walking to the next drum
‘Pizza’(Sign for food)
44
24
Walking to the next drum
‘Cake’(Sign for food)
Etc.Hit the drum
My Favourite Food Is...
Sounding Out Toolkit Section 2 Page 23
STEP DESCRIPTION MUSIC
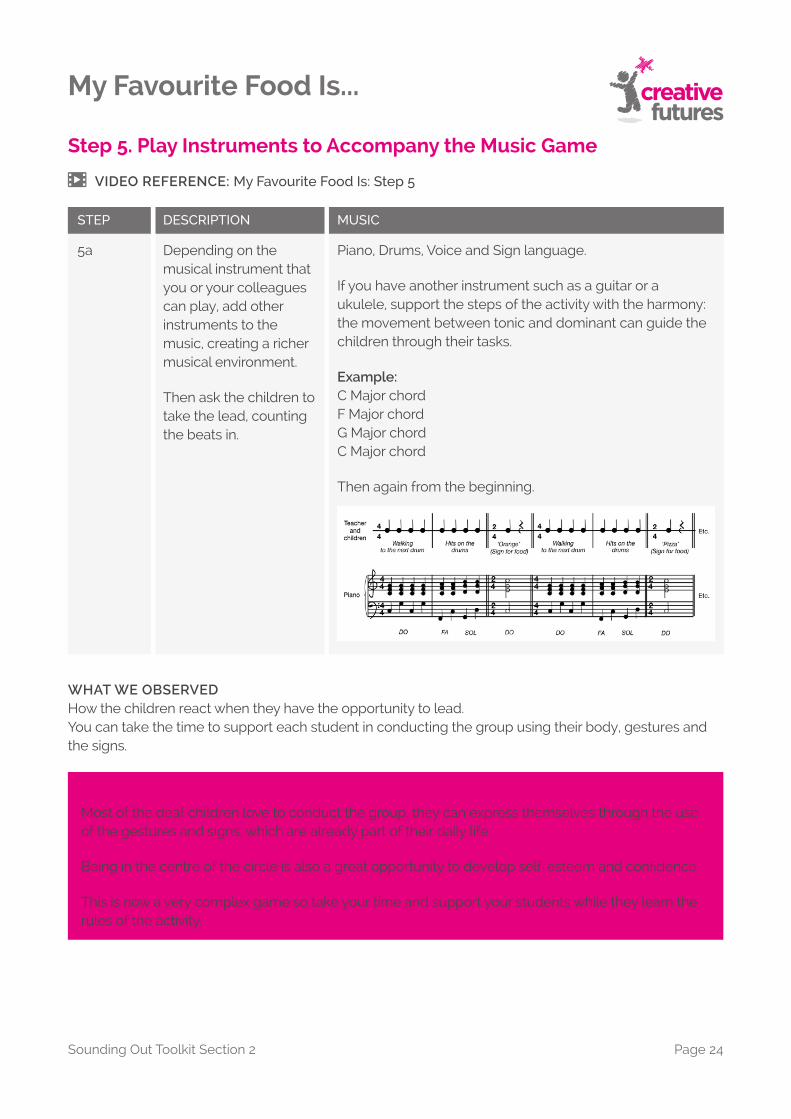
Depending on the musical instrument that you or your colleagues can play, add other instruments to the music, creating a richer musical environment.
Then ask the children to take the lead, counting the beats in.
Piano, Drums, Voice and Sign language.
If you have another instrument such as a guitar or a ukulele, support the steps of the activity with the harmony: the movement between tonic and dominant can guide the children through their tasks.
Example:C Major chordF Major chordG Major chordC Major chord
Then again from the beginning.
5a
Step 5. Play Instruments to Accompany the Music Game
IMPORTANTMost of the deaf children love to conduct the group: they can express themselves through the use of the gestures and signs, which are already part of their daily life.
Being in the centre of the circle is also a great opportunity to develop self-esteem and con�dence.
This is now a very complex game so take your time and support your students while they learn the rules of the activity.
WHAT WE OBSERVEDHow the children react when they have the opportunity to lead.You can take the time to support each student in conducting the group using their body, gestures and the signs.
VIDEO REFERENCE: My Favourite Food Is: Step 5
My Favourite Food Is...
Sounding Out Toolkit Section 2 Page 24
STEP DESCRIPTION MUSIC
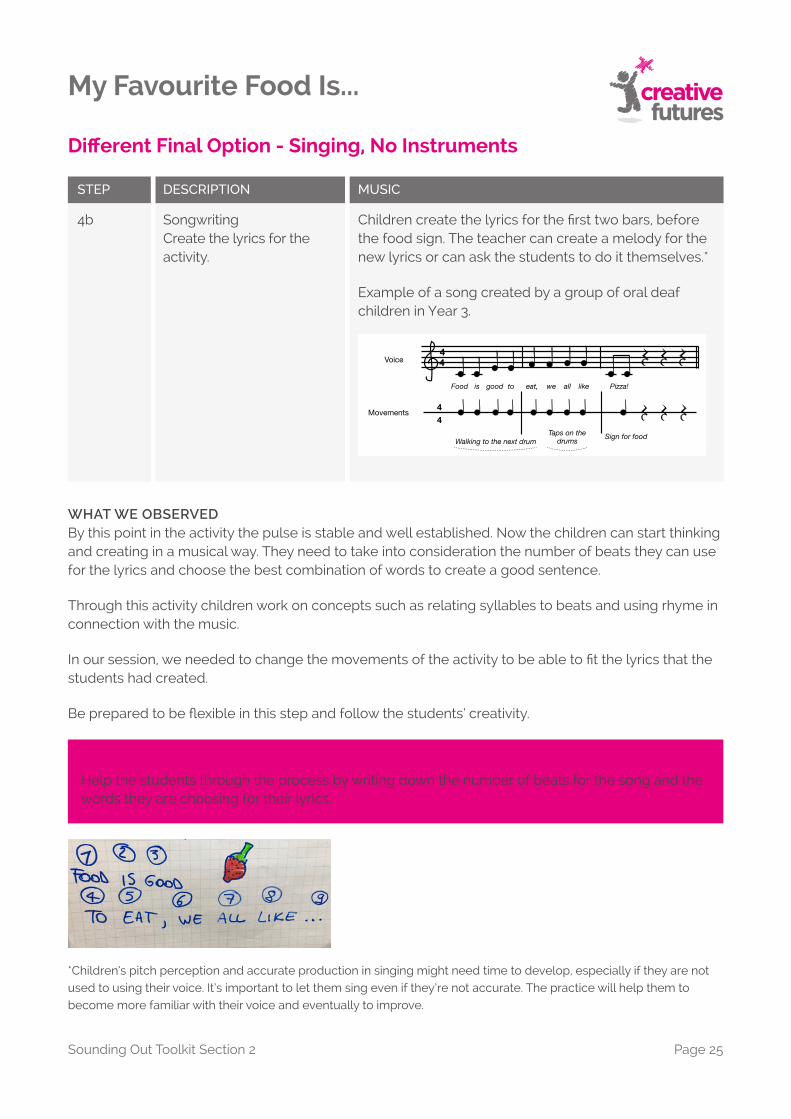
SongwritingCreate the lyrics for the activity.
Children create the lyrics for the rst two bars, before the food sign. The teacher can create a melody for the new lyrics or can ask the students to do it themselves.*
Example of a song created by a group of oral deaf children in Year 3.
4b
Di�erent Final Option - Singing, No Instruments
IMPORTANTHelp the students through the process by writing down the number of beats for the song and the words they are choosing for their lyrics.
WHAT WE OBSERVEDBy this point in the activity the pulse is stable and well established. Now the children can start thinking and creating in a musical way. They need to take into consideration the number of beats they can use for the lyrics and choose the best combination of words to create a good sentence.
Through this activity children work on concepts such as relating syllables to beats and using rhyme in connection with the music.
In our session, we needed to change the movements of the activity to be able to �t the lyrics that the students had created.
Be prepared to be �exible in this step and follow the students’ creativity.
*Children’s pitch perception and accurate production in singing might need time to develop, especially if they are not used to using their voice. It’s important to let them sing even if they’re not accurate. The practice will help them to become more familiar with their voice and eventually to improve.
44
Food good to eat, weis all like Pizza!
44
Taps on the drumsWalking to the next drum Sign for food
Voice
Movements
My Favourite Food Is...
Sounding Out Toolkit Section 2 Page 25
This is also an activity that creates a space for collaboration and team working:• opens communication;• brainstorming ideas as a group;• working together lets students discover the talents of their schoolmates;• establishes strong relationships;• teaches con�ict resolution skills.
Songwriting (and composition) in a group helps to develop EF skills and requires planning and negotiation between the students to come up with an original piece.
My Favourite Food Is...
Sounding Out Toolkit Section 2 Page 26
Rhythm Cards
Music withDeaf Students
Warm up activity
Foundation activityMain activity
Routine
Inclusion
Relationship betweenmovement & language
Executive functions
Proprioception & motor skills
What is thecommunication style?
Minimal language
Visual aids
Duration of the activity
Singing
Using instruments
Areas oflearning
Things to consider
Communication
Sounding OutA toolkit for music practitioners working with deaf students
Dr. Kathryn MasonTiziana Pozzo
Sounding Out Toolkit Section 3 Page 27
FOUNDATION ACTIVITY
This activity introduces notation to visually support time signature, note values and the stave. This is achieved through the use of cards with simple symbols that can be transformed into notes.
Children can read, write, compose and perform a short rhythmic sequence in front of their classmates, using body percussion or instruments.
PREPARATION OF THE ACTIVITY:
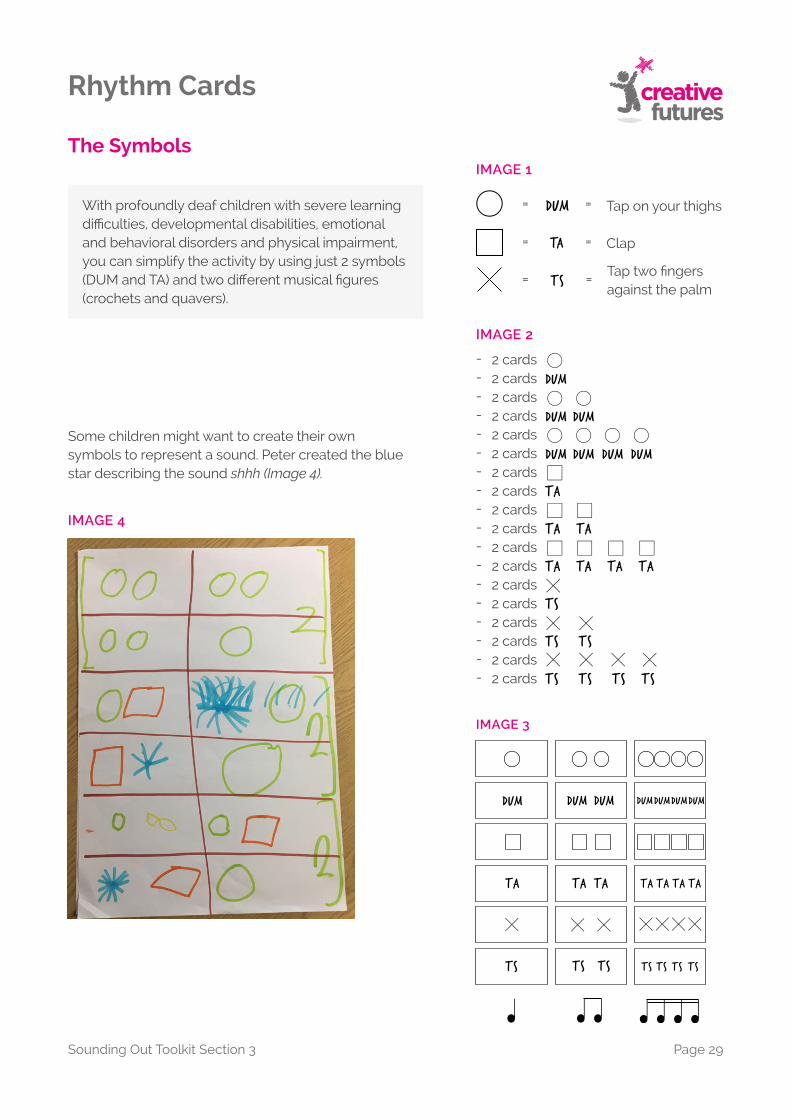
A circle represents the vocal sound DUM and a single tap on the thighs;A square is the sound TA and a single clap;An X is the sound TS and a single tap with two �ngers against your palm (Image 1).
Each card shows one or more symbols, representing the musical �gures: crotchet, quavers, semiquavers (Image 2).
Start by creating your own cards (minimum two for each symbol) up to a total of 18 (Image 3).
You can also add more cards with your own symbols, to represent other sounds and movements.
The students working on their composition with the Rhythm Cards.
small groupsin a line
in a circle
Visual cues, multimodal and intermodal musical game:
• Reading rhythmic cards
• Composition
• Body percussion
• Polyrhythm
• Drum circle and other instruments
From a body music game by Pedro Consorte
Sounding Out Toolkit Section 3 Page 28
Rhythm Cards
The Symbols
With profoundly deaf children with severe learning diculties, developmental disabilities, emotional and behavioral disorders and physical impairment, you can simplify the activity by using just 2 symbols (DUM and TA) and two di�erent musical �gures (crochets and quavers).
Some children might want to create their ownsymbols to represent a sound. Peter created the blue star describing the sound shhh (Image 4).
DUM
TA
TS
IMAGE 1
- 2 cards - 2 cards DUM- 2 cards- 2 cards DUM DUM- 2 cards - 2 cards DUM DUM DUM DUM - 2 cards- 2 cards TA - 2 cards- 2 cards TA TA - 2 cards- 2 cards TA TA TA TA - 2 cards - 2 cards TS - 2 cards - 2 cards TS TS- 2 cards- 2 cards TS TS TS TS
IMAGE 2
IMAGE 3
IMAGE 4
TS
DUM
TA
=
=
=
=
==
Clap
Tap two �ngers against the palm
Tap on your thighs
TS TS TS TS TS TS
DUM DUM
TA TA TA TA TA TA
DUMDUMDUMDUM
Rhythm Cards
Sounding Out Toolkit Section 3 Page 29
STEP DESCRIPTION / MUSIC
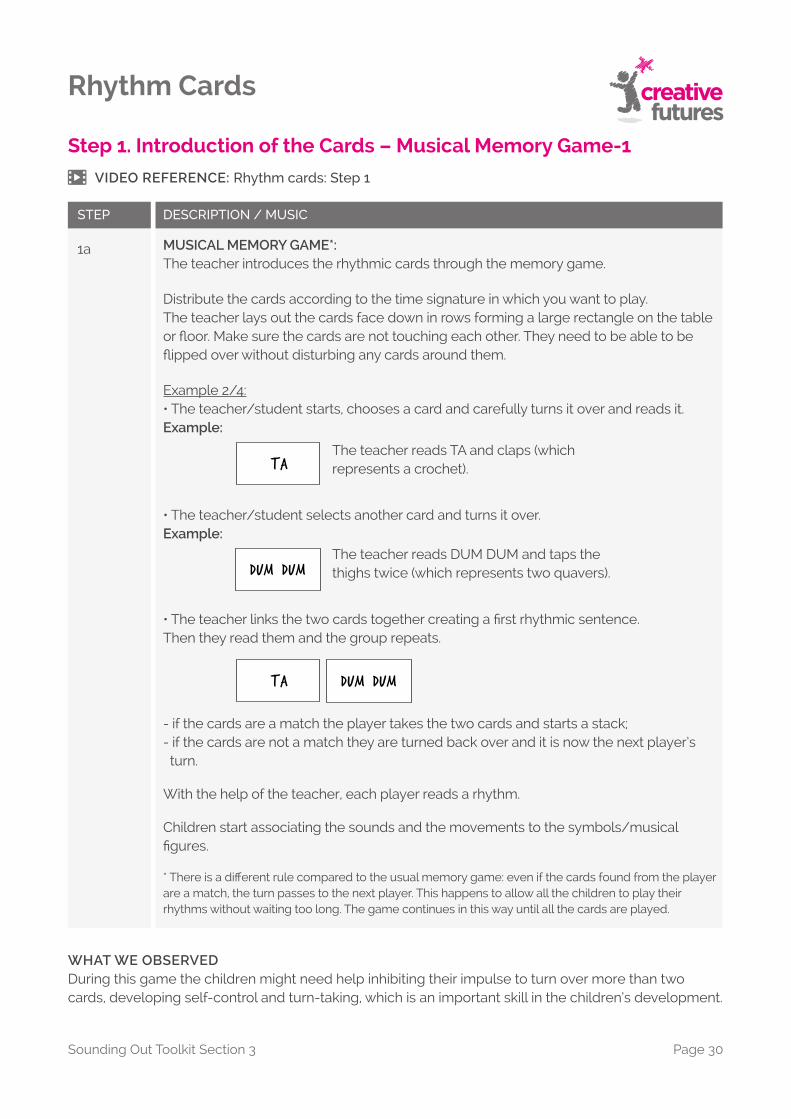
MUSICAL MEMORY GAME*:The teacher introduces the rhythmic cards through the memory game.
Distribute the cards according to the time signature in which you want to play.The teacher lays out the cards face down in rows forming a large rectangle on the table or �oor. Make sure the cards are not touching each other. They need to be able to be �ipped over without disturbing any cards around them.
Example 2/4:• The teacher/student starts, chooses a card and carefully turns it over and reads it.Example:
• The teacher/student selects another card and turns it over.Example:
• The teacher links the two cards together creating a �rst rhythmic sentence.Then they read them and the group repeats.
- if the cards are a match the player takes the two cards and starts a stack;- if the cards are not a match they are turned back over and it is now the next player’s turn.
With the help of the teacher, each player reads a rhythm.
Children start associating the sounds and the movements to the symbols/musical �gures.
* There is a di�erent rule compared to the usual memory game: even if the cards found from the player are a match, the turn passes to the next player. This happens to allow all the children to play their rhythms without waiting too long. The game continues in this way until all the cards are played.
Step 1. Introduction of the Cards – Musical Memory Game-1
1a
VIDEO REFERENCE: Rhythm cards: Step 1
TA
DUM DUM
TA DUM DUM
WHAT WE OBSERVEDDuring this game the children might need help inhibiting their impulse to turn over more than two cards, developing self-control and turn-taking, which is an important skill in the children’s development.
The teacher reads TA and claps (which represents a crochet).
The teacher reads DUM DUM and taps the thighs twice (which represents two quavers).
Sounding Out Toolkit Section 3 Page 30
Rhythm Cards
IMPORTANTIt’s really important to point the symbols with your �nger while reading the cards, to guide the children and allow them to understand the speed and the beat value of the �gures.
This is a particularly good game for non verbal deaf children as they are supported by the body percussion.
STEP DESCRIPTION MUSIC
Once all the cards have beentaken, the group creates asequence of cards (Image 5) in aline or in circle (Image 6 and 7).
With the help of the teacher, the whole group reads the whole rhythmic sequence out loud. Teachers who are working with non-verbal students can go directly to step 4 of this activity.
2
Now, each student reads their own cards, maintaining the pulse.
The whole group goes through the sequence again, adding body percussion.
This develops the association between voice and movements.
3
4
Steps 2–4. Sight-reading and Body Percussion
VIDEO REFERENCE: Rhythm Cards: Step 2, Rhythm Cards: Step 3 and Rhythm Cards: Step 4
WHAT WE OBSERVEDThis is a good activity to develop sight-reading and visual-spacial skills. The body percussion helps memorising and internalising the rhythm.
42
TS
TS TS TS TS
TA TA
TA TA TA TA
DUM DUM
TA
DUM DUM
IMAGE 5 RHYTHM OF IMAGE 5
IMAGE 6
Rhythm Cards
Sounding Out Toolkit Section 3 Page 31
STEP DESCRIPTION MUSIC
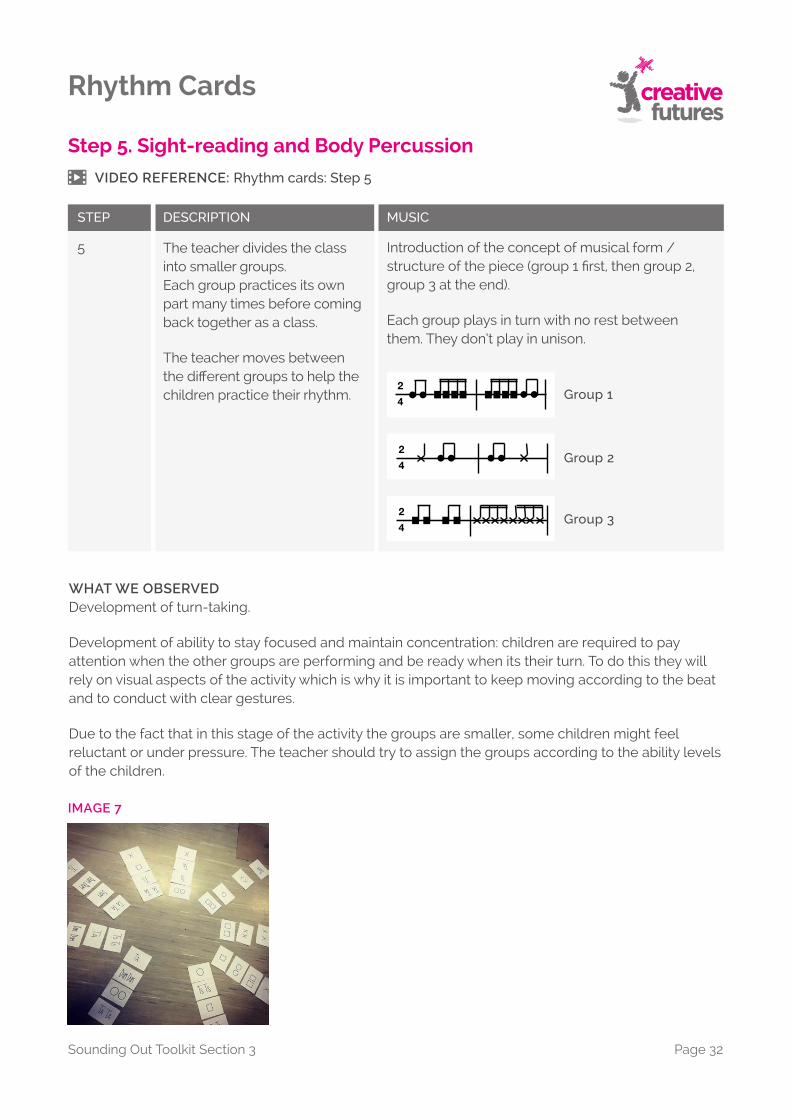
The teacher divides the class into smaller groups.Each group practices its own part many times before coming back together as a class.
The teacher moves between the di�erent groups to help thechildren practice their rhythm.
Introduction of the concept of musical form / structure of the piece (group 1 �rst, then group 2, group 3 at the end).
Each group plays in turn with no rest between them. They don’t play in unison.
5
WHAT WE OBSERVEDDevelopment of turn-taking.
Development of ability to stay focused and maintain concentration: children are required to pay attention when the other groups are performing and be ready when its their turn. To do this they will rely on visual aspects of the activity which is why it is important to keep moving according to the beat and to conduct with clear gestures.
Due to the fact that in this stage of the activity the groups are smaller, some children might feel reluctant or under pressure. The teacher should try to assign the groups according to the ability levels of the children.
Group 1
Step 5. Sight-reading and Body Percussion
VIDEO REFERENCE: Rhythm cards: Step 5
42
42
42
42
42
42
42
42
42
42
42
42
Group 2
Group 3
IMAGE 7
Rhythm Cards
Sounding Out Toolkit Section 3 Page 32
STEP DESCRIPTION MUSIC
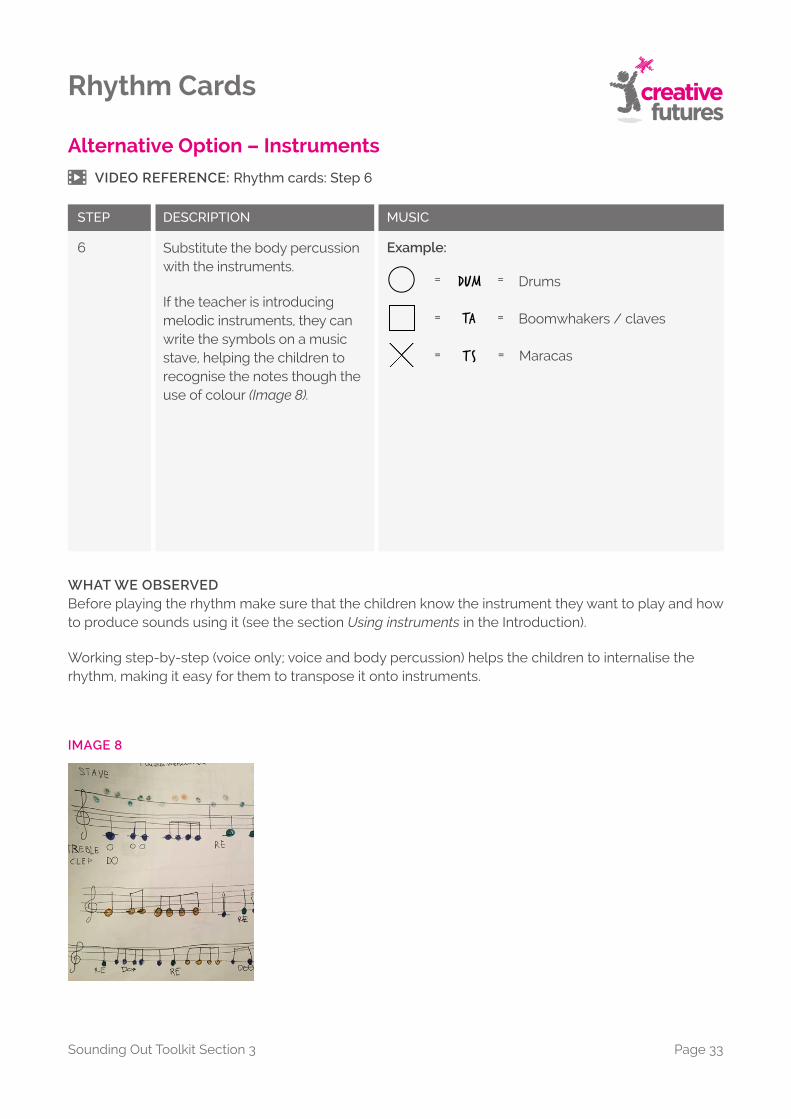
Substitute the body percussion with the instruments.
If the teacher is introducing melodic instruments, they can write the symbols on a music stave, helping the children to recognise the notes though the use of colour (Image 8).
Example:6
Alternative Option – Instruments
VIDEO REFERENCE: Rhythm cards: Step 6
WHAT WE OBSERVEDBefore playing the rhythm make sure that the children know the instrument they want to play and how to produce sounds using it (see the section Using instruments in the Introduction).
Working step-by-step (voice only; voice and body percussion) helps the children to internalise the rhythm, making it easy for them to transpose it onto instruments.
DUM
TA
TS
=
=
=
=
==
Boomwhakers / claves
Maracas
Drums
IMAGE 8
Rhythm Cards
Sounding Out Toolkit Section 3 Page 33
STEP DESCRIPTION MUSIC
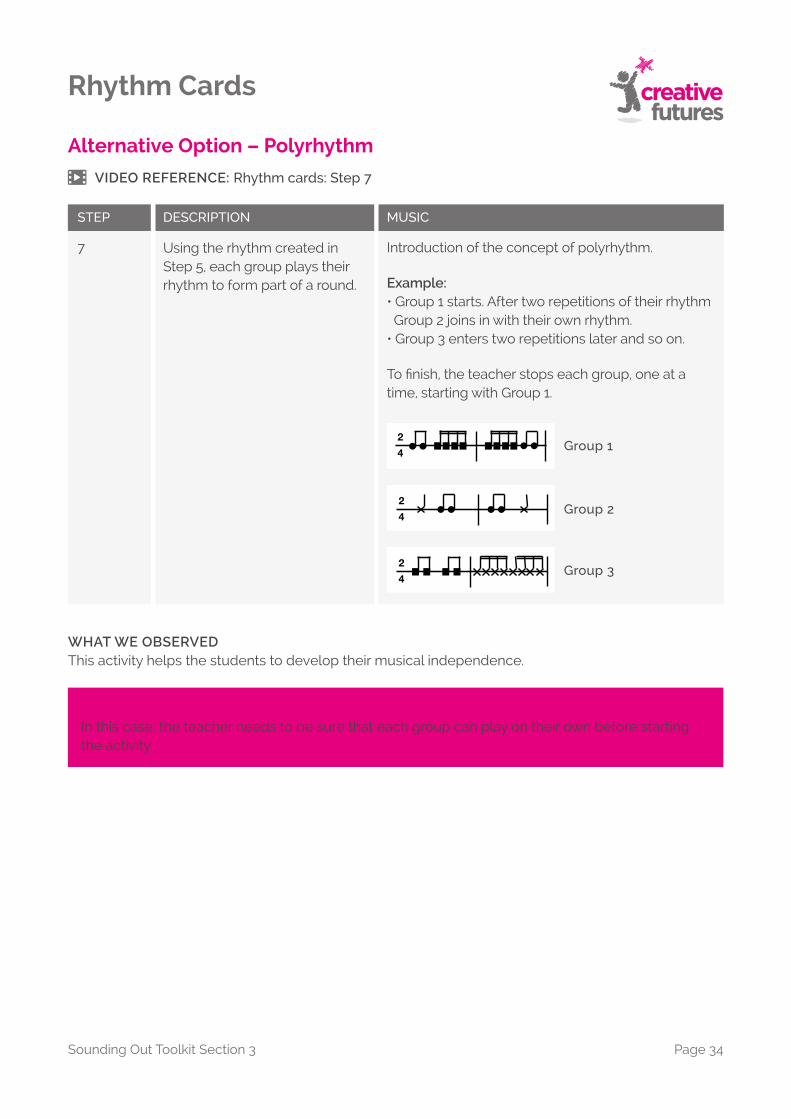
Using the rhythm created in Step 5, each group plays their rhythm to form part of a round.
Introduction of the concept of polyrhythm.
Example:• Group 1 starts. After two repetitions of their rhythm Group 2 joins in with their own rhythm.• Group 3 enters two repetitions later and so on.
To �nish, the teacher stops each group, one at a time, starting with Group 1.
7
Alternative Option – Polyrhythm
VIDEO REFERENCE: Rhythm cards: Step 7
WHAT WE OBSERVEDThis activity helps the students to develop their musical independence.
IMPORTANTIn this case, the teacher needs to be sure that each group can play on their own before starting the activity.
Group 1
42
42
42
42
42
42
42
42
42
42
42
42
Group 2
Group 3
Rhythm Cards
Sounding Out Toolkit Section 3 Page 34
DESCRIPTION MUSIC
The teacher divides the class into groups and asks each group to compose their own rhythm, choosing from the pack of cards.
Each group practices its own part (body percussion) many times alone and with the teacher, to learn it properly.
Eventually, the whole class will get together again to play all the rhythms following the structure ABA:
A. The whole group reads all the new rhythms in unison;
B. Each group reads its own part in turn, keeping the tempo;
A. Last part in unison again;
Introduction of the concept of musical form / structure of the piece.
Through this activity, the children develop their ability to play together waiting for their turn to play.
Alternative Option – Composition
44
Unison
Group 1
Group 2
Group 3
Group 4
Unison
A
B
A
TA
Dum
TA
DUM DUM
TS
TS
TA TA
Dum
TS
44
44
44
44
44
TA
Dum
TA
DUM DUM
TS
TS
TA TA
Dum
TS
44
44
44
44
44
TA
Dum
TA
DUM DUM
TS
TS
TA TA
Dum
TS
44
44
44
44
44
TA
Dum
TA
DUM DUM
TS
TS
TA TA
Dum
TS
44
44
44
44
44
IMPORTANTGiving the children the opportunity to perform their compositions in front of their classmates will help to build con�dence for performing in front of larger audiences in the future.
Group 1 Group 2 Group 3 Group 4
Rhythm Cards
Sounding Out Toolkit Section 3 Page 35
Katie Has One Friend
Music withDeaf Students
Warm up activity
Foundation activity
Main activity
Routine
Inclusion
Relationship betweenmovement & language
Executive functions
Proprioception & motor skills
What is thecommunication style?
Minimal language
Visual aids
Duration of the activity
Singing
Using instruments
Areas oflearning
Things to consider
Communication
Sounding OutA toolkit for music practitioners working with deaf students
Dr. Kathryn MasonTiziana Pozzo
Sounding Out Toolkit Section 4 Page 36
MAIN ACTIVITY
With this activity you will introduce the instruments step-by-step, starting by using sign language, and then through a musical game involving movement. This will help the children to internalise the rhythm of a song in a natural and fun way.
Finally you will introduce instrumental production.
Visual cues, multimodal and intermodal musical game:
• Sign language
• Singing
• Body percussion
• Music game
• Instruments
Based on a music game by The singing classroom
Students performing “Katie has one friend” at their assembly at the end of the Sounding Out project.
LYRICS
Katie has no friends, no friends, no friendsKatie has no friends, now she has one!ONE
Katie has one friend, one friend, one friendKatie has one friend, now she has two!ONE, TWO
Katie has two friends, two friends, two friendsKatie has two friends, now she has three!ONE, TWO, THREEEtc.
Katie has many friends, many friends, many friendsKatie has many friends, now she can play!
small groupsin a line
in a circle
Sounding Out Toolkit Section 4 Page 37
Katie Has One Friend
STEP DESCRIPTION MUSIC
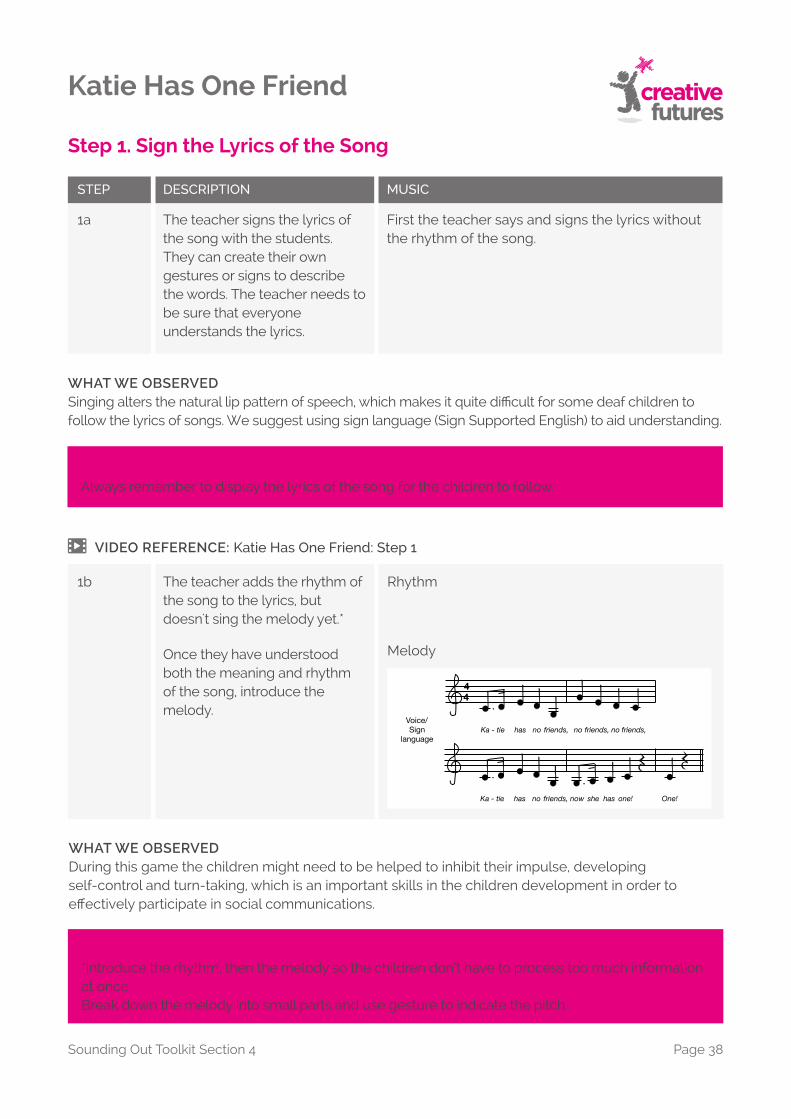
The teacher signs the lyrics of the song with the students. They can create their own gestures or signs to describe the words. The teacher needs to be sure that everyone understands the lyrics.
First the teacher says and signs the lyrics without the rhythm of the song.
Step 1. Sign the Lyrics of the Song
1a
WHAT WE OBSERVEDSinging alters the natural lip pattern of speech, which makes it quite di�cult for some deaf children to follow the lyrics of songs. We suggest using sign language (Sign Supported English) to aid understanding.
IMPORTANTAlways remember to display the lyrics of the song for the children to follow.
1b Rhythm
Melody
WHAT WE OBSERVEDDuring this game the children might need to be helped to inhibit their impulse, developing self-control and turn-taking, which is an important skills in the children development in order to e�ectively participate in social communications.
IMPORTANT*Introduce the rhythm, then the melody so the children don’t have to process too much information at once.Break down the melody into small parts and use gesture to indicate the pitch.
The teacher adds the rhythm of the song to the lyrics, but doesn't sing the melody yet.*
Once they have understood both the meaning and rhythm of the song, introduce themelody.
VIDEO REFERENCE: Katie Has One Friend: Step 1
44
Ka - tie has no friends, noVoice/Sign
languagefriends, no friends,
Ka - tie has no friends, now she has one! One!
Katie Has One Friend
Sounding Out Toolkit Section 4 Page 38
Step 2. Play the Game All Together
STEP DESCRIPTION MUSIC
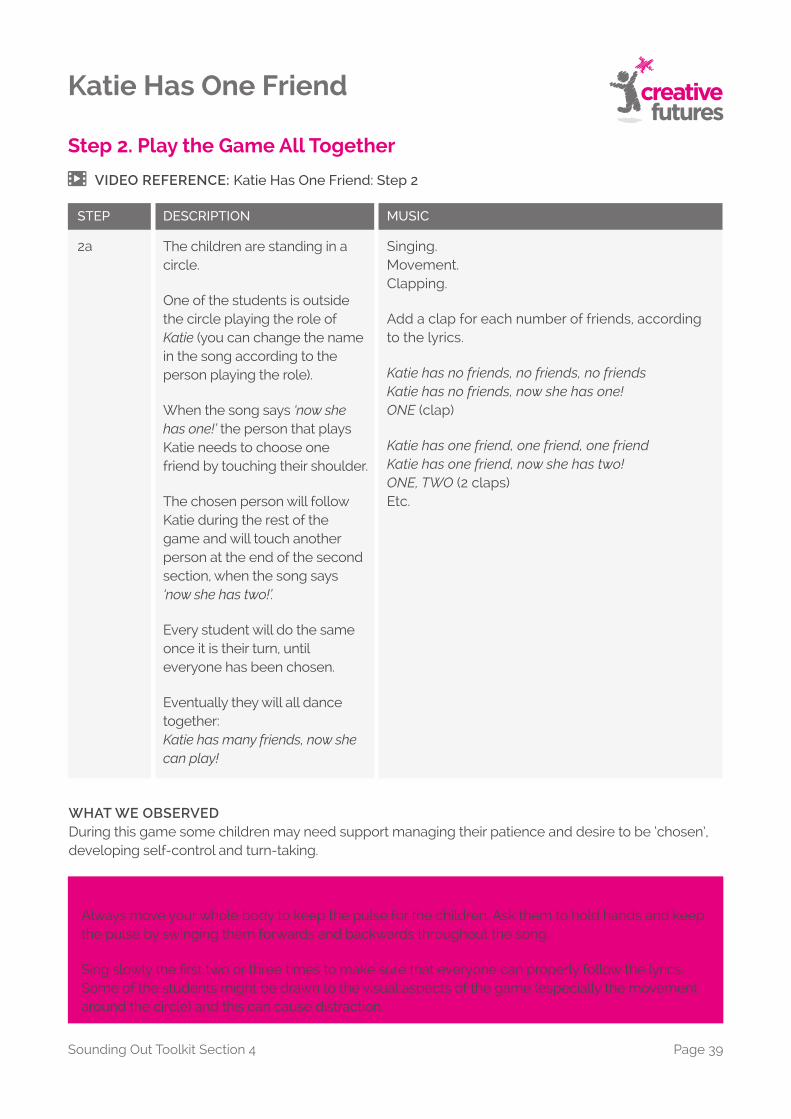
The children are standing in a circle.
One of the students is outside the circle playing the role of Katie (you can change the name in the song according to the person playing the role).
When the song says ‘now she has one!’ the person that plays Katie needs to choose one friend by touching their shoulder.
The chosen person will follow Katie during the rest of the game and will touch another person at the end of the second section, when the song says ‘now she has two!’.
Every student will do the same once it is their turn, until everyone has been chosen.
Eventually they will all dance together:Katie has many friends, now she can play!
Singing.Movement.Clapping.
Add a clap for each number of friends, accordingto the lyrics.
Katie has no friends, no friends, no friendsKatie has no friends, now she has one!ONE (clap)
Katie has one friend, one friend, one friendKatie has one friend, now she has two!ONE, TWO (2 claps)Etc.
2a
VIDEO REFERENCE: Katie Has One Friend: Step 2
WHAT WE OBSERVEDDuring this game some children may need support managing their patience and desire to be ‘chosen’, developing self-control and turn-taking.
IMPORTANTAlways move your whole body to keep the pulse for the children. Ask them to hold hands and keep the pulse by swinging them forwards and backwards throughout the song.
Sing slowly the �rst two or three times to make sure that everyone can properly follow the lyrics. Some of the students might be drawn to the visual aspects of the game (especially the movement around the circle) and this can cause distraction.
Sounding Out Toolkit Section 4 Page 39
Katie Has One Friend
Step 3. Add the Instruments
STEP DESCRIPTION MUSIC
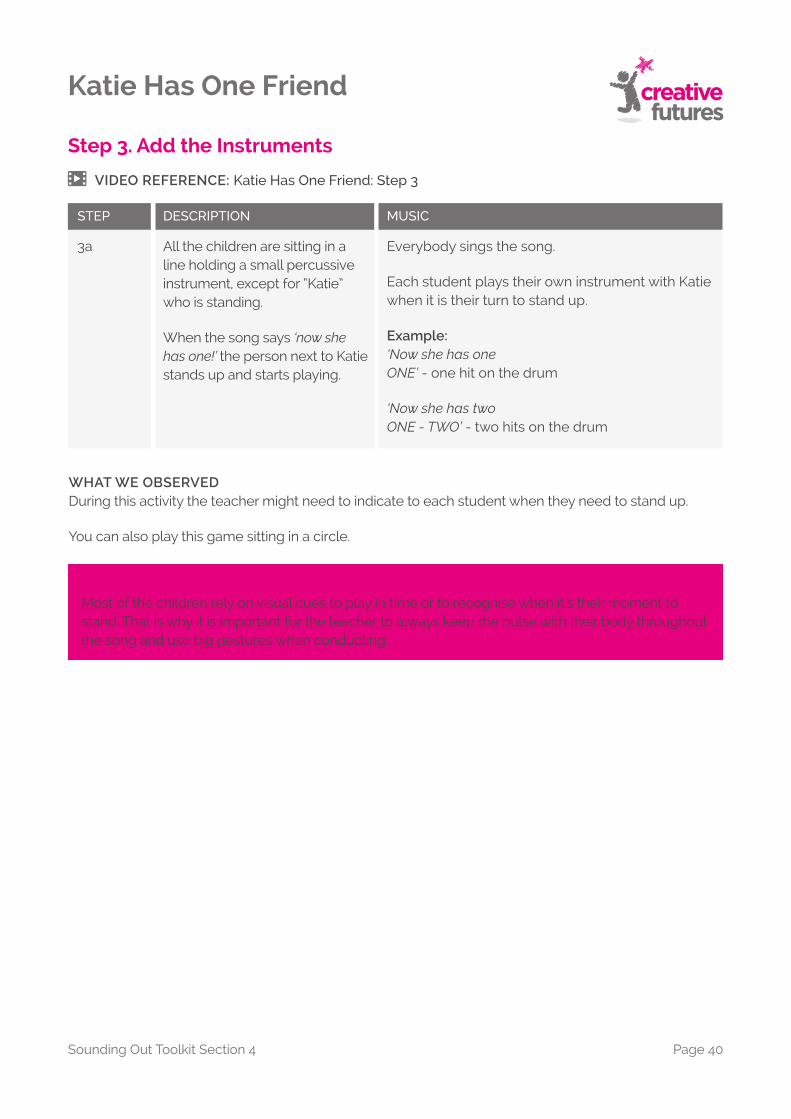
All the children are sitting in a line holding a small percussive instrument, except for “Katie” who is standing.
When the song says ‘now she has one!’ the person next to Katie stands up and starts playing.
Everybody sings the song.
Each student plays their own instrument with Katie when it is their turn to stand up.
Example:‘Now she has oneONE’ - one hit on the drum
‘Now she has twoONE - TWO’ - two hits on the drum
3a
VIDEO REFERENCE: Katie Has One Friend: Step 3
IMPORTANTMost of the children rely on visual cues to play in time or to recognise when it’s their moment to stand. That is why it is important for the teacher to always keep the pulse with their body throughout the song and use big gestures when conducting.
WHAT WE OBSERVEDDuring this activity the teacher might need to indicate to each student when they need to stand up.
You can also play this game sitting in a circle.
Katie Has One Friend
Sounding Out Toolkit Section 4 Page 40
Simama Kaa
Music withDeaf Students
Warm up activity
Foundation activity
Main activity
Routine
Inclusion
Relationship betweenmovement & language
Executive functions
Proprioception & motor skills
What is thecommunication style?
Minimal language
Visual aids
Duration of the activity
Singing
Using instruments
Areas oflearning
Things to consider
Communication
Sounding OutA toolkit for music practitioners working with deaf students
Dr. Kathryn MasonTiziana Pozzo
Sounding Out Toolkit Section 5 Page 41
MAIN ACTIVITY
Simama Kaa is a very popular song in music education due to its rhythmic syllables in Swahili, catchy melody and repetitive rhythm. There are many versions of the song on YouTube, with di�erent movements and body percussion sequences to accompany to the piece.
In this Toolkit we’re going to describe how we used the song with groups of deaf children both in primary and secondary school.
It is widely accepted that deaf people can access music more easily if sound is associated with tactile or visual perception. We planned our sessions with this in mind: during games, musical activities and in performance. We observed that the use of visual cues to instruct sound production engaged students most e�ectively.
Body movement as a descriptive gesture of sound was the most successful. With movement, students discovered a tool for understanding musical concepts: the body became the centre of the musical activity, and gestures added meaning to the di�erent musical elements (pulse, volume, tempo, timbre etc.).
Multimodal and intermodal musical game:
• Voice
• Body percussion
• Instruments
OPTION A:
This activity has been used with children with varying levels of deafness and additional needs (ADHD, Autism, Dyslexia).
in a c i rc le
The children were either verbal or nonverbal, using sign language to supporttheir communication.
• Parachute
• Voice
OPTION B:
This activity has been used with a group of profoundly deaf secondary school children with severe learning di�culties, developmental disabilities, emotional and behavioural disorders (ADHD) and physical impairment.
in small groupsin a circle
Sounding Out Toolkit Section 5 Page 42
Simama Kaa
Option A - Step 1. Body Percussion
VIDEO REFERENCE: Simama Kaa: Step 1
STEP DESCRIPTION MUSIC
Describe the rhythm withbody percussion
Working in unison.Coordination between voice and movements.Dynamics.Tempo.
The lyrics contain �ve words.• simama = stand up• kaa = sit down• ruka = jump• tembea = walk• kimbia = run
The song is composed of 3 di�erent parts: assign the same movement/rhythm to each part and don’t change it through the song.
1a
Tap on your thighs
44
Si -ma- ma kaa, Si -ma ma kaa
Tap on your chest Ruka Ruka Ruka
-
Clap be- - a, beaKim Tem be- - a, beaKimTem
SIMAMA KAA
RUKA
TEMBEA KIMBIA
The teacher introduces the musical form/structure of the piece: ABA
Repeat the song three times: �rst with body percussion and singing (A), then without singing (B) and �nally the third time with singing again (A).
1b
Sounding Out Toolkit Section 5 Page 43
Simama Kaa
IMPORTANTUse the signs to conduct the song (Soundpainting or your own gestures). If you want to make any changes during the activity make sure that everyone is looking at you before signing the modi�cation (e.g. going slower/faster; play with or without voice etc; stopping and starting again etc.).
Part B is important because it gives children the chance to internalise the song and test their knowledge without the teacher’s support.
Keep mouthing the lyrics in part B, as this will help the group to stay in time until they are con�dent with the song.
Option A - Step 2. Play ‘Cat And Mouse’ - Musical Game
STEP DESCRIPTION MUSIC
PART 1:The teacher asks for one volunteer to play the ‘mouse’. The other players form a circle sitting or standing, making sure to not leave any spaces. The player who is the ’mouse’ stands on the periphery, waiting for the song to start before walking around the circle.
The ‘mouse’ needs to choose which of his friends in the circle will become the ‘cat’ by touching the person’s head at the end of the song.*
PART 1:All of the players sing Simama Kaa, and do body percussion movements.
The ‘mouse’ could face some di�culties in coordinating rhythmical hand movement while stomping in time around the circle. If this occurs, the player can stop moving their hands and just walk in time.
PART 2:The teacher starts improvising a melody in a quicker tempo, encouraging the children to clap or tap on their thighs faster to the beat.
PART 2:Then, the person who has been chosen by the ‘mouse’ becomes the ‘cat’ and chases after the ‘mouse’, following the same direction around the circle.
The aim of the ‘mouse’ is to sit in the circle, stealing the place of the ‘cat’ who will try to catch them before they get there.
If the ‘mouse’ is caught, the ‘cat’ can go back to their place and the ‘mouse’ will try again with another friend.
2a
VIDEO REFERENCE: Simama Kaa: Step 2
Sounding Out Toolkit Section 5 Page 44
Simama Kaa
IMPORTANT*PART 1: Students who are playing the ‘mouse’ with severe or profound deafness, rely on their movements and on the visual cues of the game to understand when Part 1 is �nished. This is why it is important to always continue the body percussion during Part 1 and keep mouthing the lyrics.
Step 3. Introduce the Instruments
STEP DESCRIPTION MUSIC
The teacher assigns instruments and forms groups according to the musical level of the students.
Call and respond.
Simama Kaa and Tembea Kimbia’s part is easier than Ruka ruka ruka.*
Children beat the rhythm to Simama Kaa using their instruments. This is transferring the rhythm from body percussion to instruments.
One group plays the Simama Kaa rhythm, and the second group plays Ruka ruka ruka (call and response style). Both groups play Tembea Kimbia in unison.
According to their instrumental levels, the children play drums, small percussion, xylophones, piano, violin etc. (Image 2).
3a
VIDEO REFERENCE: Simama Kaa: Step 3
IMPORTANTWe used Rhythm Card notation to write the parts down (Image 1).
Drawings on big board - Instruments assigned according to the lyrics
Drawings on big board - Piano part based on the Rhythm Cards in a primary school group
IMAGE 1 IMAGE 2
Simama Kaa
Sounding Out Toolkit Section 5 Page 45
Option B - Step 1. Parachute
STEP DESCRIPTION MUSIC
The teacher writes downthe lyrics to teach the song to the students.
Use the parachute as avisual cue to reinforce therhythm of the song.
Rhythm.Singing.Coordination between movement and voice.
The movements always have to be accompanied by the voice.
The song is composed of 3 di�erent parts: the teacher assigns a rhythmic movement to each part.
1a
VIDEO REFERENCE: Simama Kaa: Step 1
WHAT WE OBSERVEDAfter two or three repetitions, one of the children naturally changed the words from Simama Kaa - Ruka ruka ruka into Mama cat - running running running, giving a di�erent meaning to the syllables but keeping the same rhythm.
The teacher embraced the new idea as they also found that starting the song on the beat instead of the upbeat was much easier for the children.
The interpreter immediately signed the new words to the rest of the group. After this, one of the profoundly deaf students, who previously struggled to engage with the activity, appeared to enjoy the game a lot more and was able to access the song as she could sign along with the lyrics. This also helped her rhythmic skills.
Eventually the song was simpli ed by removing Tembea Kimbia.
IMPORTANTThis is an activity that you can use with deaf students who have severe learning di�culties. It’s fun, colourful, based on tactile perception, rich in visual cues, and allows deaf children to enjoy music as a game.
The movement of the parachute follows syllabic rhythm of the lyrics which can be perceived easily by holding the parachutes. If there is more than one teacher, they might want to sit between the children to play the rhythm more precisely.
44
Ma - ma cat, Run-ning,ma - ma cat, run-ning, run-ning, ma - ma cat
Simama Kaa
Sounding Out Toolkit Section 5 Page 46
Step 1. Parachute-1
STEP DESCRIPTION MUSIC
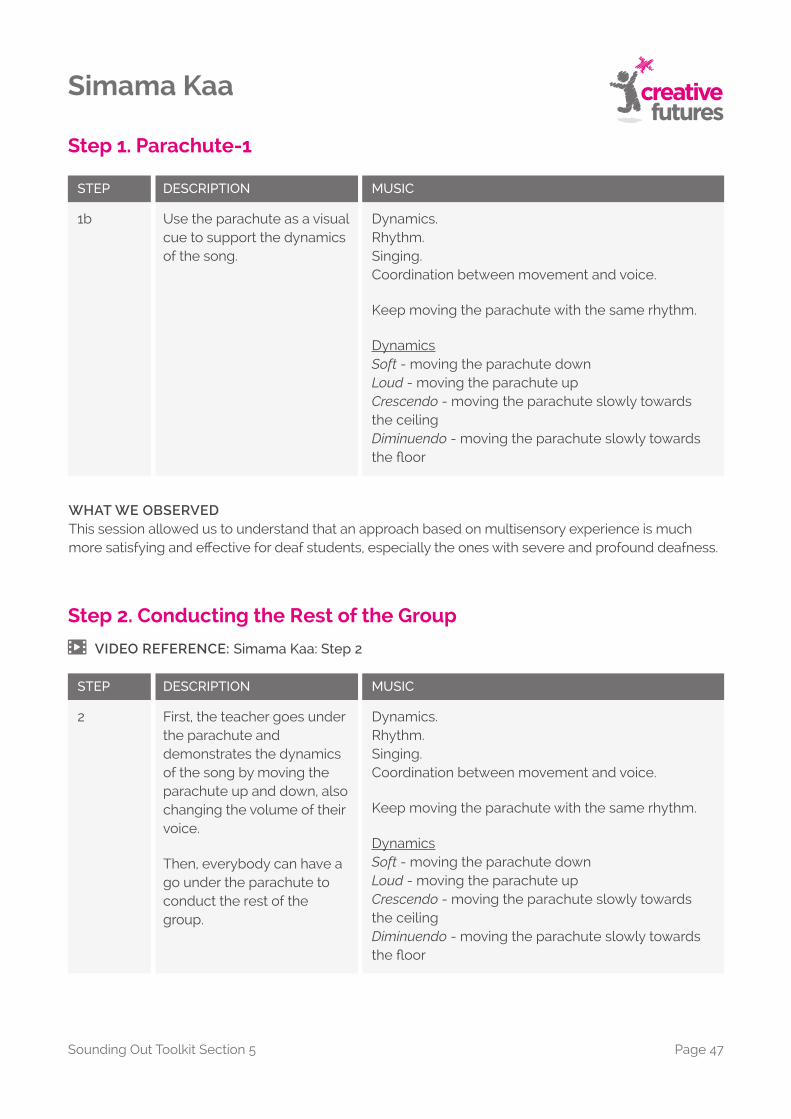
Use the parachute as a visual cue to support the dynamics of the song.
Dynamics.Rhythm.Singing.Coordination between movement and voice.
Keep moving the parachute with the same rhythm.
DynamicsSoft - moving the parachute downLoud - moving the parachute upCrescendo - moving the parachute slowly towards the ceilingDiminuendo - moving the parachute slowly towards the �oor
1b
WHAT WE OBSERVEDThis session allowed us to understand that an approach based on multisensory experience is much more satisfying and e�ective for deaf students, especially the ones with severe and profound deafness.
Step 2. Conducting the Rest of the Group
STEP DESCRIPTION MUSIC
First, the teacher goes under the parachute anddemonstrates the dynamics of the song by moving the parachute up and down, also changing the volume of their voice.
Then, everybody can have a go under the parachute to conduct the rest of thegroup.
Dynamics.Rhythm.Singing.Coordination between movement and voice.
Keep moving the parachute with the same rhythm.
DynamicsSoft - moving the parachute downLoud - moving the parachute upCrescendo - moving the parachute slowly towards the ceilingDiminuendo - moving the parachute slowly towards the �oor
2
VIDEO REFERENCE: Simama Kaa: Step 2
Simama Kaa
Sounding Out Toolkit Section 5 Page 47
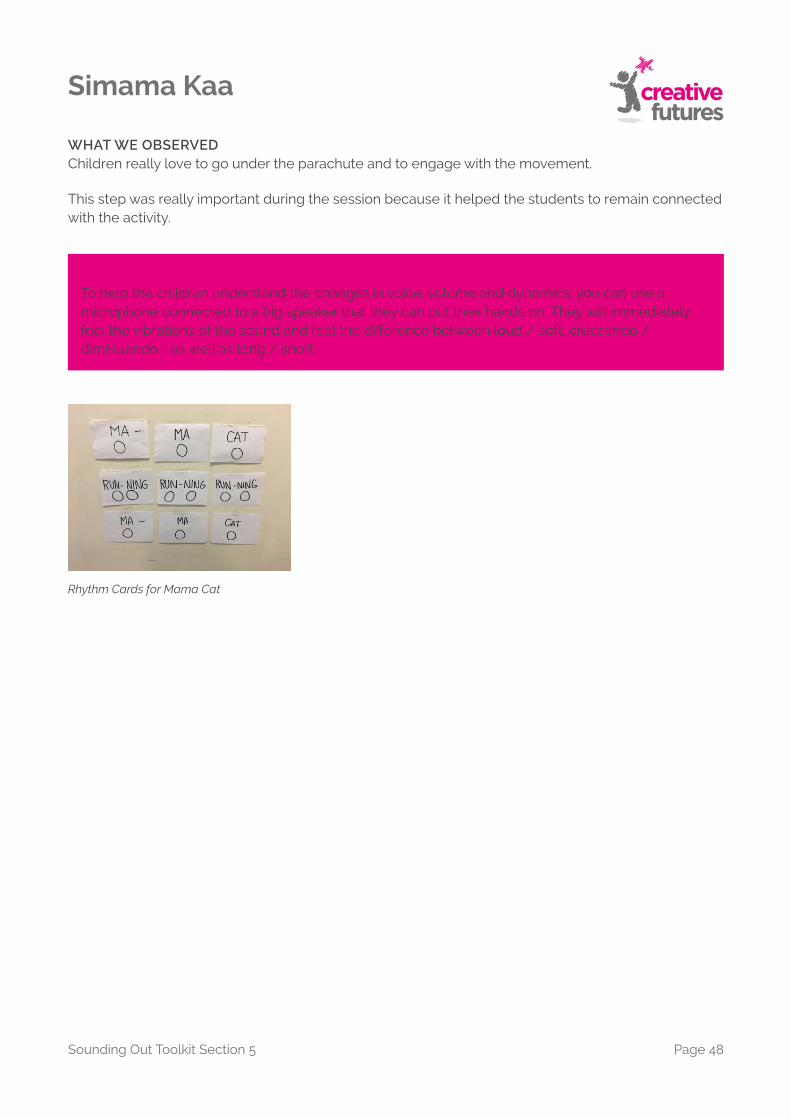
WHAT WE OBSERVEDChildren really love to go under the parachute and to engage with the movement.
This step was really important during the session because it helped the students to remain connected with the activity.
IMPORTANTTo help the children understand the changes in voice, volume and dynamics, you can use a microphone connected to a big speaker that they can put their hands on. They will immediately feel the vibrations of the sound and feel the di�erence between loud / soft, crescendo / diminuendo - as well as long / short.
Rhythm Cards for Mama Cat
Simama Kaa
Sounding Out Toolkit Section 5 Page 48
Take and Pass, What Will I Find?
Music withDeaf Students
Warm up activity
Foundation activity
Main activity
Routine
Inclusion
Relationship betweenmovement & language
Executive functions
Proprioception & motor skills
What is thecommunication style?
Minimal language
Visual aids
Duration of the activity
Singing
Using instruments
Areas oflearning
Things to consider
Communication
Sounding OutA toolkit for music practitioners working with deaf students
Dr. Kathryn MasonTiziana Pozzo
Sounding Out Toolkit Section 6 Page 49
MAIN ACTIVITY
Take and pass, what will I find? is a fun, engaging musical game designed to work on many di�erent skills such as: rhythm, melody, coordination, laterality, visual-spatial skills, cooperation and language.
The game can include di�erent types of objects, depending on what the teacher is exploring in the classroom. In the Toolkit video, we have used animals because during Sounding Out sessions we were working on the pronunciation of animal names with Year 3 students. However, teachers may choose to opt for small instruments, percussion, numbers, musical gures, cards with words/syllables etc.
Take and pass, what will I find? can be used to enhance categorisation skills: a process of organising and association which begins to develop in earliest infancy alongside other cognitive functions. It is fundamental for learning, storing and processing information.
With deaf students it can be useful to work on the categorisation of instruments into their various families (percussion, brass, woodwind etc.). However, you can also use semantic categories (e.g. farm animals or sea life), or phonological categories (e.g. things that start with the letter “f”, words that rhyme etc.).
The activity can be played on the �oor or on a table/desk.
Multimodal and intermodal musical game:
• Voice
• Sign language
• Movement
• Body percussion
• Objects
in a c i rc le
Sounding Out Toolkit Section 6 Page 50
Take and Pass, What Will I Find?
STEP DESCRIPTION MUSIC
Learn the basic movement from left to right.
Working in unison.Association voice-movement.
The teacher says one-two or signs the numbers to describe the movement from left to right.
The teacher then substitutes the words one-two with take and pass (if you’re signing the numbers continue doing that)
ONE - put your hand on the space in front of you.
TWO - move your hand to the right, in front of the friend next to you.
One = Take andTwo = Pass
Step 1. Learn the Basic Movements From Left to Right
1
WHAT WE OBSERVEDThis exercise involves organised movements from left to right and it might be di�cult for deaf children who struggle with visual-spatial tasks.
IMPORTANTTo support the children with these movements you can use di�erent kinds of visual cues or teaching tactics:• Start by working in lines, not in a circle, and sit in front of the group so they can mirror your moves (the teacher moves from right to left).• Initially, put paper sheets on the �oor where the objects will be so the children can practice moving an object.• Once in the circle, sit on the left of the children that need support so they can copy your movement.
VIDEO REFERENCE: Take and Pass: Step 1
Sounding Out Toolkit Section 6 Page 51
Take and Pass, What Will I Find?
Step 2. Introduce the Song and the First Object
STEP DESCRIPTION MUSIC
The teacher hides a number ofobjects behind their back.
Then, the teacher starts singingand moving according to thelyrics (signing if necessary) andintroduces the �rst object at theend of the song, when the lyricsare: What will I find?
All the participants move and sing/sign the song, according to the lyrics. At the end of the song, the teacher will show one object and will say/sign itsname out loud.
Then, the object will be passed to each student in turn, so they can pronounce or sign its name.
2
VIDEO REFERENCE: Take and Pass: Step 2
WHAT WE OBSERVEDChildren really like to inspect each object. During Sounding Out sessions they showed great creativity by making unique names to describe the object in detail. For example, a simple parrot became the red parrot with a long beak.*
IMPORTANTRemember to write down the lyrics and make sure that everyone understands the meaning of the song.
*During this time remind the children that, during the activity, they will have just a short time to say/sign the names of the object so they need to choose just one word each. This can demonstrate the kind of perception of rhythm/time your students have developed.
Sounding Out Toolkit Section 6 Page 52
Take and Pass, What Will I Find?
Step 3. Introduce New Objects
STEP DESCRIPTION MUSIC
Introduce a new object whenever the lyrics state Take and pass, until each person has an item in front of them.
Each time the teacher introduces a new object the whole group stops, observes and names/signs it.
Rhythm.Coordination.Playing in unison.
During the activity, the teacher should indicate to each child when it’s their time to name/sign their object, using clear gestures.
3a
VIDEO REFERENCE: Take and Pass: Step 3
IMPORTANTHelp the children to keep the tempo by conducting with clear gestures.
WHAT WE OBSERVEDSome children might take a long time to name their object once it is their turn. This may be because they haven’t internalised or understood the importance of rhythm to the game yet.
Take this opportunity to explain the concept of rhythm/pulse when playing music. You can use the example of ticking clock hands, and their constant movement to demonstrate this concept.
Sing the song again and at theend, everyone says/signs thename of their object at thesame time.
Play the game faster and faster.
Rhythm.Coordination.Playing in unison.
3b
3c
IMPORTANTBefore repeating the song, make sure that every child has an object in front of them.
Take and Pass, What Will I Find?
Sounding Out Toolkit Section 6 Page 53
Categorisation
DESCRIPTION MUSIC
The teacher sets a particular category/theme for the game (e.g. percussion). It is played as before, until step 3b.
At the end of the last repetition of the song, once everyone has said/signed the name of their instruments, the students arrange themselves into smaller groups according to the kind of instruments they are holding.
Eventually, the teacher asks the students to play their instruments to check if the children are in the right family/group.
Example:The teacher introduces 4 kinds of percussion instruments during the game:- 2 wooden instruments with di erent shapes- 2 maracas with di erent colours- 2 di erent drums- 2 di erent metal instruments
IMPORTANTSee the section Using instruments in the Toolkit Introduction.